Selfcad 3D Rocket Design Tutorial
by mufasu cad in Workshop > 3D Printing
482 Views, 2 Favorites, 0 Comments
Selfcad 3D Rocket Design Tutorial
Today we can learn how to create 3d model rocket with Selfcad by using drawing tools. For the steps you can see below.
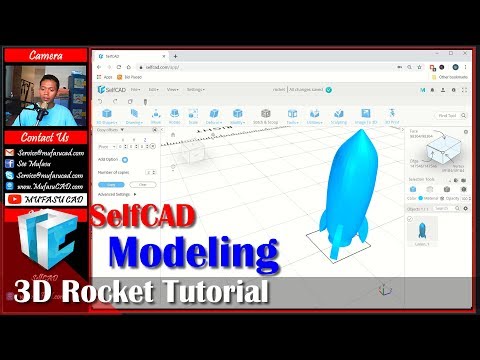
Creating 7 Circle Objects
- Open your Selfcad account and create a project
- Click Drawing > 3D Sketch
- Click circle sketch and make sure use to/bottom plane
- Next we can create circle with coordinate and radius, set edge into 32
- For the first circle set X: 0, Y: 0 Z: 0 (enter), radius 10 (enter) and change name into 1
- For the next circle set X: 0, Y: 8 Z: 0 (enter), radius 10 (enter) and change name into 2
- Next circle set X: 0, Y: 10 Z: 0 (enter), radius 12 (enter) and change name into 3
- Next circle set X: 0, Y: 40 Z: 0 (enter), radius 16 (enter) and change name into 4
- Next circle set X: 0, Y: 62 Z: 0 (enter), radius 16 (enter) and change name into 5
- Next circle set X: 0, Y: 78 Z: 0 (enter), radius 13 (enter) and change name into 6
- Next circle set X: 0, Y: 93 Z: 0 (enter), radius 1 (enter) and change name into 7 (if circle to big you can use scale command and change X: 2 and Z:2
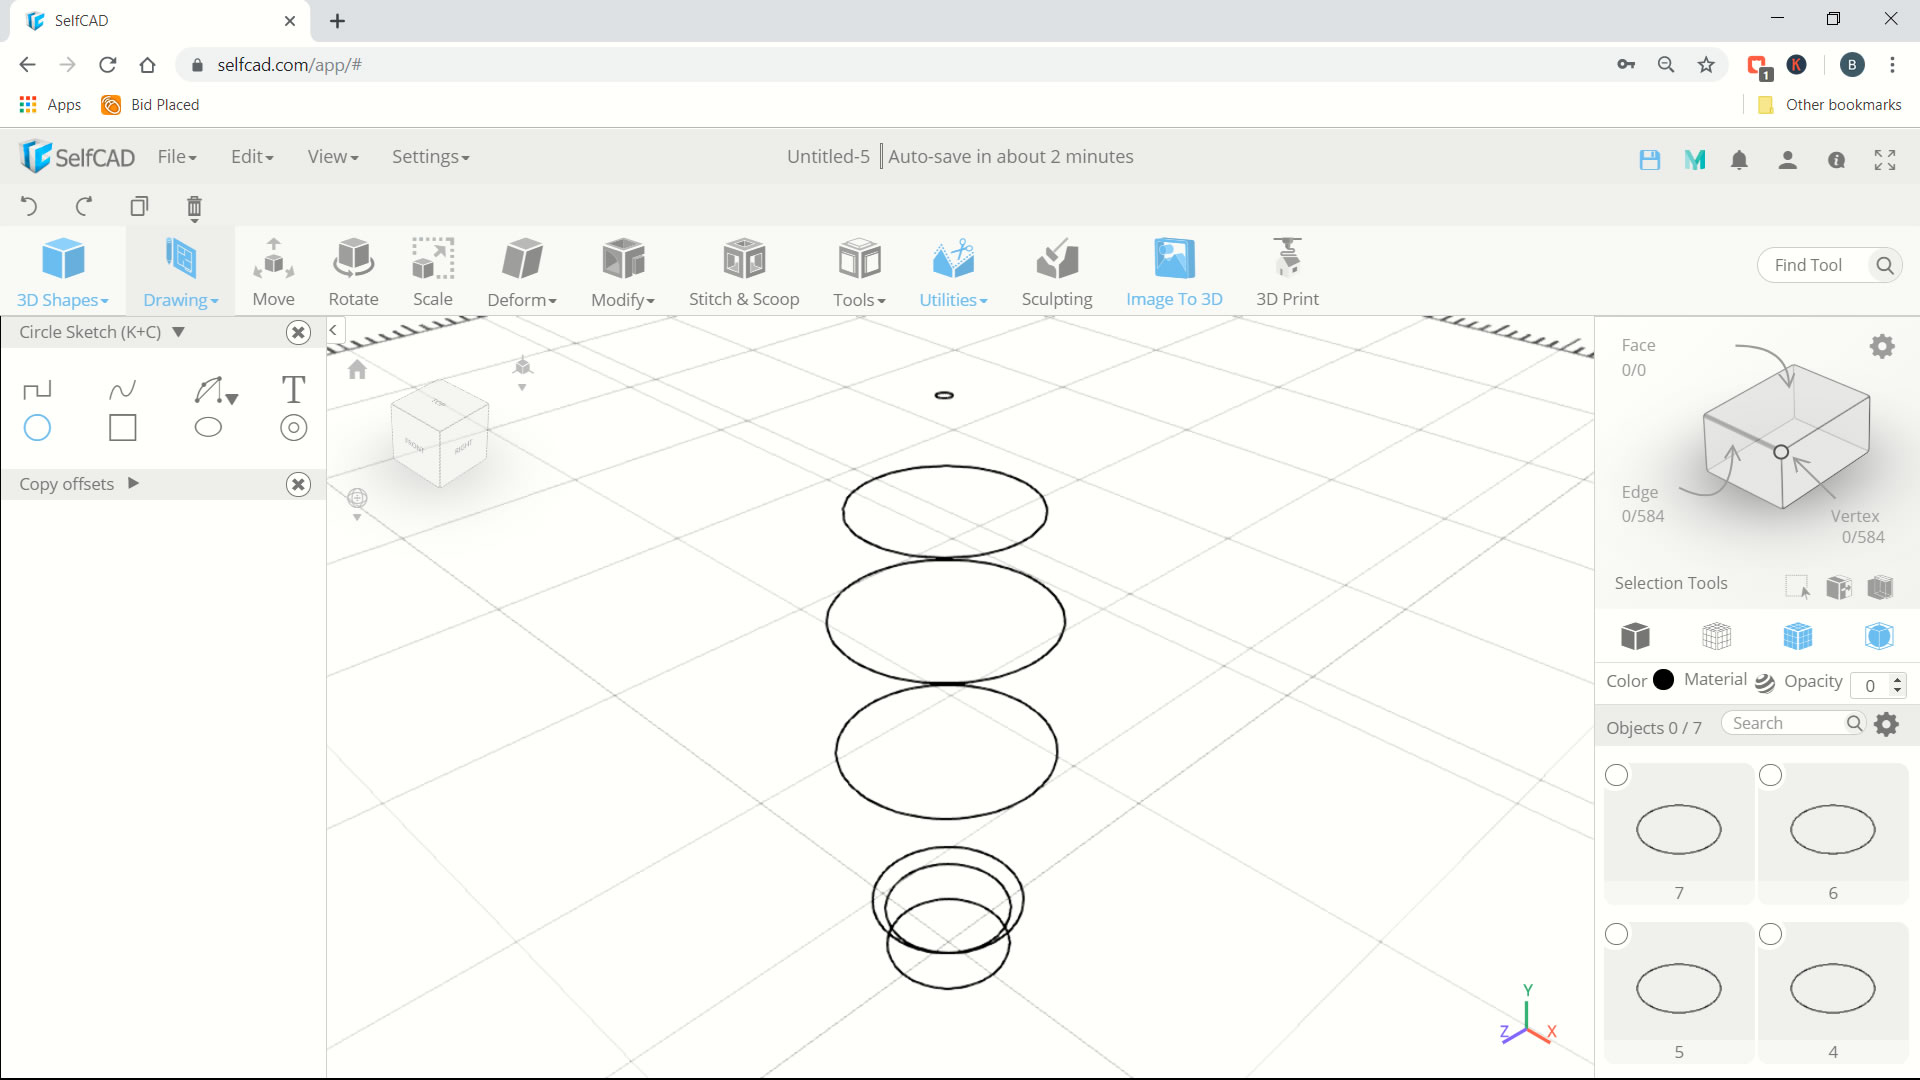
Create Rocket Body
- Select all circle from 1 to 7
- Click Tools > Loft
- The object will be automatically convert into solid
- Next you can select all circle object and delete
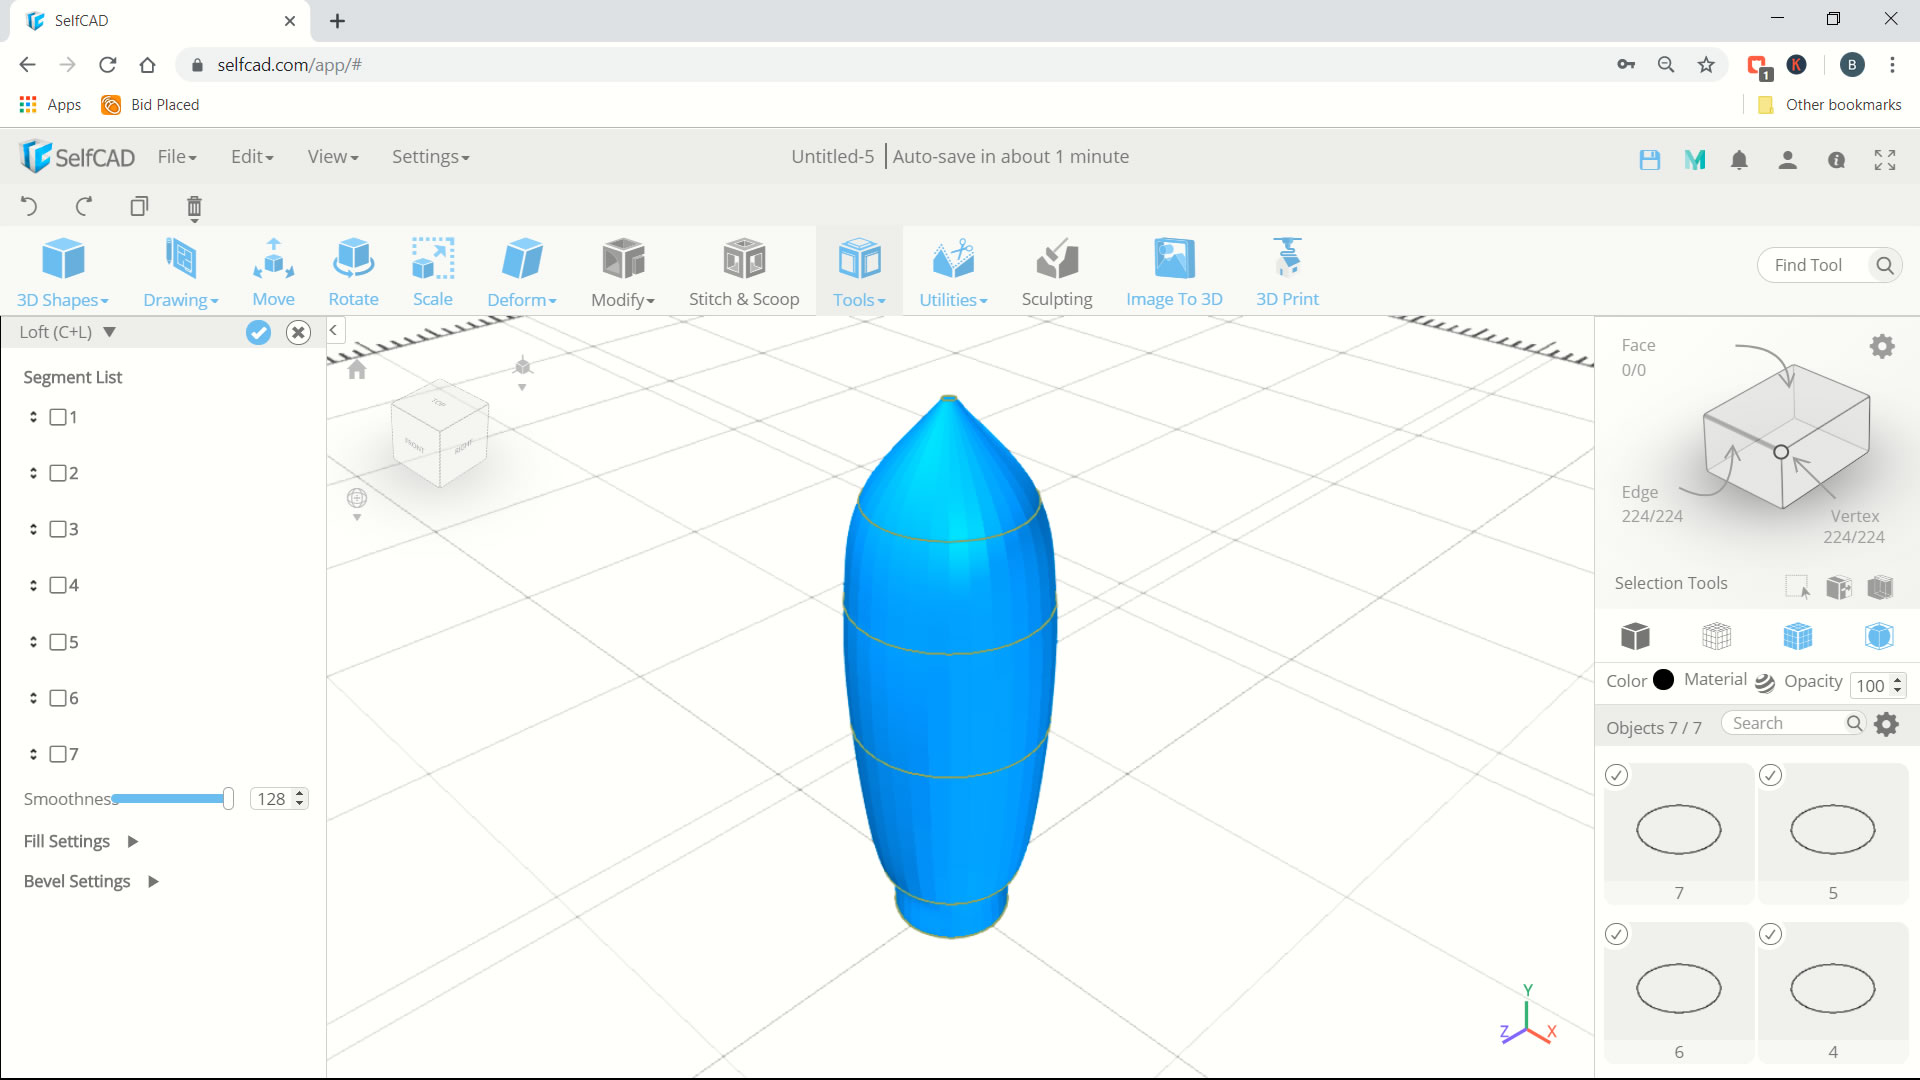
Create Wing Profile
- Click drawing > 3d Sketch
- Click Plane Settings > change into Precision Settings. In Snap to 4 selected (click) and check Grid Vertices (it will be 5 selected.
- Change again to Plane Settings > Change plane into Front/Back. Next you can click Front view in viewcube
- Use line command, and for first point set X: 20, Y: 0 Z:0, move cursor to right and give Length 2
- next point Length 10 (tab) and angle 100 (enter)
- next point Length 15 (tab) and angle 160 (enter)
- next point Length 15 (tab) and angle 155 (enter)
- next point Length 20 (tab) and angle 50 (enter)
- next point Length 5 (tab) and angle 226 (enter)
- Move cursor to bottom and change plane settings into Precision Settings, Now you can uncheck Gird Vertices
- Next you can connect line object into first point
Create Wings
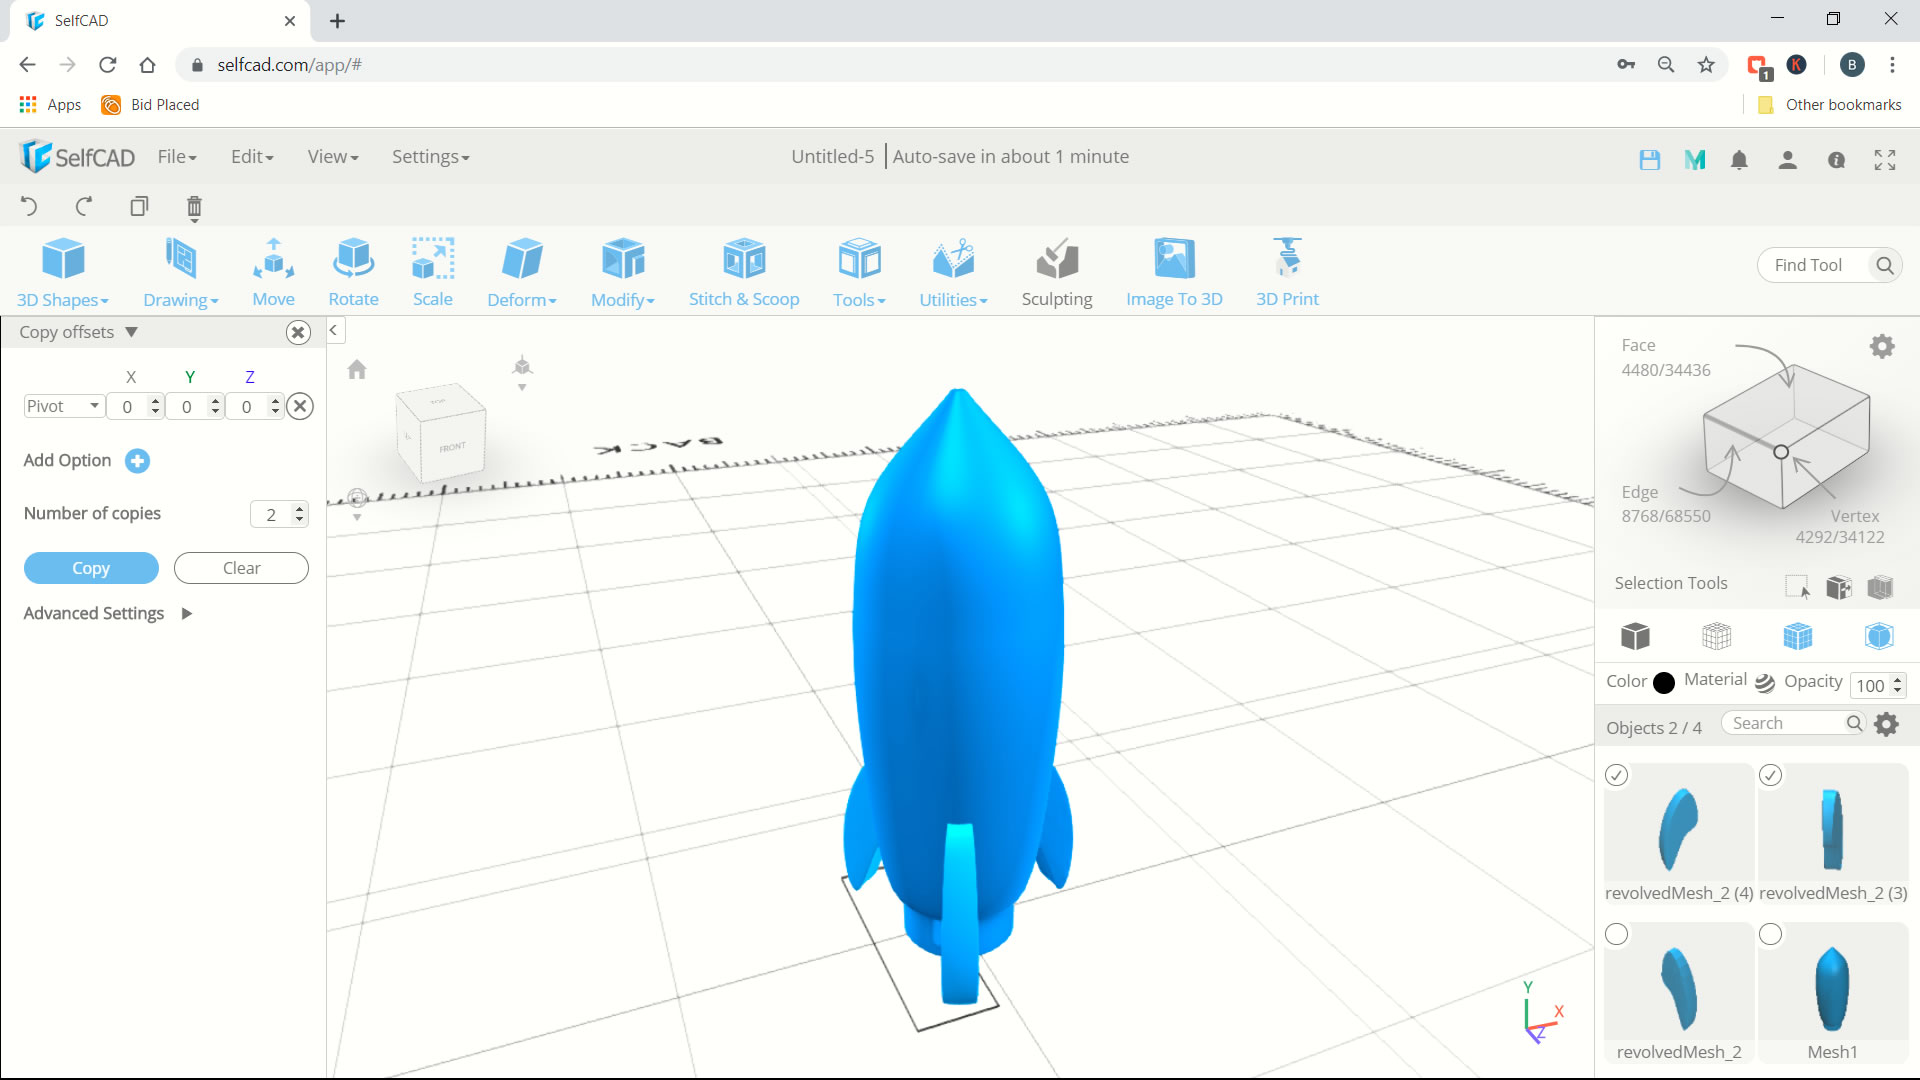
- Click tools > revolve and change angel 15 (ok)
- Select profile (delete)
- Next select wing > click modify > click round object > change smoothness into 3 (ok)
- Click tools > copy offsets > change position into pivot and number of copies 2 (copy)
- Now you can select all object and click Stitch and Scoop > union > apply
- We already create 3d Rocket