Secure Your Projects With Fingerprint Sensors and Arduino
by RoboCircuits in Circuits > Arduino
2827 Views, 50 Favorites, 0 Comments
Secure Your Projects With Fingerprint Sensors and Arduino
Biometric authentication is becoming increasingly common today, offering enhanced security and convenience. One of the most popular biometric methods is fingerprint recognition.
In this article, we'll explore implementing a fingerprint sensor with Arduino using the Adafruit Fingerprint Library. By the end, you'll know how to create your fingerprint-based security projects.
If you want to watch a video instead of reading the article check out this video - https://youtu.be/ARCMkdLBLws
Understanding Adafruit Fingerprint Library
The Adafruit Fingerprint Library simplifies the integration of fingerprint sensors, particularly the Adafruit Optical Fingerprint Sensor, with Arduino. This library streamlines communication between the sensor and Arduino, making it easier for hobbyists and developers to create fingerprint-based projects.
You can use the same process to use it with esp32. If you don't know how to use esp32 go to this article https://robocircuits.com/index.php/2023/03/26/installing-esp32-add-on-in-arduino-ide/
Supplies
Before diving into the code, ensure you have the following components ready:
- Arduino board (e.g., Arduino Uno or Arduino Nano)
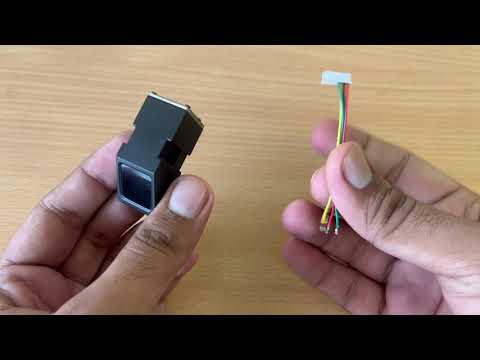
- Adafruit Optical Fingerprint Sensor
- Jumper wires
- Computer with the Arduino IDE installed
- Adafruit Fingerprint Library (available in the Arduino Library Manager)
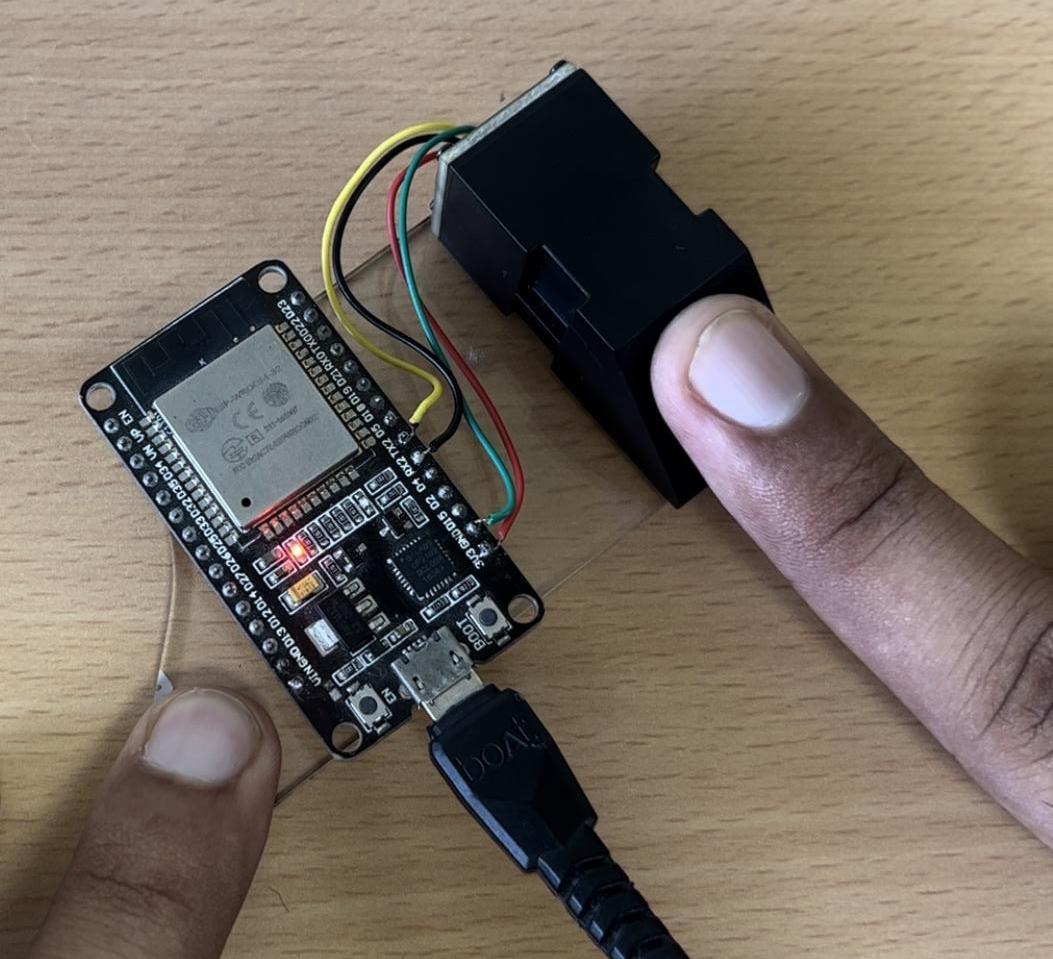
Connecting the Fingerprint Sensor
Connect the fingerprint sensor to your Arduino as follows:
- VCC to 5V
- GND to GND
- RX (Sensor) to 2 (Arduino)
- TX (Sensor) to 3 (Arduino)
Installing the Adafruit Fingerprint Library
- Open the Arduino IDE and navigate to "Sketch" -> "Include Library" -> "Manage Libraries..."
- Search for "Adafruit Fingerprint Sensor Library" in the Library Manager and install it.
Enrolling Our Finger Into the Sensor
Enrolling a fingerprint with a fingerprint sensor typically involves a series of steps to capture and store the unique fingerprint pattern in the sensor's memory for future authentication. Here's a general guide on how to enroll a fingerprint using a fingerprint sensor (like the Adafruit Optical Fingerprint Sensor) with Arduino:
Note: This example assumes you have already connected your fingerprint sensor to Arduino and uploaded this code to enroll your finger.
#include <Adafruit_Fingerprint.h>

// Create an Adafruit_Fingerprint object
Adafruit_Fingerprint finger = Adafruit_Fingerprint(&Serial);

void setup()
{
  Serial.begin(9600);
  delay(100);
  Serial.println("Adafruit fingerprint sensor enrollment");

  // Initialize the fingerprint sensor
  if (!finger.begin(57600))
  {
    Serial.println("Couldn't find fingerprint sensor :(");
    while (1);
  }

  // Check if the sensor is connected
  if (finger.verifyPassword())
  {
    Serial.println("Found fingerprint sensor!");
  }
  else
  {
    Serial.println("Did not find fingerprint sensor :(");
    while (1);
  }
}

void loop()
{
  // Enroll a new fingerprint
  Serial.println("Place your finger on the sensor...");

  // Wait for a valid fingerprint
  while (! finger.getImage());
  Serial.println("Image taken");

  int result = finger.image2Tz(1);
  switch (result)
  {
    case FINGERPRINT_OK:
      Serial.println("Image converted");
      break;
    case FINGERPRINT_NOFINGER:
      Serial.println("No finger detected");
      return;
    case FINGERPRINT_PACKETRECIEVEERR:
      Serial.println("Communication error");
      return;
    default:
      Serial.println("Unknown error");
      return;
  }

  // Prompt the user to remove and reposition the same finger
  Serial.println("Remove your finger and reposition it...");
  delay(2000);

  // Wait for the user to place the same finger again
  Serial.println("Place the same finger on the sensor again...");

  // Wait for a valid fingerprint
  while (! finger.getImage());
  Serial.println("Image taken");

  result = finger.image2Tz(2);
  switch (result)
  {
    case FINGERPRINT_OK:
      Serial.println("Image converted");
      break;
    case FINGERPRINT_NOFINGER:
      Serial.println("No finger detected");
      return;
    case FINGERPRINT_PACKETRECIEVEERR:
      Serial.println("Communication error");
      return;
    default:
      Serial.println("Unknown error");
      return;
  }

  // Create a fingerprint template
  result = finger.createModel();
  if (result == FINGERPRINT_OK)
  {
    Serial.println("Fingerprint enrolled successfully!");
  }
  else
  {
    Serial.println("Unknown error");
    return;
  }
}
This code captures the user's fingerprint twice to ensure consistency and then stores it as a template.
Open the Serial Monitor and follow the steps to enroll your finger. Once enrolled, you can use this template for fingerprint verification and access control.
Authentication the Fingerprint
To Authenticate the finger you enrolled in the sensor you need to upload the following code.
/***************************************************
  This is an example sketch for our optical Fingerprint sensor

  Designed specifically to work with the Adafruit BMP085 Breakout
  ----> http://www.adafruit.com/products/751

  These displays use TTL Serial to communicate, 2 pins are required to
  interface
  Adafruit invests time and resources providing this open source code,
  please support Adafruit and open-source hardware by purchasing
  products from Adafruit!

  Written by Limor Fried/Ladyada for Adafruit Industries.
  BSD license, all text above must be included in any redistribution
 ****************************************************/


#include <Adafruit_Fingerprint.h>


#if (defined(__AVR__) || defined(ESP8266)) && !defined(__AVR_ATmega2560__)
// For UNO and others without hardware serial, we must use software serial...
// pin #2 is IN from sensor (GREEN wire)
// pin #3 is OUT from arduino  (WHITE wire)
// Set up the serial port to use softwareserial..
SoftwareSerial mySerial(2, 3);

#else
// On Leonardo/M0/etc, others with hardware serial, use hardware serial!
// #0 is green wire, #1 is white
#define mySerial Serial1

#endif


Adafruit_Fingerprint finger = Adafruit_Fingerprint(&mySerial);

void setup()
{
  Serial.begin(9600);
  while (!Serial);  // For Yun/Leo/Micro/Zero/...
  delay(100);
  Serial.println("\n\nAdafruit finger detect test");

  // set the data rate for the sensor serial port
  finger.begin(57600);
  delay(5);
  if (finger.verifyPassword()) {
    Serial.println("Found fingerprint sensor!");
  } else {
    Serial.println("Did not find fingerprint sensor :(");
    while (1) { delay(1); }
  }

  Serial.println(F("Reading sensor parameters"));
  finger.getParameters();
  Serial.print(F("Status: 0x")); Serial.println(finger.status_reg, HEX);
  Serial.print(F("Sys ID: 0x")); Serial.println(finger.system_id, HEX);
  Serial.print(F("Capacity: ")); Serial.println(finger.capacity);
  Serial.print(F("Security level: ")); Serial.println(finger.security_level);
  Serial.print(F("Device address: ")); Serial.println(finger.device_addr, HEX);
  Serial.print(F("Packet len: ")); Serial.println(finger.packet_len);
  Serial.print(F("Baud rate: ")); Serial.println(finger.baud_rate);

  finger.getTemplateCount();

  if (finger.templateCount == 0) {
    Serial.print("Sensor doesn't contain any fingerprint data. Please run the 'enroll' example.");
  }
  else {
    Serial.println("Waiting for valid finger...");
      Serial.print("Sensor contains "); Serial.print(finger.templateCount); Serial.println(" templates");
  }
}

void loop()                     // run over and over again
{
  getFingerprintID();
  delay(50);            //don't ned to run this at full speed.
}

uint8_t getFingerprintID() {
  uint8_t p = finger.getImage();
  switch (p) {
    case FINGERPRINT_OK:
      Serial.println("Image taken");
      break;
    case FINGERPRINT_NOFINGER:
      Serial.println("No finger detected");
      return p;
    case FINGERPRINT_PACKETRECIEVEERR:
      Serial.println("Communication error");
      return p;
    case FINGERPRINT_IMAGEFAIL:
      Serial.println("Imaging error");
      return p;
    default:
      Serial.println("Unknown error");
      return p;
  }

  // OK success!

  p = finger.image2Tz();
  switch (p) {
    case FINGERPRINT_OK:
      Serial.println("Image converted");
      break;
    case FINGERPRINT_IMAGEMESS:
      Serial.println("Image too messy");
      return p;
    case FINGERPRINT_PACKETRECIEVEERR:
      Serial.println("Communication error");
      return p;
    case FINGERPRINT_FEATUREFAIL:
      Serial.println("Could not find fingerprint features");
      return p;
    case FINGERPRINT_INVALIDIMAGE:
      Serial.println("Could not find fingerprint features");
      return p;
    default:
      Serial.println("Unknown error");
      return p;
  }

  // OK converted!
  p = finger.fingerSearch();
  if (p == FINGERPRINT_OK) {
    Serial.println("Found a print match!");
  } else if (p == FINGERPRINT_PACKETRECIEVEERR) {
    Serial.println("Communication error");
    return p;
  } else if (p == FINGERPRINT_NOTFOUND) {
    Serial.println("Did not find a match");
    return p;
  } else {
    Serial.println("Unknown error");
    return p;
  }

  // found a match!
  Serial.print("Found ID #"); Serial.print(finger.fingerID);
  Serial.print(" with confidence of "); Serial.println(finger.confidence);

  return finger.fingerID;
}

// returns -1 if failed, otherwise returns ID #
int getFingerprintIDez() {
  uint8_t p = finger.getImage();
  if (p != FINGERPRINT_OK)  return -1;

  p = finger.image2Tz();
  if (p != FINGERPRINT_OK)  return -1;

  p = finger.fingerFastSearch();
  if (p != FINGERPRINT_OK)  return -1;

  // found a match!
  Serial.print("Found ID #"); Serial.print(finger.fingerID);
  Serial.print(" with confidence of "); Serial.println(finger.confidence);
  return finger.fingerID;
}
Now open the serial monitor and place your fingers on the sensor. If you place the already enrolled finger it will display the finger match found. else it will display match not found.
In this way, you can easily use a fingerprint sensor with Arduino.
Social Links
Instagram - http://www.instagram.com/robocircuits
Hackster.io - https://www.hackster.io/robocircuits