Secret Highlighter Holder
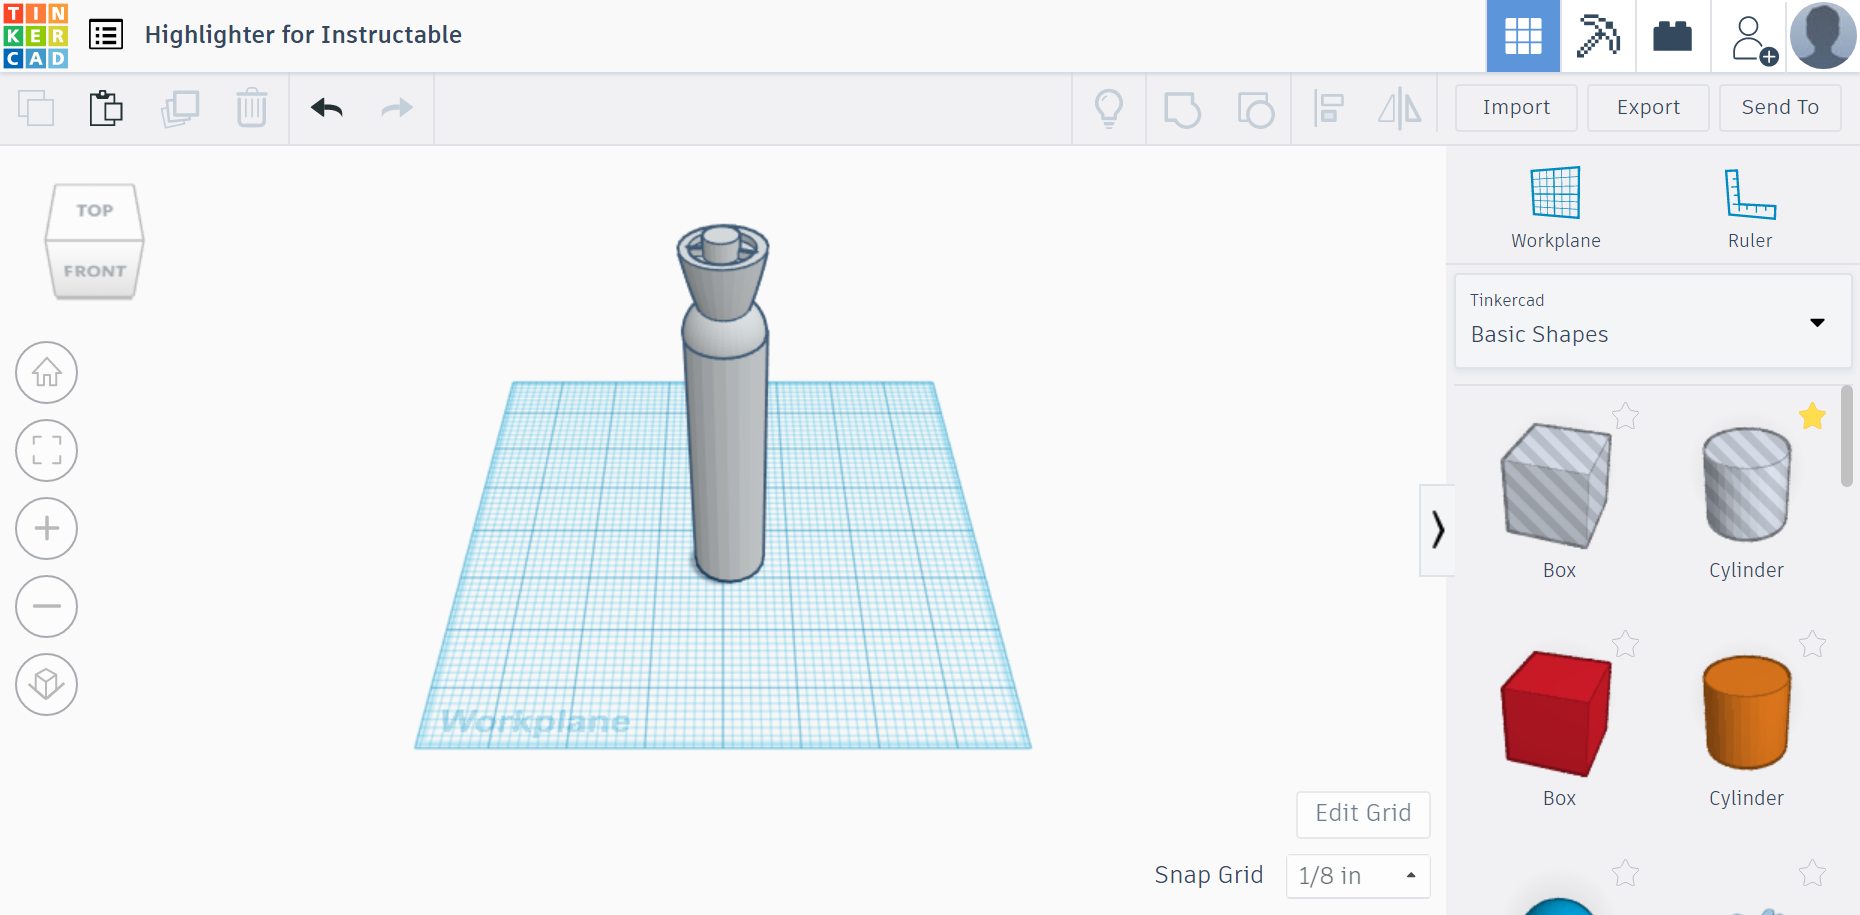
I made this Secret Highlighter Holder for the Silly Solutions category. It is a secret holder disguised as a highlighter you can store anything secretly inside of it. I suggest small candy like nerds or small pencils.
Setup
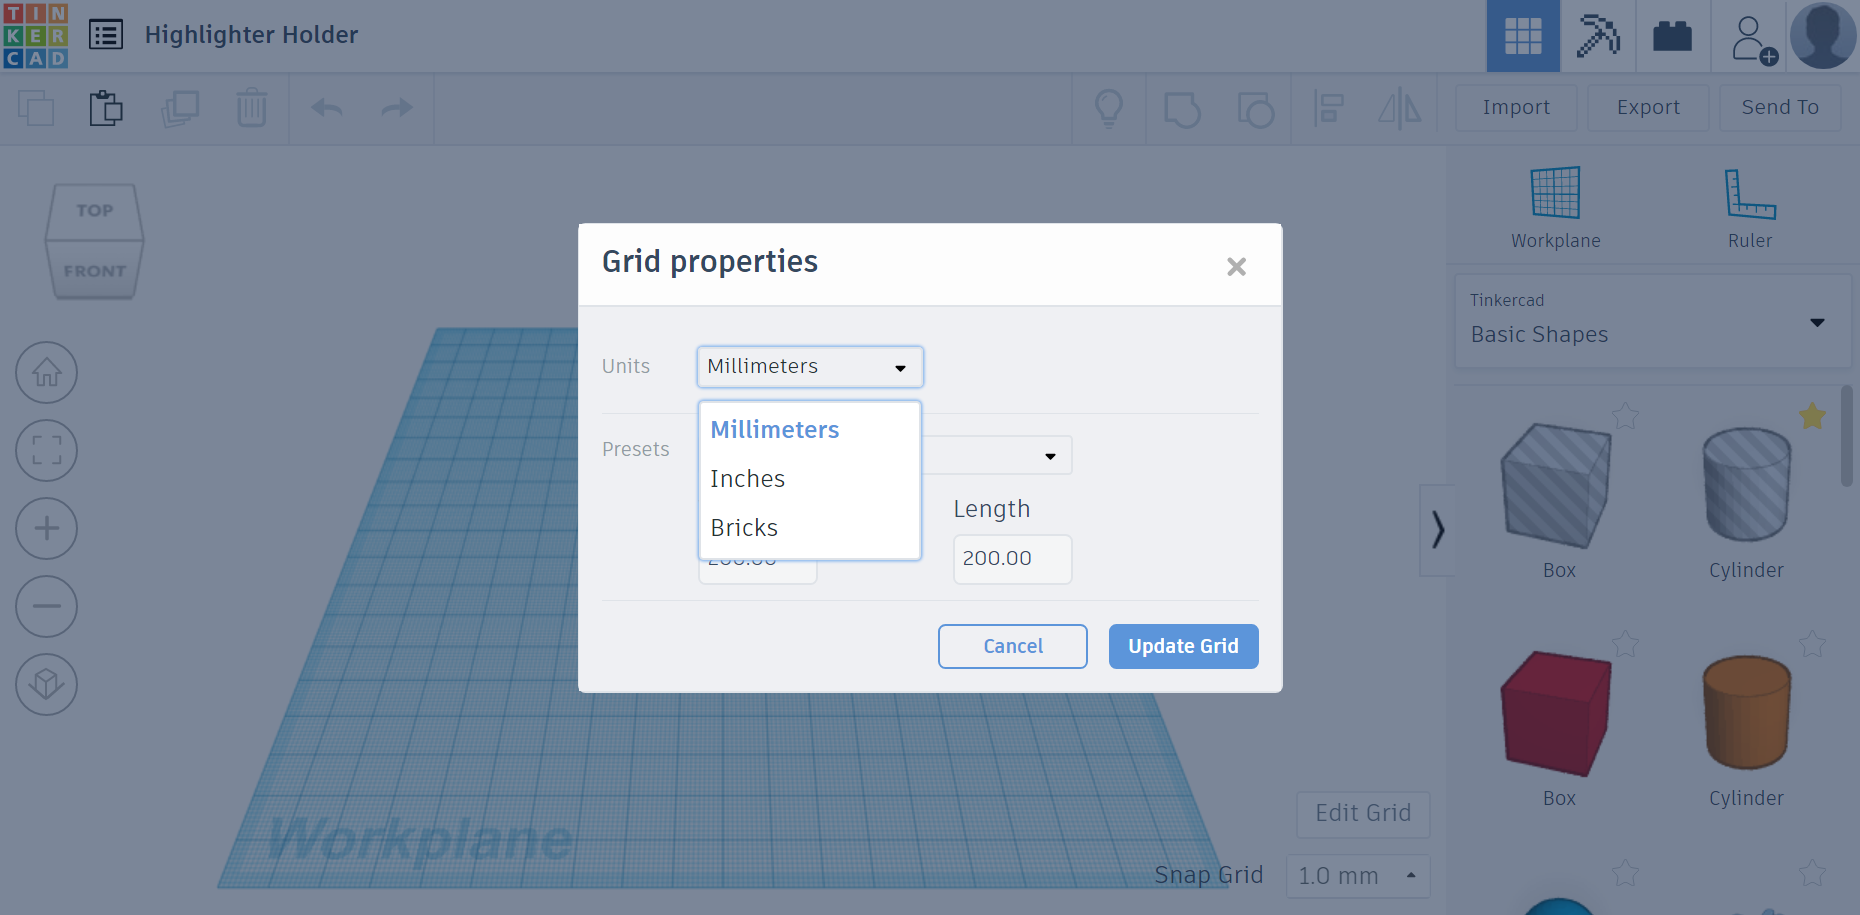
Click "Edit Grid" to change "units" from millimeters to inches.
Click & Drag a cylinder to the Workplane. Make sure the cylinder base is 1 in. x 1 in., and adjust the height to 4 inches tall.
Star on the Bottom
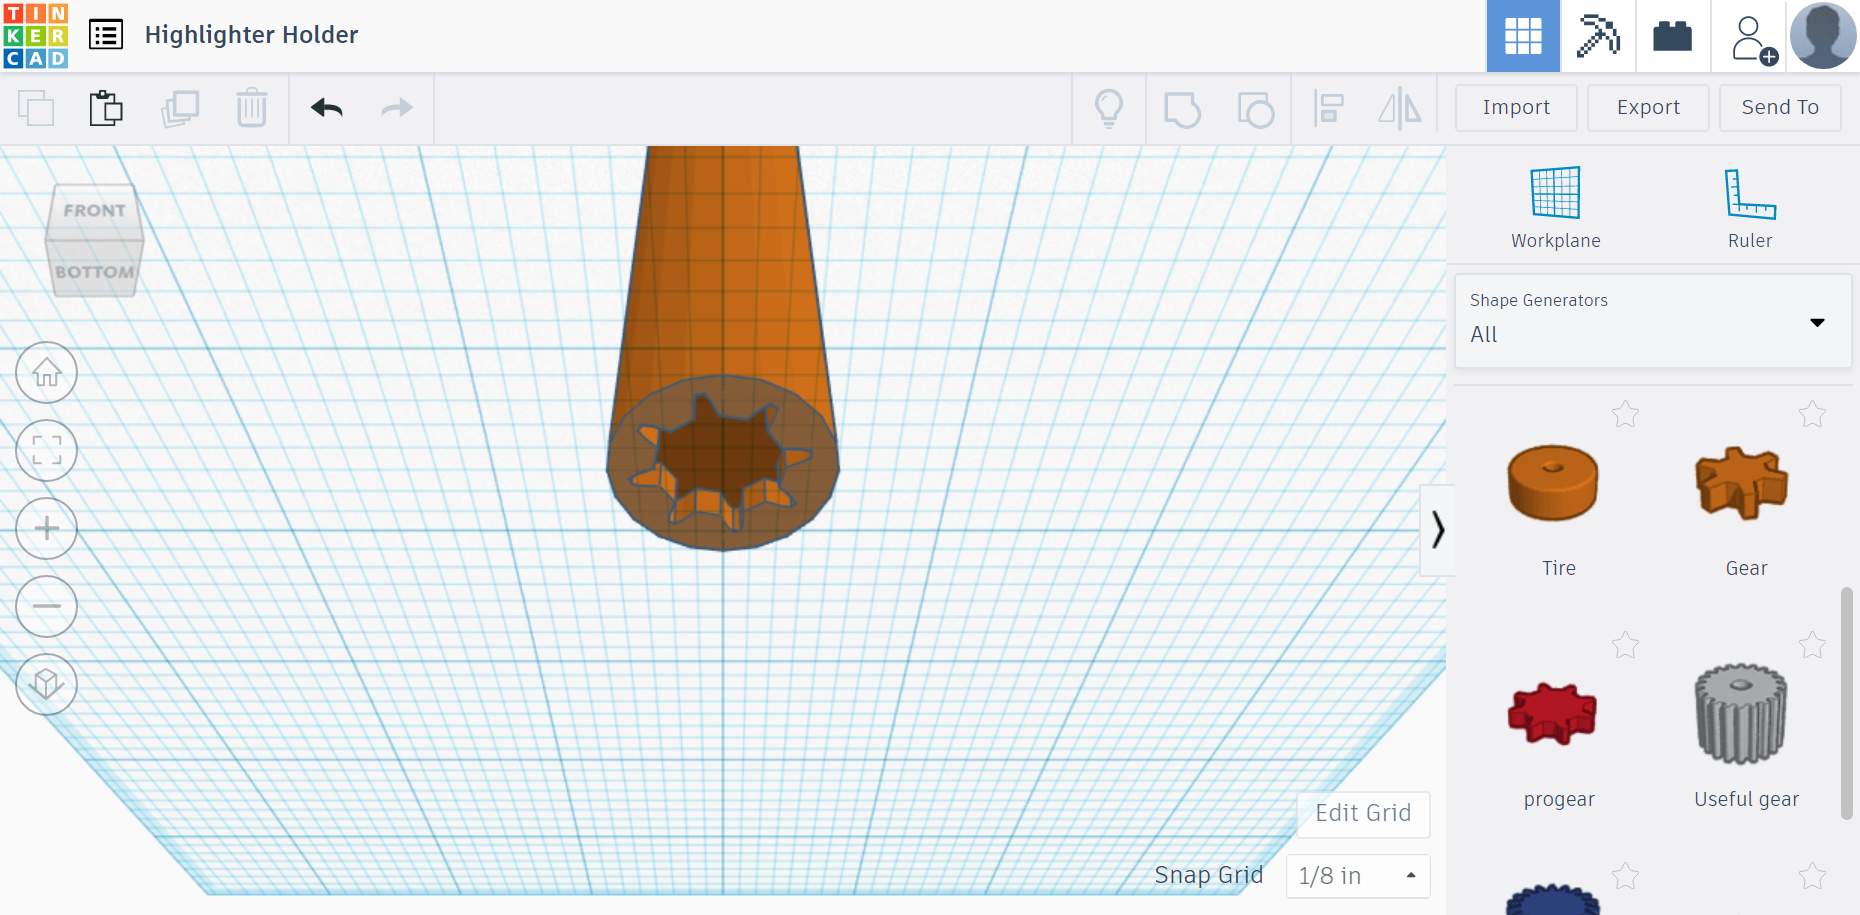
Create the star on the bottom of a highlighter: Click "Basic Shapes" then change to "Shape Generators All" and find the shape "Progear.” Change it from "Solid" to "Hole" and adjust the size to 0.8 in. x 0.8 in. Place directly under the cylinder, and make sure it’s centered. Select both shapes and click "Group."
Cap Part 1
Create the round top: Select the "Half Sphere" shape. Place this directly on top of the cylinder. Select both and "Group".
Cap Part 2
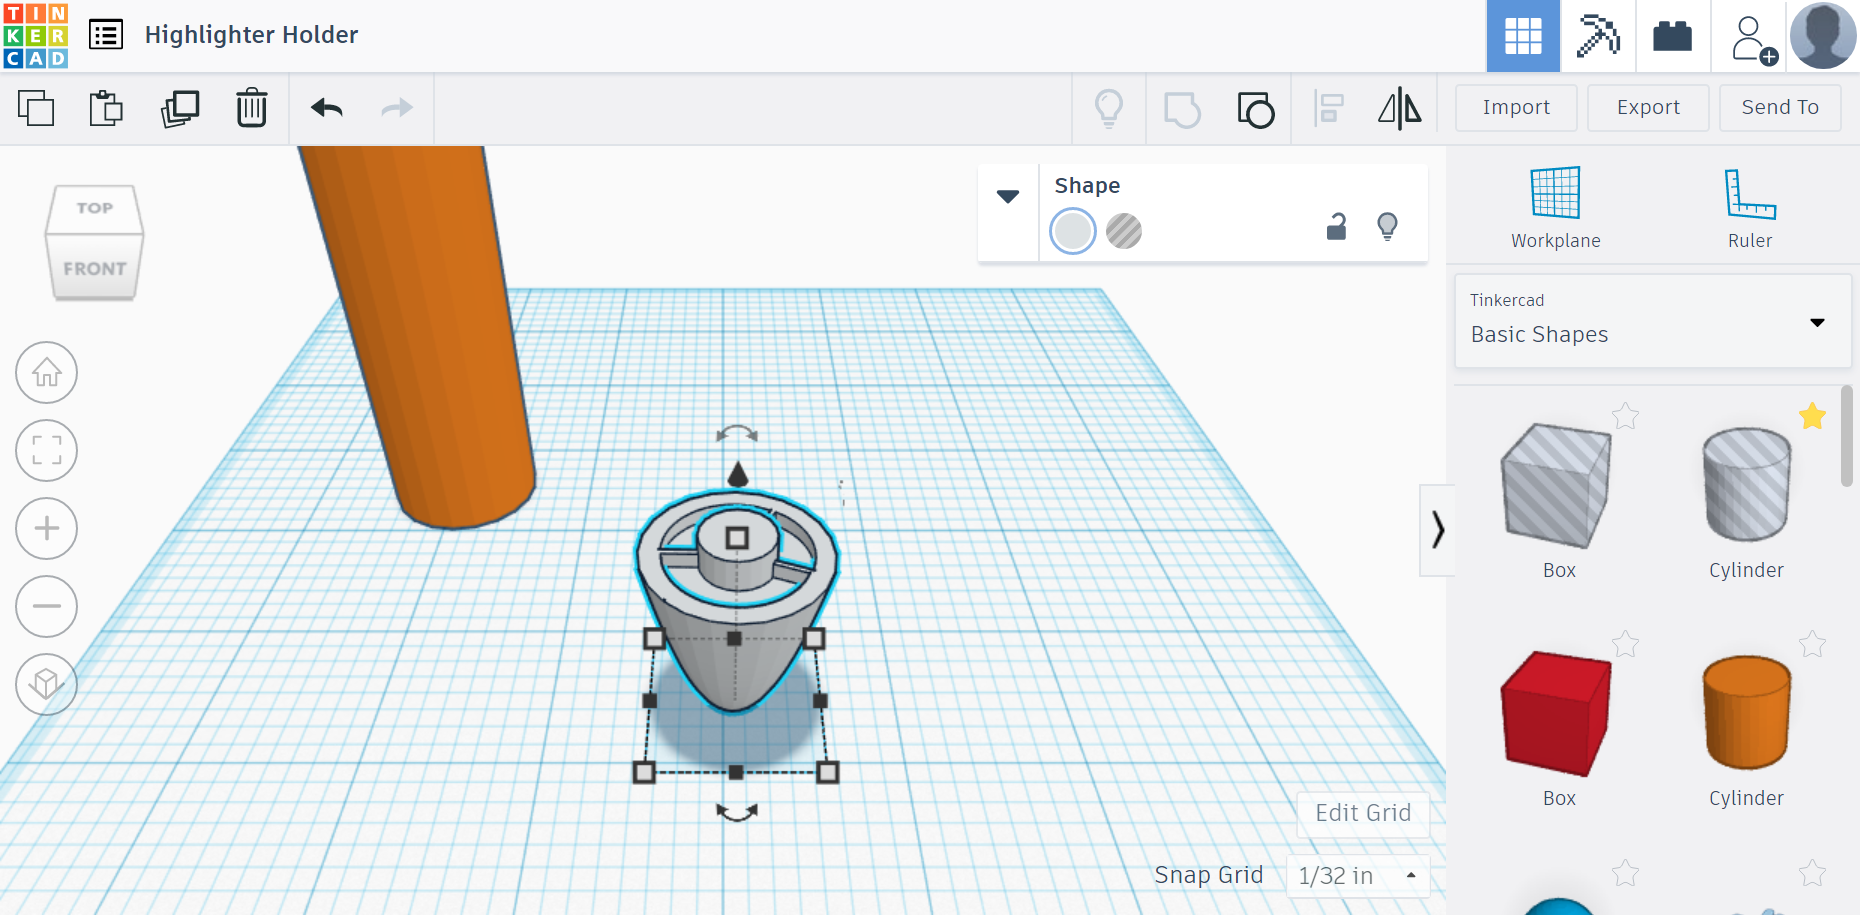
Create the cap: Select the "Paraboloid" shape and the default "Pie Chart" (This is also located in "All.") Shrink "Pie Chart" to 0.8in. x 0.8in. Make it "Hole." Place it directly under the "Paraboloid.” Select both and "Group". Rotate "Paraboloid" 180 degrees. Change "Paraboloid" height to 1.156 in. Next, Click & Drag a cylinder to the Workplane. Make sure the cylinder base is 0.4 in. x 0.4 in., and adjust the height to 0.25 in. Using the black cone button, elevate the cylinder to 1 inch in height. Place this cylinder in the middle of the cap. Select and "Group" the cylinder with the rest of the cap shape.
Put the cap on the marker: Use the black cone button to elevate the cap to 4 inches. Slide the cap directly on top of the marker and center it. Select both shapes and "Group". Now the total height of the marker should be 5.25in.
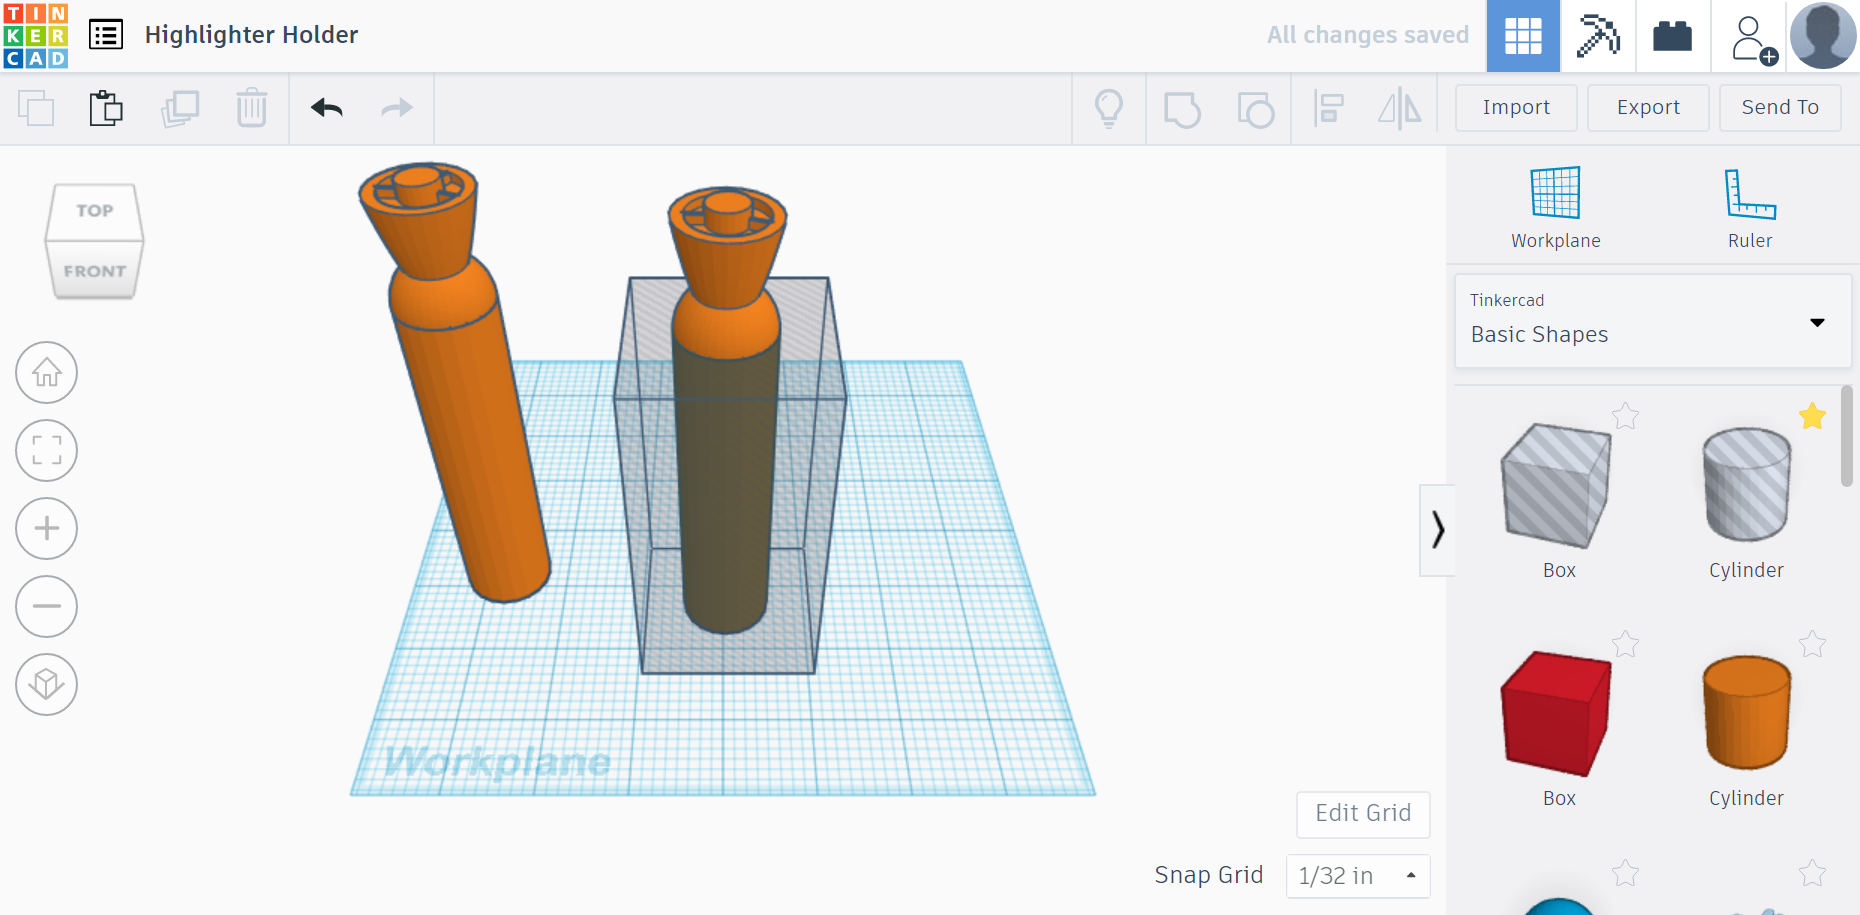
Next, select the highlighter and duplicate it. Move the original highlighter to the opposite side of the Workplane. Then Click & Drag a "Hole" Box onto the Workplane. Position it so that it surrounds the base of the duplicate highlighter. Adjust the dimensions of the box to 2in. x 2in. and the height to 4in. Select and "Group" both the box and the duplicate highlighter.
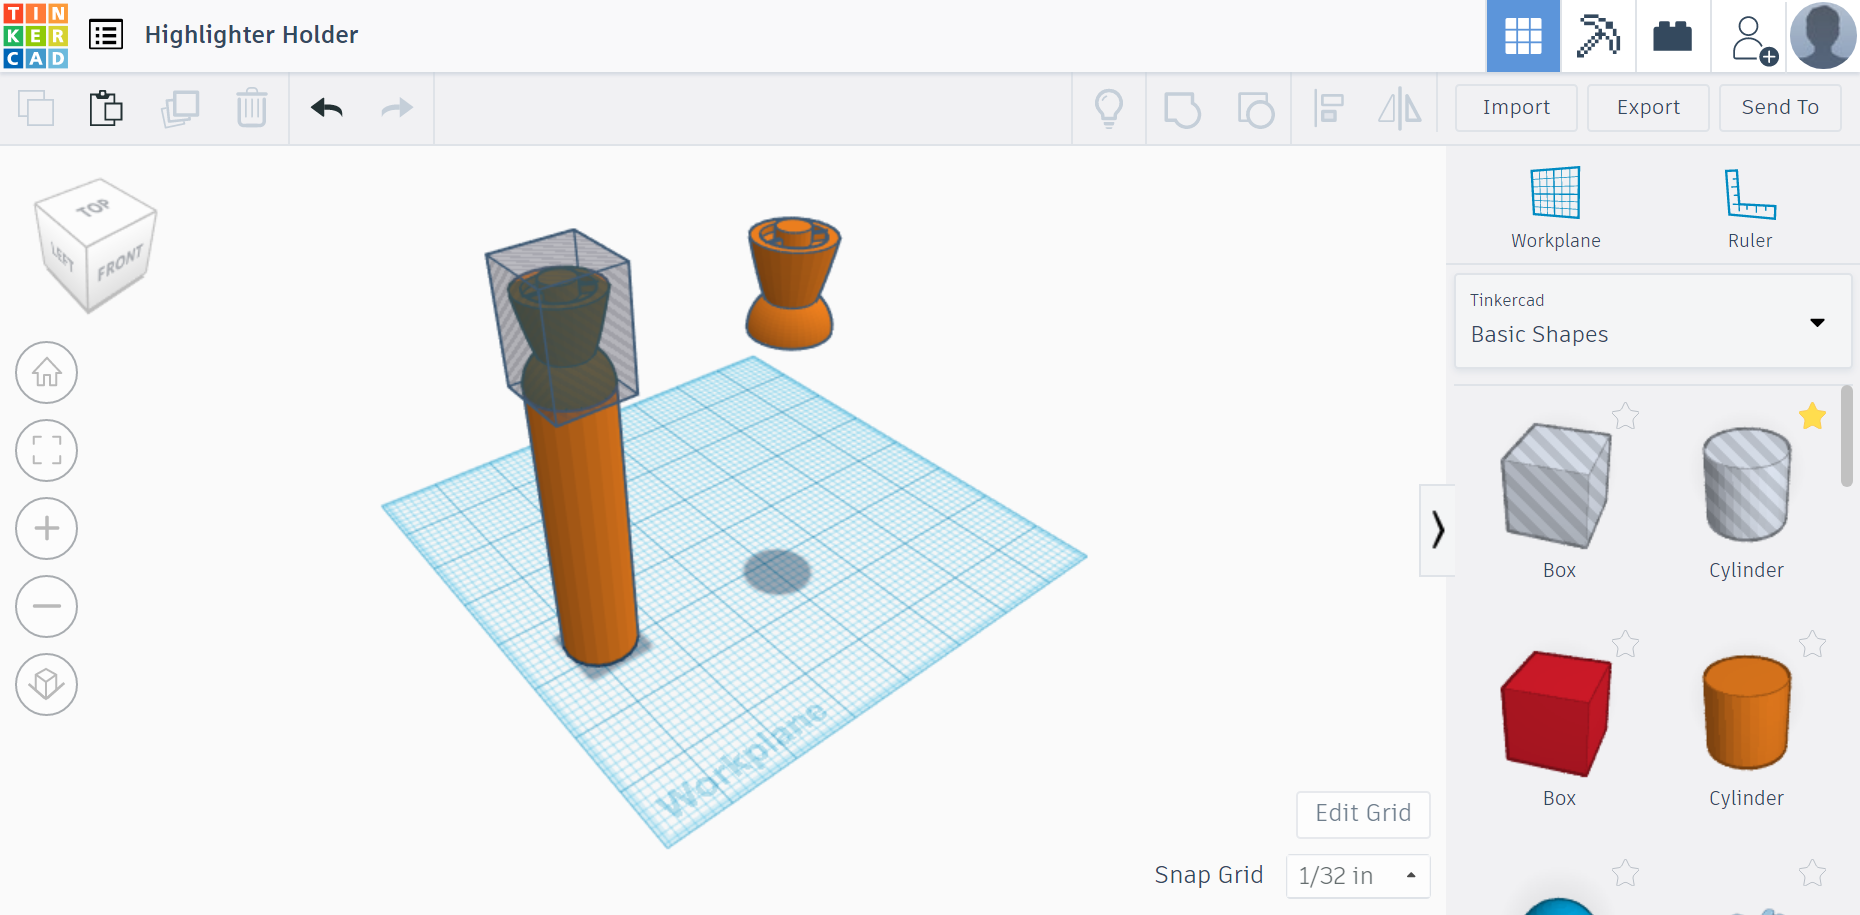
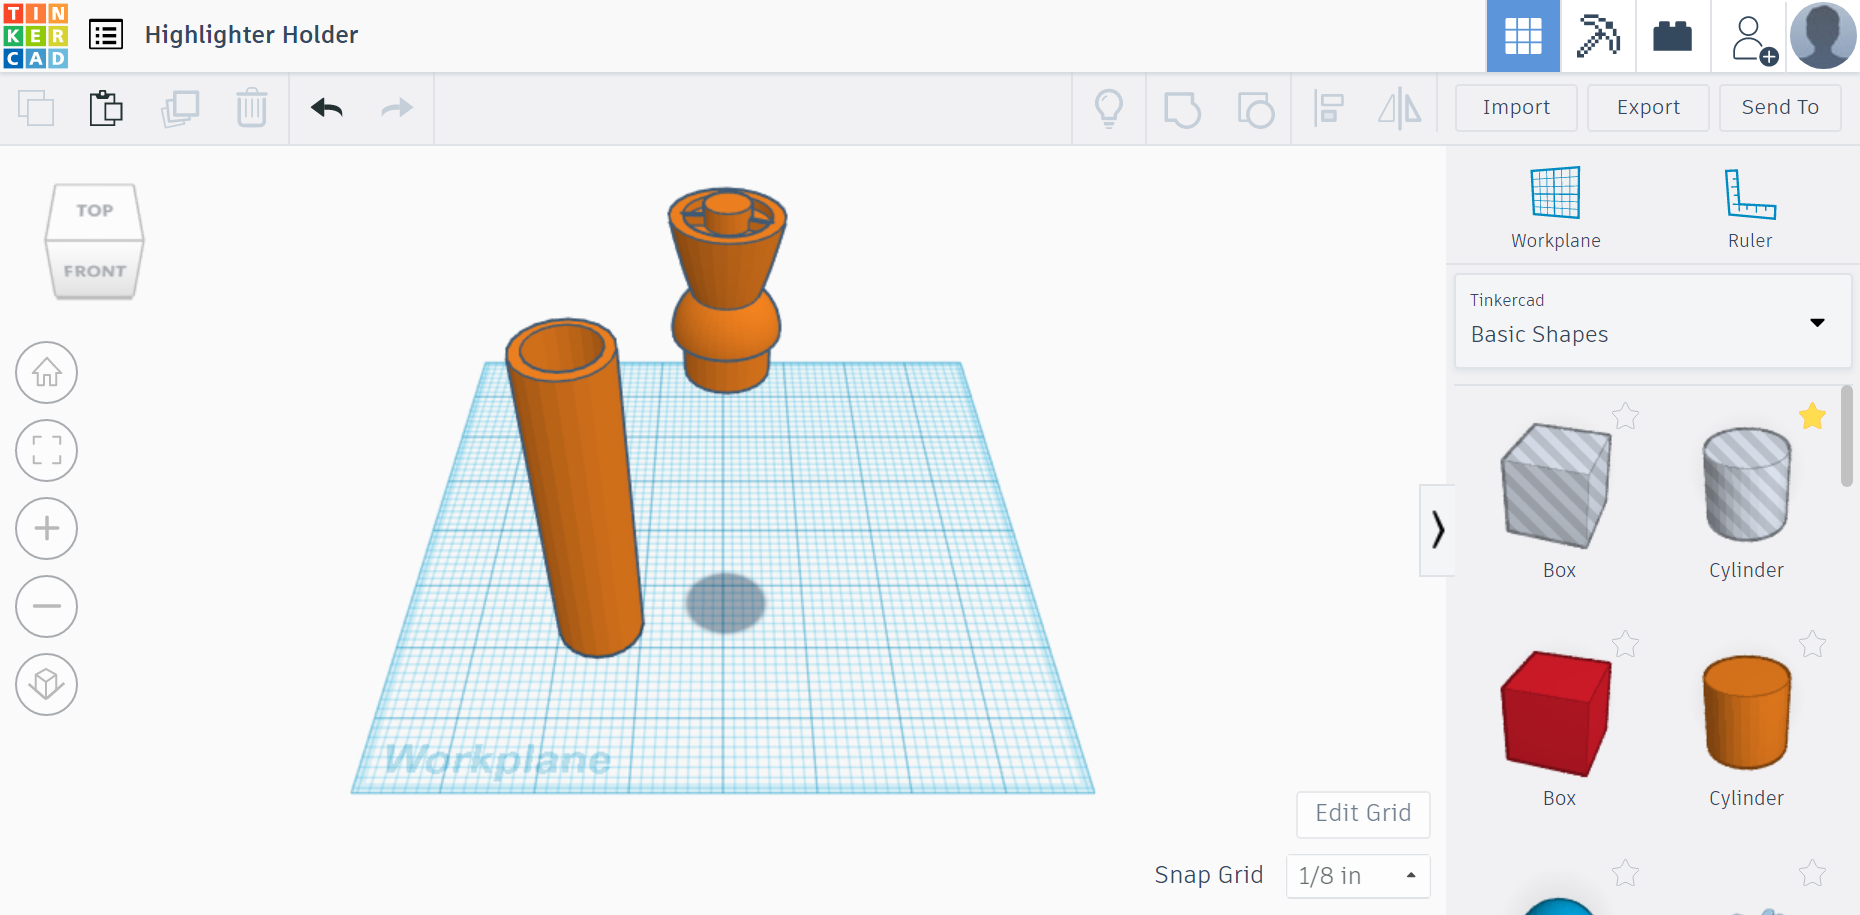
Click & Drag a "Hole" Box onto the original highlighter. Change the height of the "Hole" Box to 1.5 in, and elevate it to 4 in. Select and "Group" the square and the duplicate highlighter. Next, Click & Drag a "Hole" Cylinder onto the Workplane. Adjust the "Hole" Cylinder base to 0.8 in. x 0.8 in., and the height to 4 in. Elevate the "Hole" Cylinder to 0.125 inches. Select and "Group" the duplicate highlighter and "Hole" Cylinder.
Lastly, Click & Drag a tube onto the Workplane. Adjust the base to 0.8 in. x 0.8 in., and don't change the height. Place it directly under the cap. Select and "Group" both the tube and the cap. Now you have a secret holder disguised as a highlighter!
Tips for Printing
If you decide to create and print this highlighter. I have a very helpful tip when printing turn the cap upside down. My Zortrax M200 filled in the hole tube with support filament. Then I had to dig it out.