Scan and 3D Print Your Own Useful Tessellated Objects (CAD-free!)
by blimblarp in Workshop > 3D Printing
4578 Views, 113 Favorites, 0 Comments
Scan and 3D Print Your Own Useful Tessellated Objects (CAD-free!)
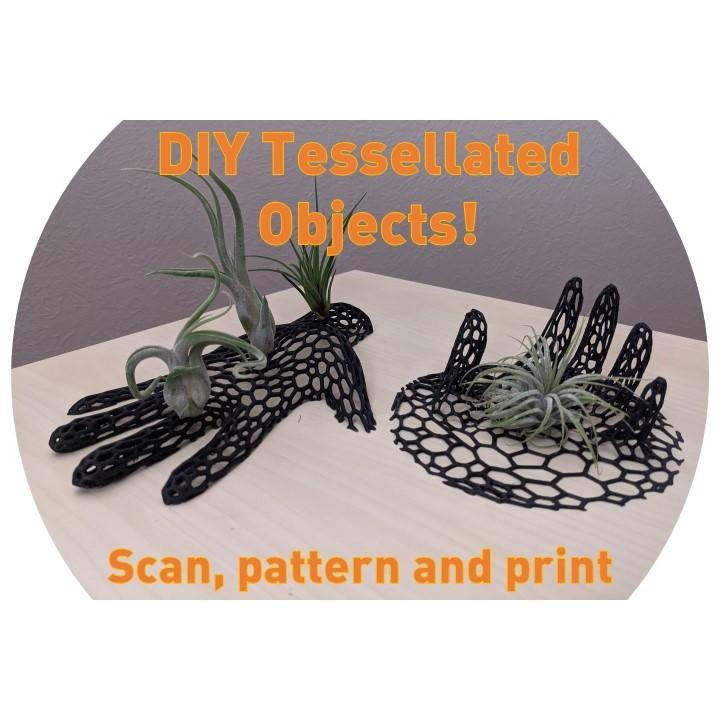
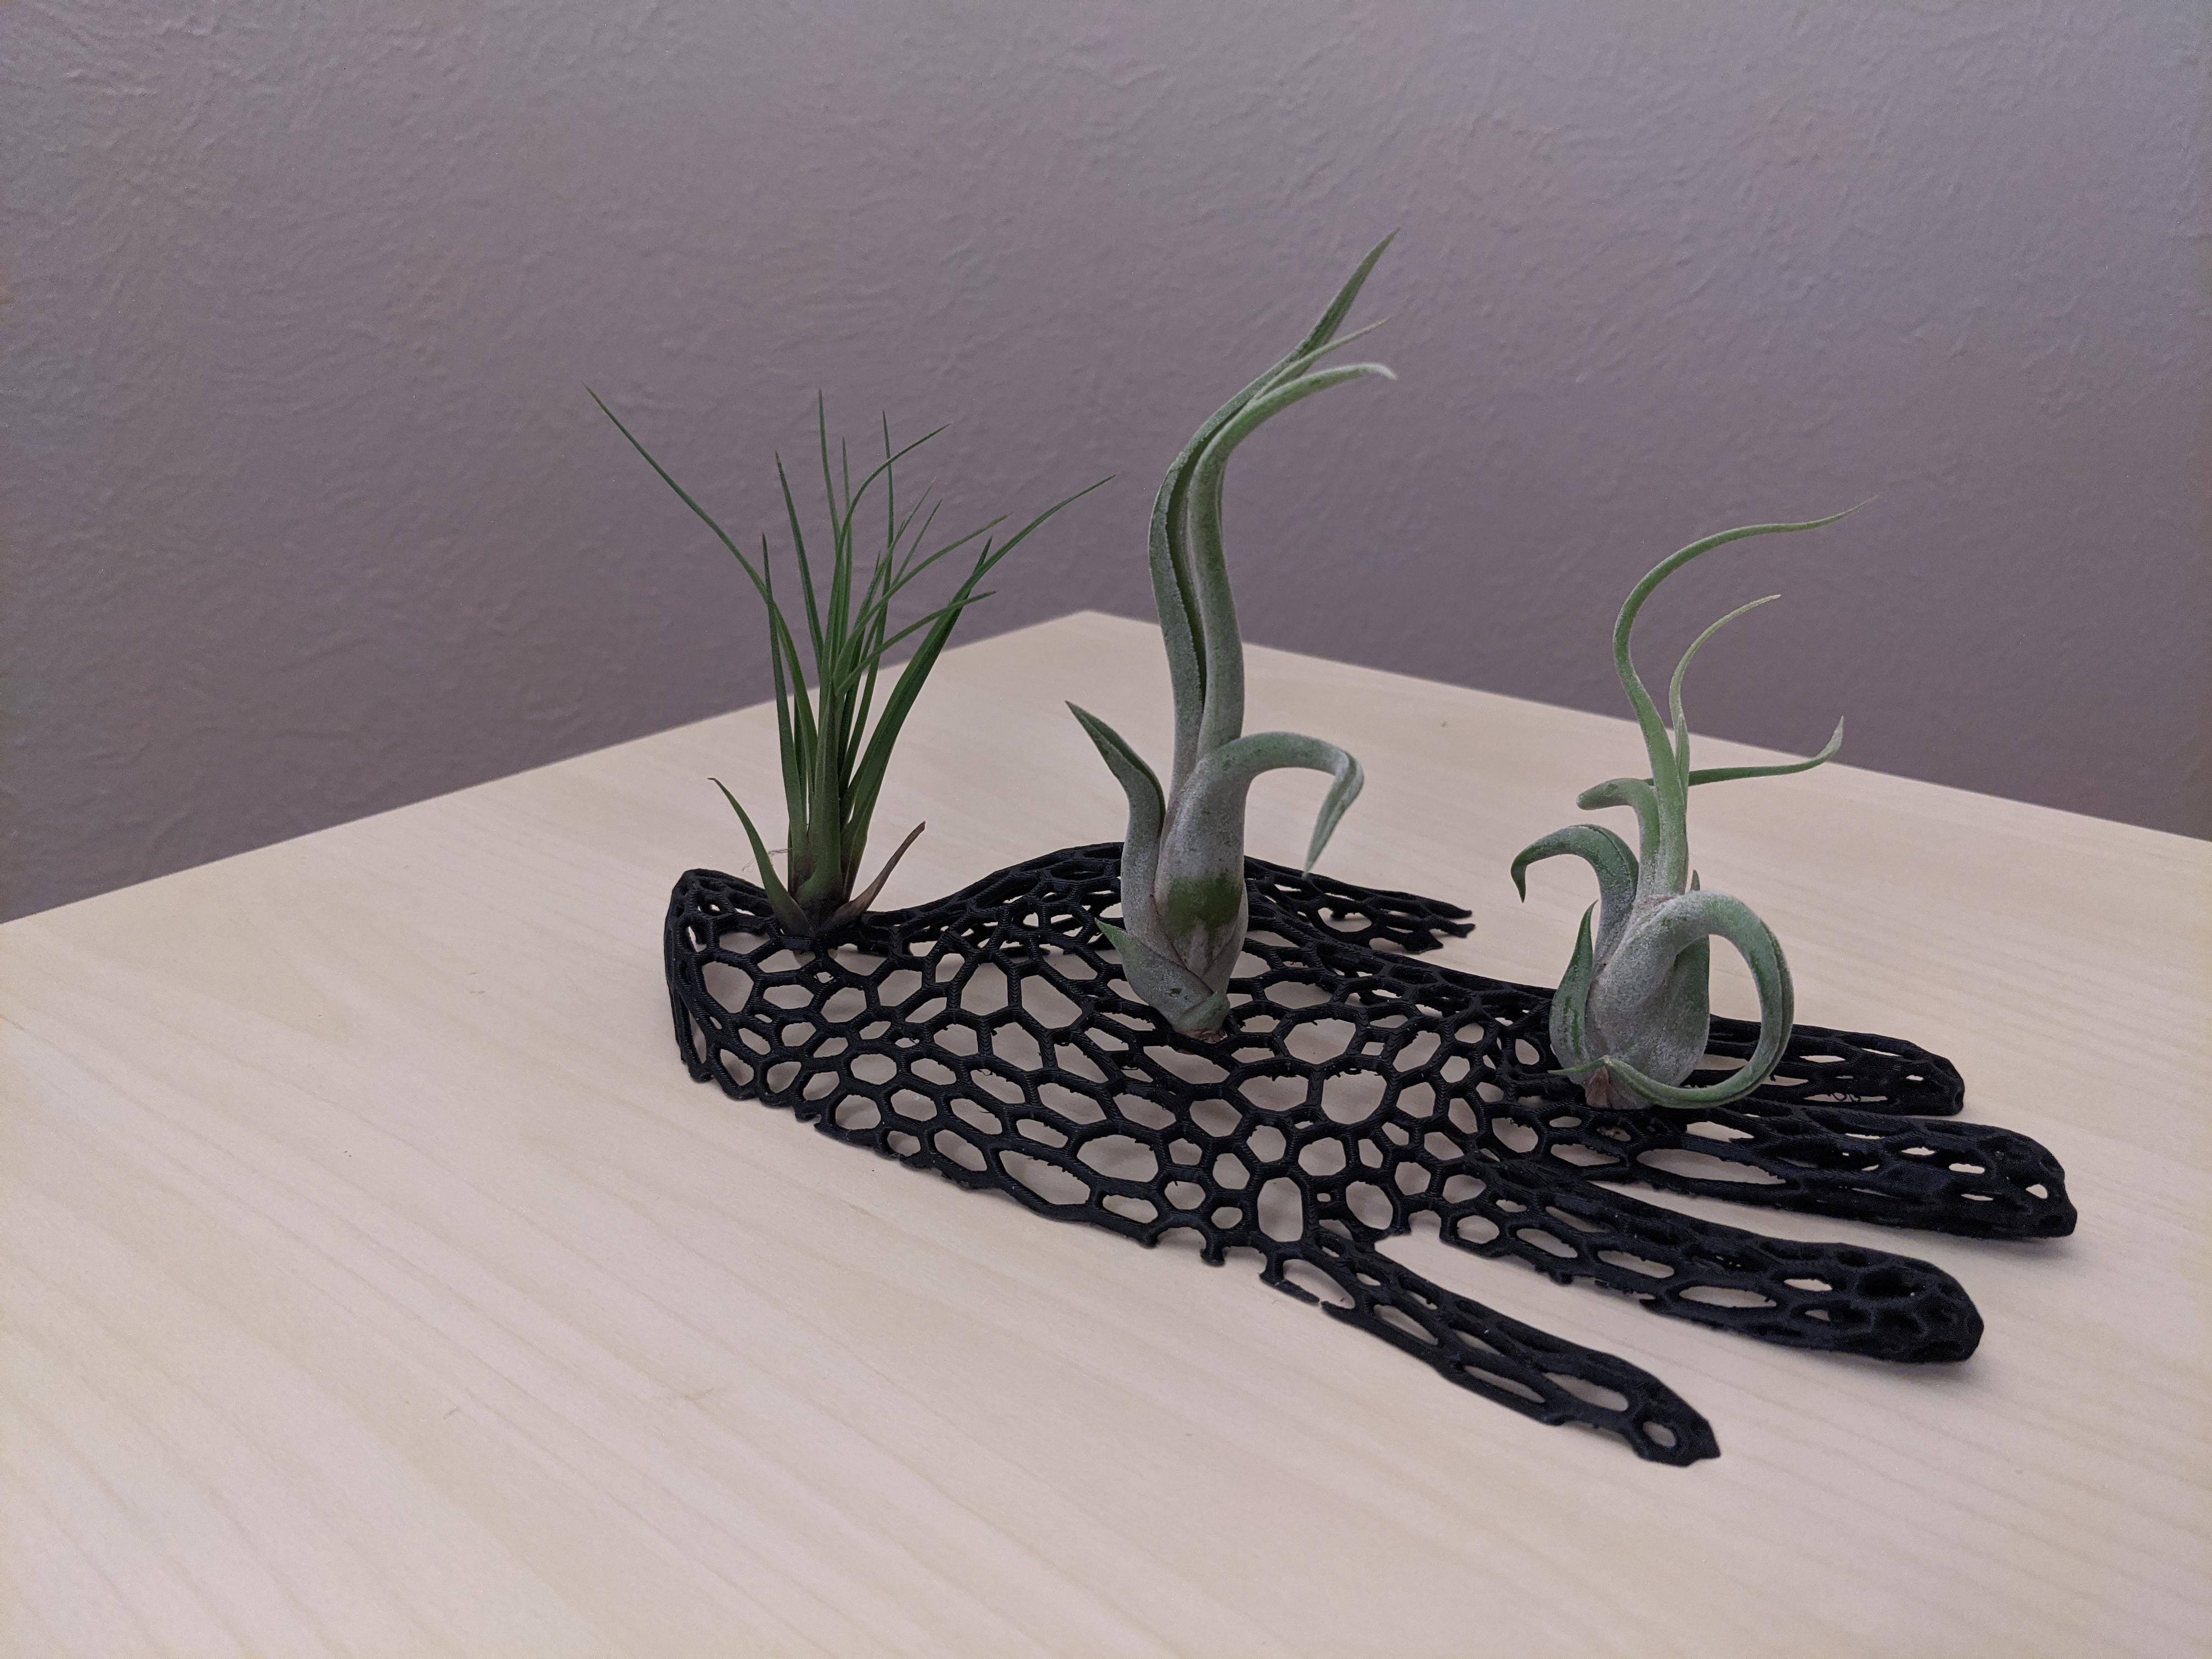
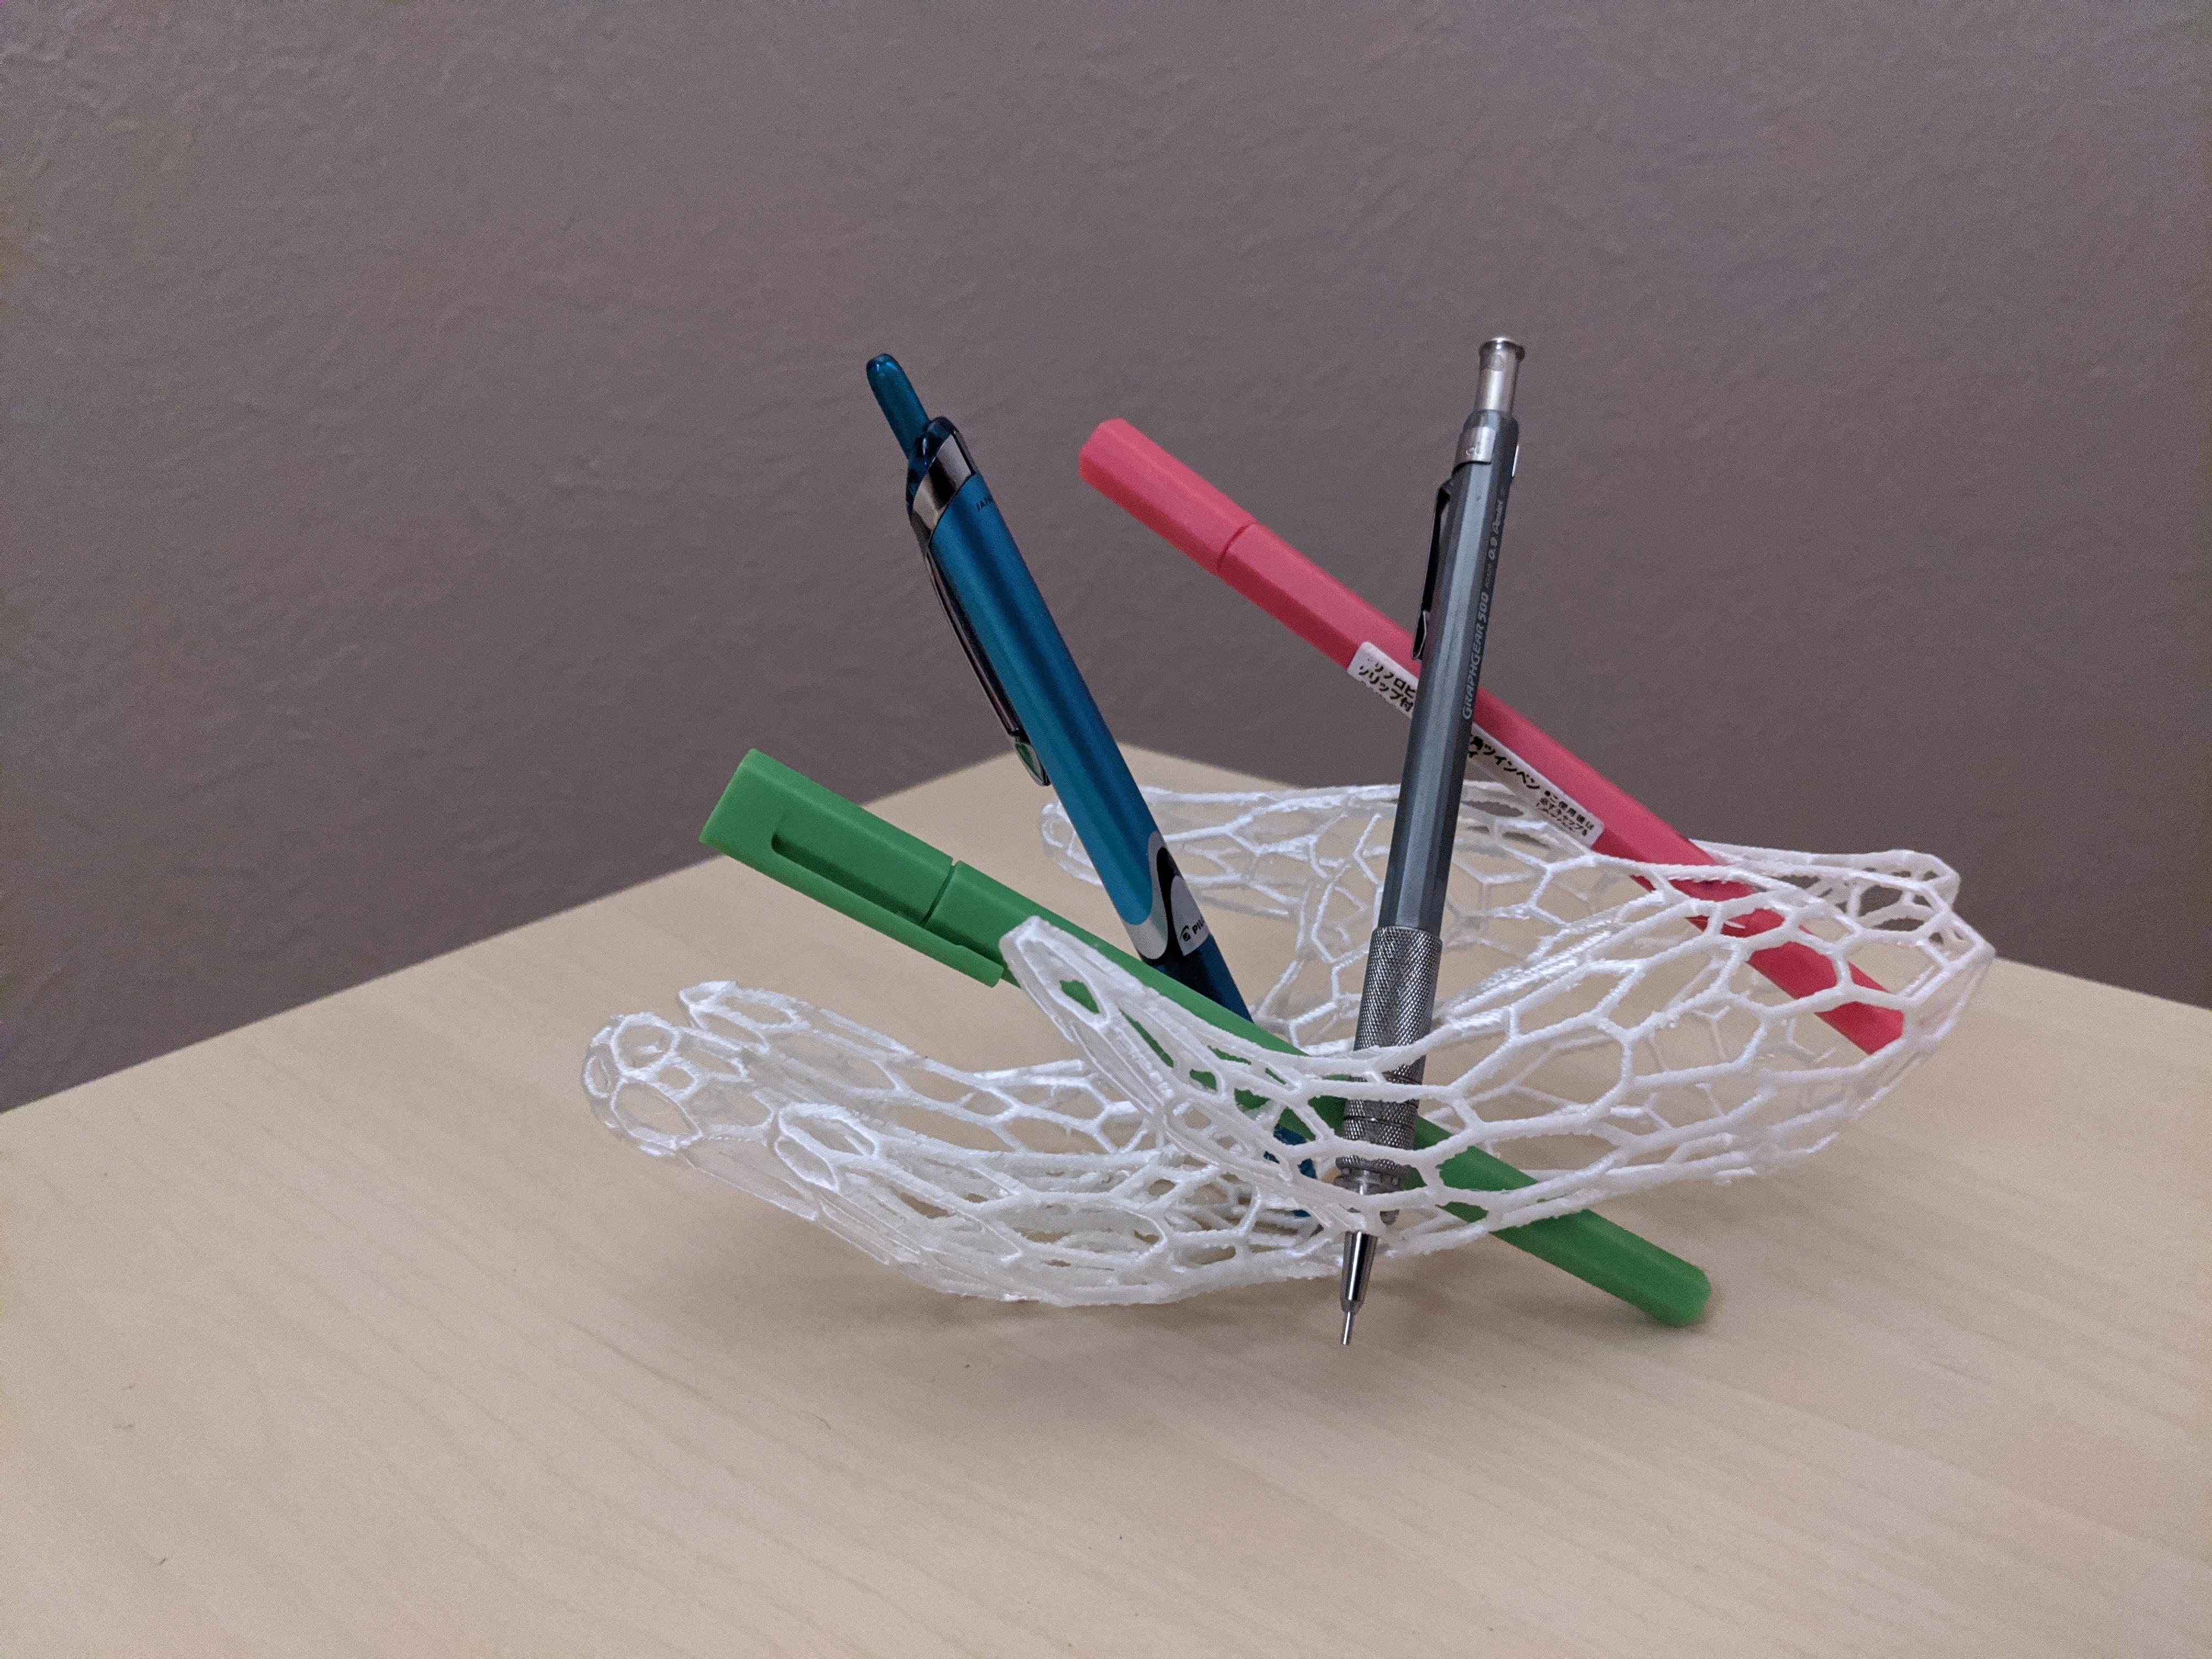
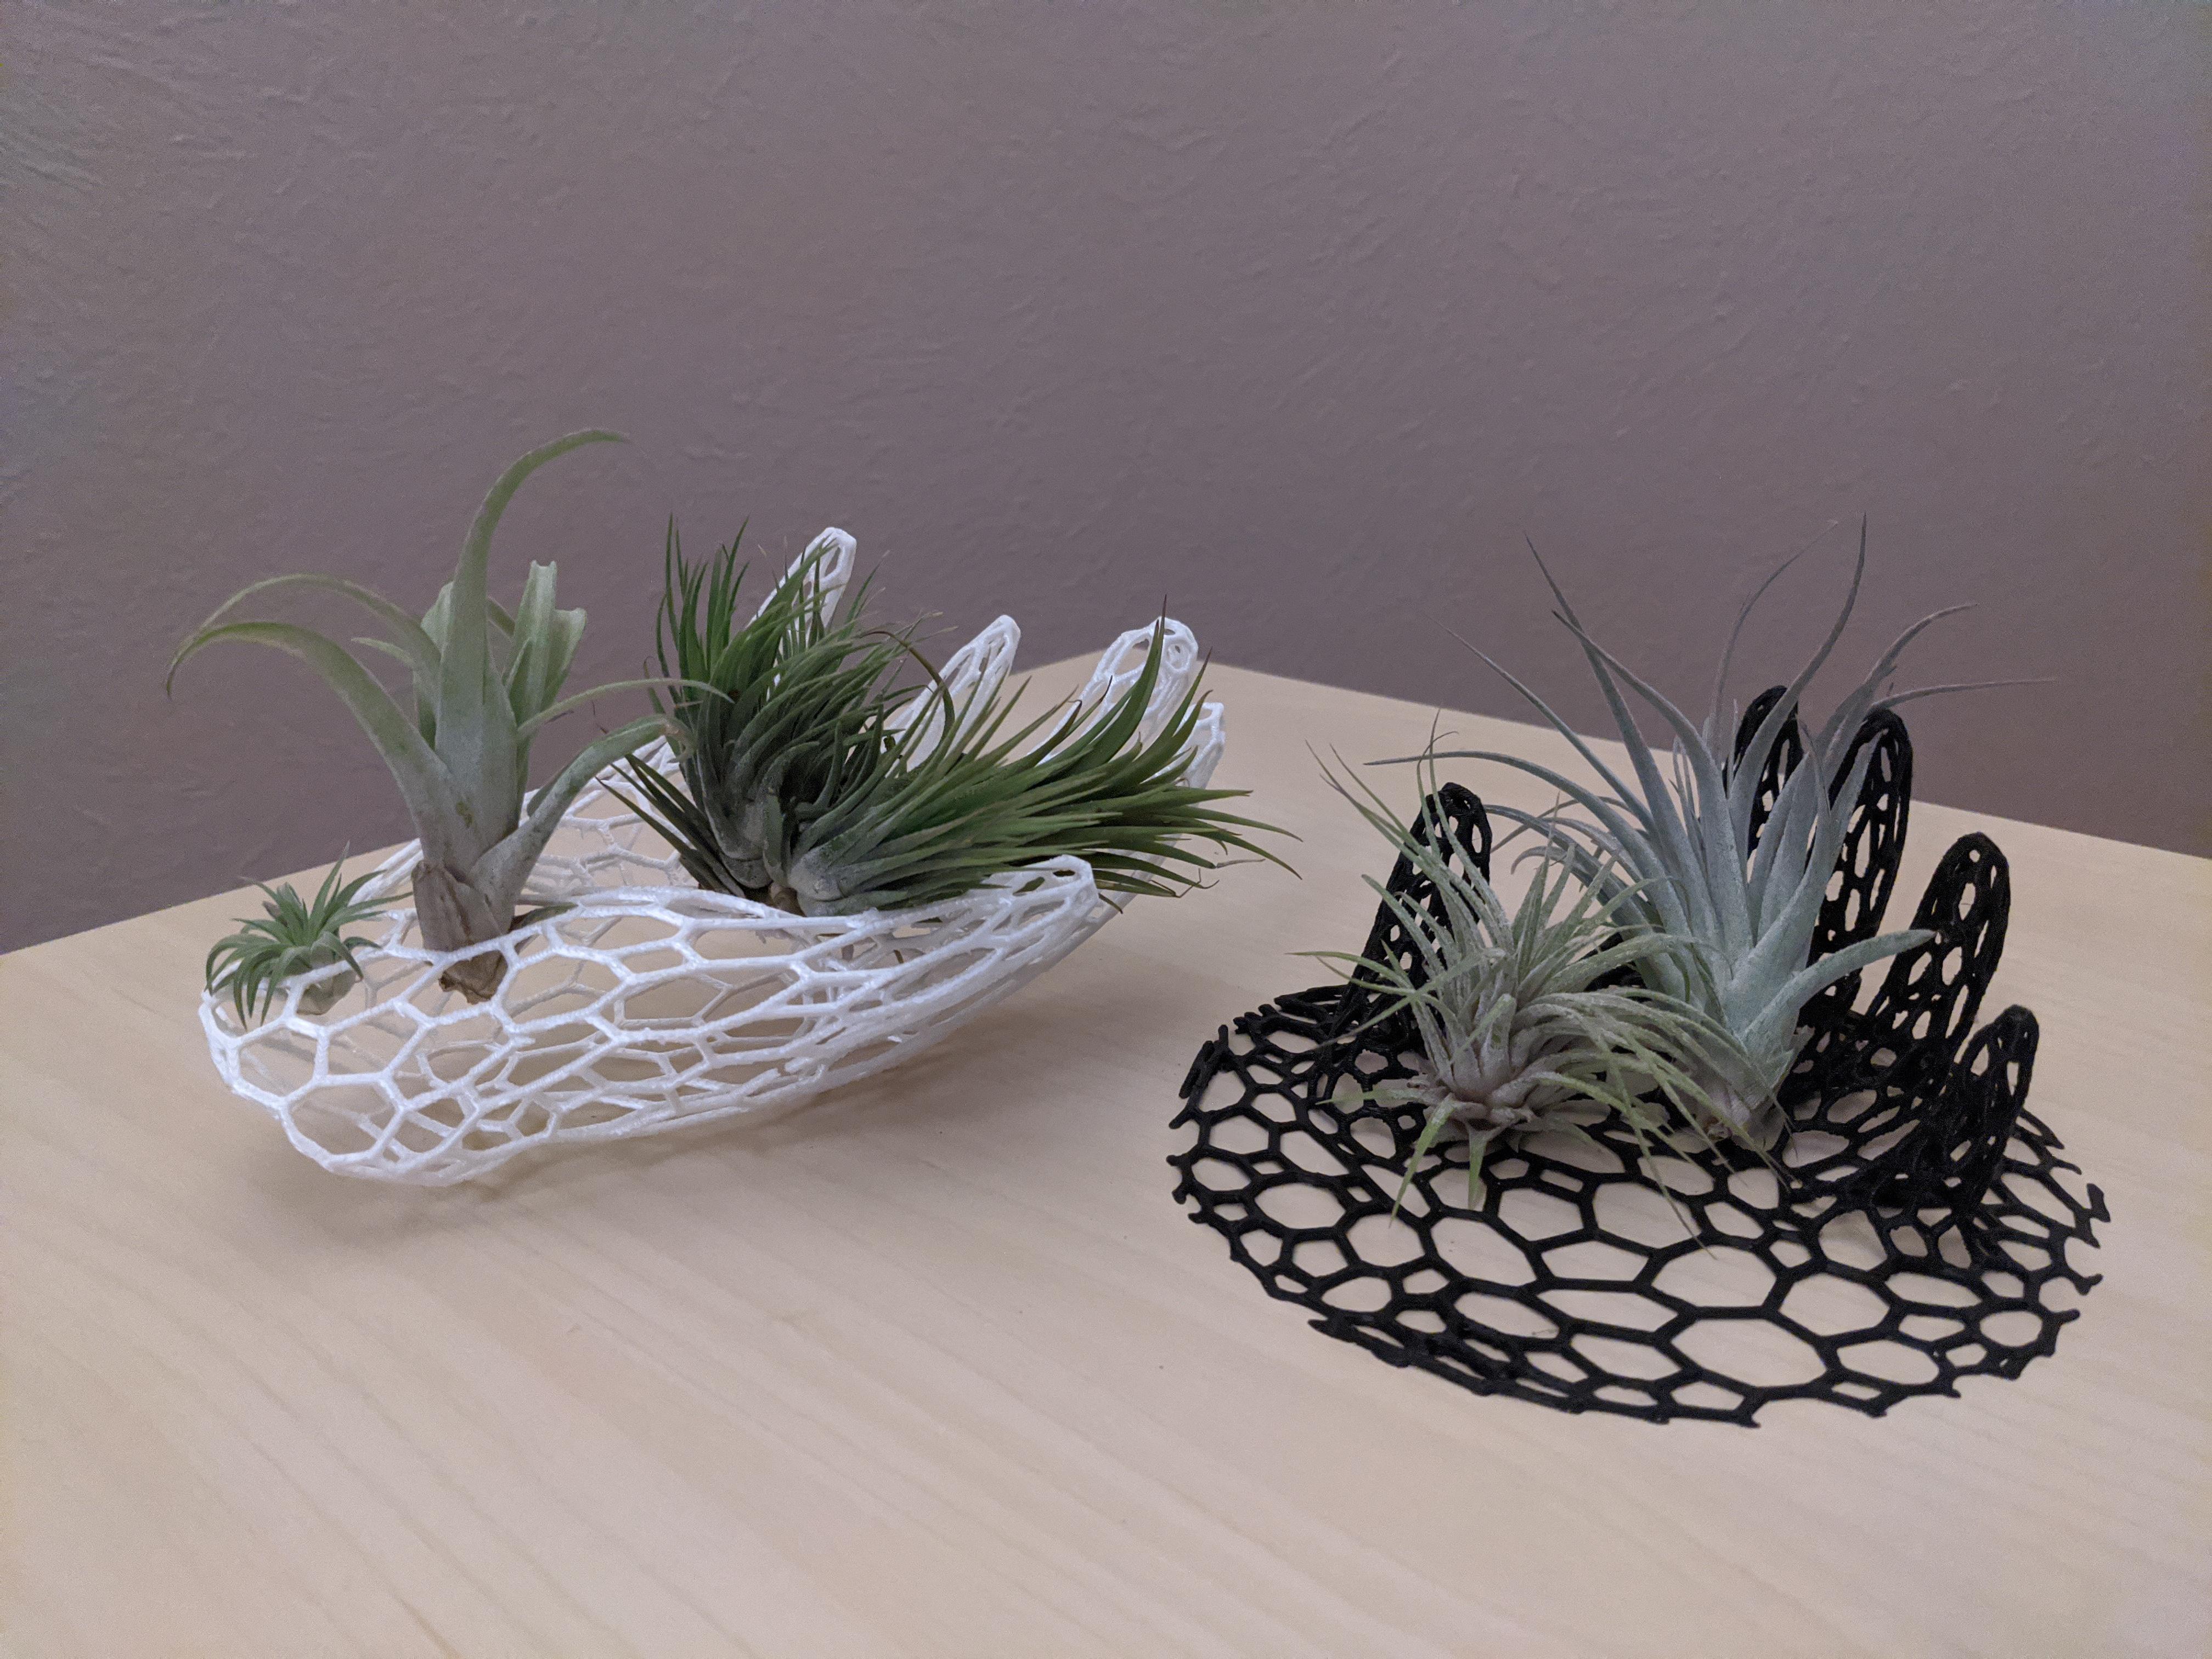
My goal for this project was to create something useful and organically-shaped that I would not need to model in a CAD program (for the purpose of this Instructable, I define "CAD program" as parametric modeling software such as Fusion 360, Solidworks, etc...). The result of my exploration is a set of scanned, post-processed and 3D printed hands that can serve a variety of functional and aesthetic purposes. More importantly, I'm excited to document and share the process that will enable you to create your own custom objects!
This Instructable builds upon the great work of community members marshallpeck and Fasterlearner, who have documented excellent methods for post-processing 3D models in Meshmixer and creating photogrammetry-derived 3D models in 3DF Zephyr, respectively. You can find their work in the following links:
I advance their work by creating a full workflow that begins with snapping photos and takes us all the way through to 3D printing, adding some tips I picked up along the way. All of these steps leverage free-to-use software.
I've shared three of my models generated using this process on Thingiverse here. I show several pictures of these printed parts acting as air plant holders, but I encourage you to let your imagination run free in finding other meaningful applications. I hope you enjoy applying these techniques to bring your own unique objects to life!
Supplies
- Tools:
- A digital camera - for reference, I used a mobile phone camera (Google Pixel 4)
- A computer with the following programs installed:
- 3D printer (or access to one) - for reference, I printed these pieces in PLA on an Ender 3 Pro
- Flush cutter, for trimming your 3D print (Link)
- Materials:
- Your printing material of choice
Take Some Photos
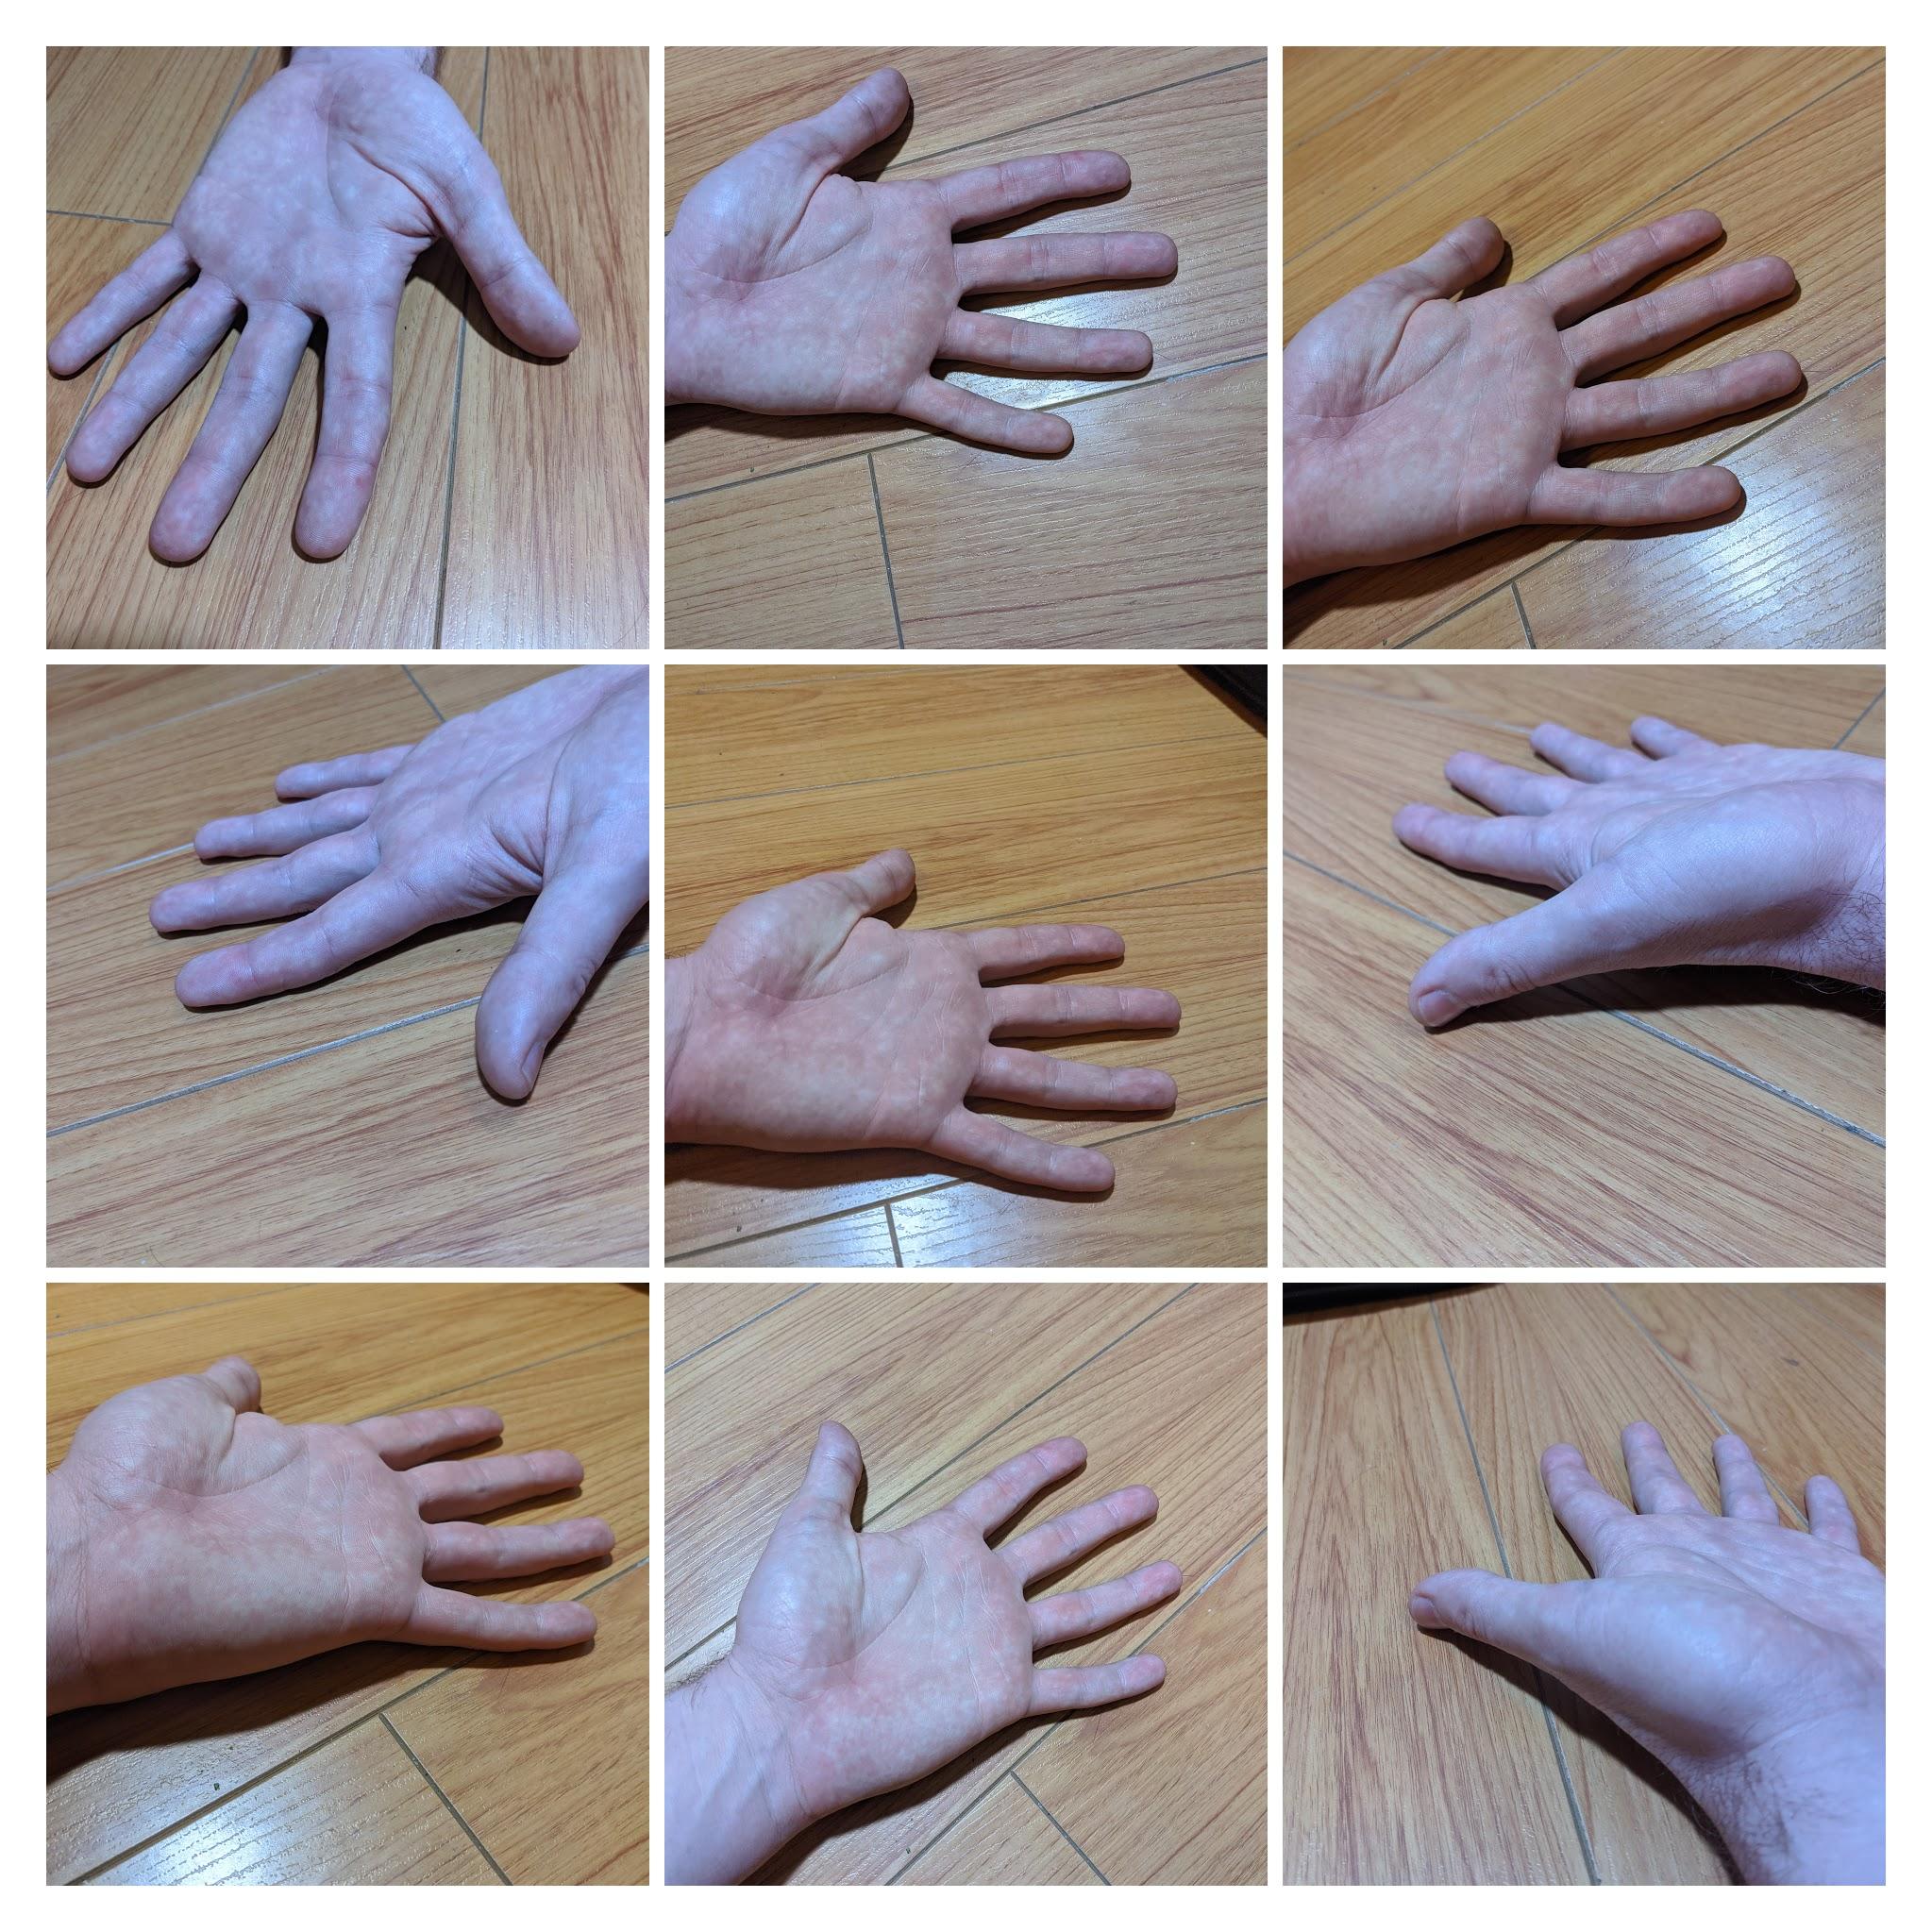
First, find an object you would like to create a scanned model of - in this example, I picked my hand!
Use your digital camera to capture approximately 50 photos of your chosen object from all angles. These are what we will be loading into 3DF Zephyr, a program that uses a technique called photogrammetry to create our model.
There are several do's and don'ts to consider when selecting objects and taking photos for photogrammetry. The process is explored brilliantly in this article from the Instructables 3D Scanning Class, which also includes links to many other helpful Instructables if you want to dive down this rabbit hole a bit further: https://www.instructables.com/lesson/Shooting-for-...
The TL;DR (in my opinion) from the above article and from my experience is:
- Make it easier on yourself and move your camera around the stationary object to take photos (it's more forgiving to an amateur photographer than holding the camera stationary and moving the object).
- If moving your camera around a stationary object, choose a background with a distinguishable pattern (rather than a solid color background)
- Choose objects with a matte finish (rather than a shiny finish)
- Choose objects with surface details (rather than smooth, featureless objects)
- Choose objects with features larger than ~1cm wide/long/deep (rather than thin/tiny features)
- Uniform, diffuse lighting on your object is important (shadows can cause problems)
In case my description above isn't clear, here is how I adhered to the above 6 suggestions in this example:
- I held my hand stationary and took photos from various angles
- I used a hardwood floor as a background, which has a distinguishable pattern
- I was not too sweaty, so my hand is rather matte
- My hand has surface details (veins, lines on my palm, skin wrinkles etc...)
- The features I was looking to capture (digits, palm) have dimensions larger than ~1cm
- I used a floor lamp to light my photos as uniformly as possible
Once you have approximately 50 photos of your object from various angles, it's time to bring them into 3DF Zephyr!
Create Your Model in 3DF Zephyr
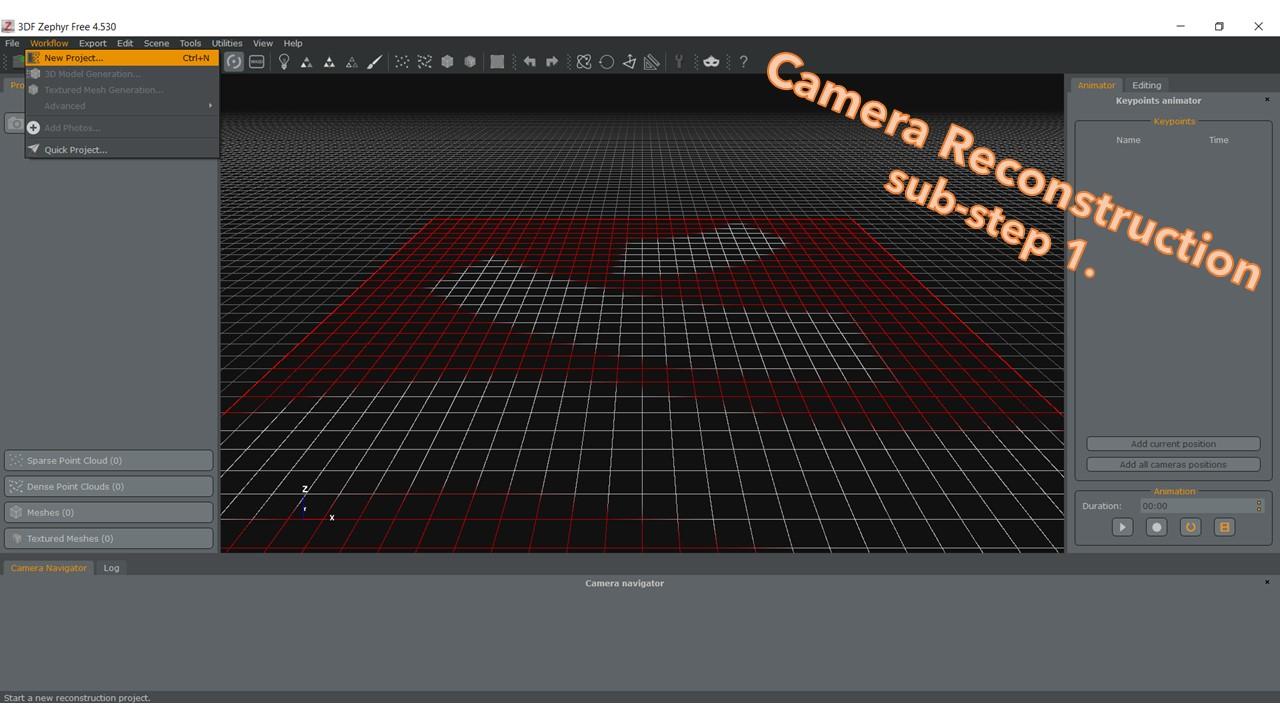
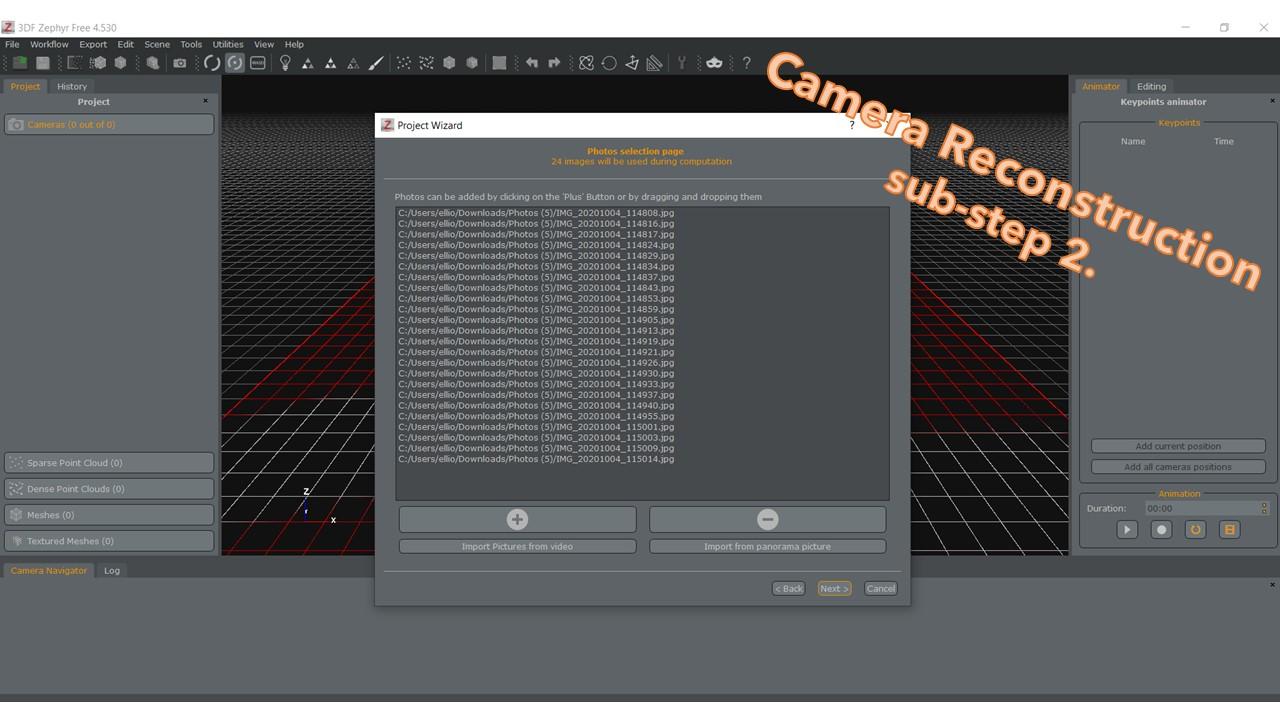
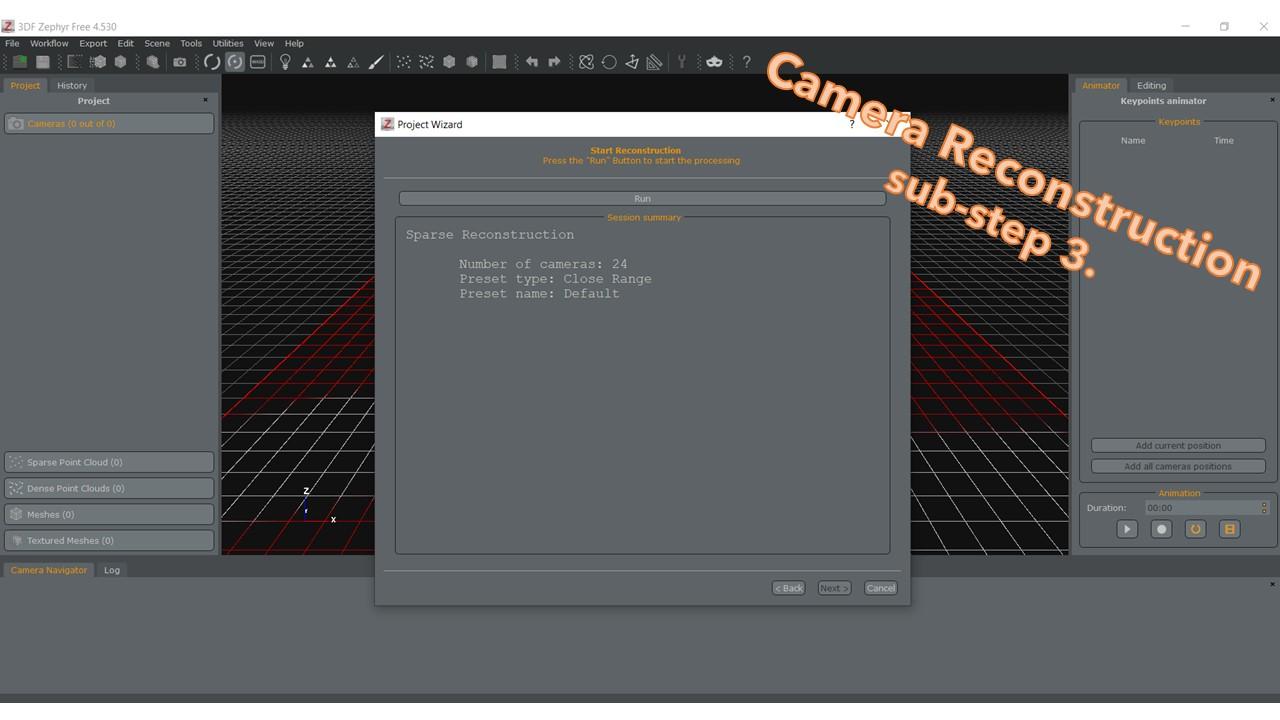
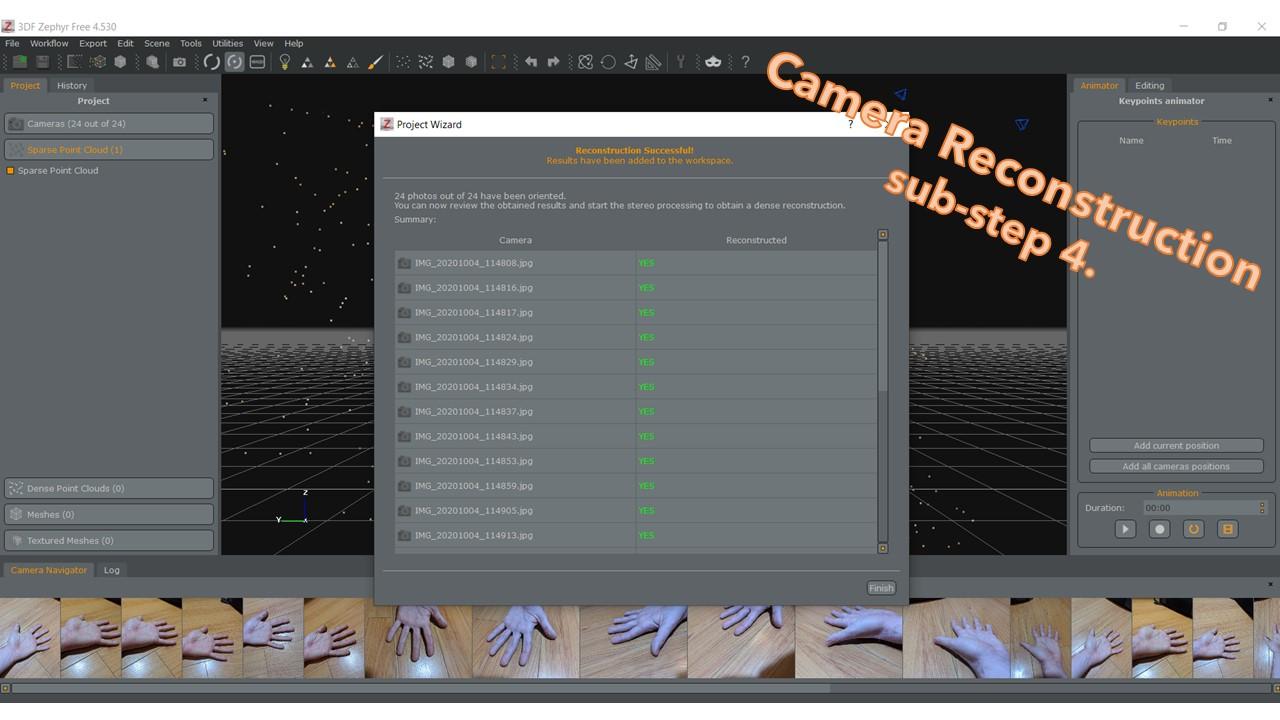
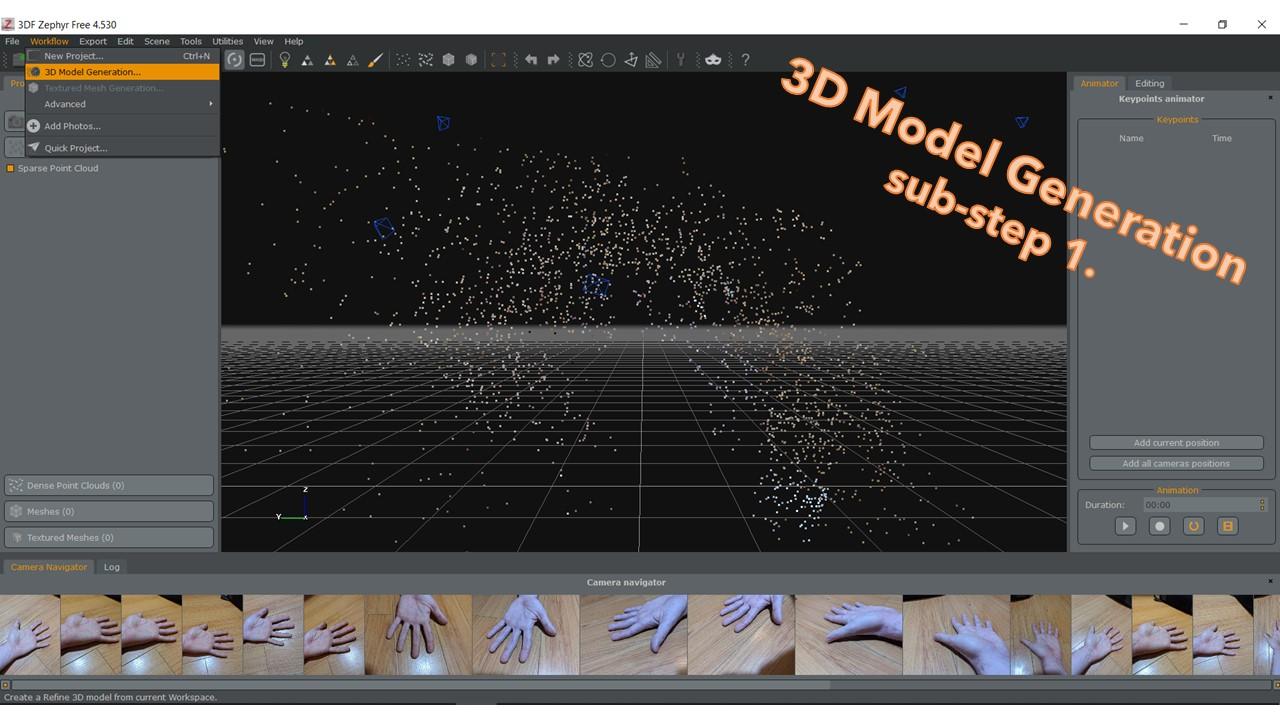
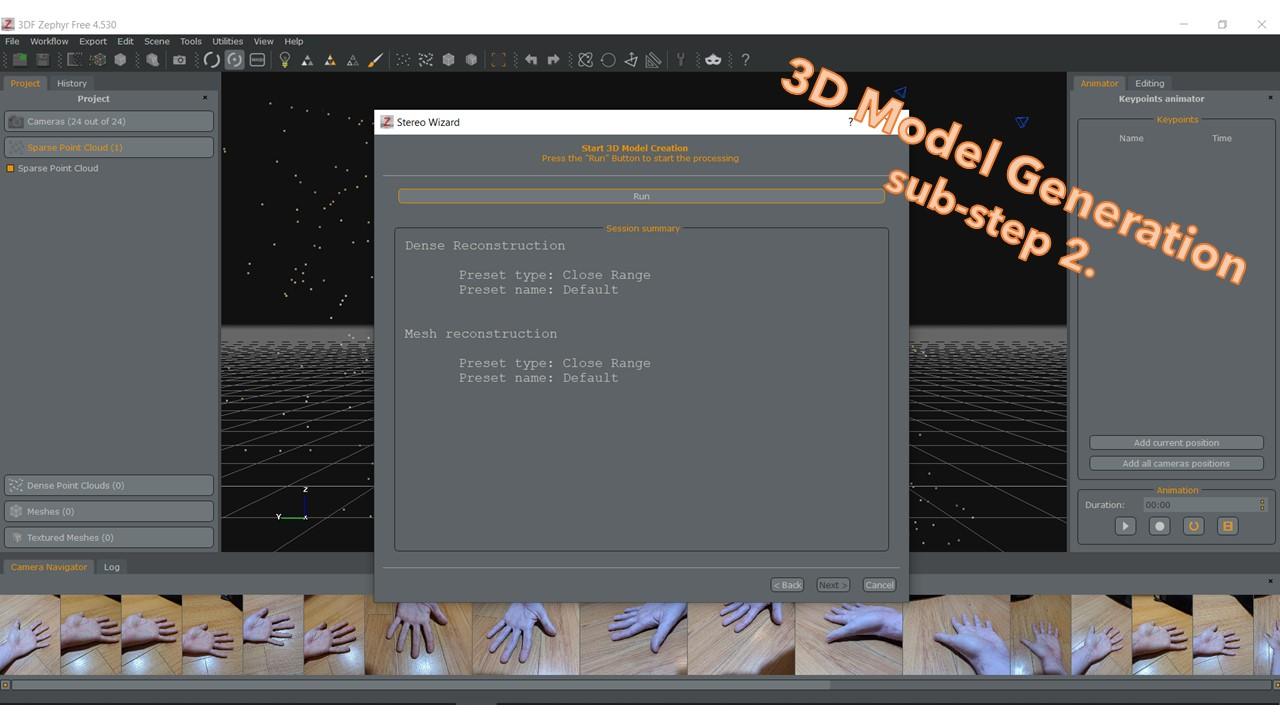
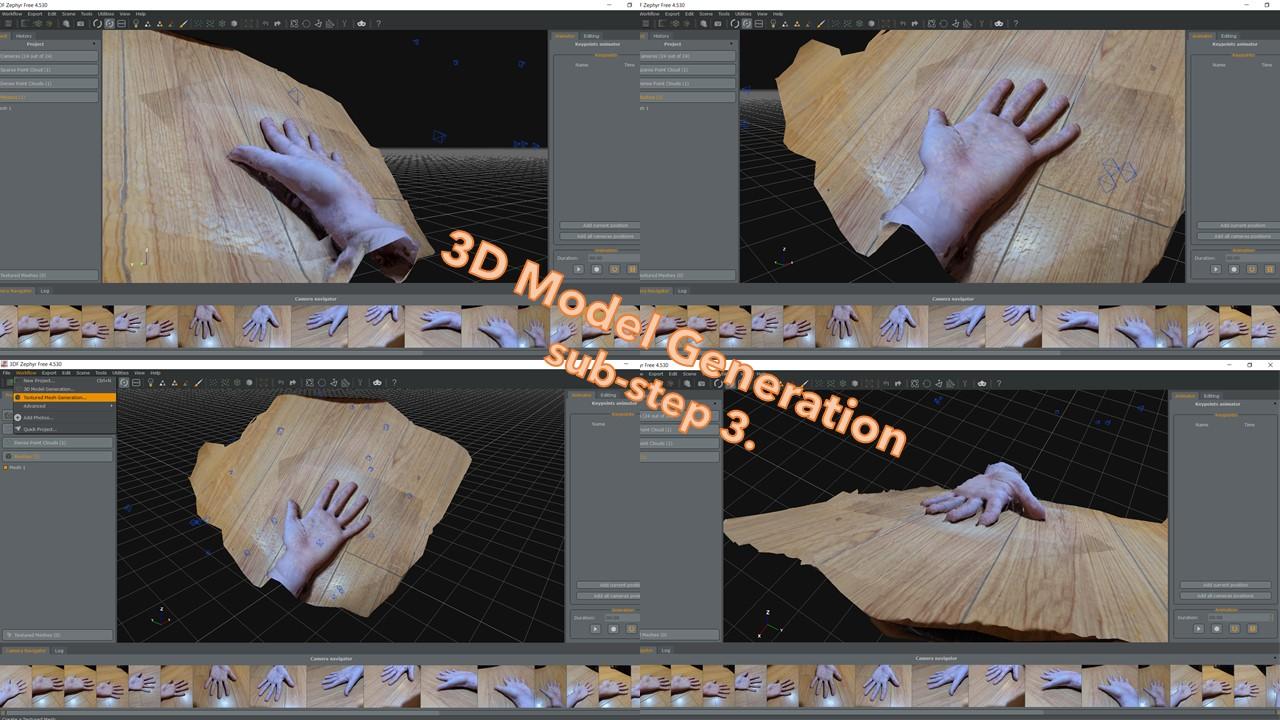
Next, we will bring these photos into 3DF Zephyr and create our 3D model (.obj file). The following steps should be more or less followed in the order presented here:
Camera Reconstruction sub-steps
- Start a new project and navigate to the 'Photos selection' page (Workflow > New Project... > Next).
- Drag and drop your photos onto the window ({drag & drop} > Next).
- The free version of 3DF Zephyr can accept a maximum of 50 photos (thanks for the correction Fasterlearner!) - in my experience, this is plenty to create a reasonably detailed model.
- I don't recommend the "Import Pictures from video" option. I haven't had much luck with it using a hand-held mobile phone camera.
- Proceed through the 'Camera calibration' and 'Camera orientation' pages to the 'Start Reconstruction' page and select 'Run' to start the reconstruction process (Next > Next > Run).
- For each of these and in the future setup steps, I've used the default settings with reasonable success.
- Wait while the reconstruction finishes (in my experience, it's less than 1 hour), then celebrate the 'Reconstruction Successful!' window (Finish).
- If one or more of your photos were not reconstructed, you may re-evaluate them to see if they aren't following the photo recommendations from Step 1, then re-run sub-steps 1-3 above. You may also continue on and see if the results are acceptable for your needs.
3D Model Generation sub-steps
- Now, we can create a 3D model from the reconstruction (Workflow > 3D Model Generation... > Next).
- Proceed through the 'Dense Point Cloud creation' and 'Surface reconstruction' pages to the 'Start 3D Model Creation' page and select 'Run' to start the reconstruction process (Next > Next > Run).
- Wait while the reconstruction finishes (in my experience, it's less than 1 hour), then rejoice upon seeing the "3D Model generation successful" window (Finish).
- At this point, you should see a fairly accurate representation of your scanned object on the screen; use the middle mouse button to rotate and view from several angles and ensure that the important details are captured before proceeding.
- If you aren't seeing important details being captured or if this process throws an error message, I recommend starting from the beginning with a new set of photos.
Textured Mesh Generation and Export sub-steps
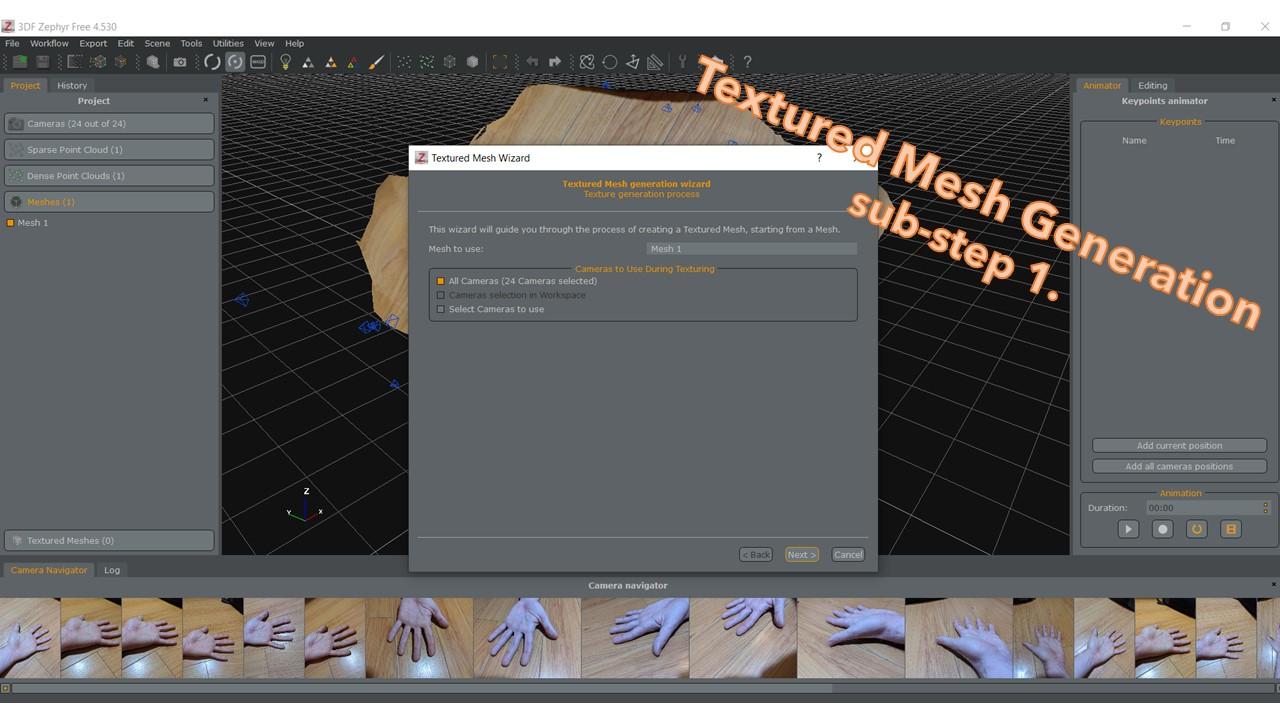
- Now, we are ready to take the last step in 3DF Zephyr, which creates a textured mesh that we can export as an .obj file (Workflow > Textured Mesh Generation... > Next).
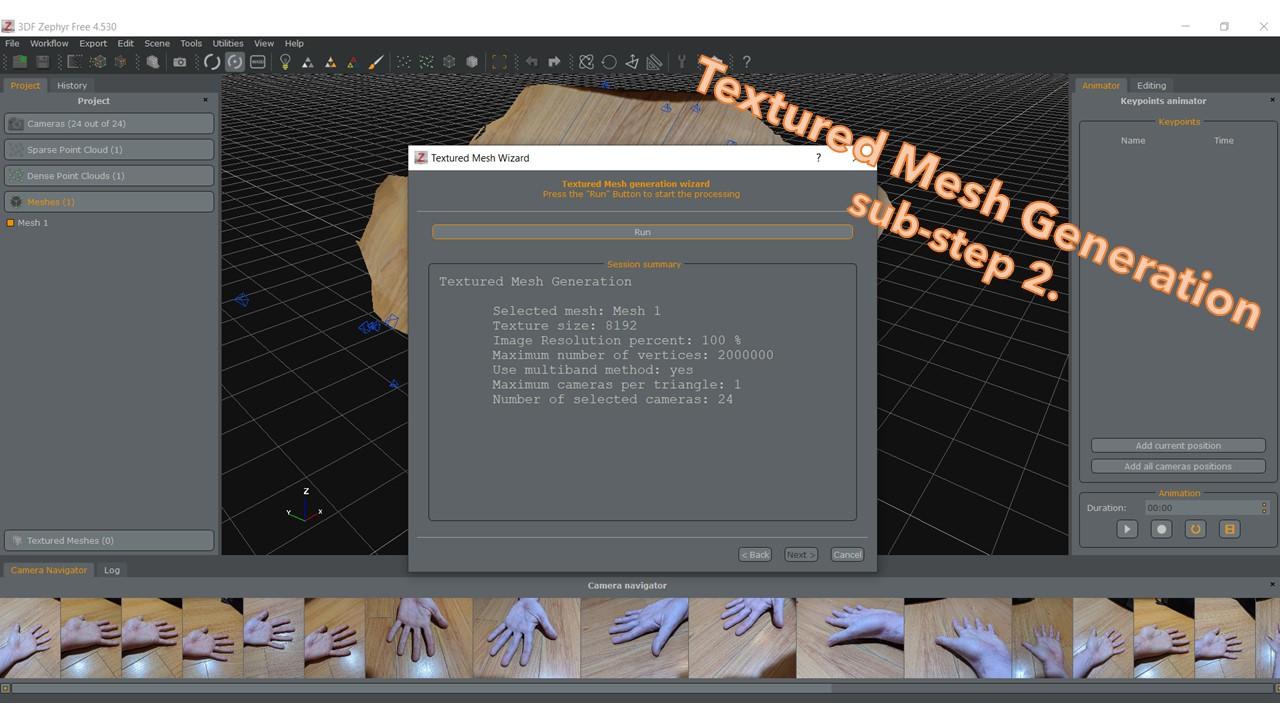
- Proceed through the 'Texturing' page to the 'Textured Mesh generation wizard' page and select 'Run' to start the process (Next > Run).
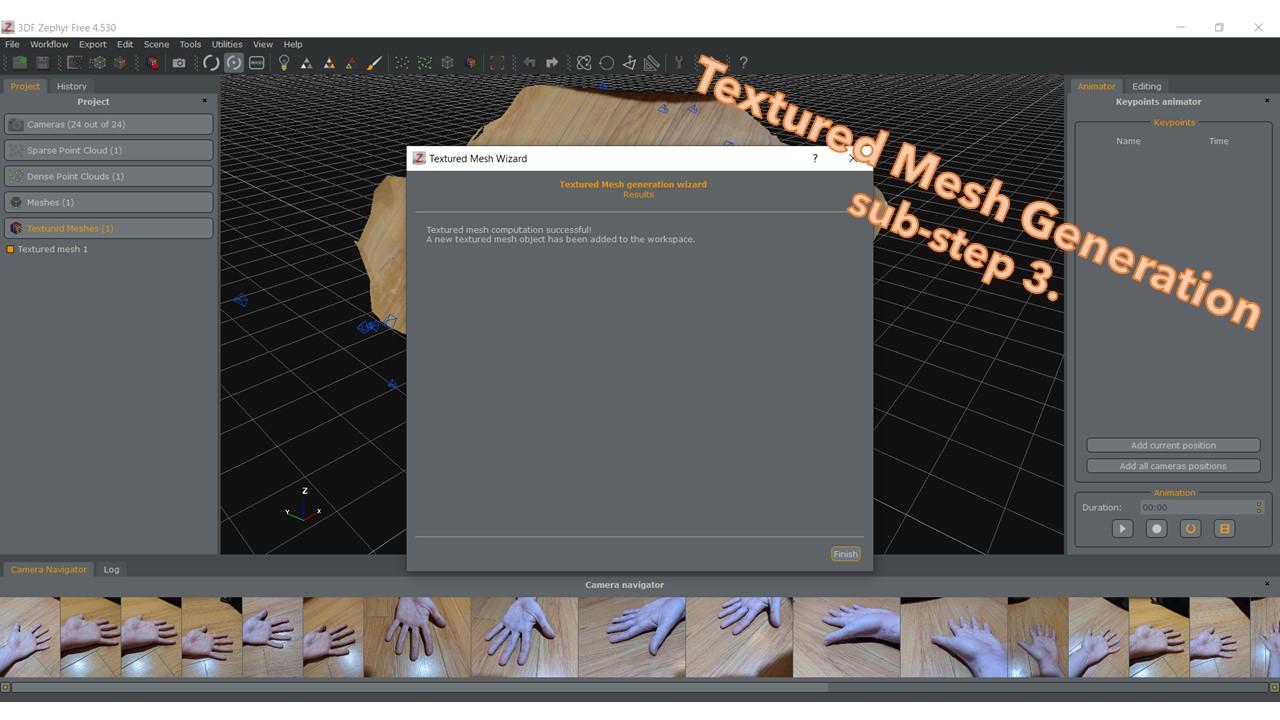
- Wait while the generation finishes (in my experience, it can take up to 2 hours), then cheer the "Textured mesh computation successful!" window (Finish).
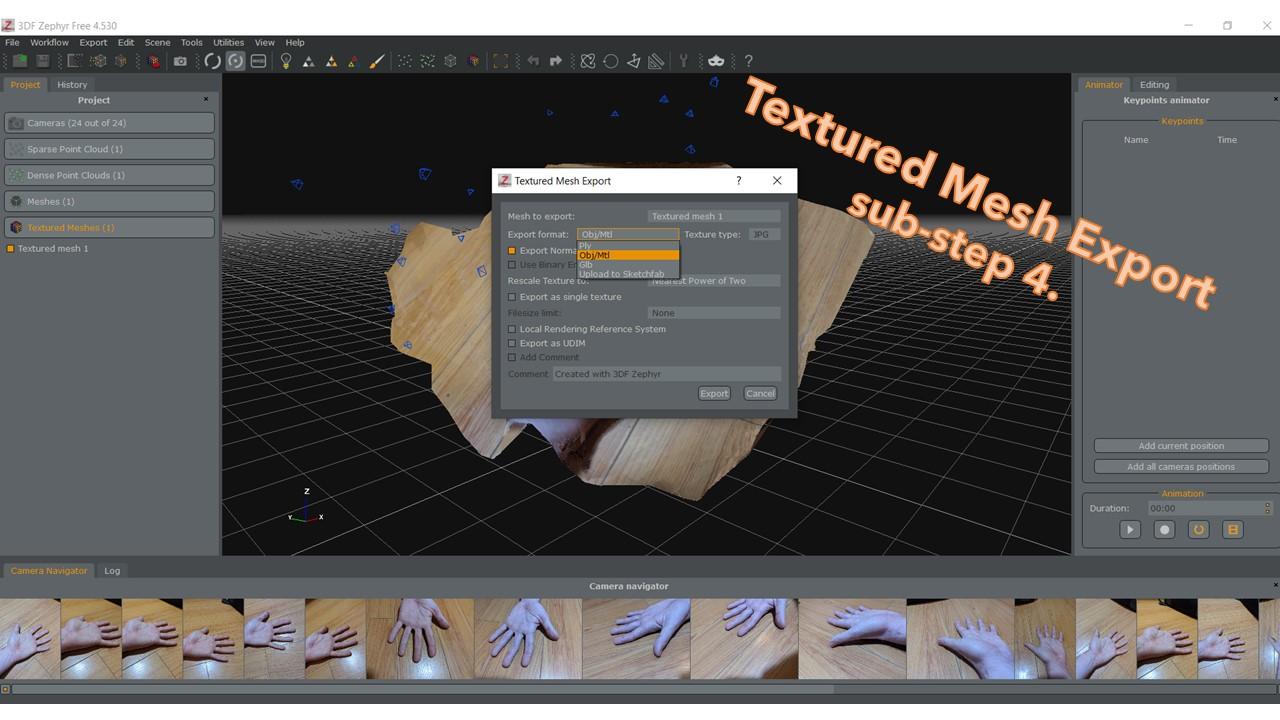
- Finally, export the model to a location that is convenient for you (Export > Export Textured Mesh... > {Export format: Obj/Mtl} > Export).
Now with our .obj file in hand (woof), let's bring it into Meshmixer!
Edit Your Model in Meshmixer
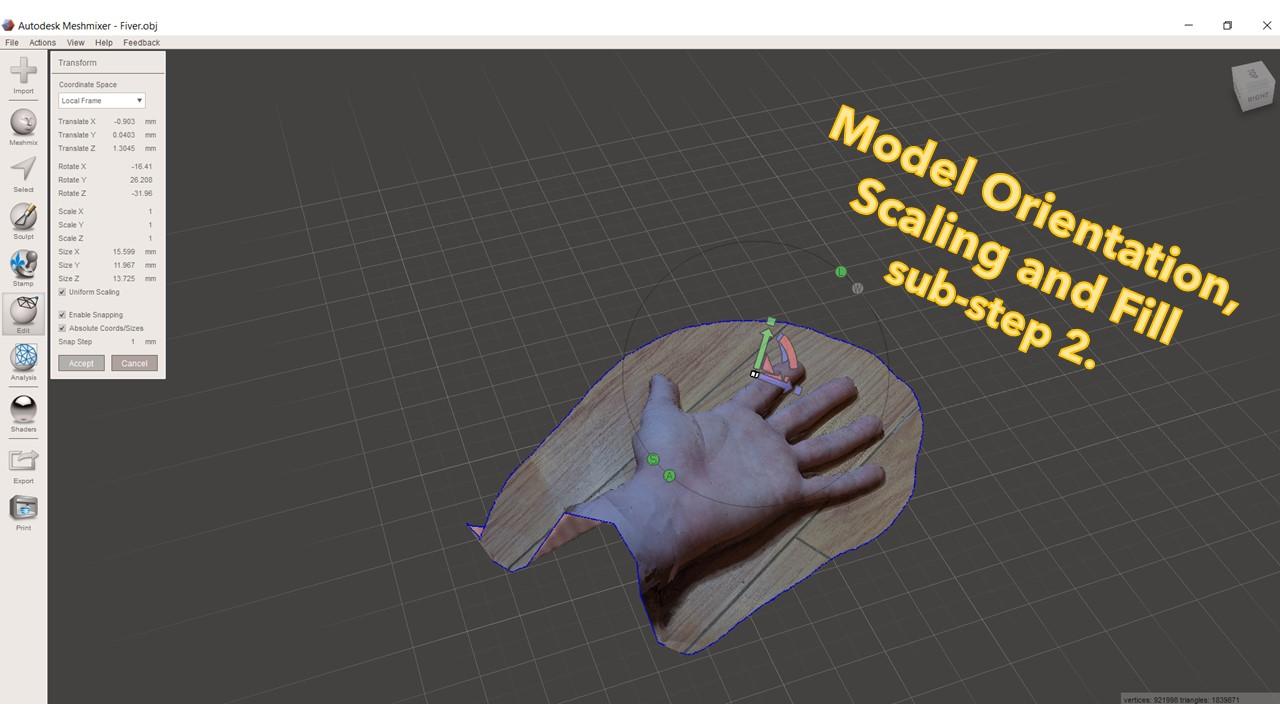
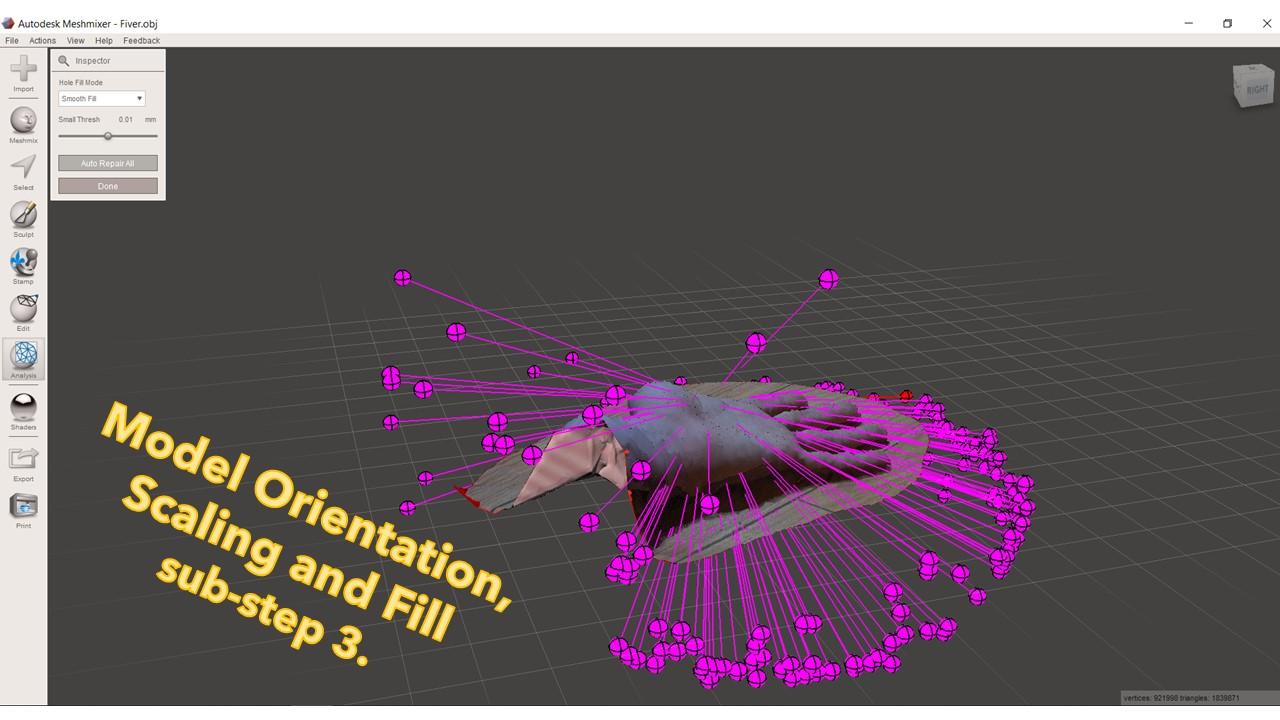
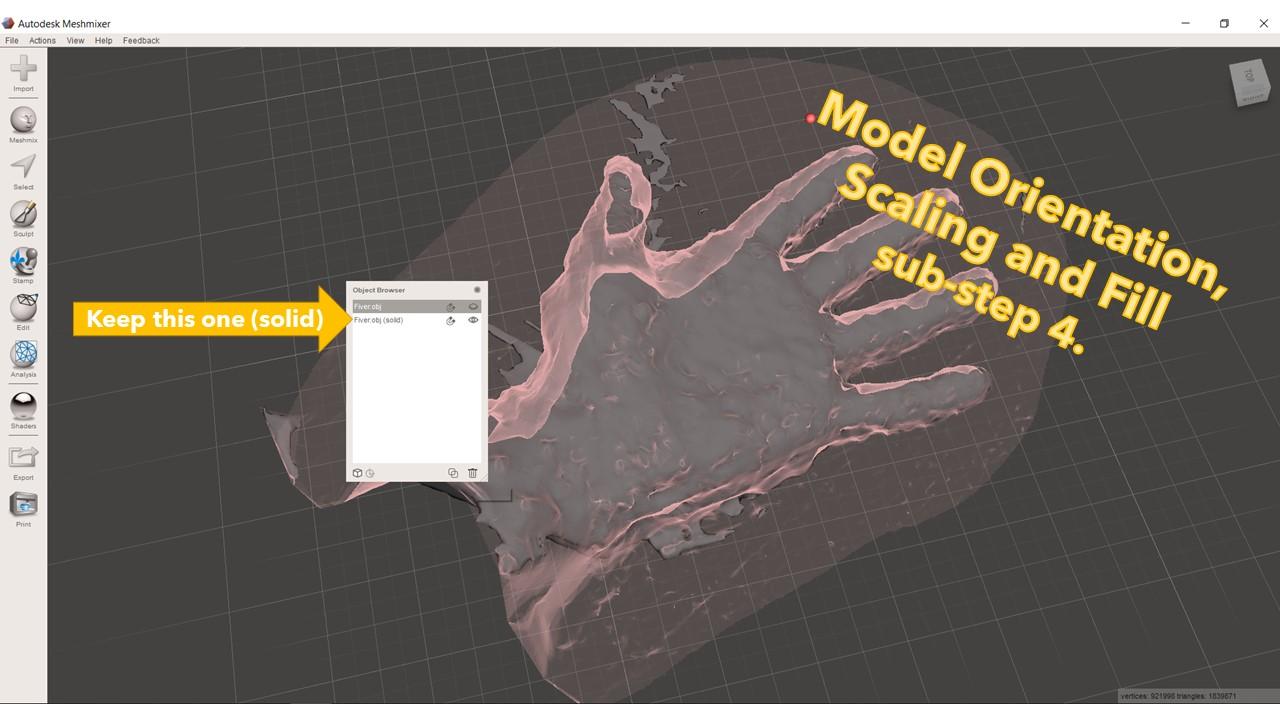
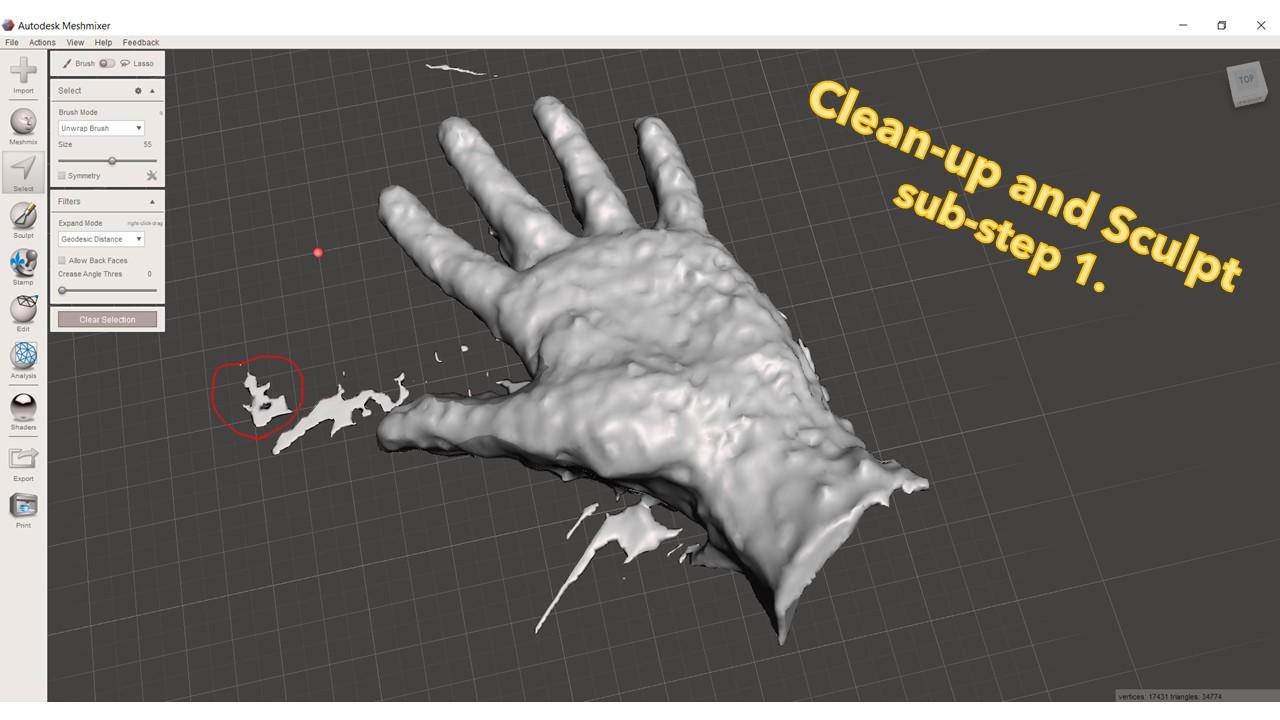
Next, we will bring our .obj file into Meshmixer to create our tessellated, printable model (.stl file). The following steps are less important to follow in the exact order I've presented. What follows is series of steps that worked well for me on several projects, but feel free to experiment!
Model Orientation, Scaling and Fill sub-steps
- Import your .obj file into the Meshmixer workspace (Import > {your .obj file}).
- In the 'Edit' menu, use the 'Transform' commands to orient your model coincident to the workspace grid and scale your model up / down as needed (Edit > Transform > {use rotation/translation handles}).
- It is important to scale your model if needed. If your model is much smaller or larger than expected, it is likely due to an import conversion between mm <> inches; divide or multiply by ~25.4 as needed.
- It isn't important to have the model exactly flat against the grid, I just find it helpful for future steps.
- In the 'Analysis' menu, use the 'Inspector' command to fill your model and create a closed mesh (Analysis > Inspector > Auto Repair All).
- When the Auto Repair finishes, the 'Object Browser' will pop up. Select the original .obj file and remove it (Delete) - we will continue work on the newly created model, which has "(solid)" next to the model name.
Clean-up and Sculpt sub-steps
- Enter the 'Select' menu and use a left click + drag to draw a rough boundary around any regions you want to remove. Once they are highlight orange, you can delete them. (Select > {L-click and drag} > Delete).
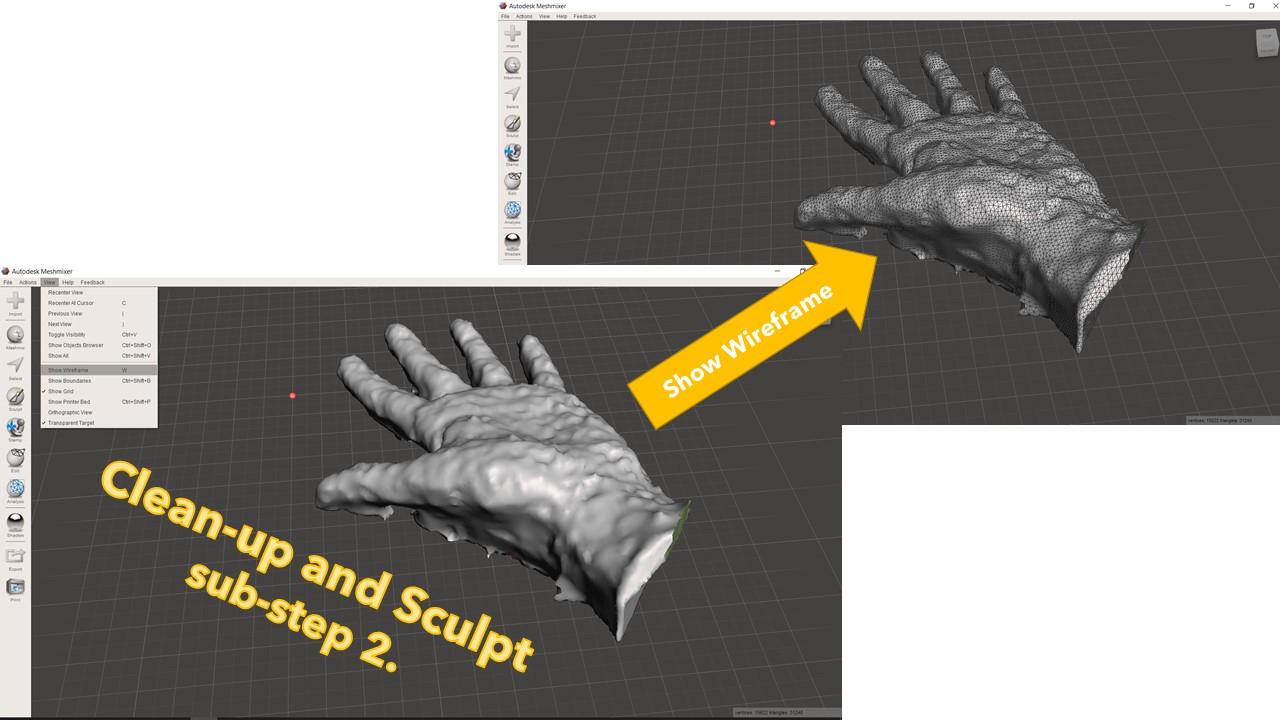
- Show the element wireframes to help visualize the remaining steps (View > Wireframe).
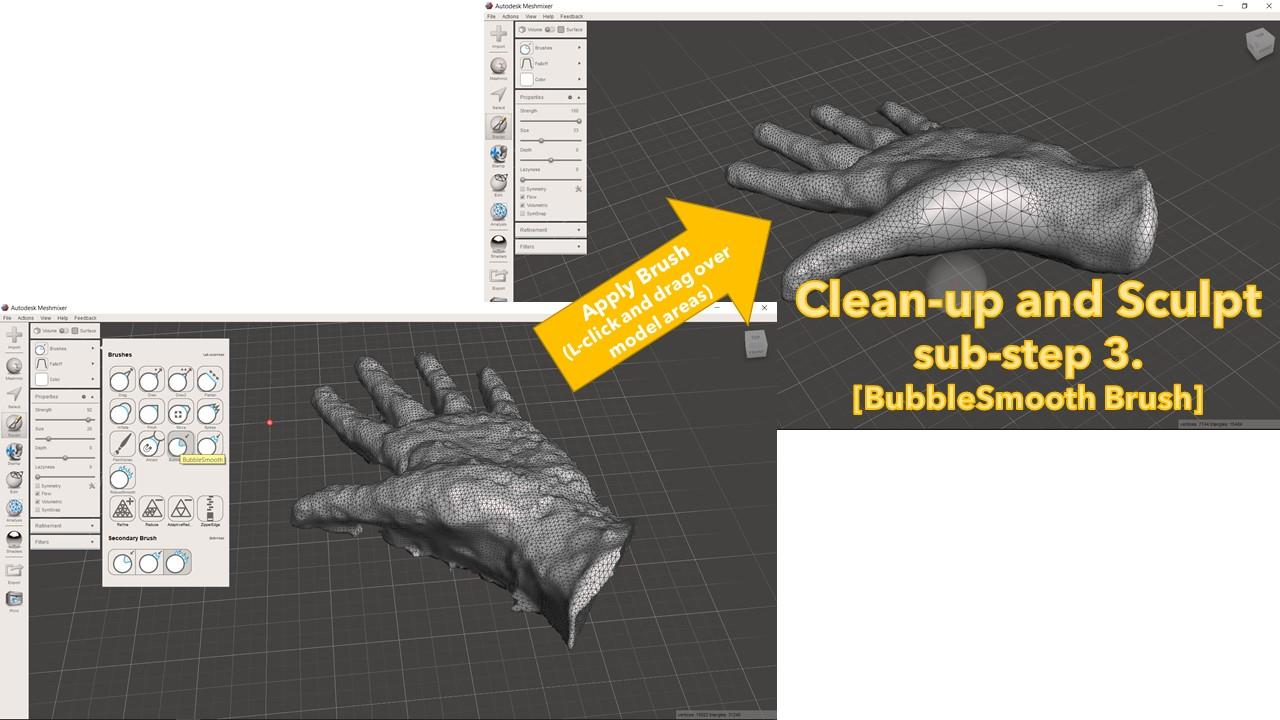
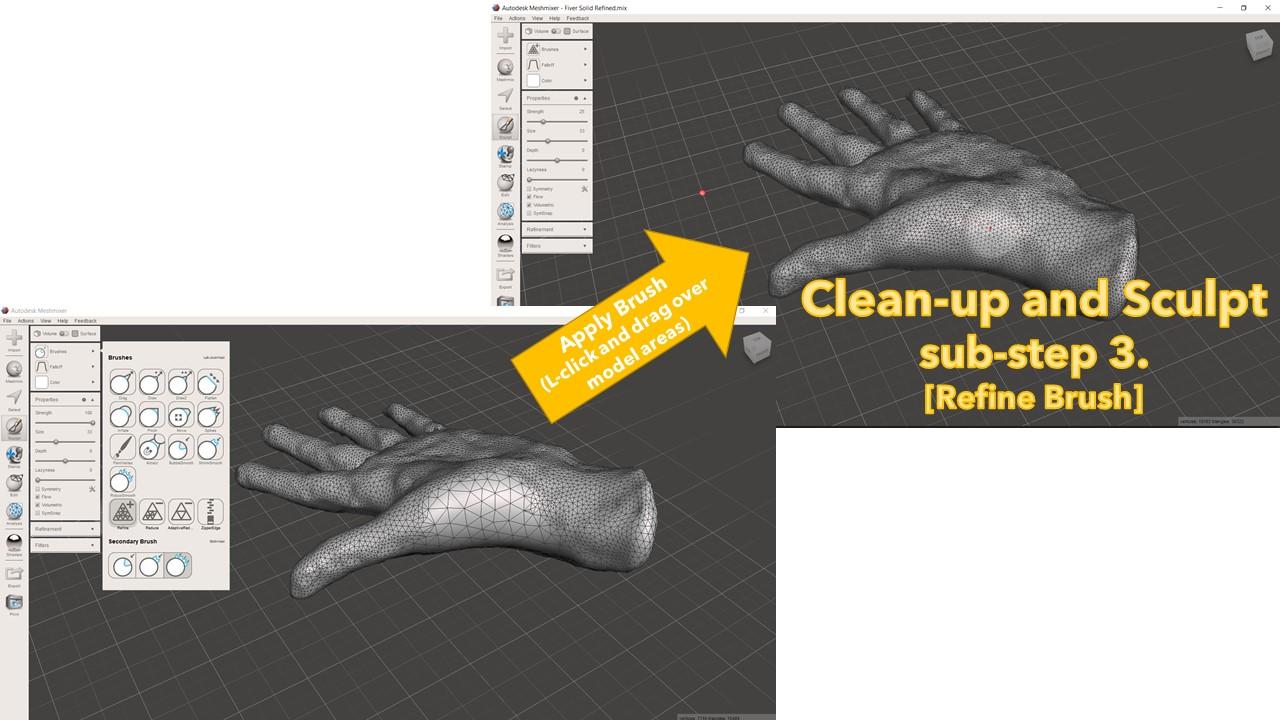
- Use the 'Sculpt' tools to reshape and refine the model as desired (Sculpt > Brushes > {L-click and drag}):
- The 'BubbleSmooth' brush works well for quickly reshaping surfaces.
- The 'Refine' brush works well for increasing the mesh density in a sparsely meshed region.
- This is a great time to experiment with other brushes / settings as well!
Reduce, Pattern and Export sub-steps
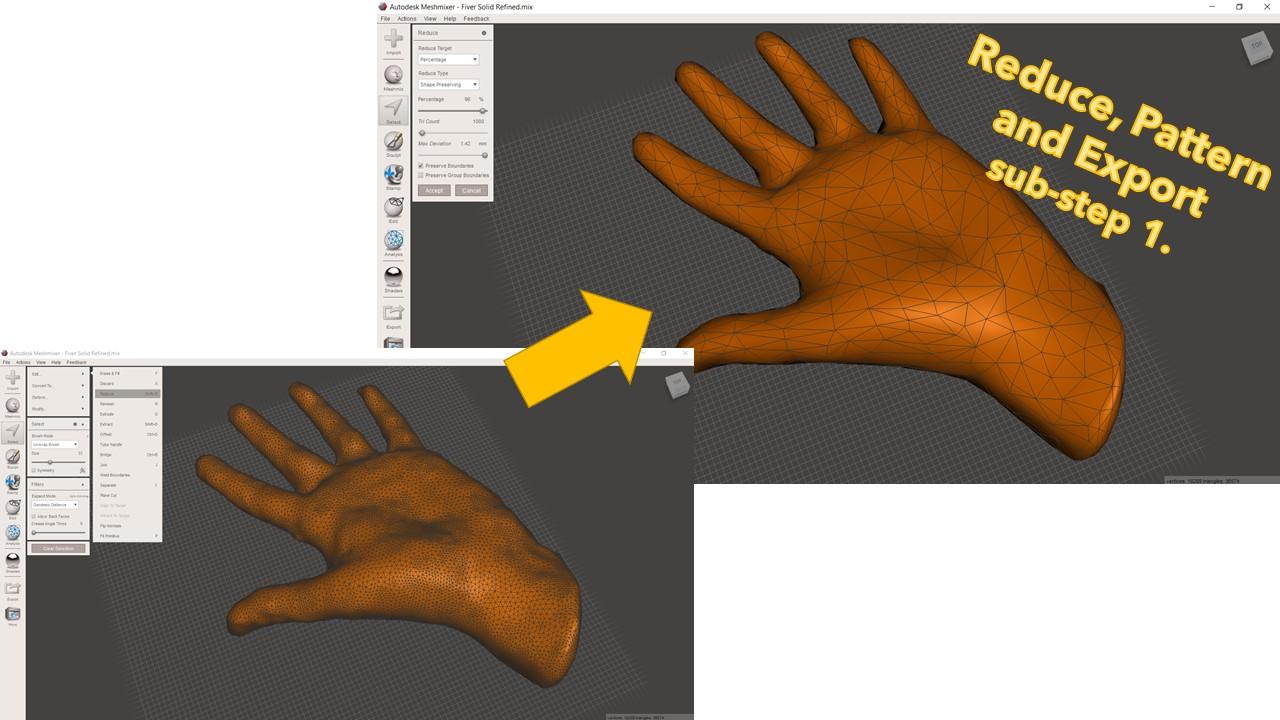
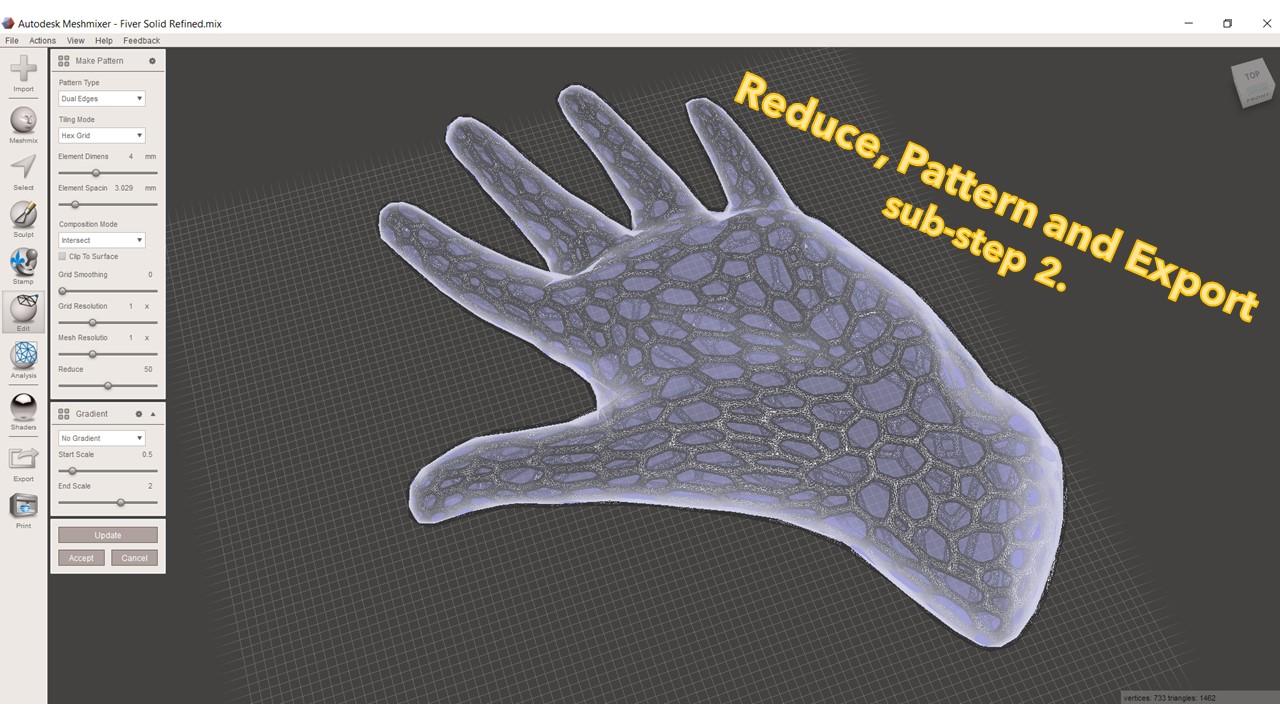
- Enter the 'Select' menu, select all elements in your model, and 'Reduce' the model to make it uniformly more sparse, targeting an element edge length of ~5-10mm (Select > {Ctrl+a} > Edit... > Reduce).
- I've found that setting the reduction percentage to 95 ~ 98% works well (see images for reference).
- Enter the 'Edit' menu and apply a pattern to generate the final tessellated shape (Edit > Make Pattern).
- I typically use the Dual Edges 'Pattern Type', but try others to see which you like the most.
- I recommend that you target an 'Element Dimens' ("thickness" of tessellated strands) of 4mm or more - any thinner, and they tend to break during the cleanup of the 3D printed part.
- While changing parameters, you can 'Update' to visualize the changes before committing to them. When you are happy with the part appearance, we can move on to the final step (Accept).
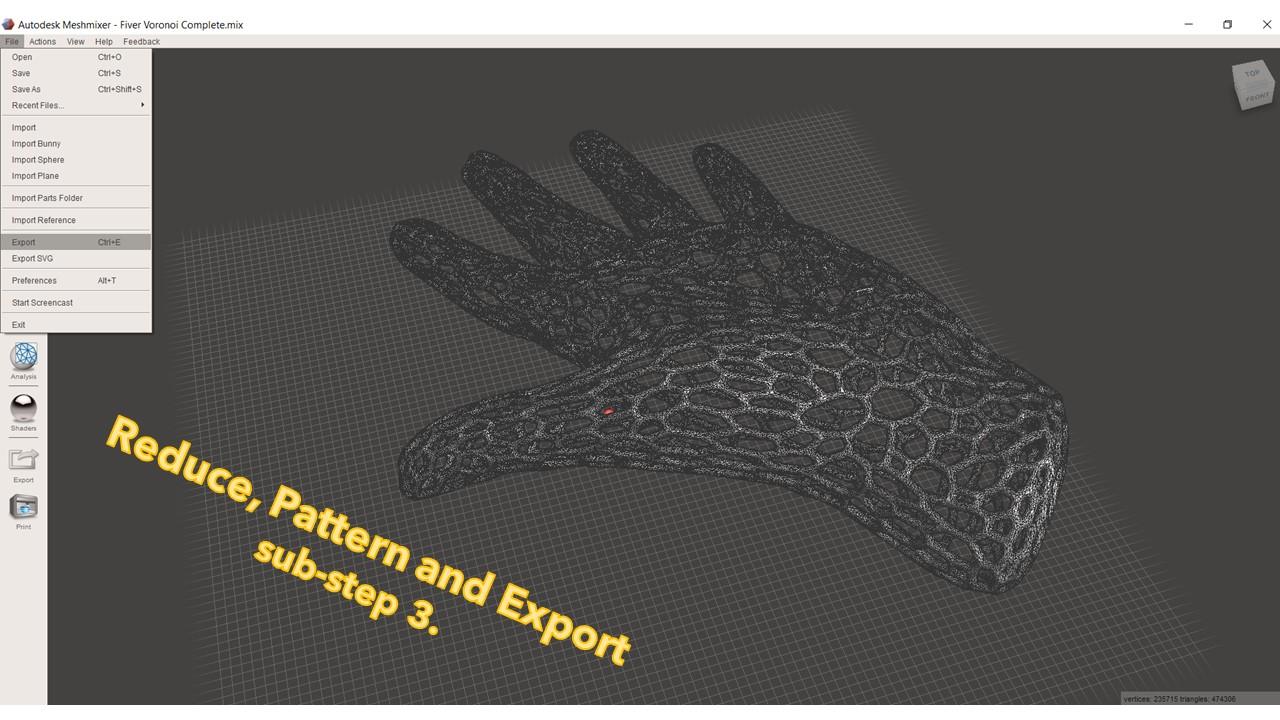
- Once again the 'Object Browser' will pop up - keep the object with "(solid)(pattern)" next to its name and delete all others. Then, export this object as an .stl so we can print it! (File > Export > {STL ASCII Format})
On to the final step - making our object real!
Print Your Model With Cura
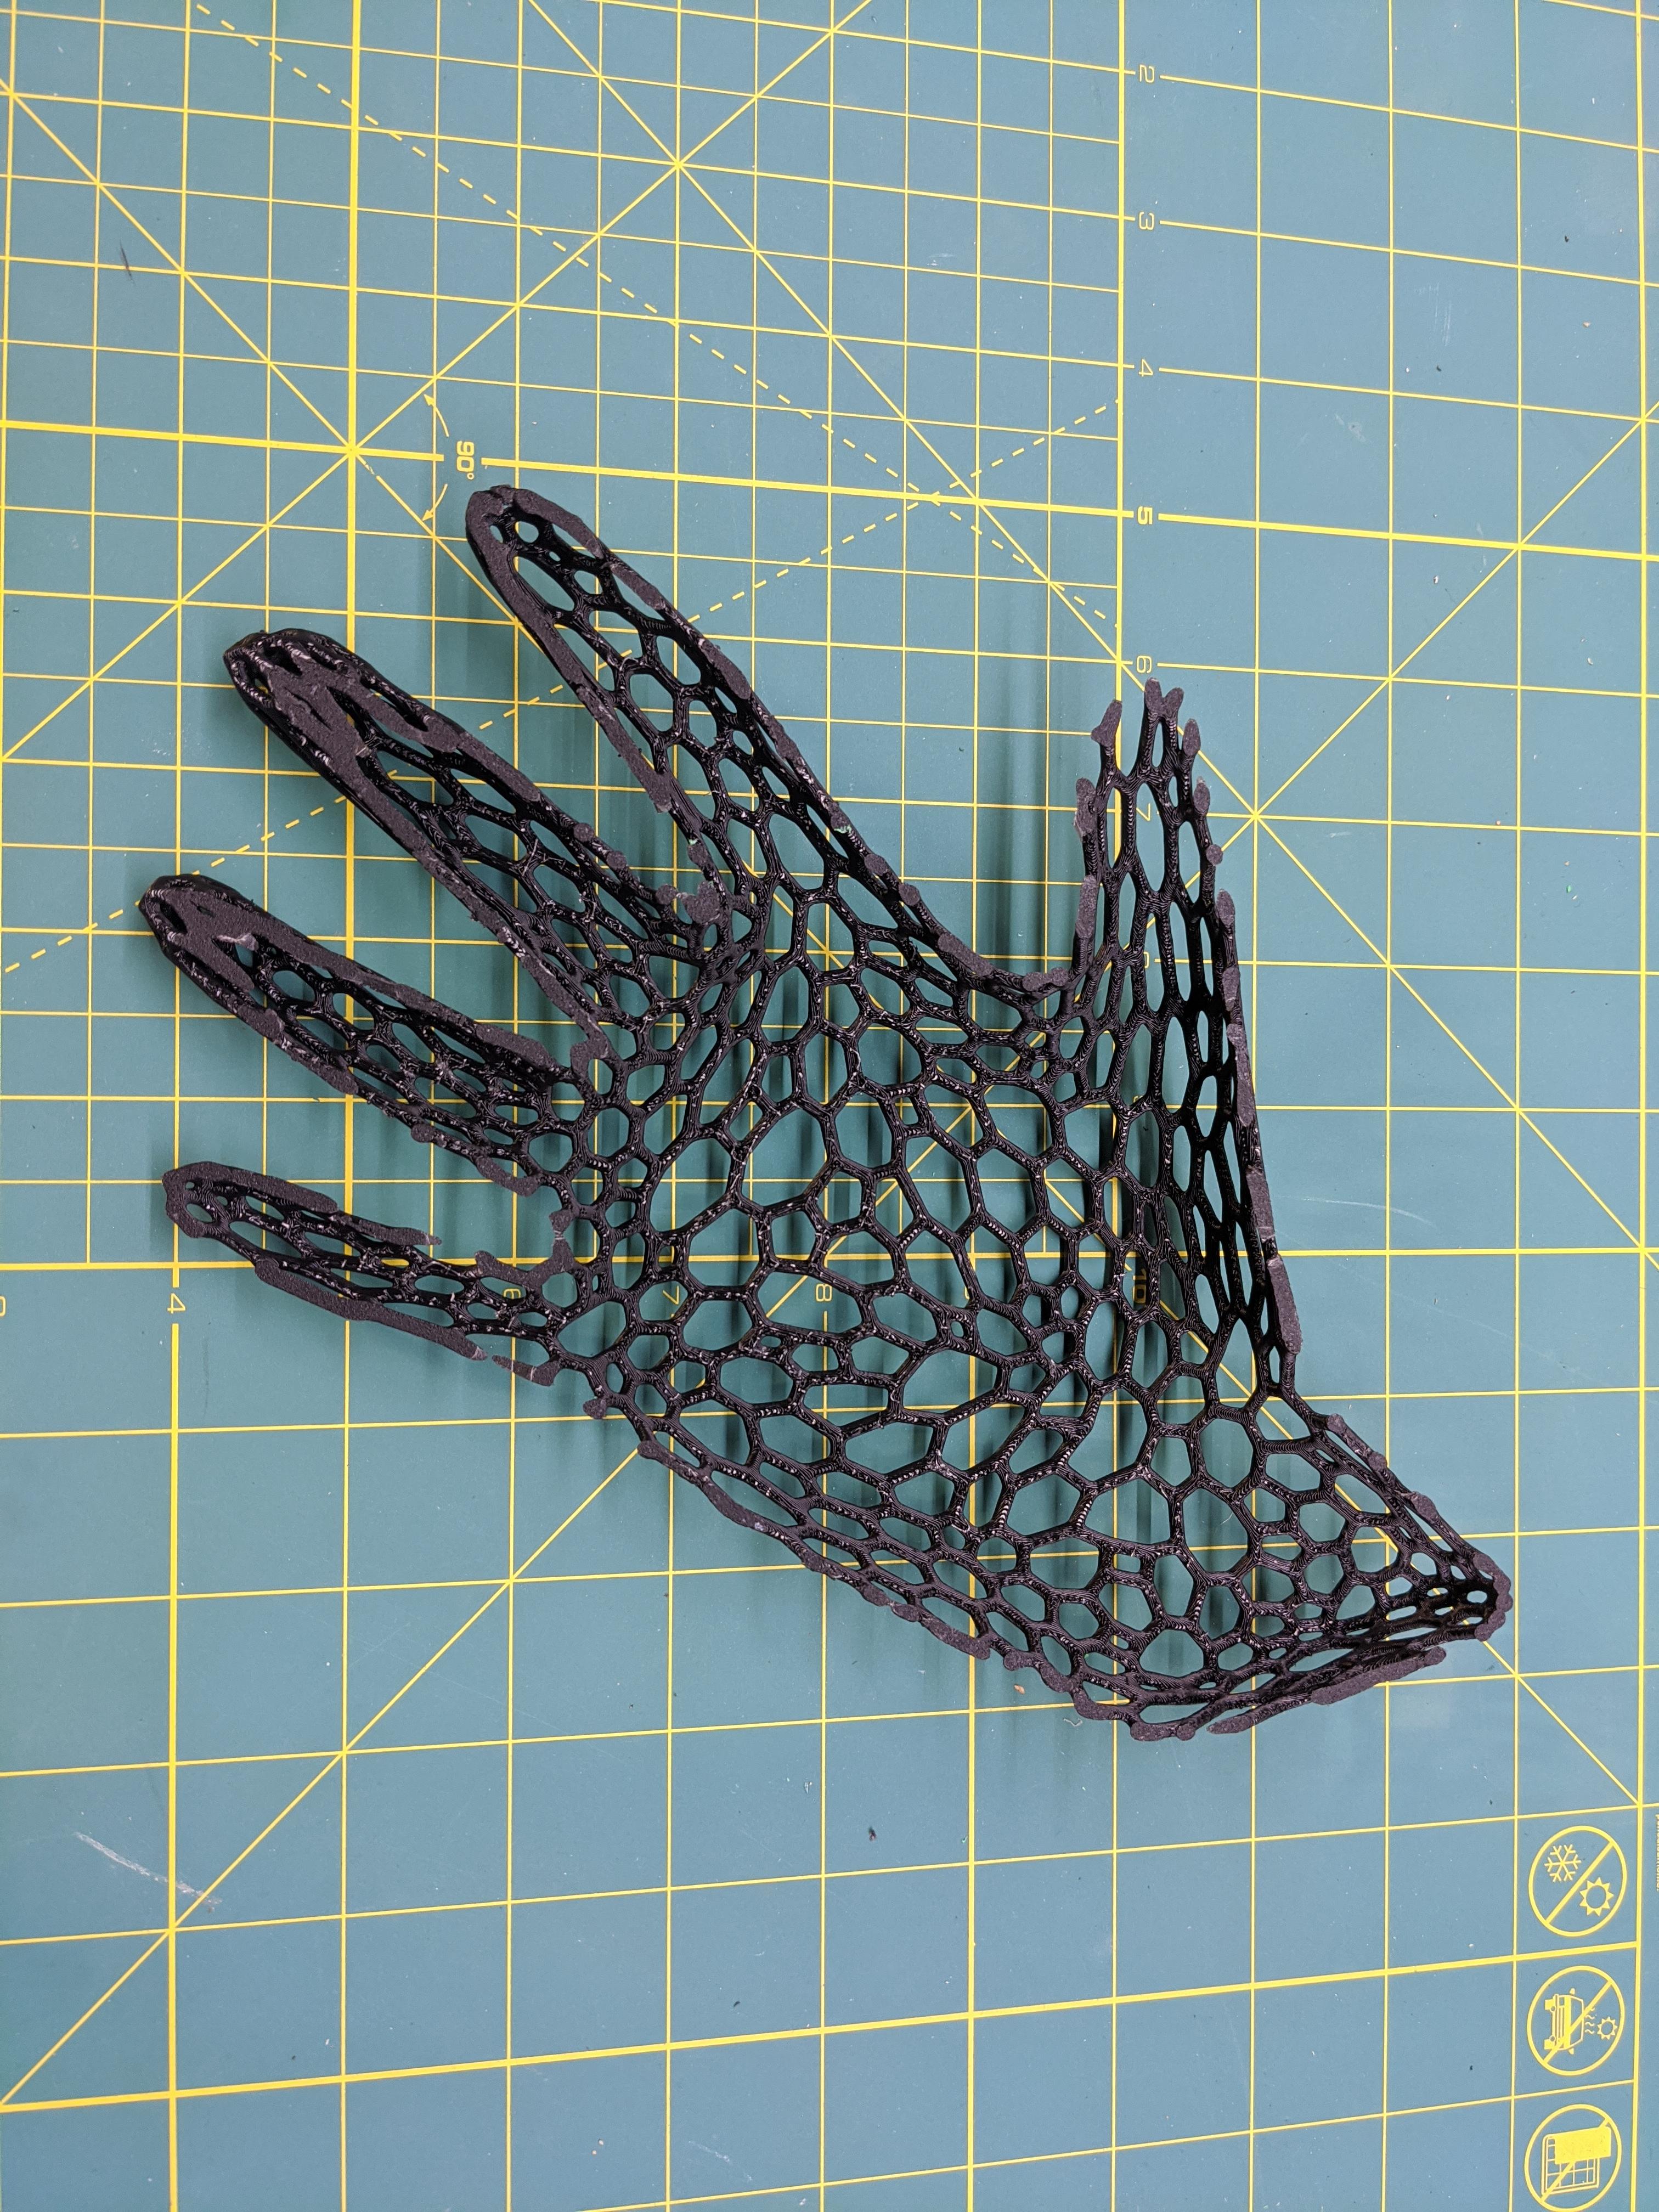
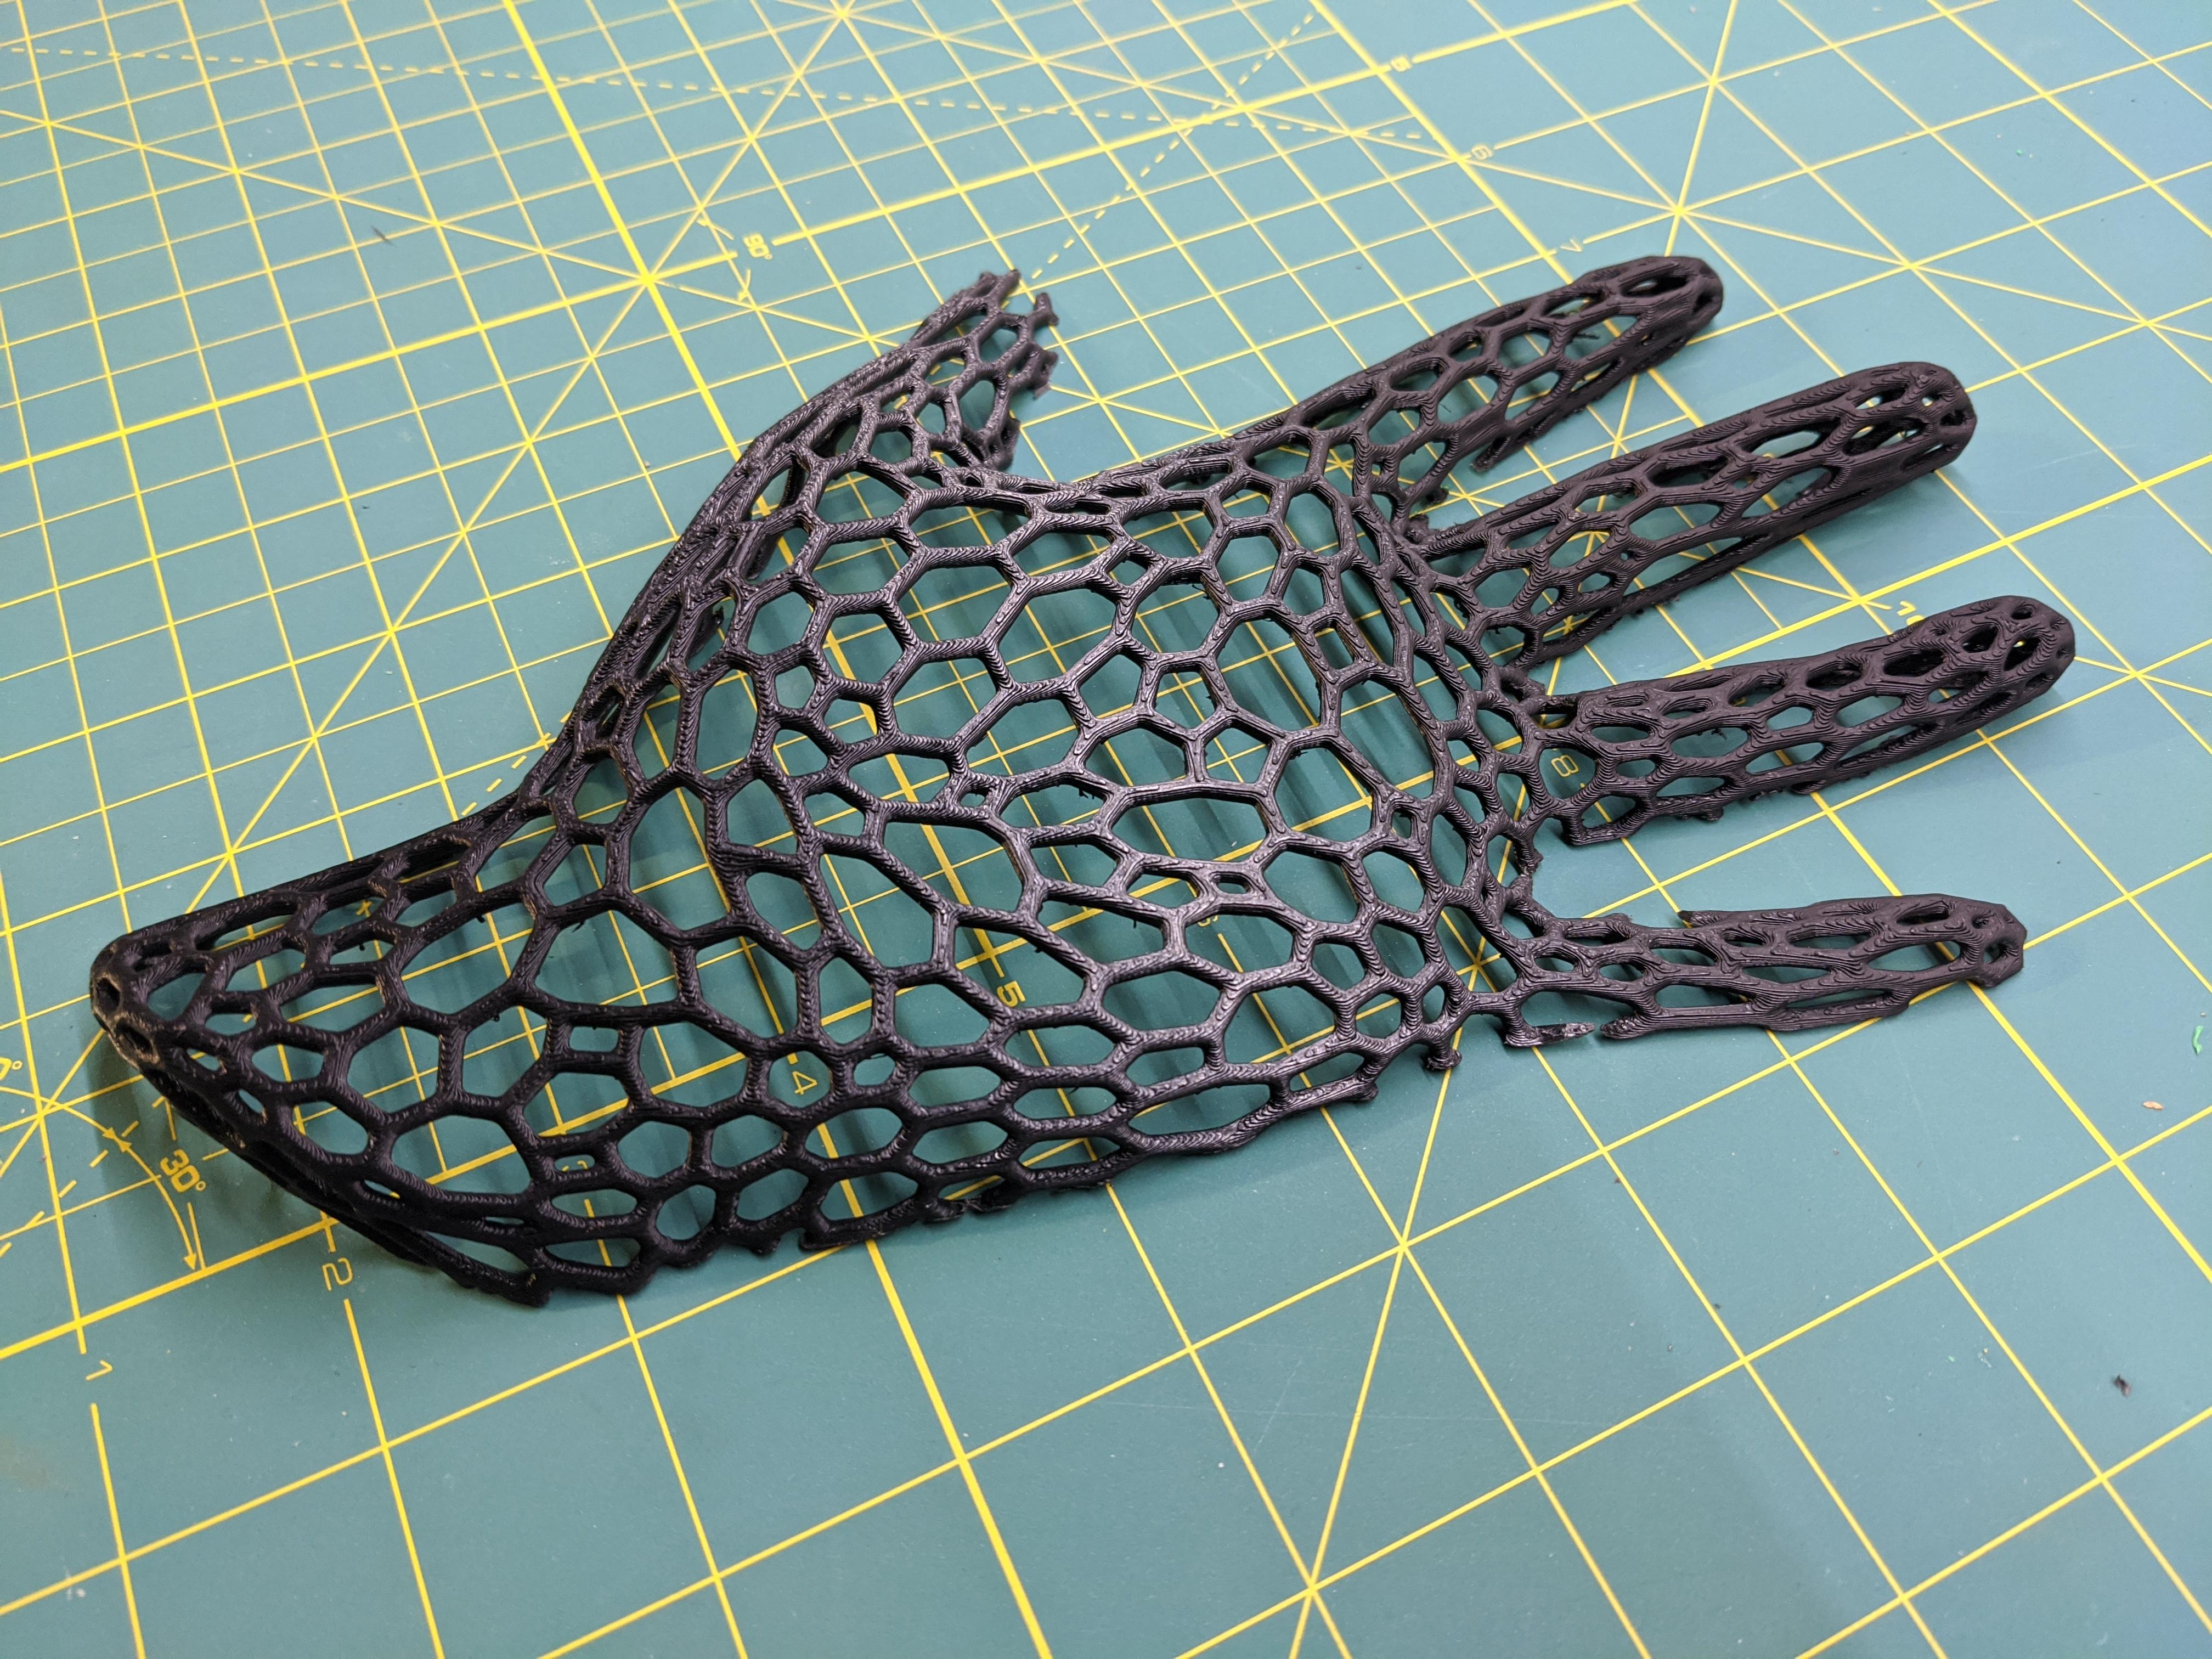
The time has come to realize our model in physical form!
Cura sub-steps
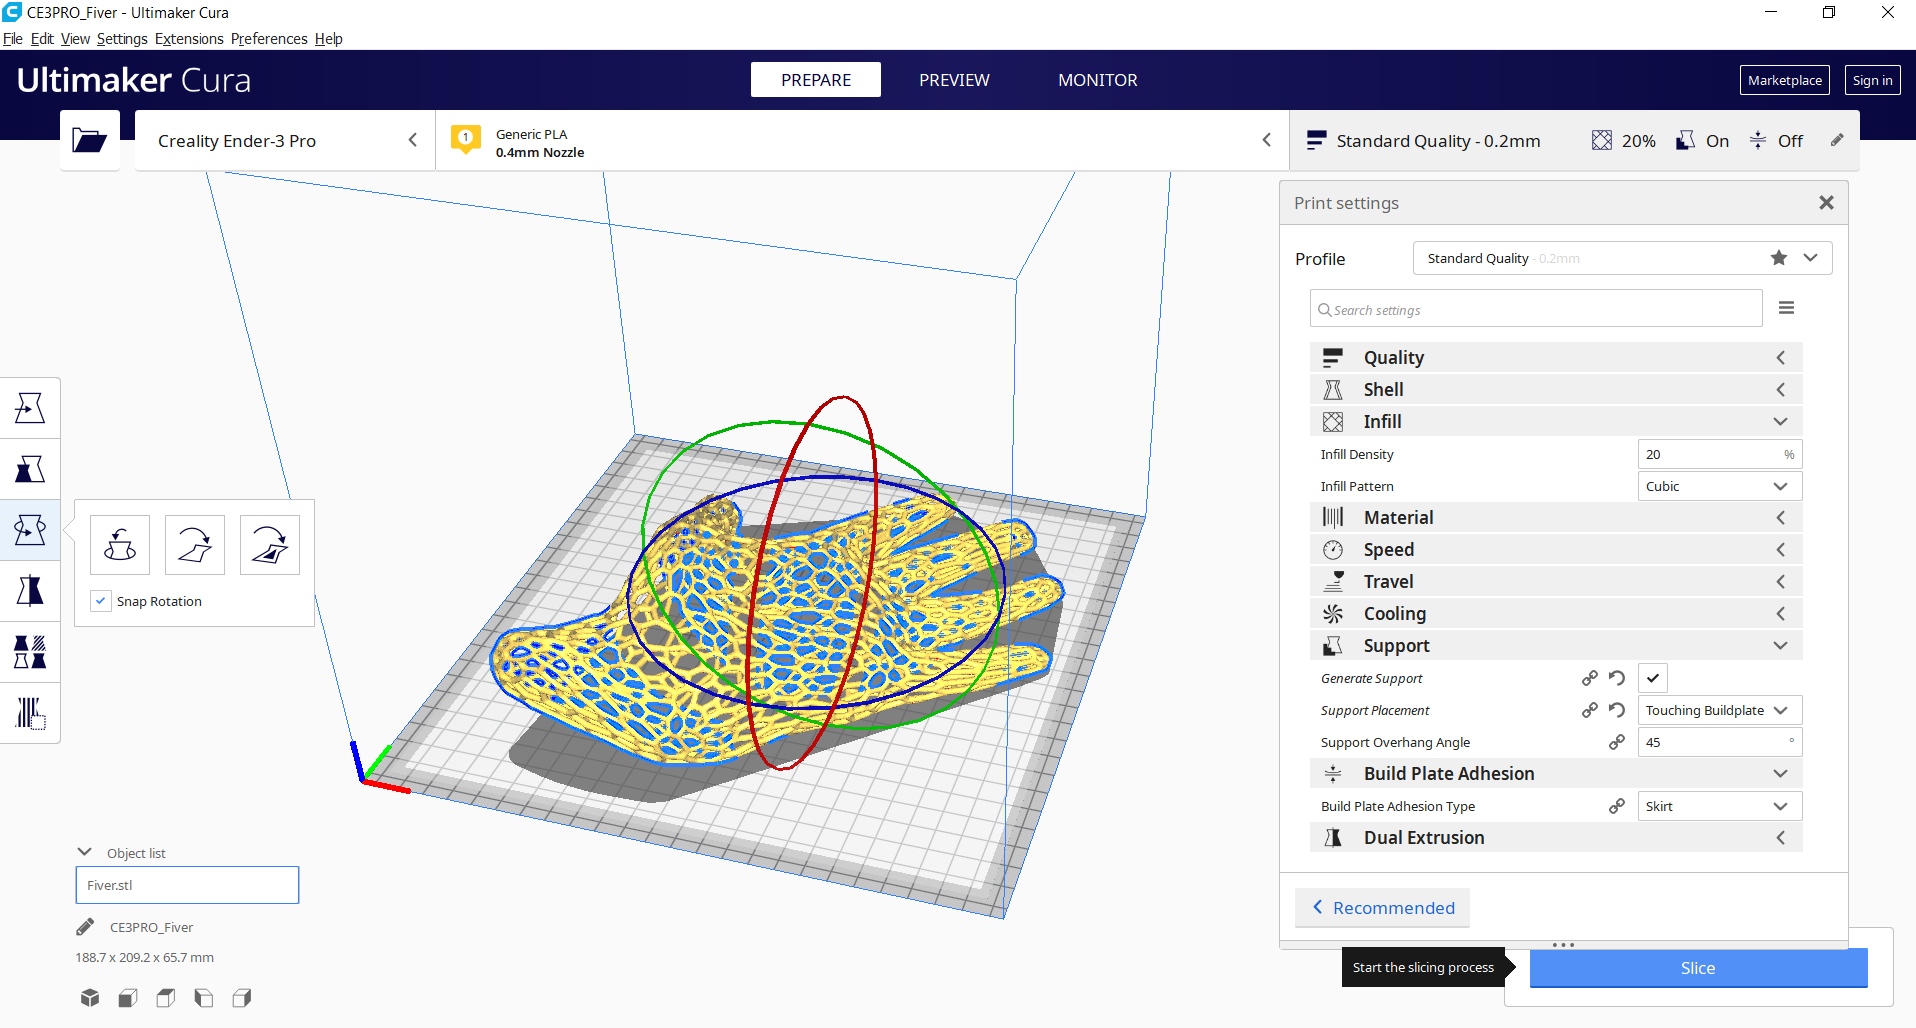
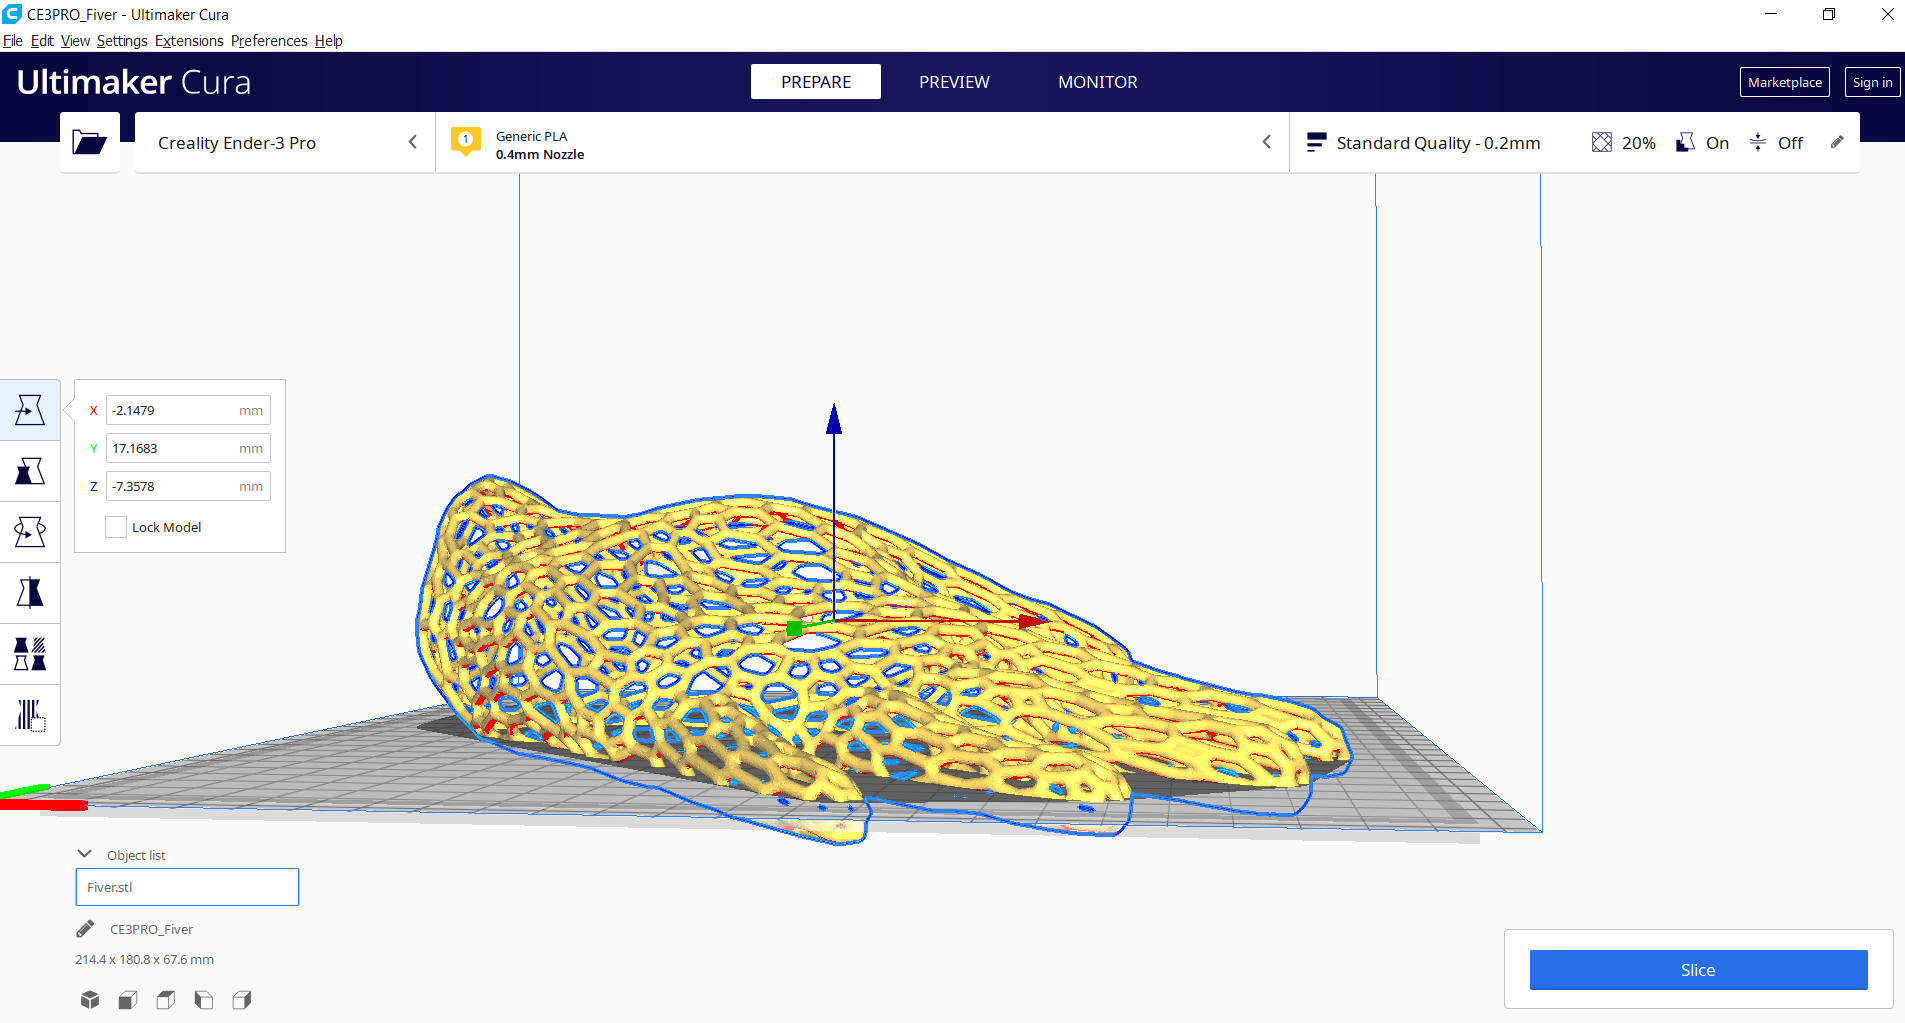
- Bring your .stl model into Cura and arrange it onto the build platform using 'Move' and 'Rotate' commands.
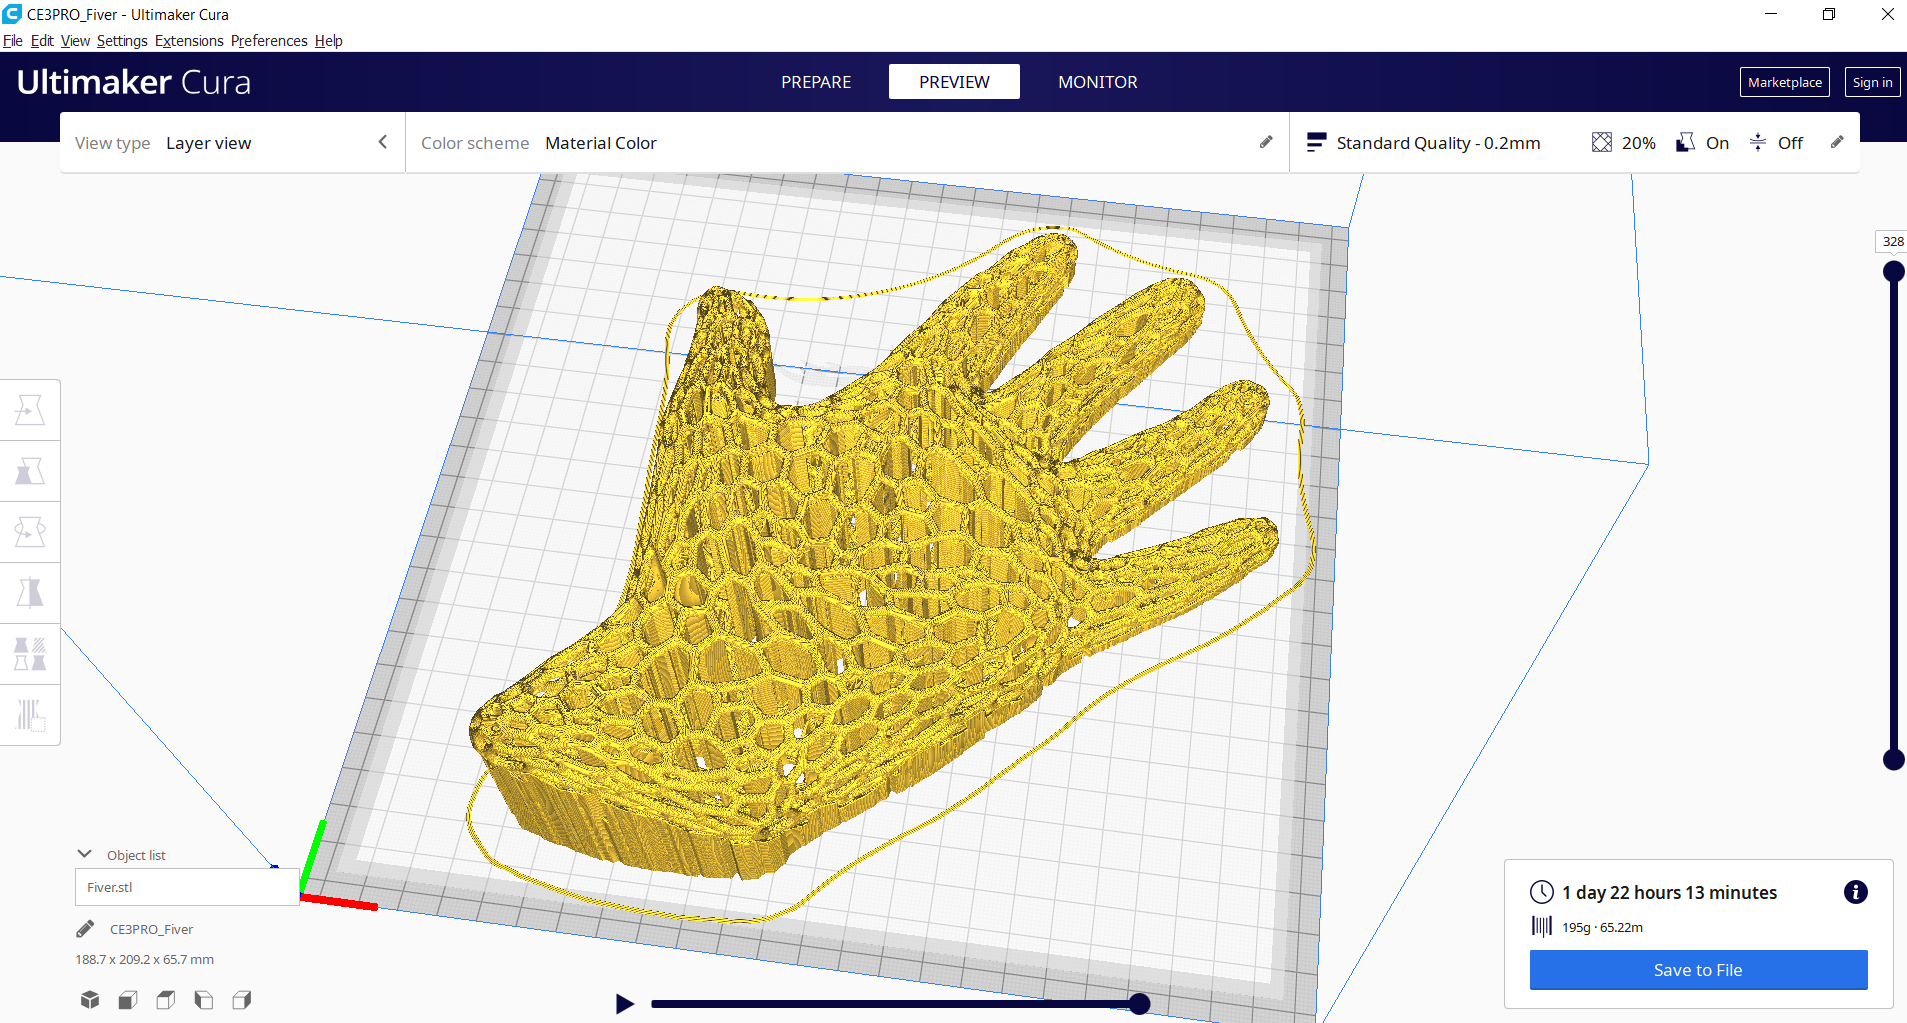
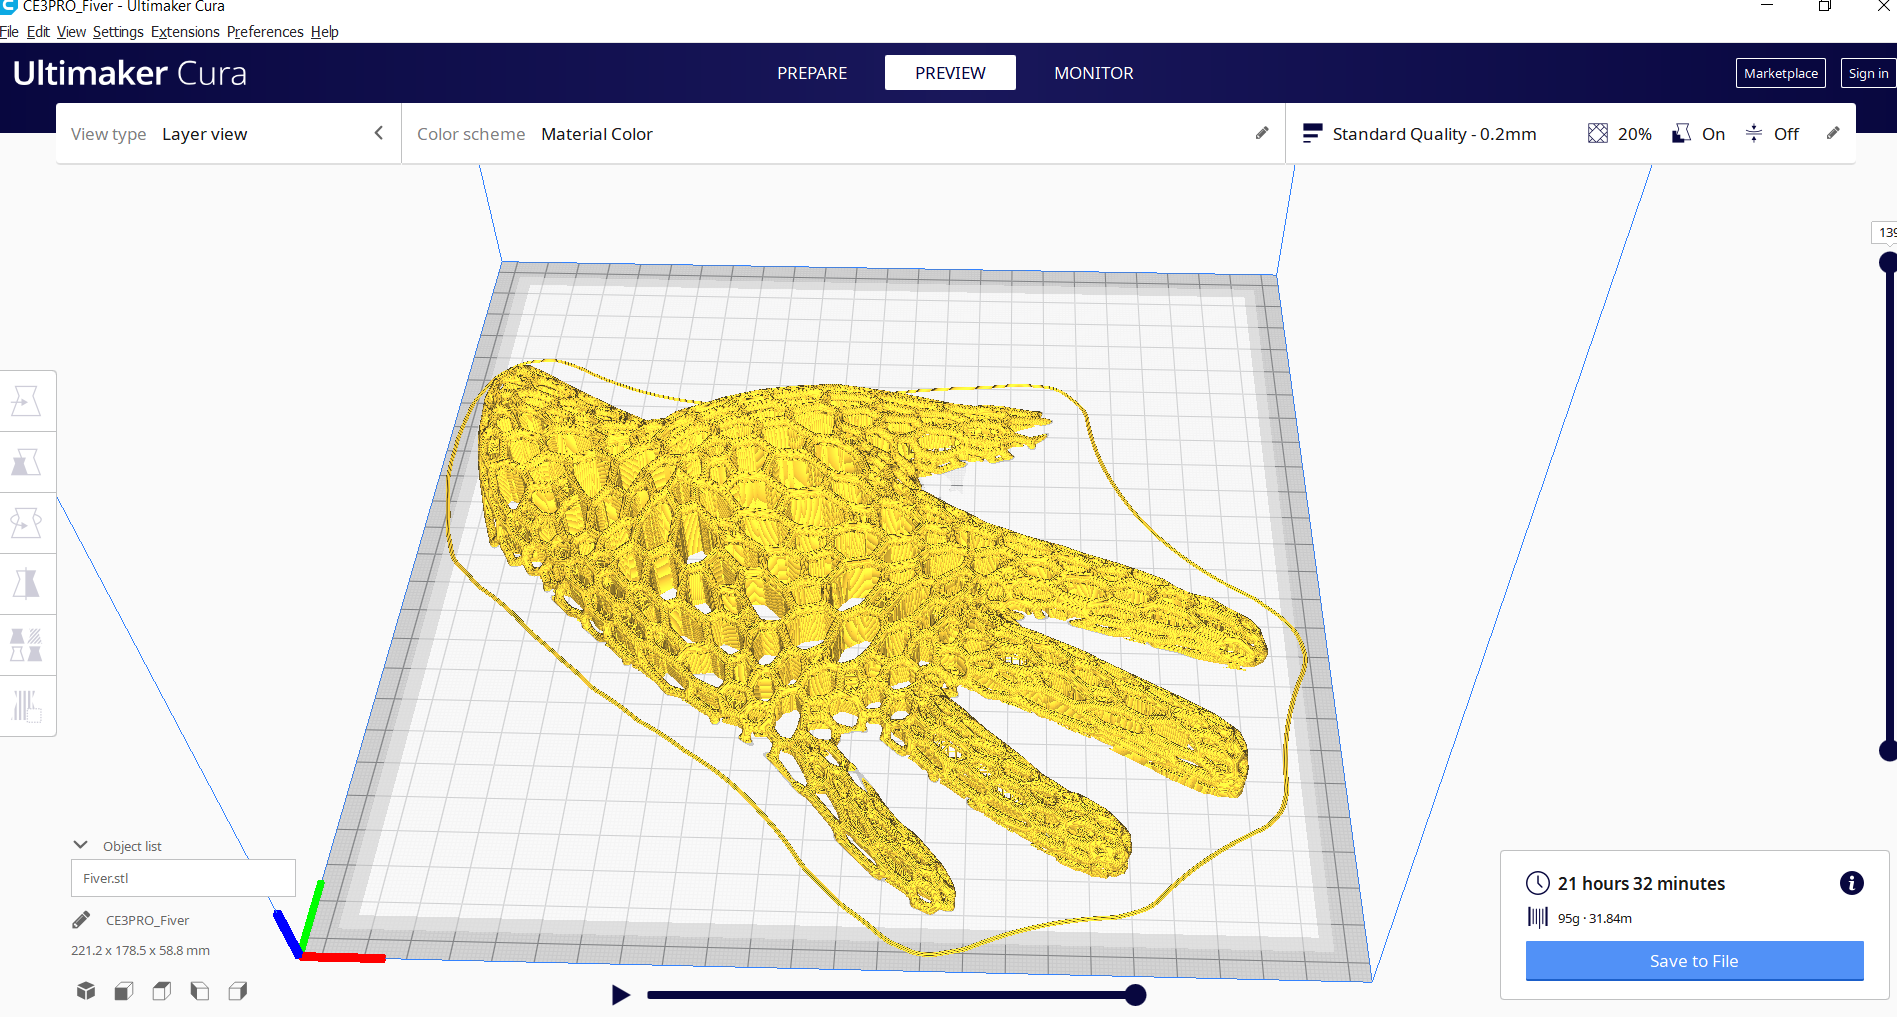
- Slice the model and view the expected time / material usage (Slice > Preview).
- If the print time is too long for your liking, one trick is to use the 'Move' command to drop the model down and 'into' the build plate to remove part of the model from the print.
- In my example, this has the added benefit of ensuring that the lower surface of my air plant holder is flat, and I appreciated the visual effect of the hand 'rising' out of the surface it's resting on.
- This approach also simplifies the cleanup process because it leaves one side of your part 'open' to more easily access and remove the support material.
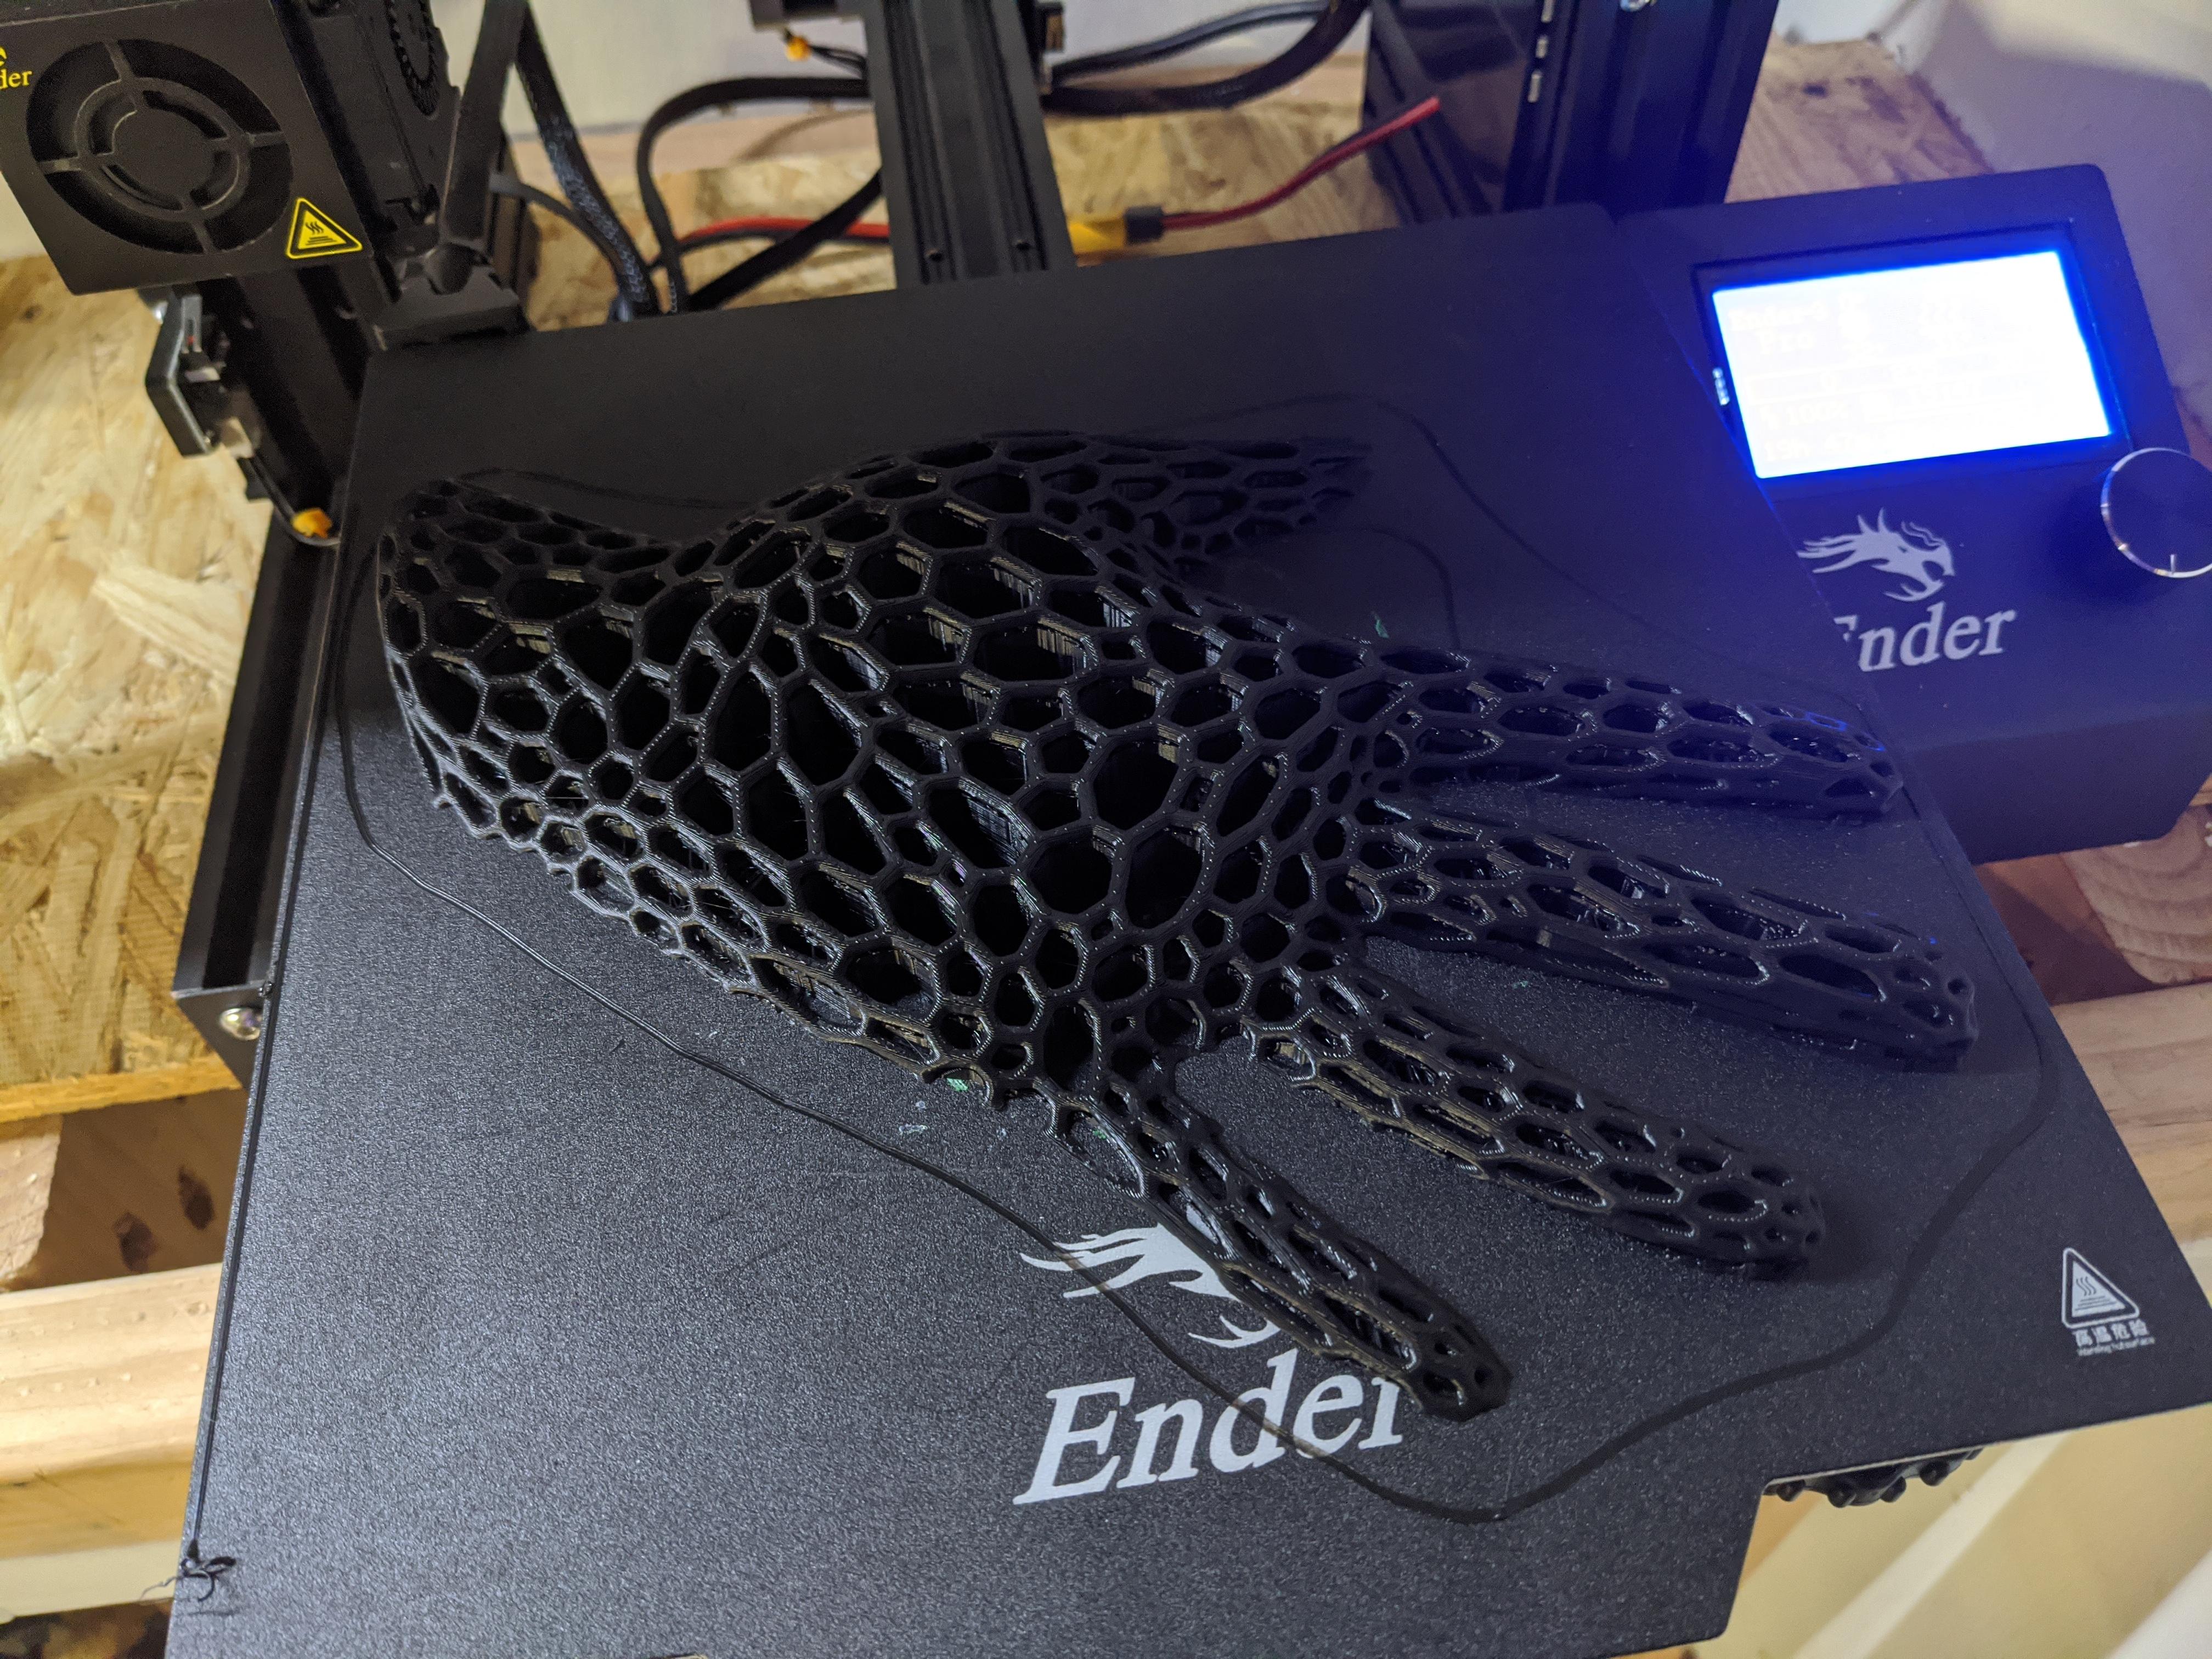
- Finally, select 'Save to File' to export your gcode, transfer it to your printer, and get the print started!
Print cleanup sub-steps
- After the print finishes up, carefully remove it from the print bed.
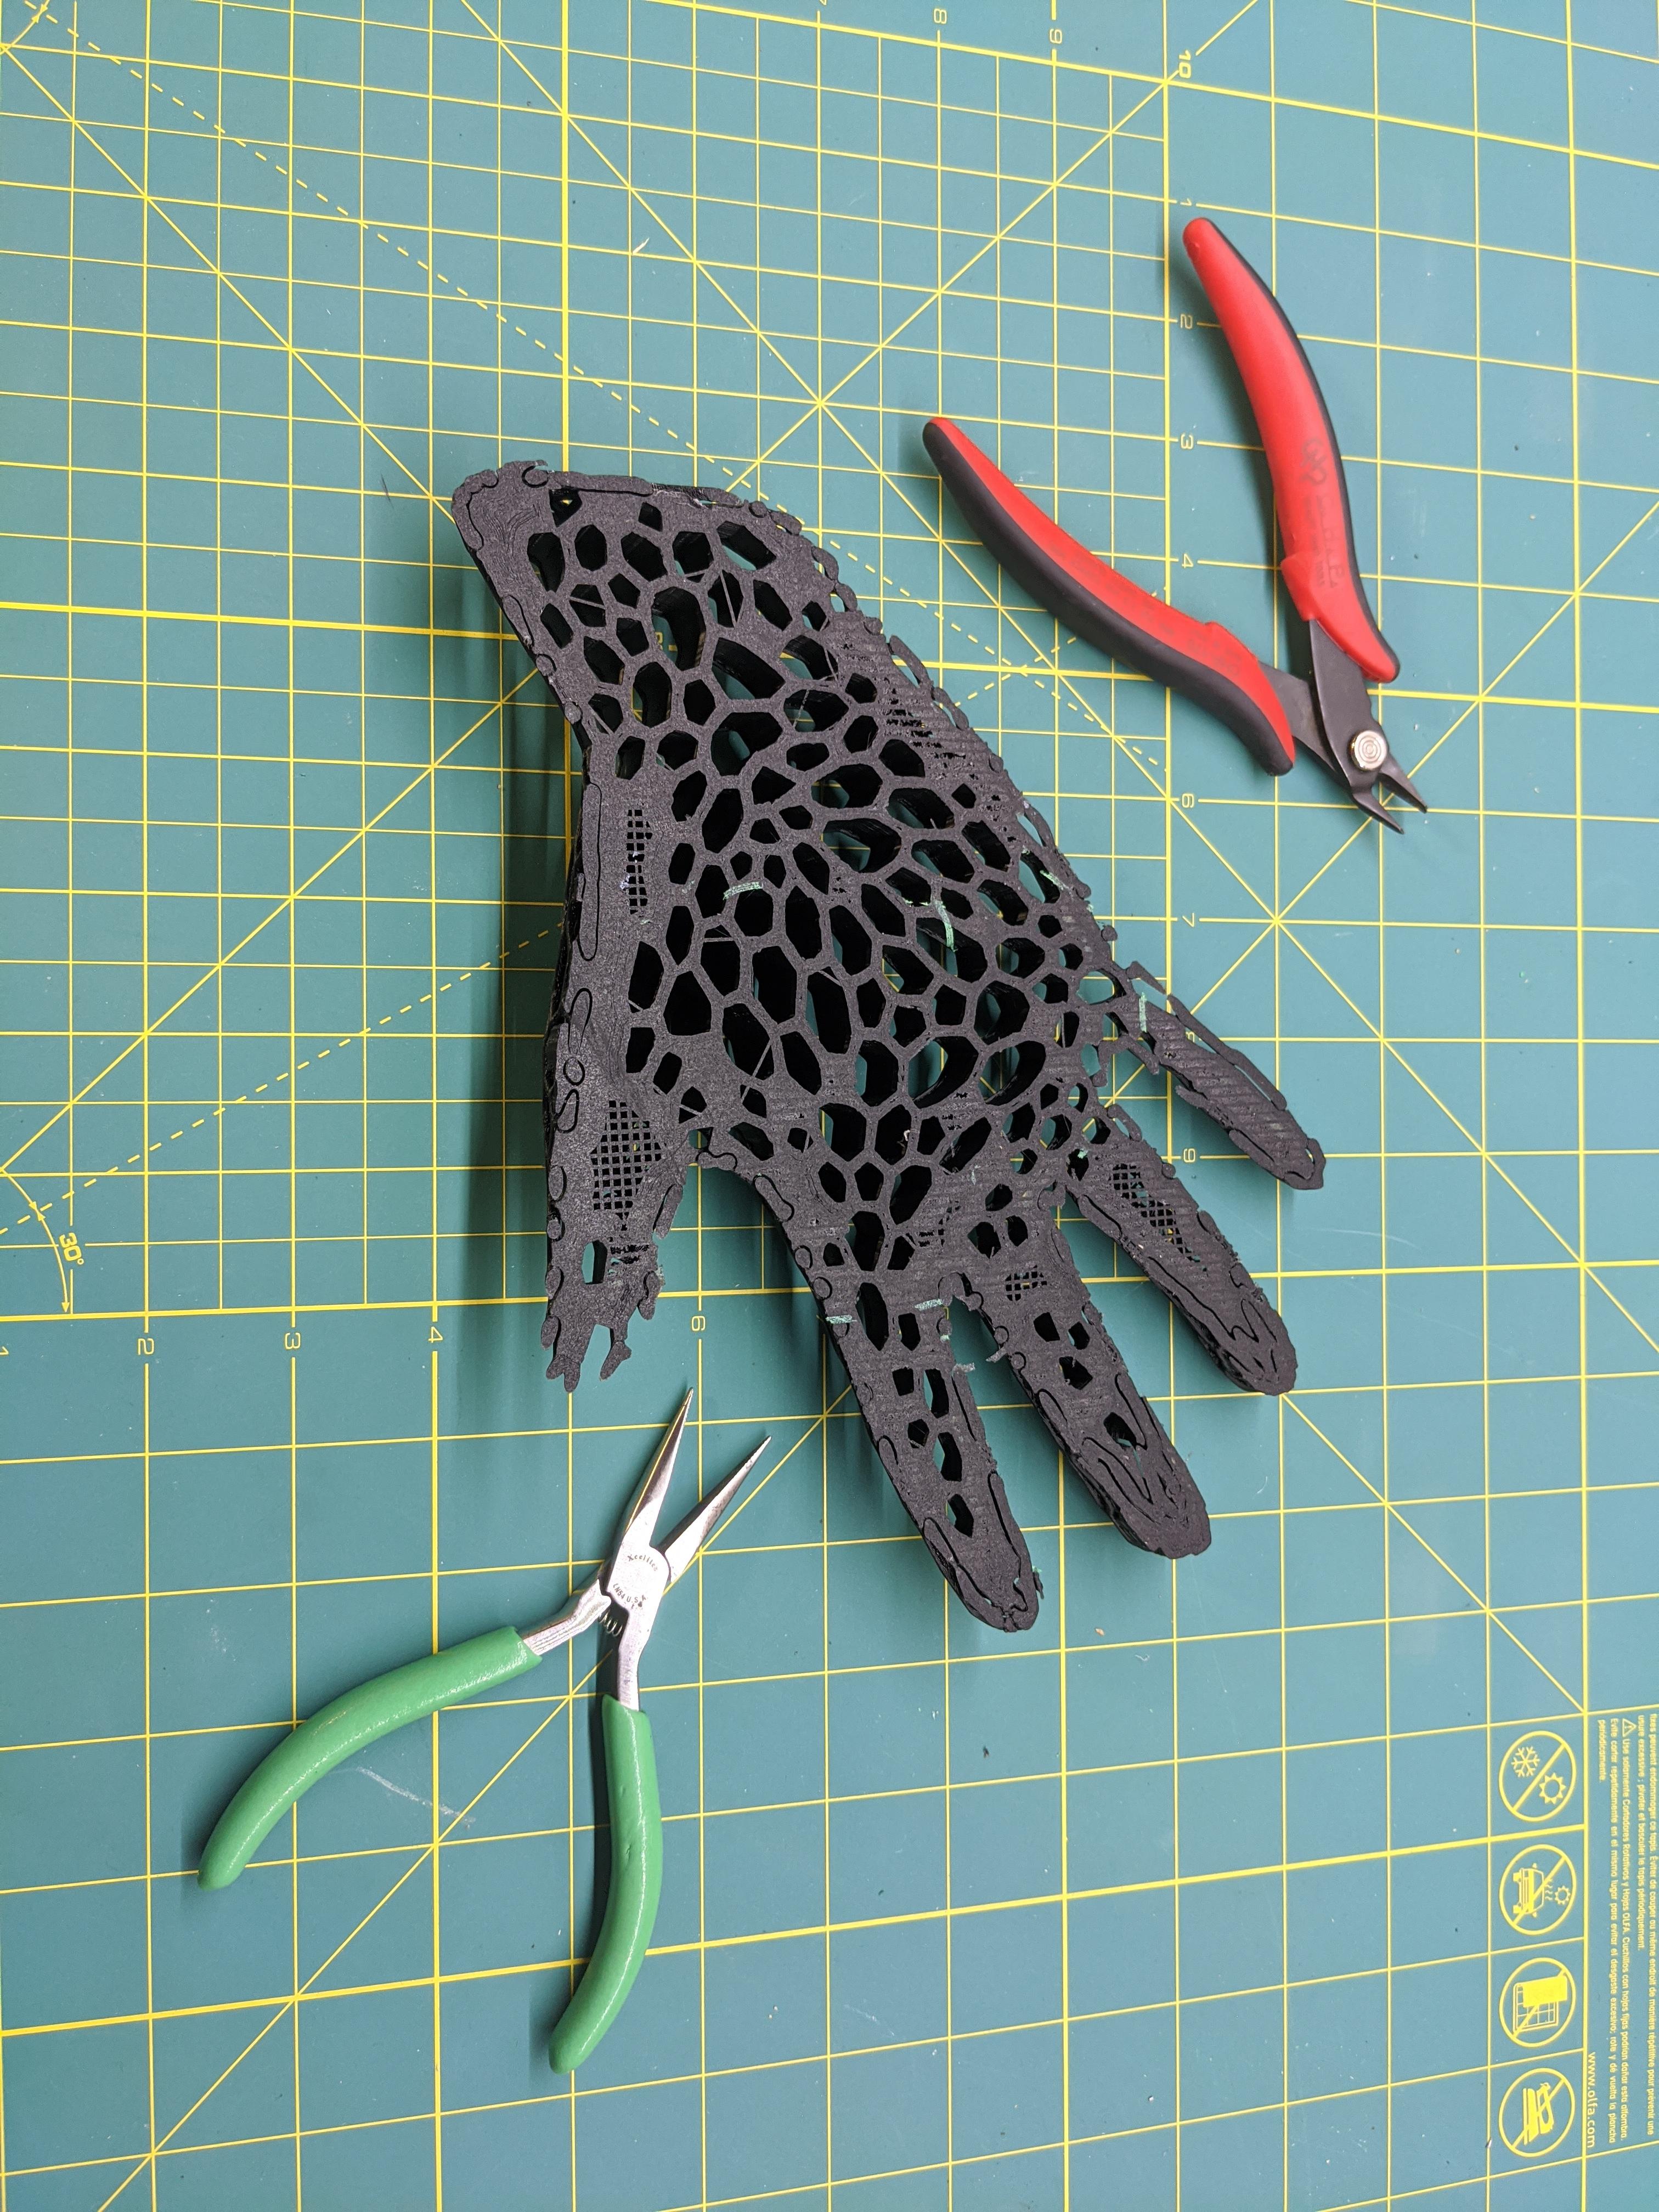
- Remove all support material from the print using the flush cutters, and take care to avoid damaging the part.
At this point, you have a finished part to interact with and enjoy! I hope you found this Instructable helpful and useful in your future projects.