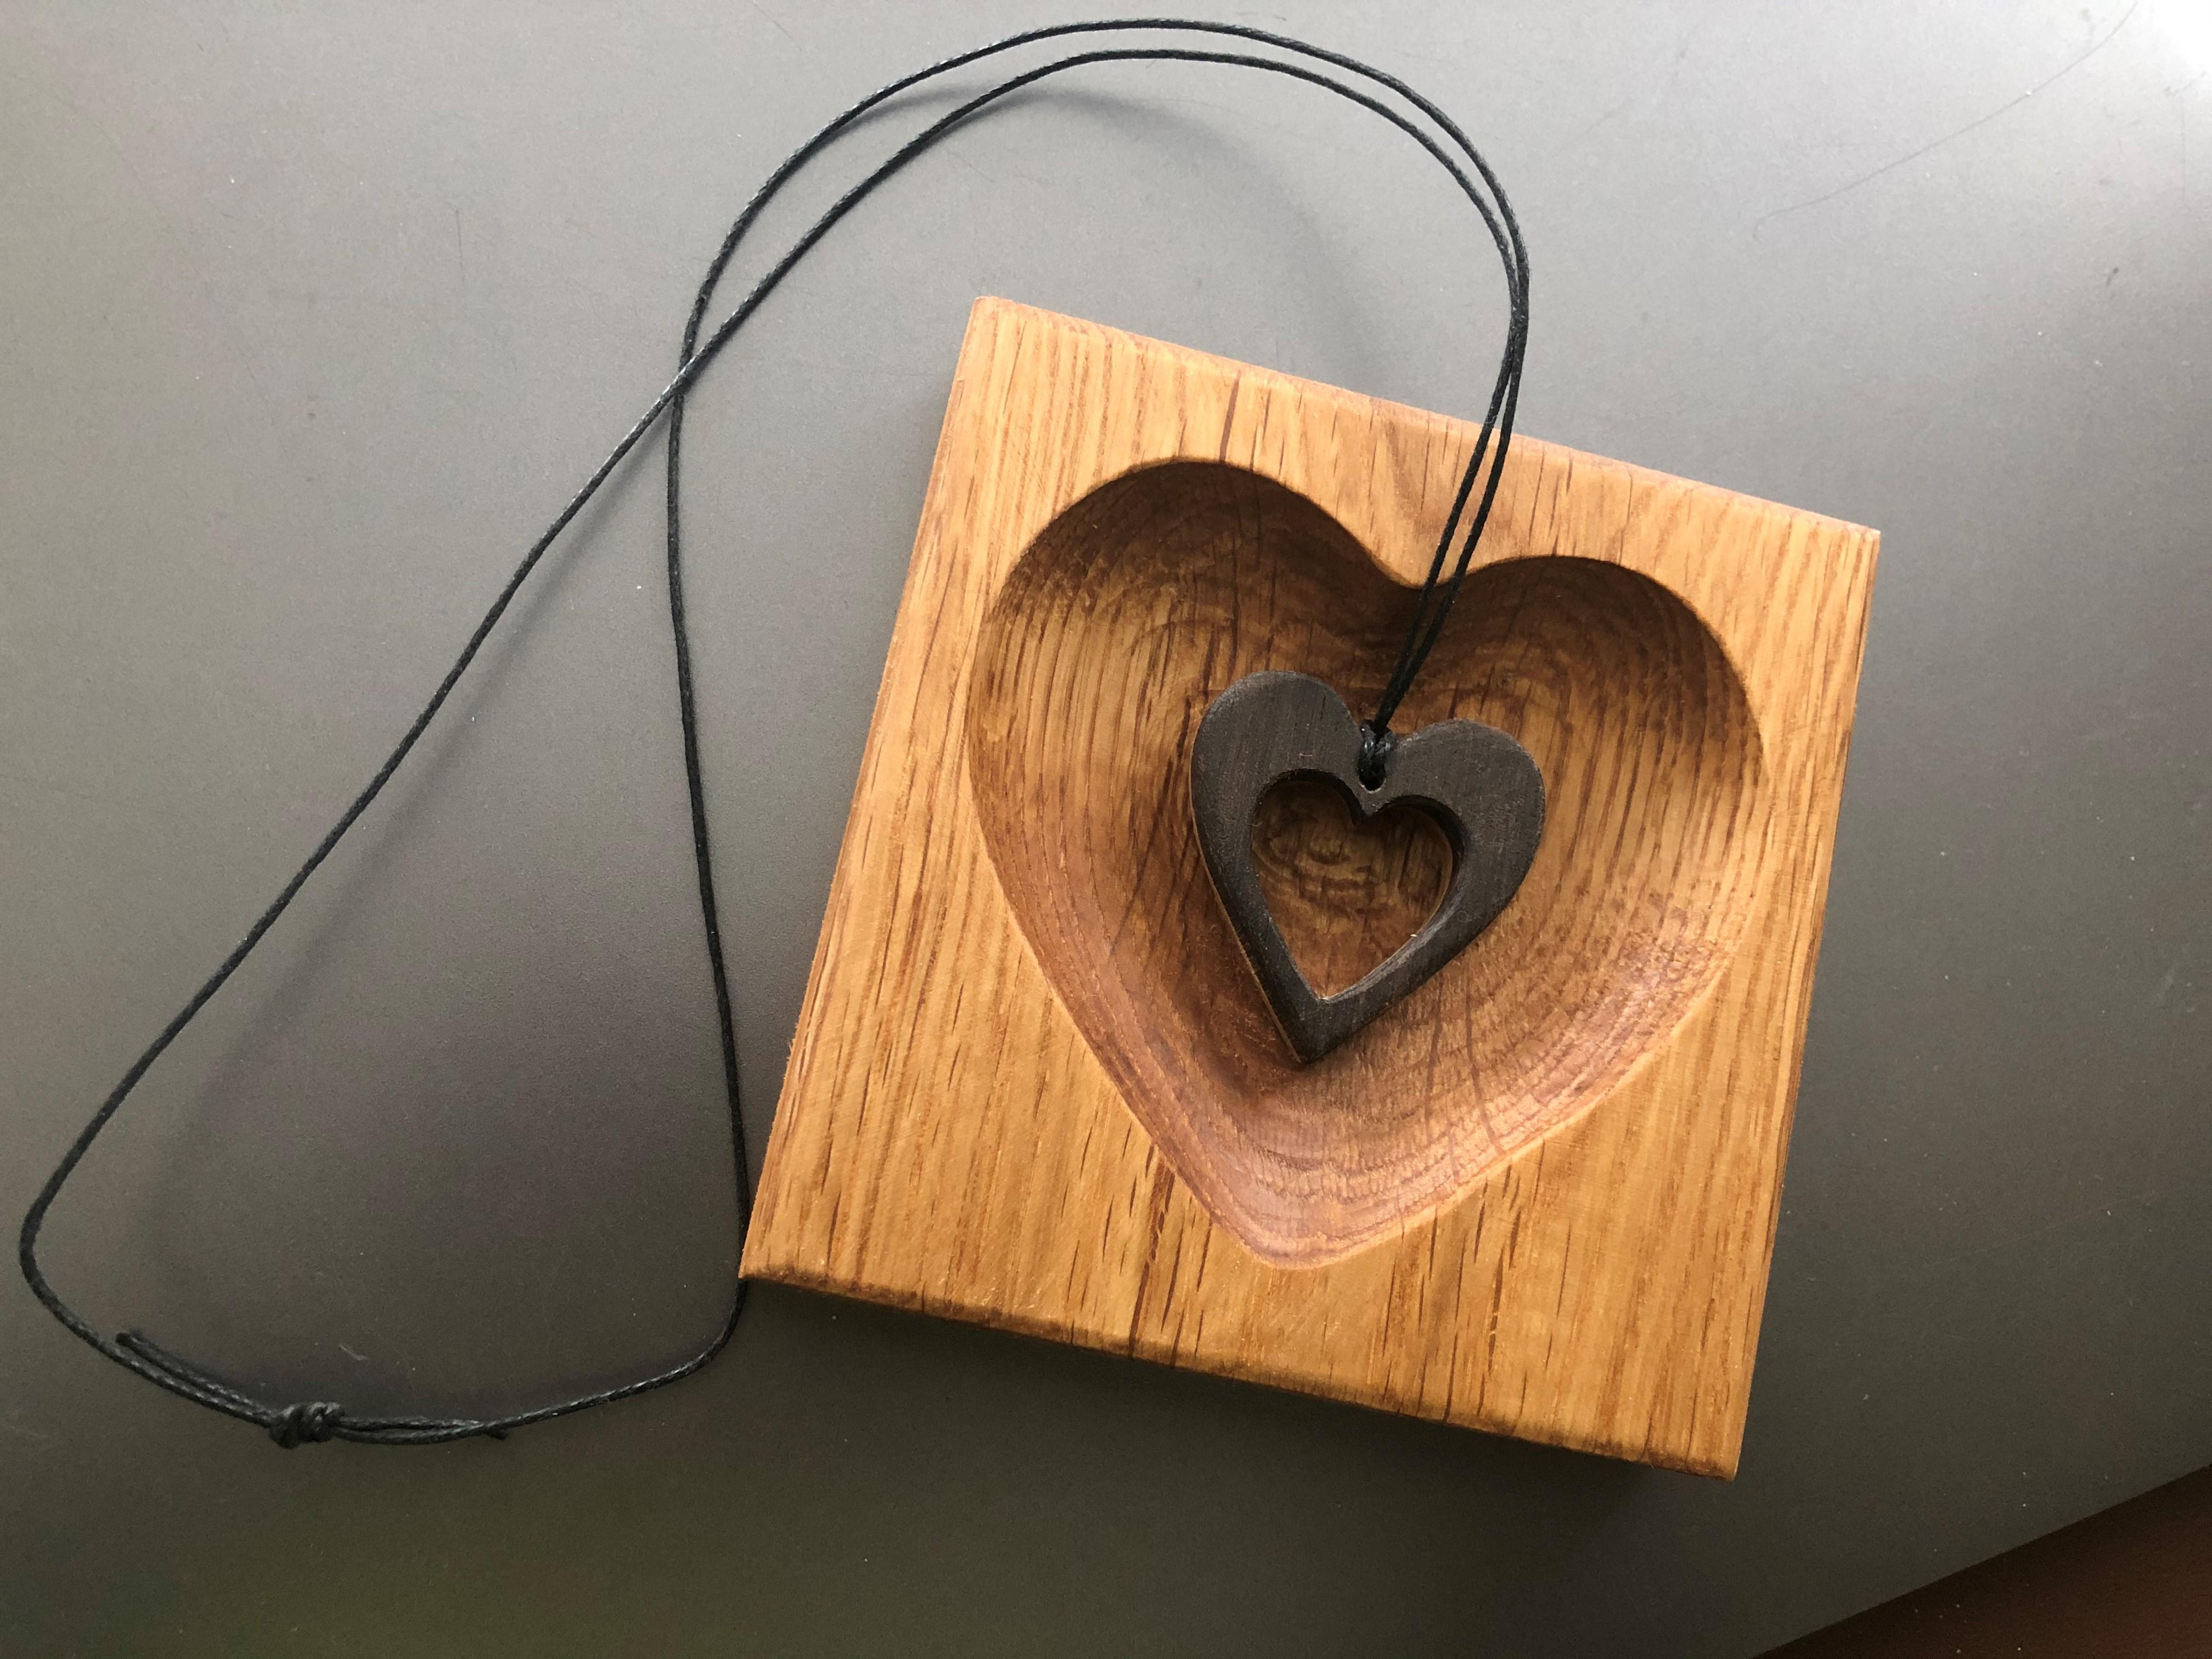
Scalloped Heart Trinket Tray/Coin Tray With Fusion 360(Updated: Heart STL Added)
1584 Views, 14 Favorites, 0 Comments
Scalloped Heart Trinket Tray/Coin Tray With Fusion 360(Updated: Heart STL Added)
In my first Instructable we designed and made a 3D Heart in wood, in this Instructable I will show you how I design and make a Scalloped Heart shaped trinket or coin tray combining the 3D heart to create the scallop using Fusion 360 and an Ox CNC Machine.
Throughout the design process we will be using the Sketch, extrude, Importing a Mesh and combine using the imported heart to cut the scallop in our piece.
We will also be using the 3D Adaptive clearing to carve our heart and 2d Contour to cut the piece out using Tabs to hold the piece in place after cutting.
Disclaimer: I'm not an expert with Fusion 360 by any means, I've picked up things along the way and this is an interpretation of how I make these Hearts in Wood, it works for me and this Instructable may give you some pointers along the way.
For this Instructable I am going to be using a piece of Solid oak flooring off-cut, any wood can be used I guess, I've used a piece of decking and the outcome was ok, but works best with a Hardwood in my opinion.
And of course you need to have a CNC machine. Before starting out ensure you have all the necessary Health and Safety equipment needed to carry out the Tasks. CNC Machines can be noisy and dangerous. As a minimum during the cutting operations you will need. Safety Glasses. Ear Defenders. Dust Mask(Rated for the work you are carrying out)
Supplies
6MM Ball end router bit.
Boiled Linseed oil or Danish oil
Medium grit sandpaper
Fusion 360

.png)
In the making of this Instructable we will be using many of the disciplines in Fusion 360.
In the early design stages we will be creating a sketch, extruding the sketch then importing a mesh, turning off design history, create a Brep and turning the heart into a solid, we will scale the heart, then use combine to scallop our workpiece with the heart as well as using cam for generating the toolpath G-code for cutting out the piece. In Cam we will be using a 3D Adaptive clearing pass and a 2D contour pass.
Fusion 360 Sketch, Extrude and Import Mesh
.png)
.png)
.png)
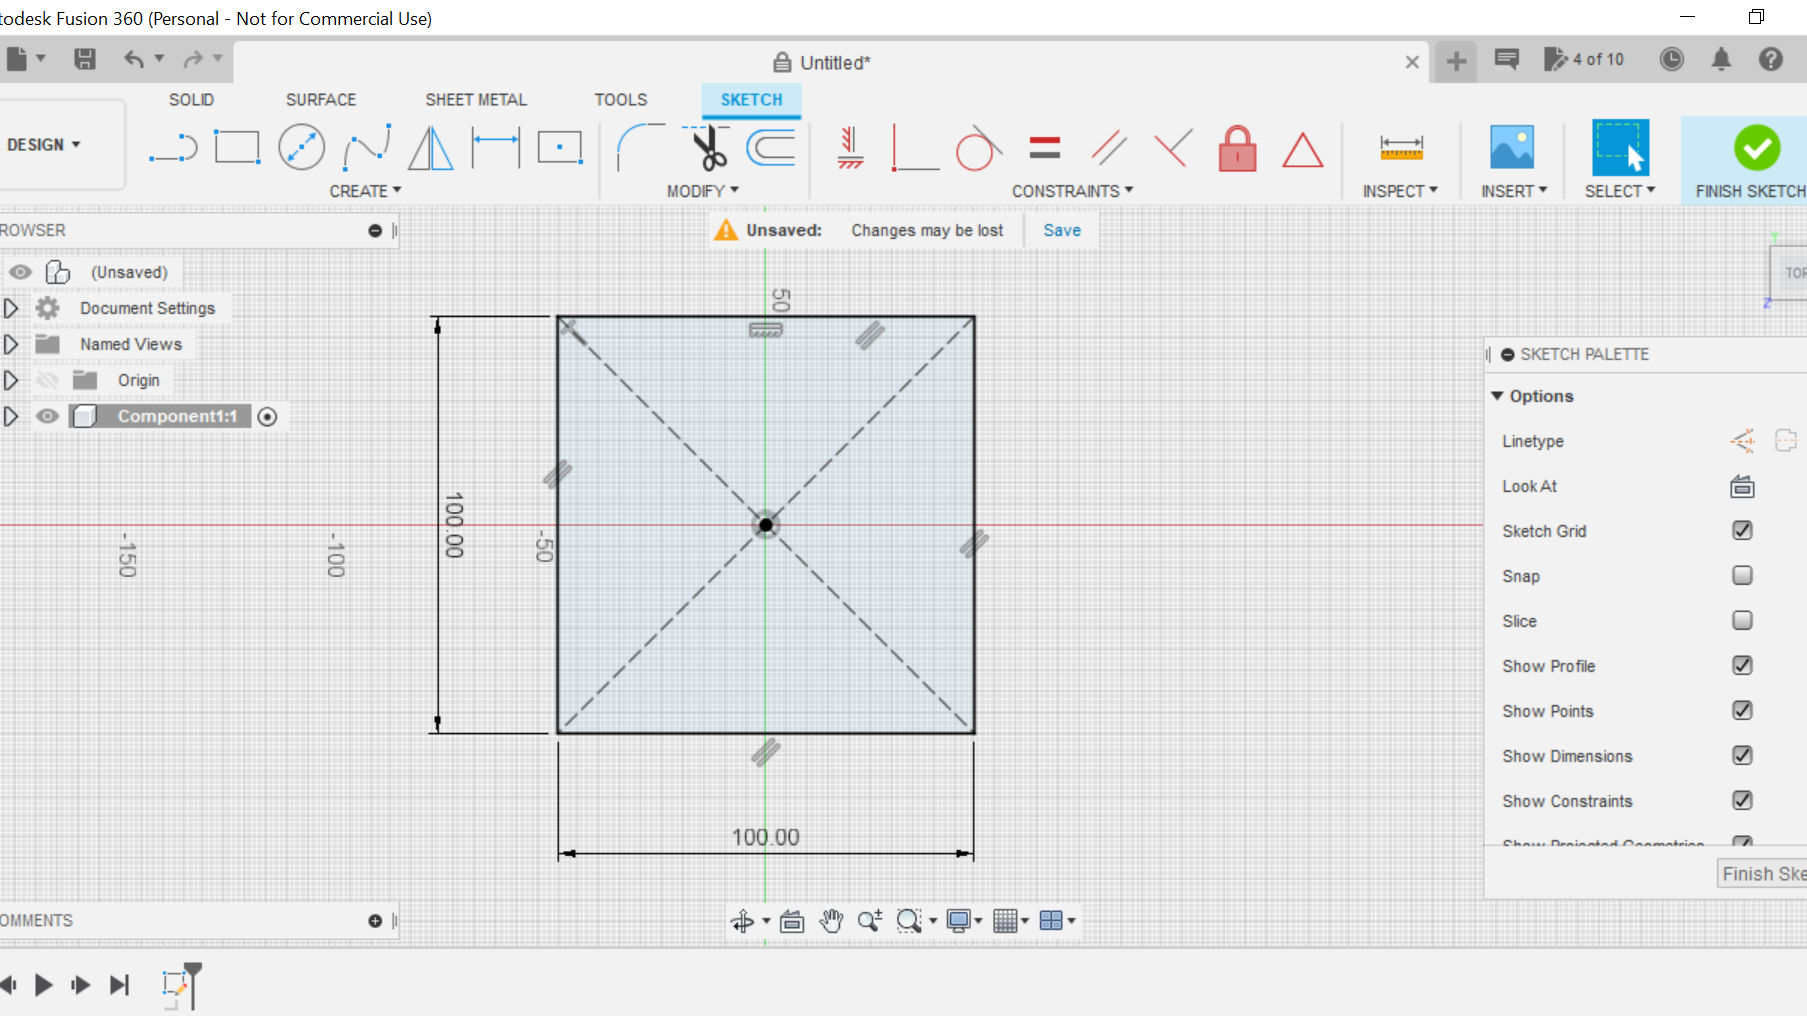
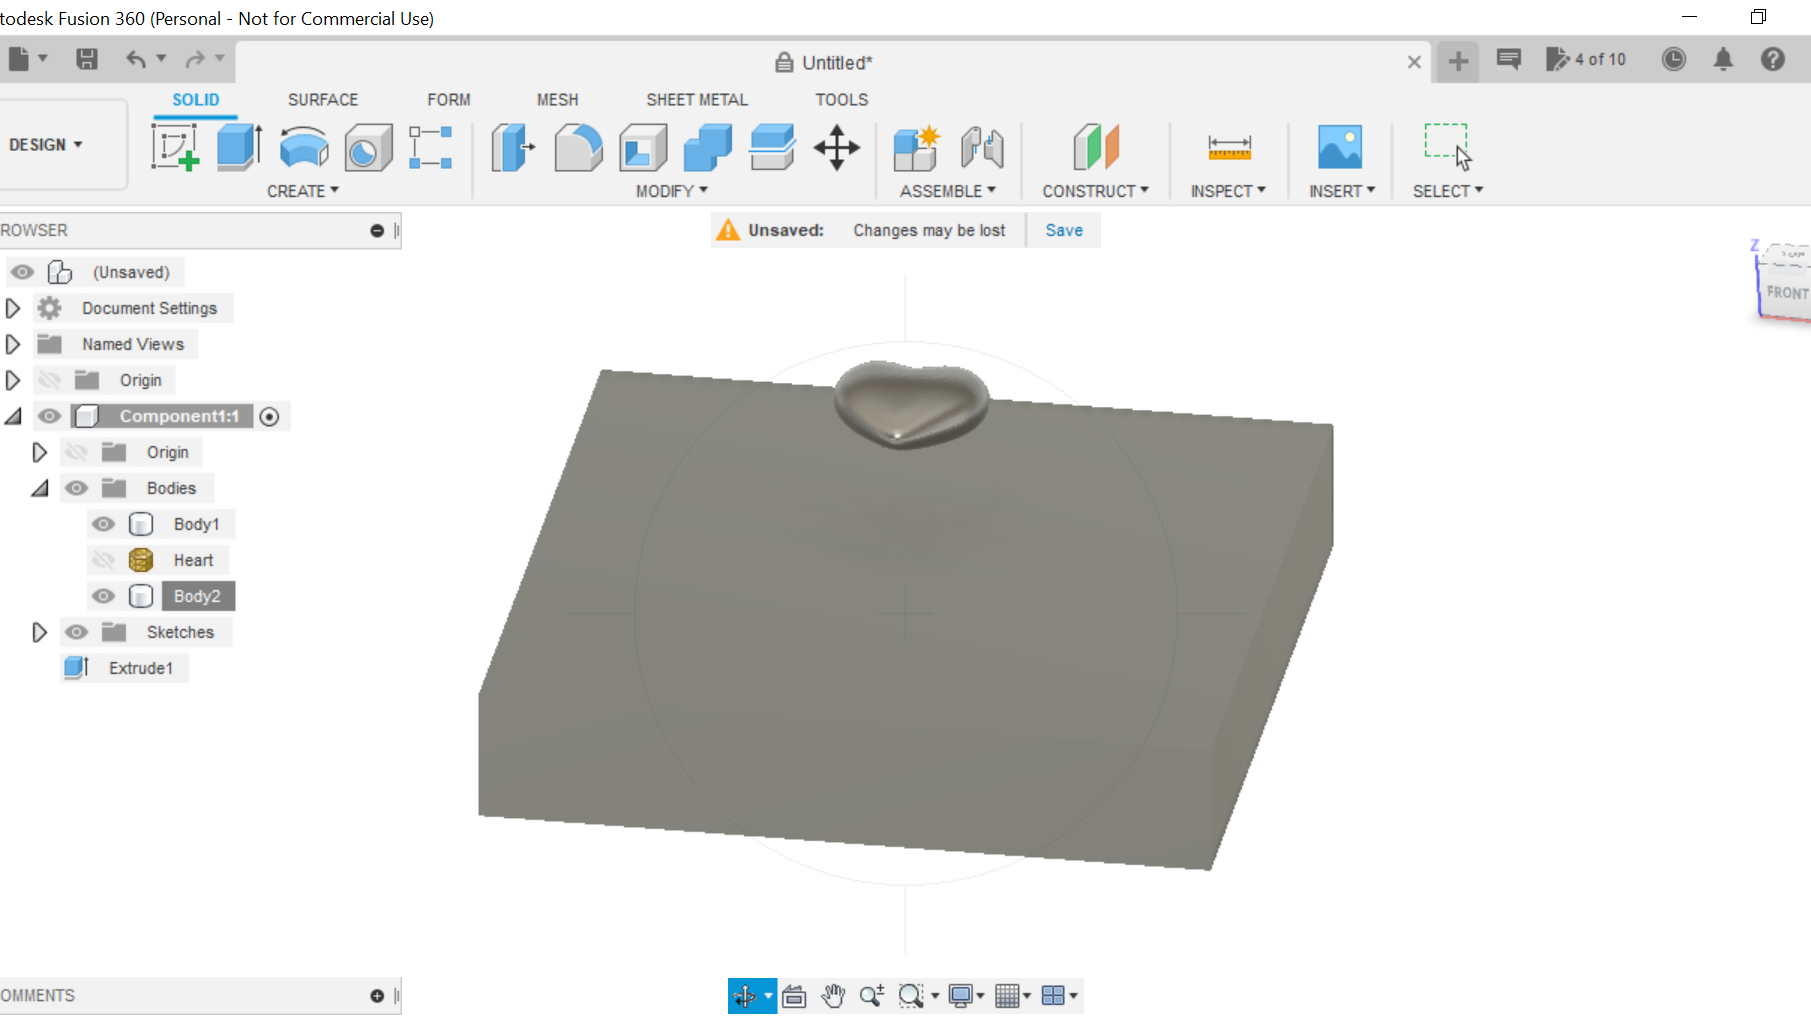
On opening we create a new component then create new sketch, we will choose the top plane for our design, we can choose either a circle or square. On this occasion I select the centre square tab and create a square, for this design I'm making the square 100mm x 100mm then going to extrude it to 18mm, this is the depth of the floorboard off cut I am going to be using.
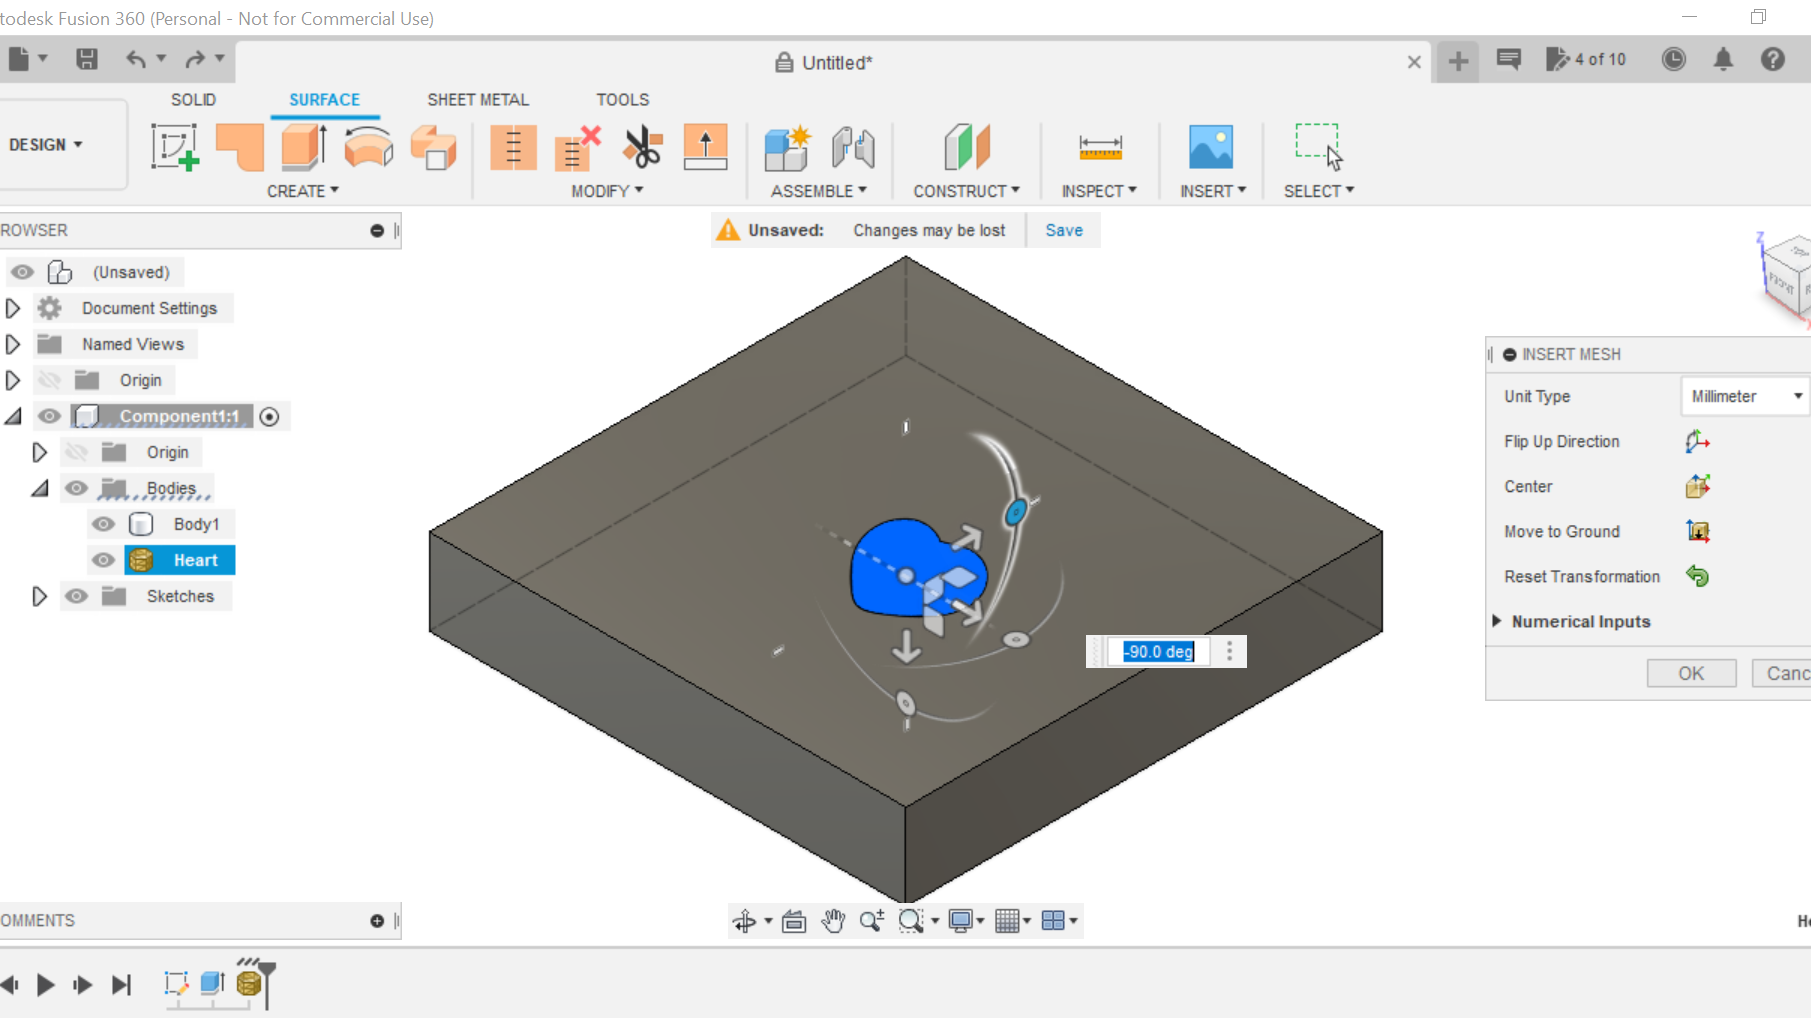
We are now going to import the Heart STL into our design, select the Insert tab, Insert mesh and select the Heart STL already downloaded.
Go into the displays settings tab at the bottom of the Fusion 360 screen and then select Visual style check the shaded with hidden edges box.
Import the mesh and turn off design history and right click on the heart tab in the left column and select mesh to Brep, this will create a solid object for us to work with(Body 2)
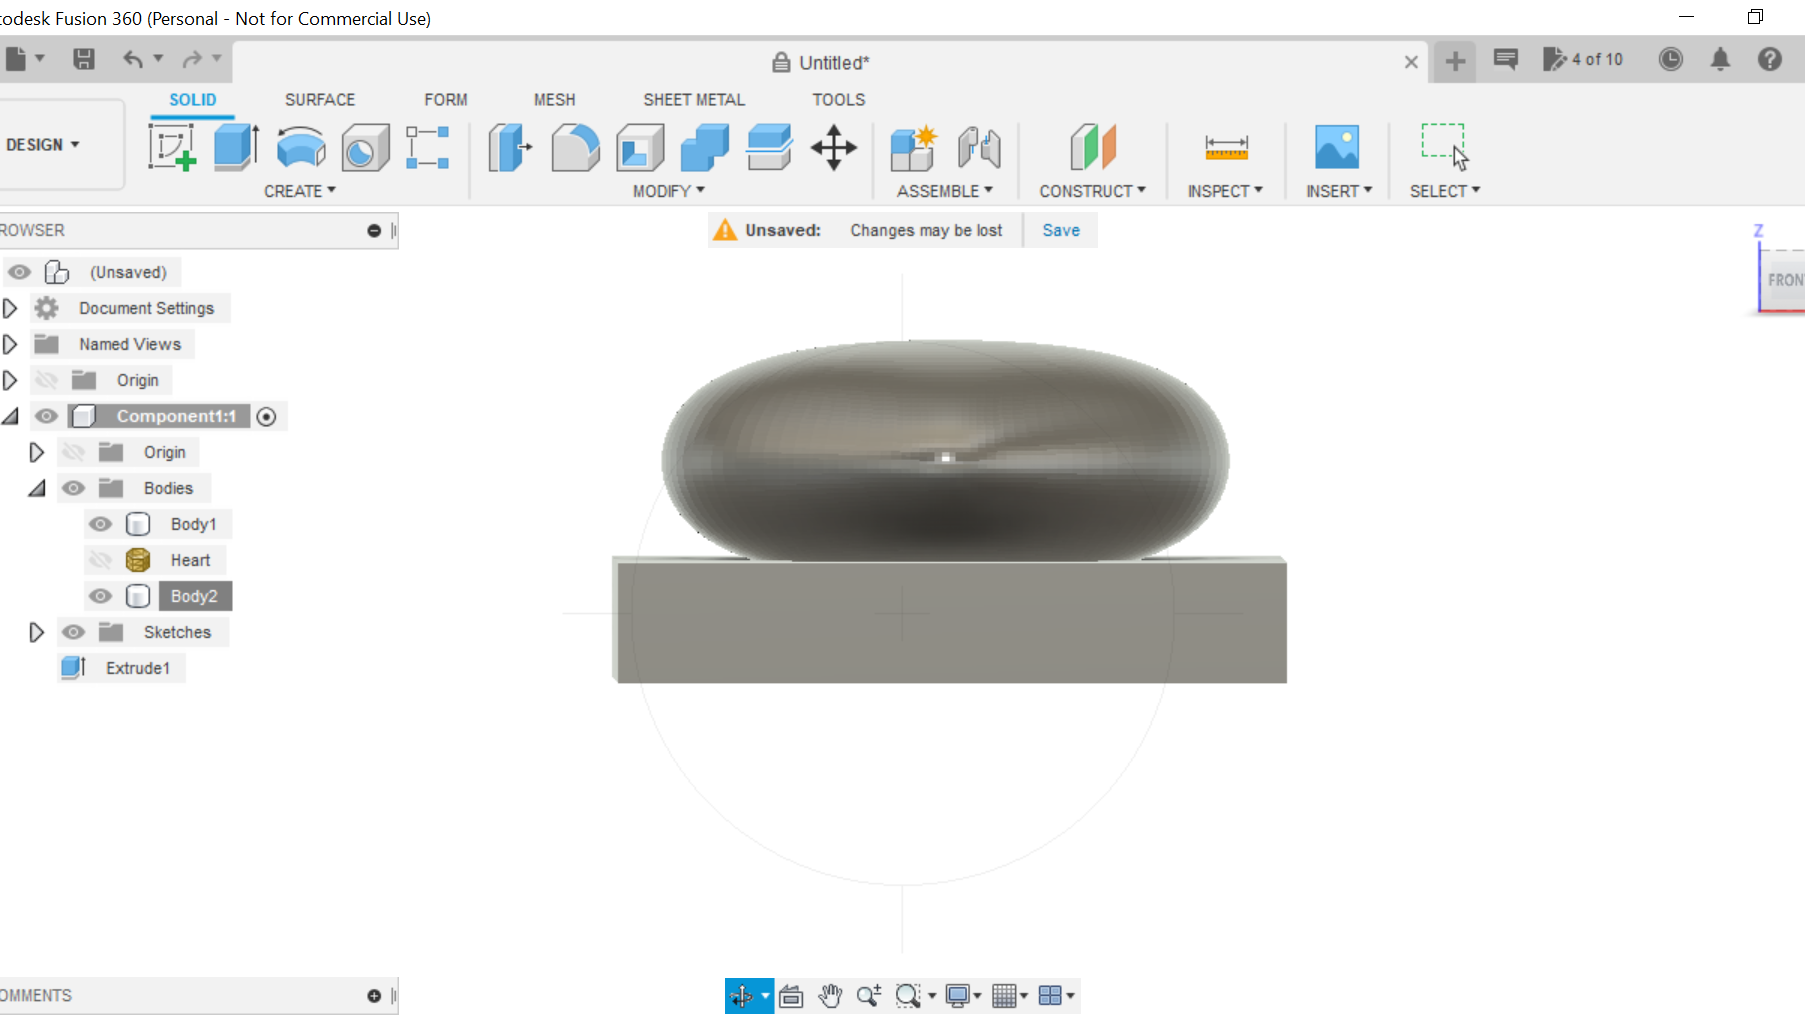
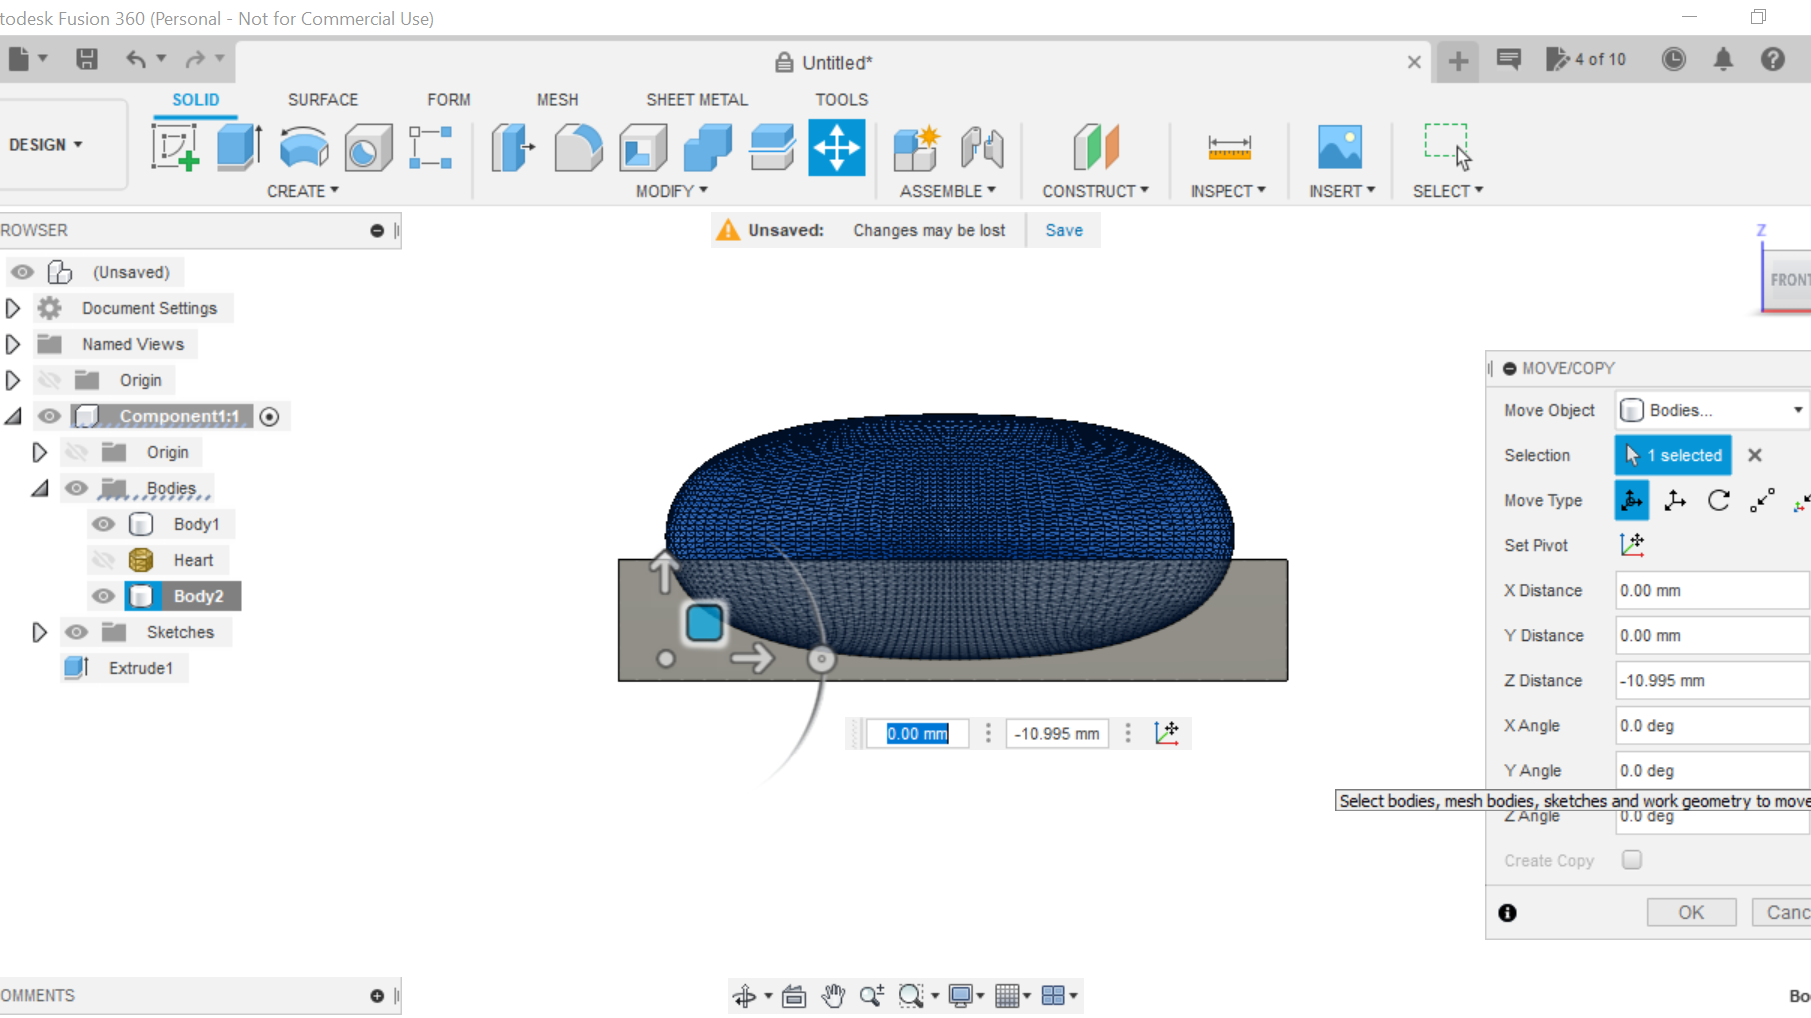
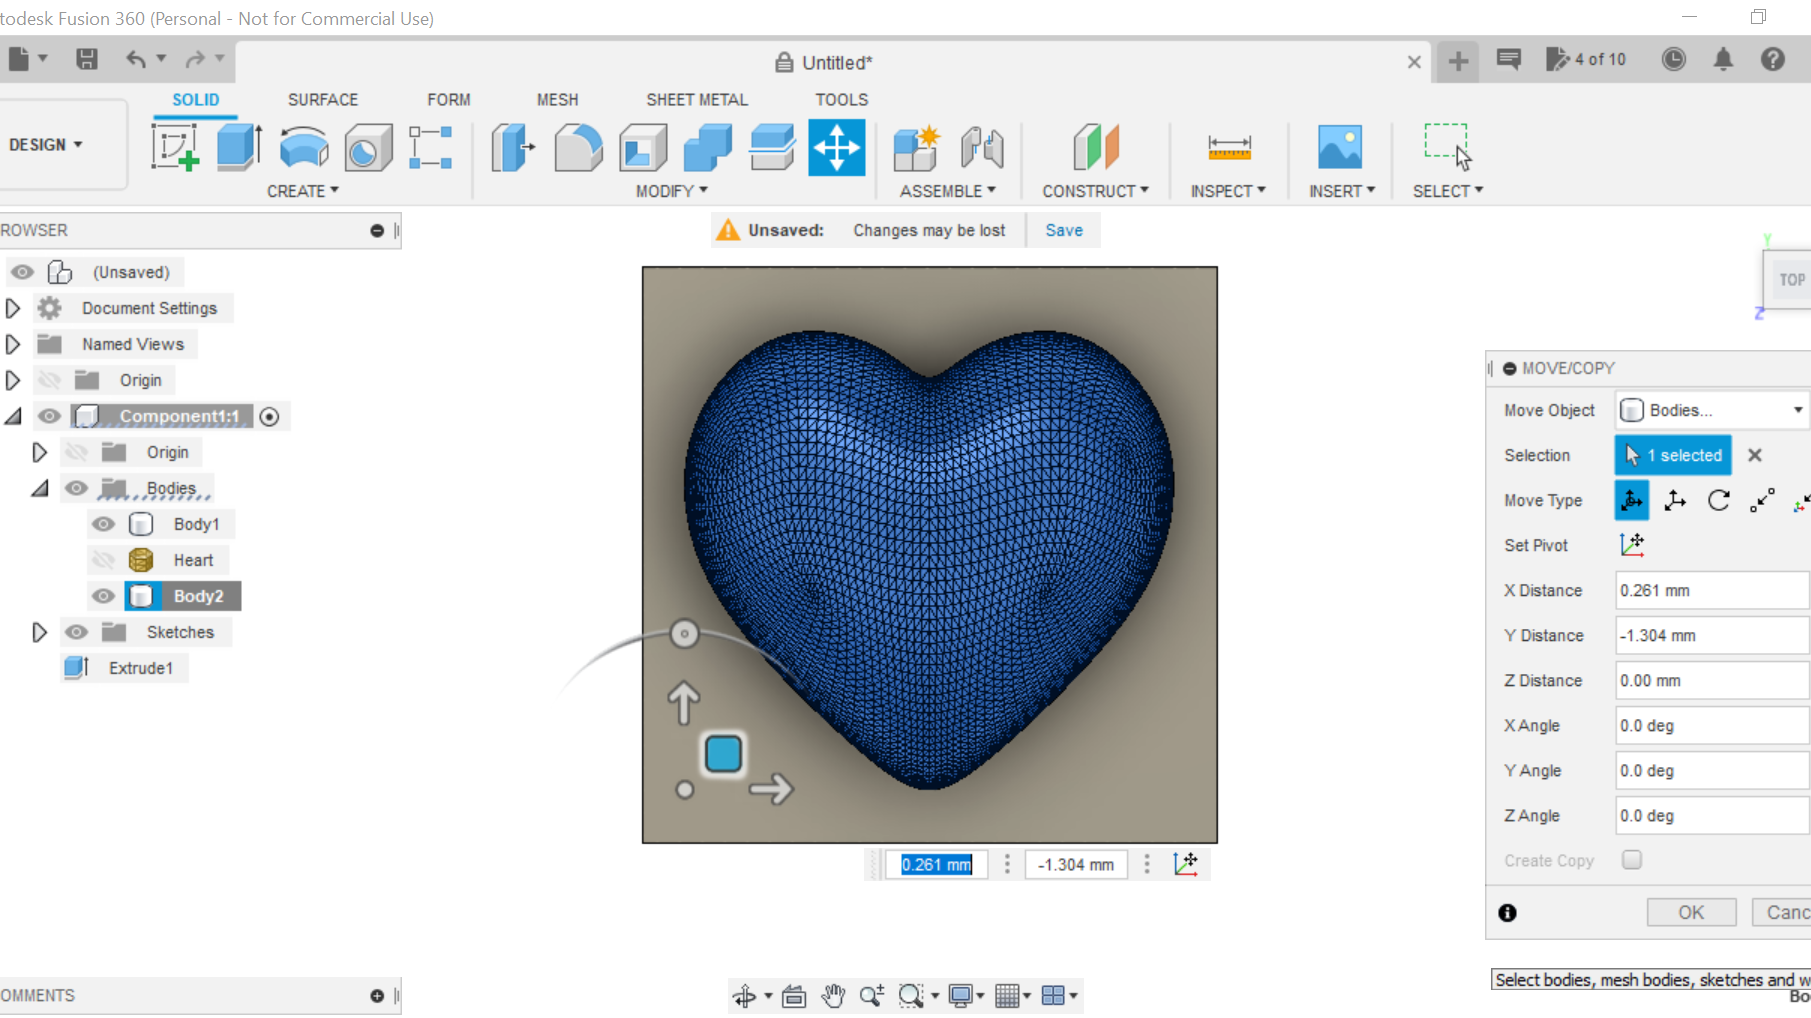
The Heart will be at the centre of our work piece, we now need to right click on Body 2 and select Move, we can now move the heart up into a position where we can scale to the size we need.
Downloads
Scale, Positioning and Combining.
.png)
.png)
.png)
.png)
.png)
.png)
.png)
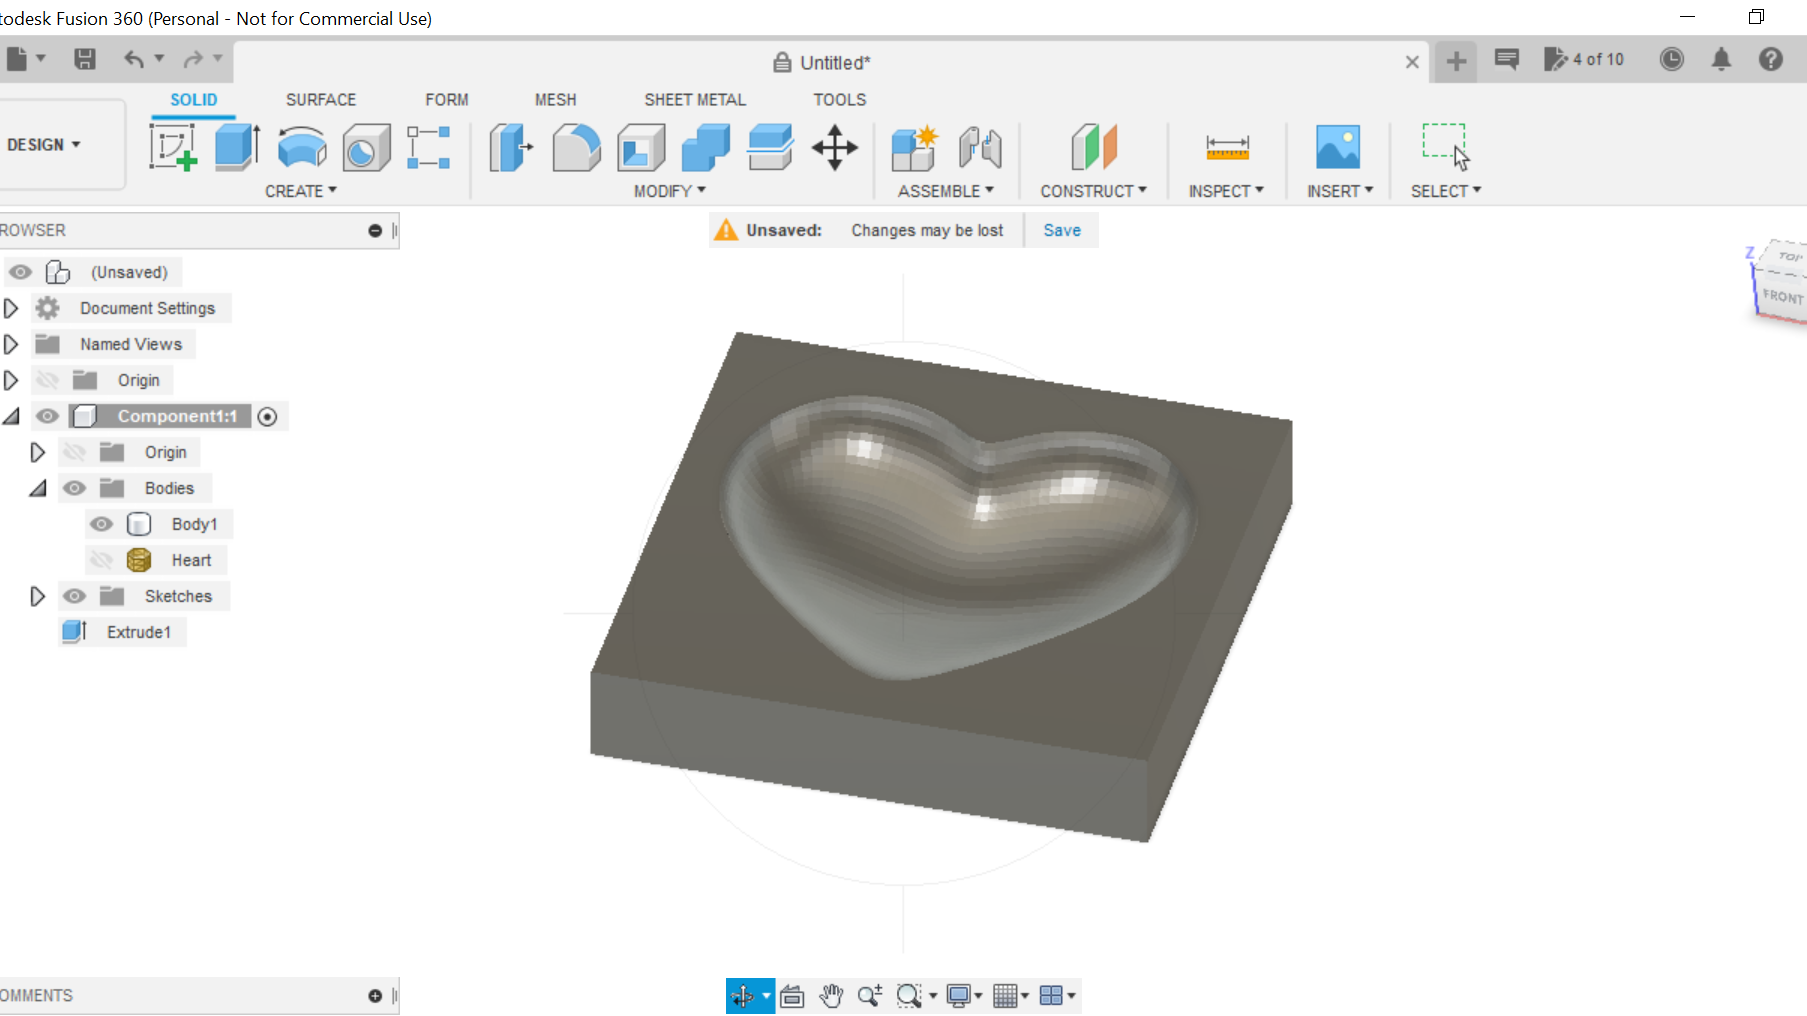
We now need to scale the heart to the size we need to create a scallop without going too close to the edge of the workpiece, on this occasion it was scaled by 4 which was perfect.
Toggling between shaded and shaded with hidden edges to position the heart in our workpiece, I tend to leave around 4mm below the heart when using hardwood but this dimension can be anything you want.
Right click on Body 2 and pick the front view and drag the heart into position, then select the top view and centralize the heart in the work piece.
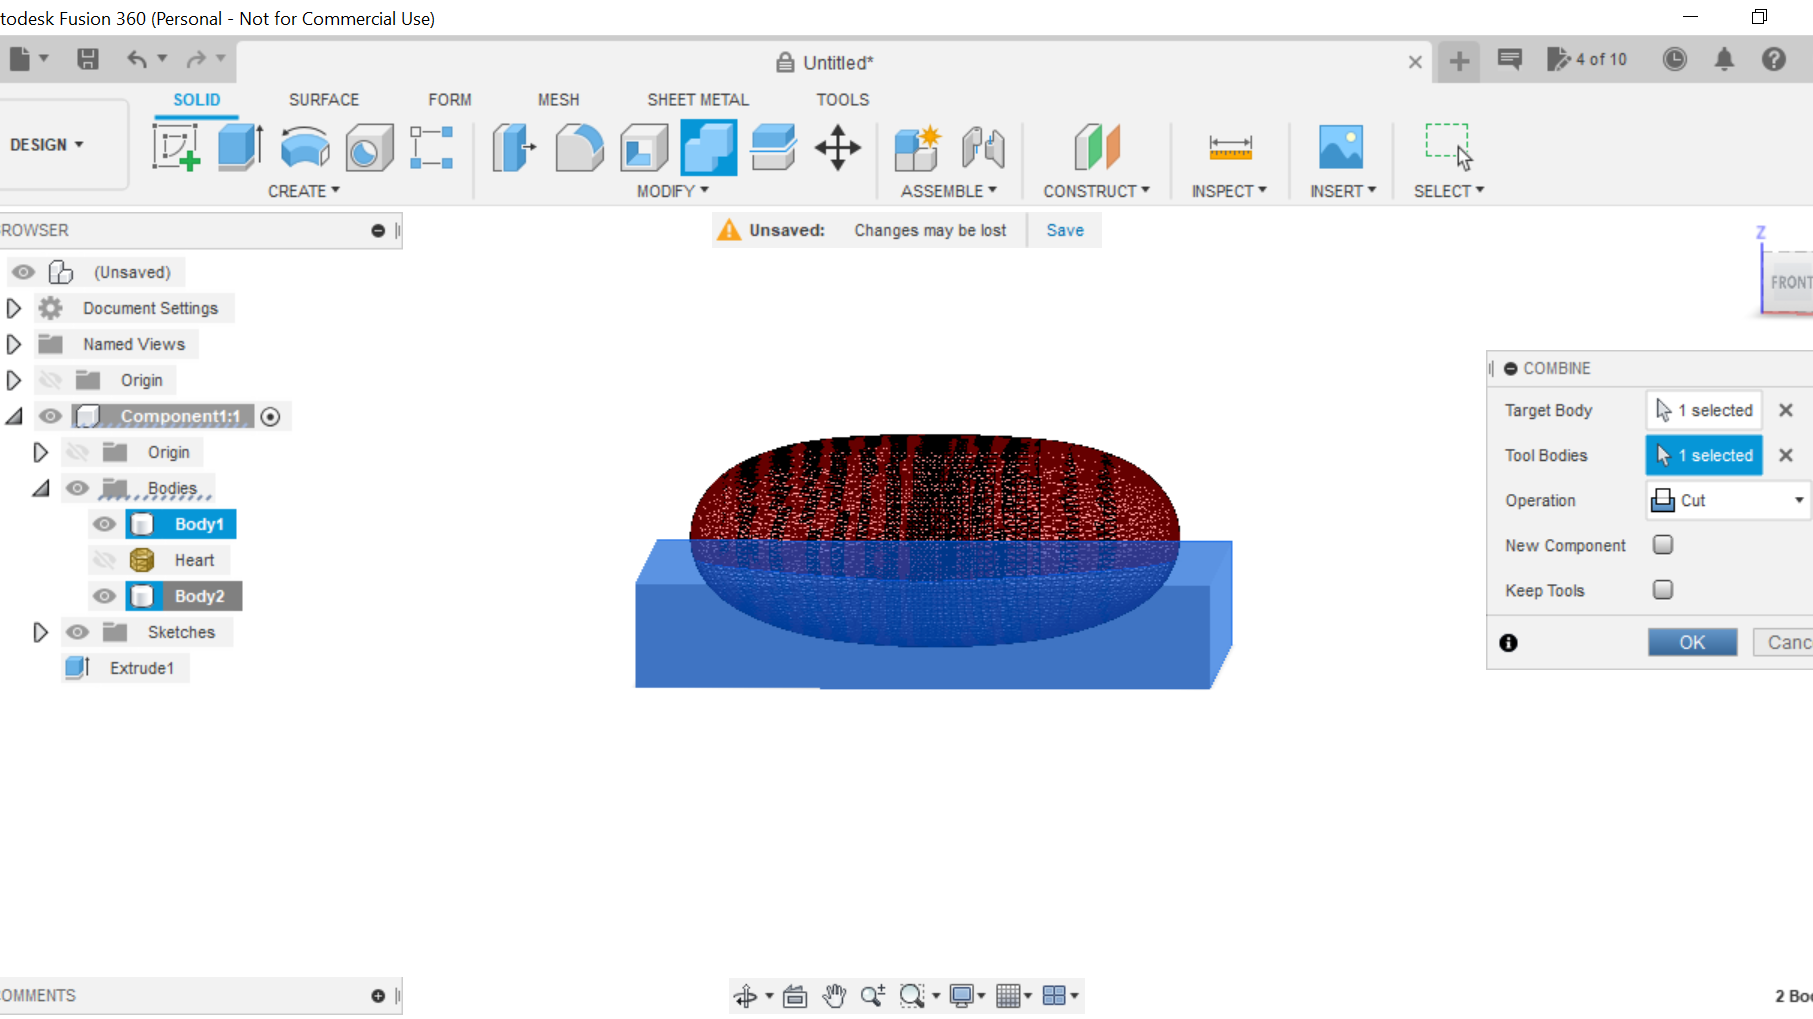
We can now utilise the combine function of Fusion 360 but on this occasion we select cut from the drop down box, select the Combine tab and highlight the workpiece as the Target body The heart is our cutting tool.
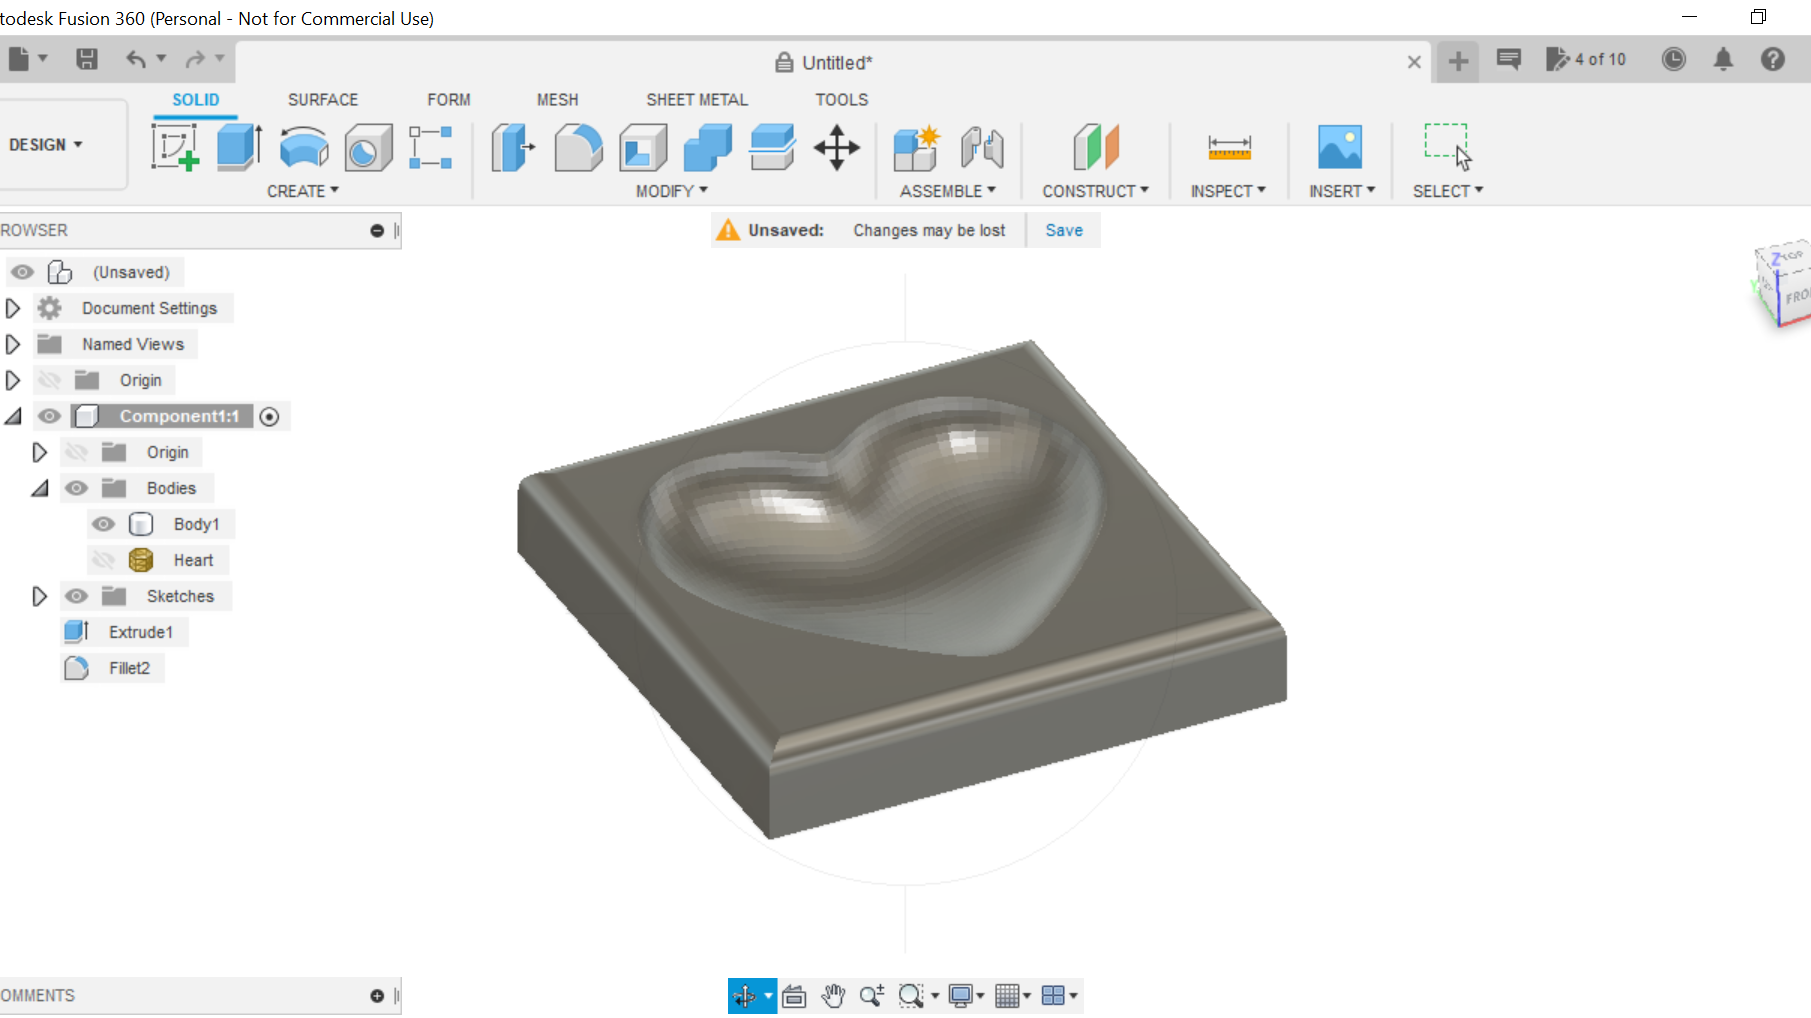
This process now leaves us with the scalloped heart.
We can use the fillet function to round the edges of the workpiece, doing this saves on sanding later or you can use a router for this function.
We are now ready to go to the Manufacturing process.
Manufacturing the Scalloped/recessed Heart
.png)
.png)
.png)
.png)
.png)
.png)
.png)
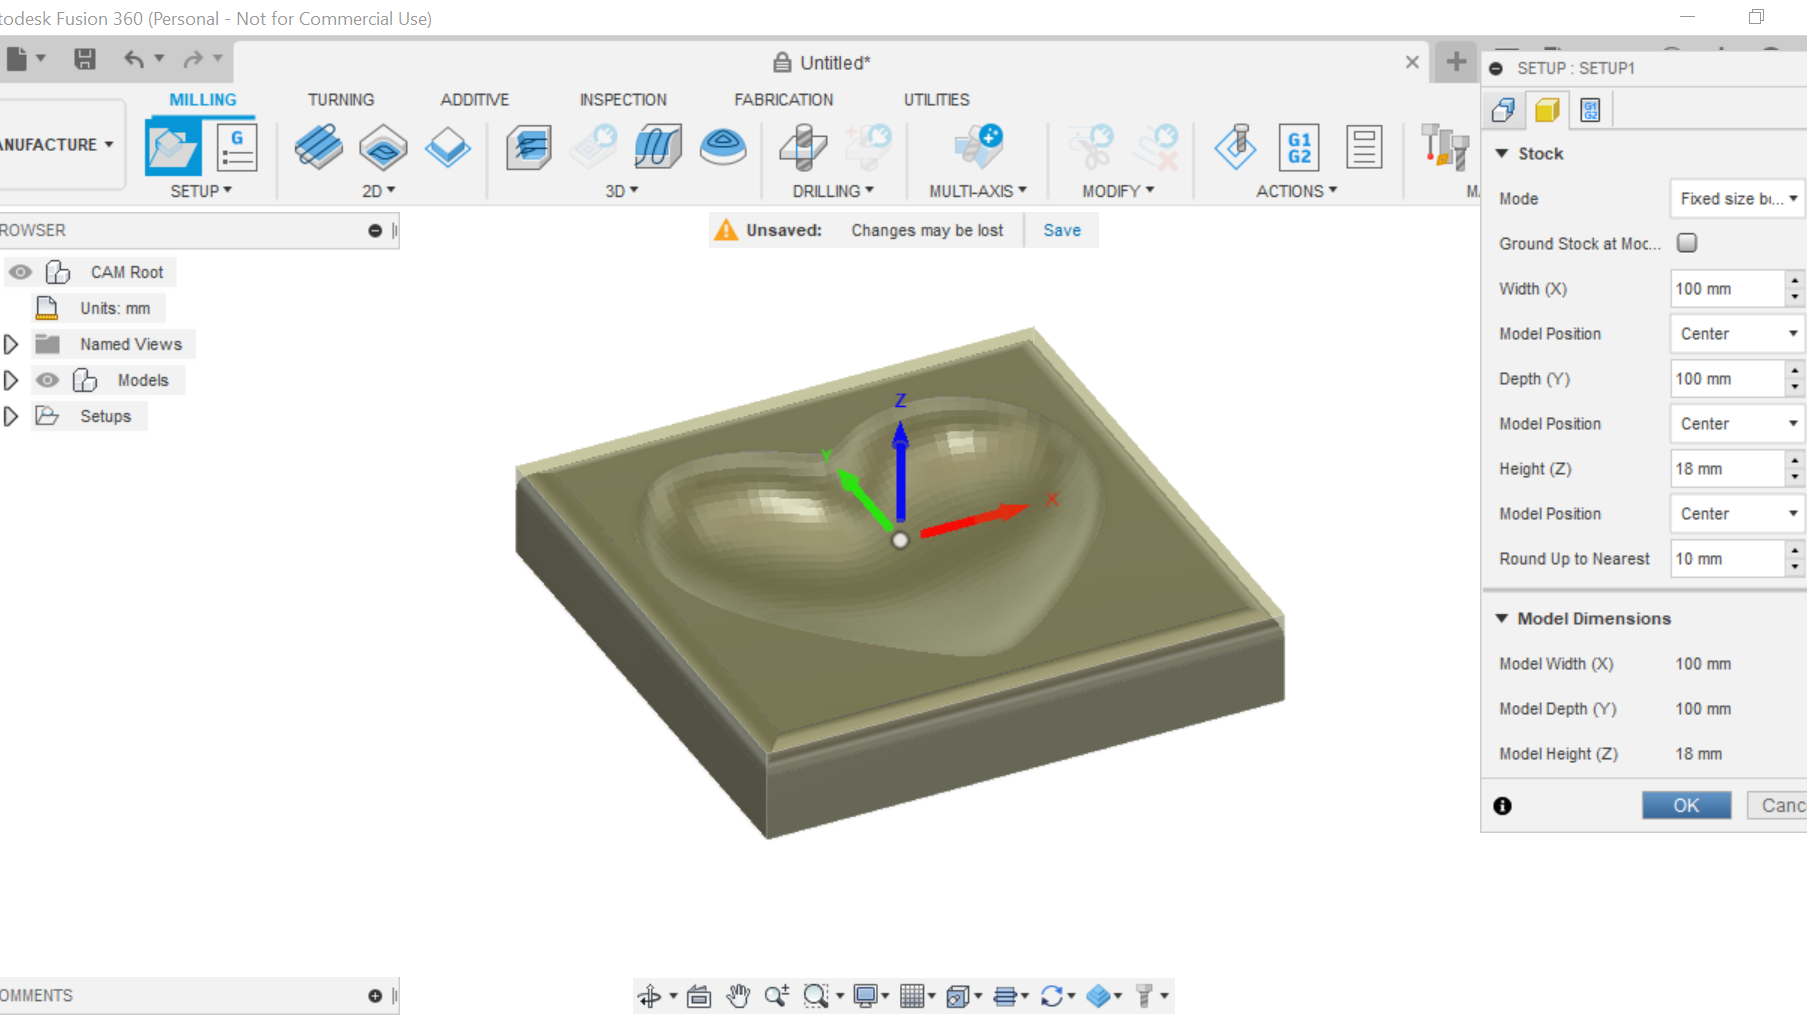
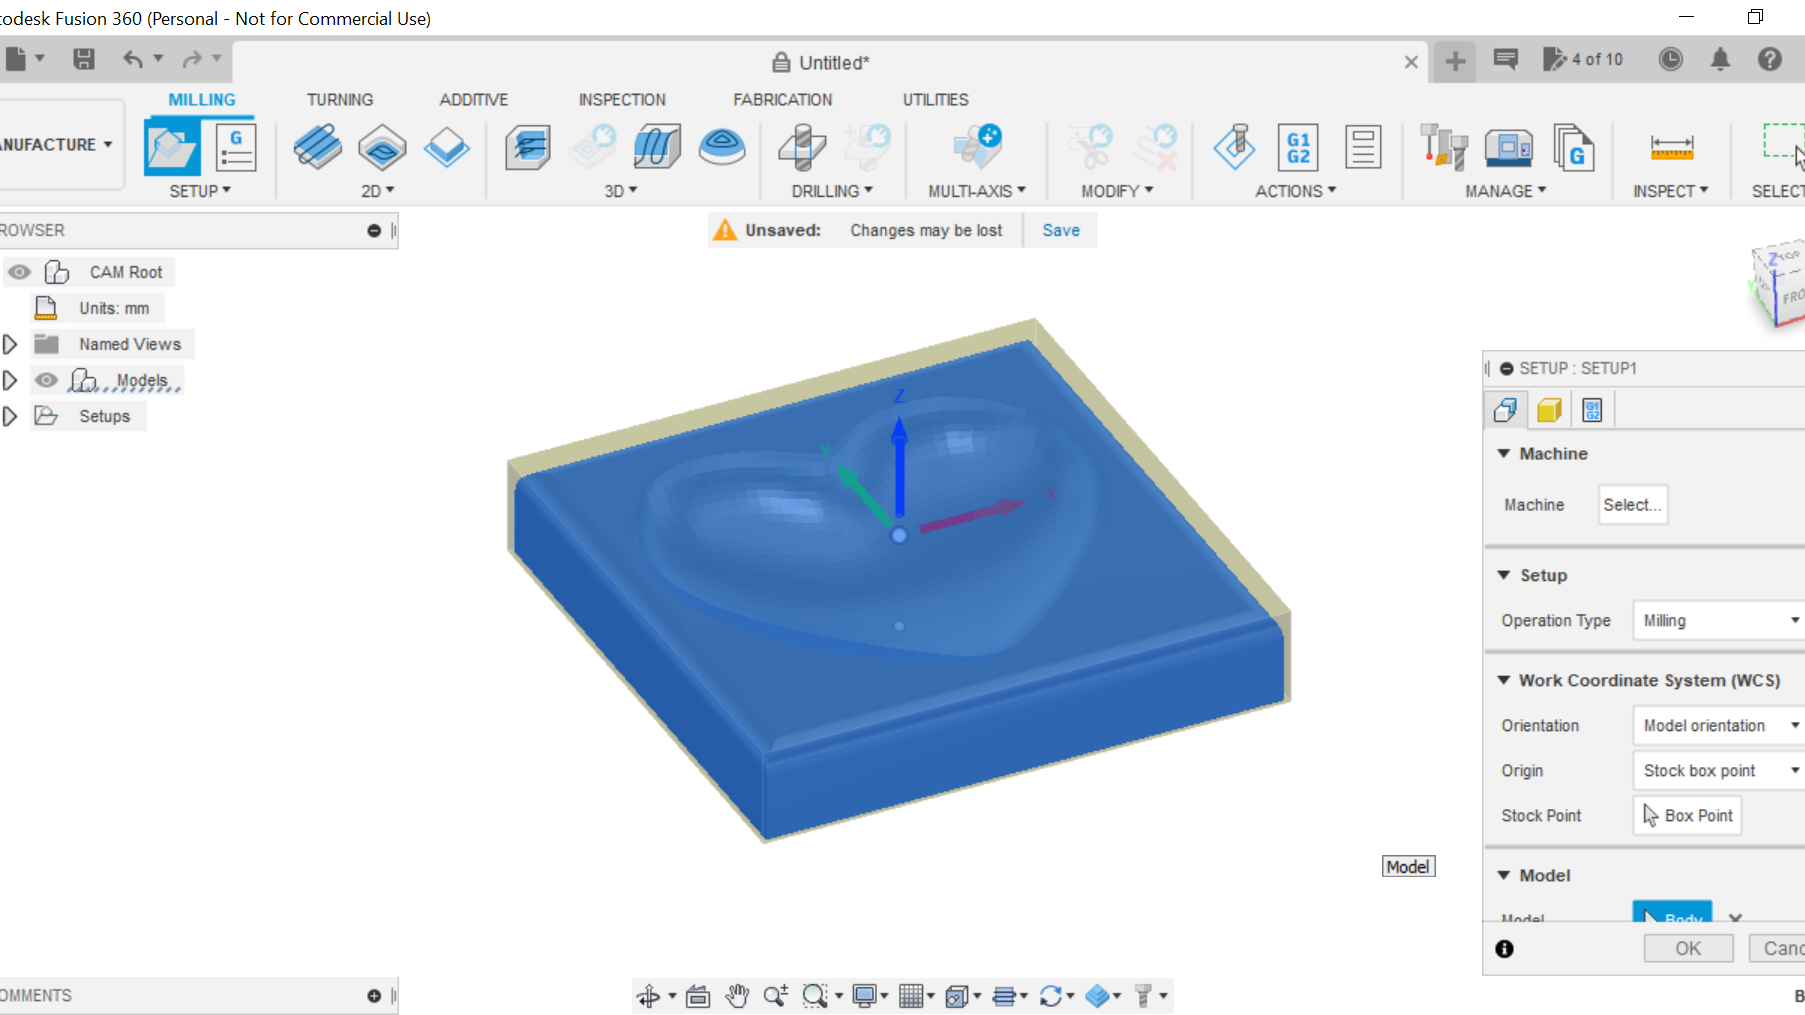
In the manufacturing section we select new set up, this is the section where we can choose the dimensions of the workpiece. I'm selecting fixed size box on this occasion with no offsets, we click on the body tab to highlight the workpiece, click ok to close this box.
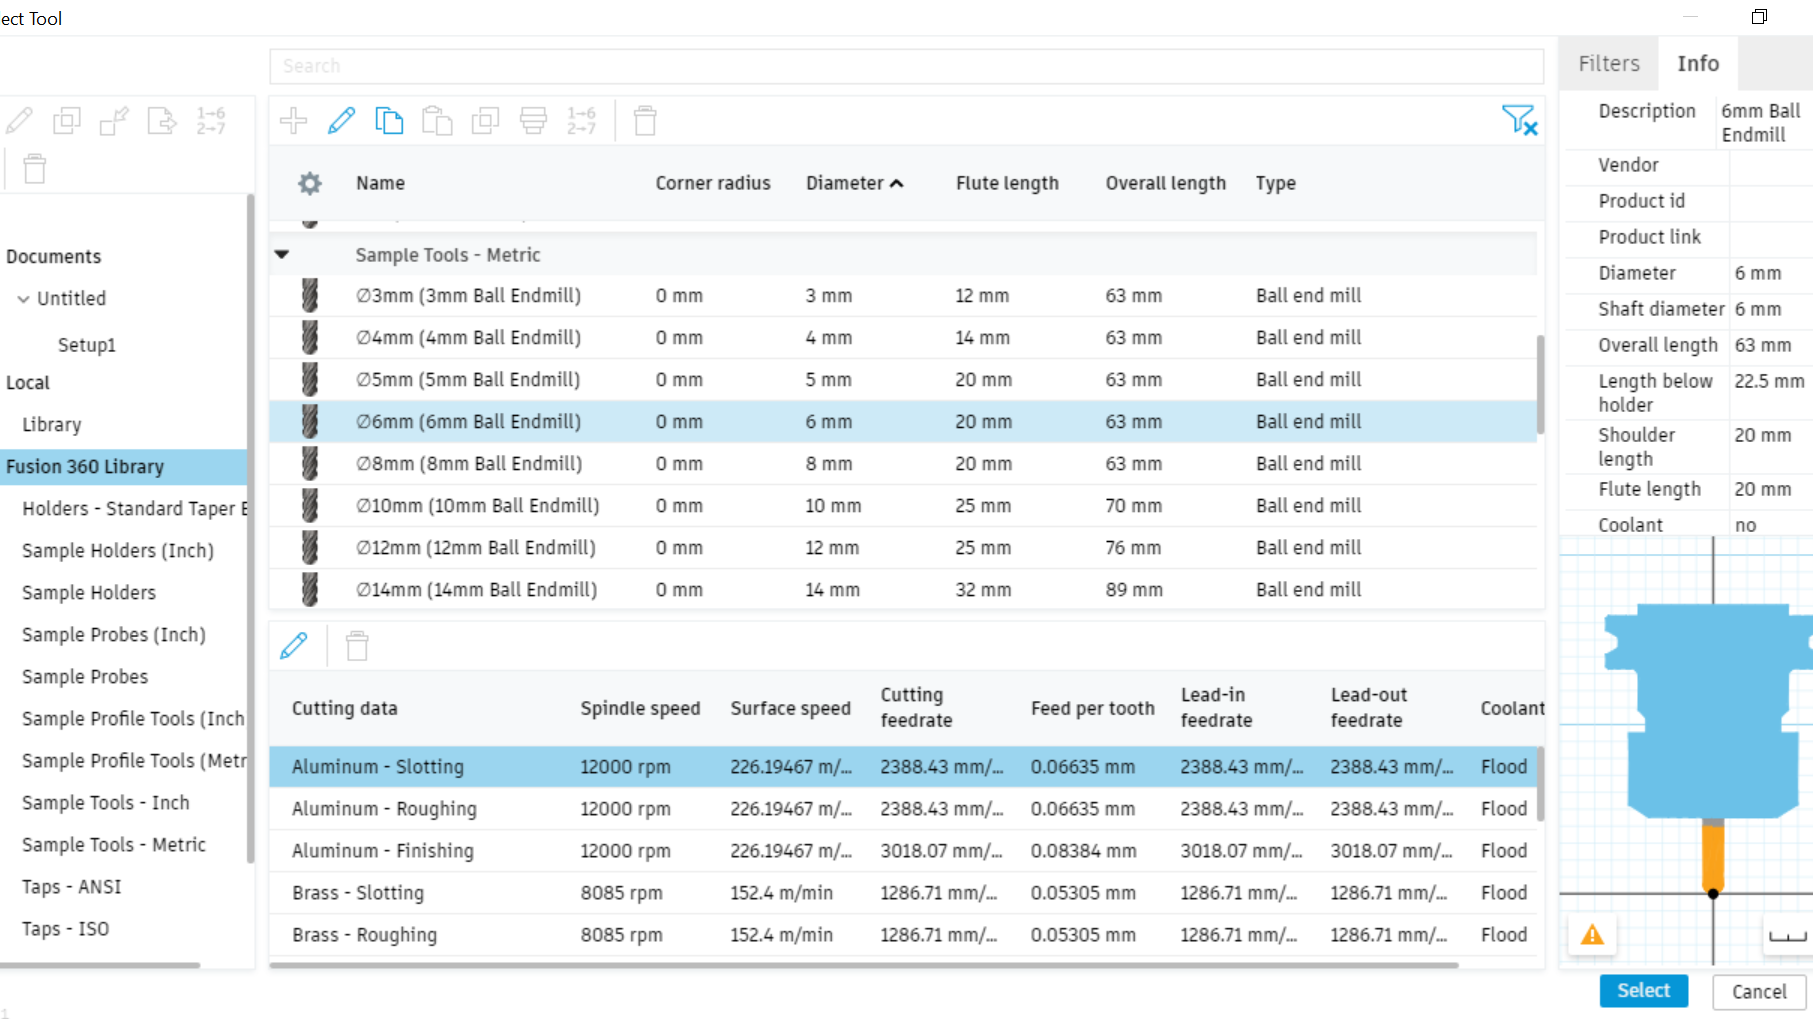
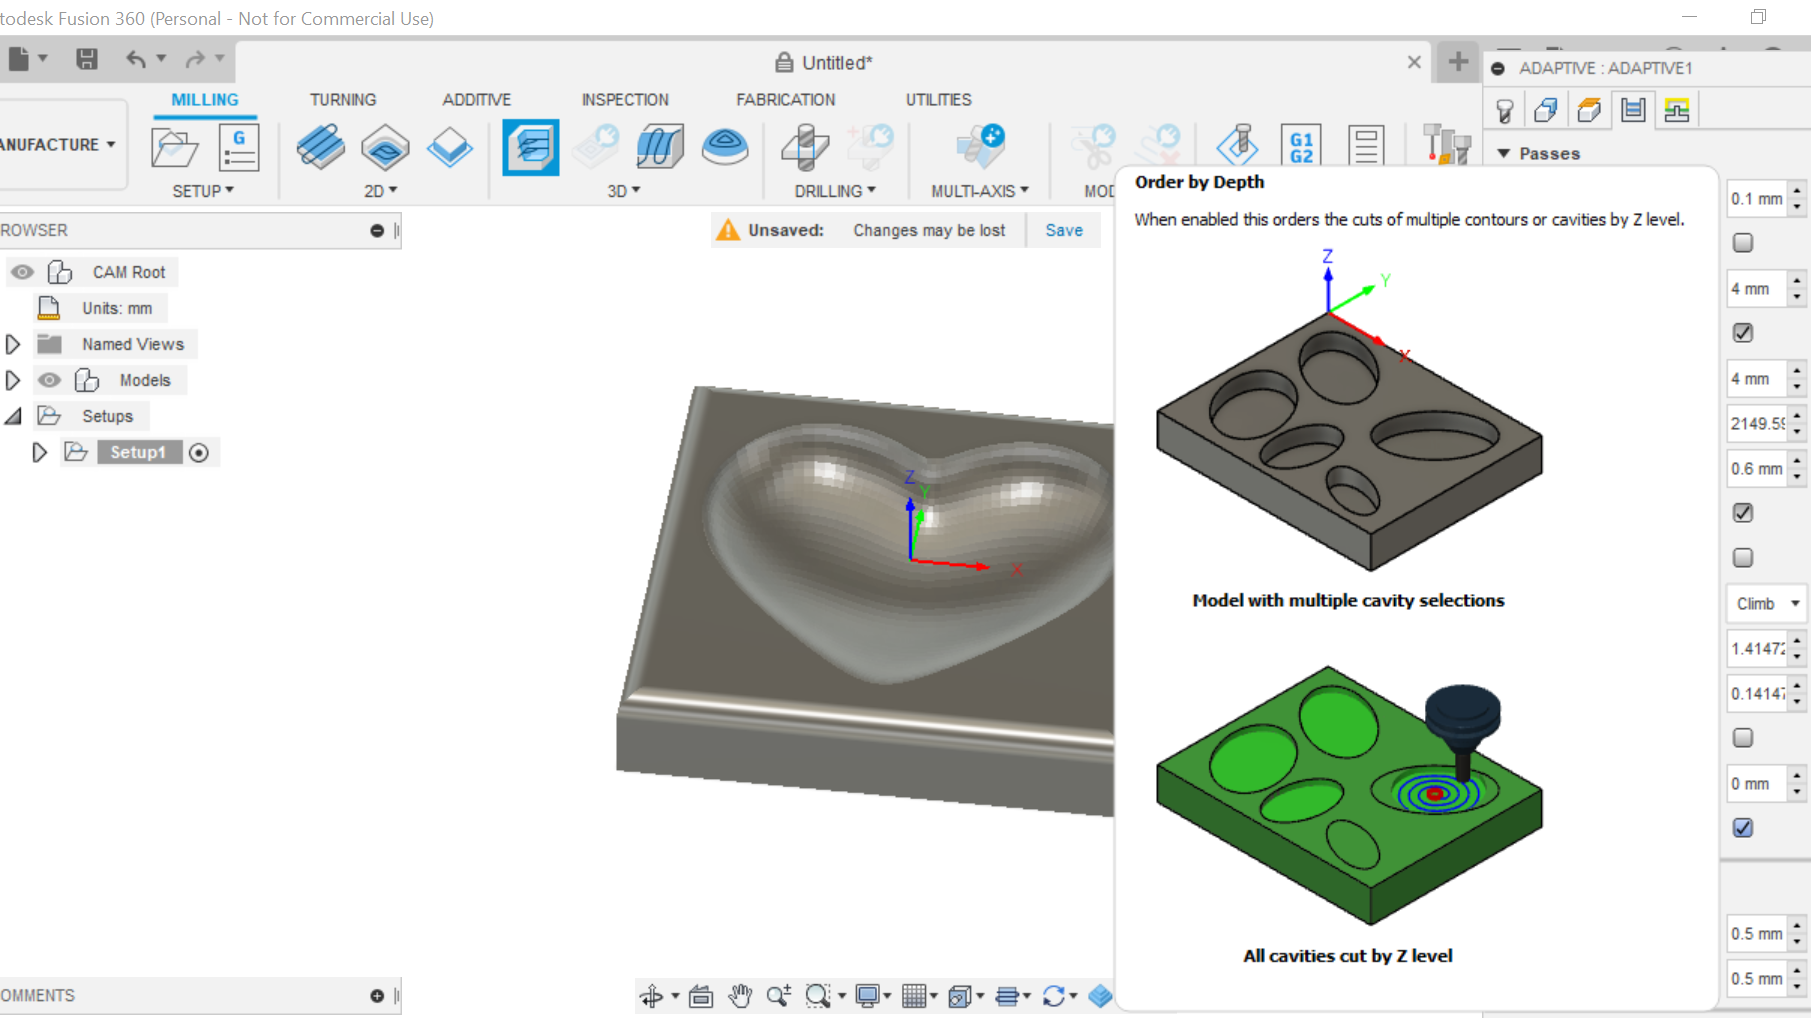
We now select the 3D adaptive clearing tab, the first tab allows us to select our cutting bit, its a 6mm ball end bit,
Coolant is disabled, and spindle speed is set to(In my case) 27000rpm
Geometry I leave as is, Fusion 360 is clever enough to work out what needs to be cut out.
Heights I leave as is.
Passes, Optimal load is set to 4mm
Both ways is selected
Order by depth is selected, stepdown is 1.4mm
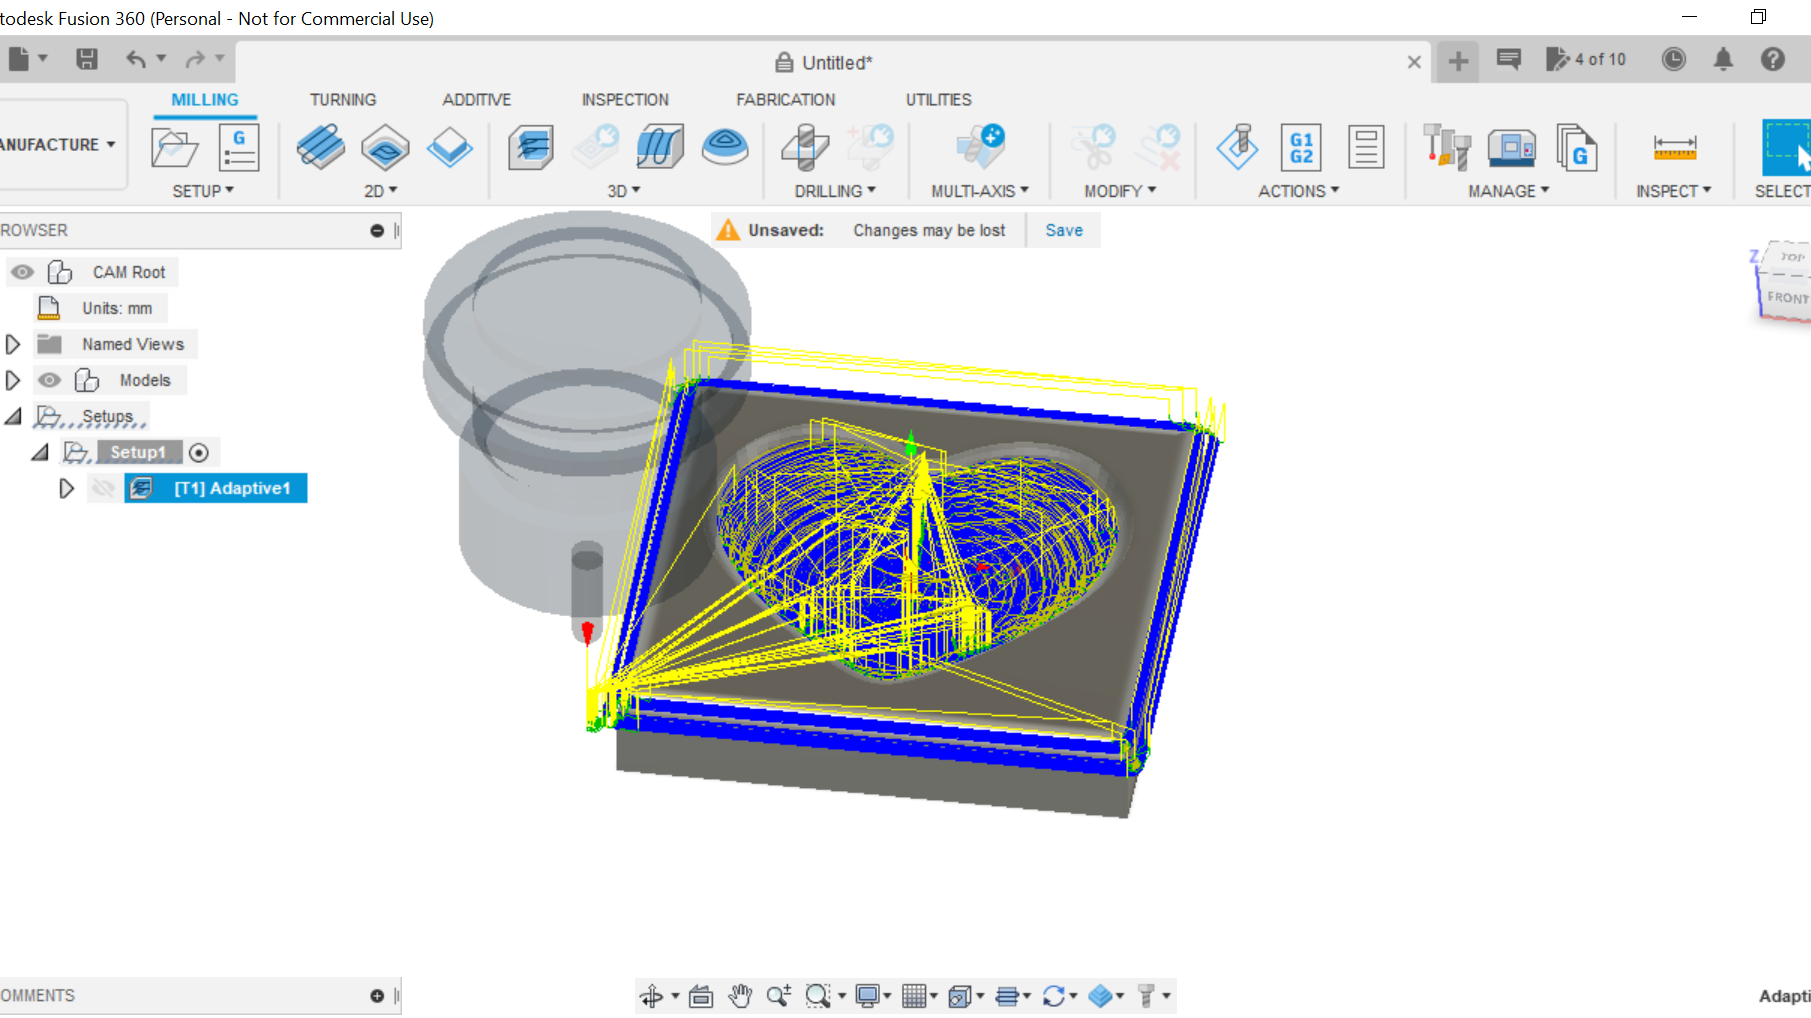
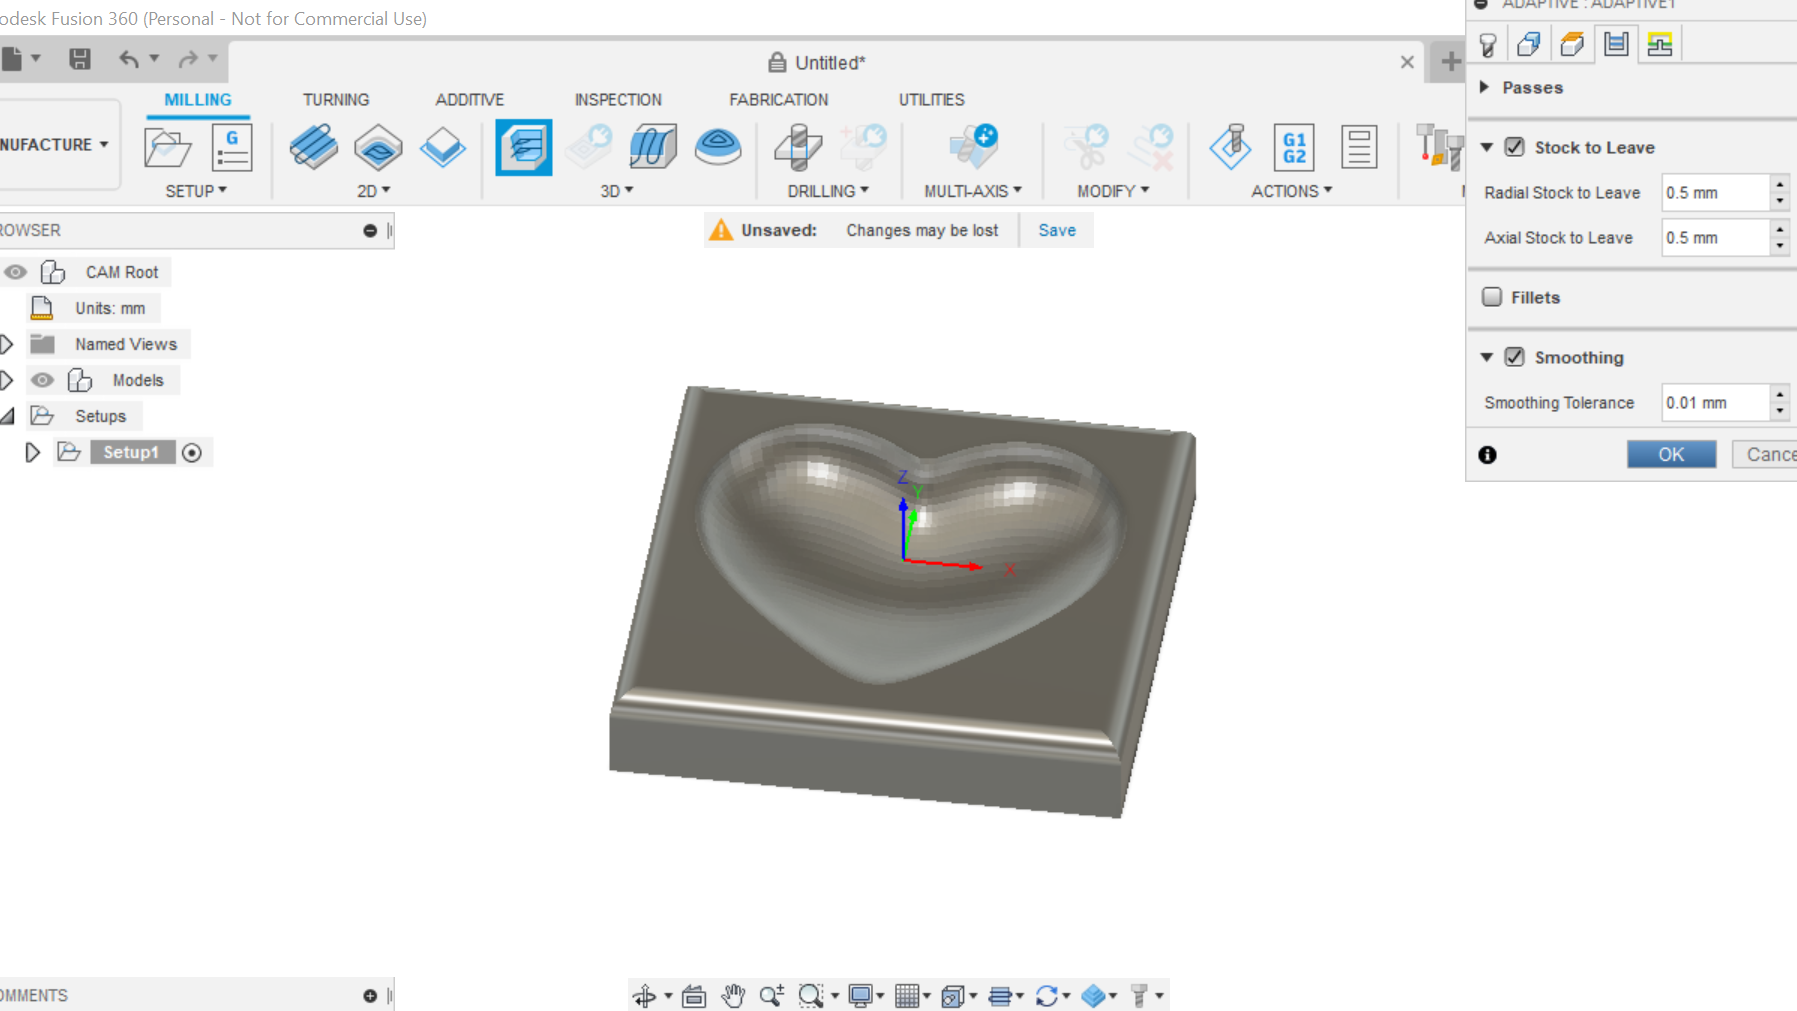
Smoothing box is selected, then press ok, Fusion 360 now works out the Toolpath for this operation.
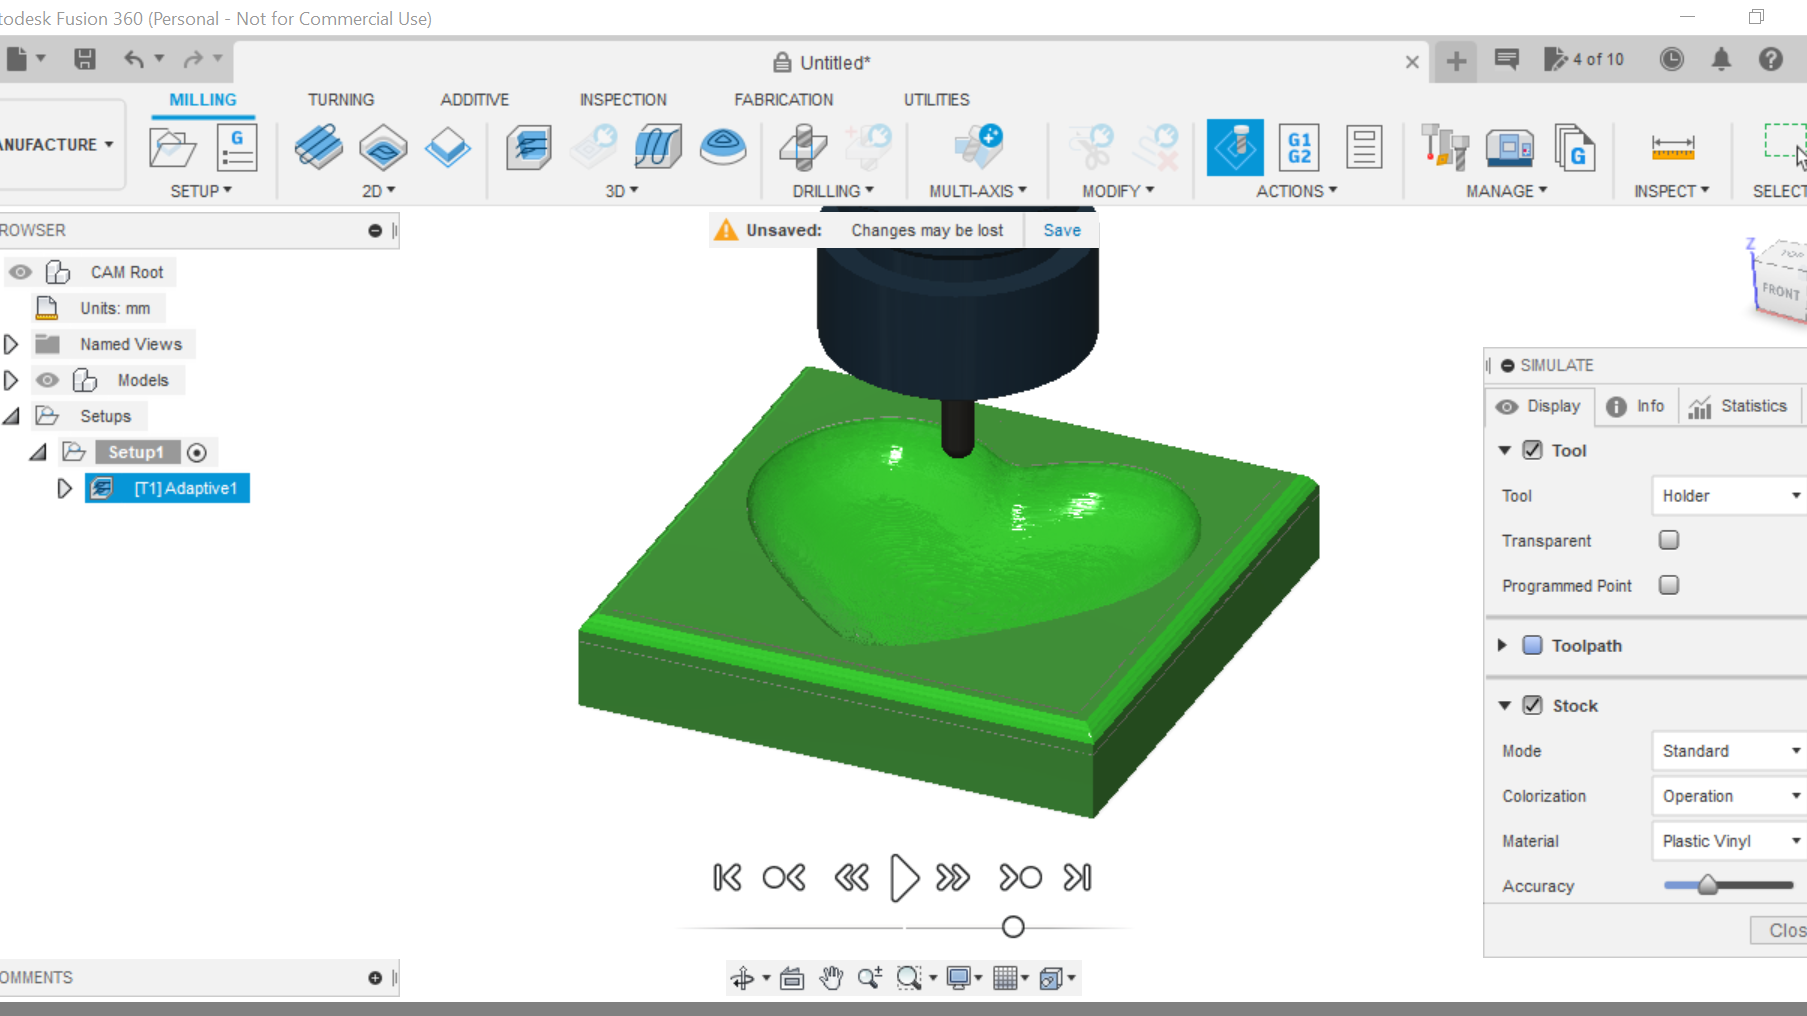
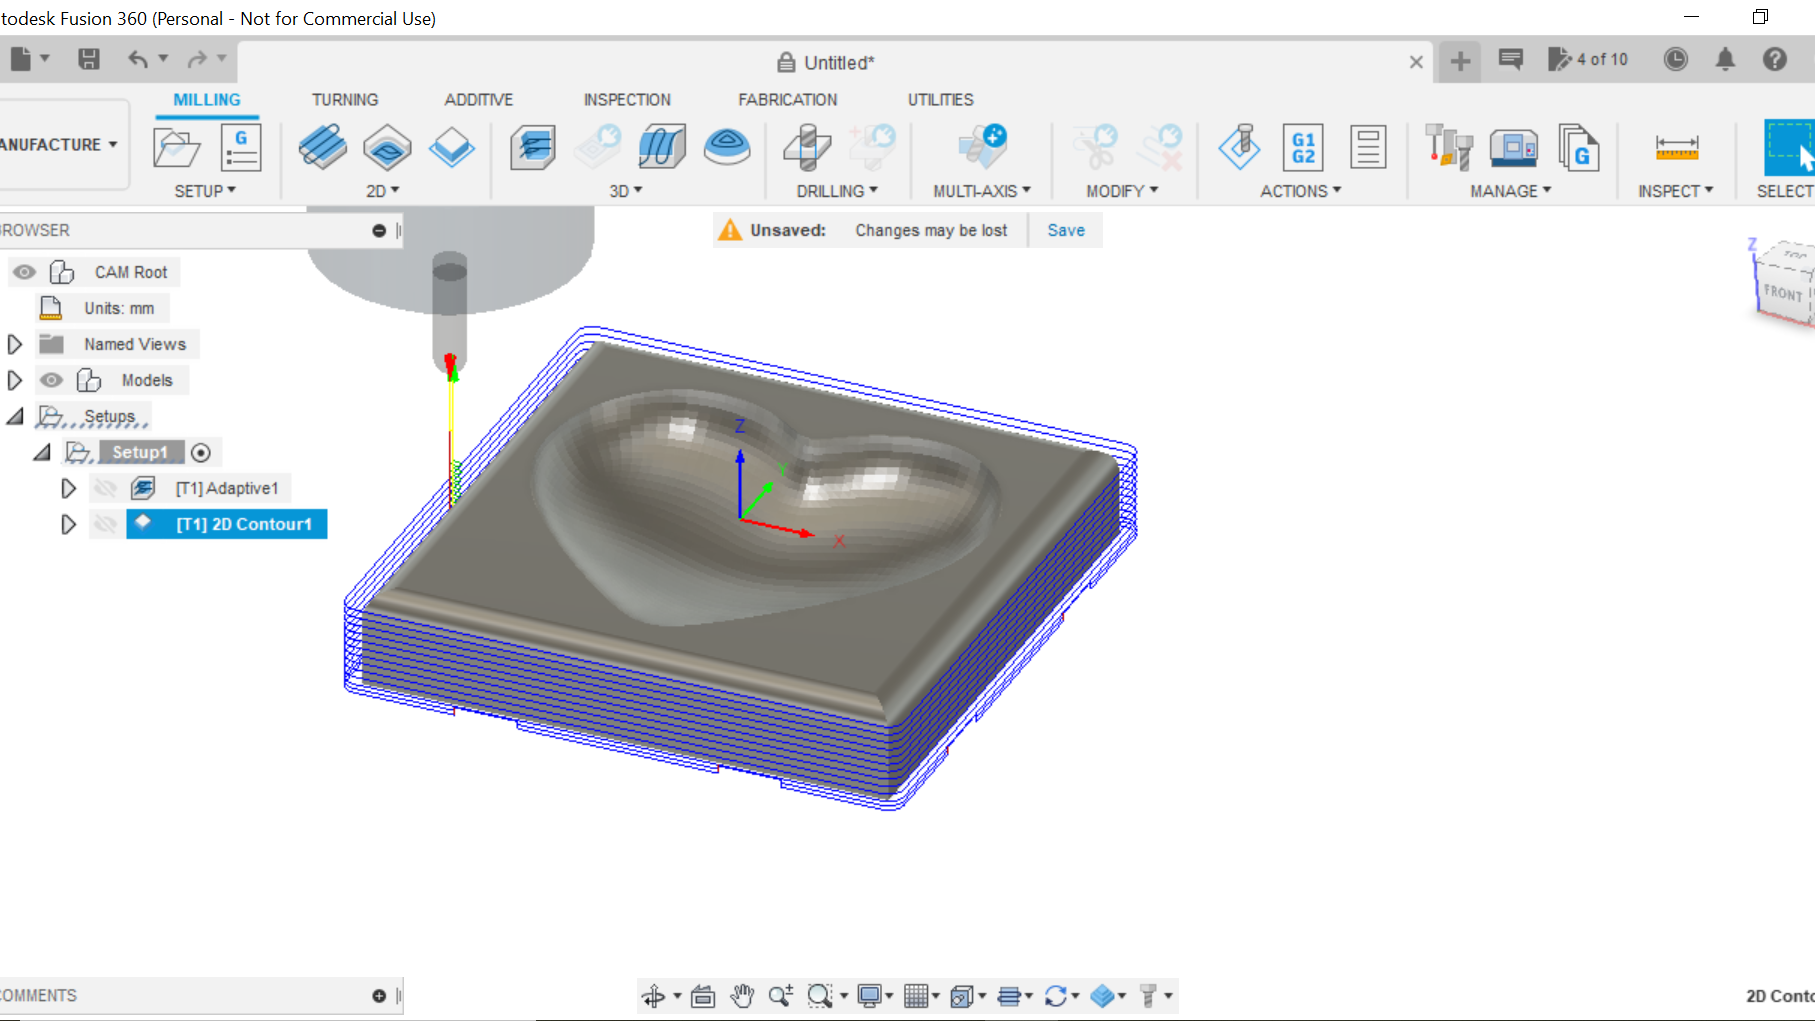
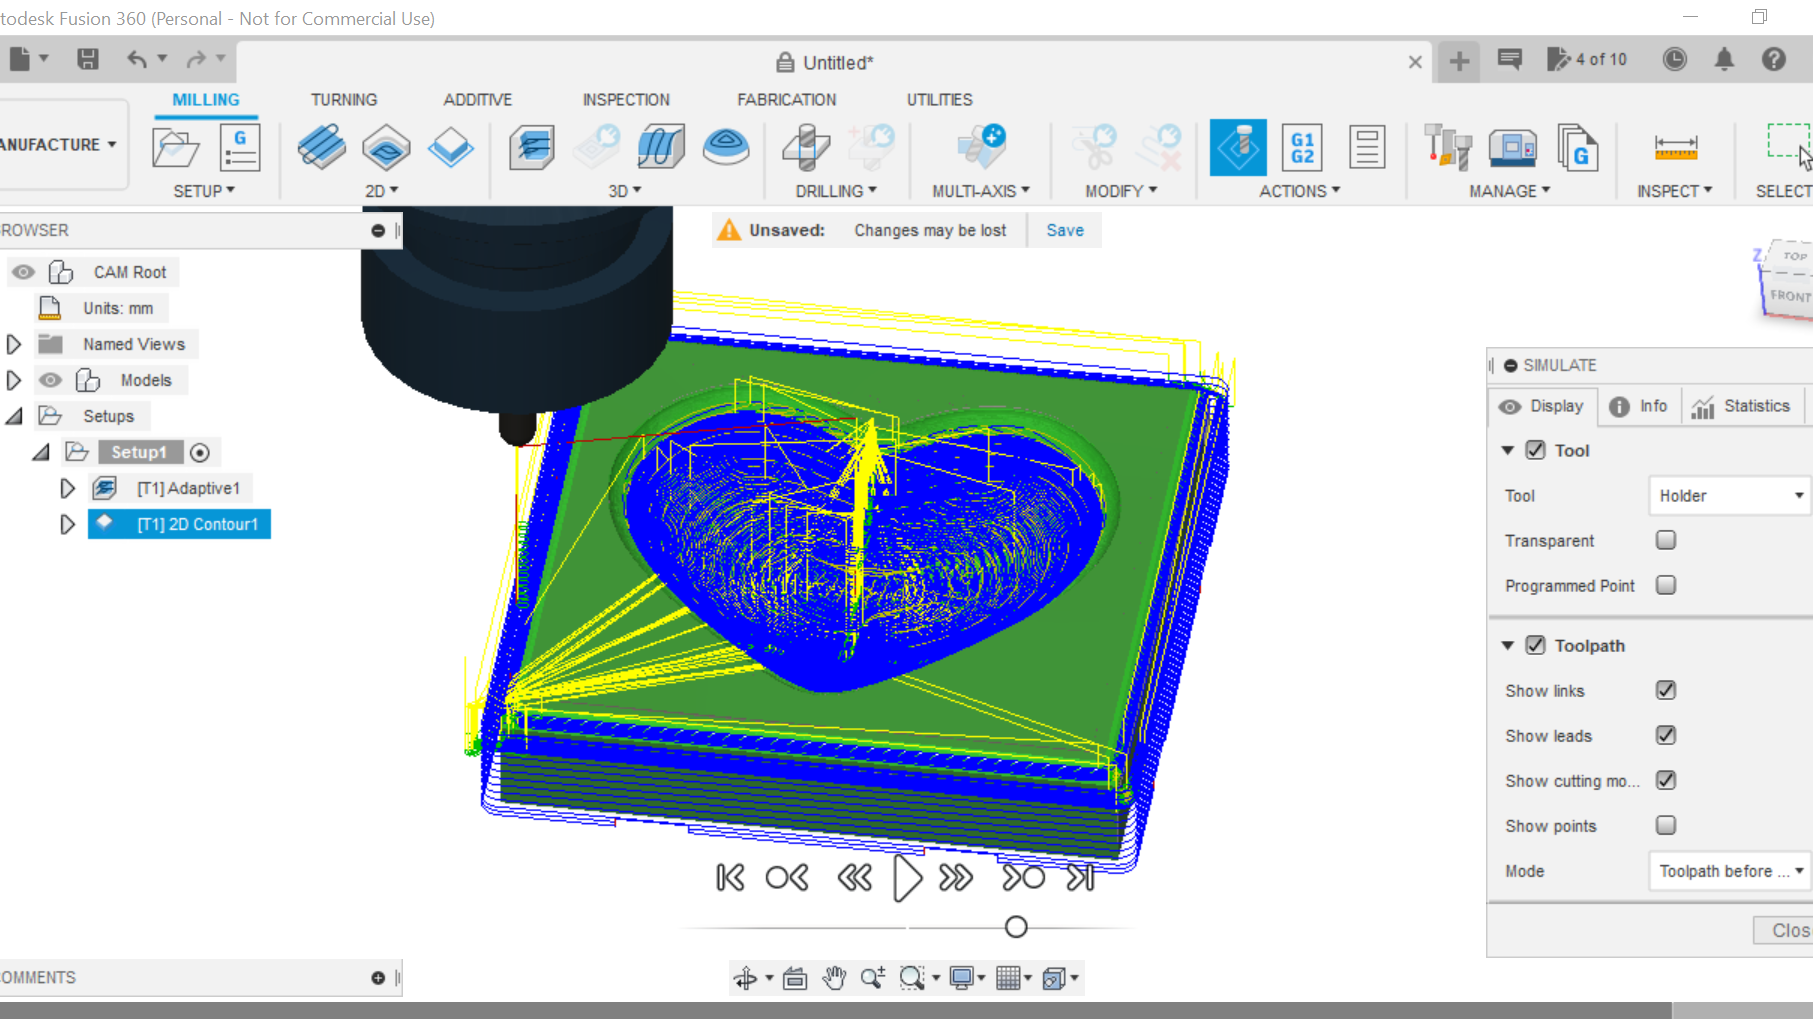
A simulation can be used to ensure the cut is clean with no conflictions.
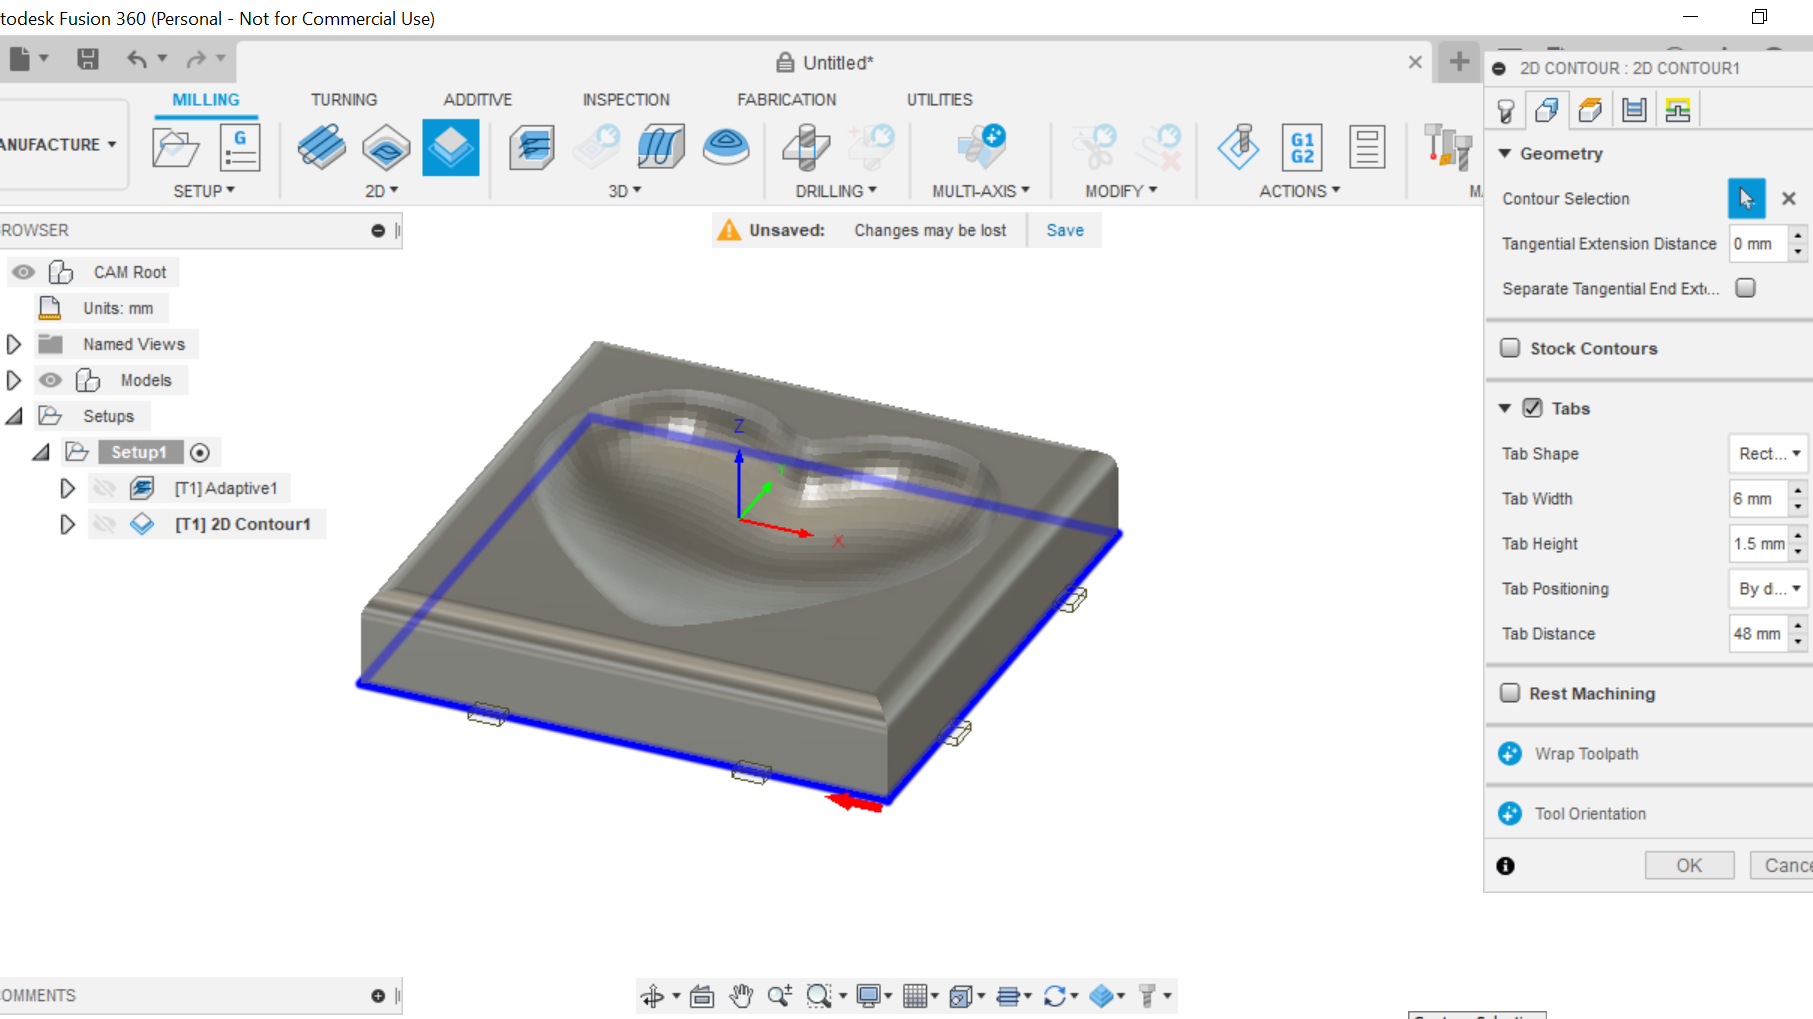
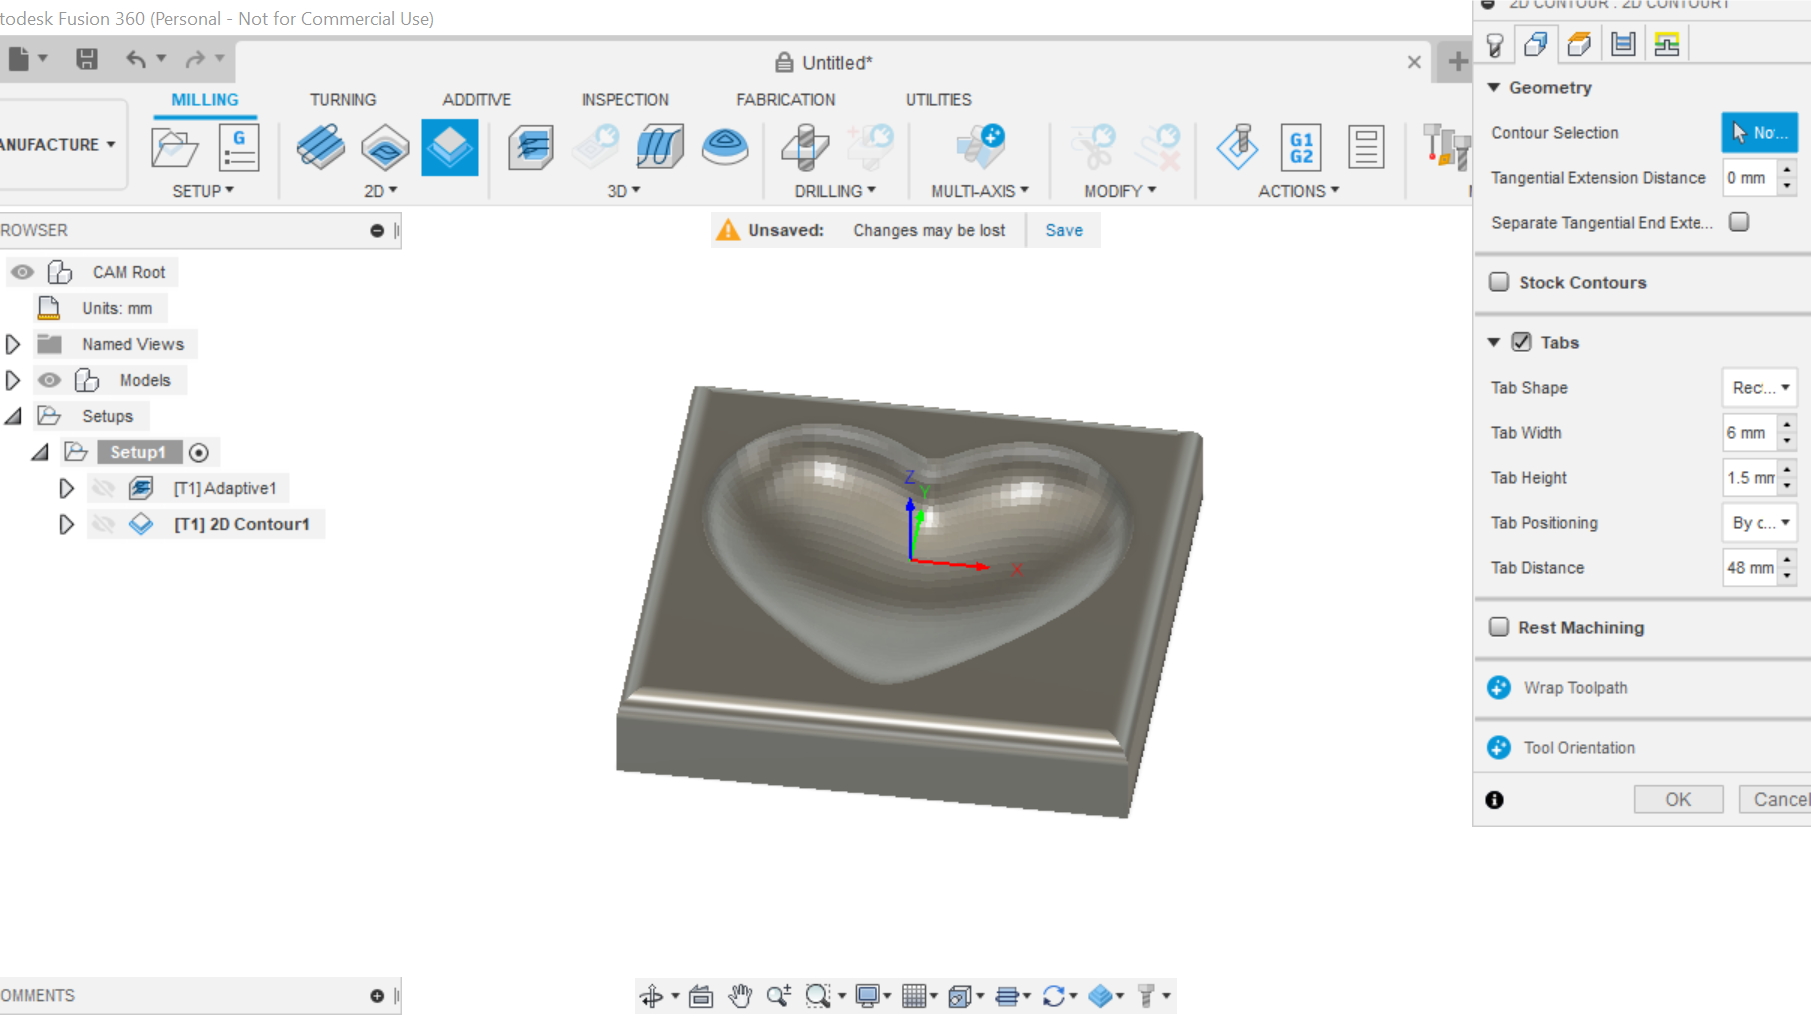
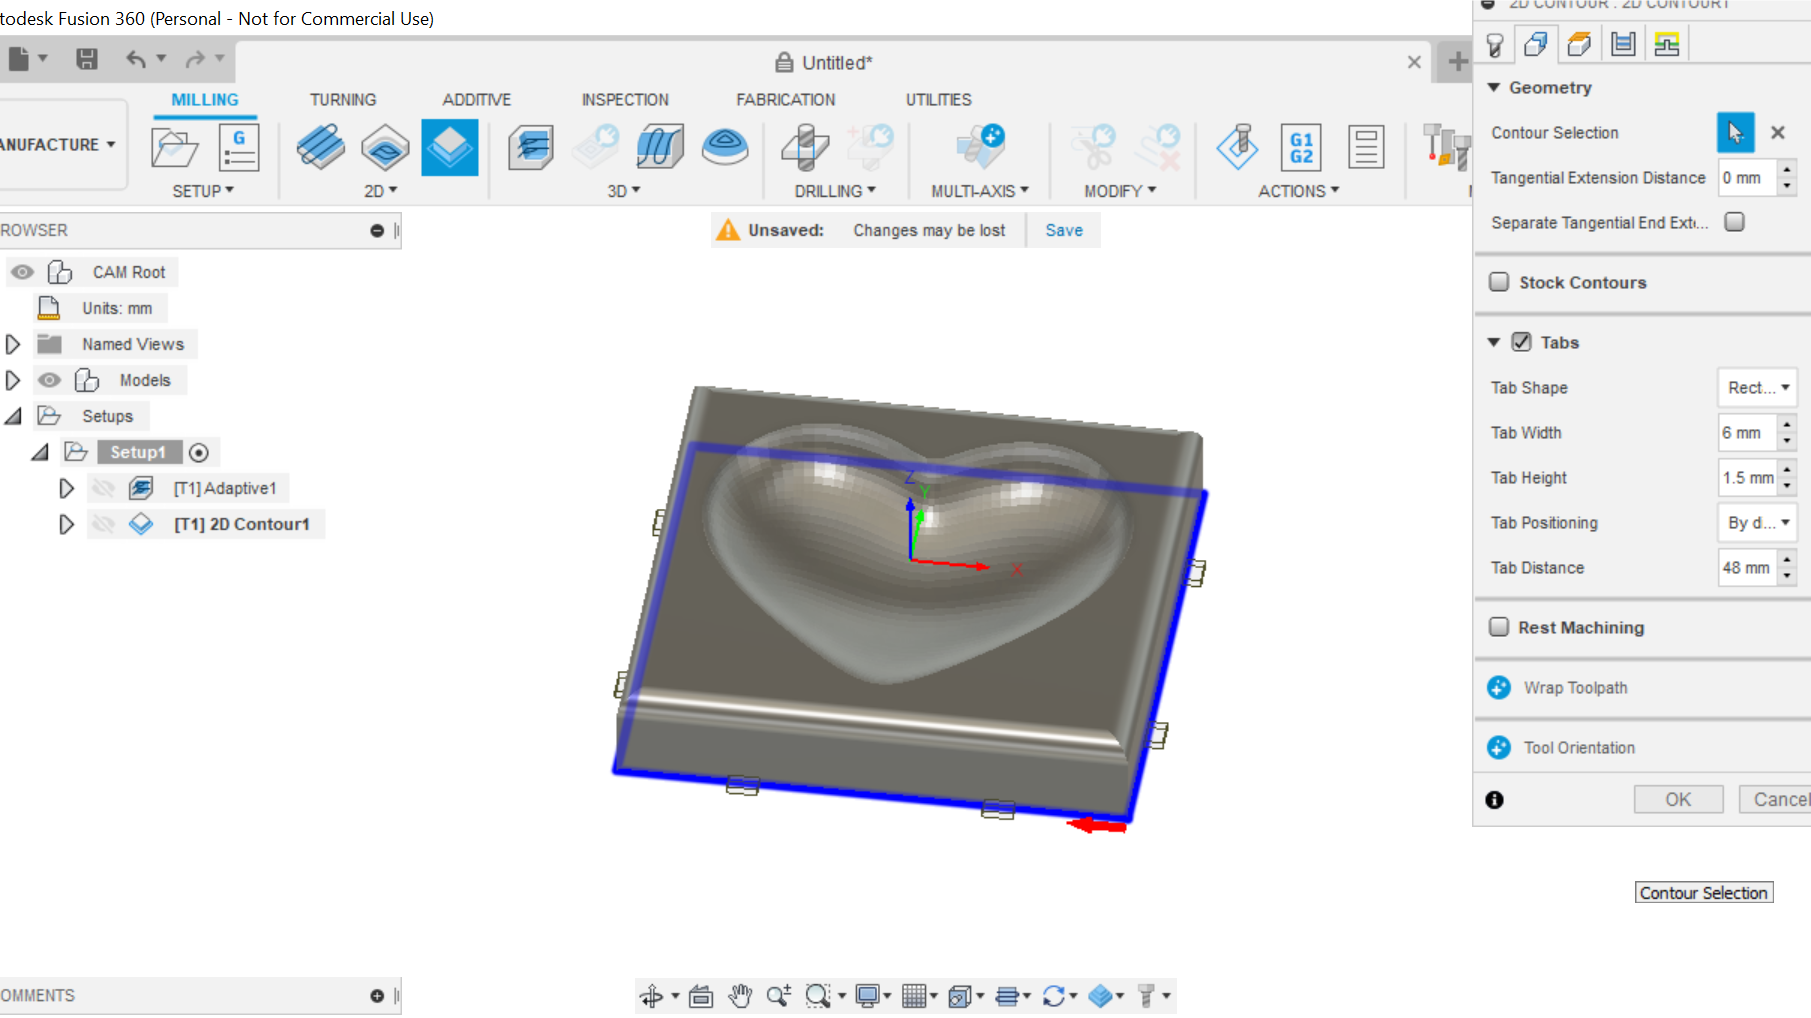
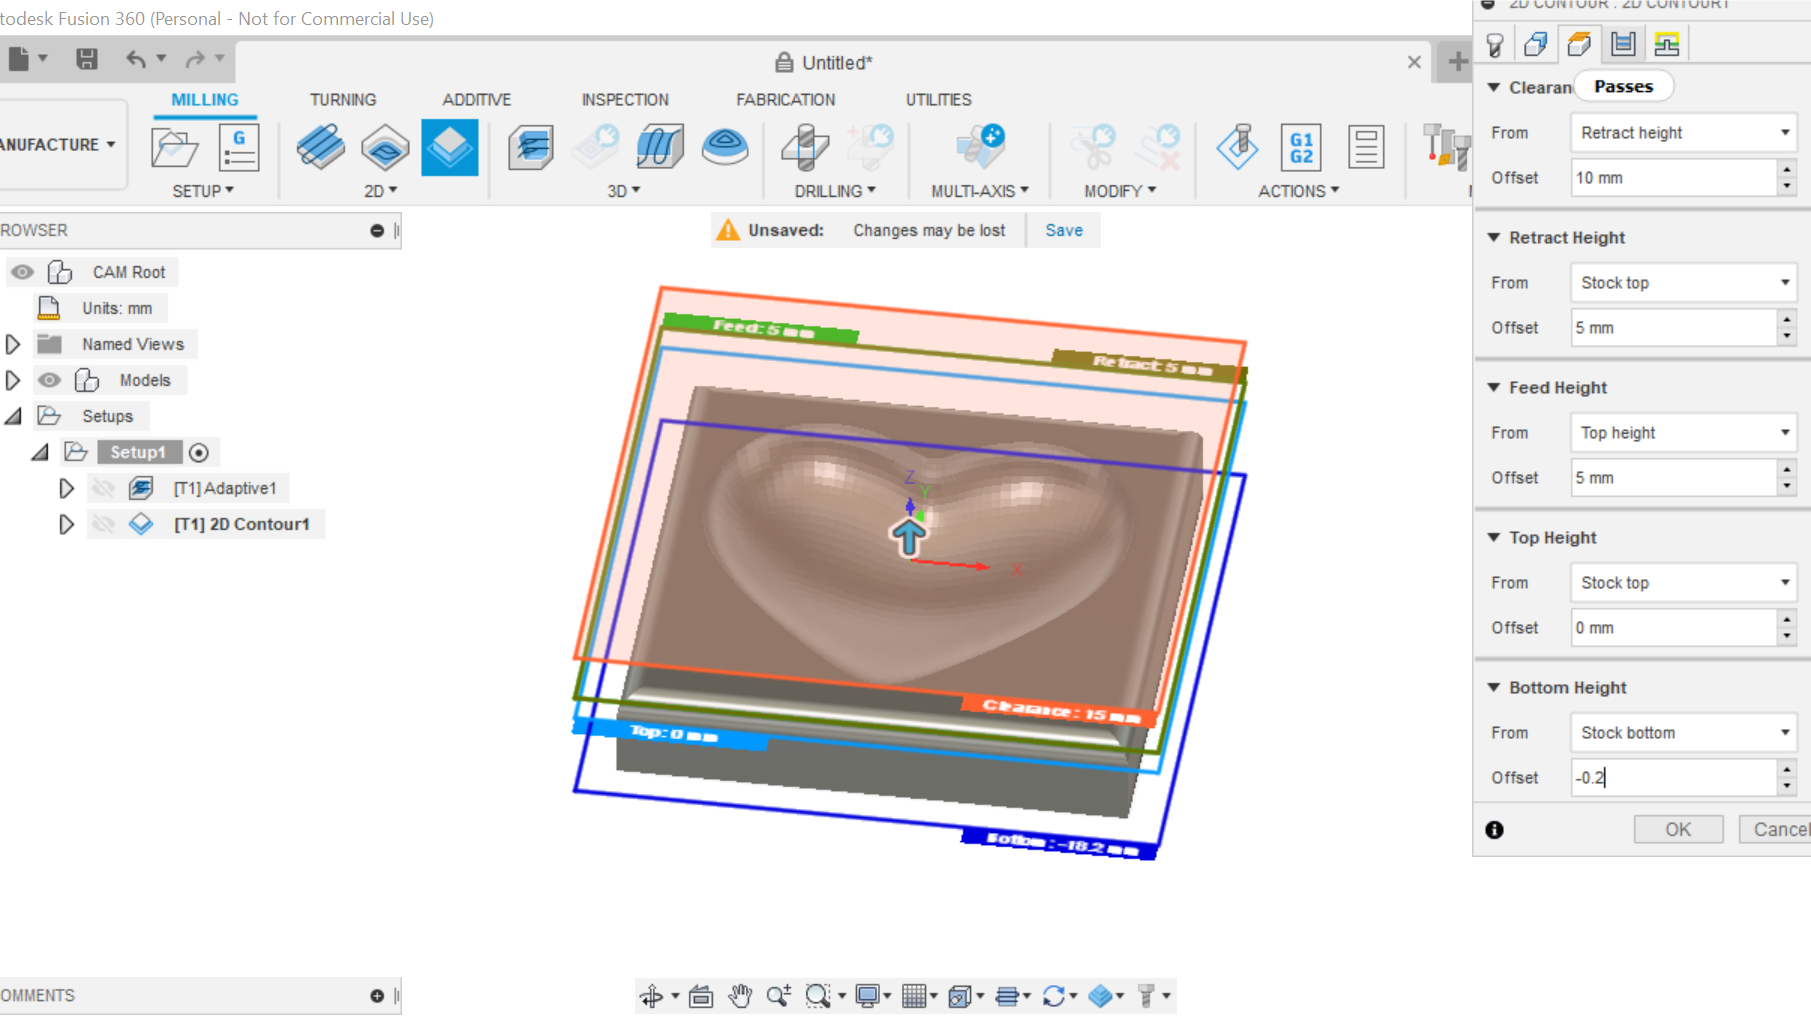
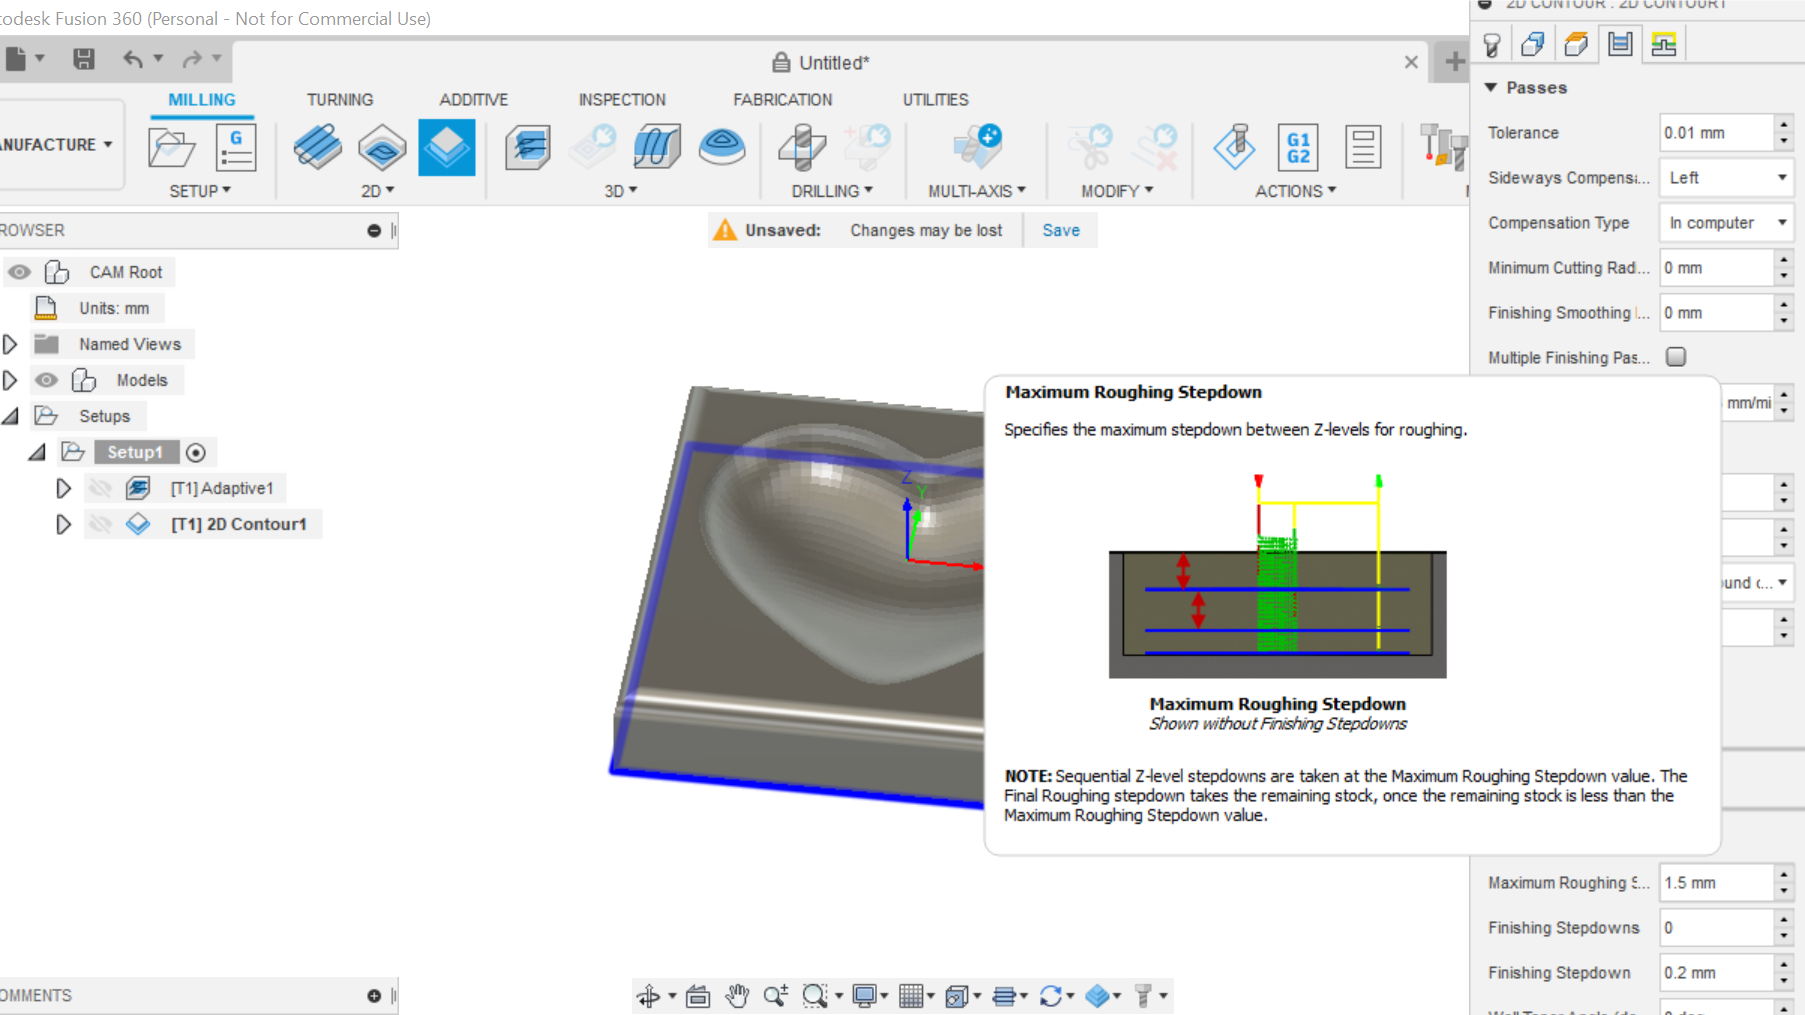
Cutting Out the Workpiece Using the 2D Contour Tab
.png)
.png)
.png)
.png)
.png)
.png)
.png)
.png)
.png)
.png)
In this section we leave the Router bit as is, coolant is disabled, Speed remains the same.
In the geometry tab we select the bottom of the workpiece, and click on the Tabs box, you can then select what size tabs you require.
In the heights section, select the bottom height, within the drop down box select (Stock Bottom) I make this dimension -0.2 so it cuts out the piece leaving the Tabs holding the piece in place.
Run the simulator once again to ensure no conflicts.
We can now Combine both the adaptive clearing and contour cuts into one process as we are using the same bit,
To do this press control on the keyboard and click on the eye on both the adaptive cutting and contour, and click on both Tabs while holding down the Control key. The G.code will now include both cuts.
We now select the Post Process to Generate the G.code save this file to, in my case Desktop, then I can send it to the CNC machine.
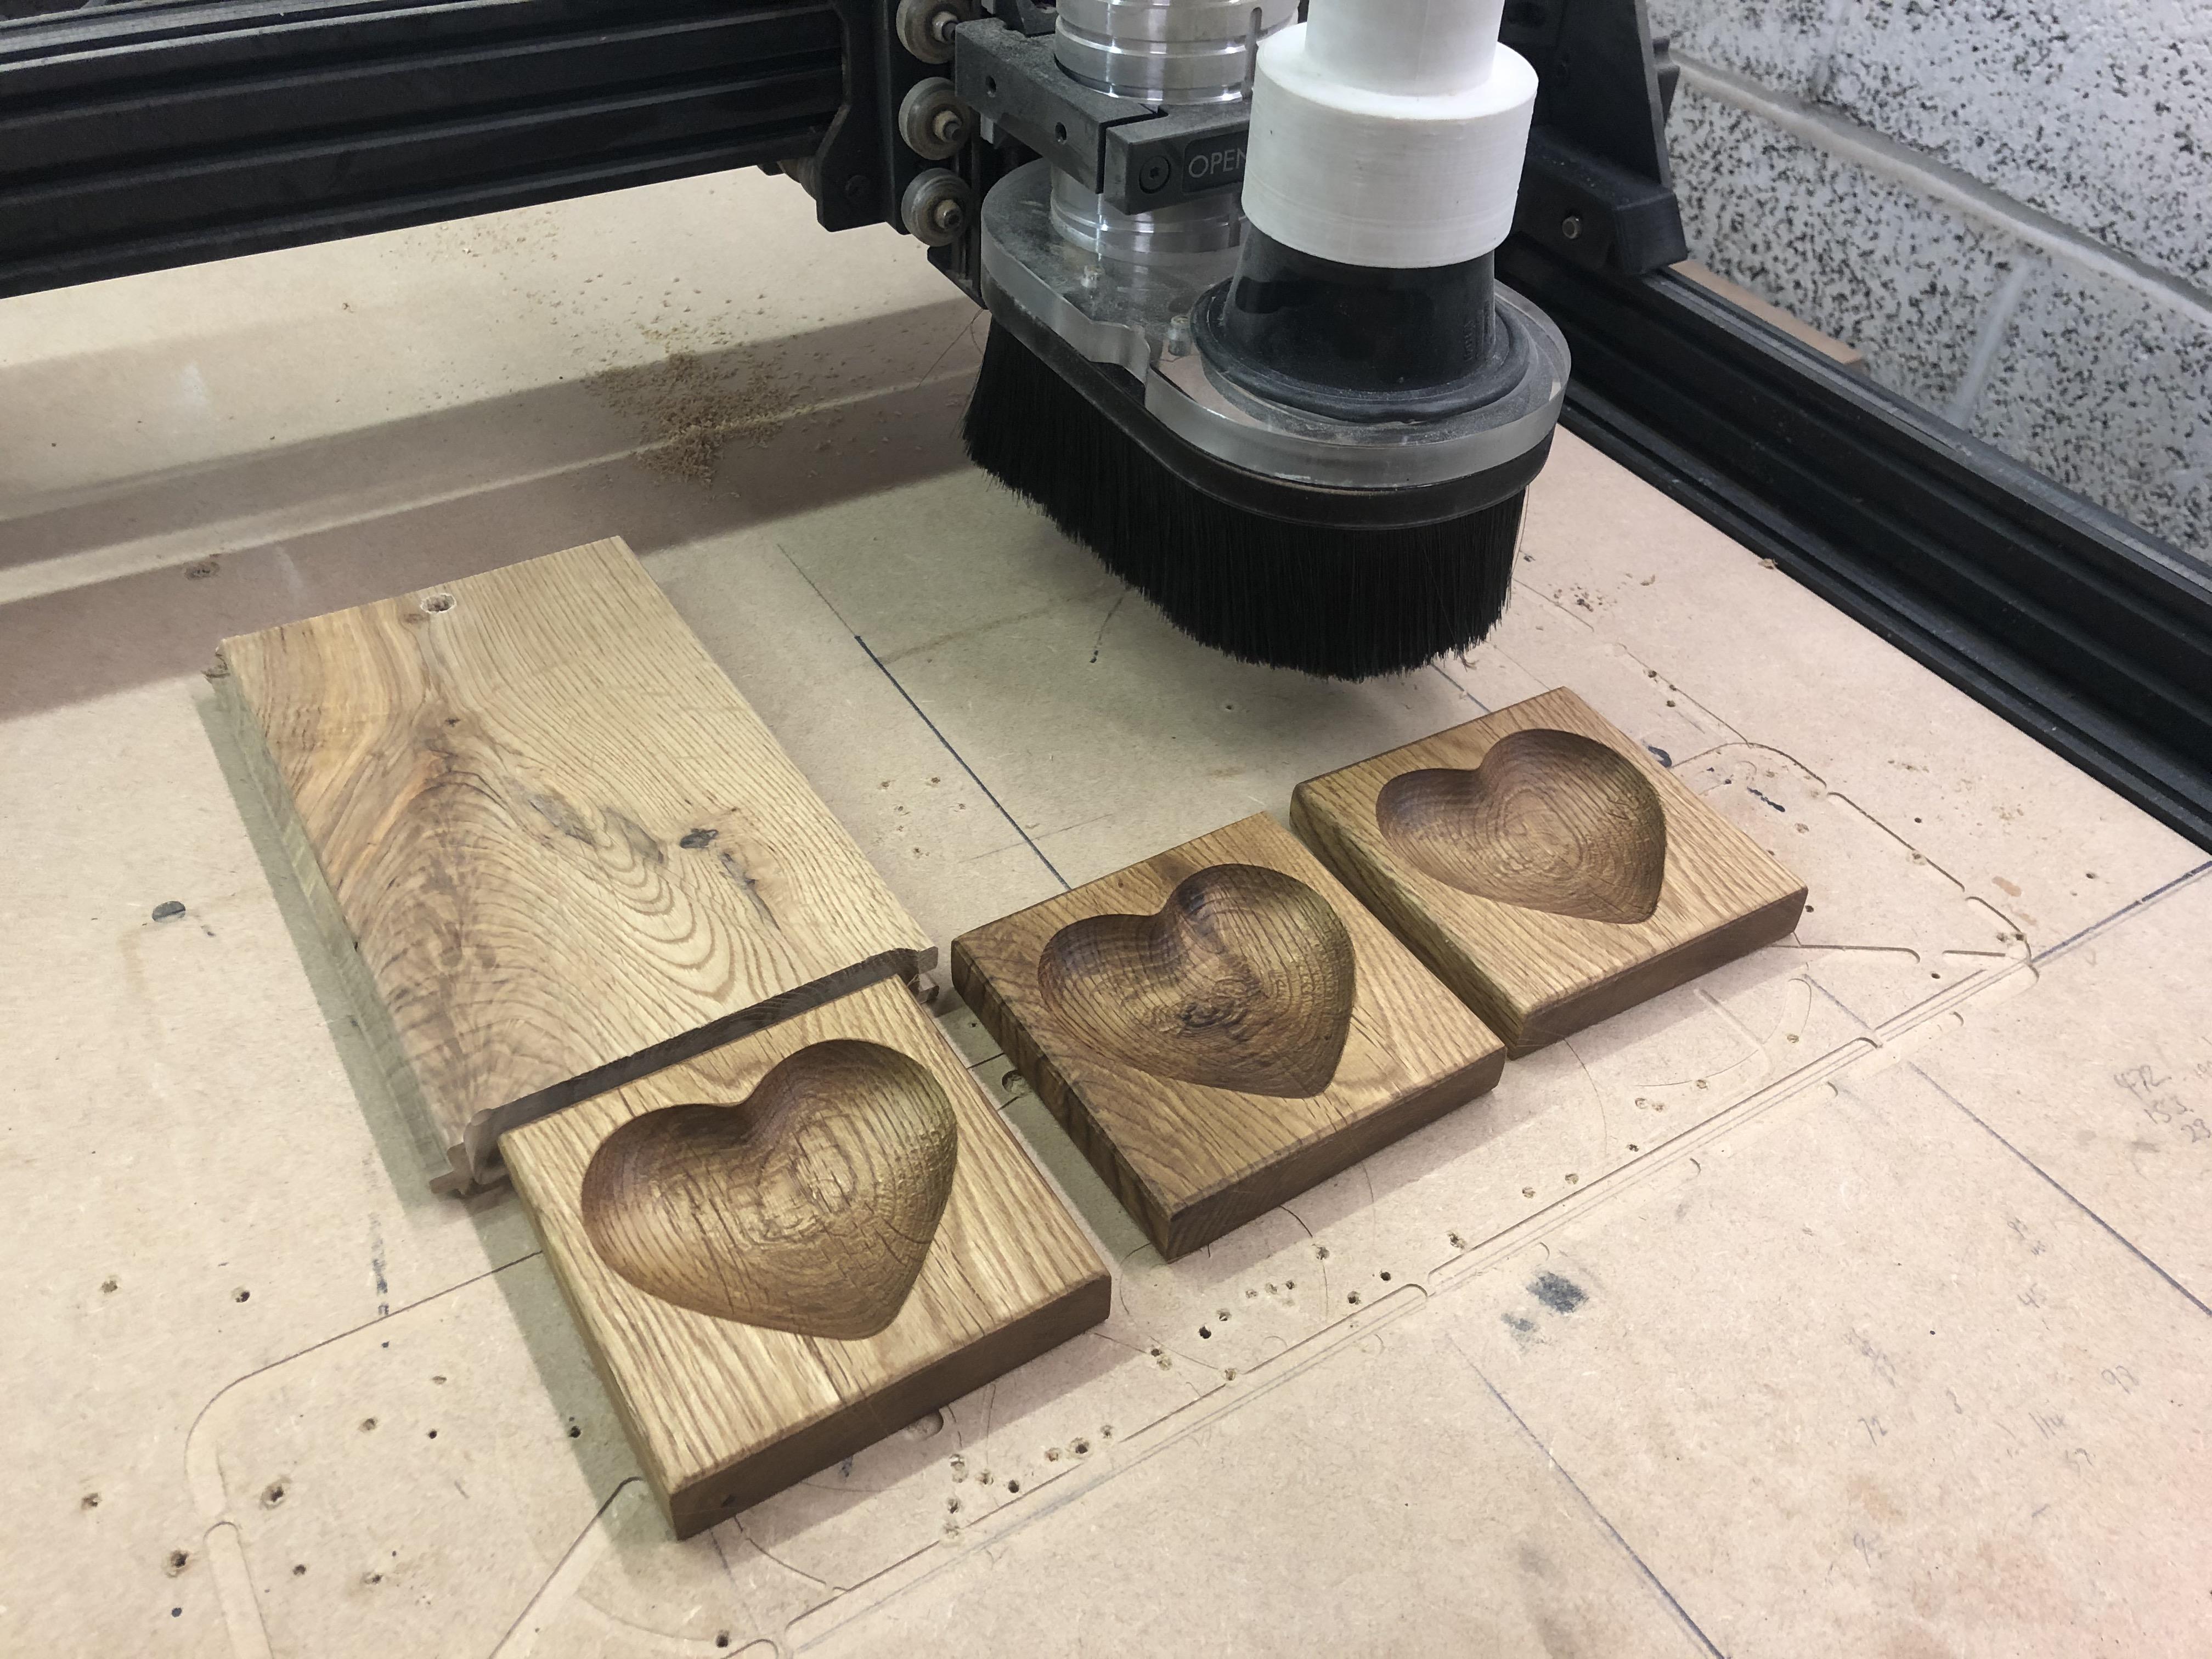
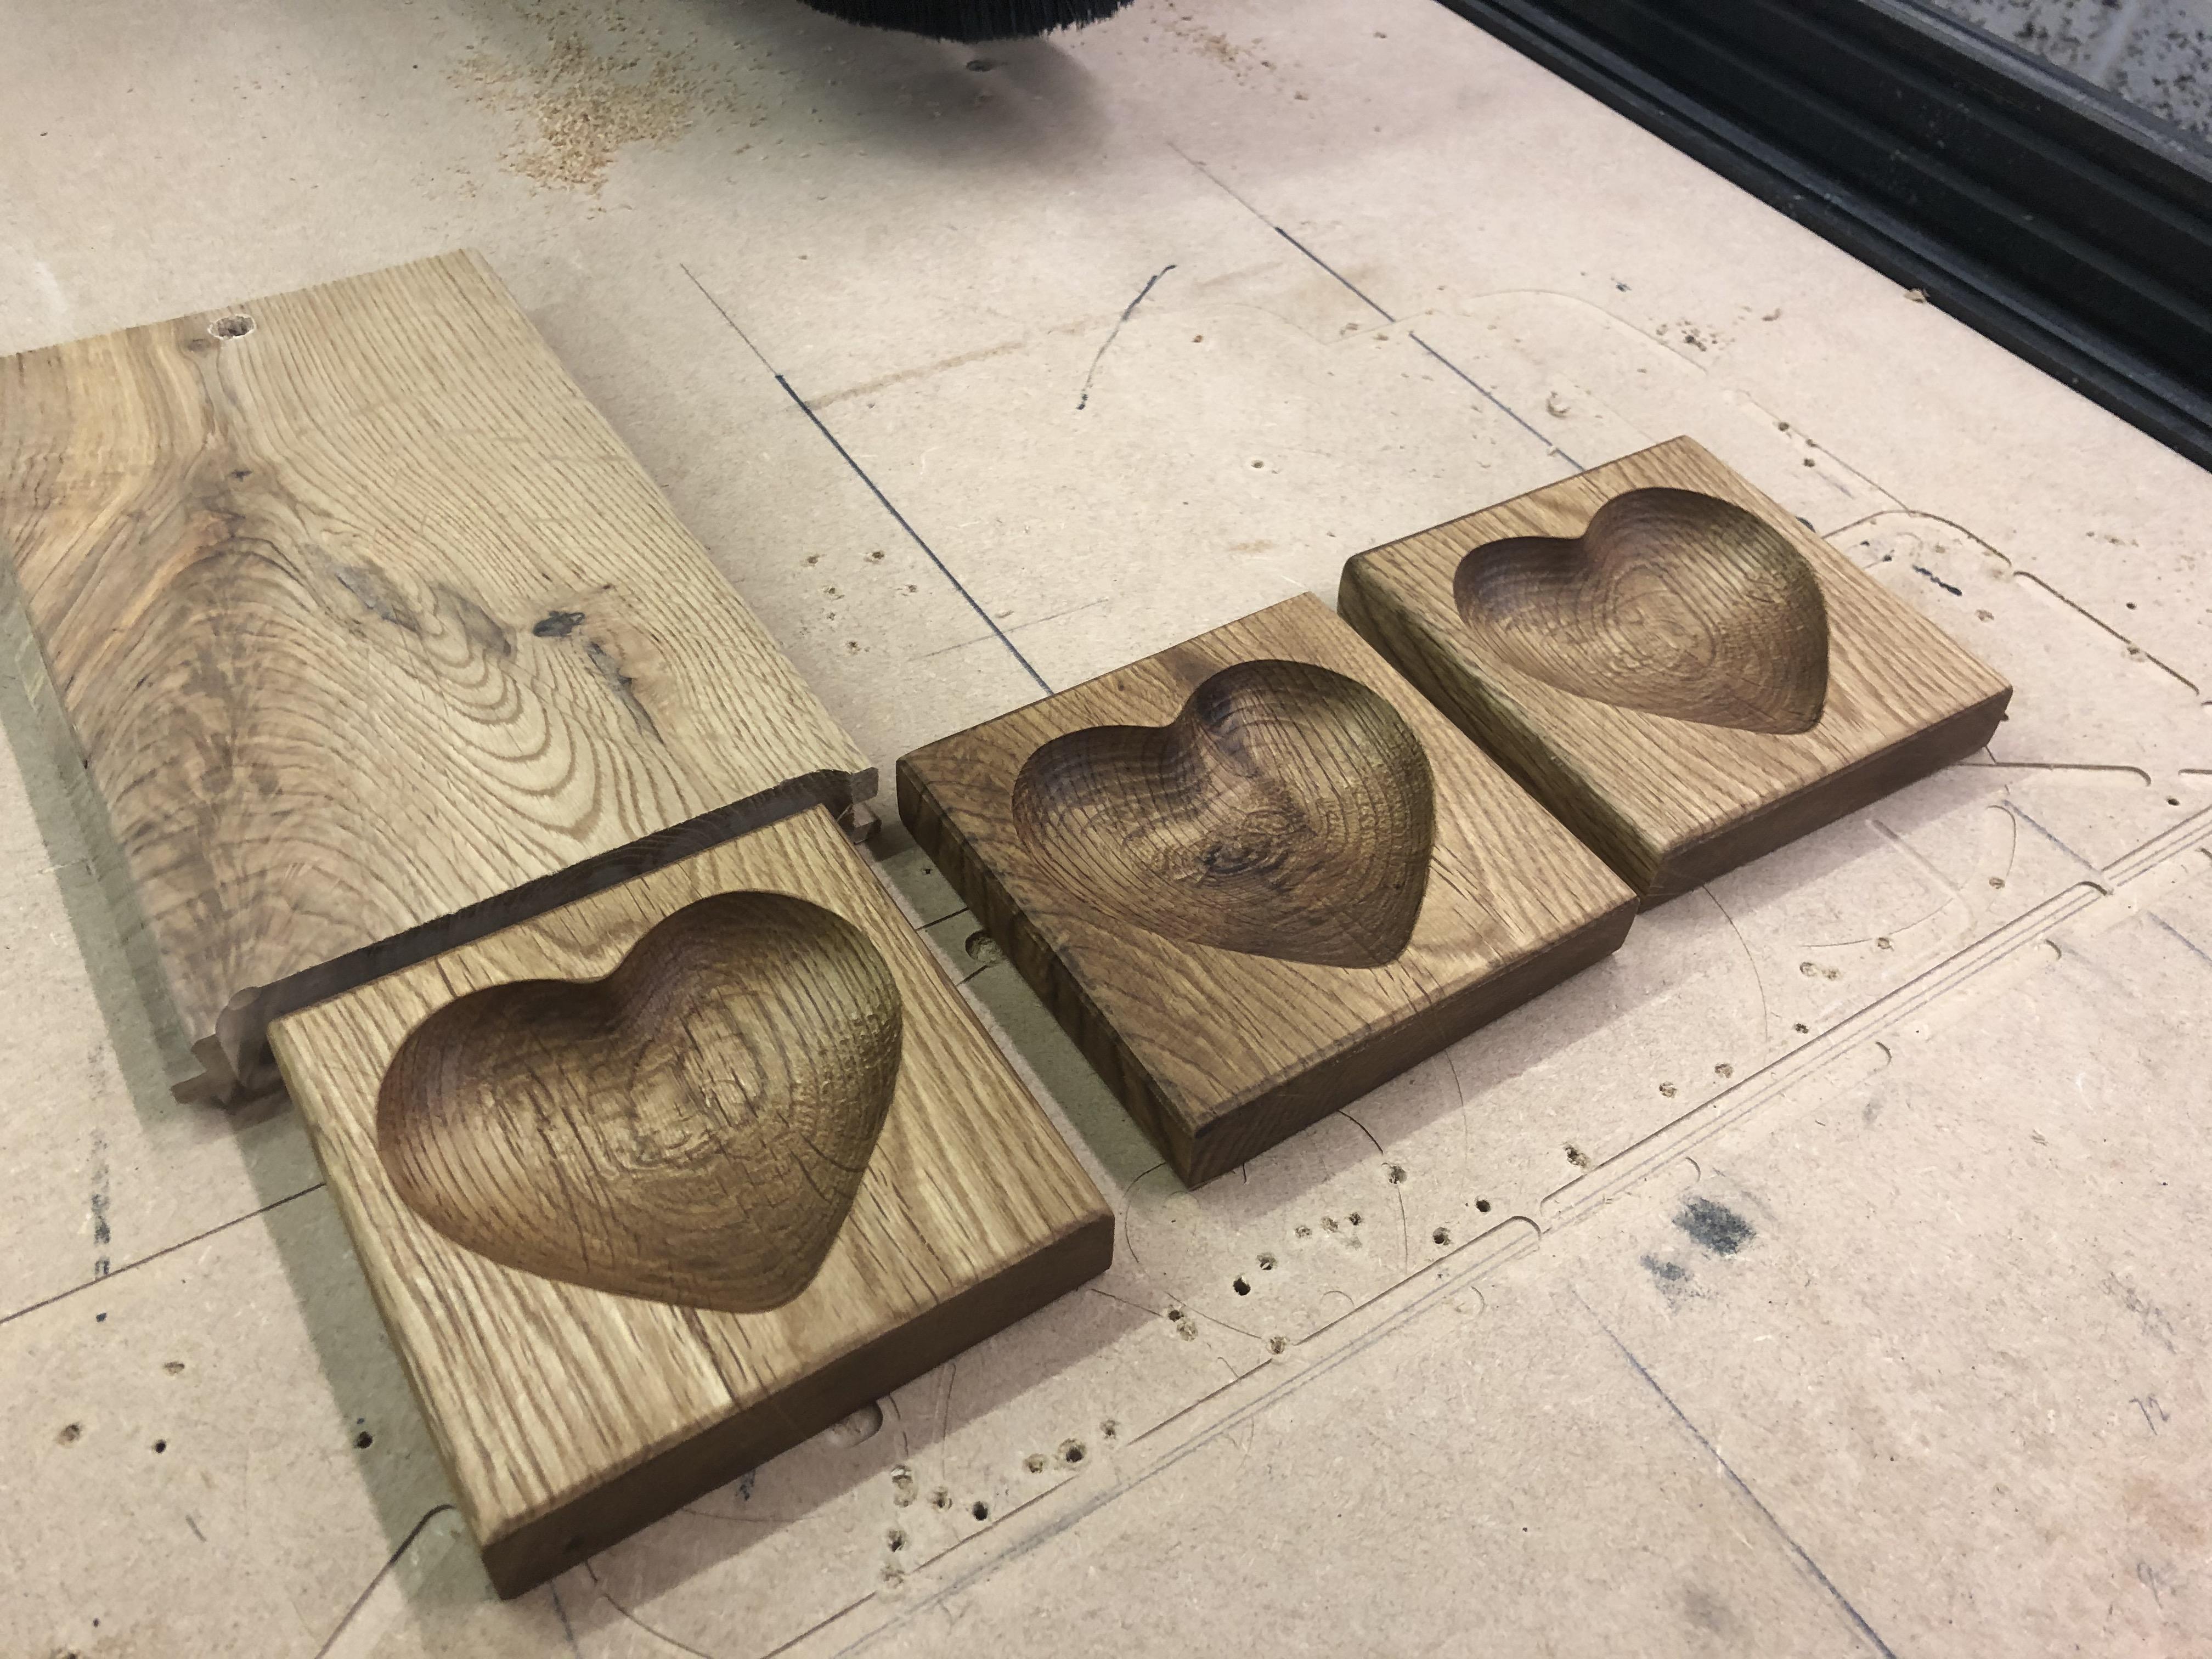
The Finished Piece
To finish off the scalloped heart we only need to lightly sand the cutting area and then finish off with either Boiled Linseed oil or Danish oil.
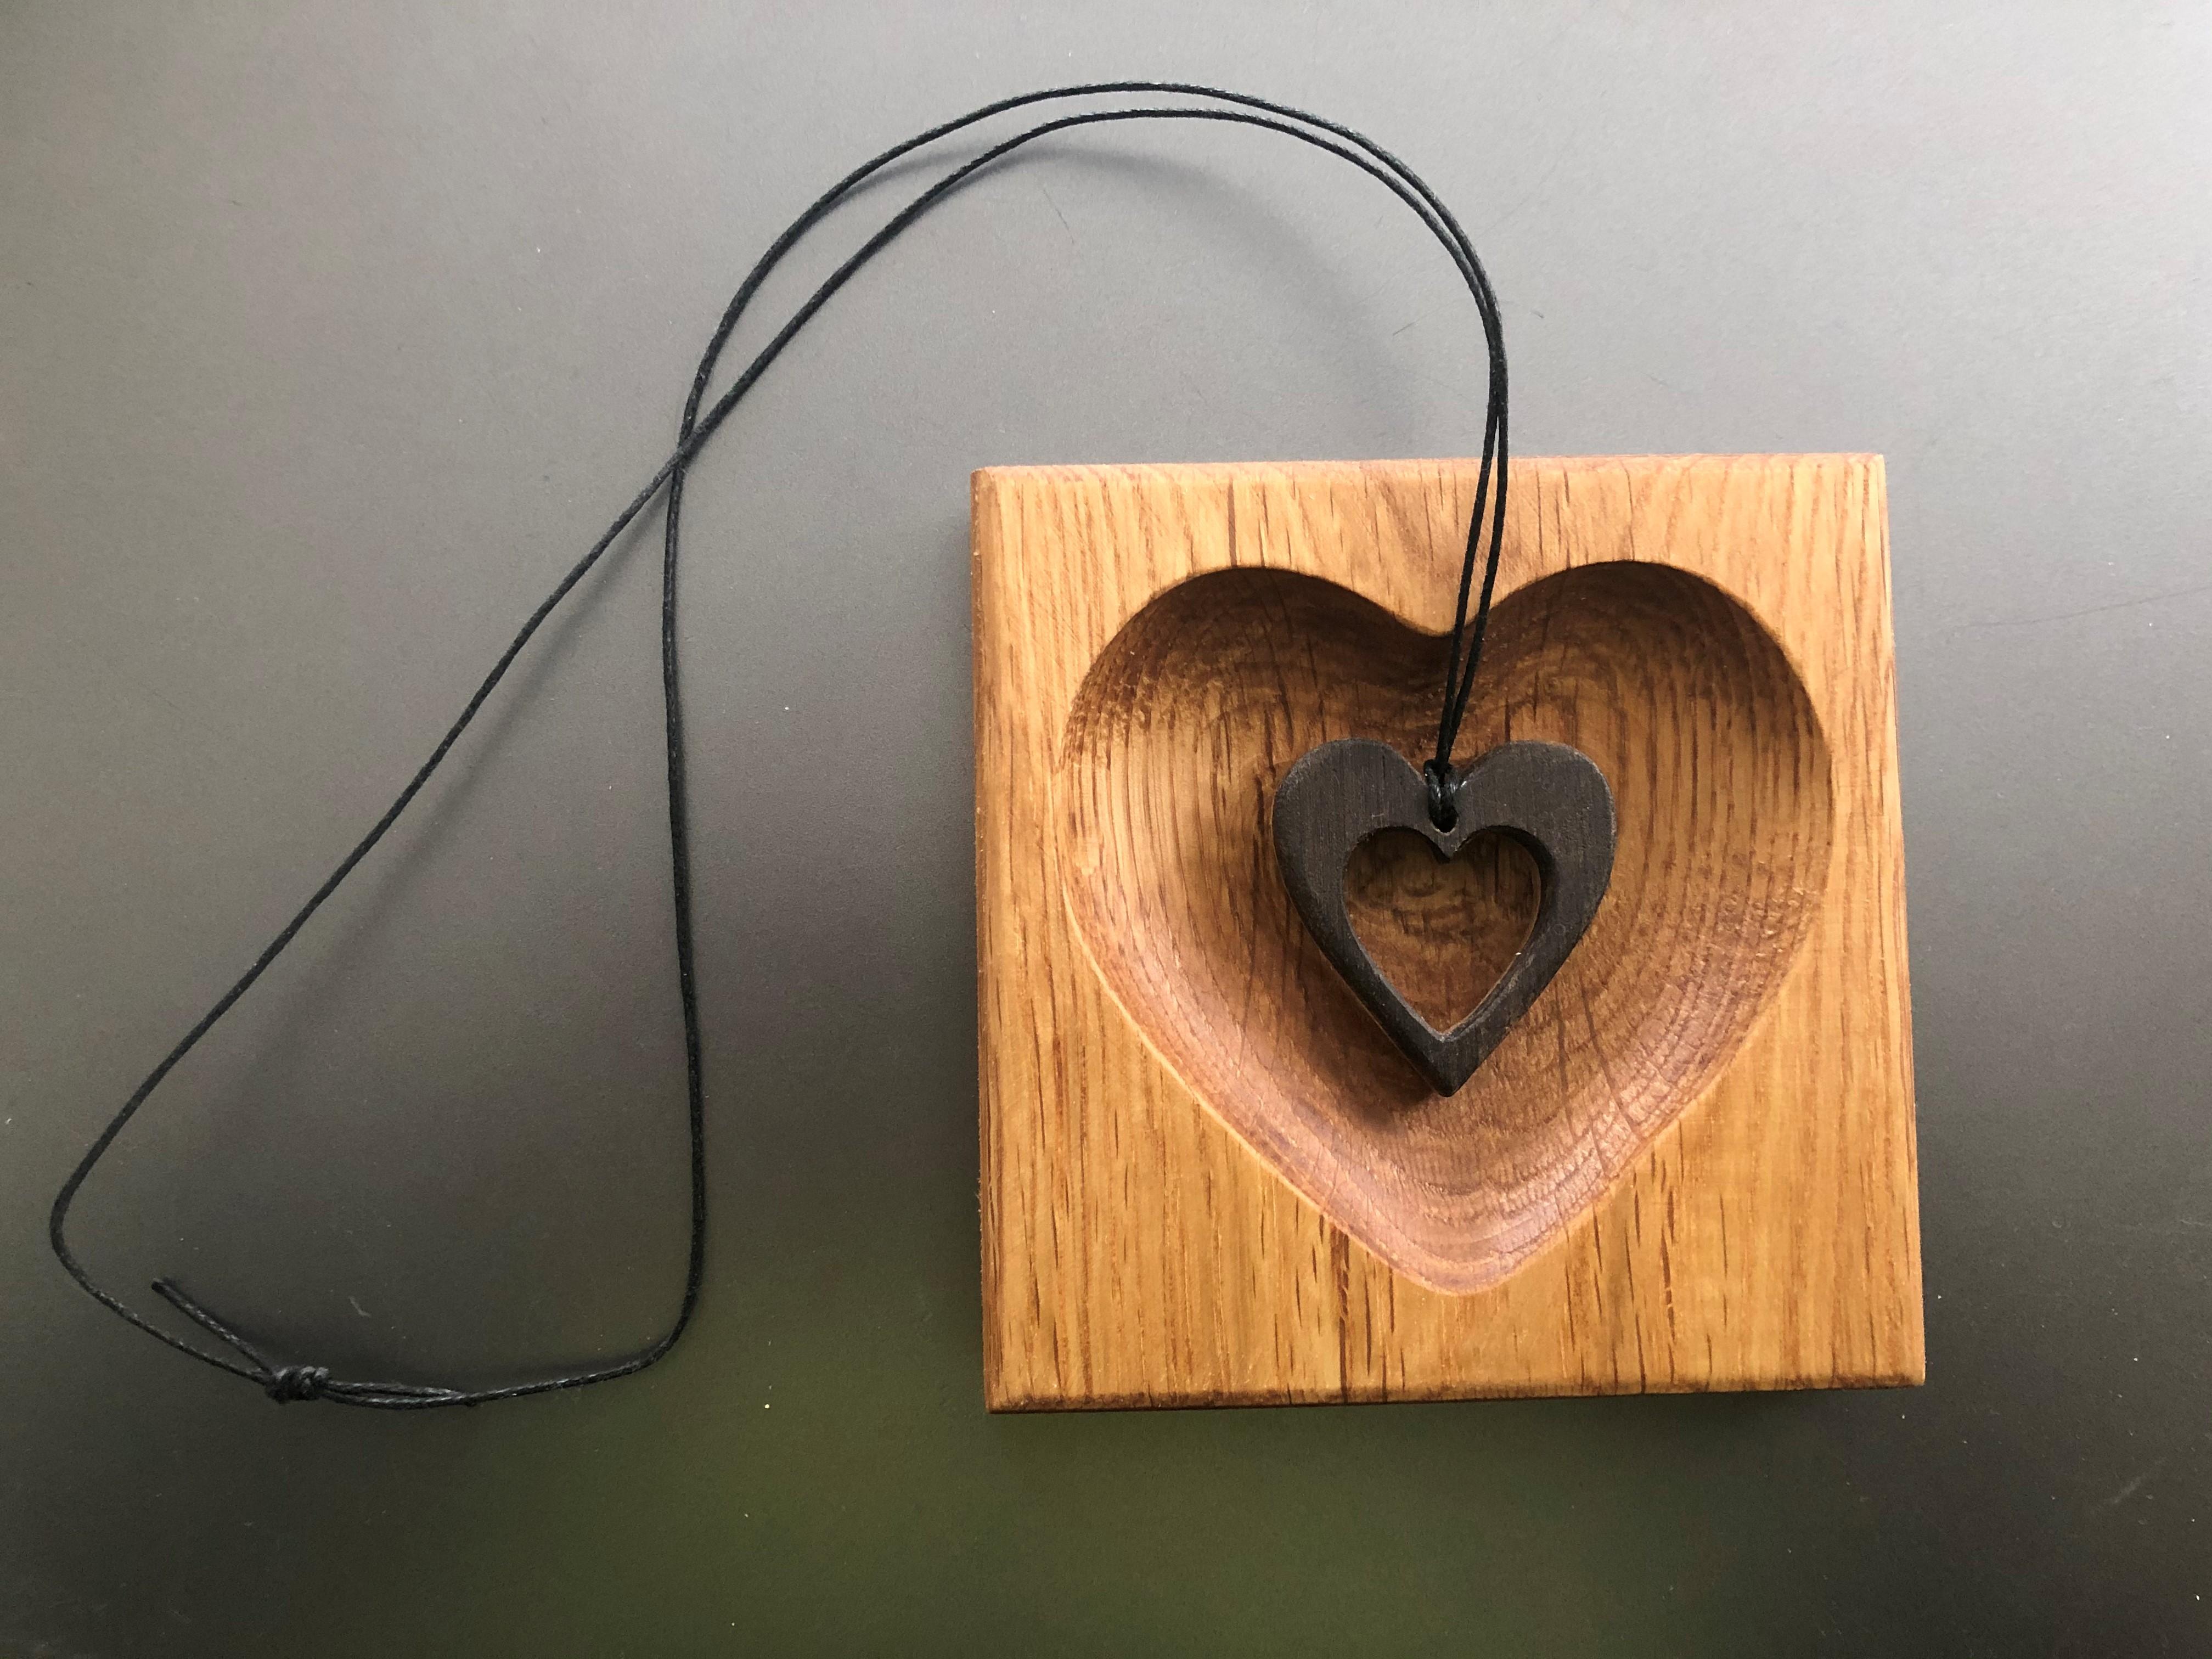
They make excellent gifts i:e Valentines, Mothers day or just a gift for a loved one.
They can be used purely as a decorative ornament or a Trinket tray for earrings etc. That ends this Instructable, thanks for looking and I hope it gives you some pointers with Fusion 360.