Sanggul Lintang - a Javanese Crown-like Headpiece
by 2431 in Design > Digital Graphics
1275 Views, 1 Favorites, 0 Comments
Sanggul Lintang - a Javanese Crown-like Headpiece
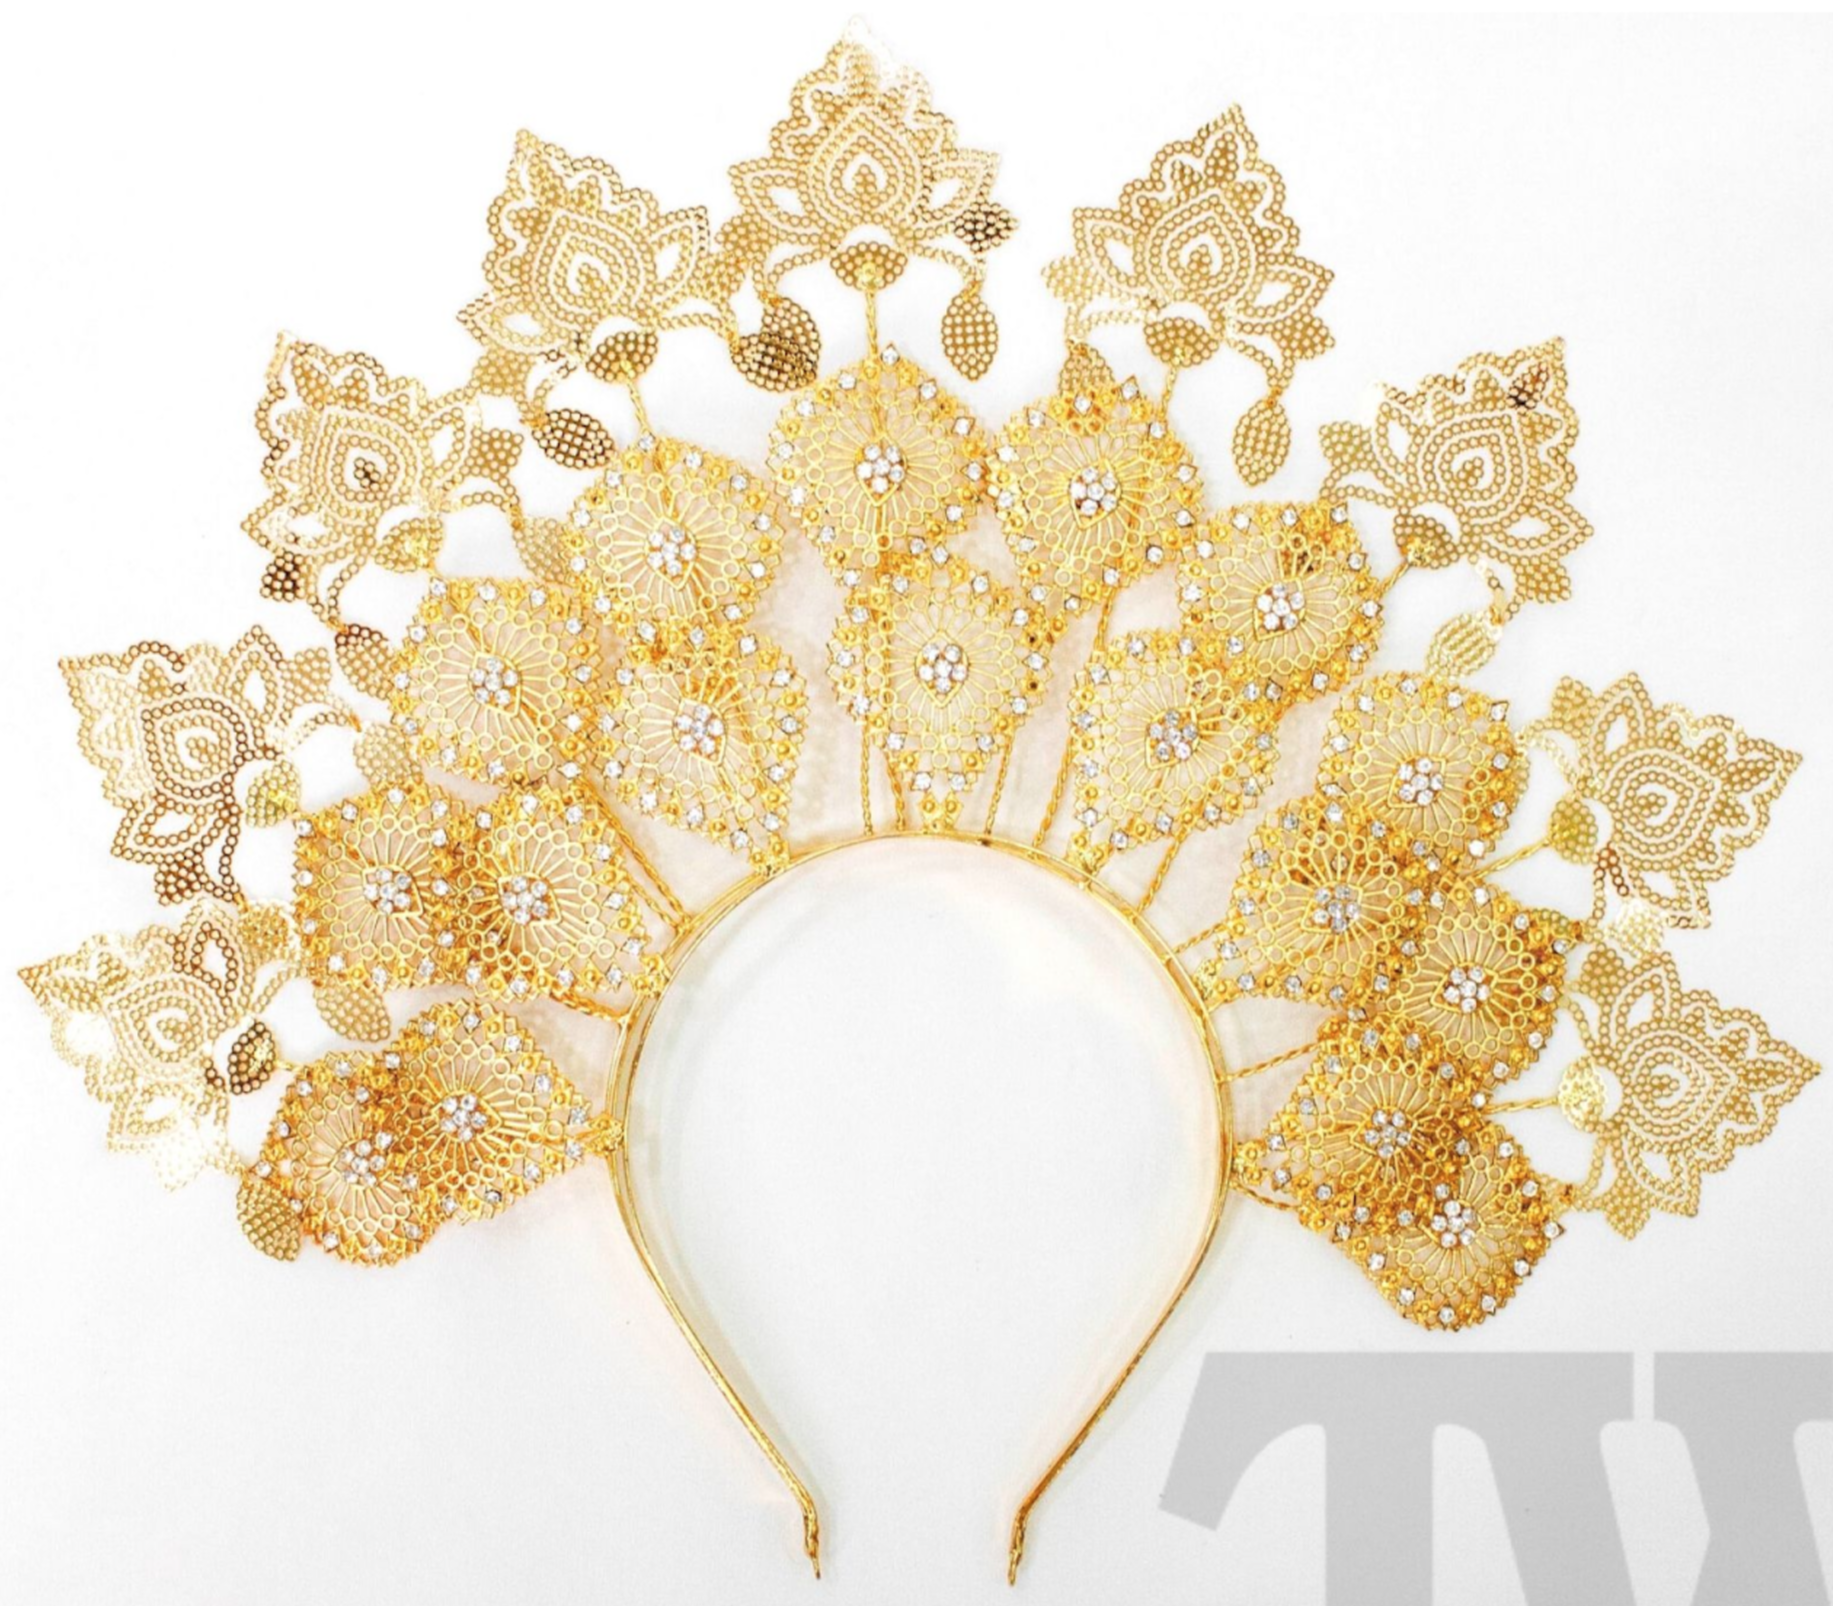


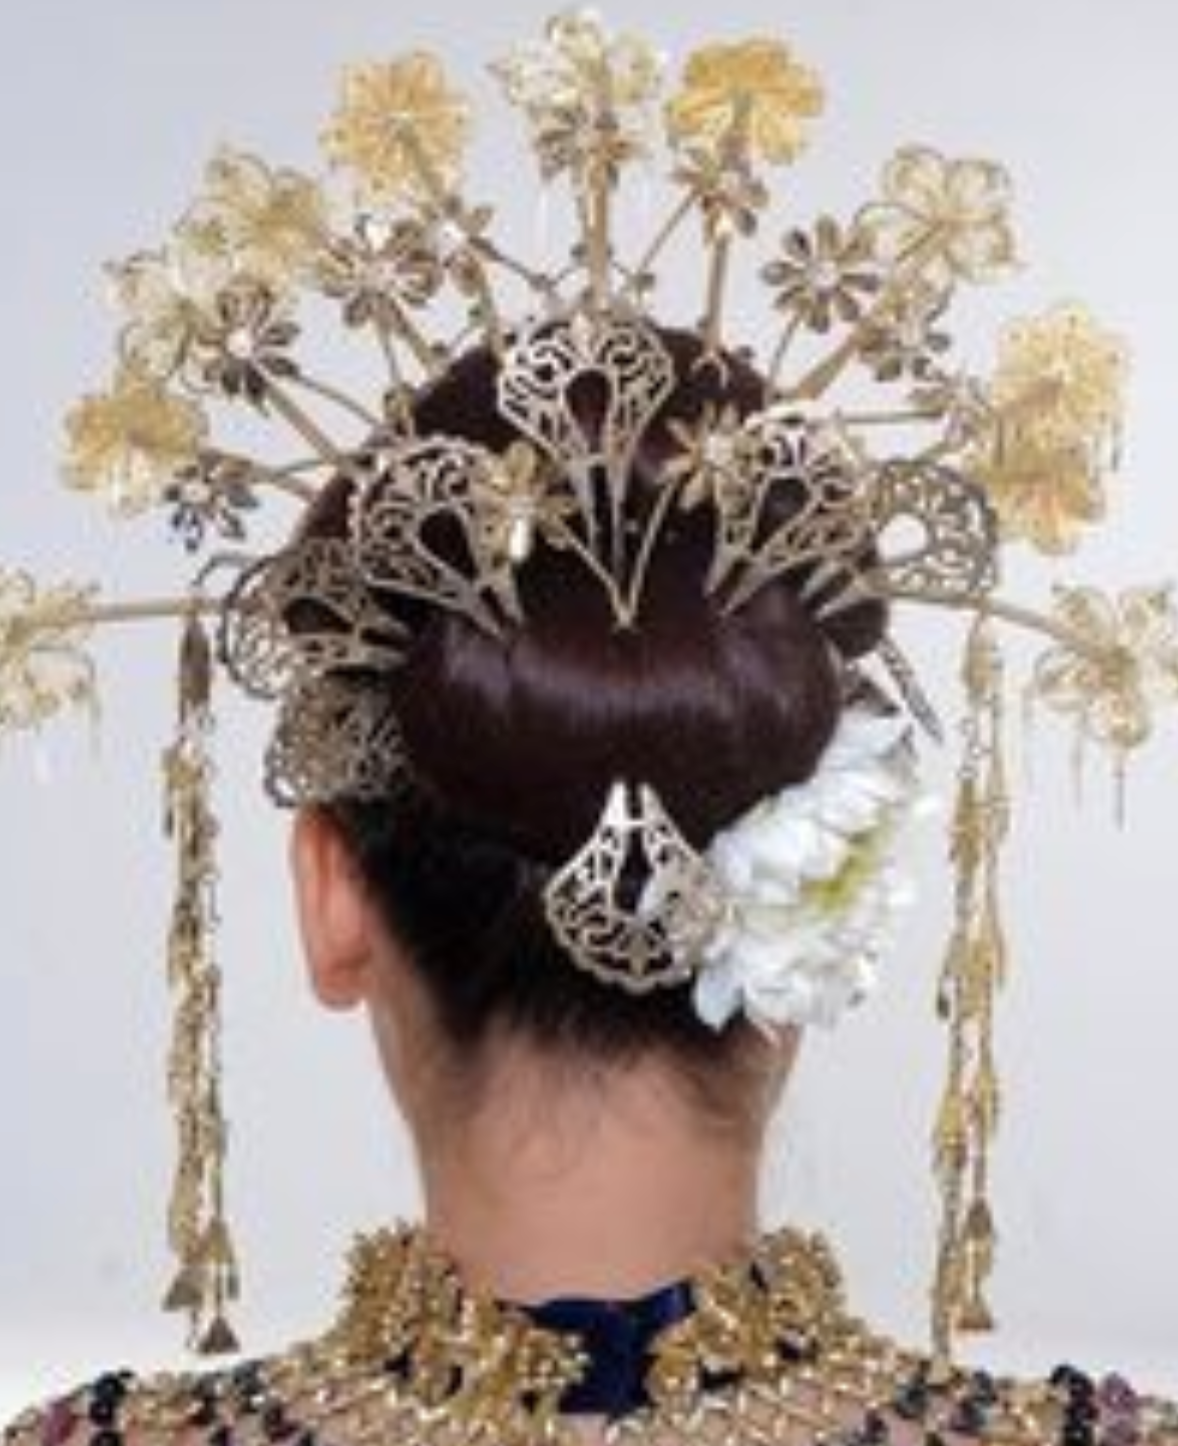

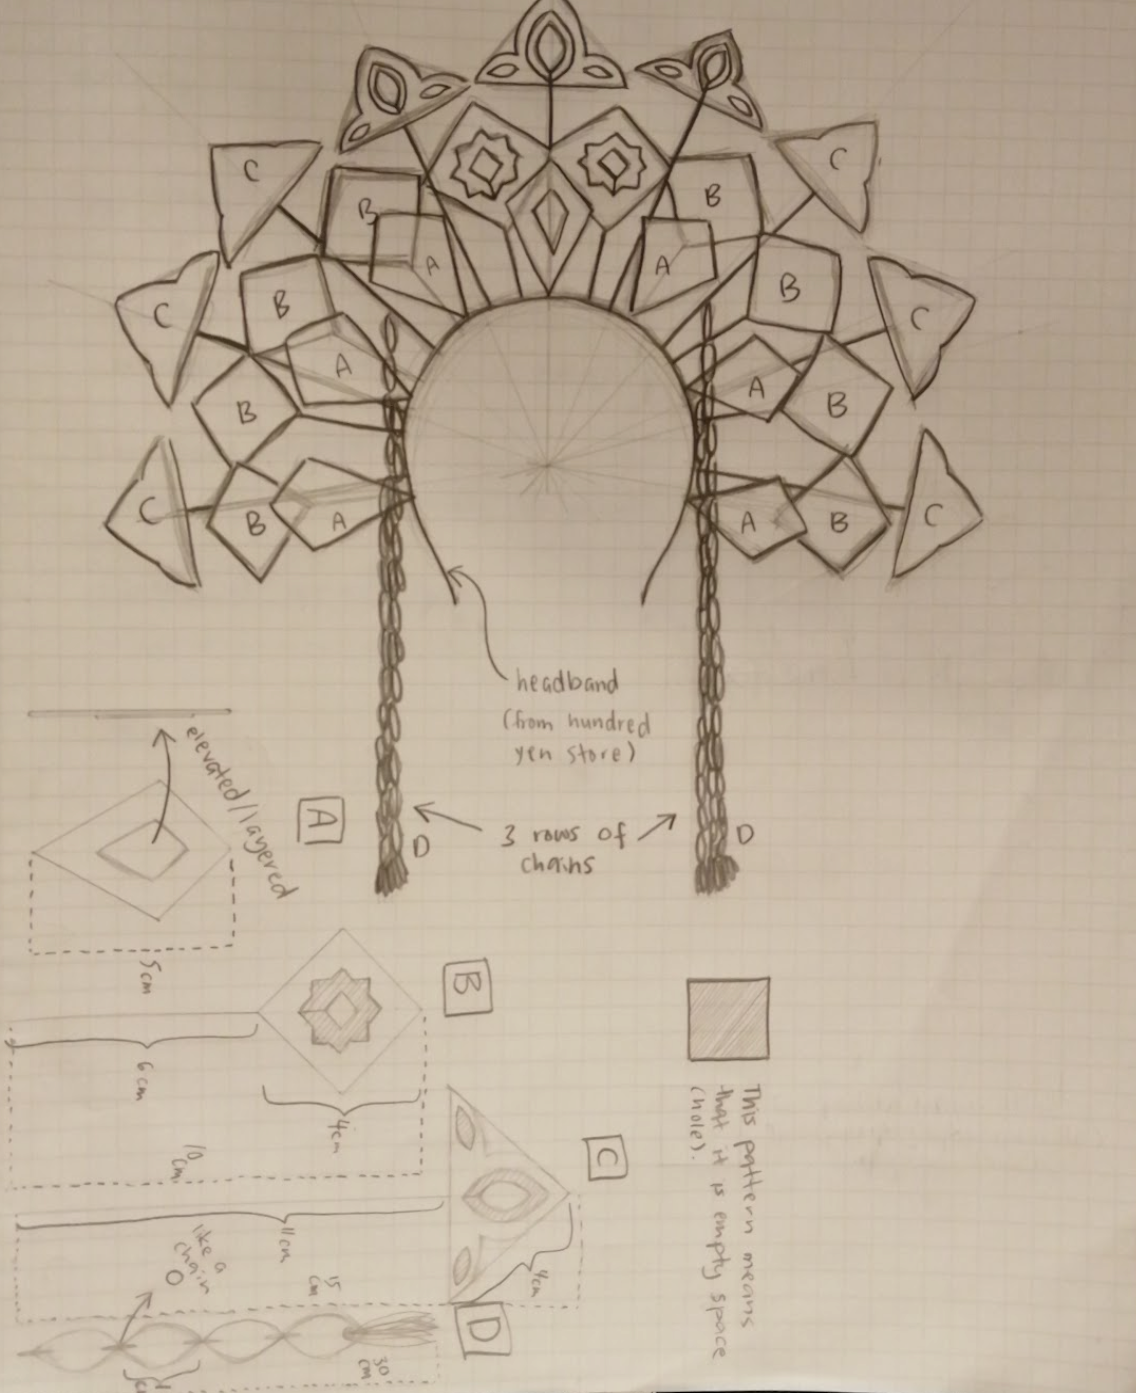
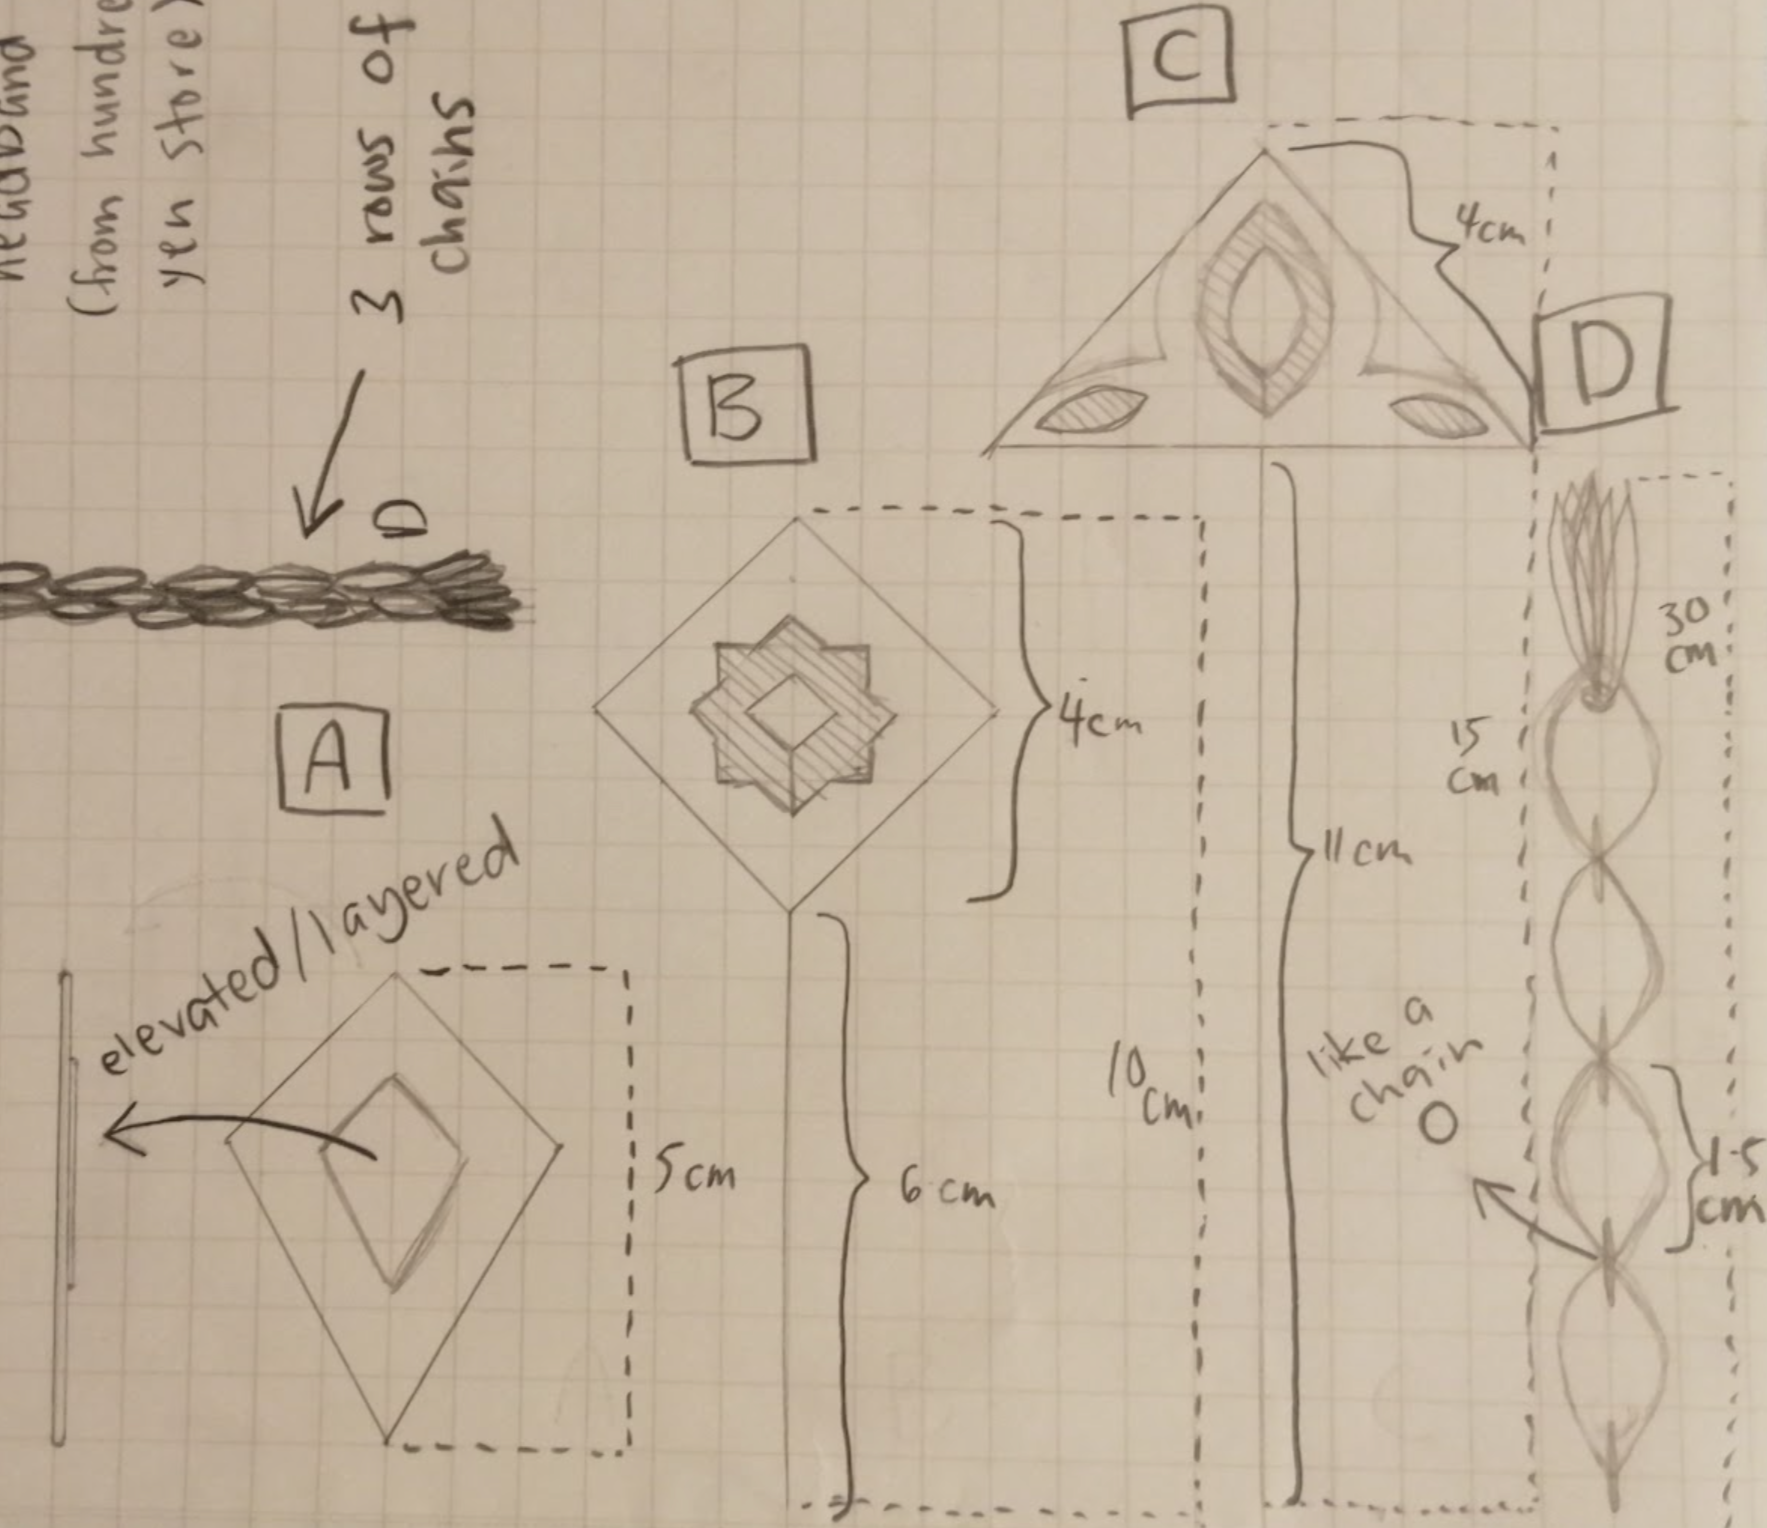
Here are images of what a Sanggul Lintang is, and the last two images are sketches I made to plan my design. I do not have a photo of my finished product yet because this project is to be 3D printed, and I have not had the chance to do so. Instead, what I have available are Tinkercad project files of the four different parts of the Sanggul Lintang I have decided on. In this Instructable, I will walk you through how to make the parts of the Sanggul Lintang using Tinkercad.
Parts:
- Sanggul Lintang A
- Sanggul Lintang B
- Sanggul Lintang C
- Sanggul Lintang D
- A headband (I will be getting mine from a ¥100 store)
Supplies
All you will need for designing this project is a 3D designing website or software, the website of my choice is Tinkercad. After the design of the project is complete, you would have to run your project file through a slicer program to finally be able to print it through a 3D printer.
- 3D designing website or software (Tinkercad)
- Slicer program
- 3D printer
Sanggul Lintang A
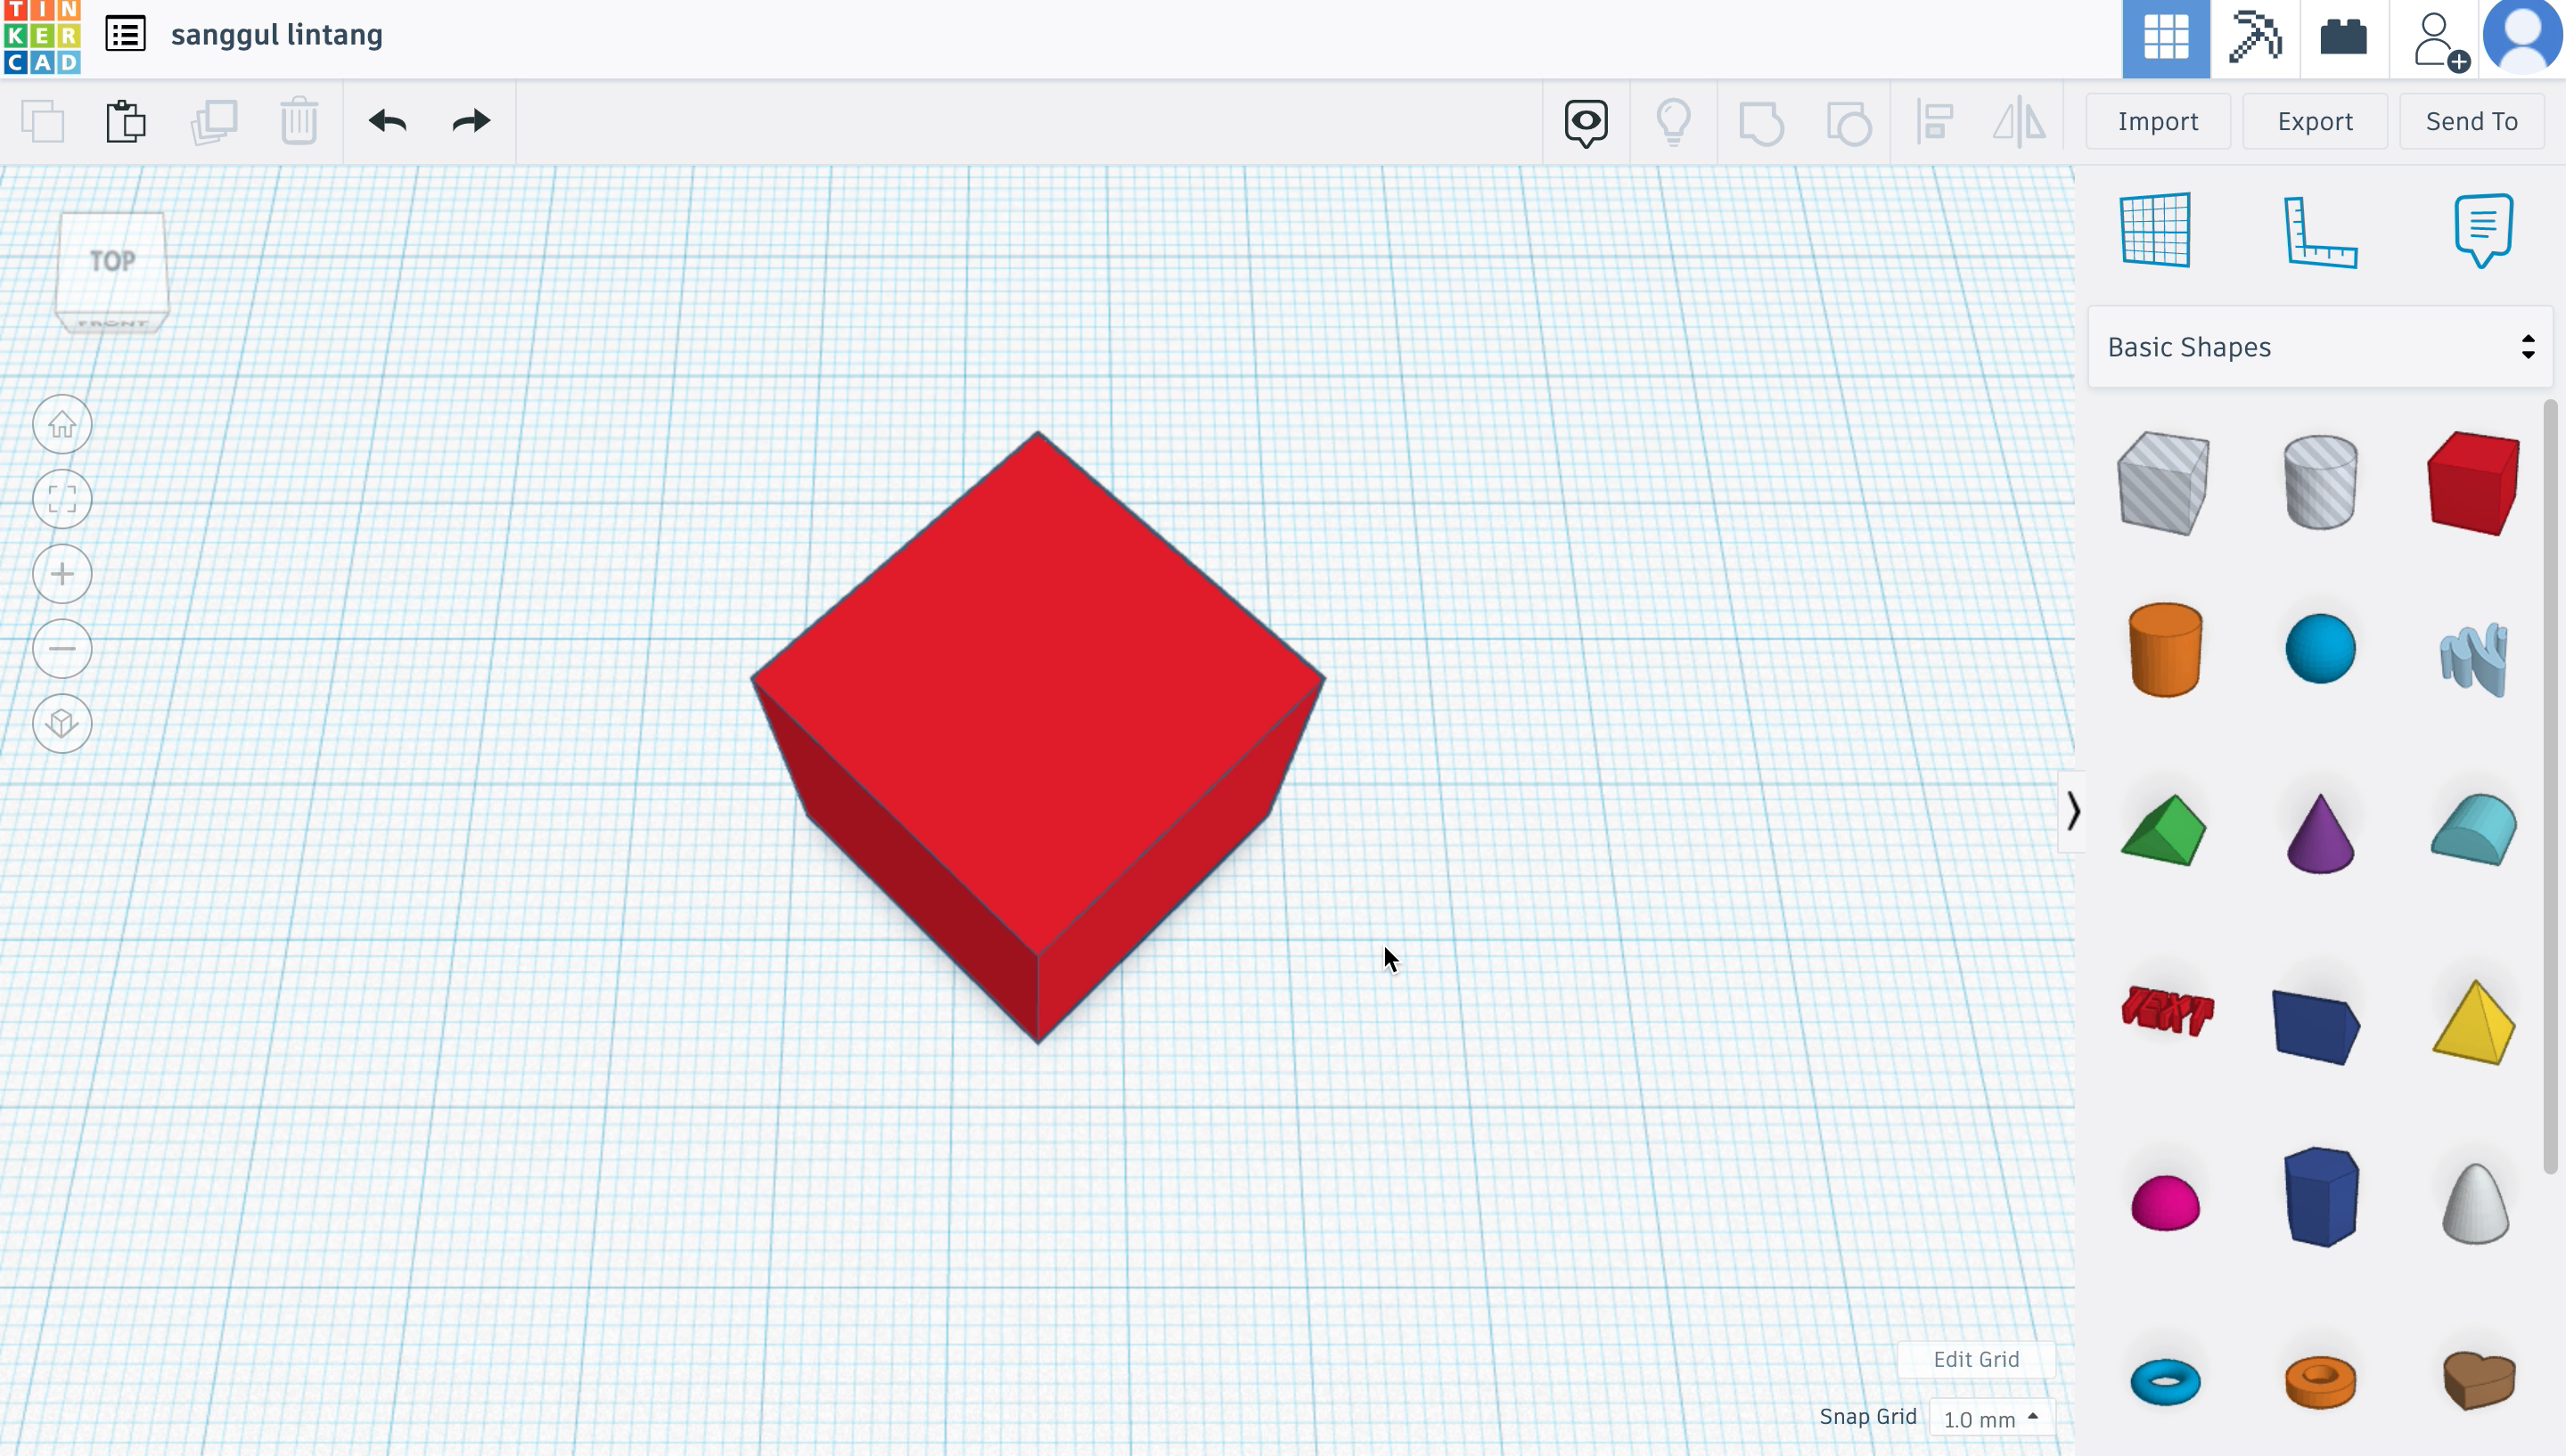
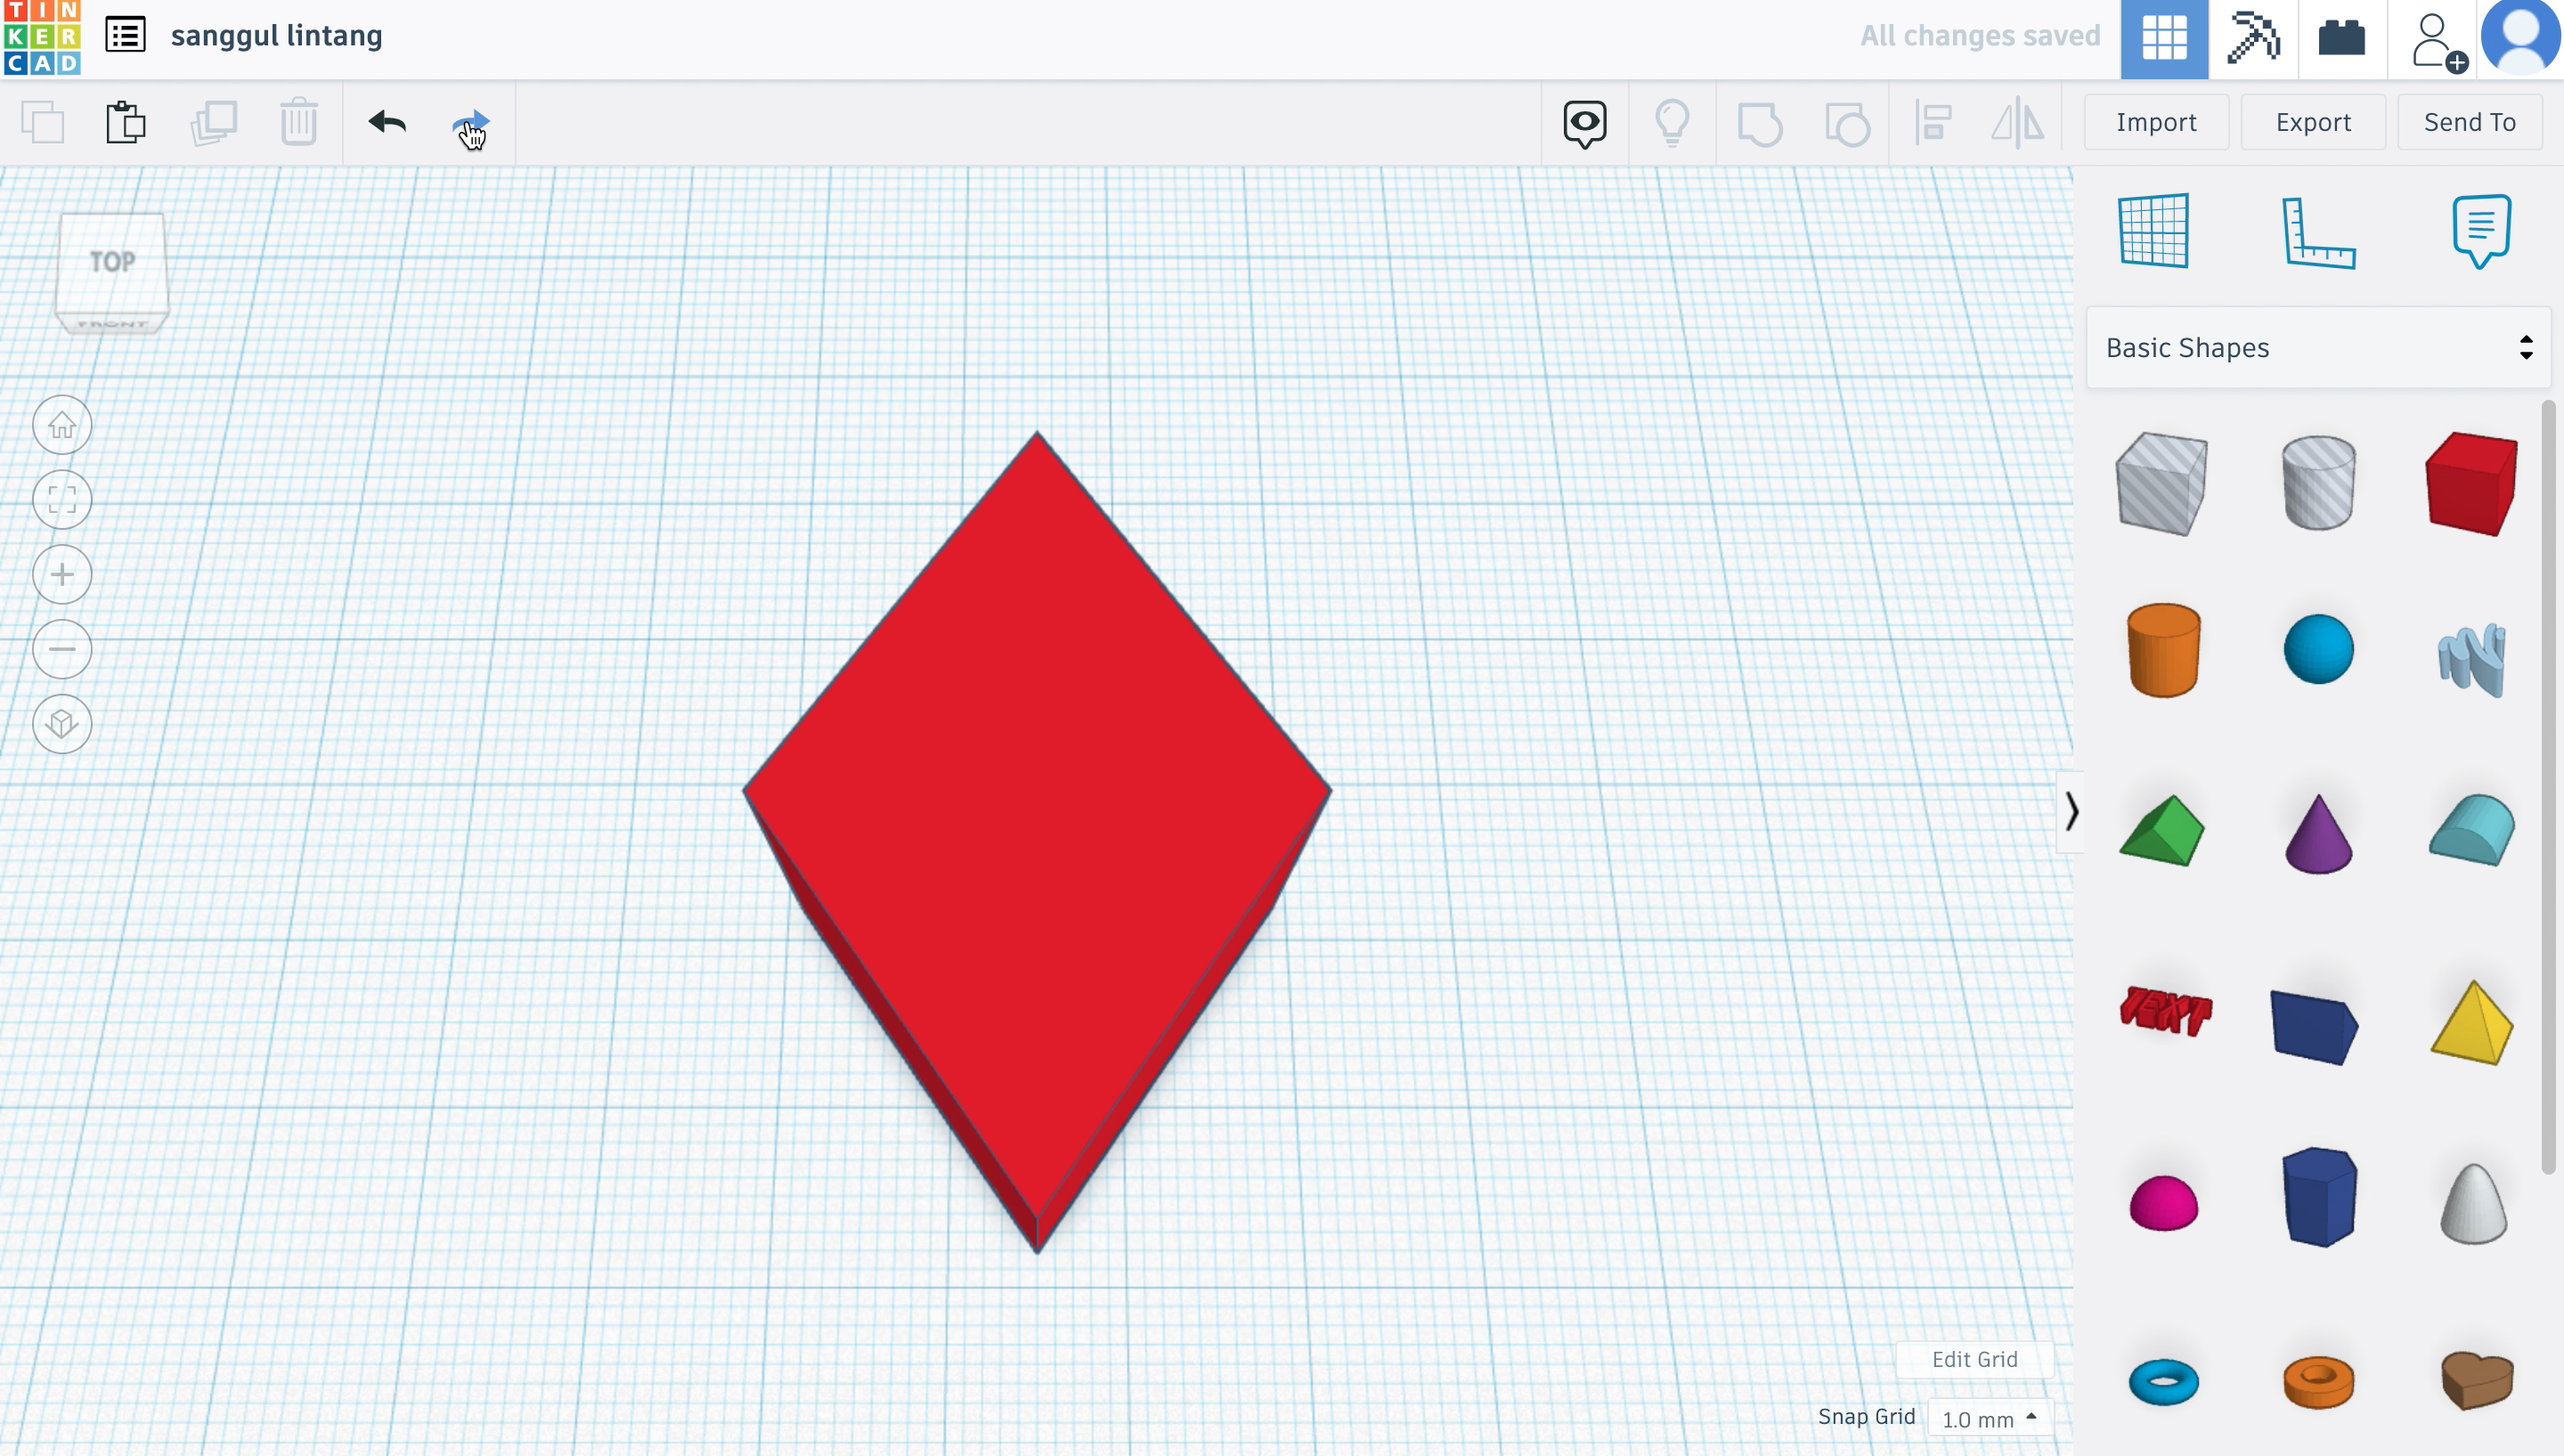
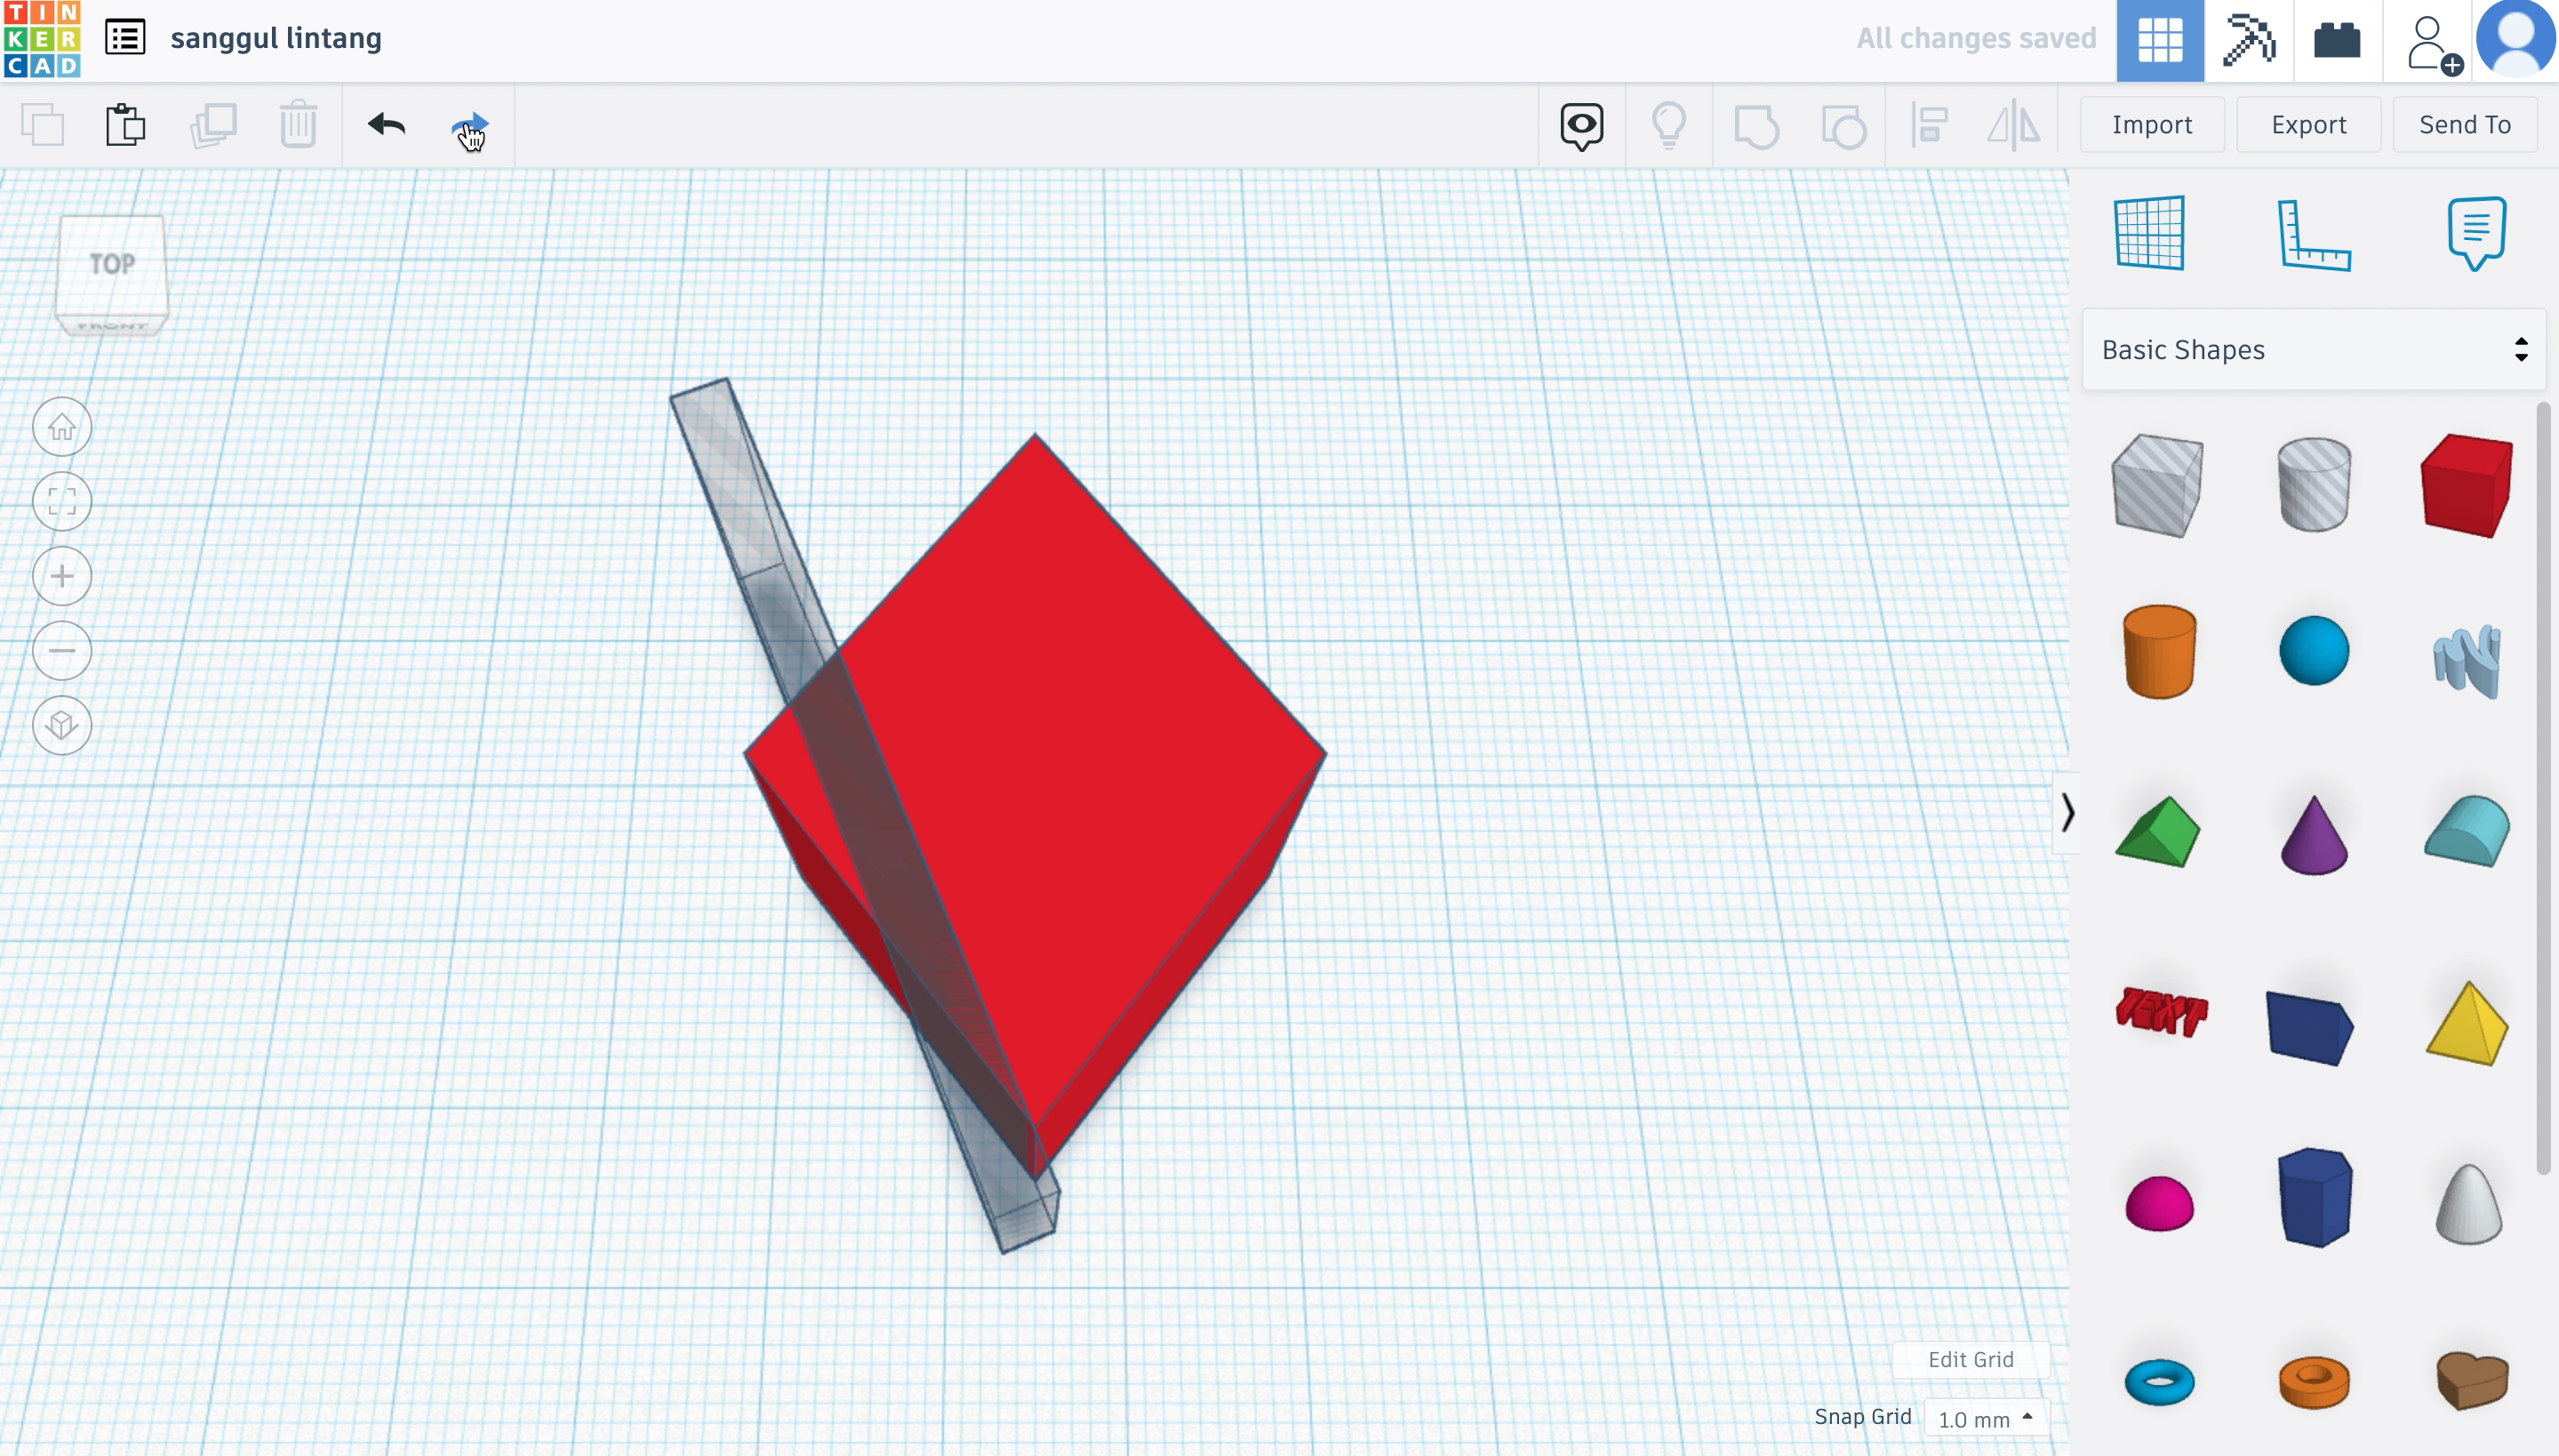
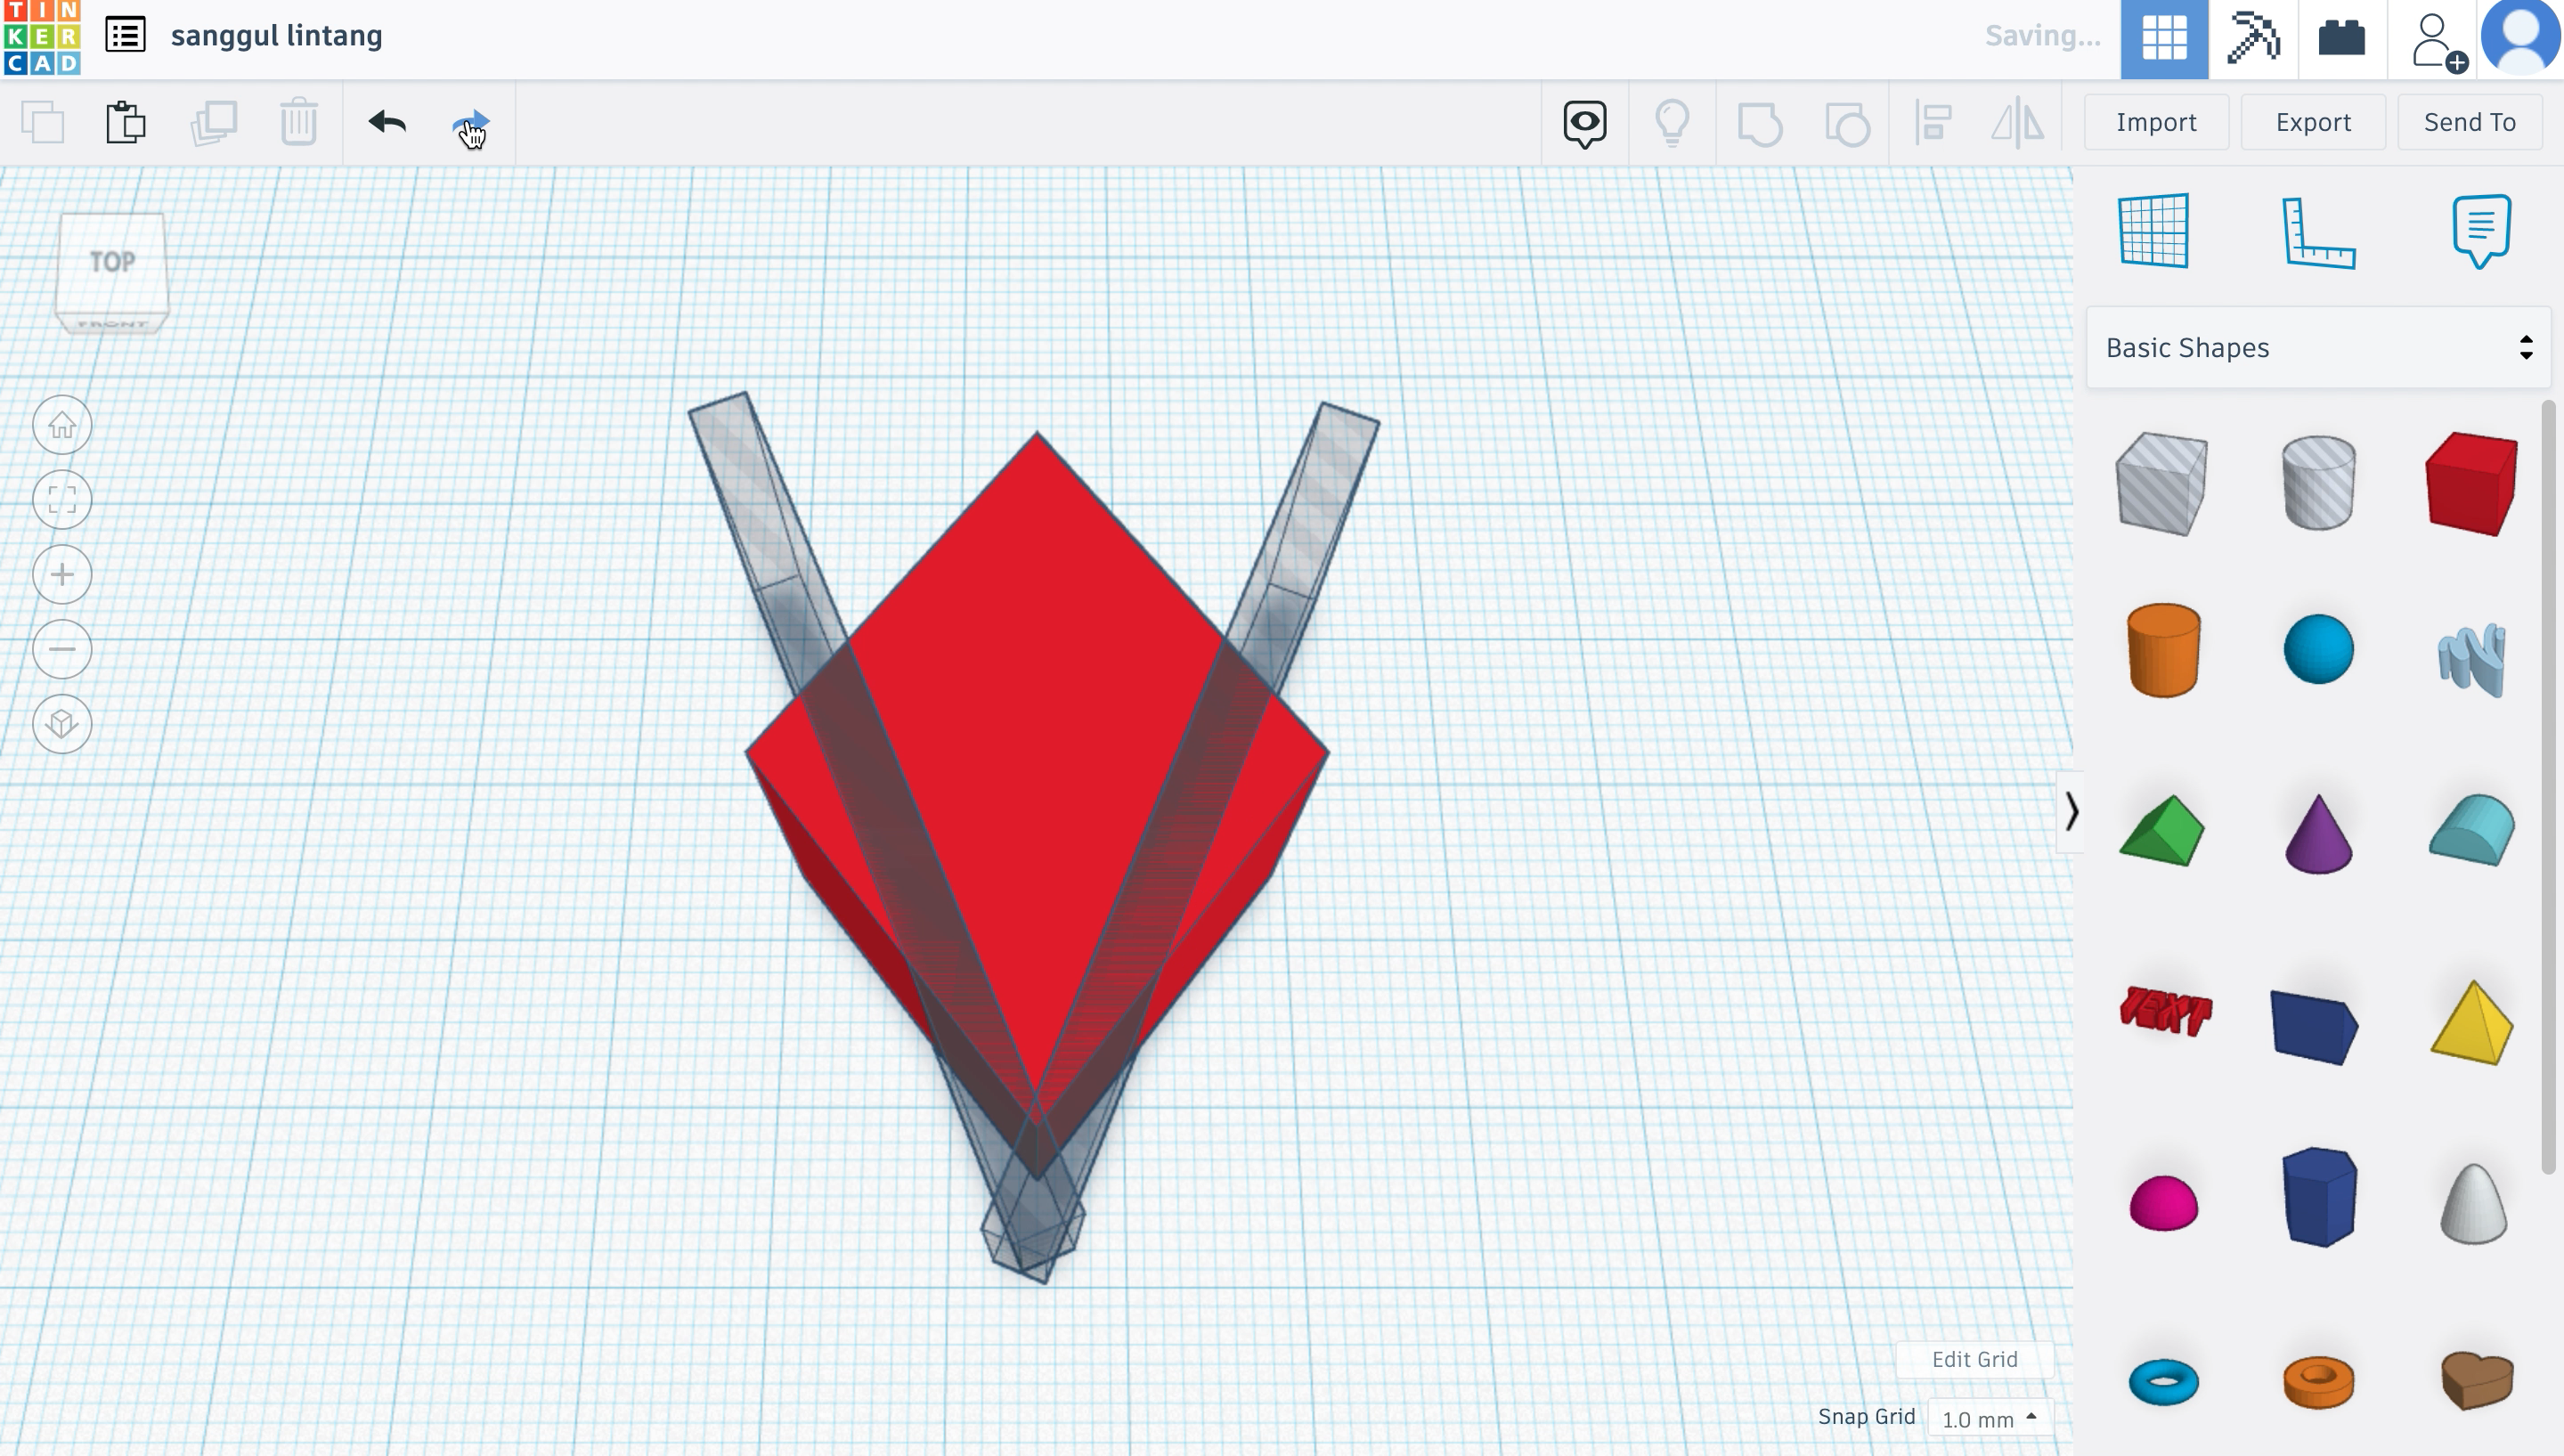

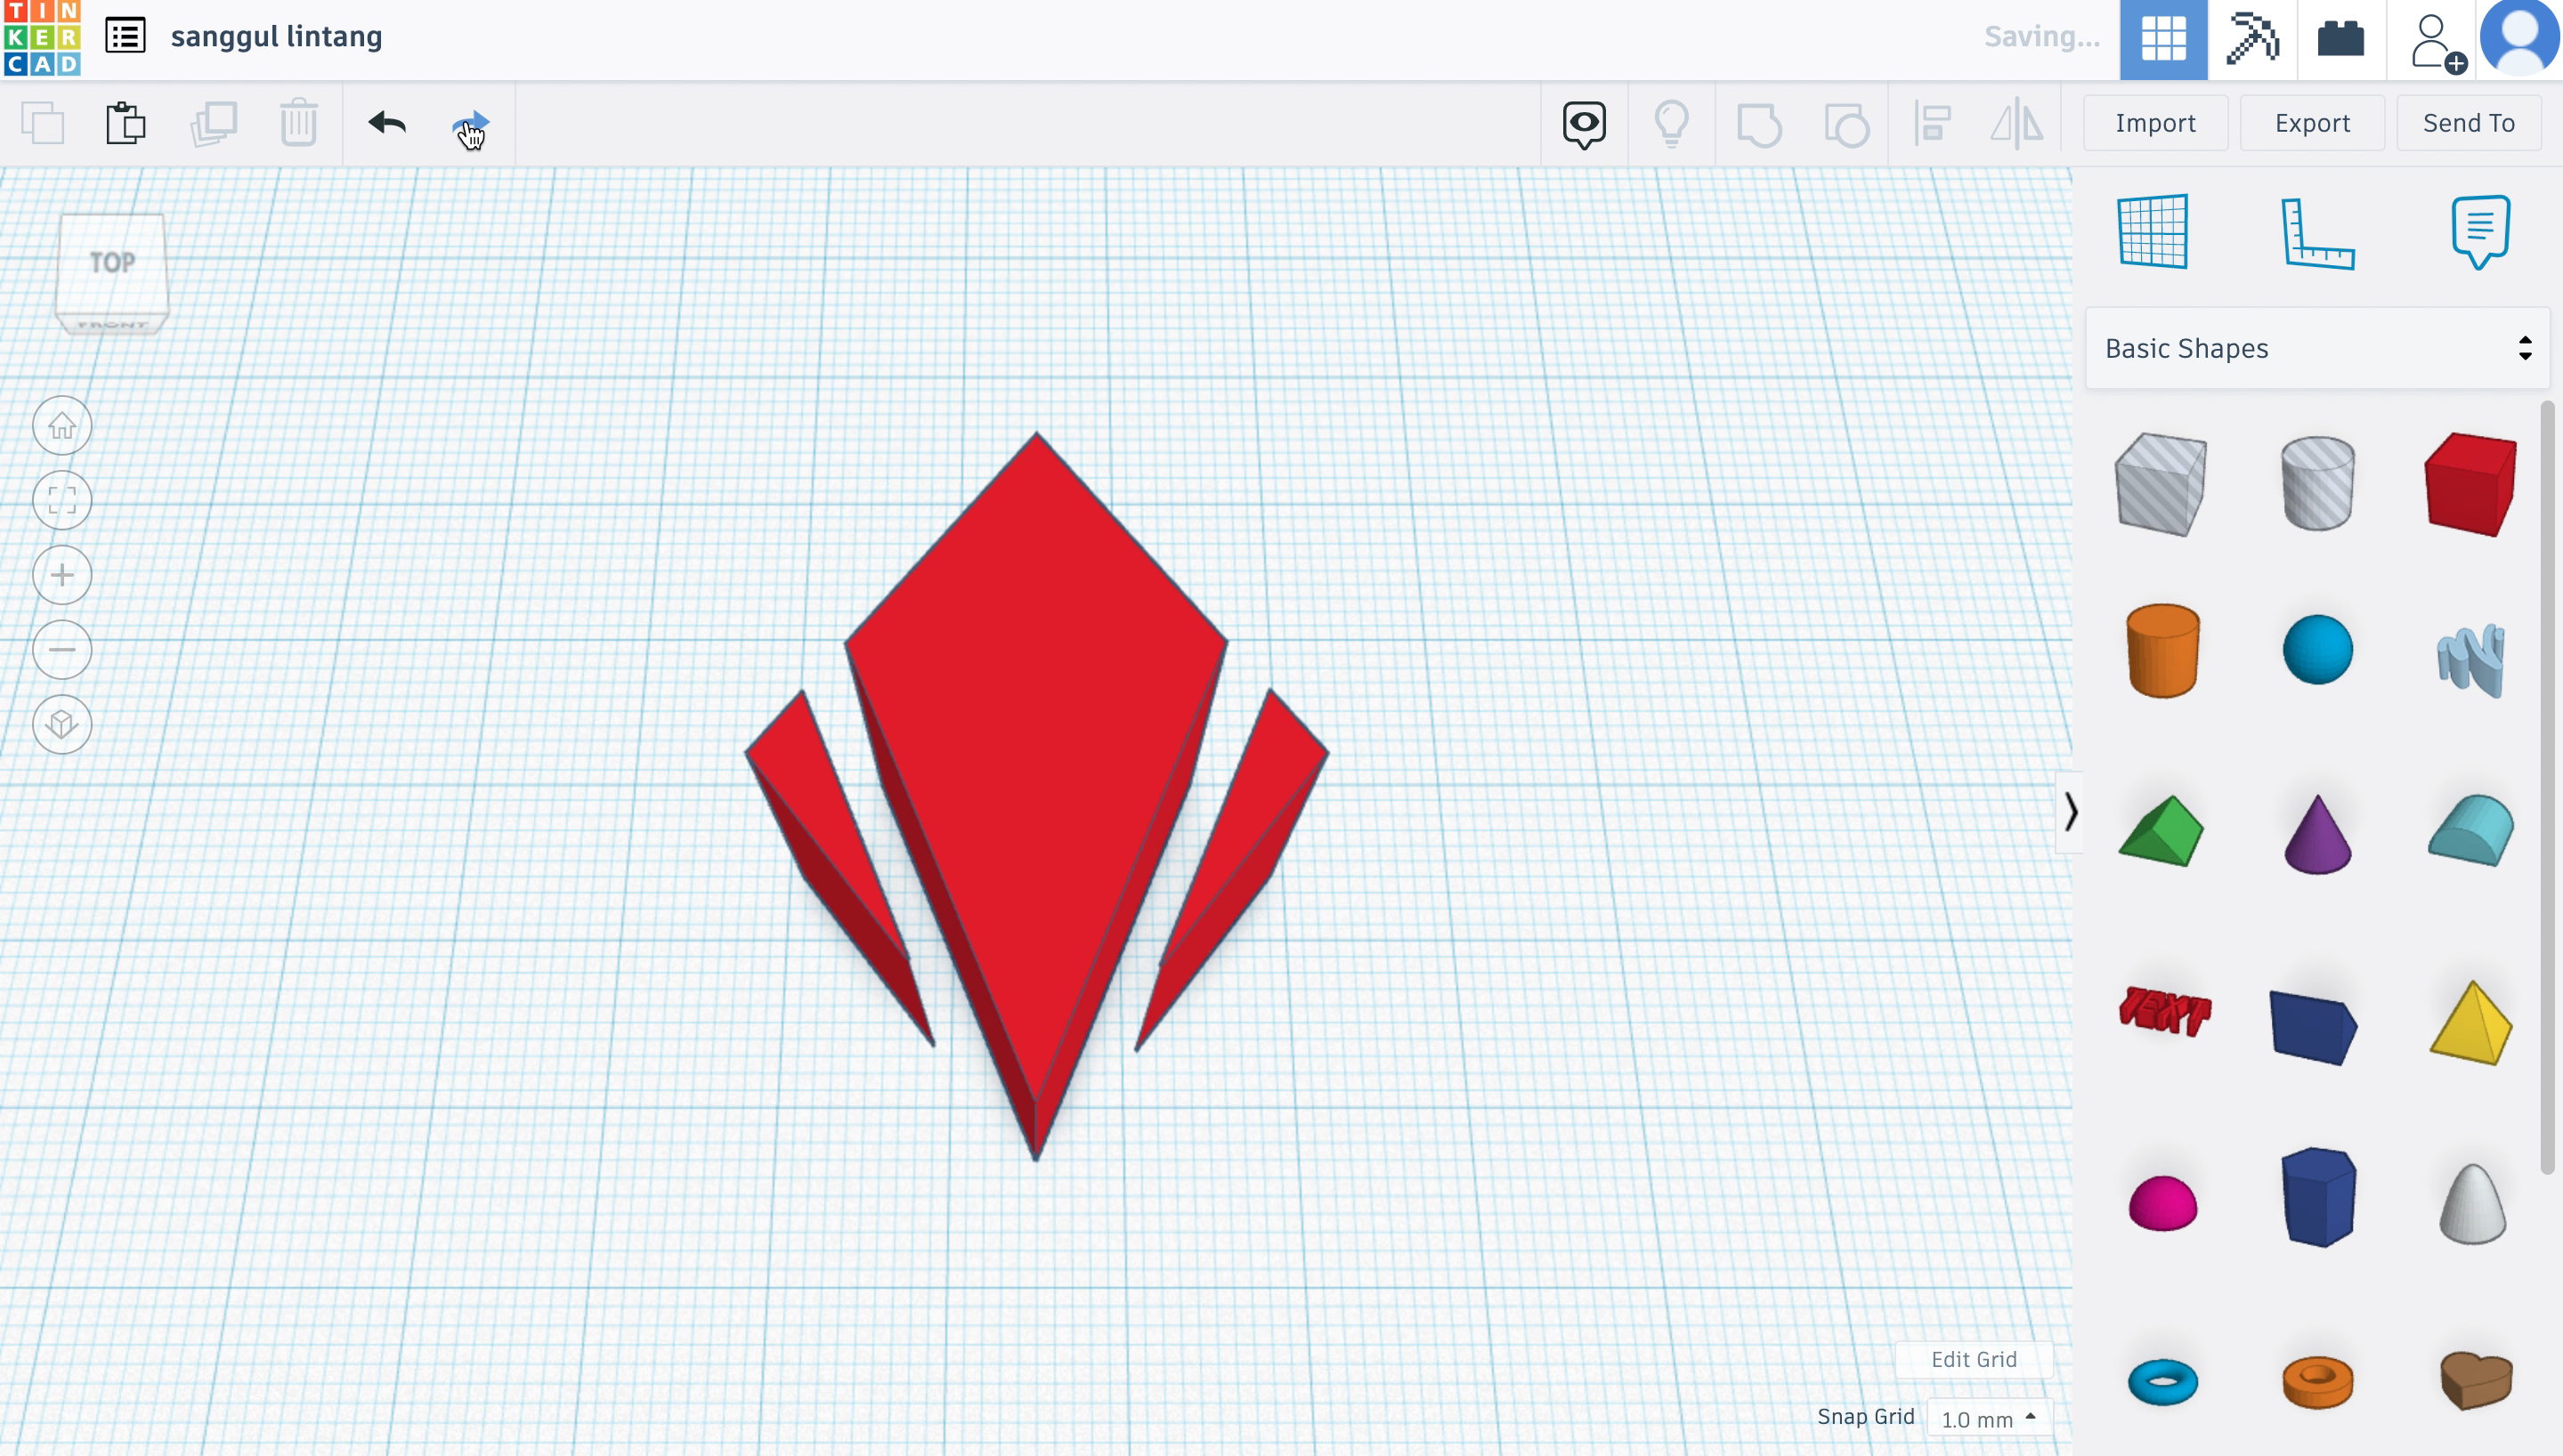
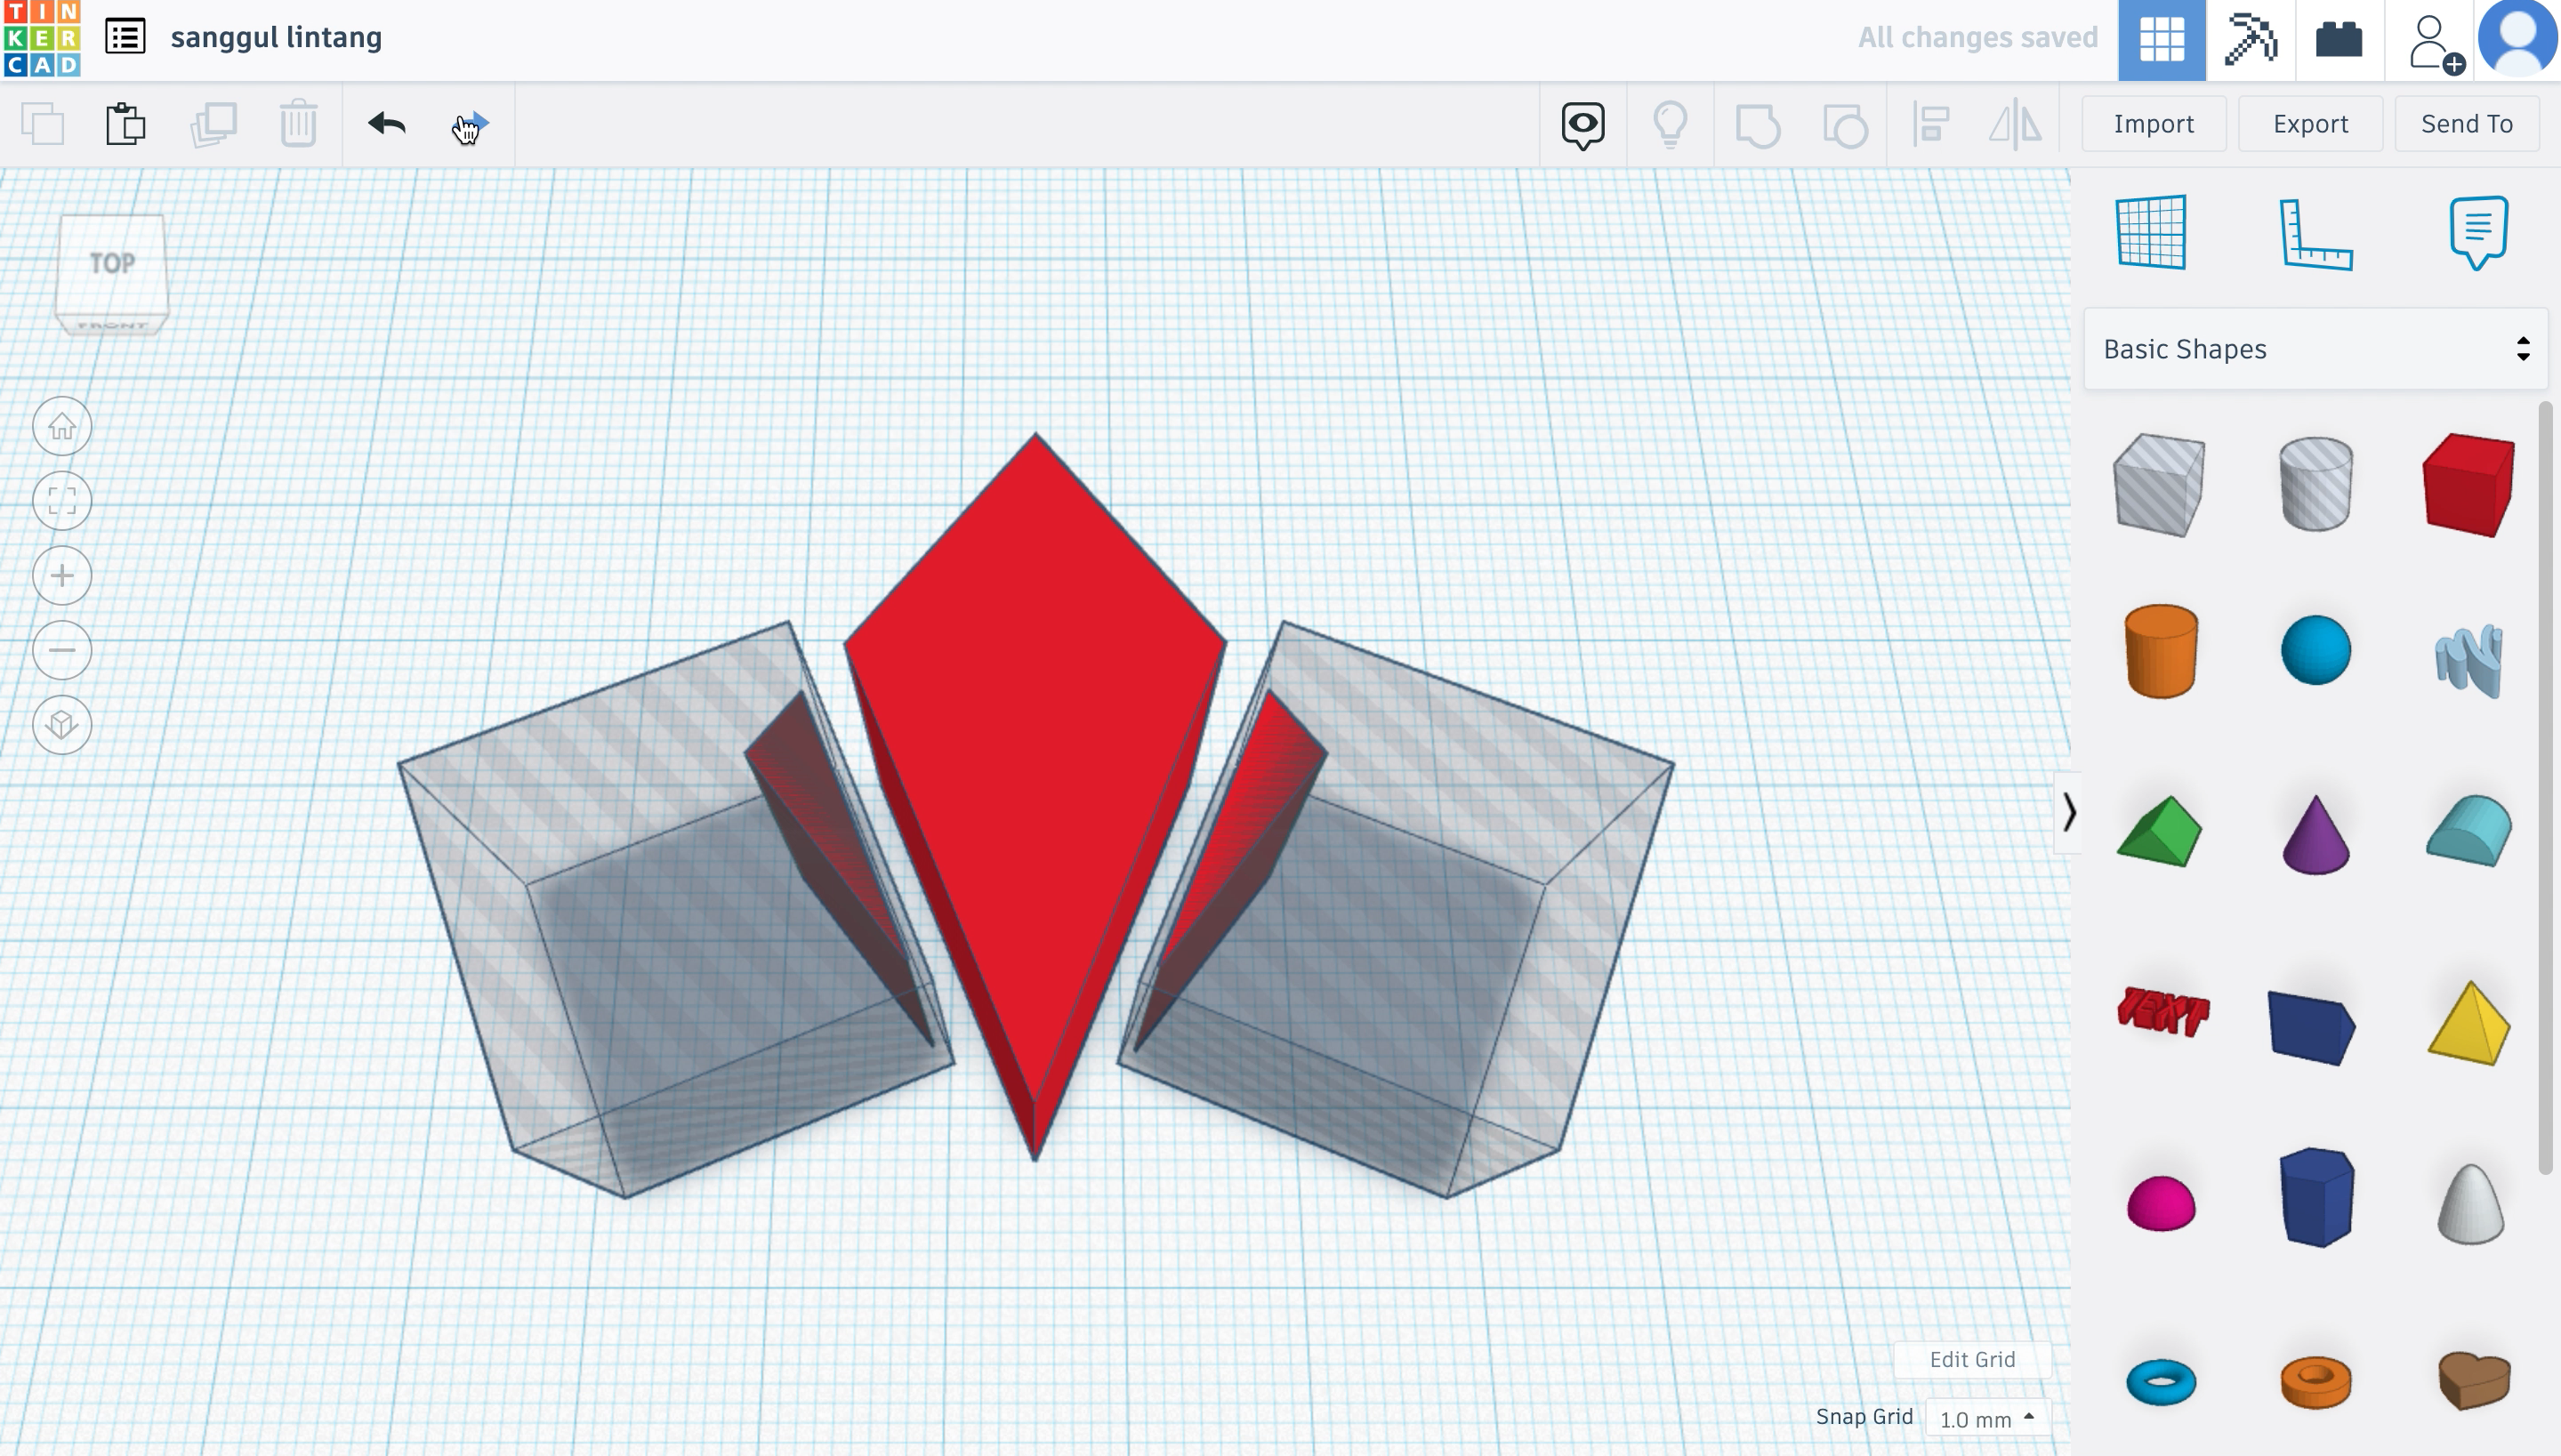
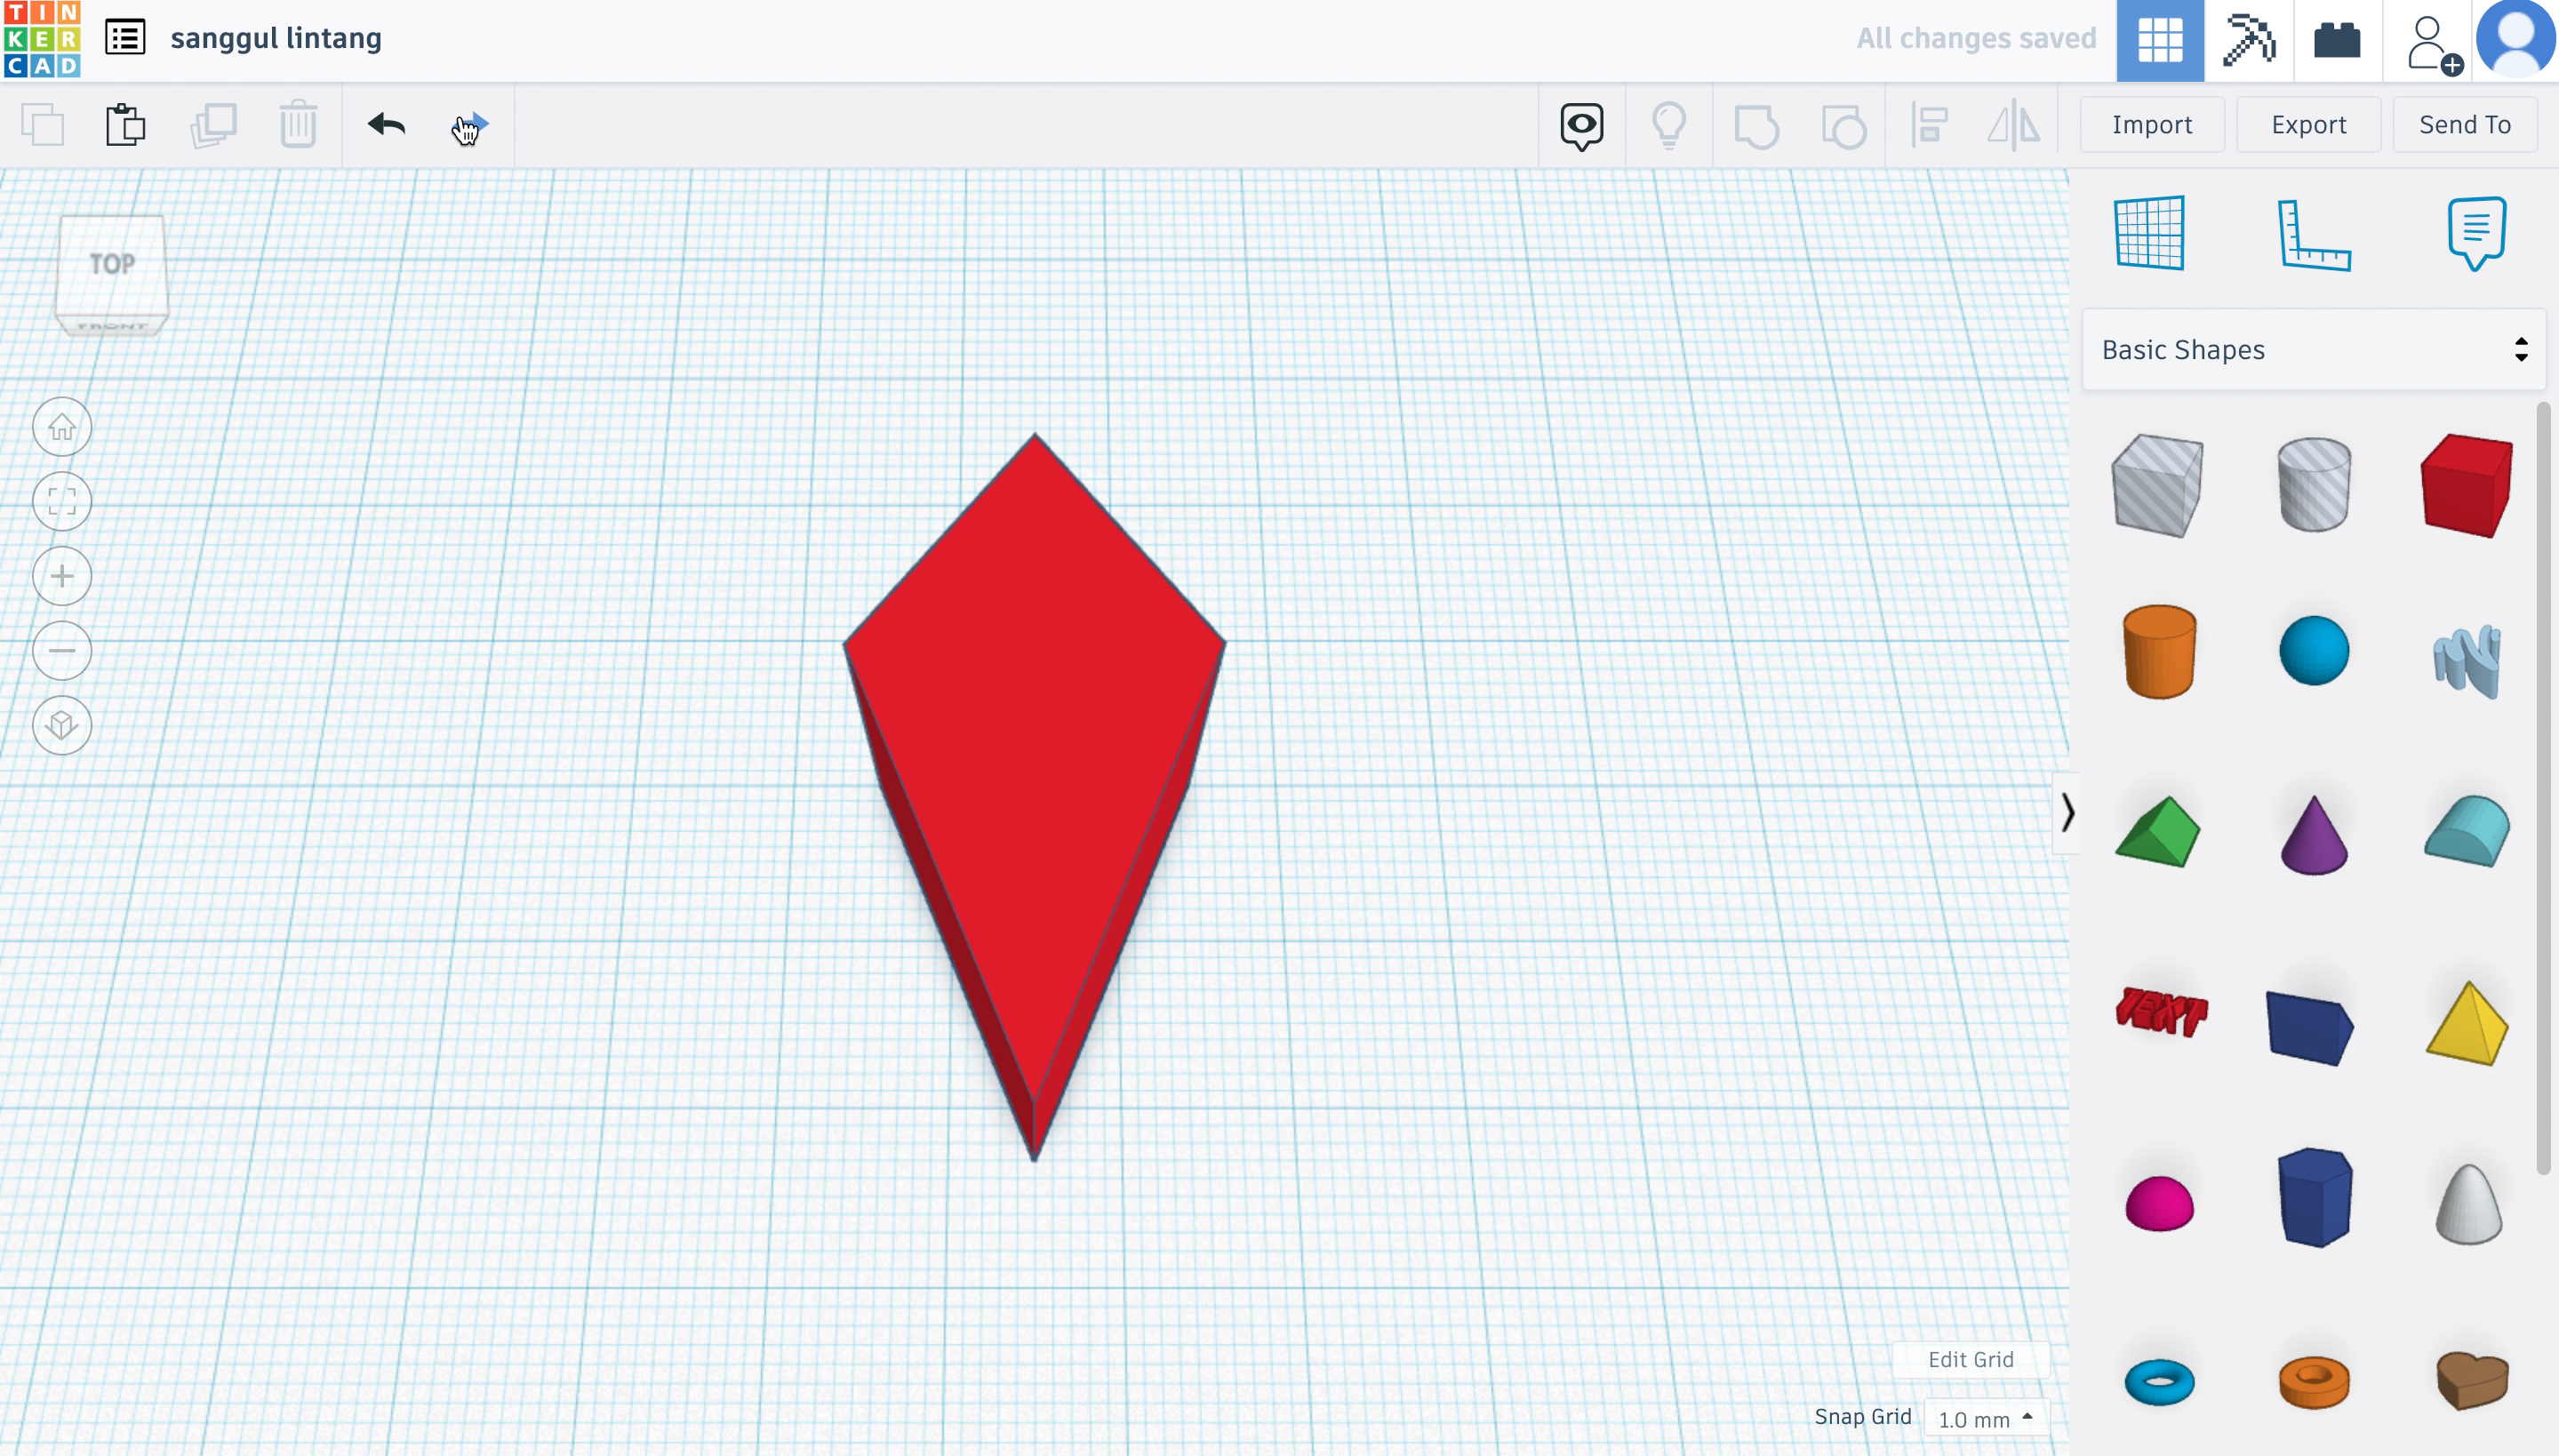
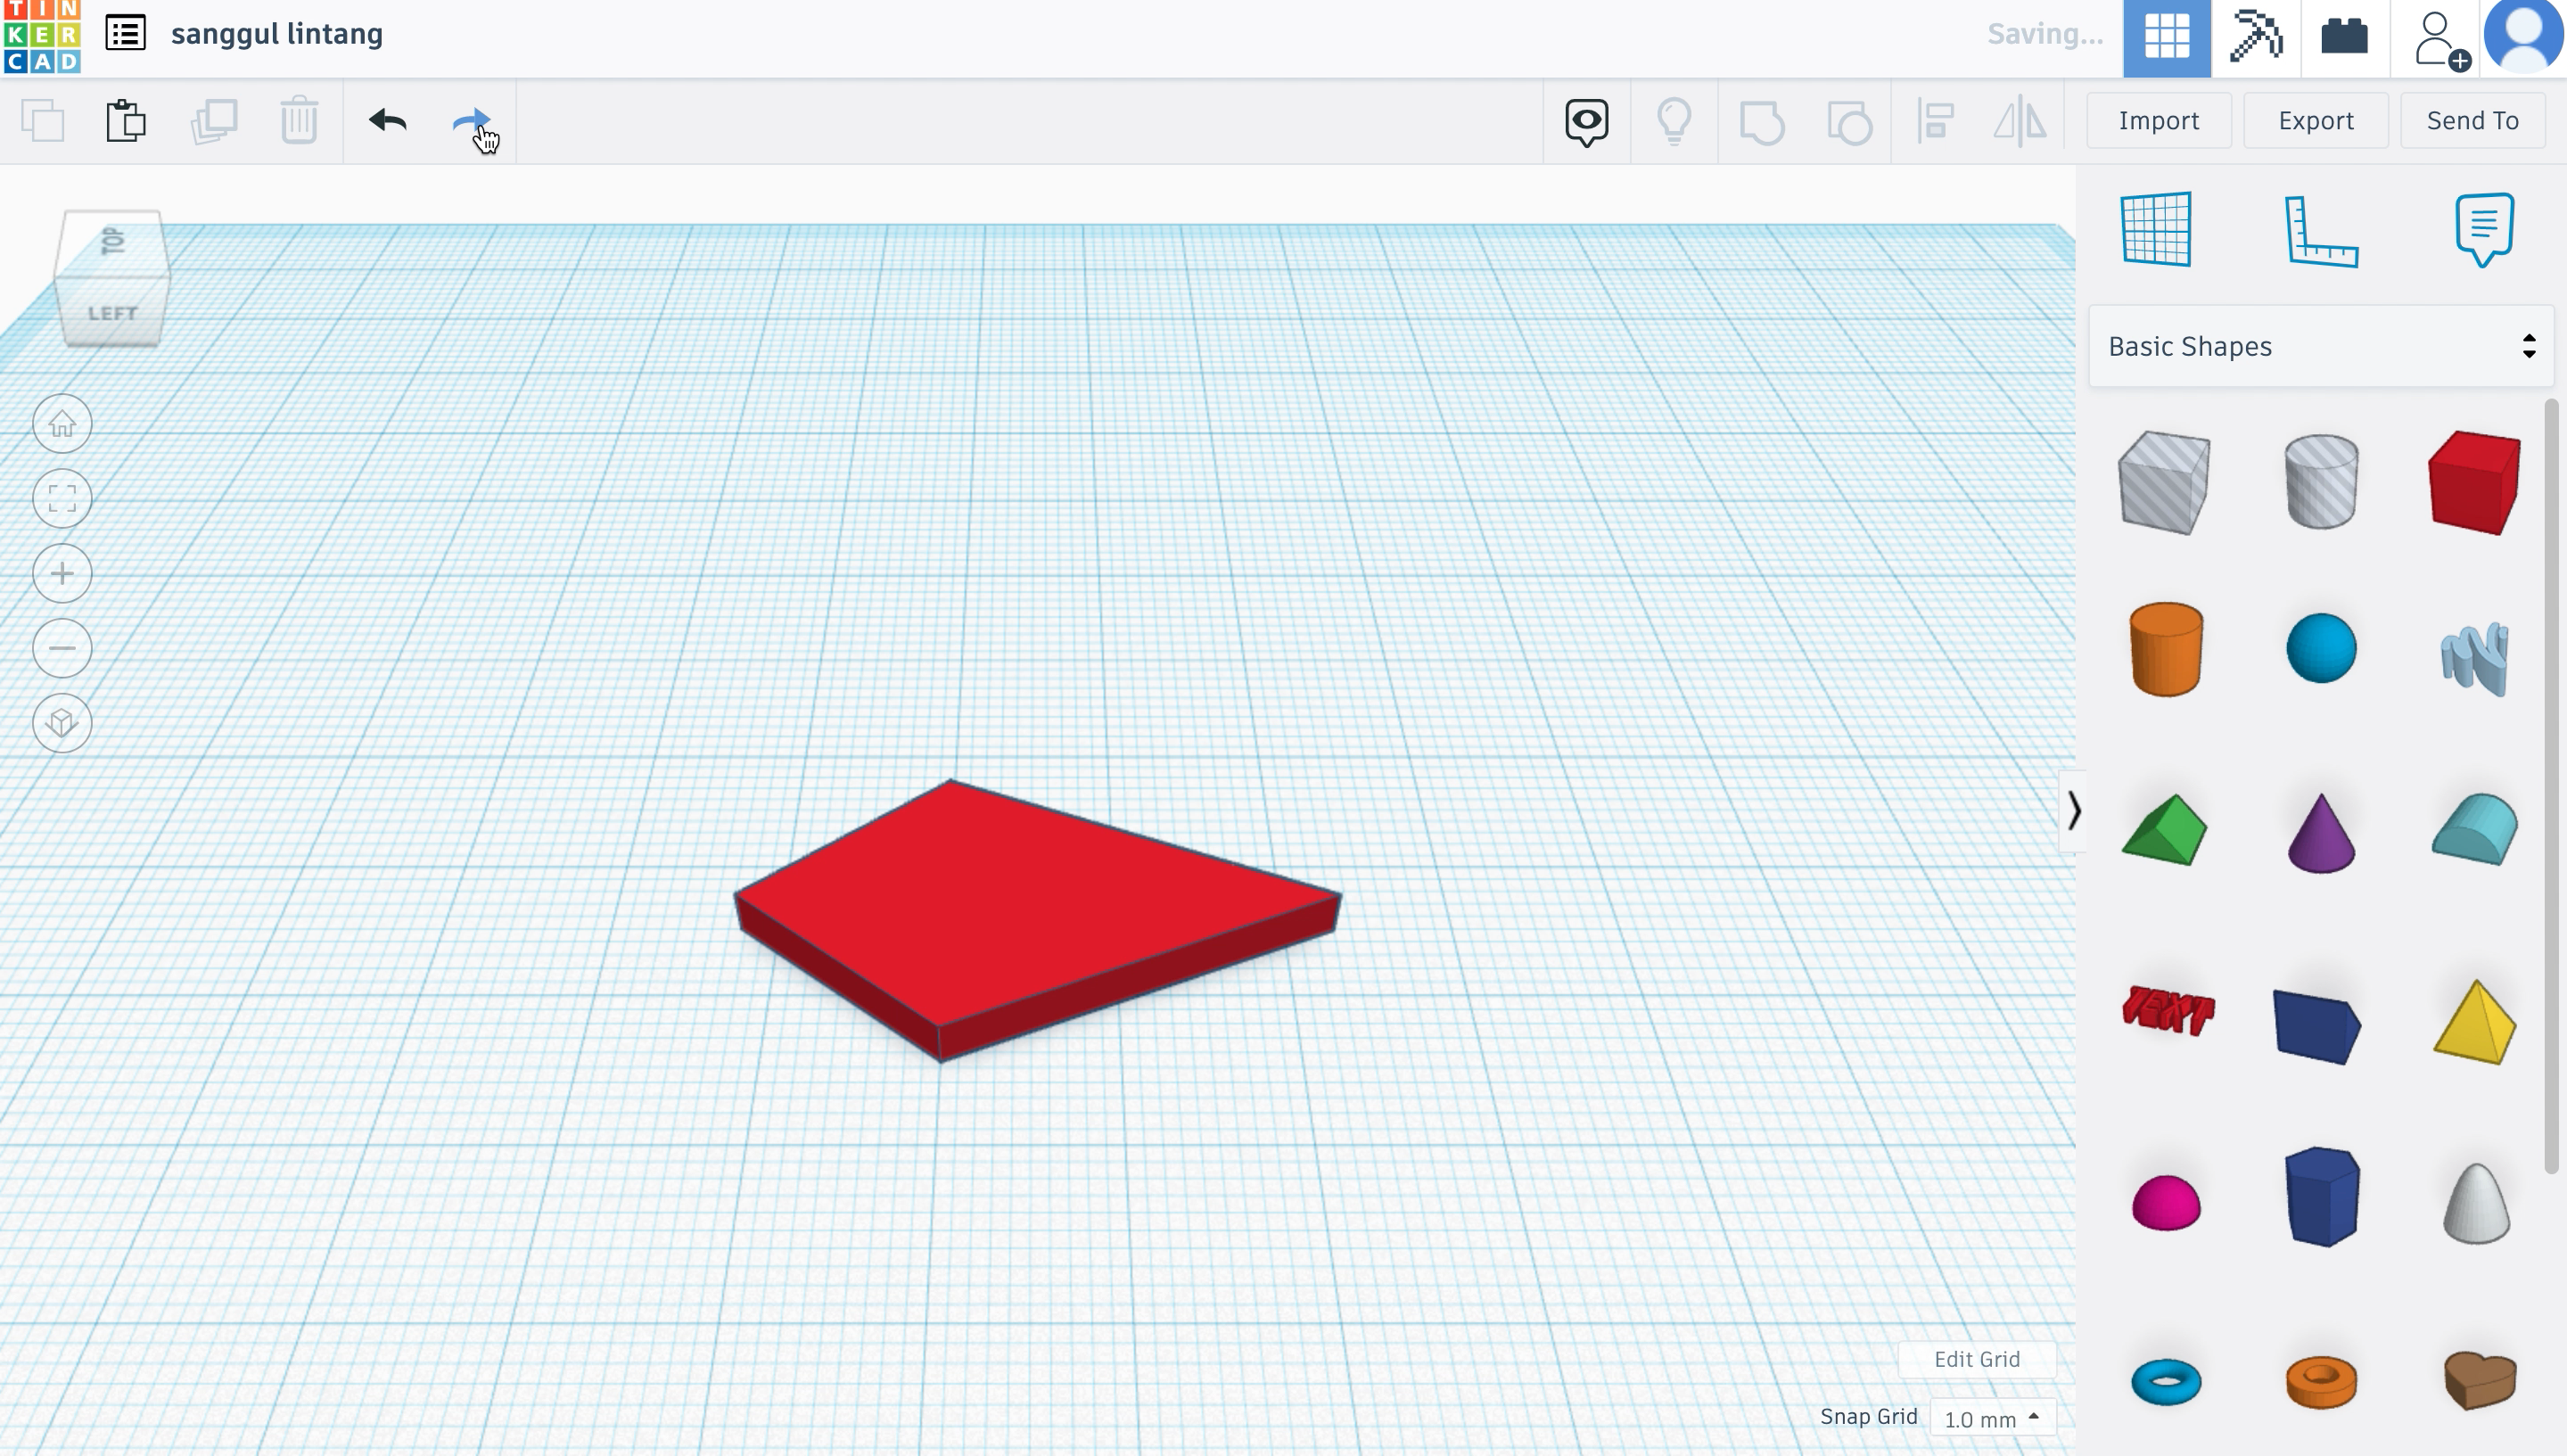
- First, grab the 'box' shape and pull it at a corner to create this diamond shape.
- Next, grab a 'hole-box' and manipulate it like in the images above, and do the same on the other side.
- Then, select all three shapes by dragging your cursor across the area you want selected/ highlighted, and click the 'group' function to combine the pieces, this will erase the 'hole' block and whatever it touches.
- Next, to remove the unwanted parts, I used more 'hole' blocks, and did the same thing; group it.
- Lastly, adjust the thickness of the shape to your liking.
Sanggul Lintang A
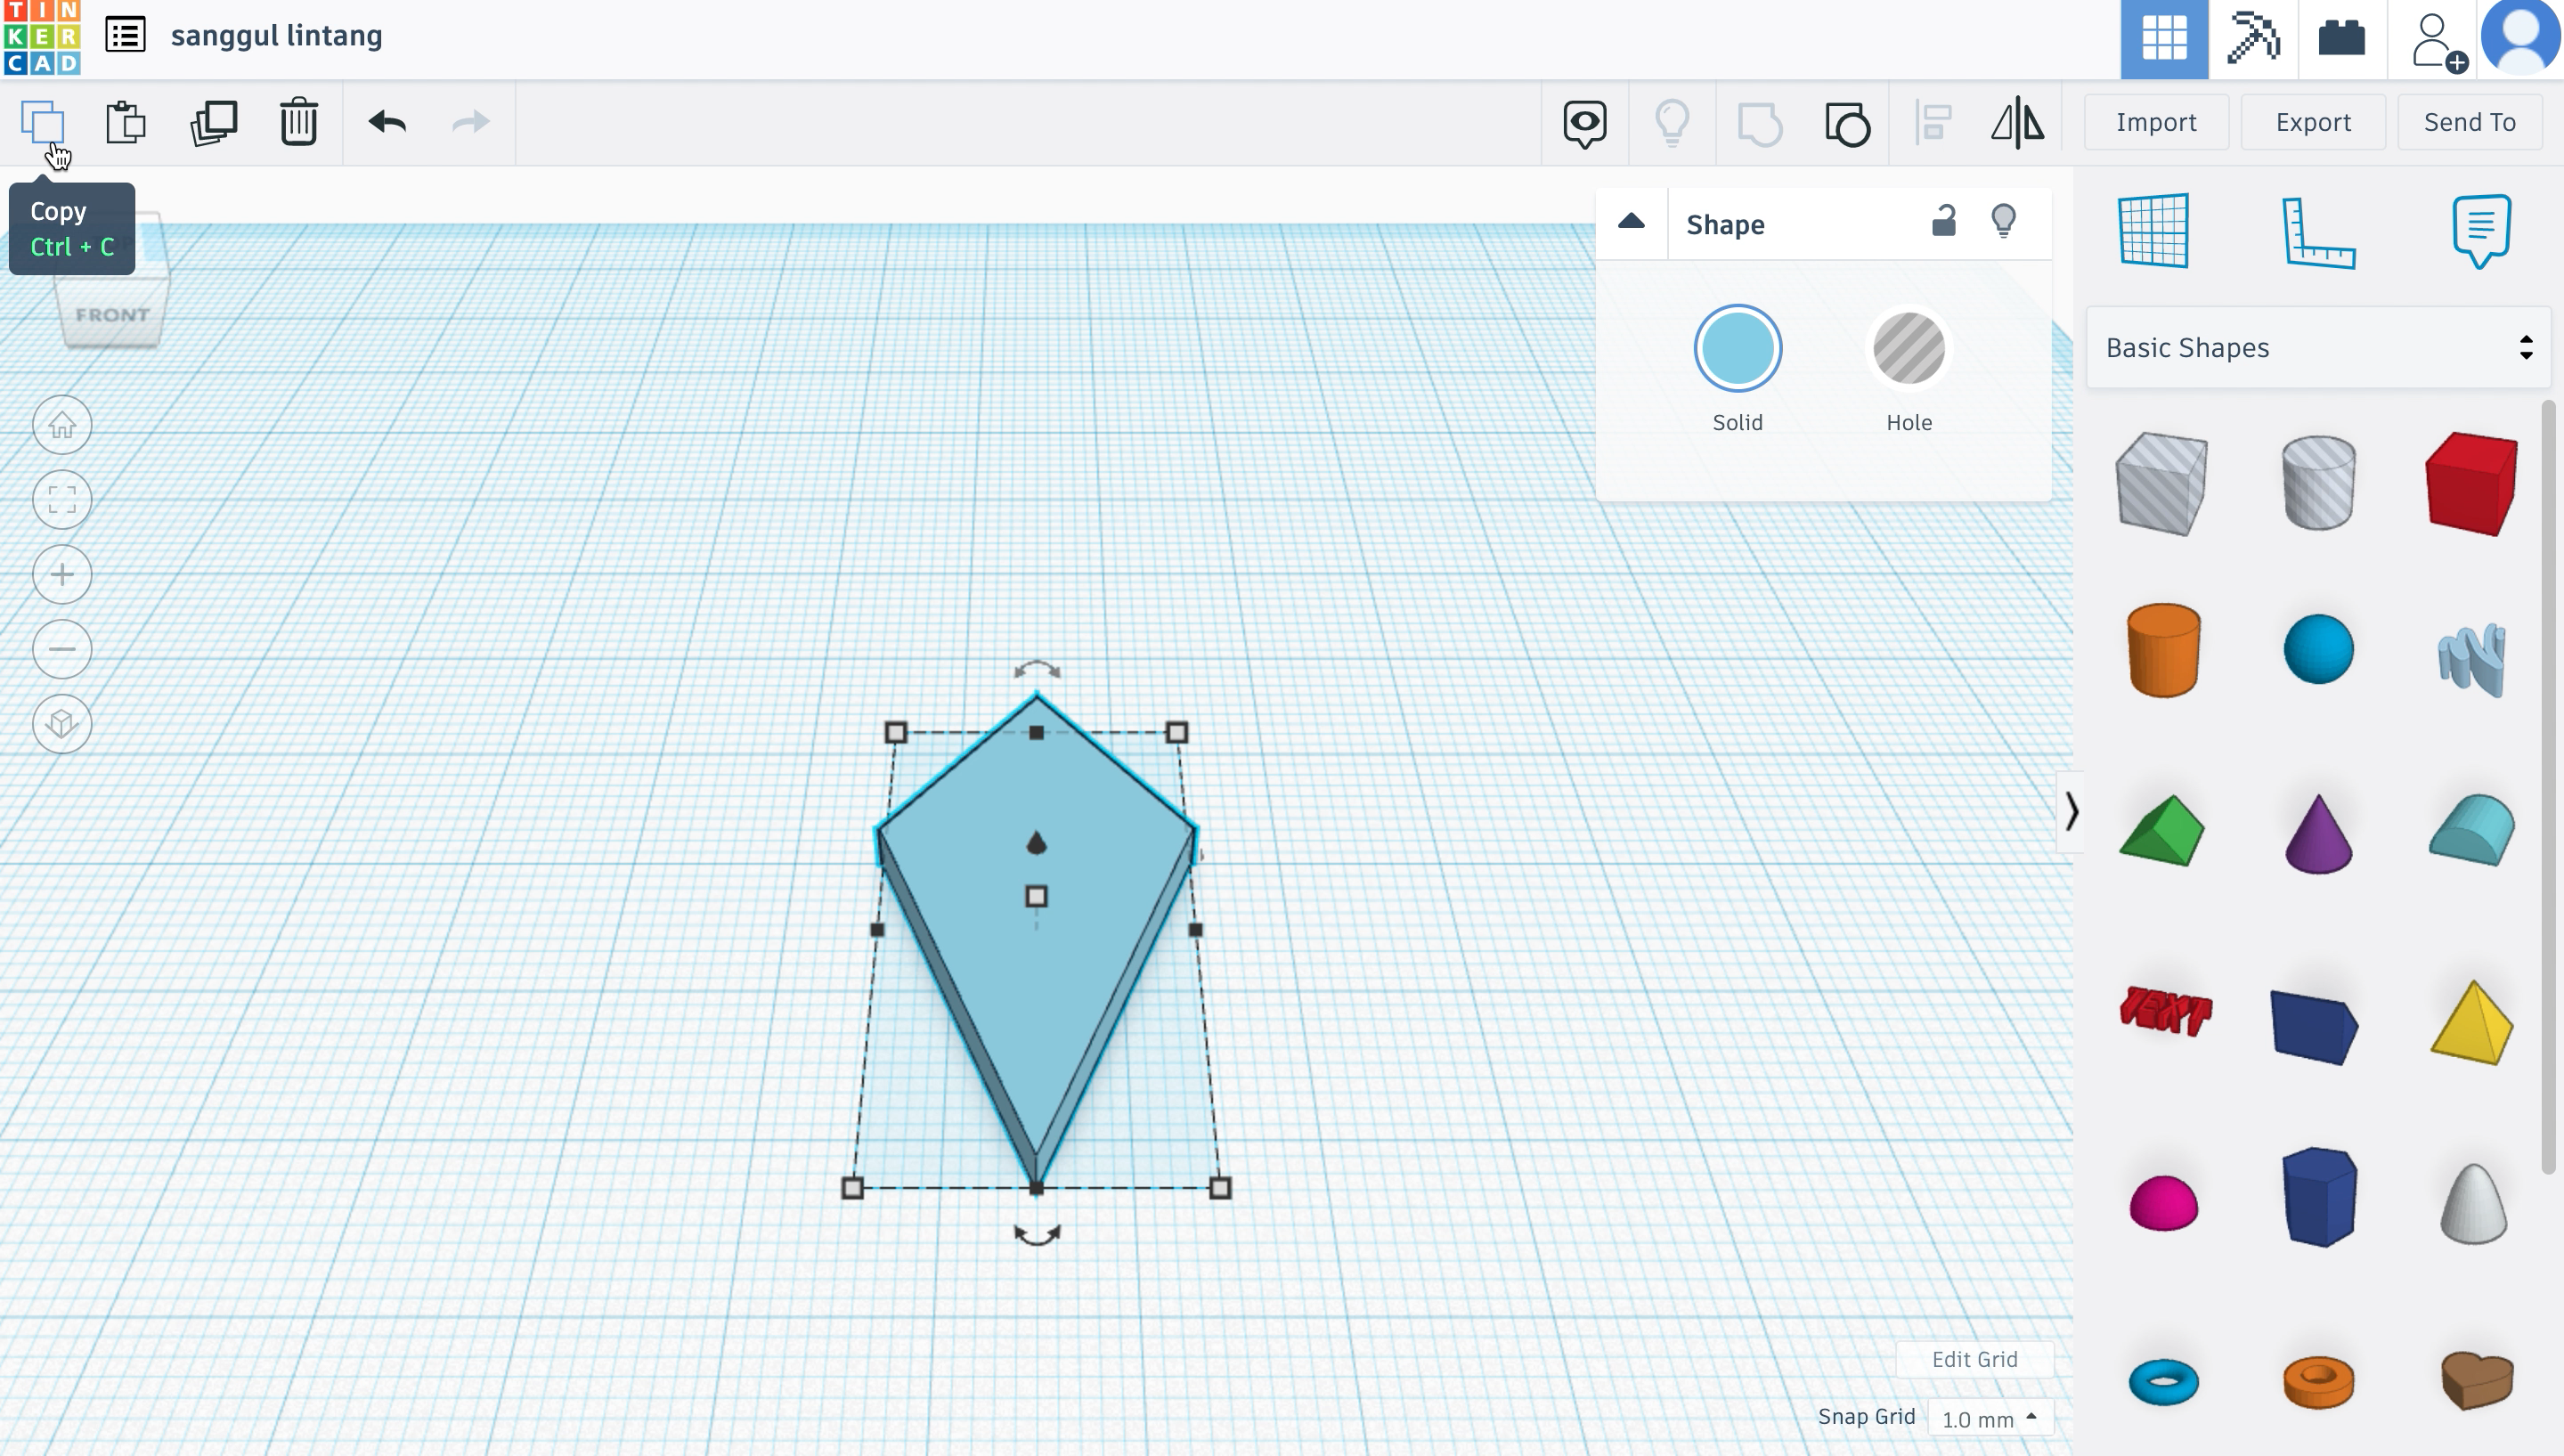
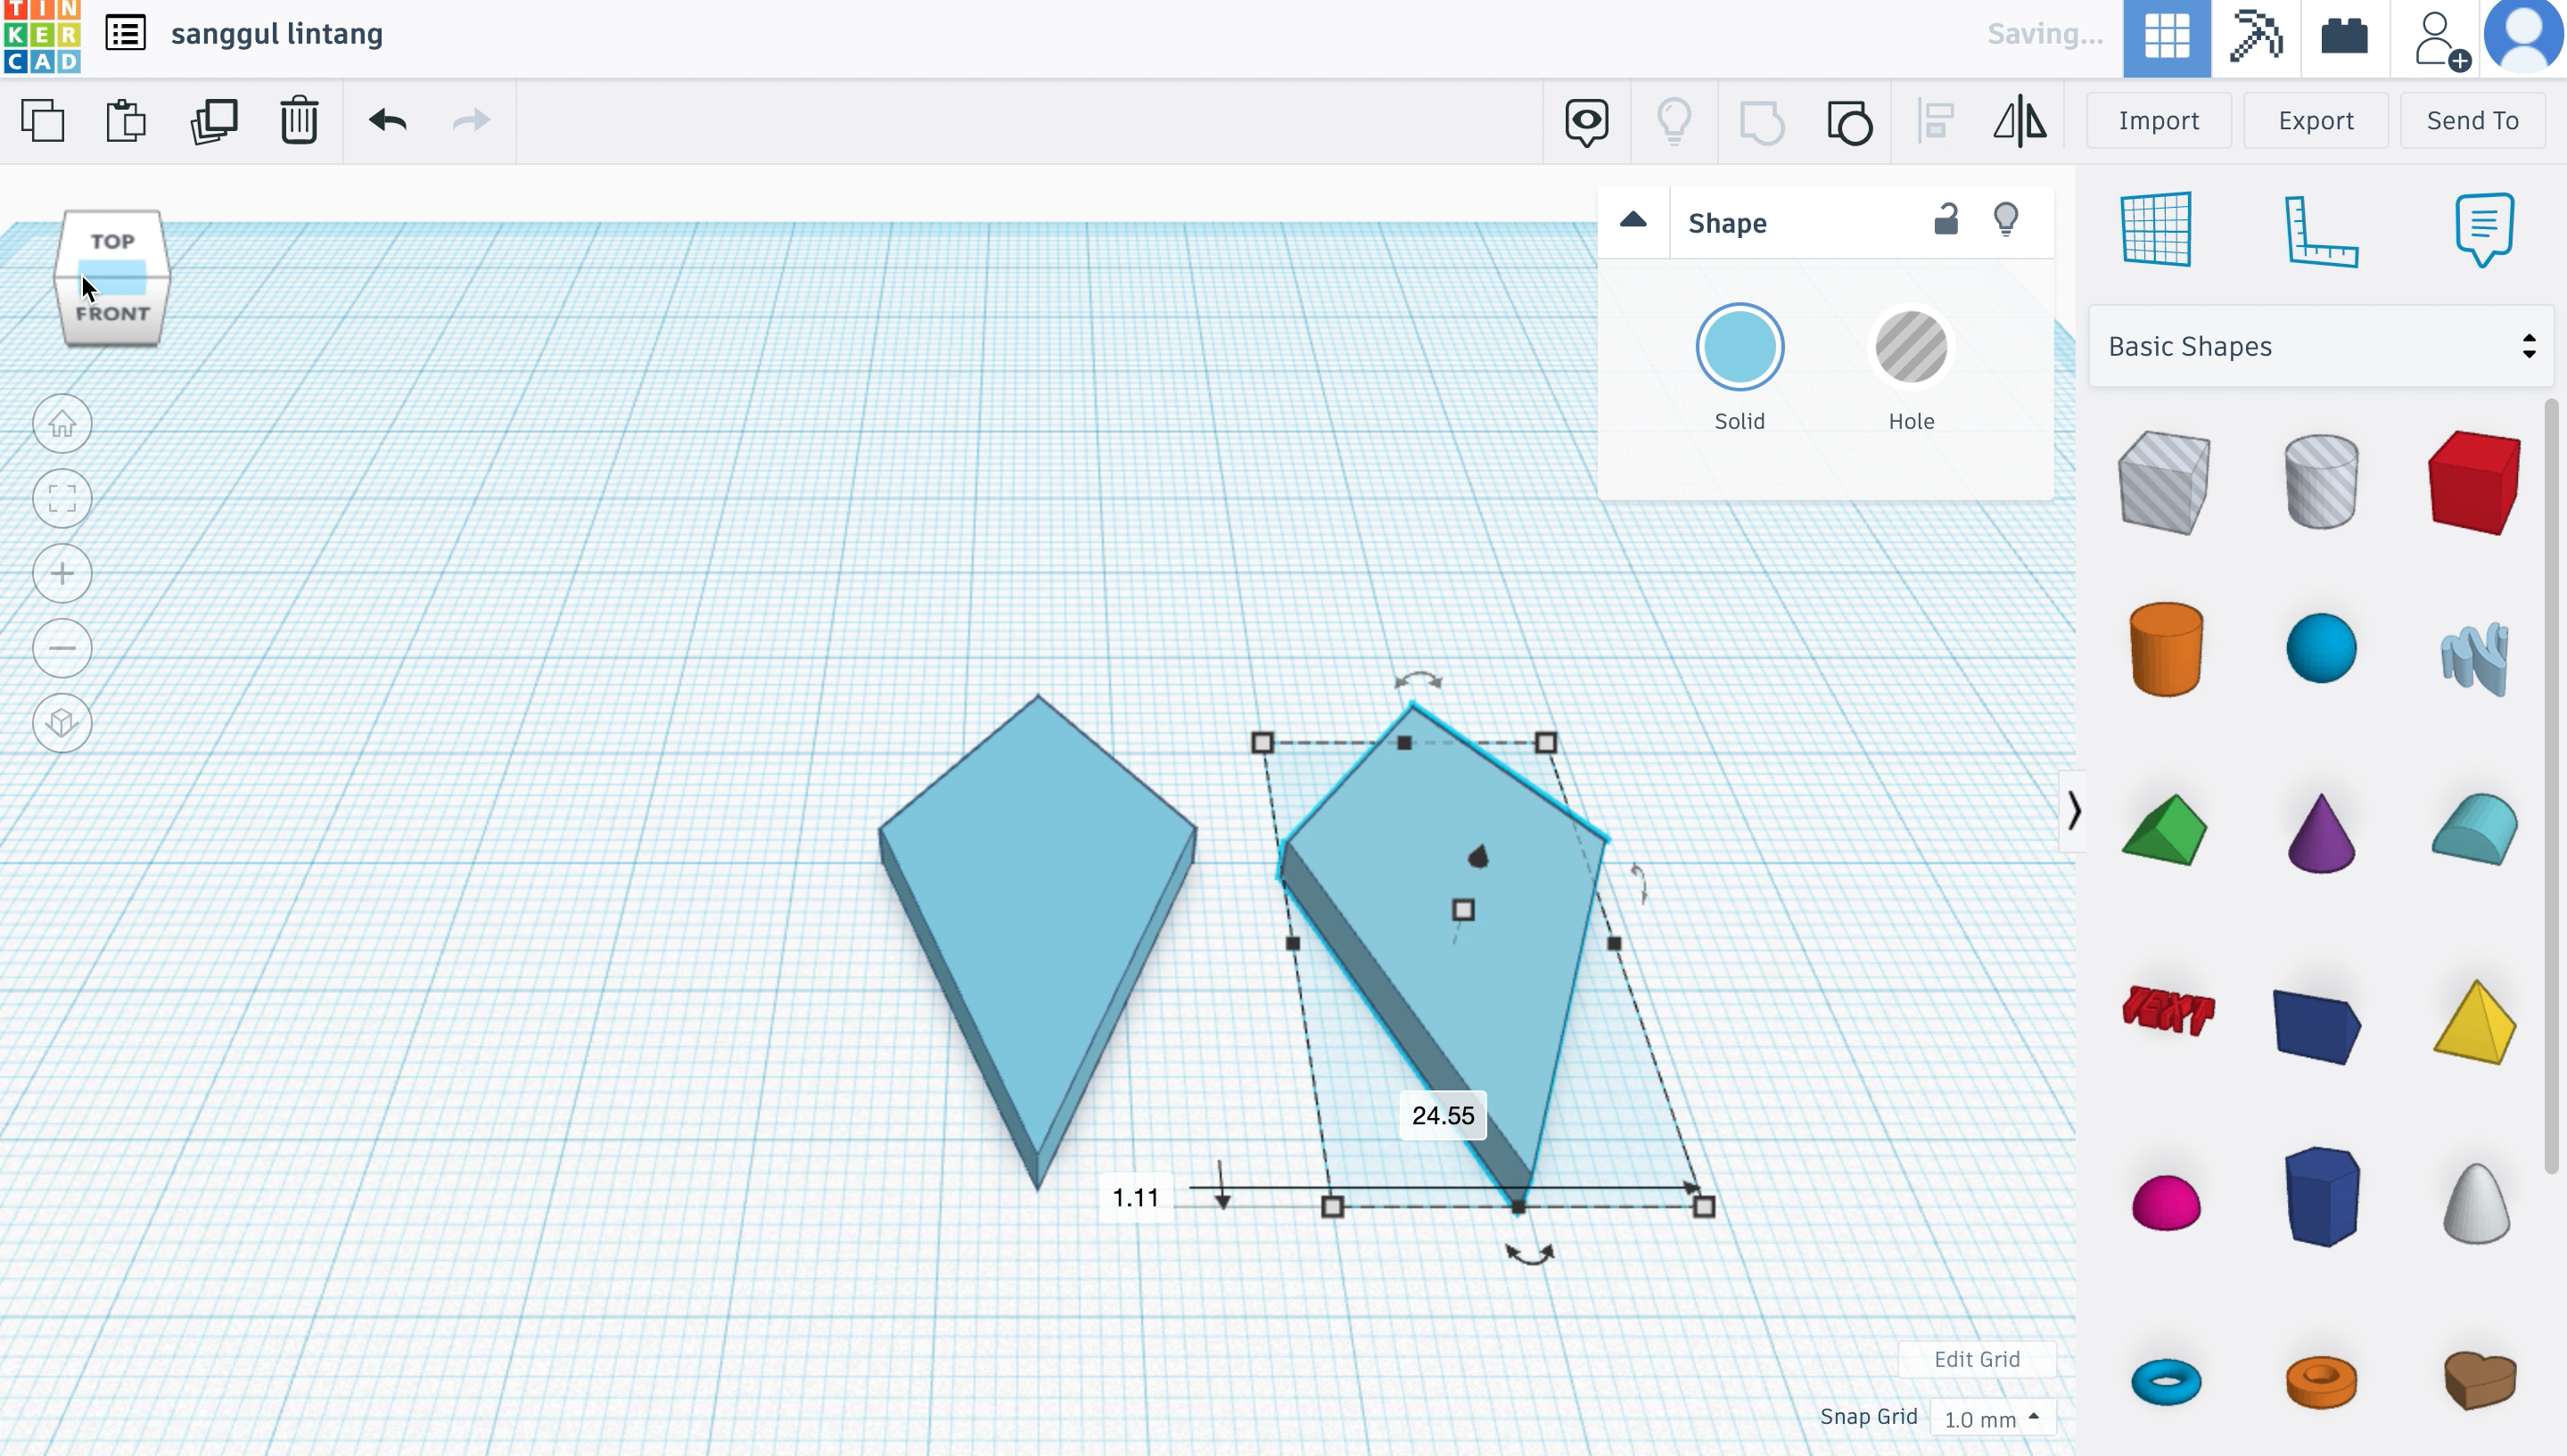
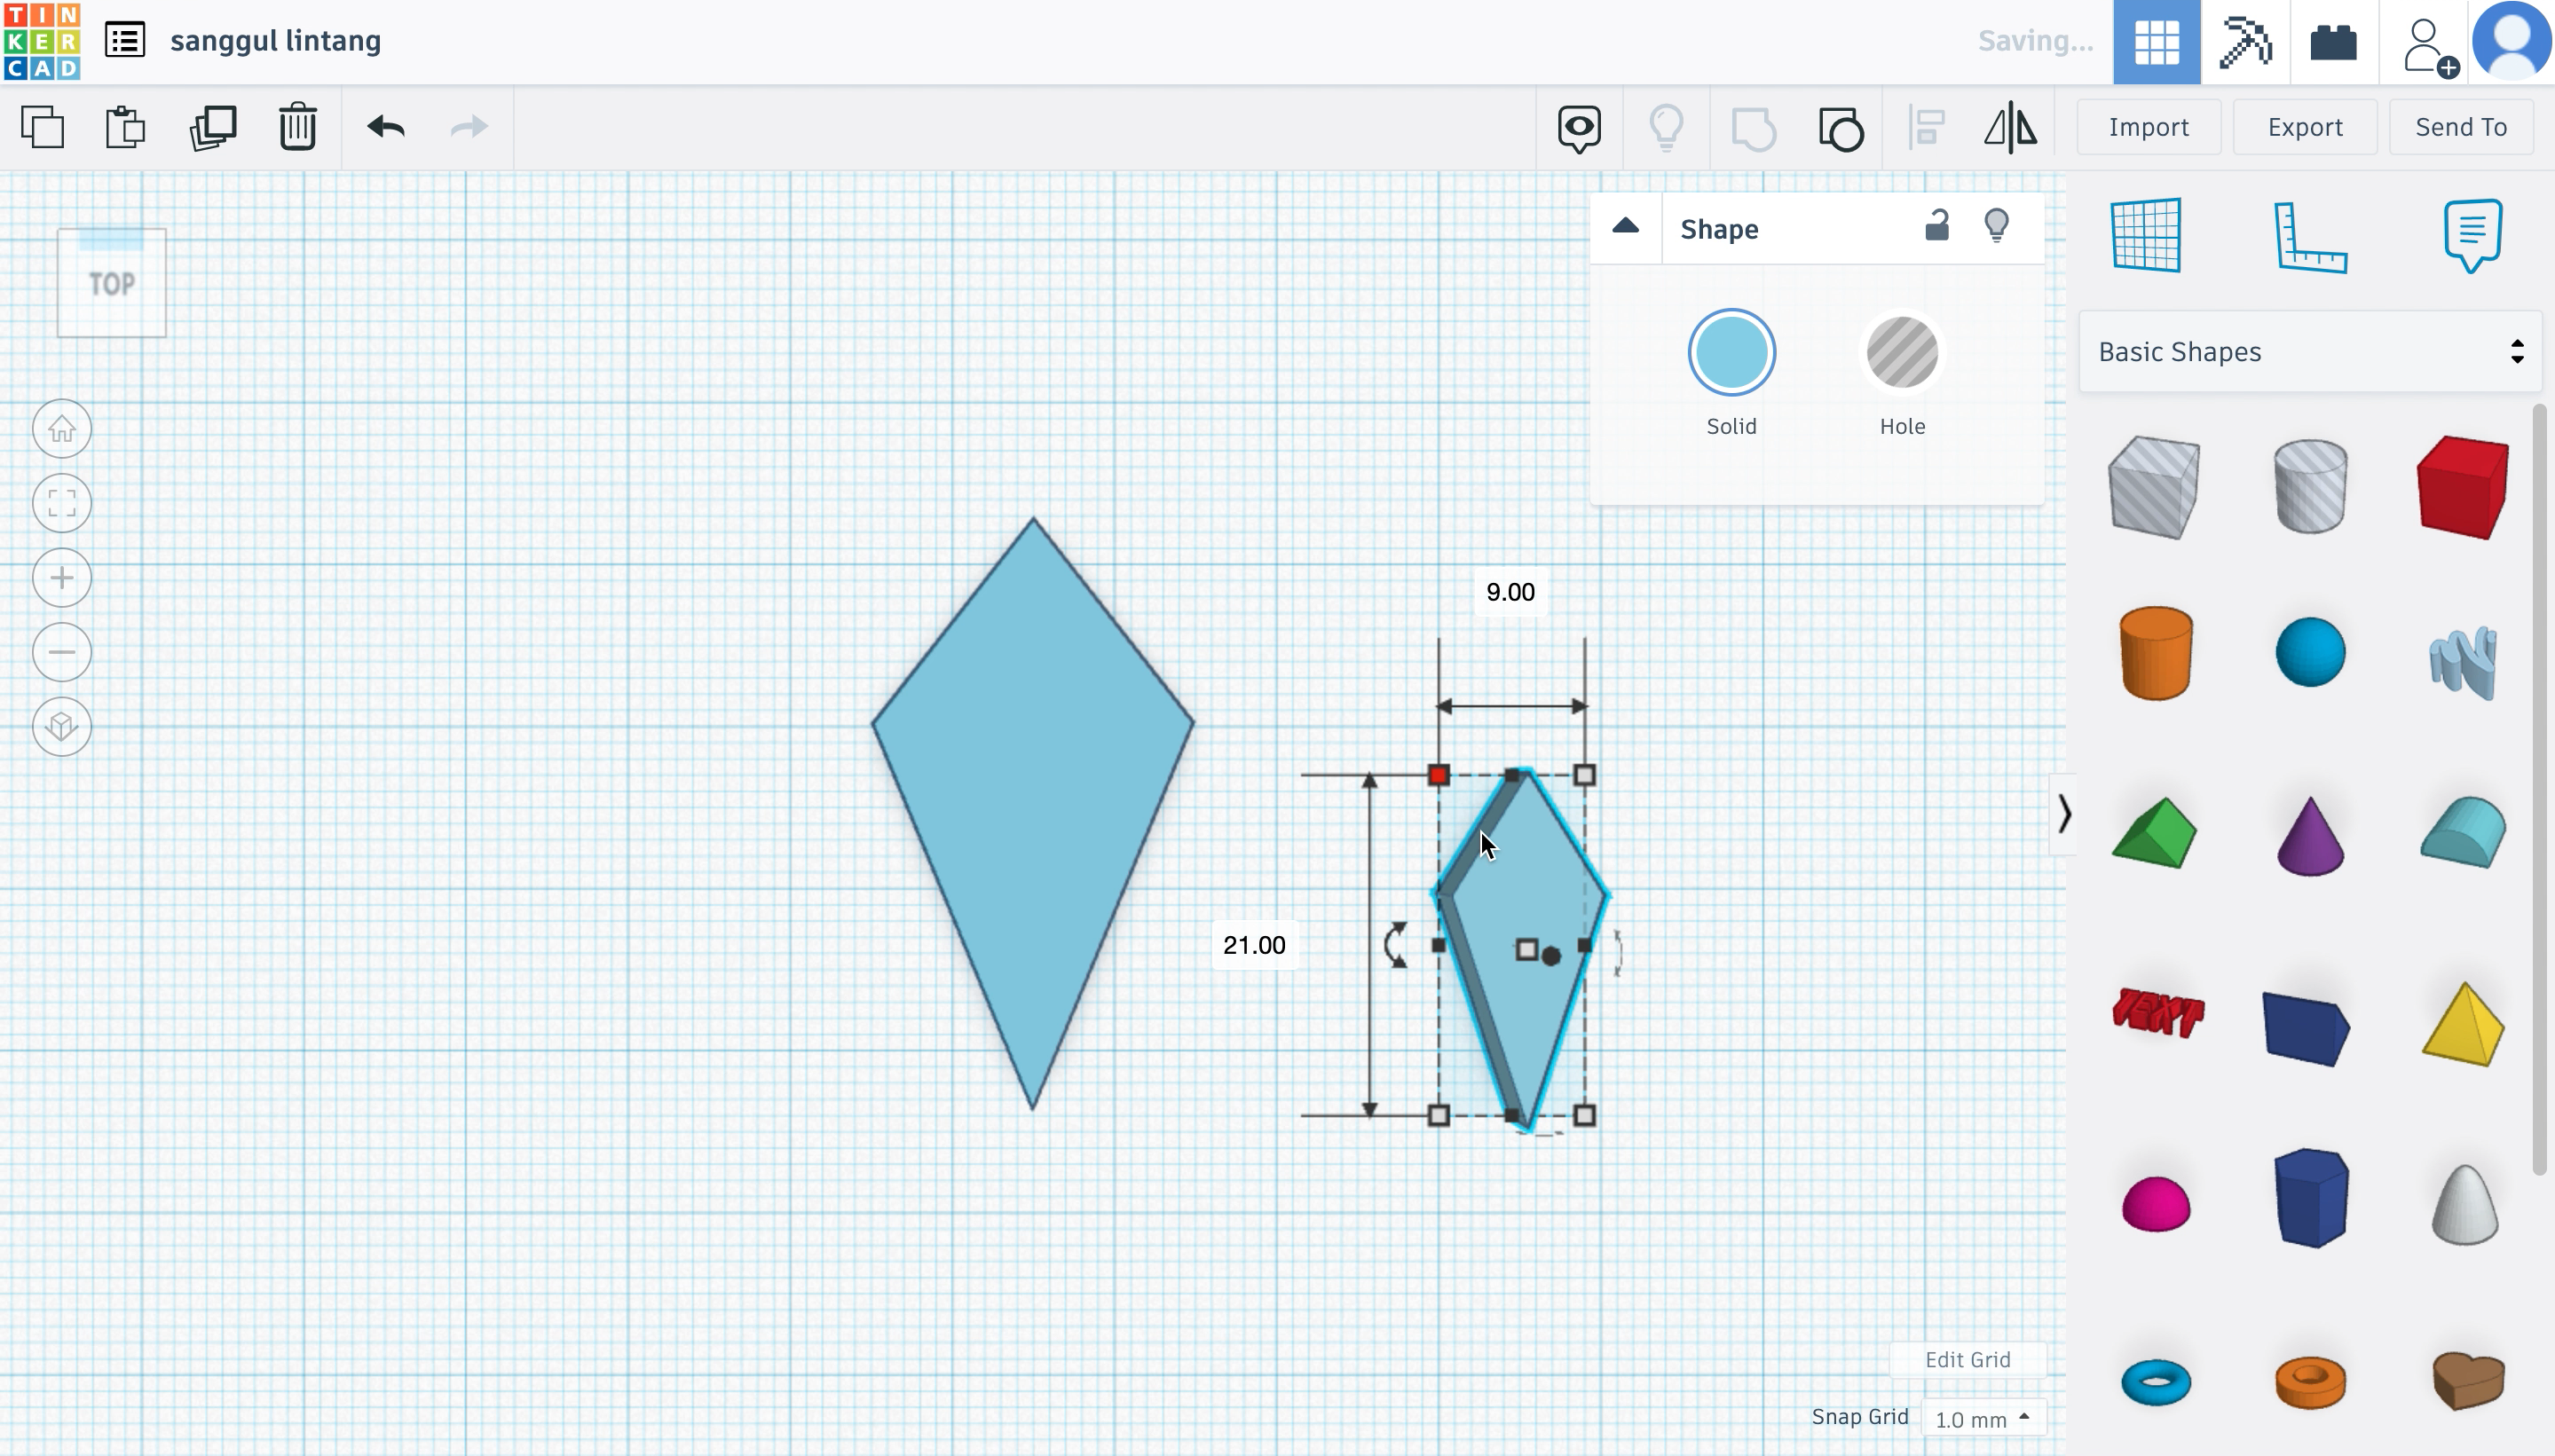
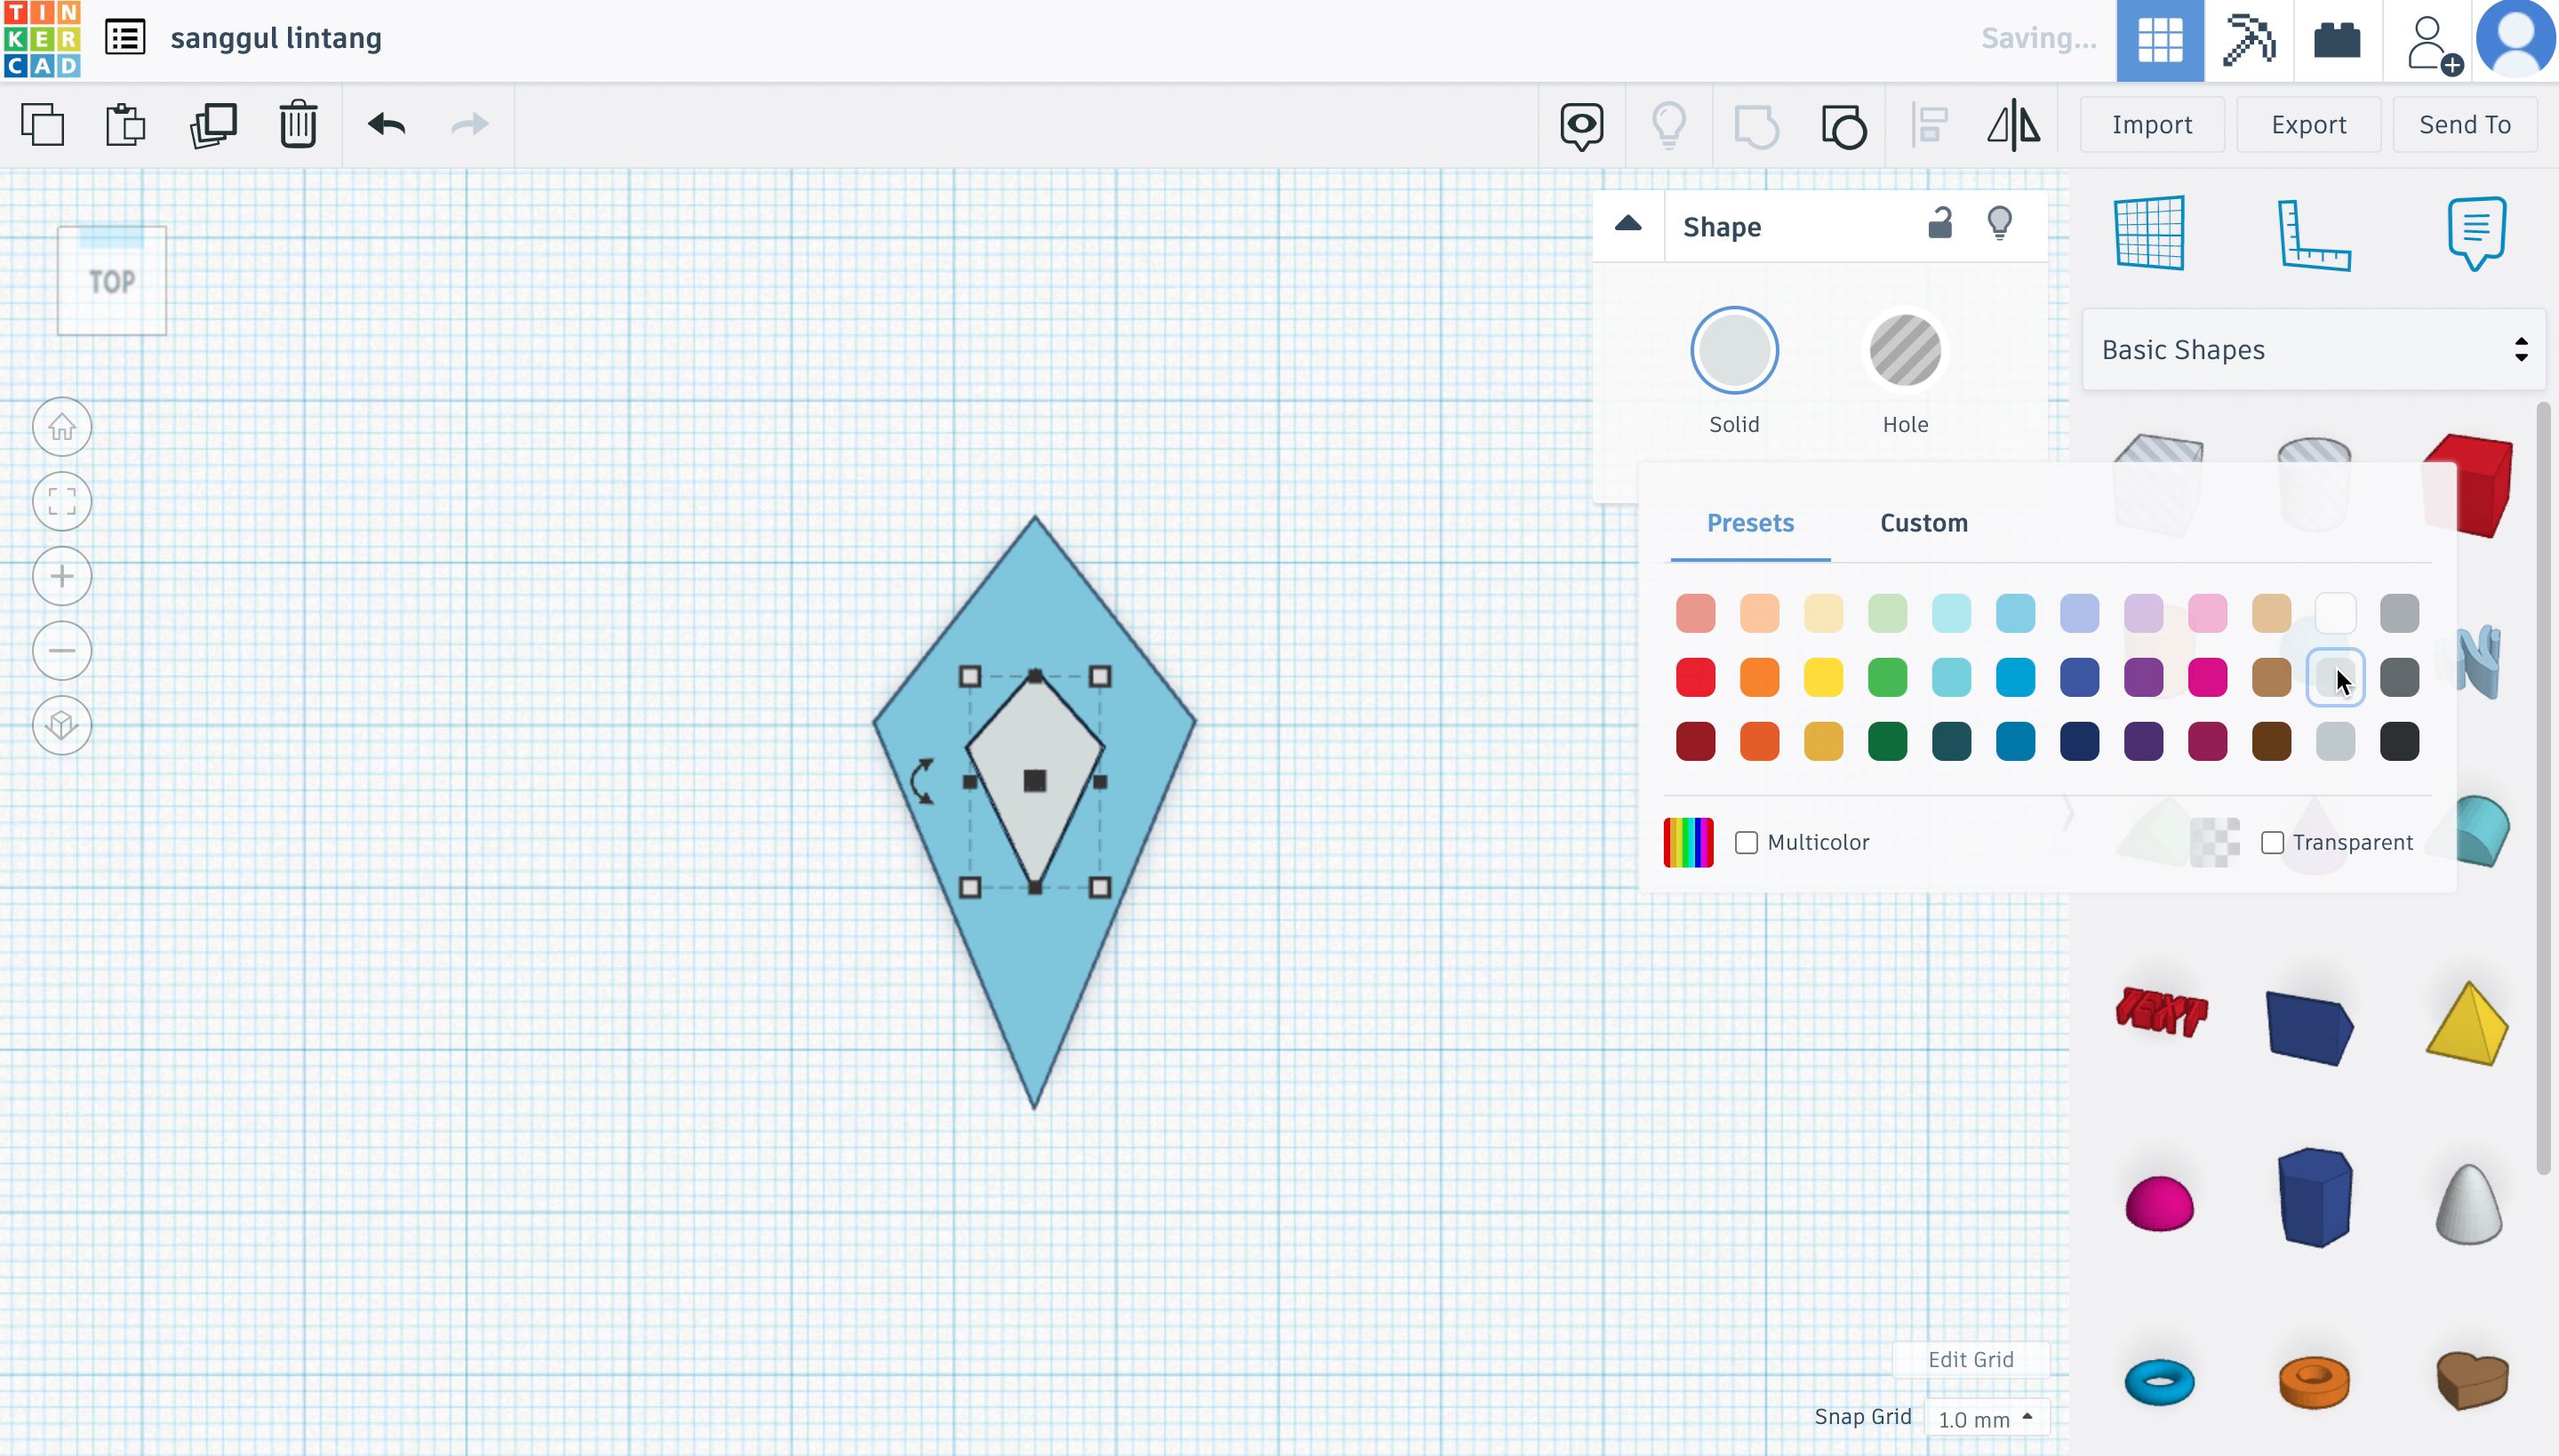
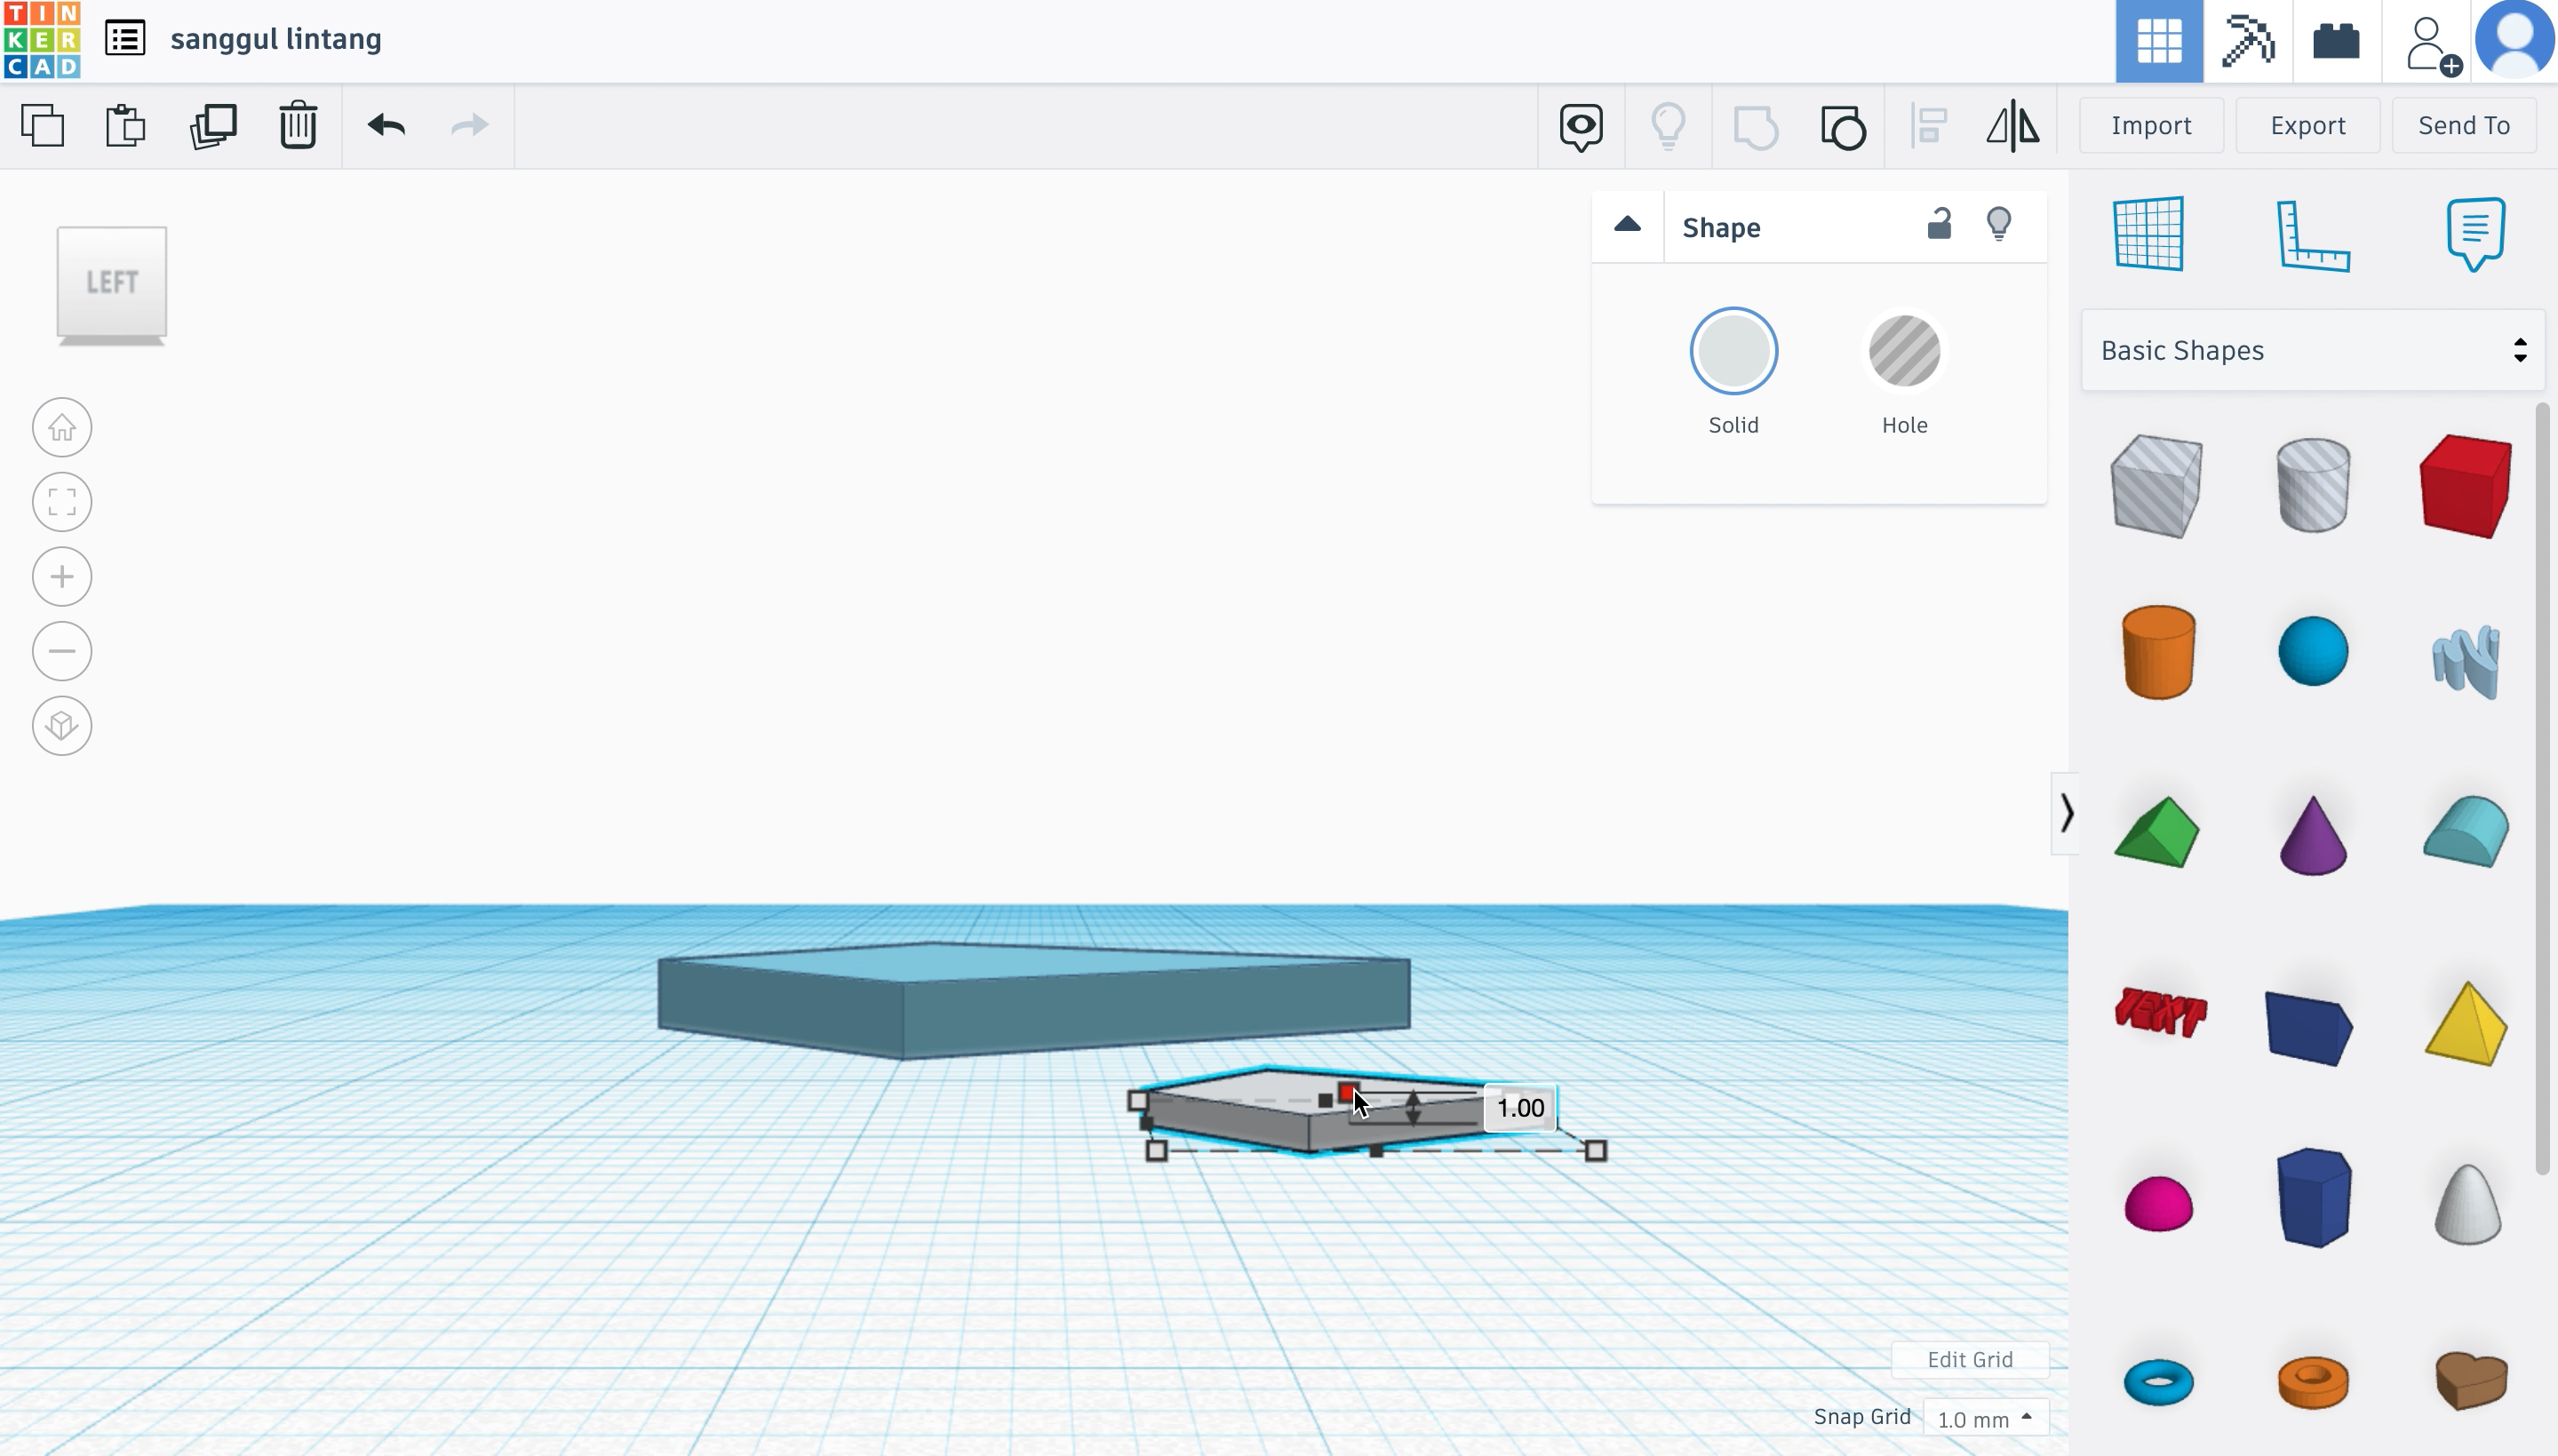
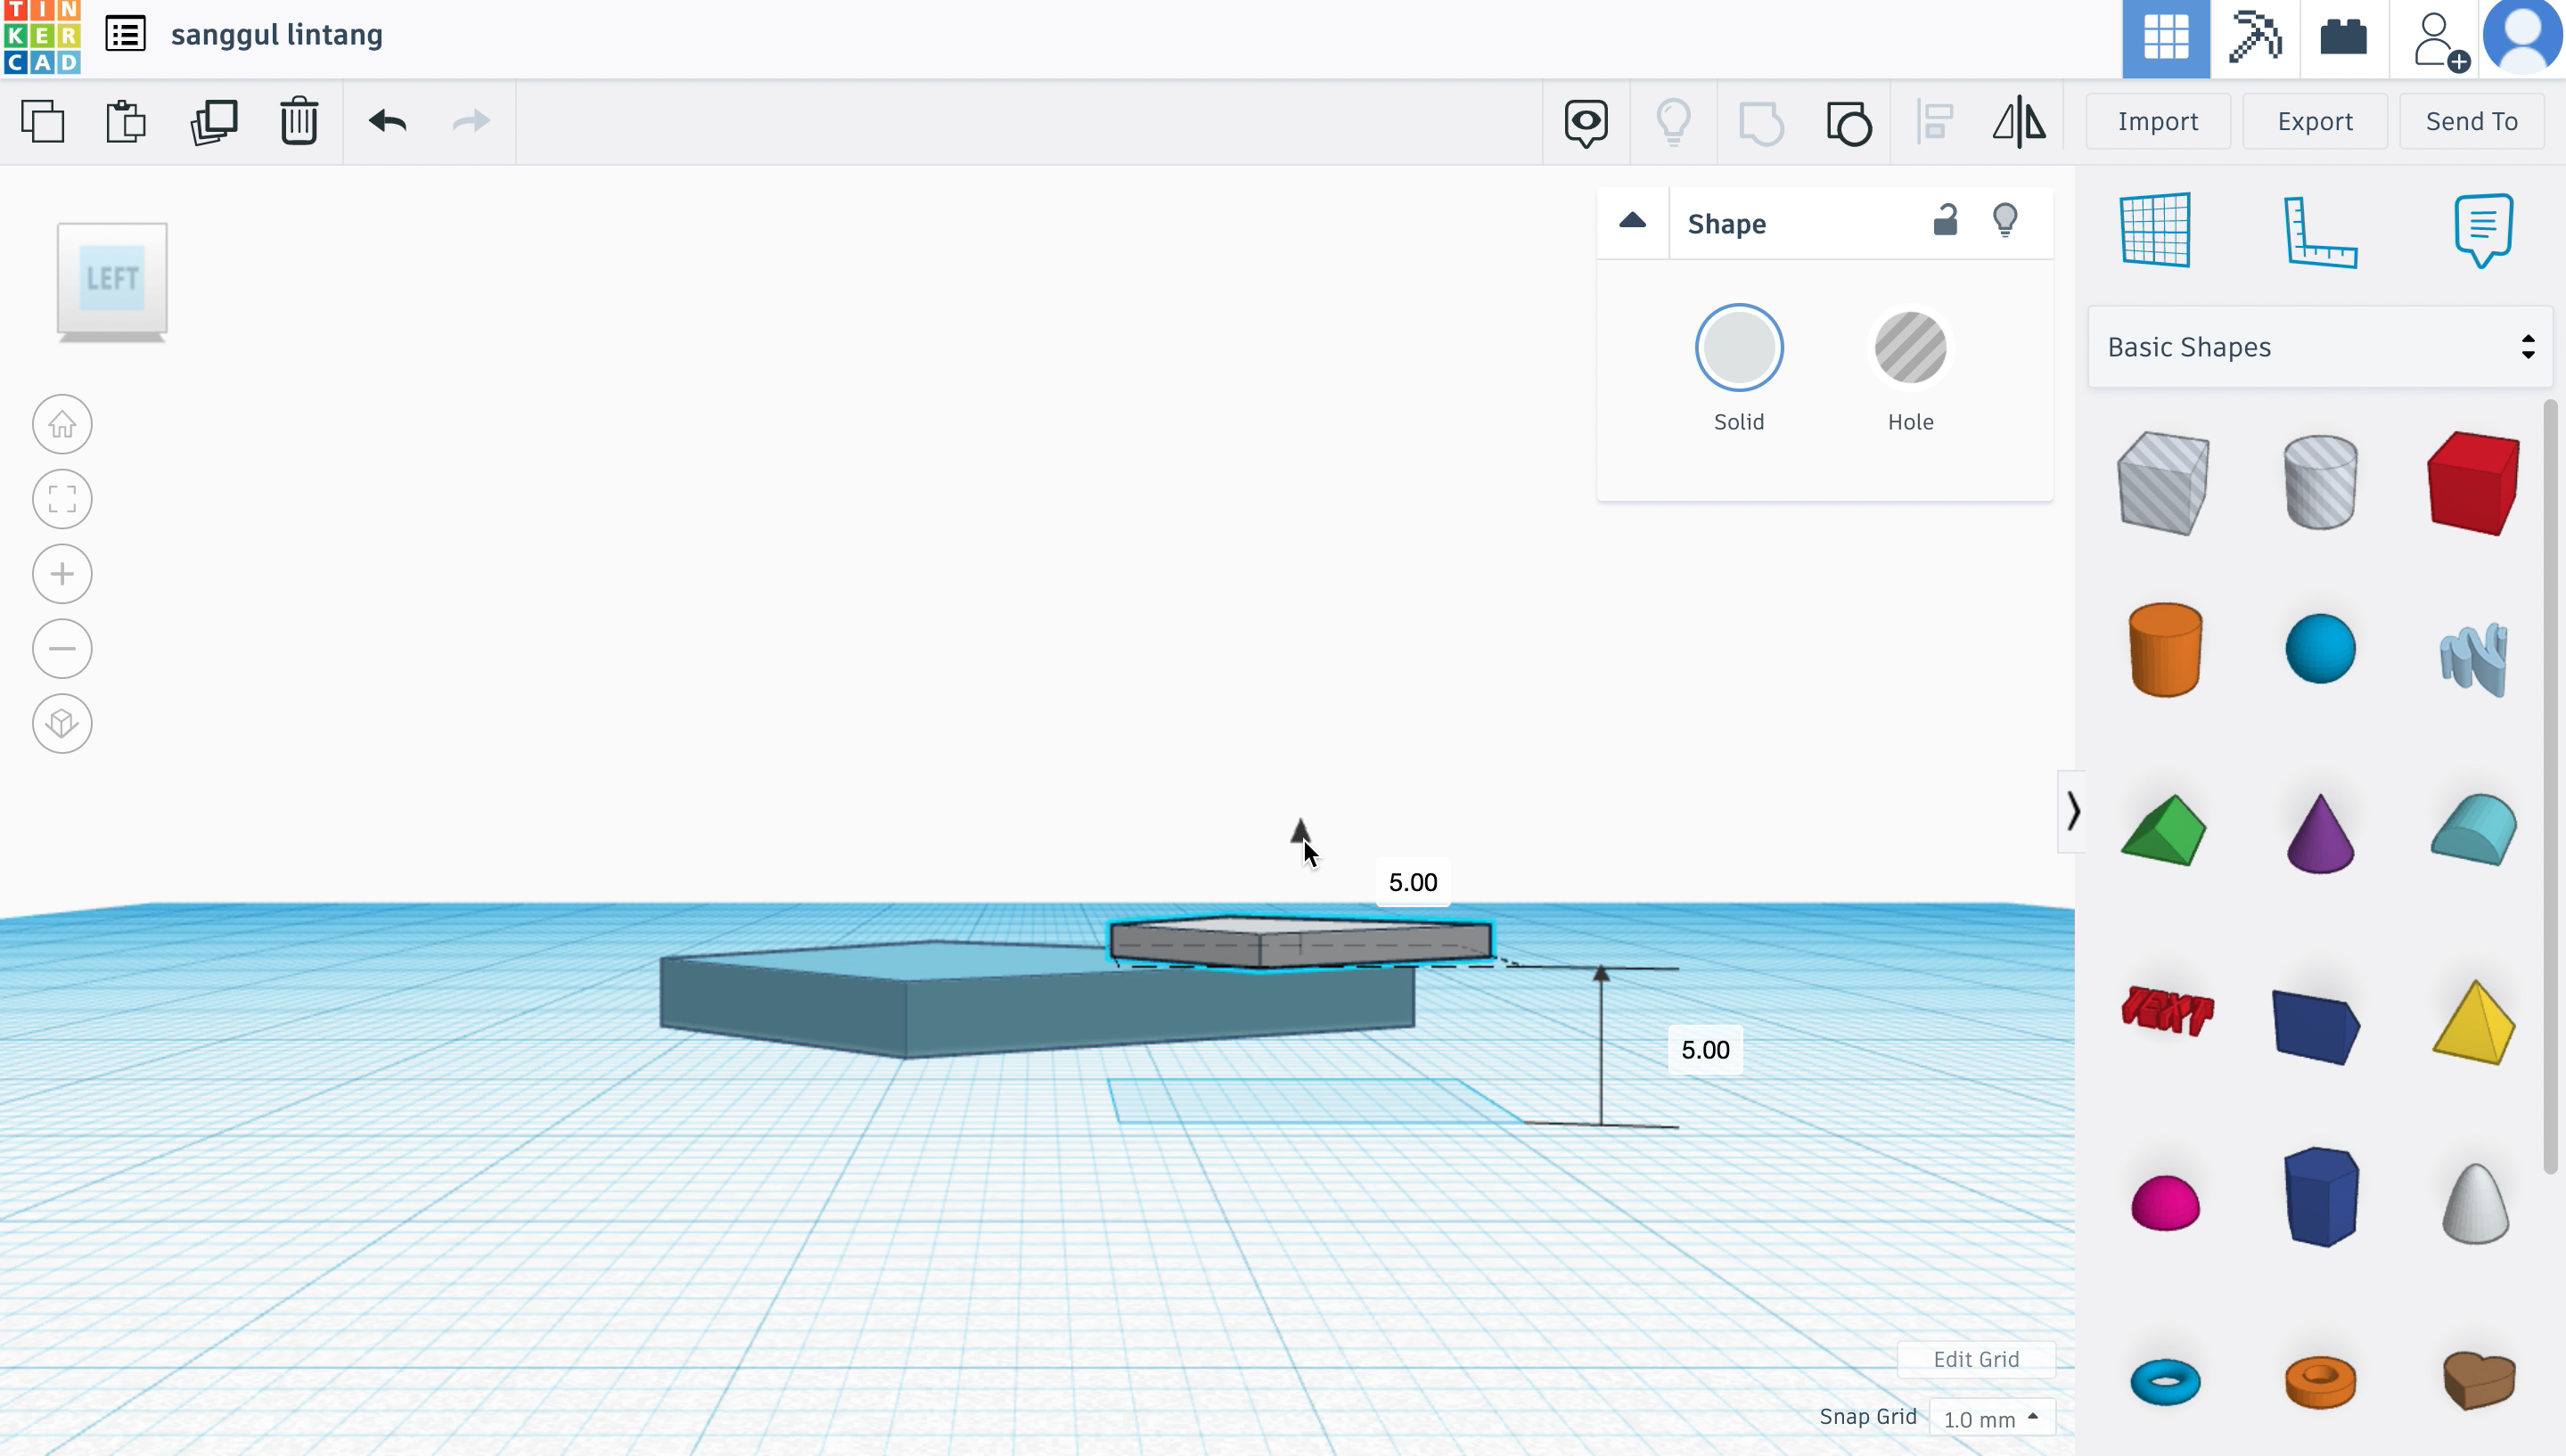
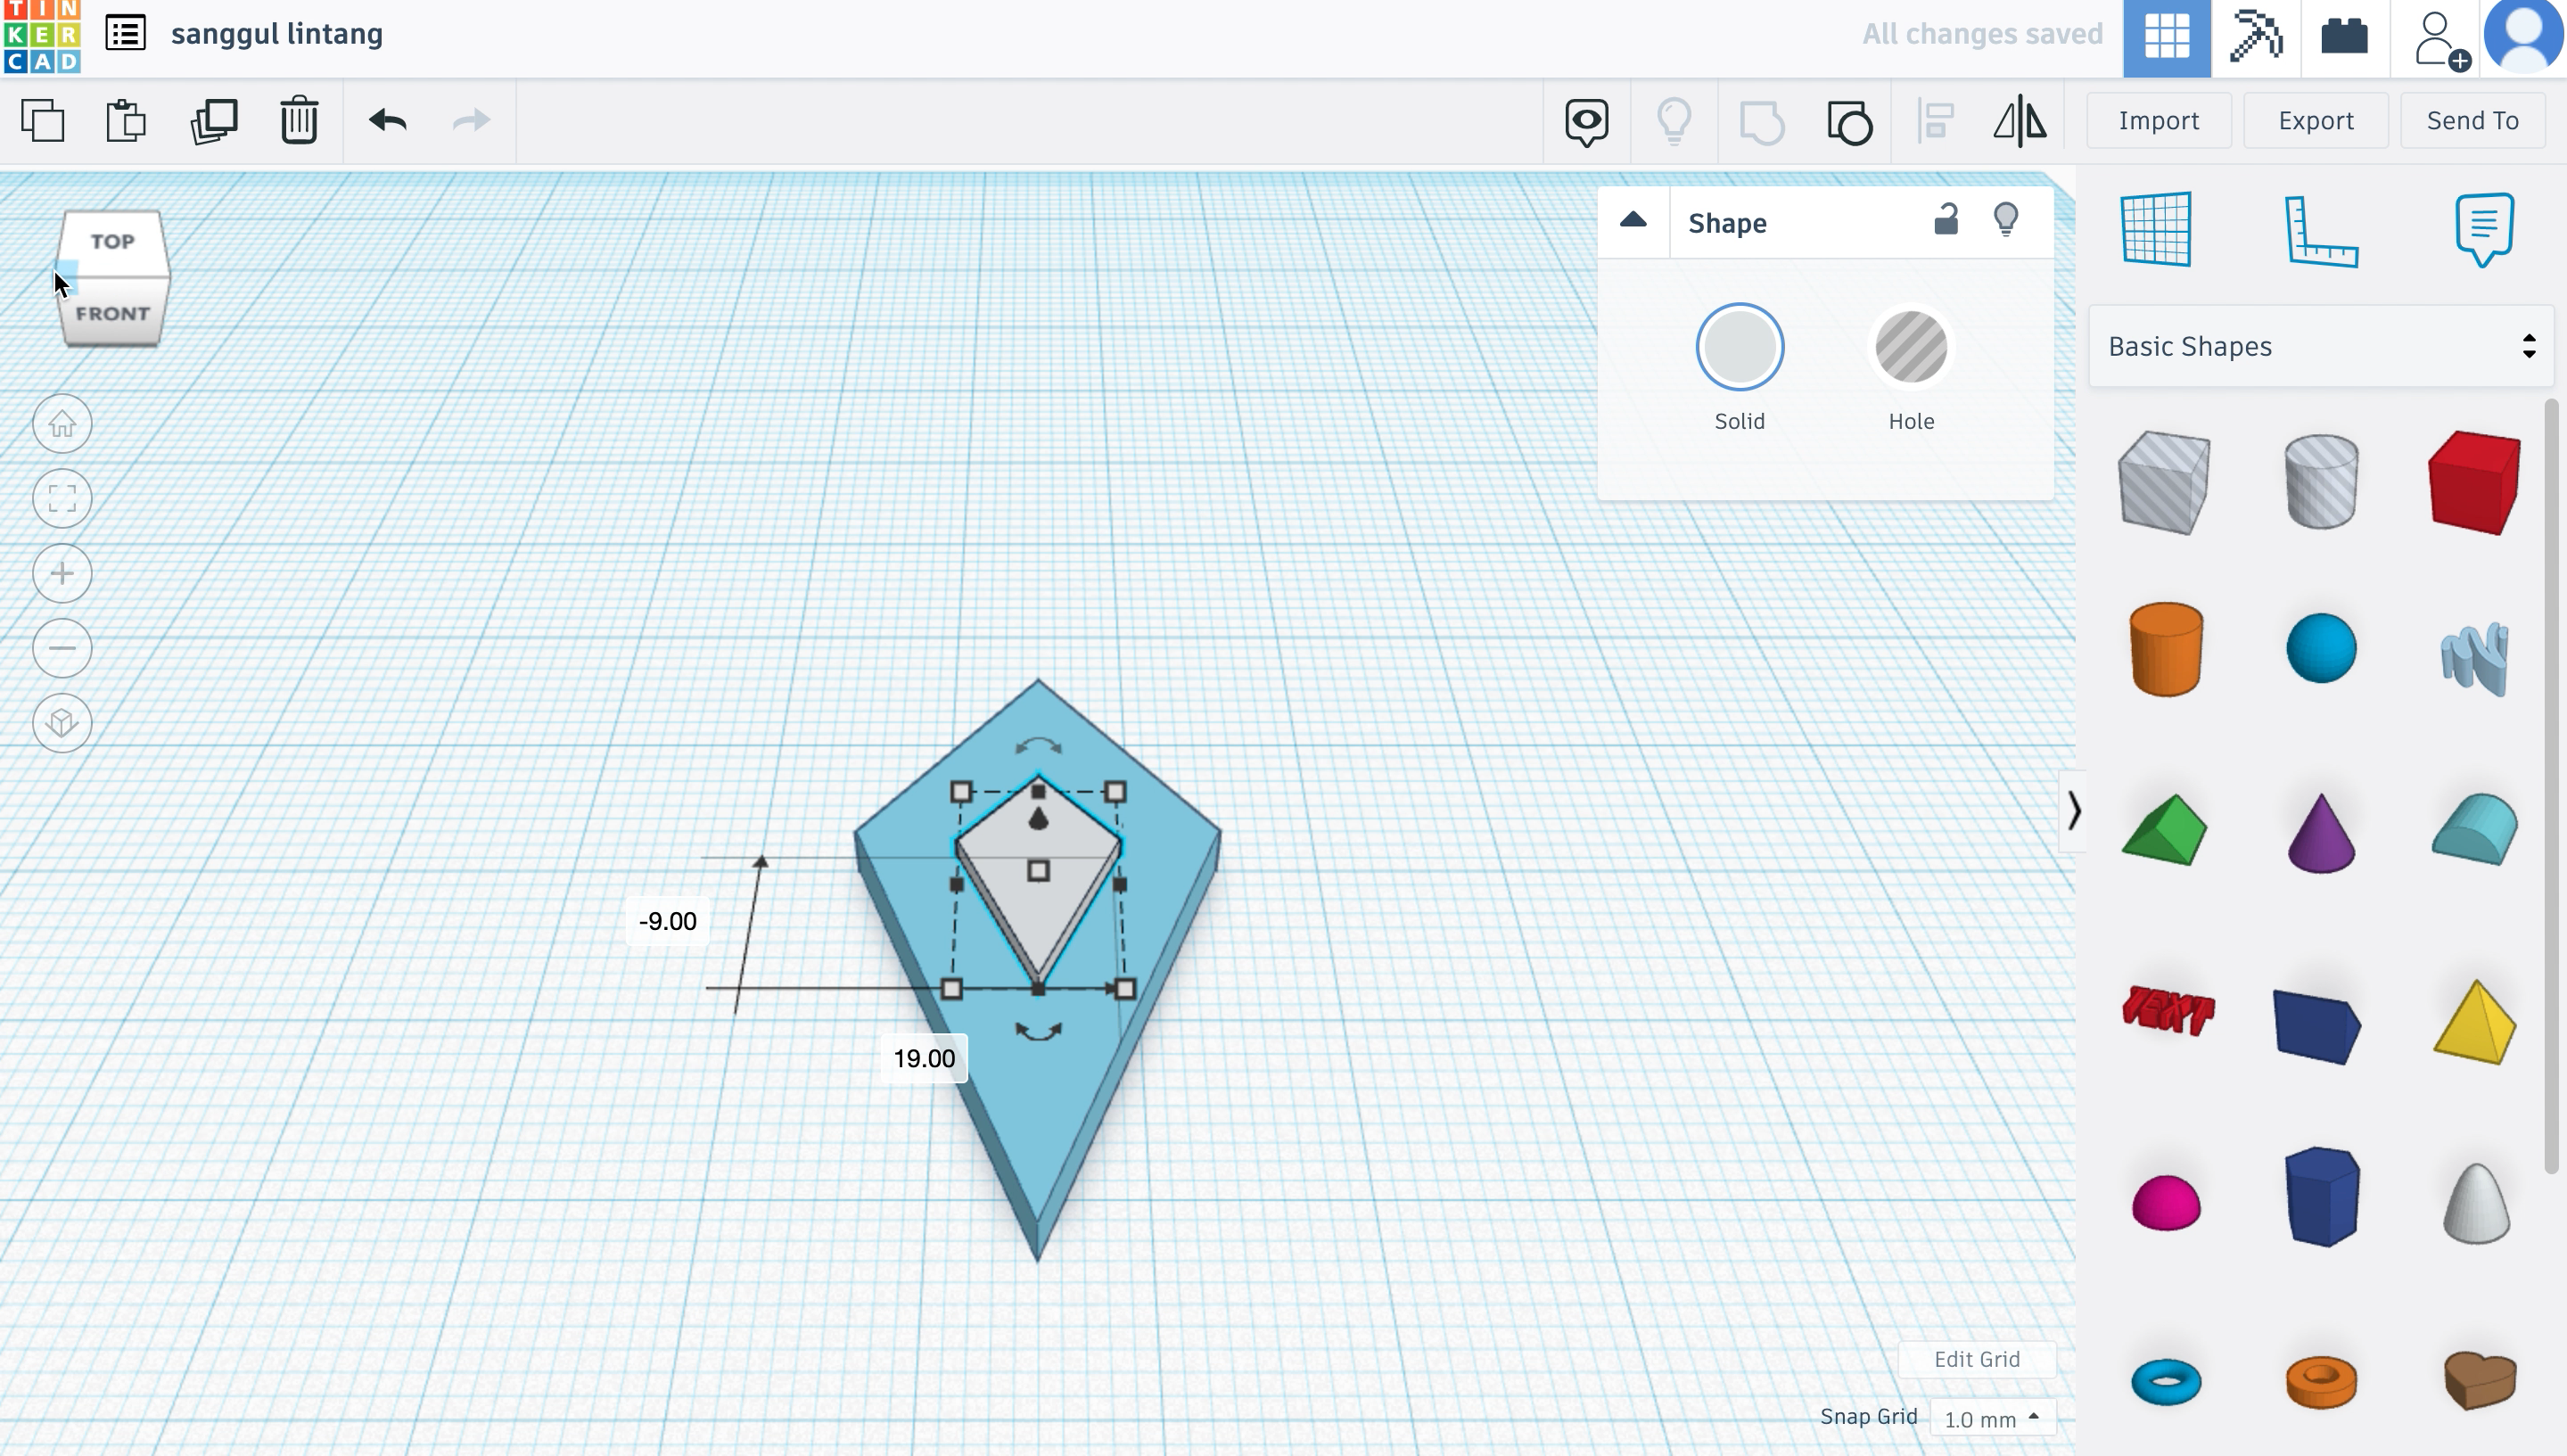
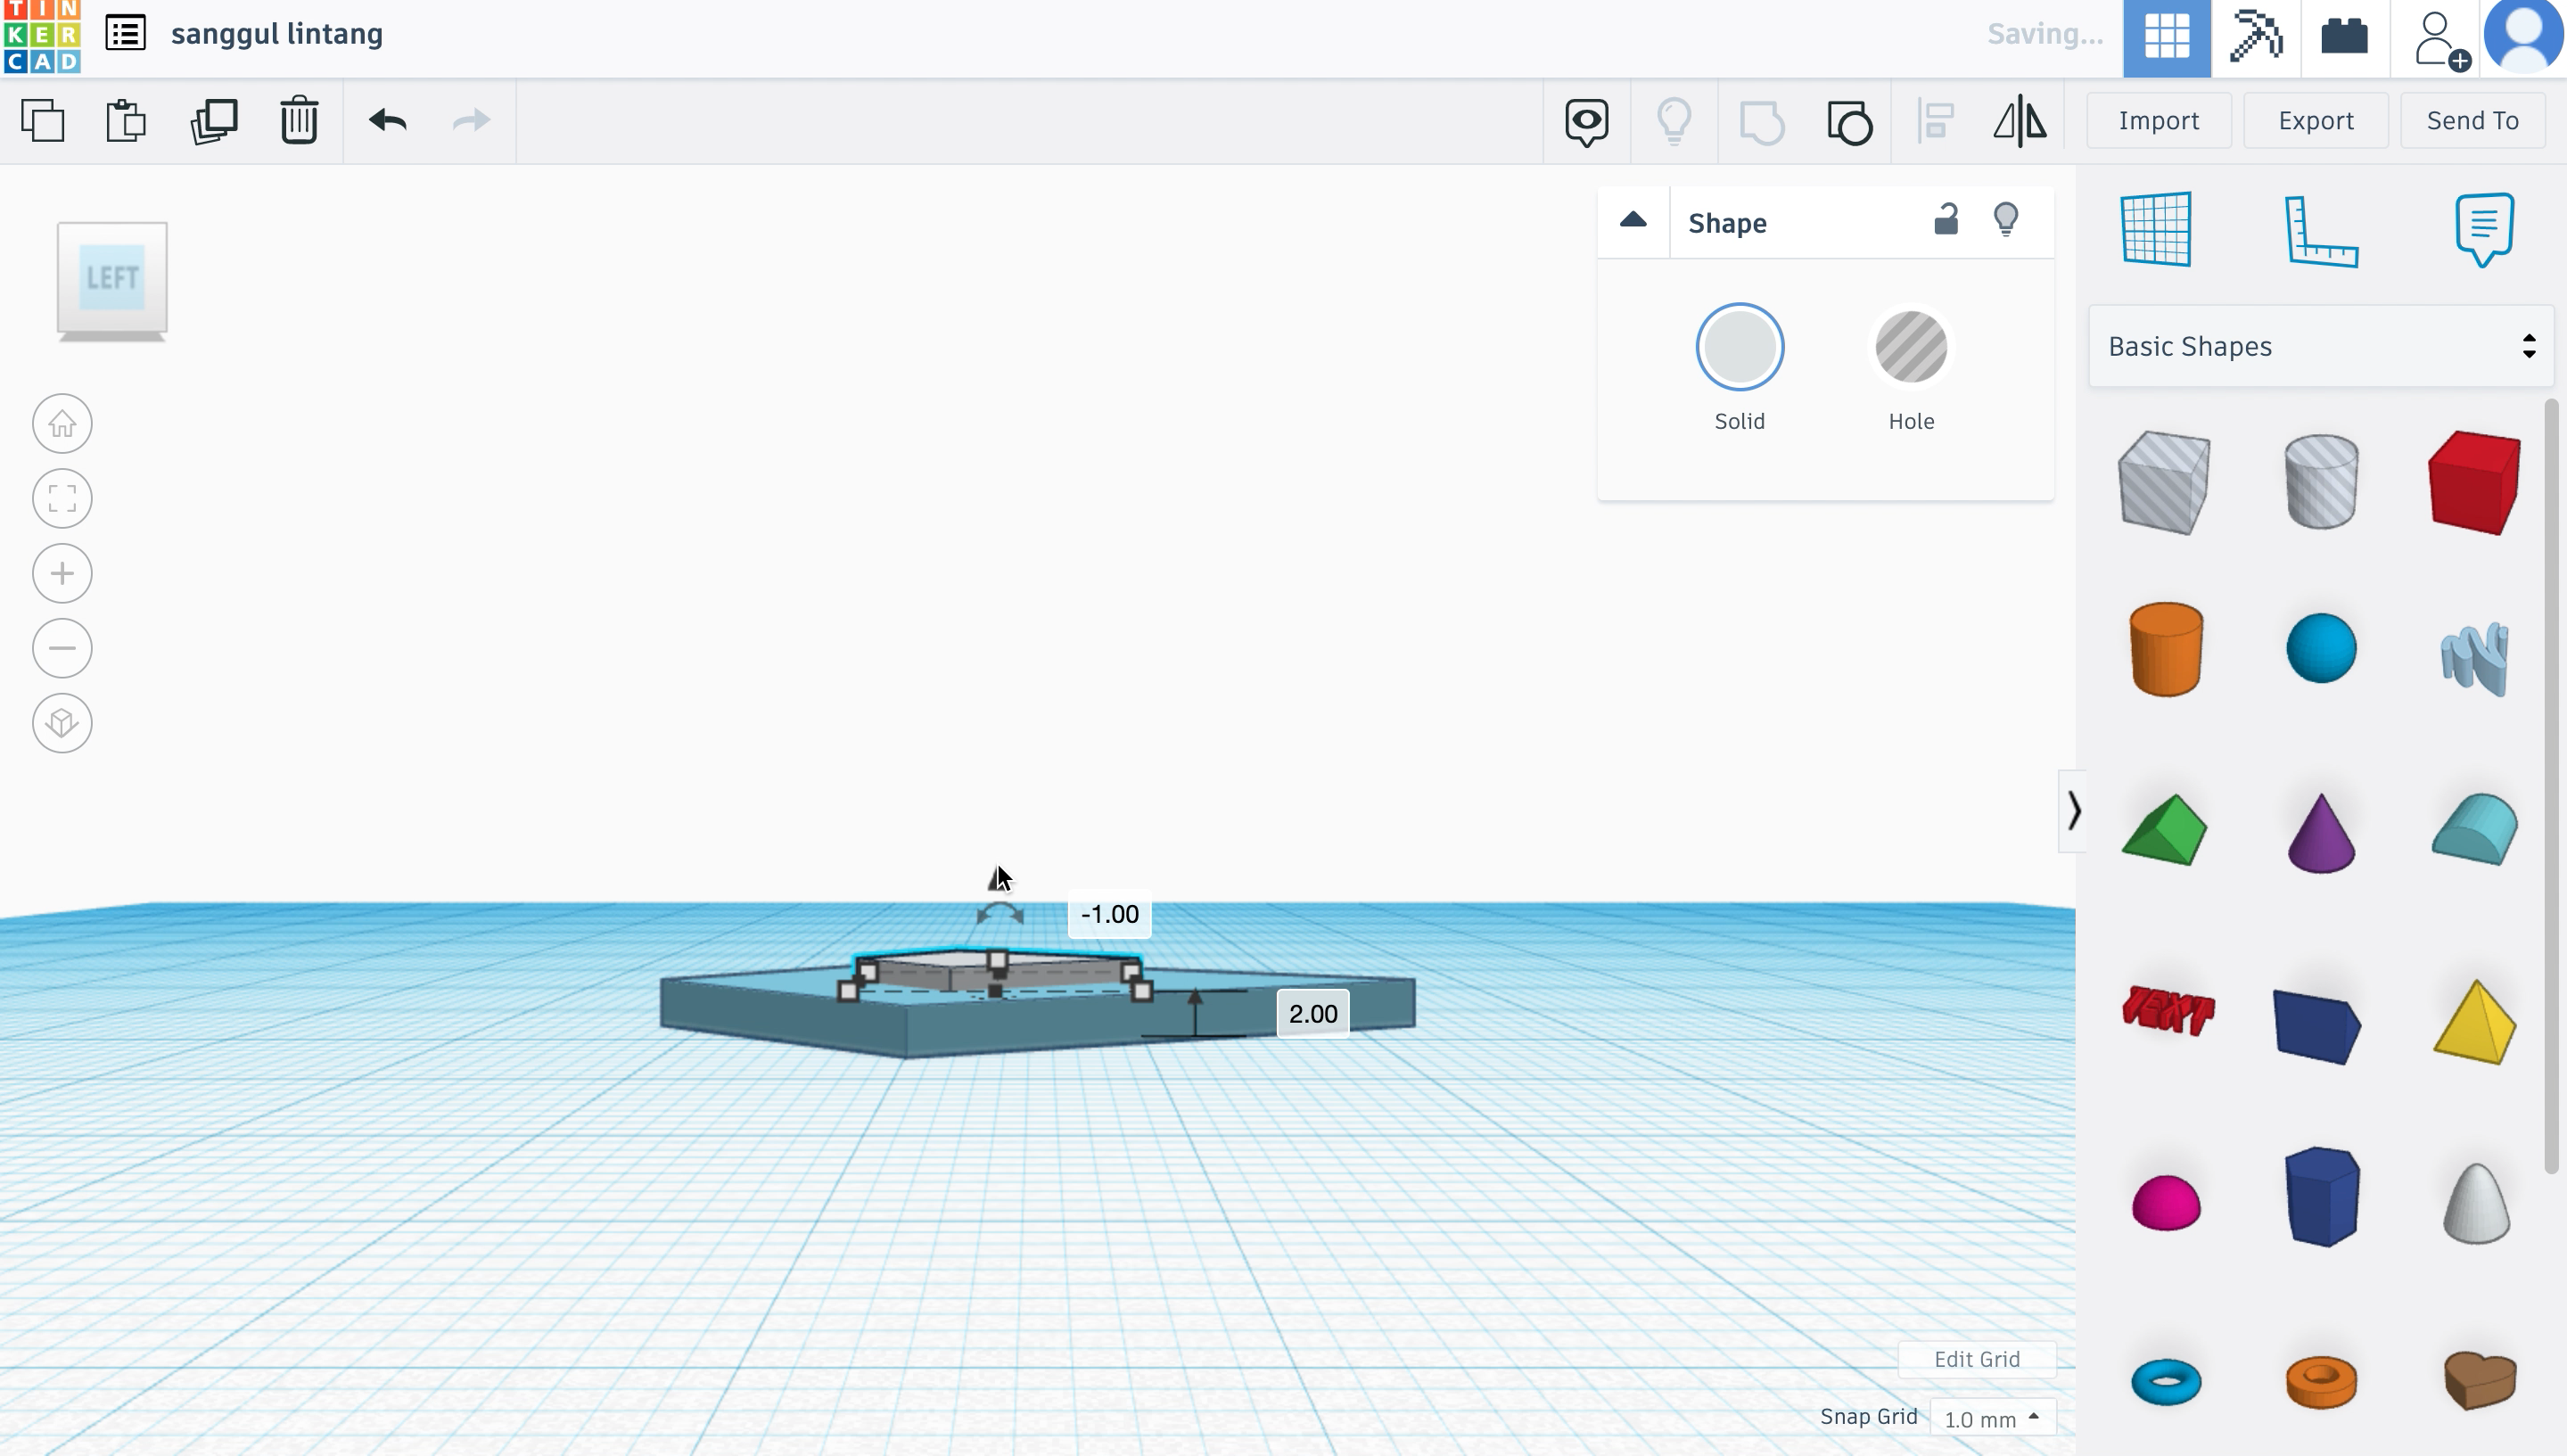
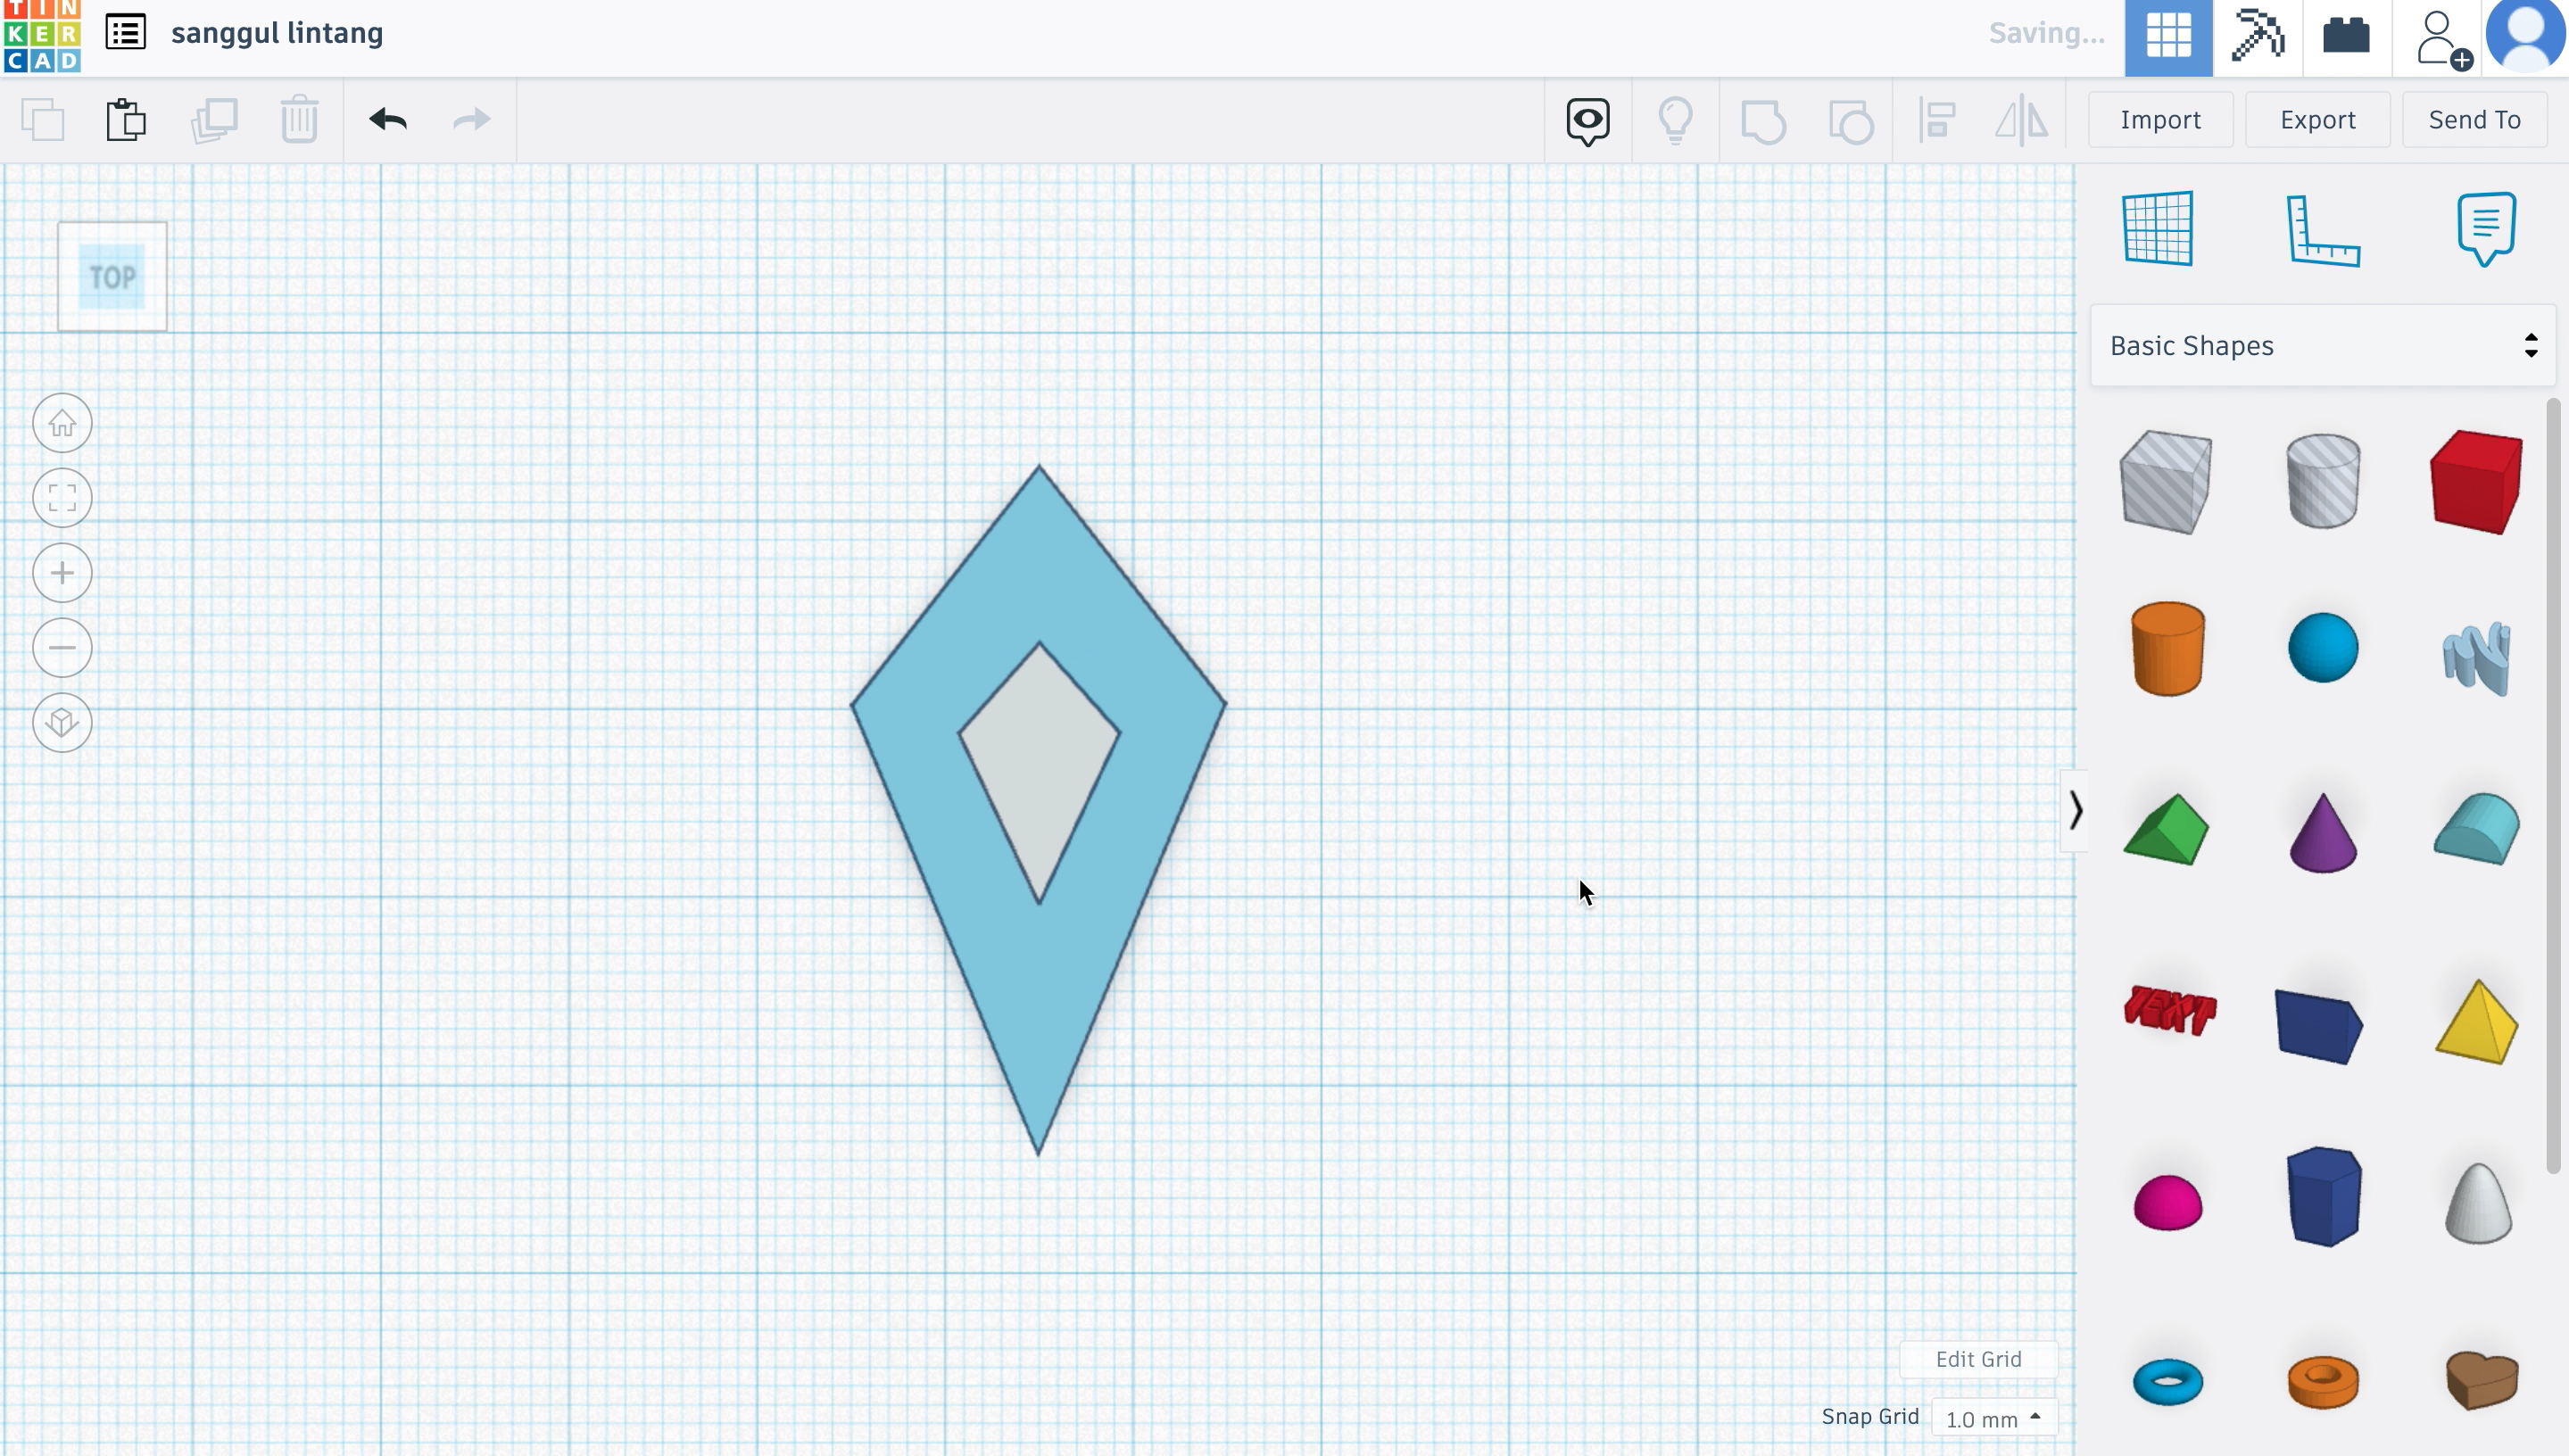
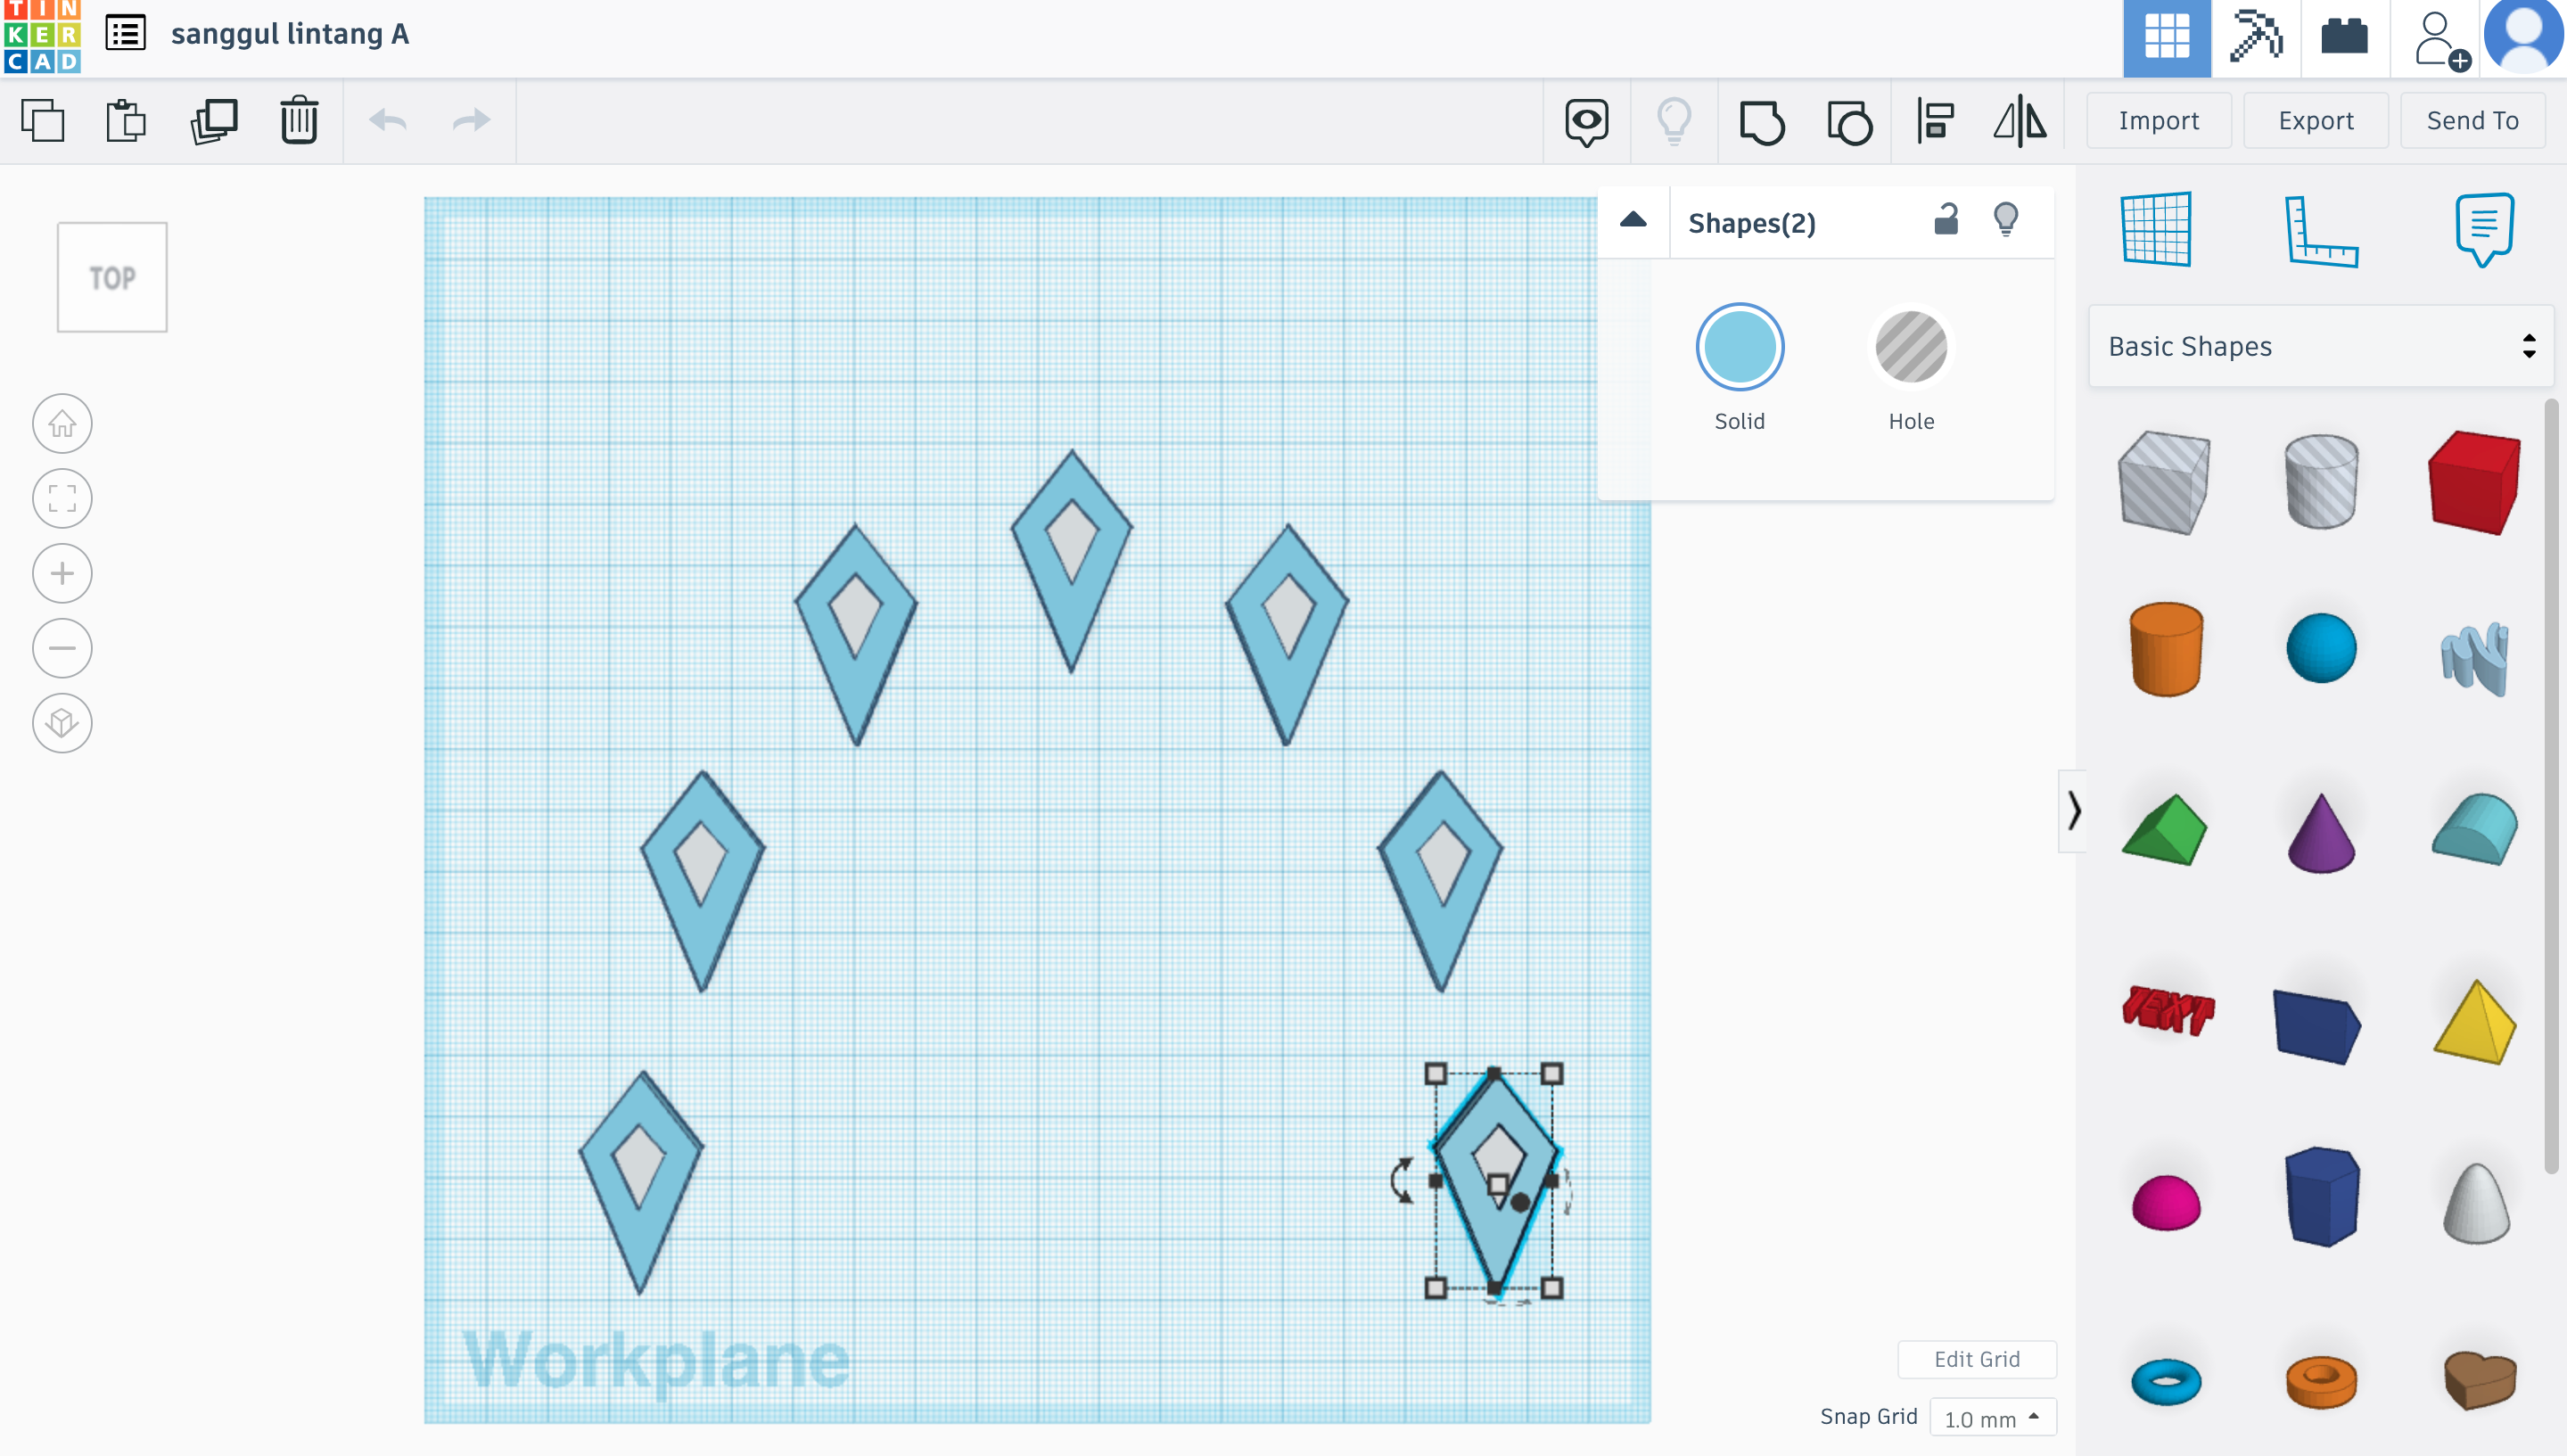
Here I decided to change the colour of the diamond, though it is unnecessary.
- First, select the diamond, copy it and paste/ duplicate it.
- Second, make the second diamond and make it smaller like in the image above. Here I changed the colour or the smaller diamond to make it easy to differentiate.
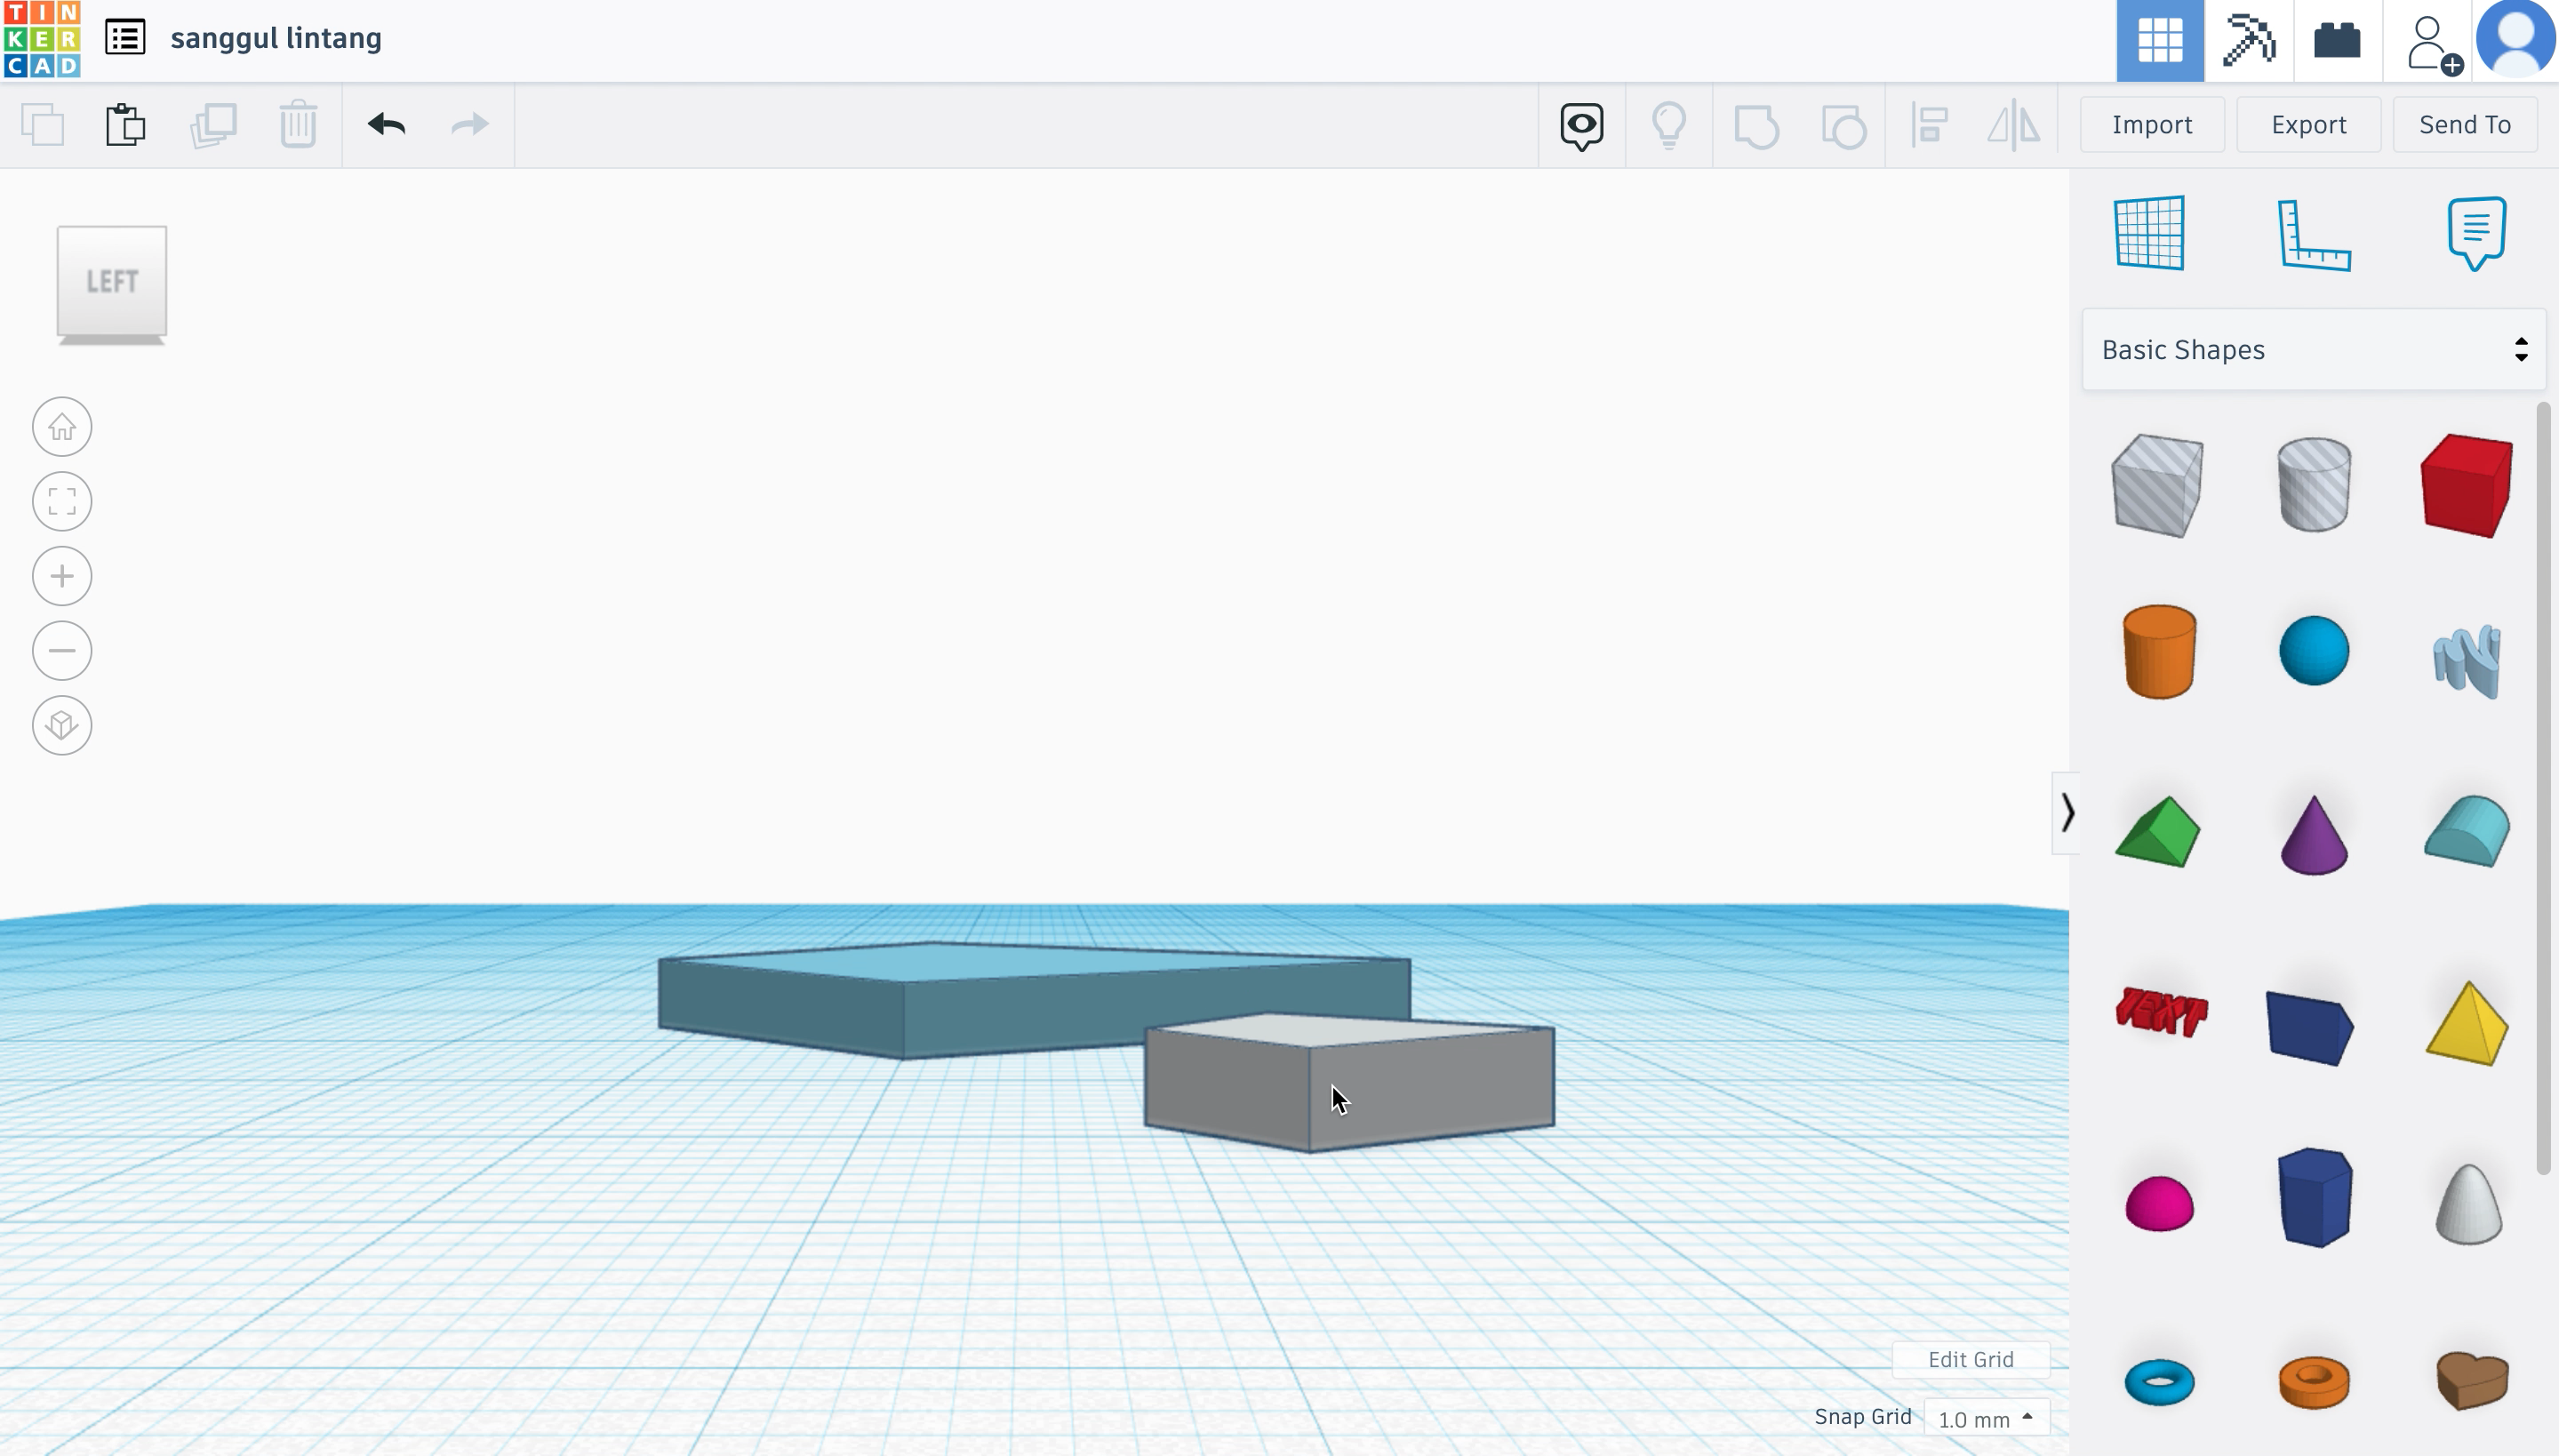
- Next, I put the grey diamond beside the blue diamond to adjust the thickness while comparing it to the blue diamond. Then, bring the grey diamond up to the height of the blue diamond, and align it back to the center of the blue diamond.
- Next, I readjusted the thickness of the blue diamond.
- Lastly, I duplicated both diamonds to the amount that I need for my sanggul lintang; seven.
Sanggul Lintang B
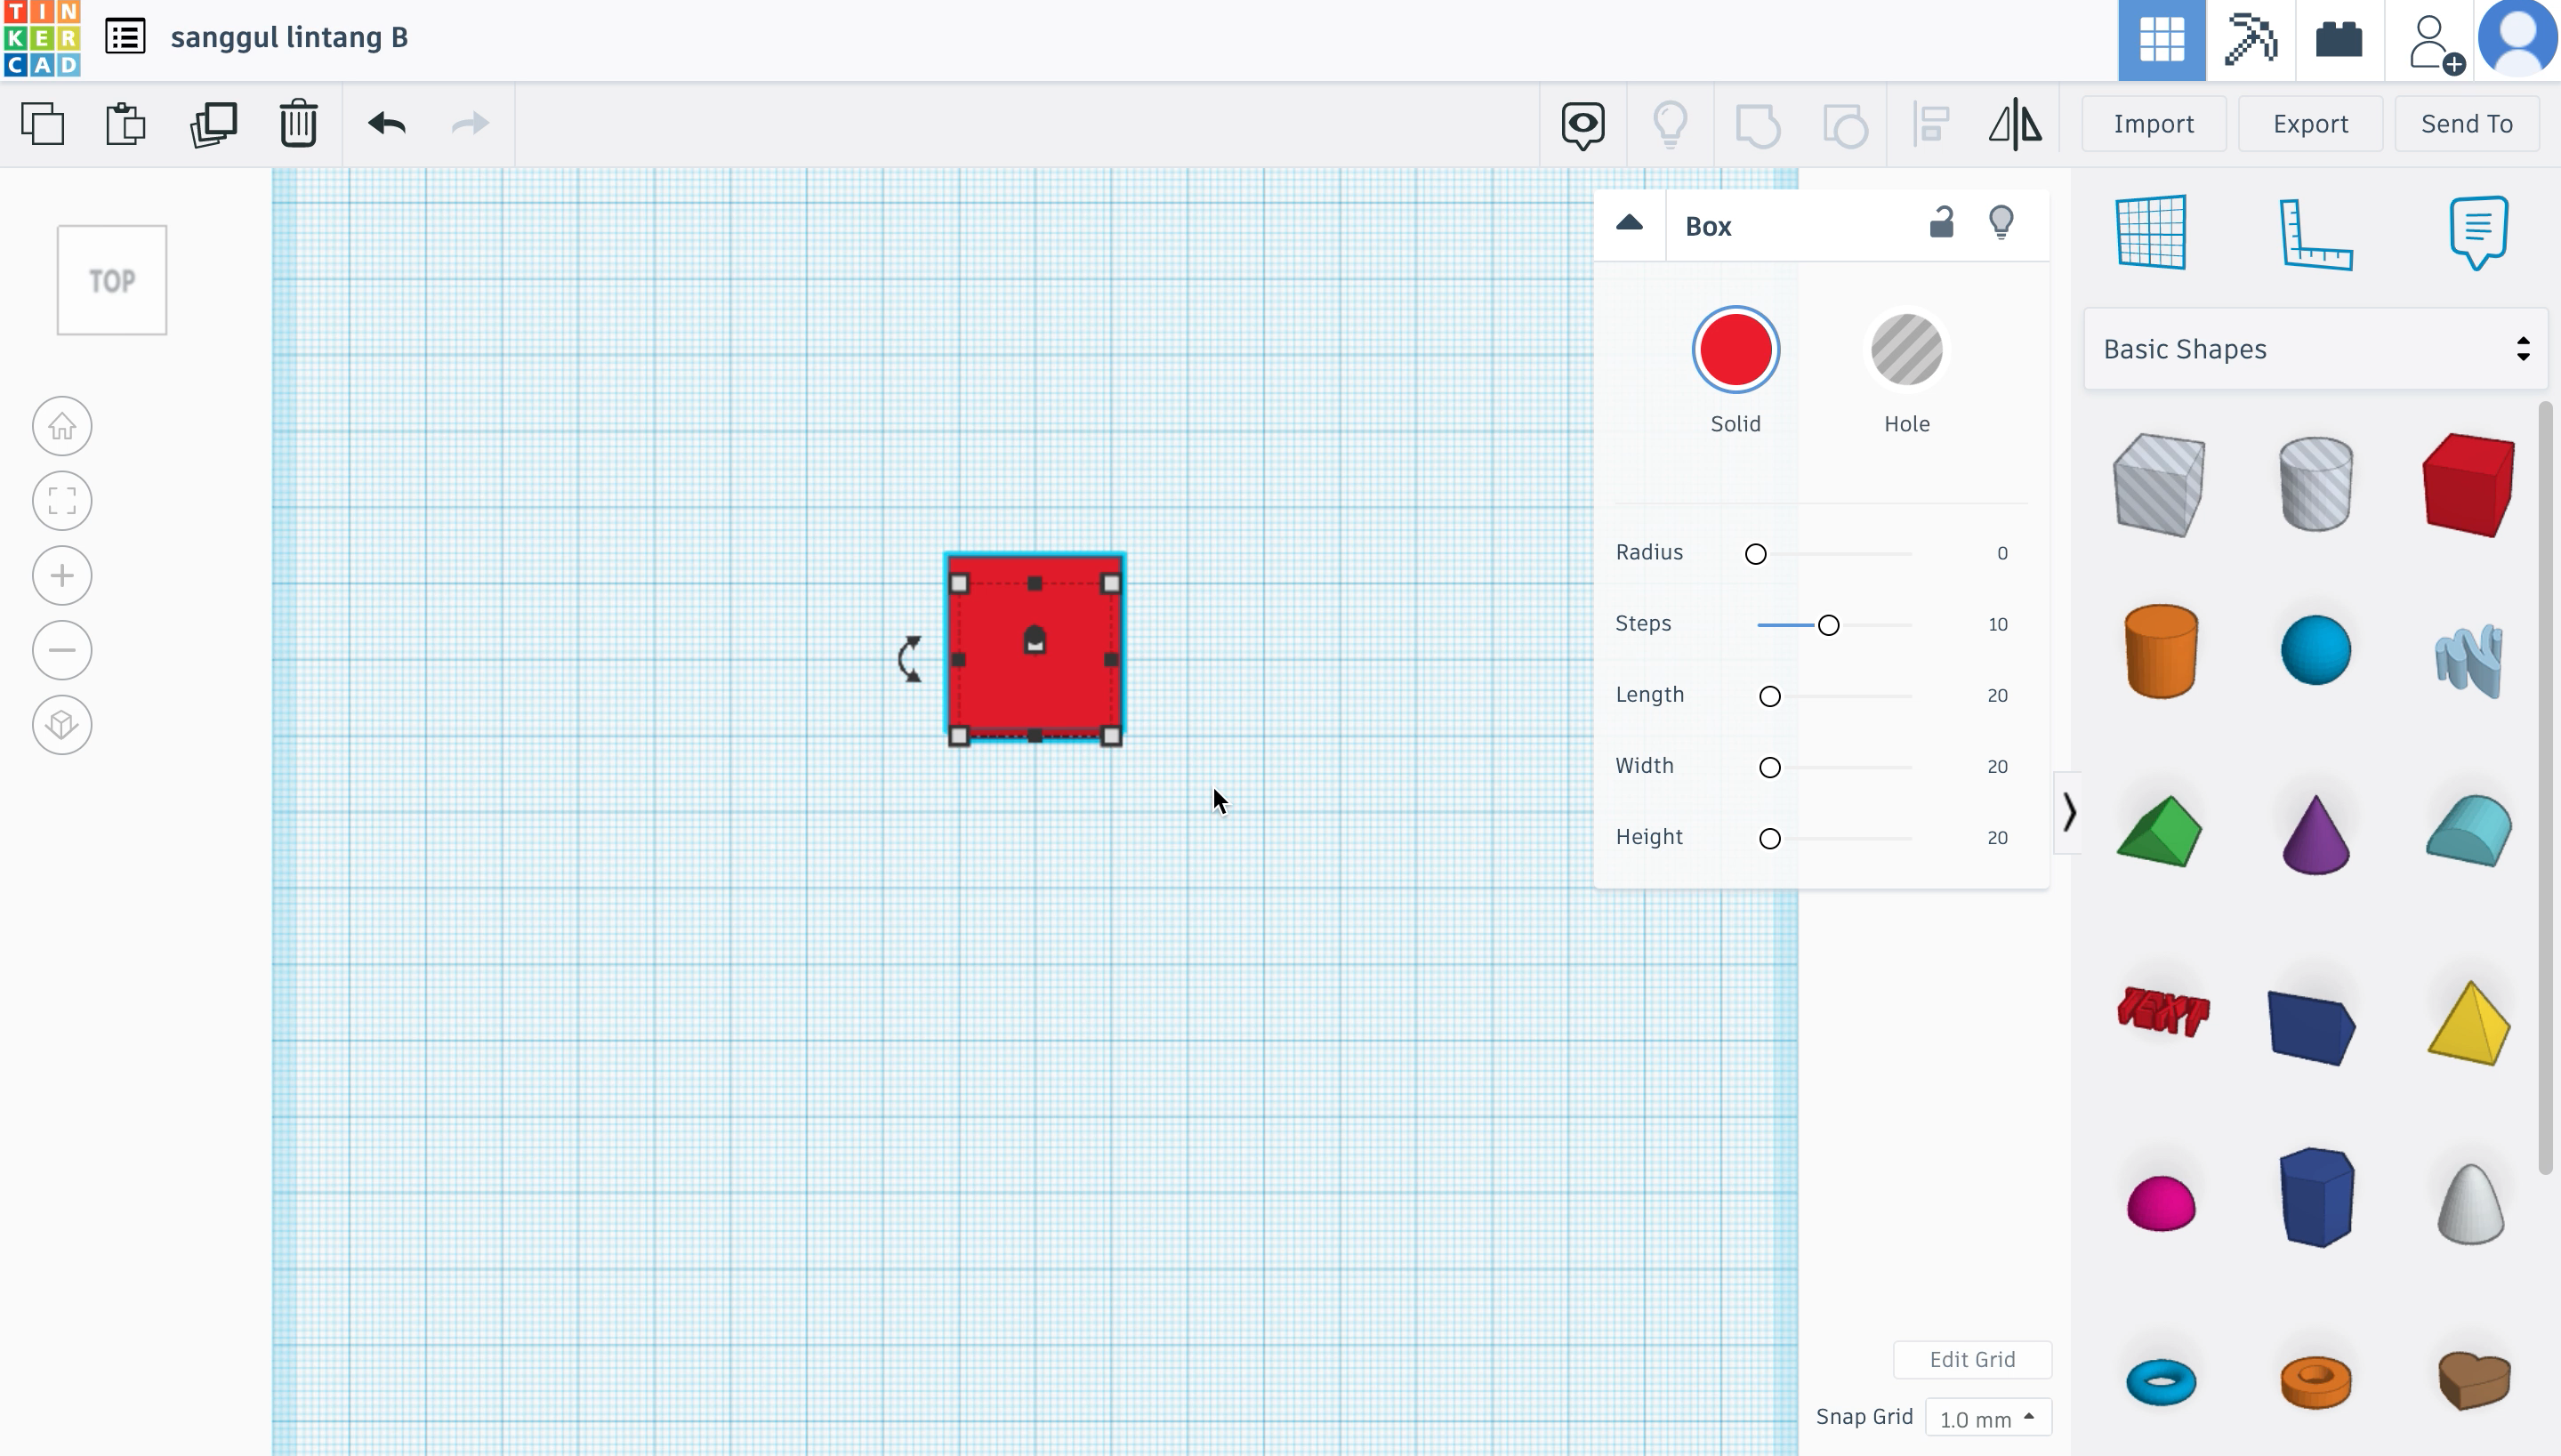
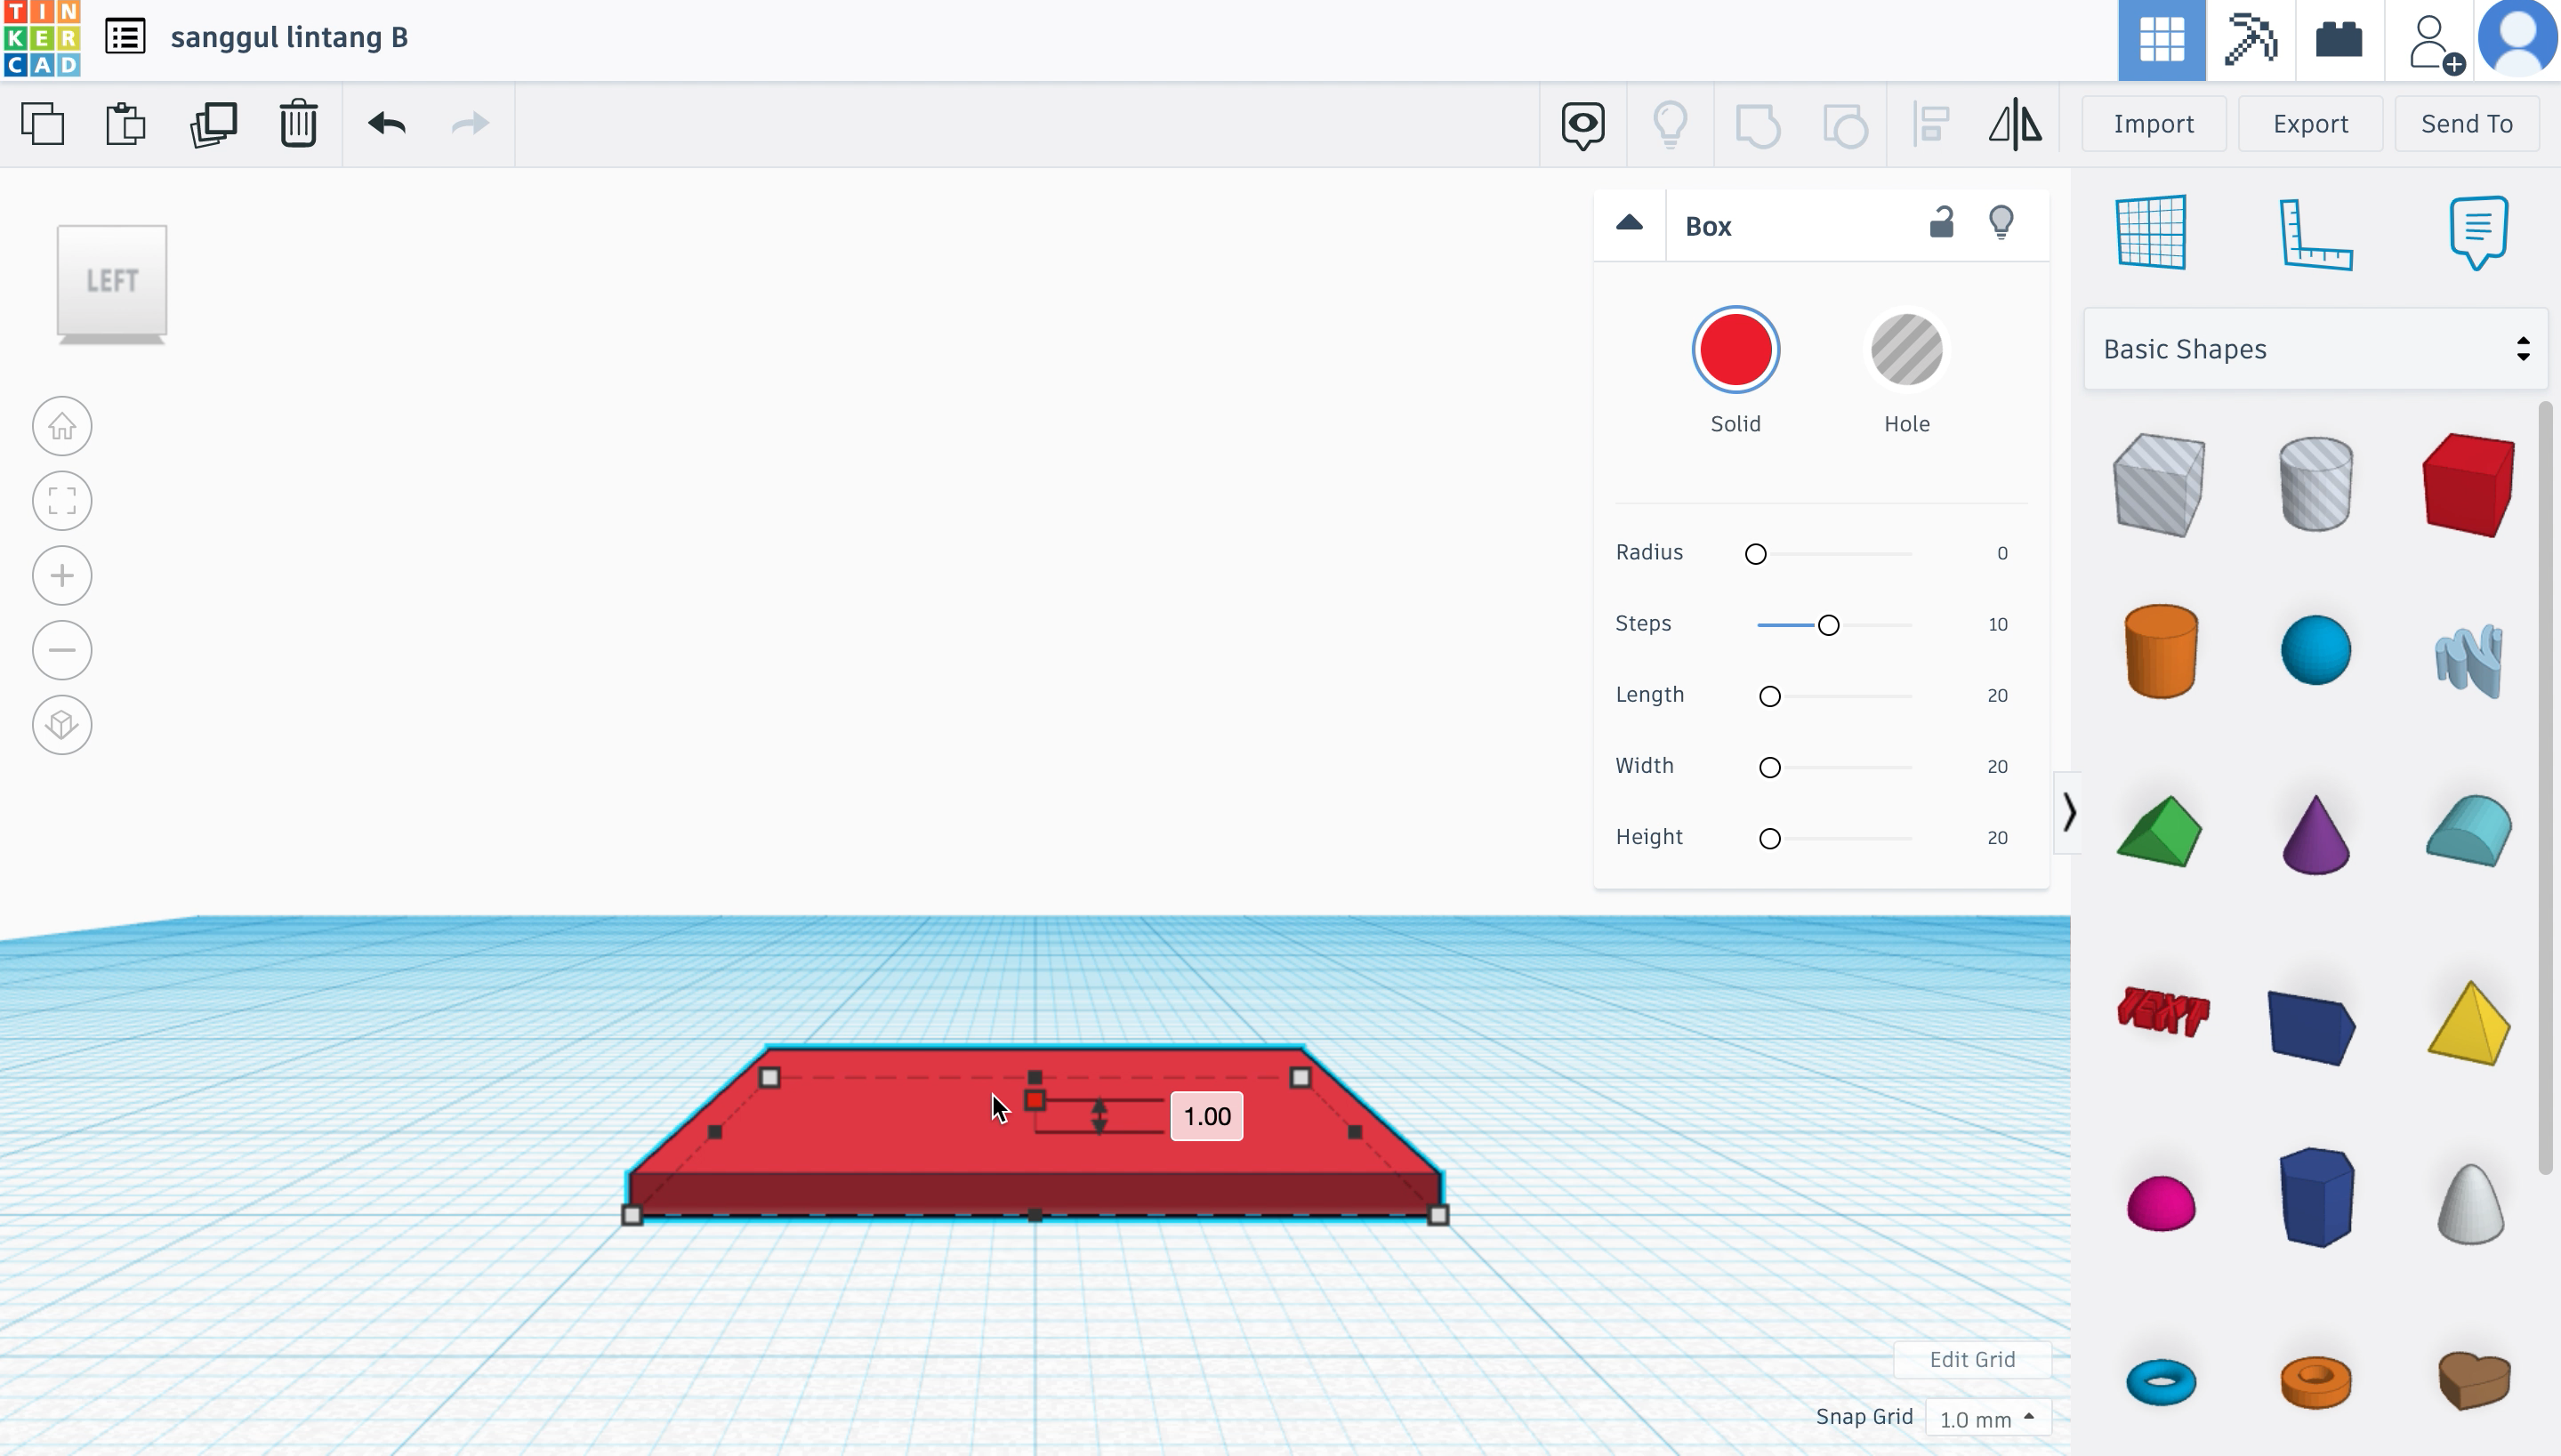
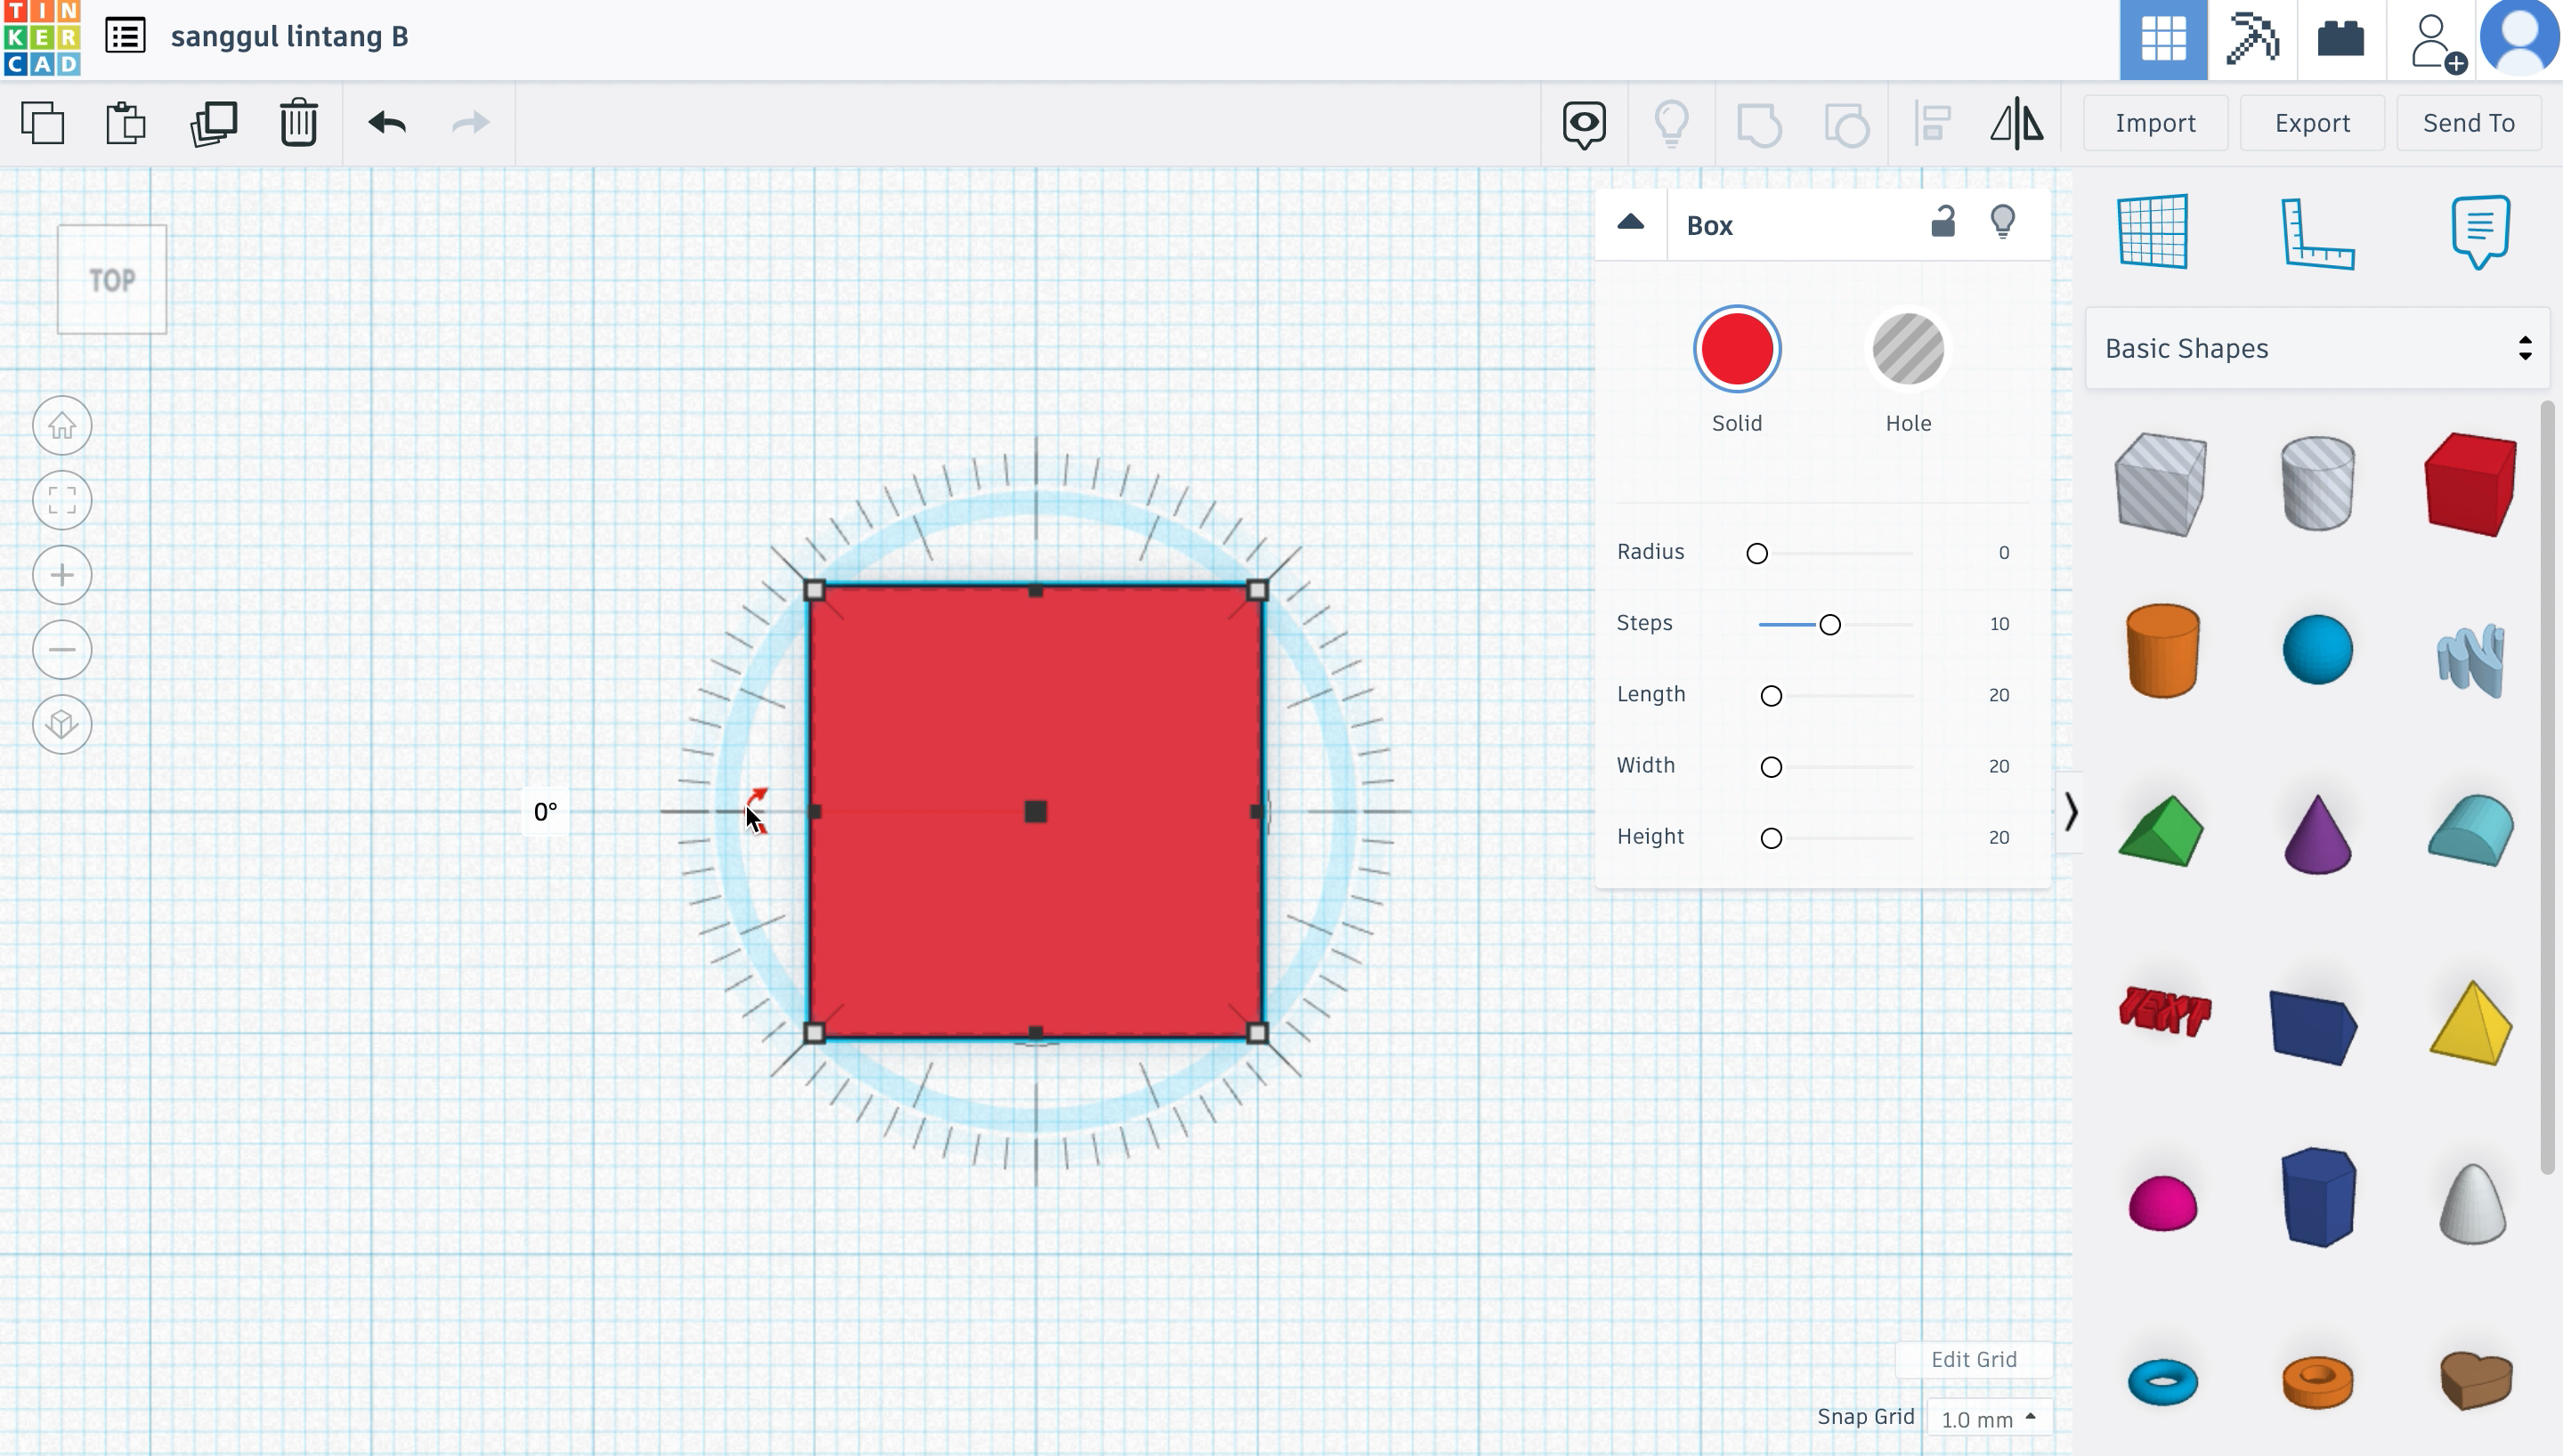
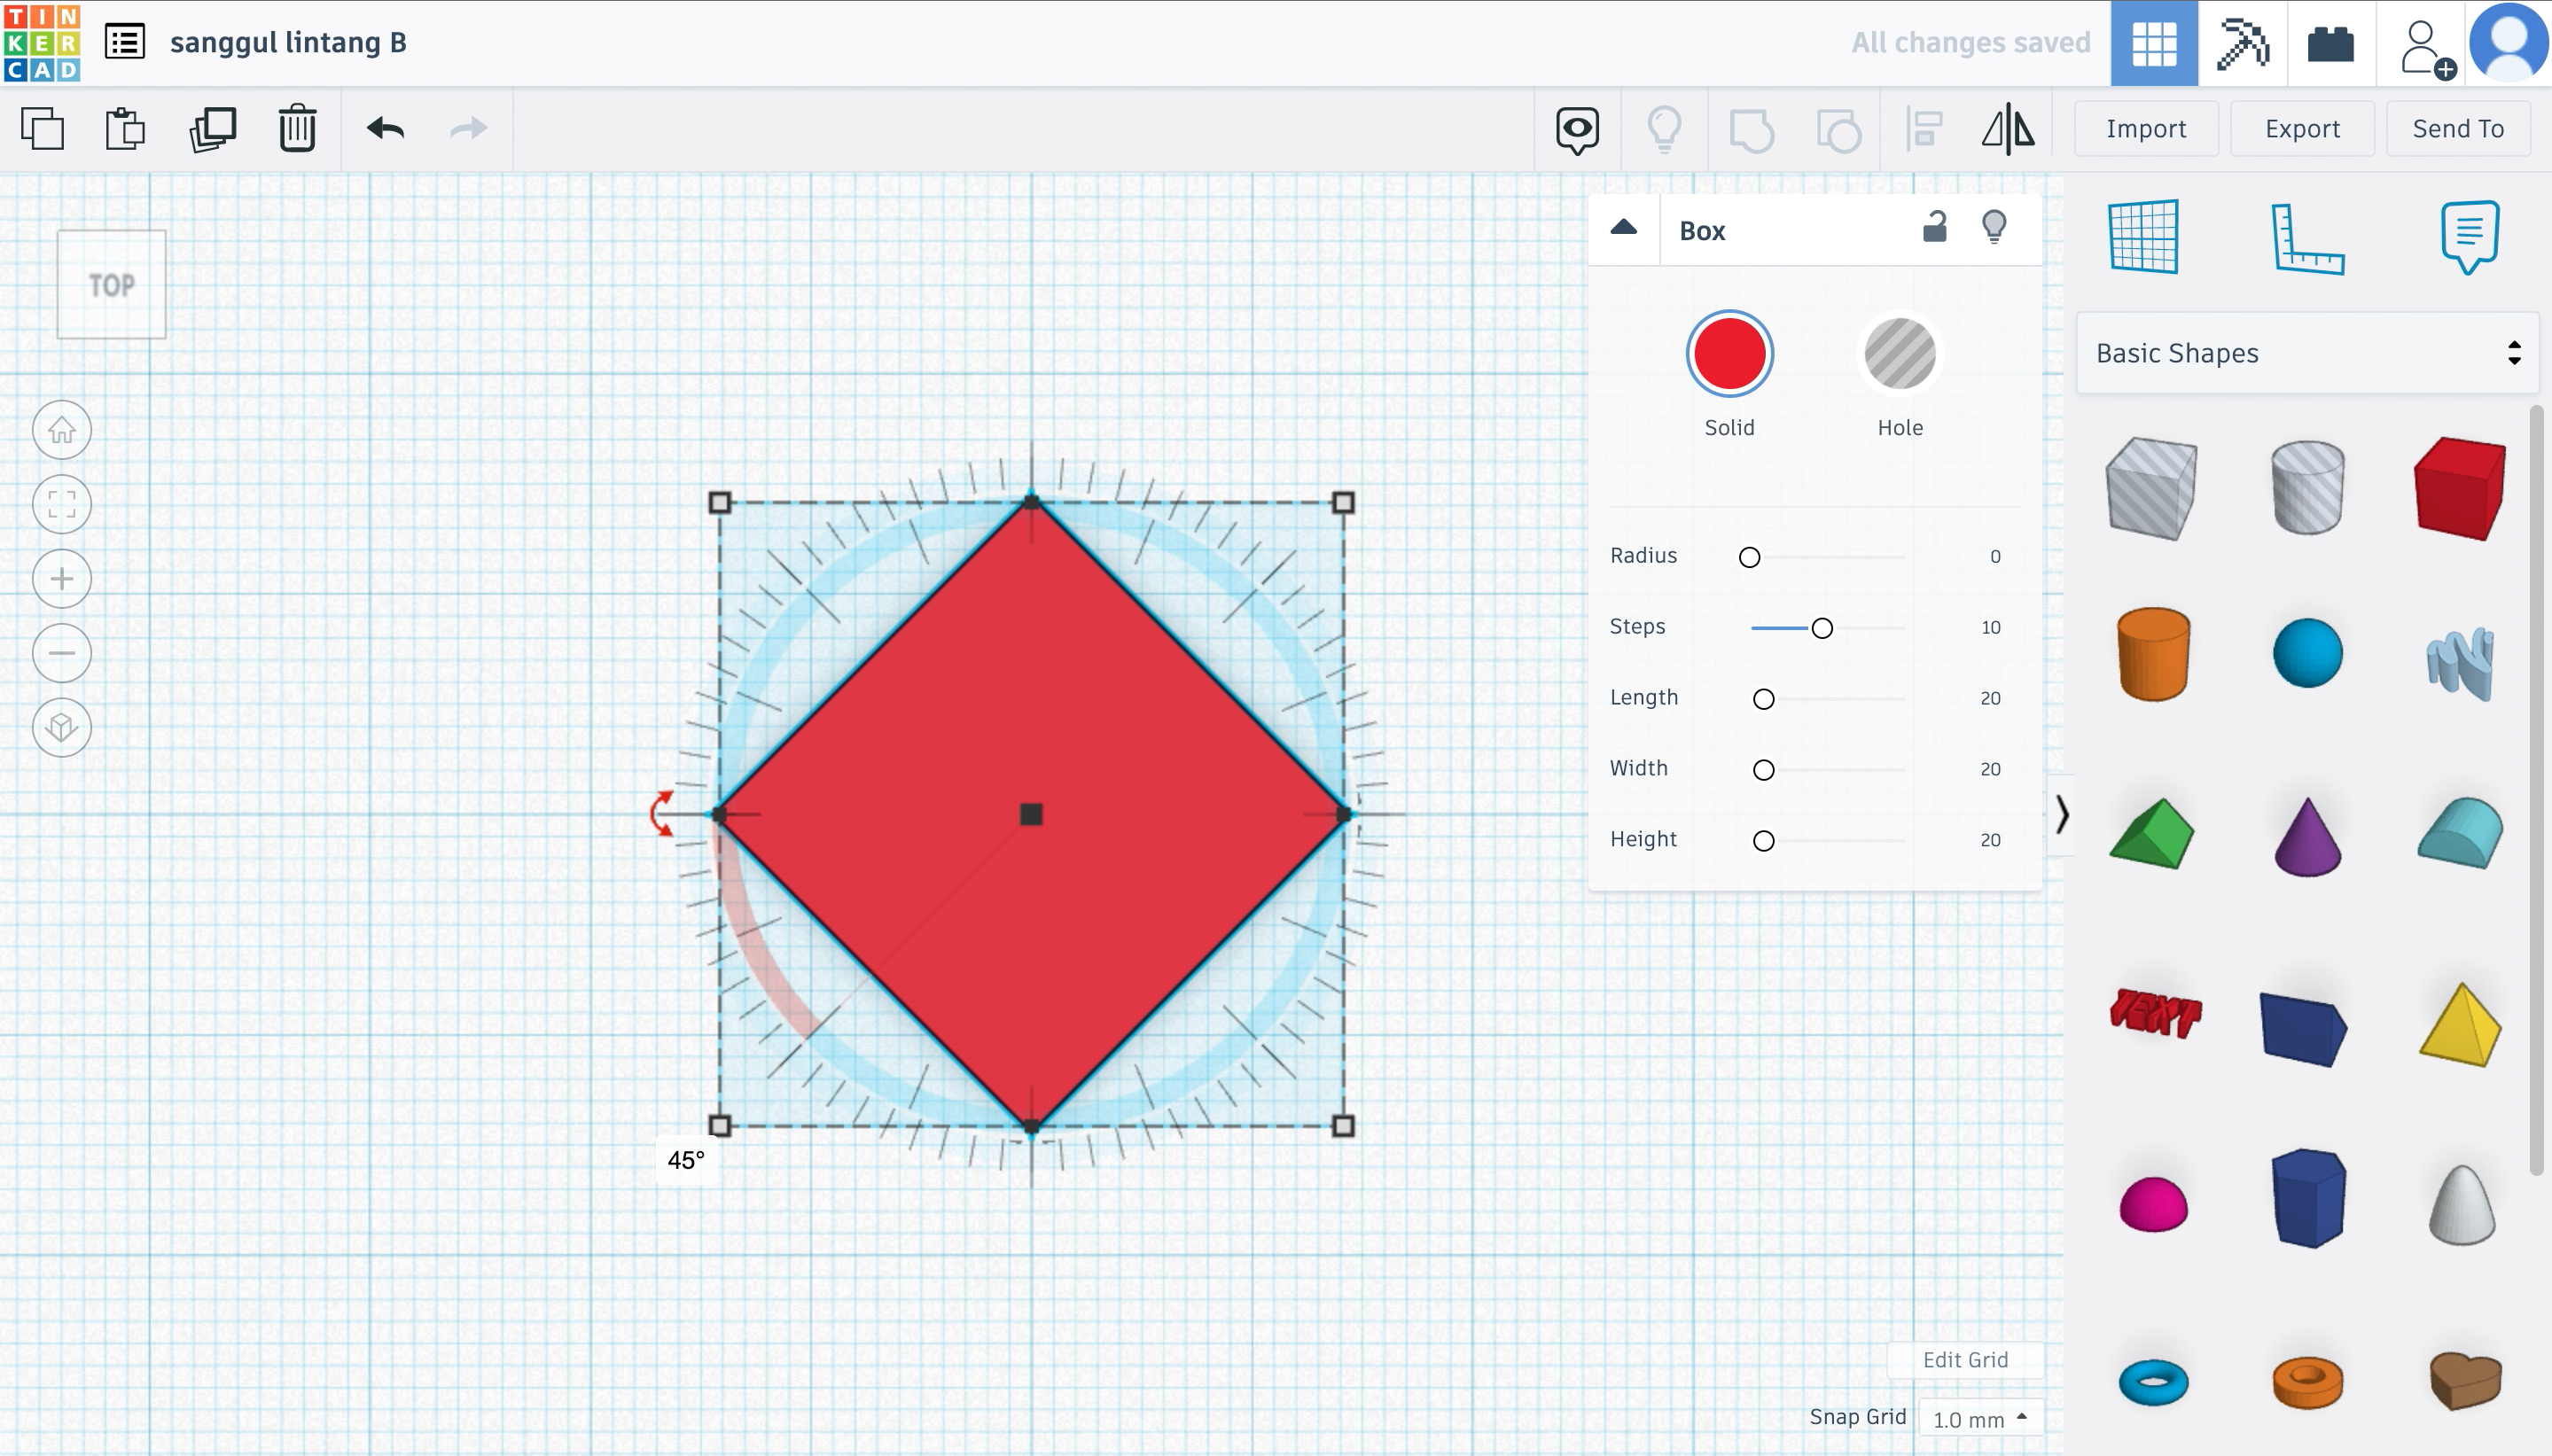
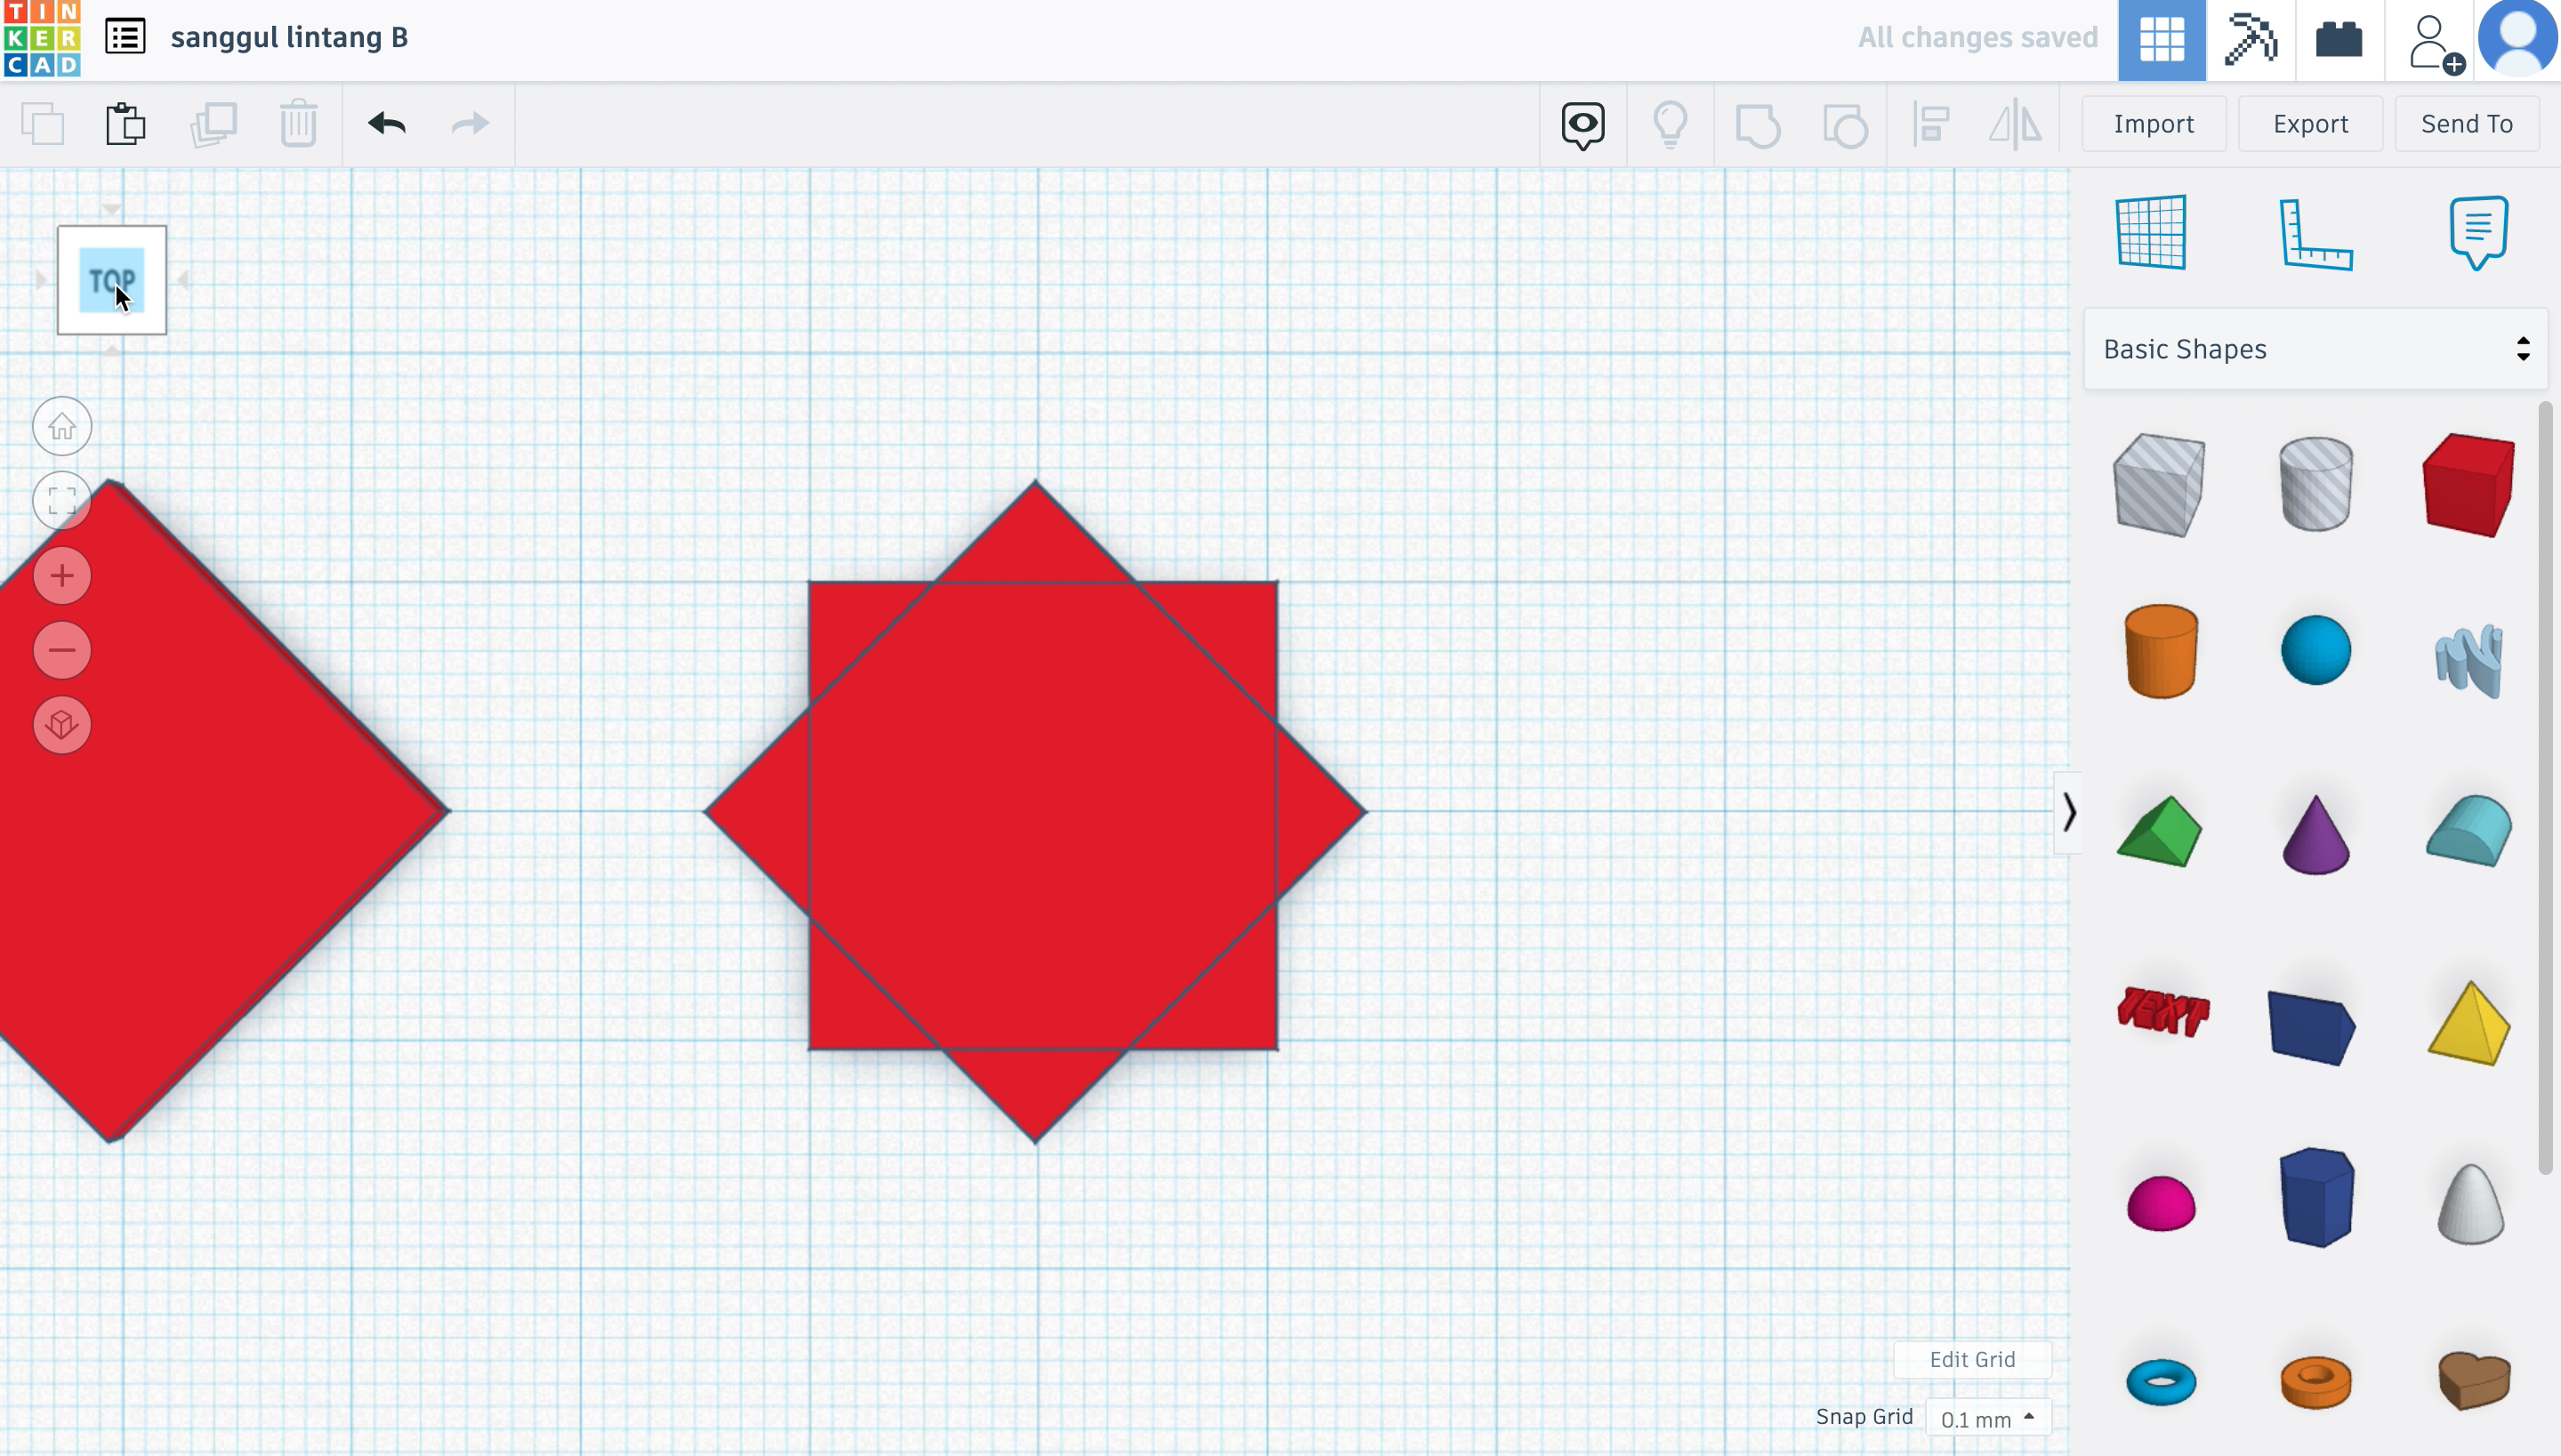
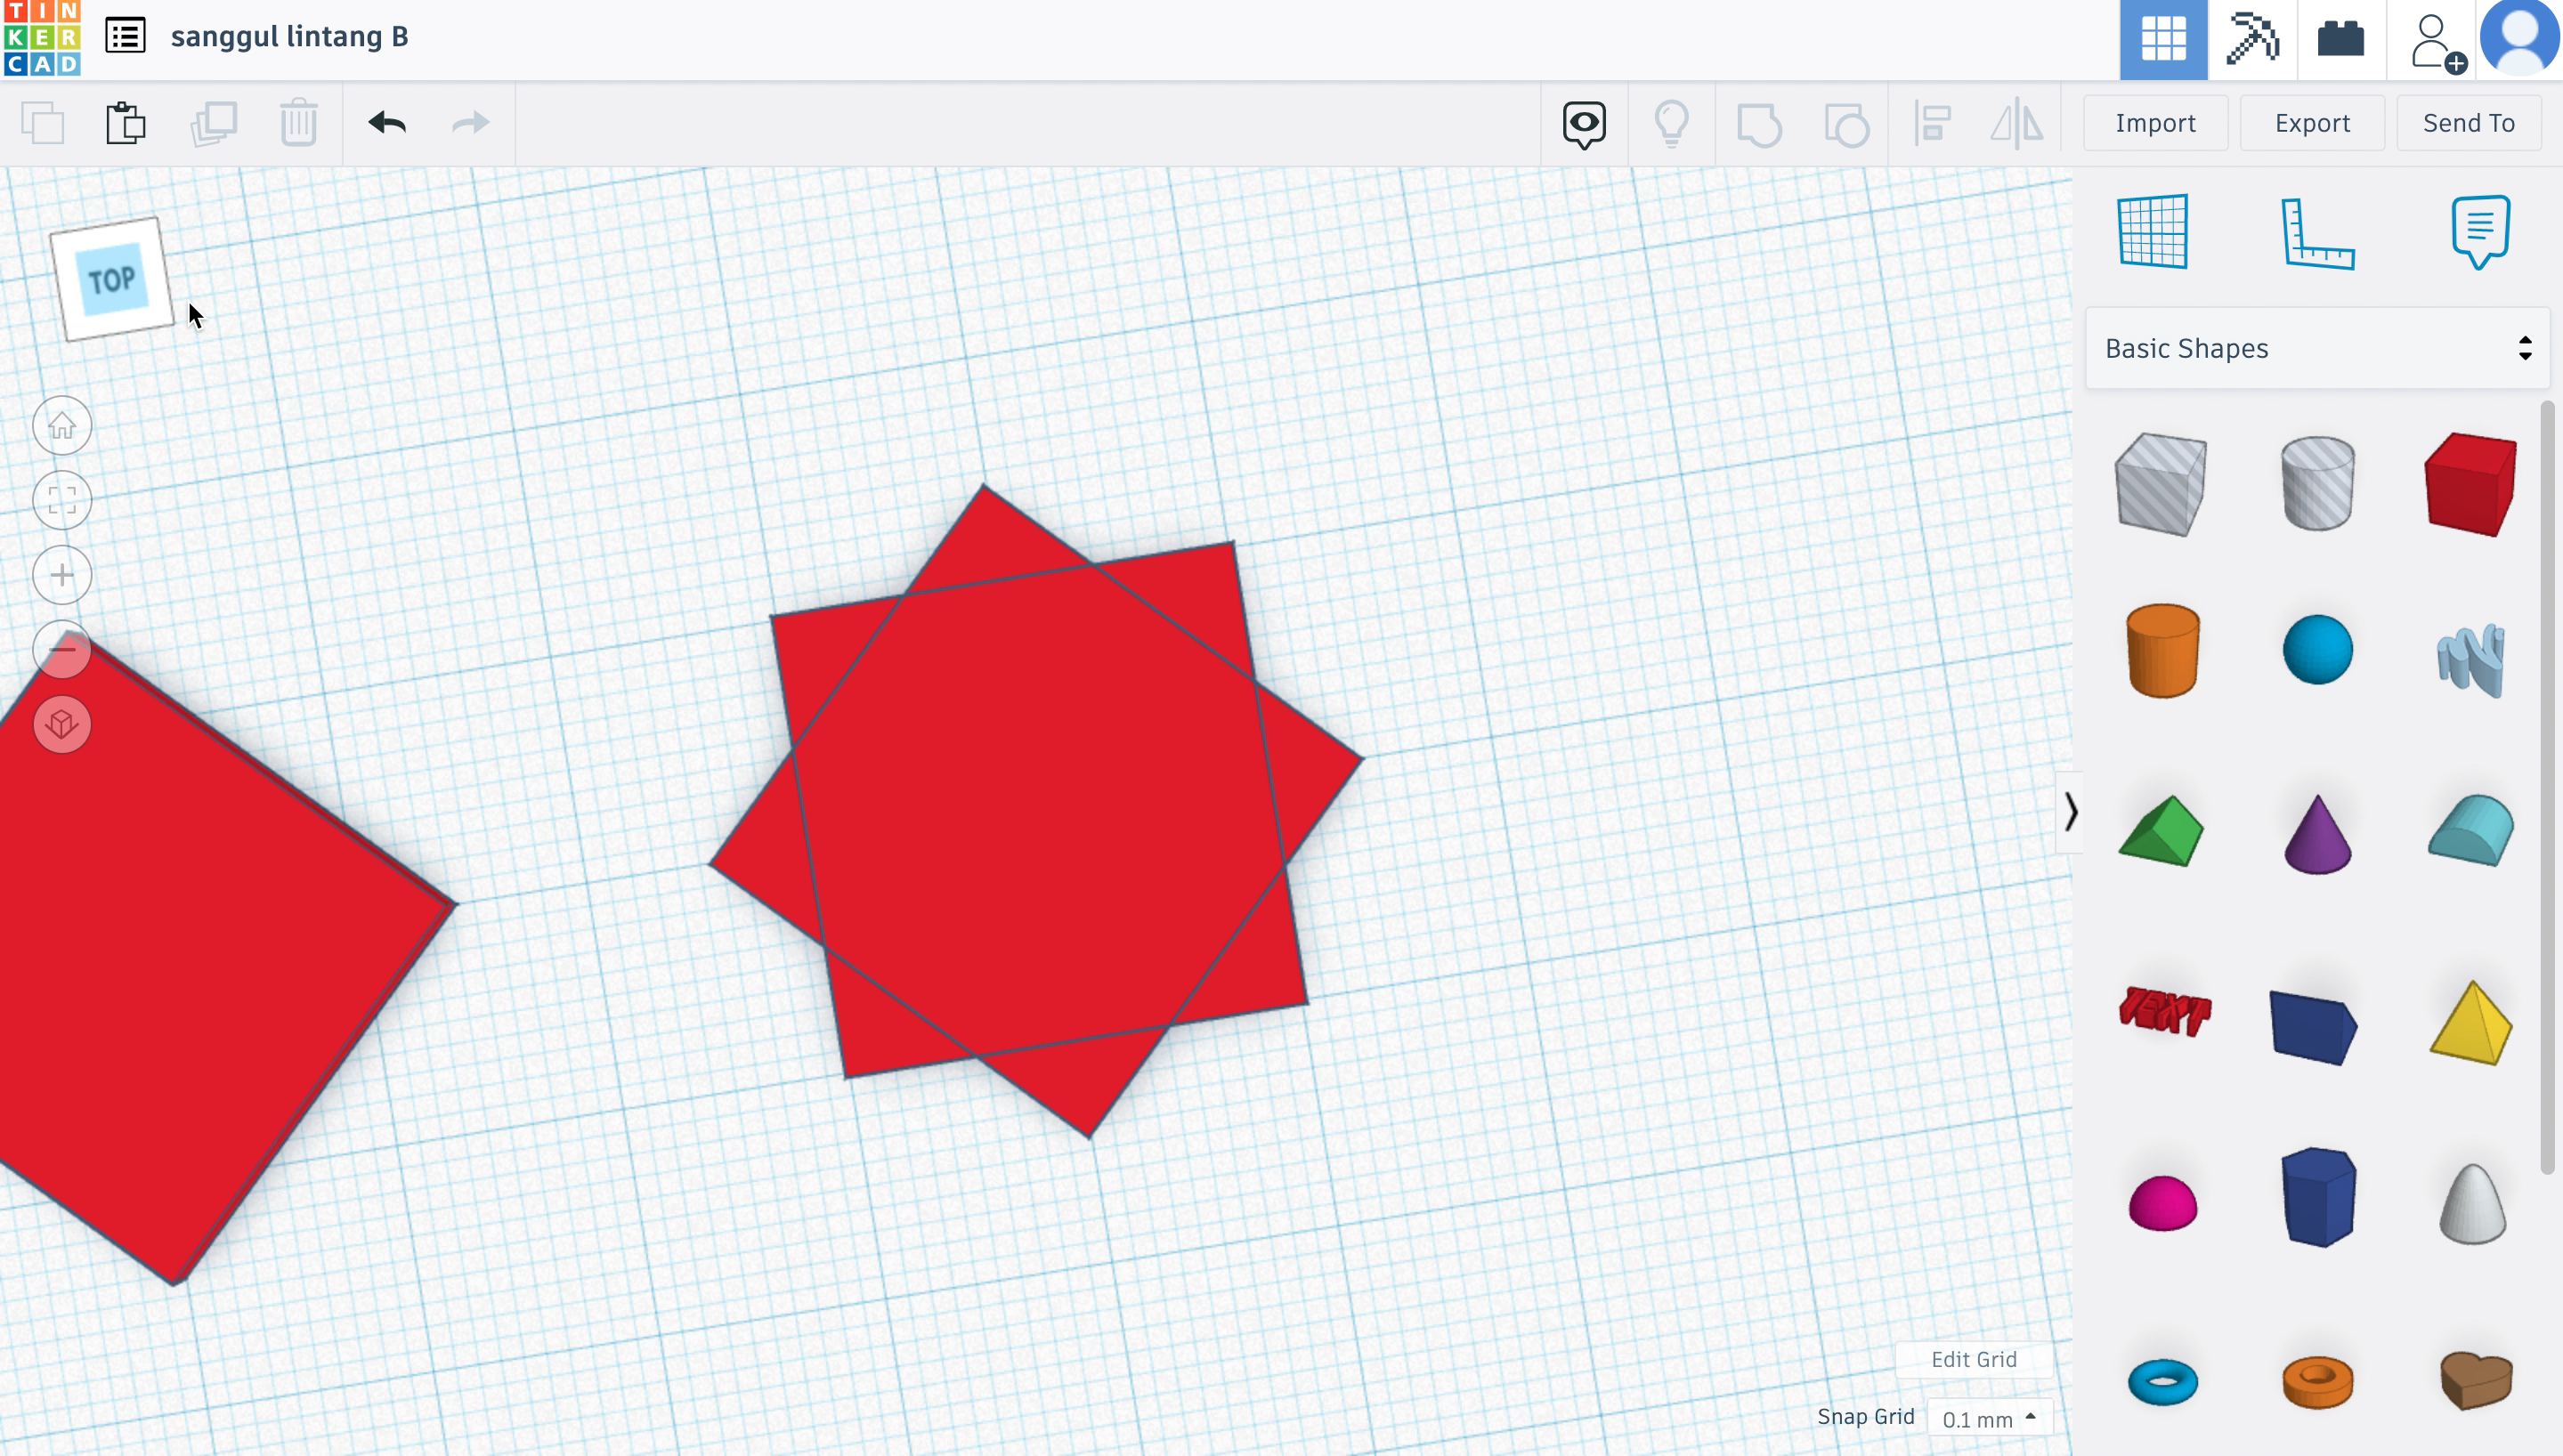
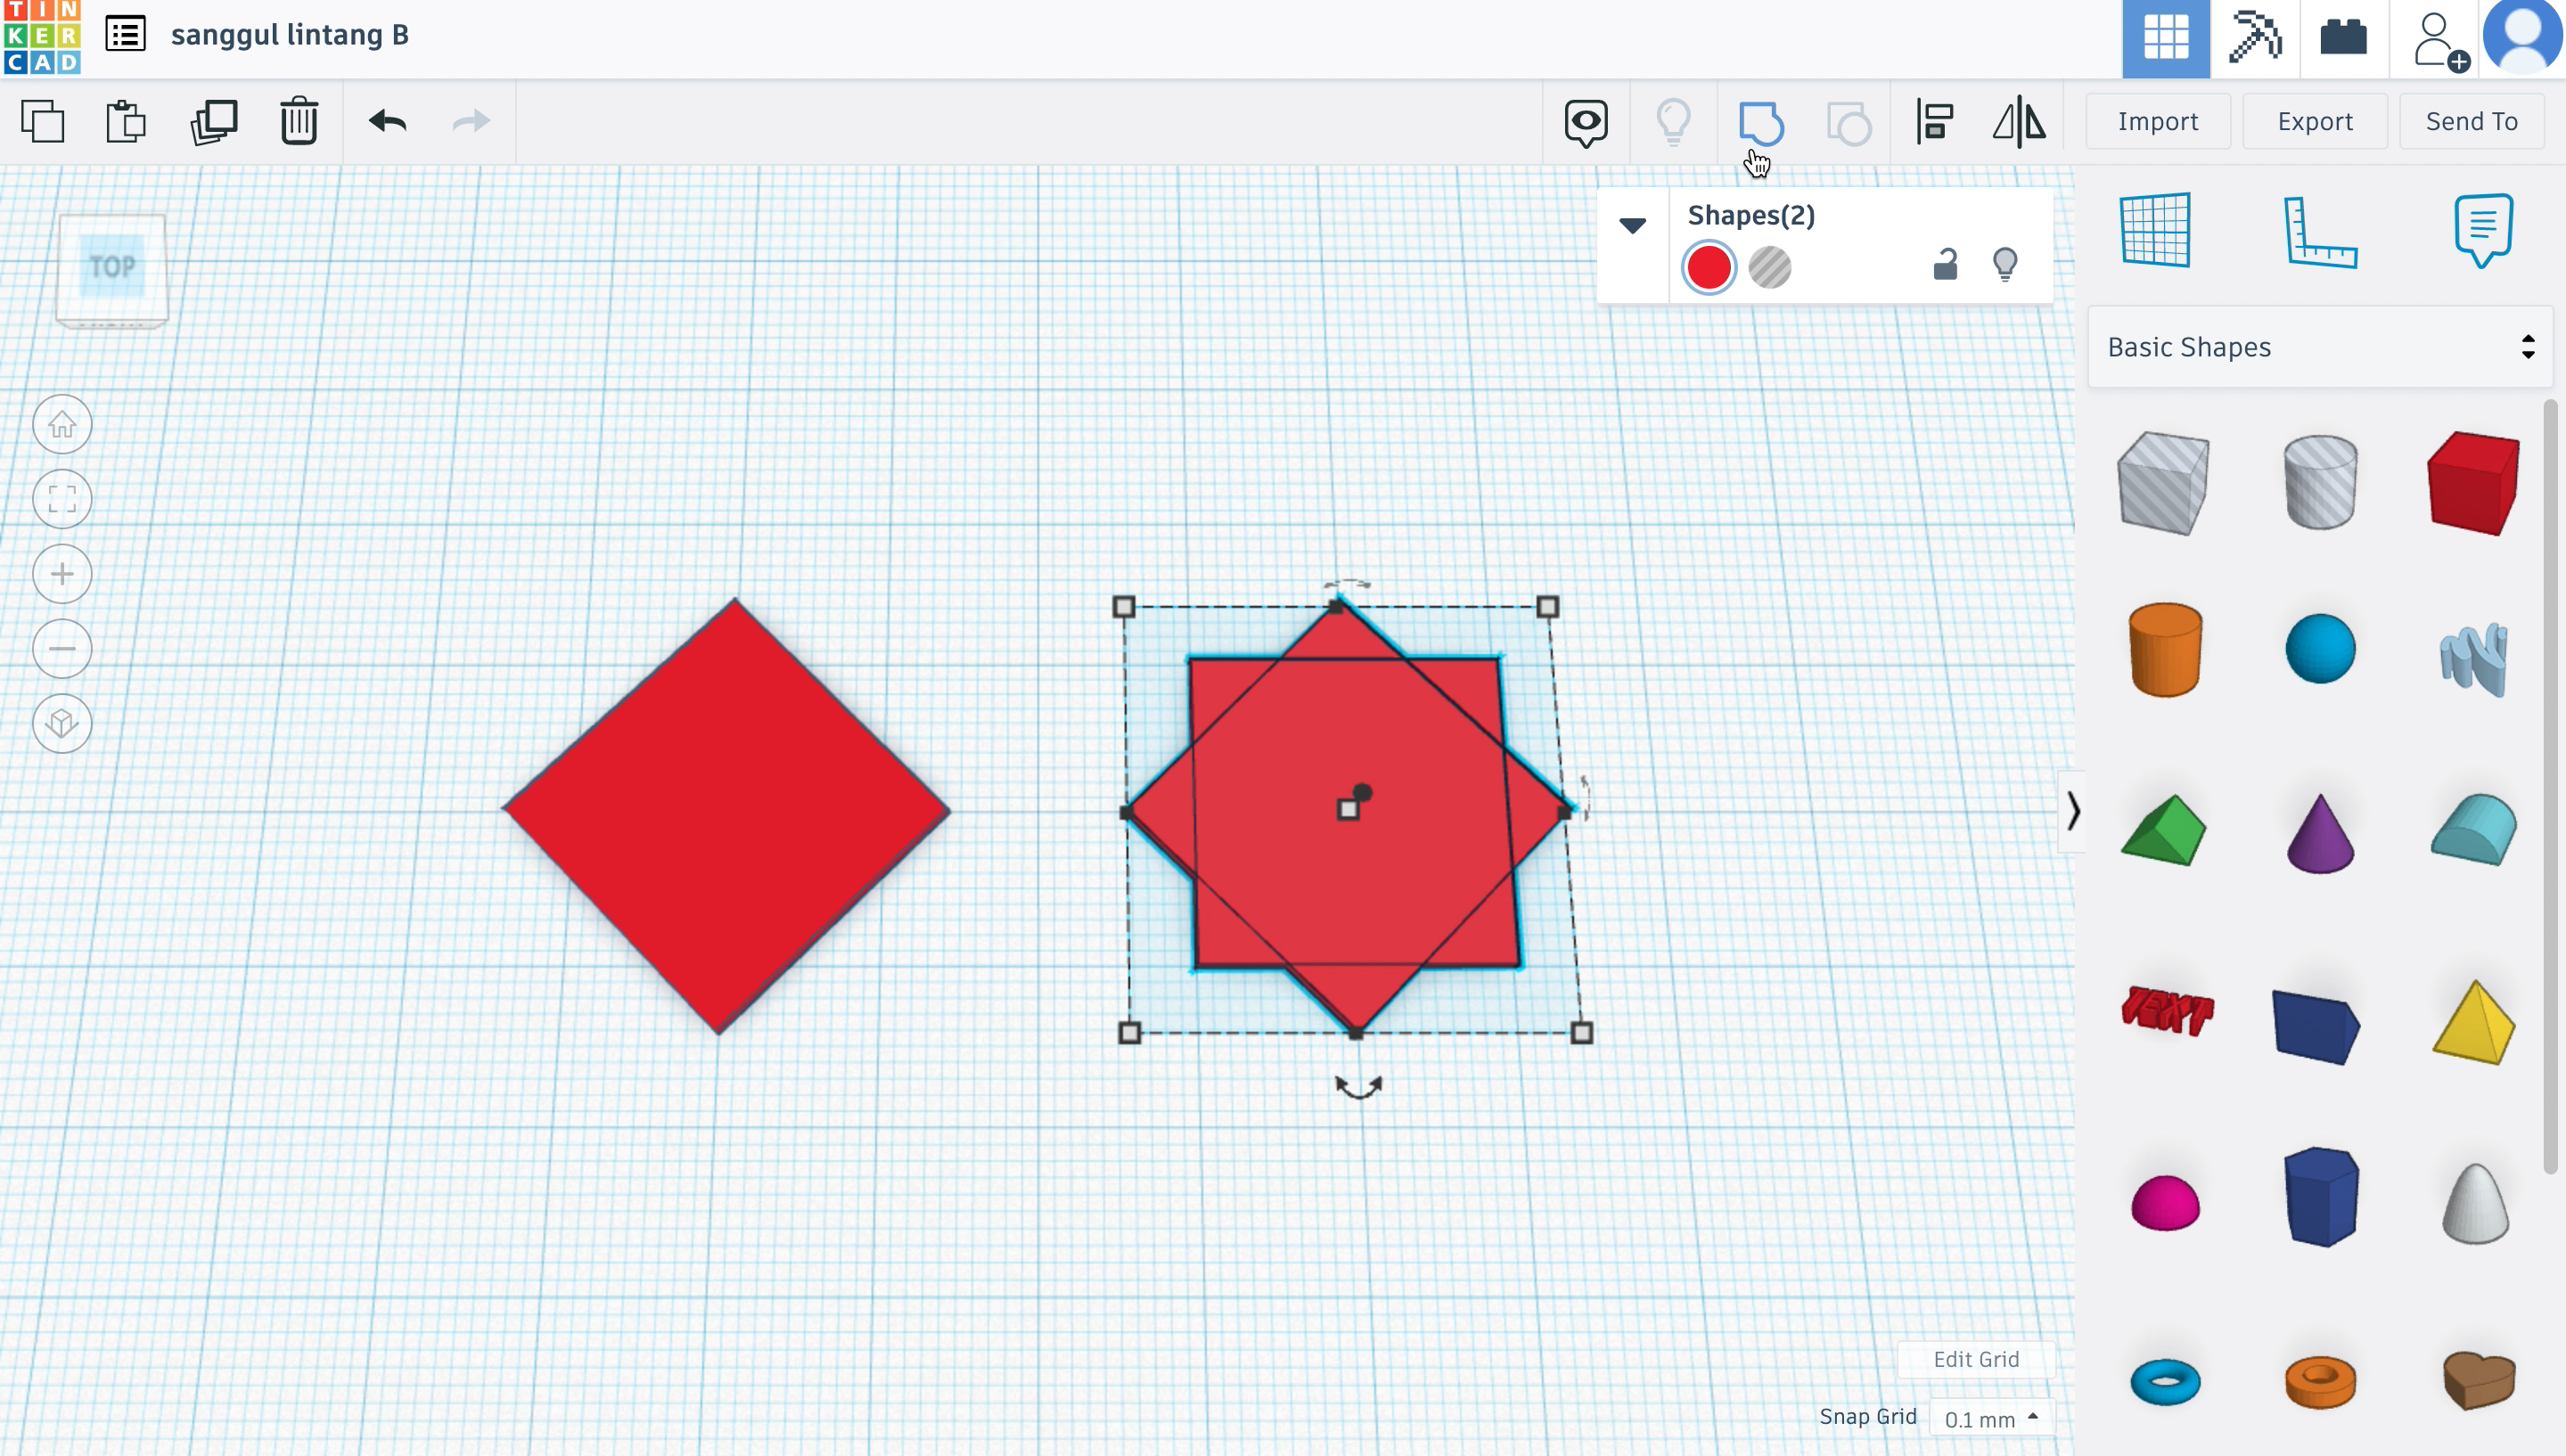
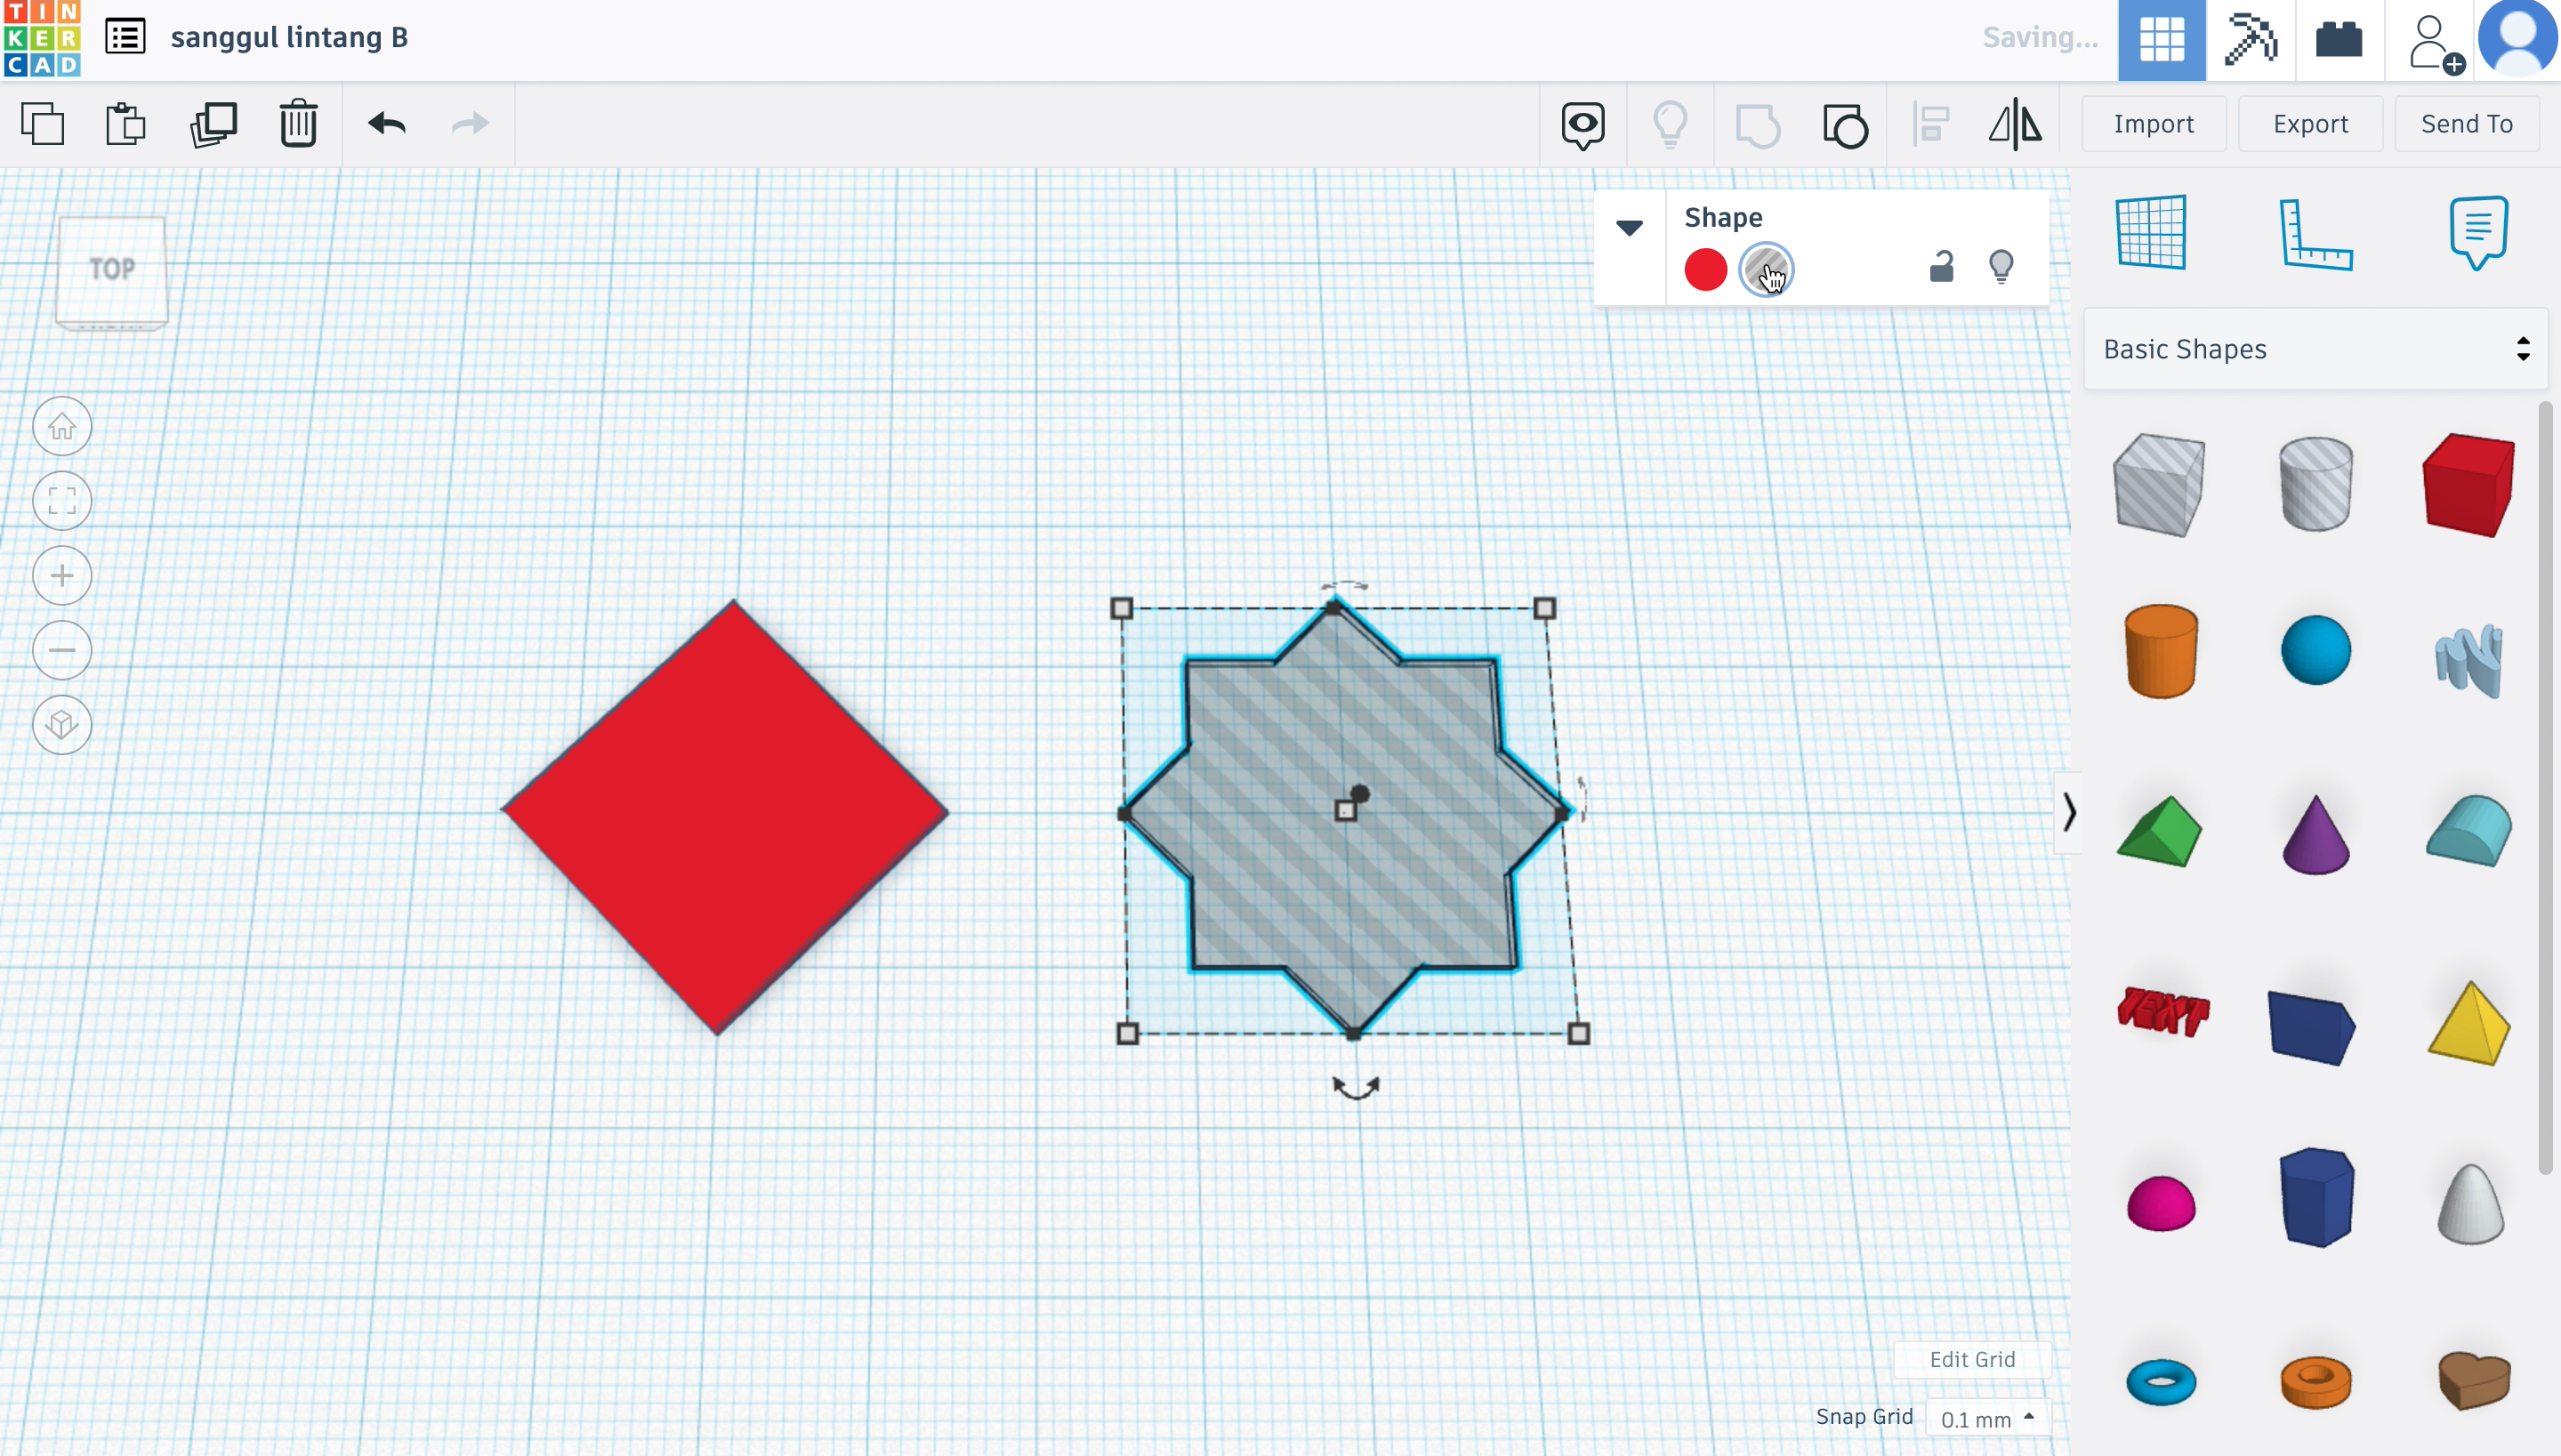
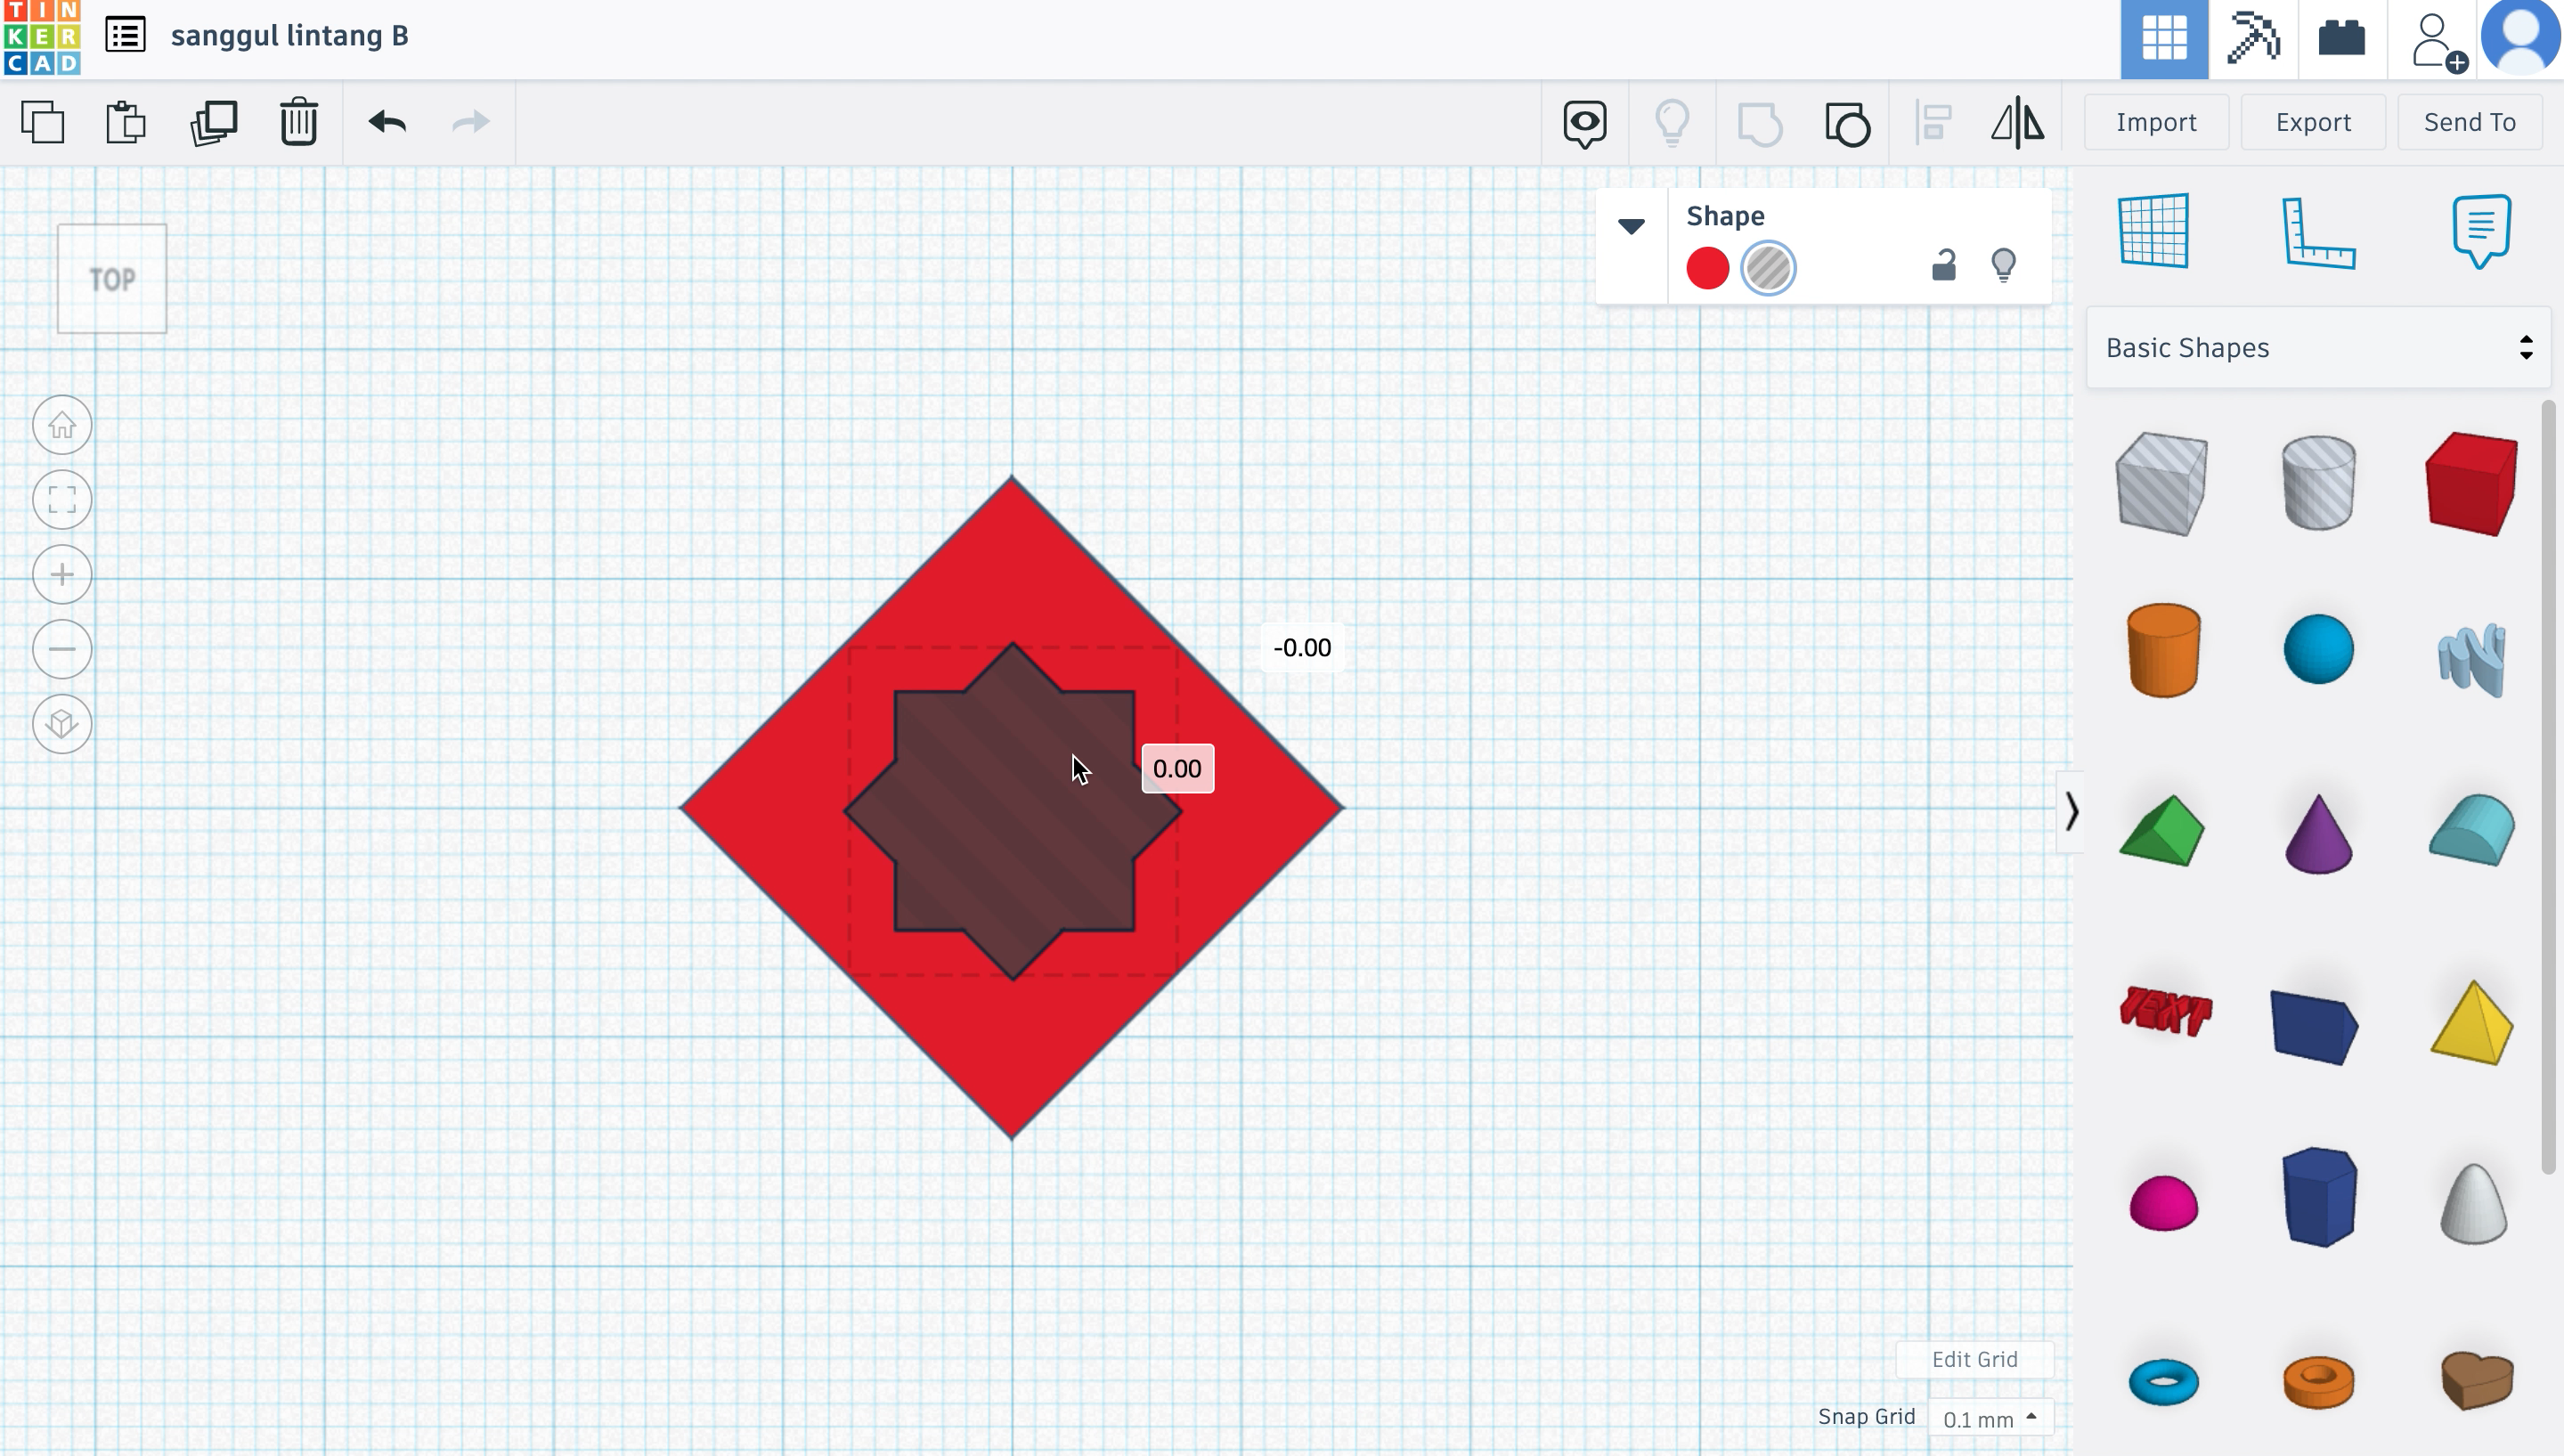
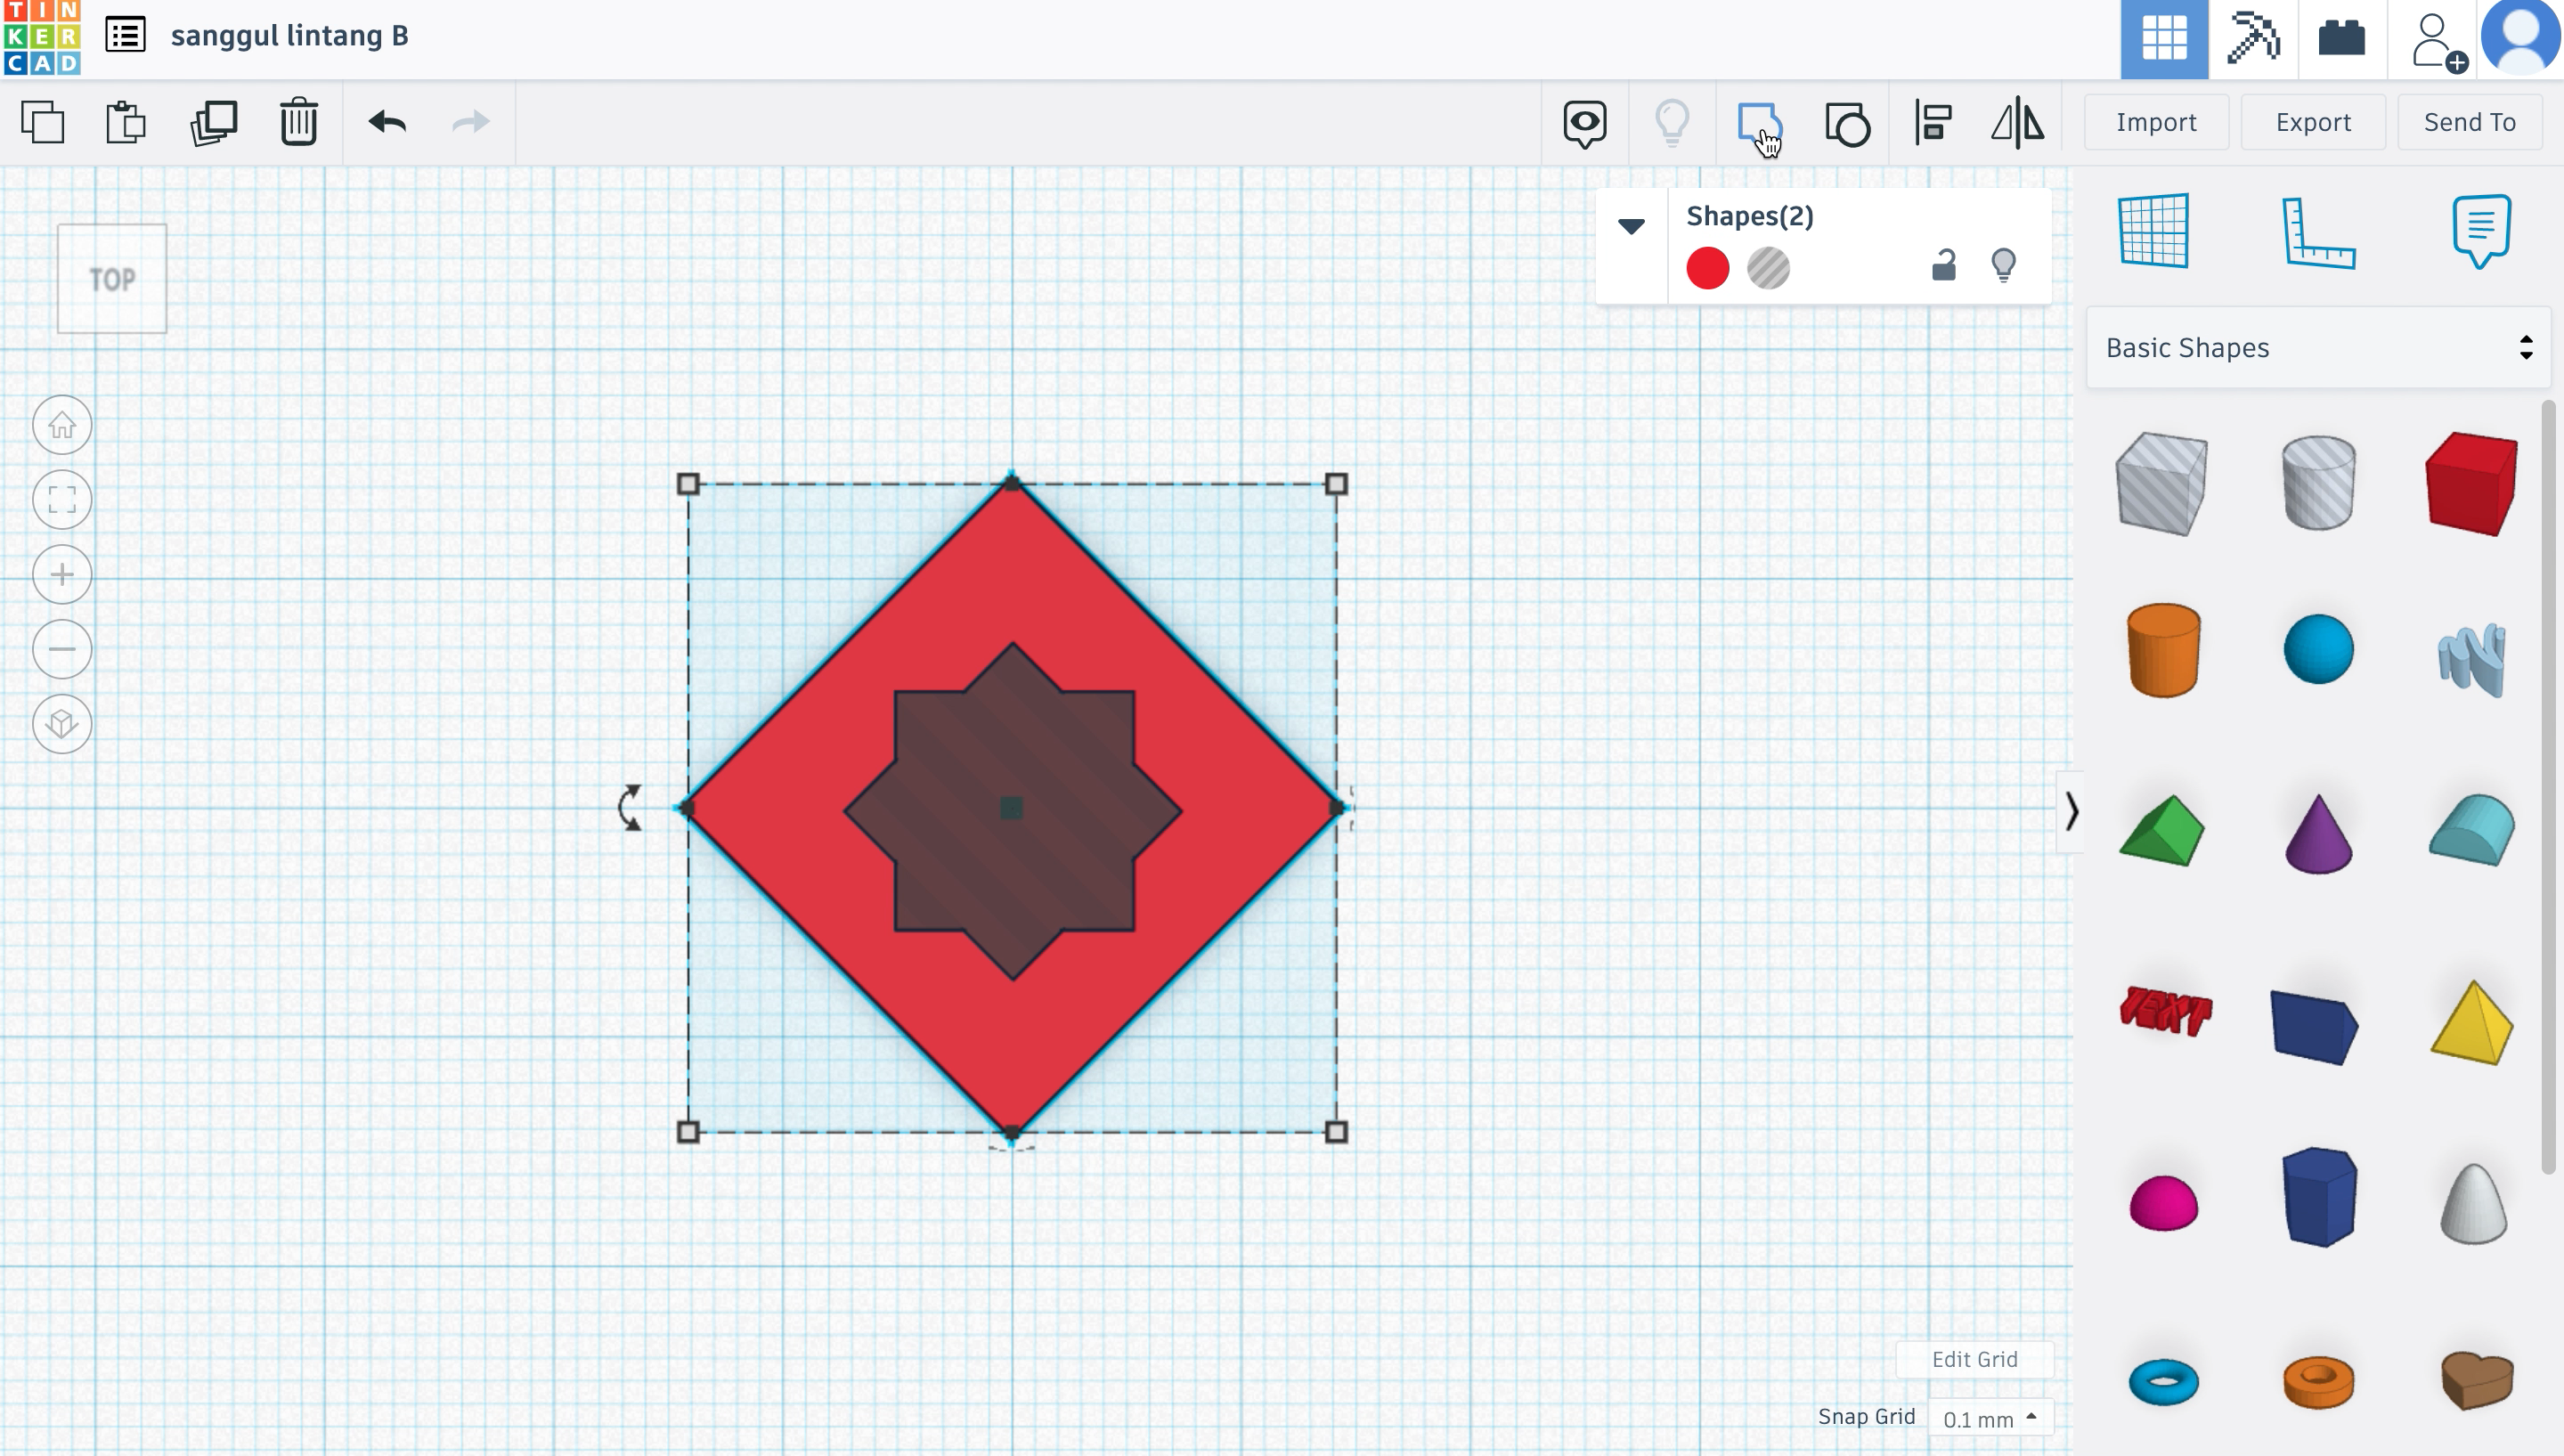
- Start with a 'box' block, and adjust the thickness to make it rather thin.
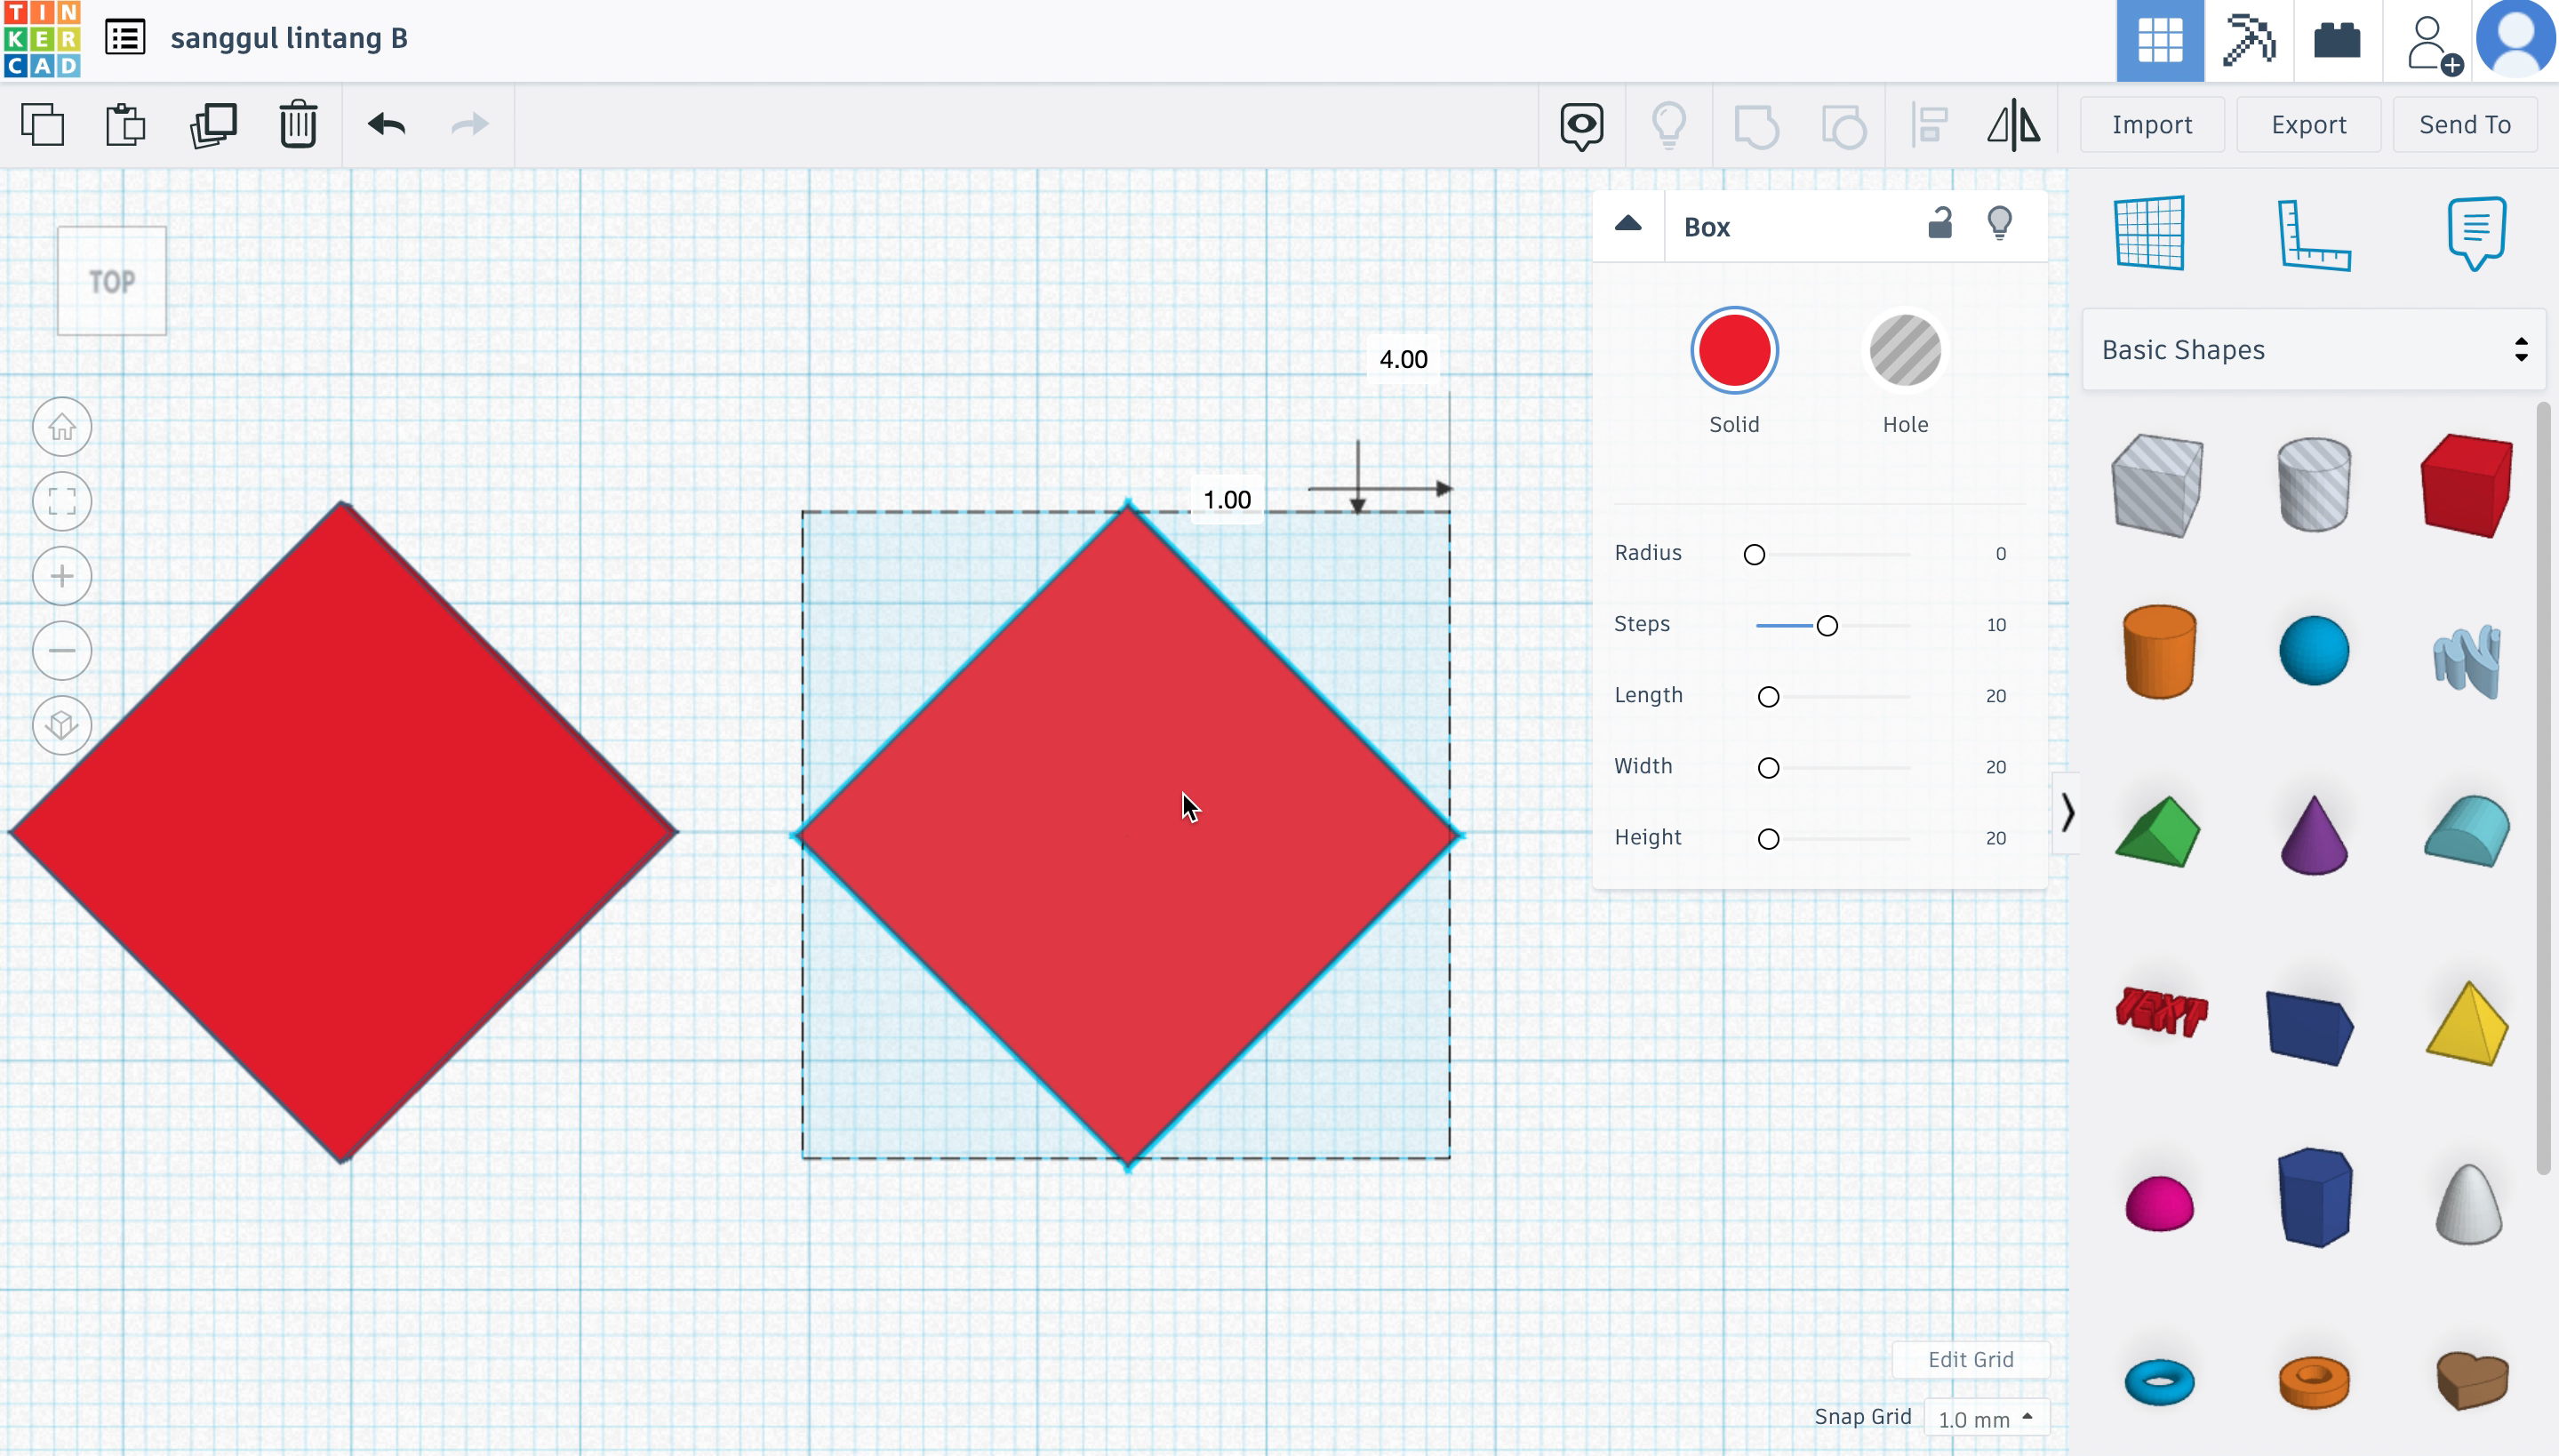
- Turn it so that the tip is at the top, and duplicate it.
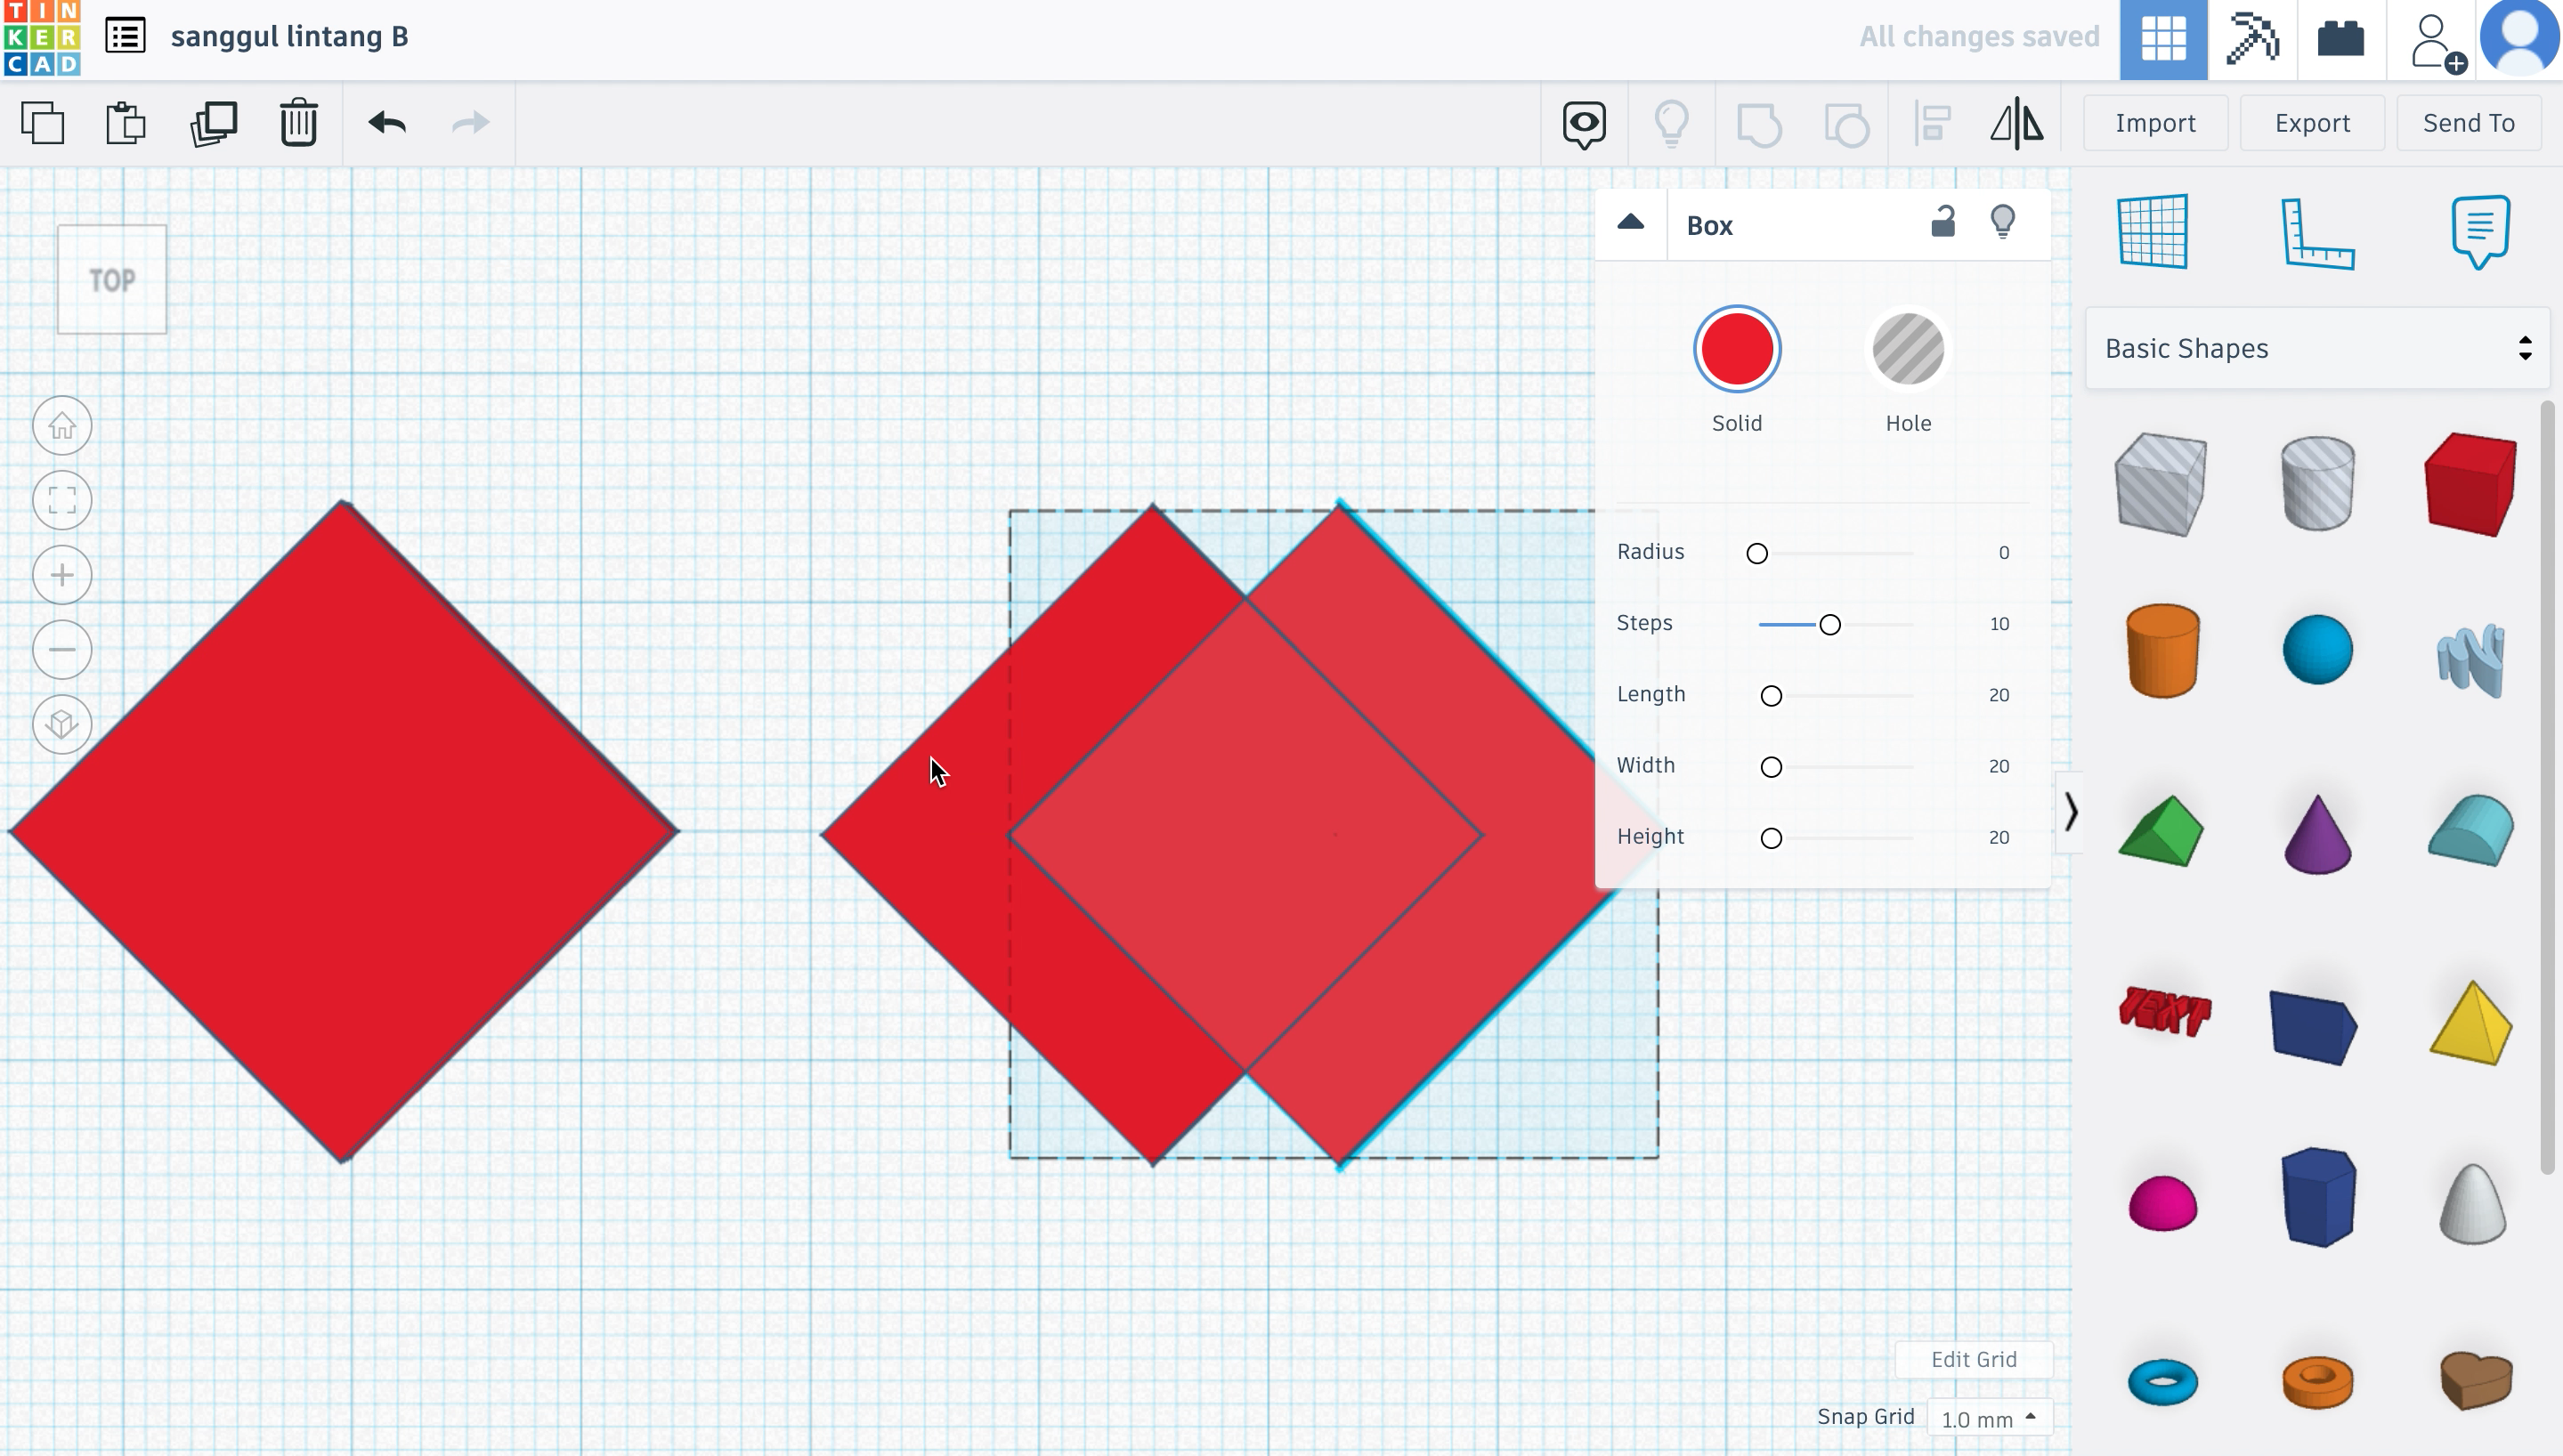
- Next, duplicate the shape once more and turn it so that it is back to a straight square. Align it so that everything is equal and balanced.
- Next, select the shapes we are currently working-on, and 'group' them. Then, make this combined shape a 'hole' block, like so in the images.
- Lastly, make the 'hole shape' smaller and fit it in the center of the square/ diamond. And finally, select everything and 'group' them.
Sanggul Lintang B
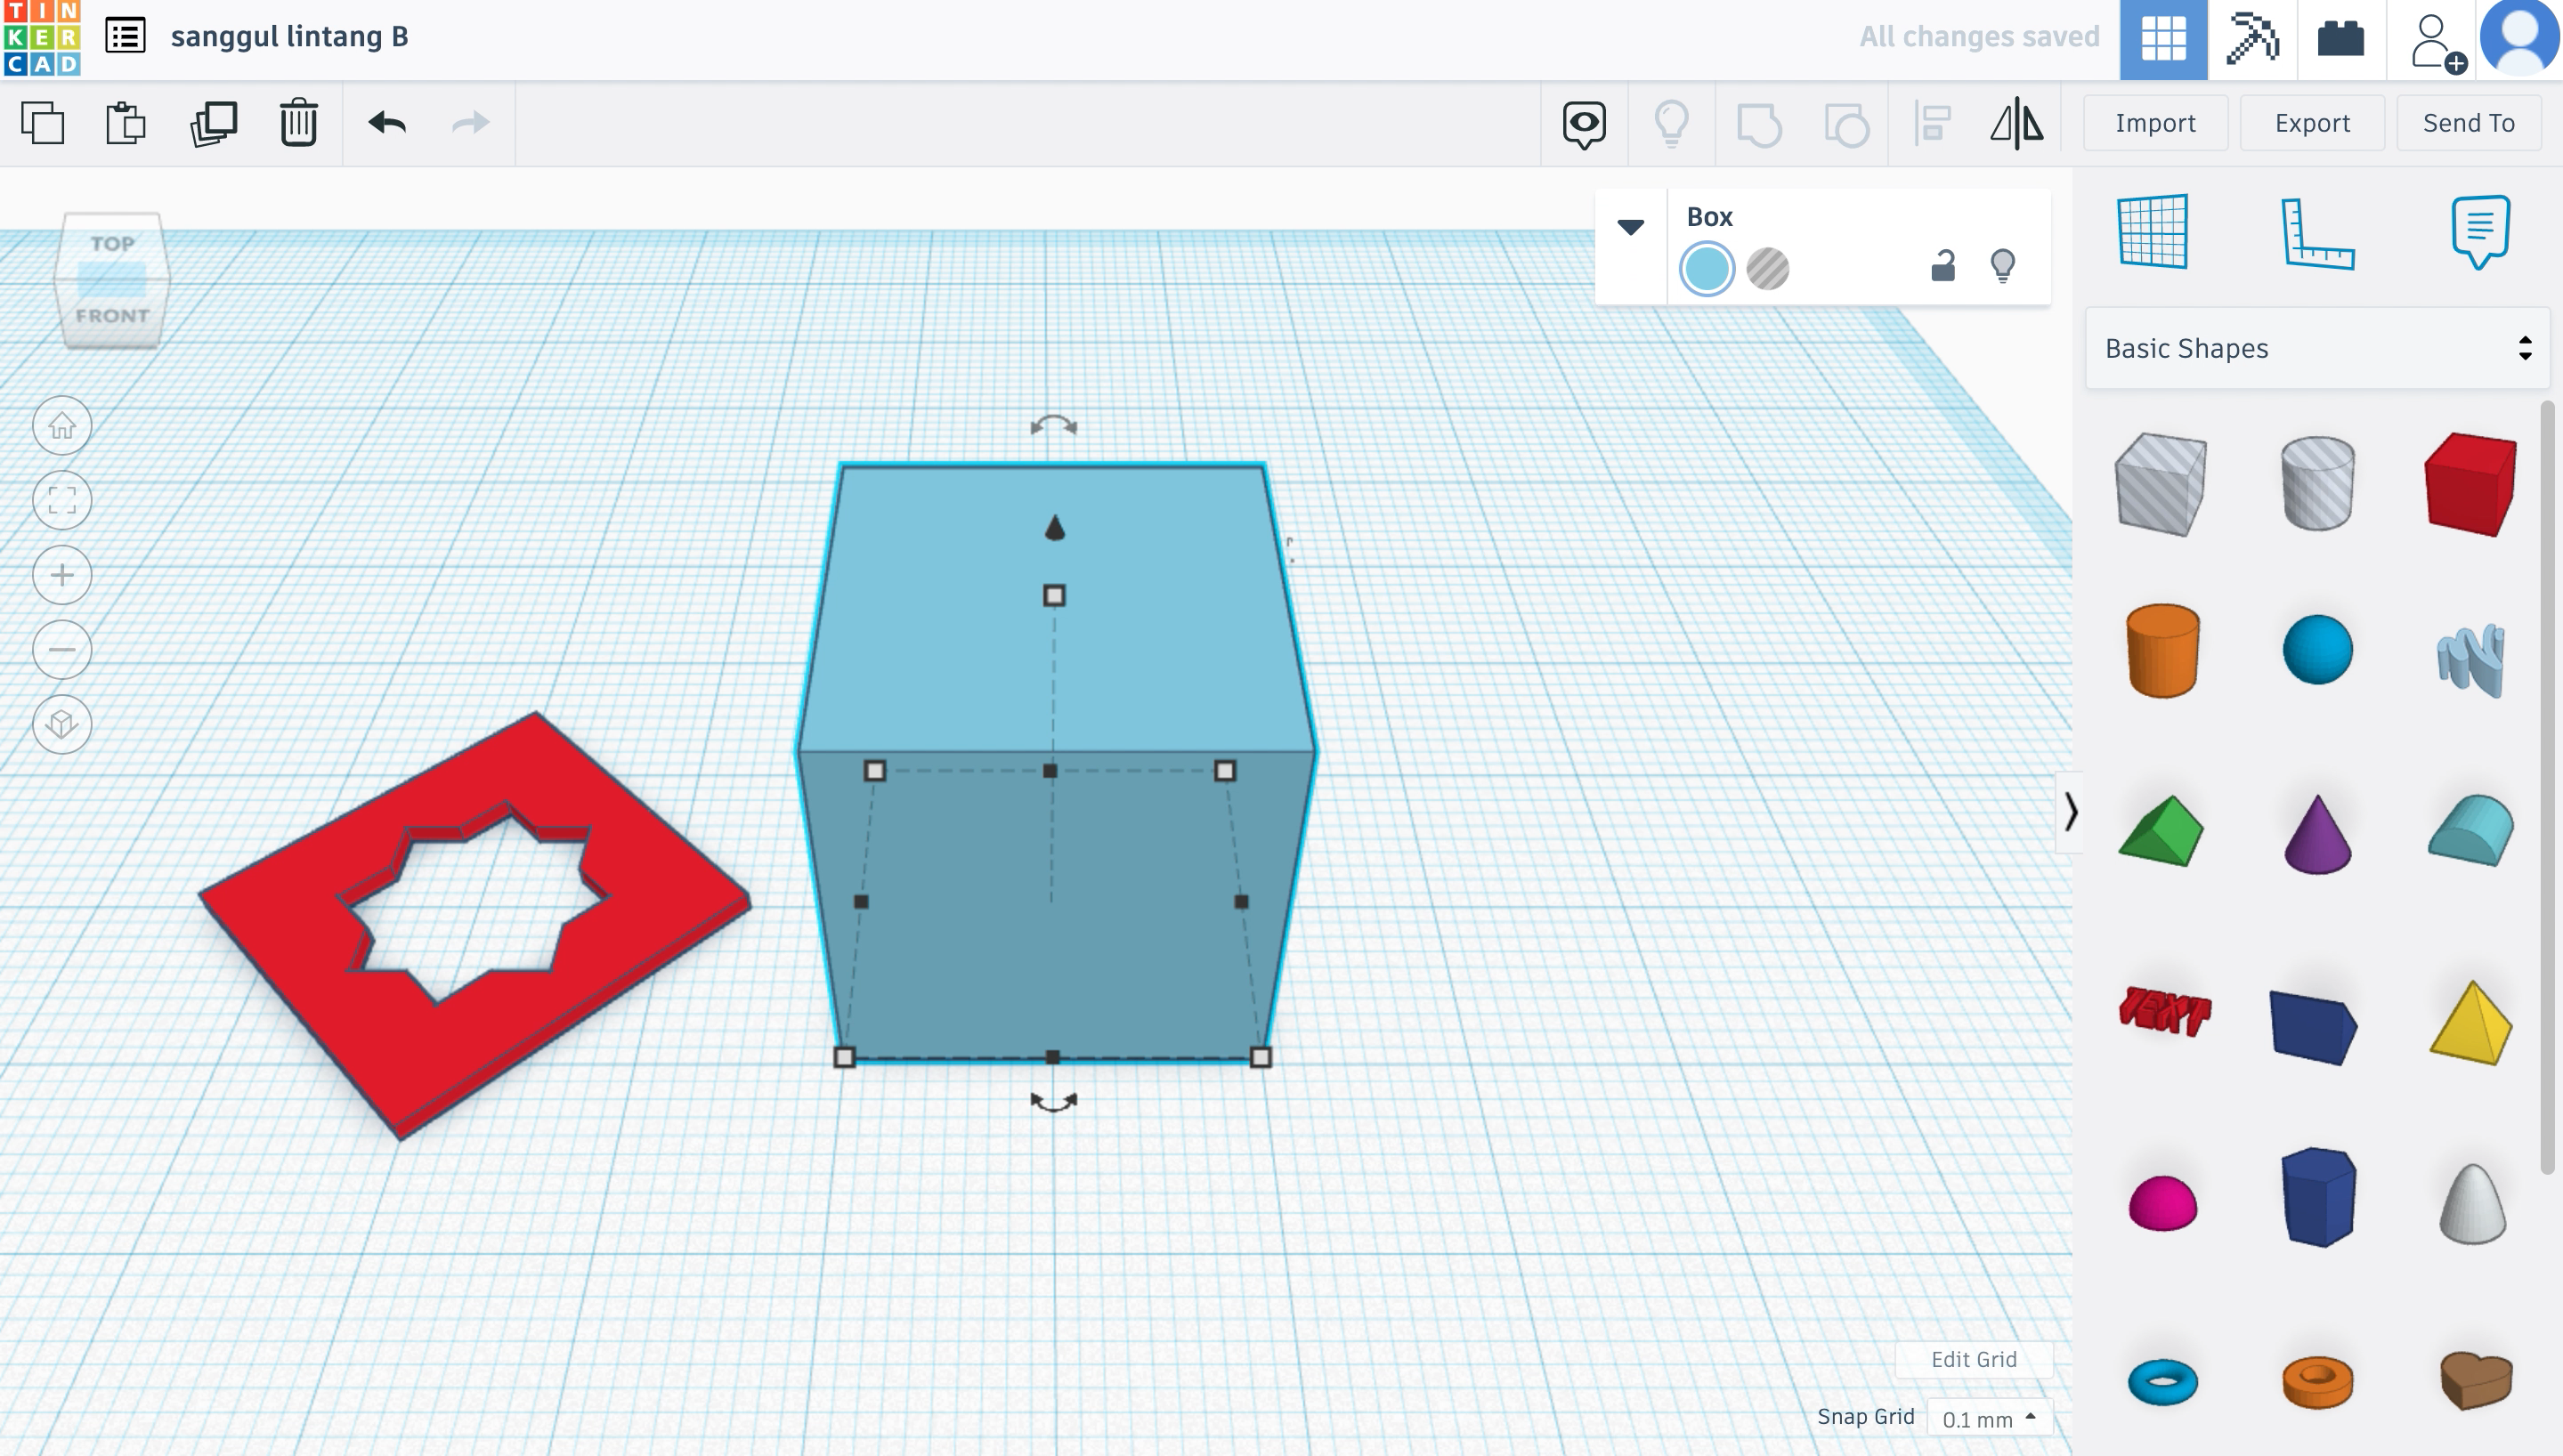
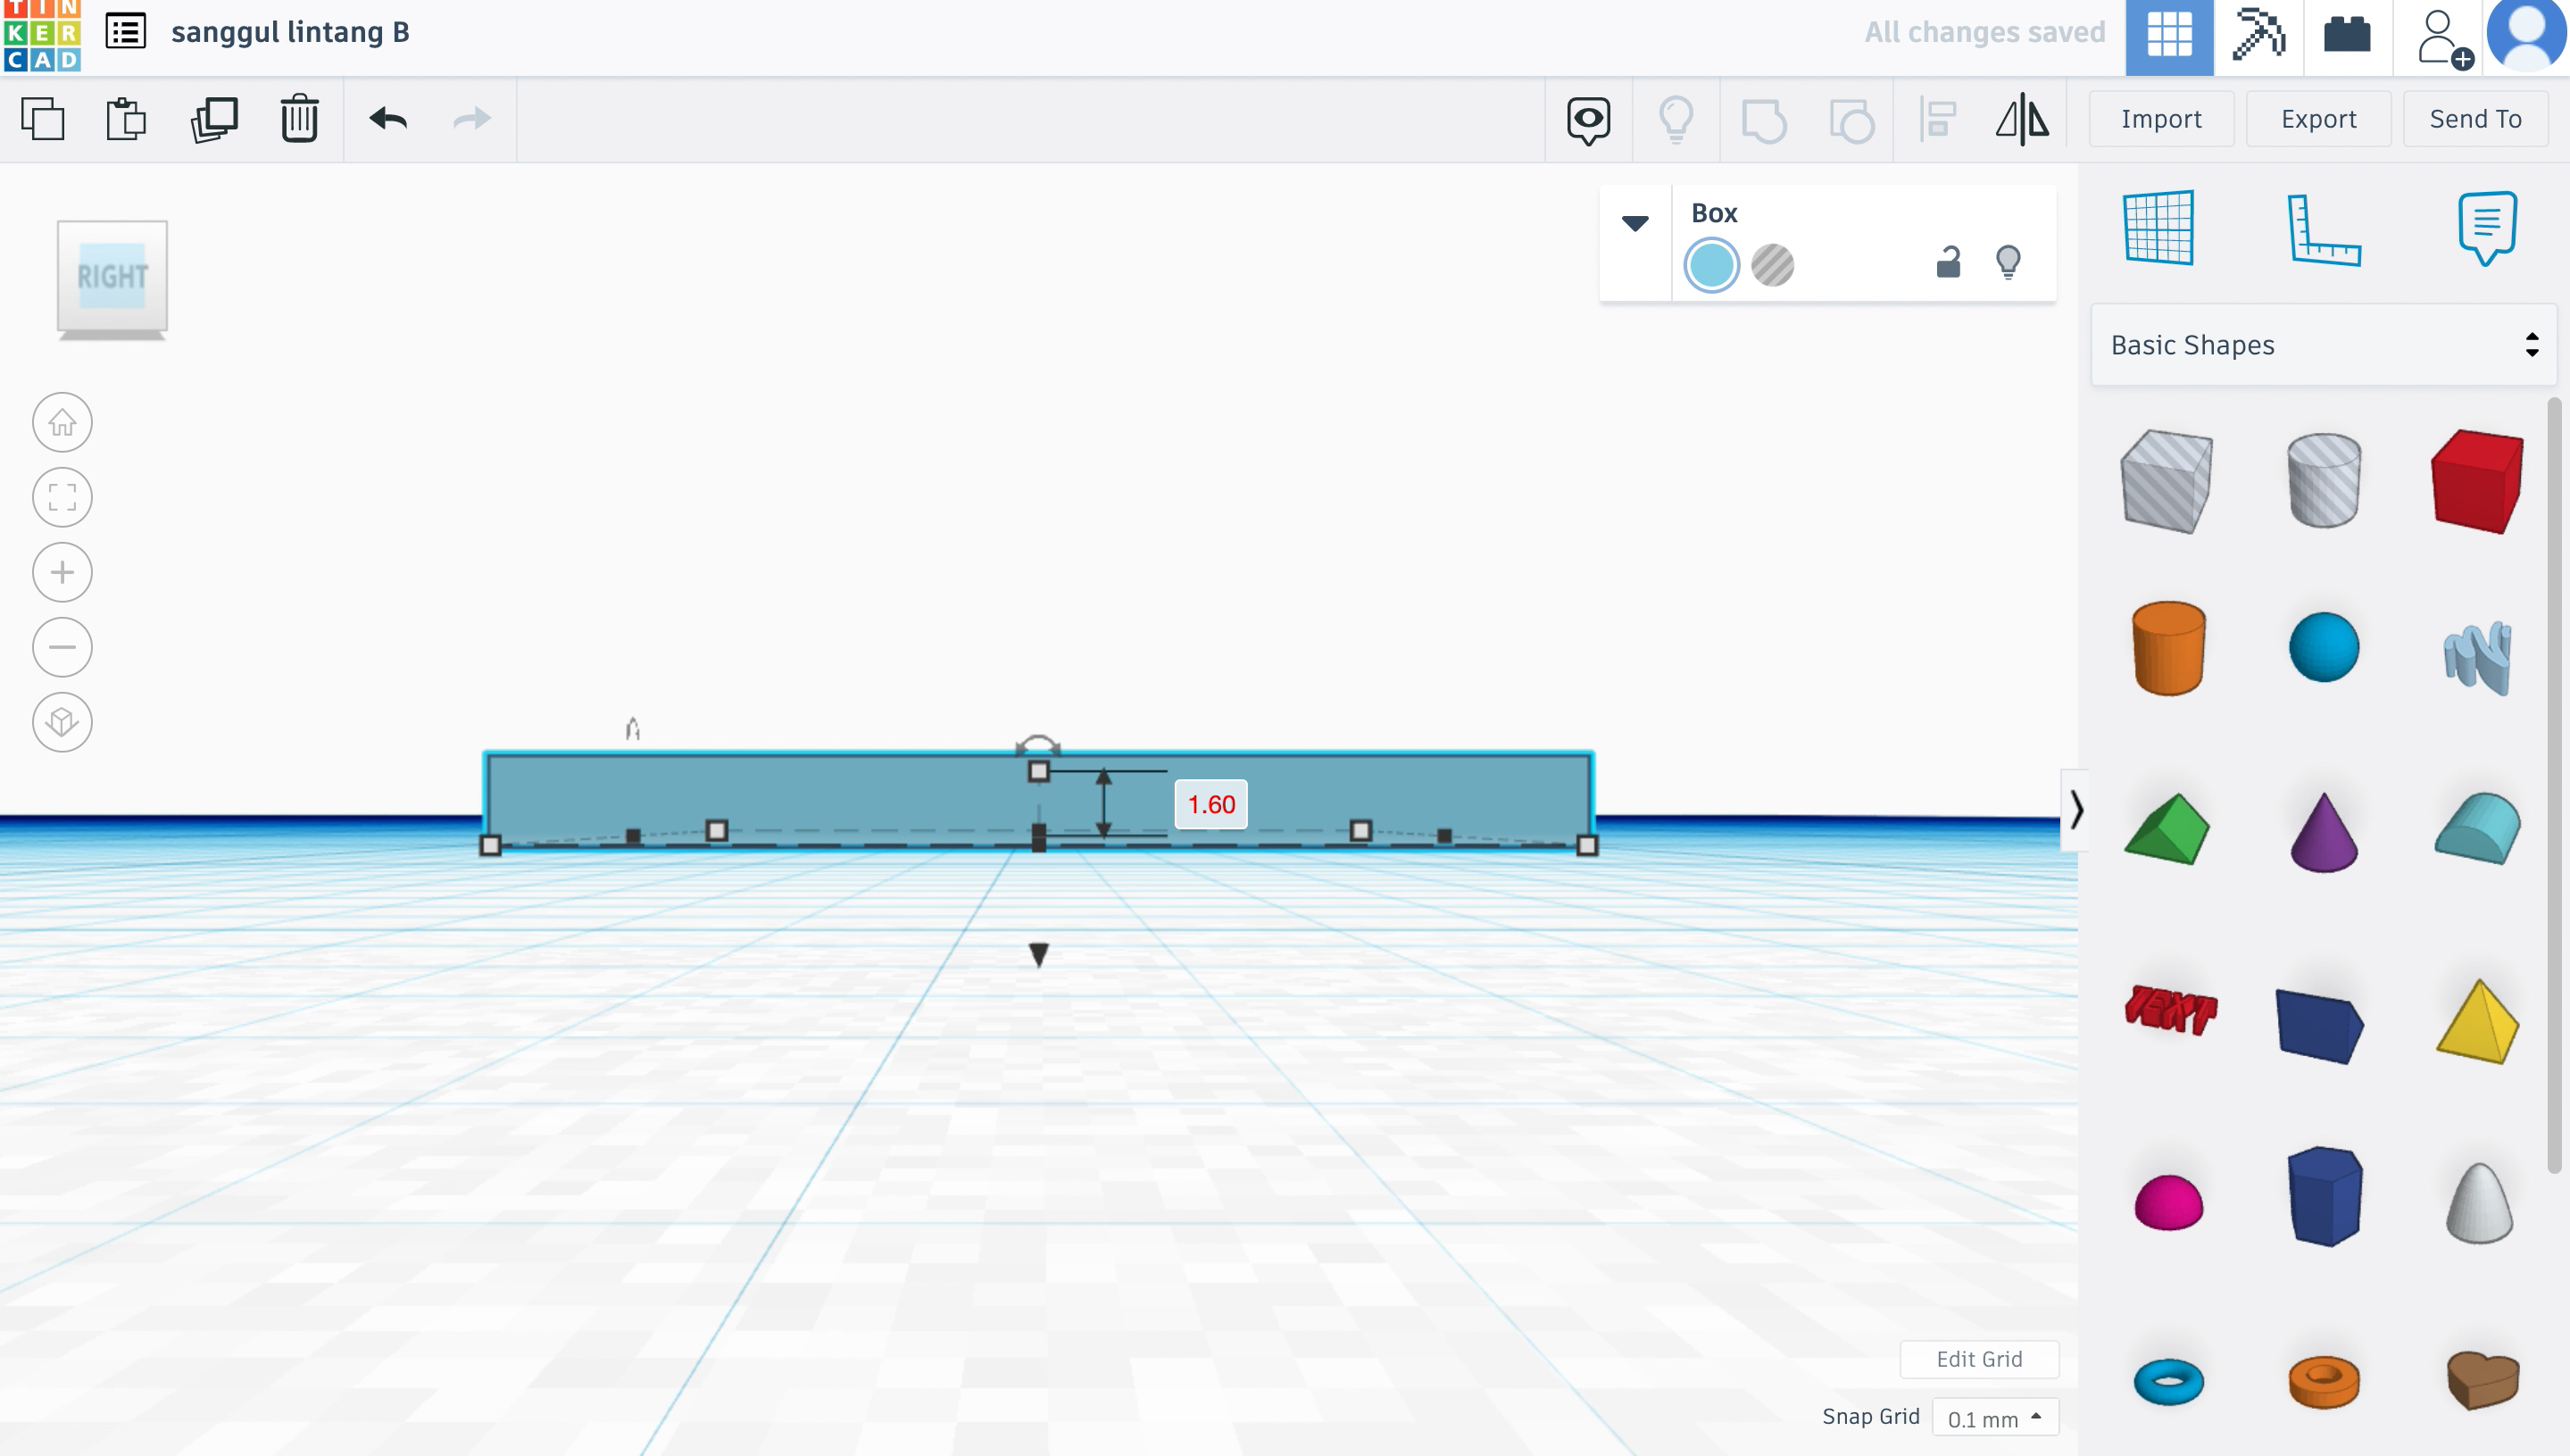
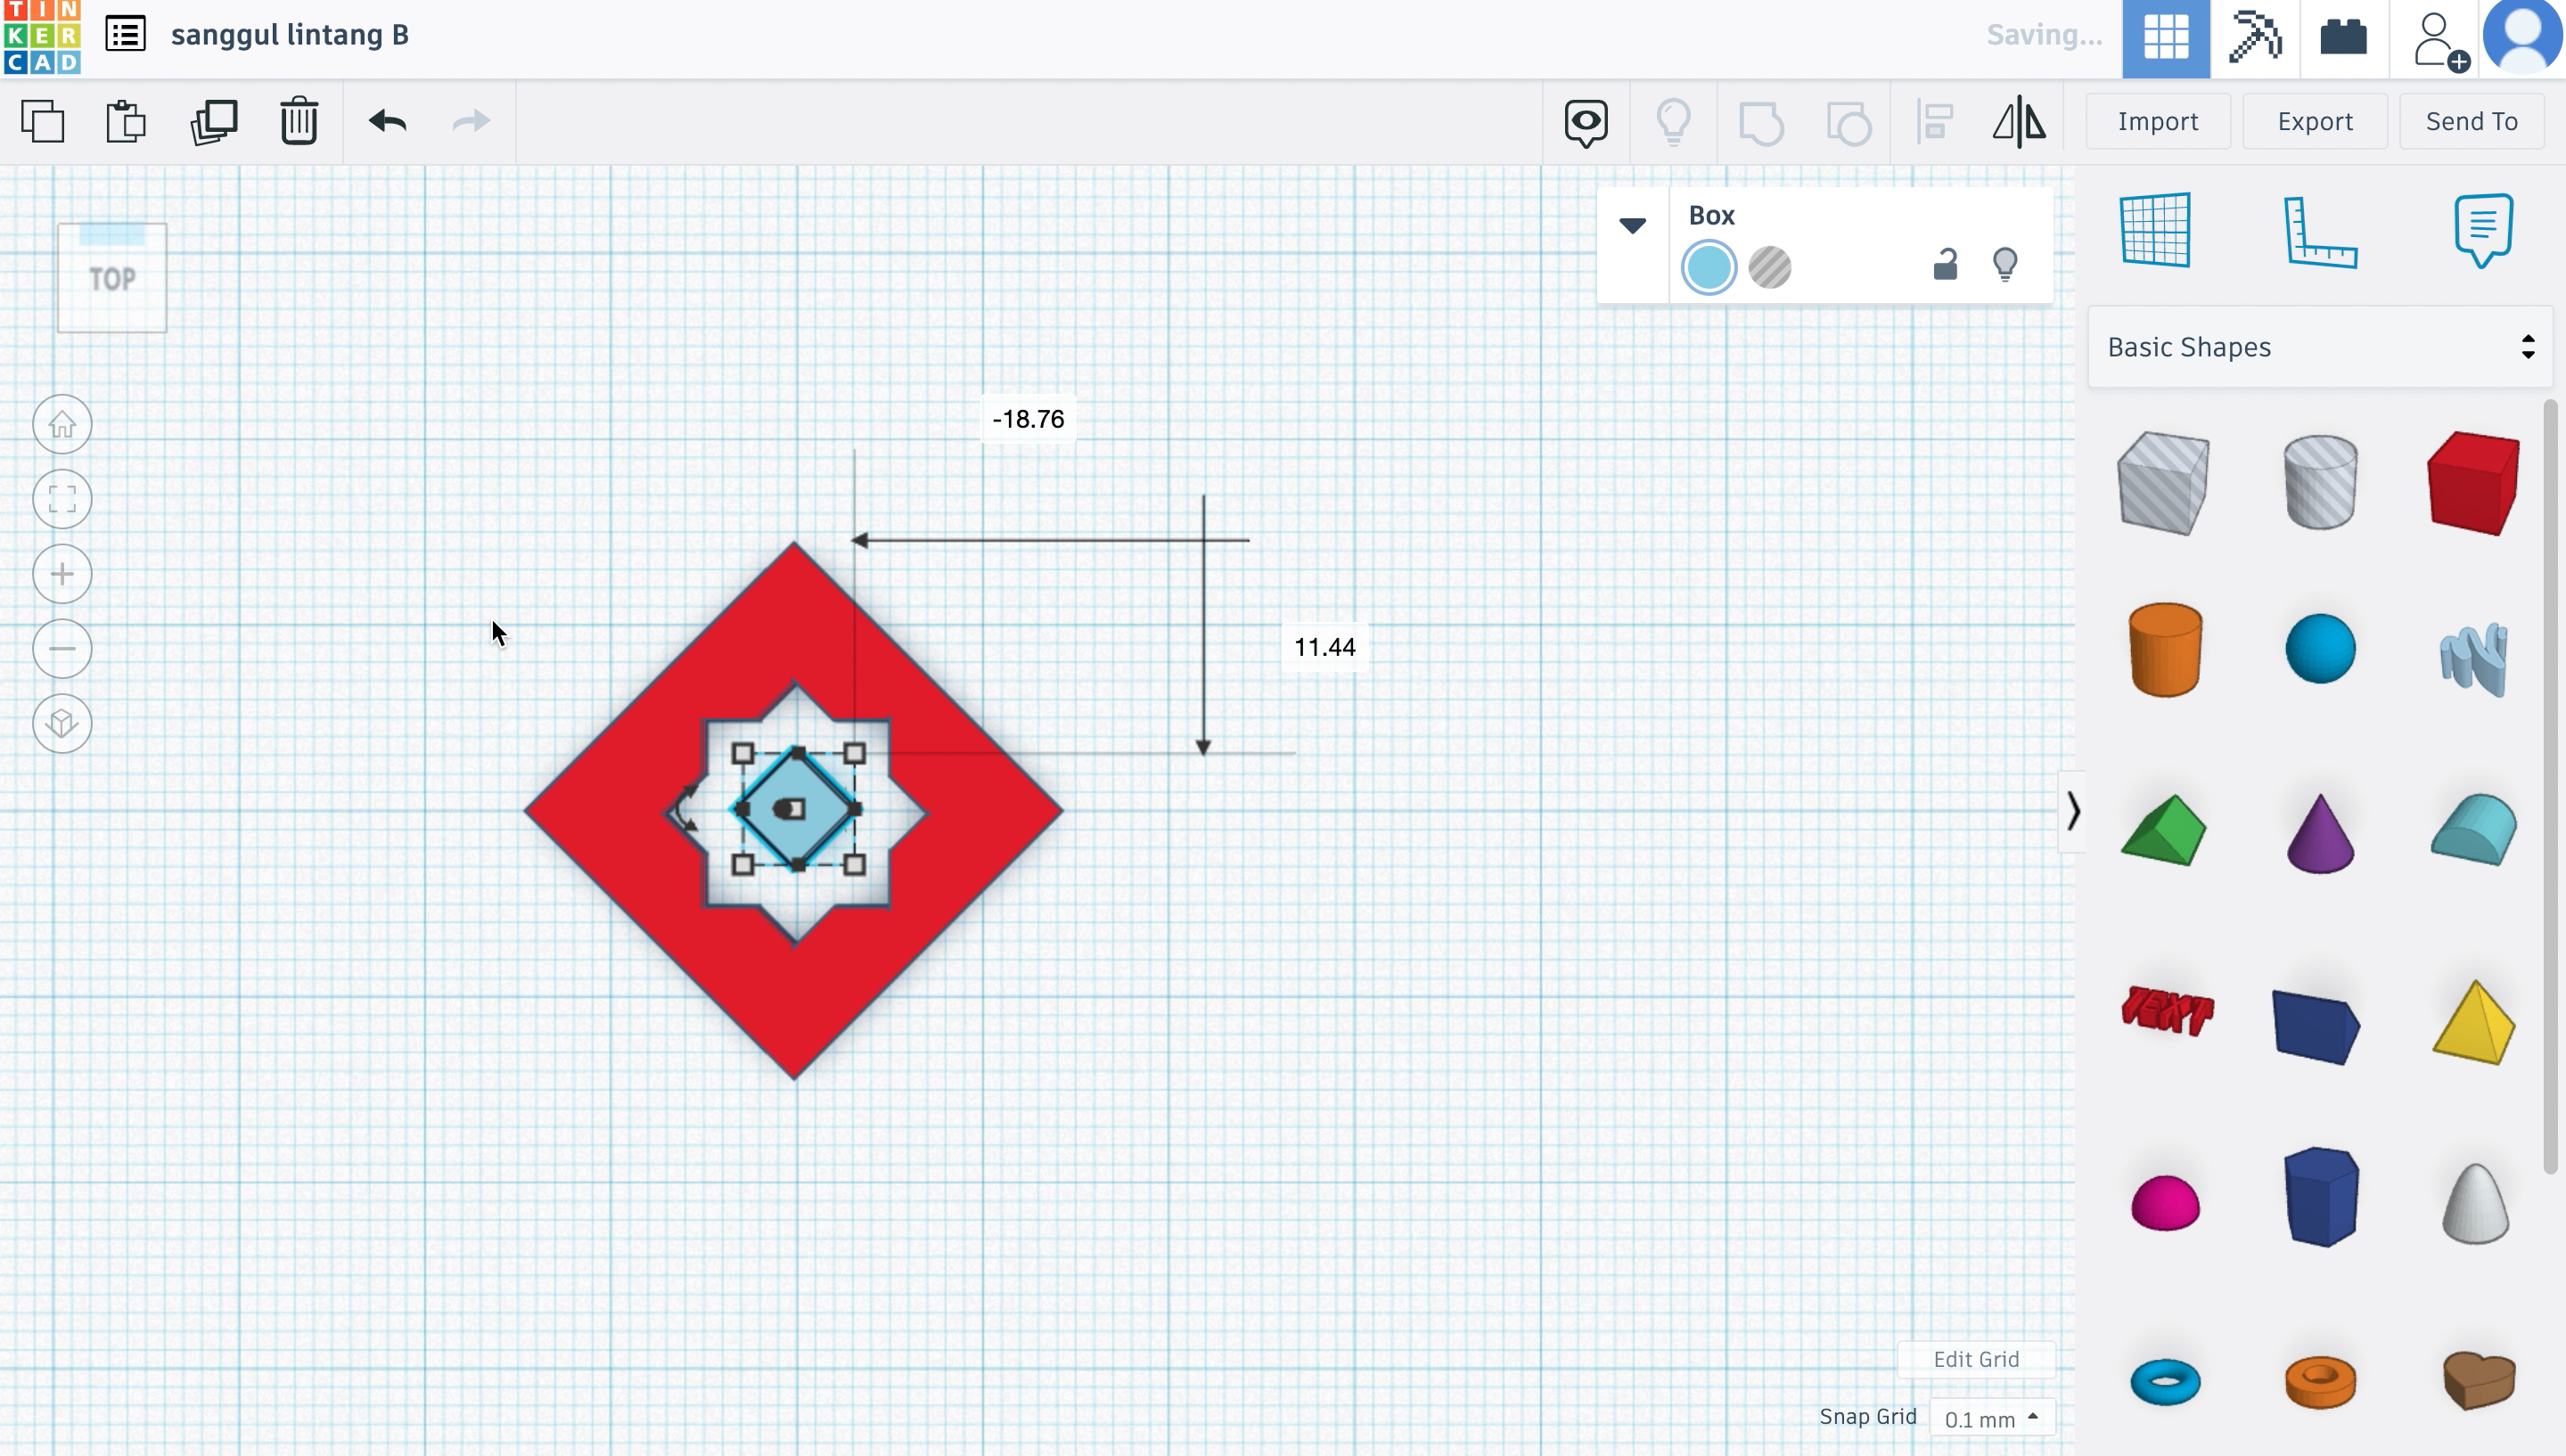

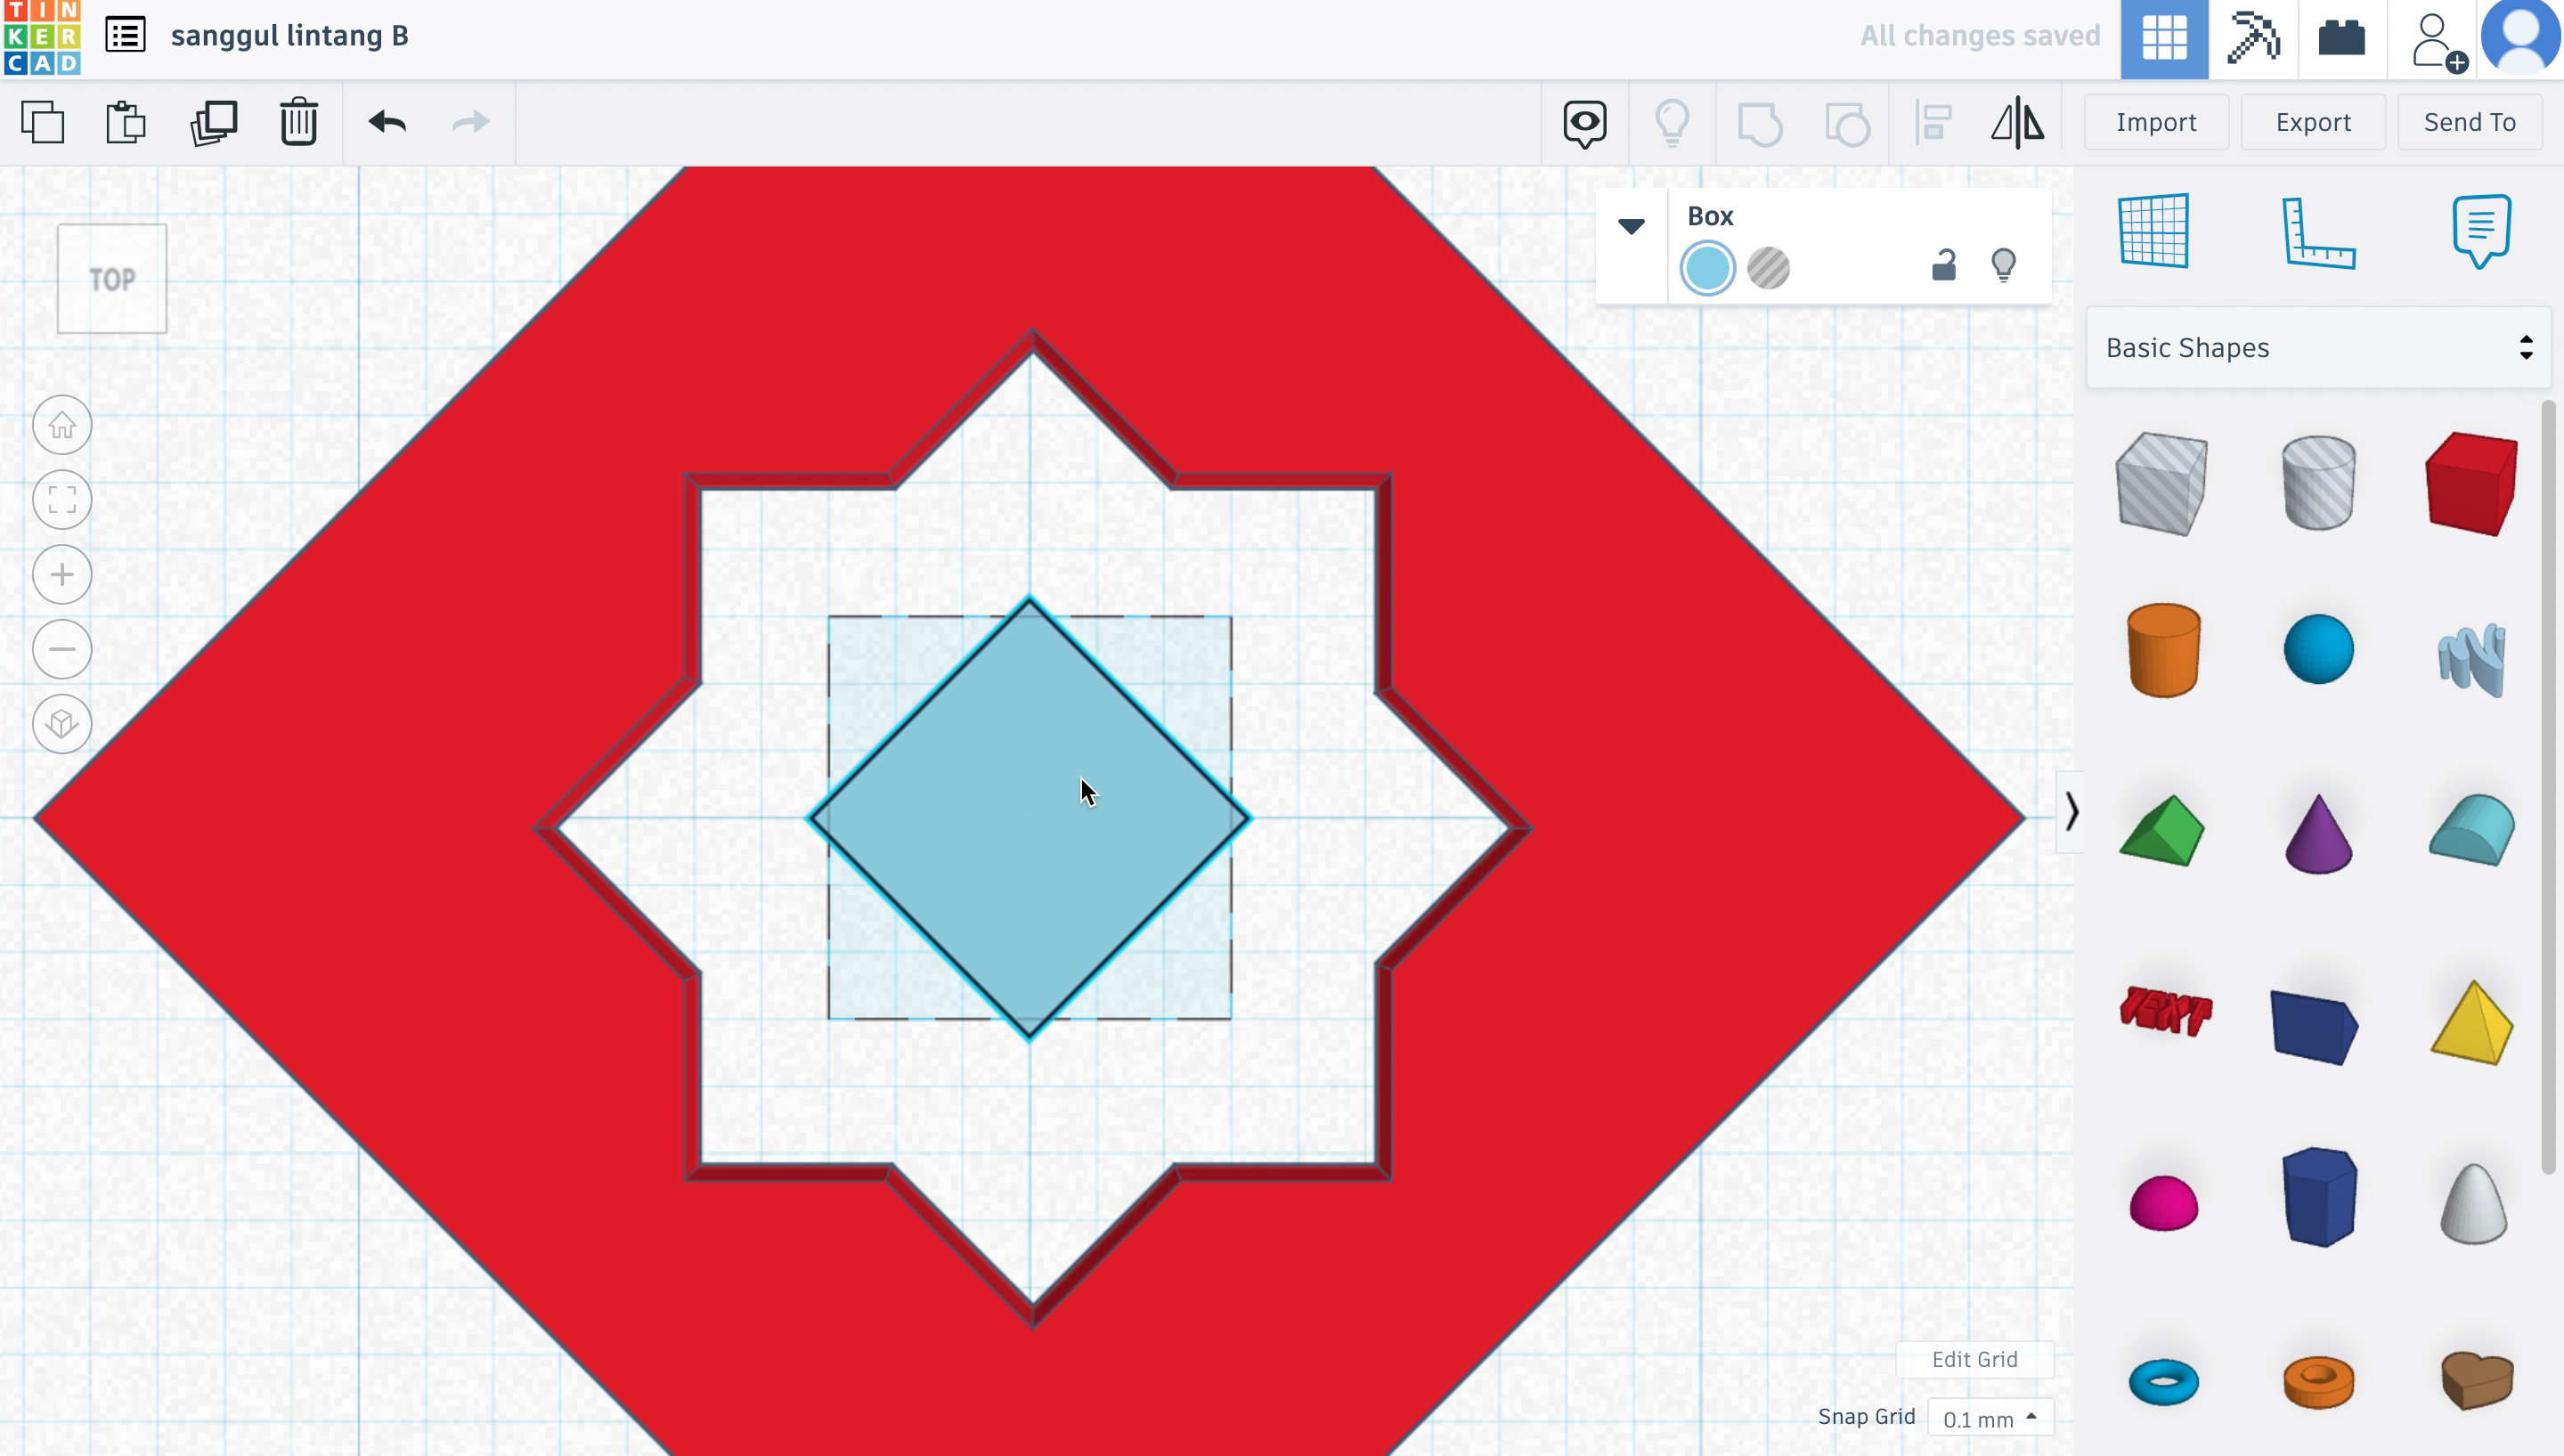
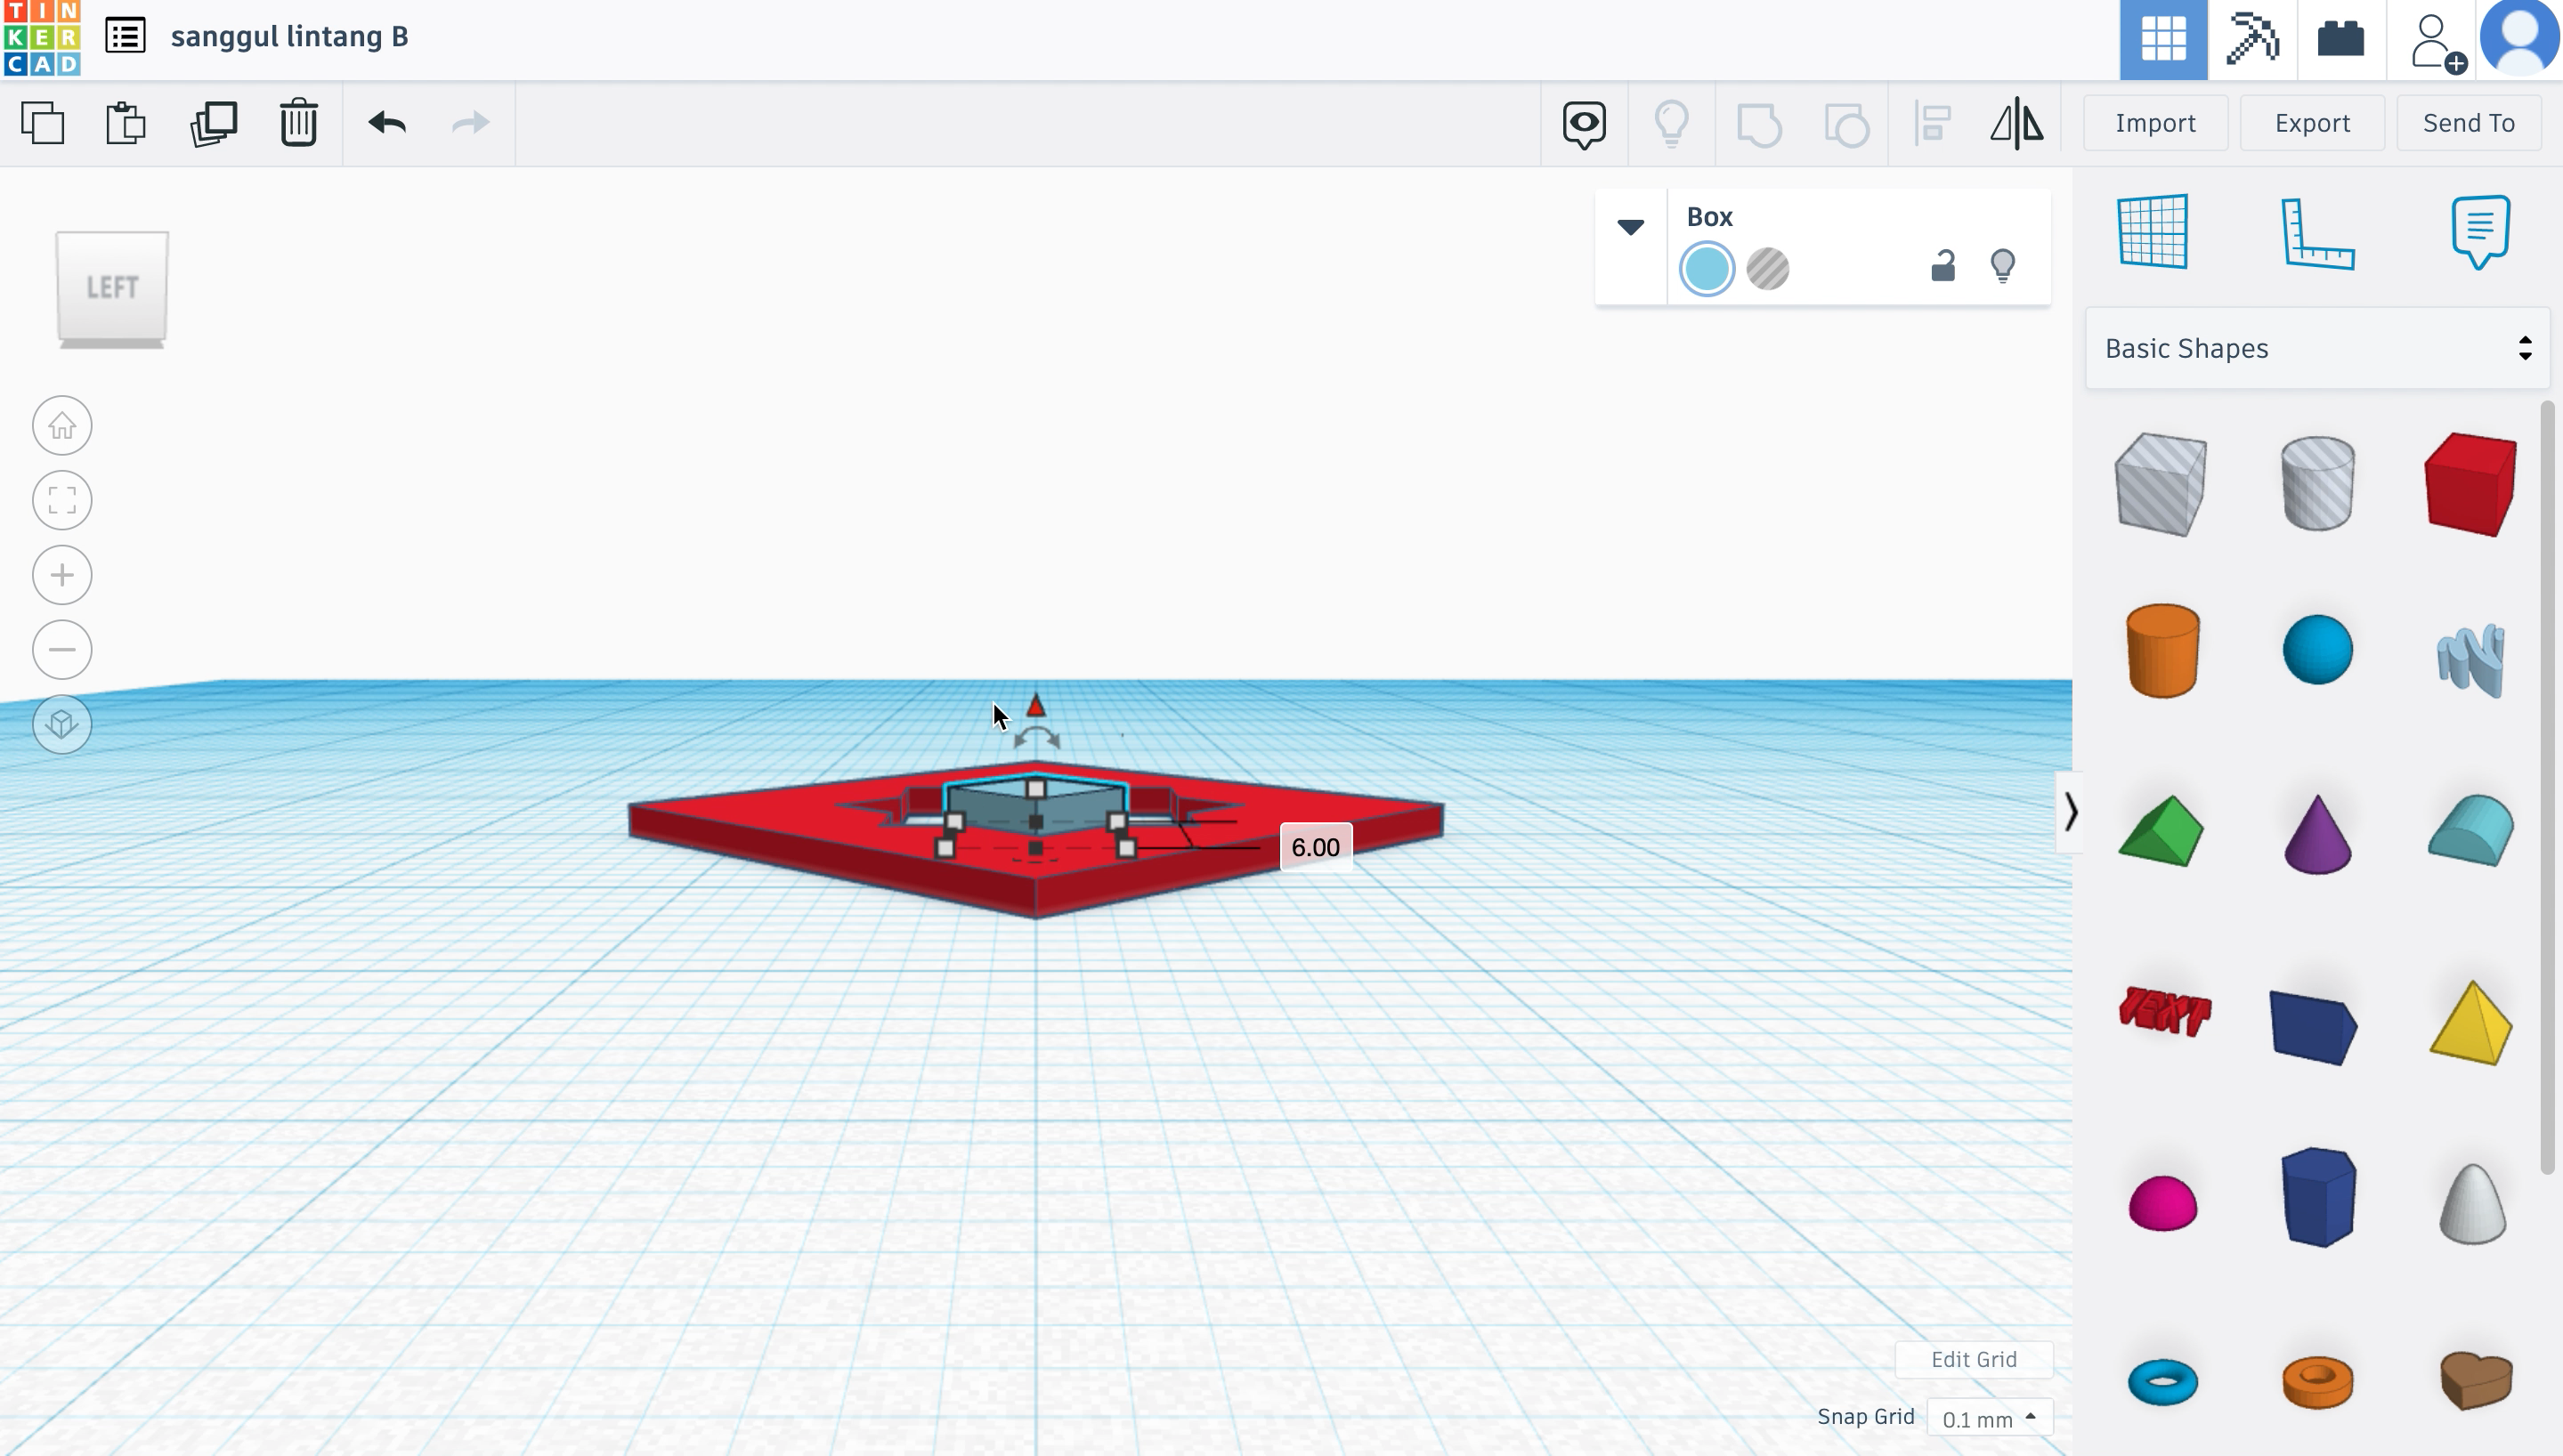
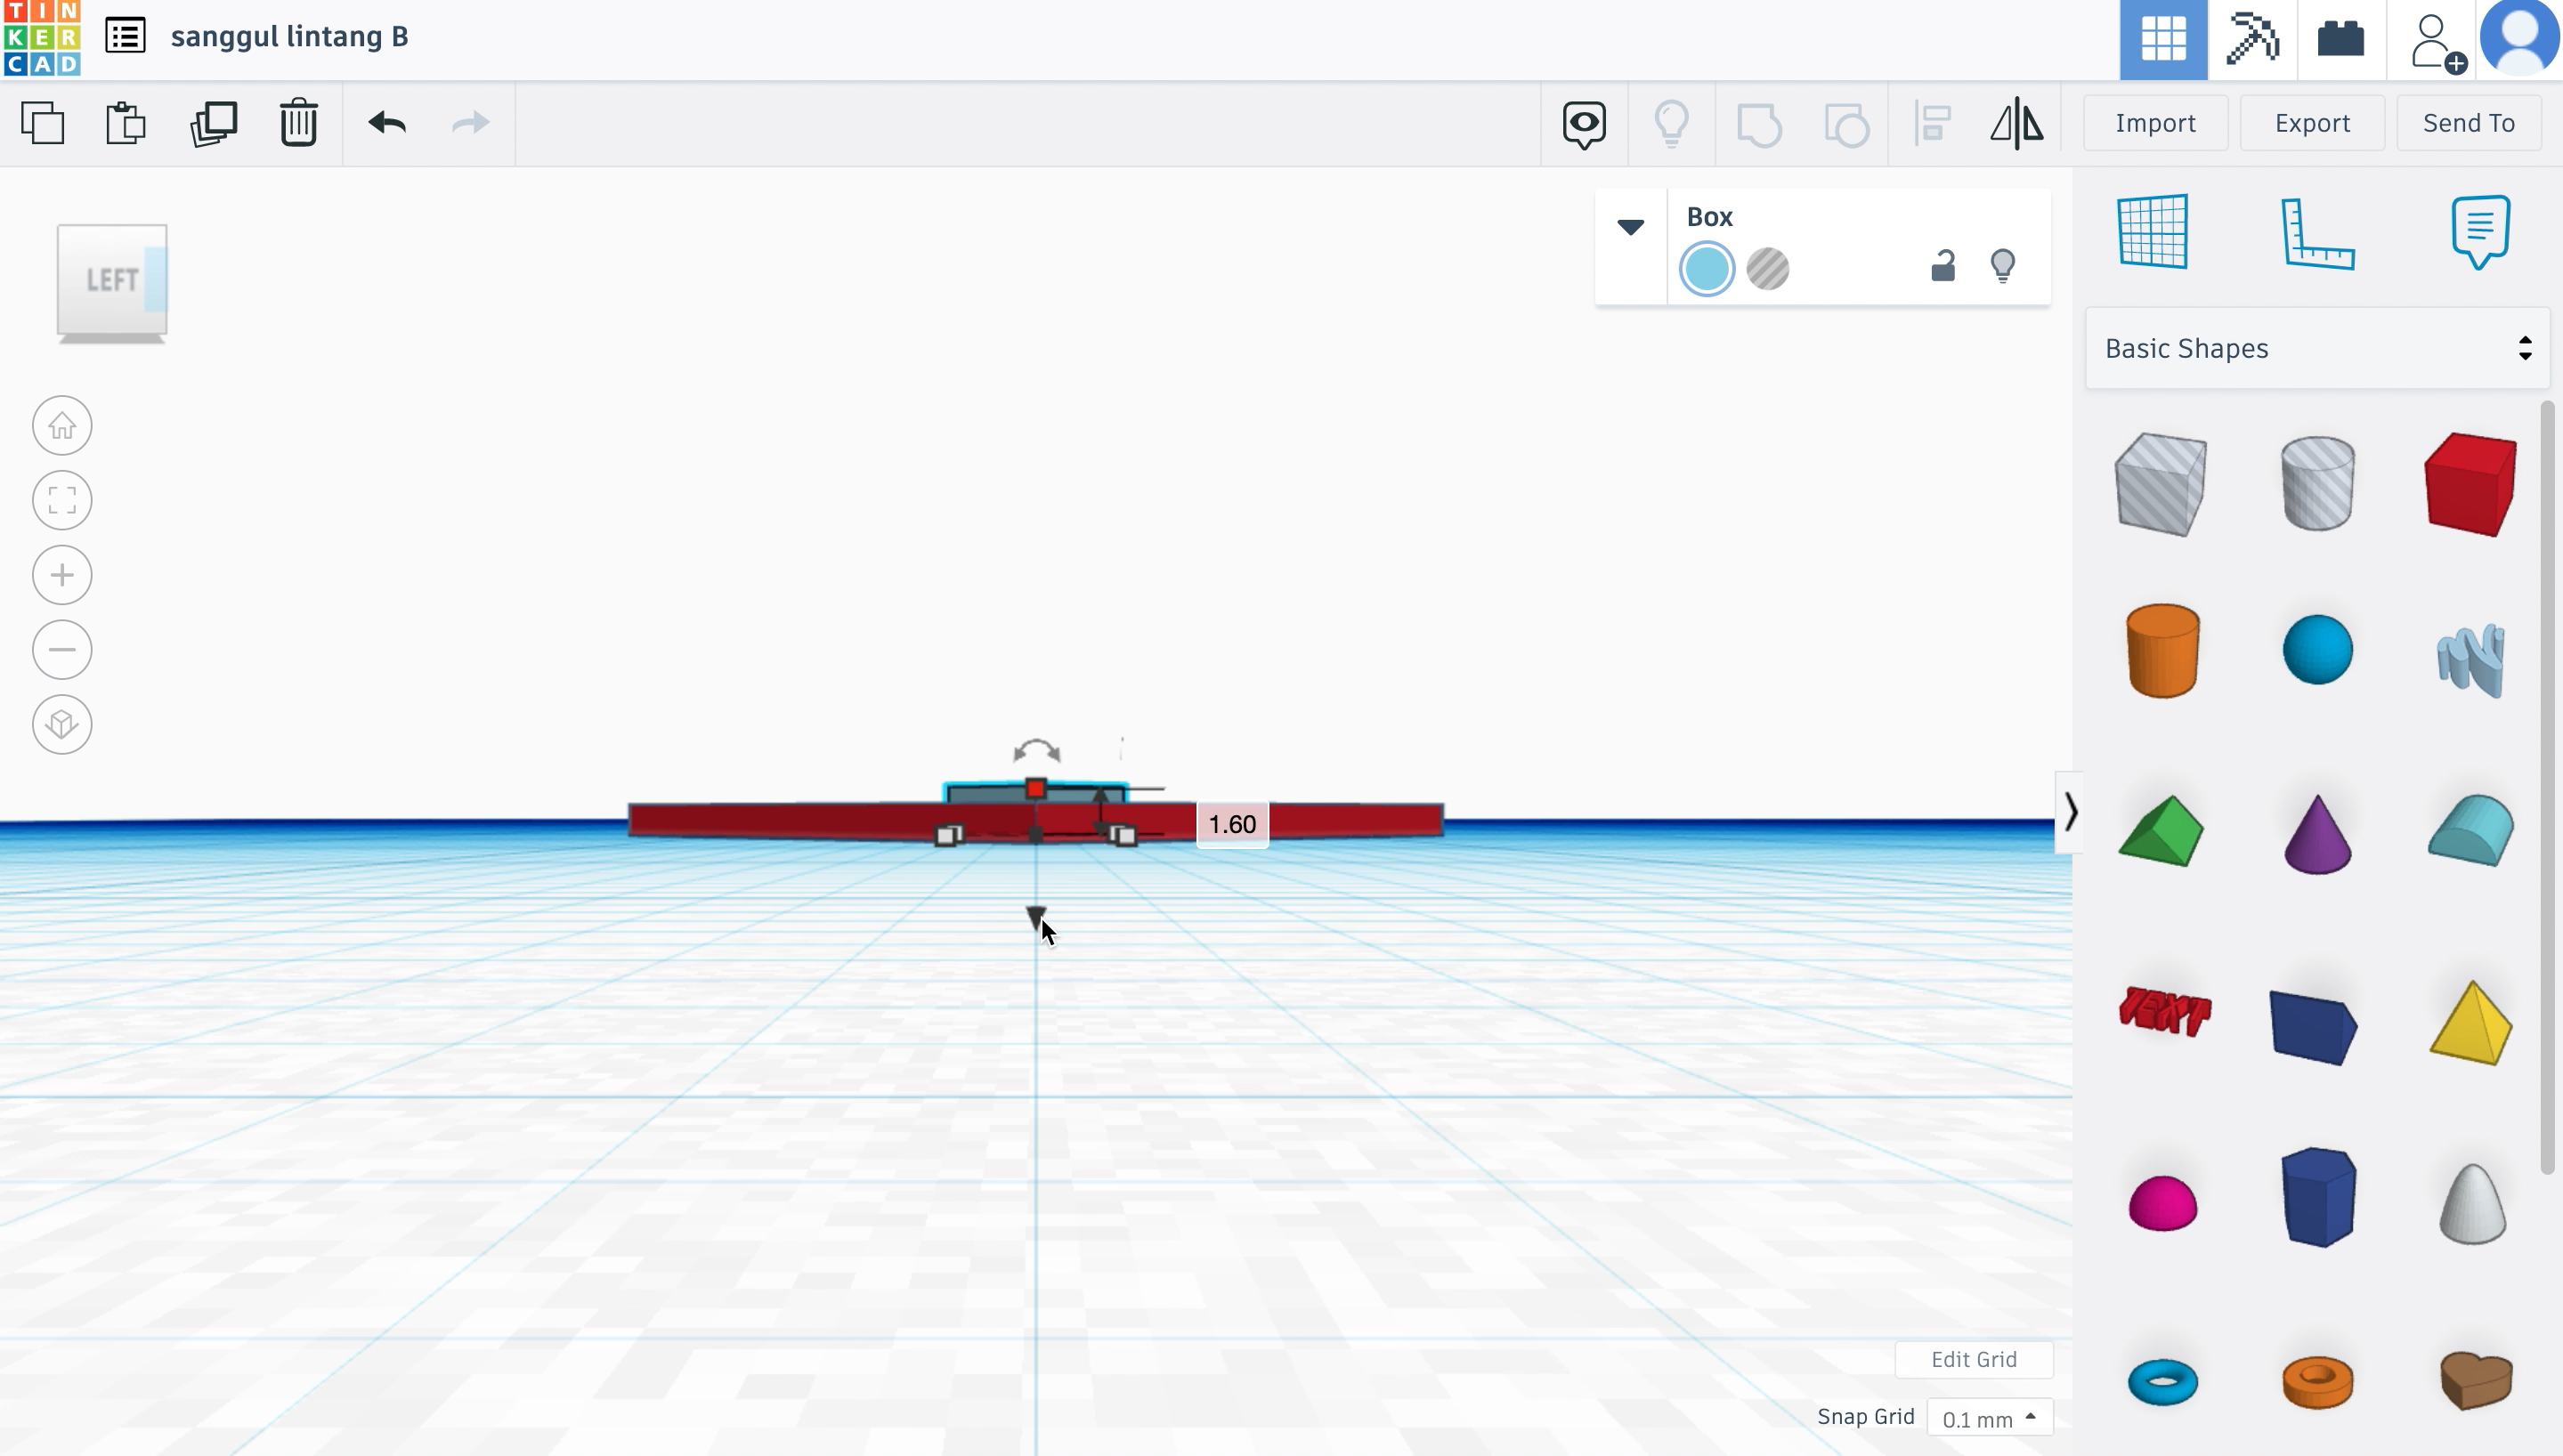
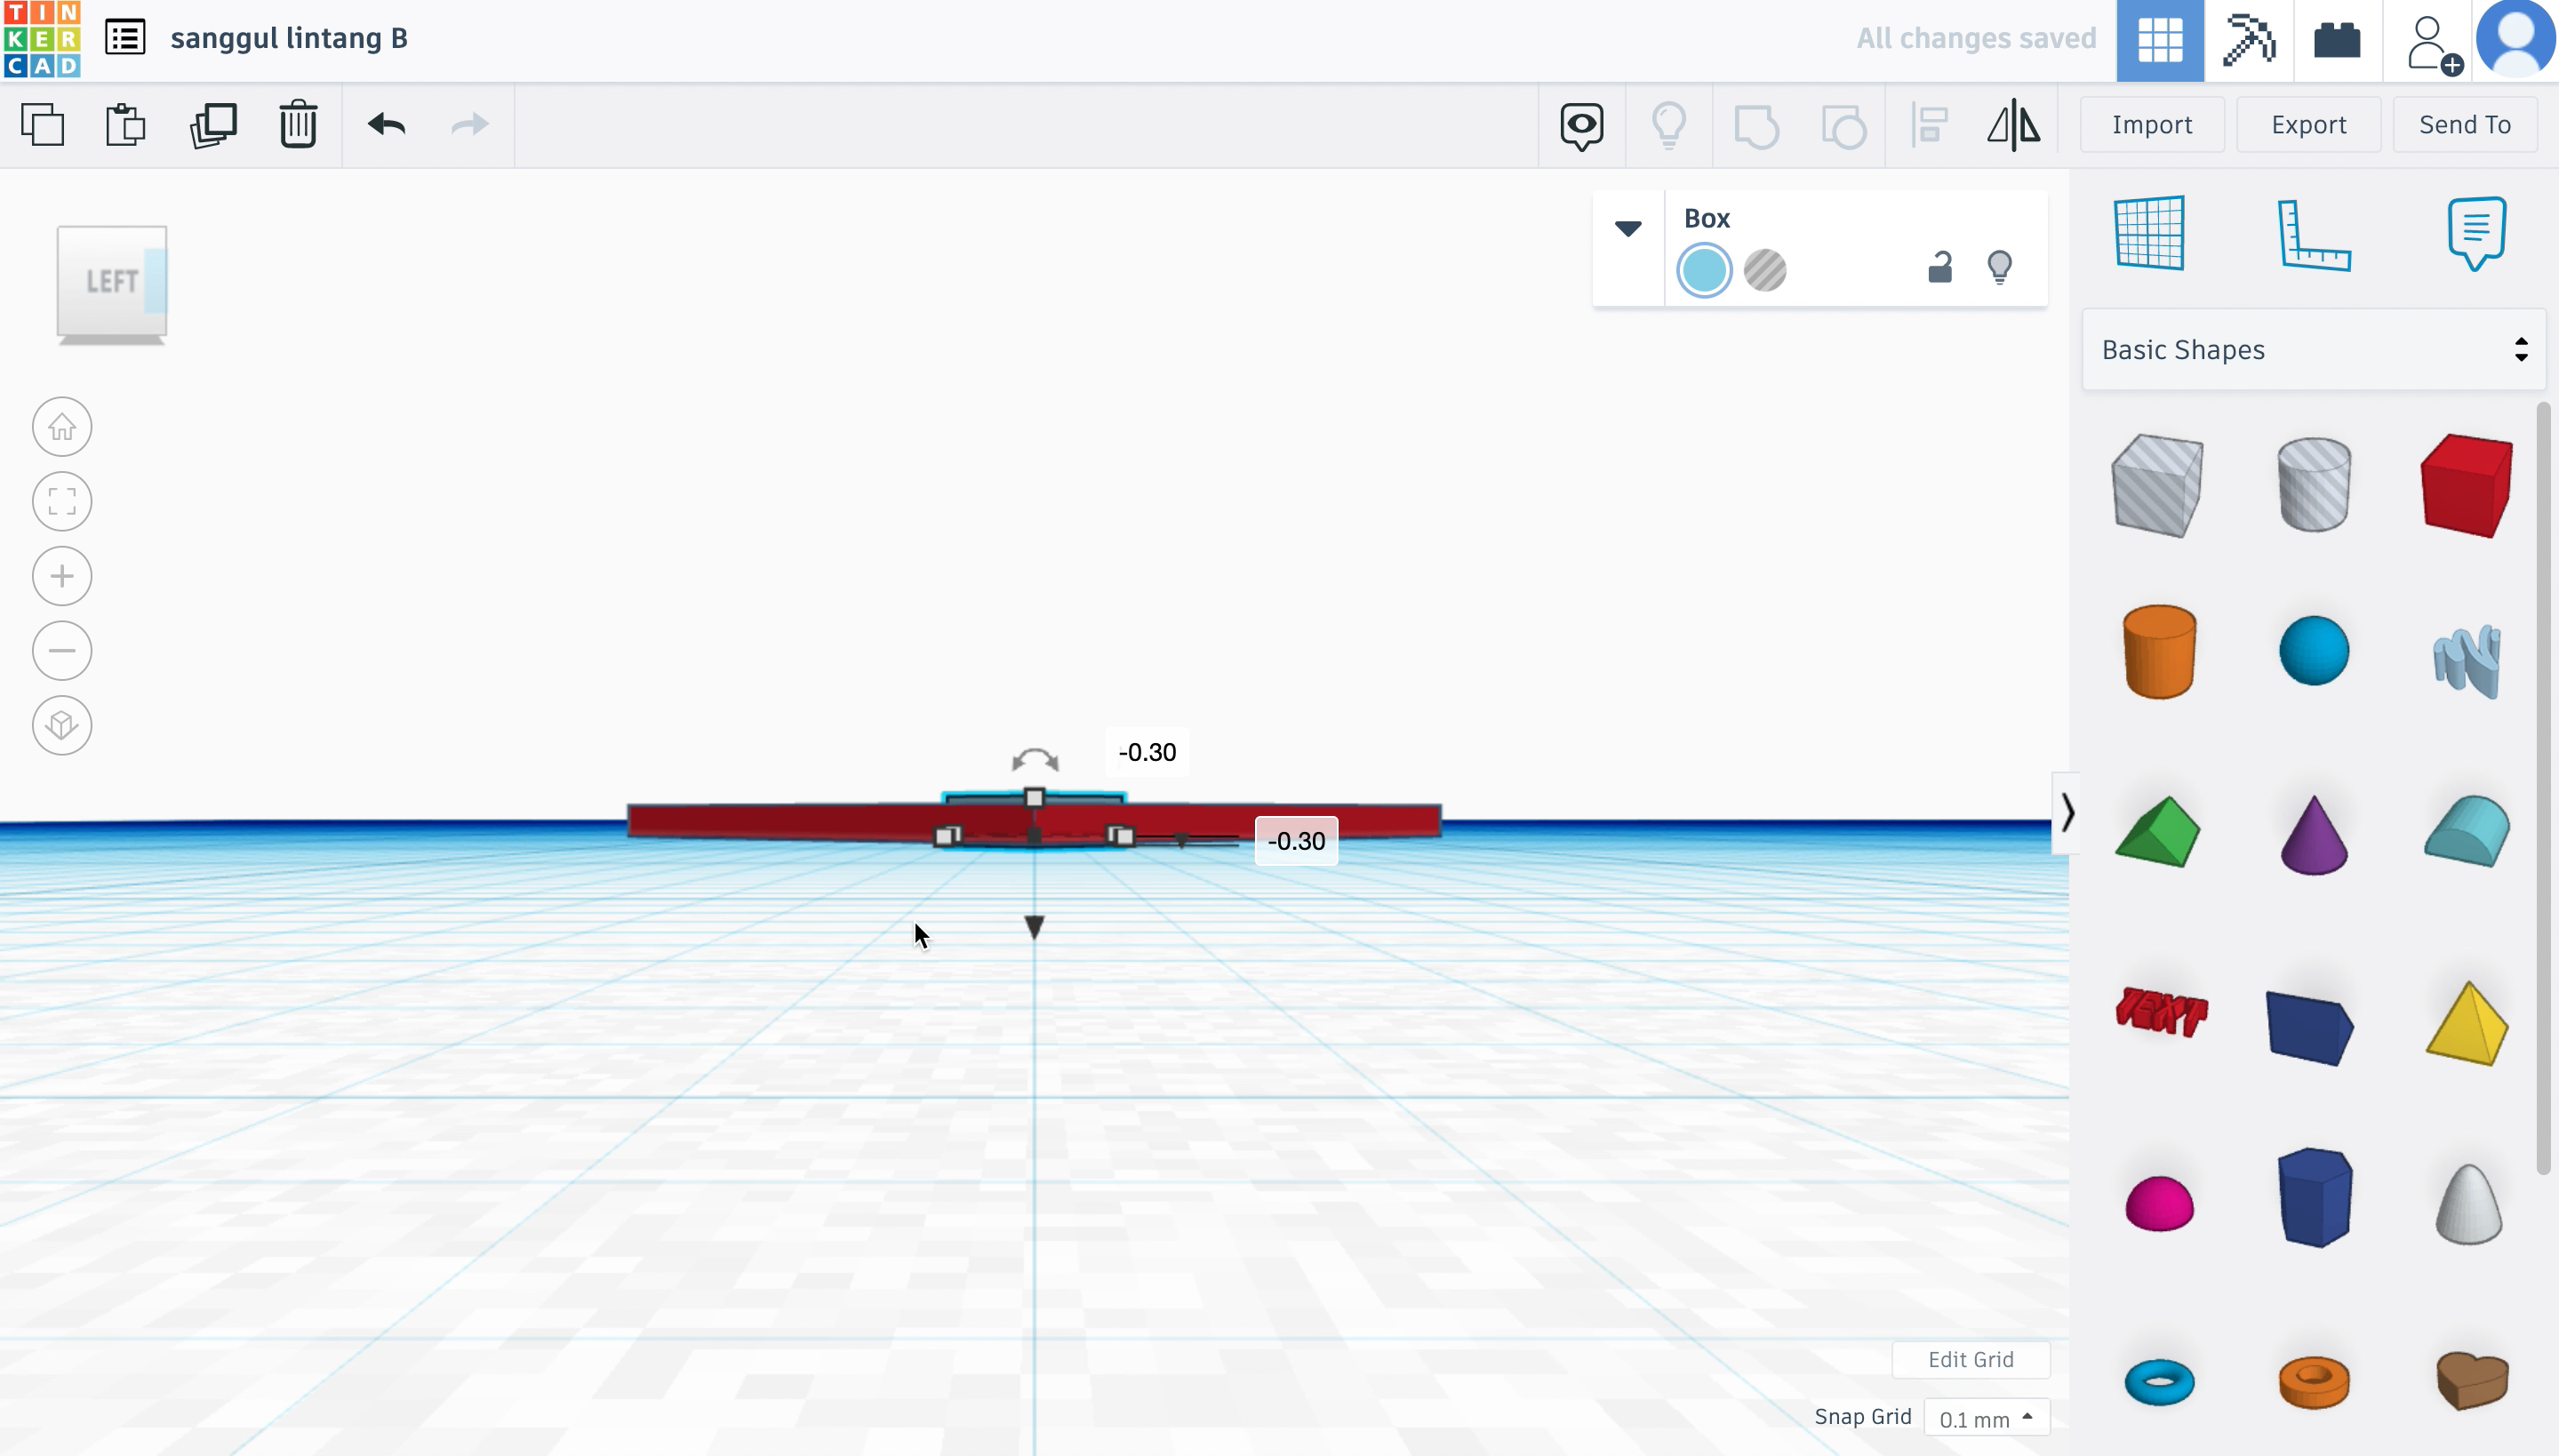
- Grab a 'box' block (I coloured coded mine blue). Then, make the height of it slightly thicker than the red shape.
- Second, align it at the center of the red shape. For small adjustments, you can use the 'fit all in view'/ zoom button.
- Next, observe the shapes from the side, and pull the blue shape so that an even amount of it pokes-out from both sides.
Sanggul Lintang B
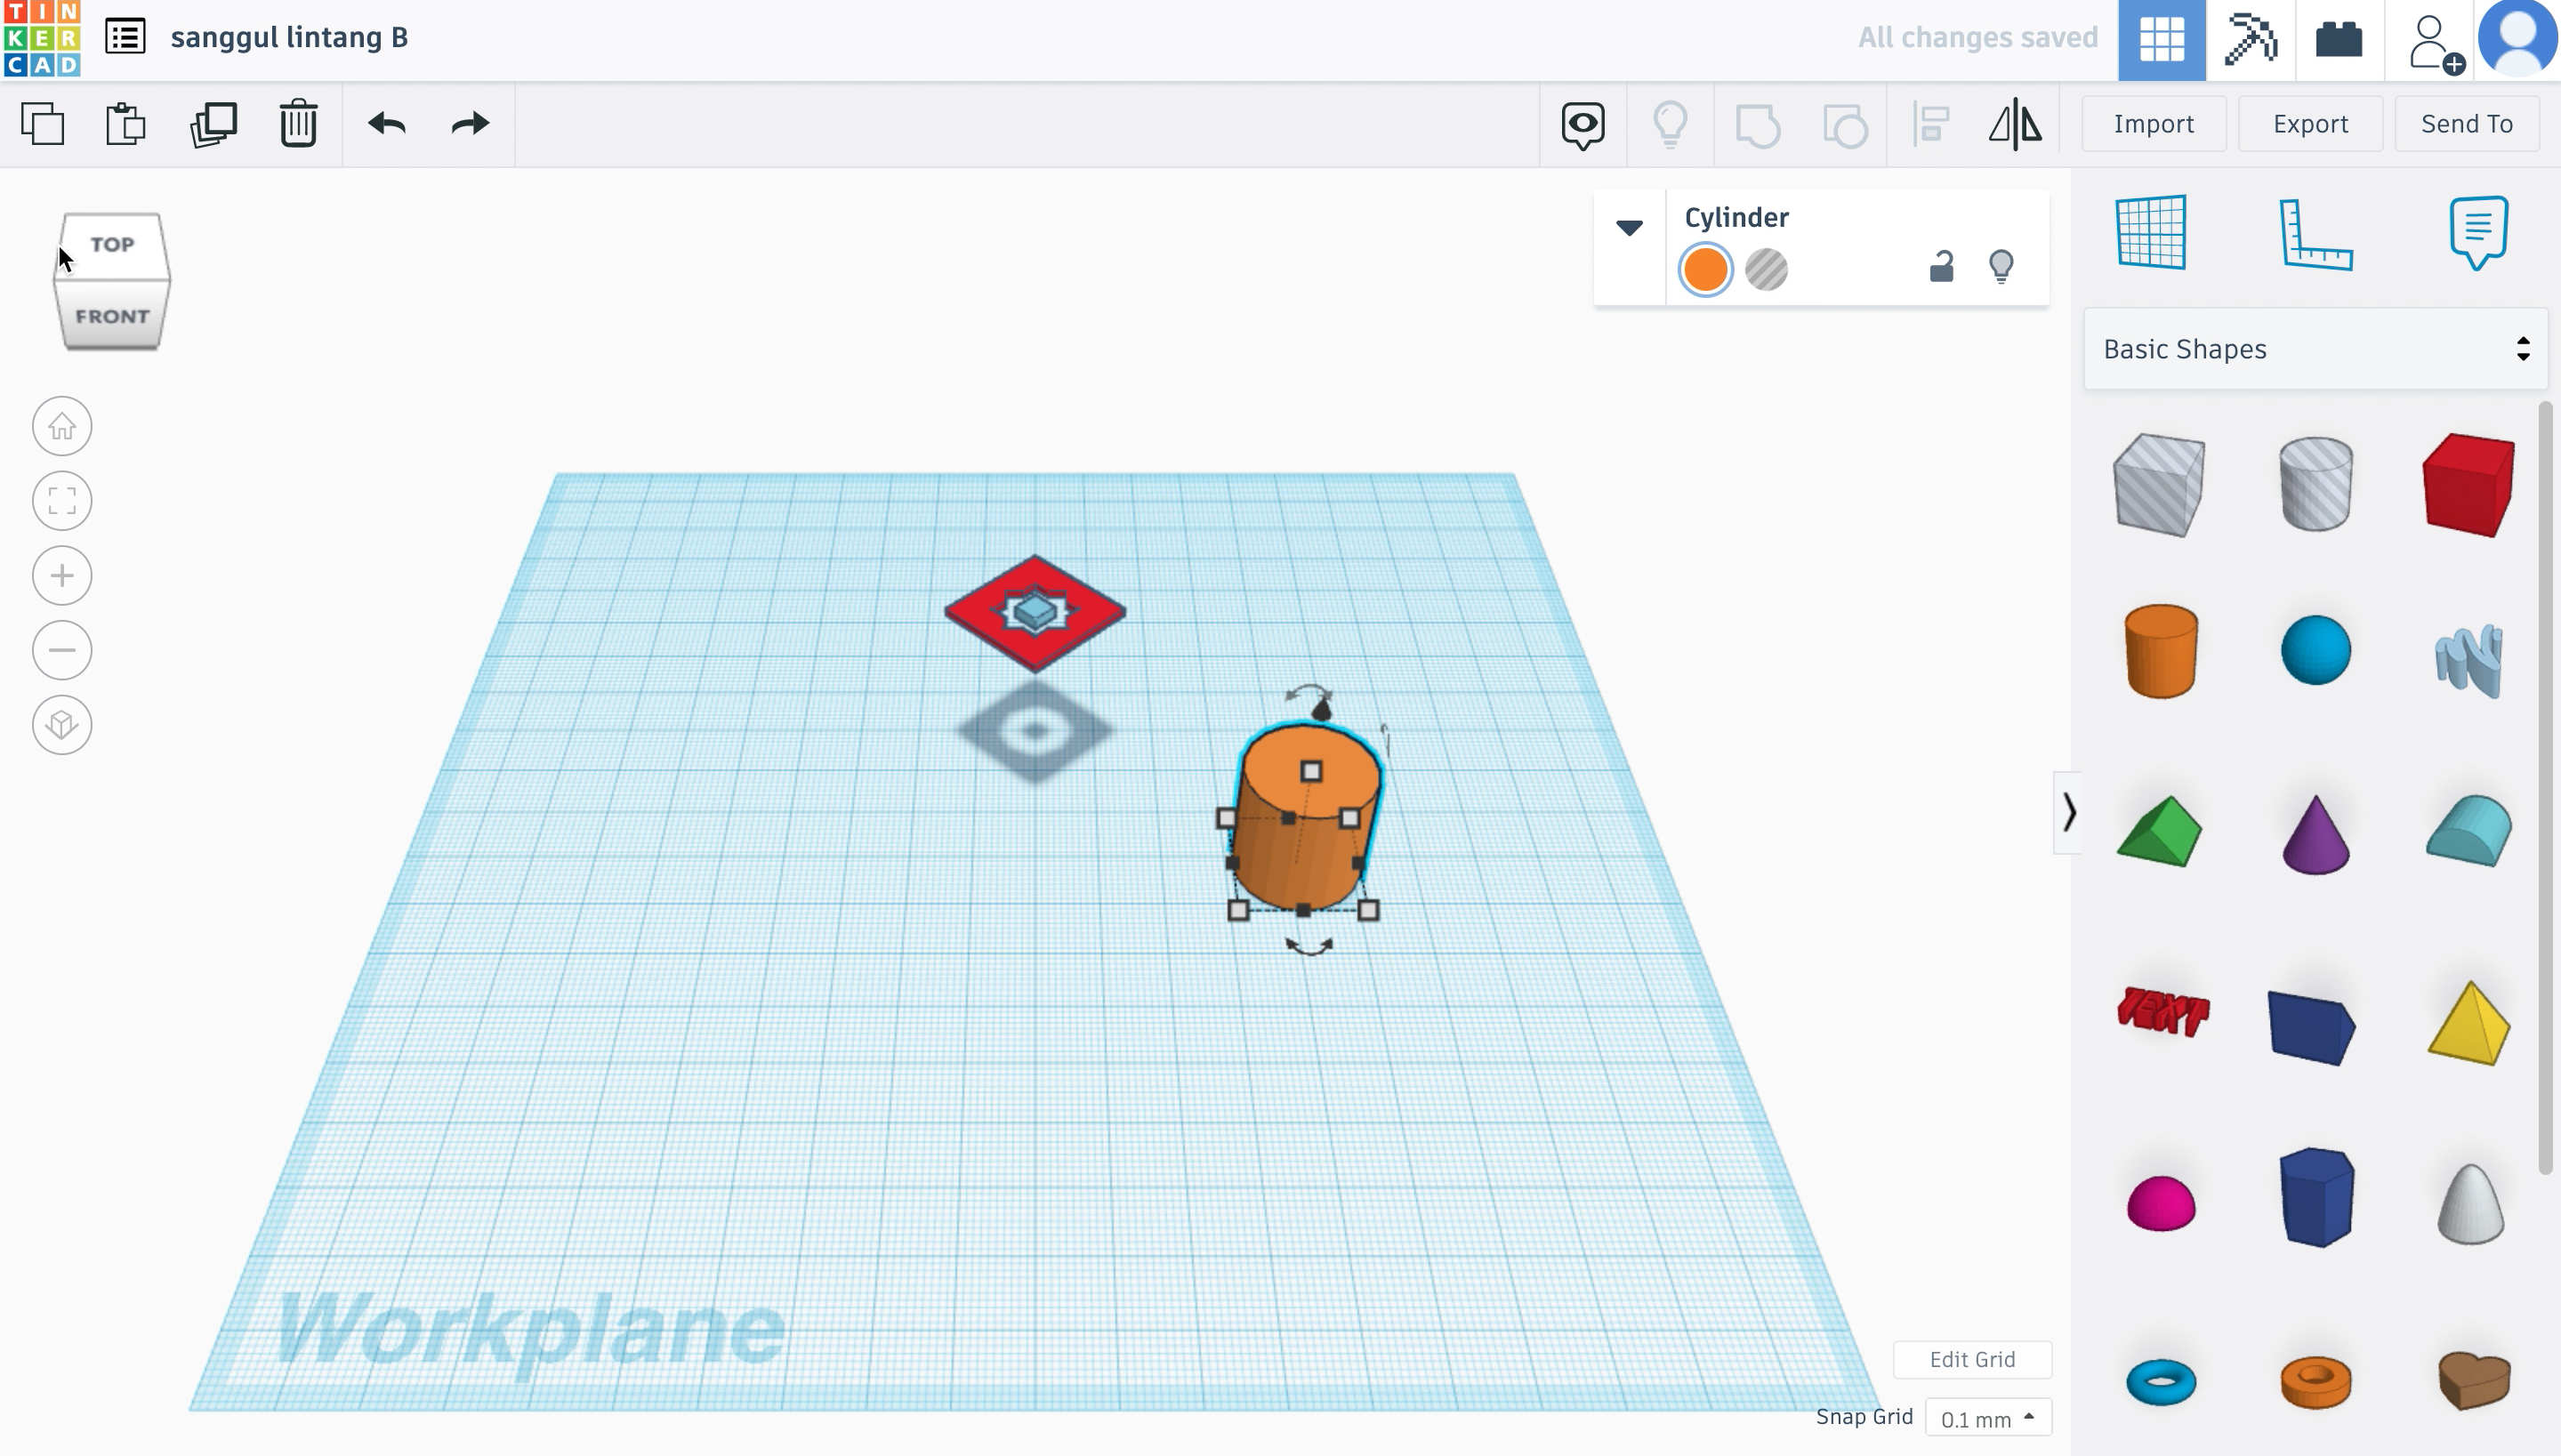
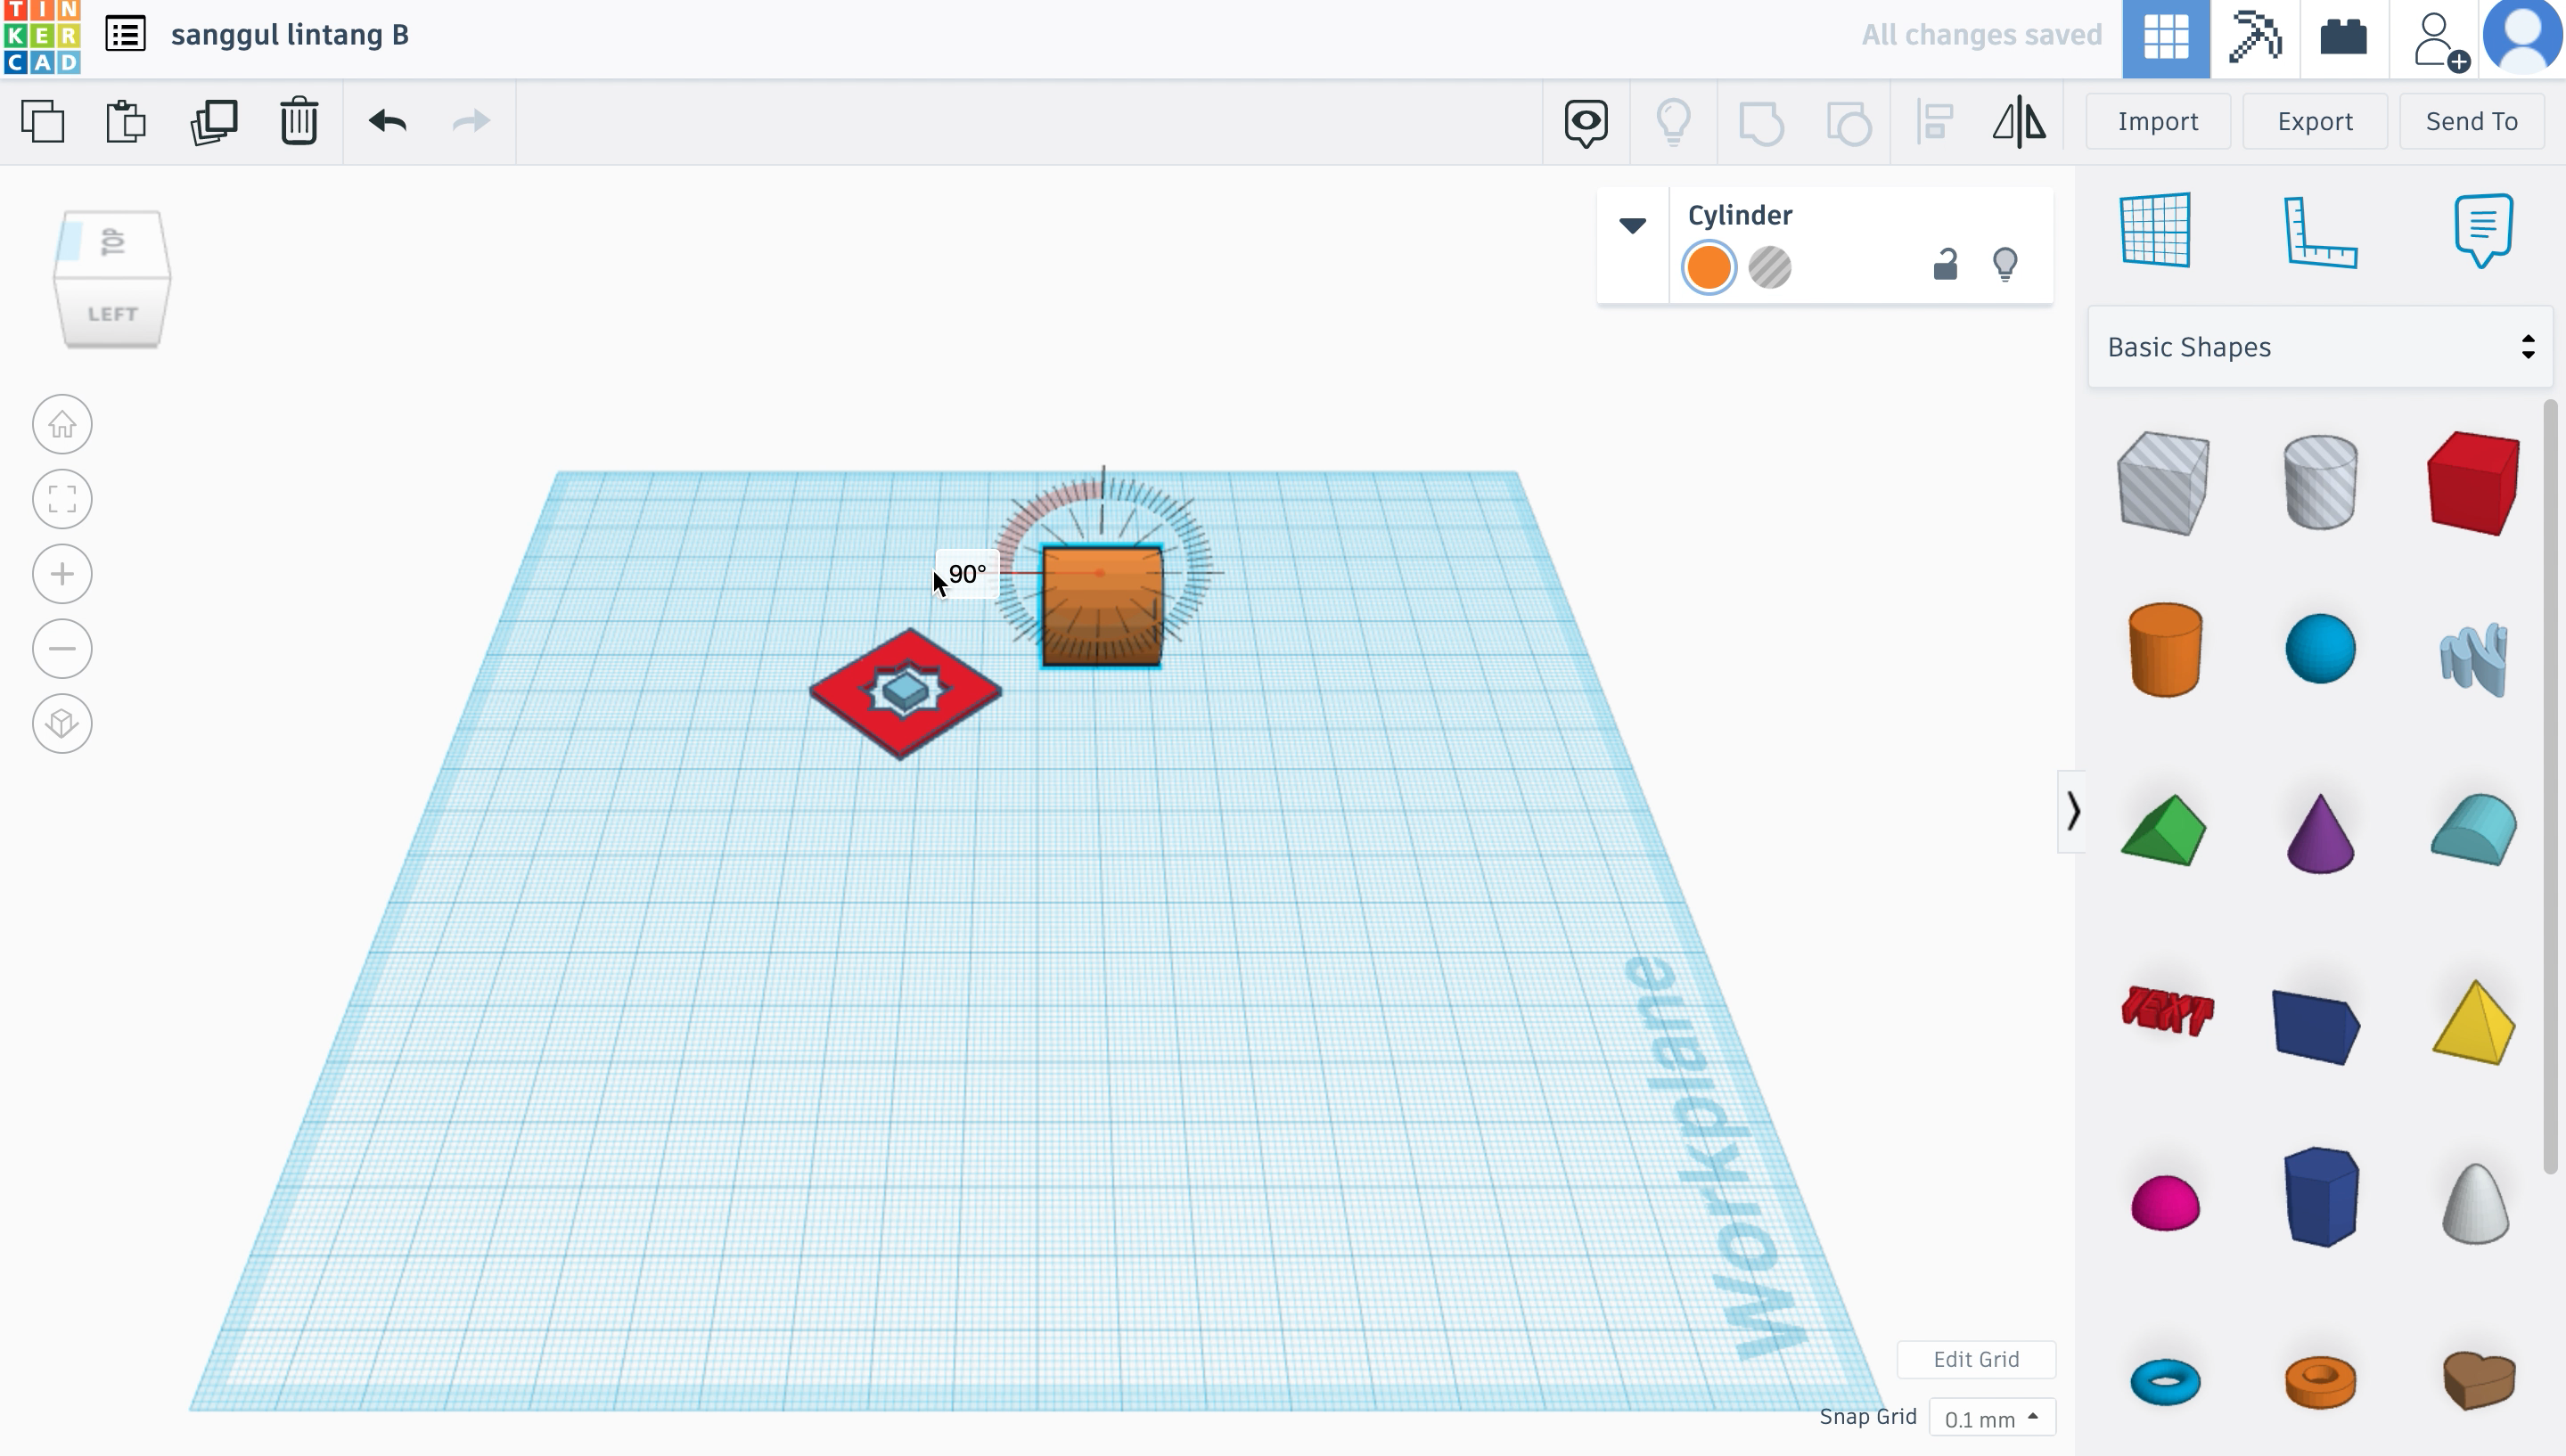
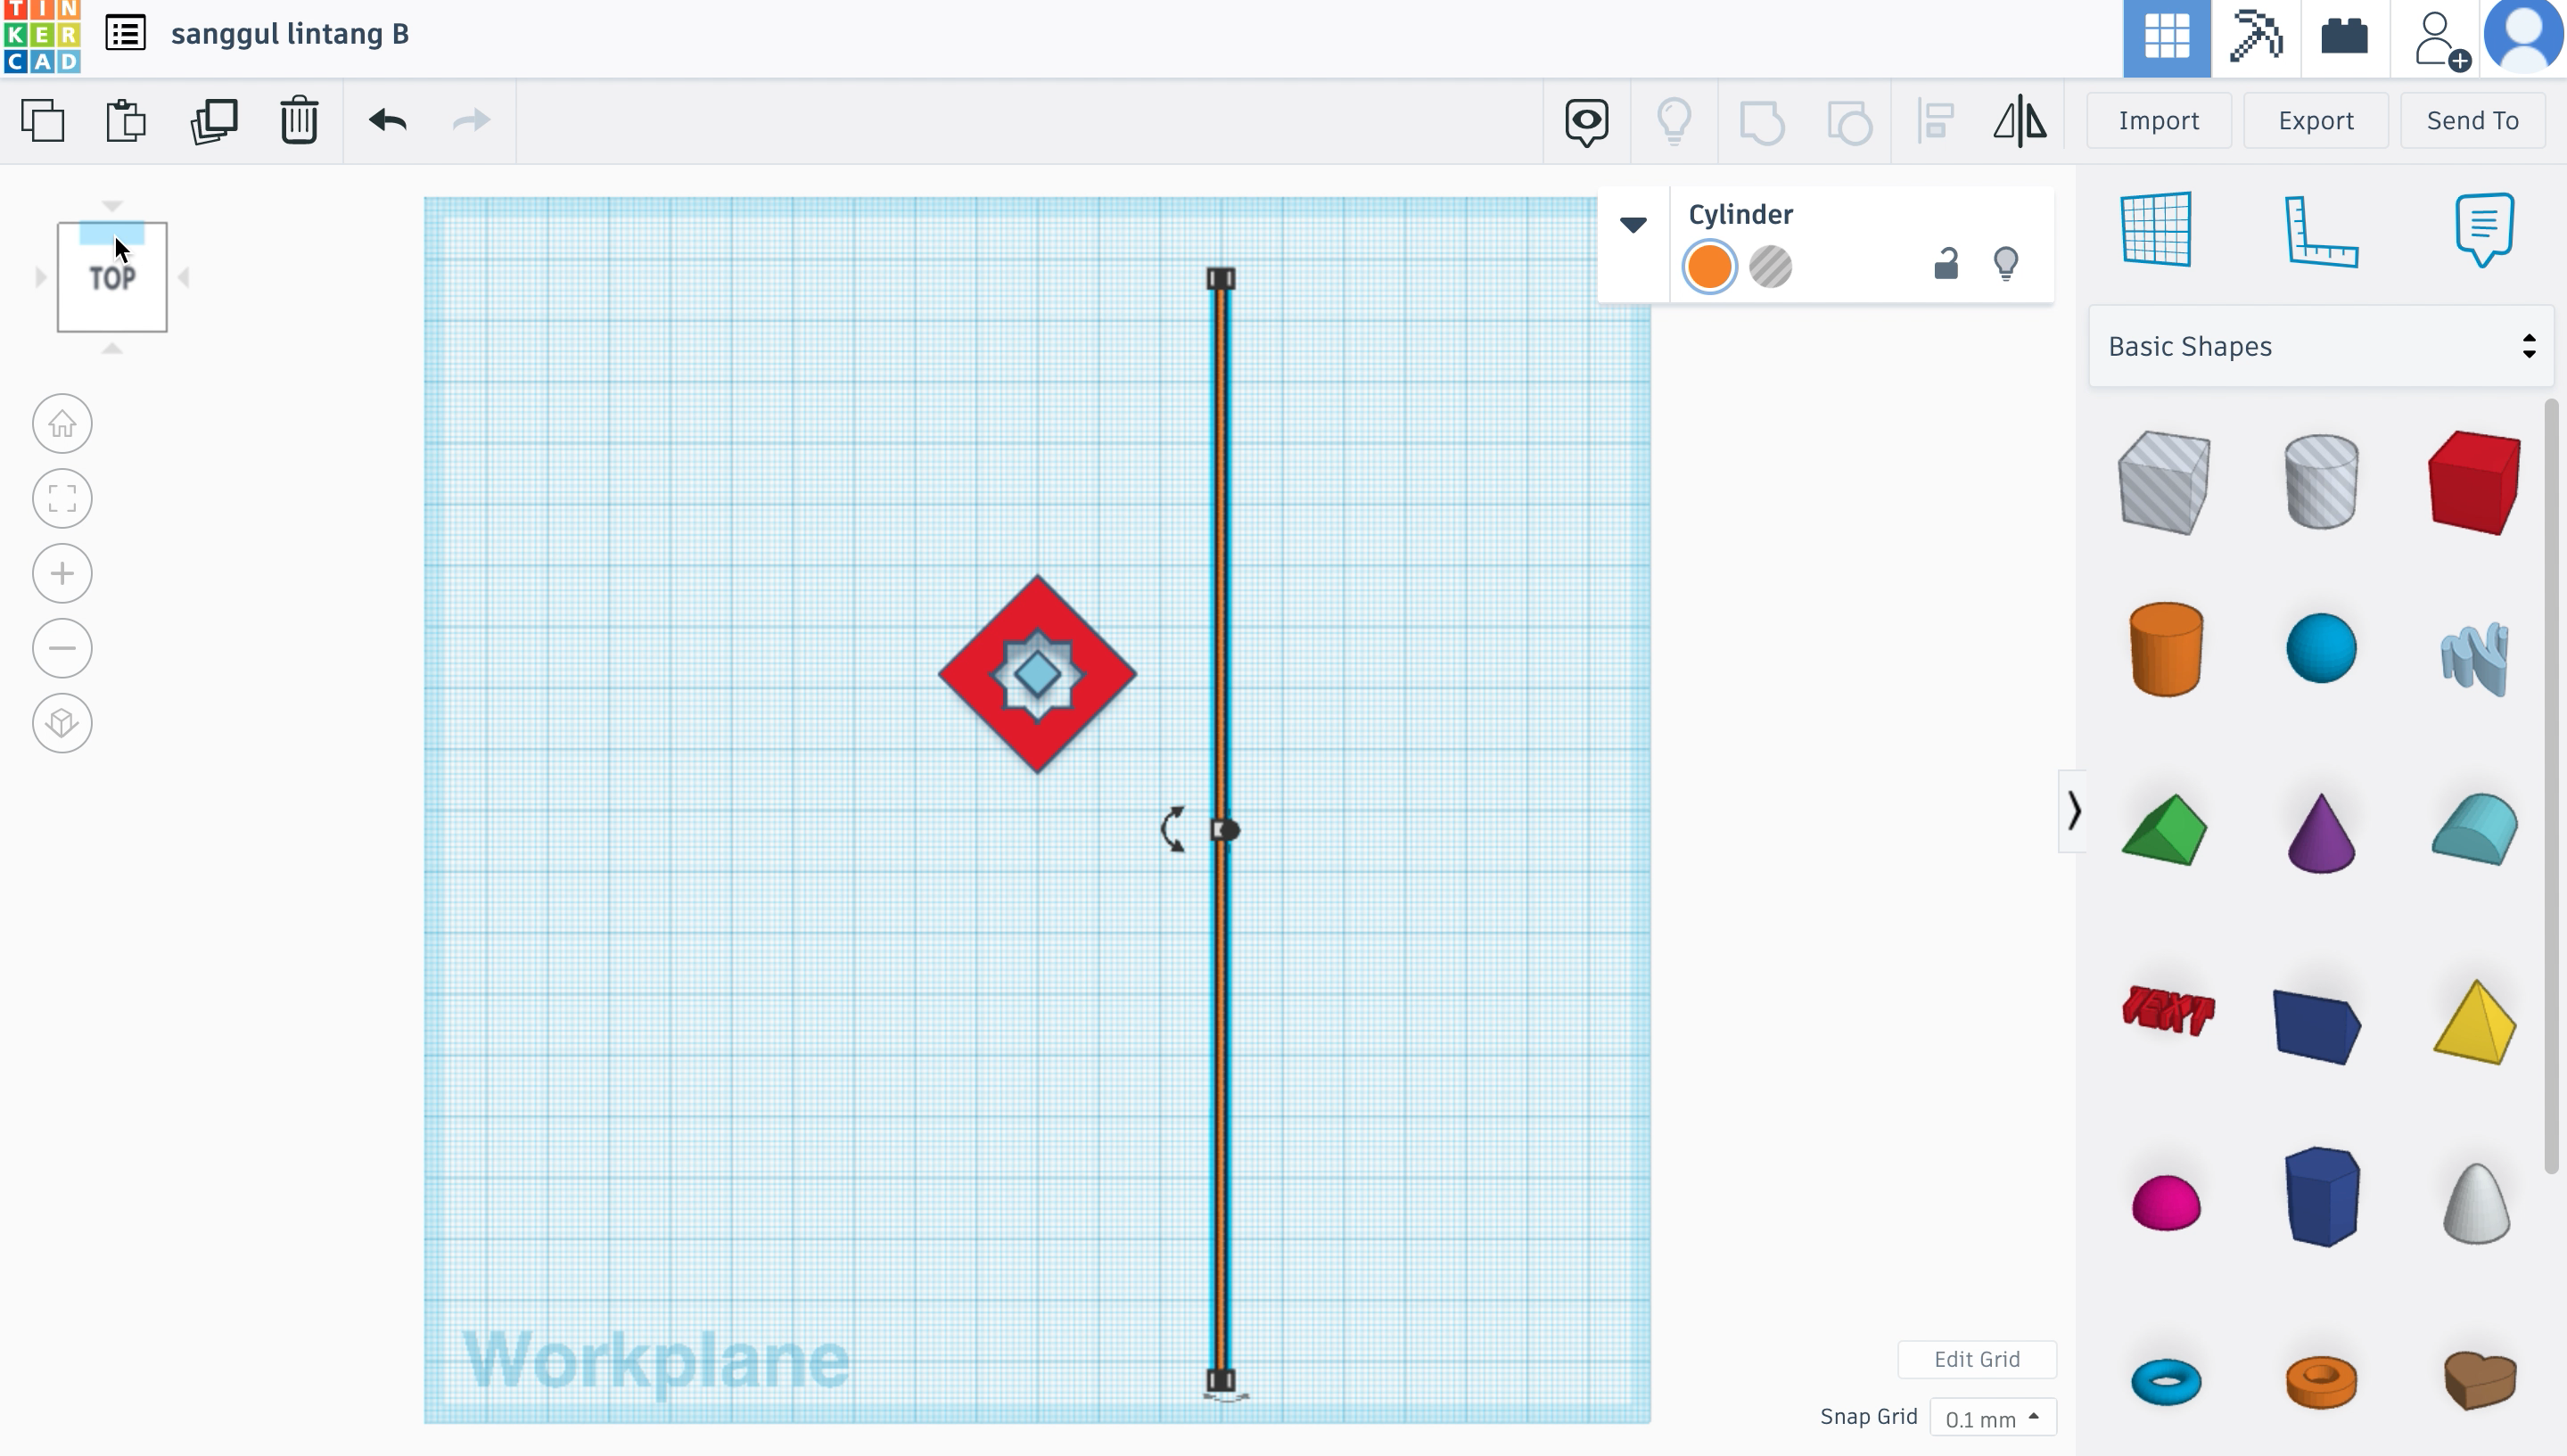
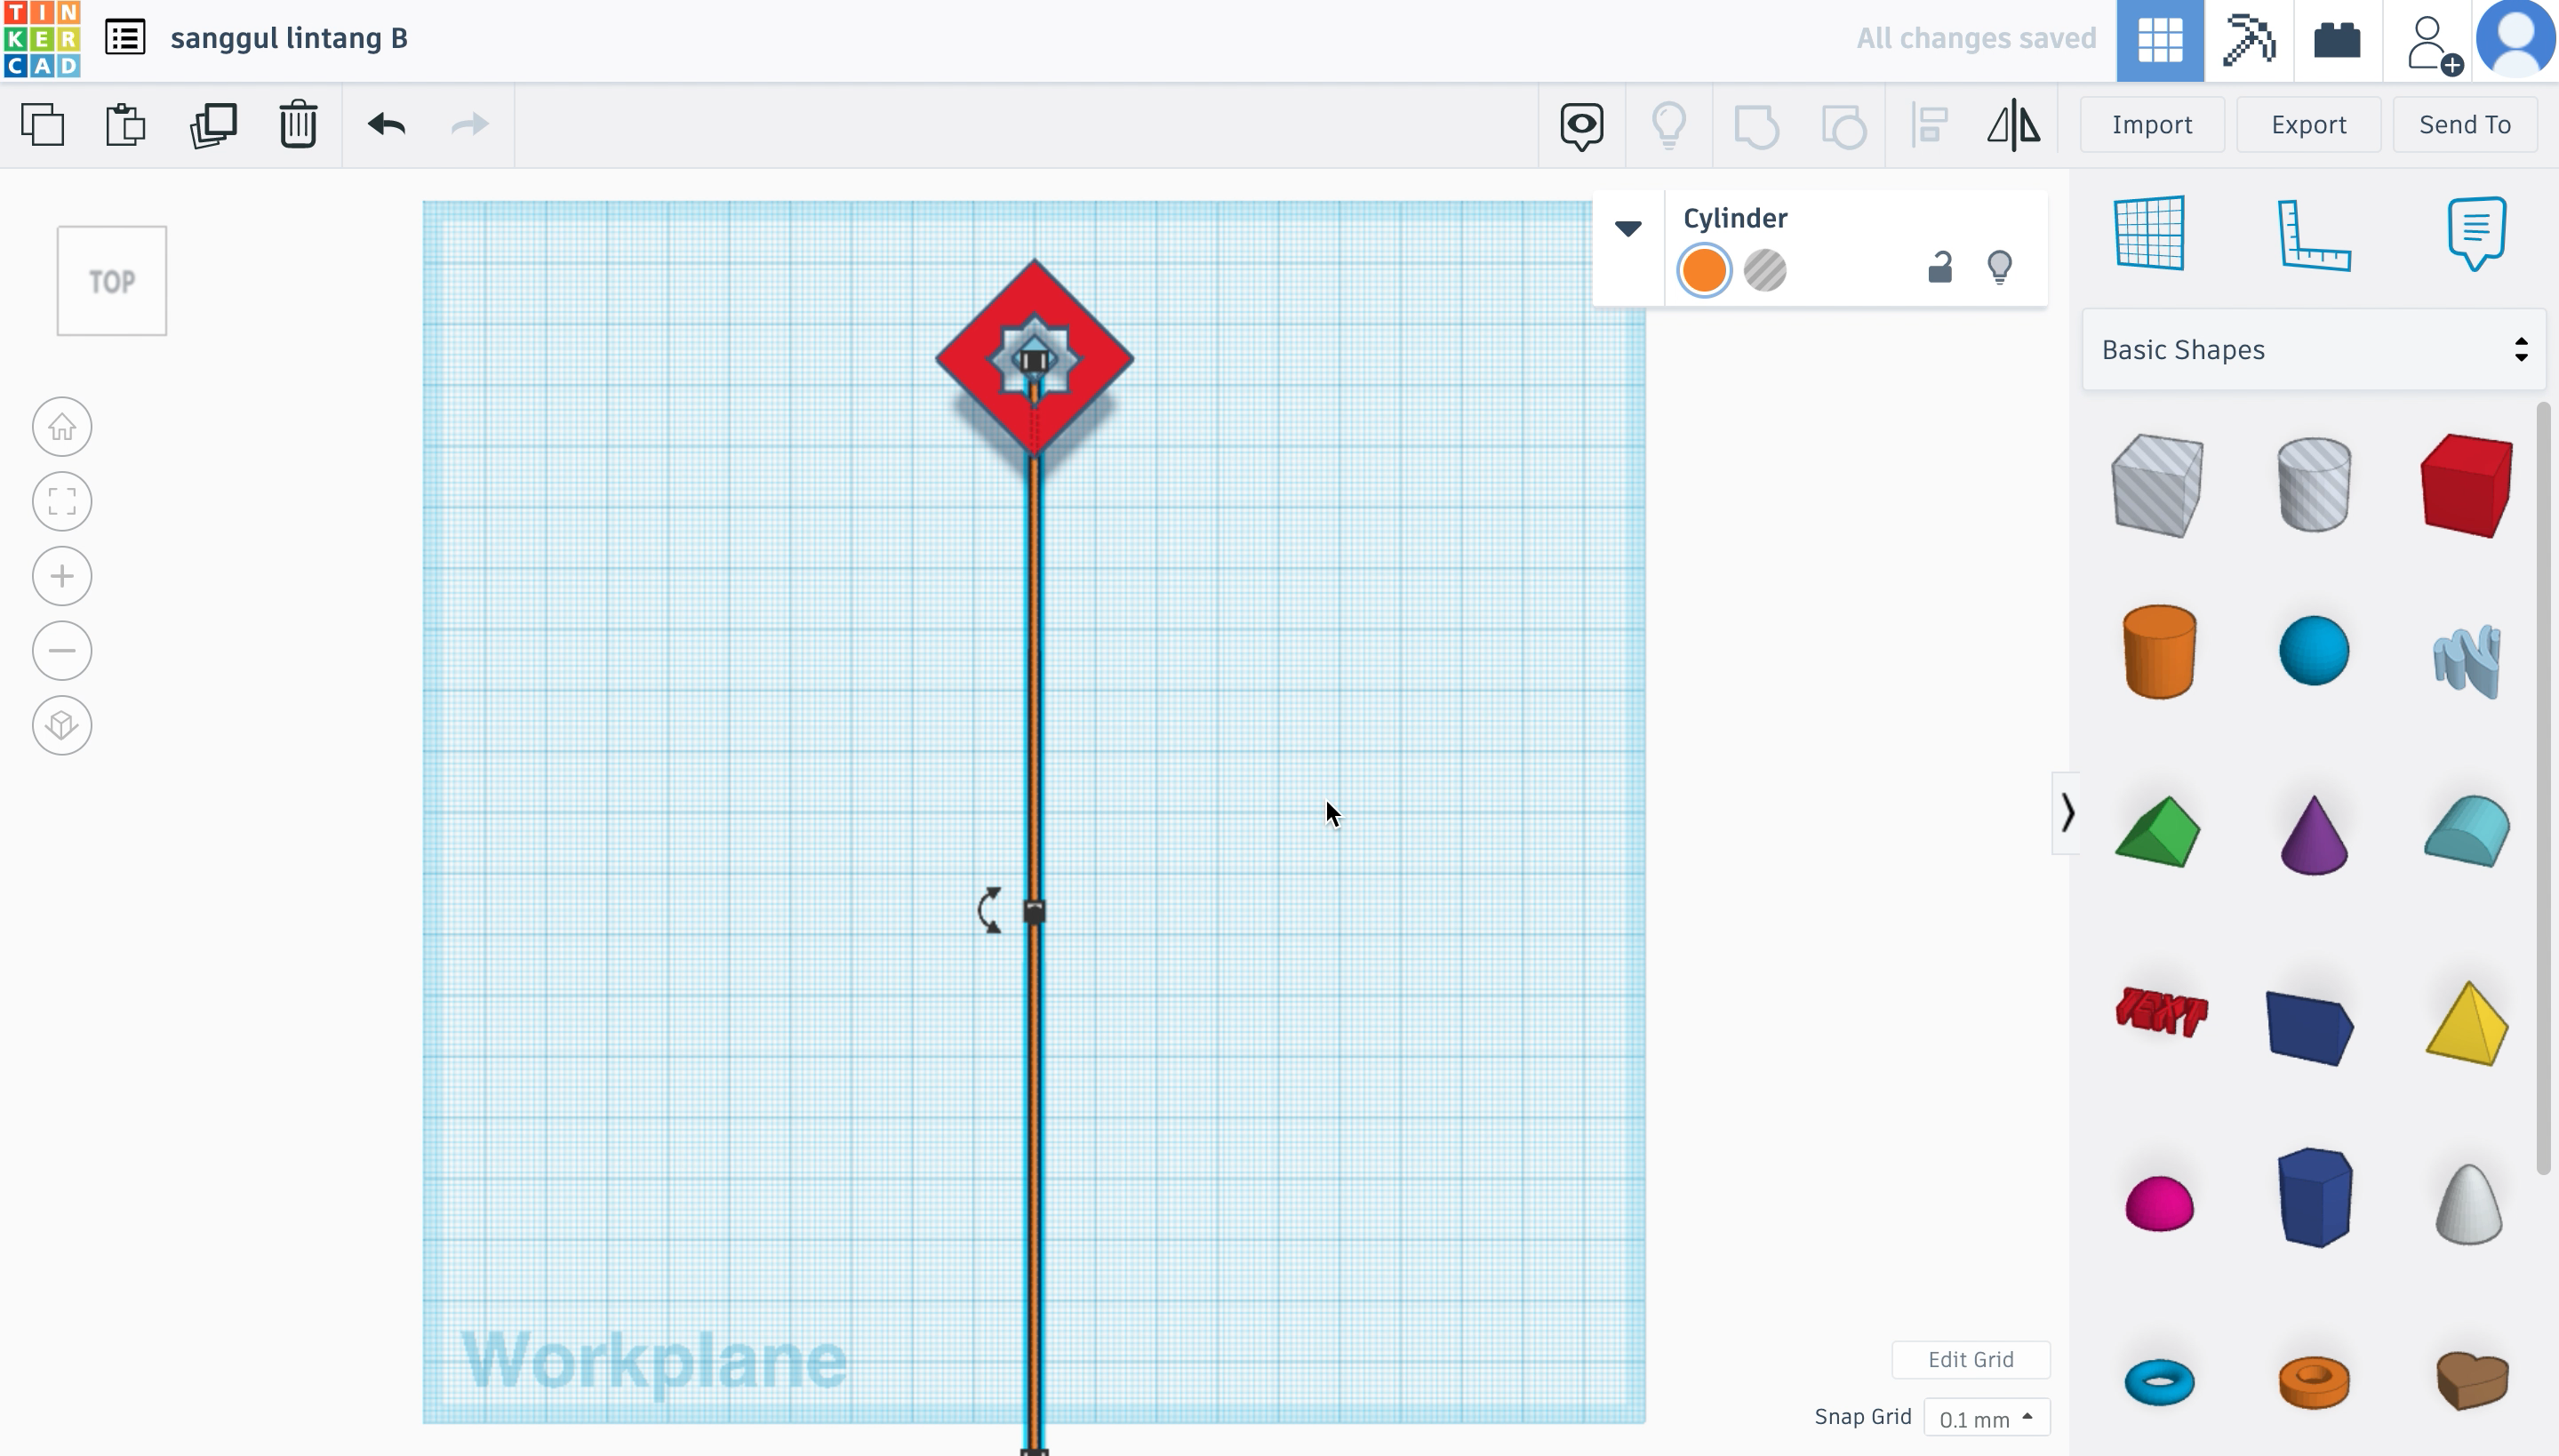
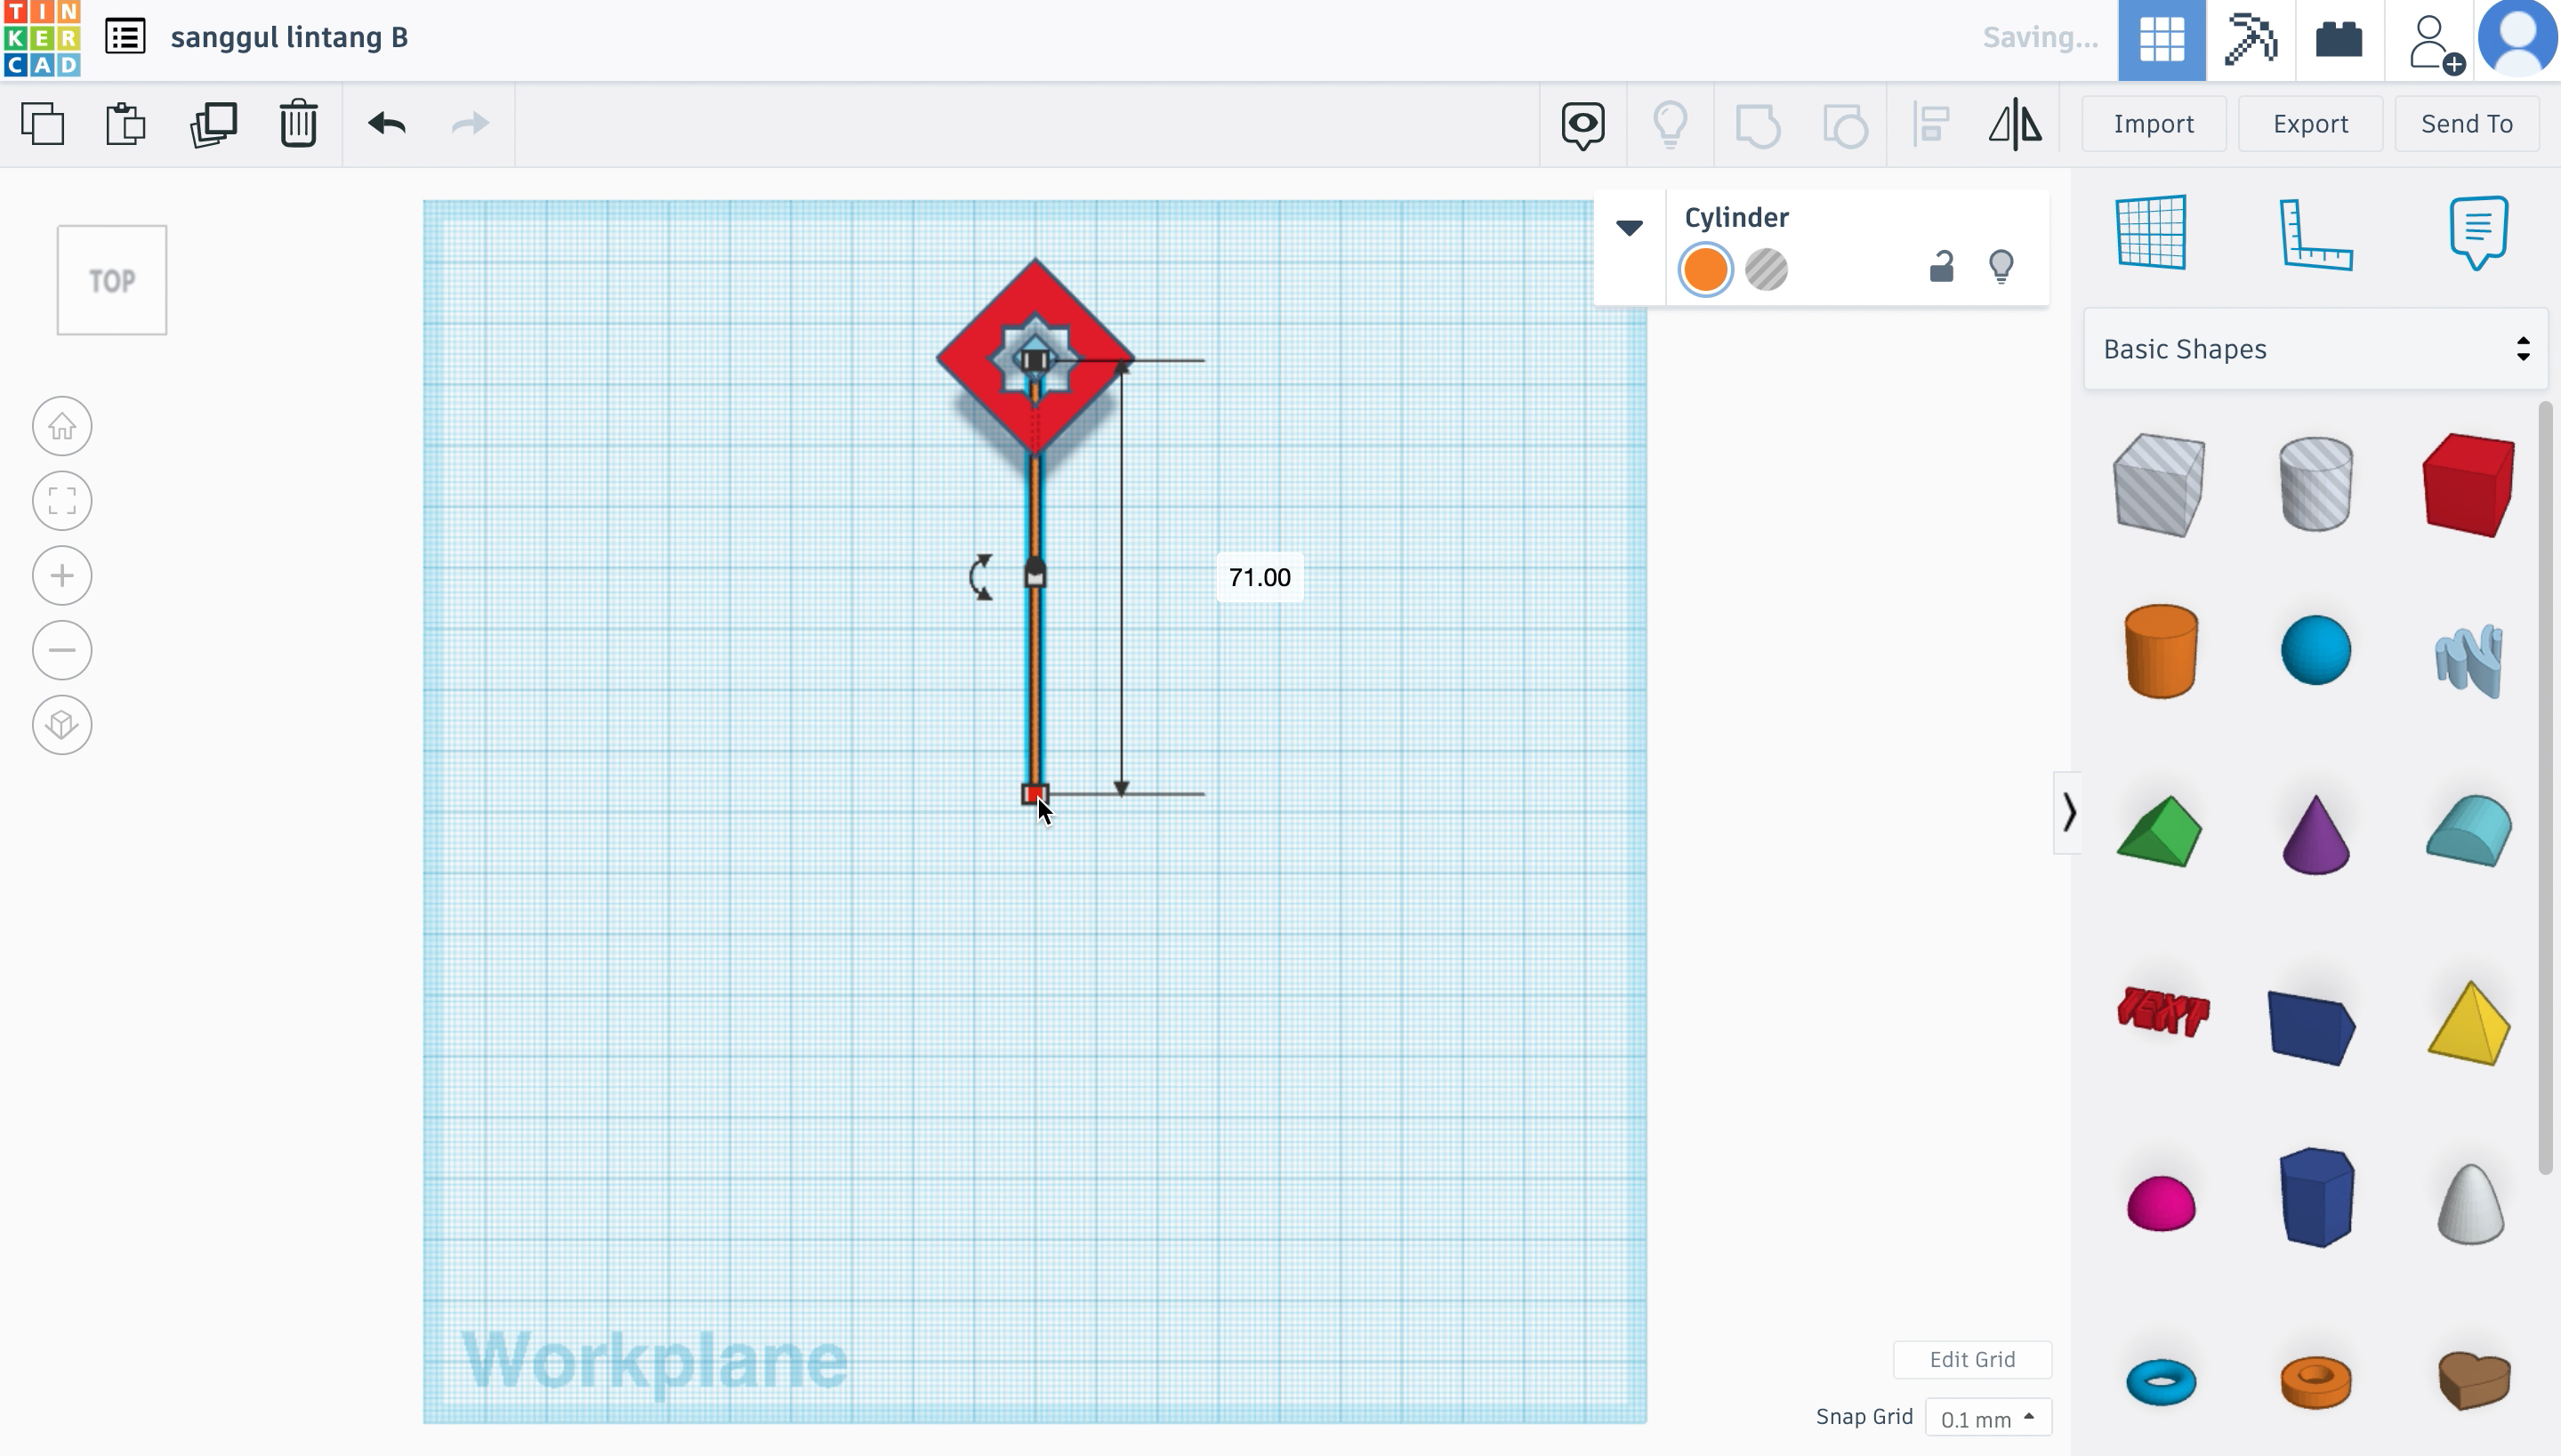
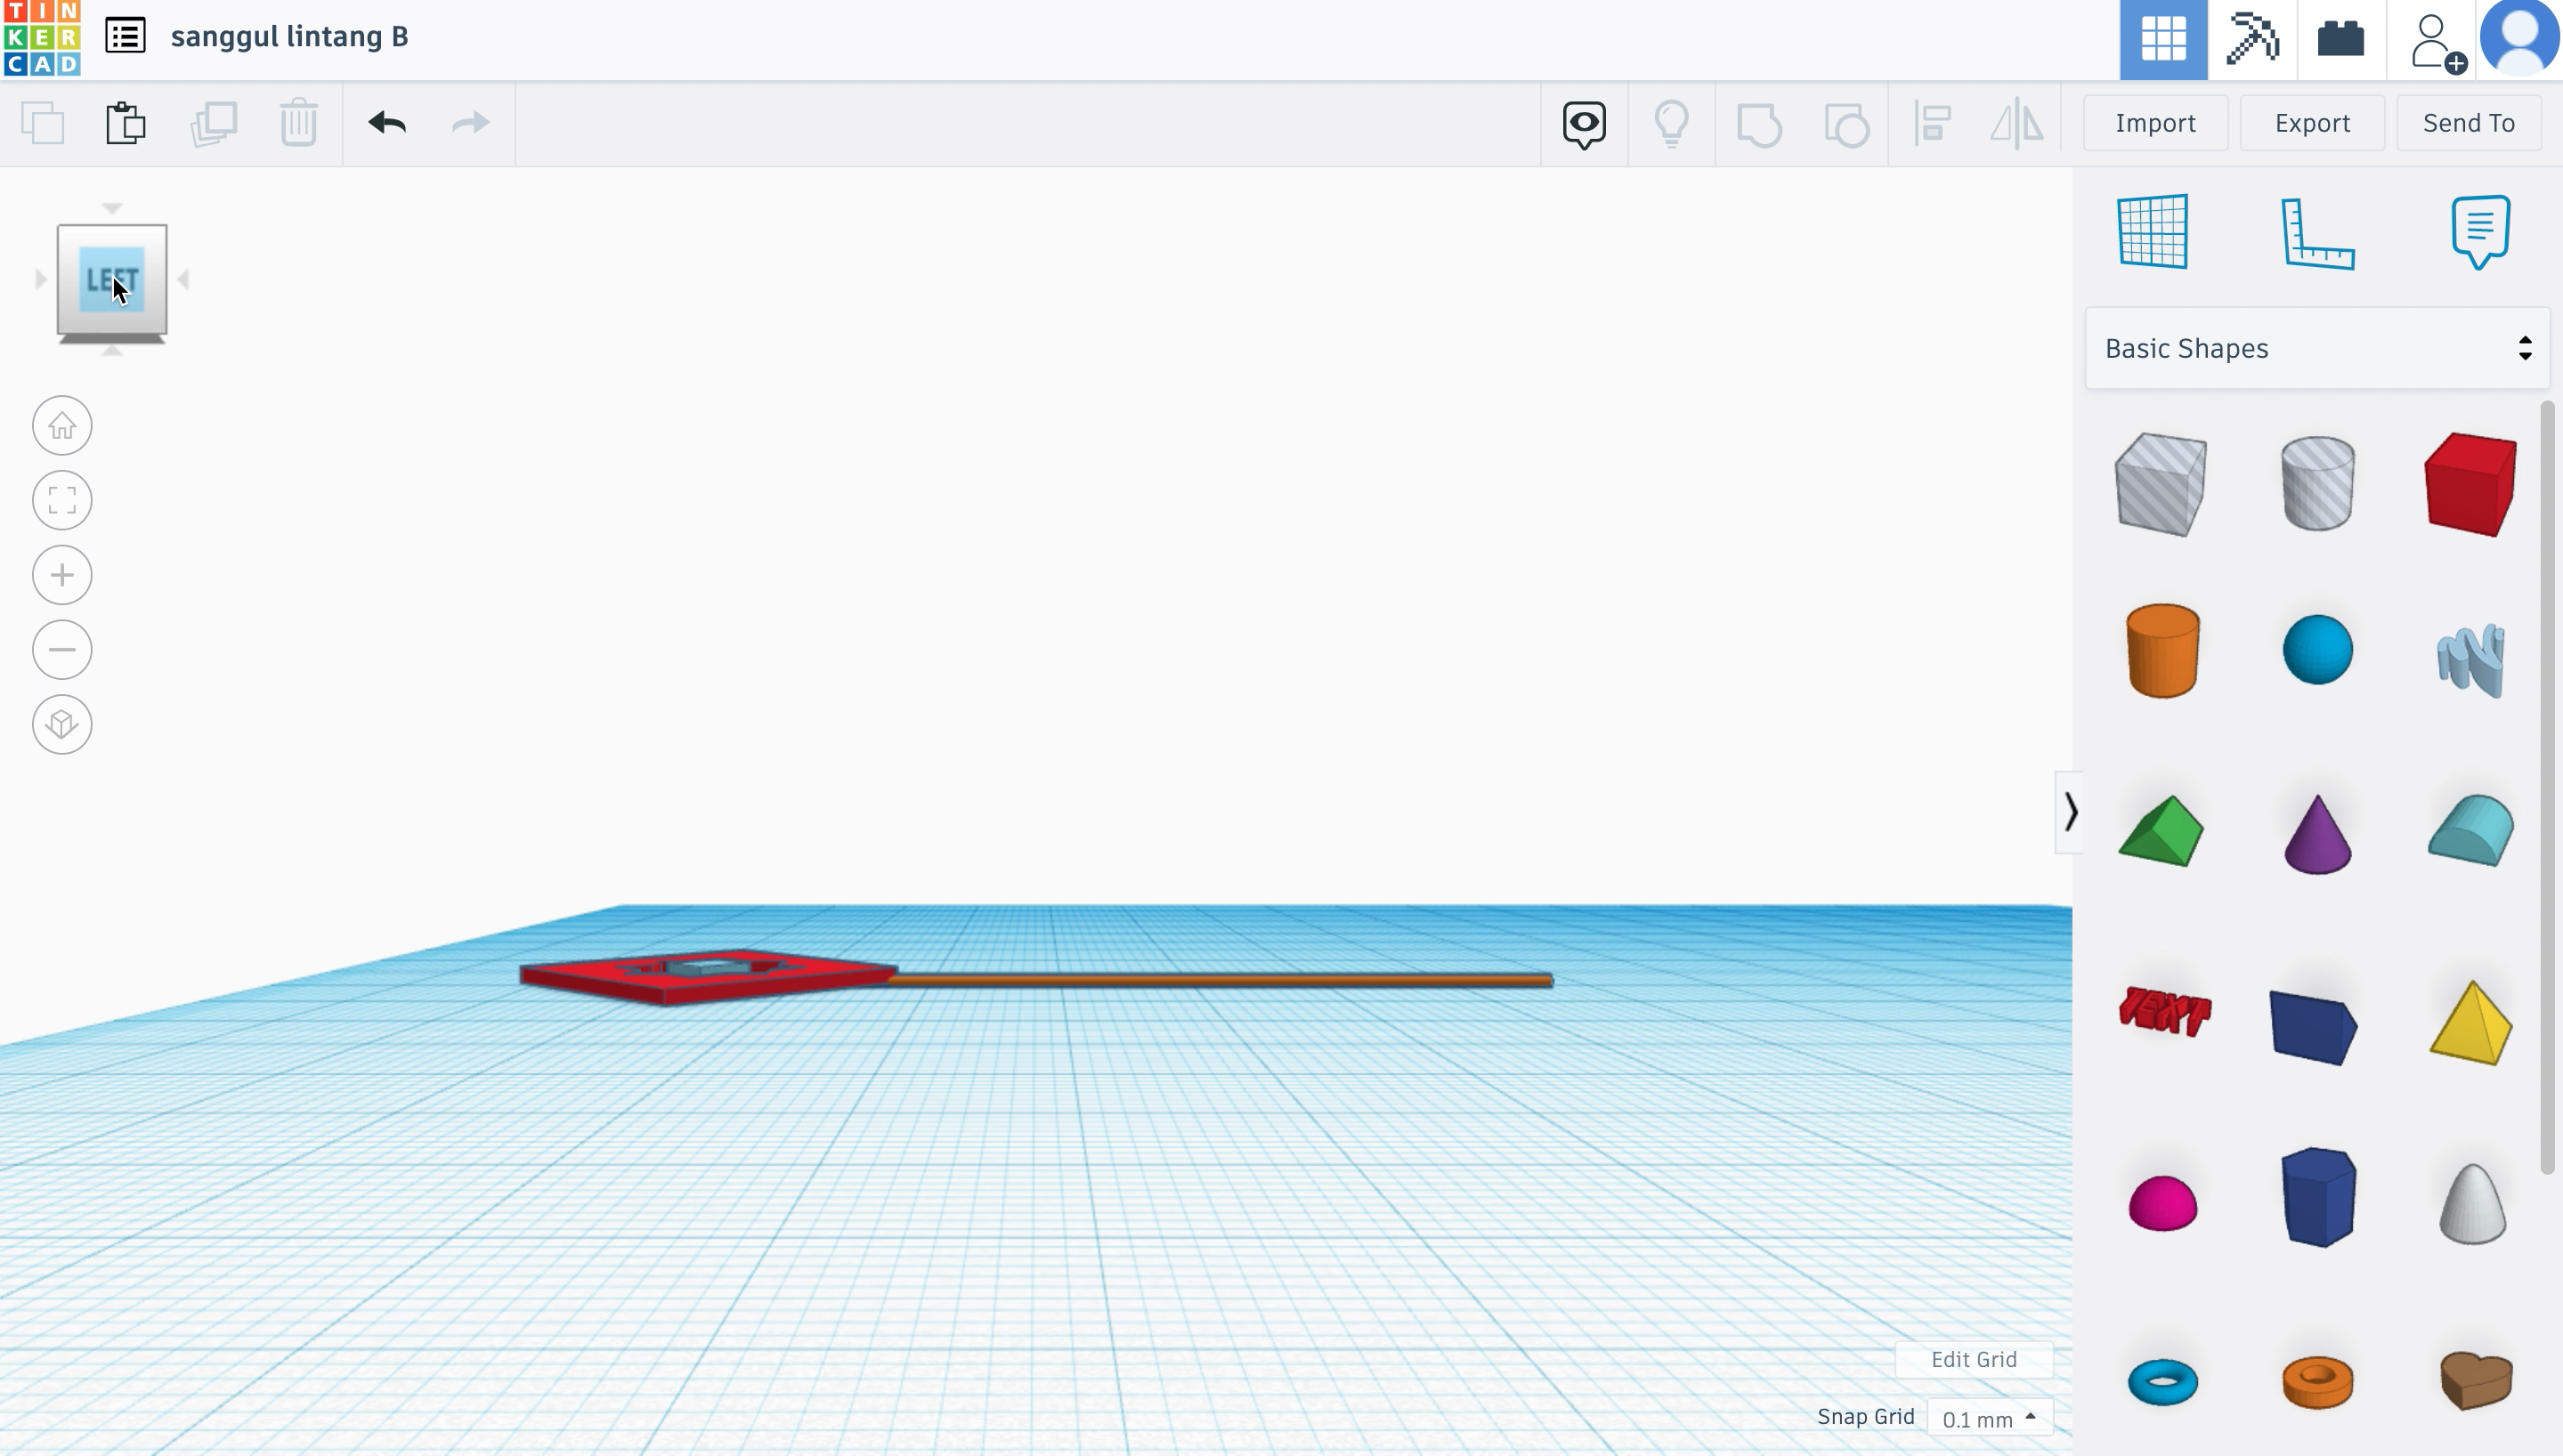
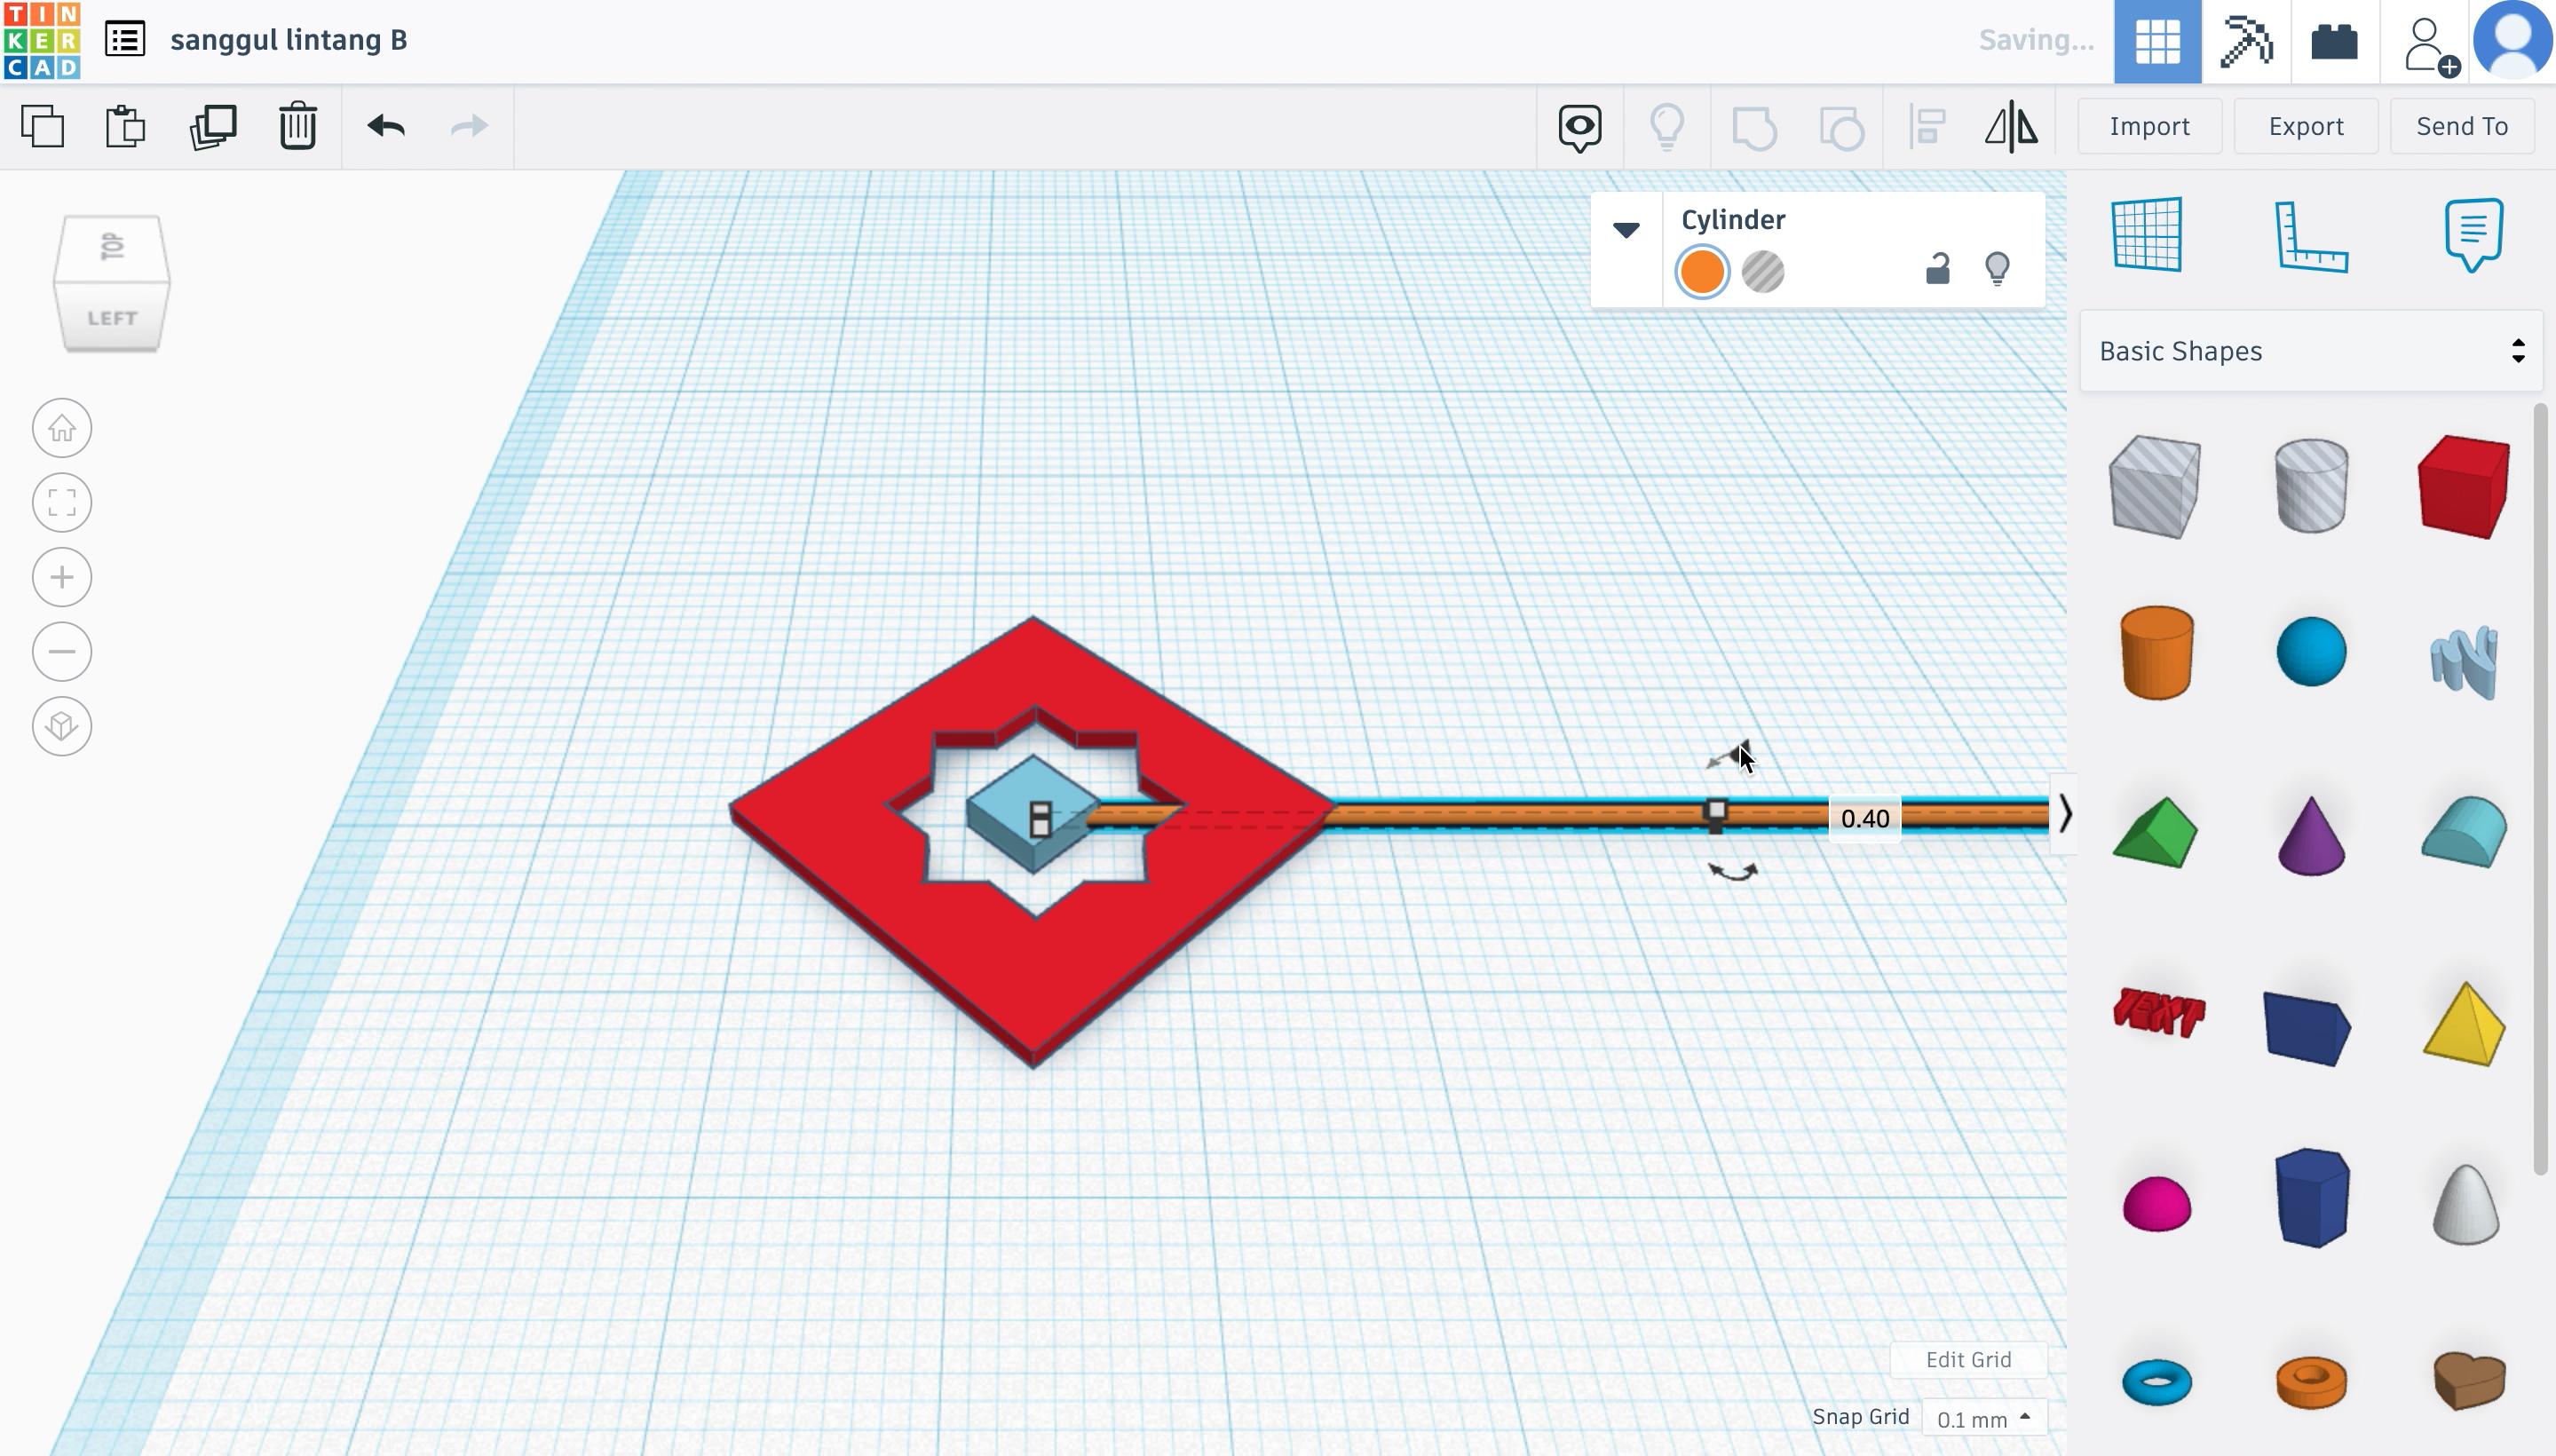
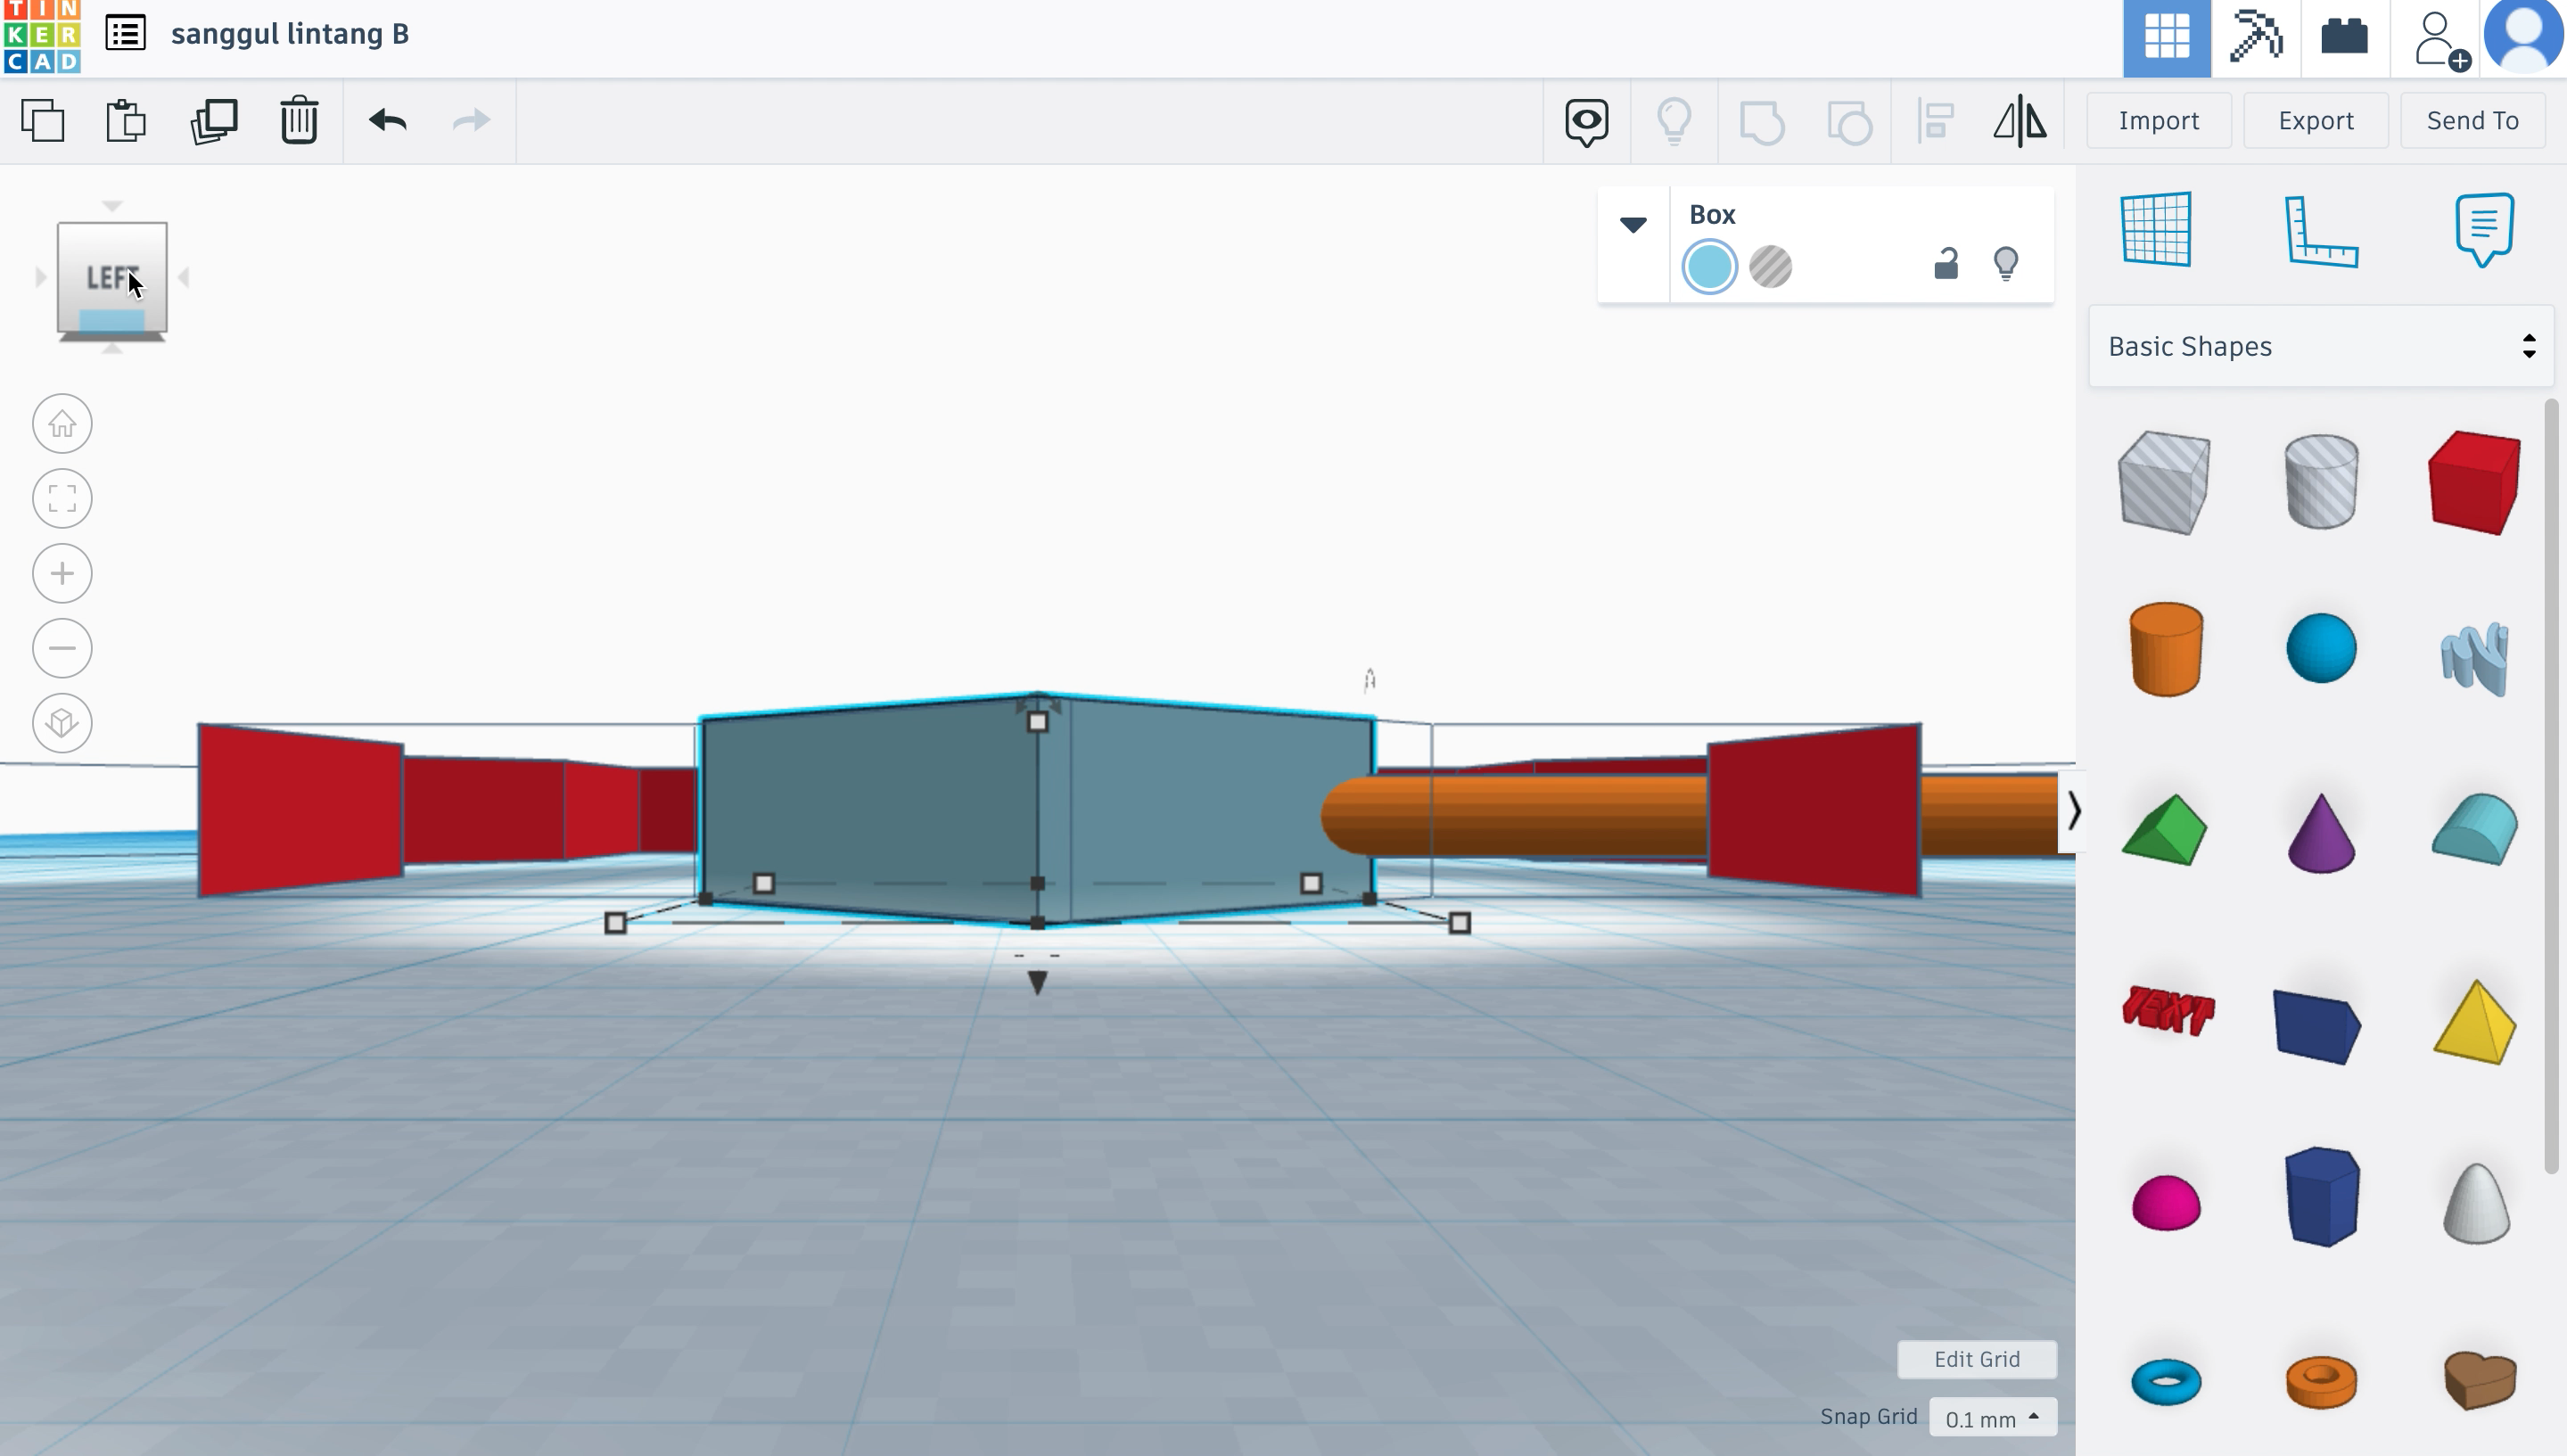
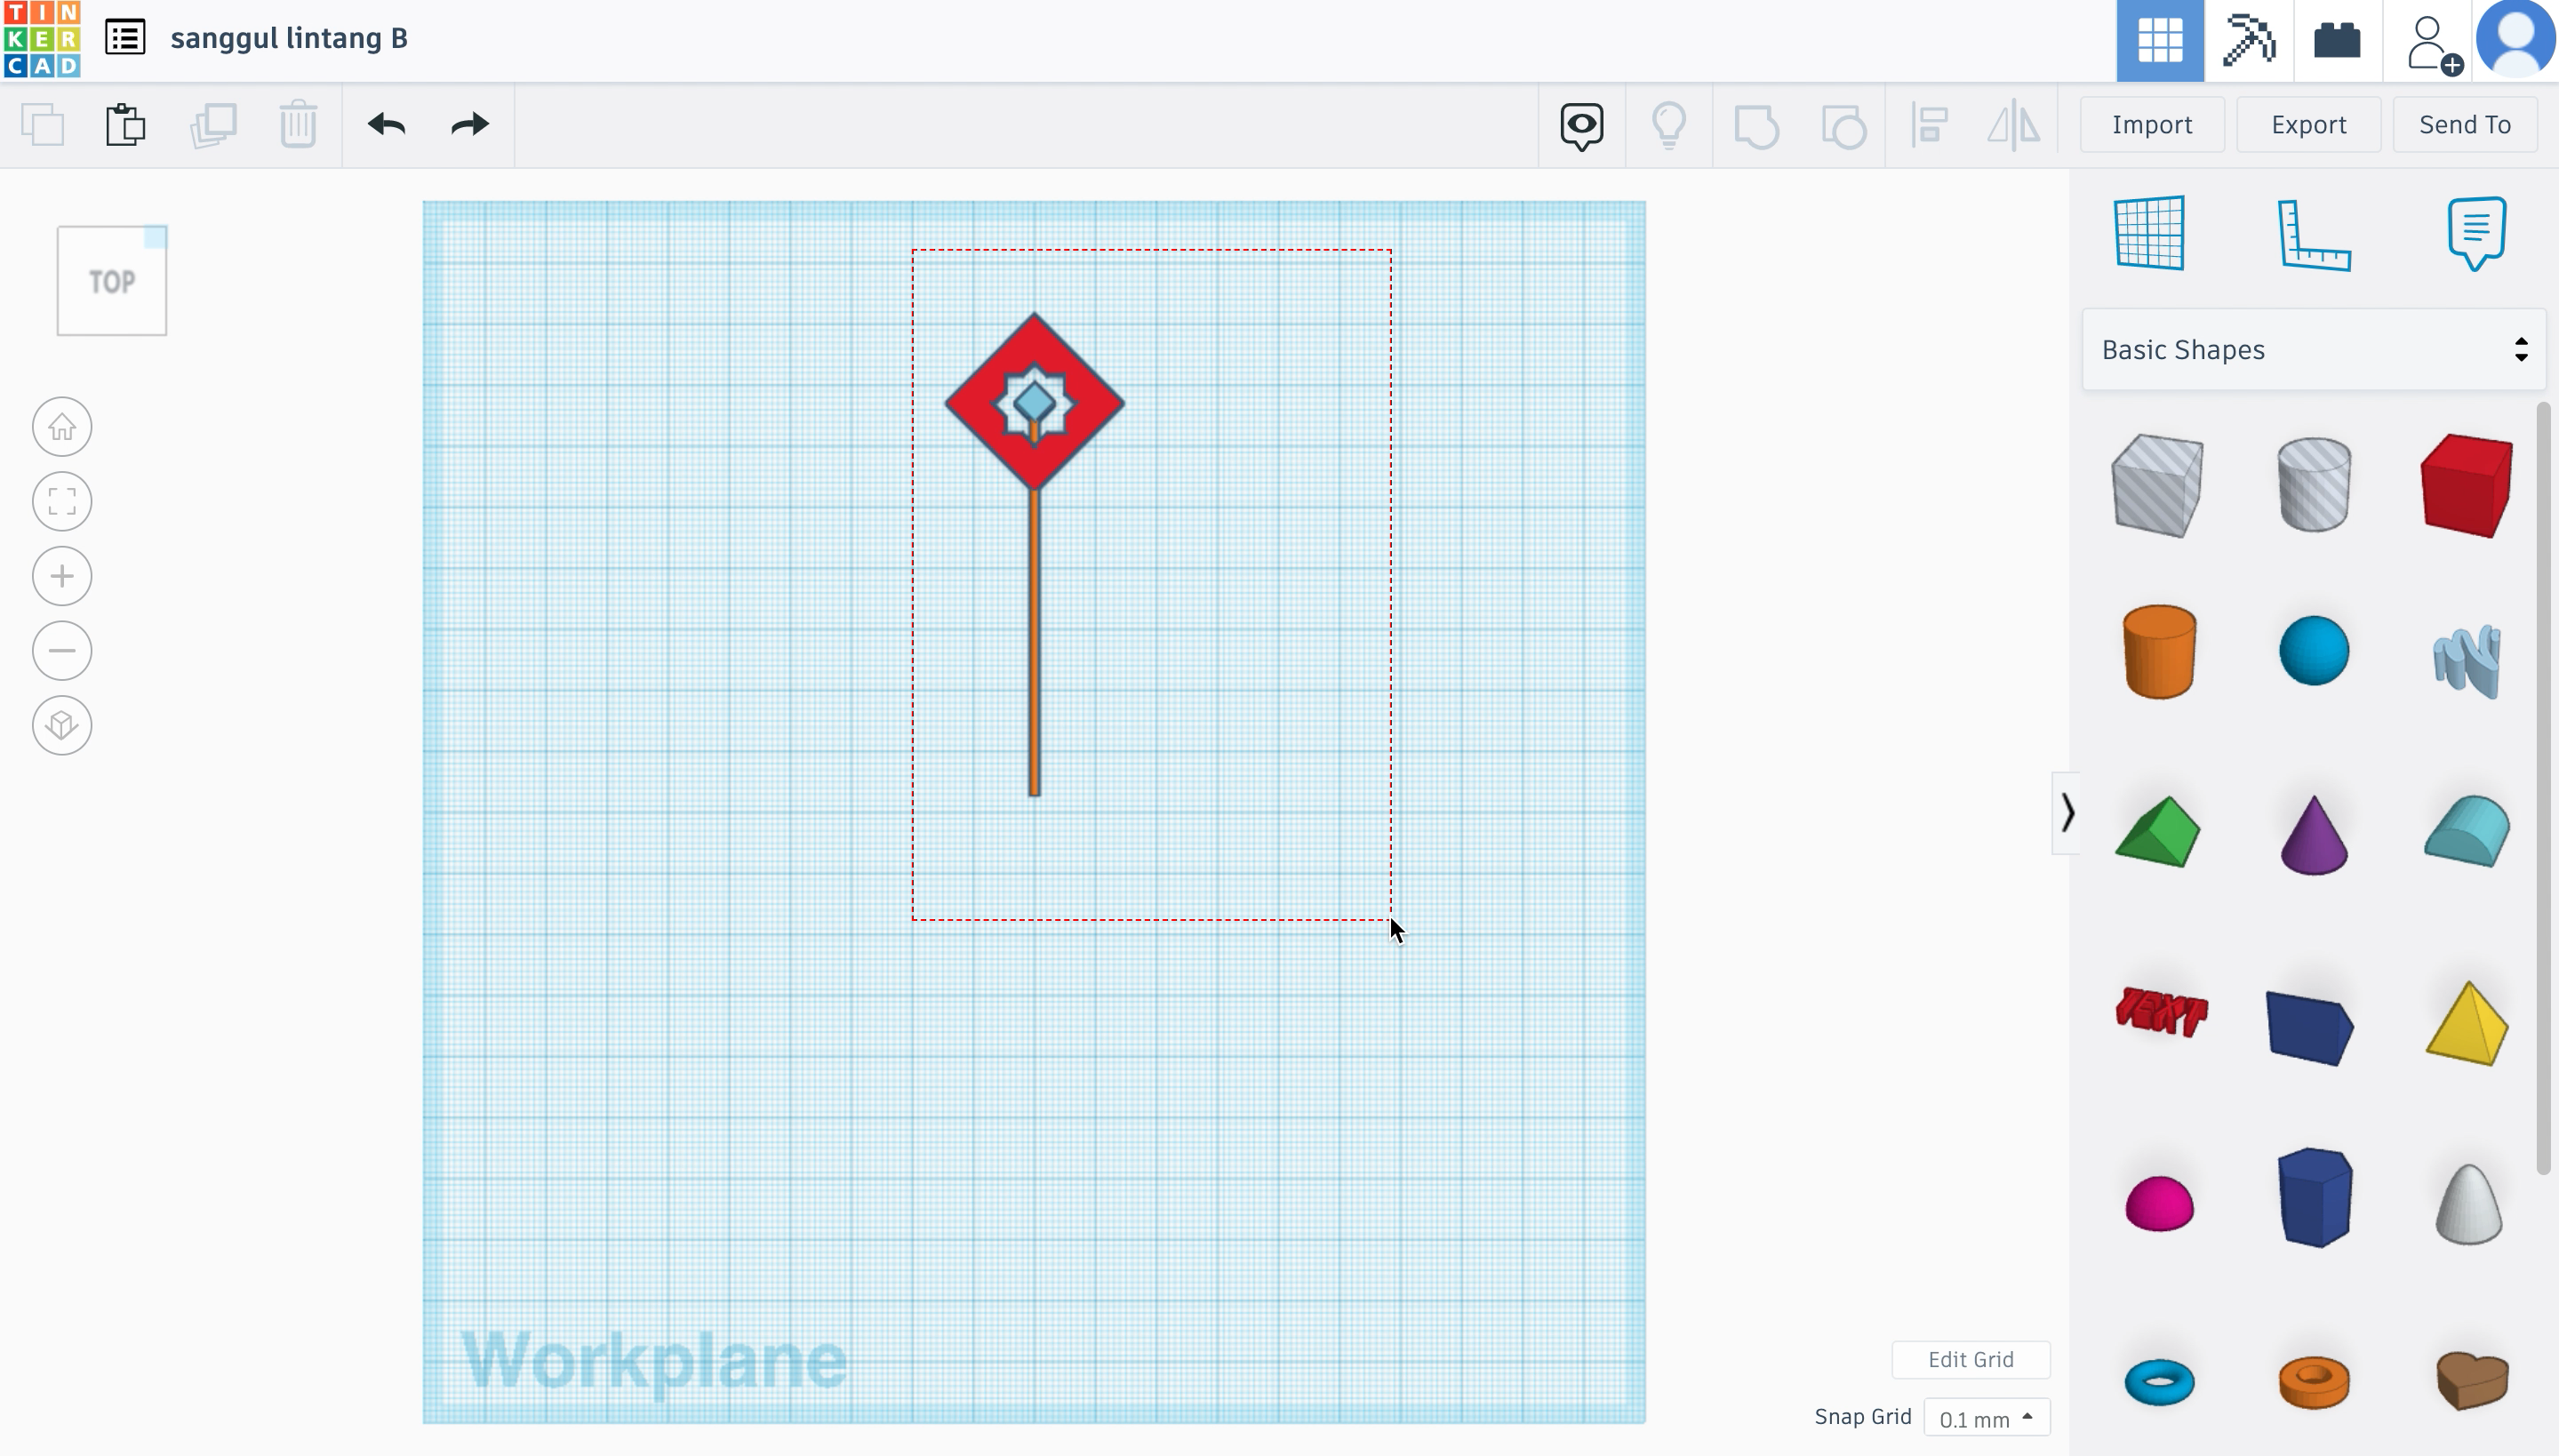
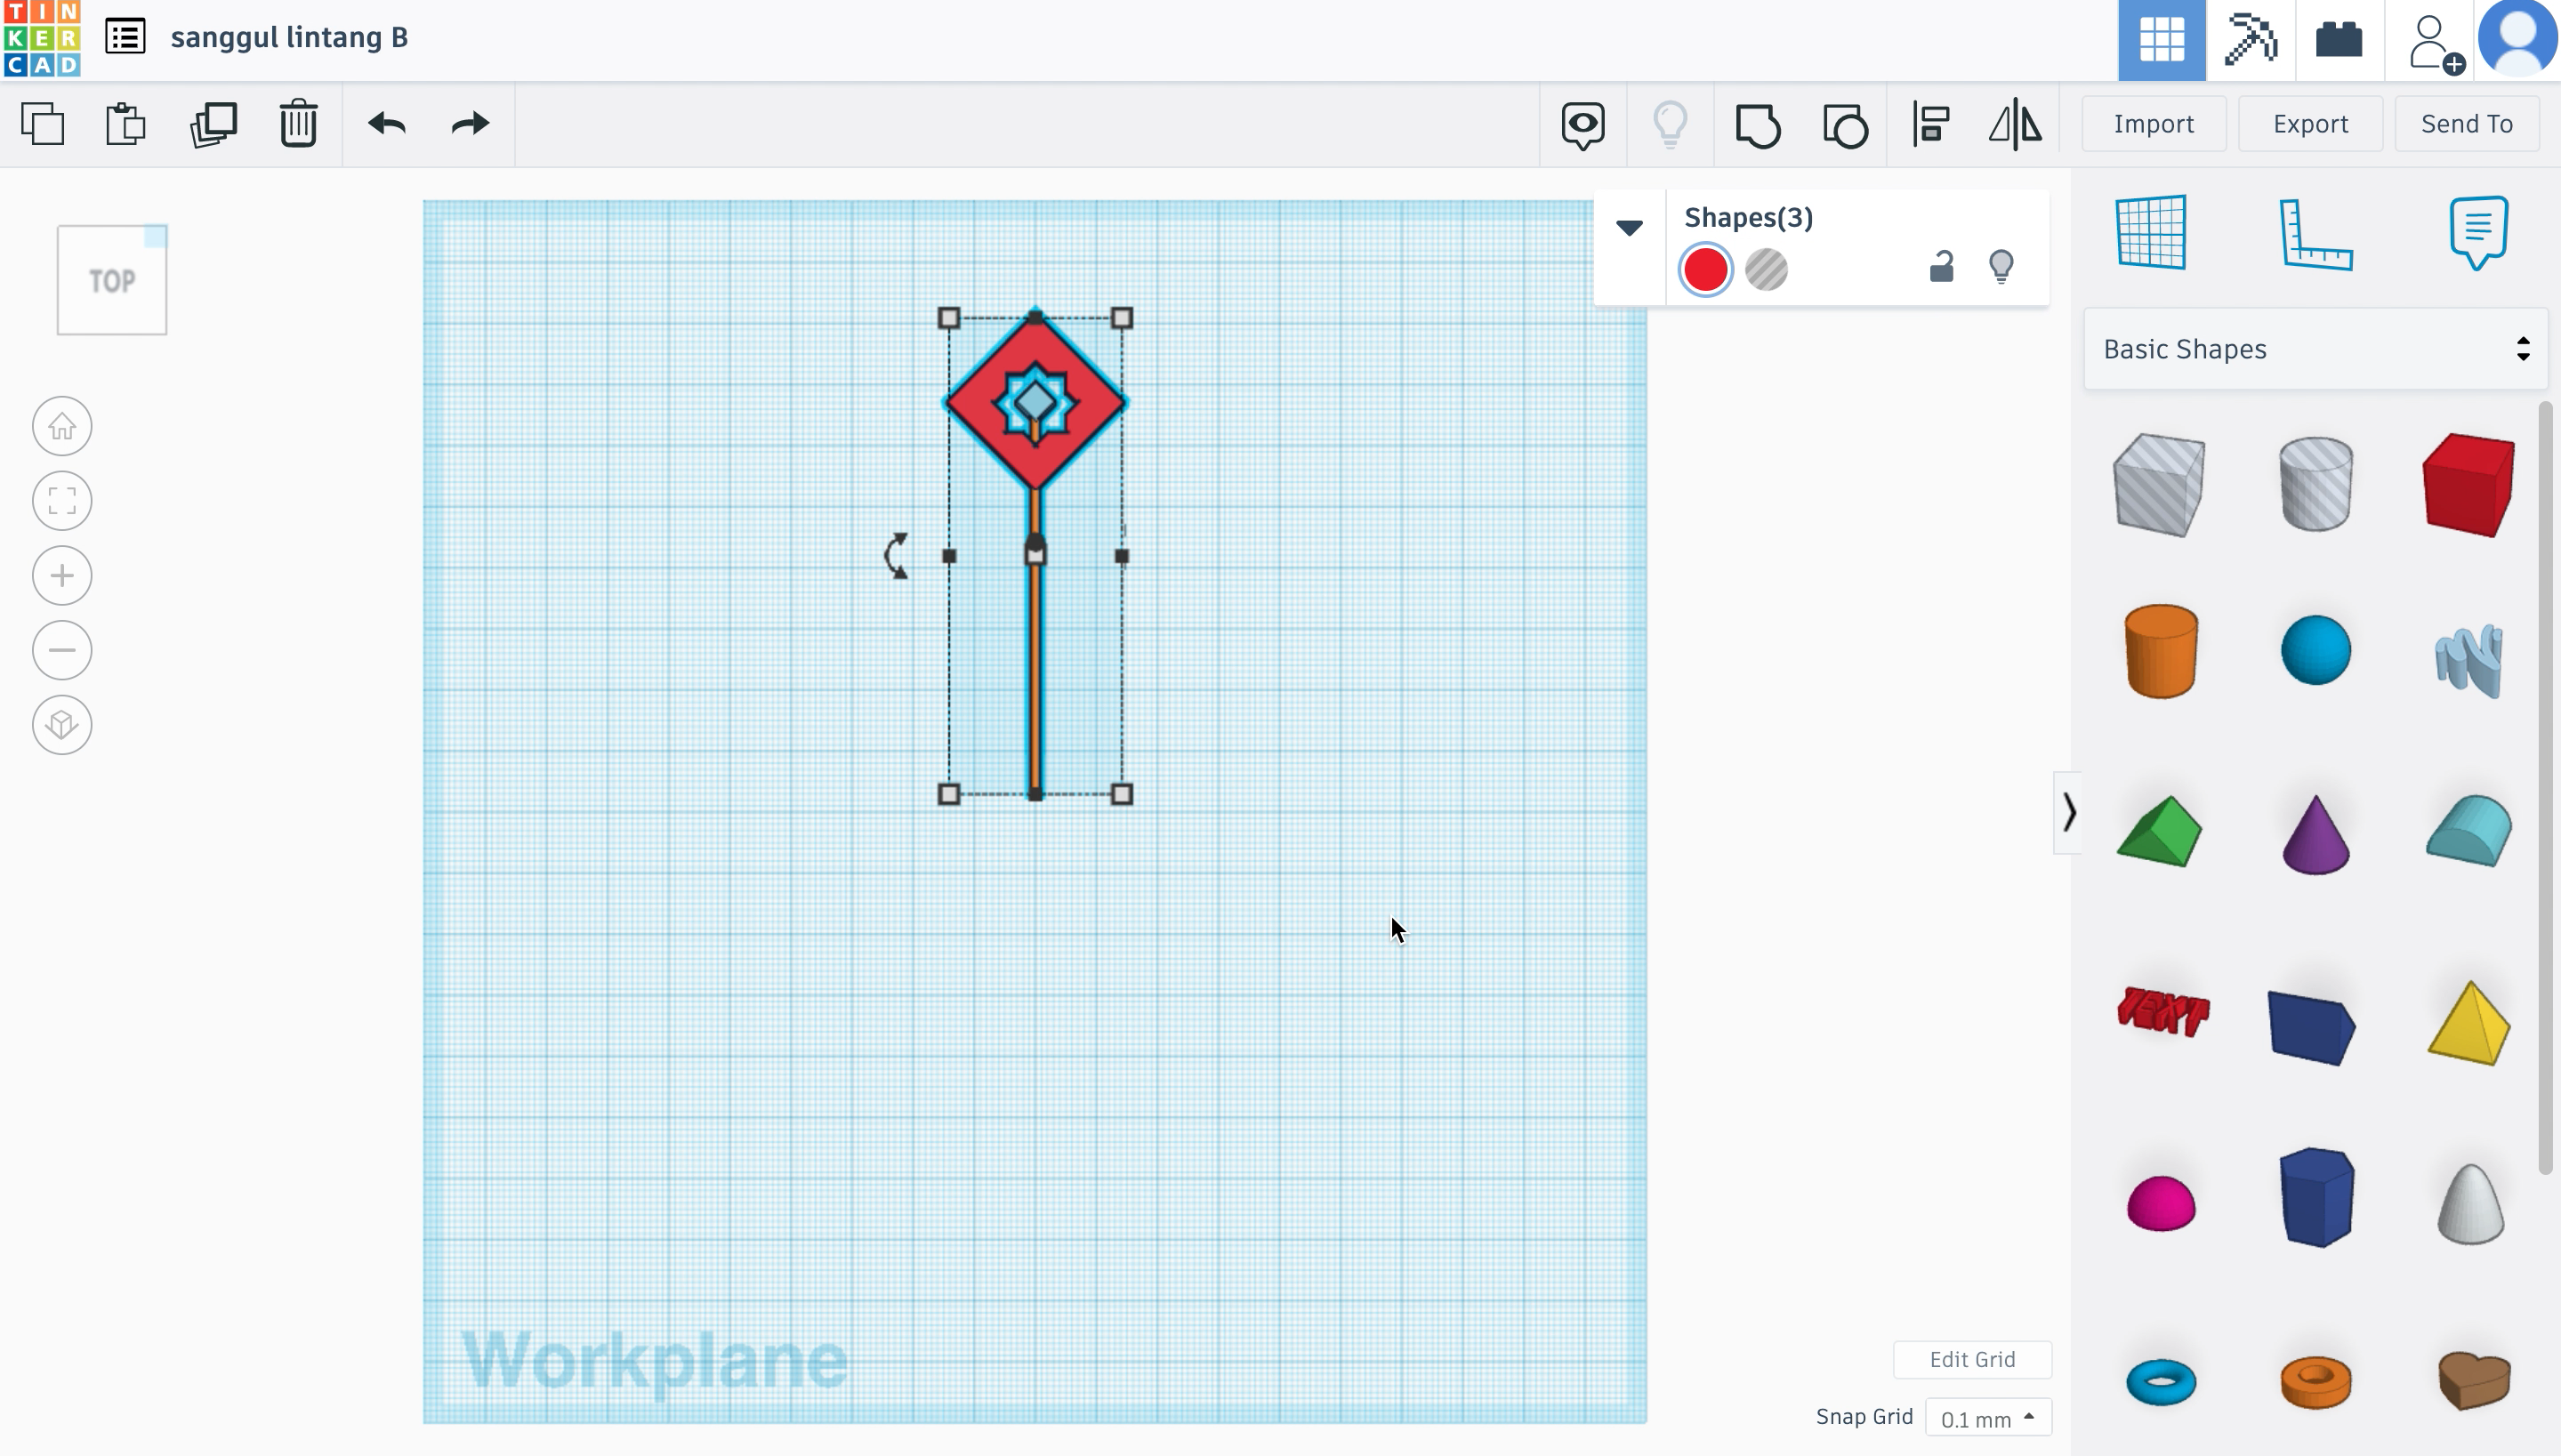
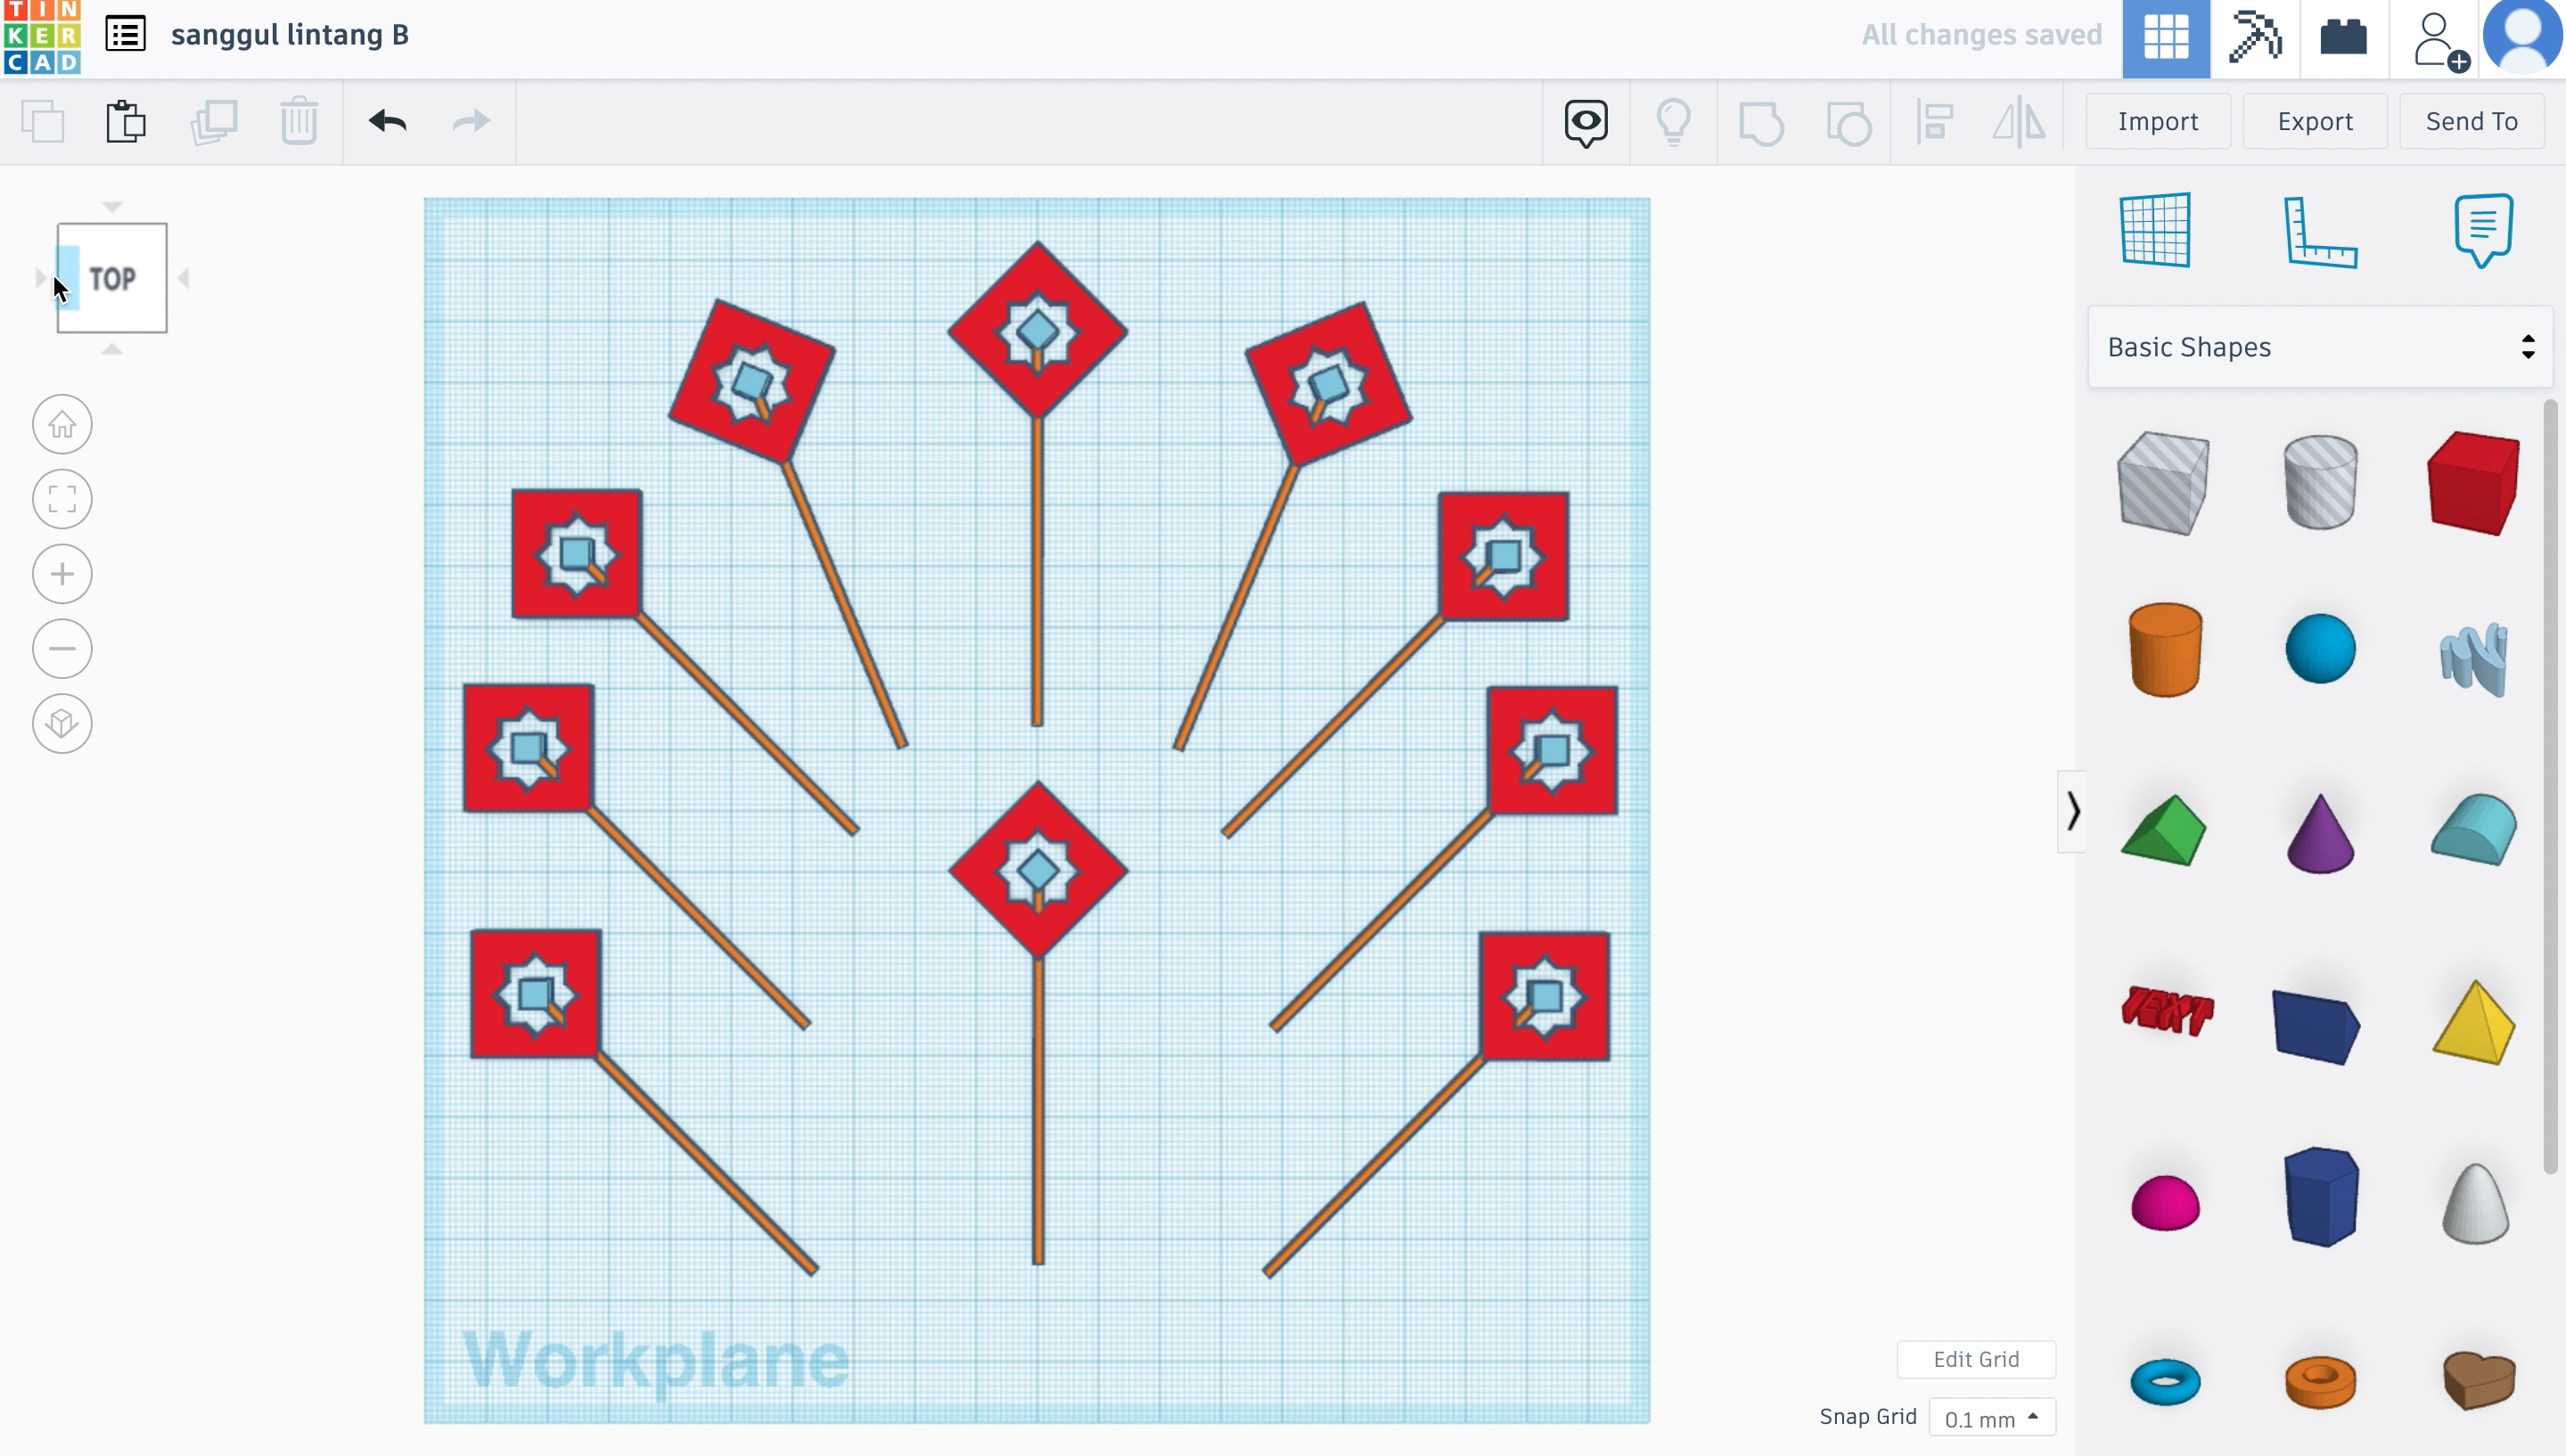
Now to work on the stick/ skewer part; this will be repeated two more times, later.
- First, grab the 'cylinder' shape and turn it to a 90˚ angle.
- Second, align the stick to the rest of the parts, like so in the image. And, adjust the length of it.
- Using the 'fit all in view' feature again, zoom-in to adjust the positioning of the stick in detail.
- Lastly, select everything and duplicate them to the amount you want. For my design, I need ten.
Sanggul Lintang C
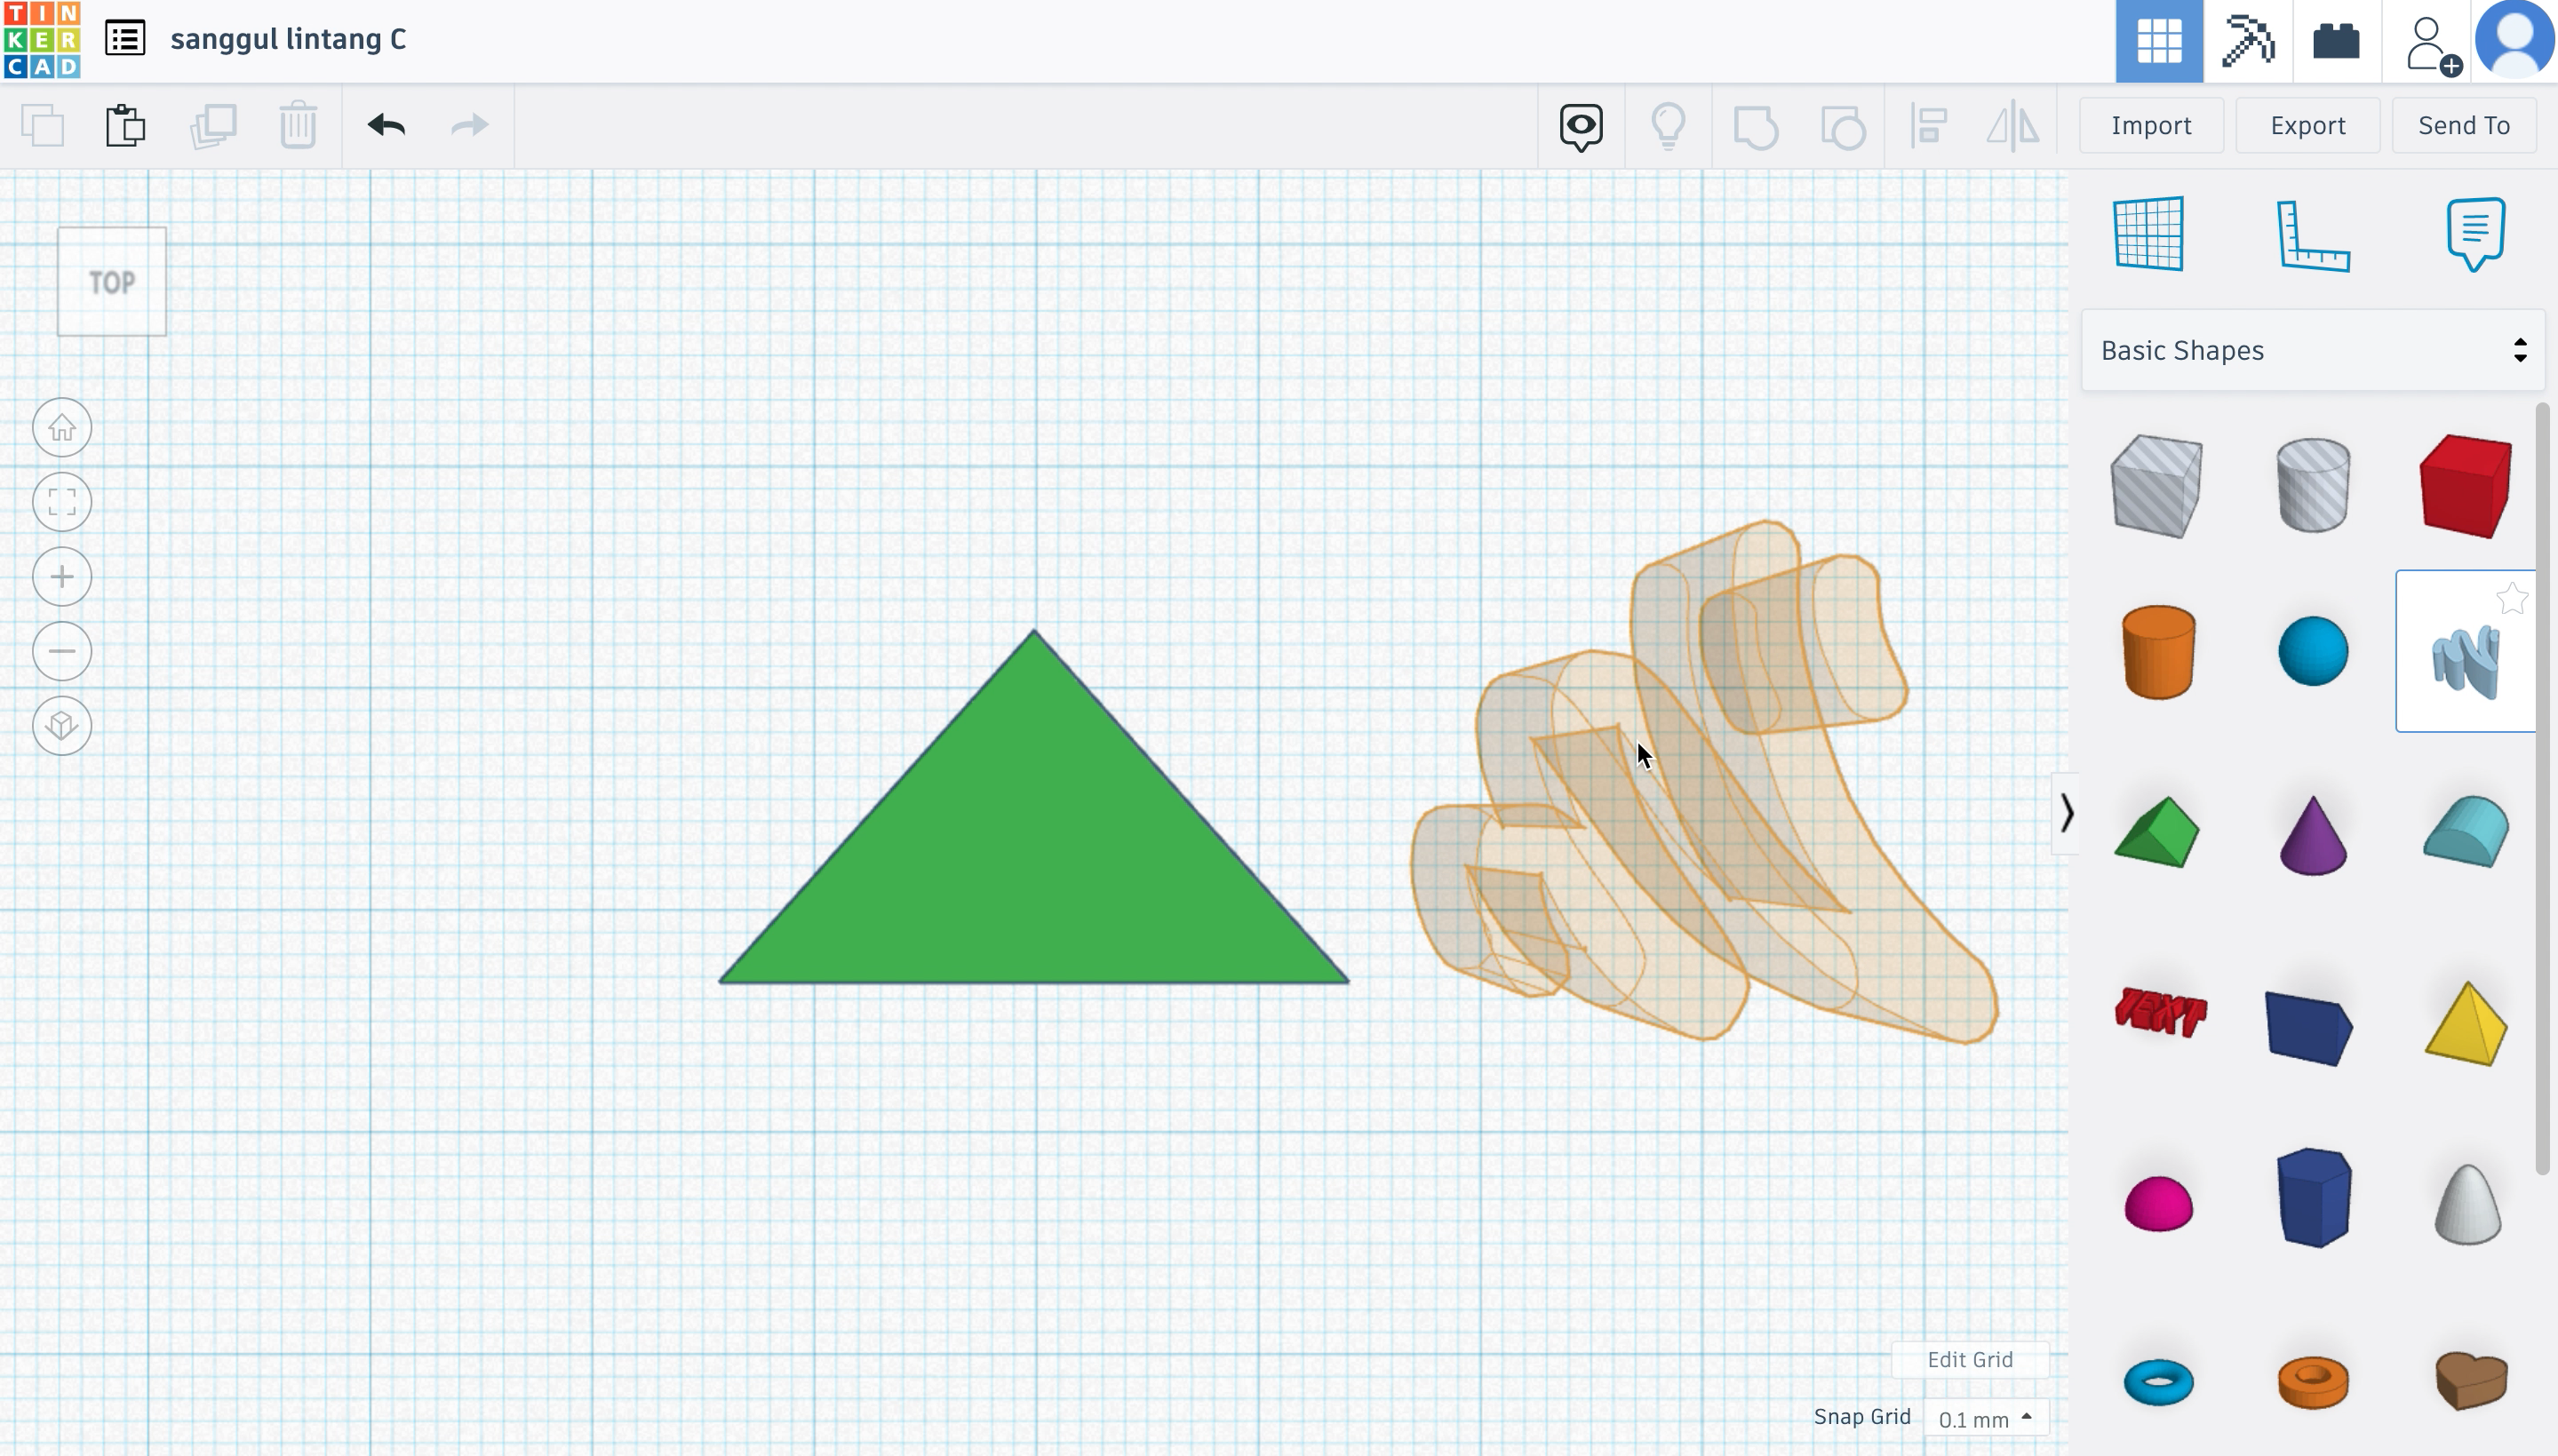
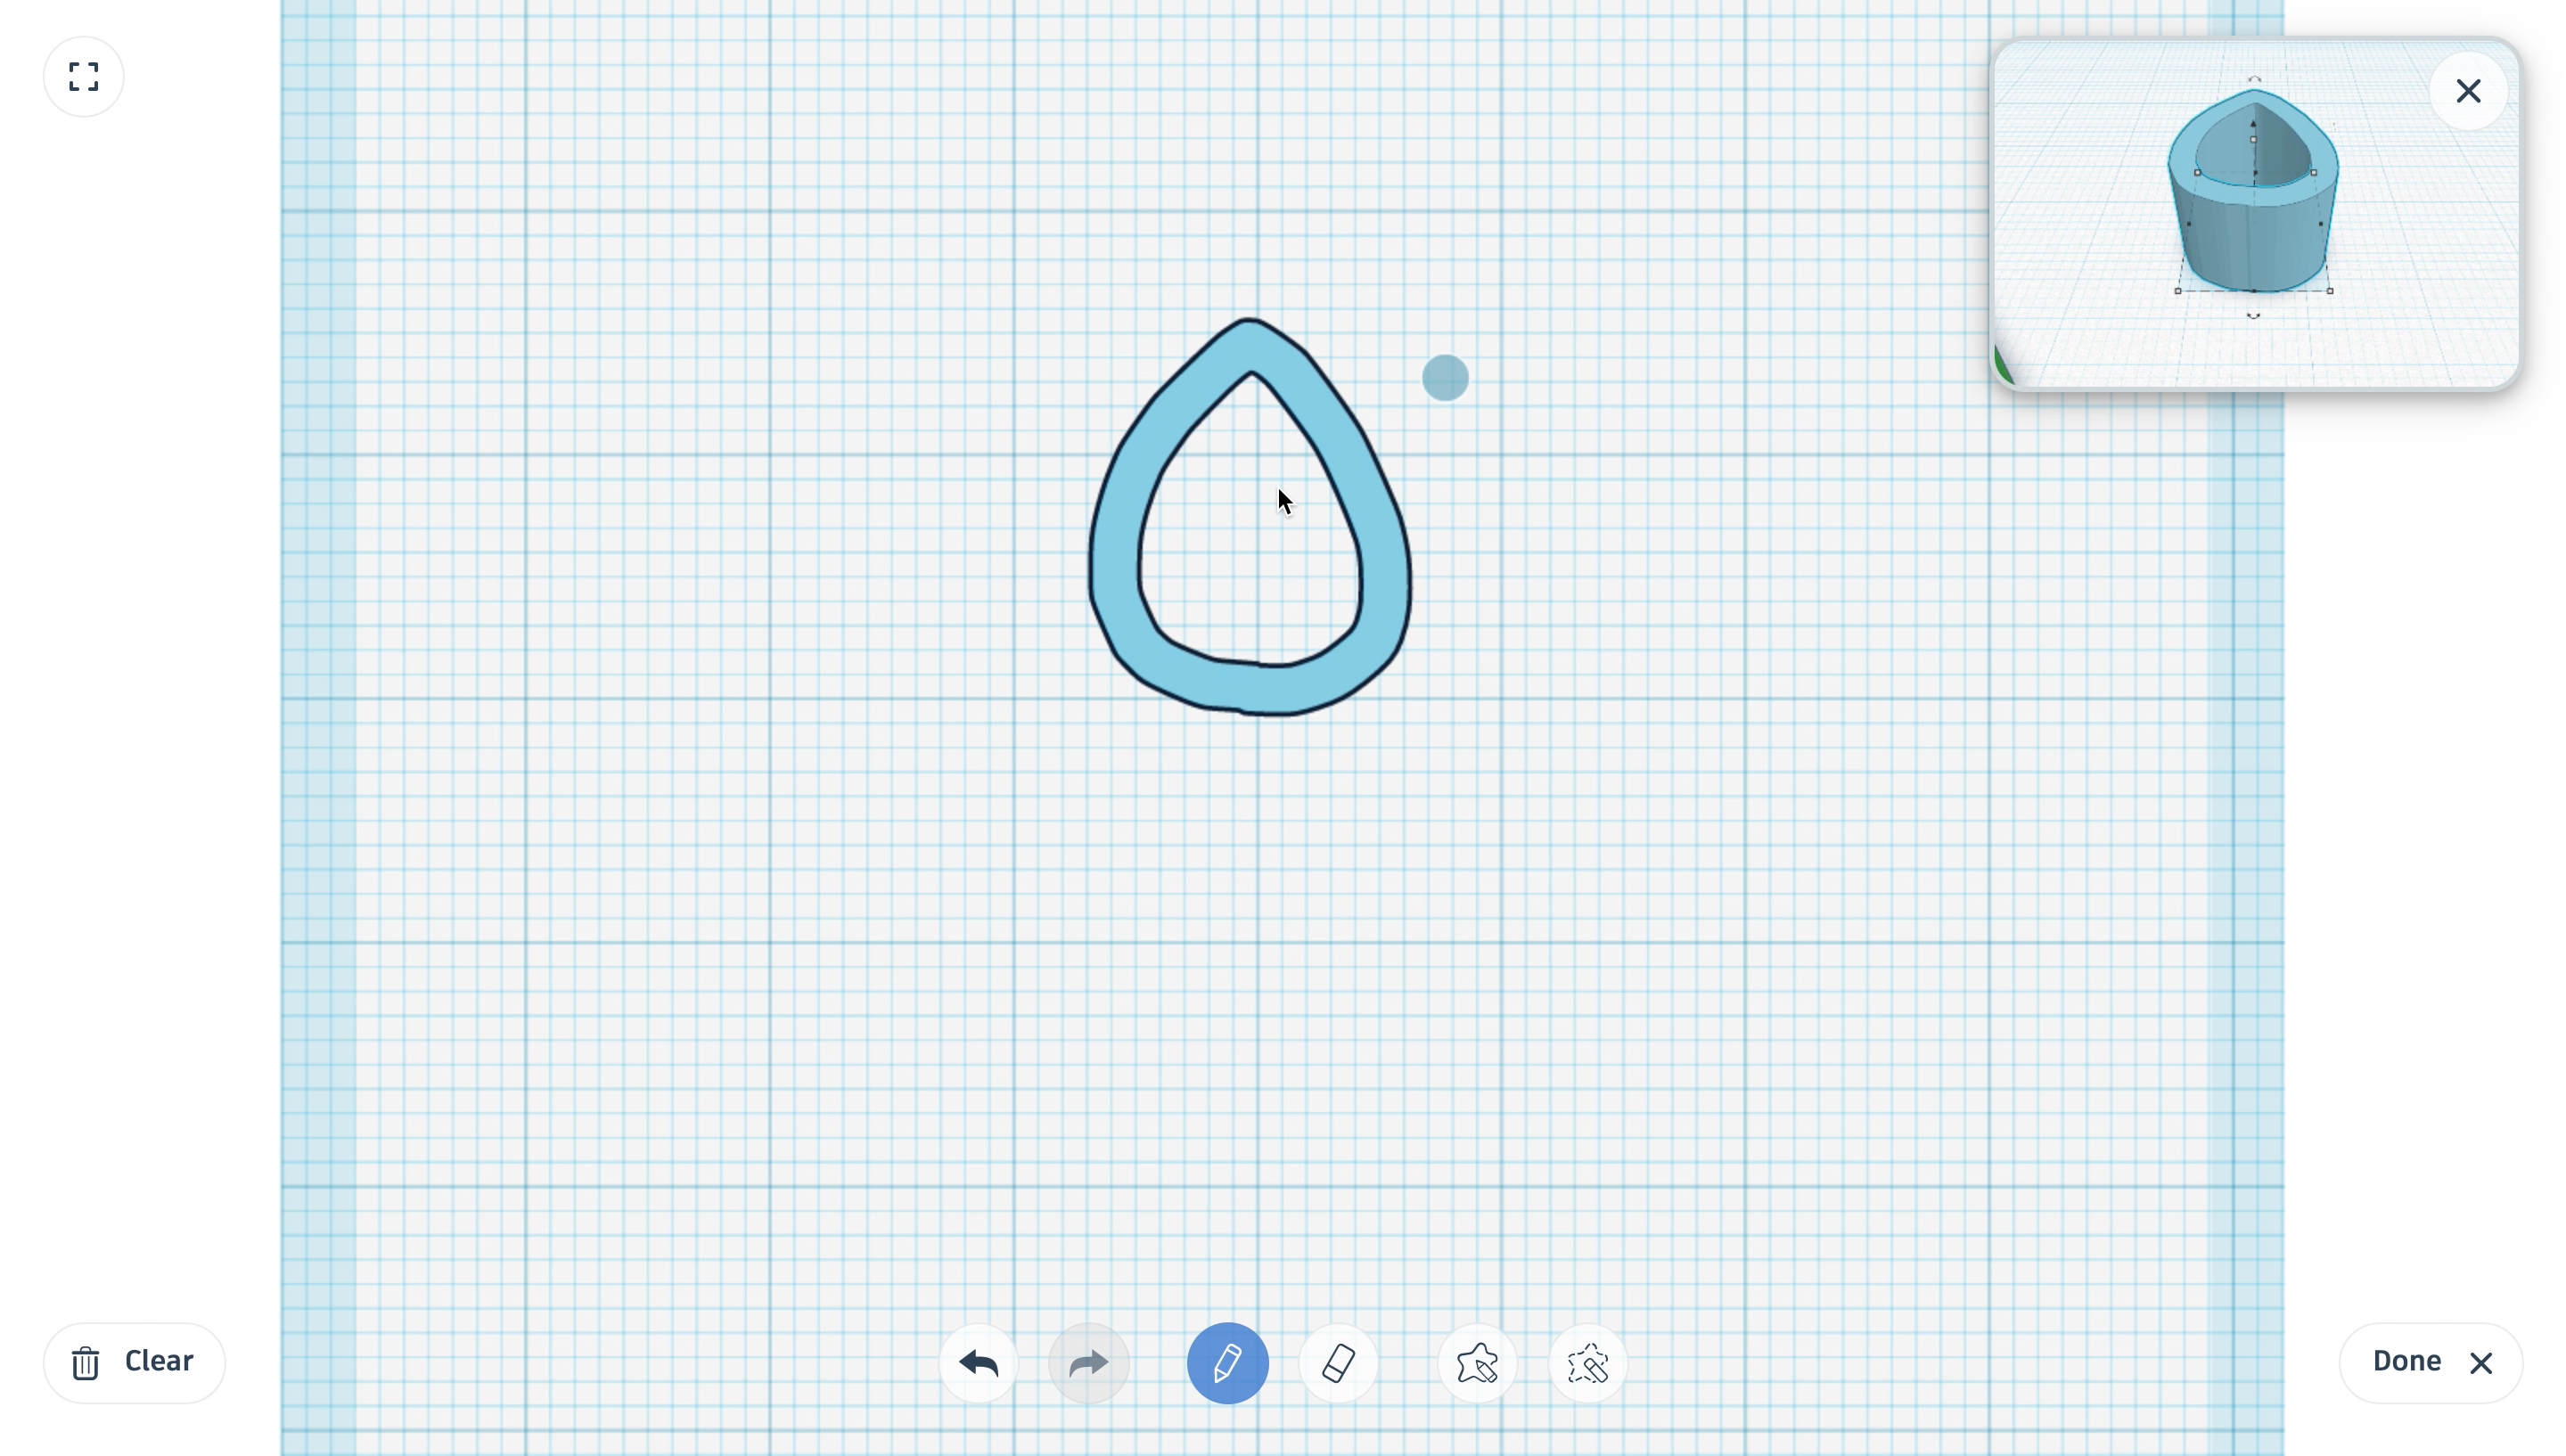
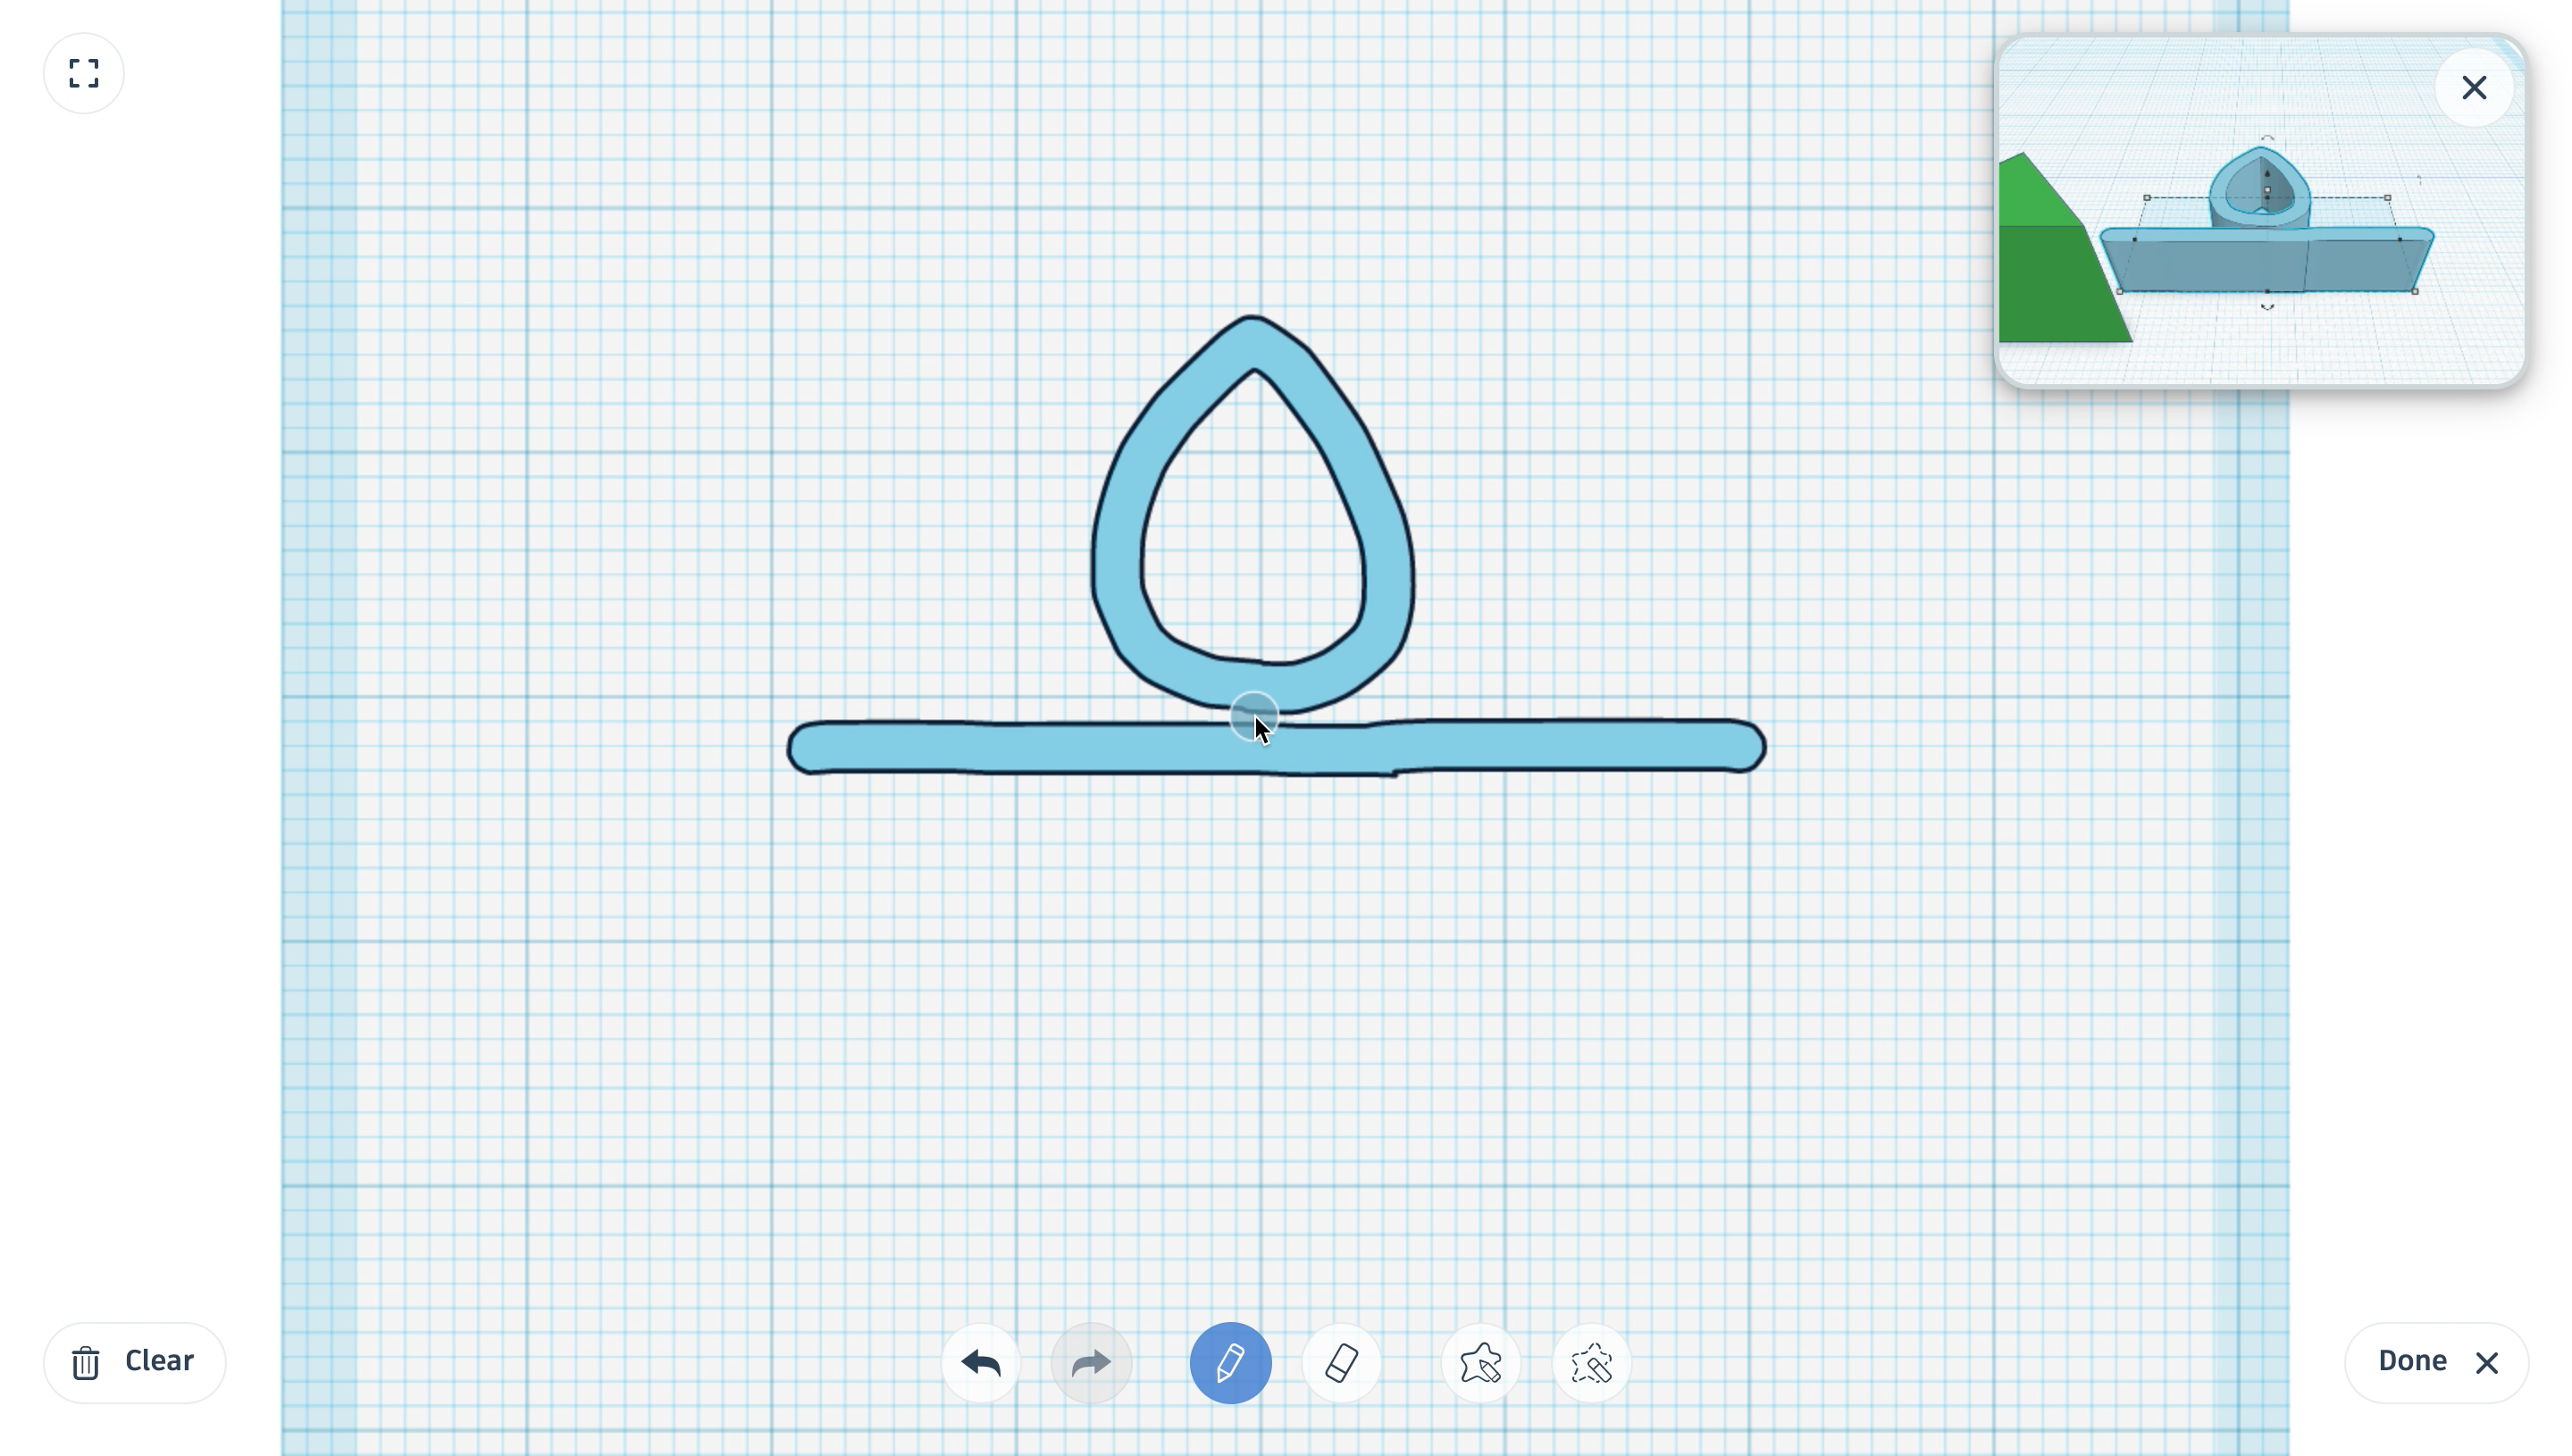
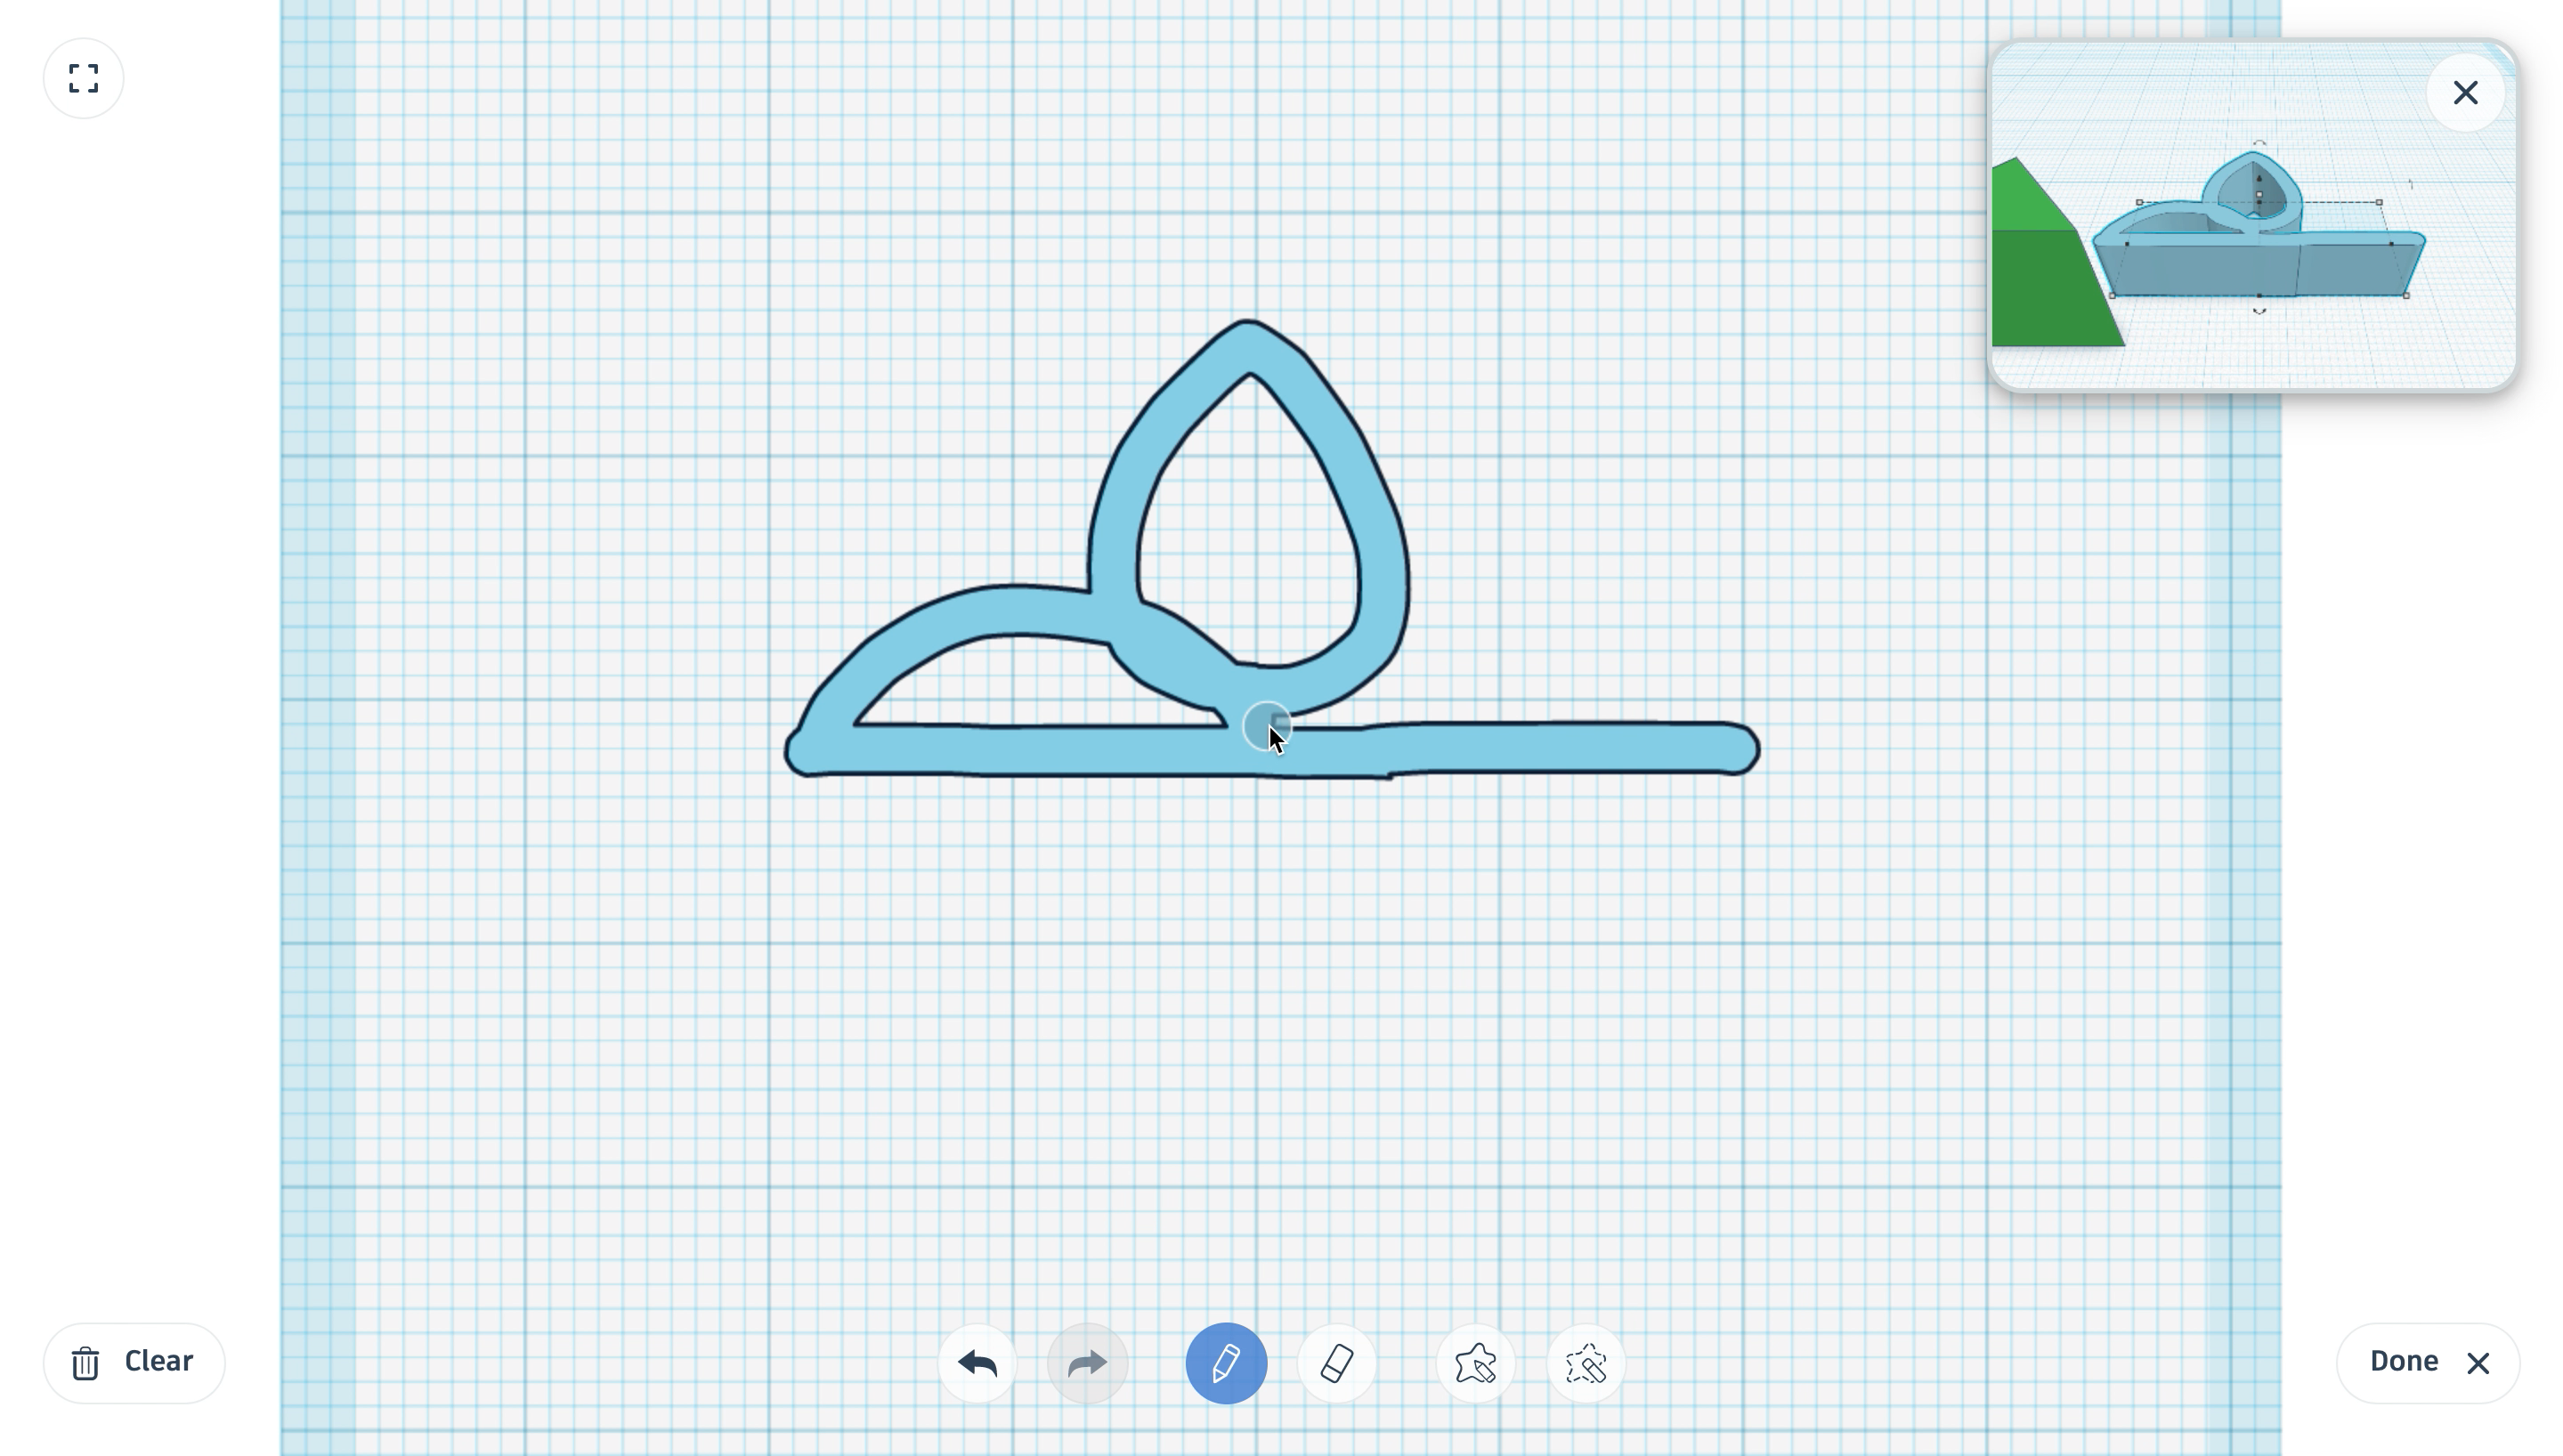
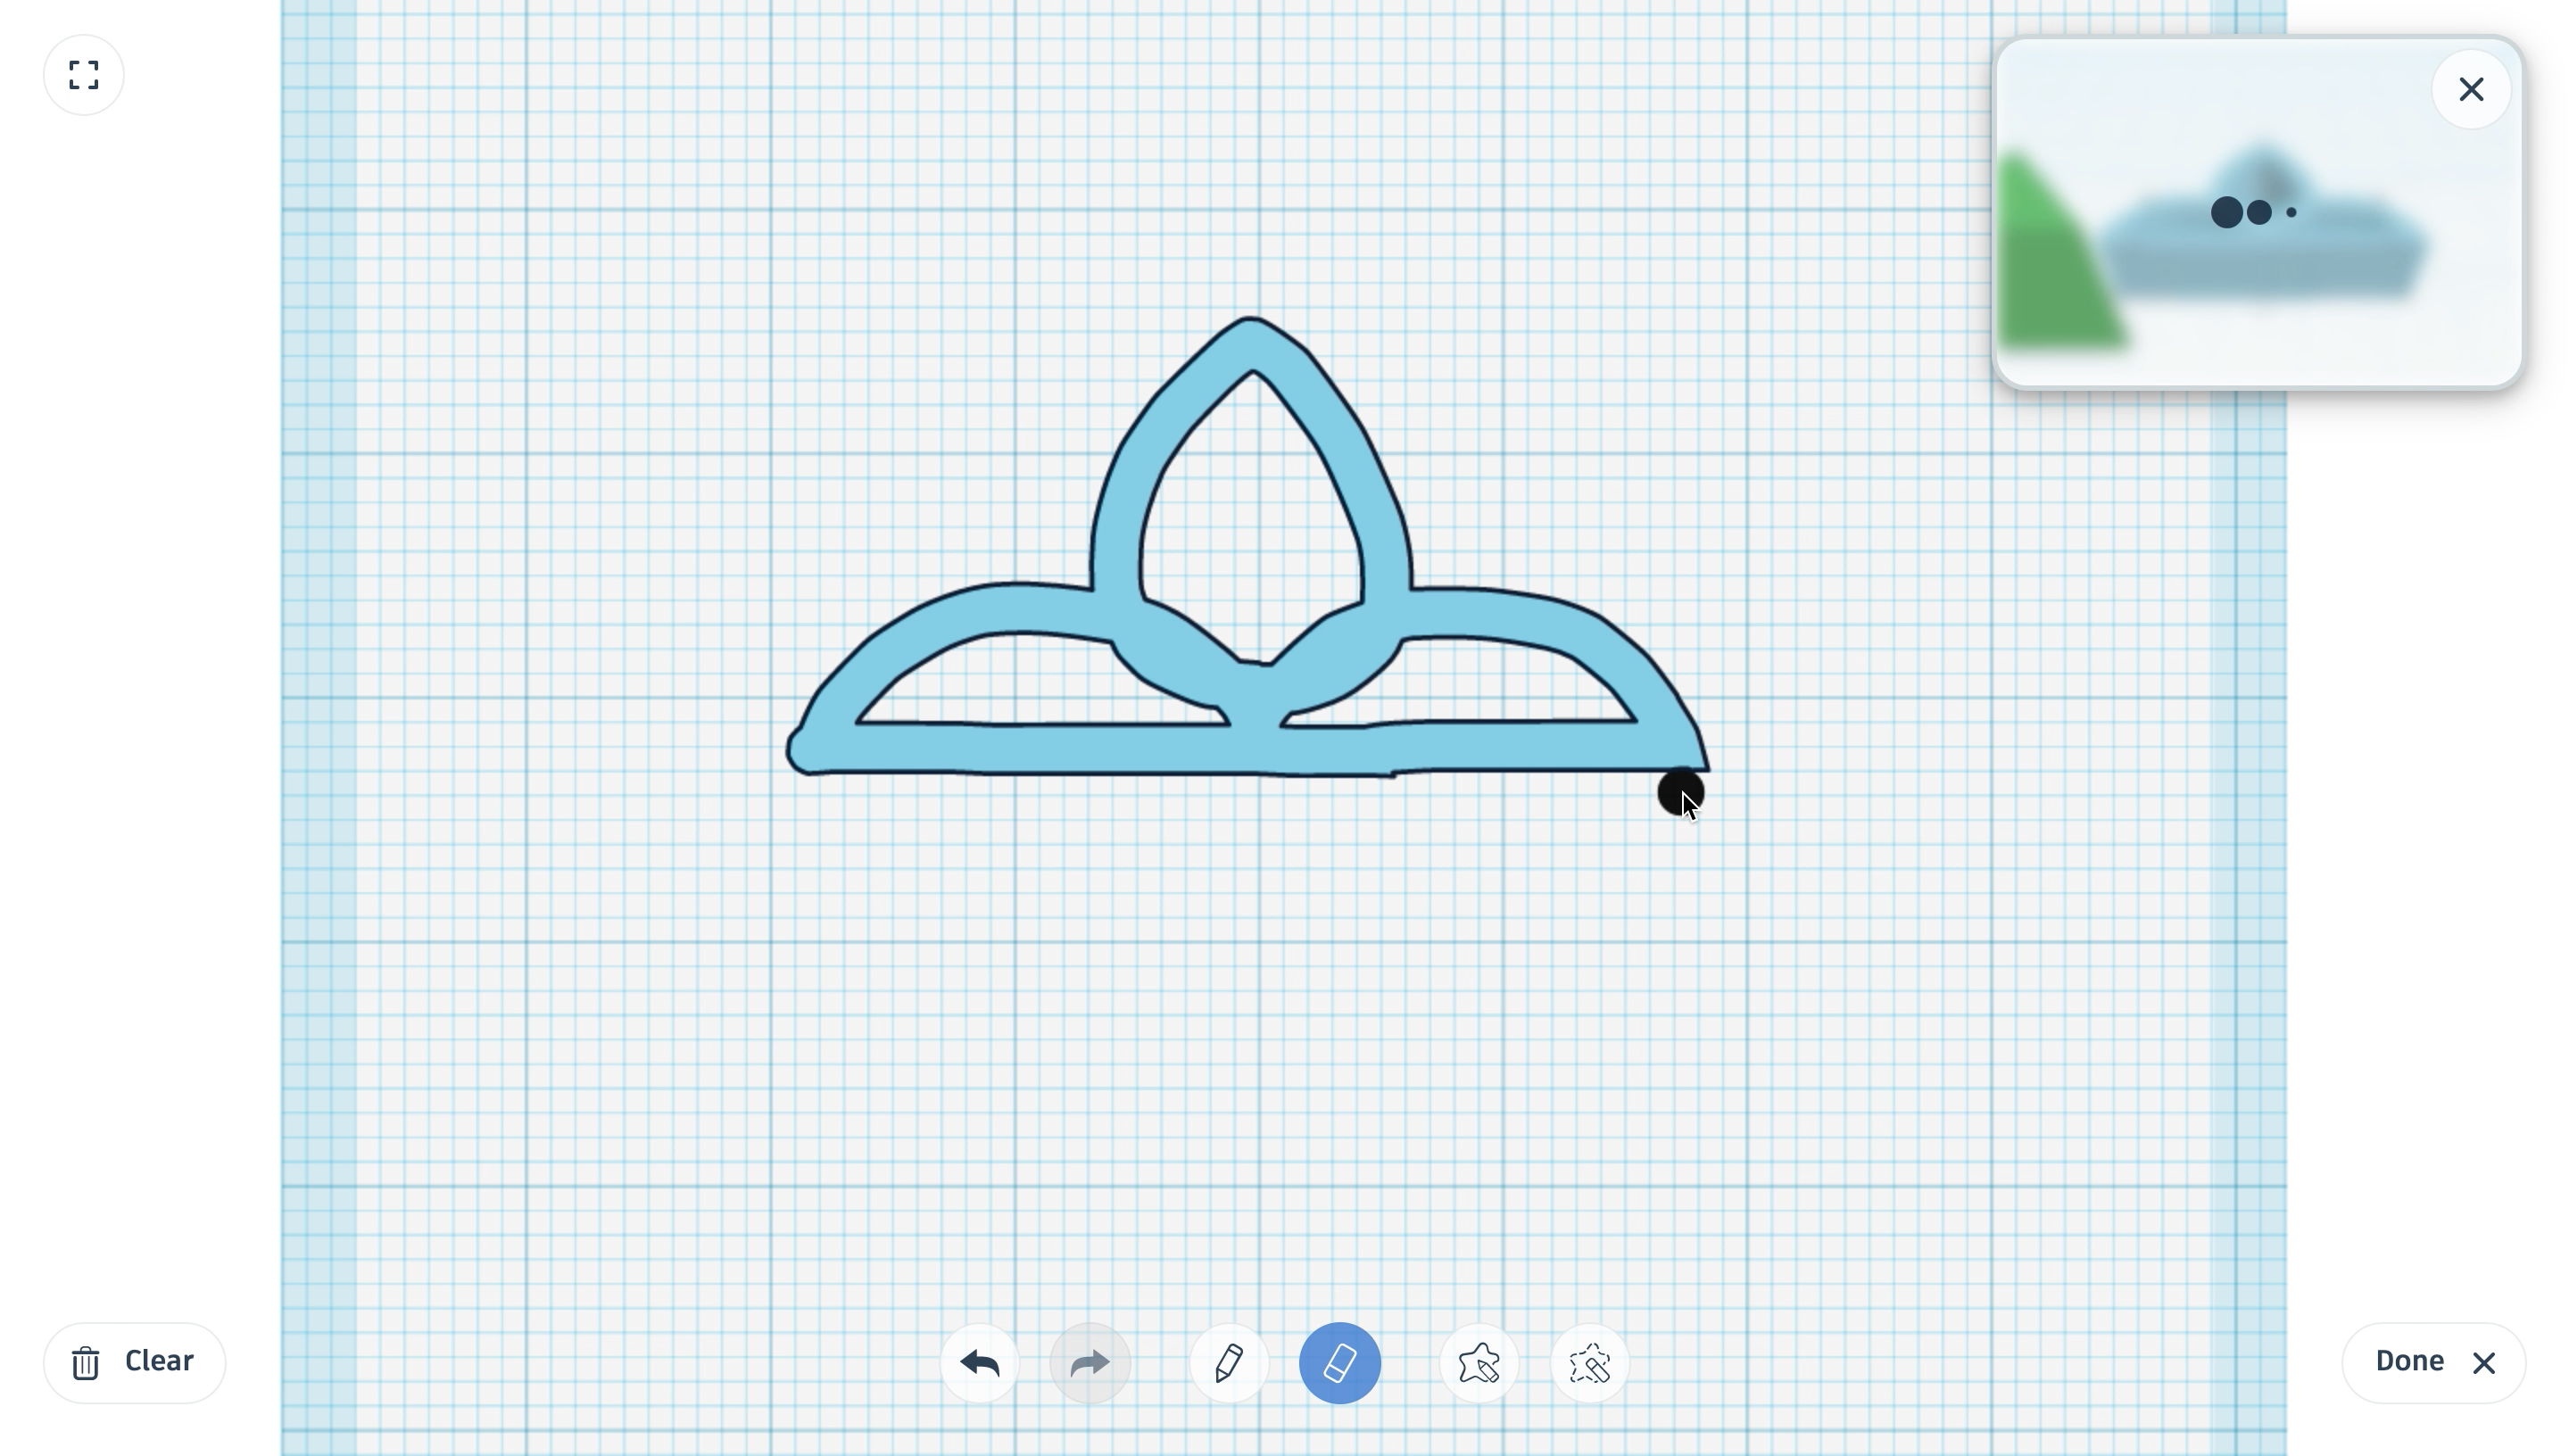
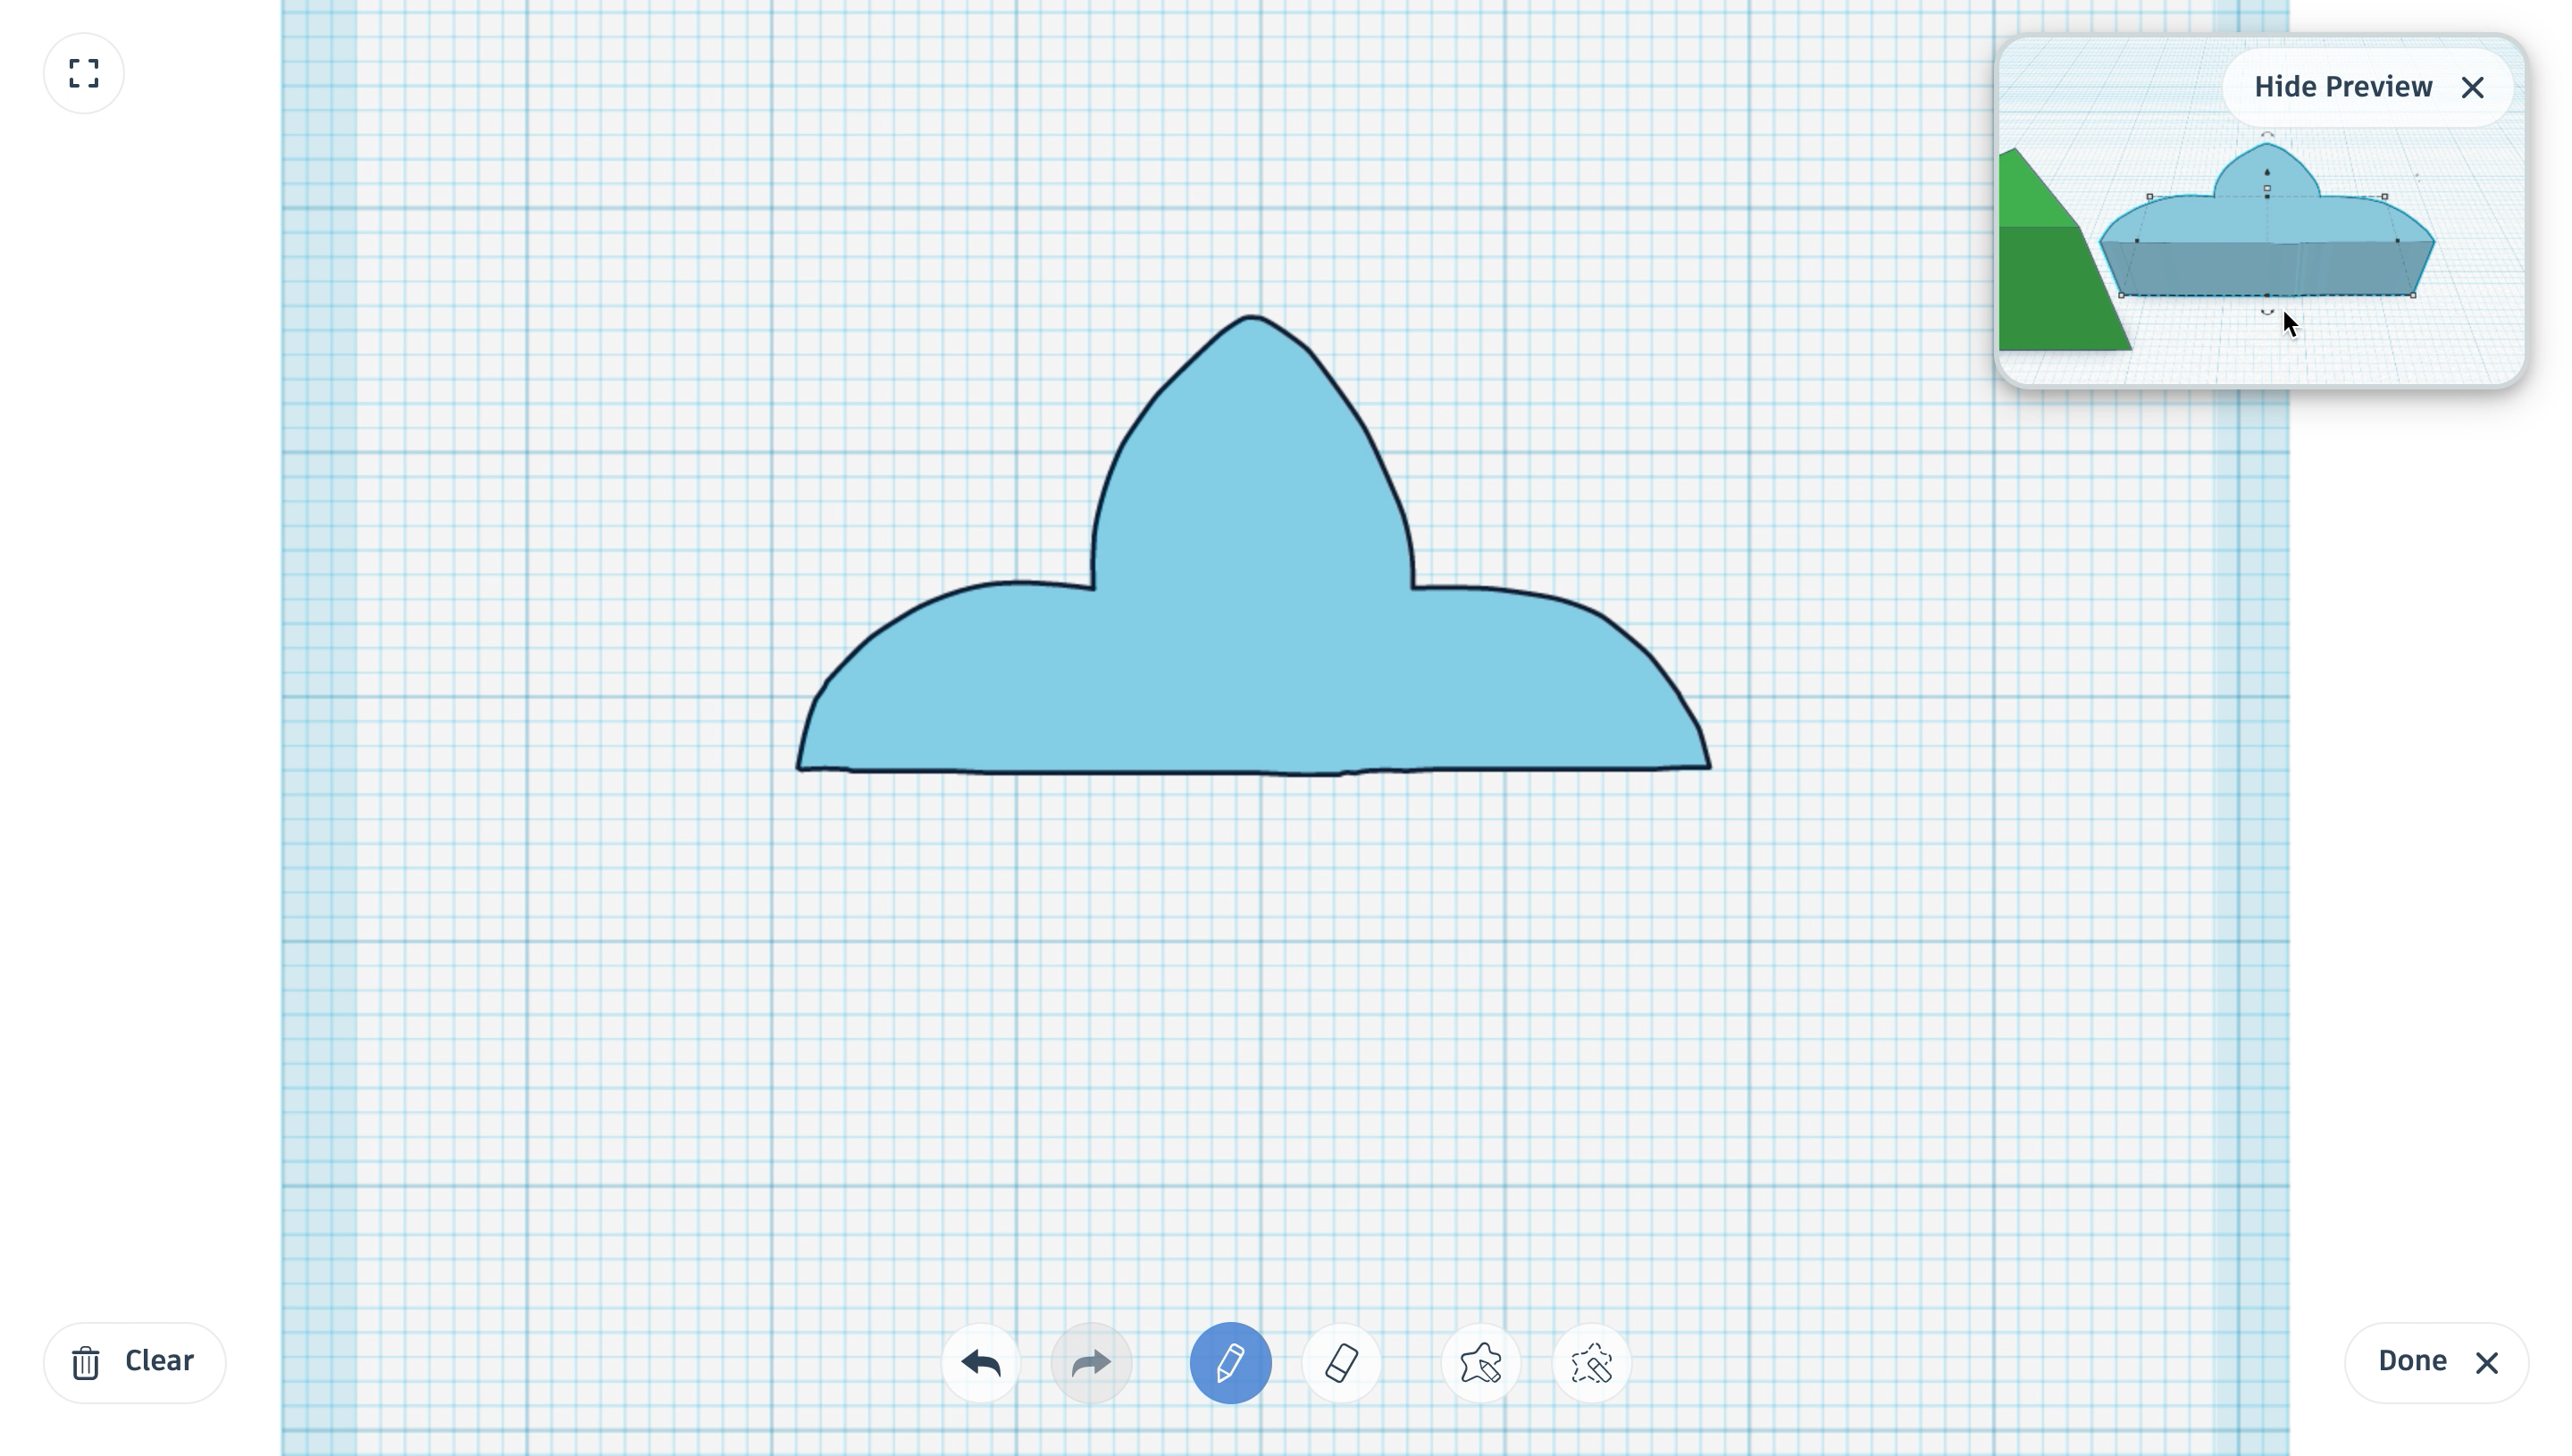
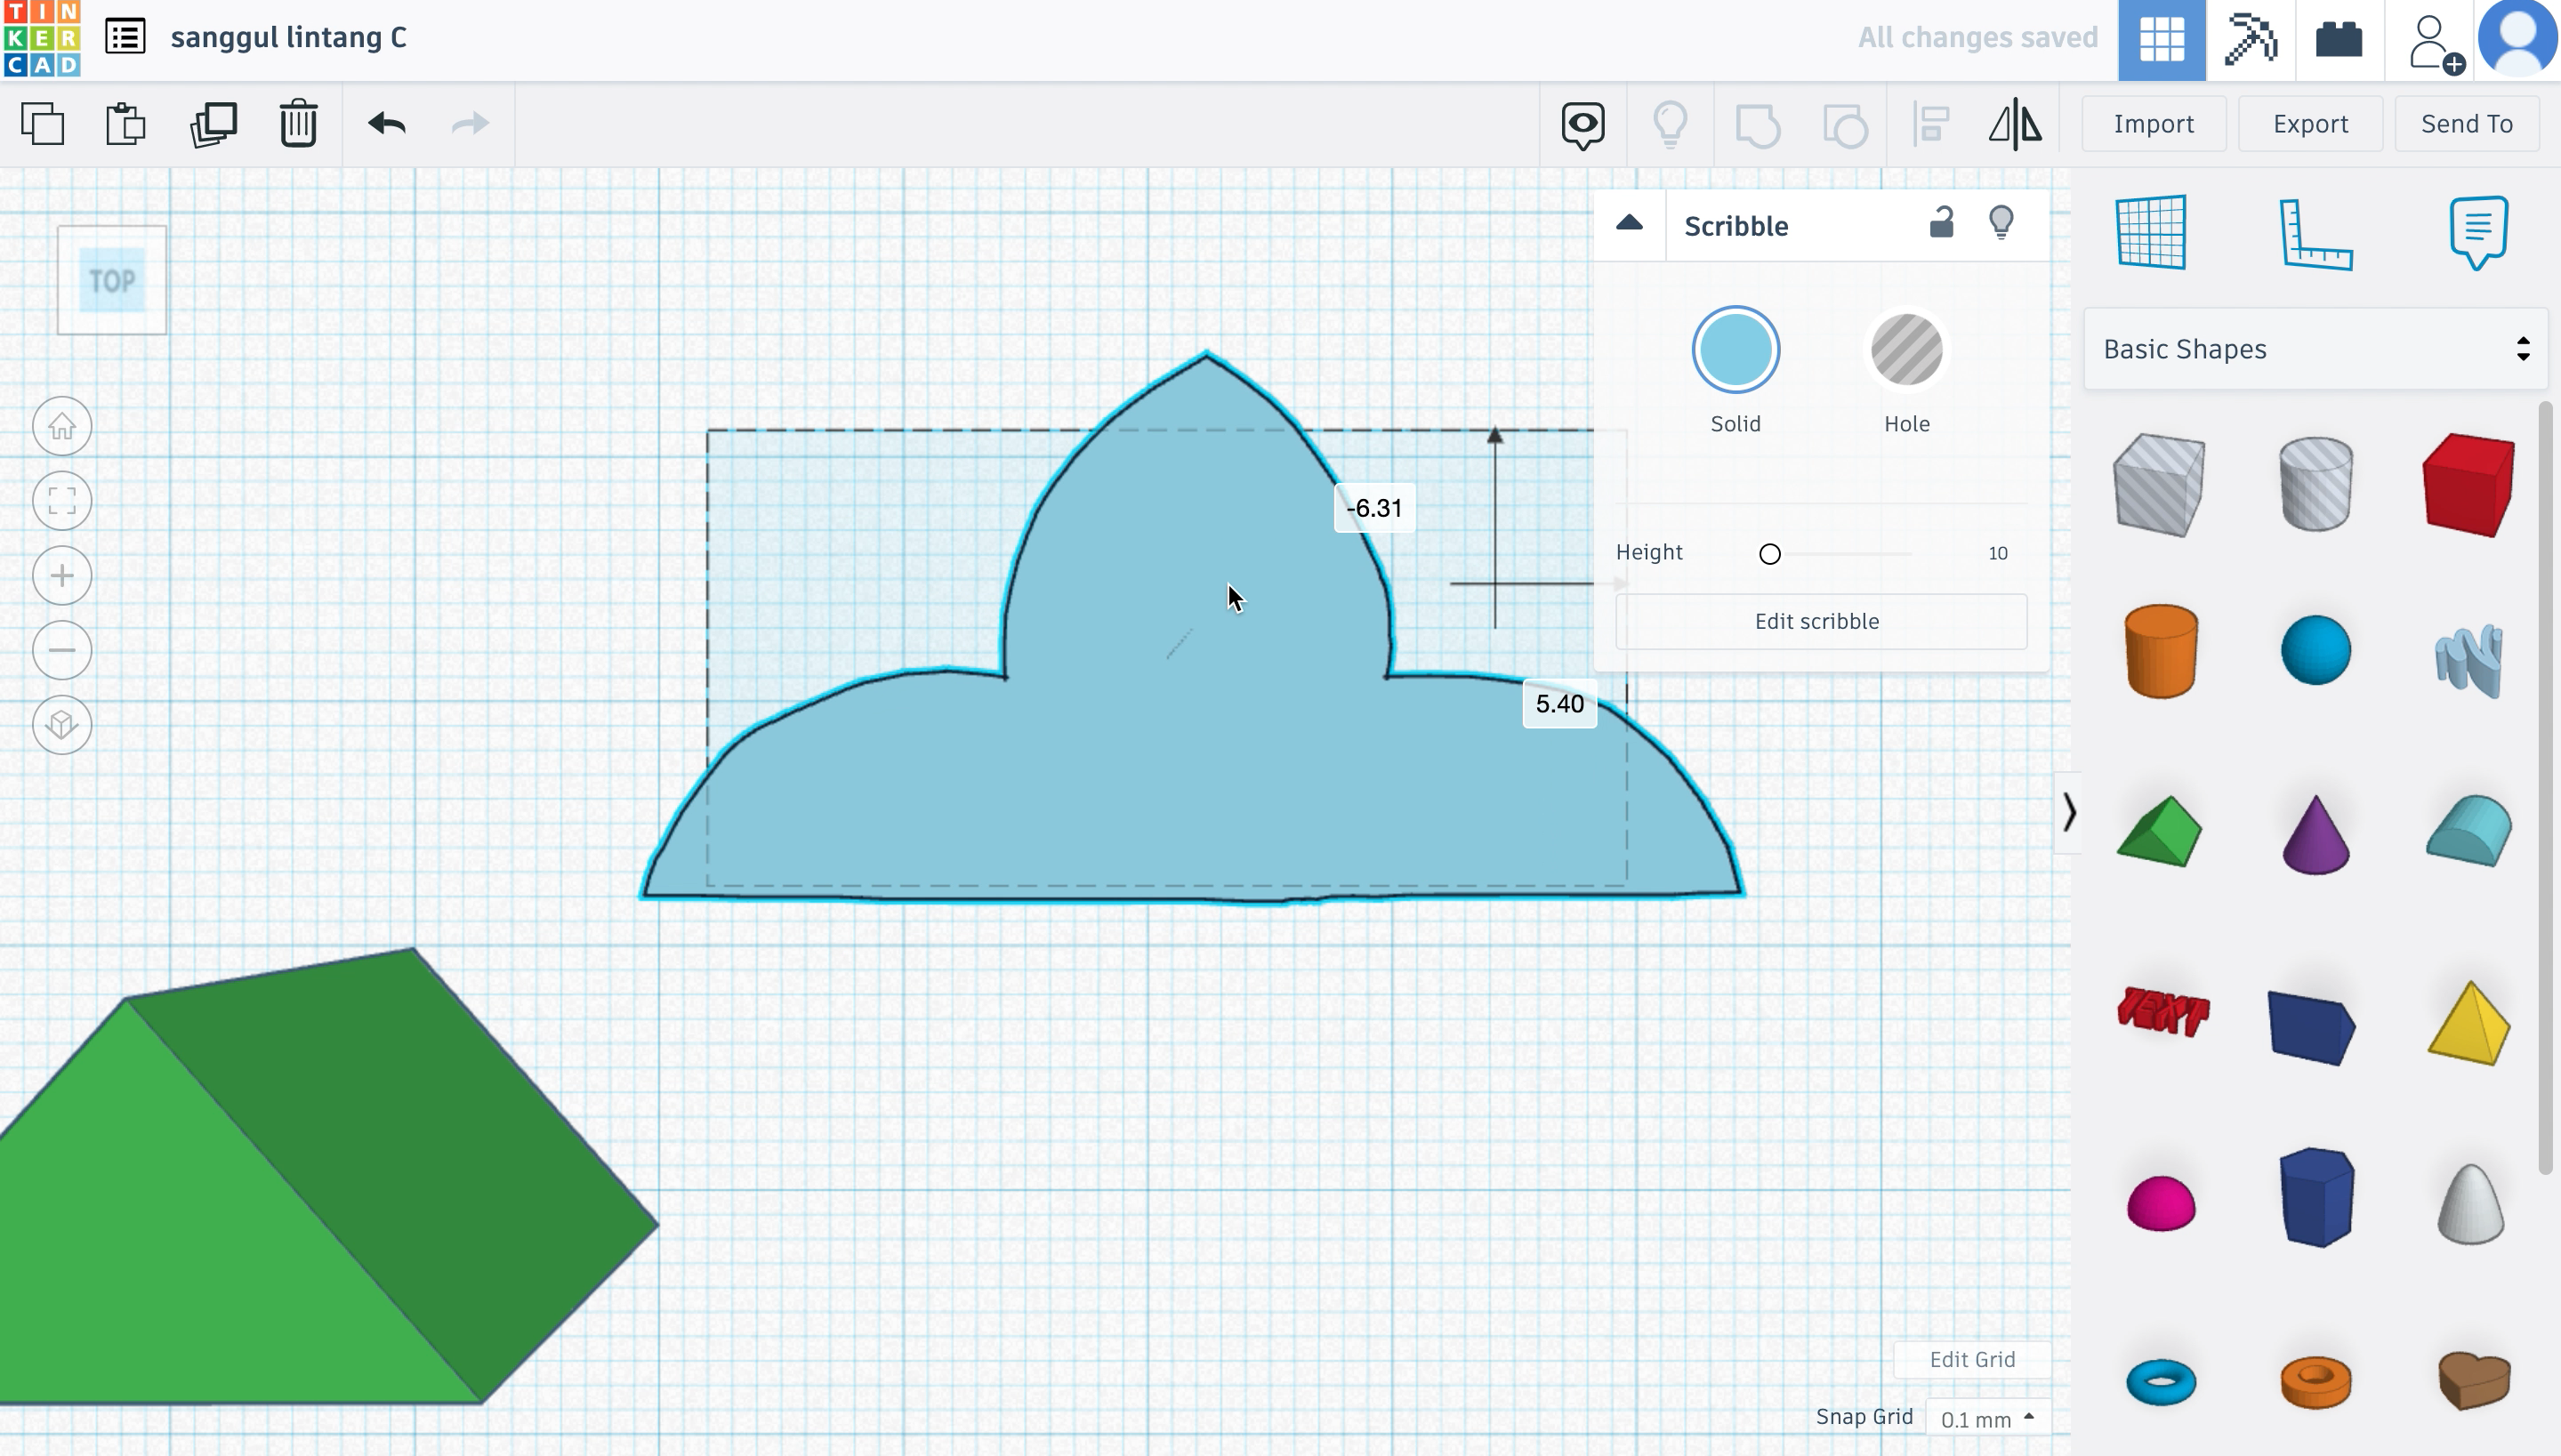
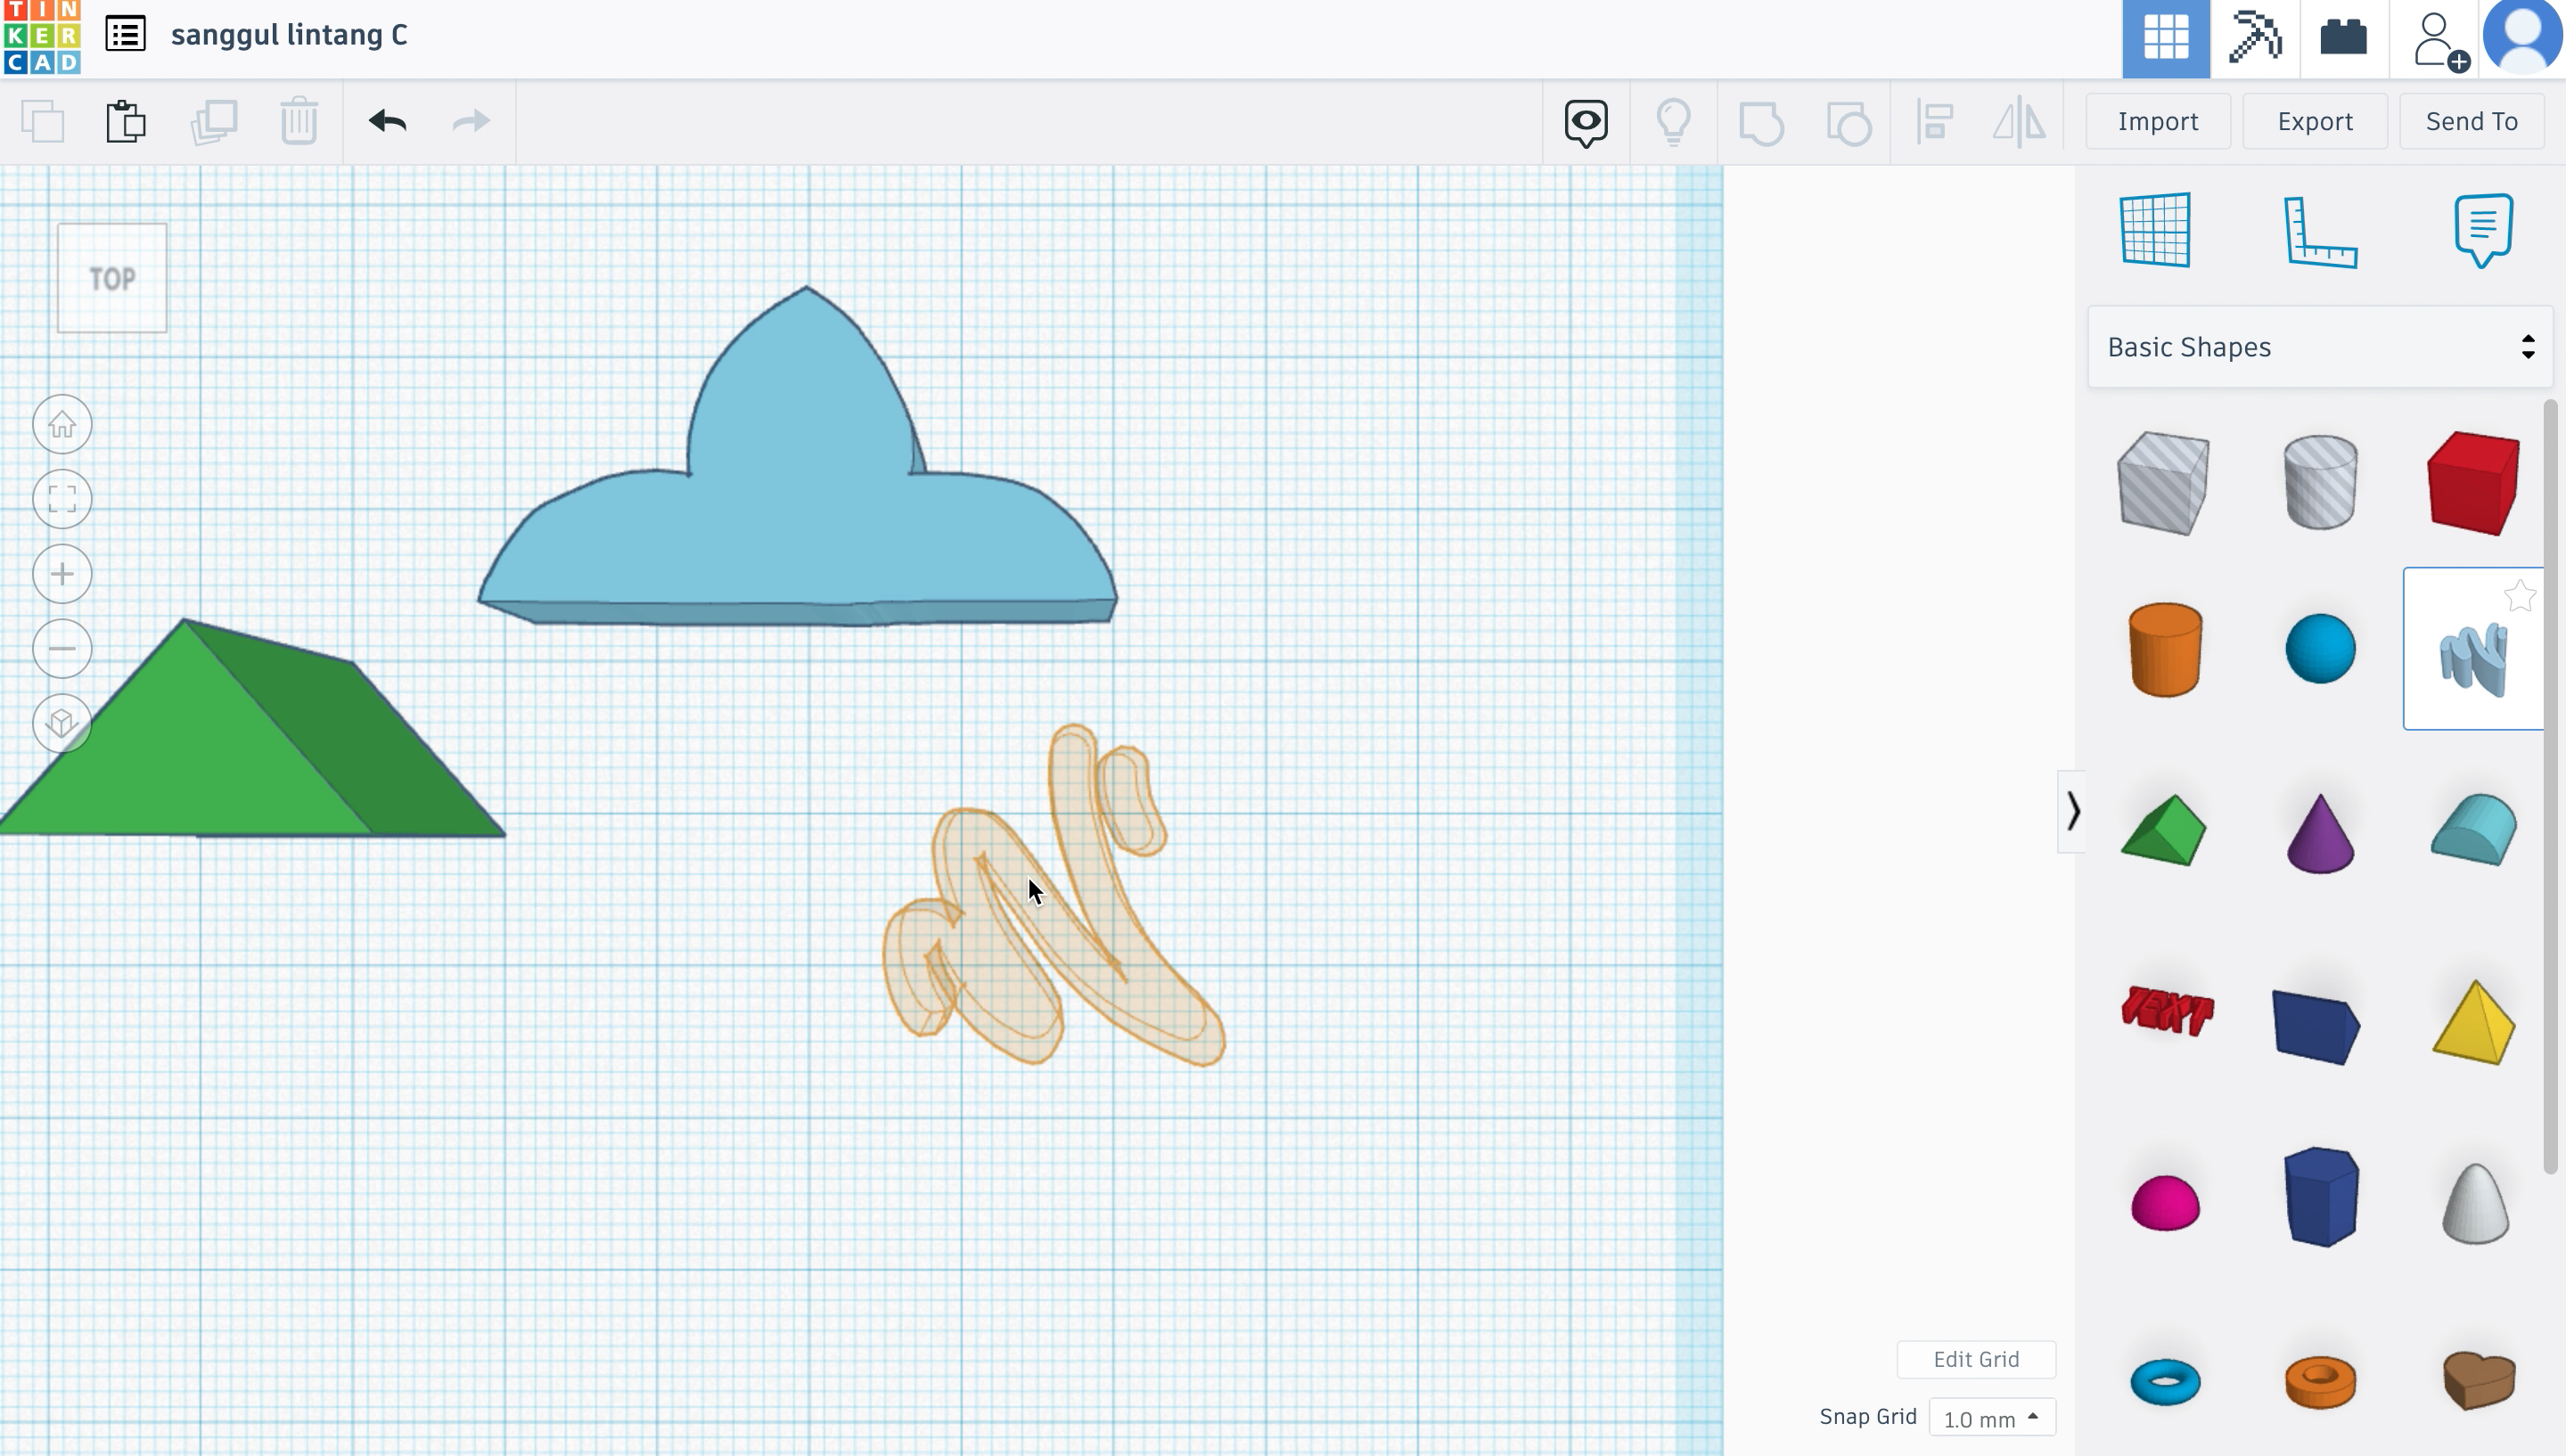
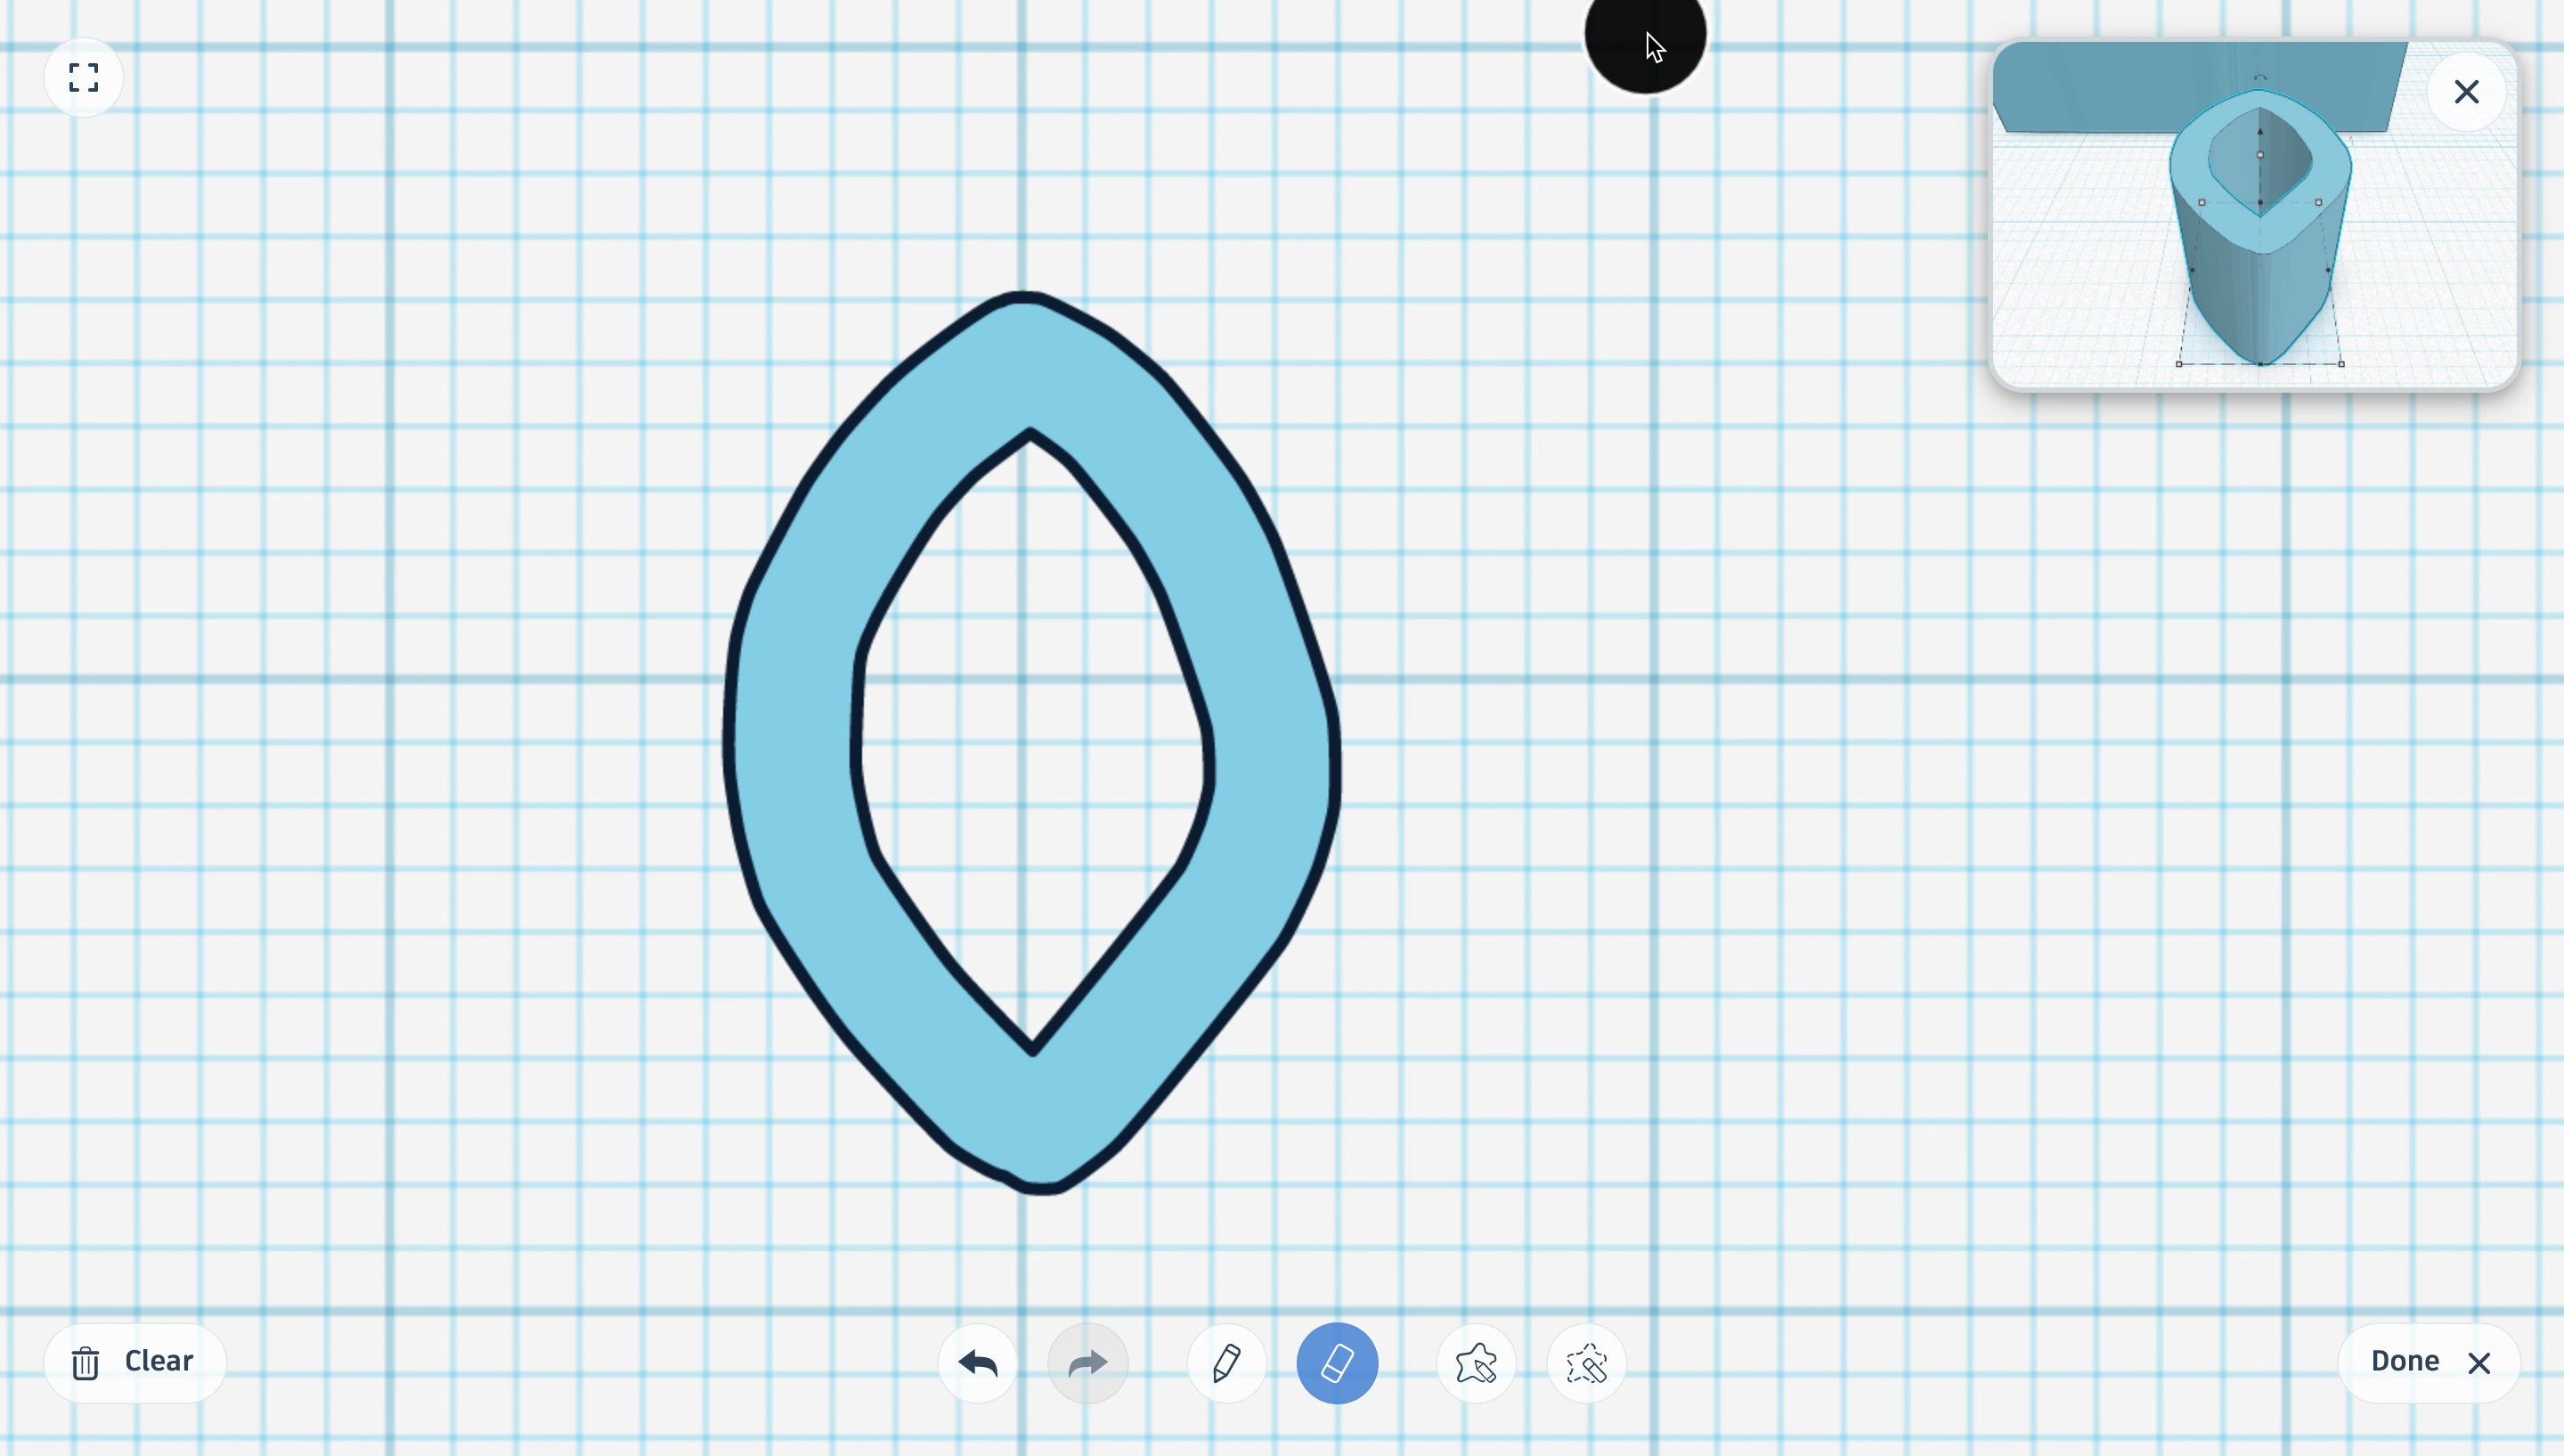
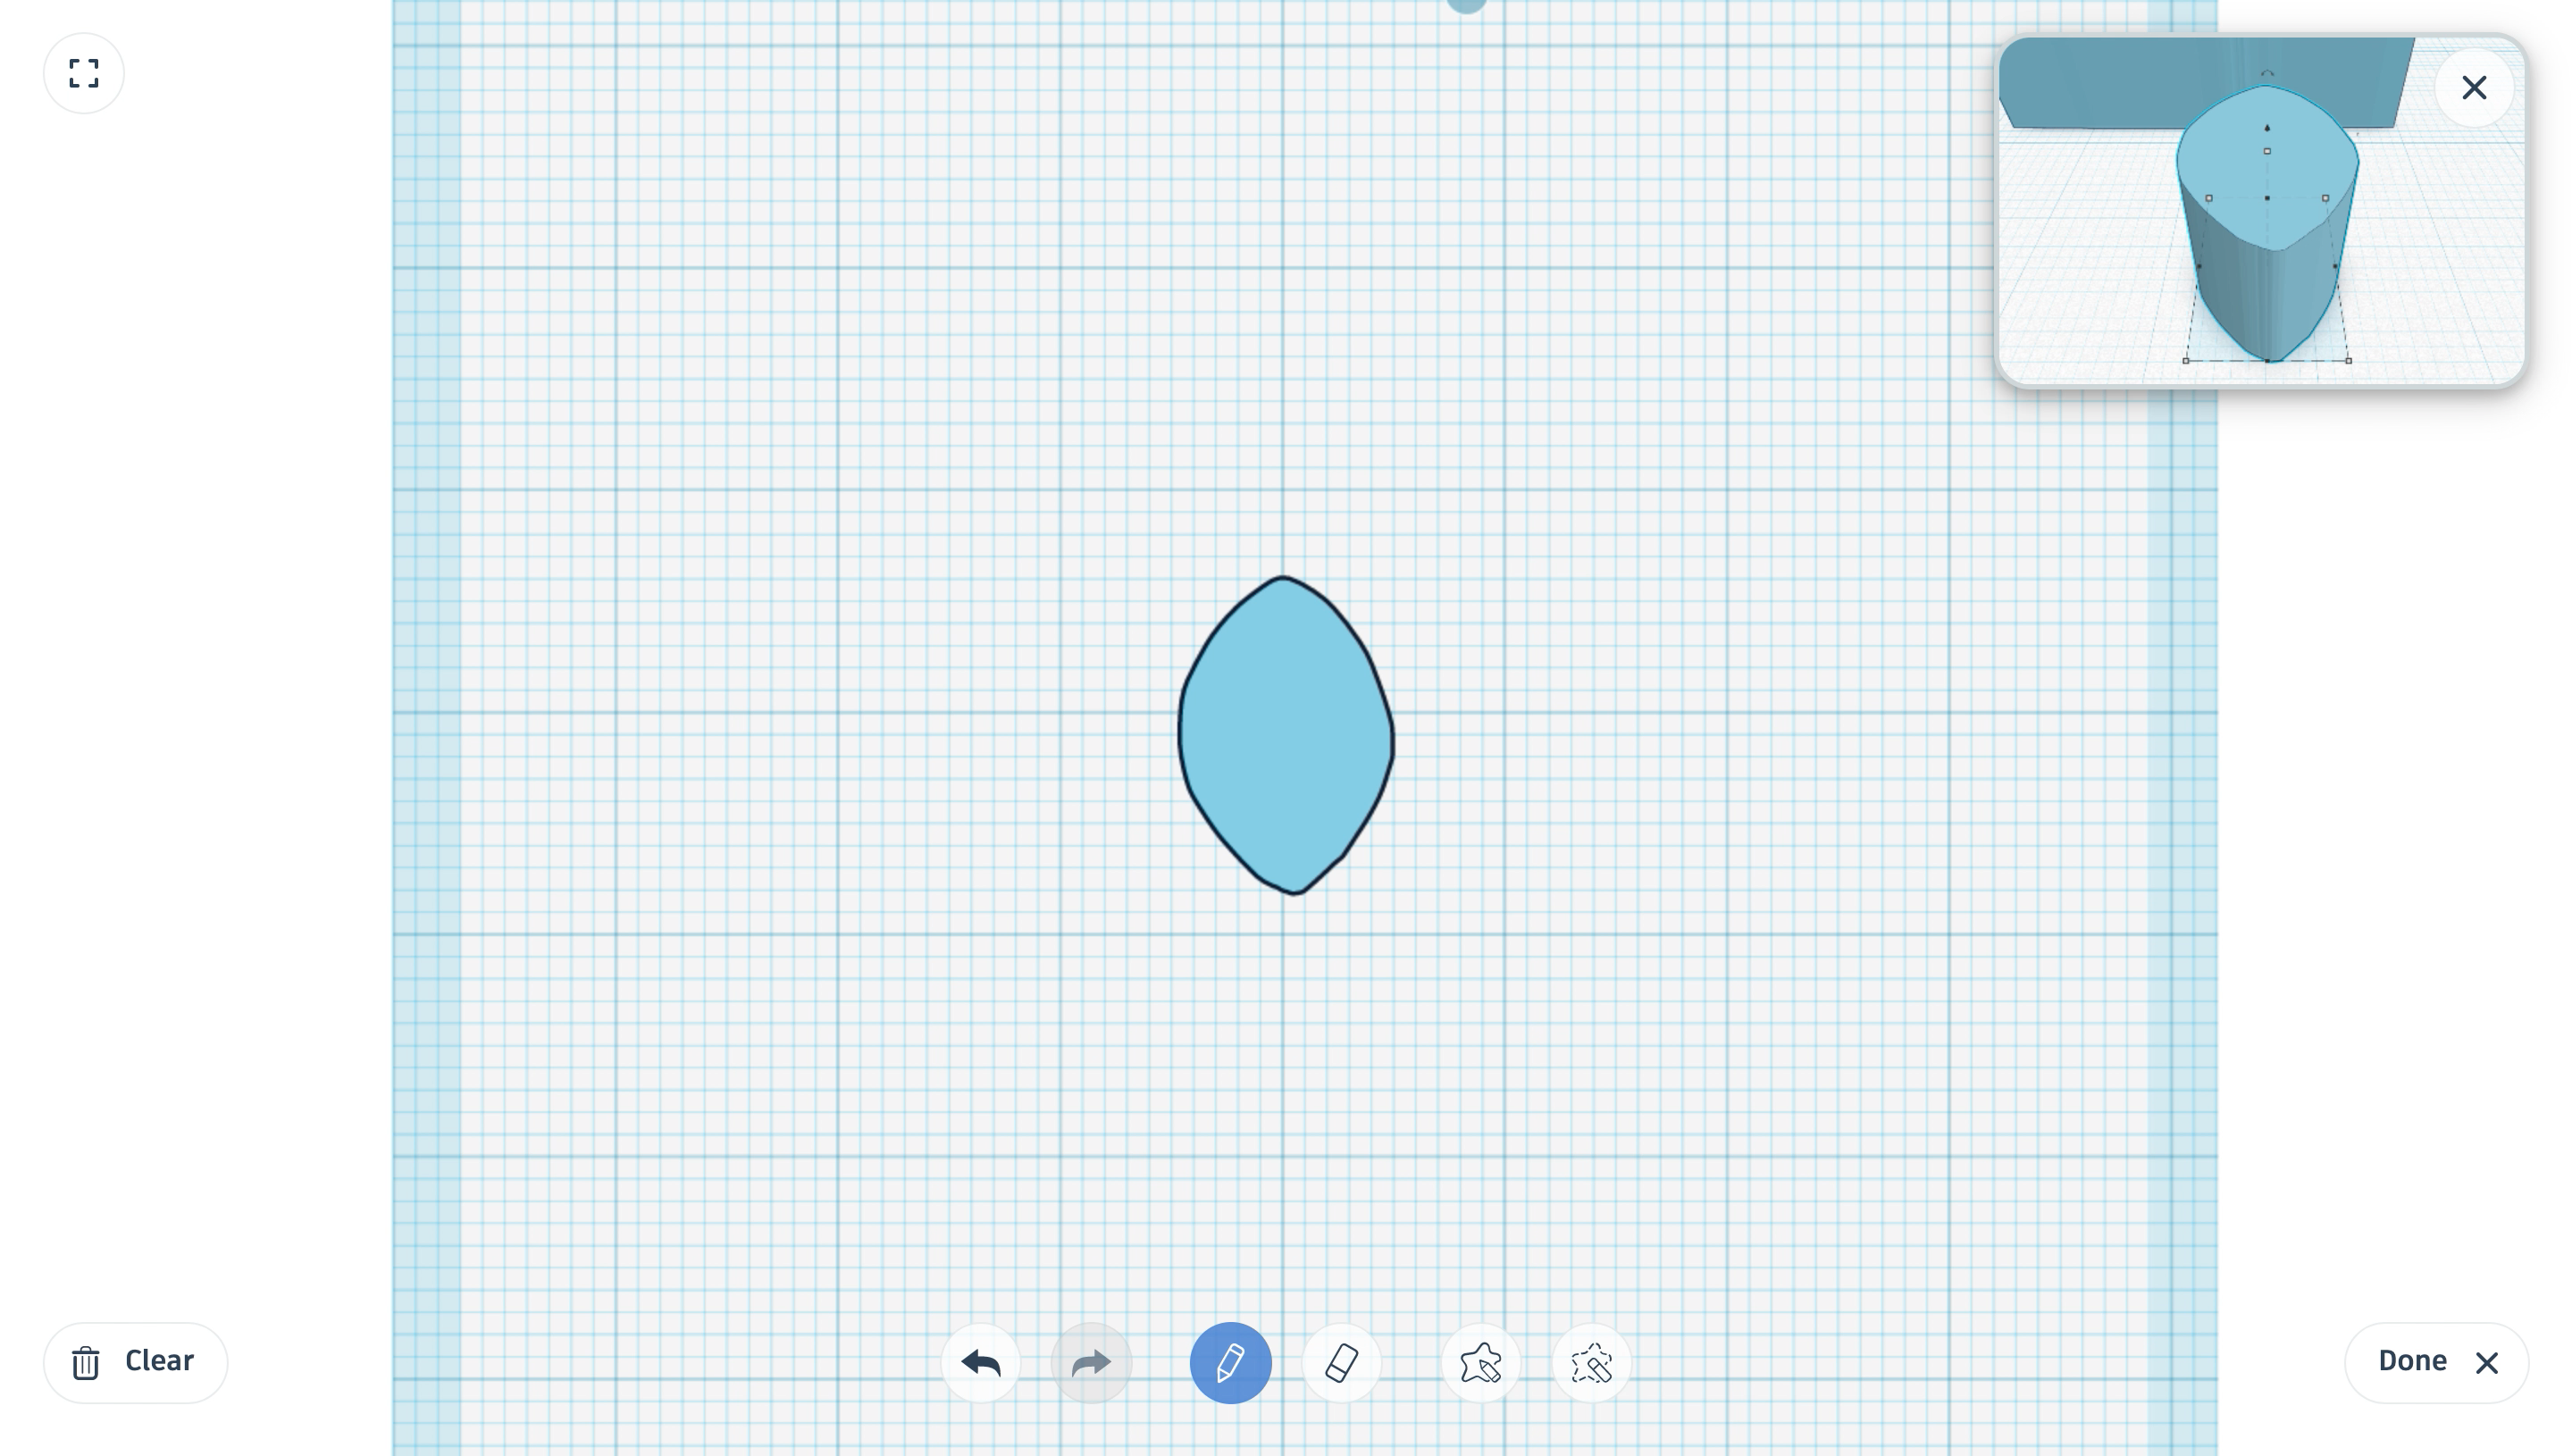
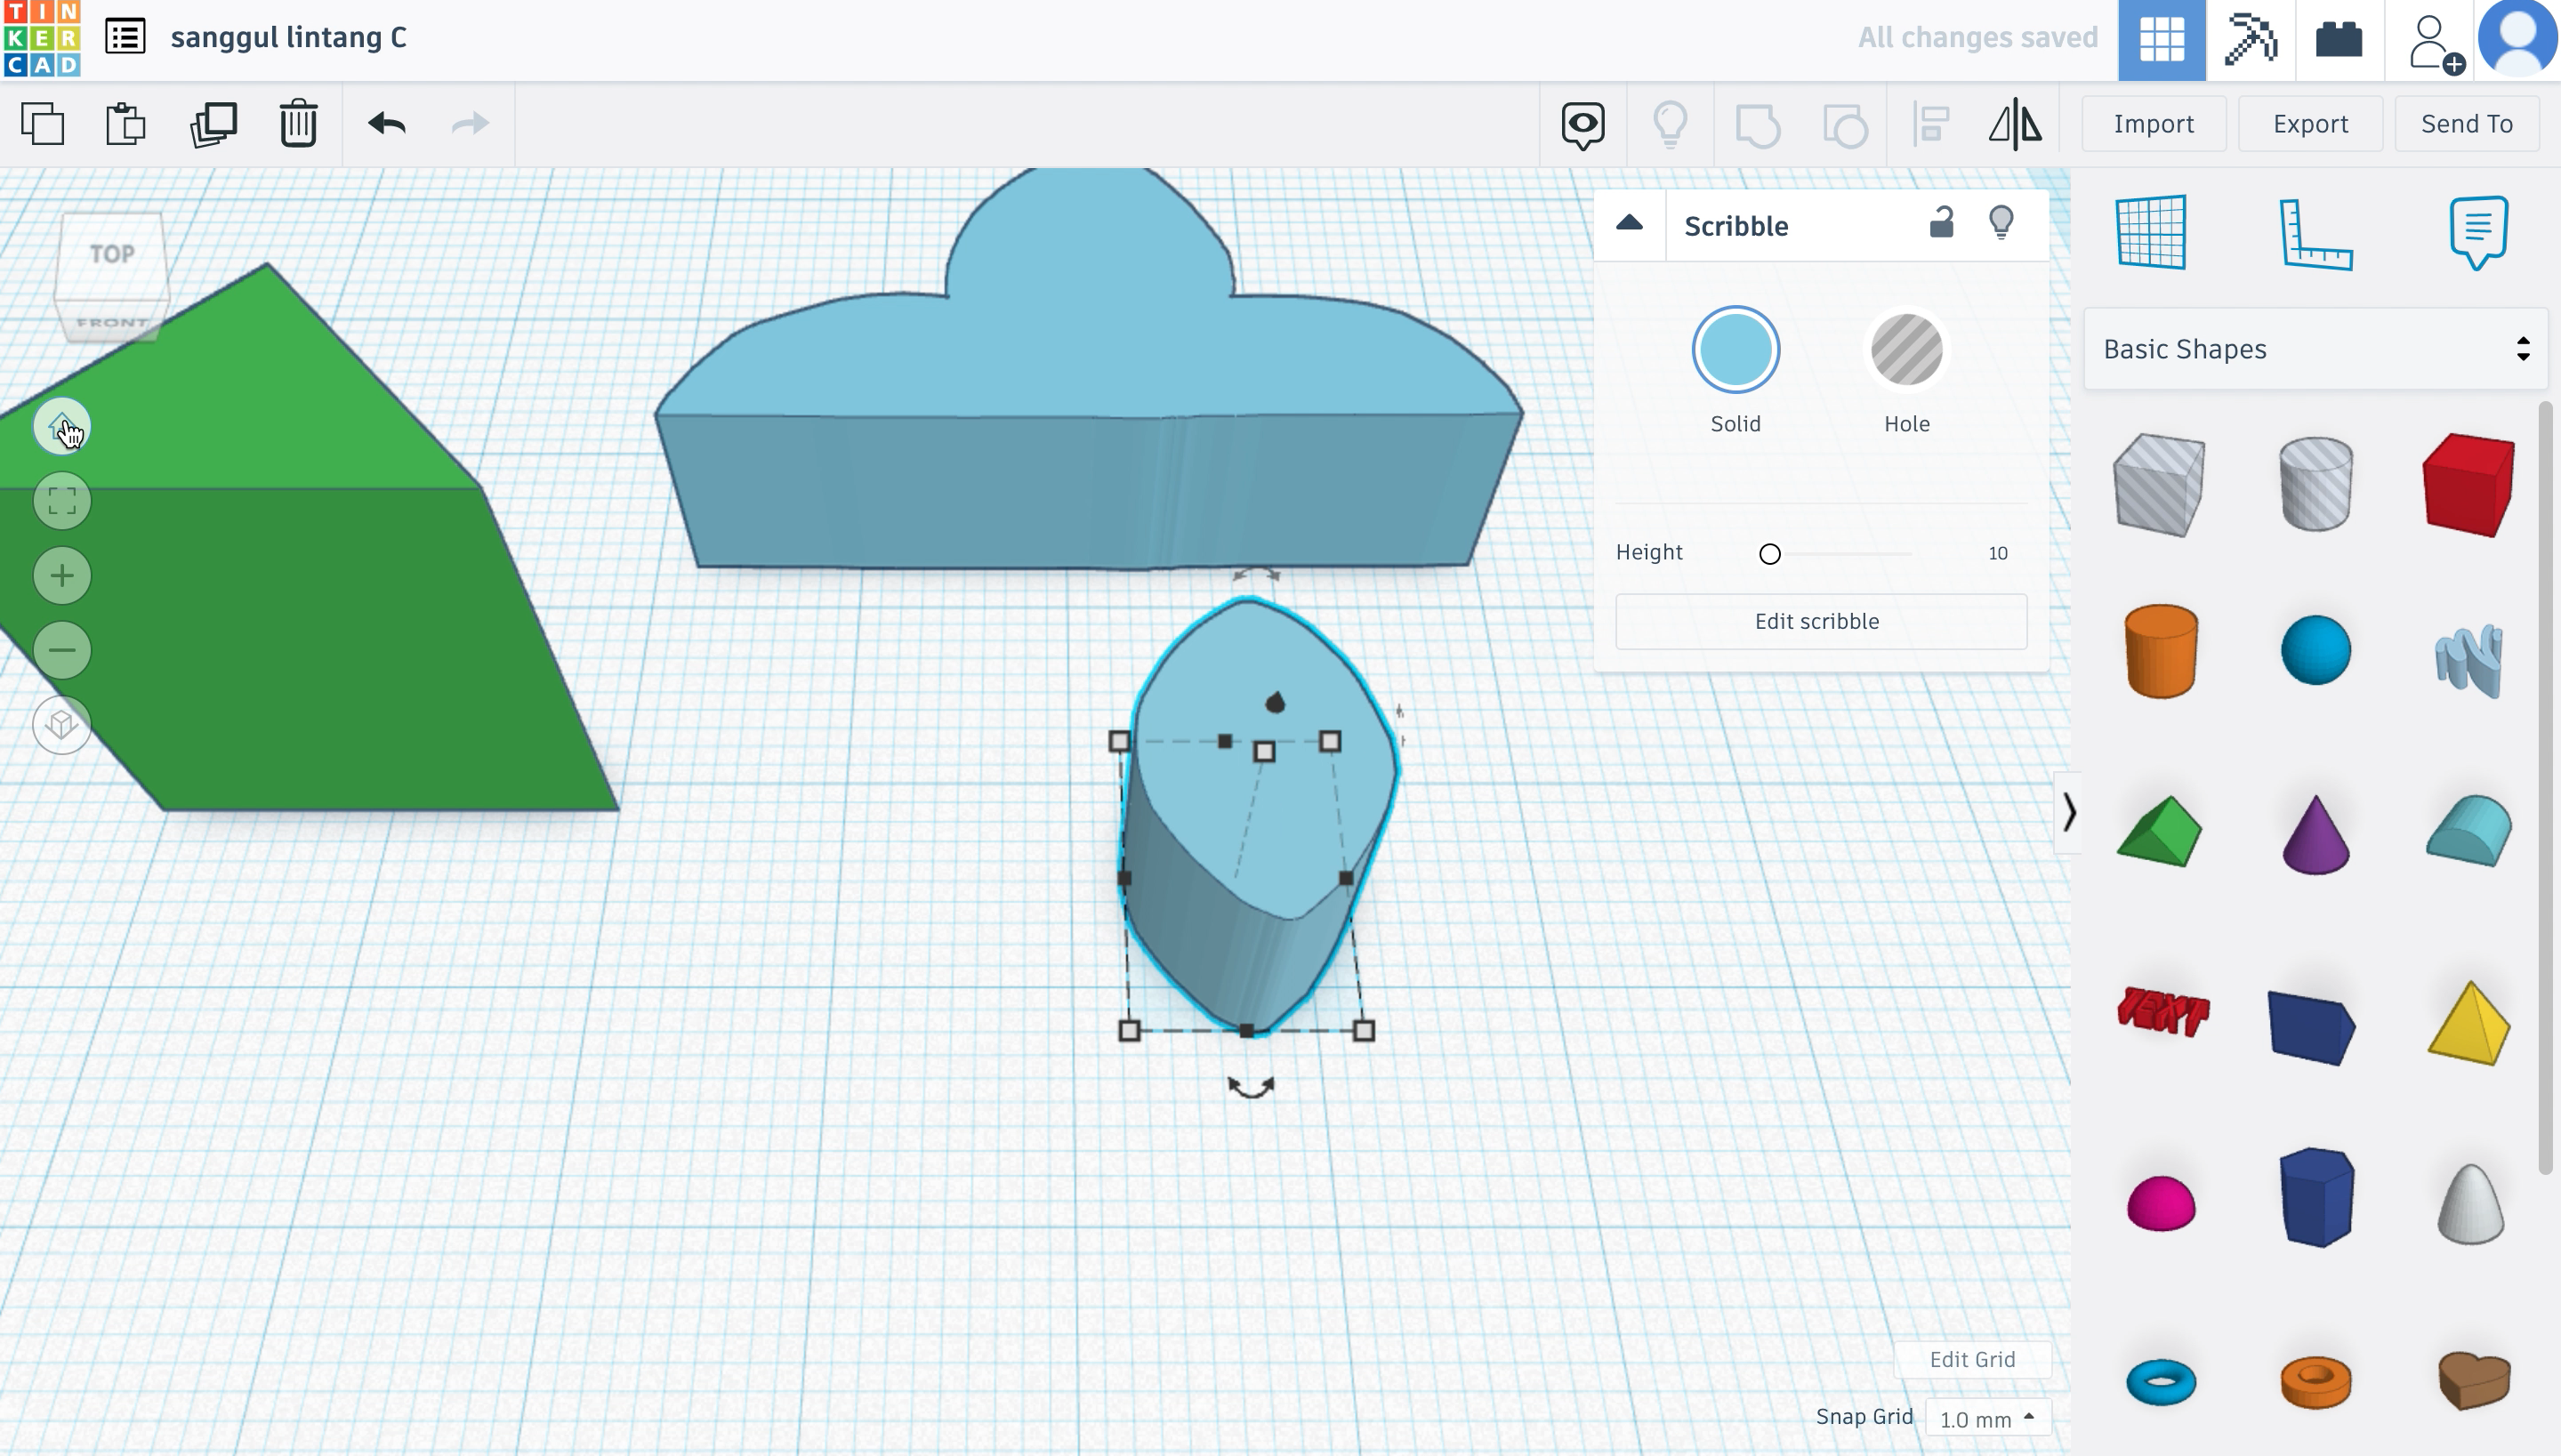
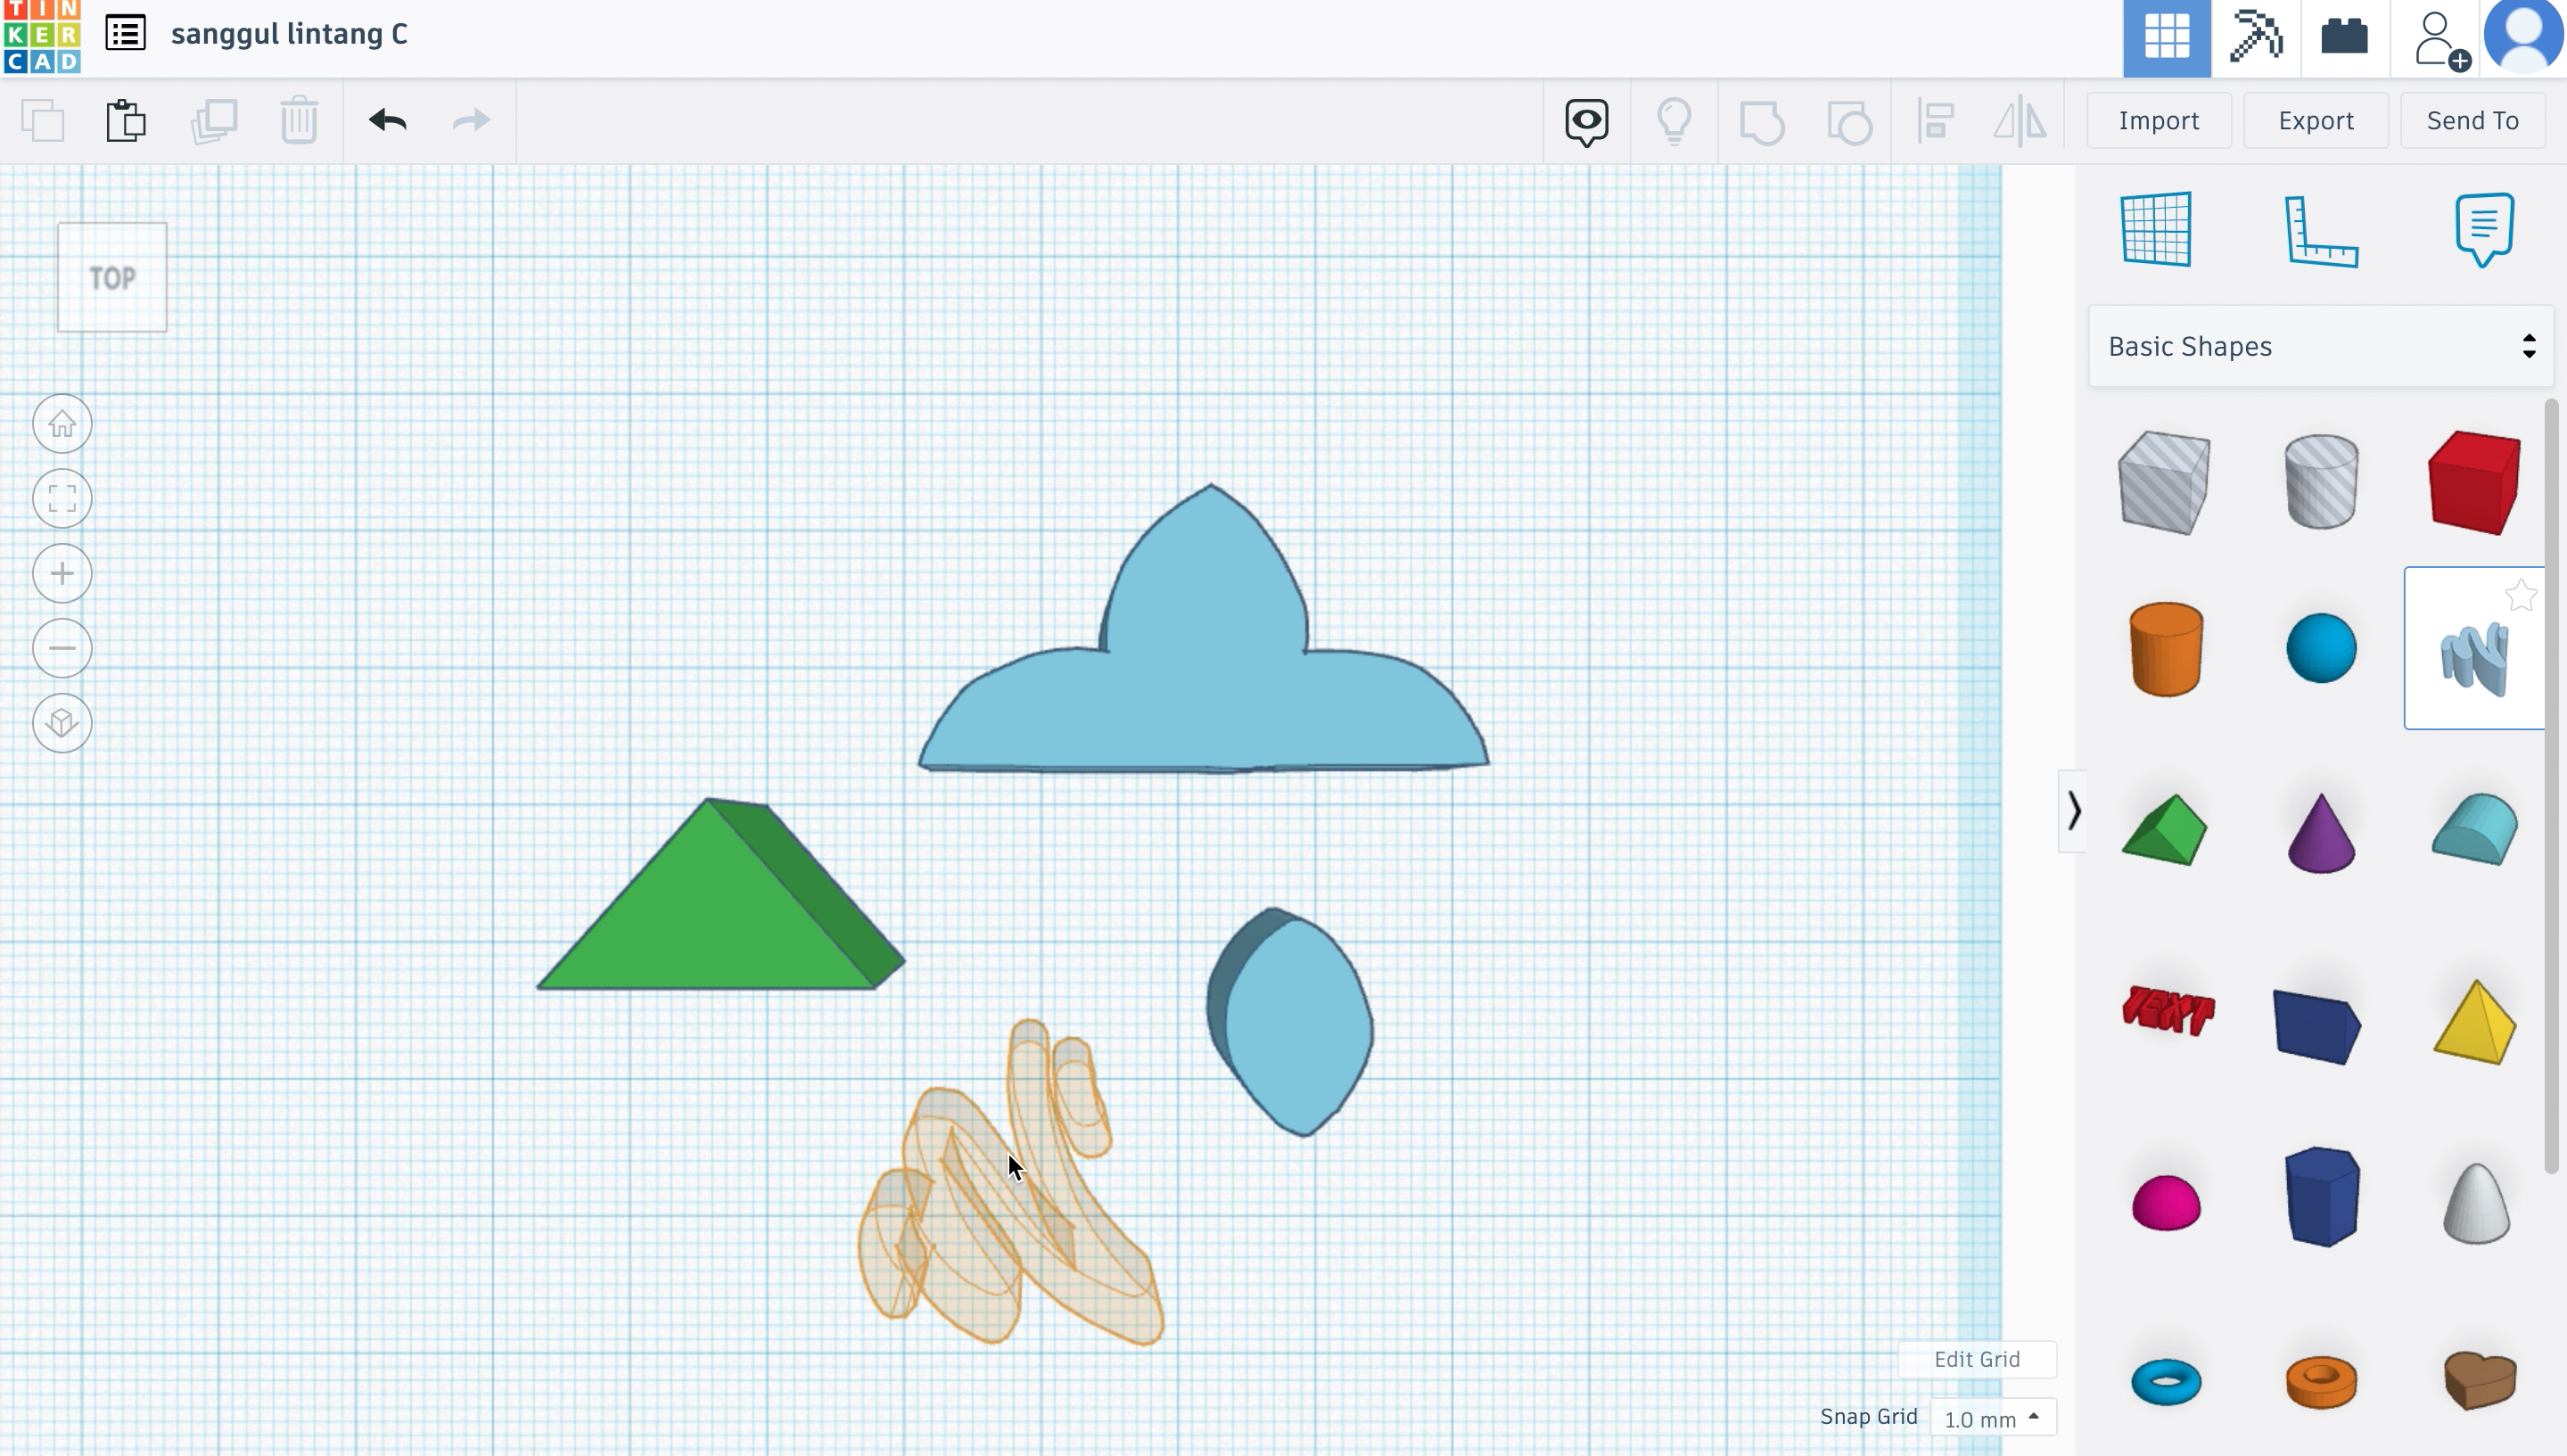
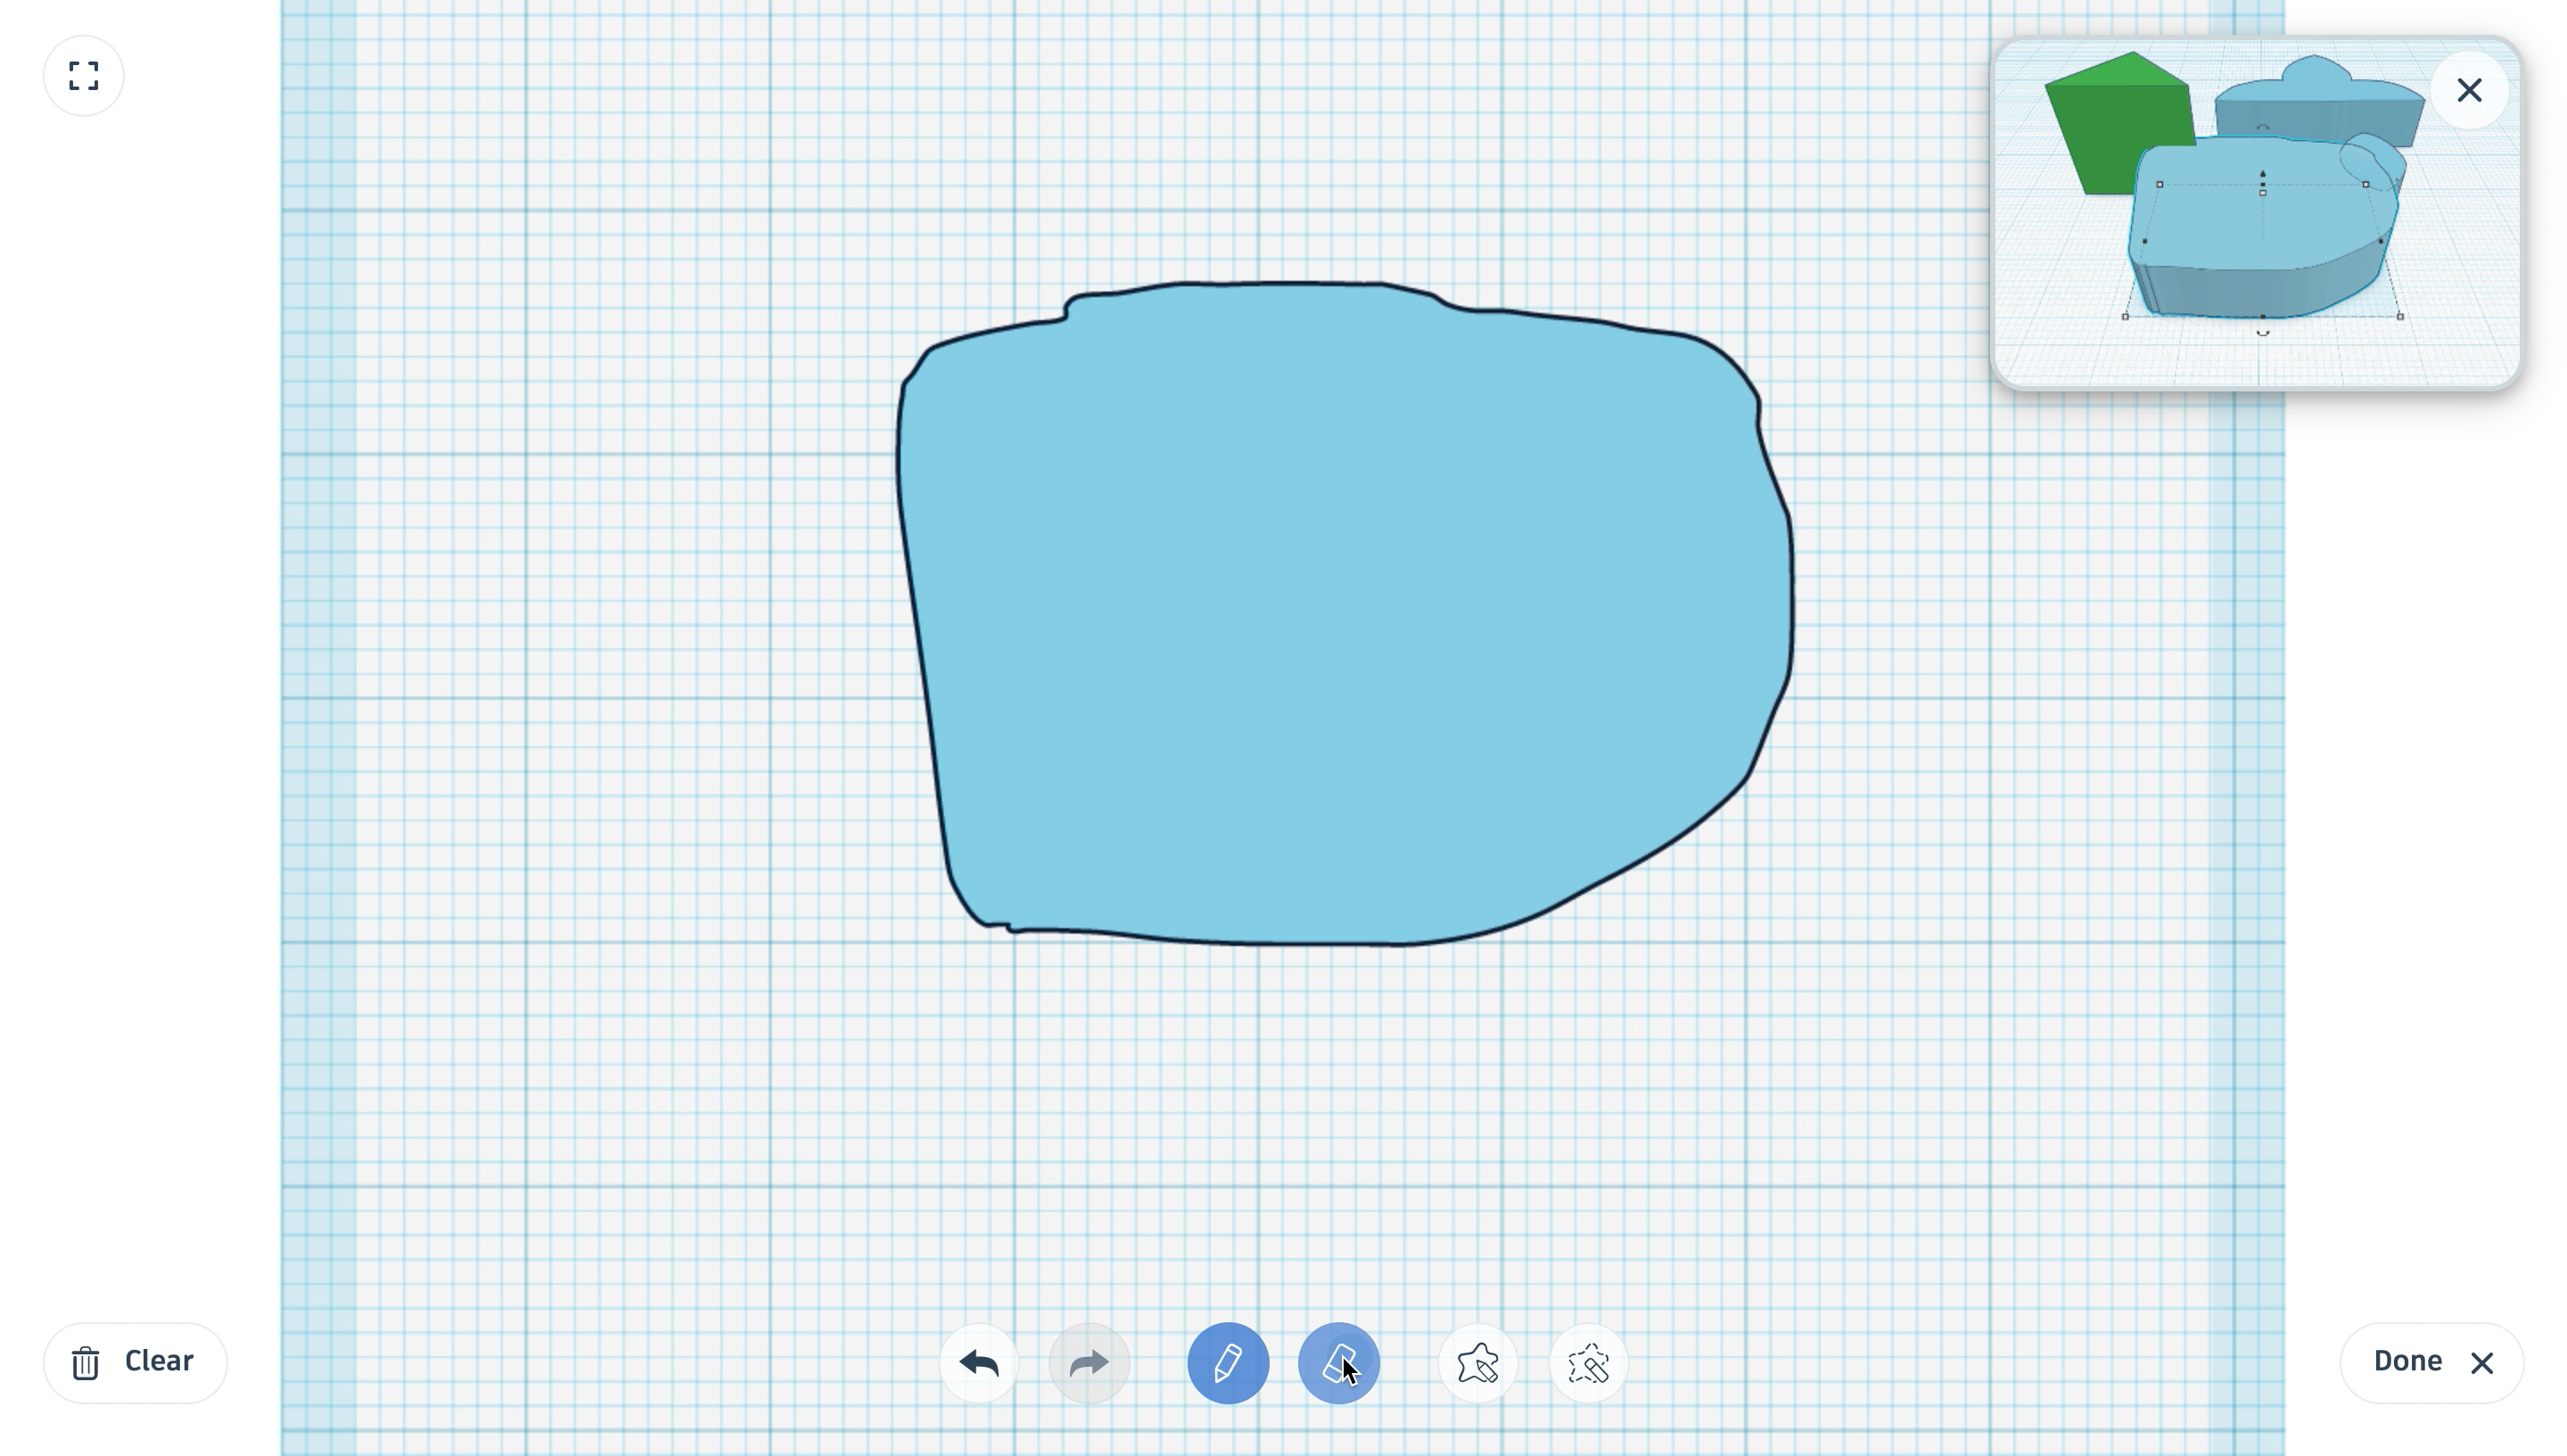
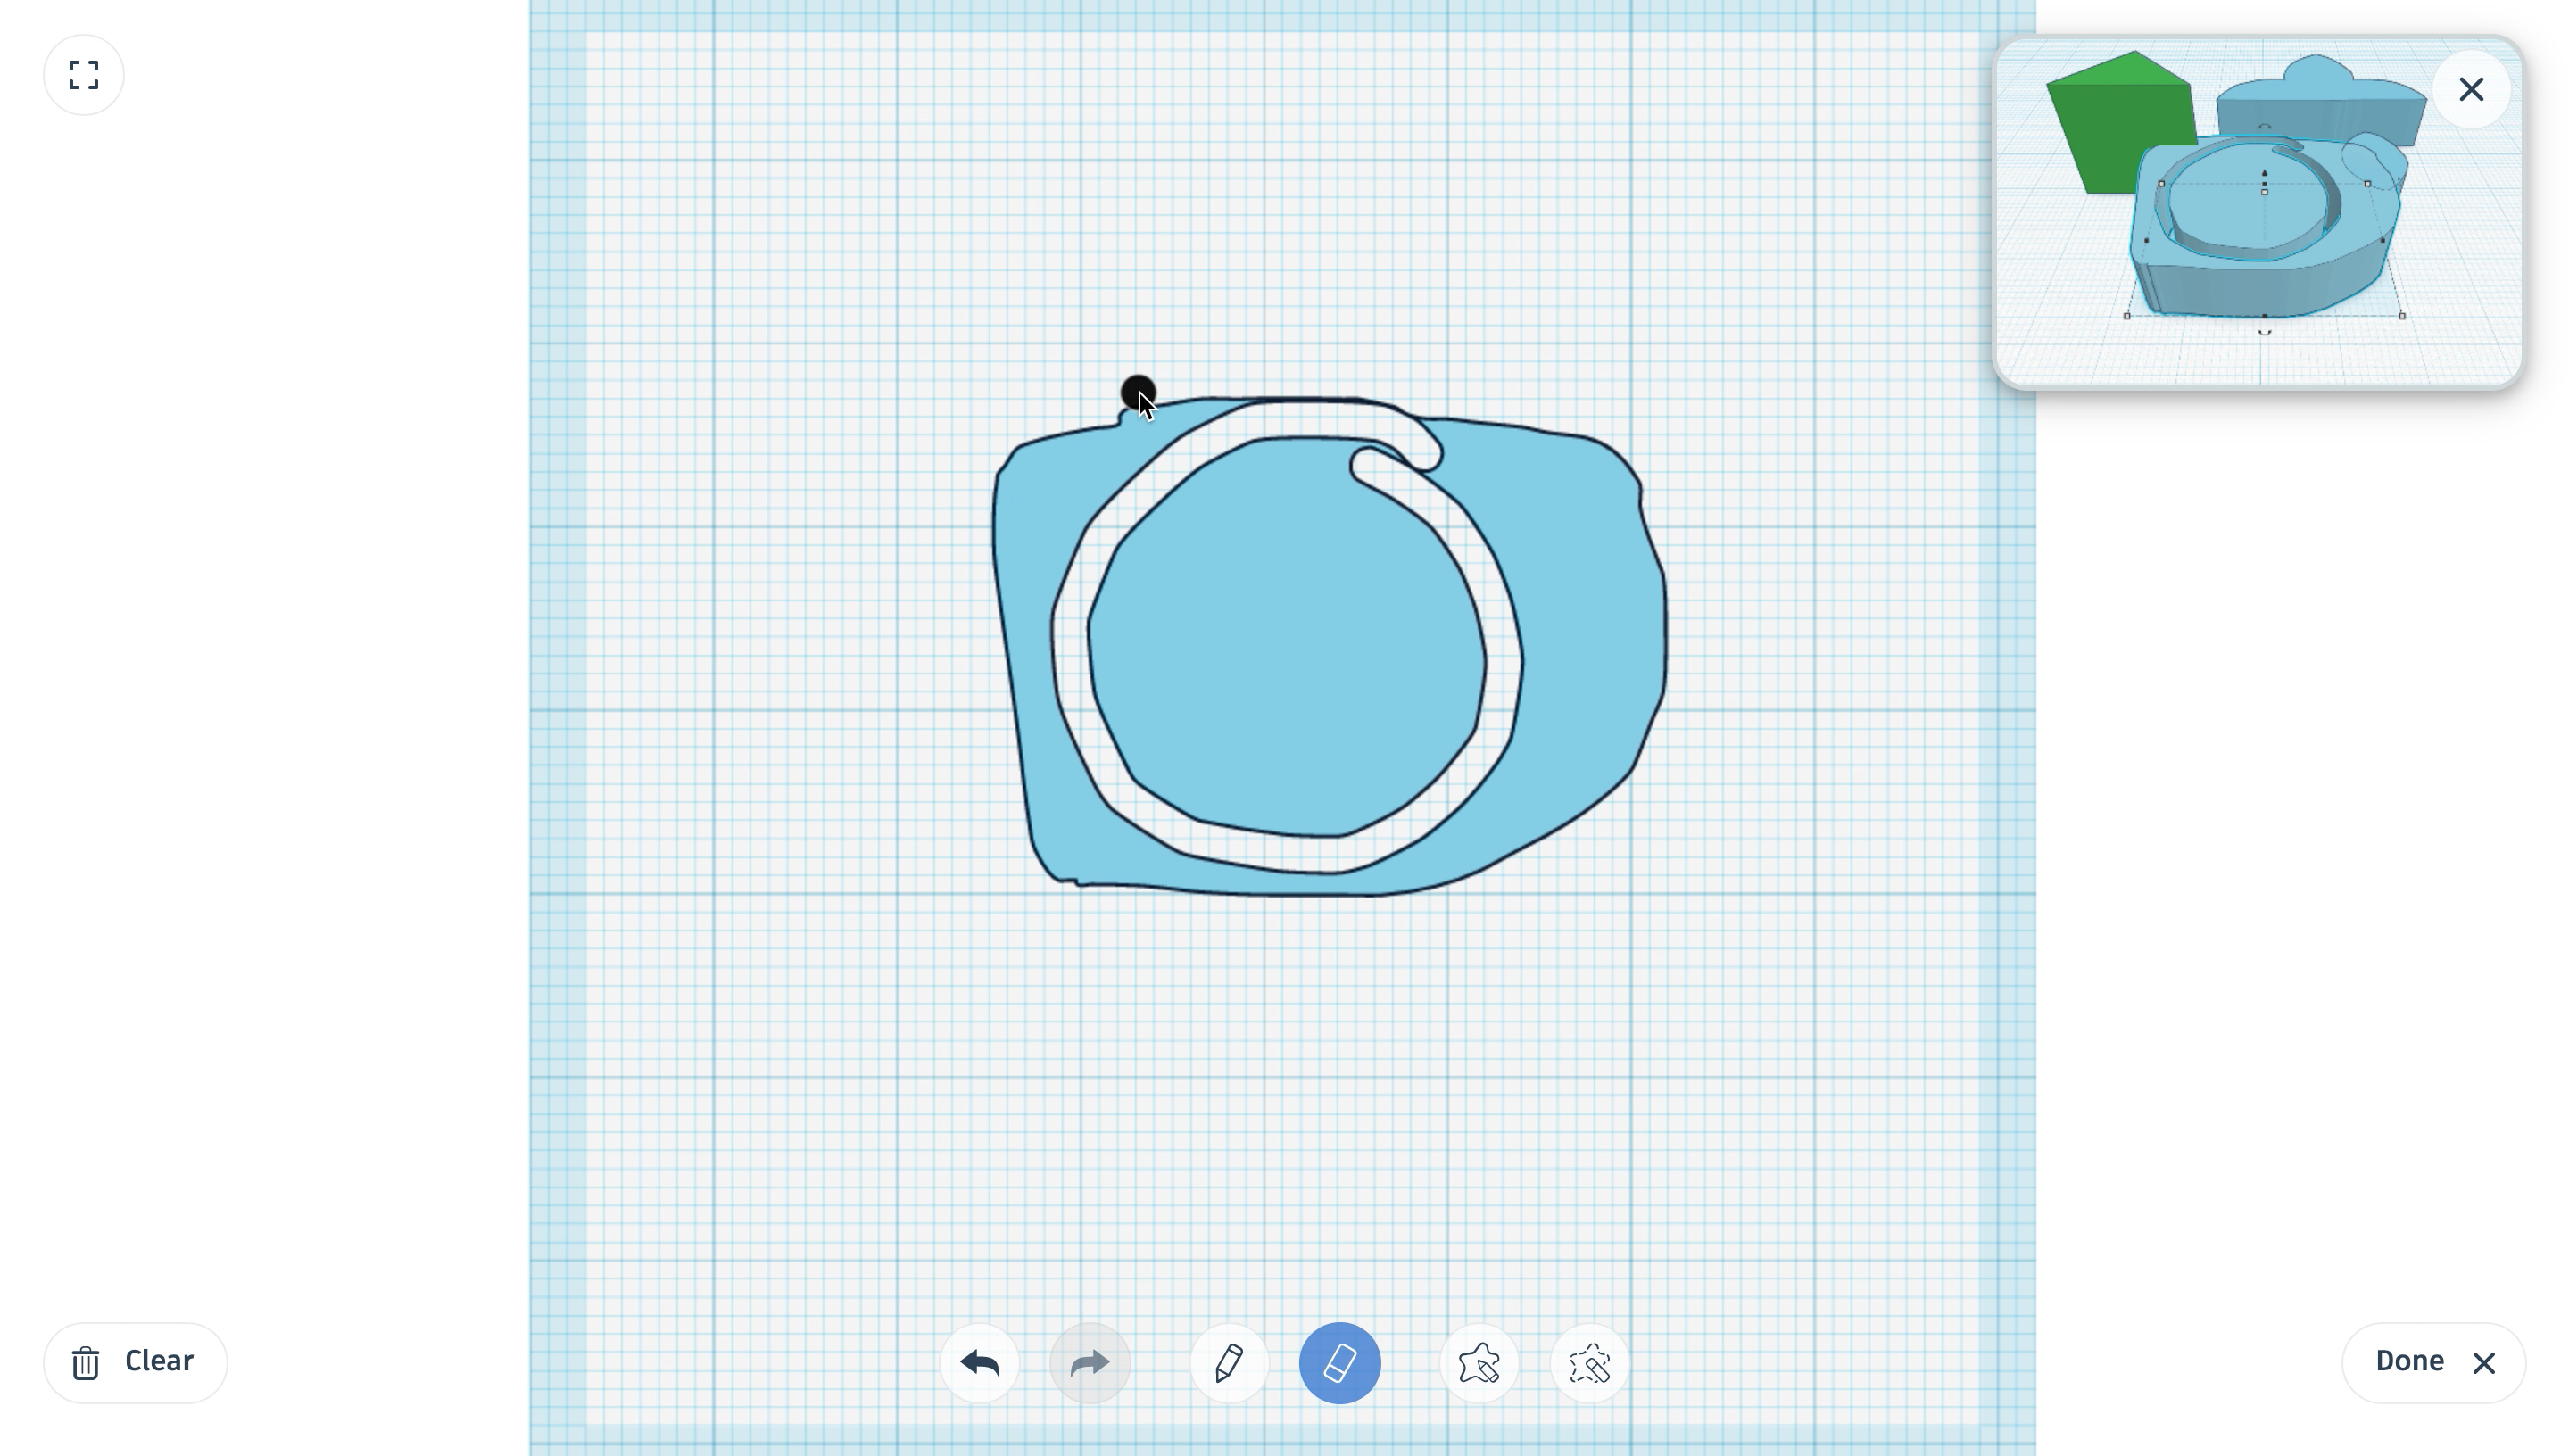
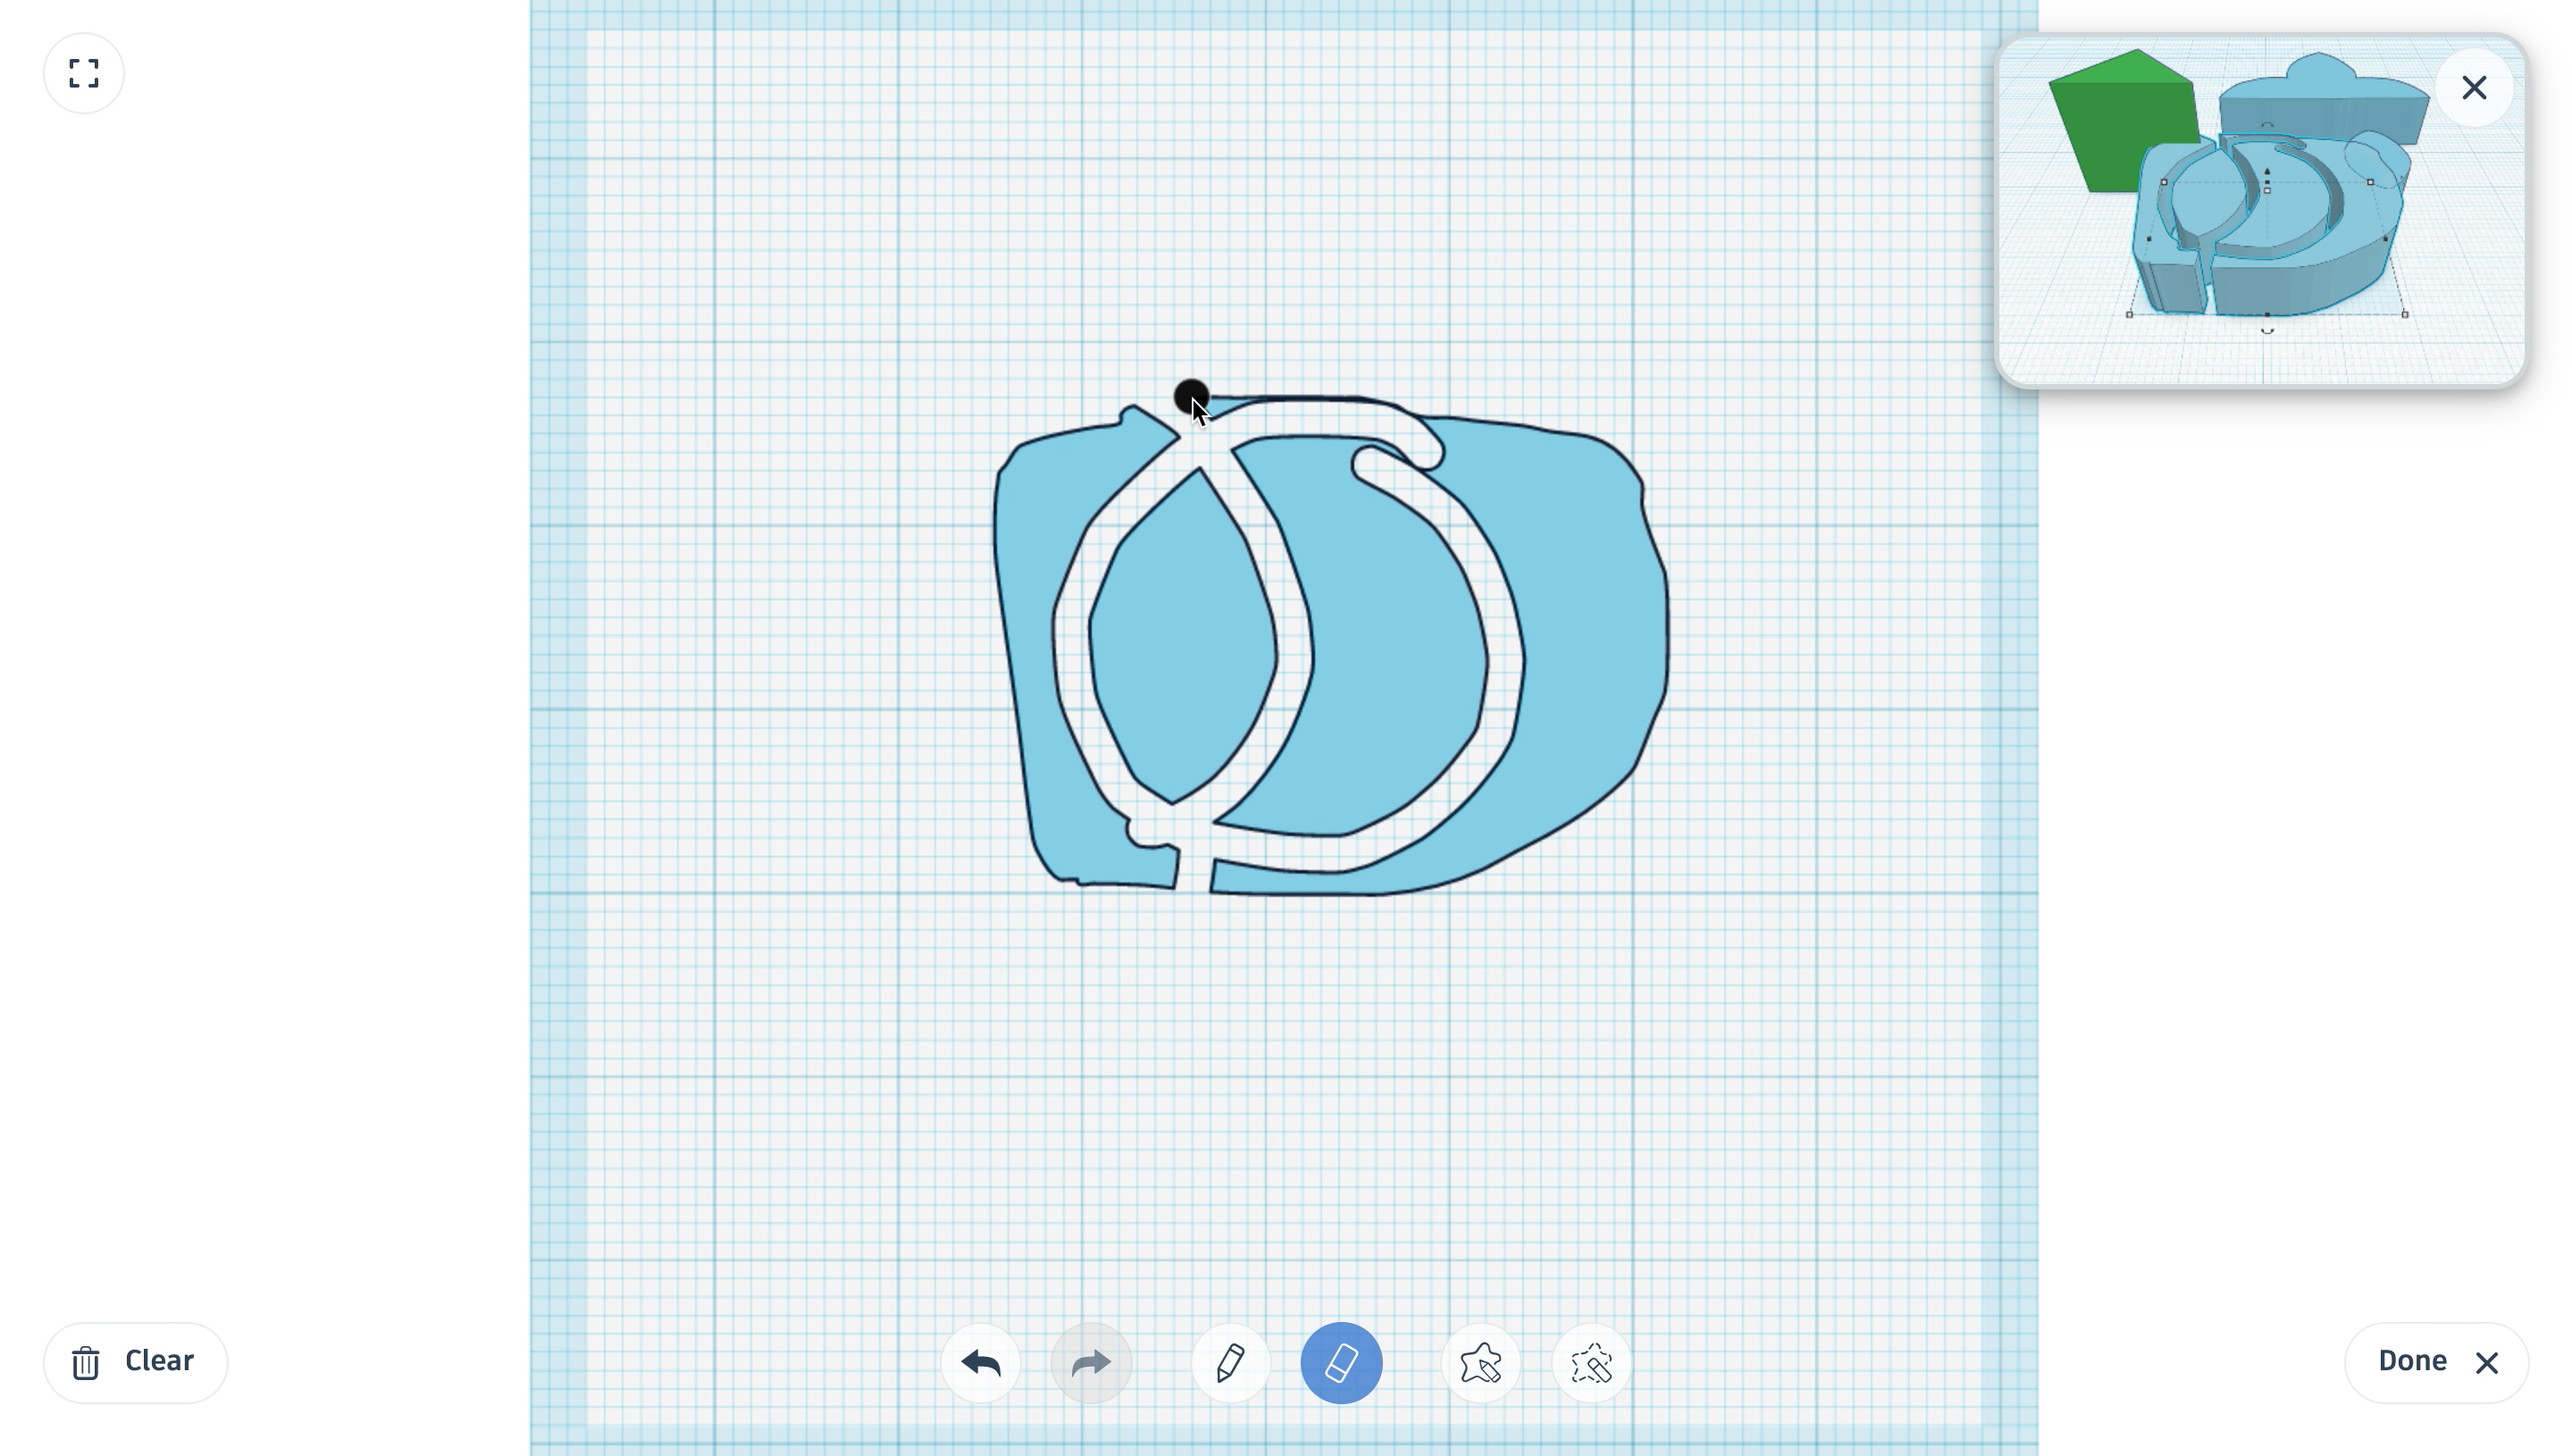
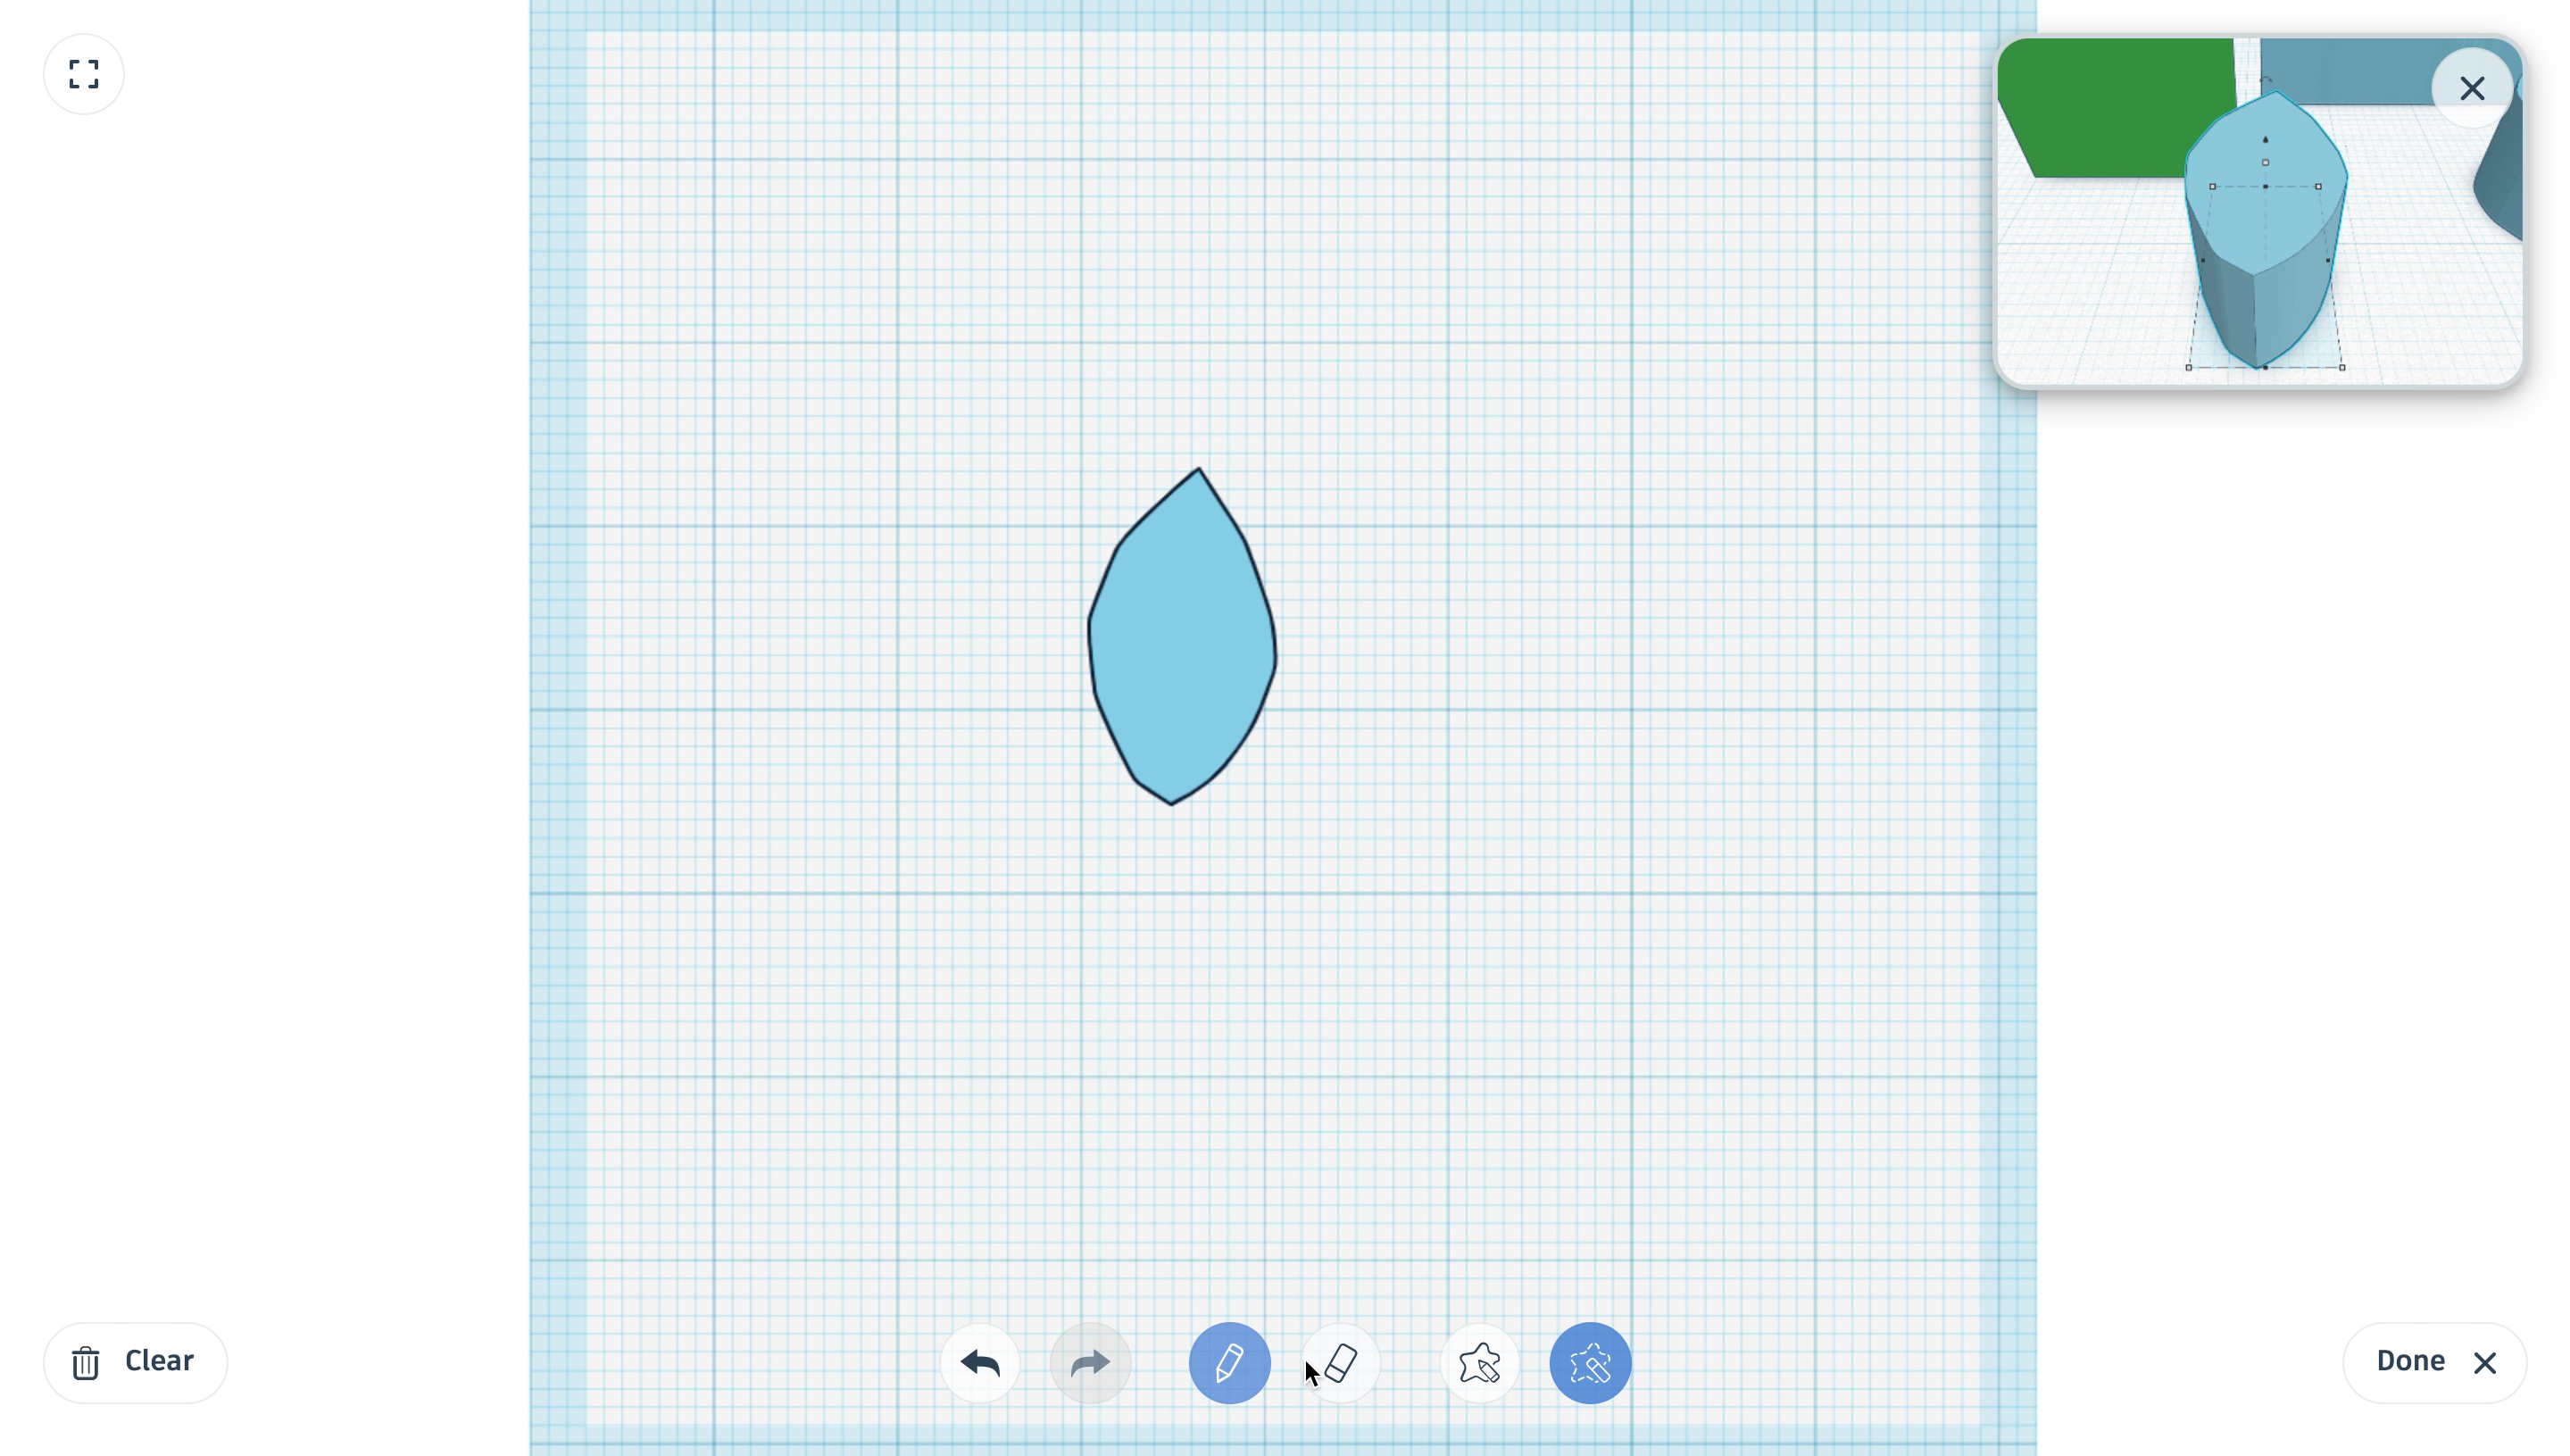
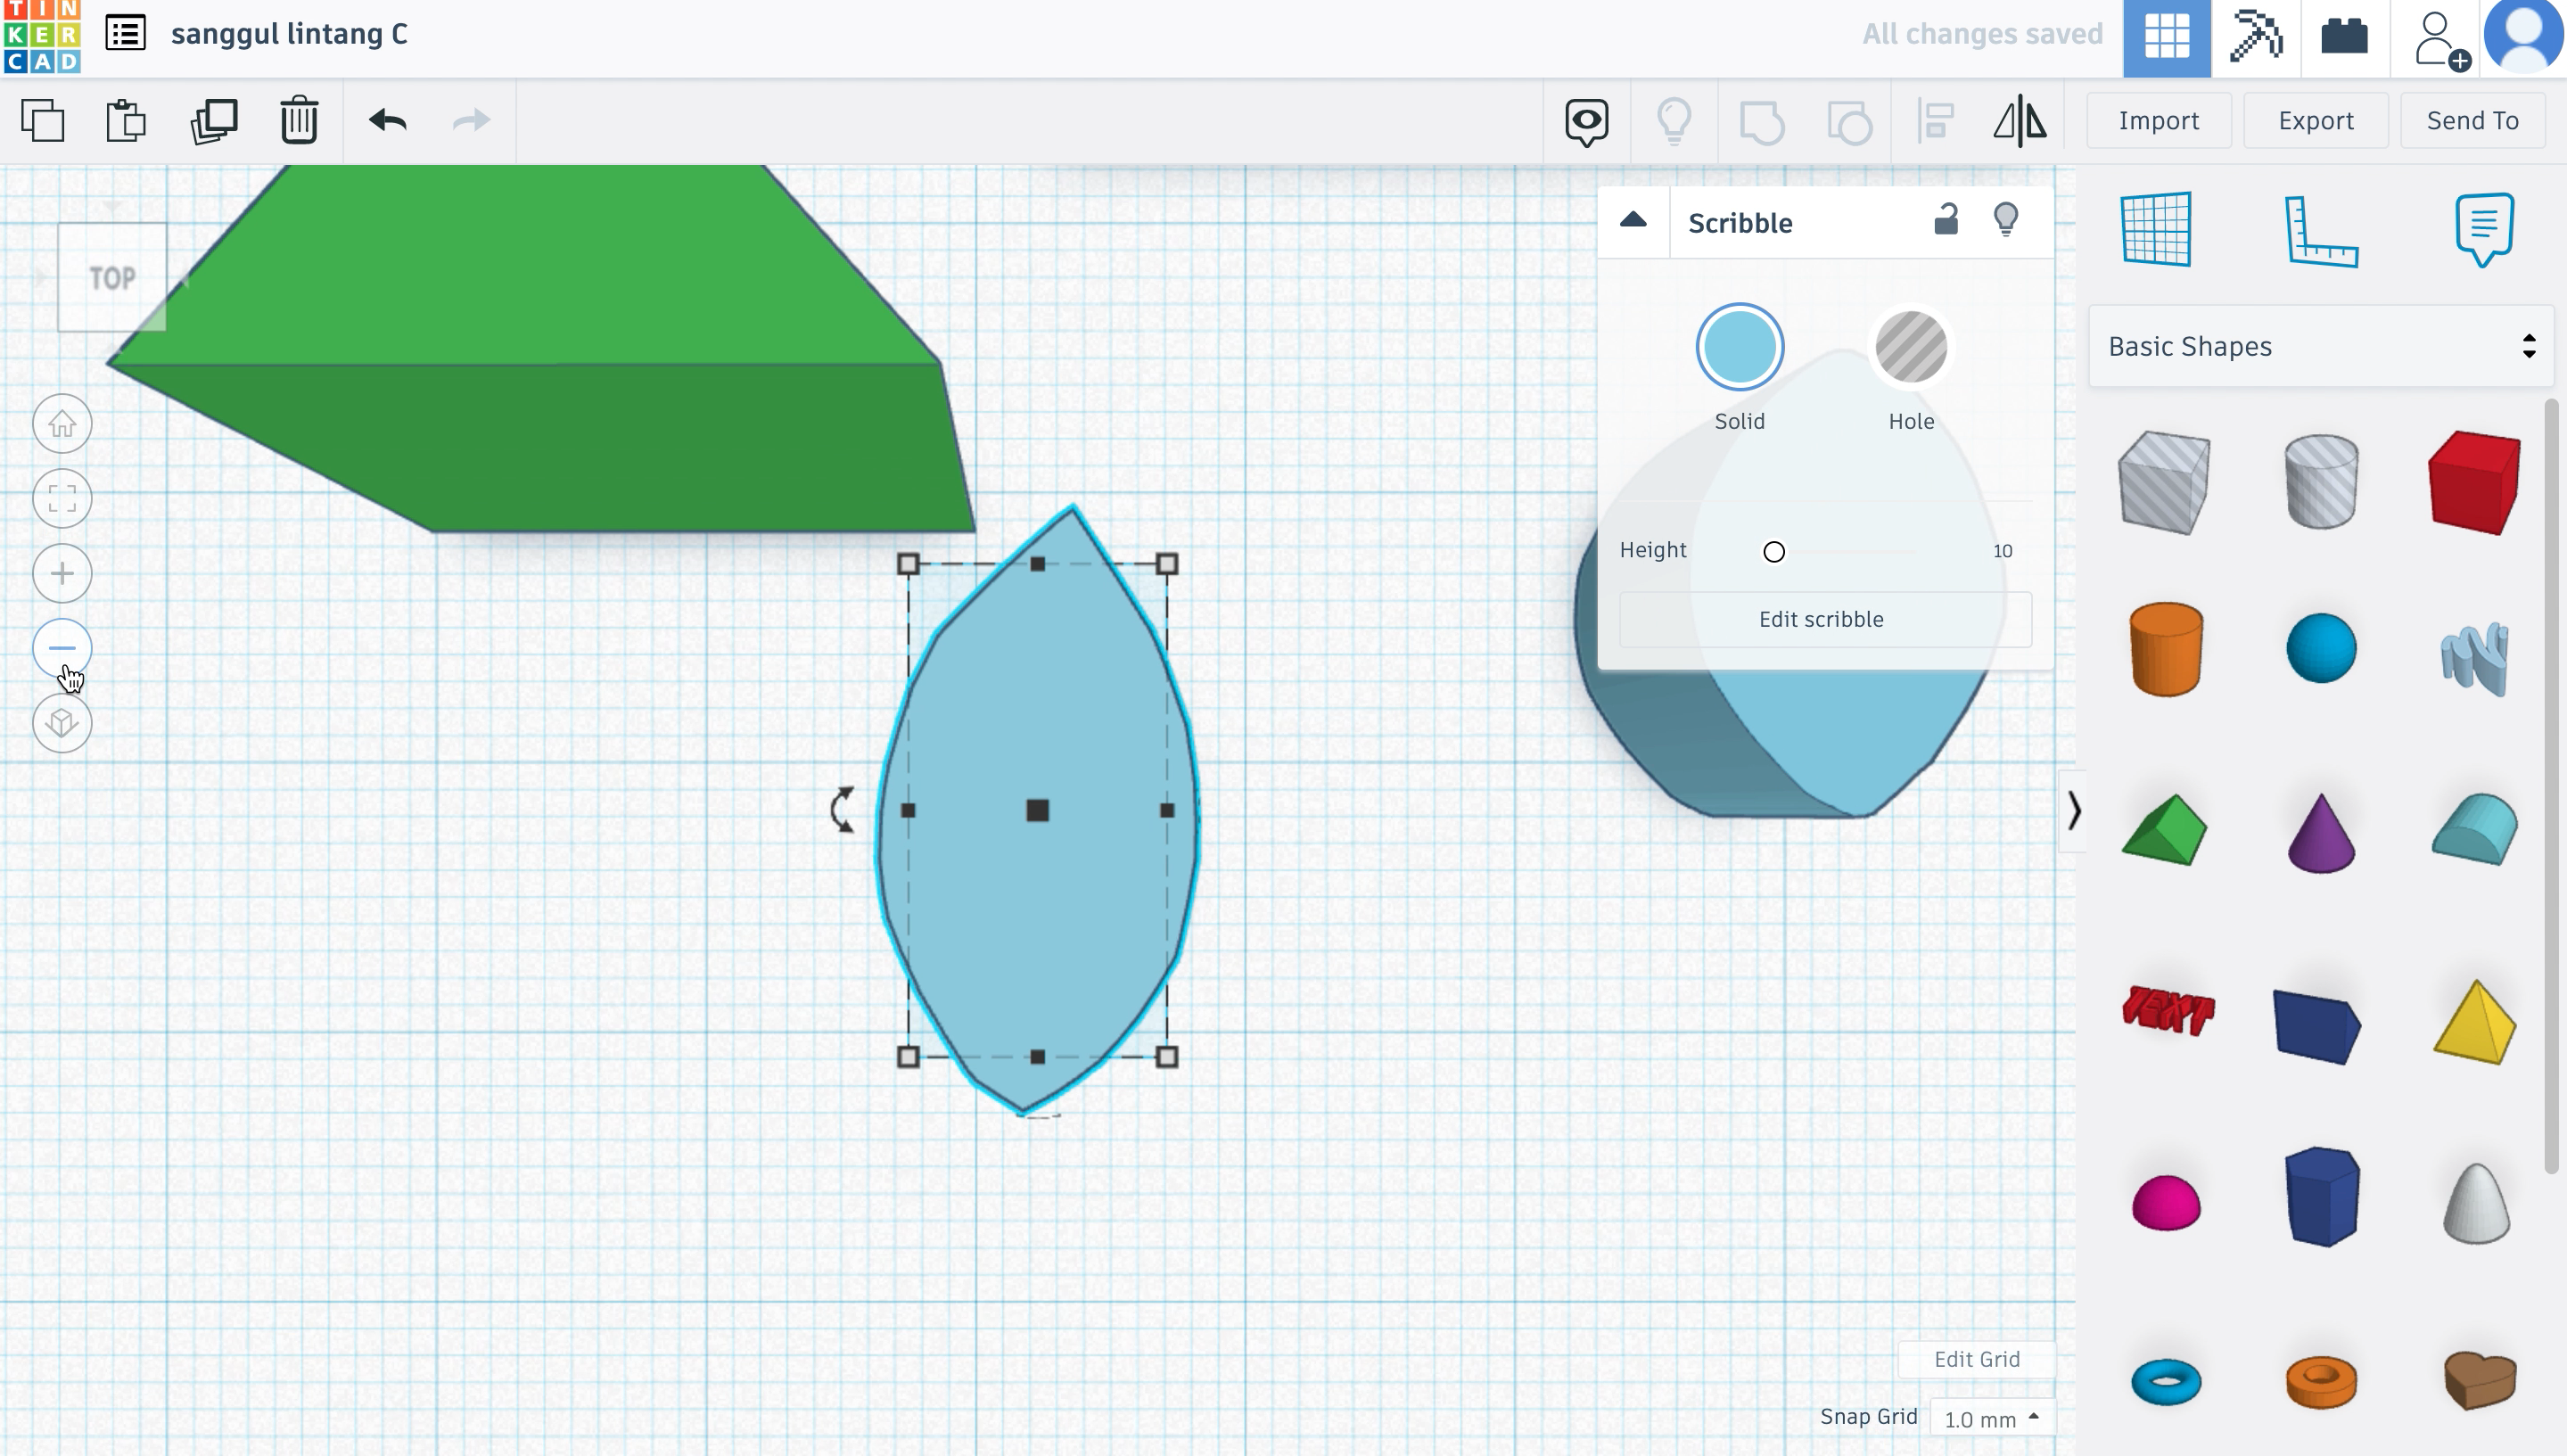
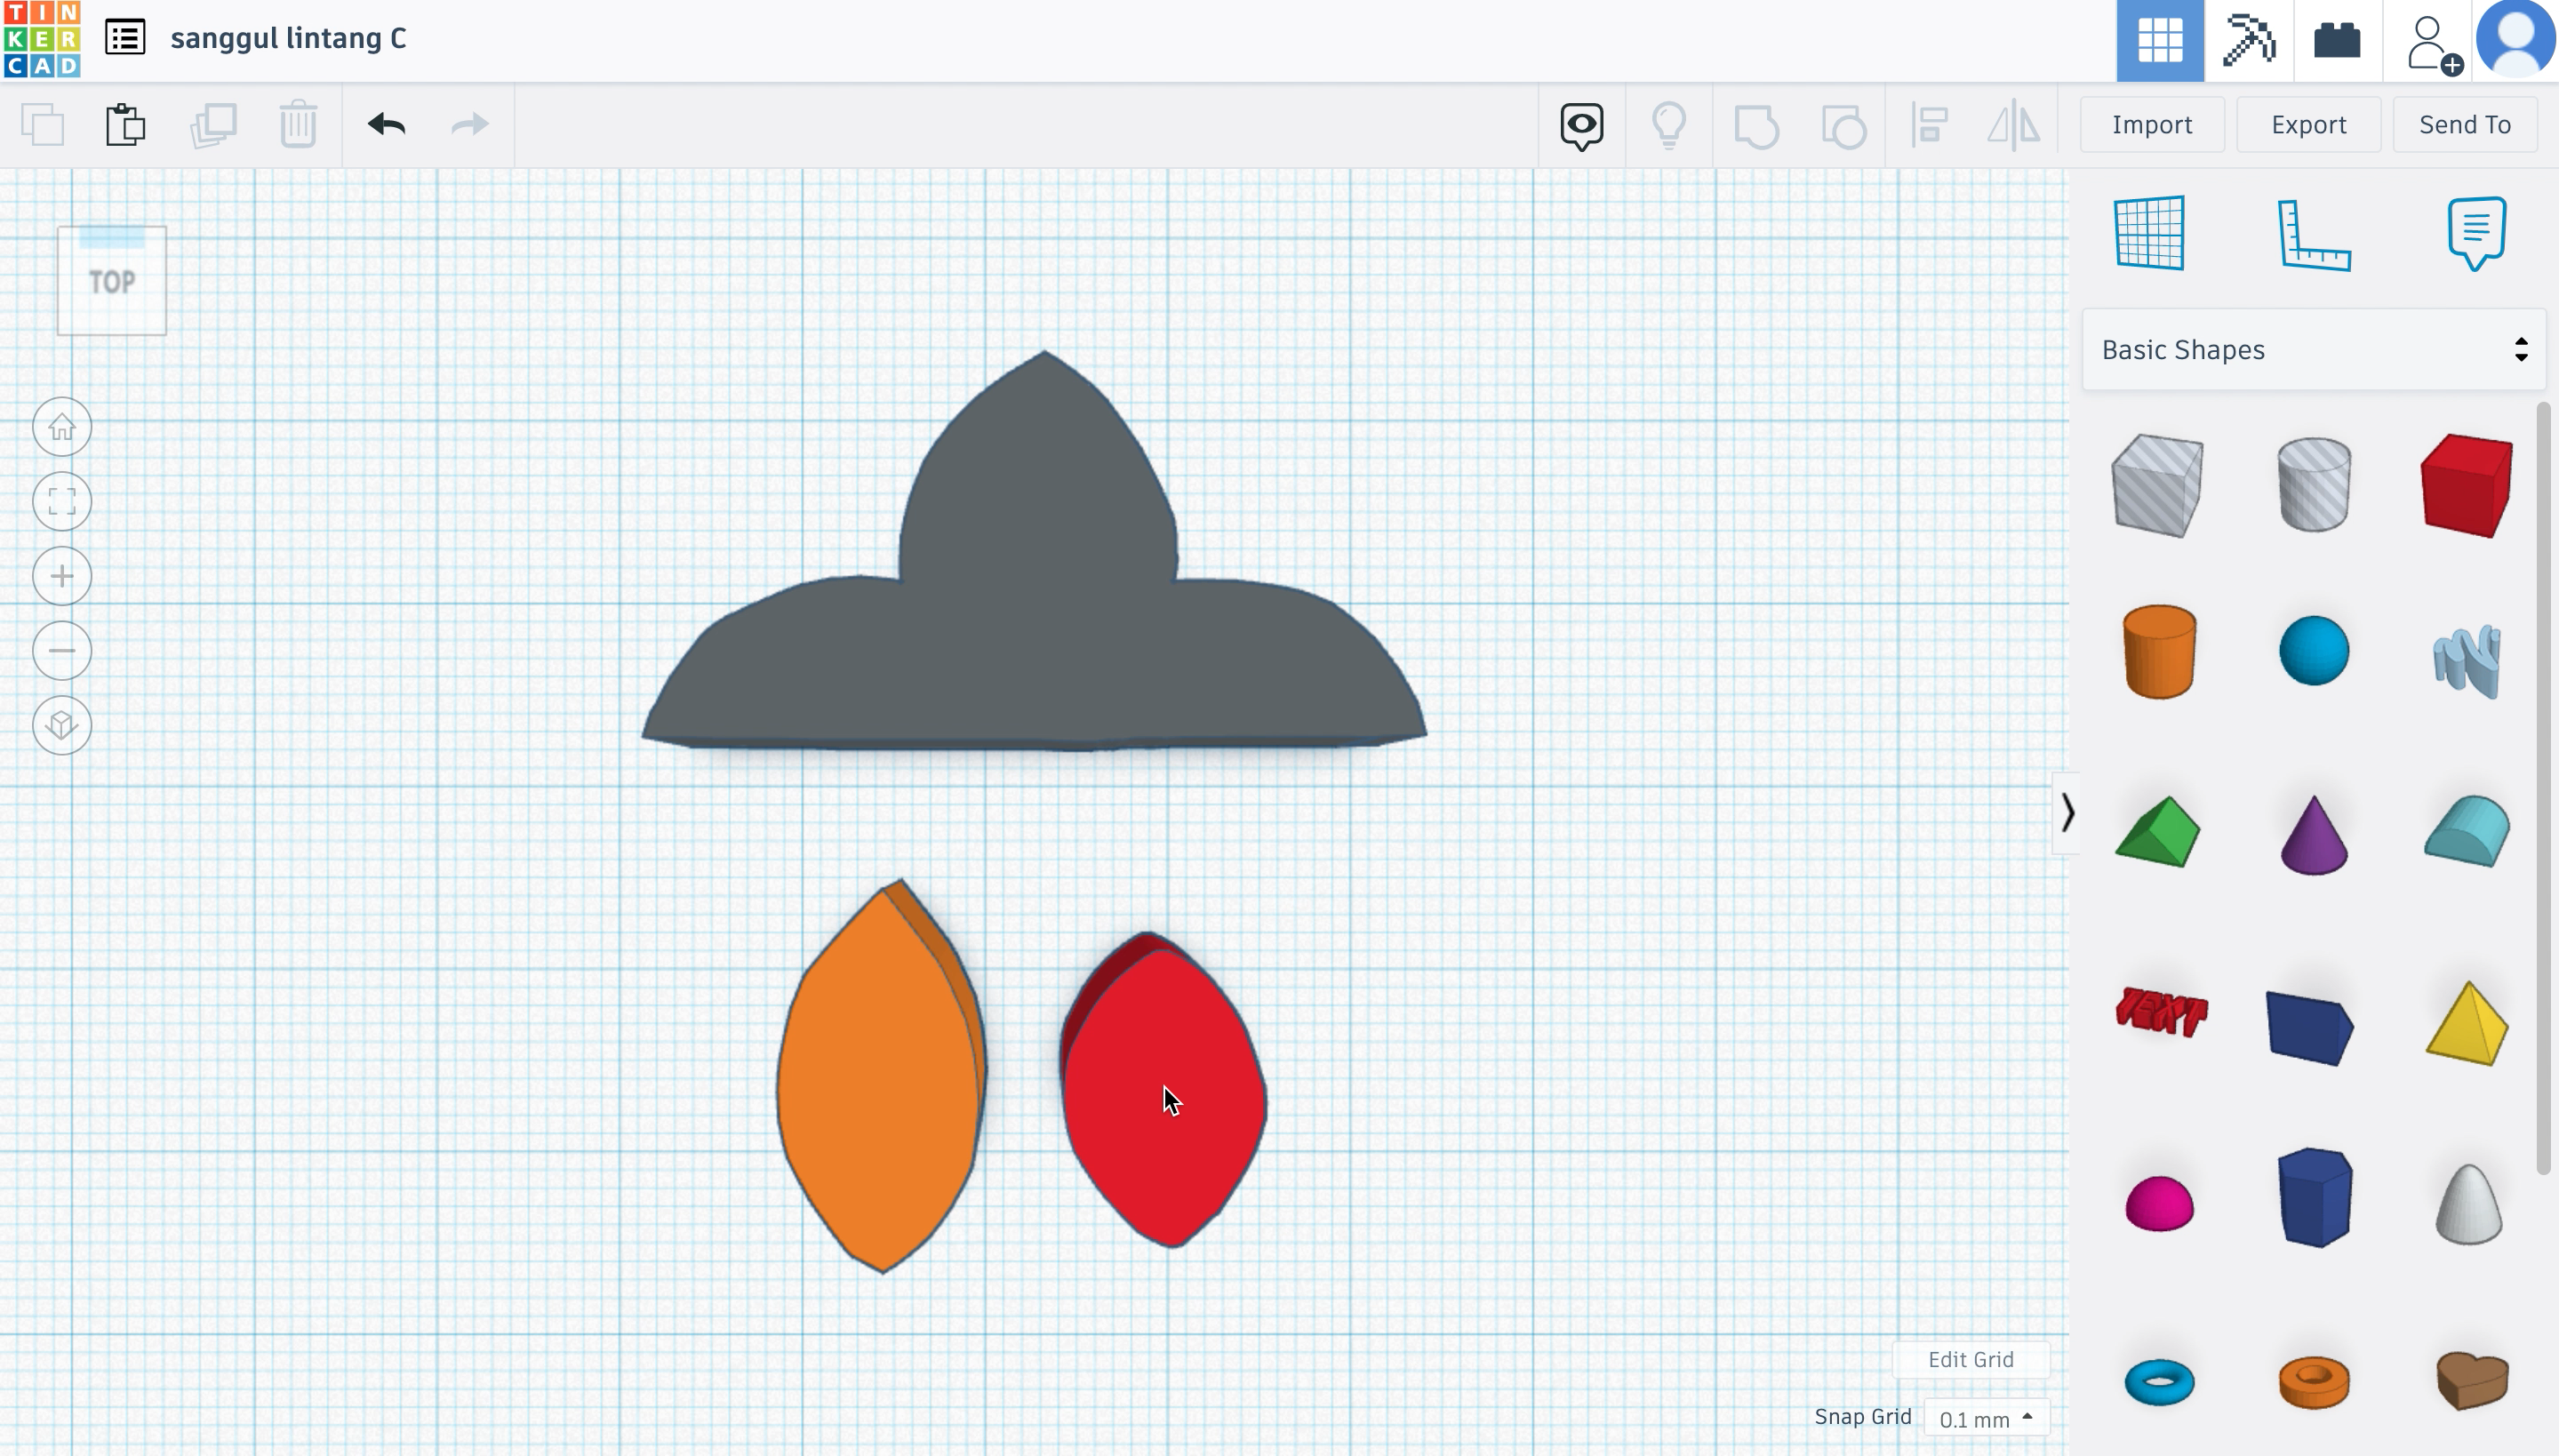
Sanggul Lintang C
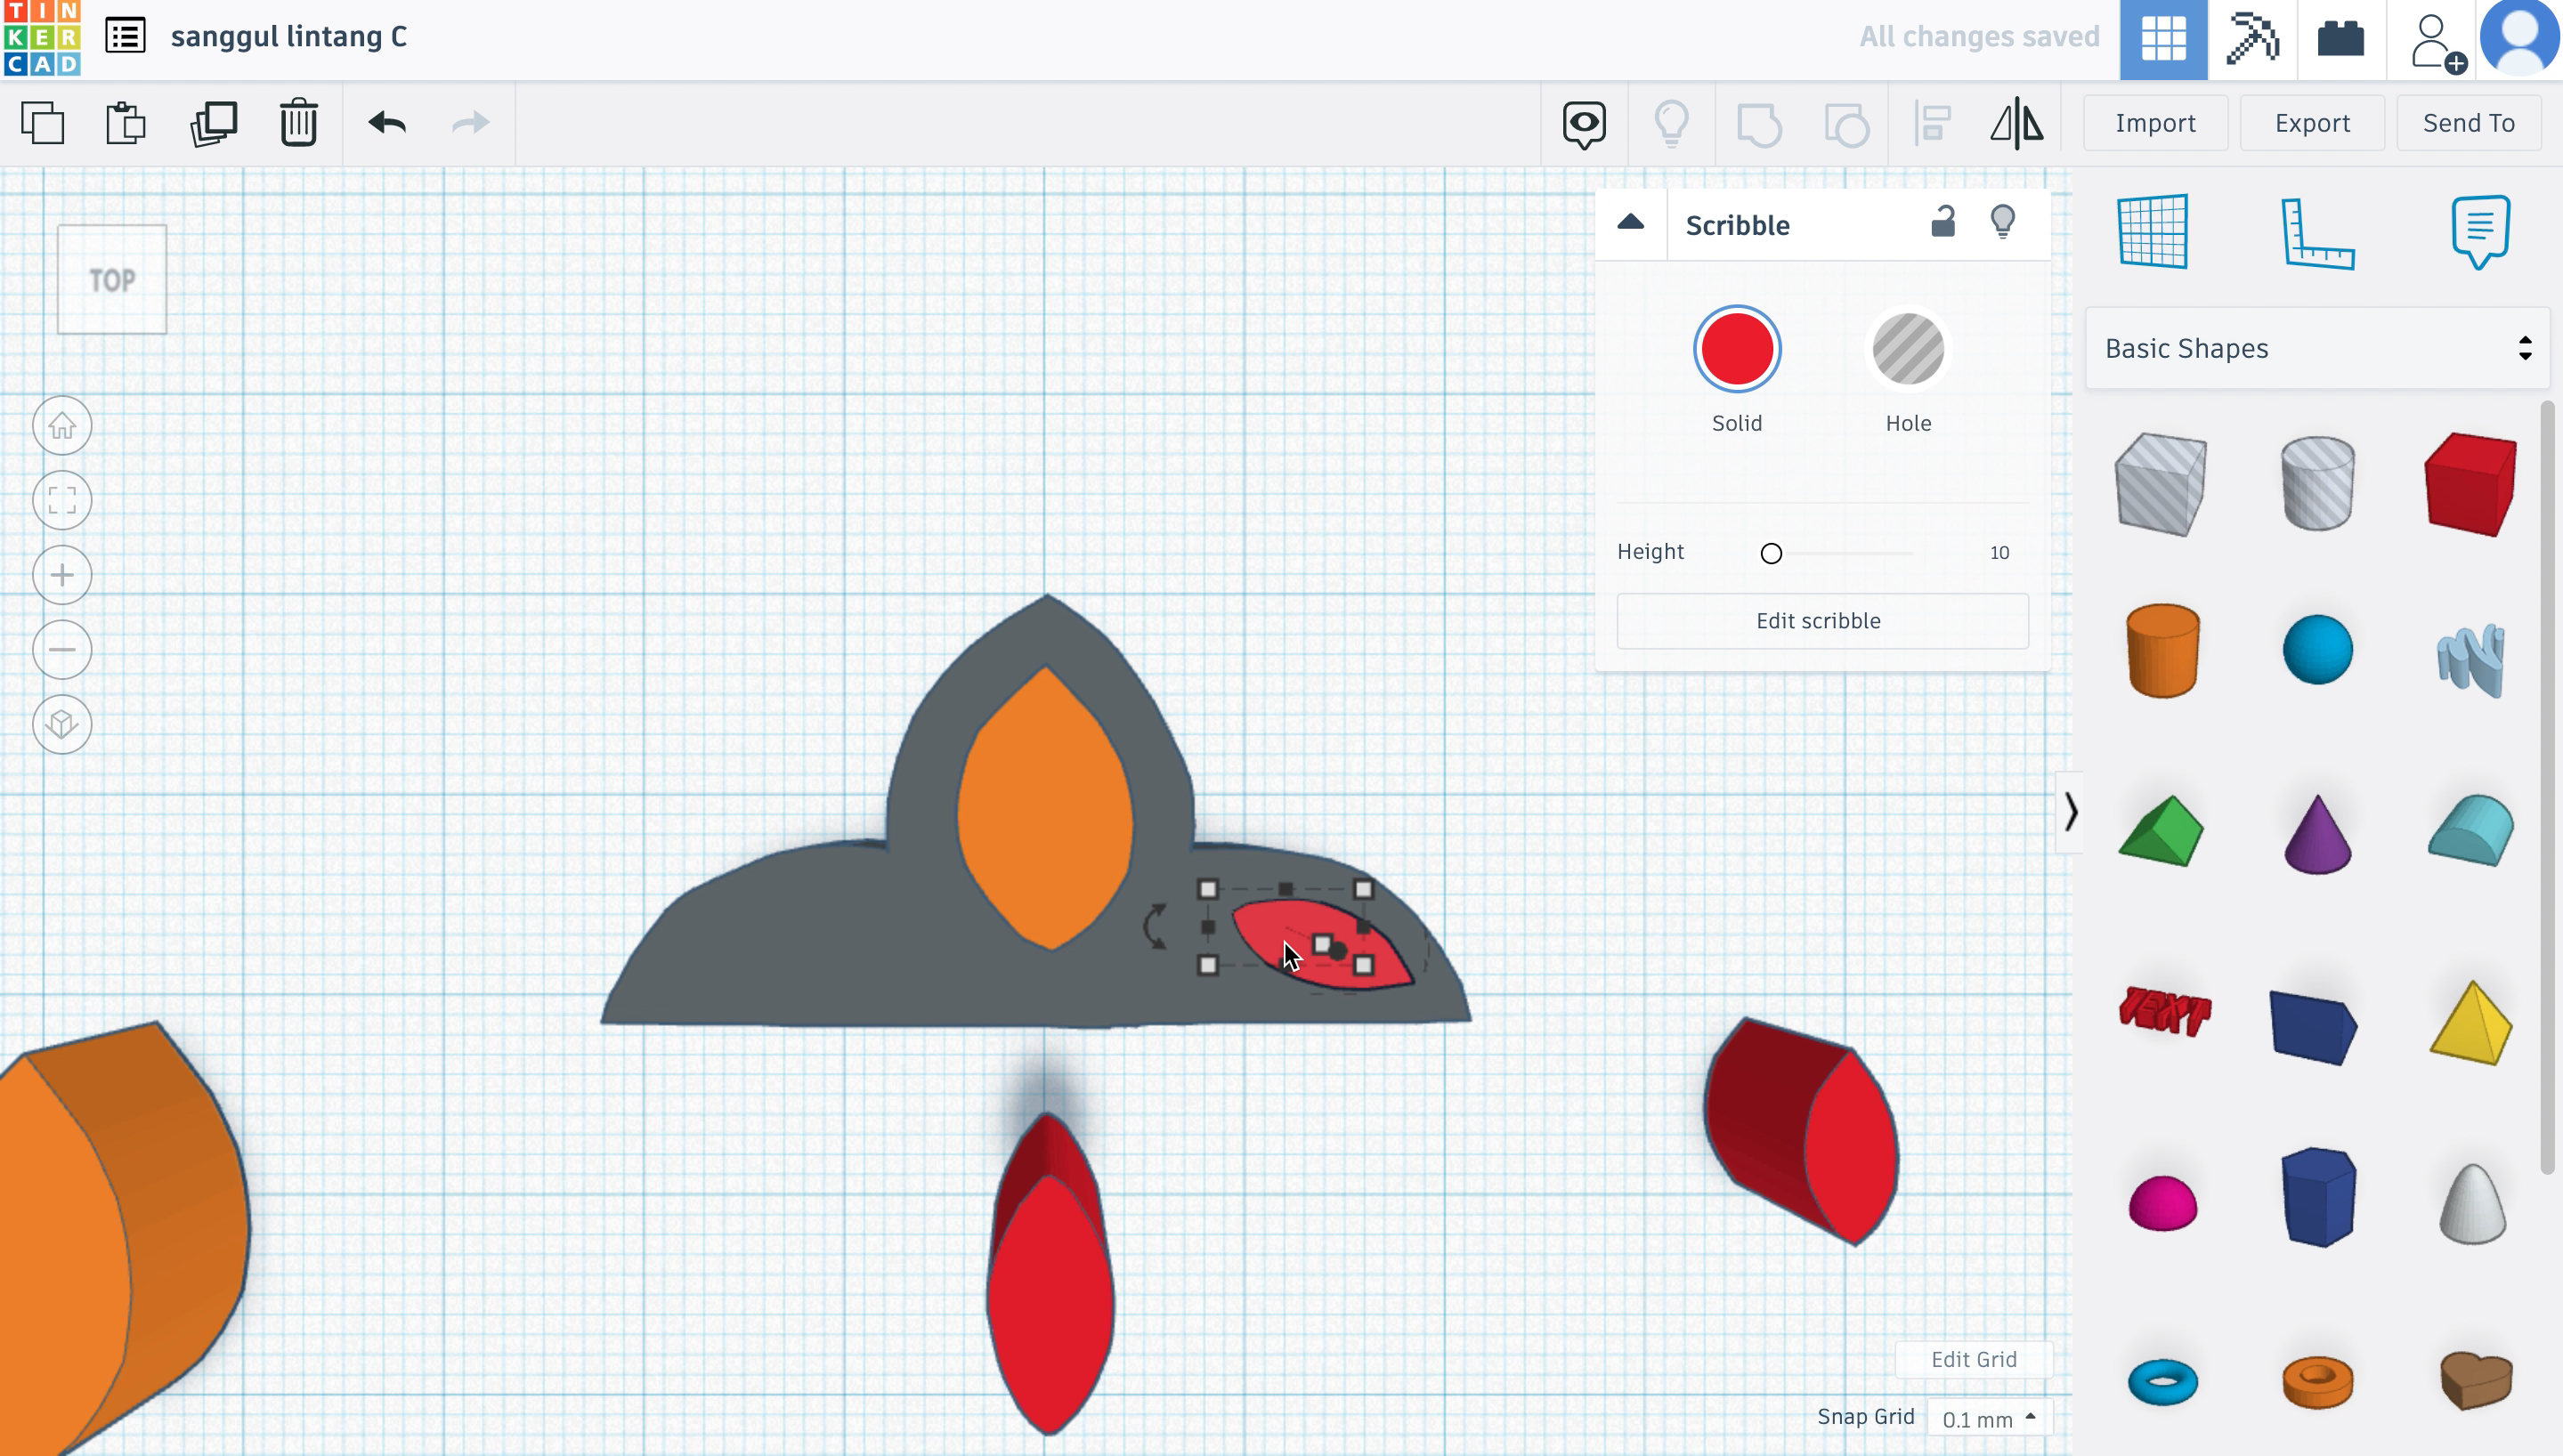
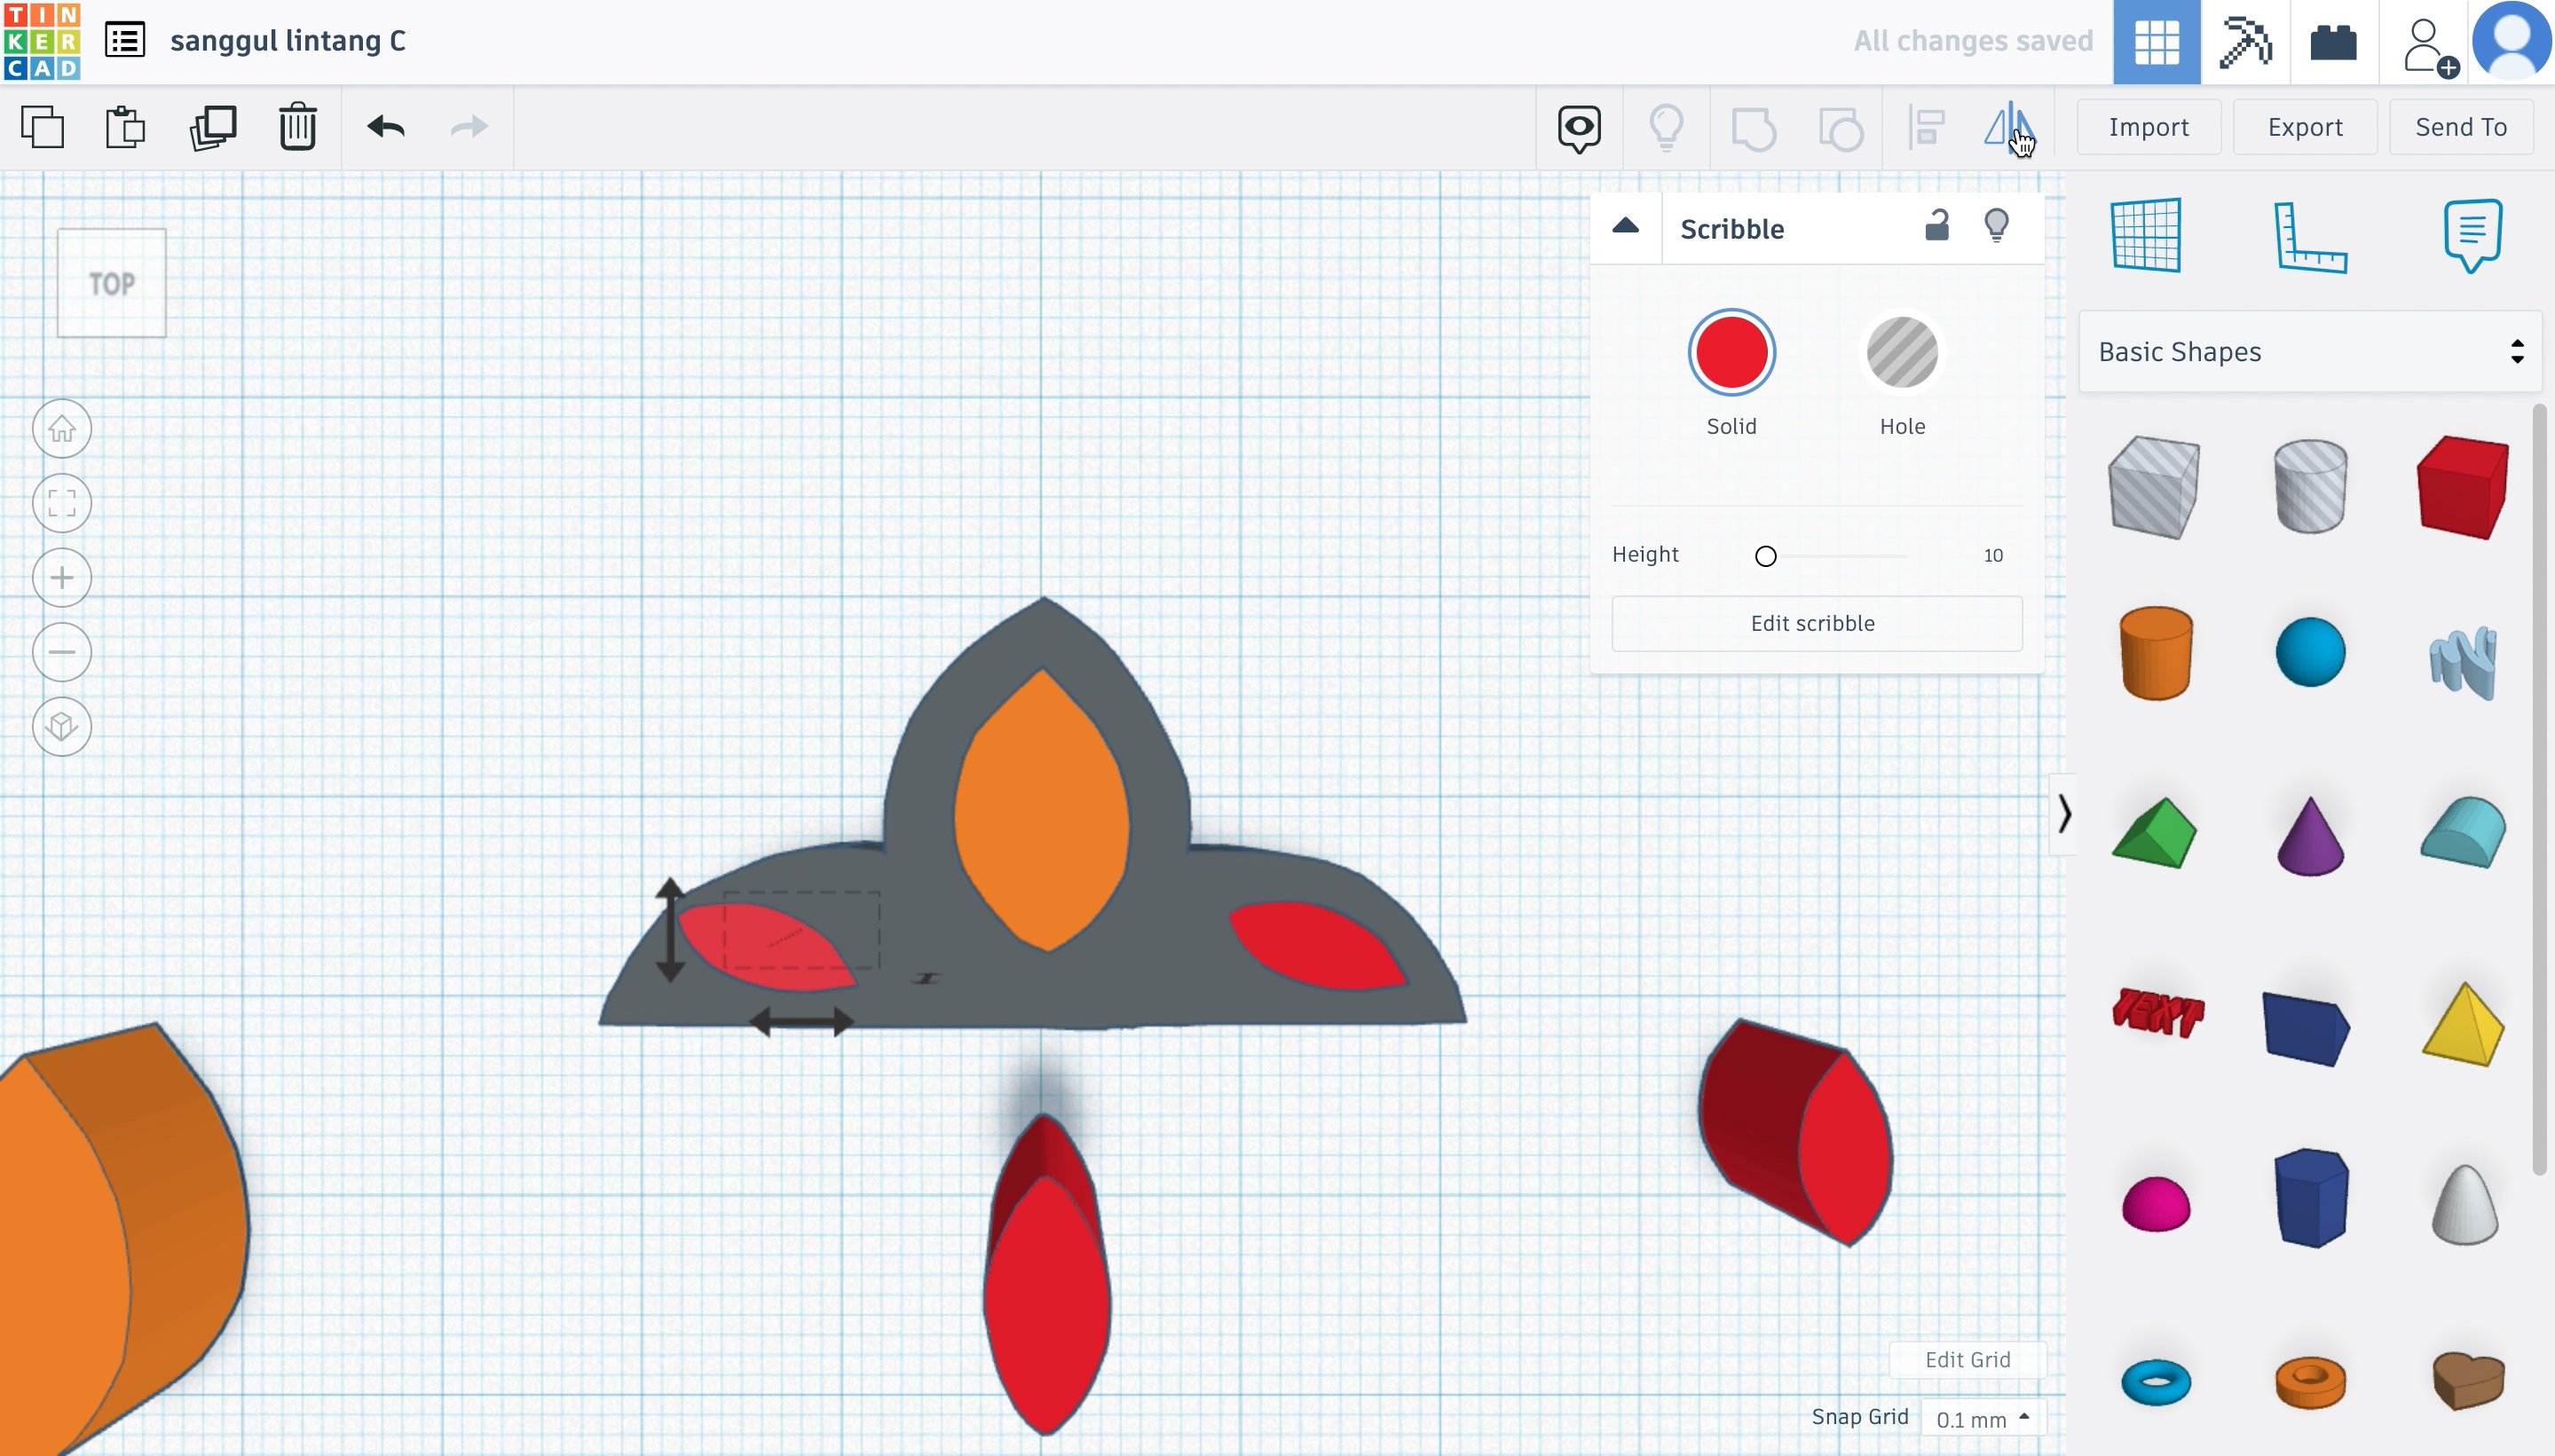

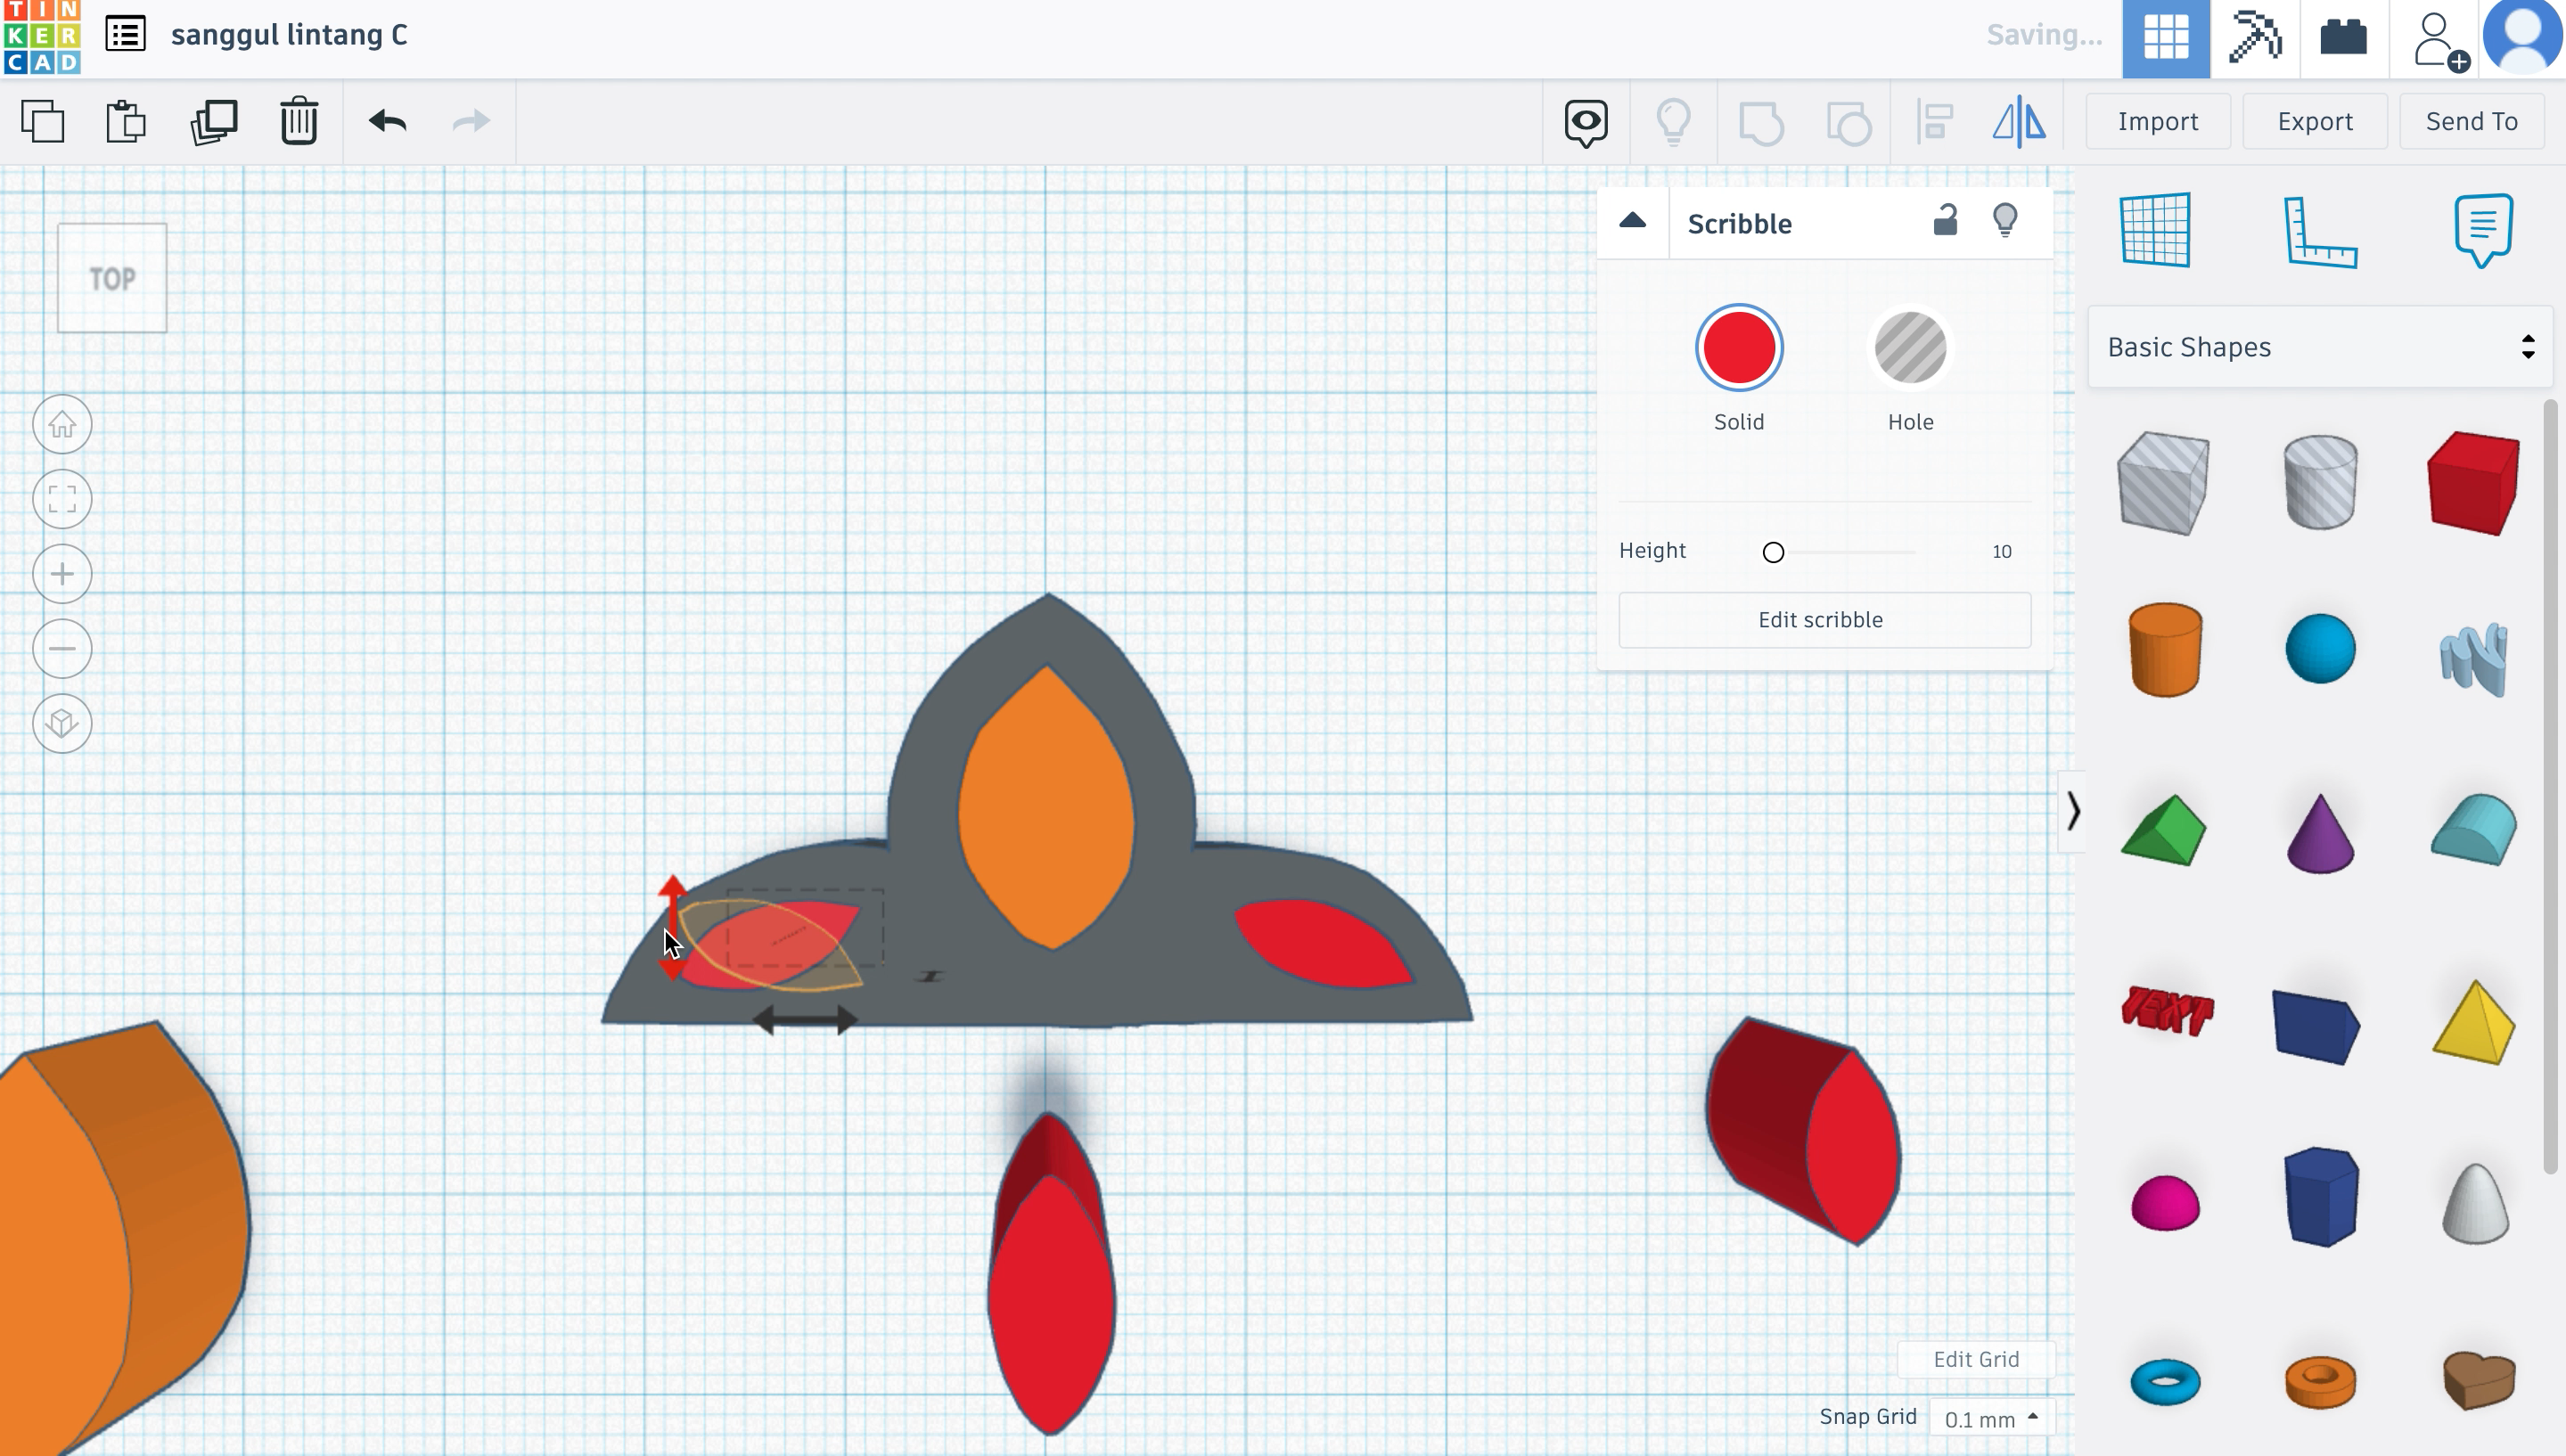
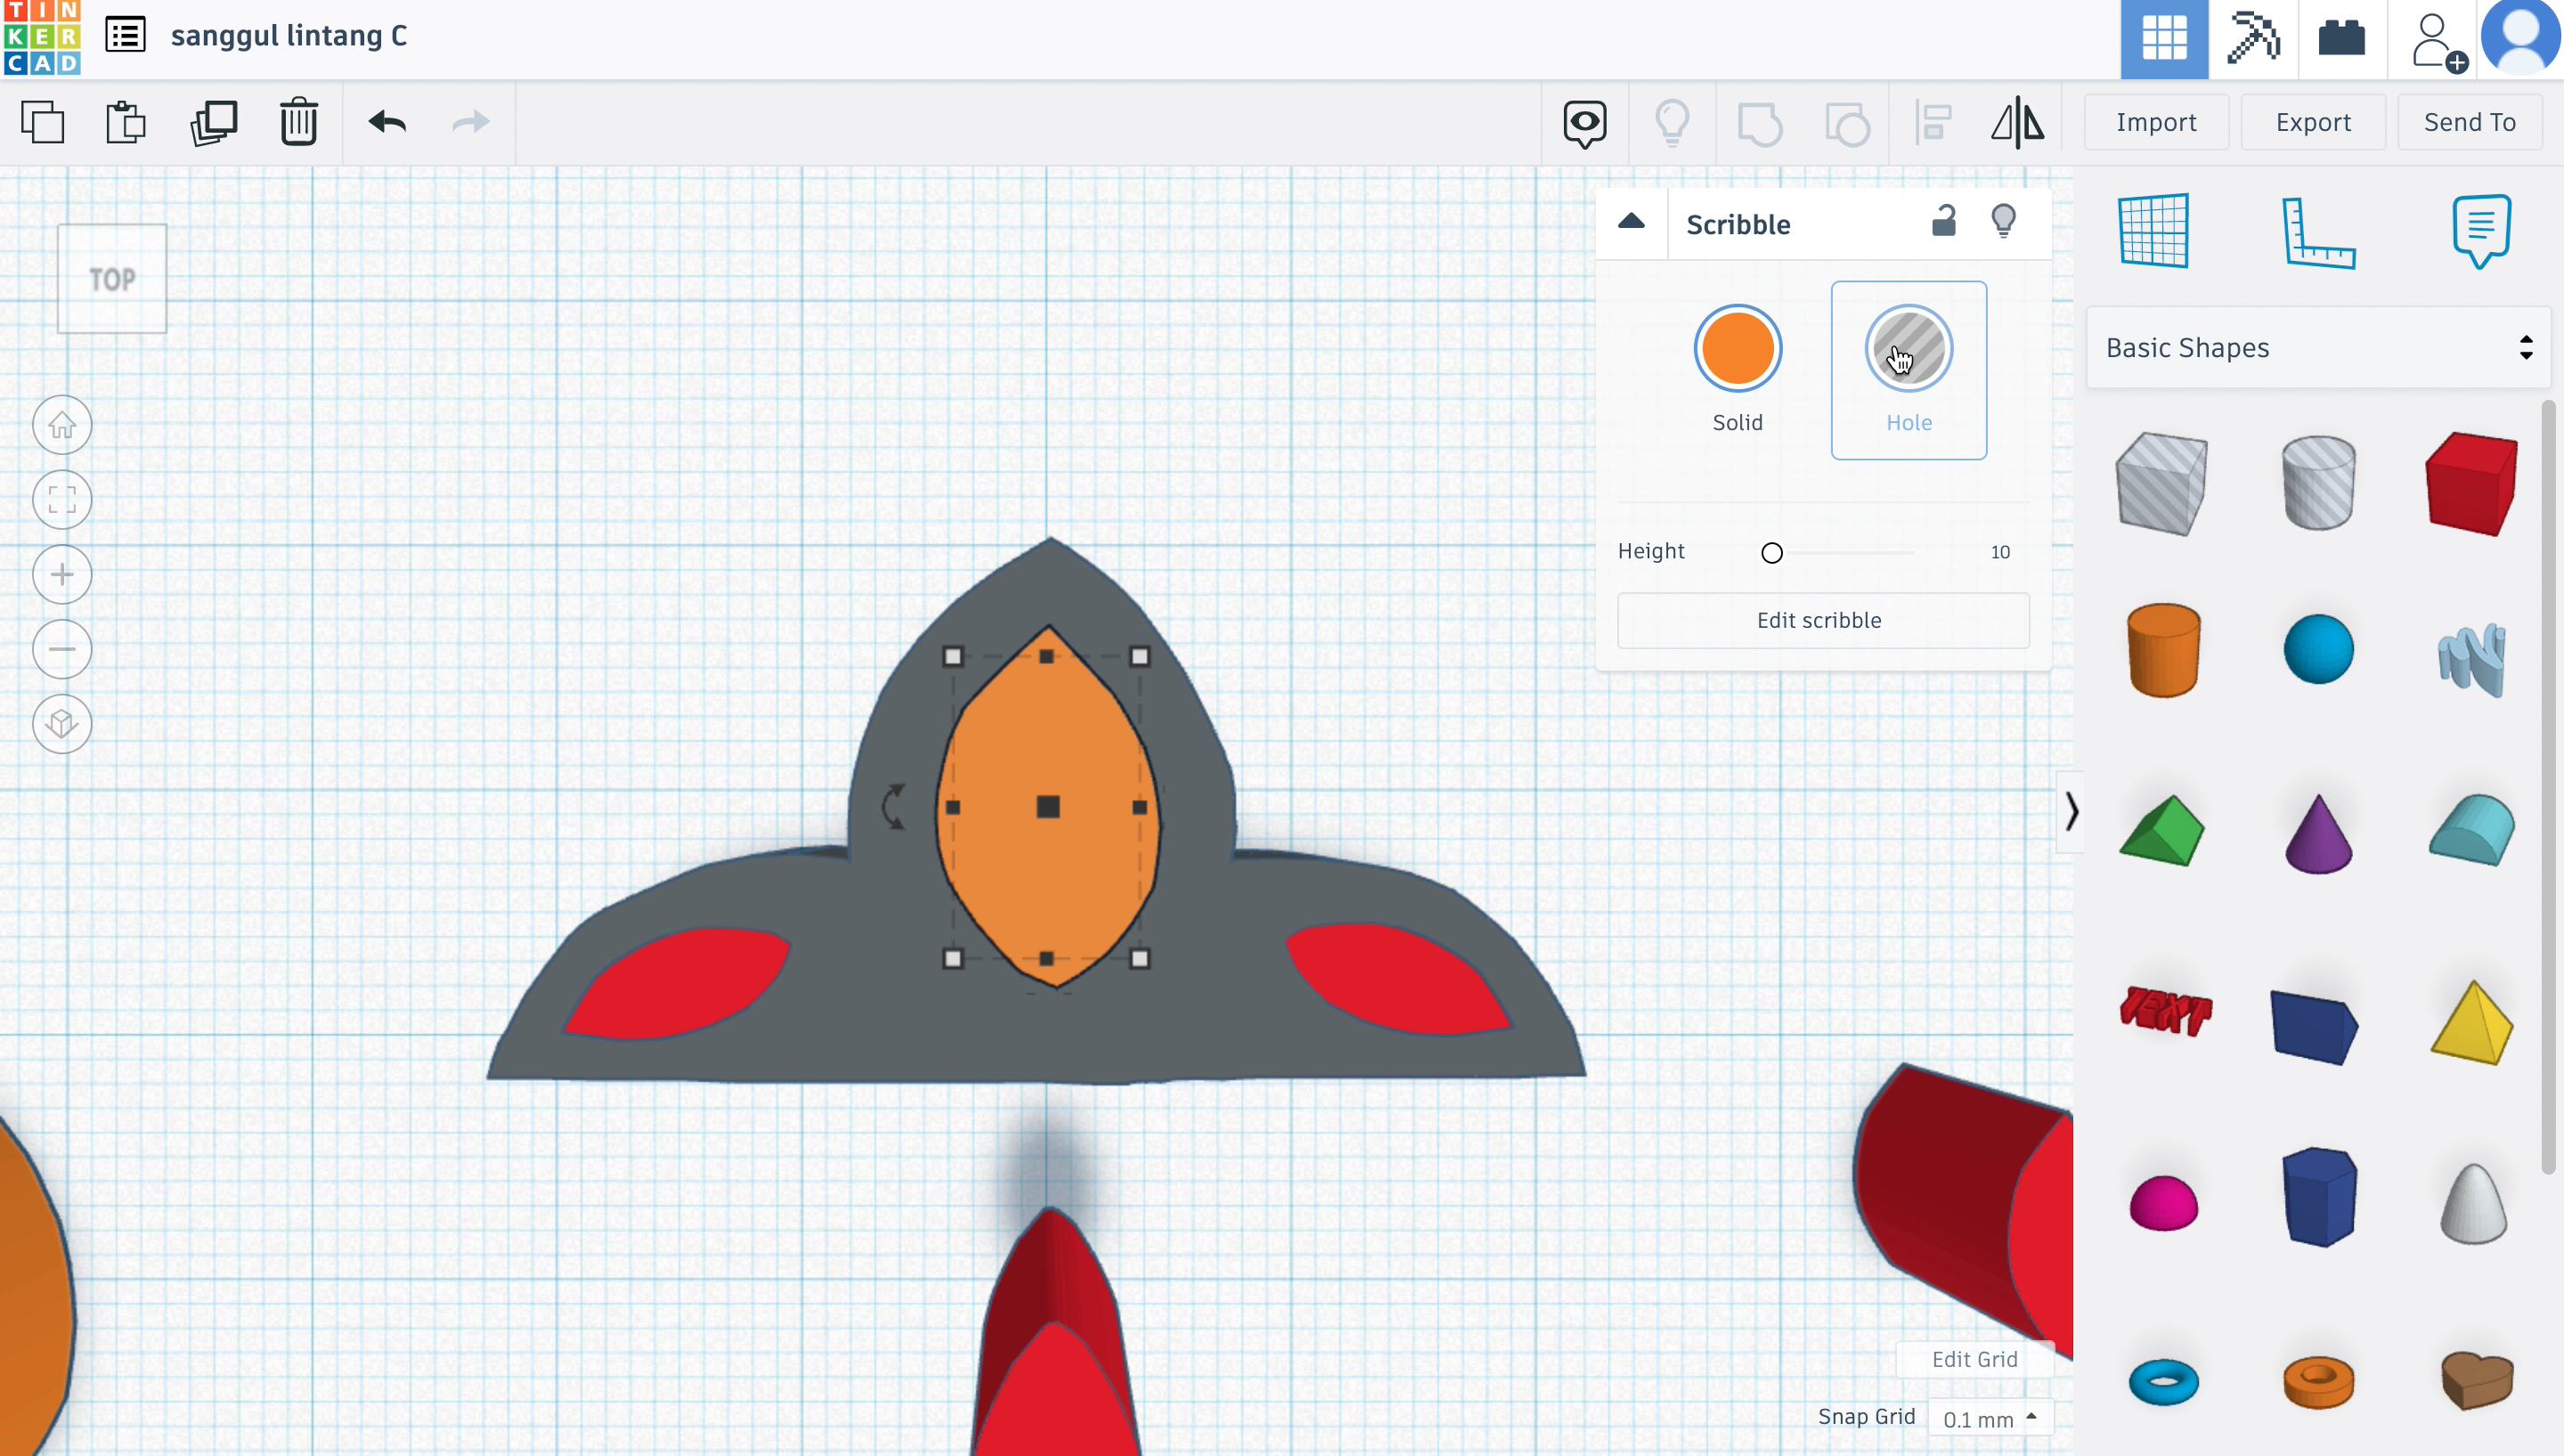
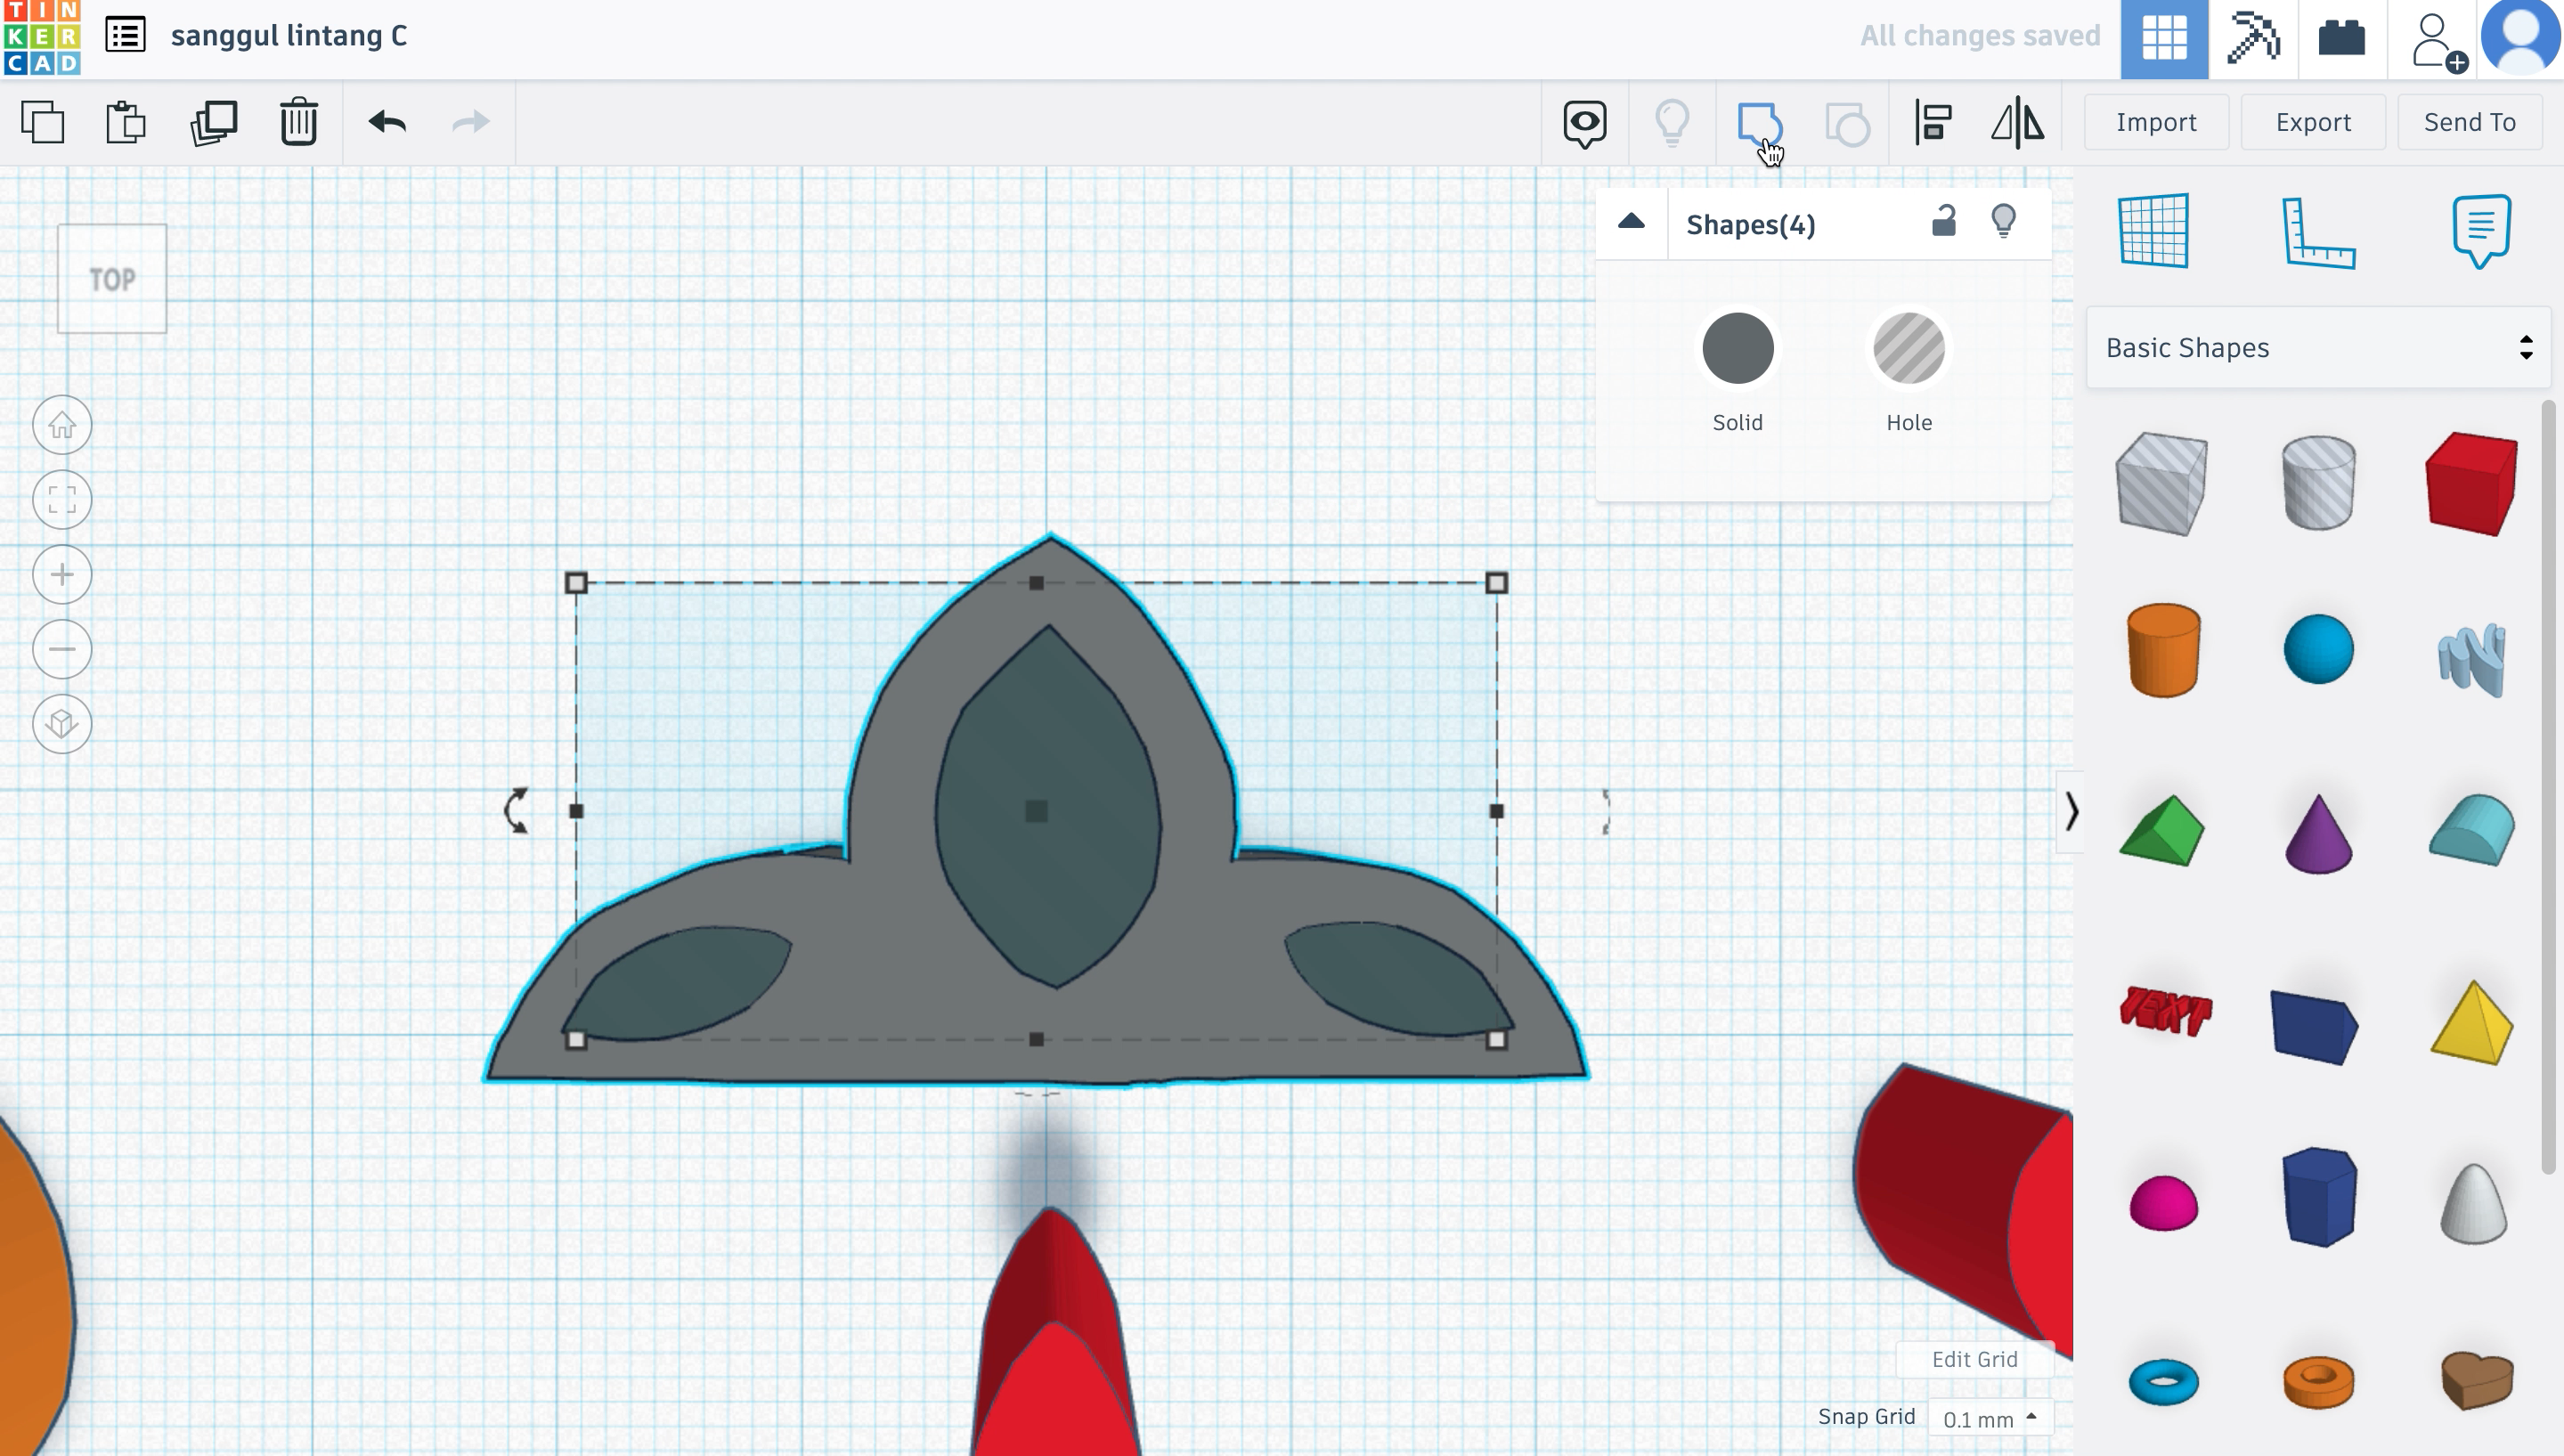
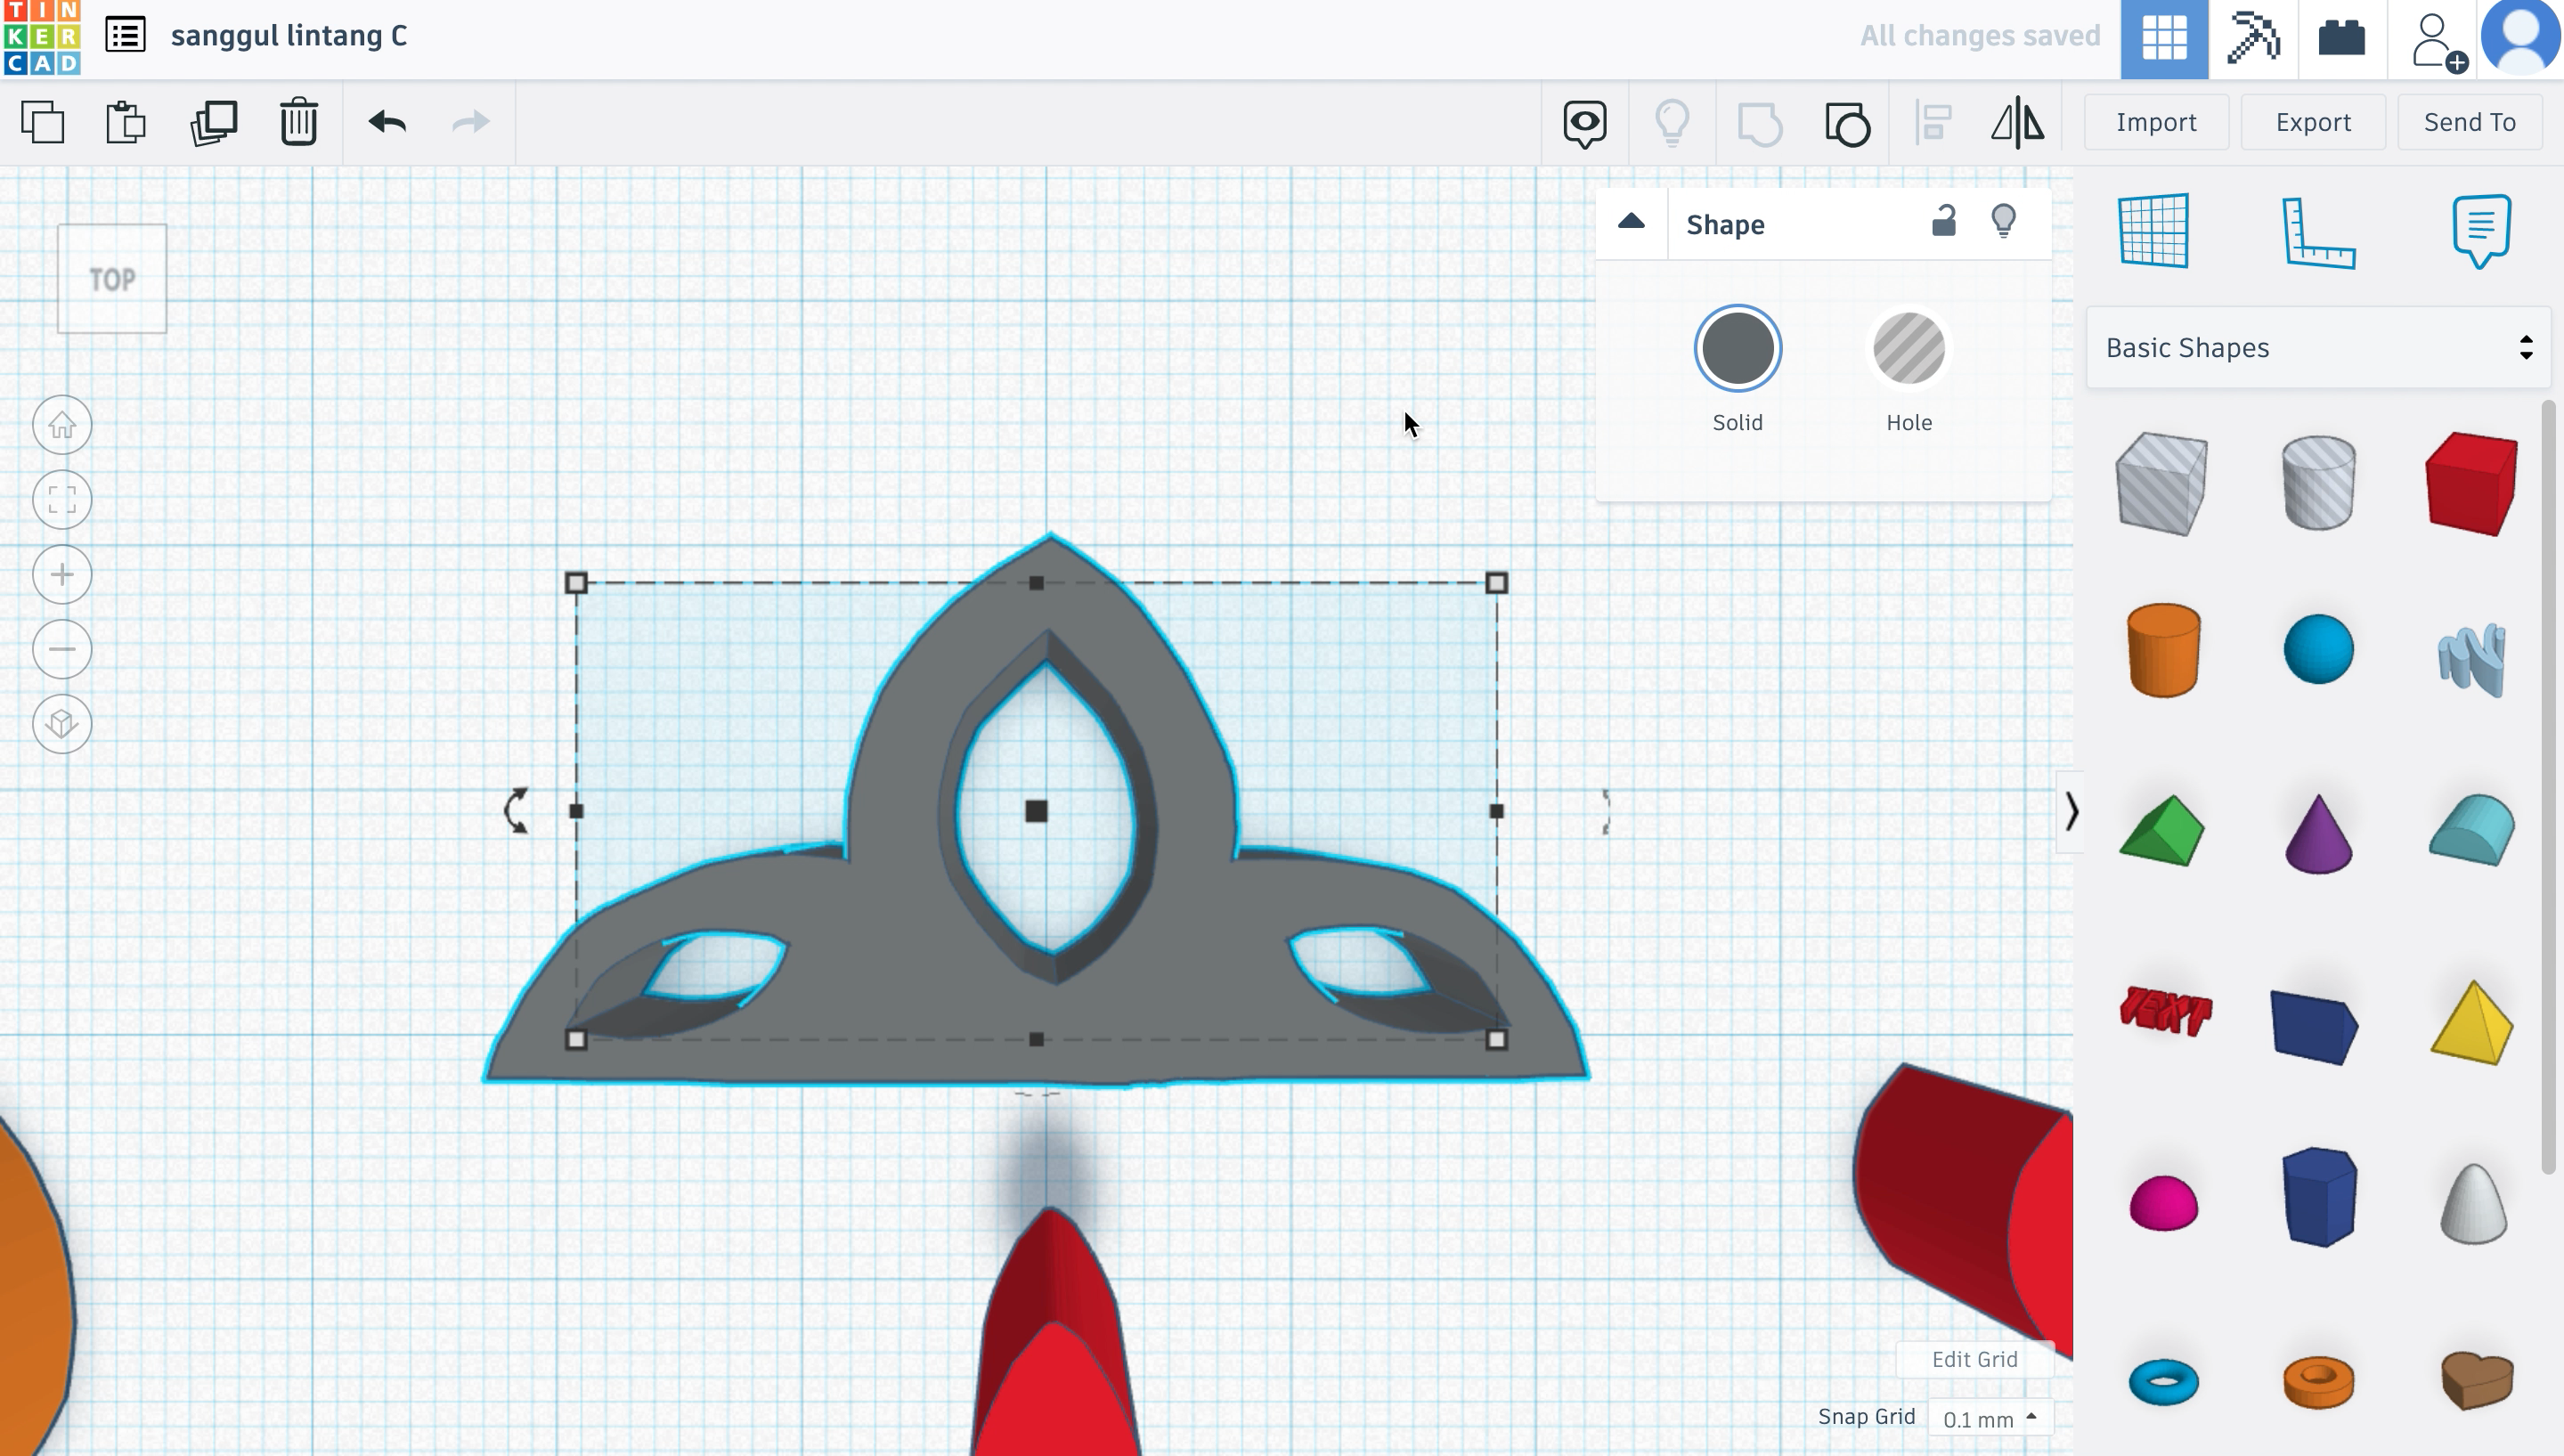
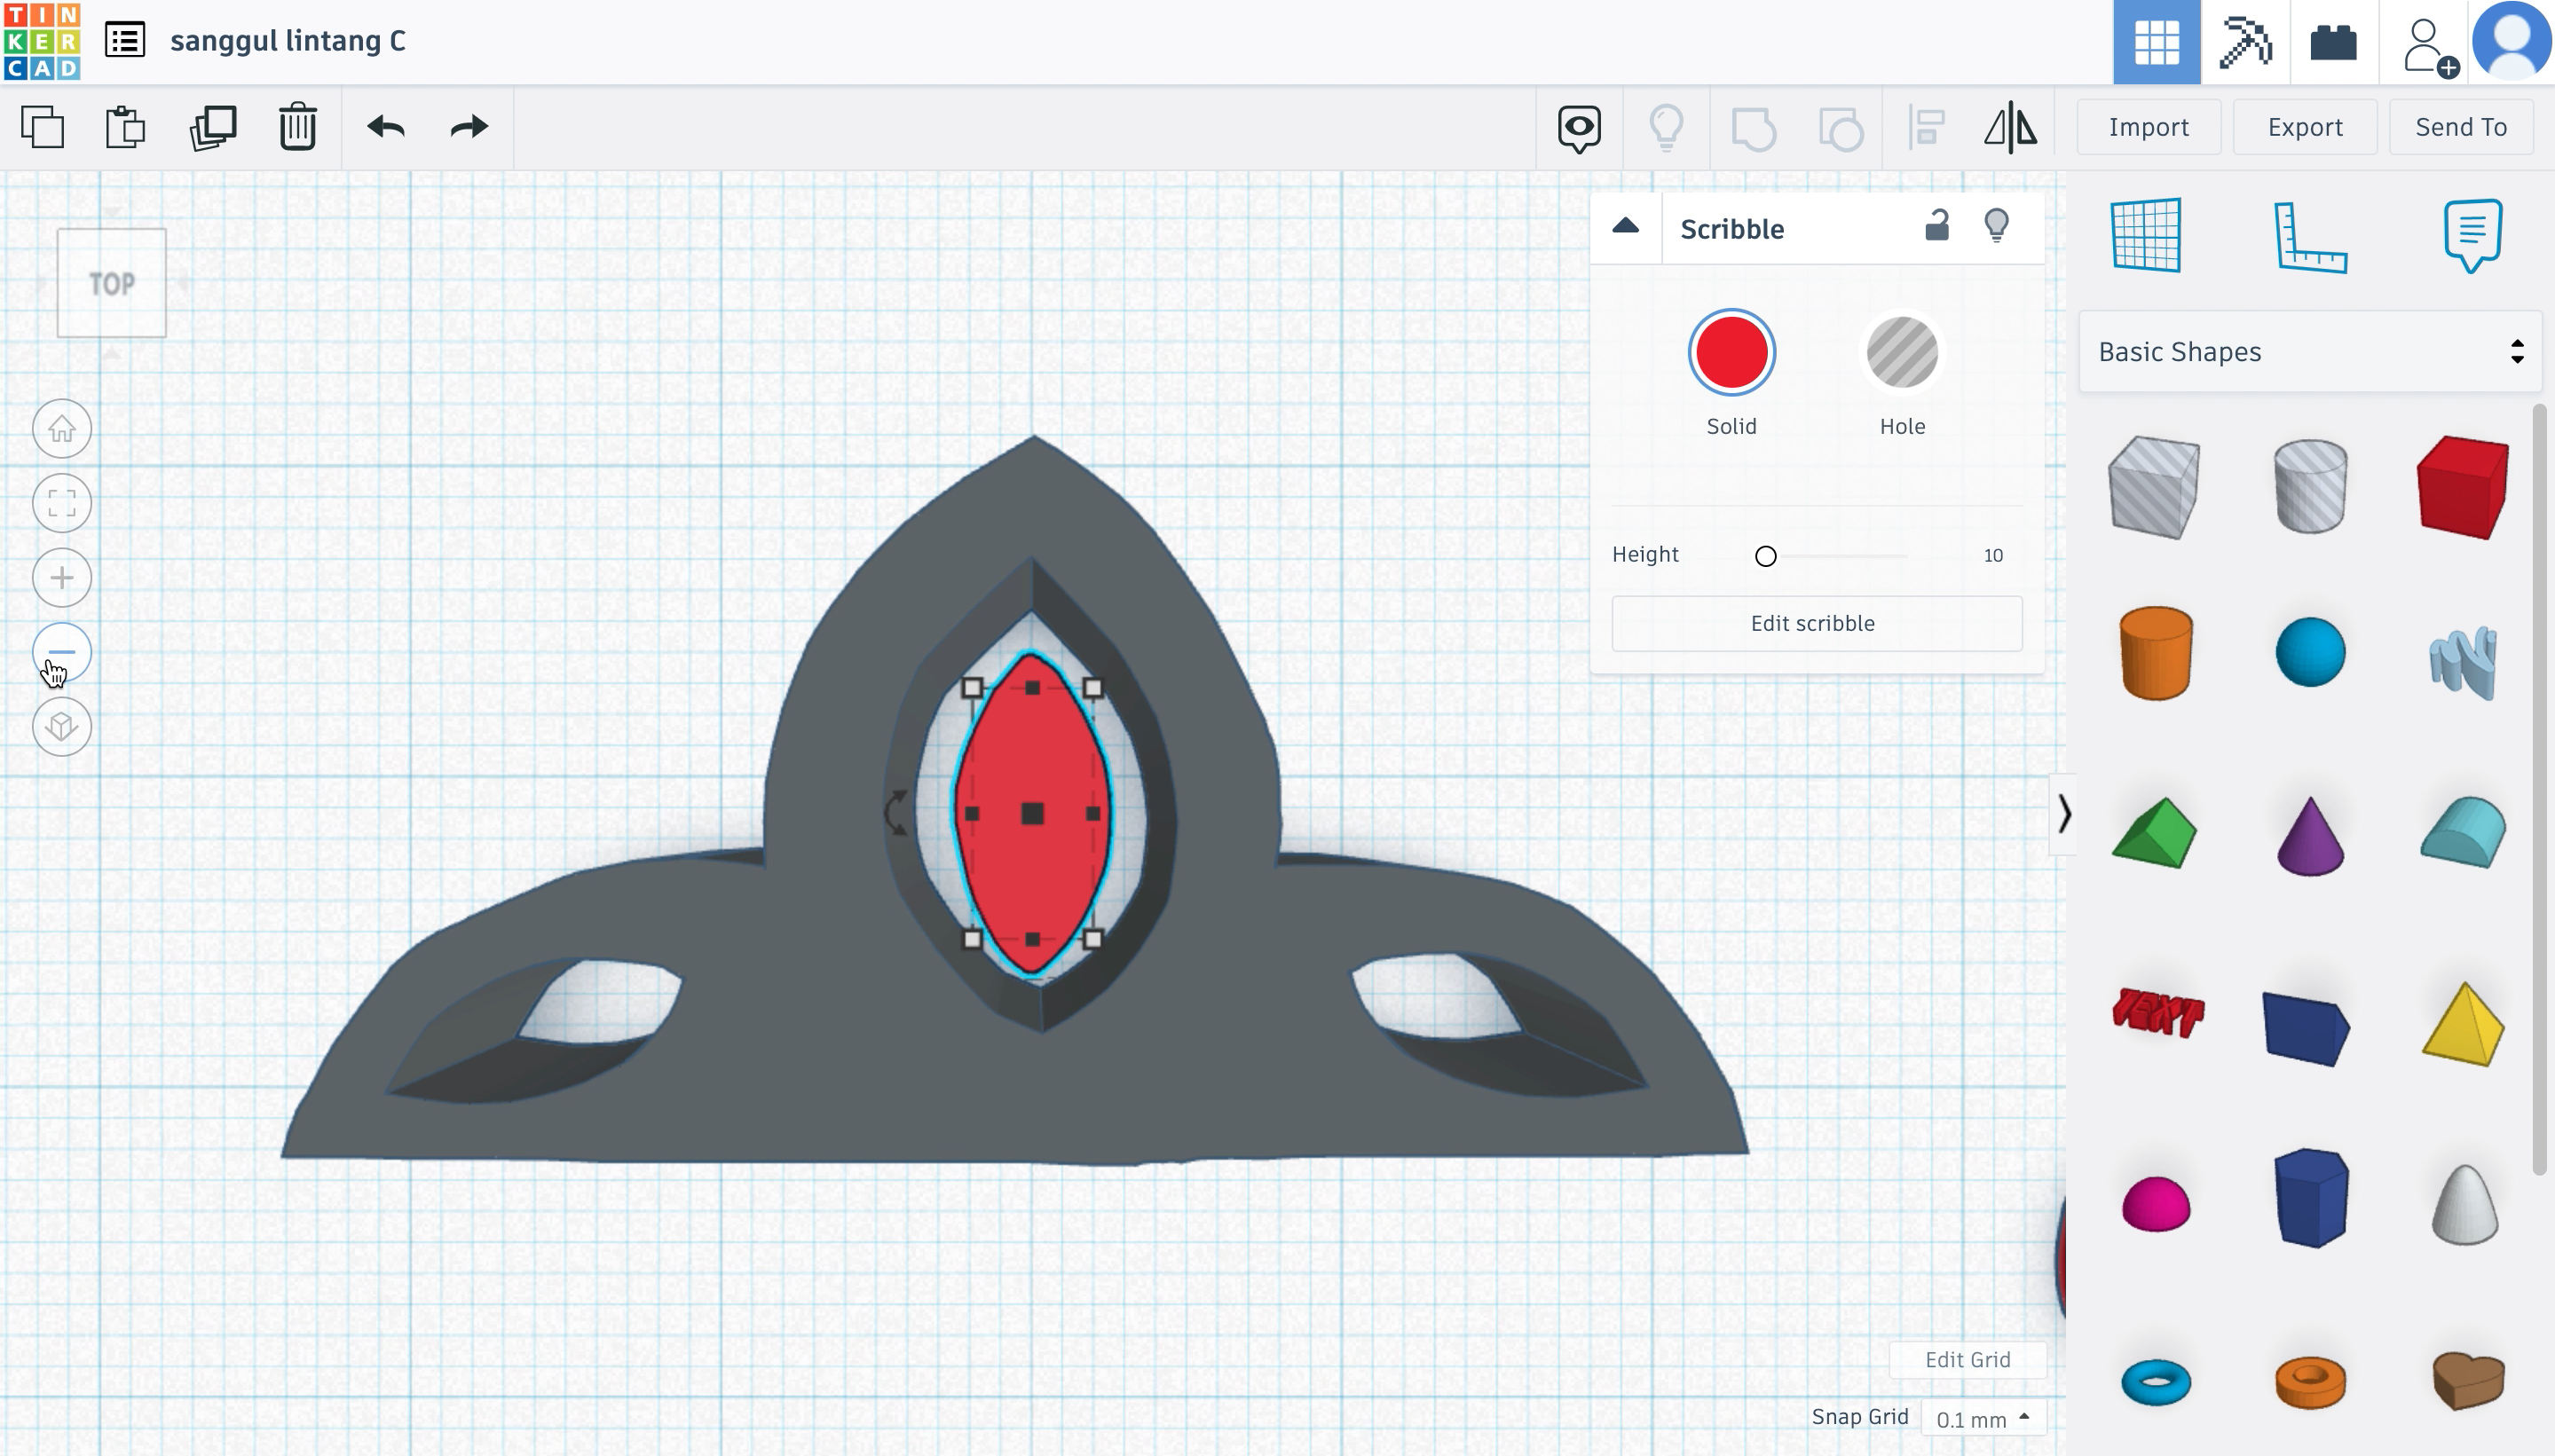
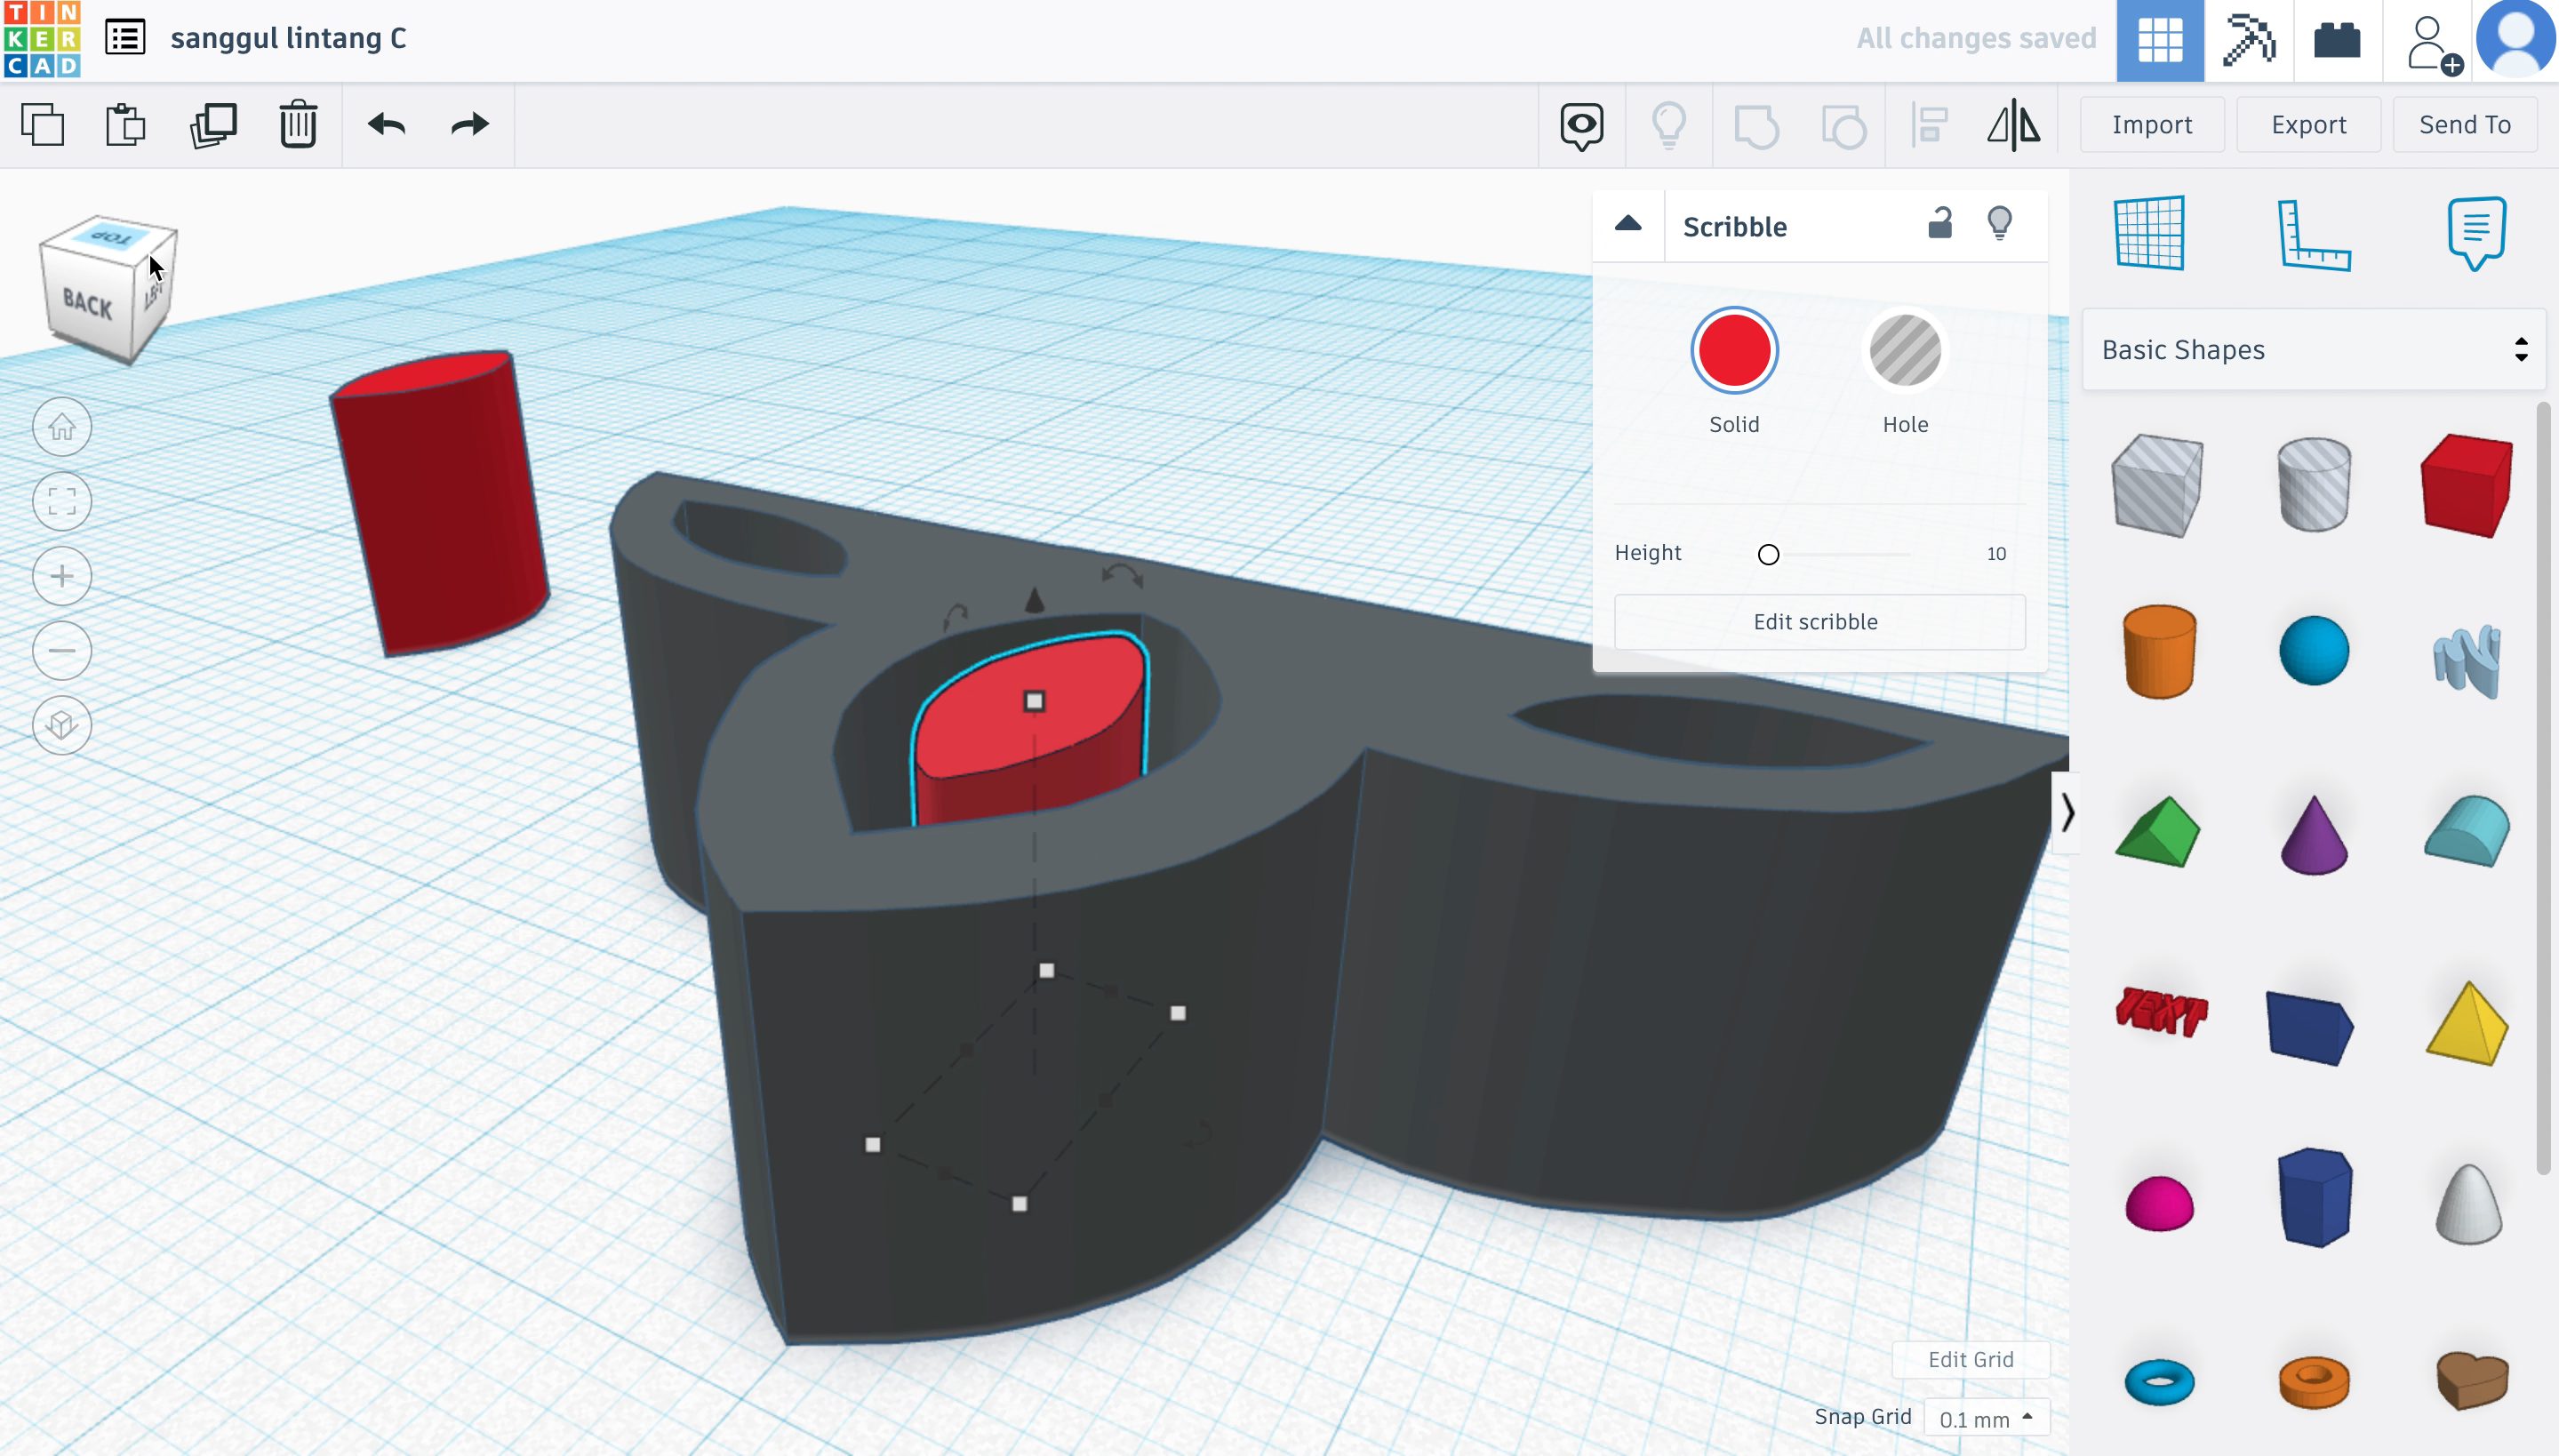
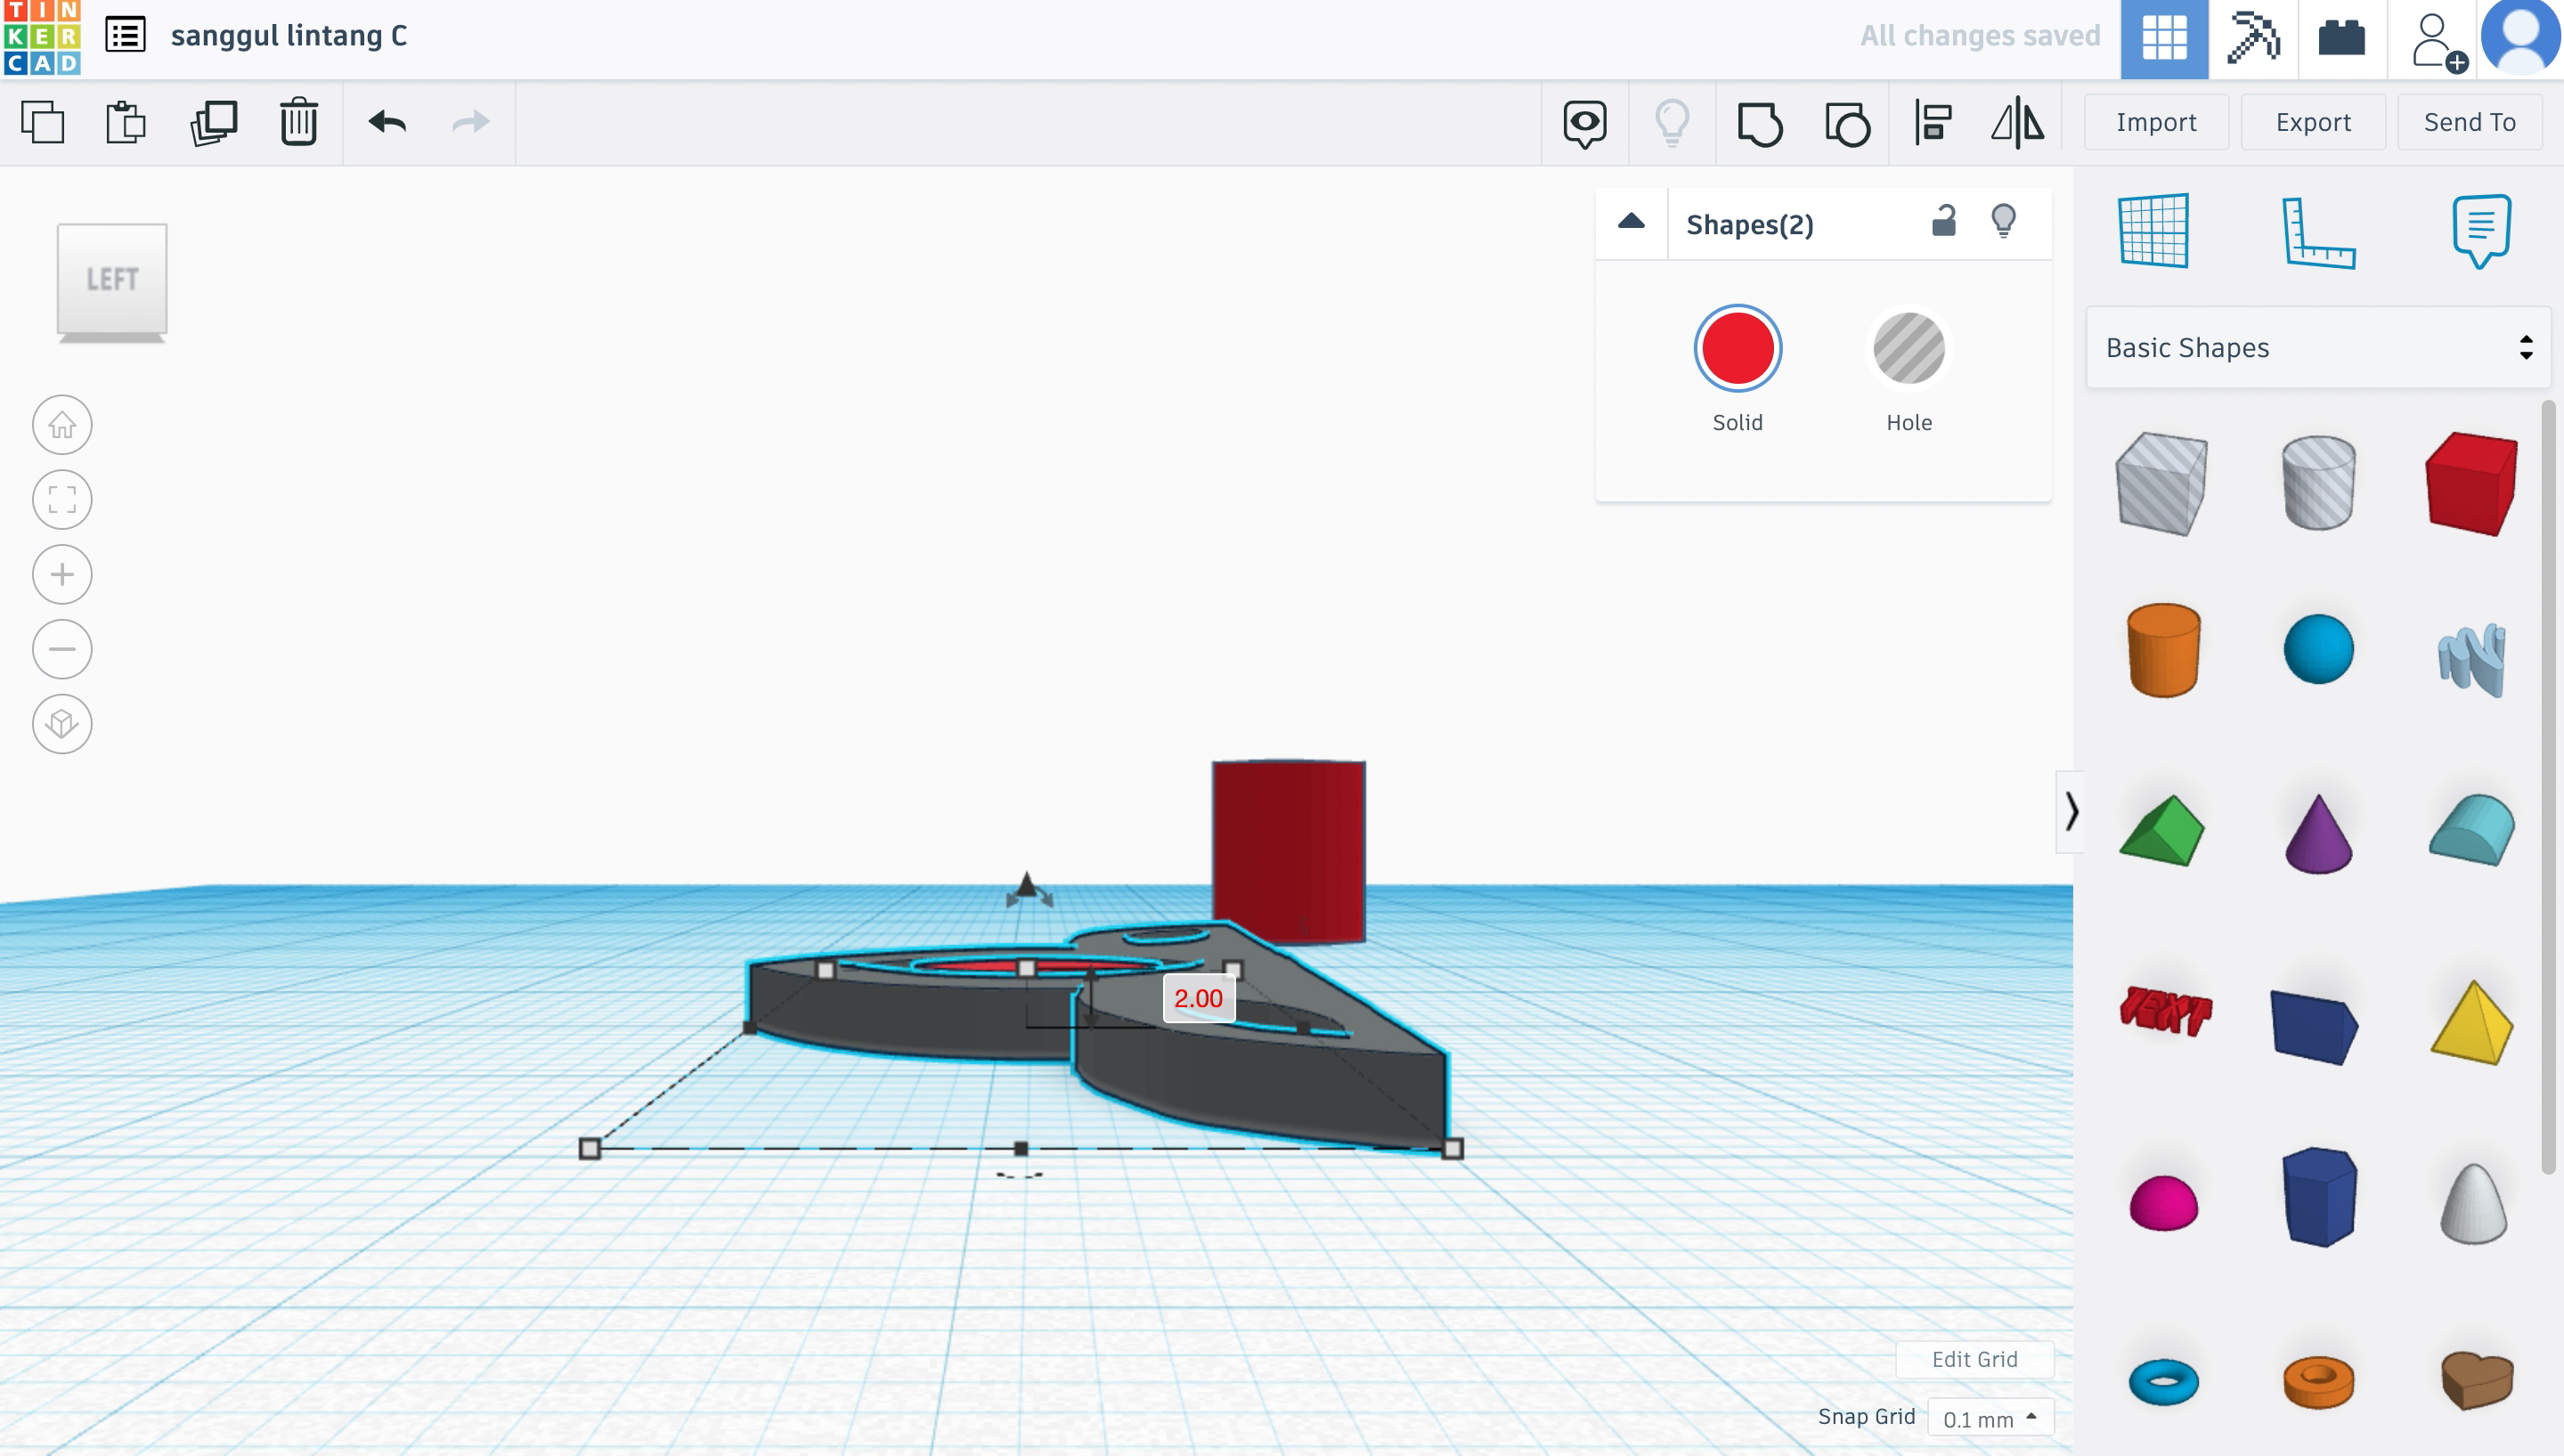
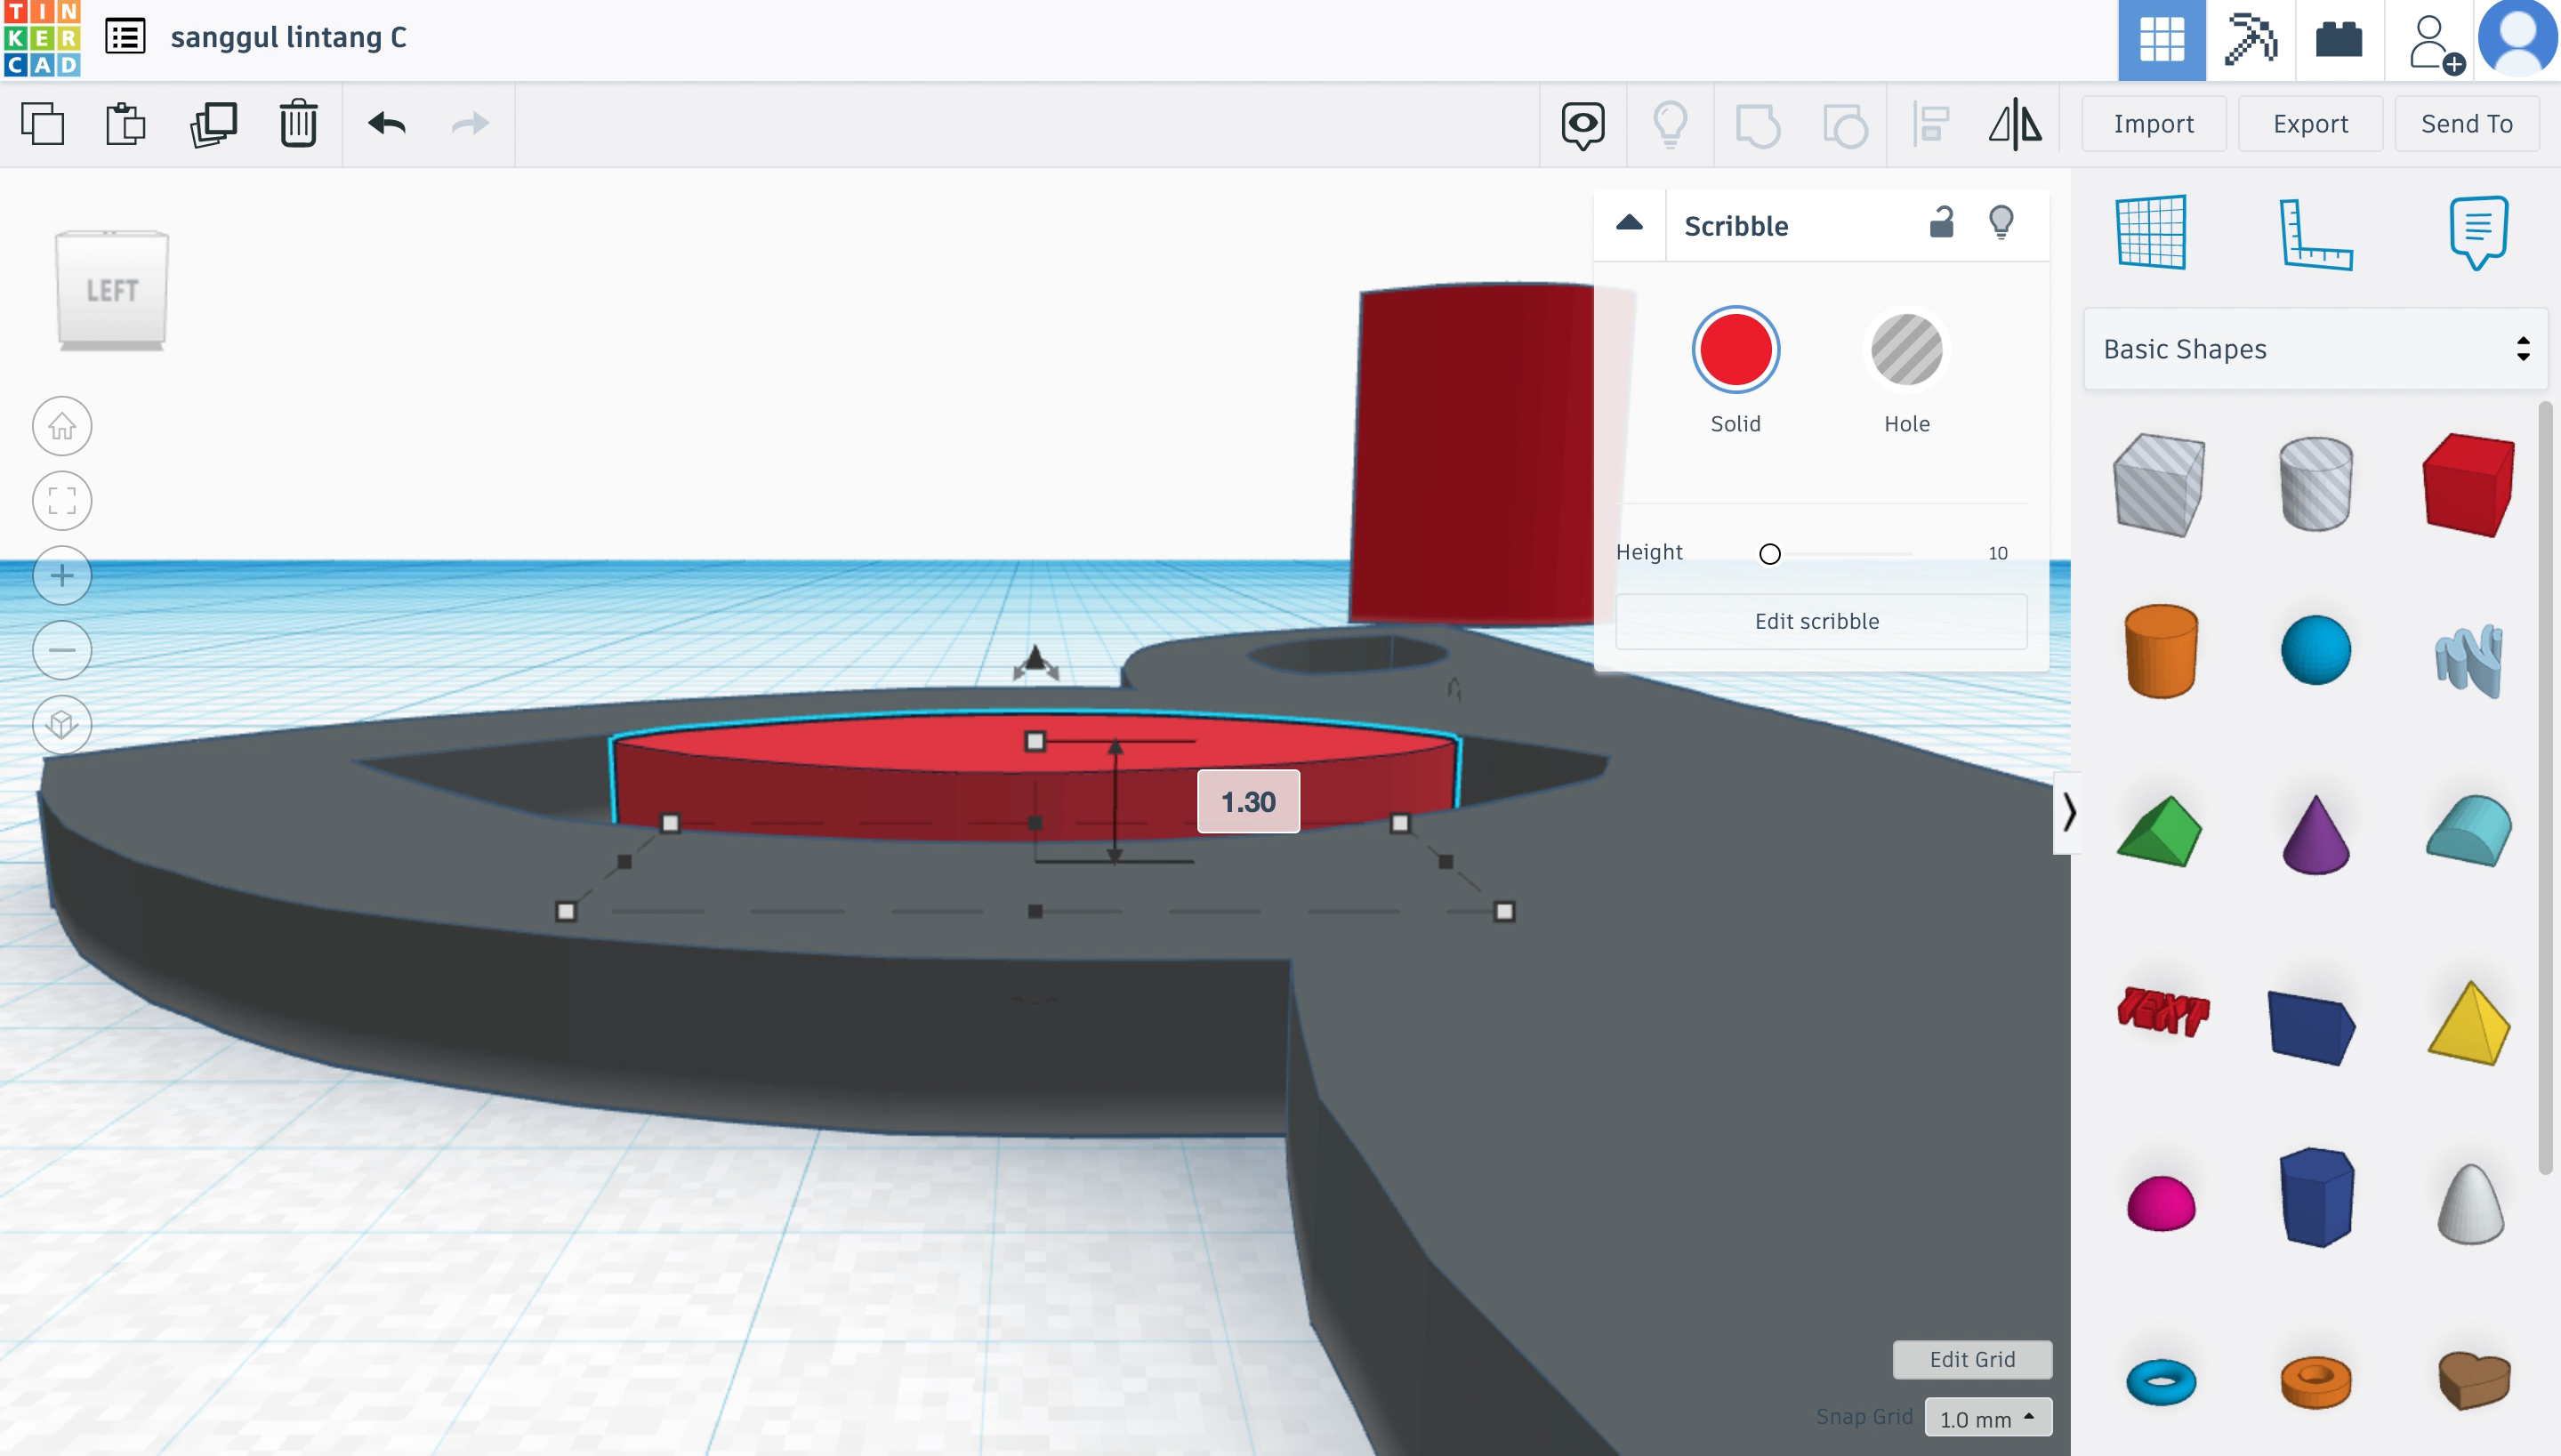
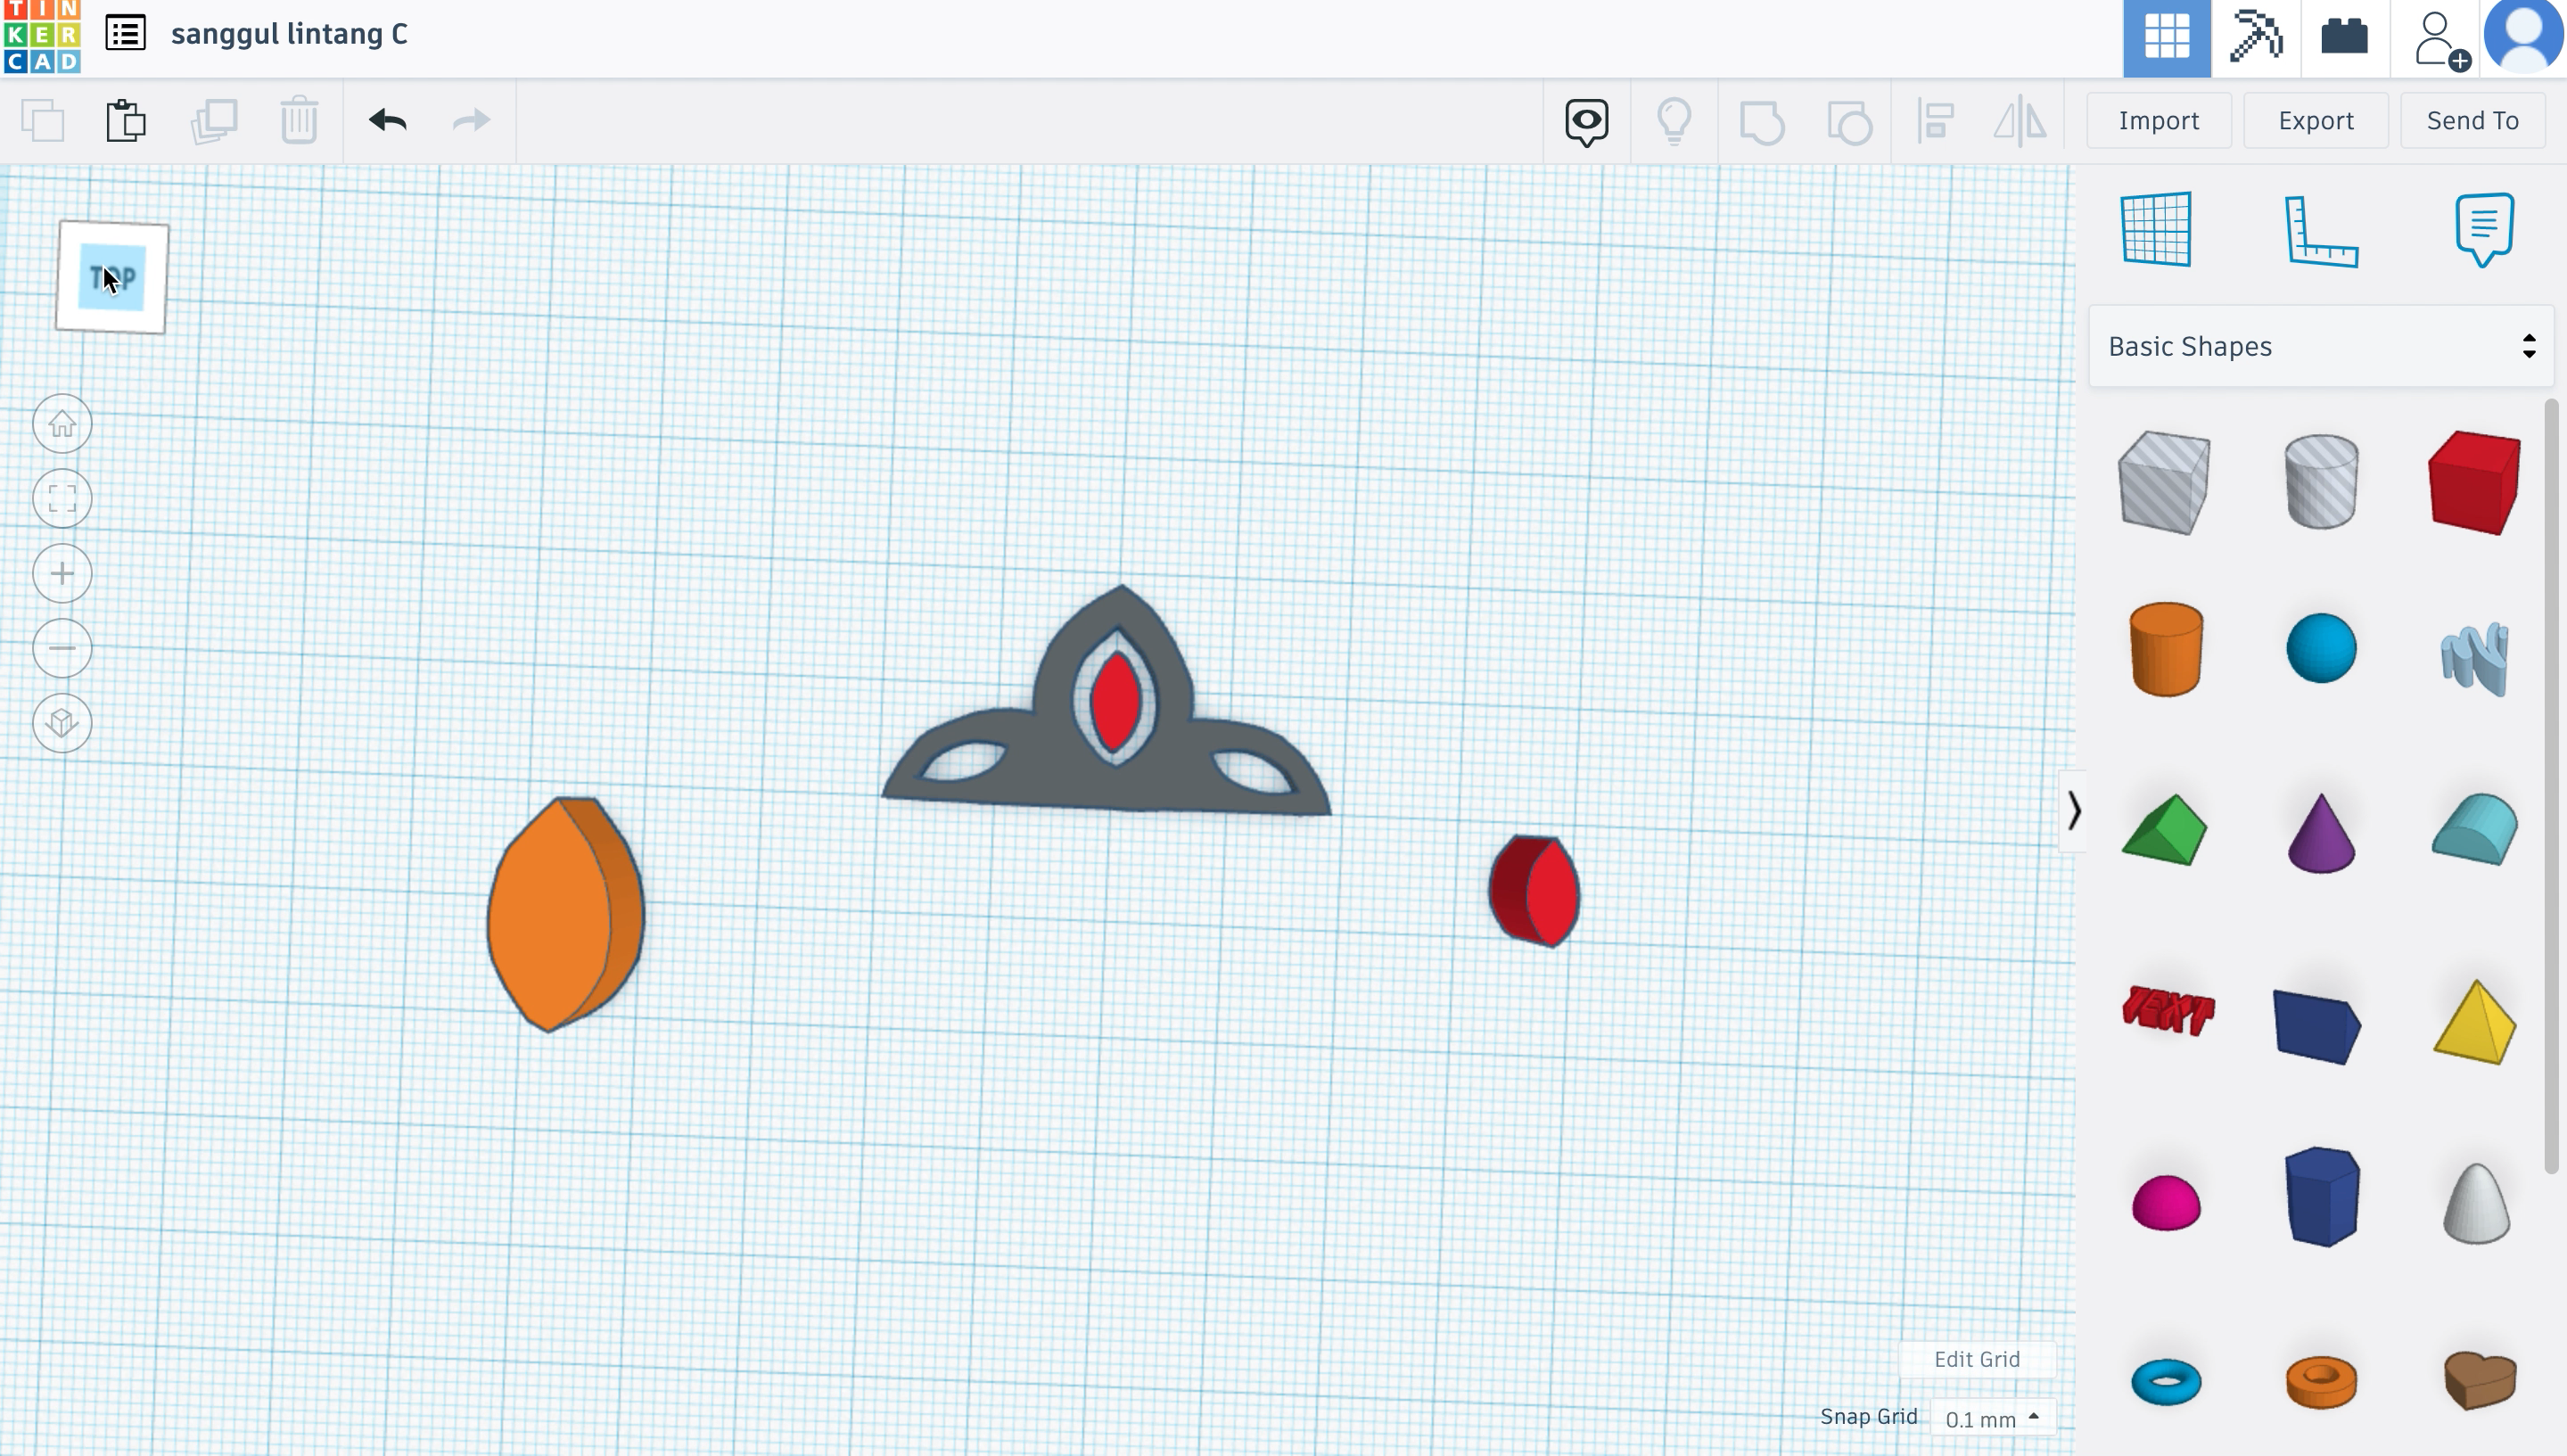
Sanggul Lintang C
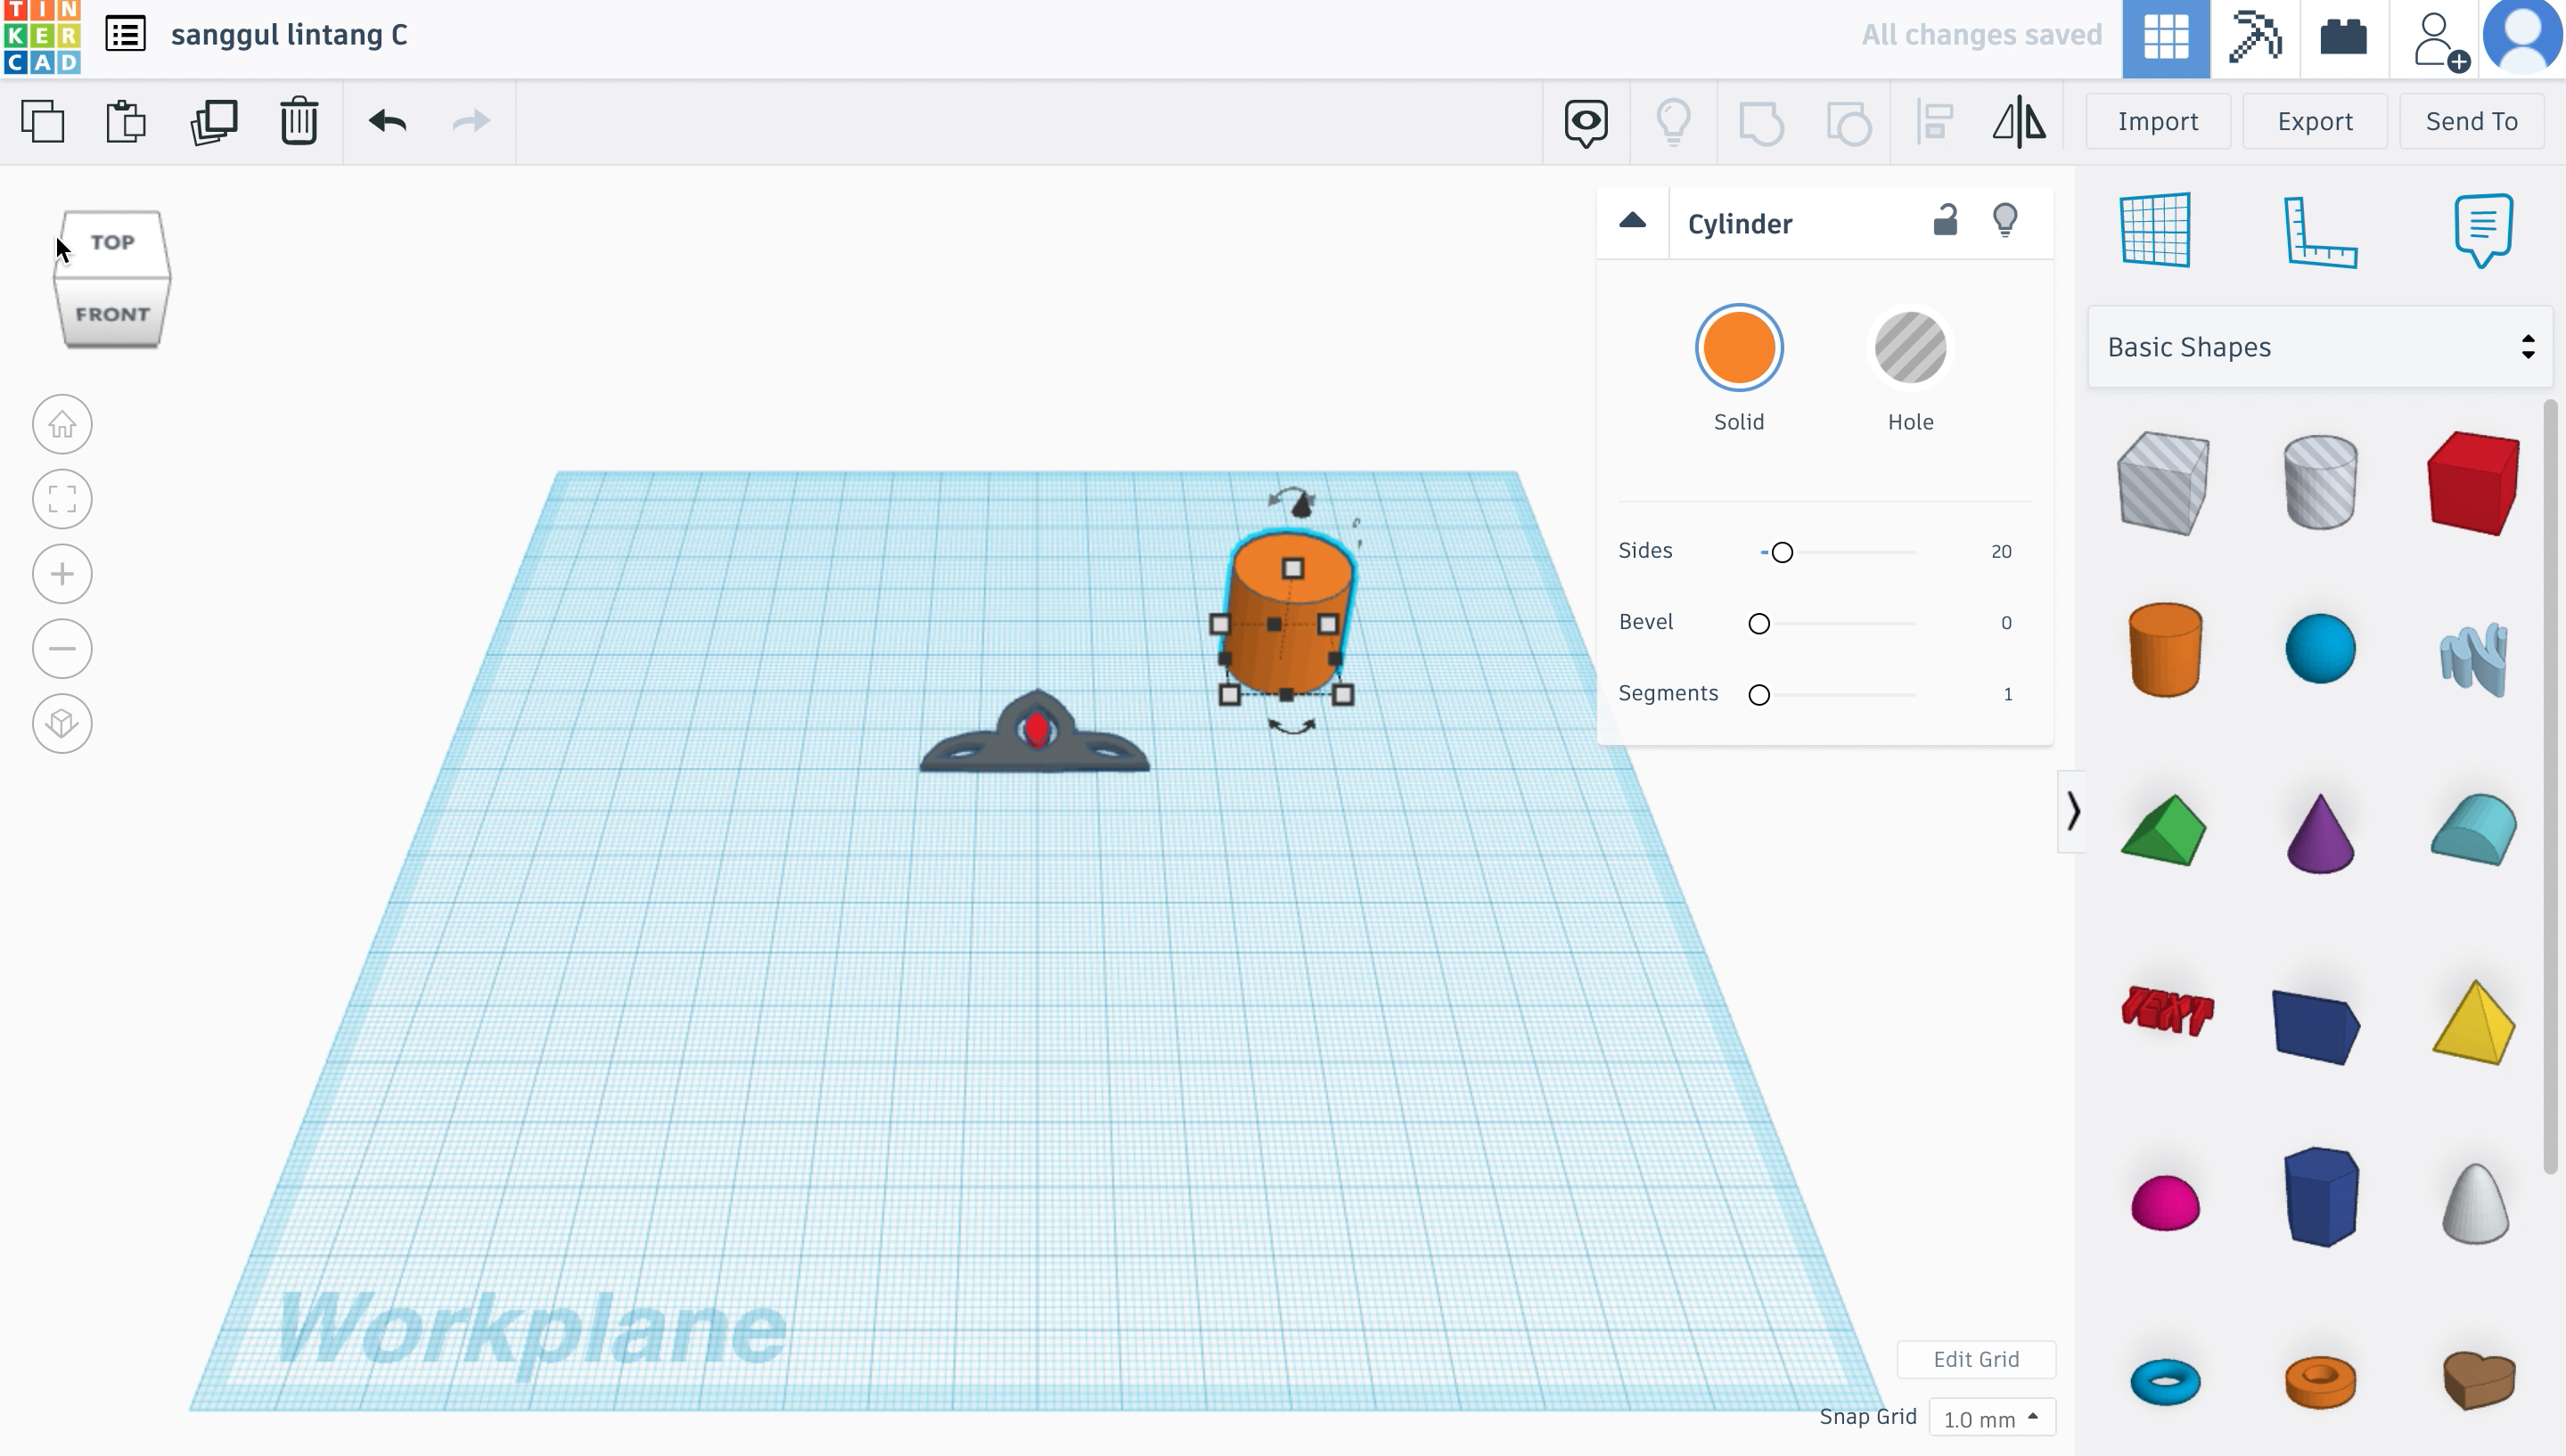
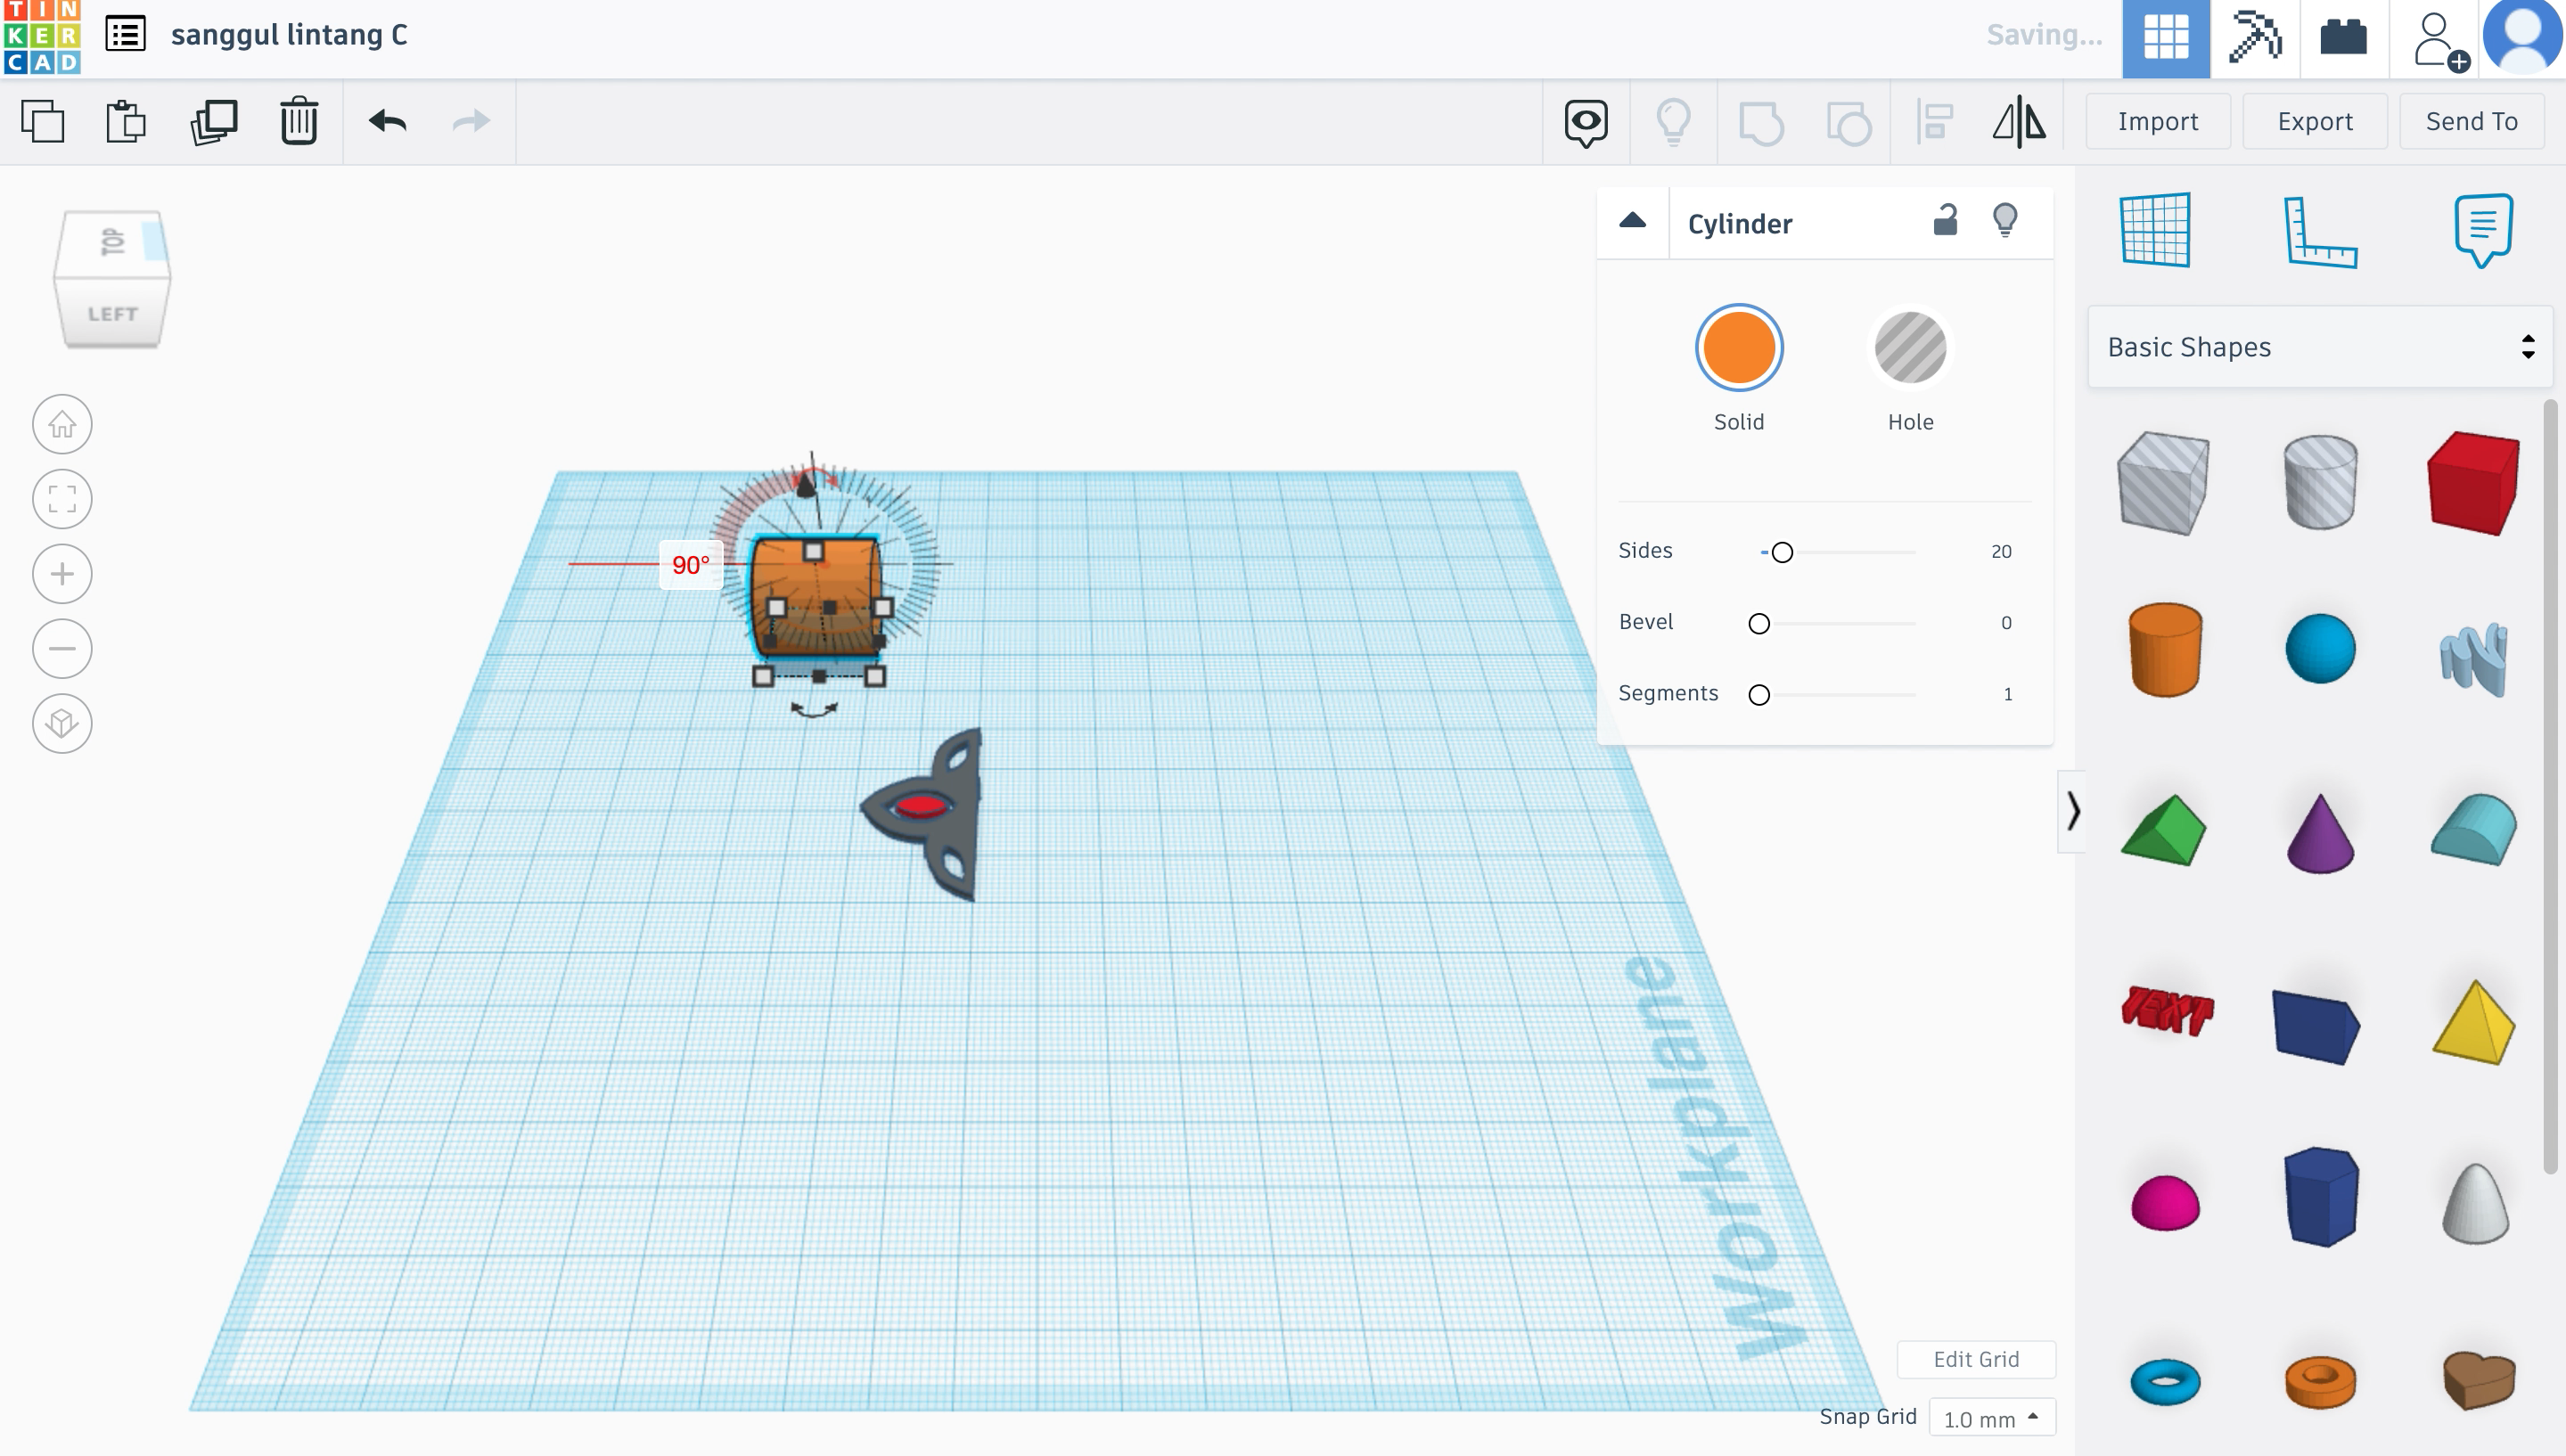
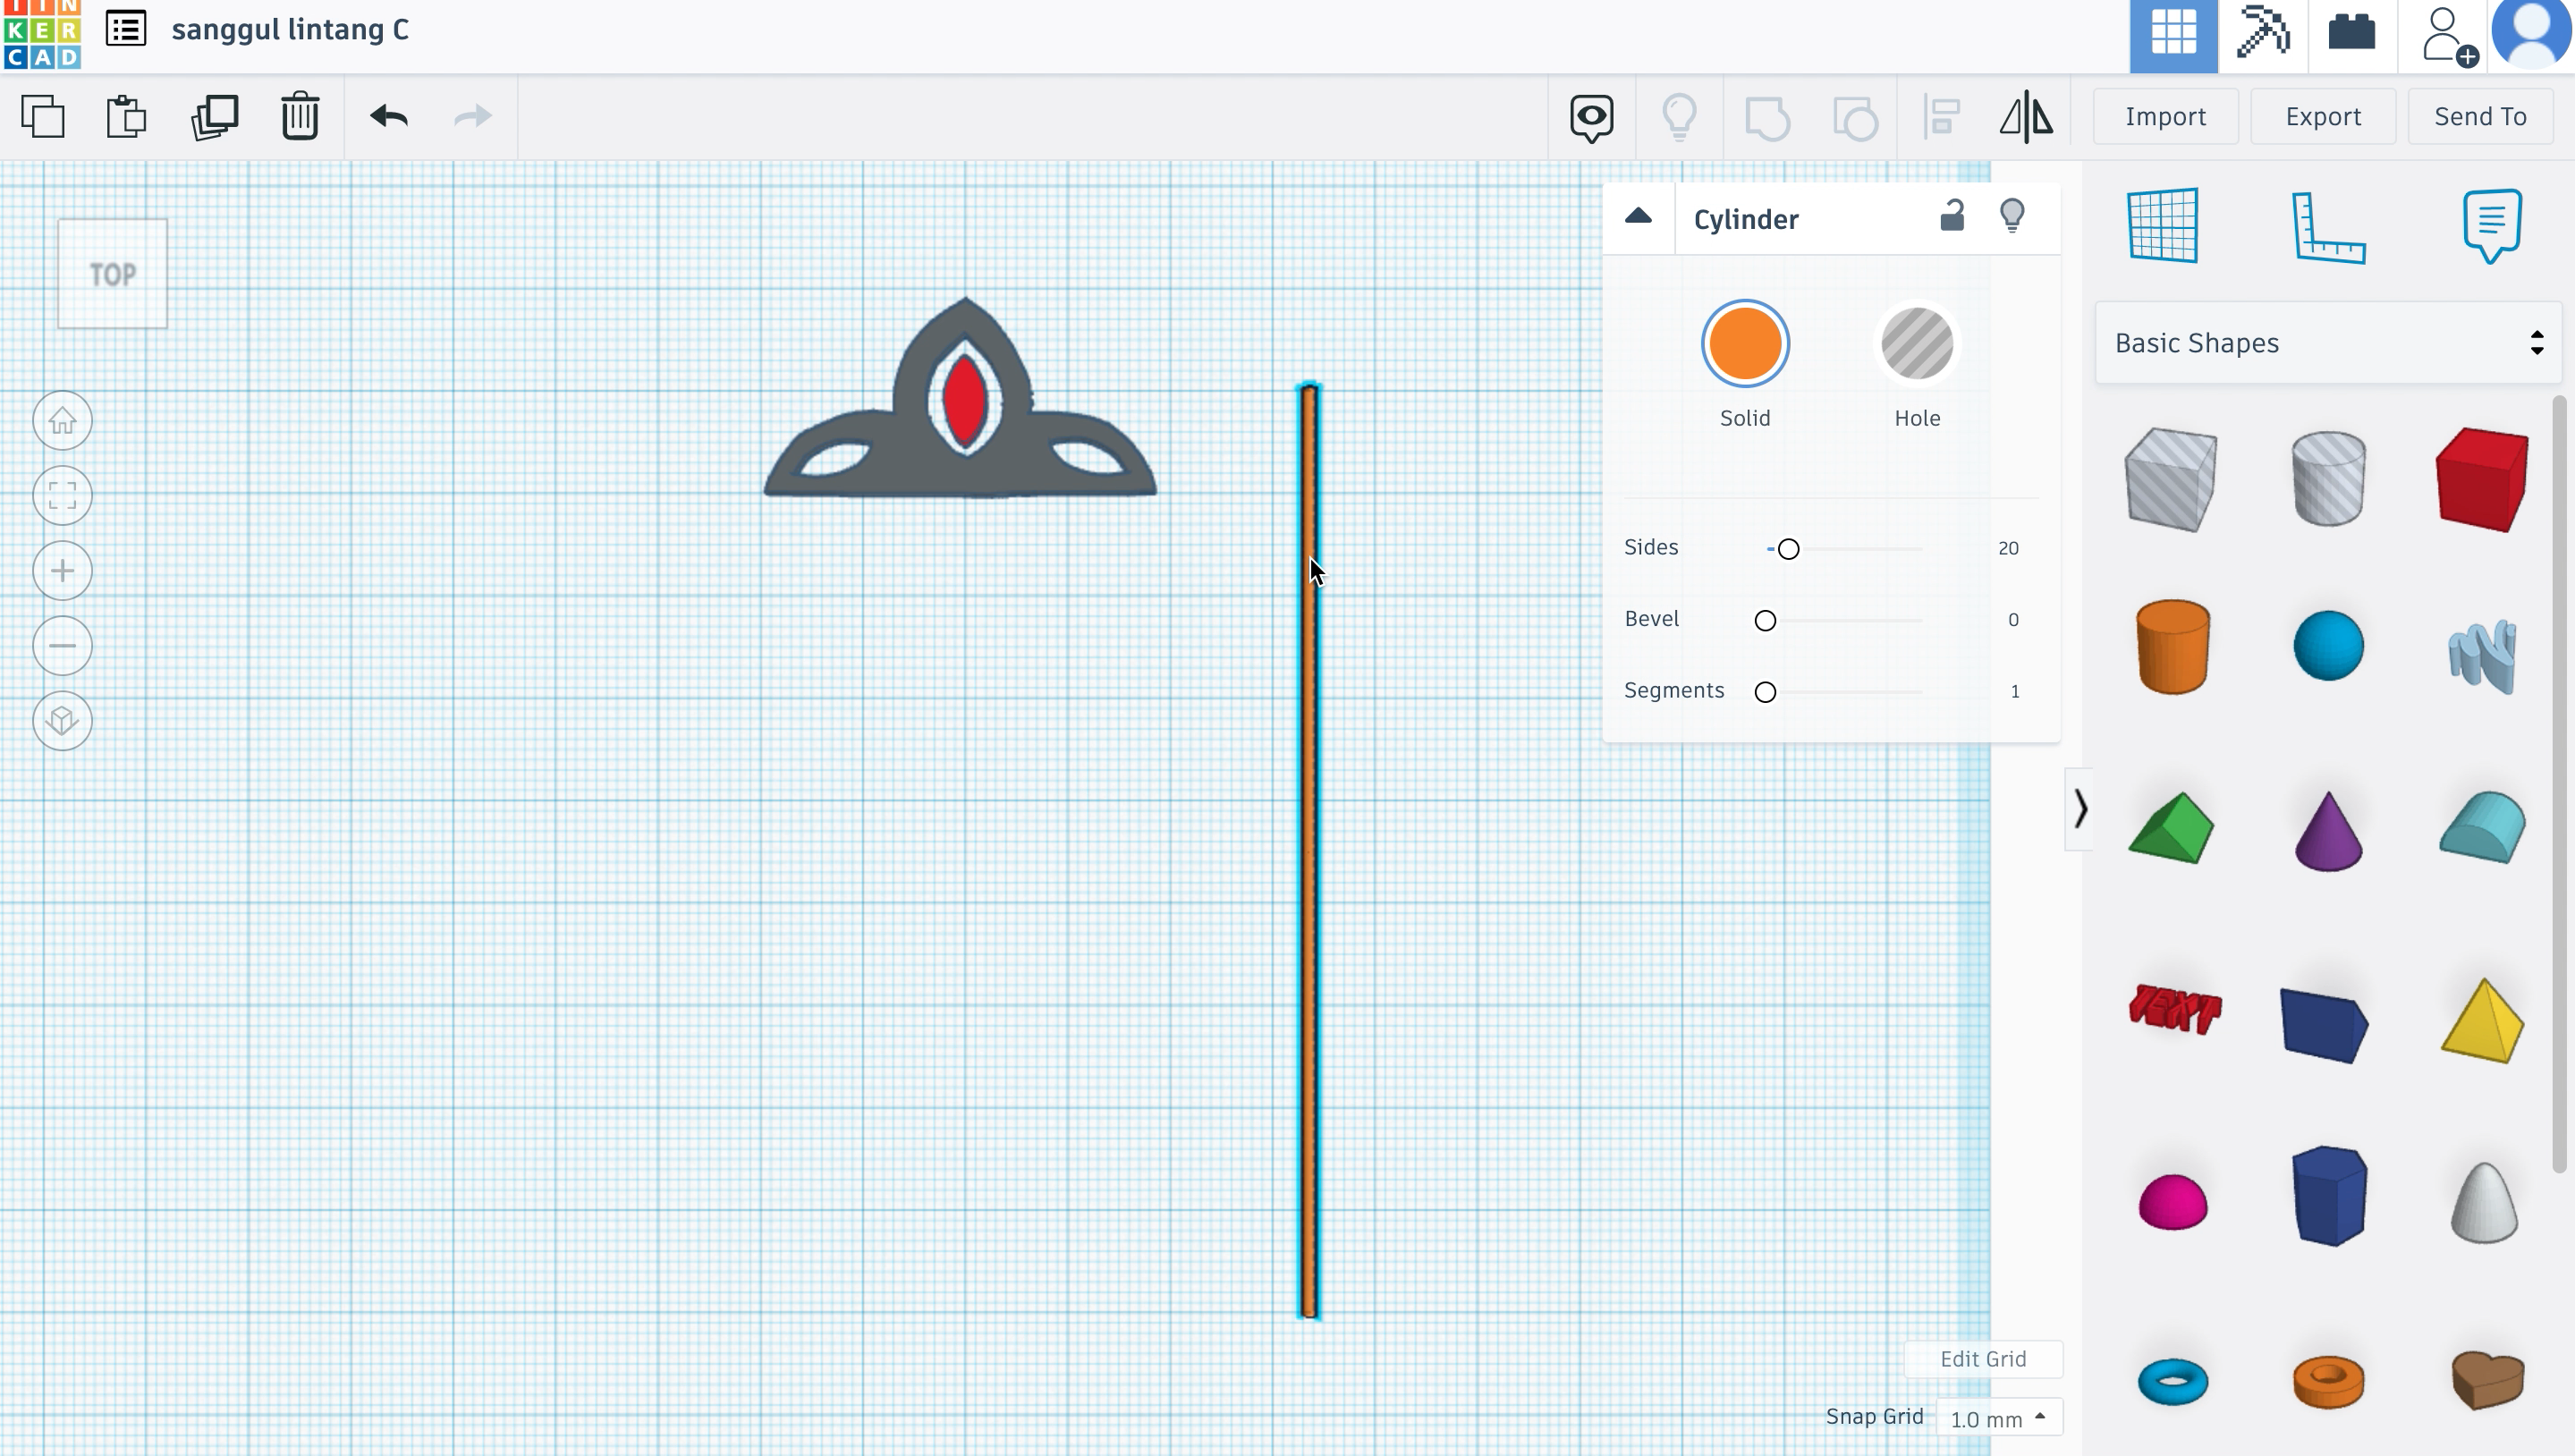
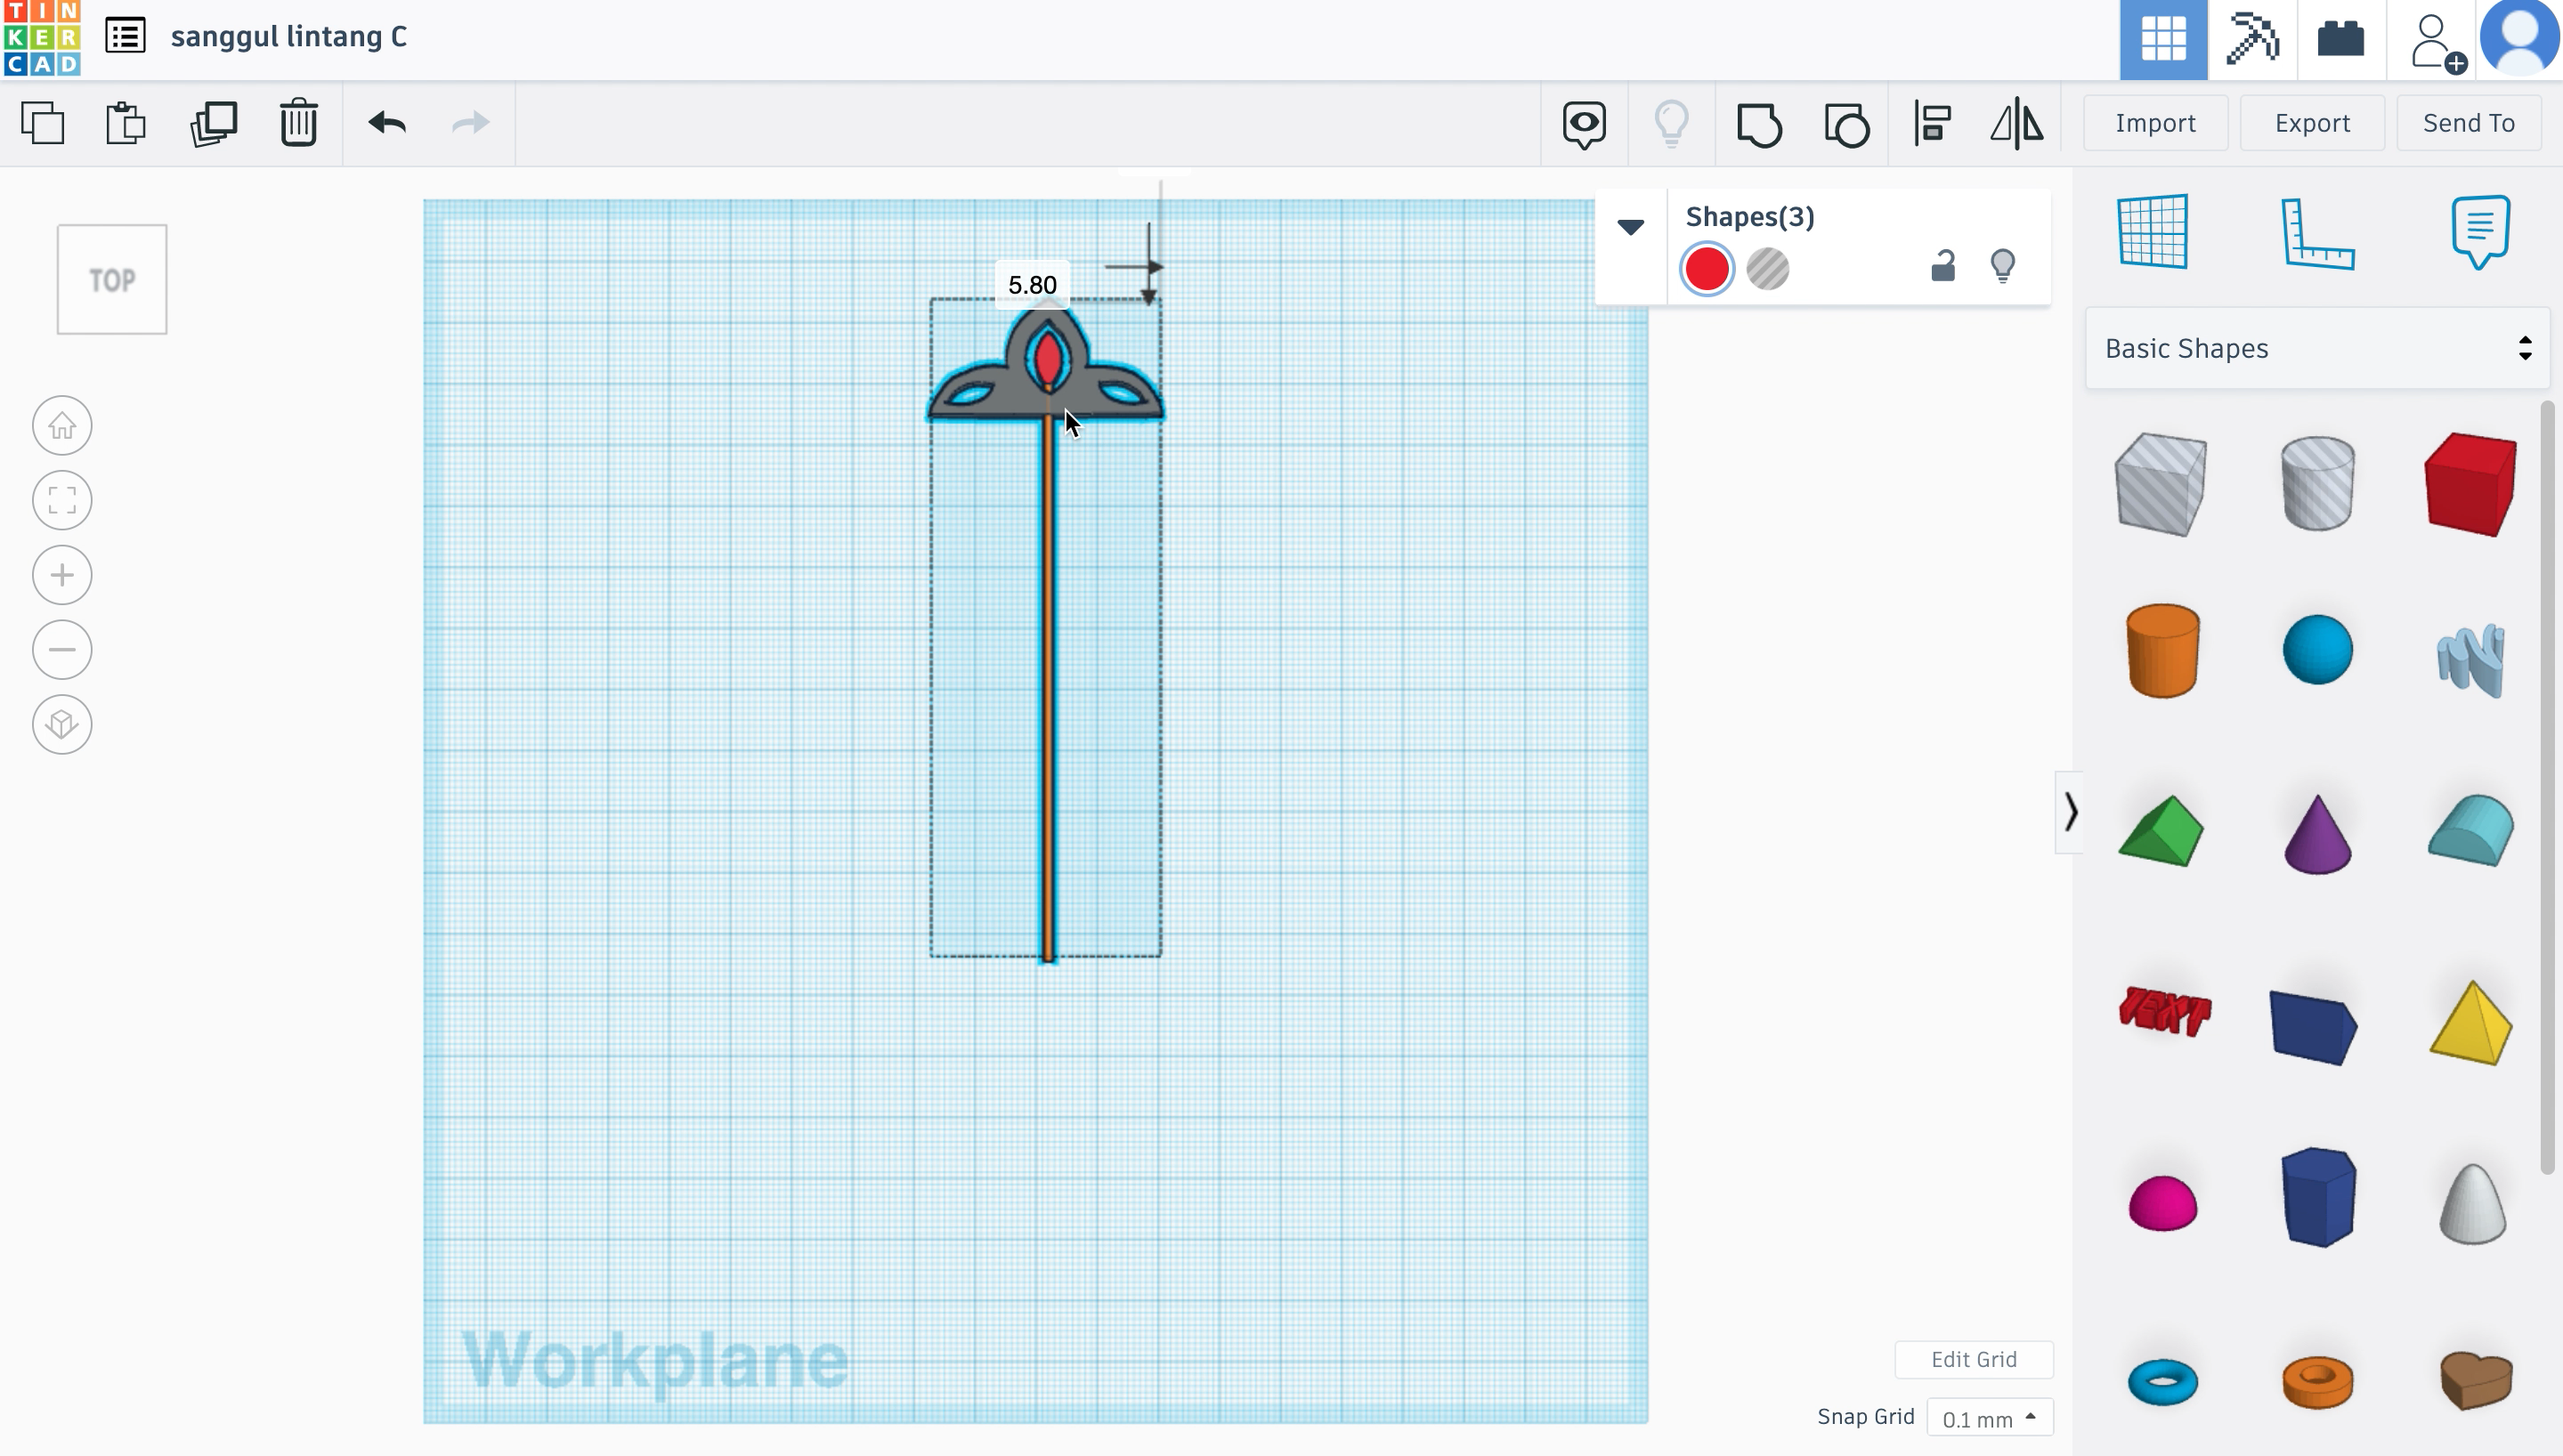
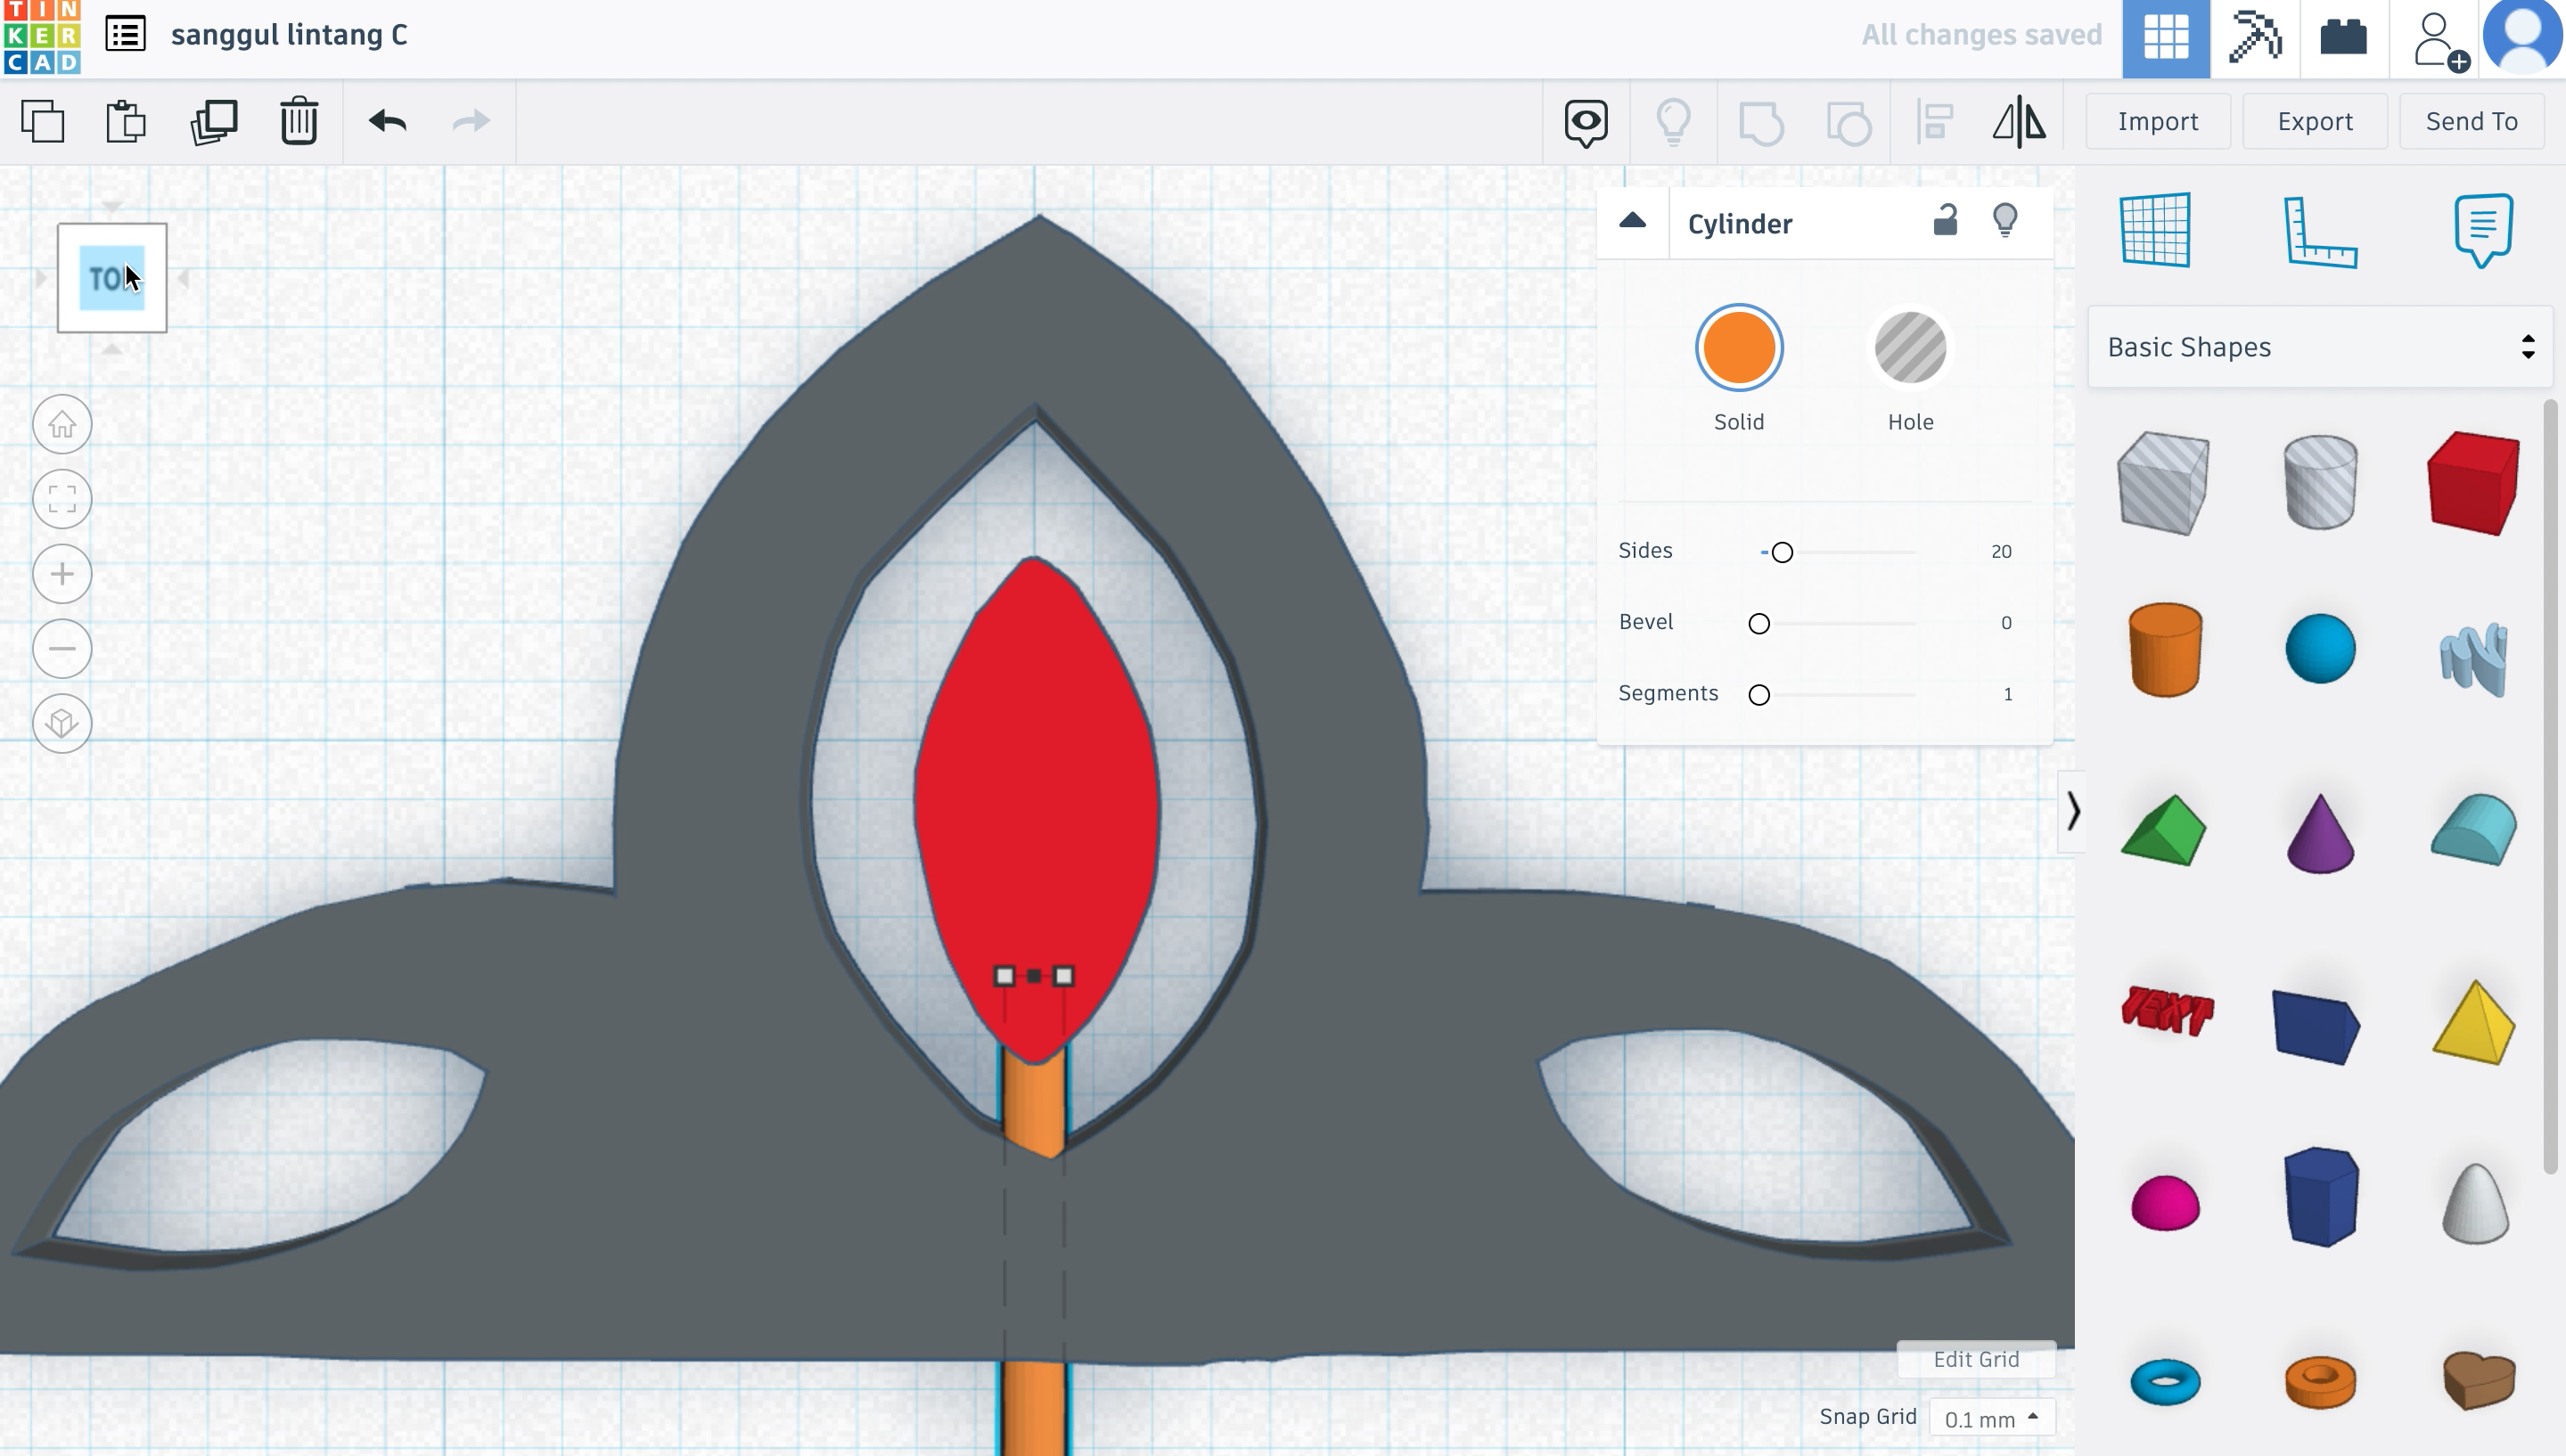
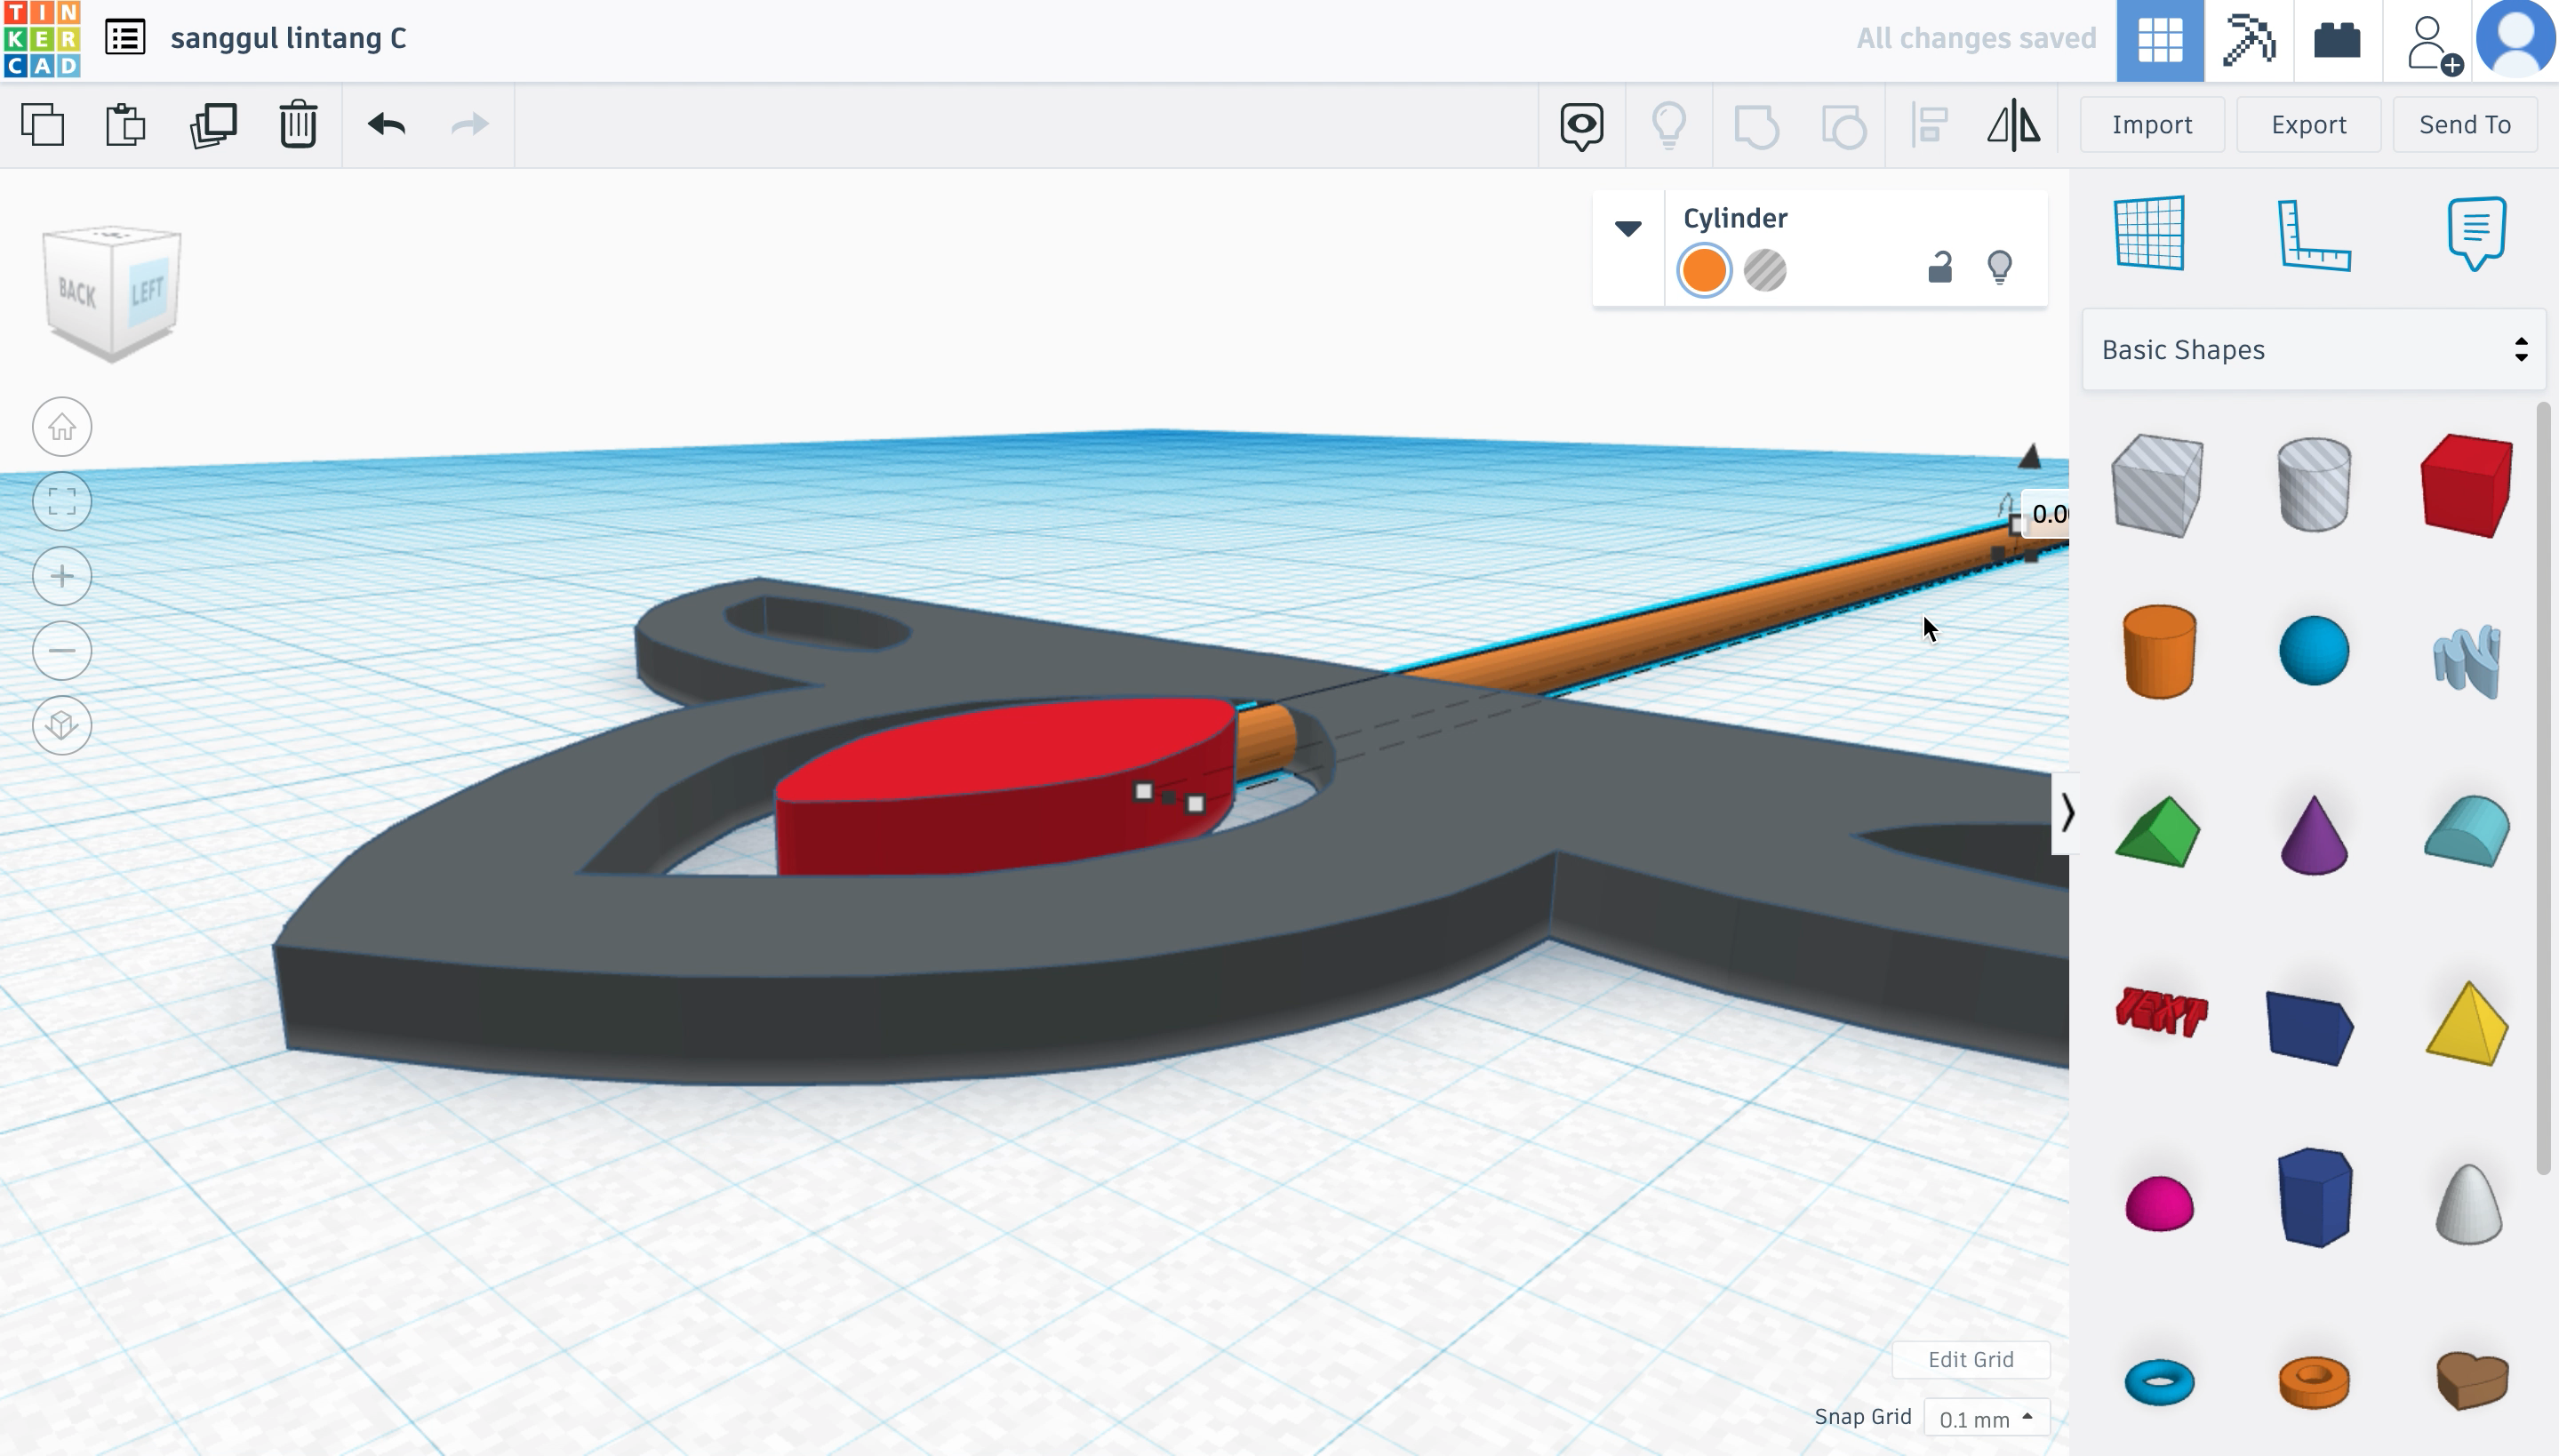
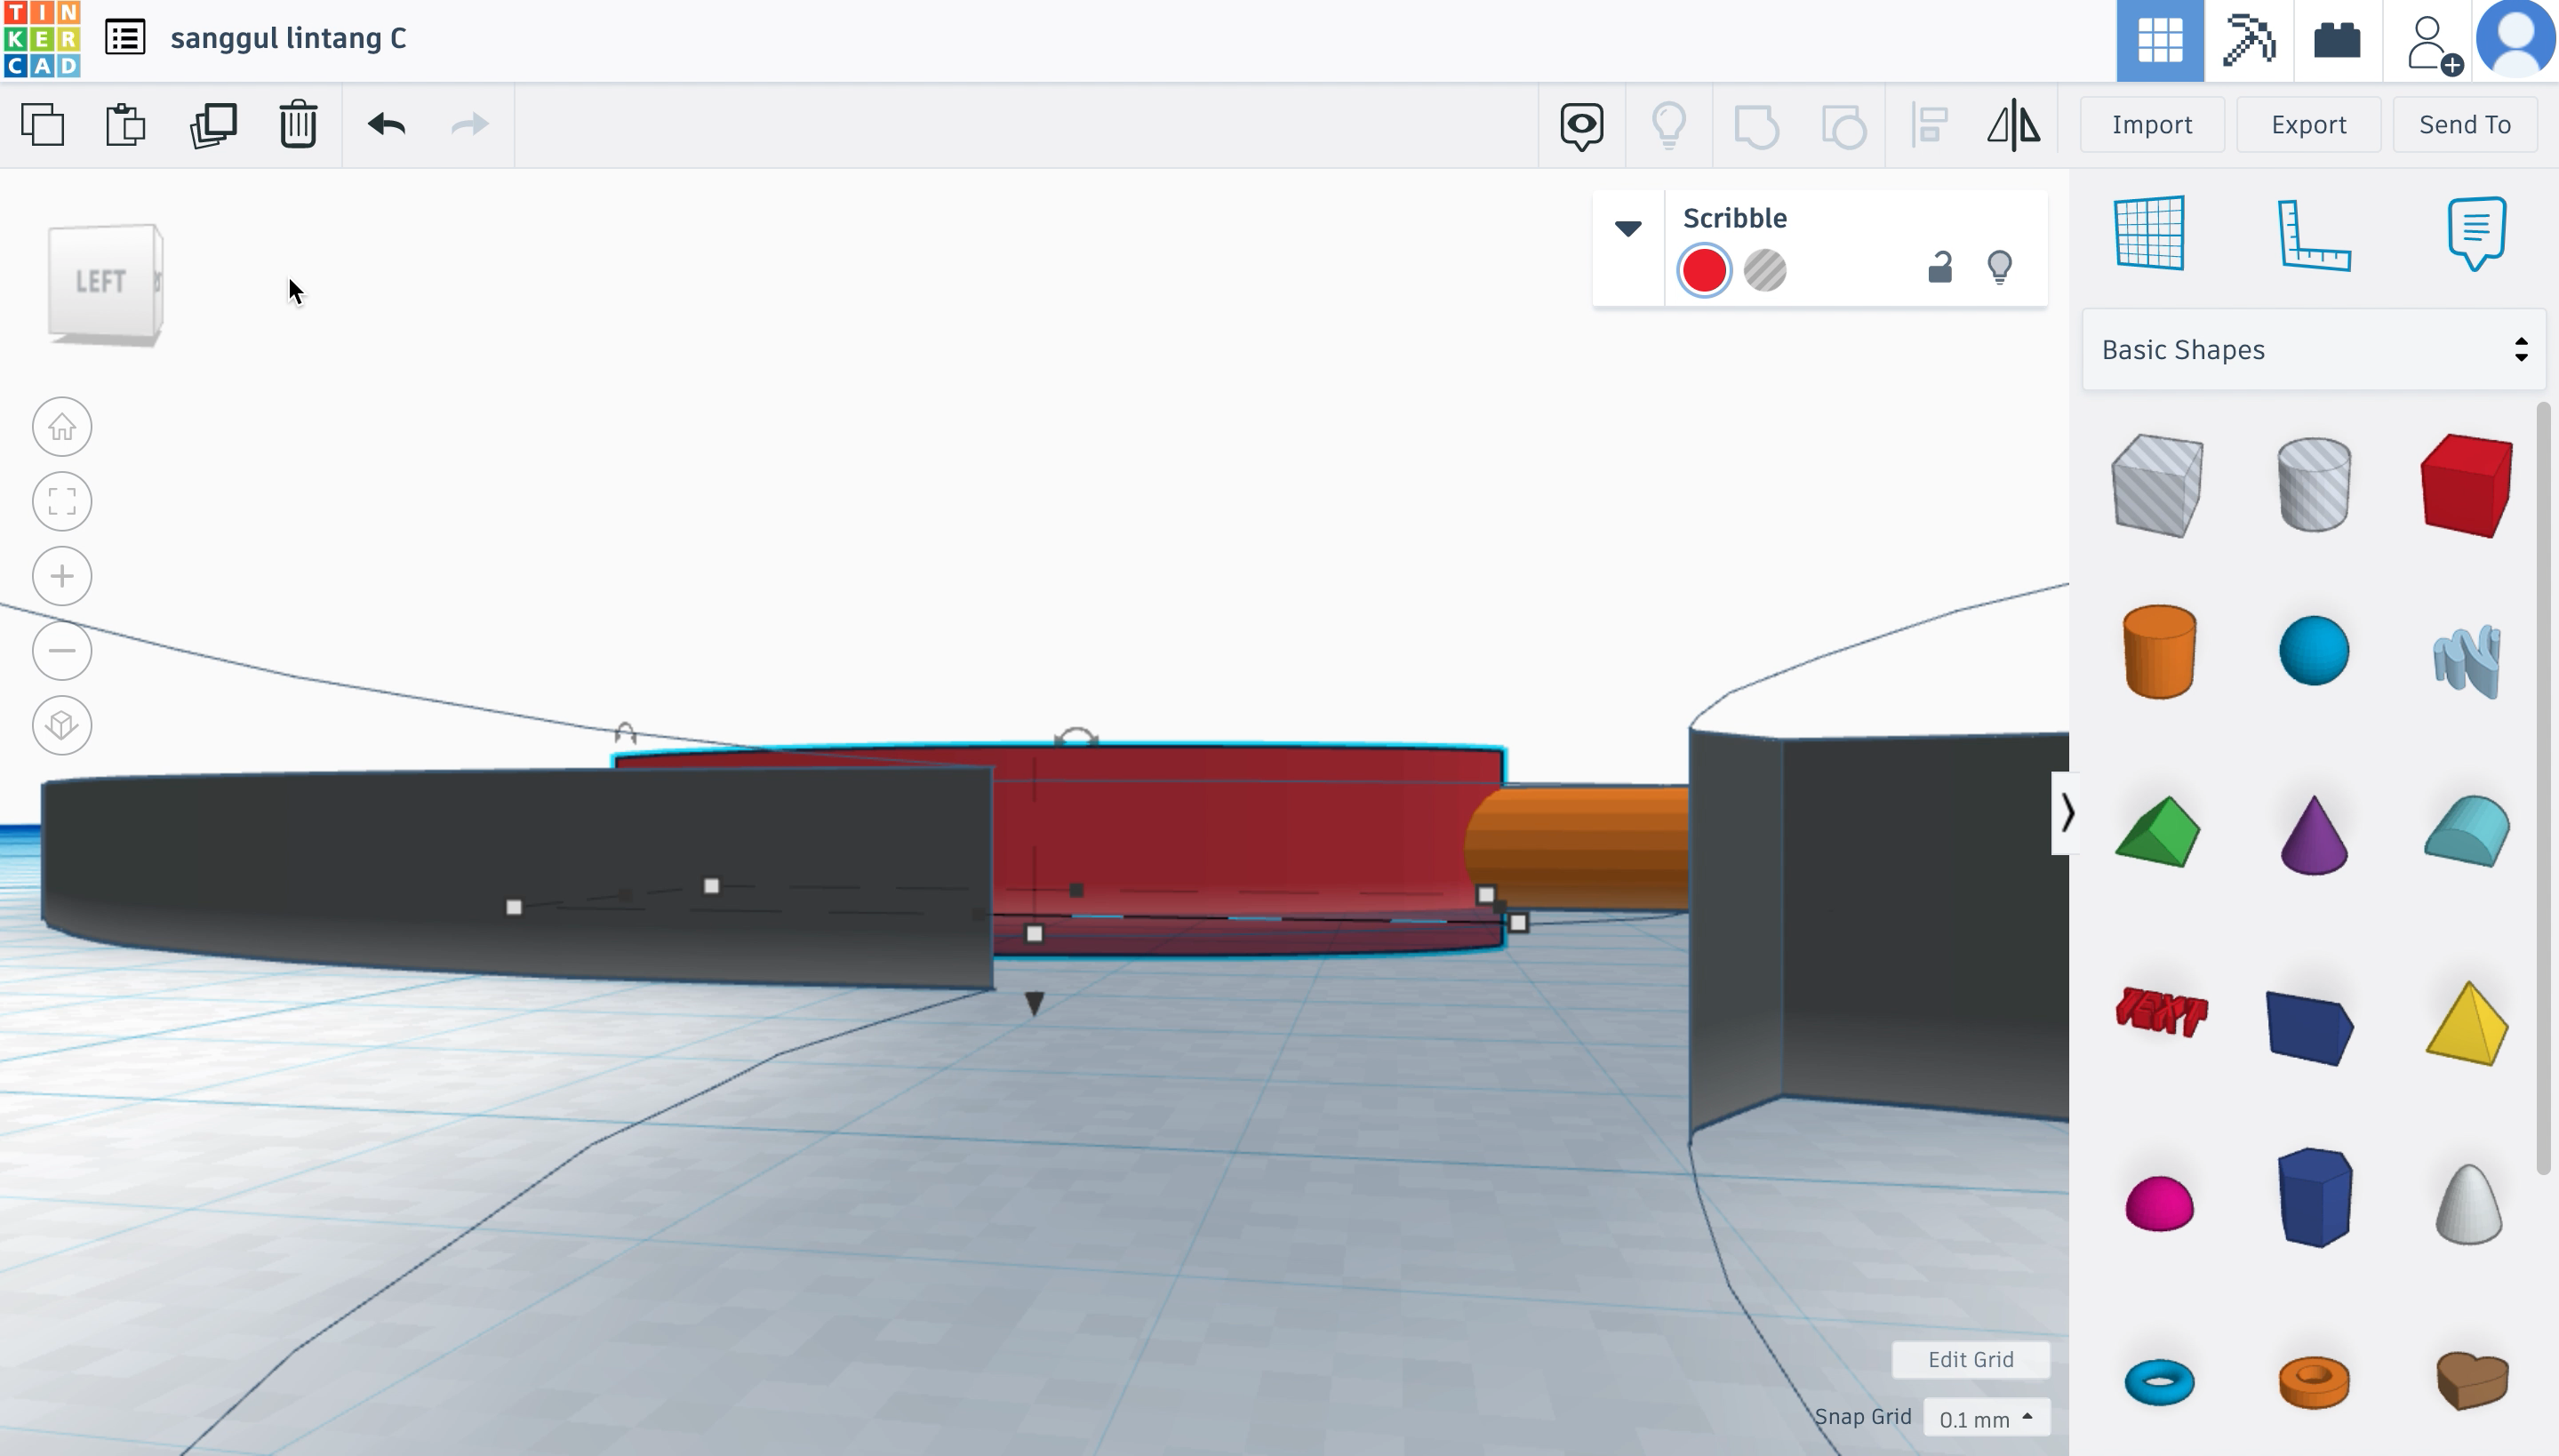
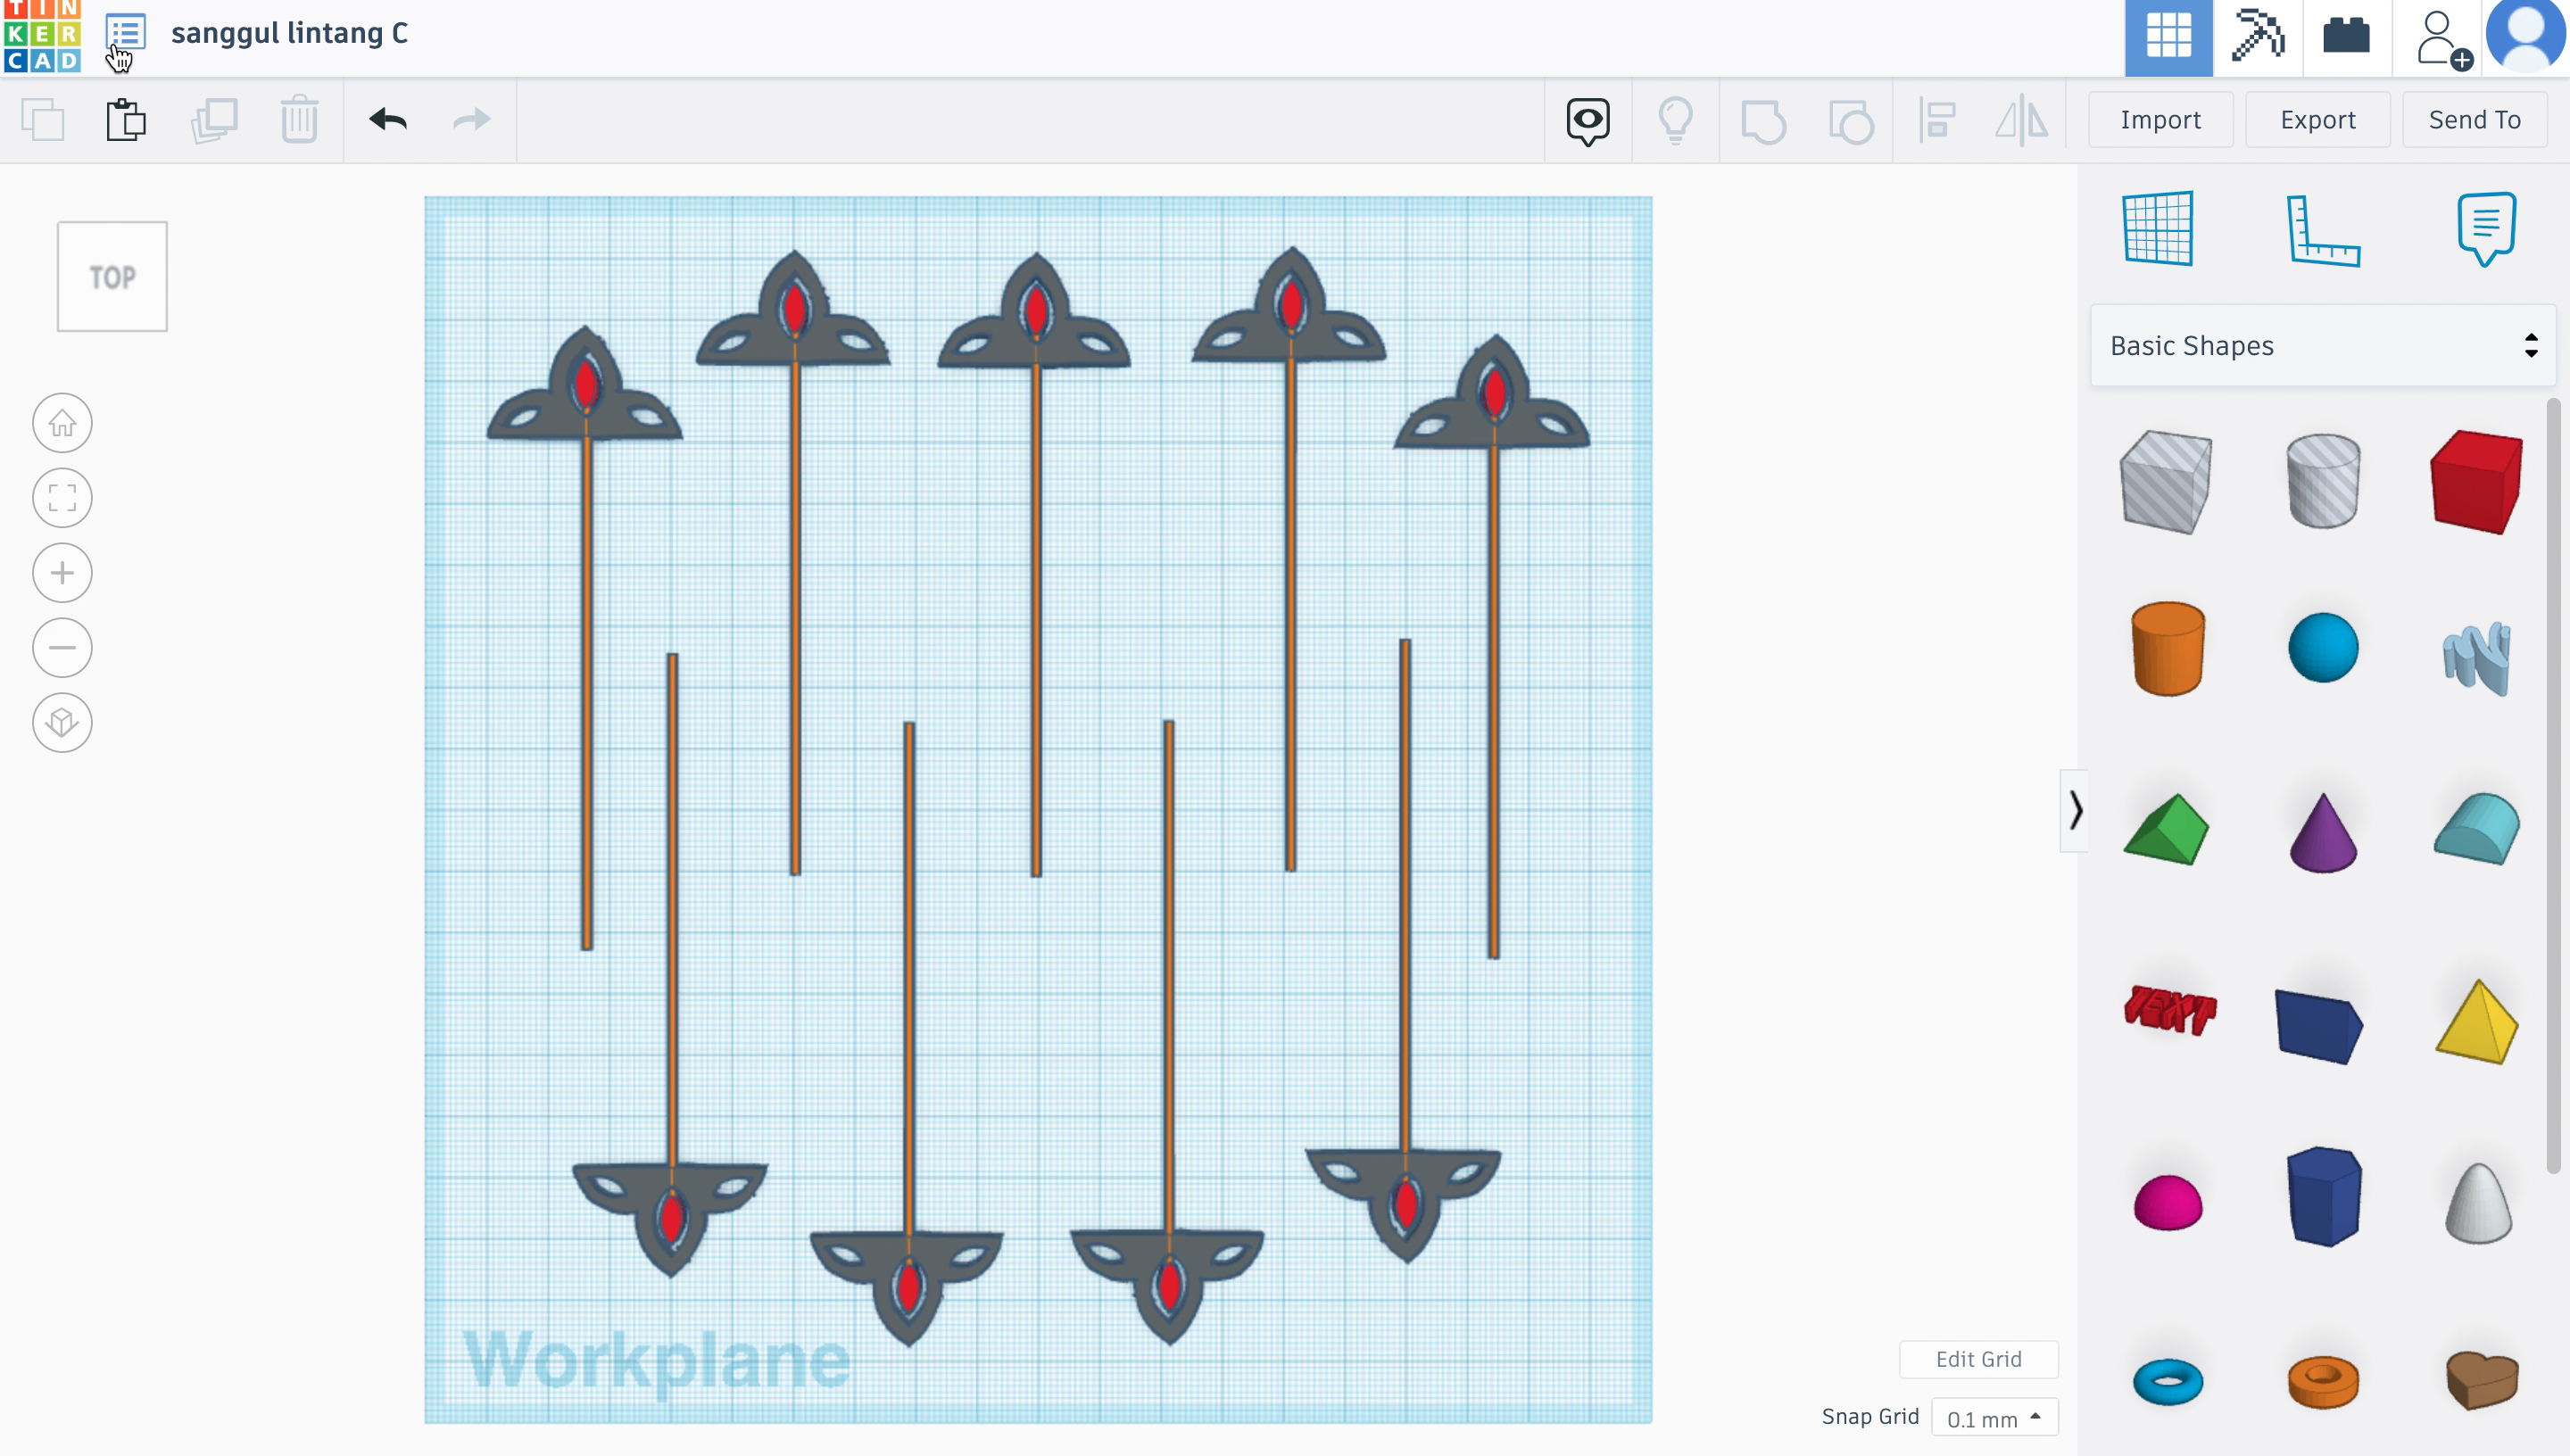
Here step 5 is repeated to make the skewers so you can refers to that for the explanation of the images.
The only thing that differs is the length of the skewers.
Sanggul Lintang D
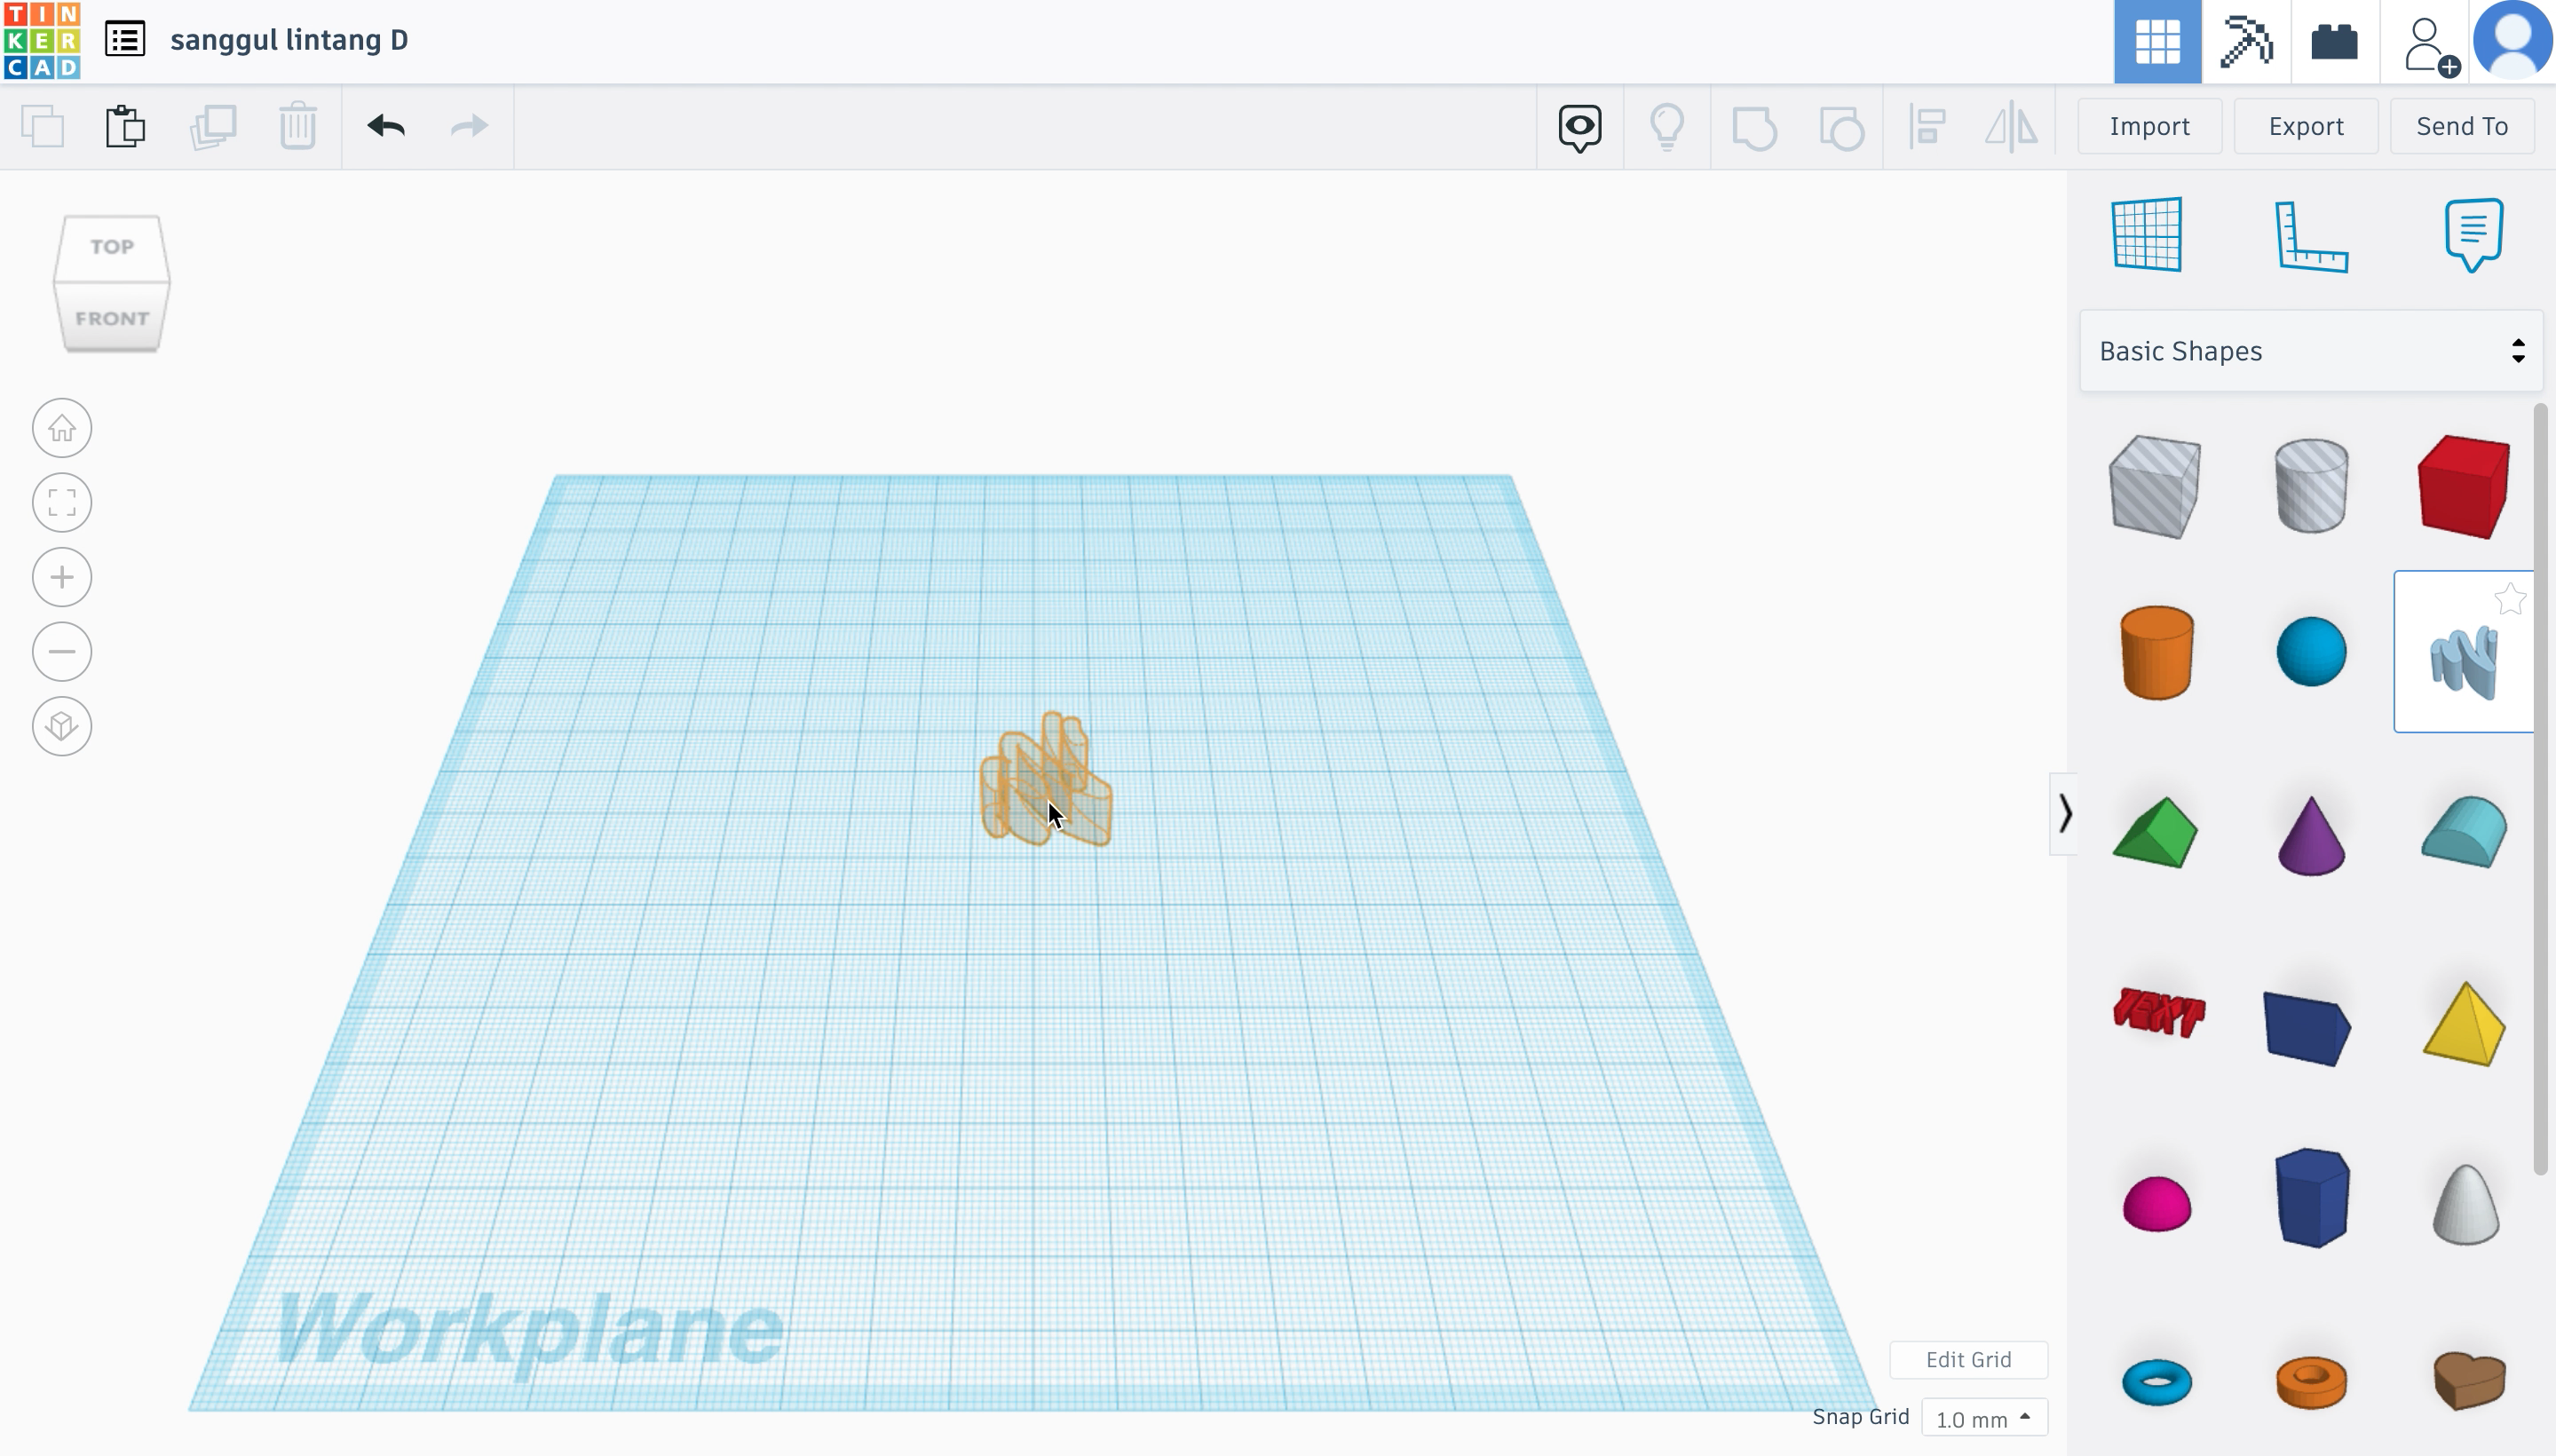
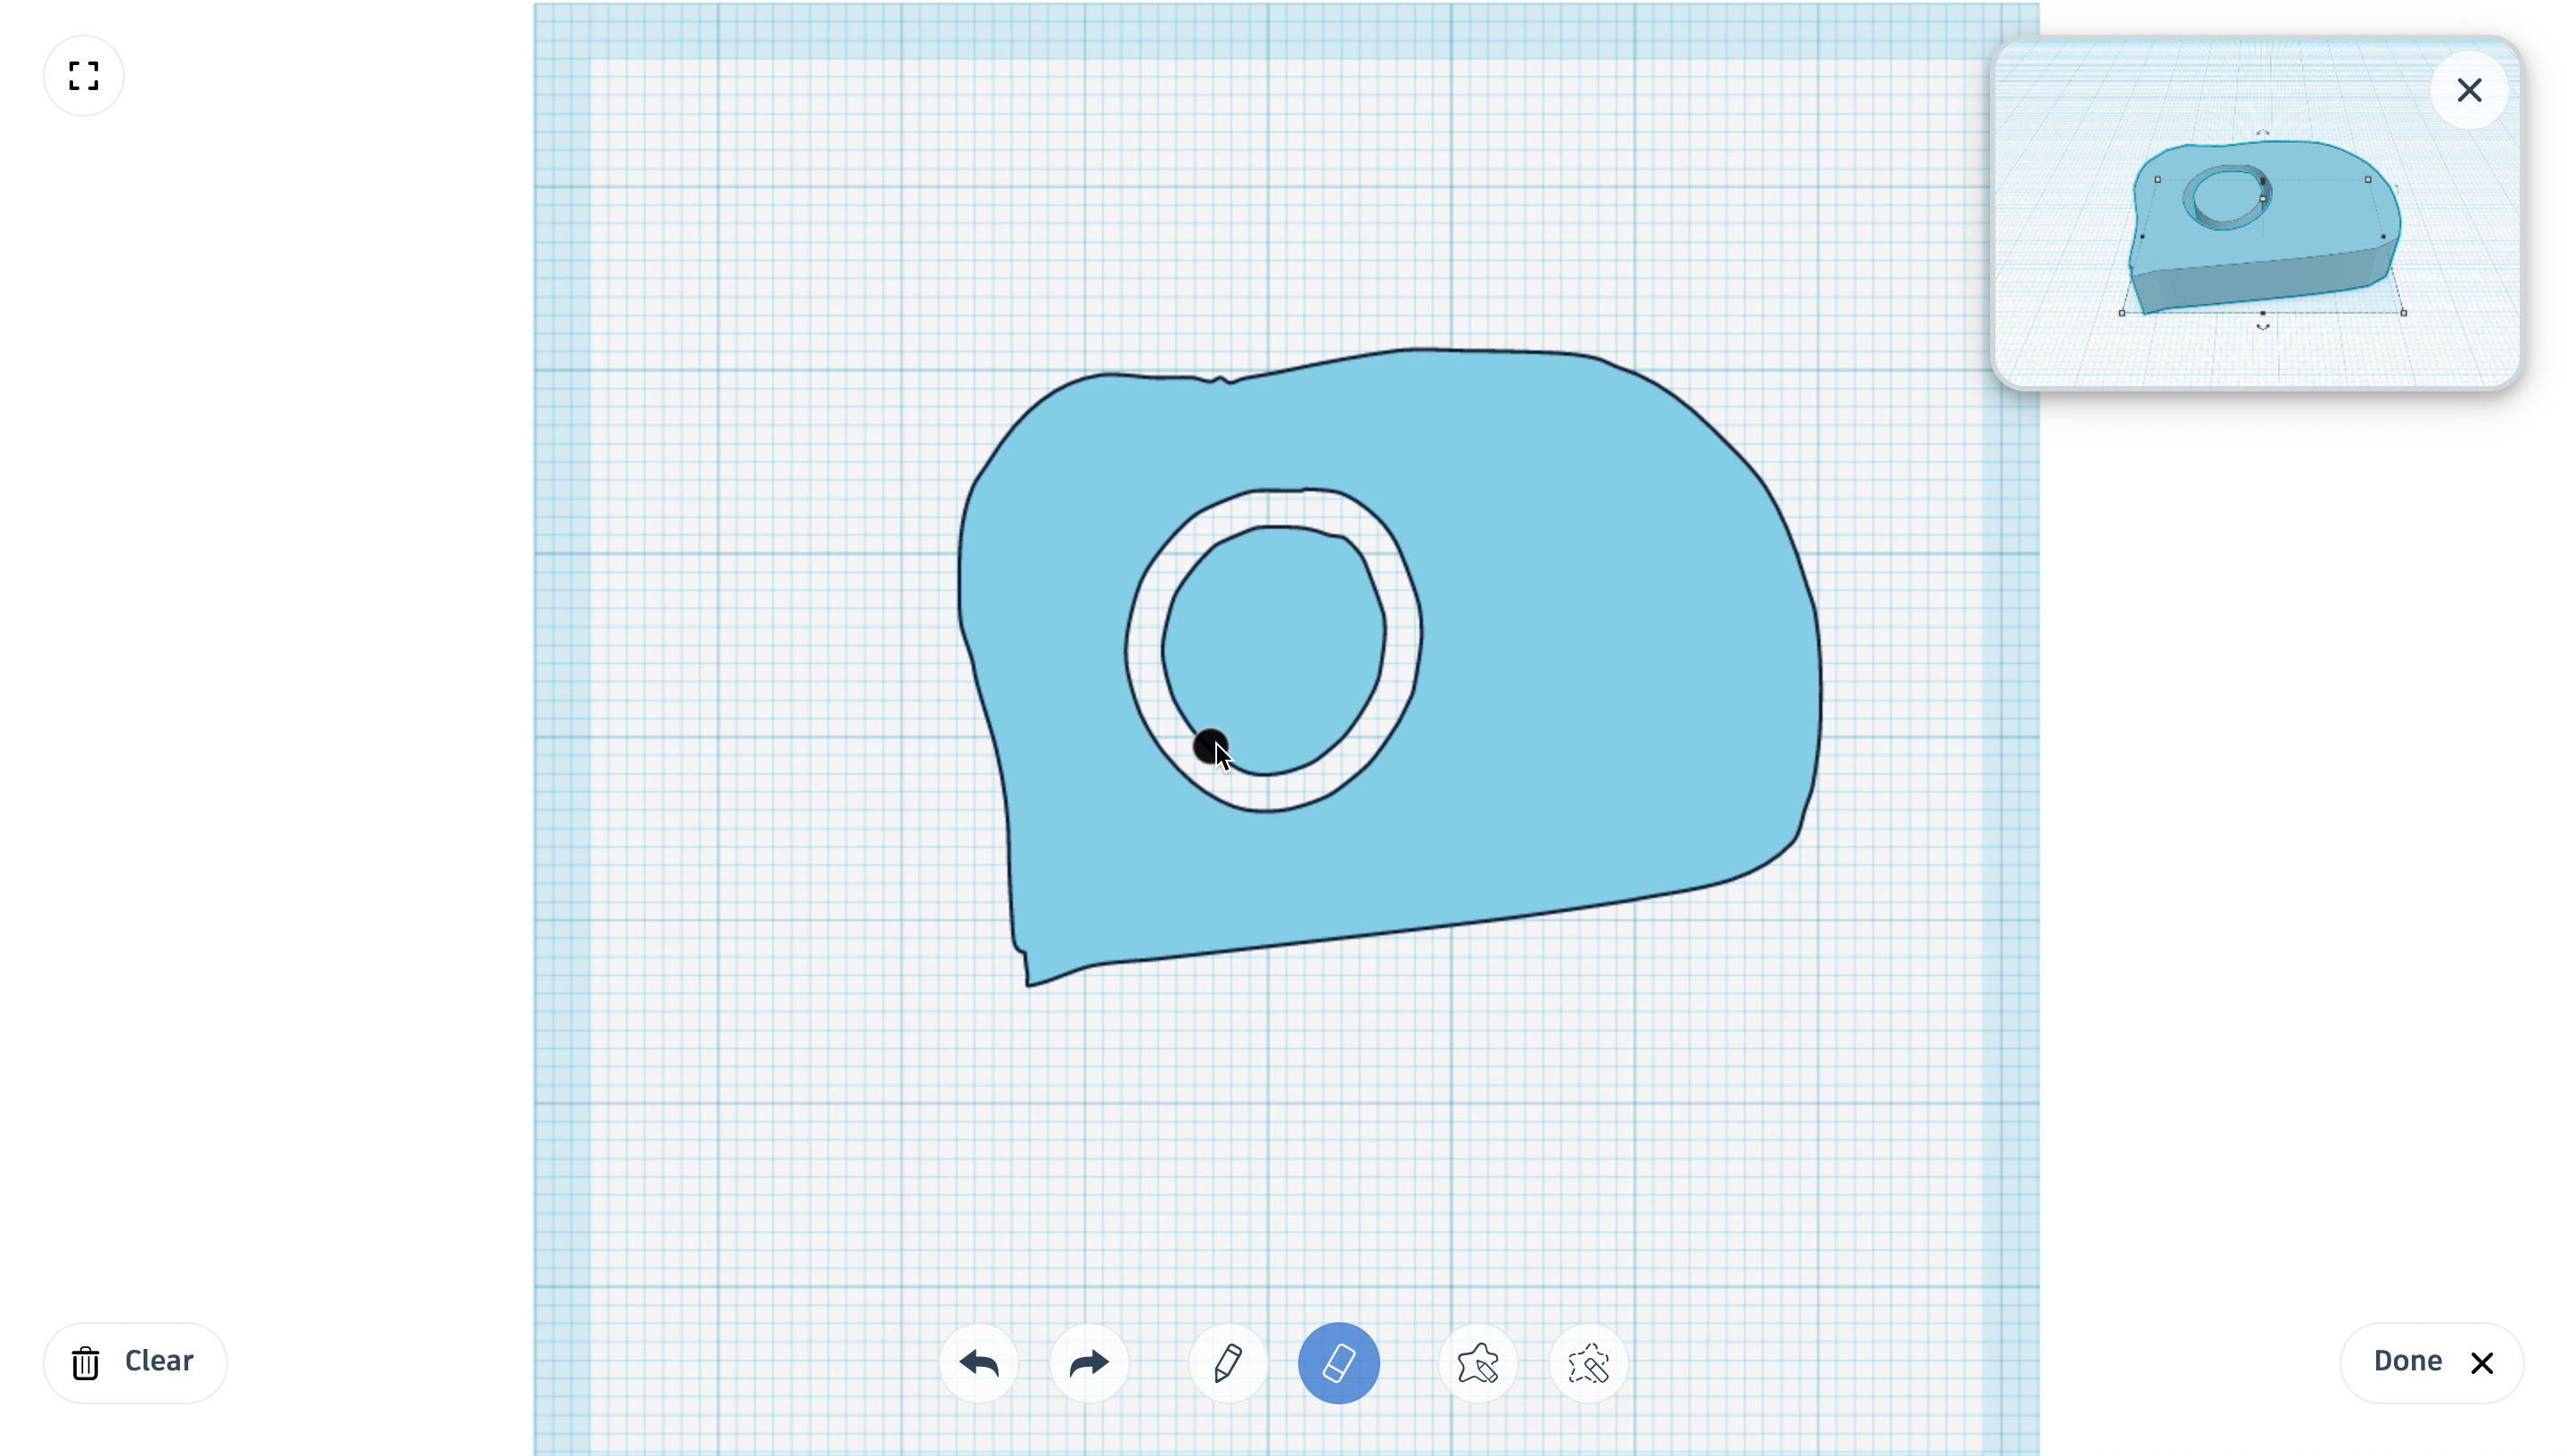
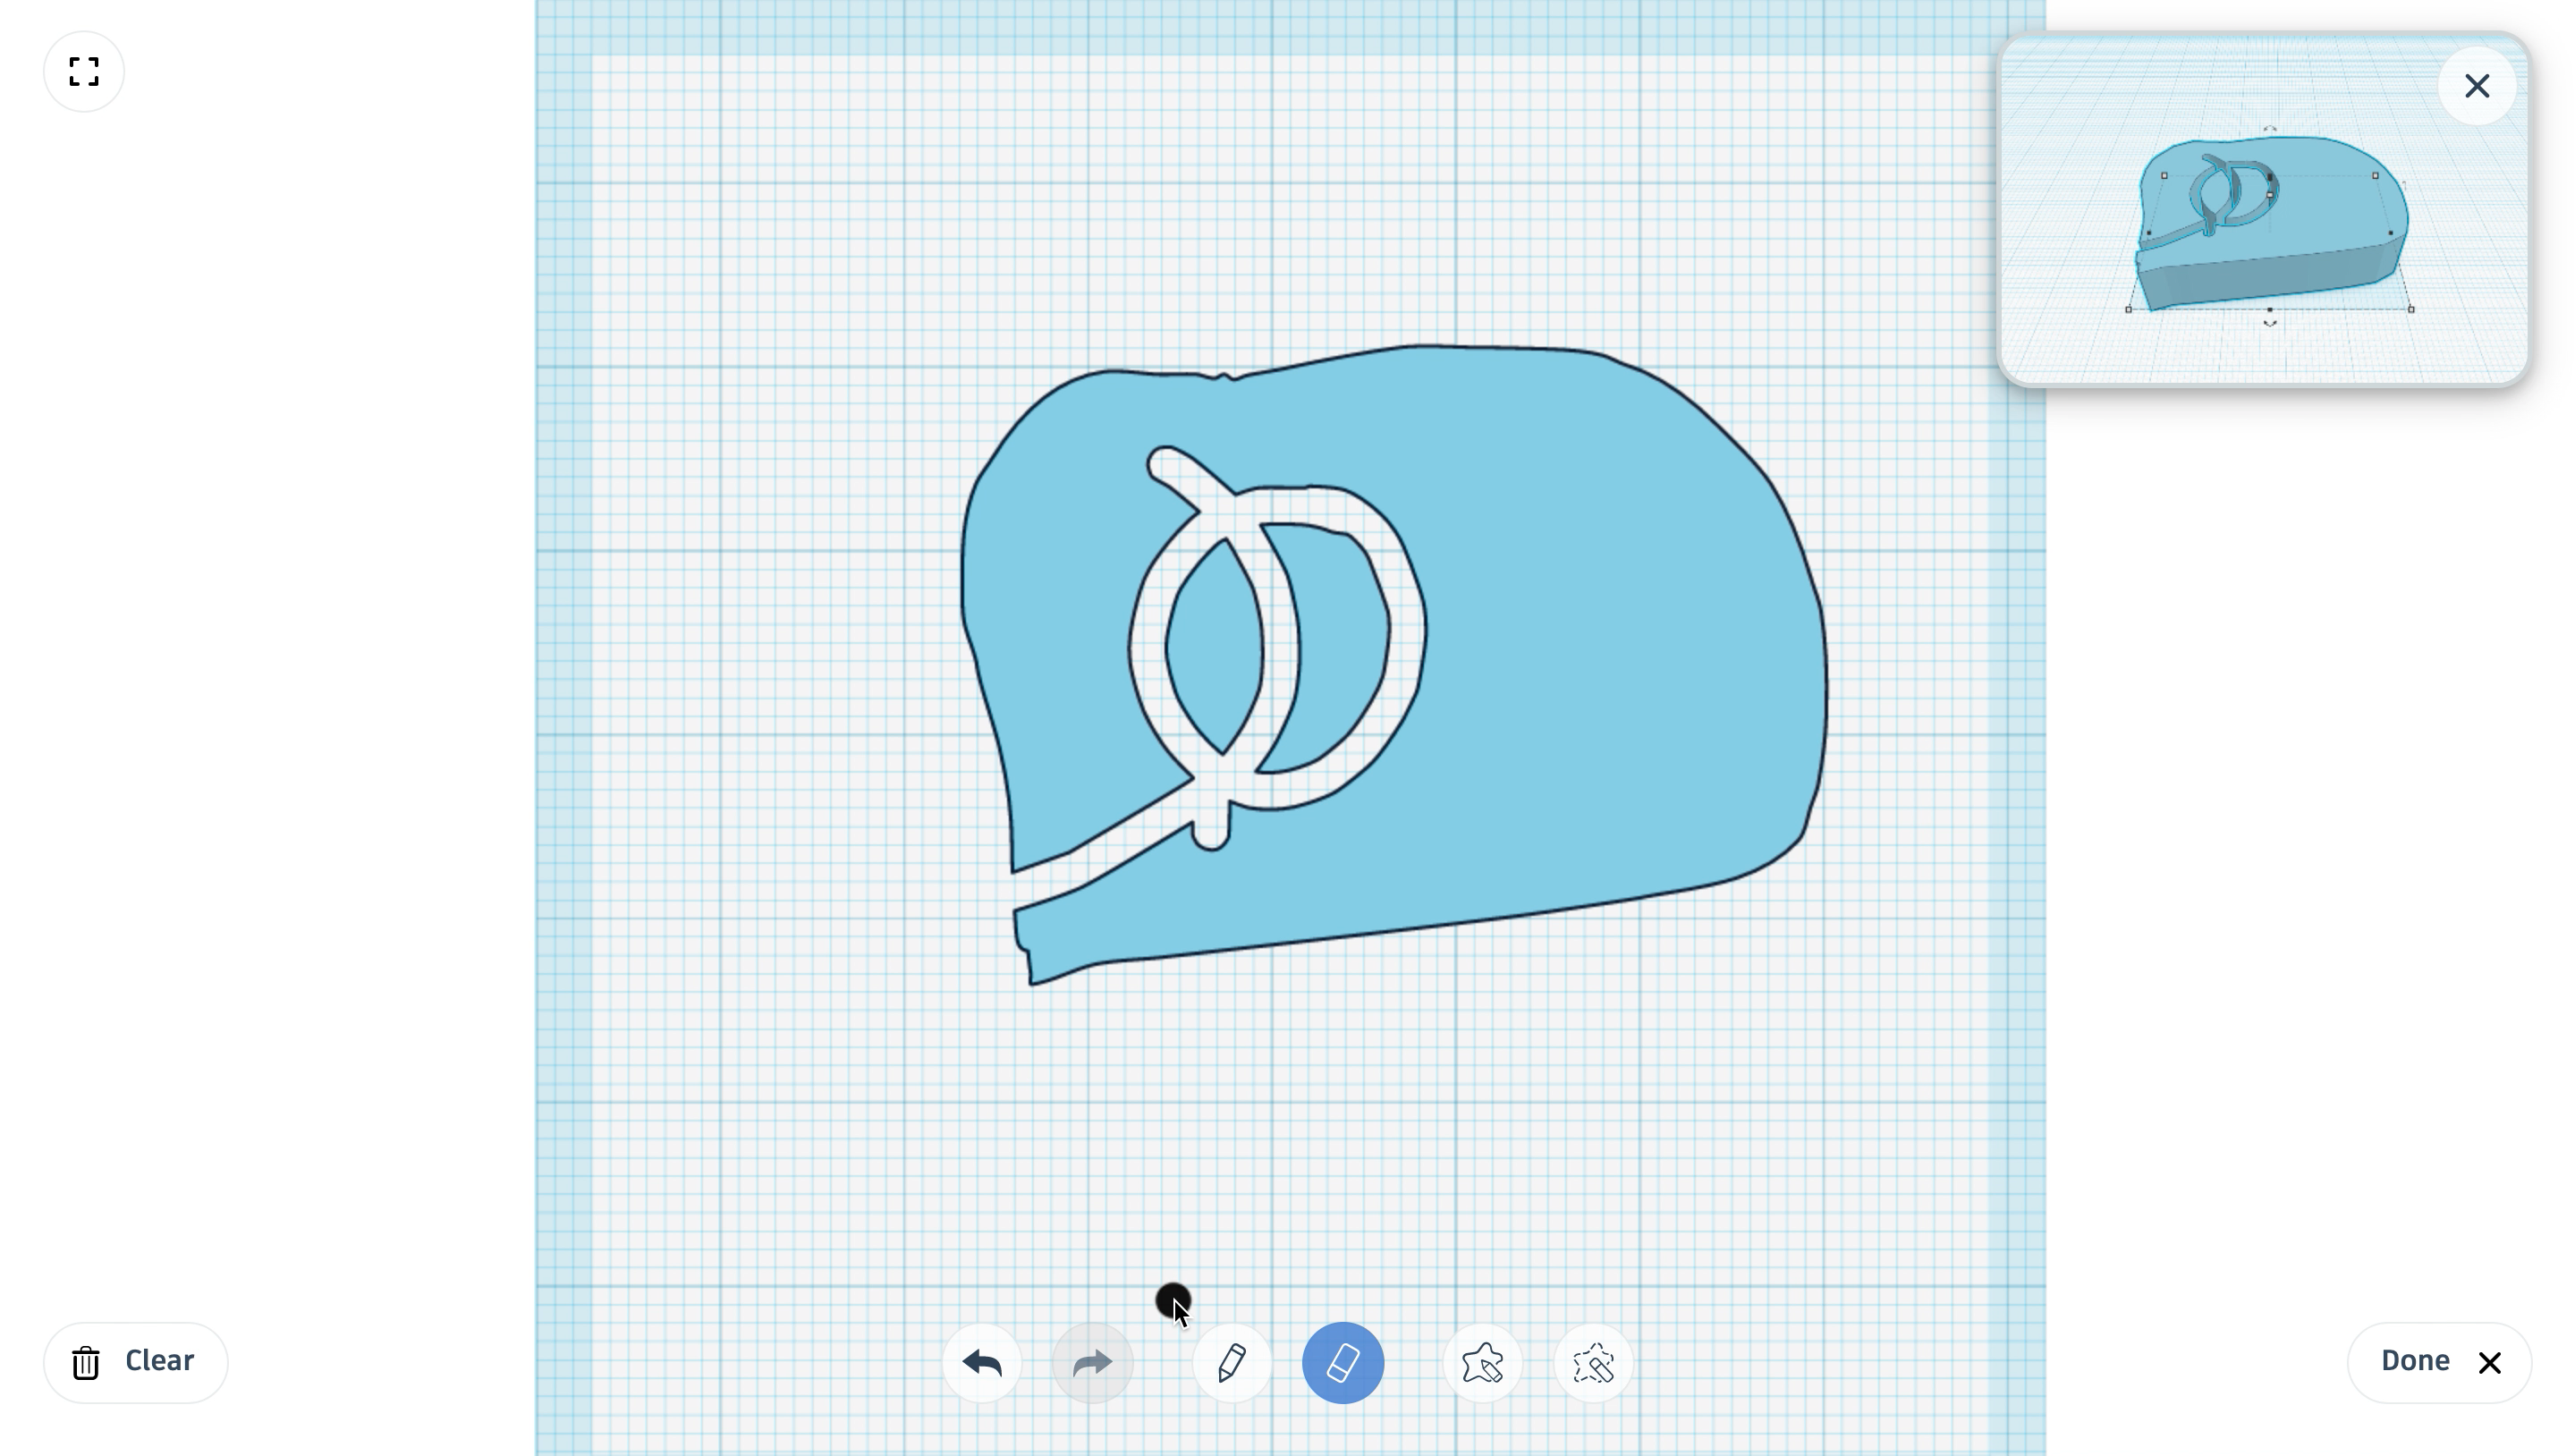
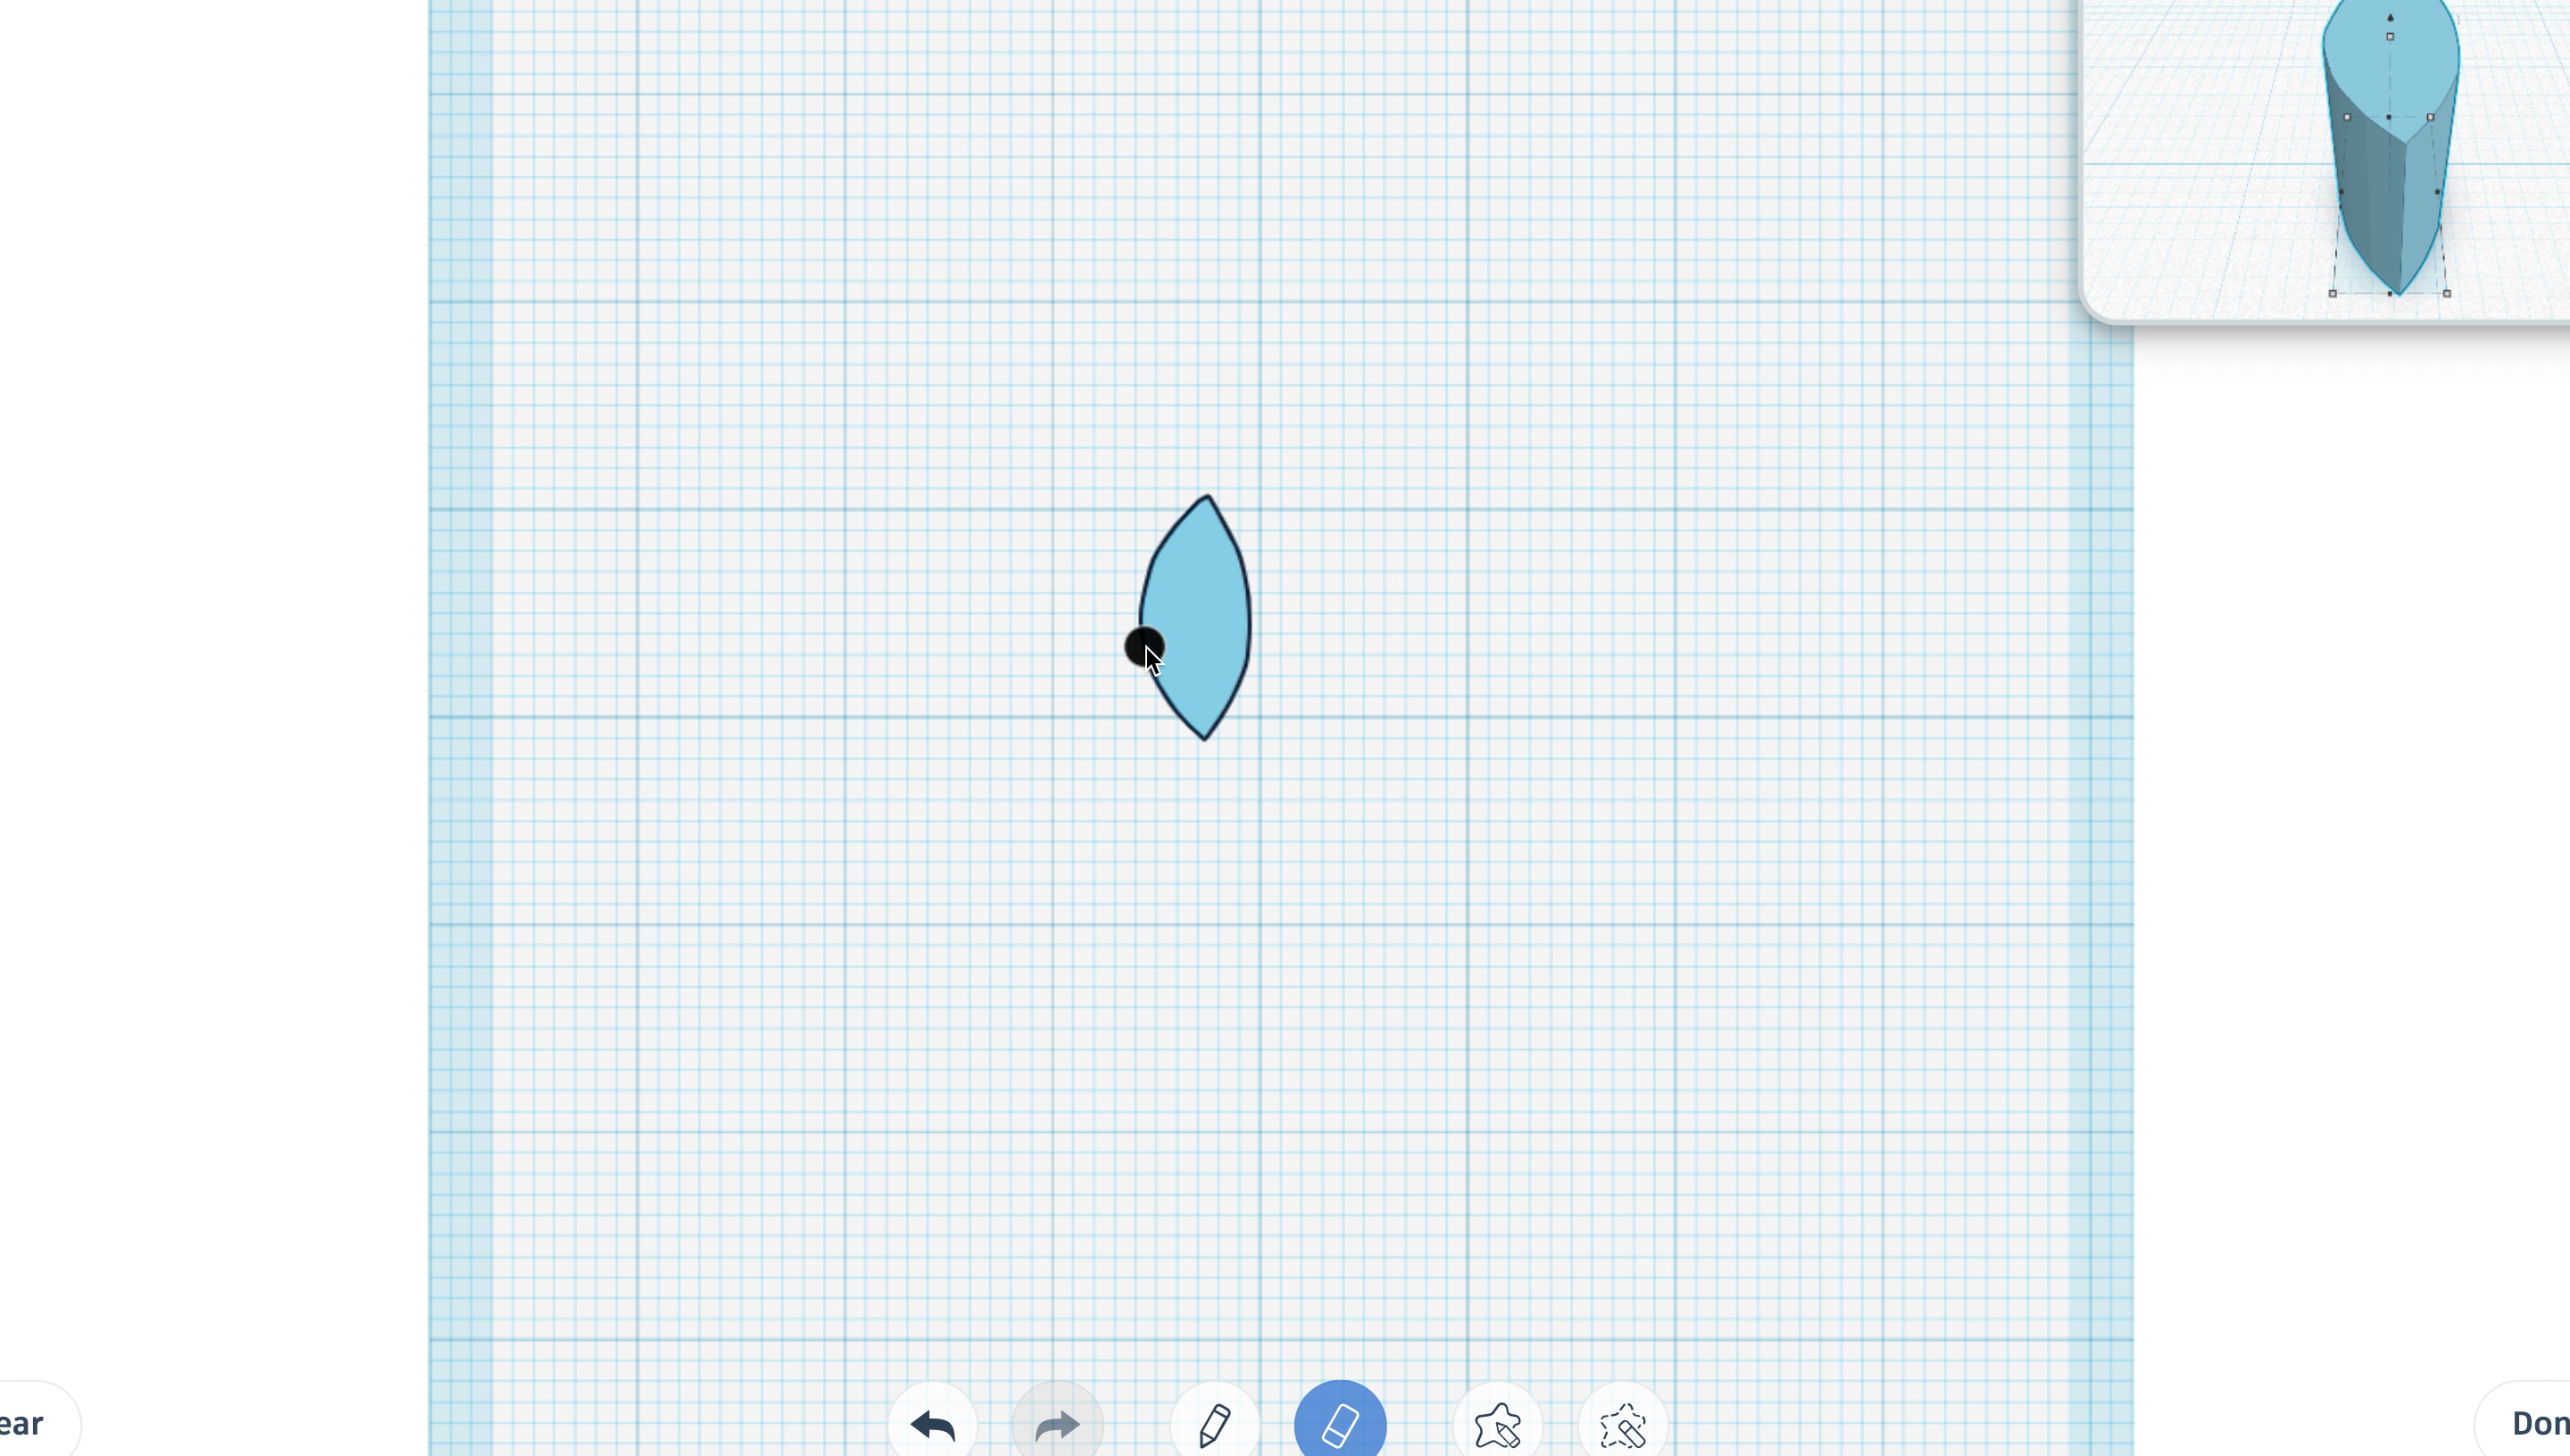
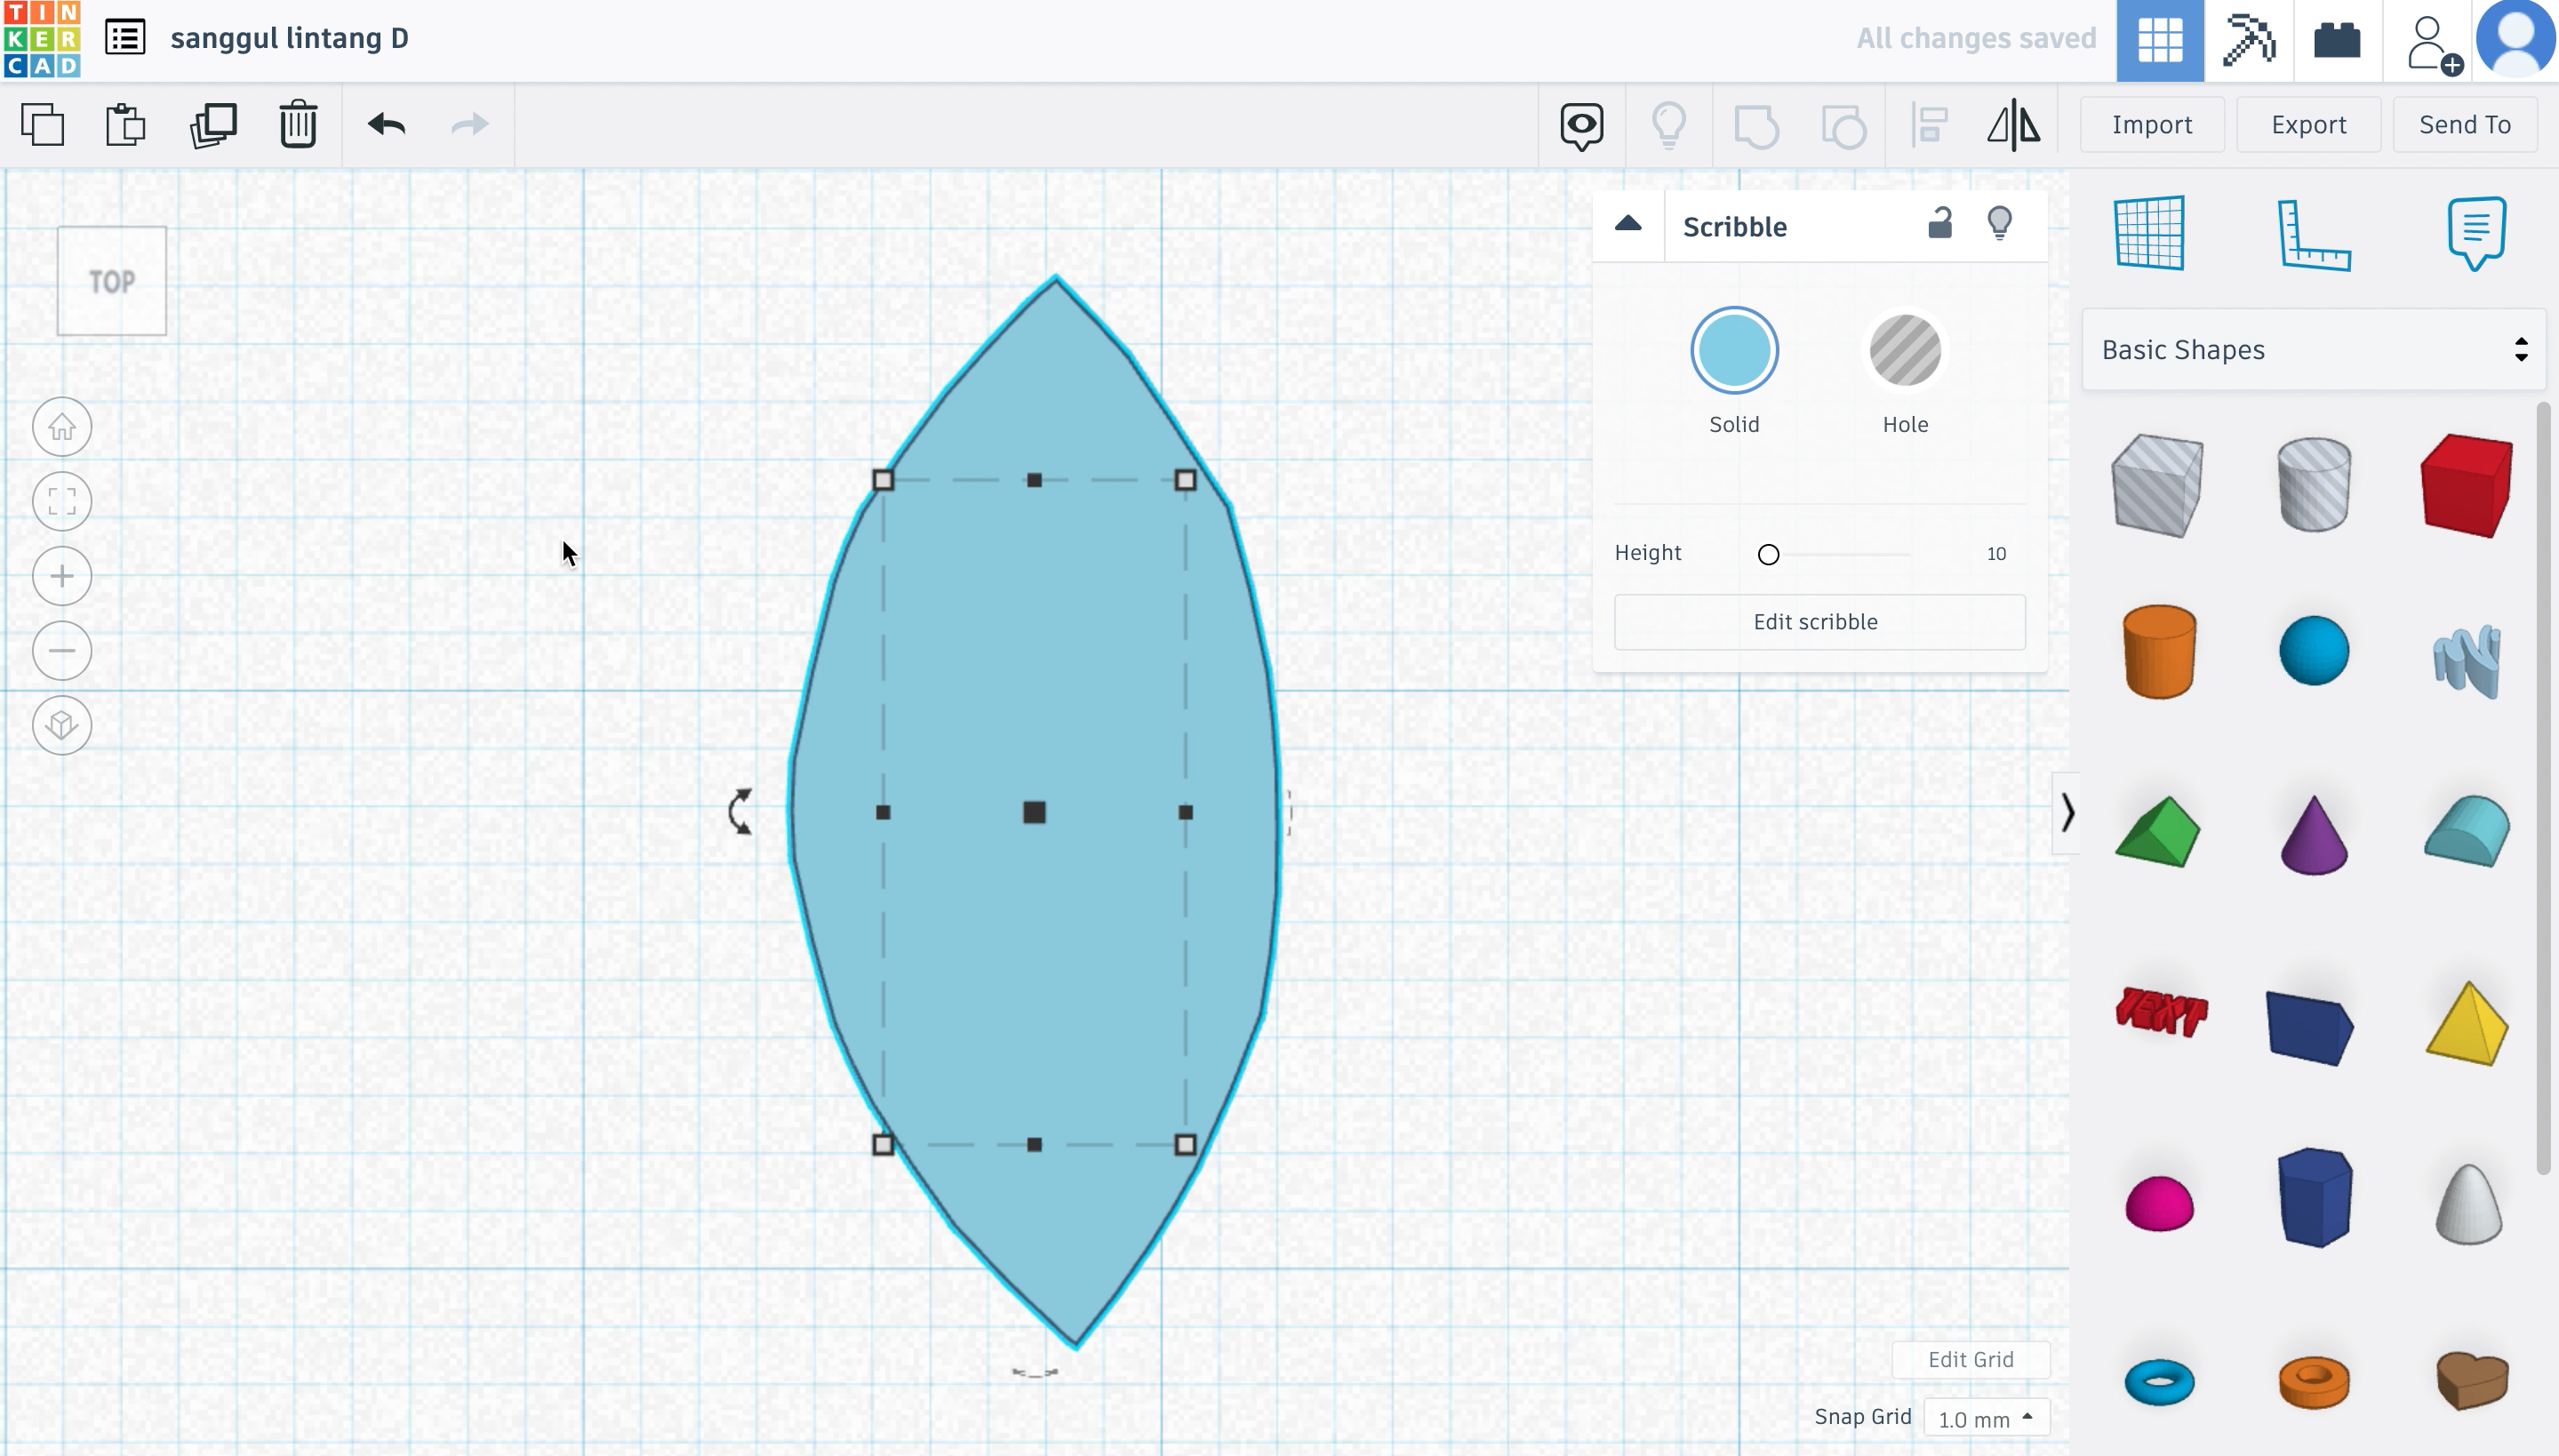
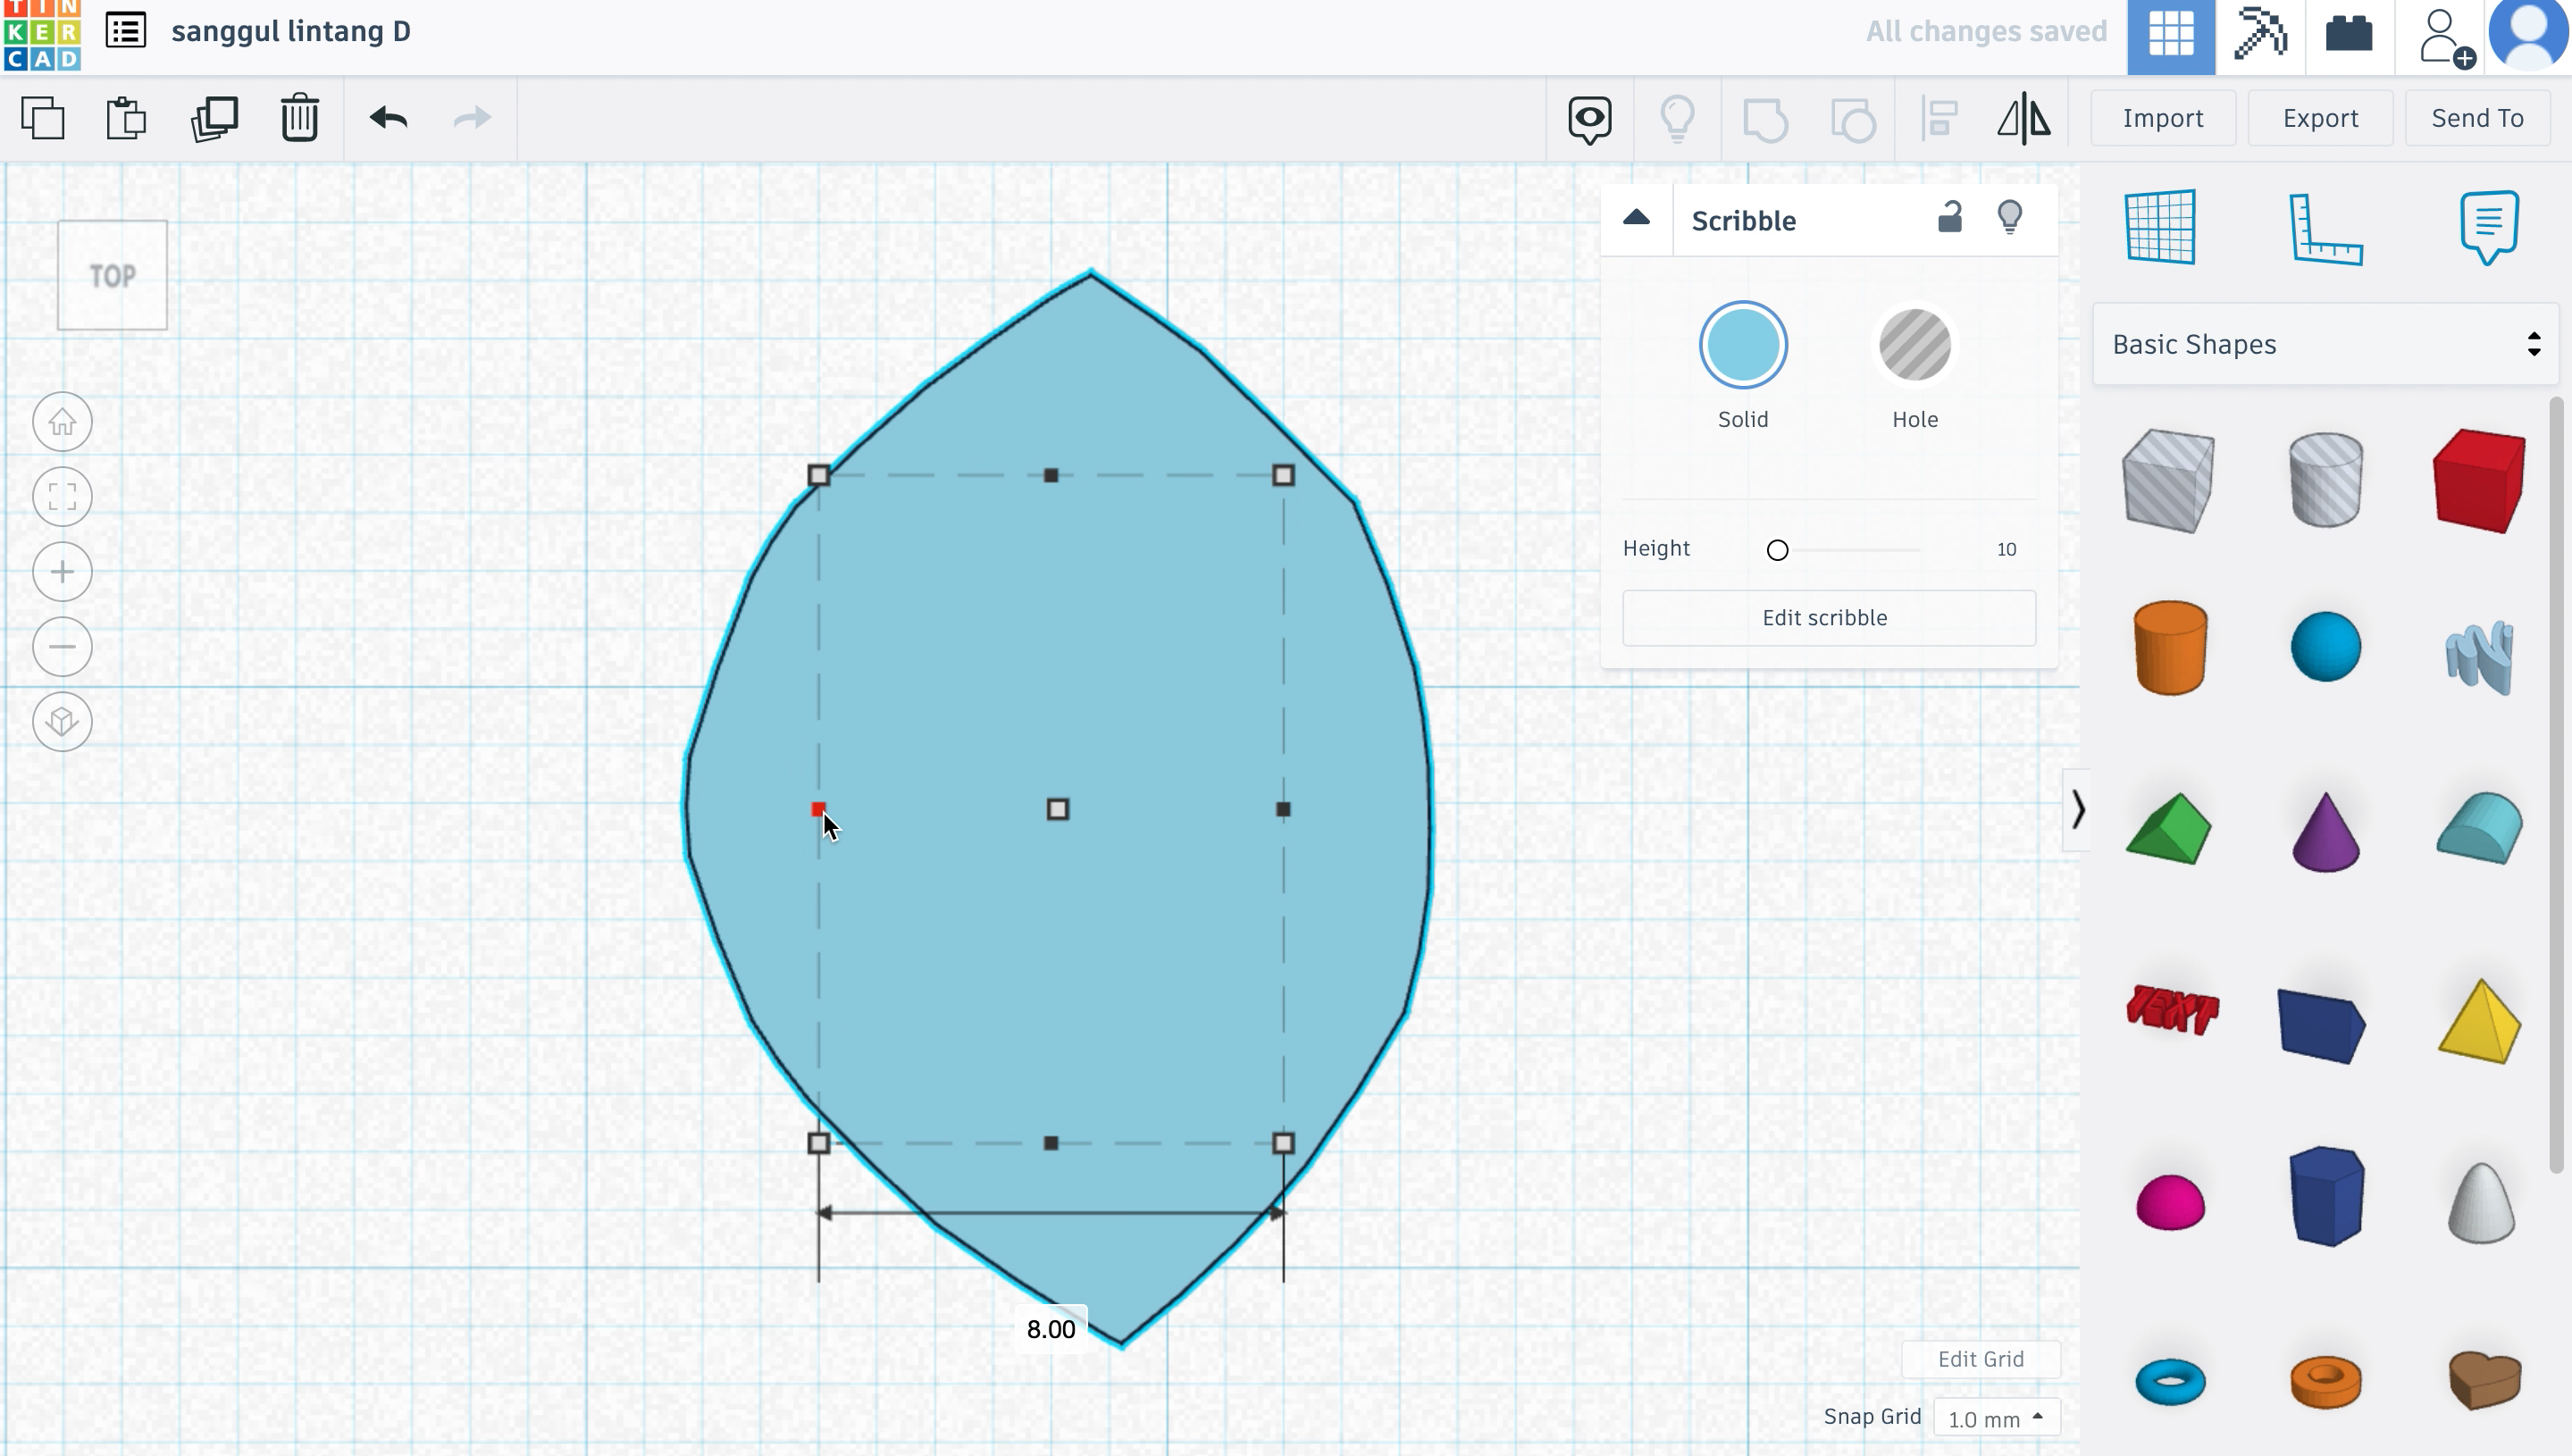
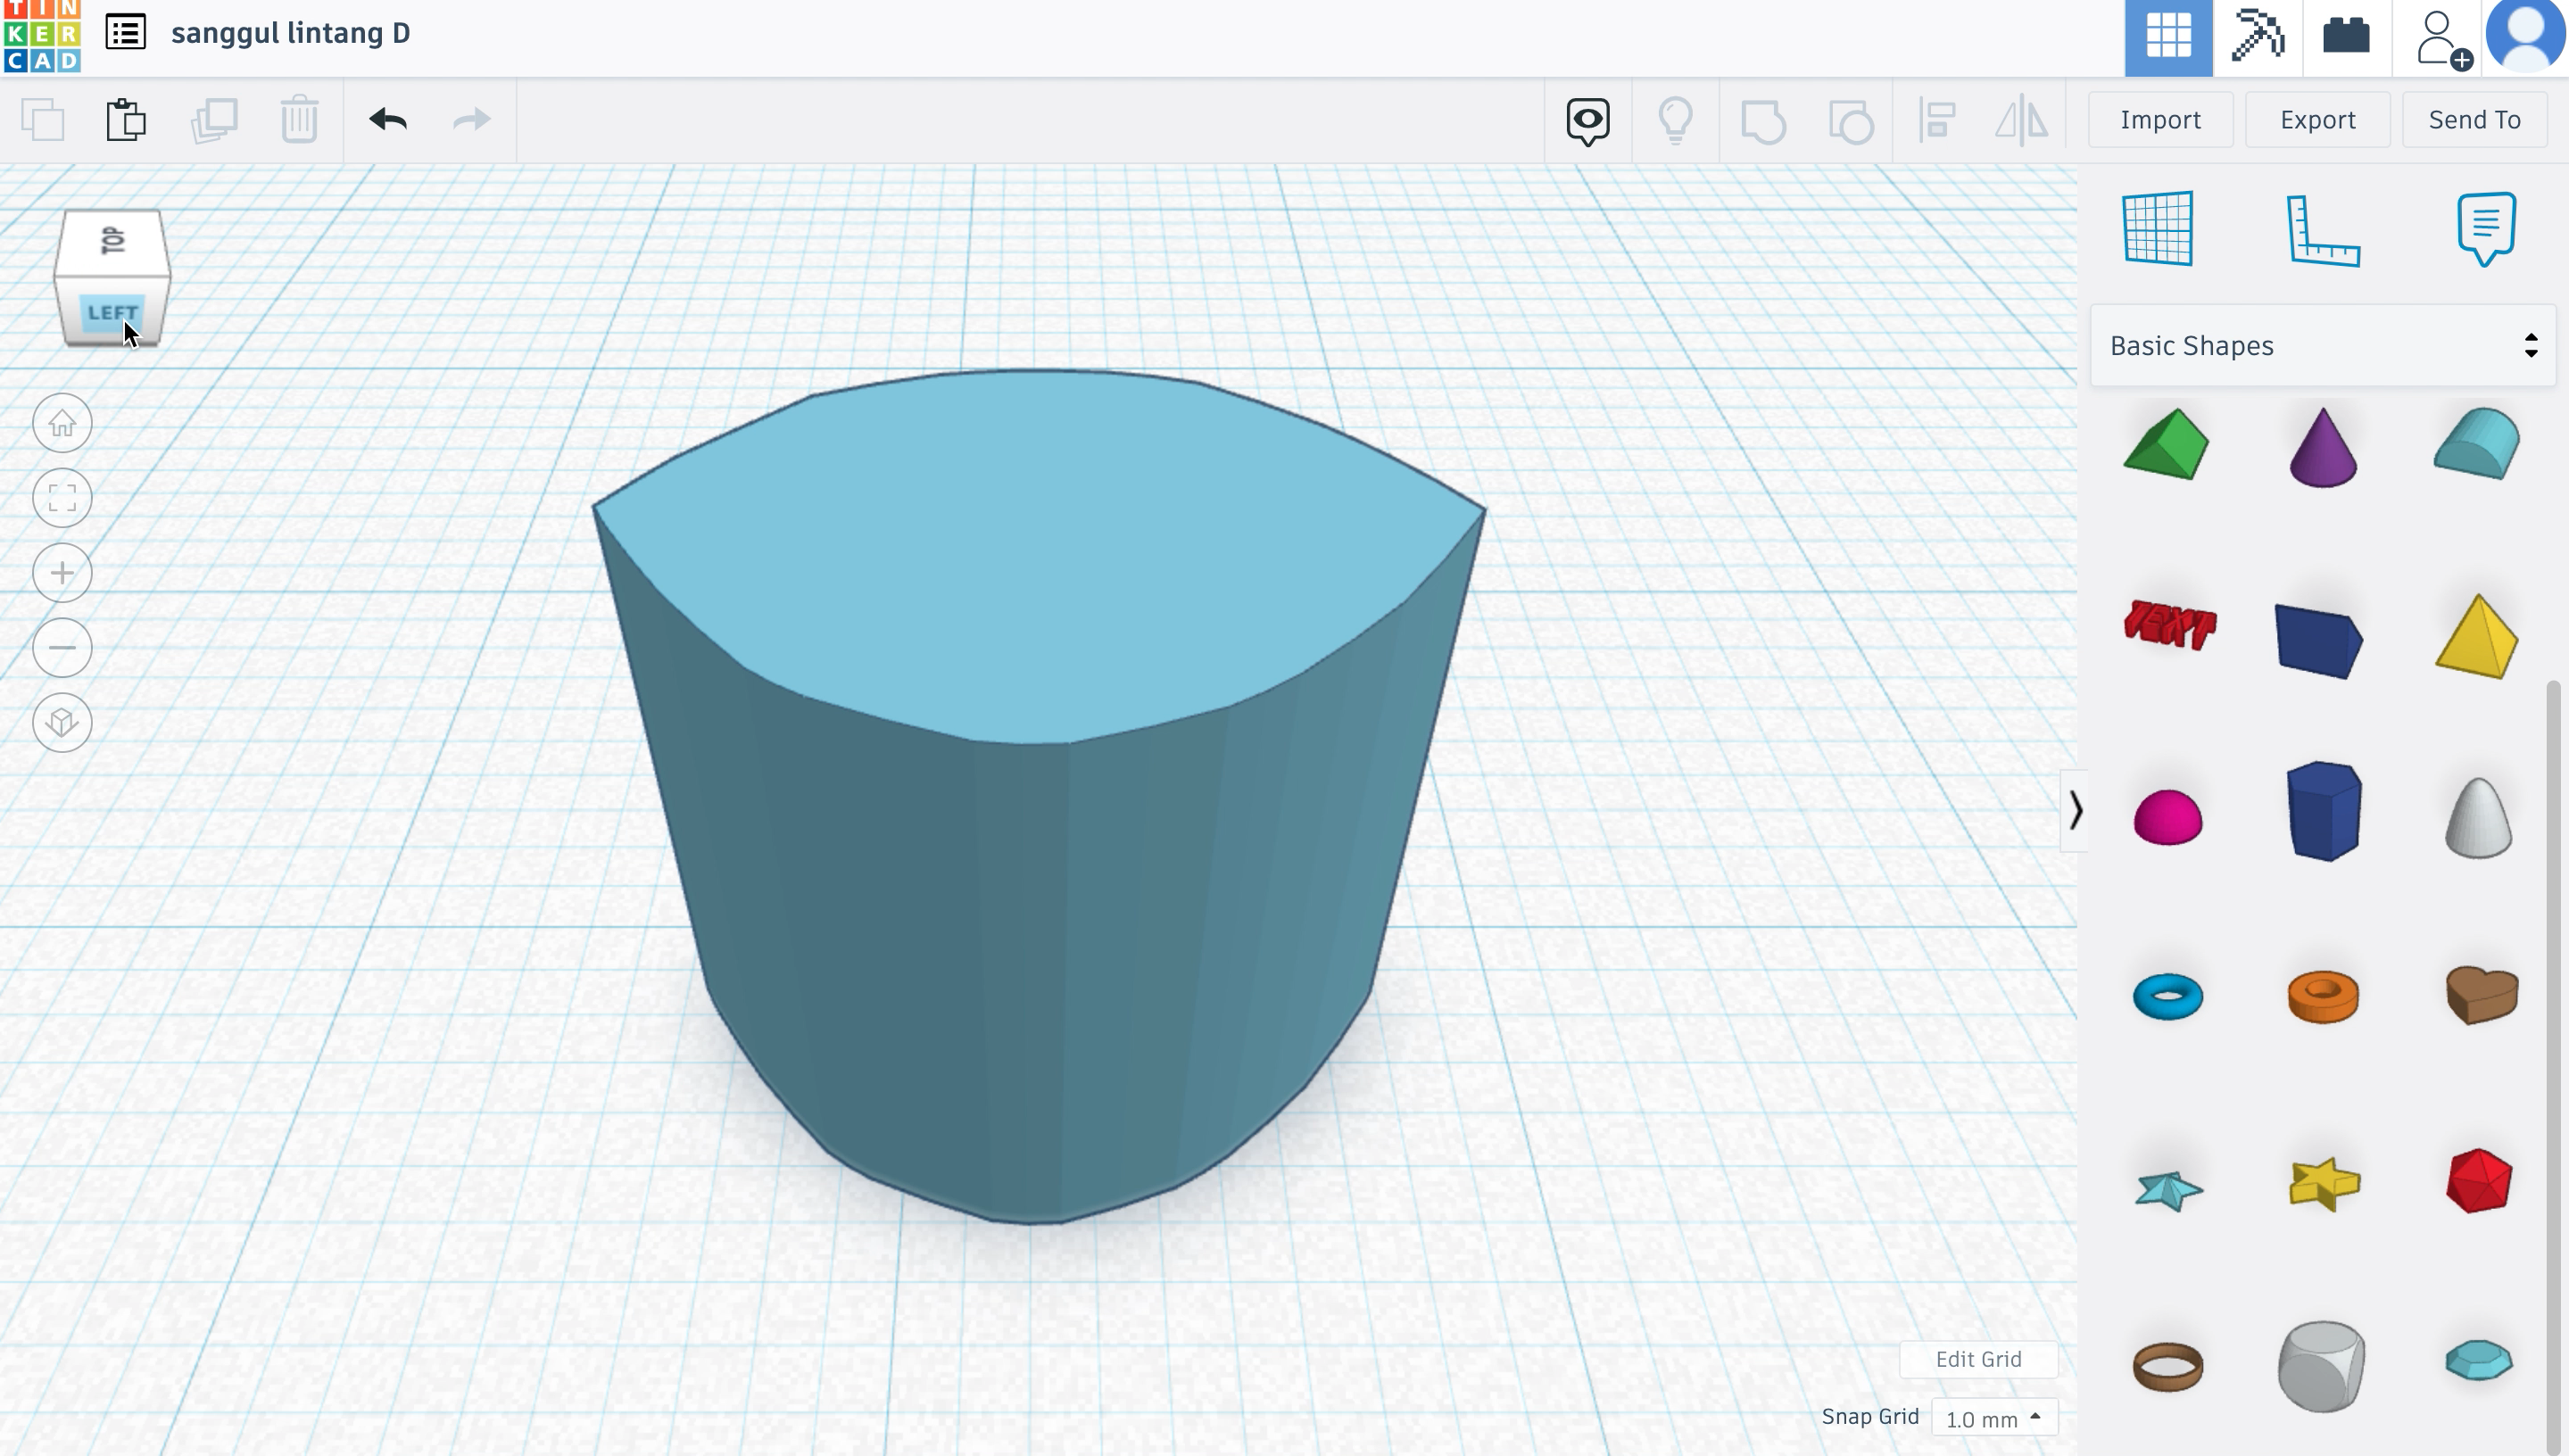
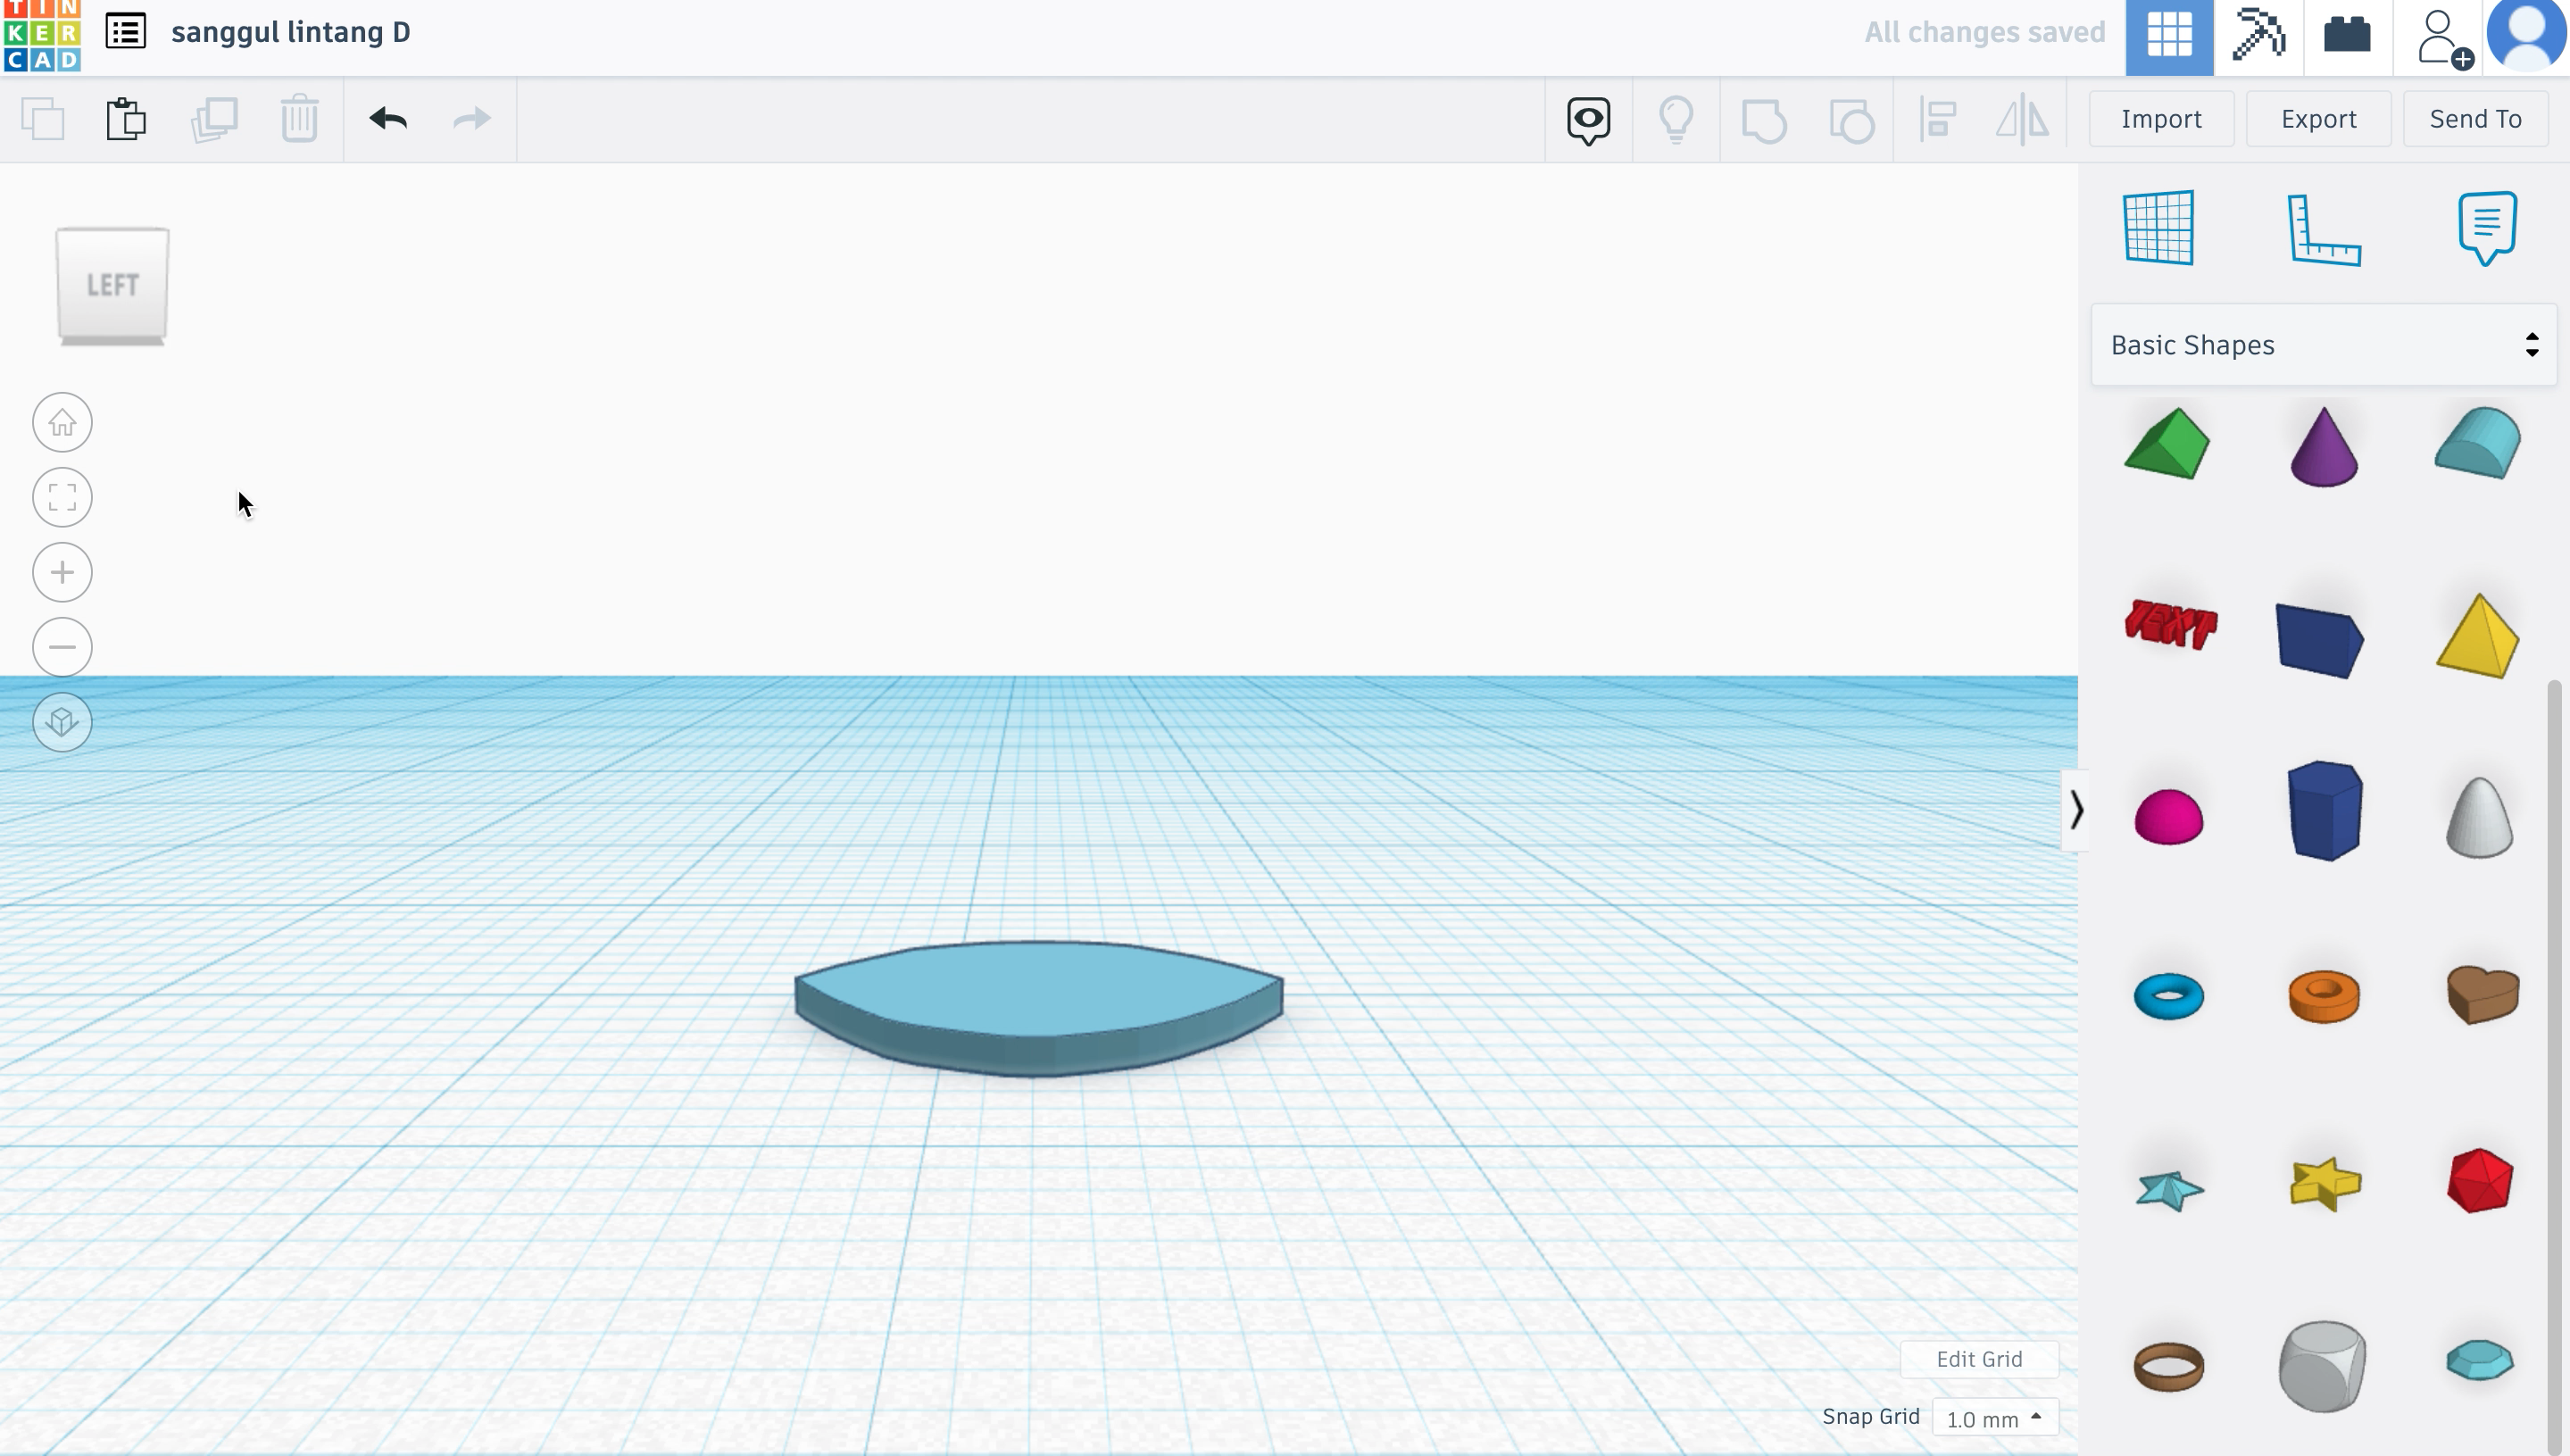
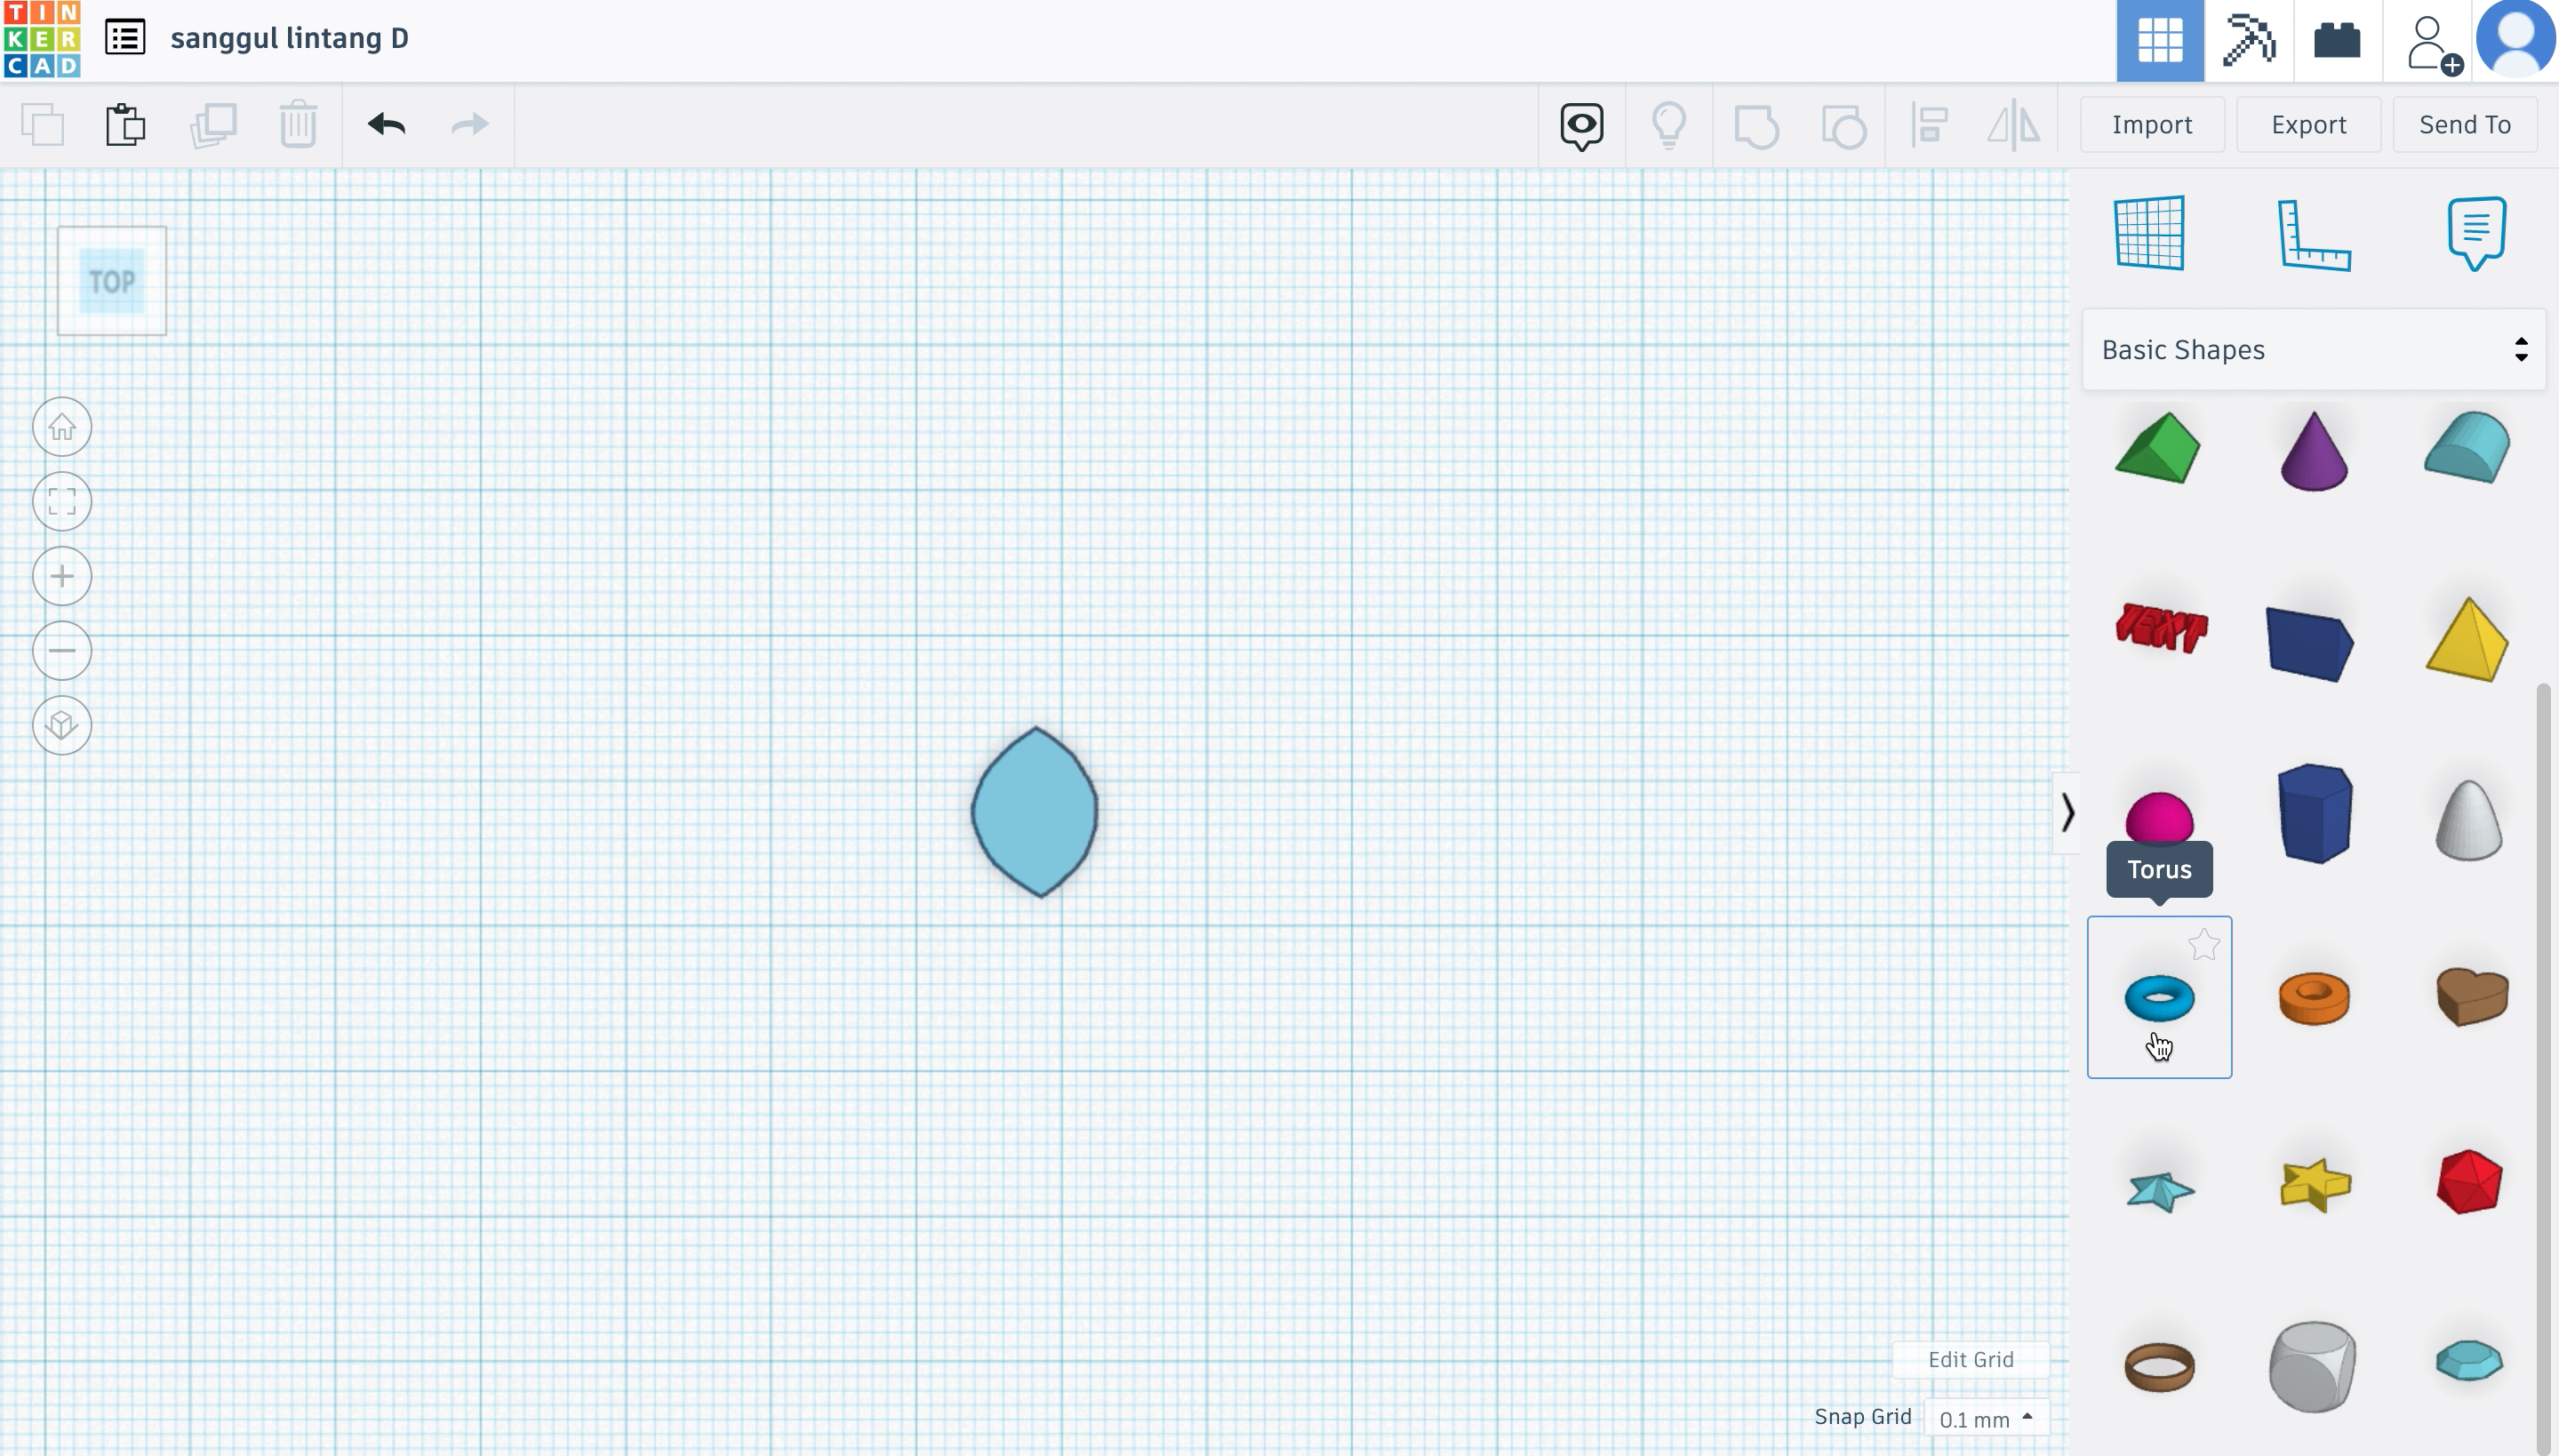
- Grab the 'scribble' block, and draw of the shape or a leaf.
- Next, adjust the thickness of the shape; make it rather thin.
Sanggul Lintang D
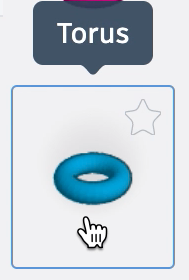
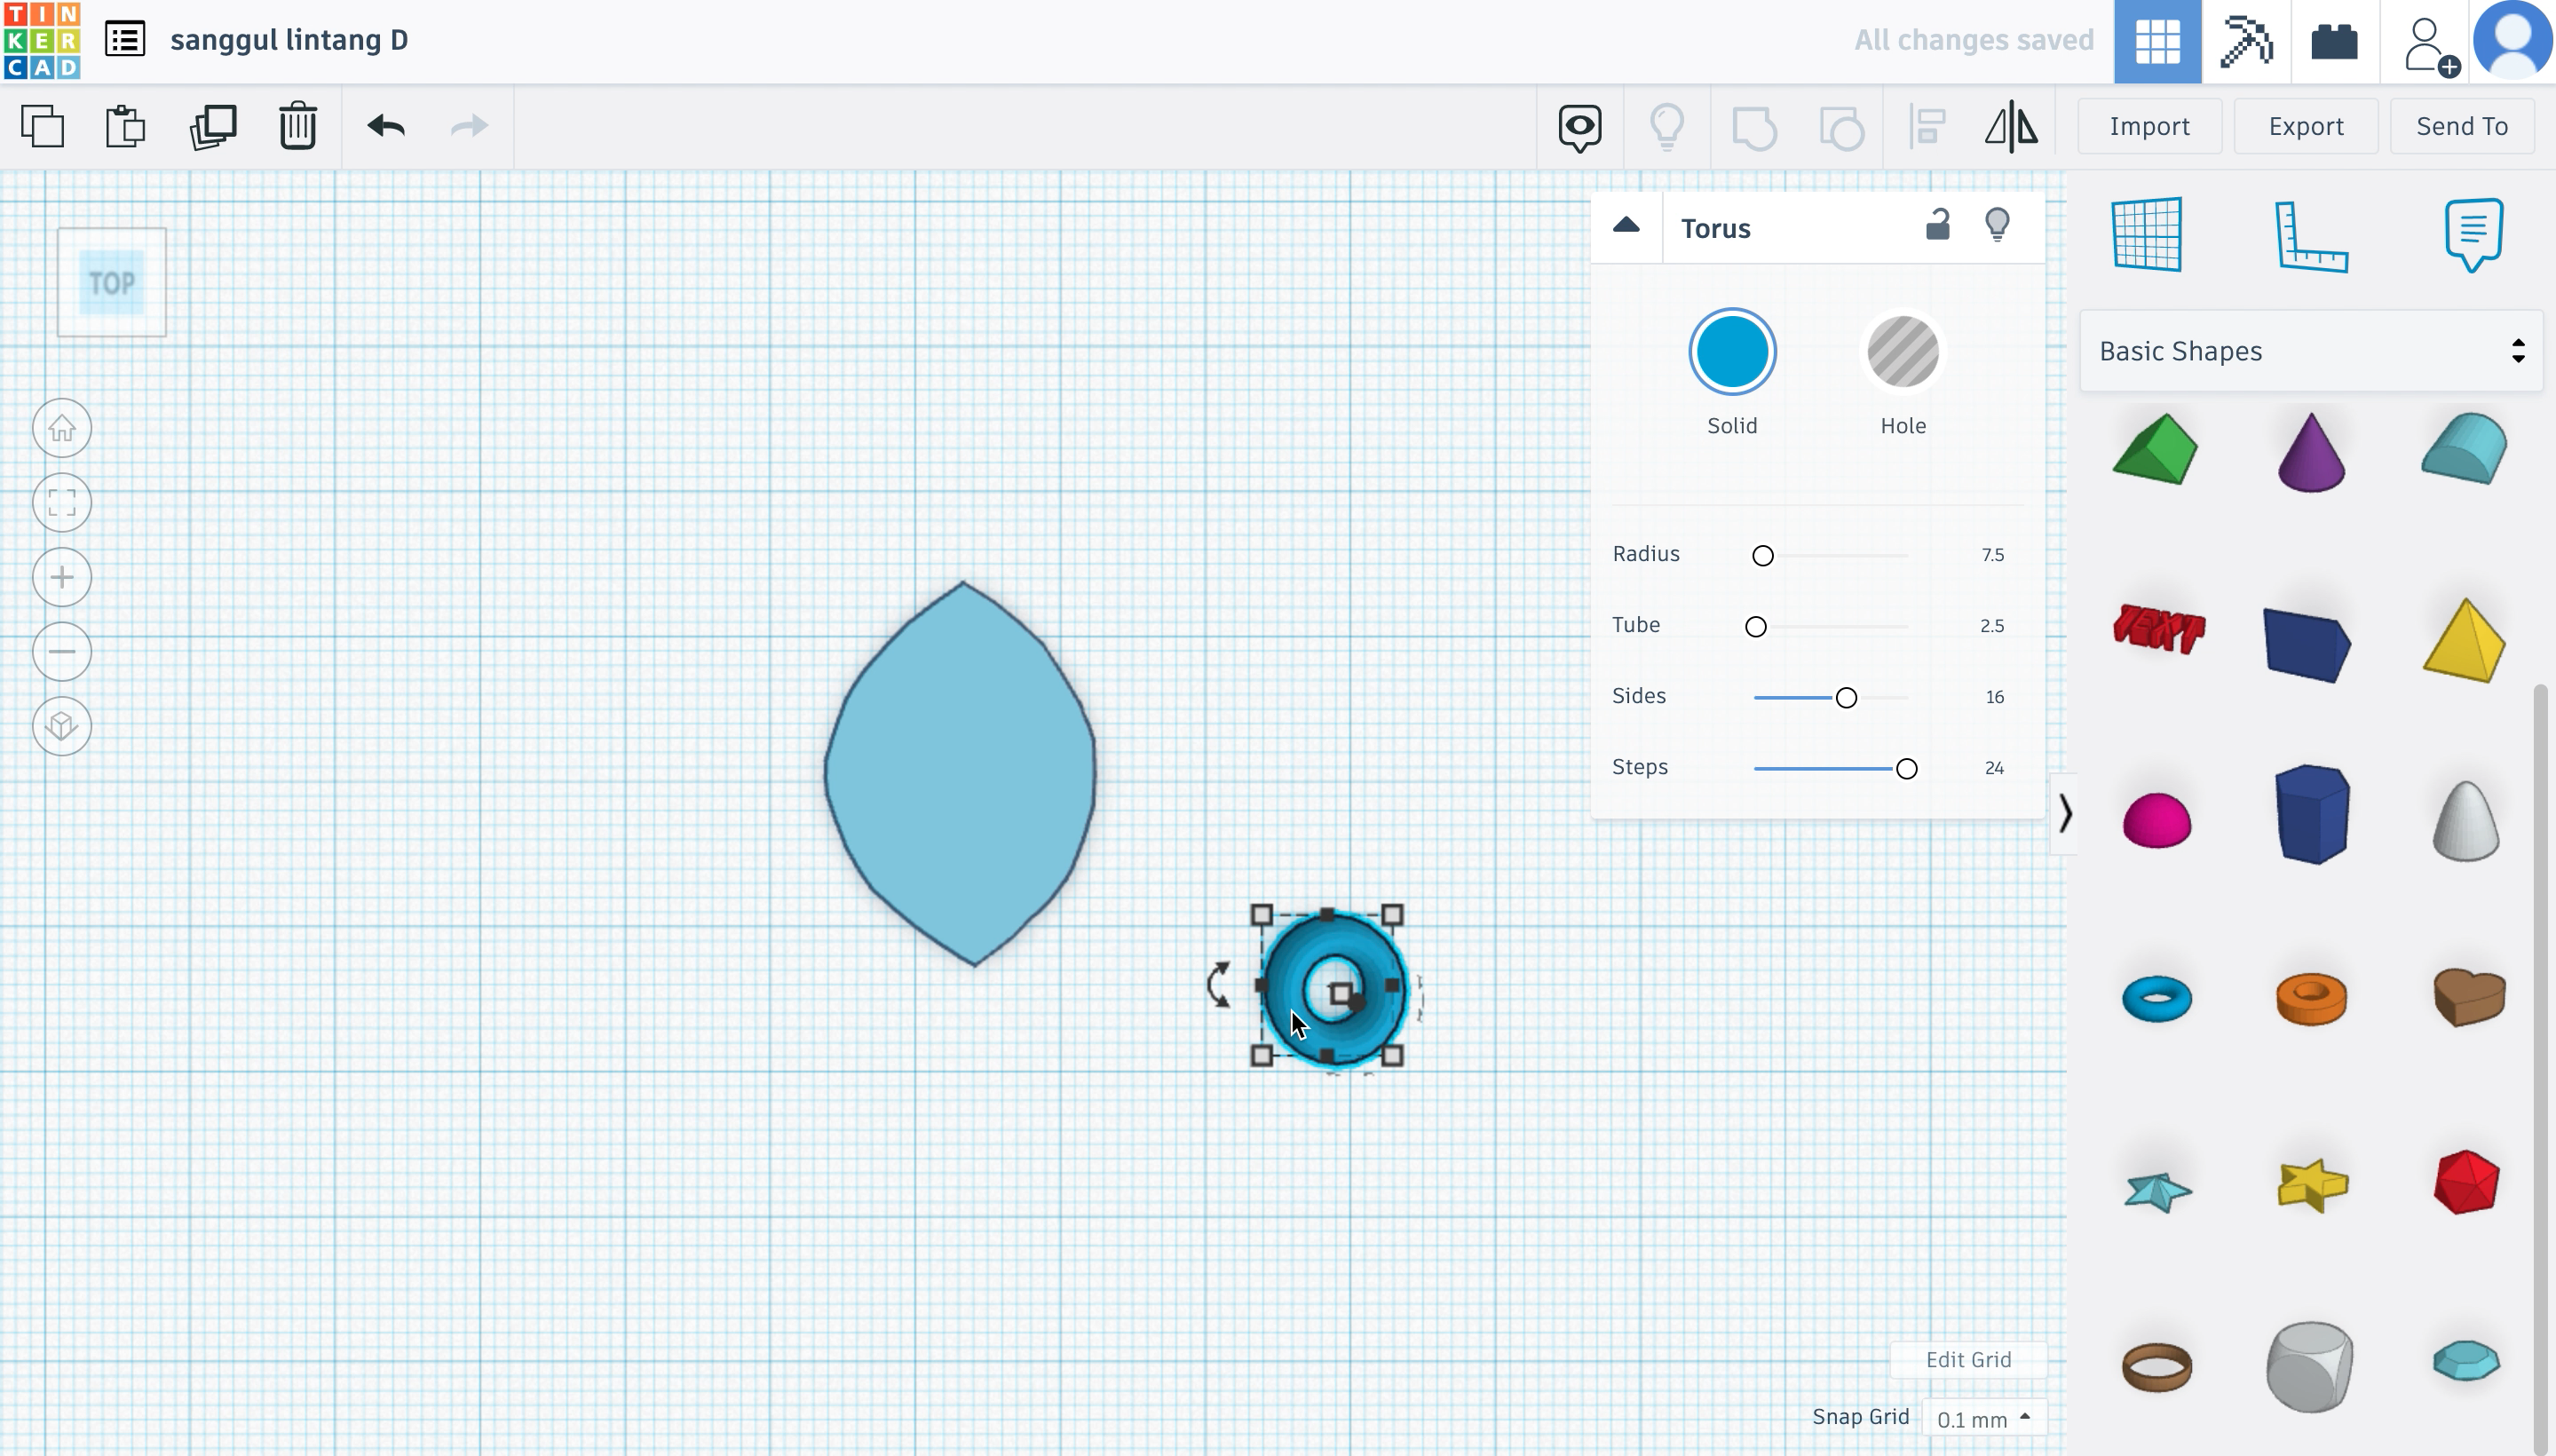
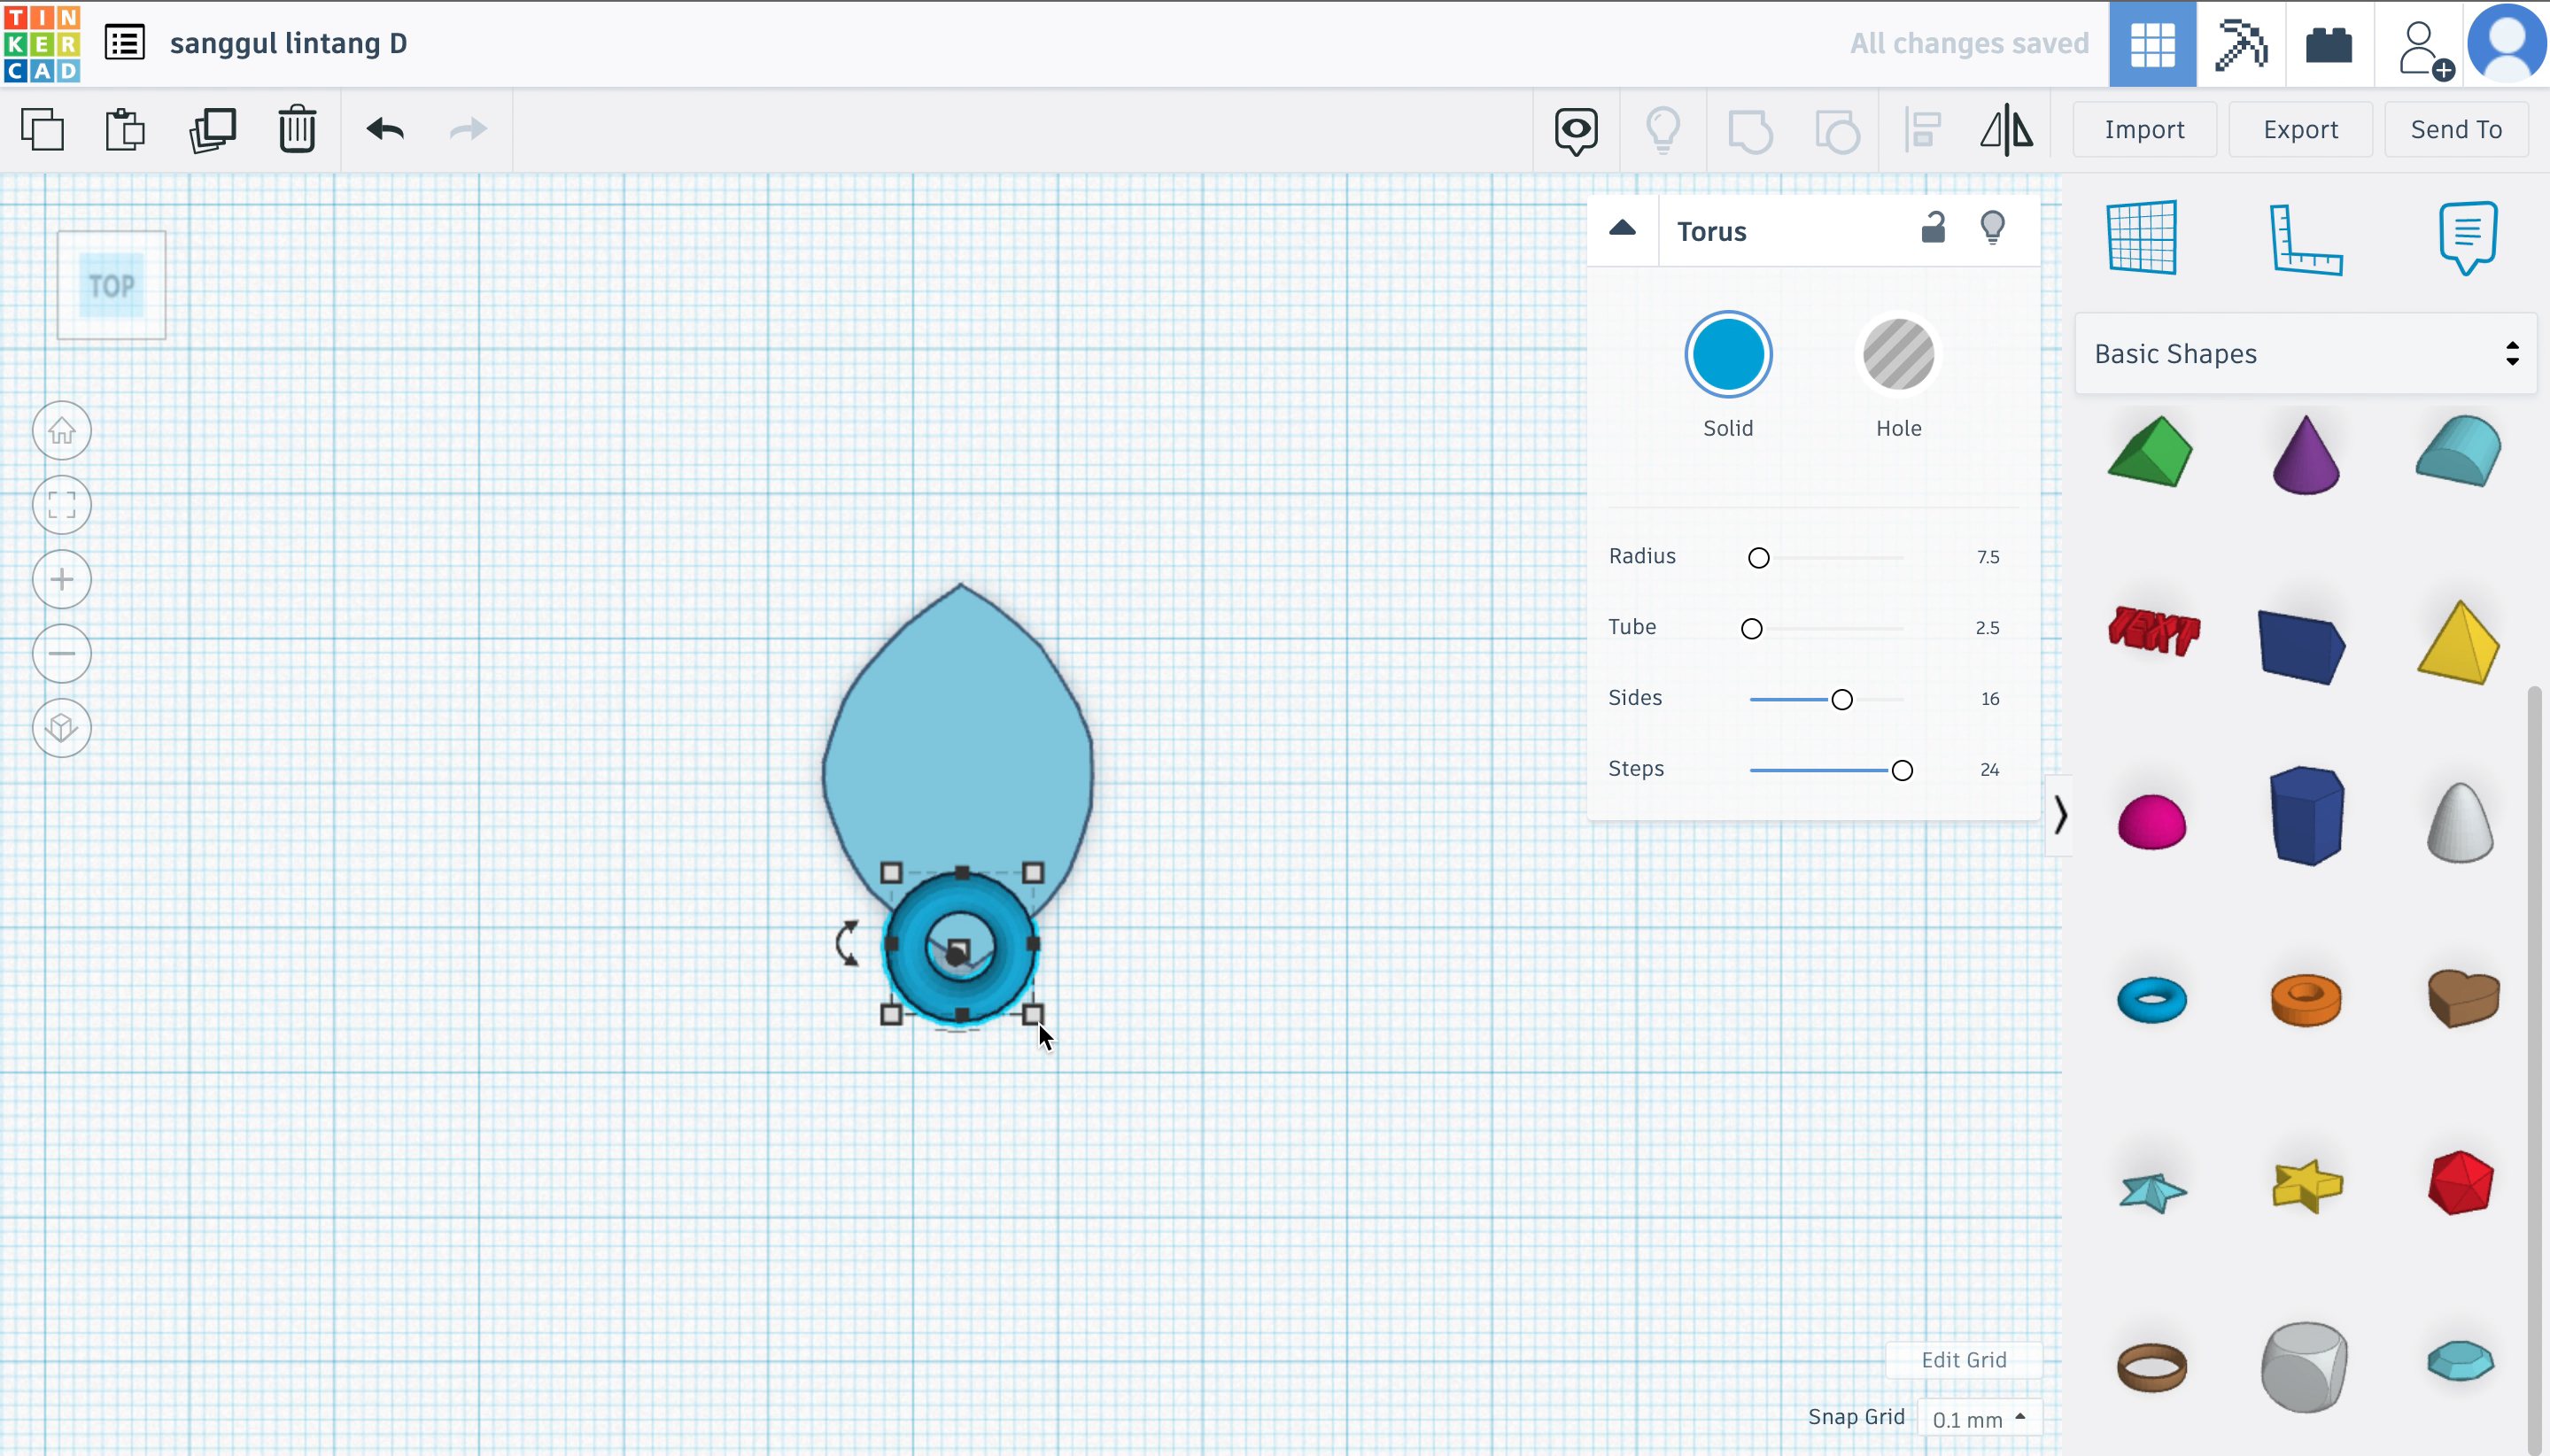
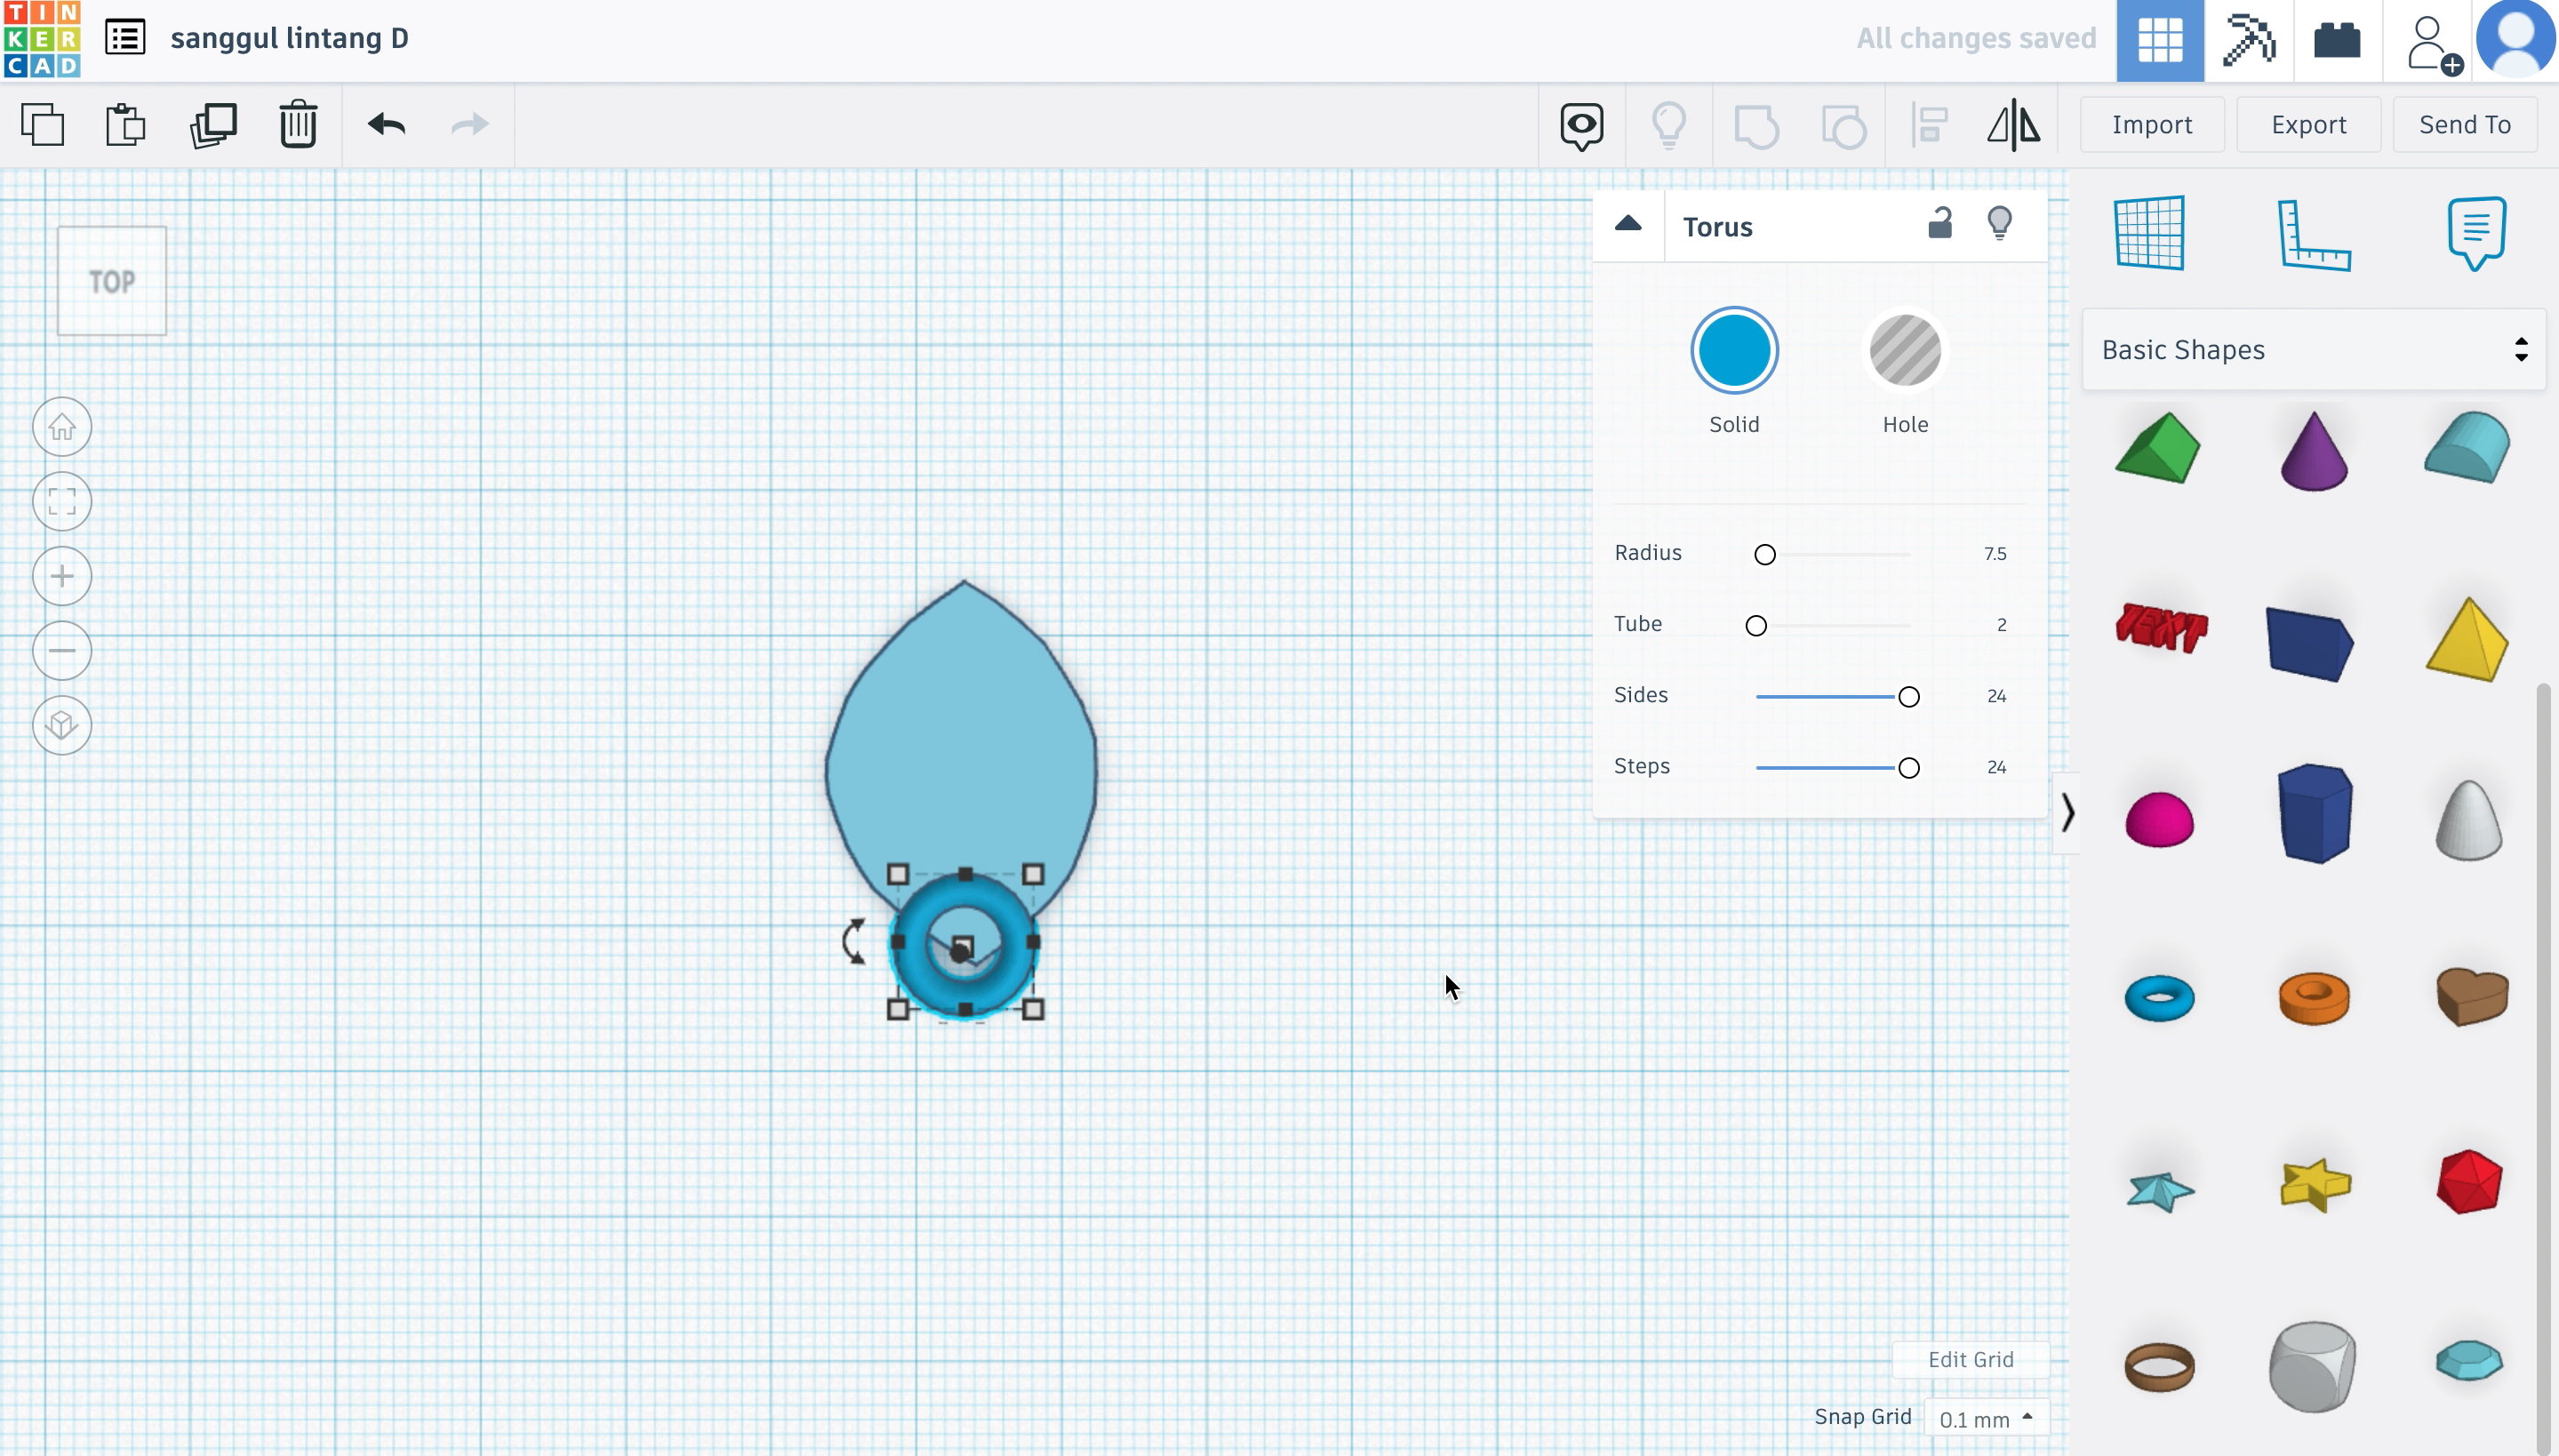
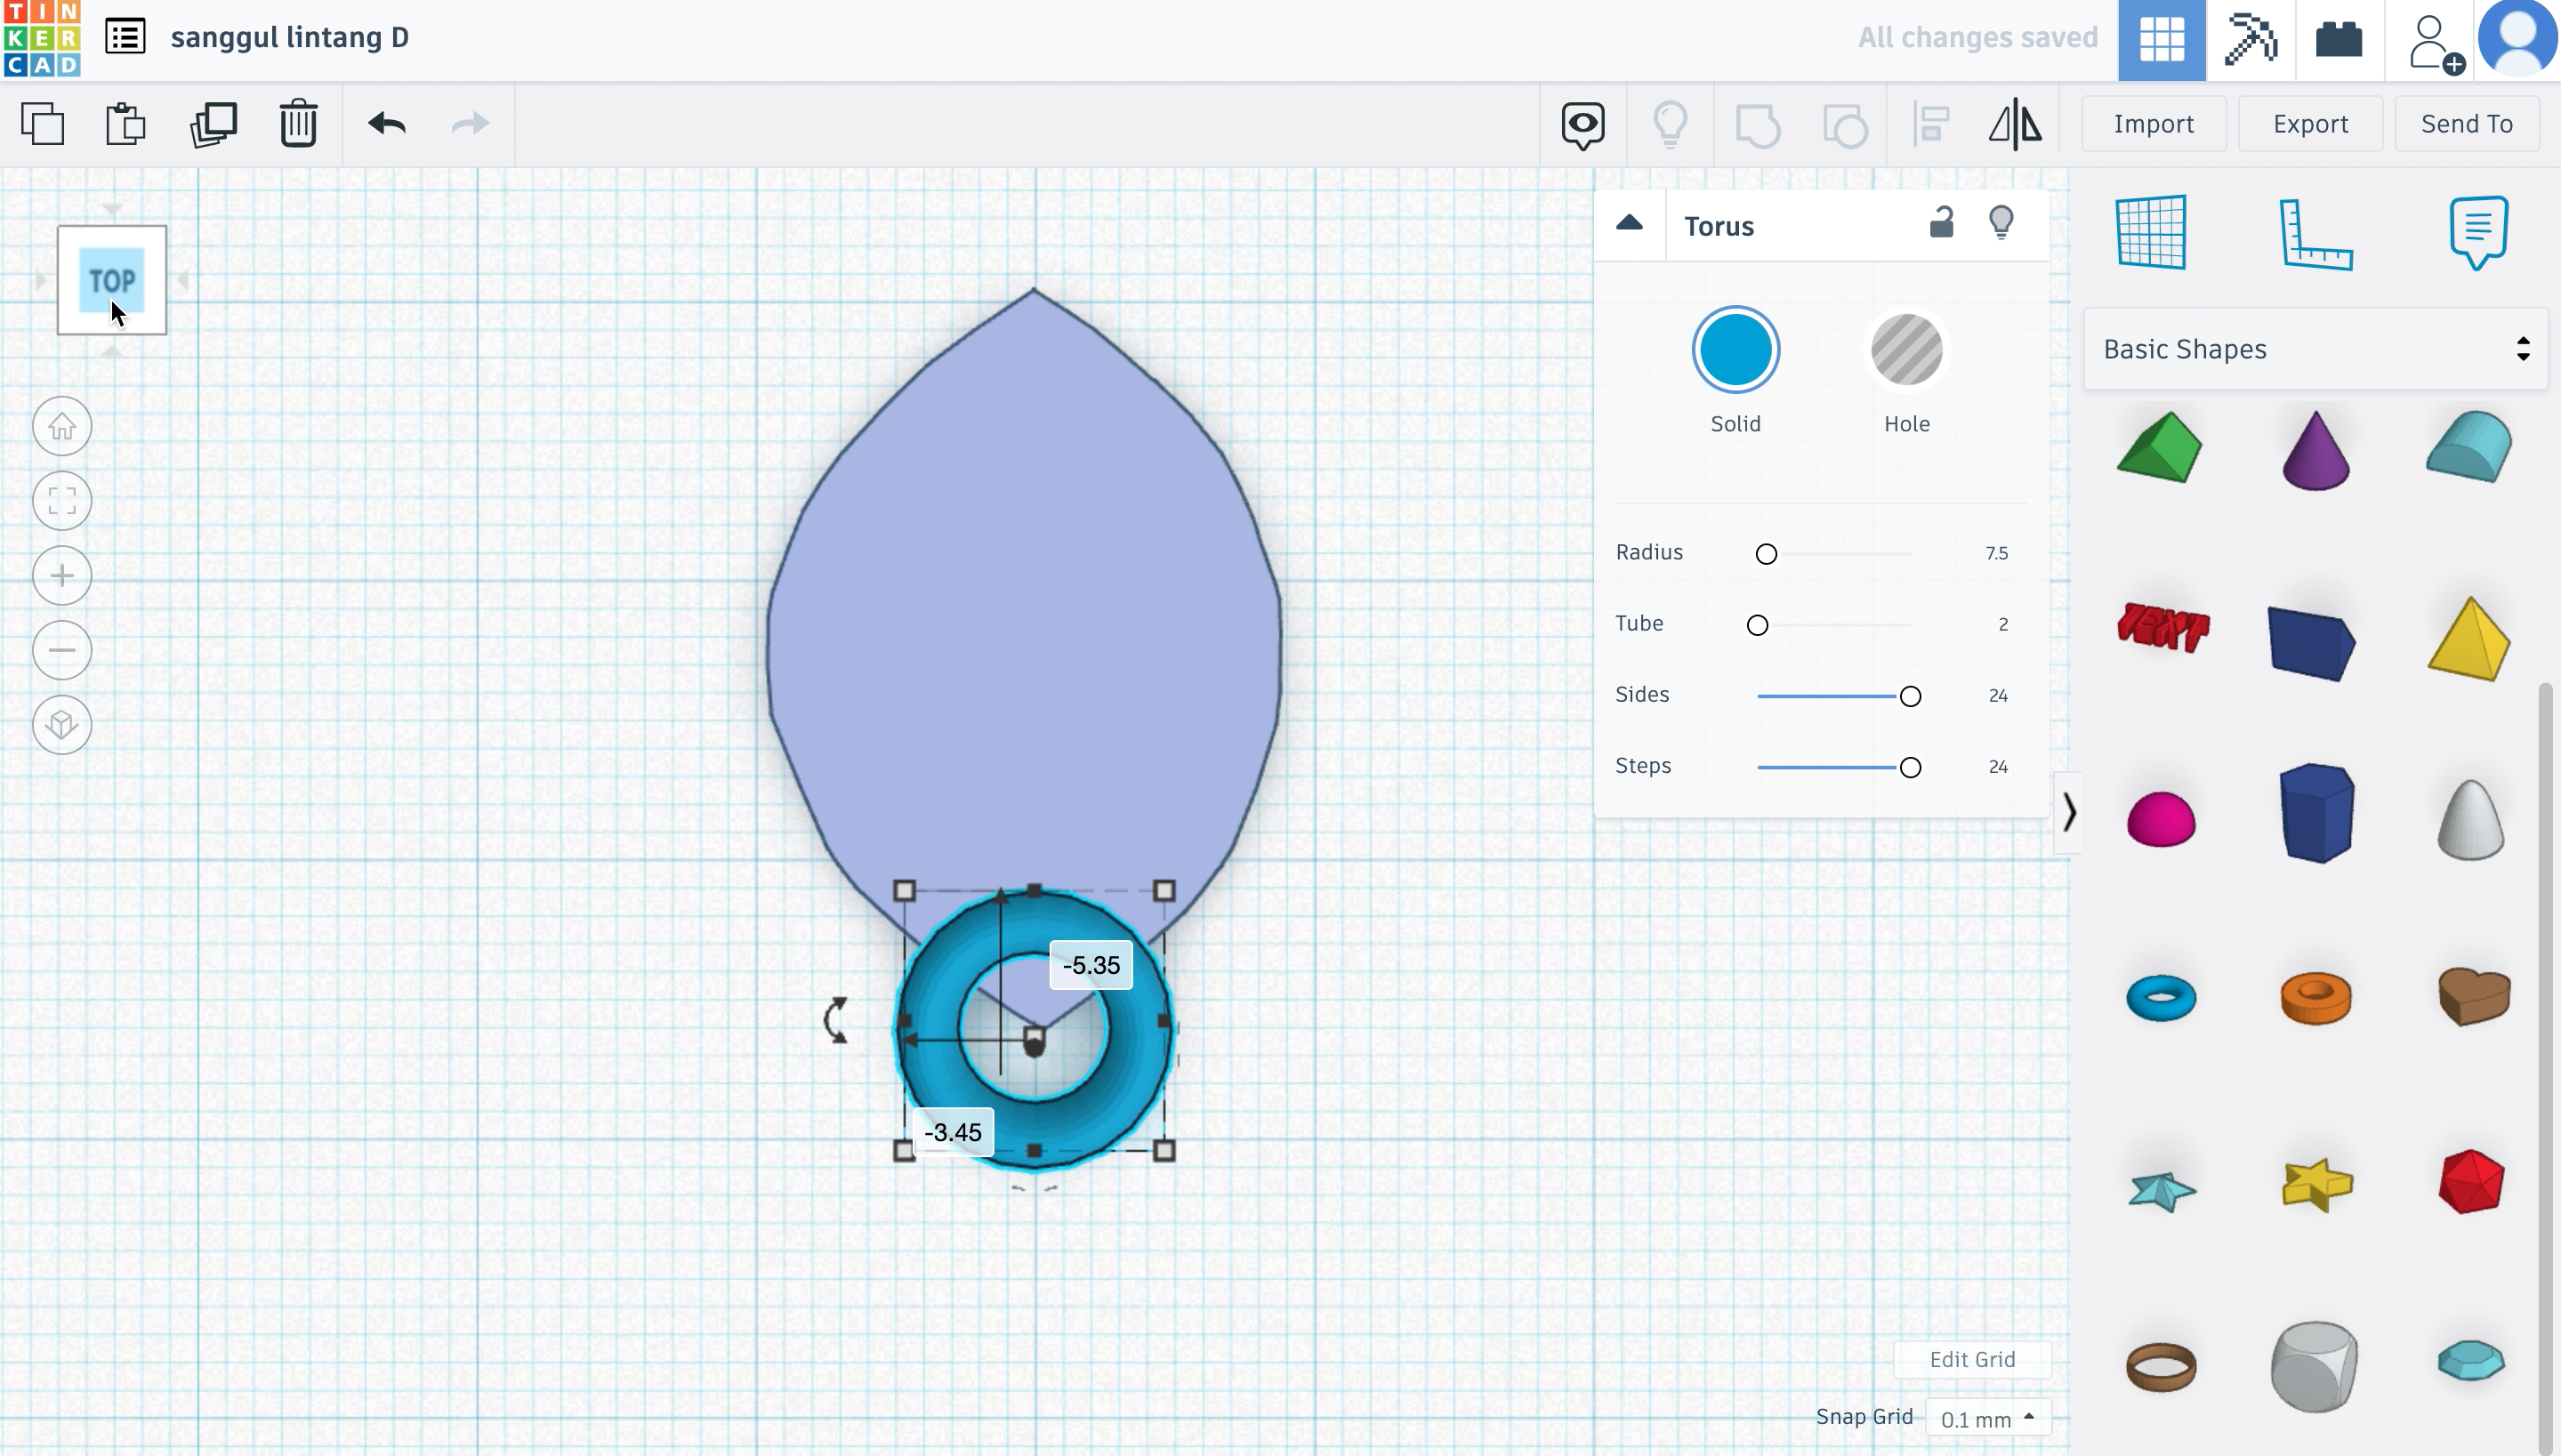
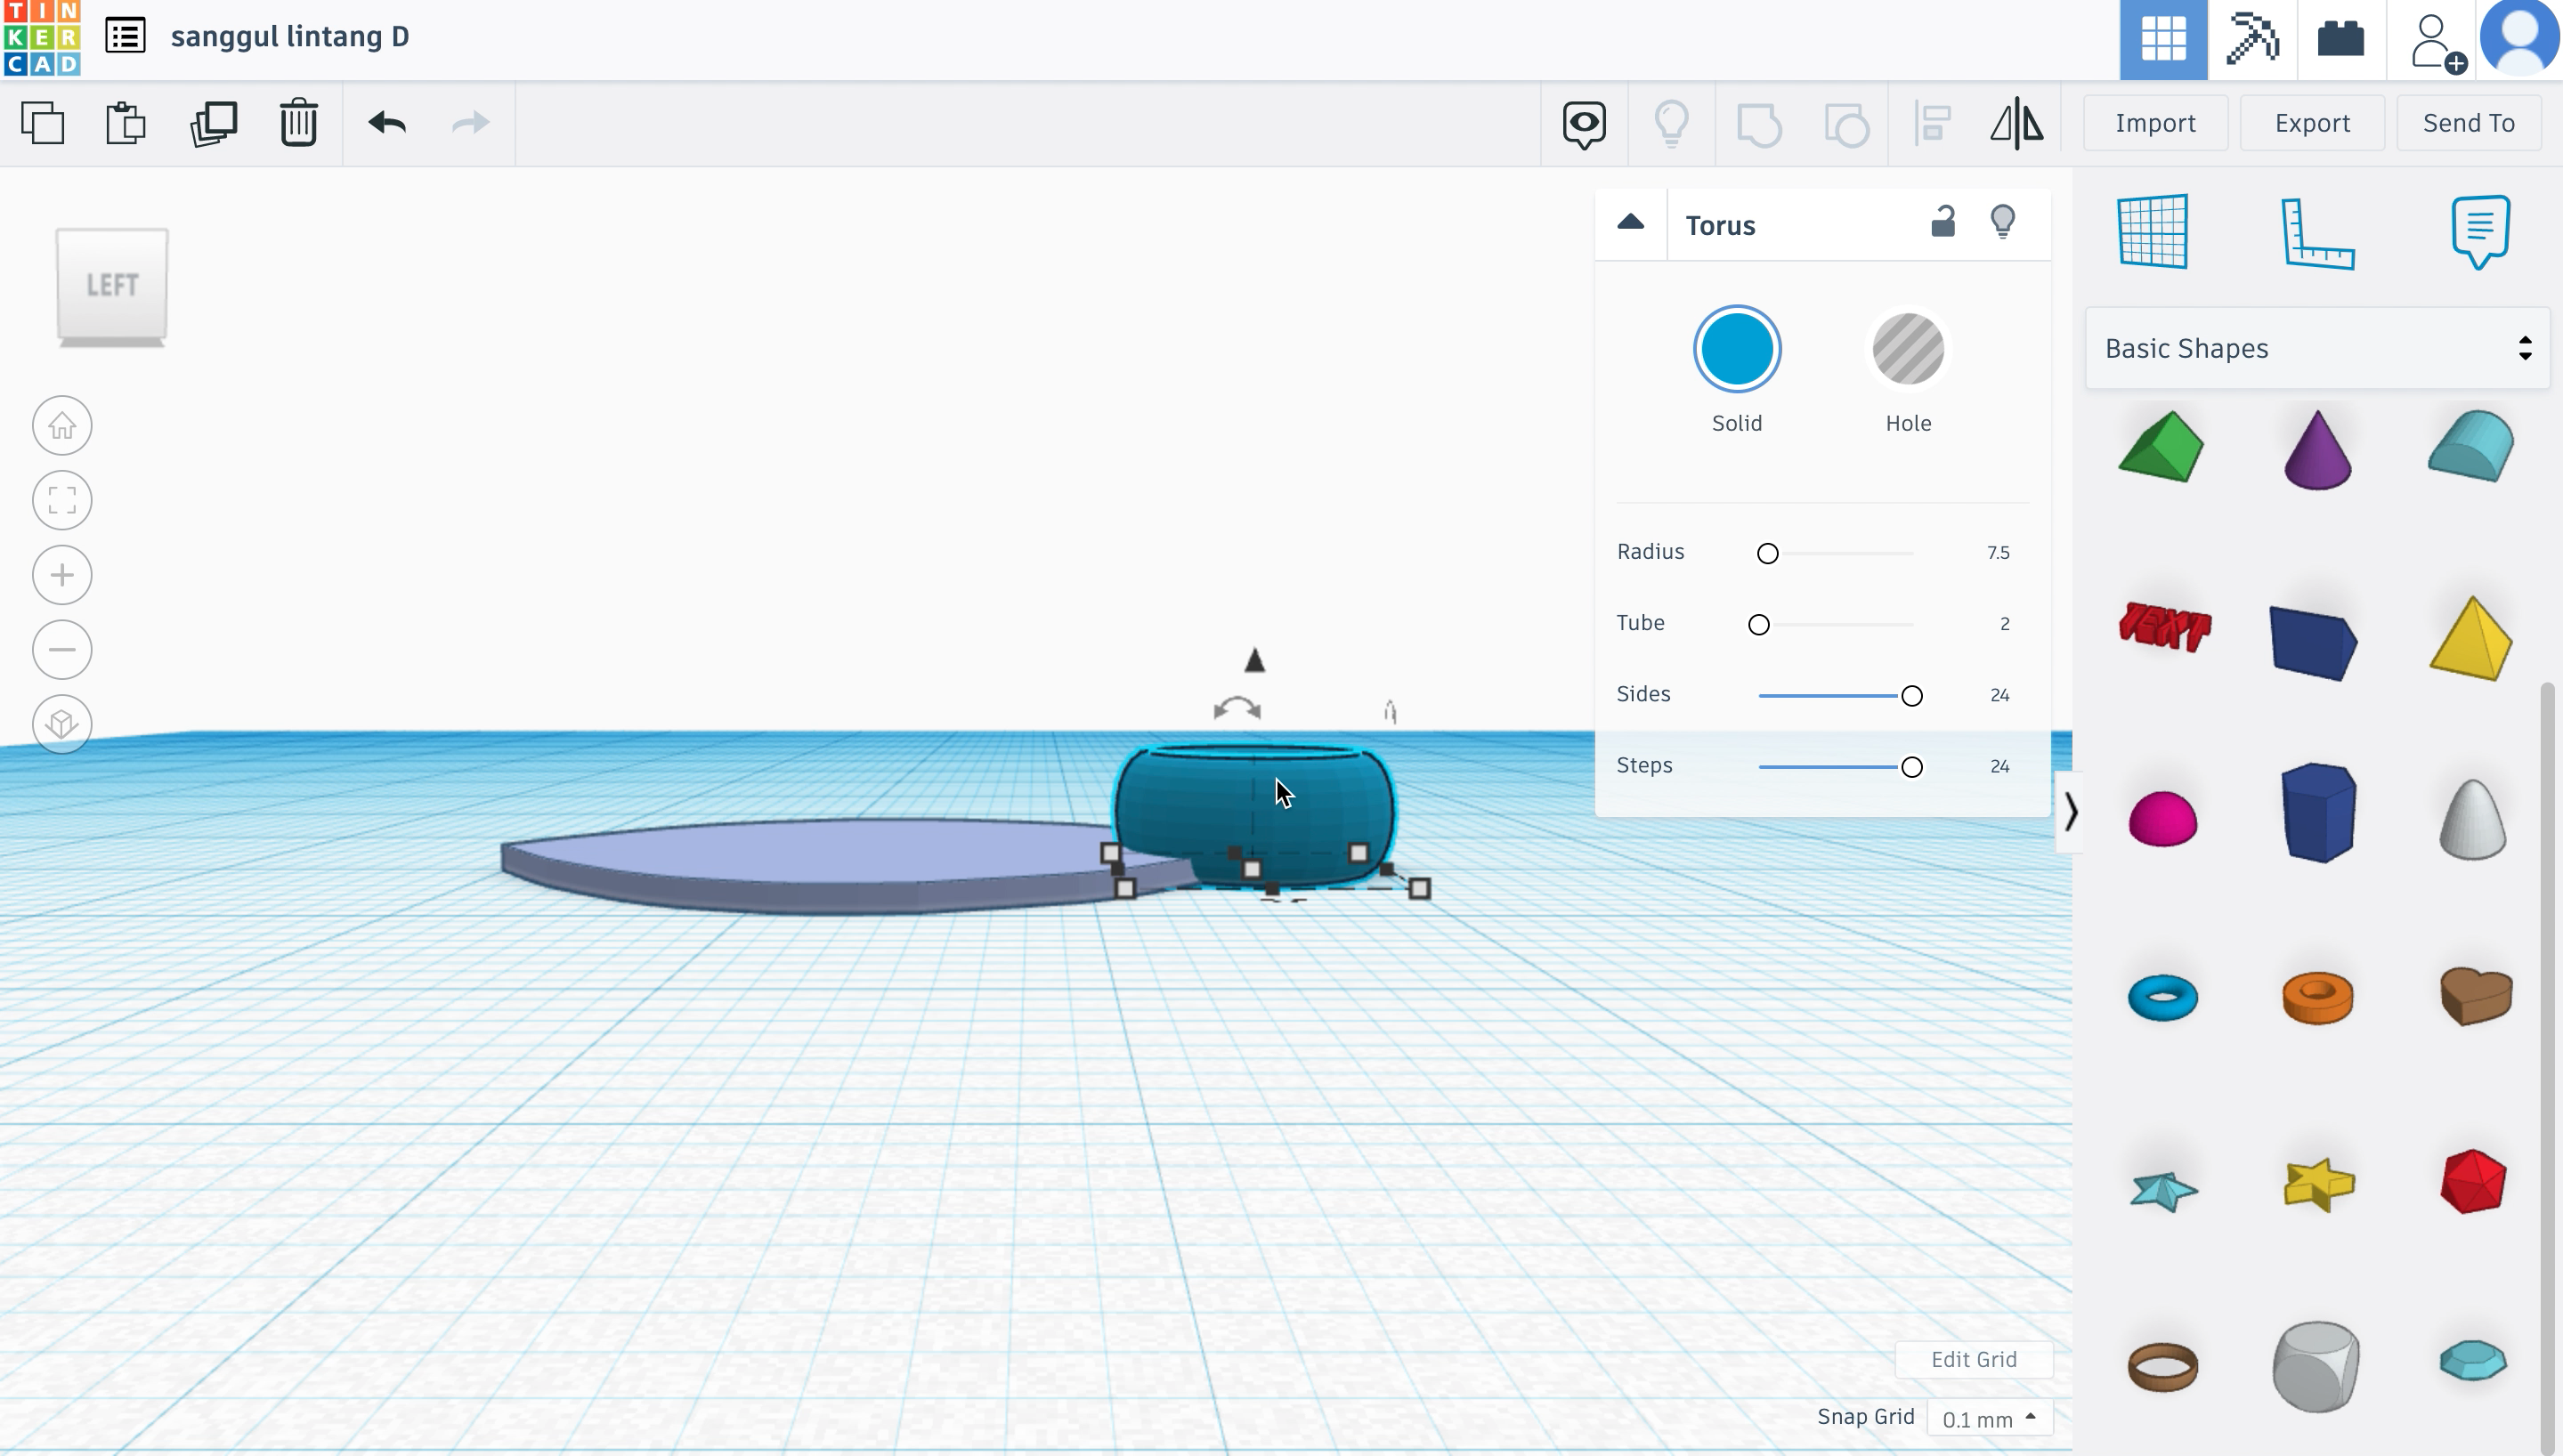
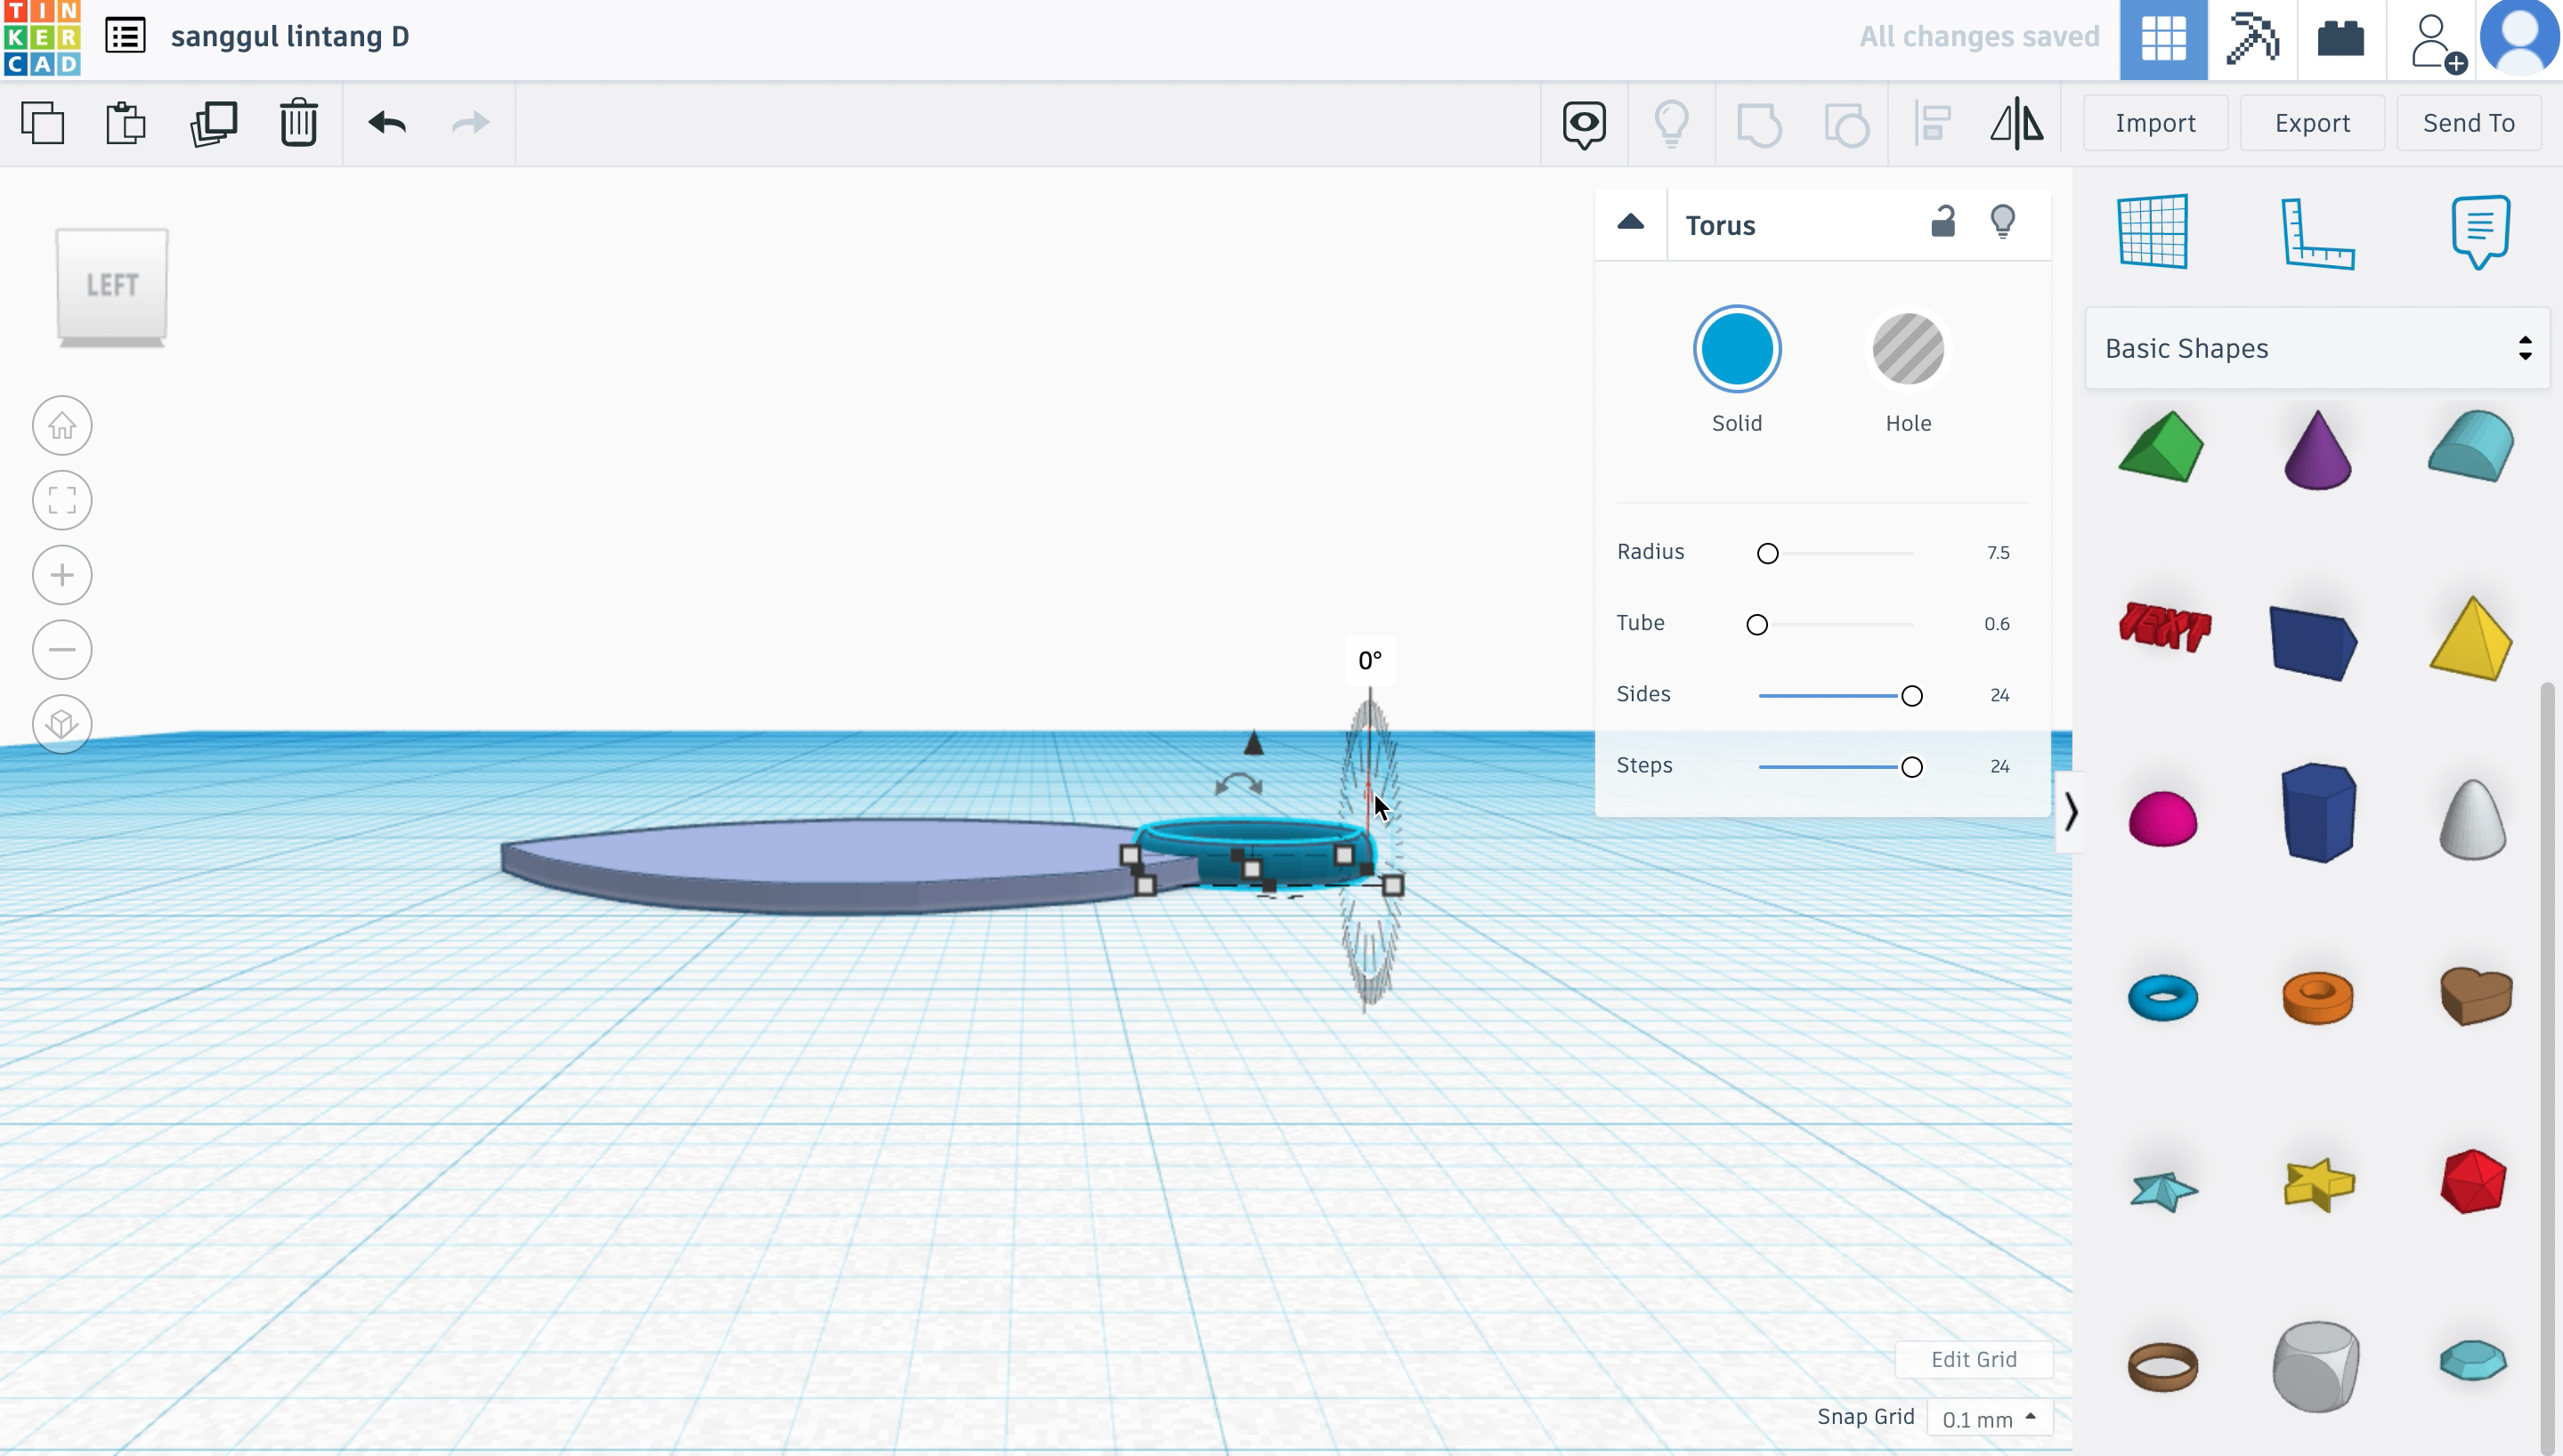
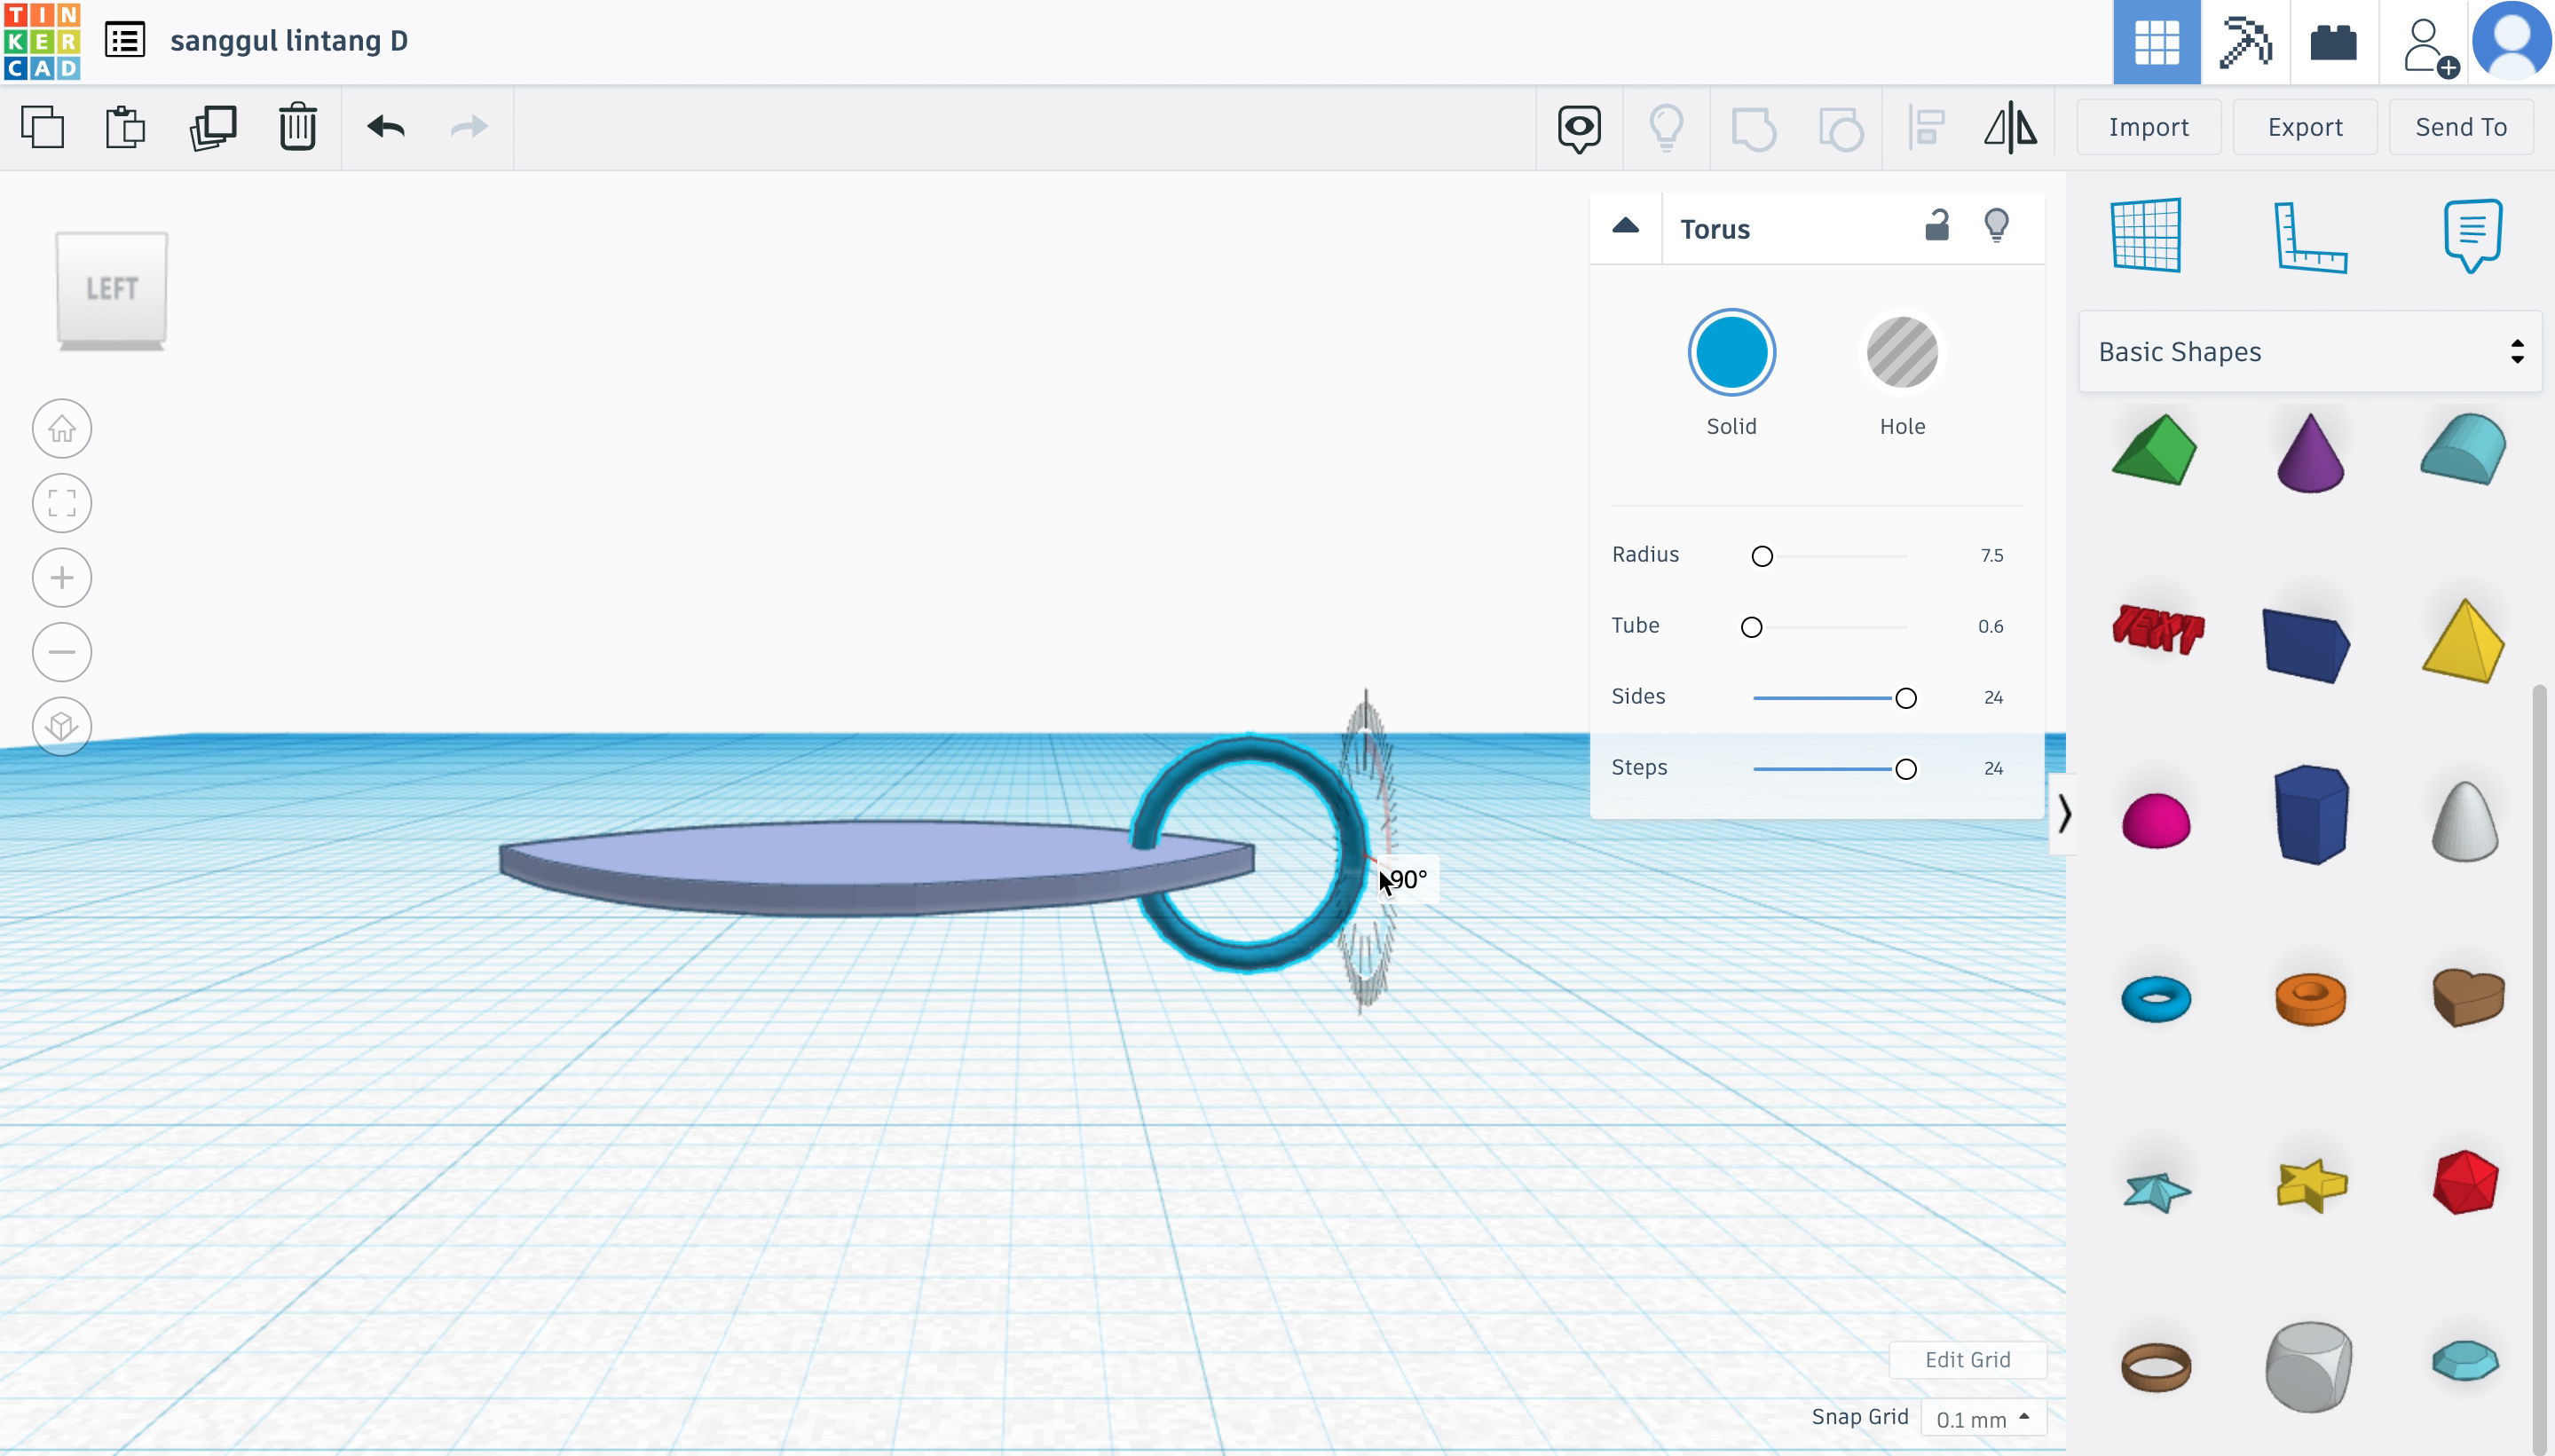
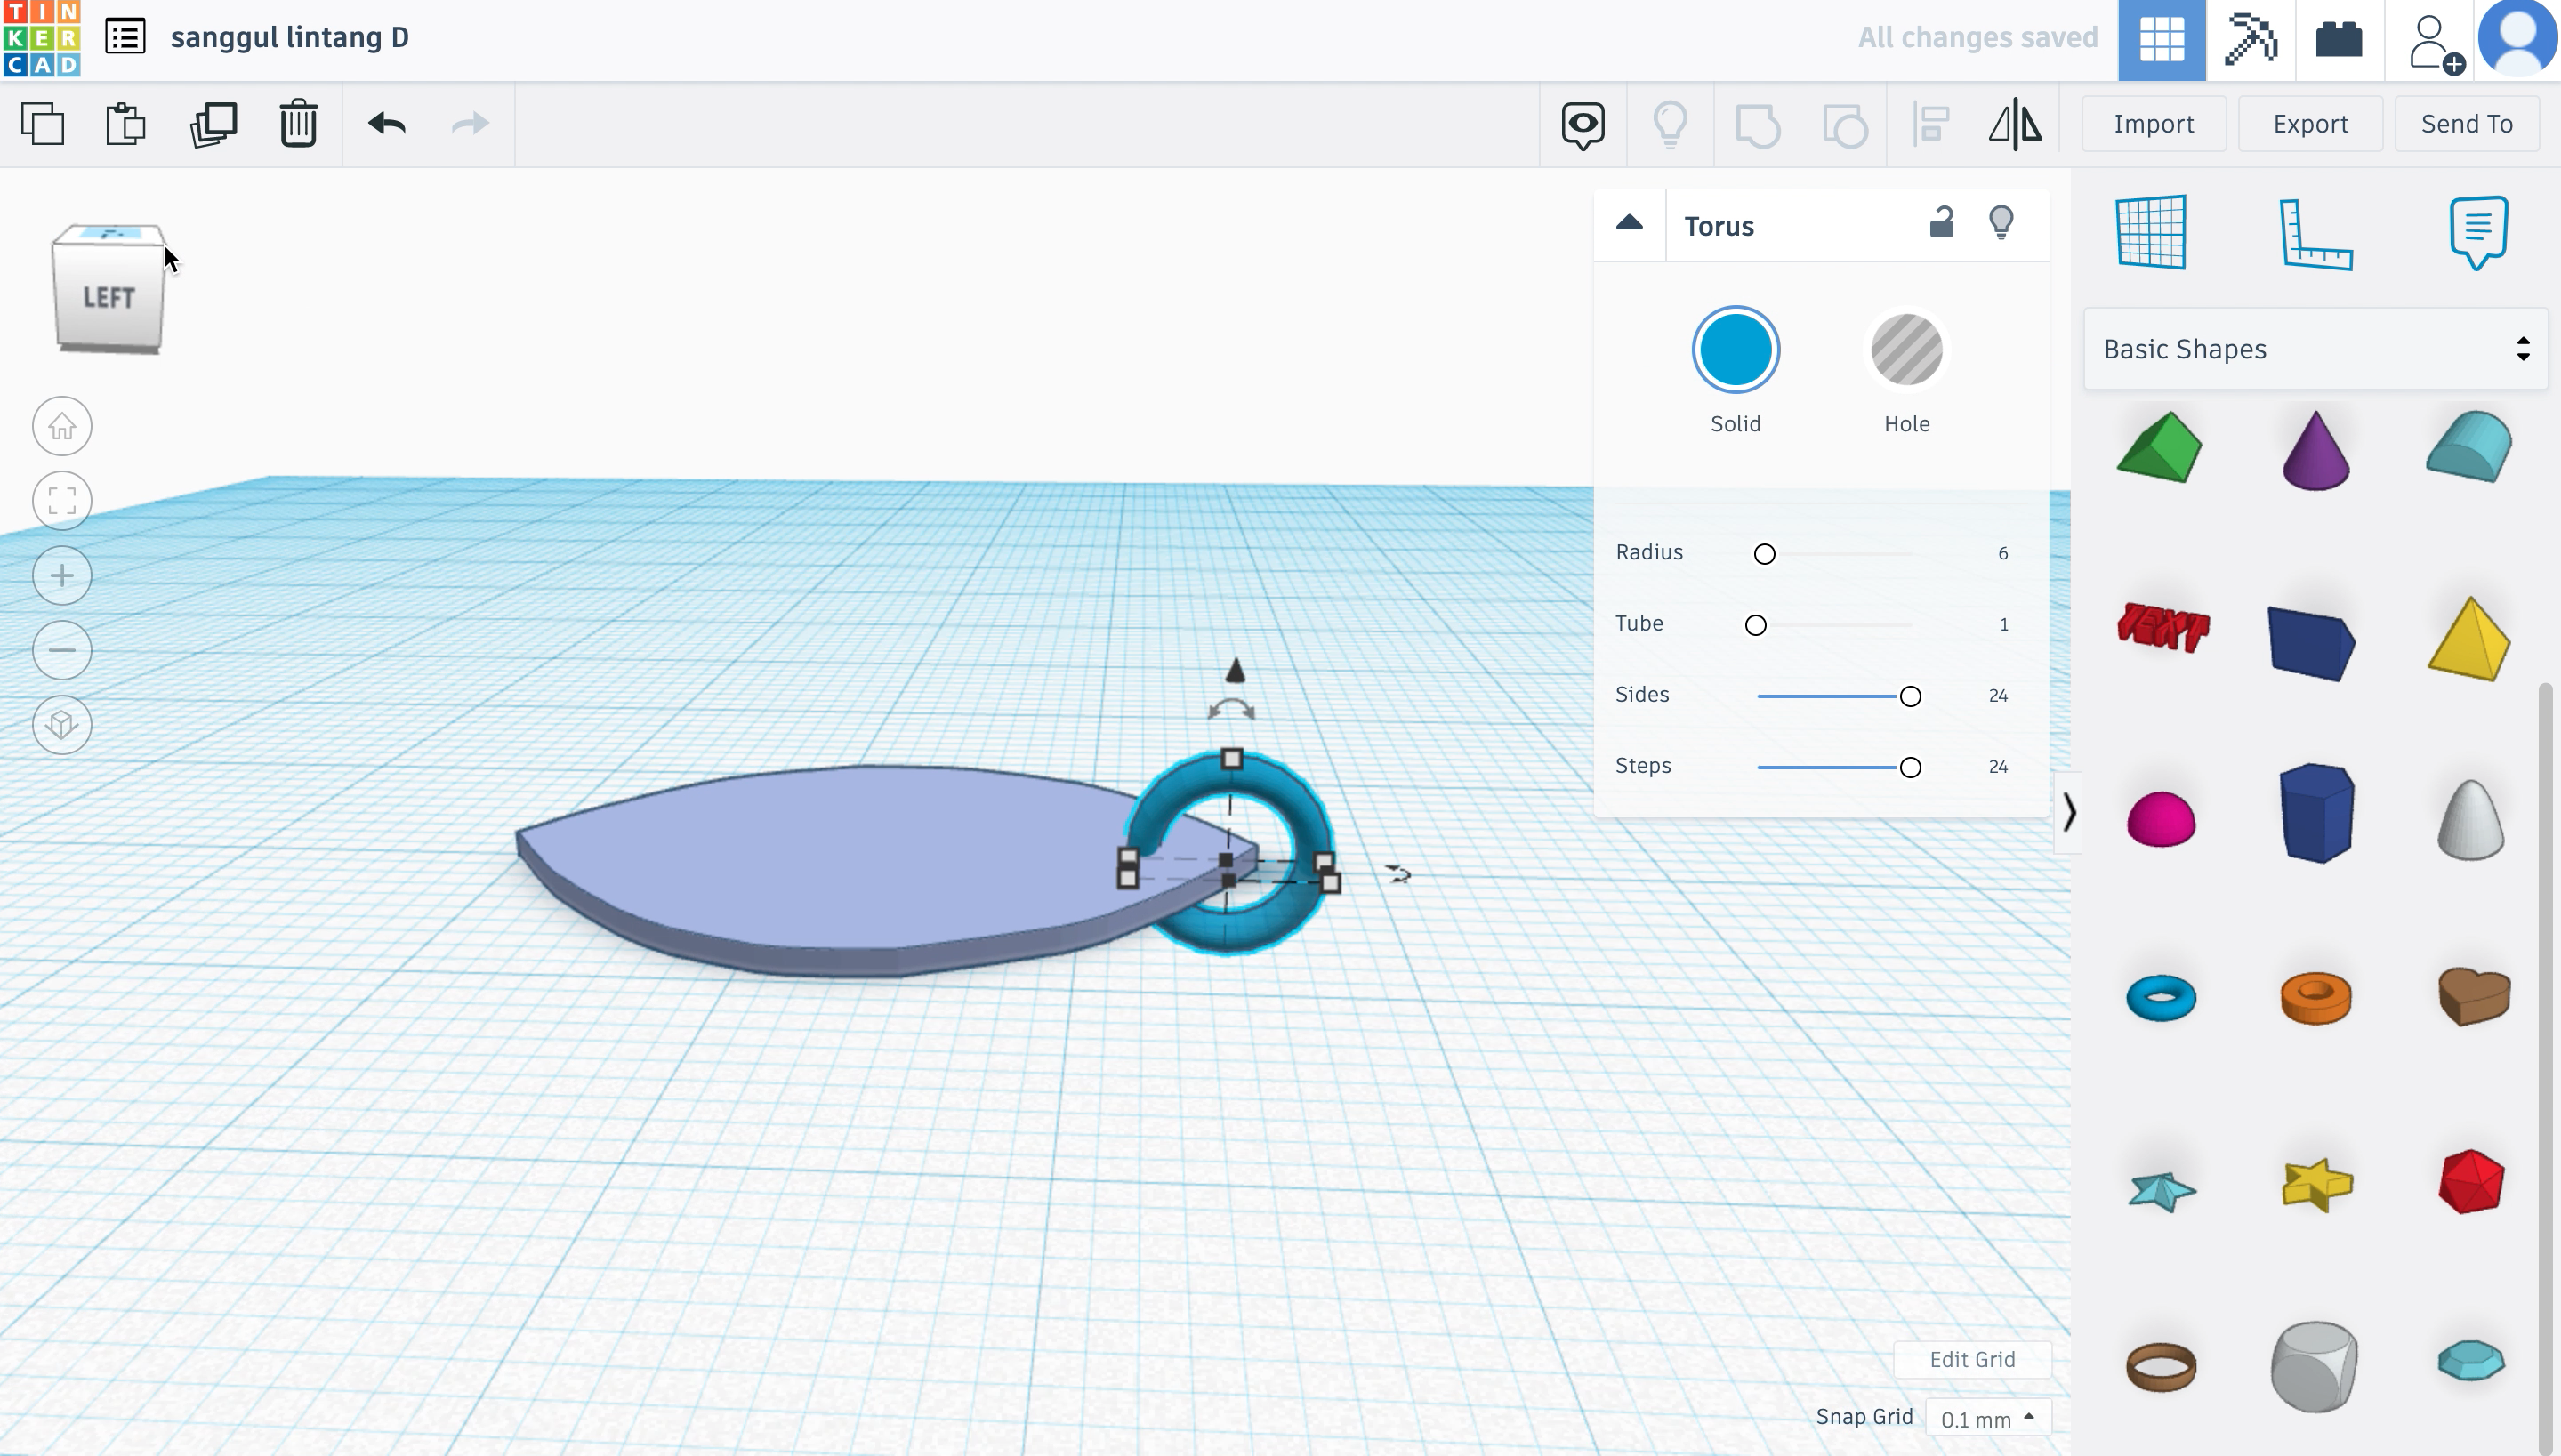
- Grab a 'torus' block and align it to the leaf shape made earlier. You can adjust the thickness of the ring using this side panel that pops-out.
- (I changed the colour again) With the 'ring' aligned with the purple shape, rotate it using the rotation feature.
Sanggul Lintang D
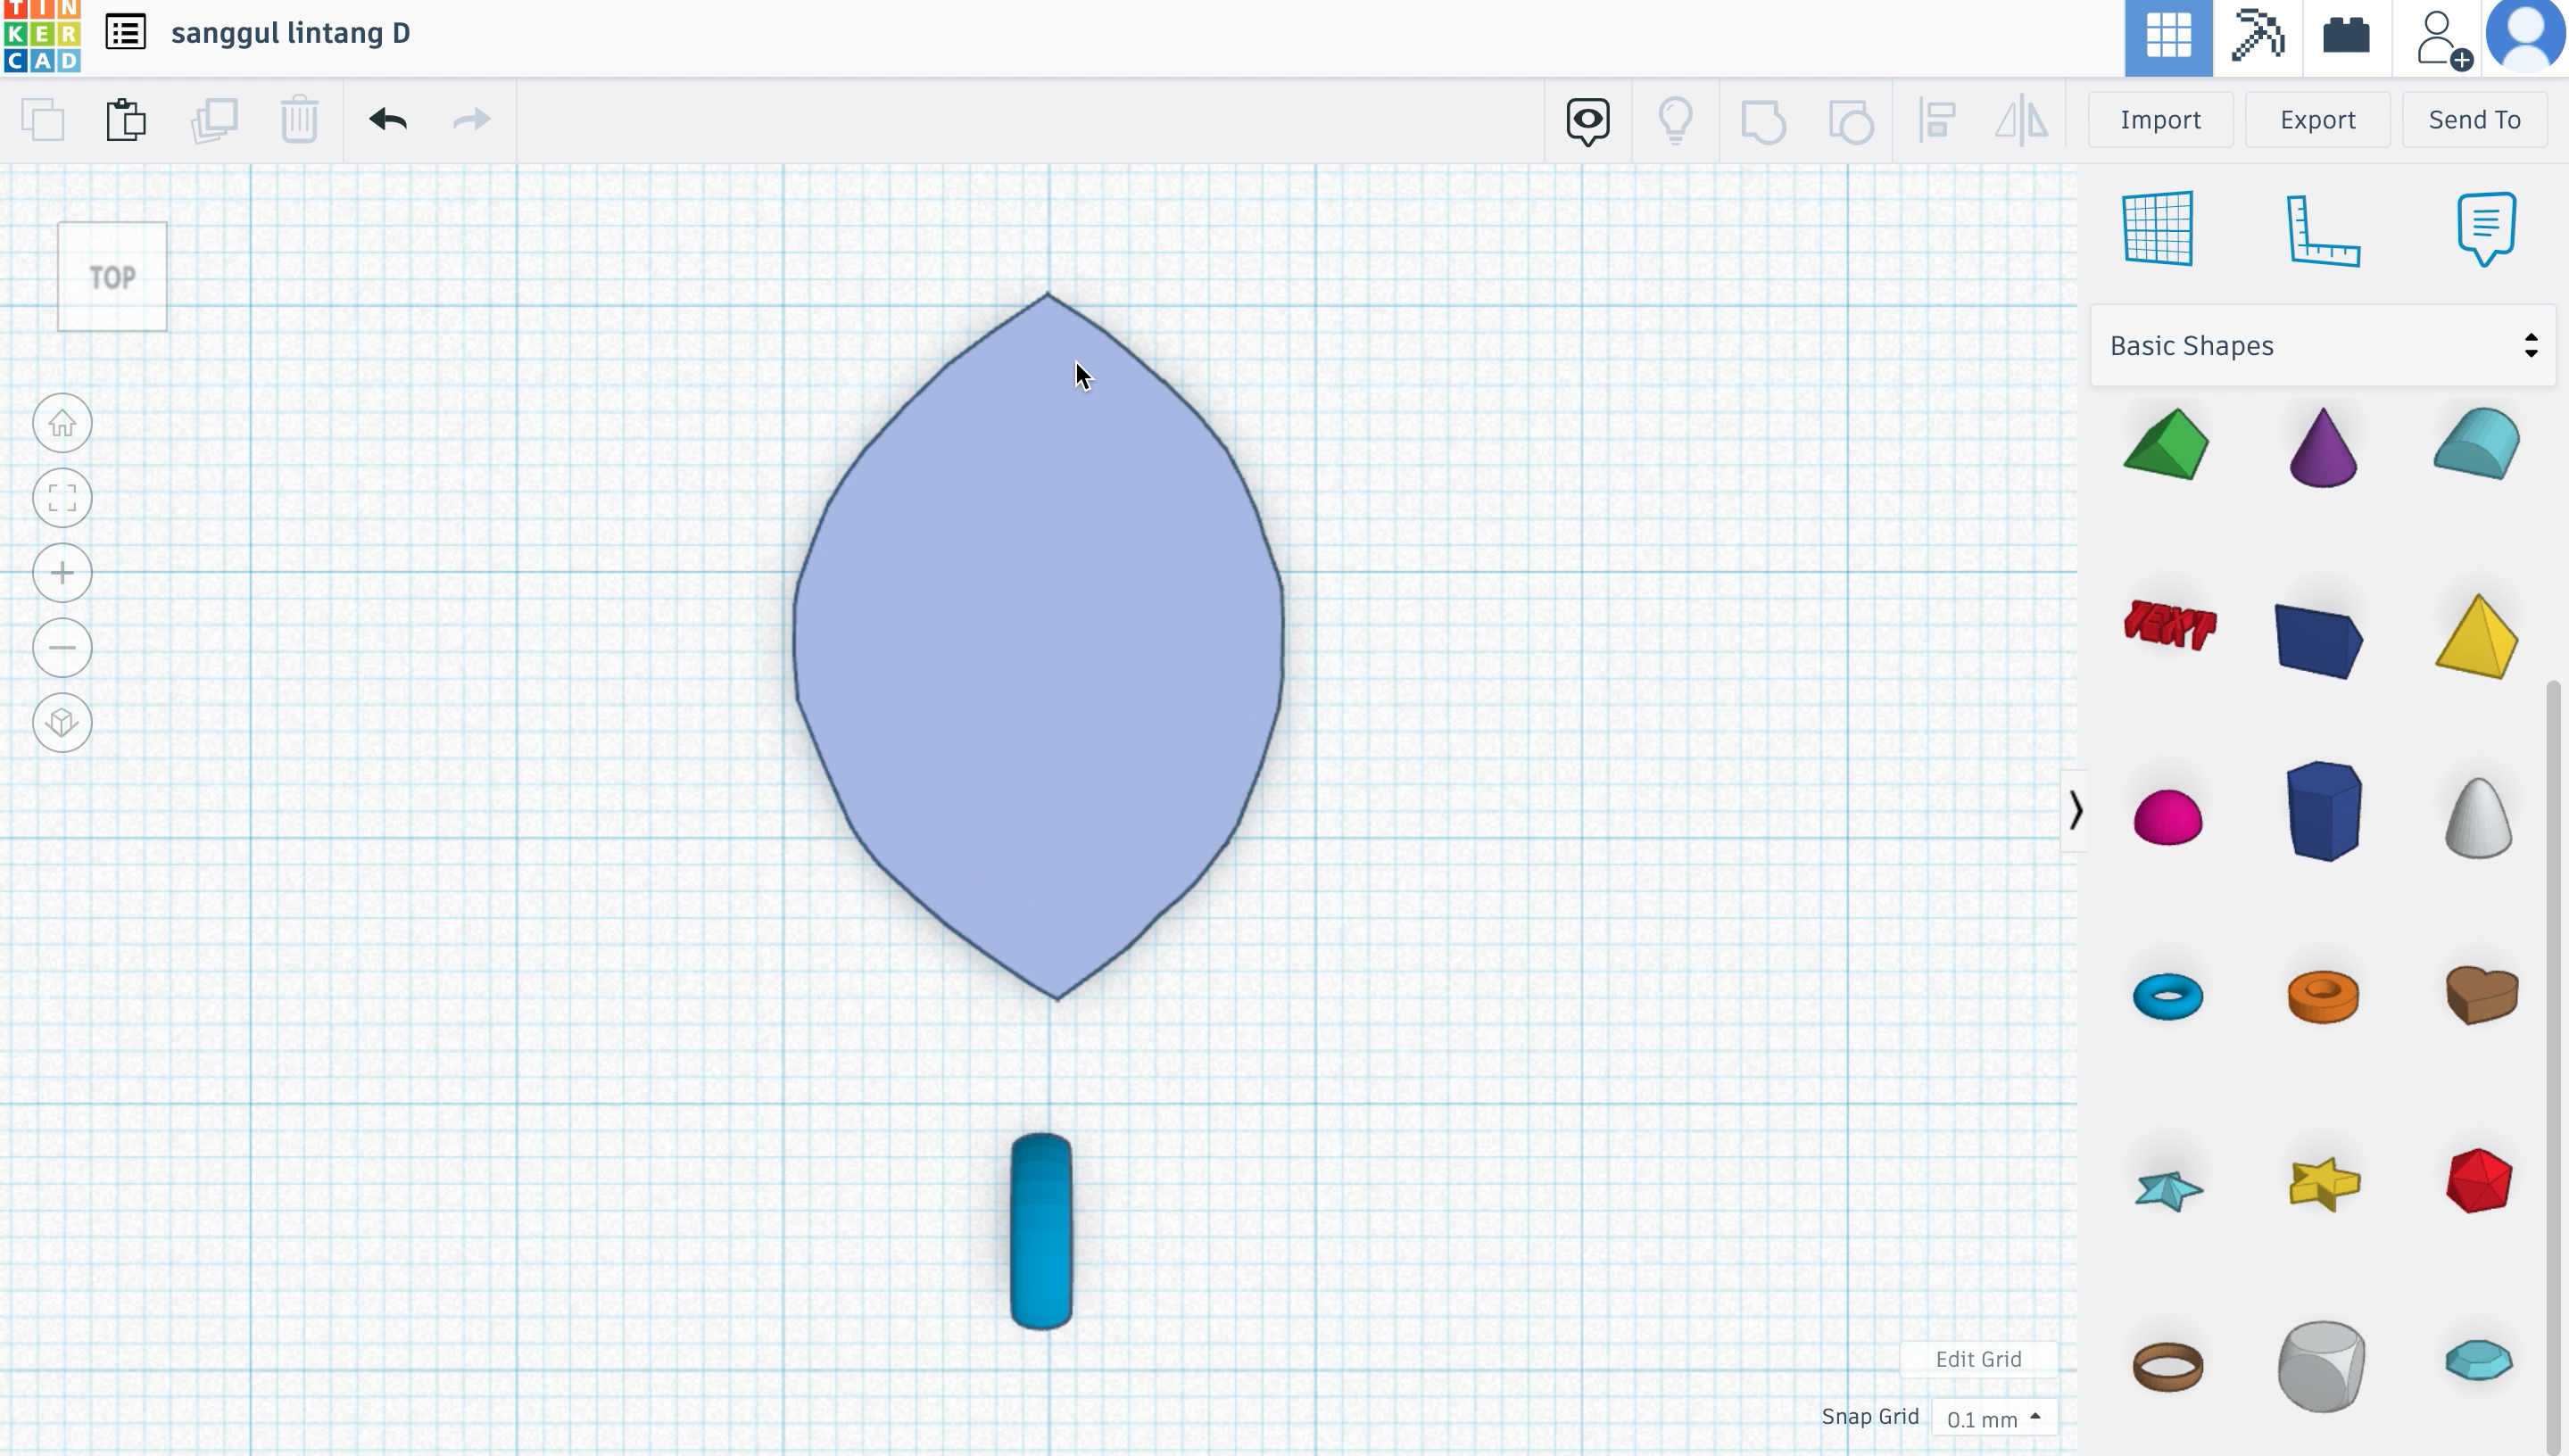
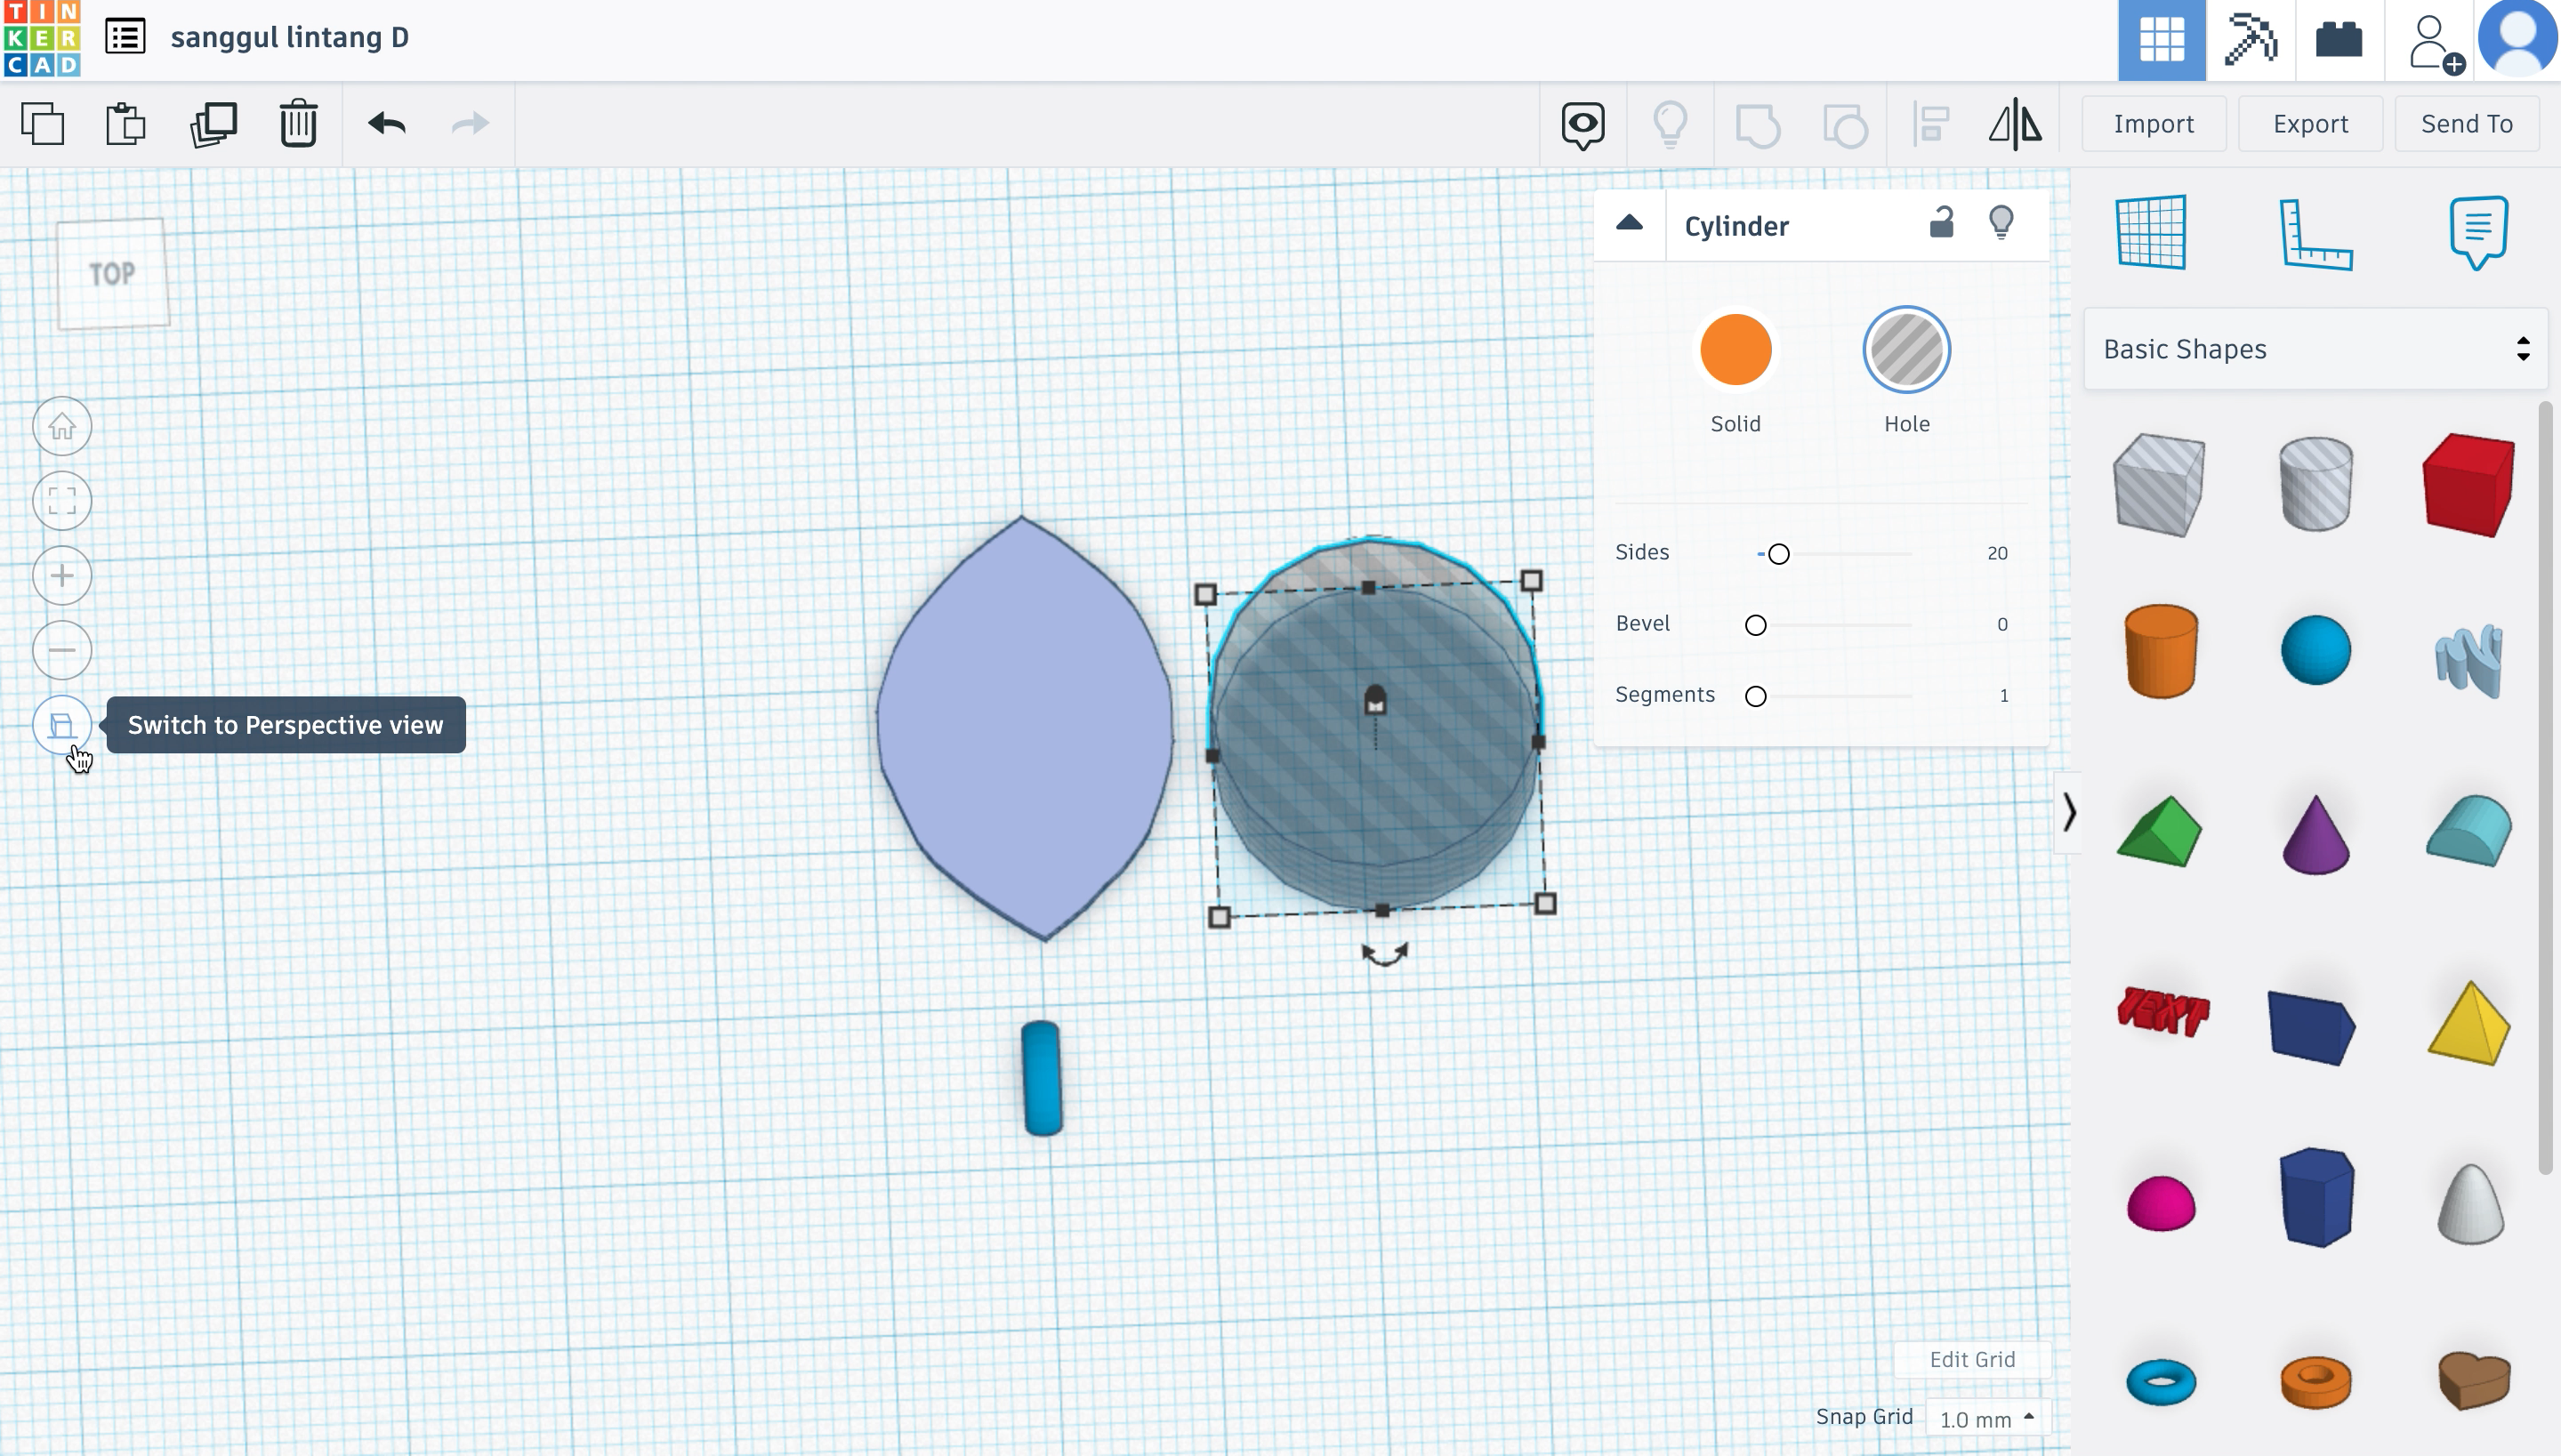
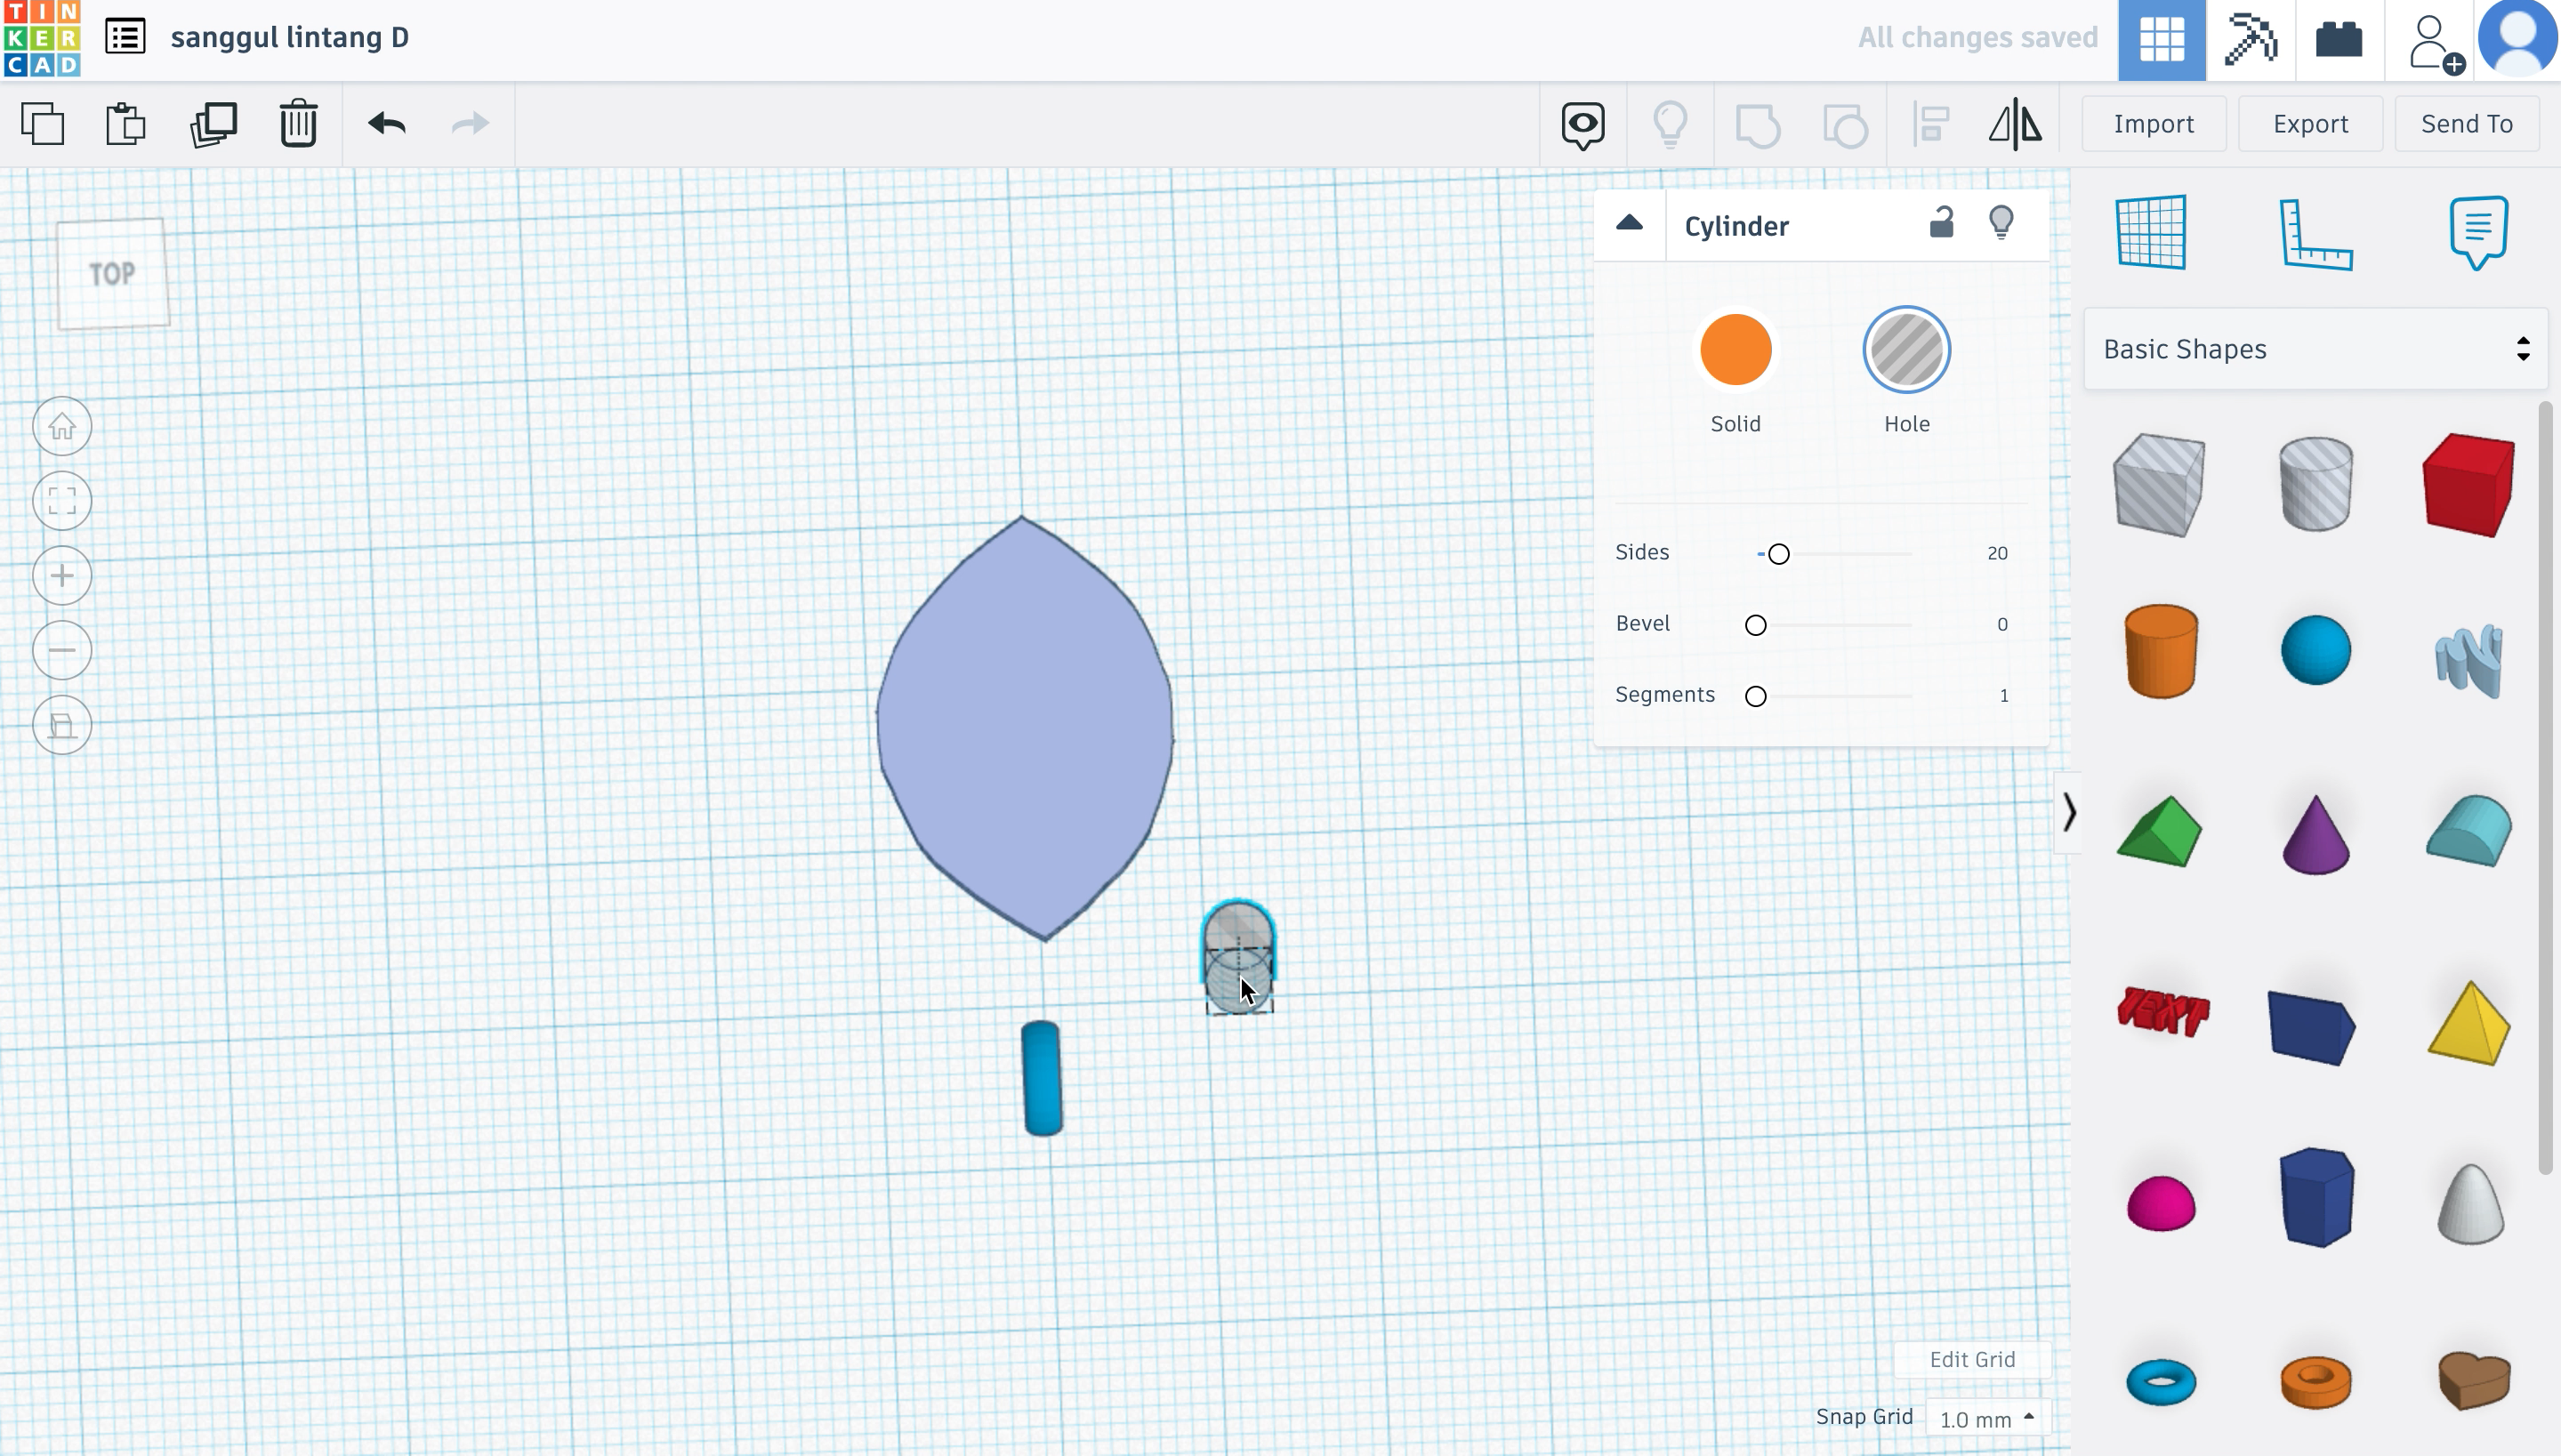
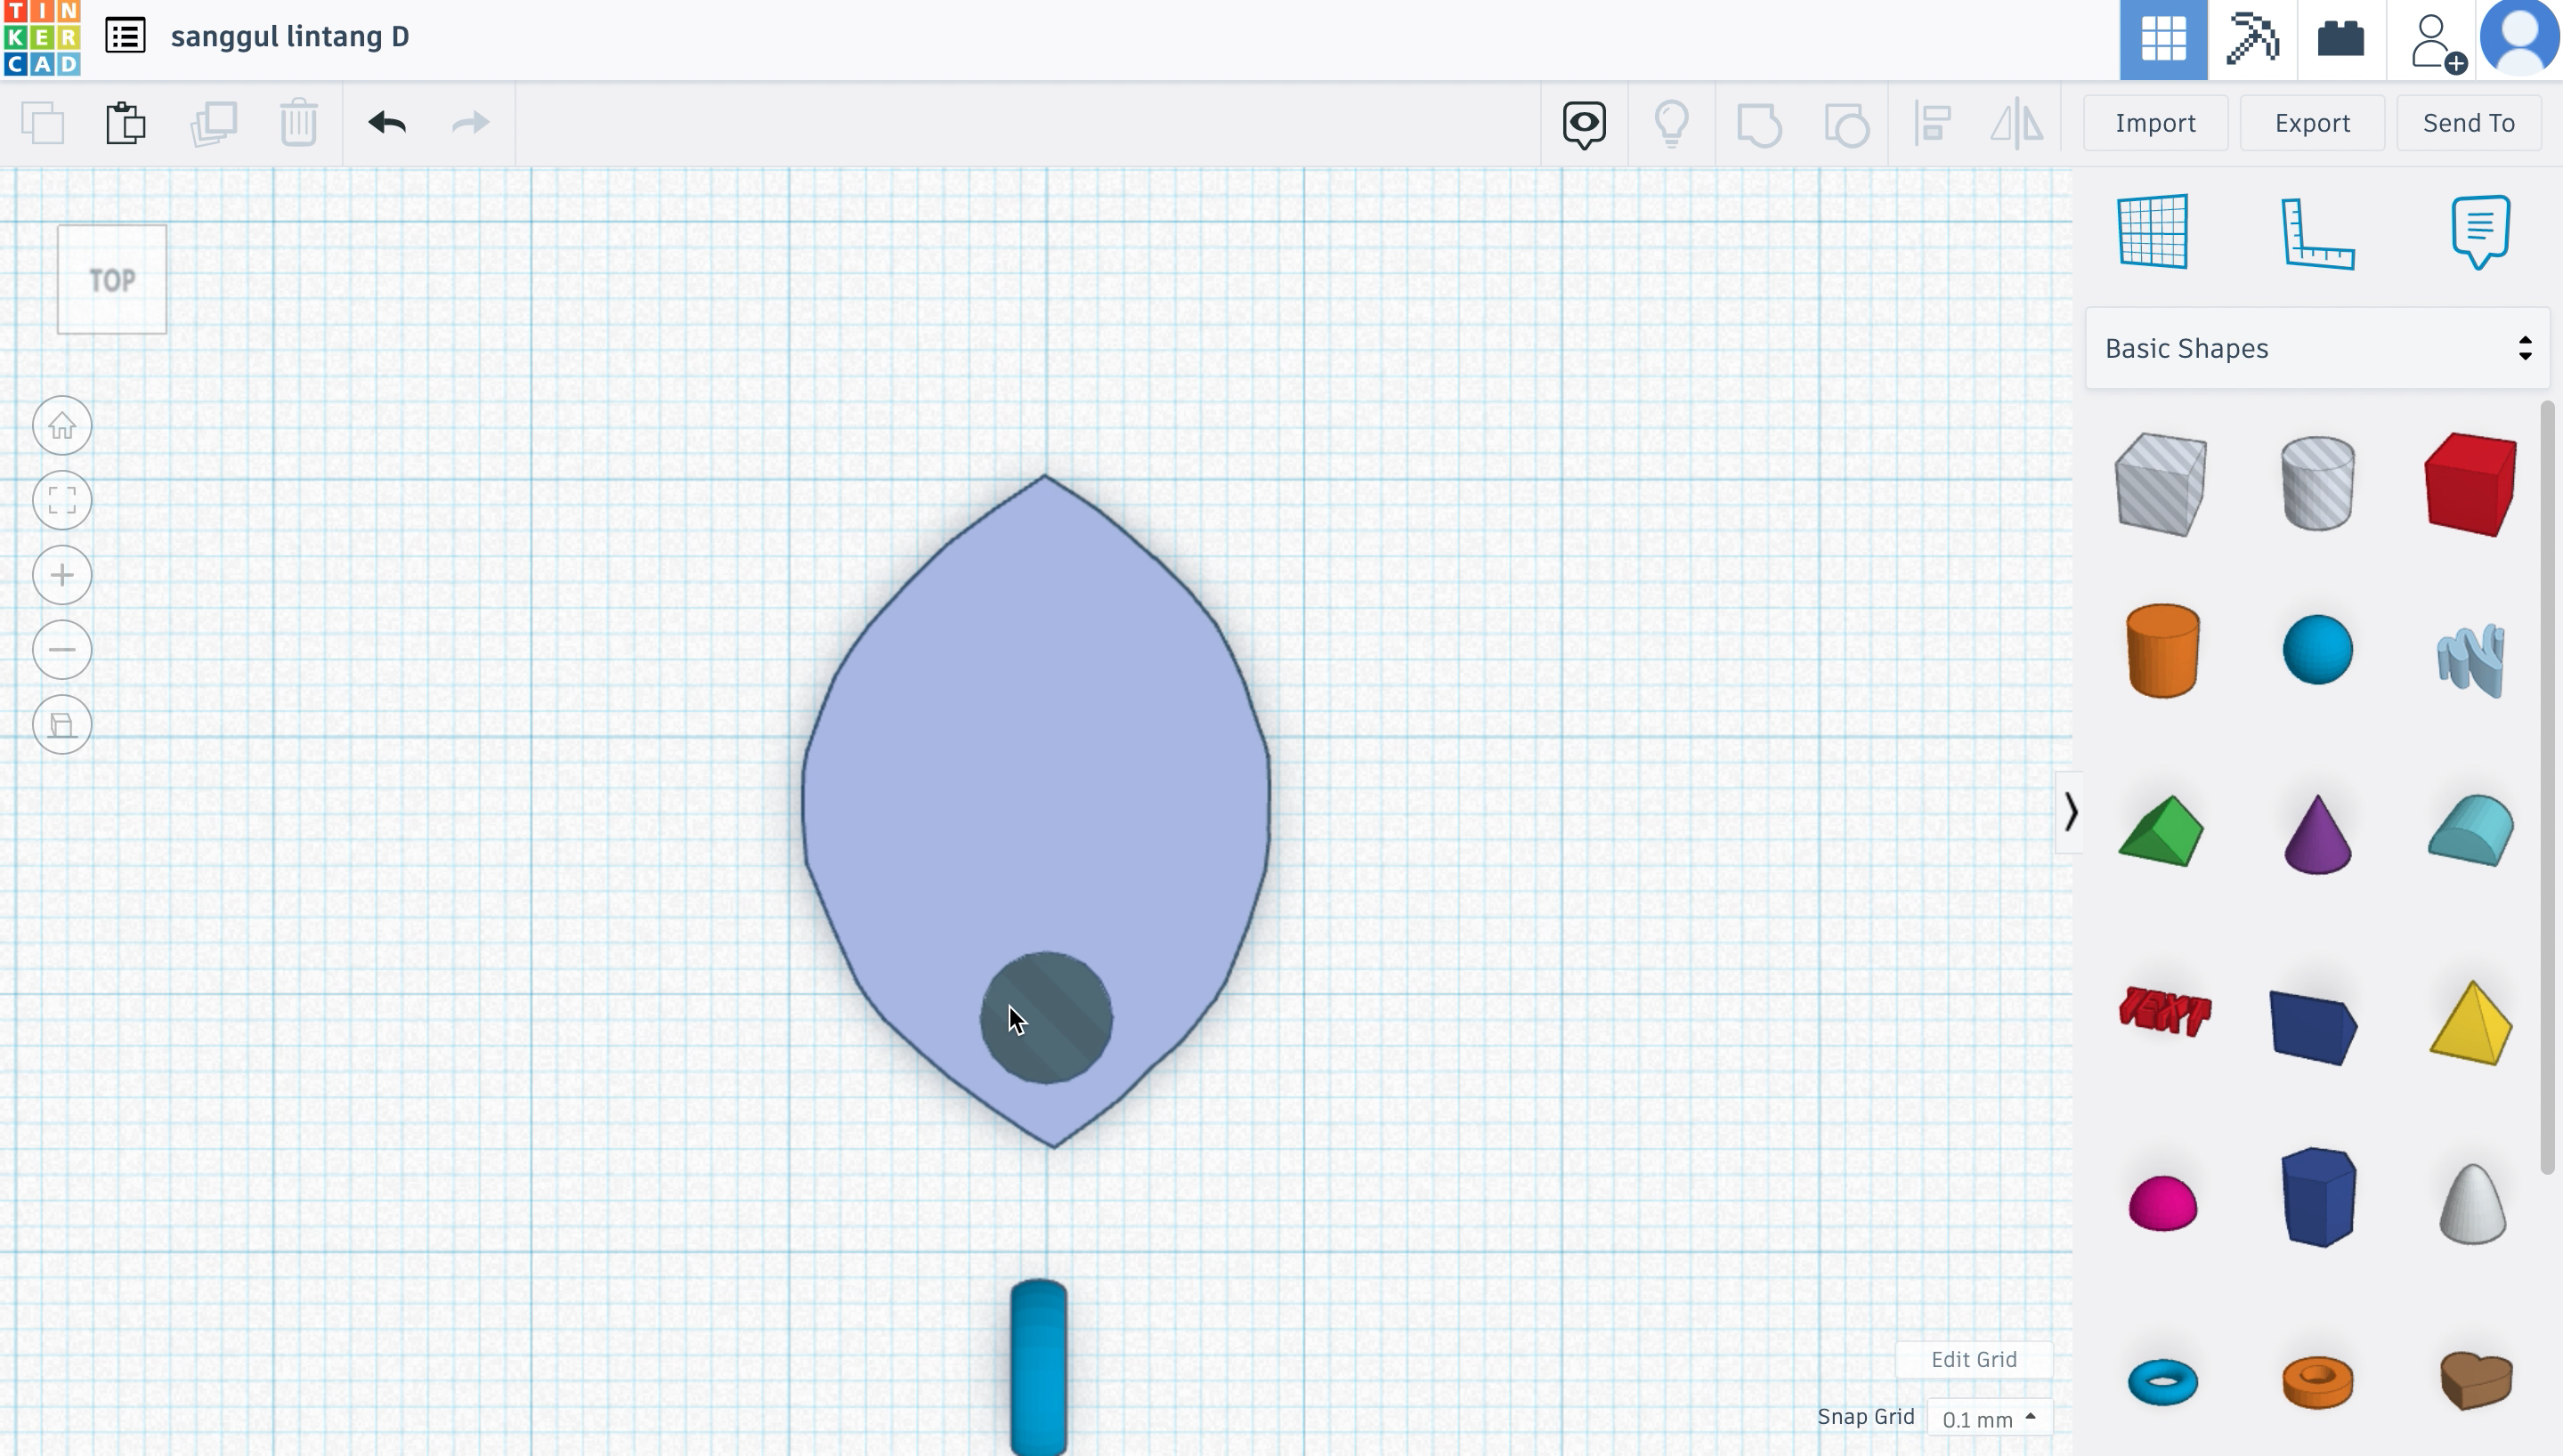
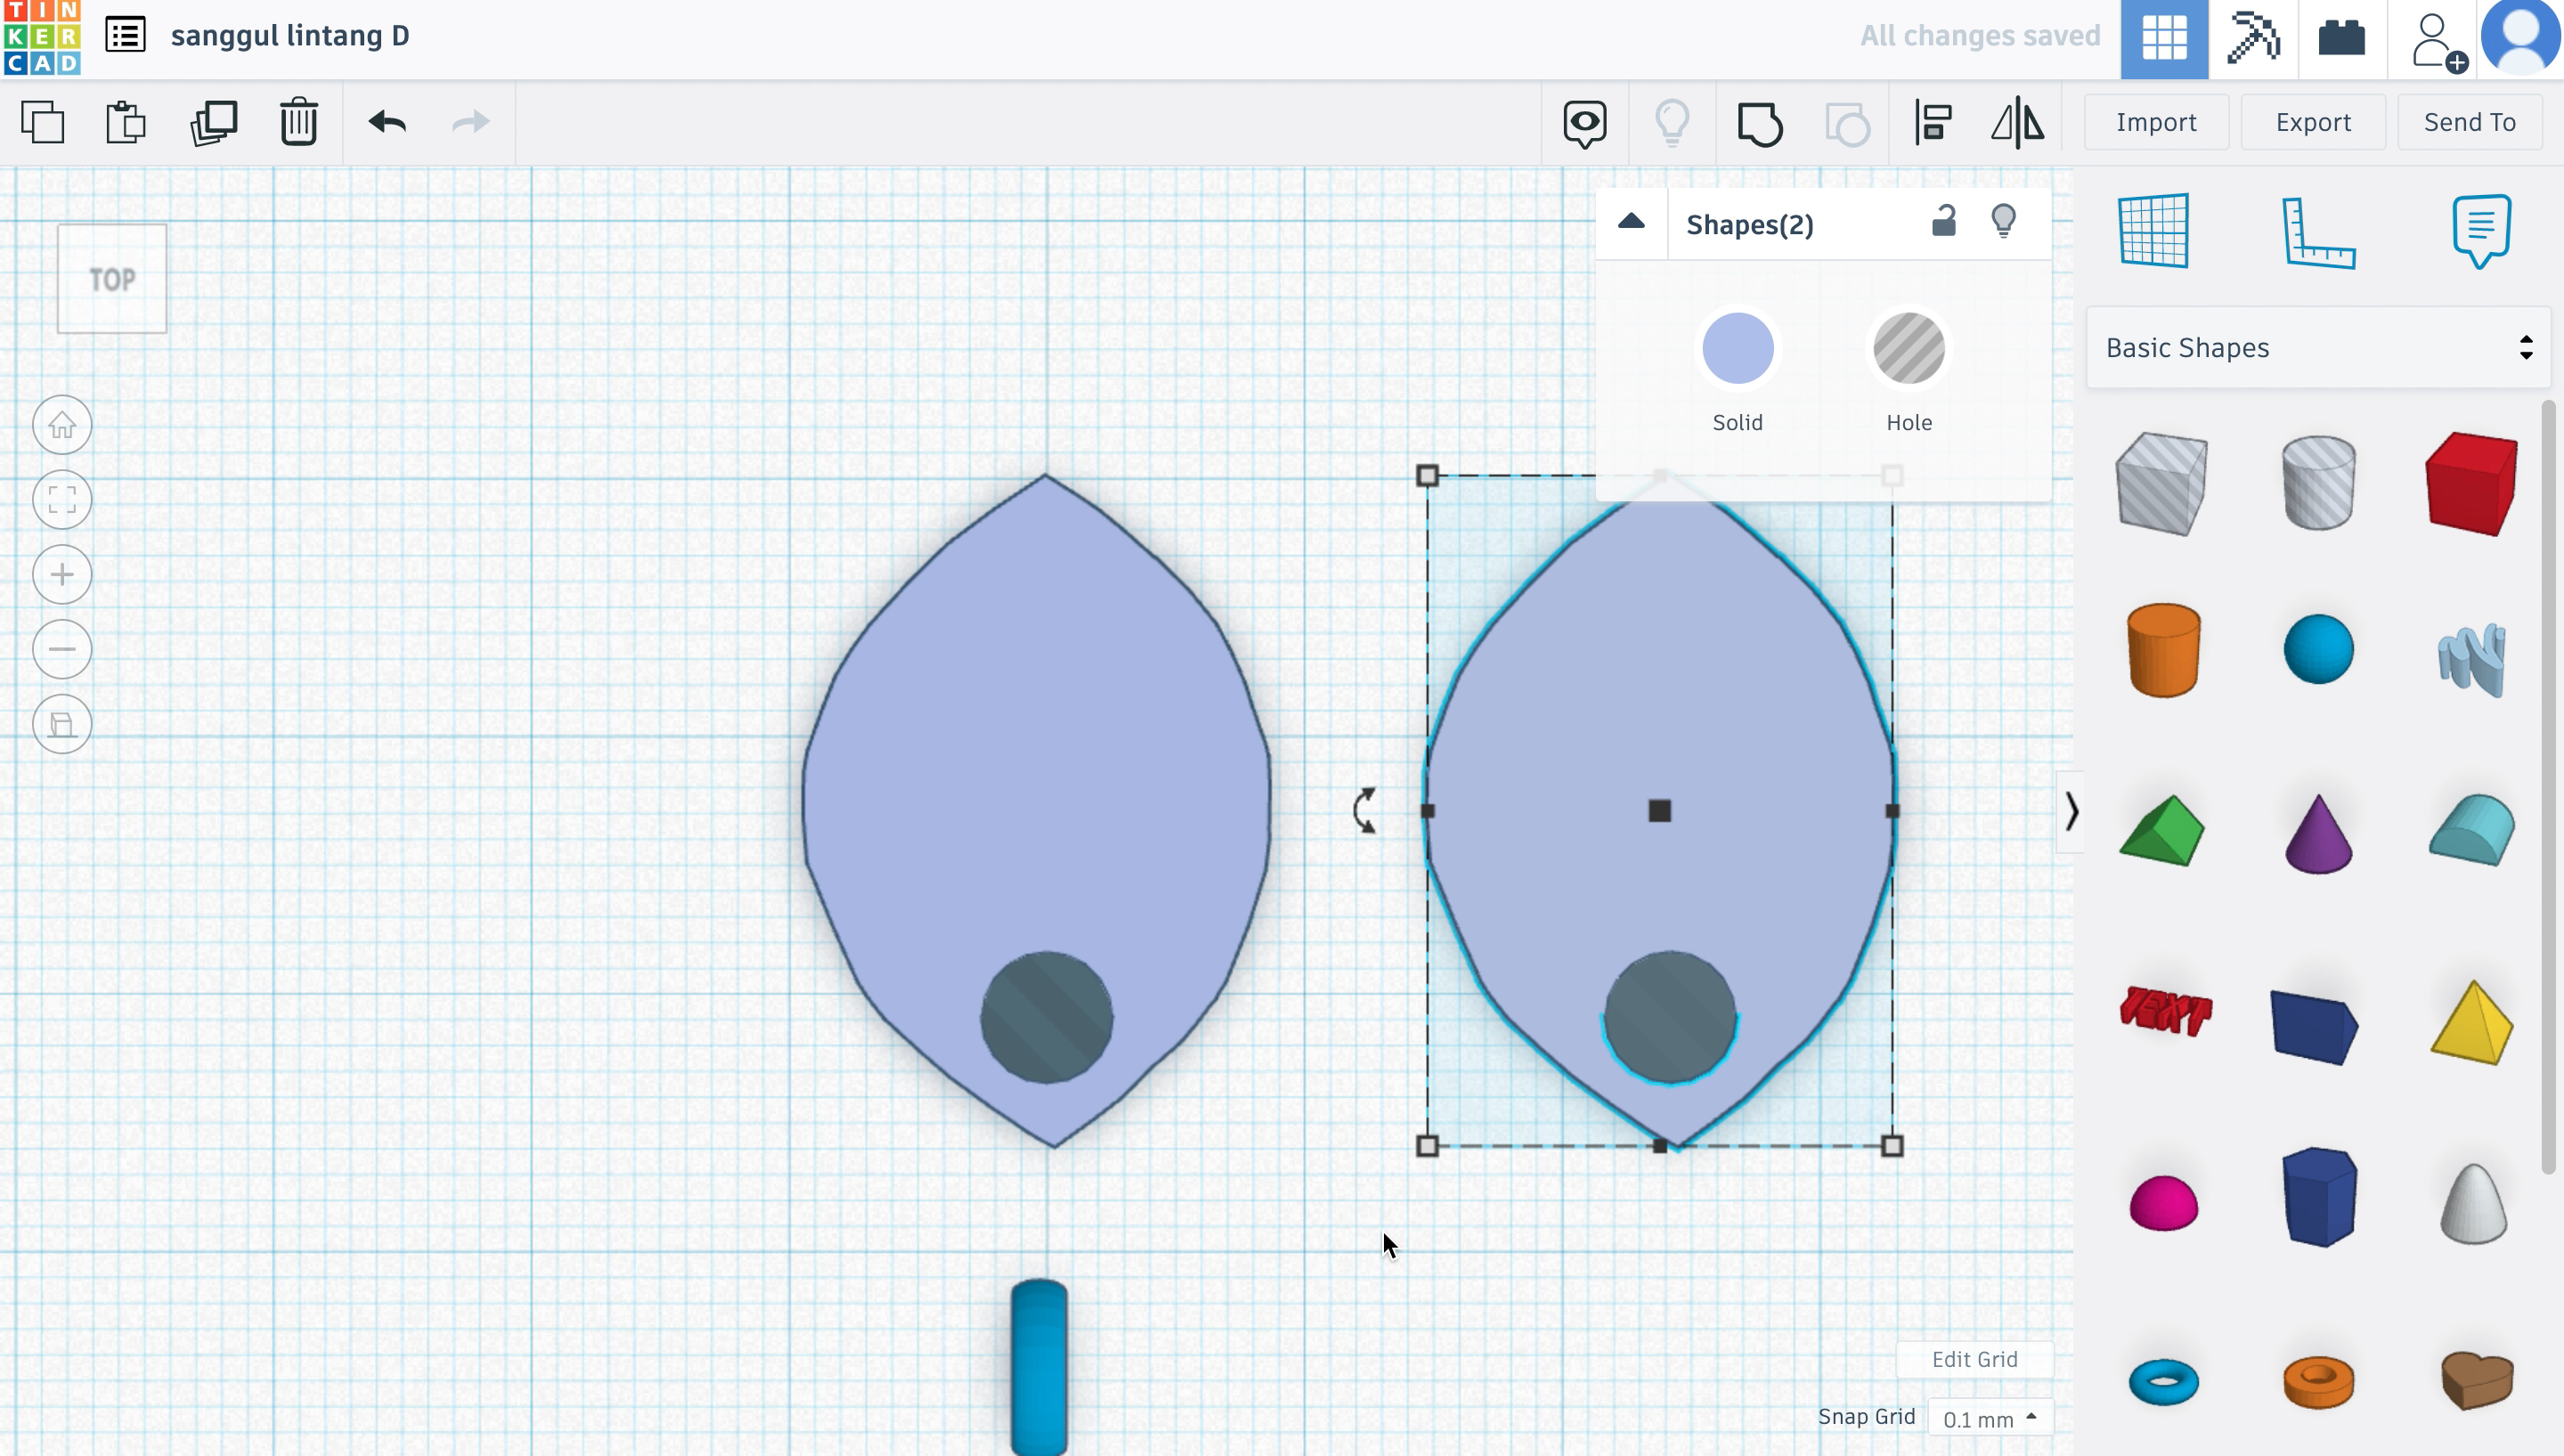
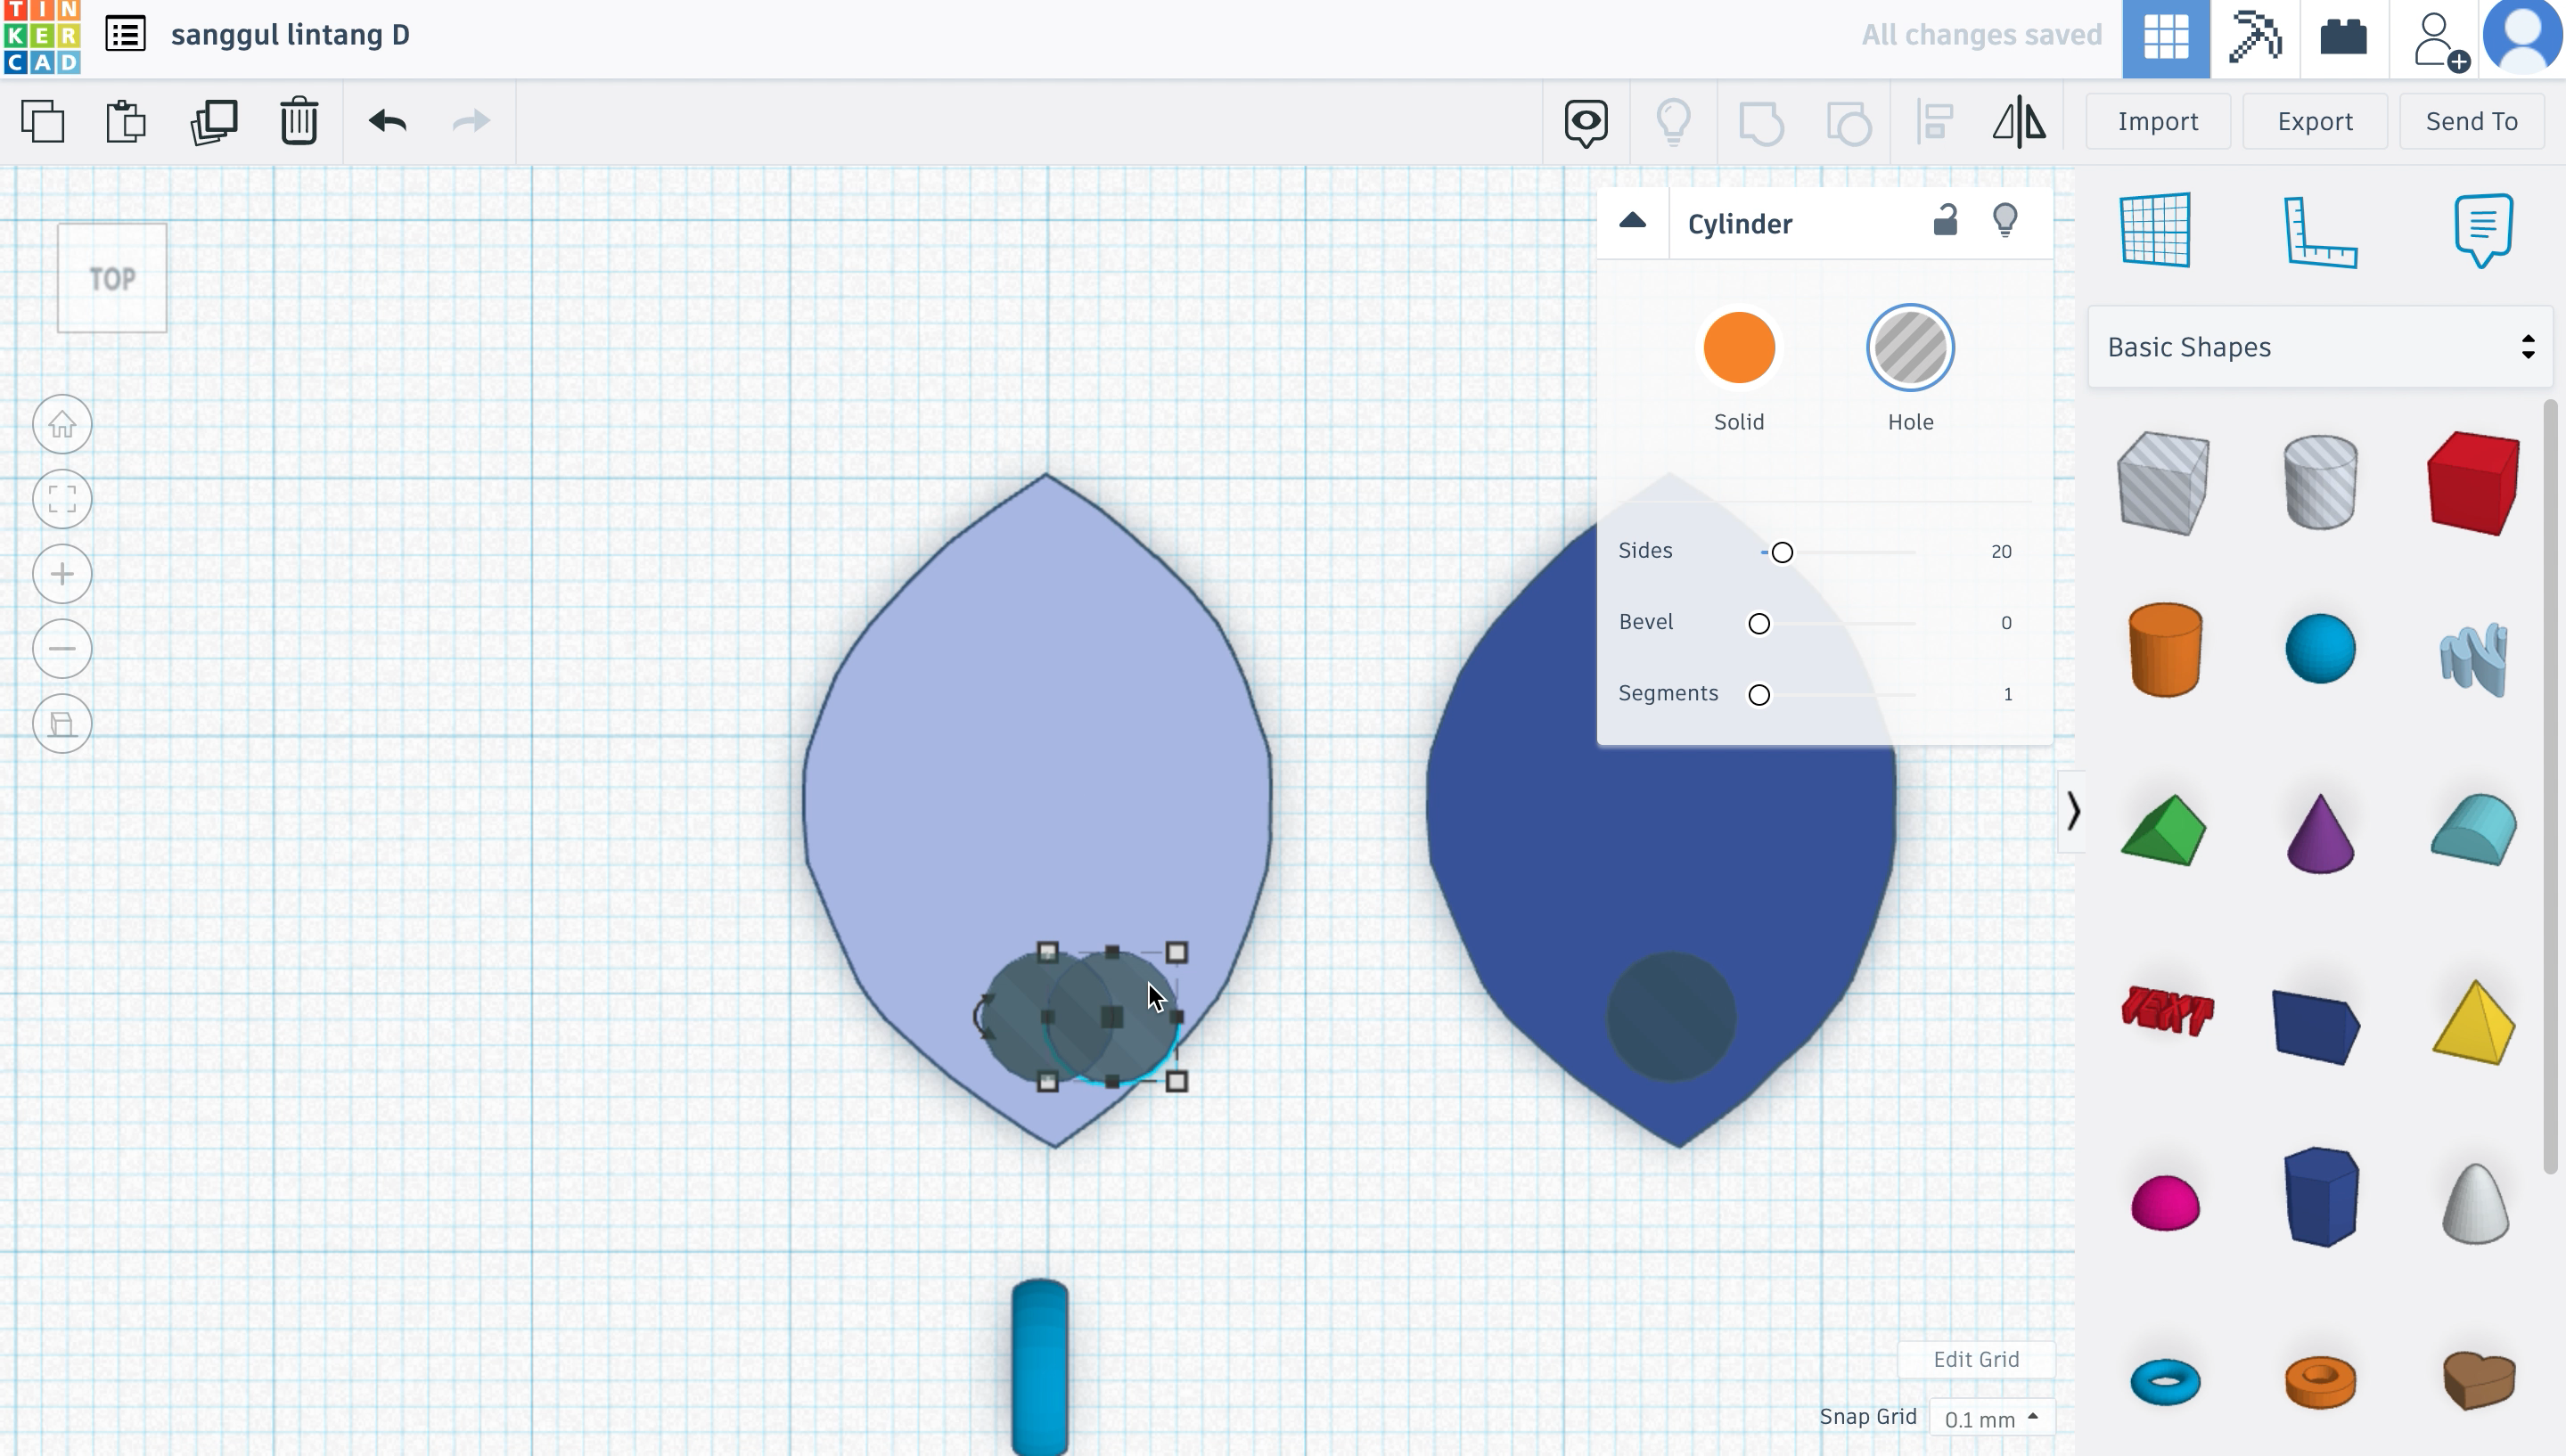
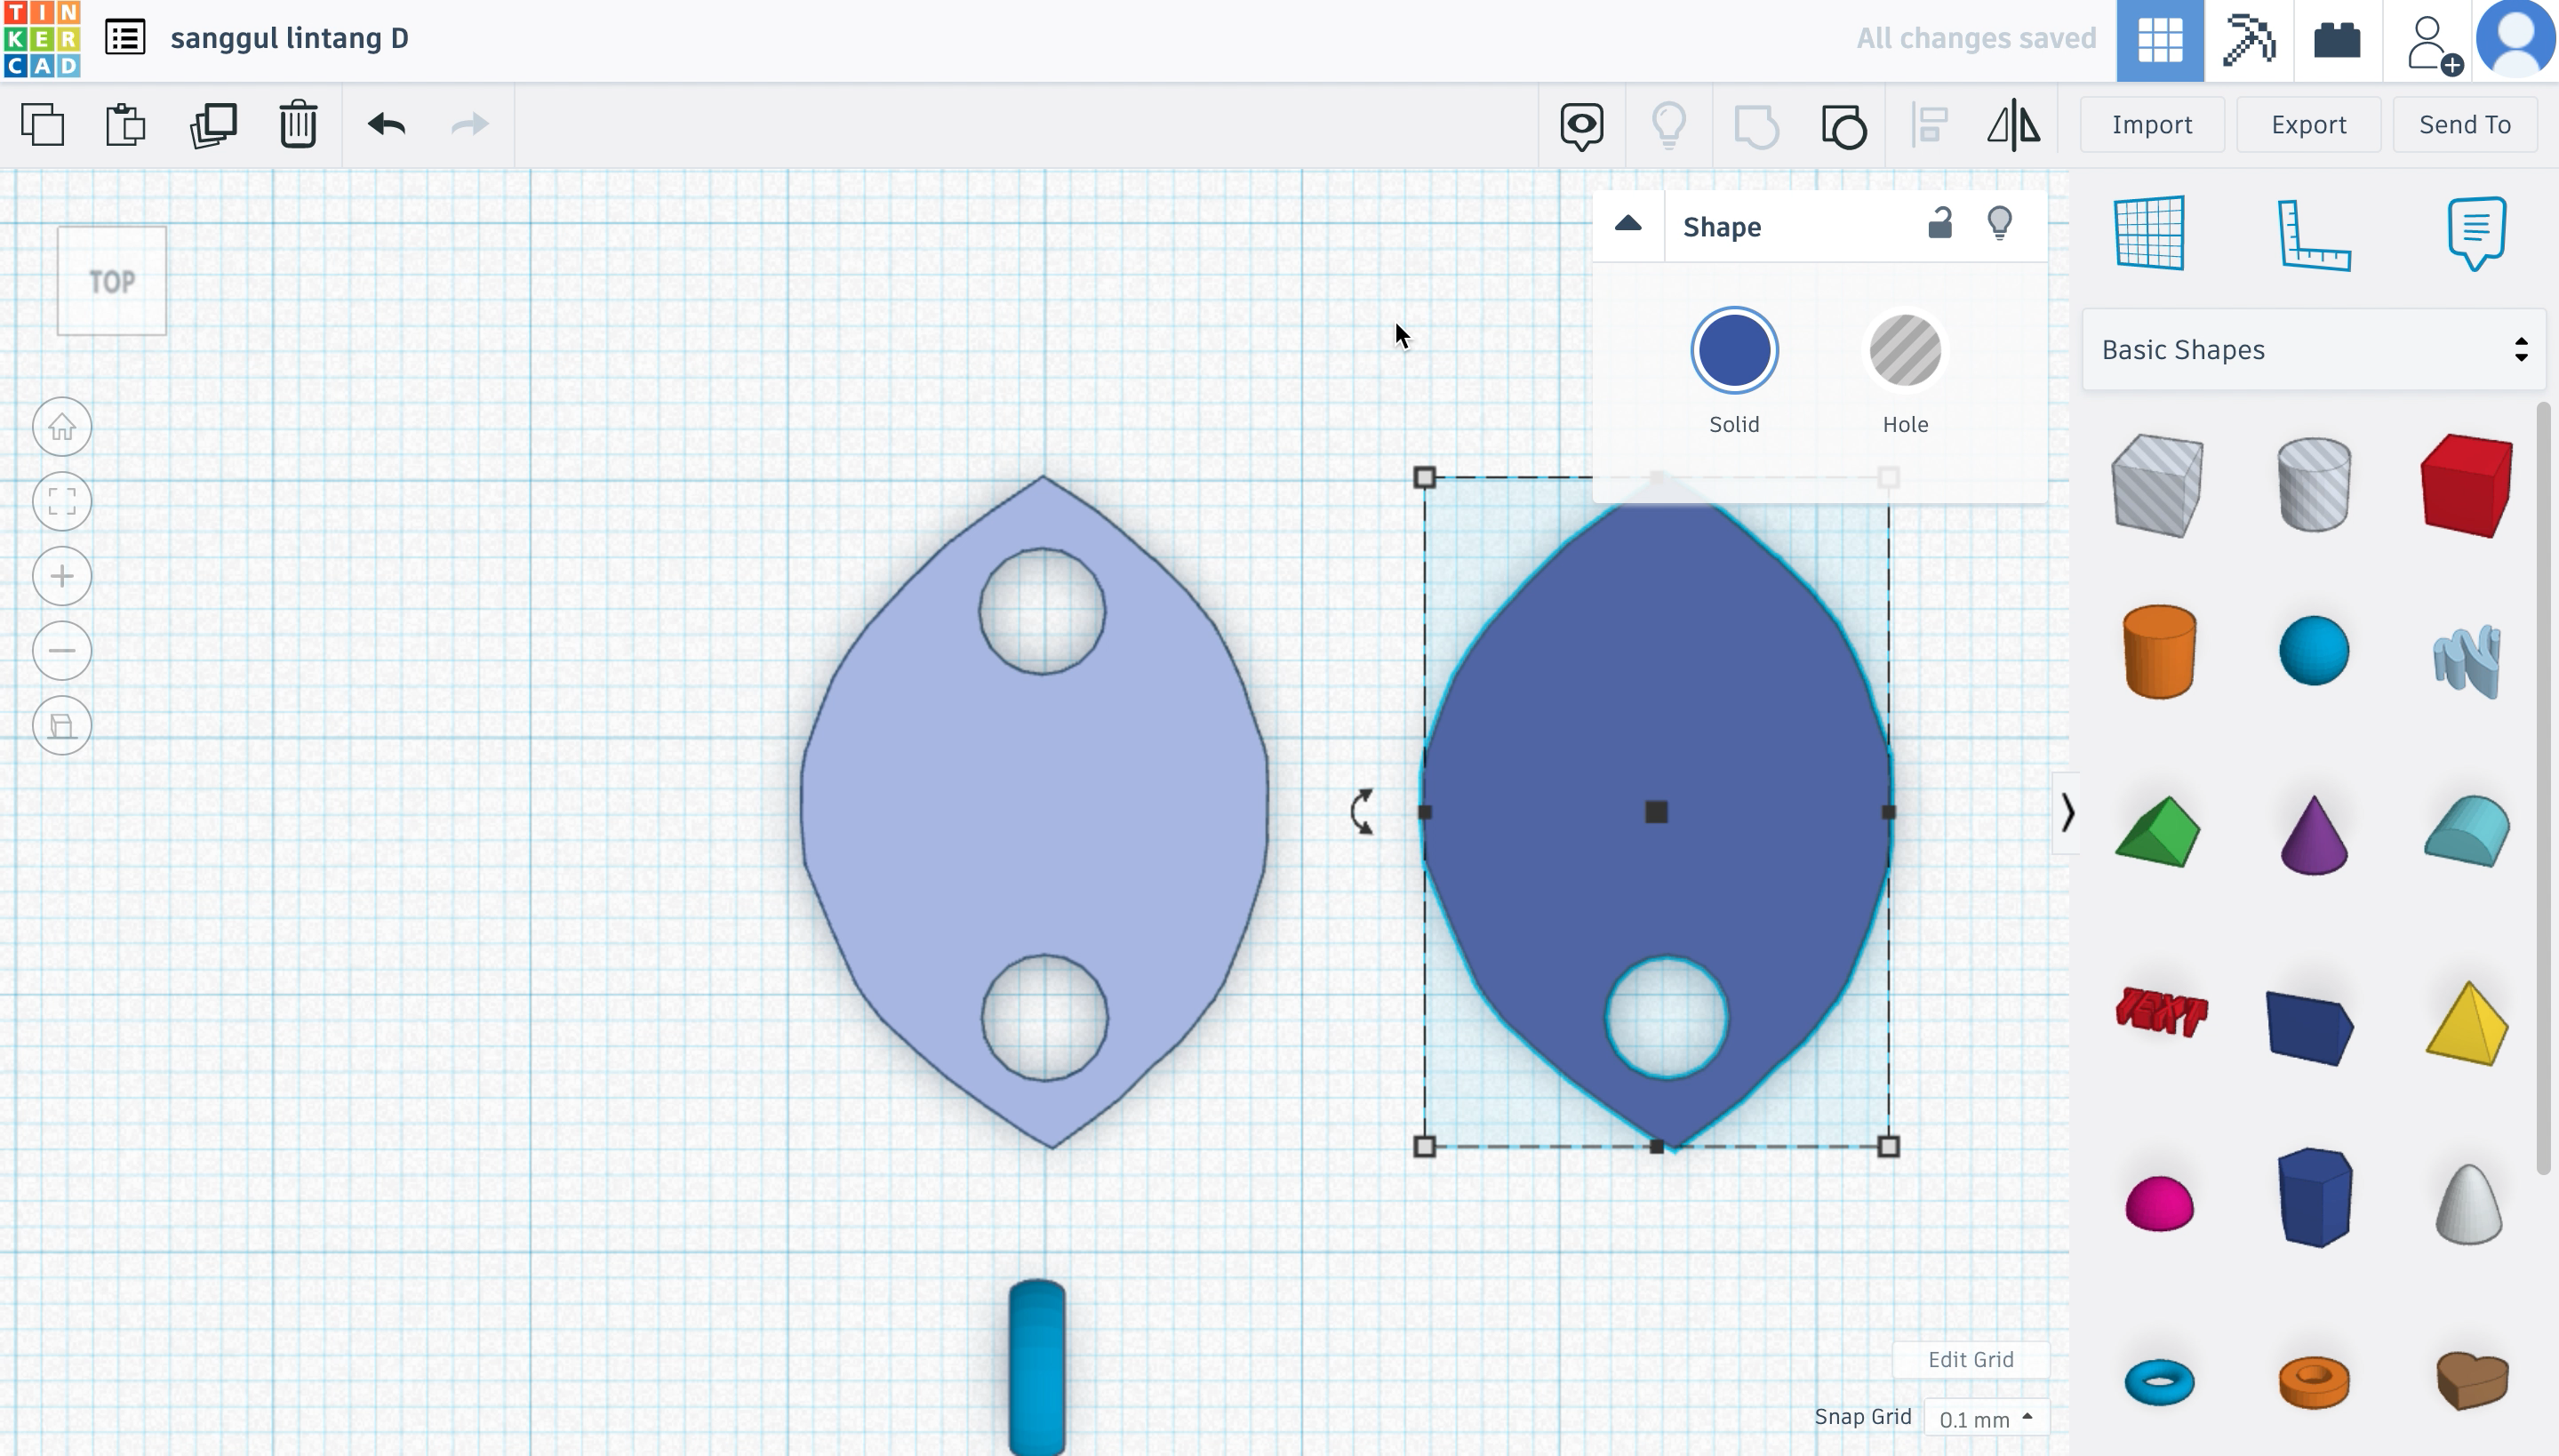
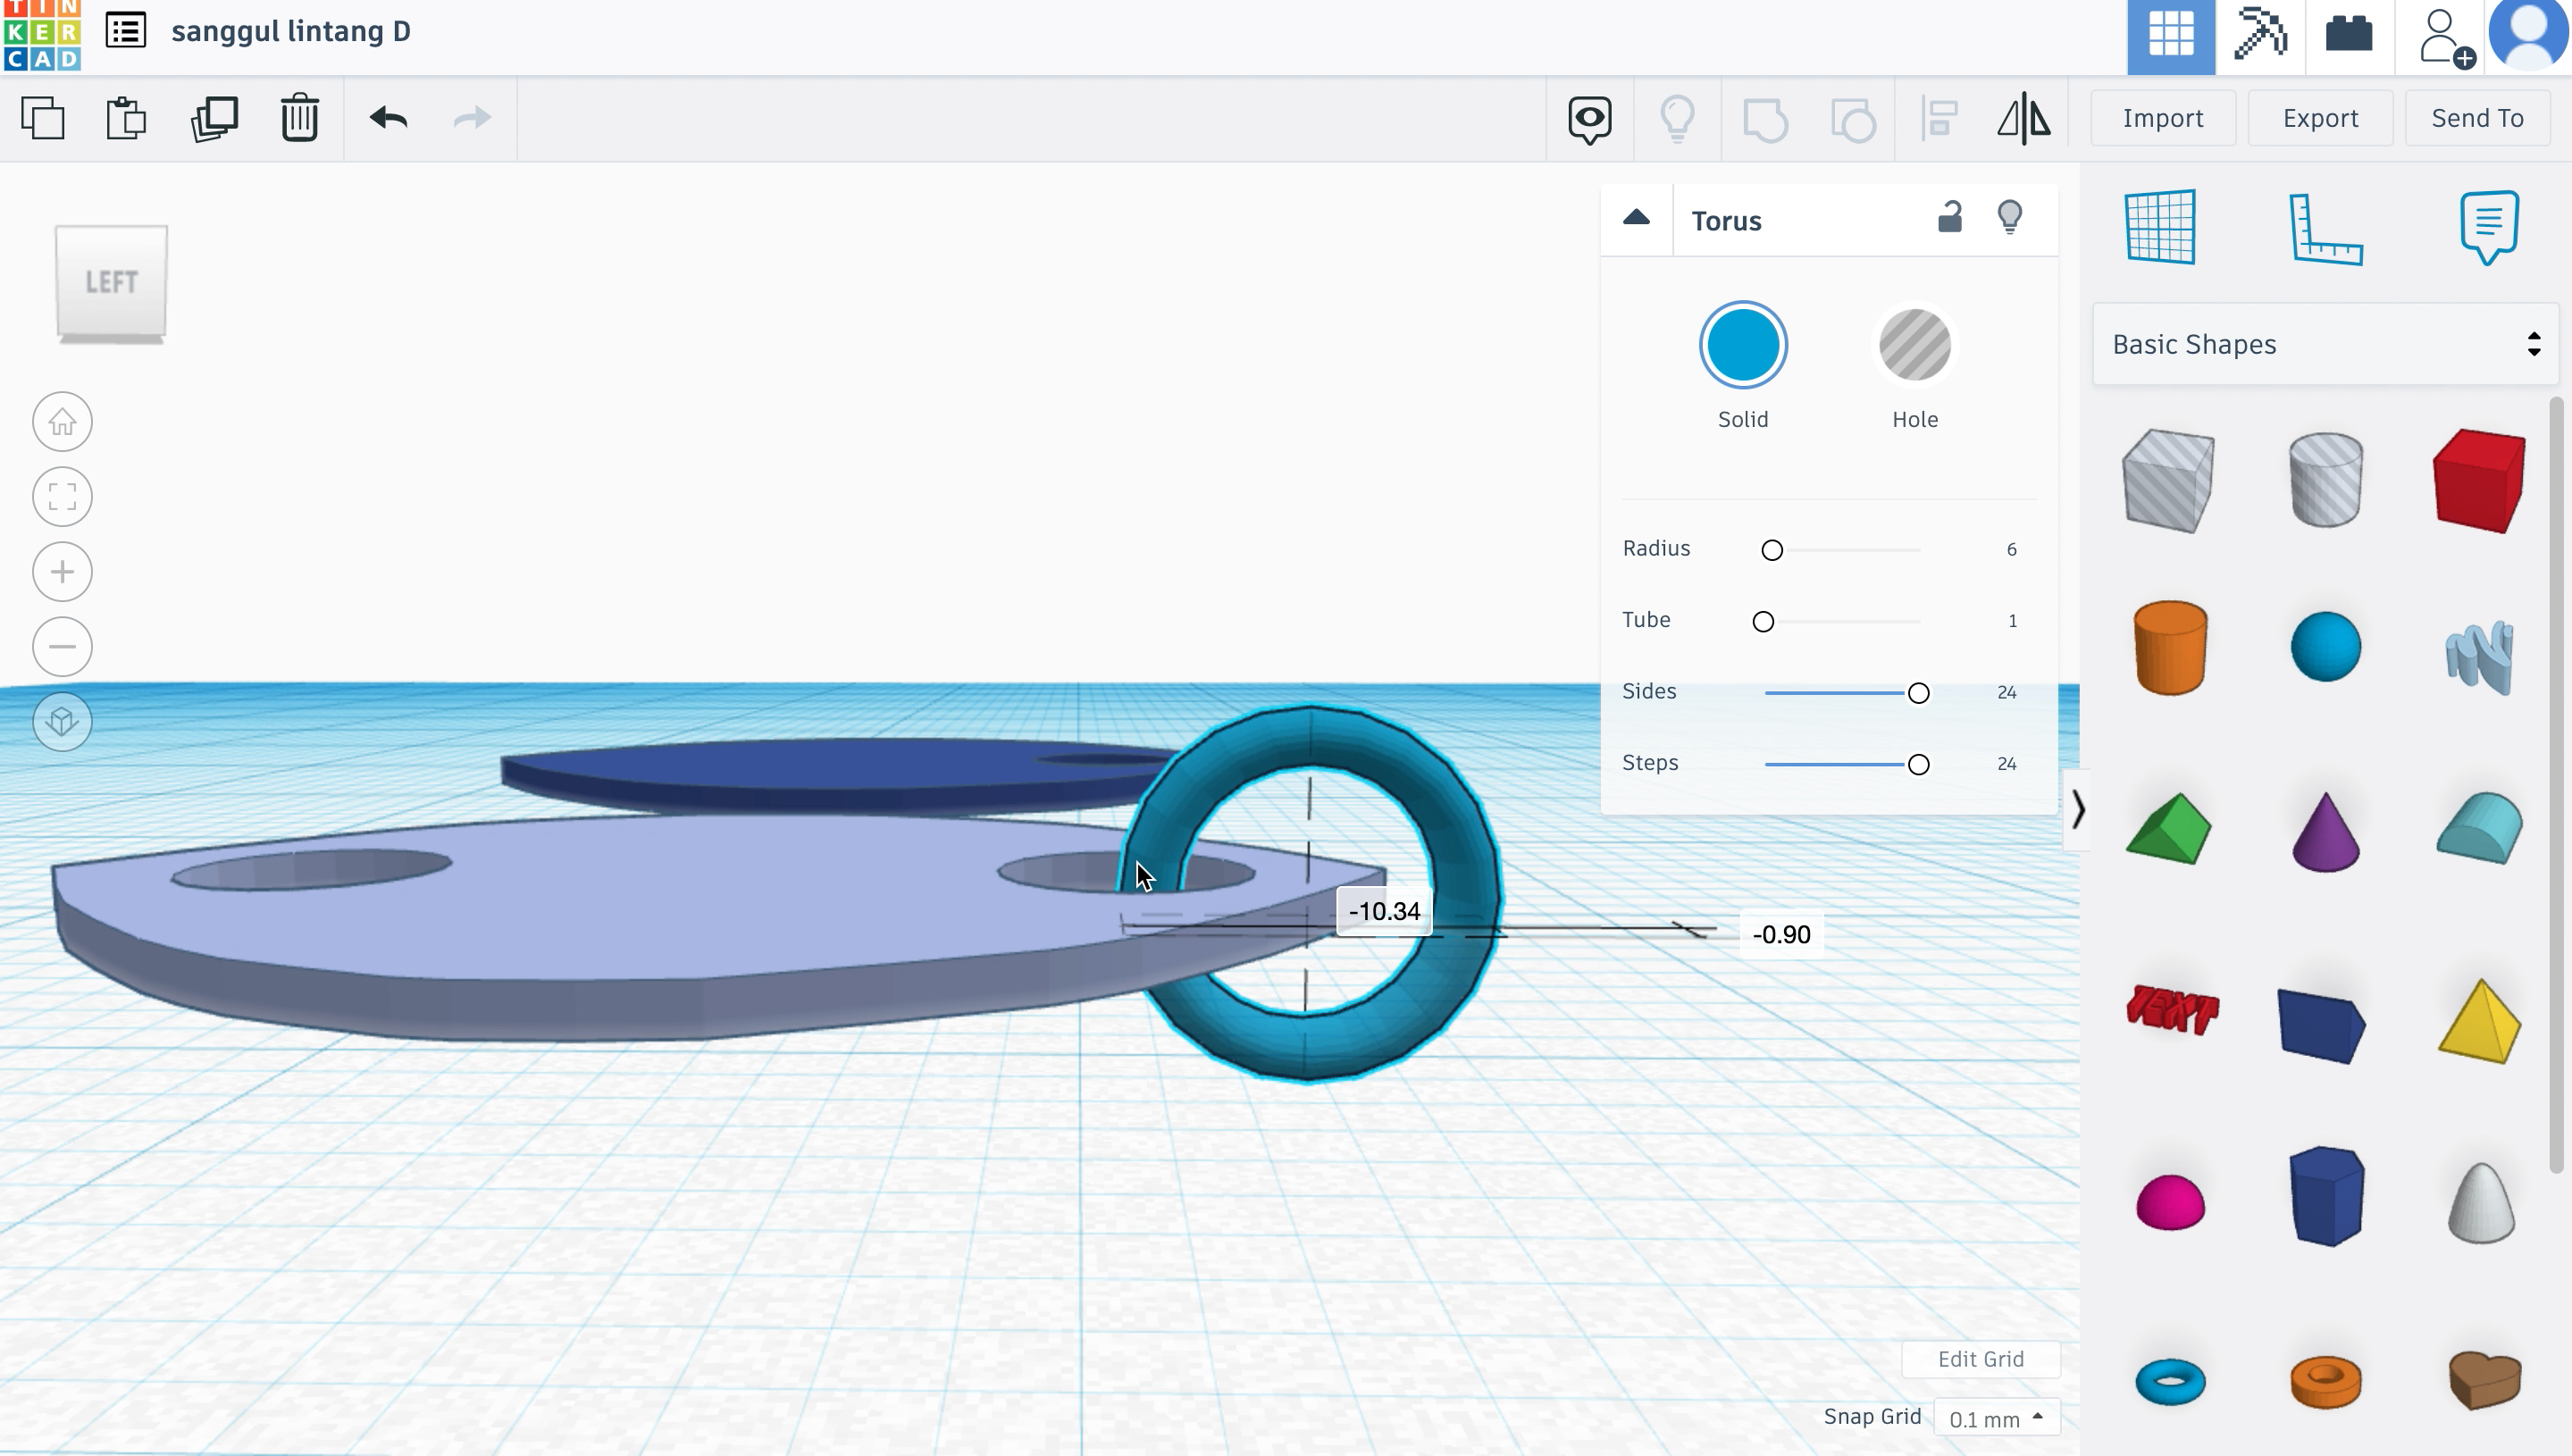
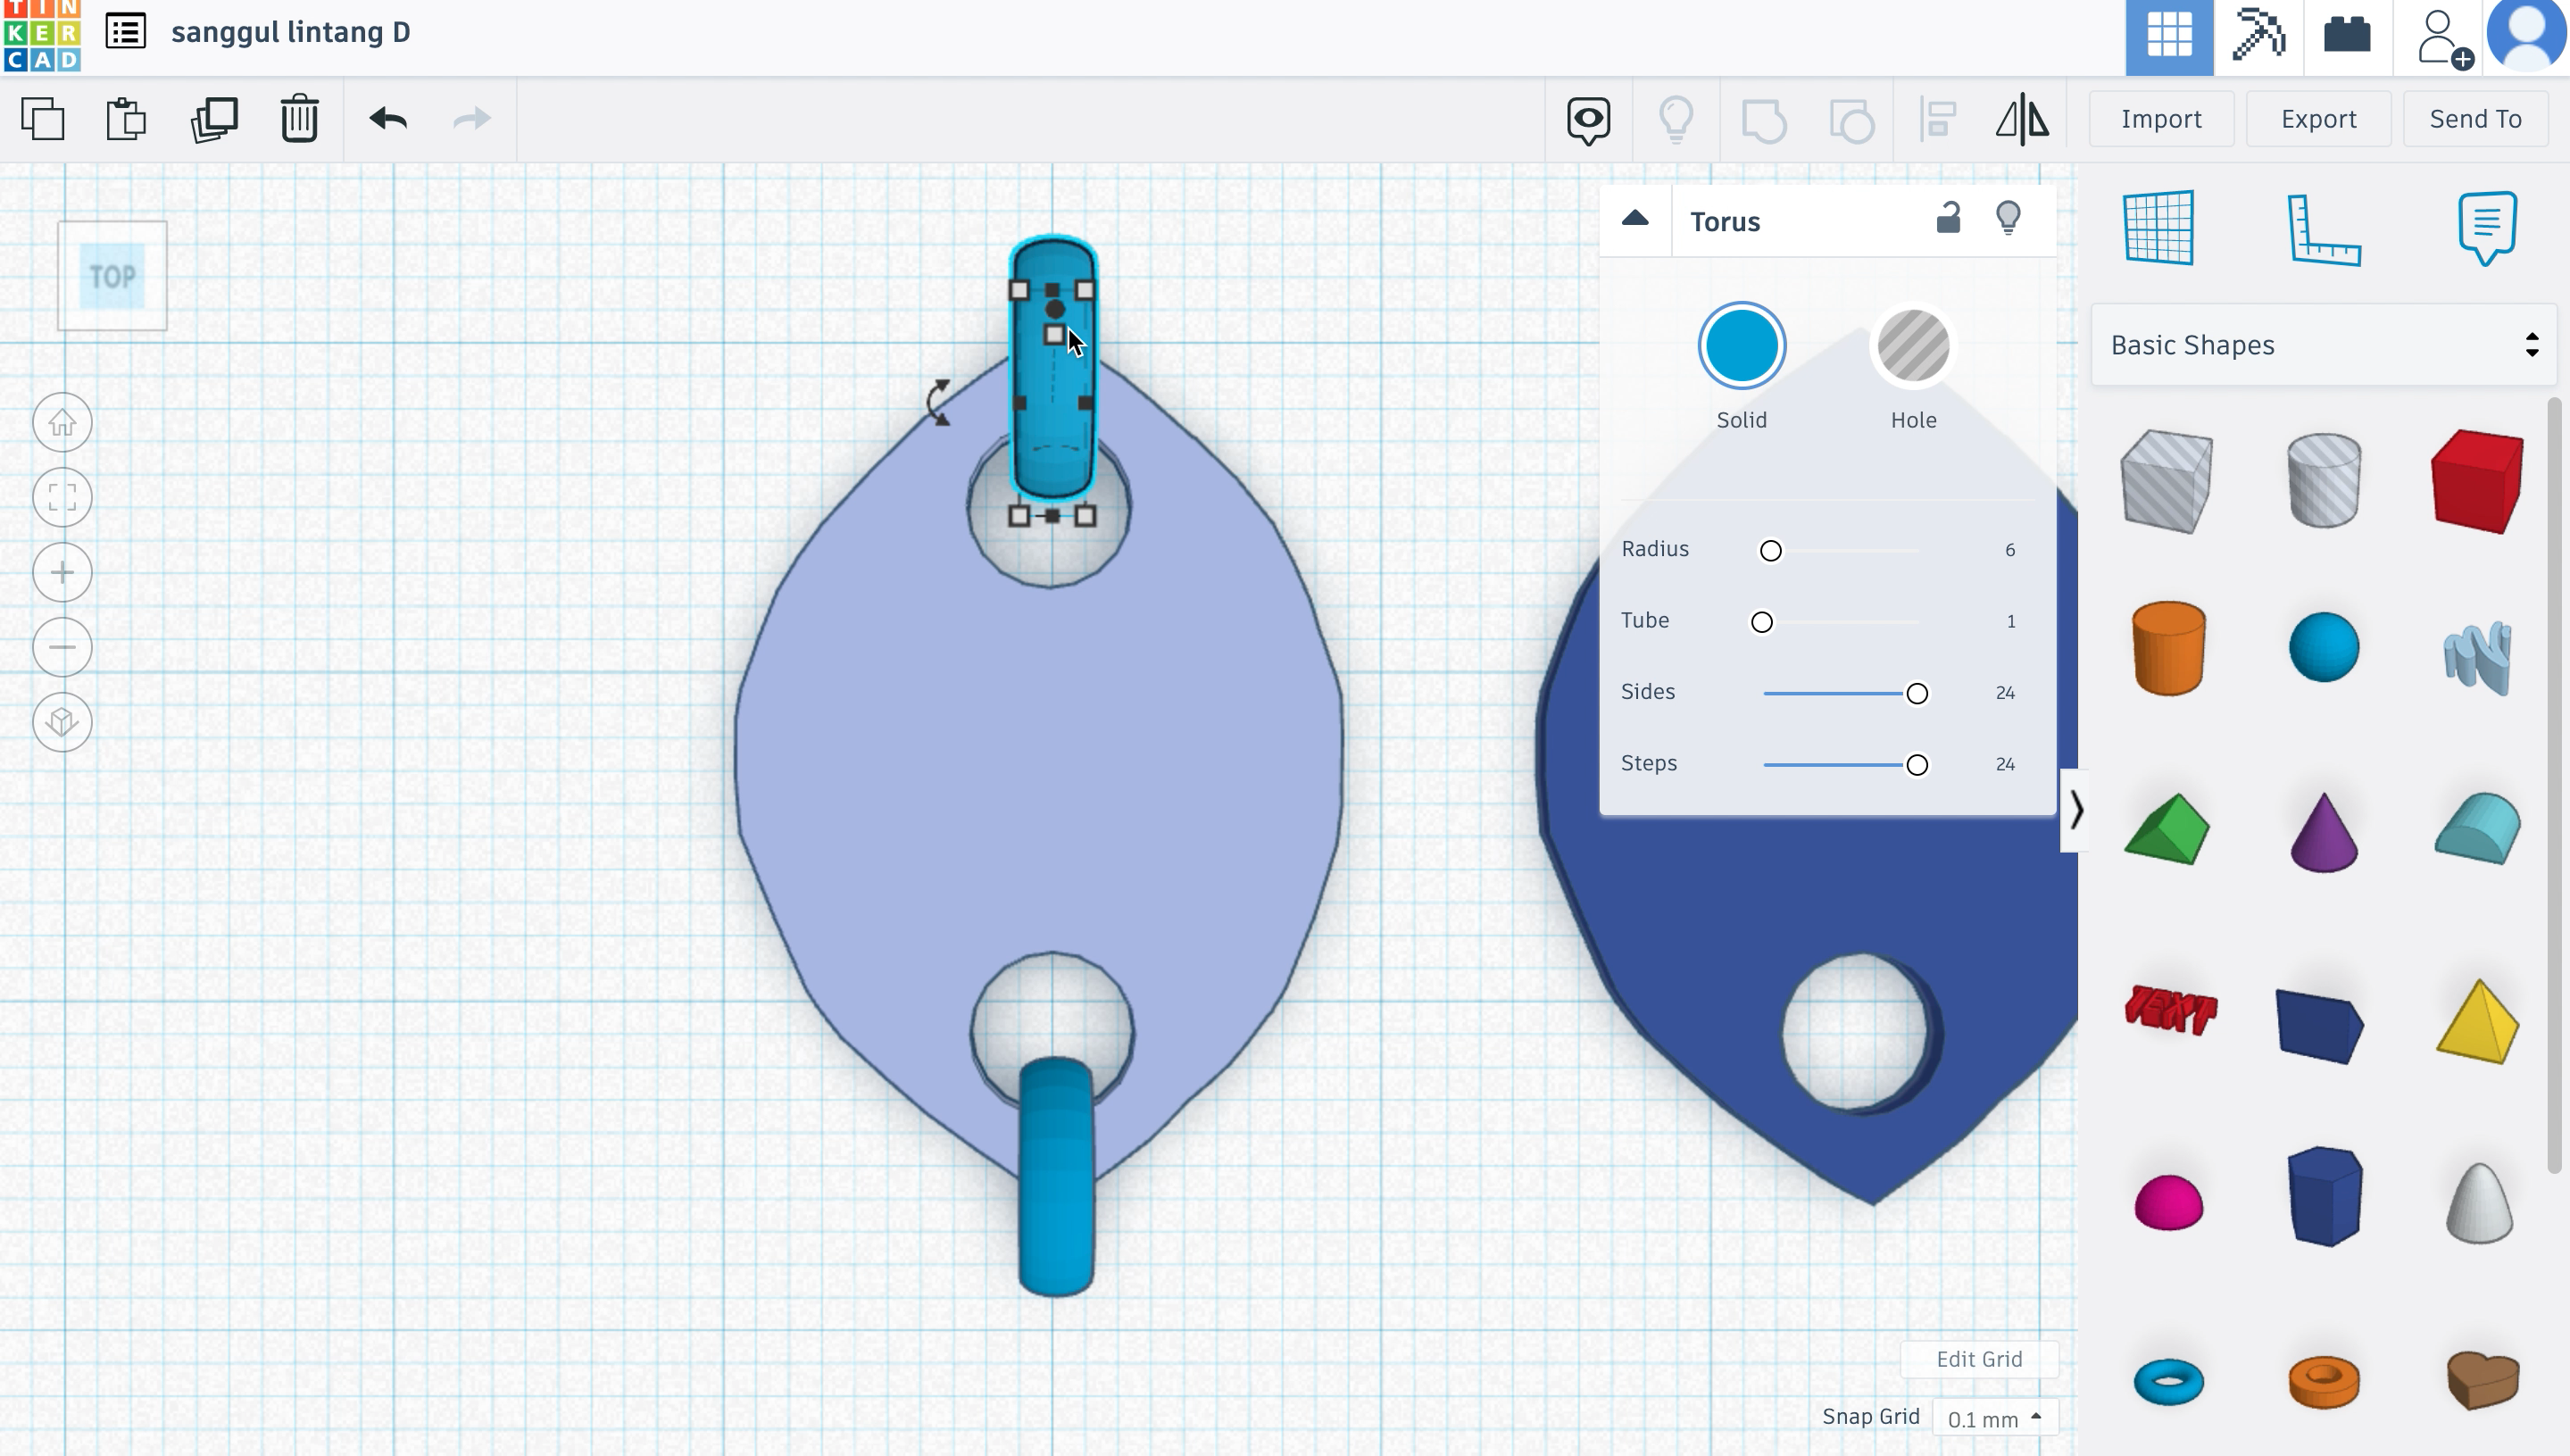
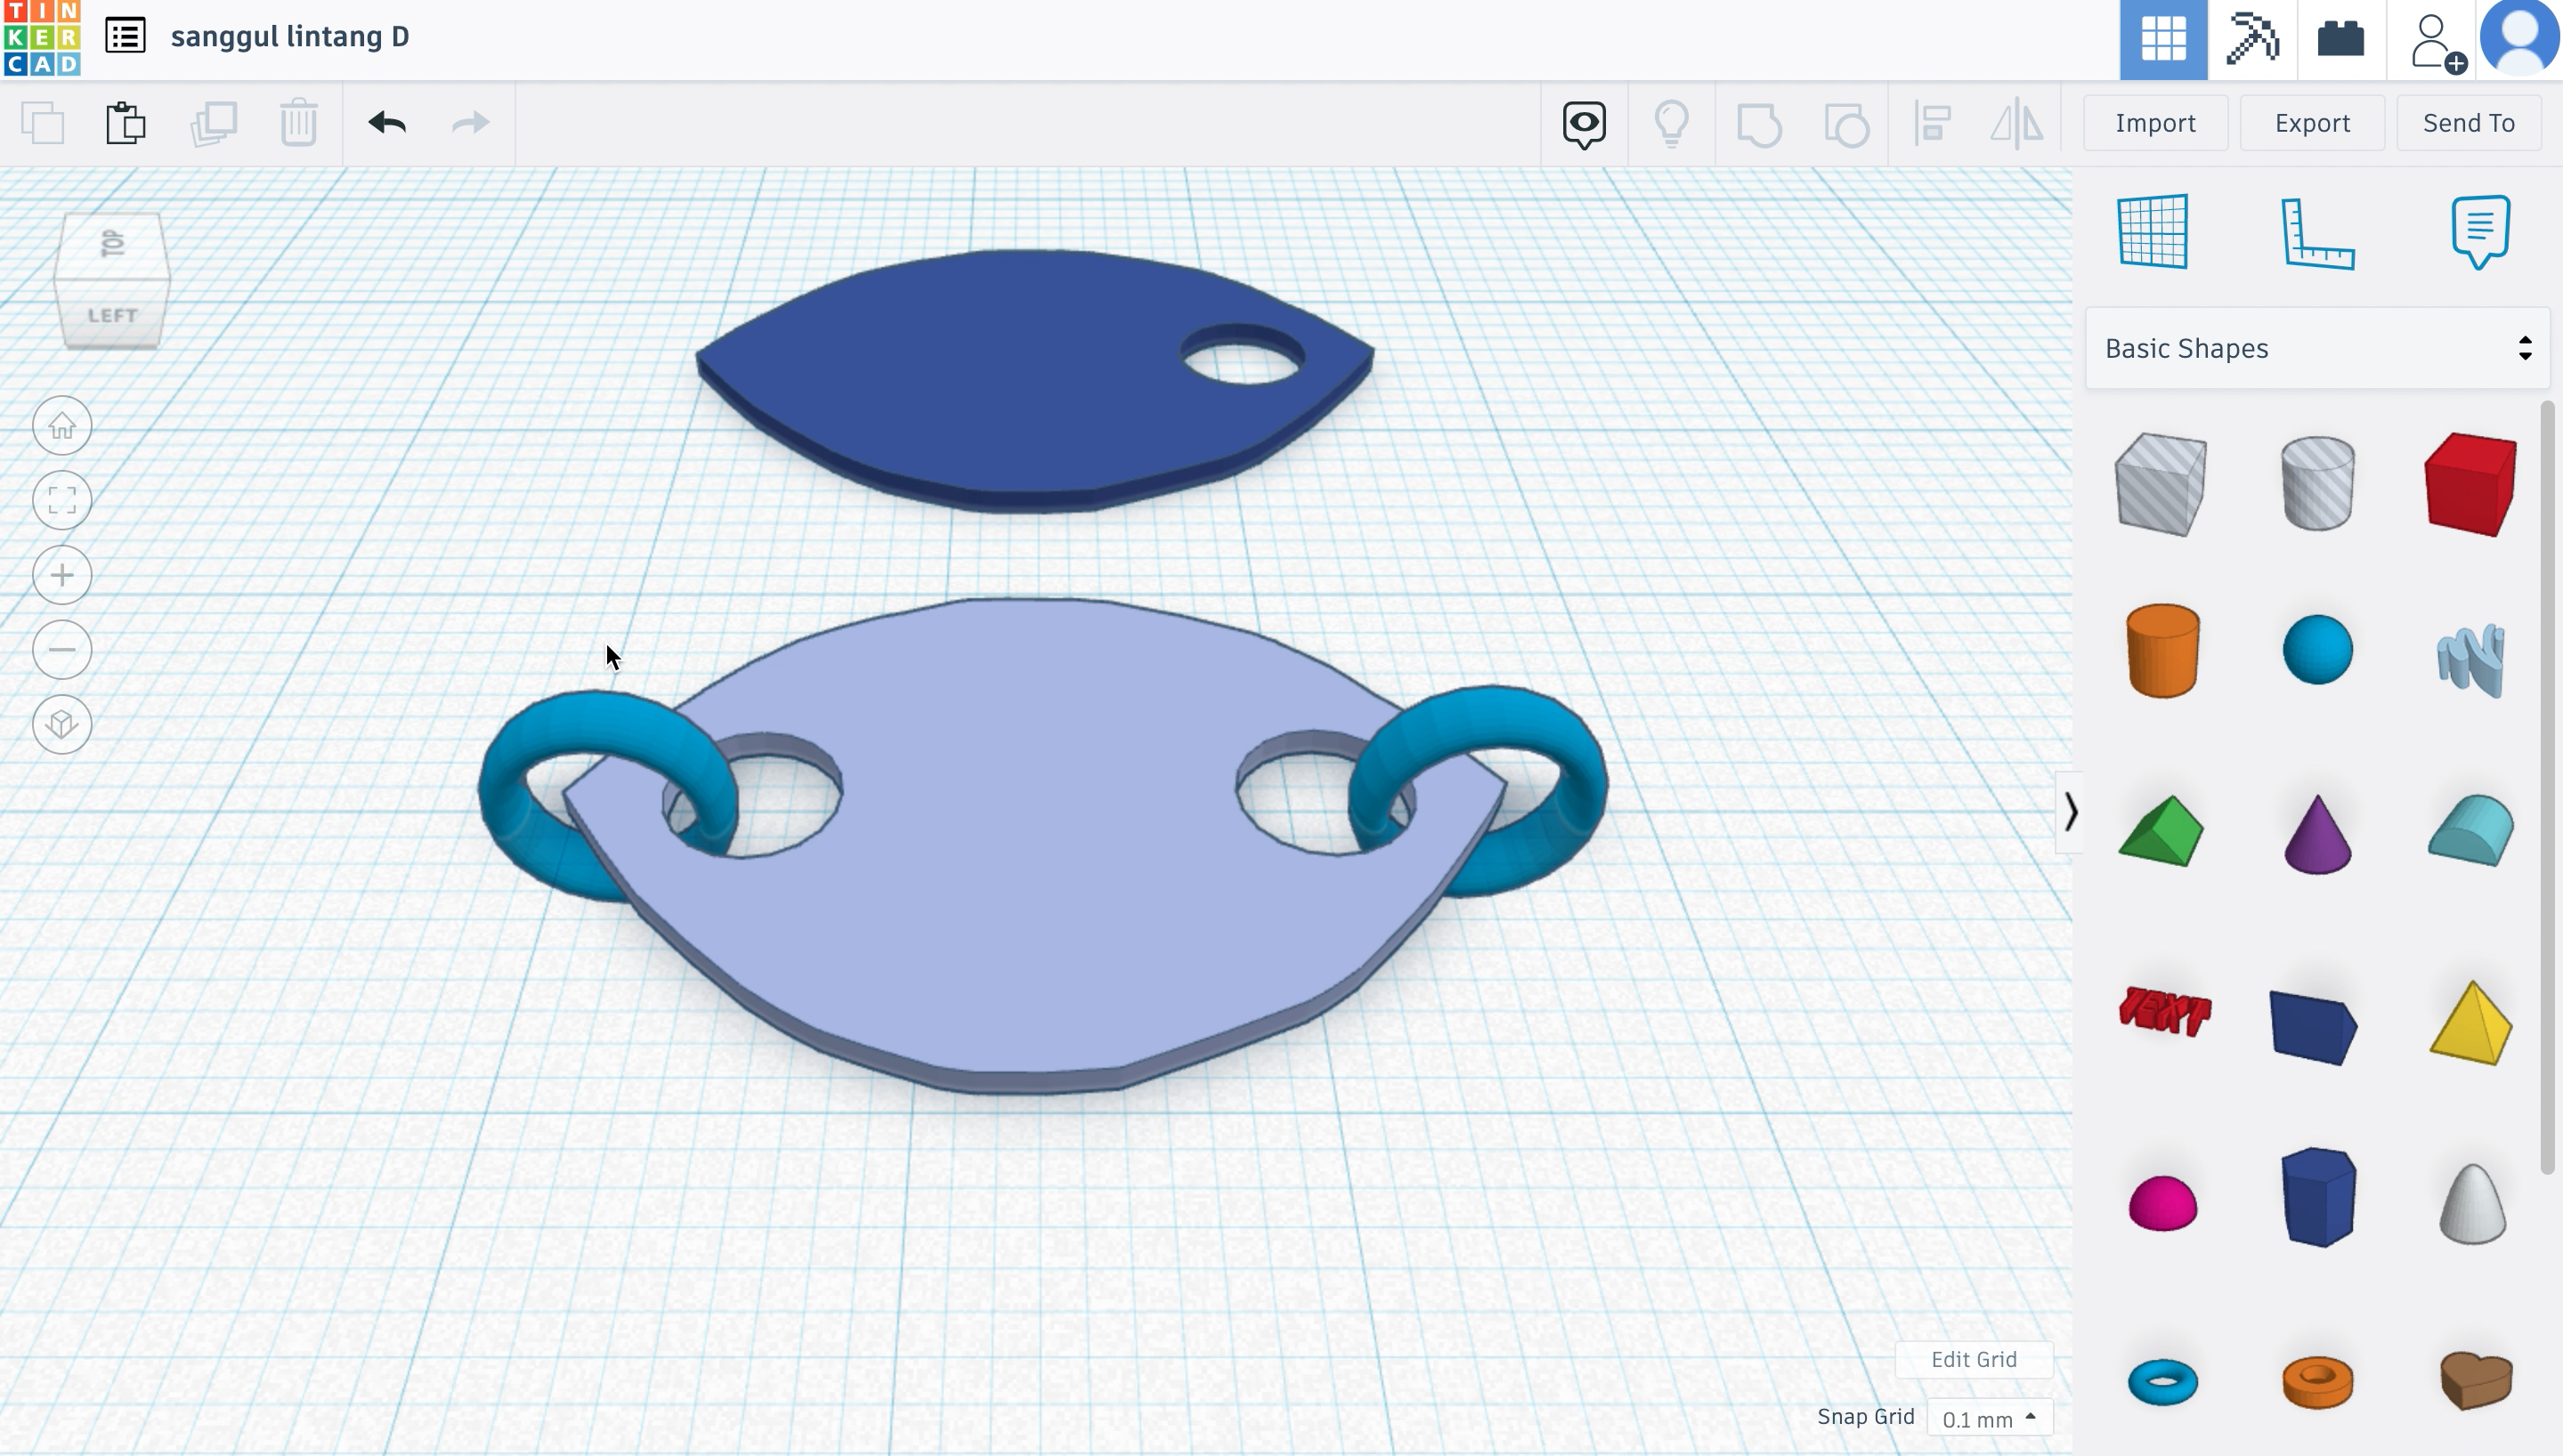
- With the blue ring detached from the purple shape, grab a 'hole cylinder', and size it down so that it can fit at the end of the purple shape.
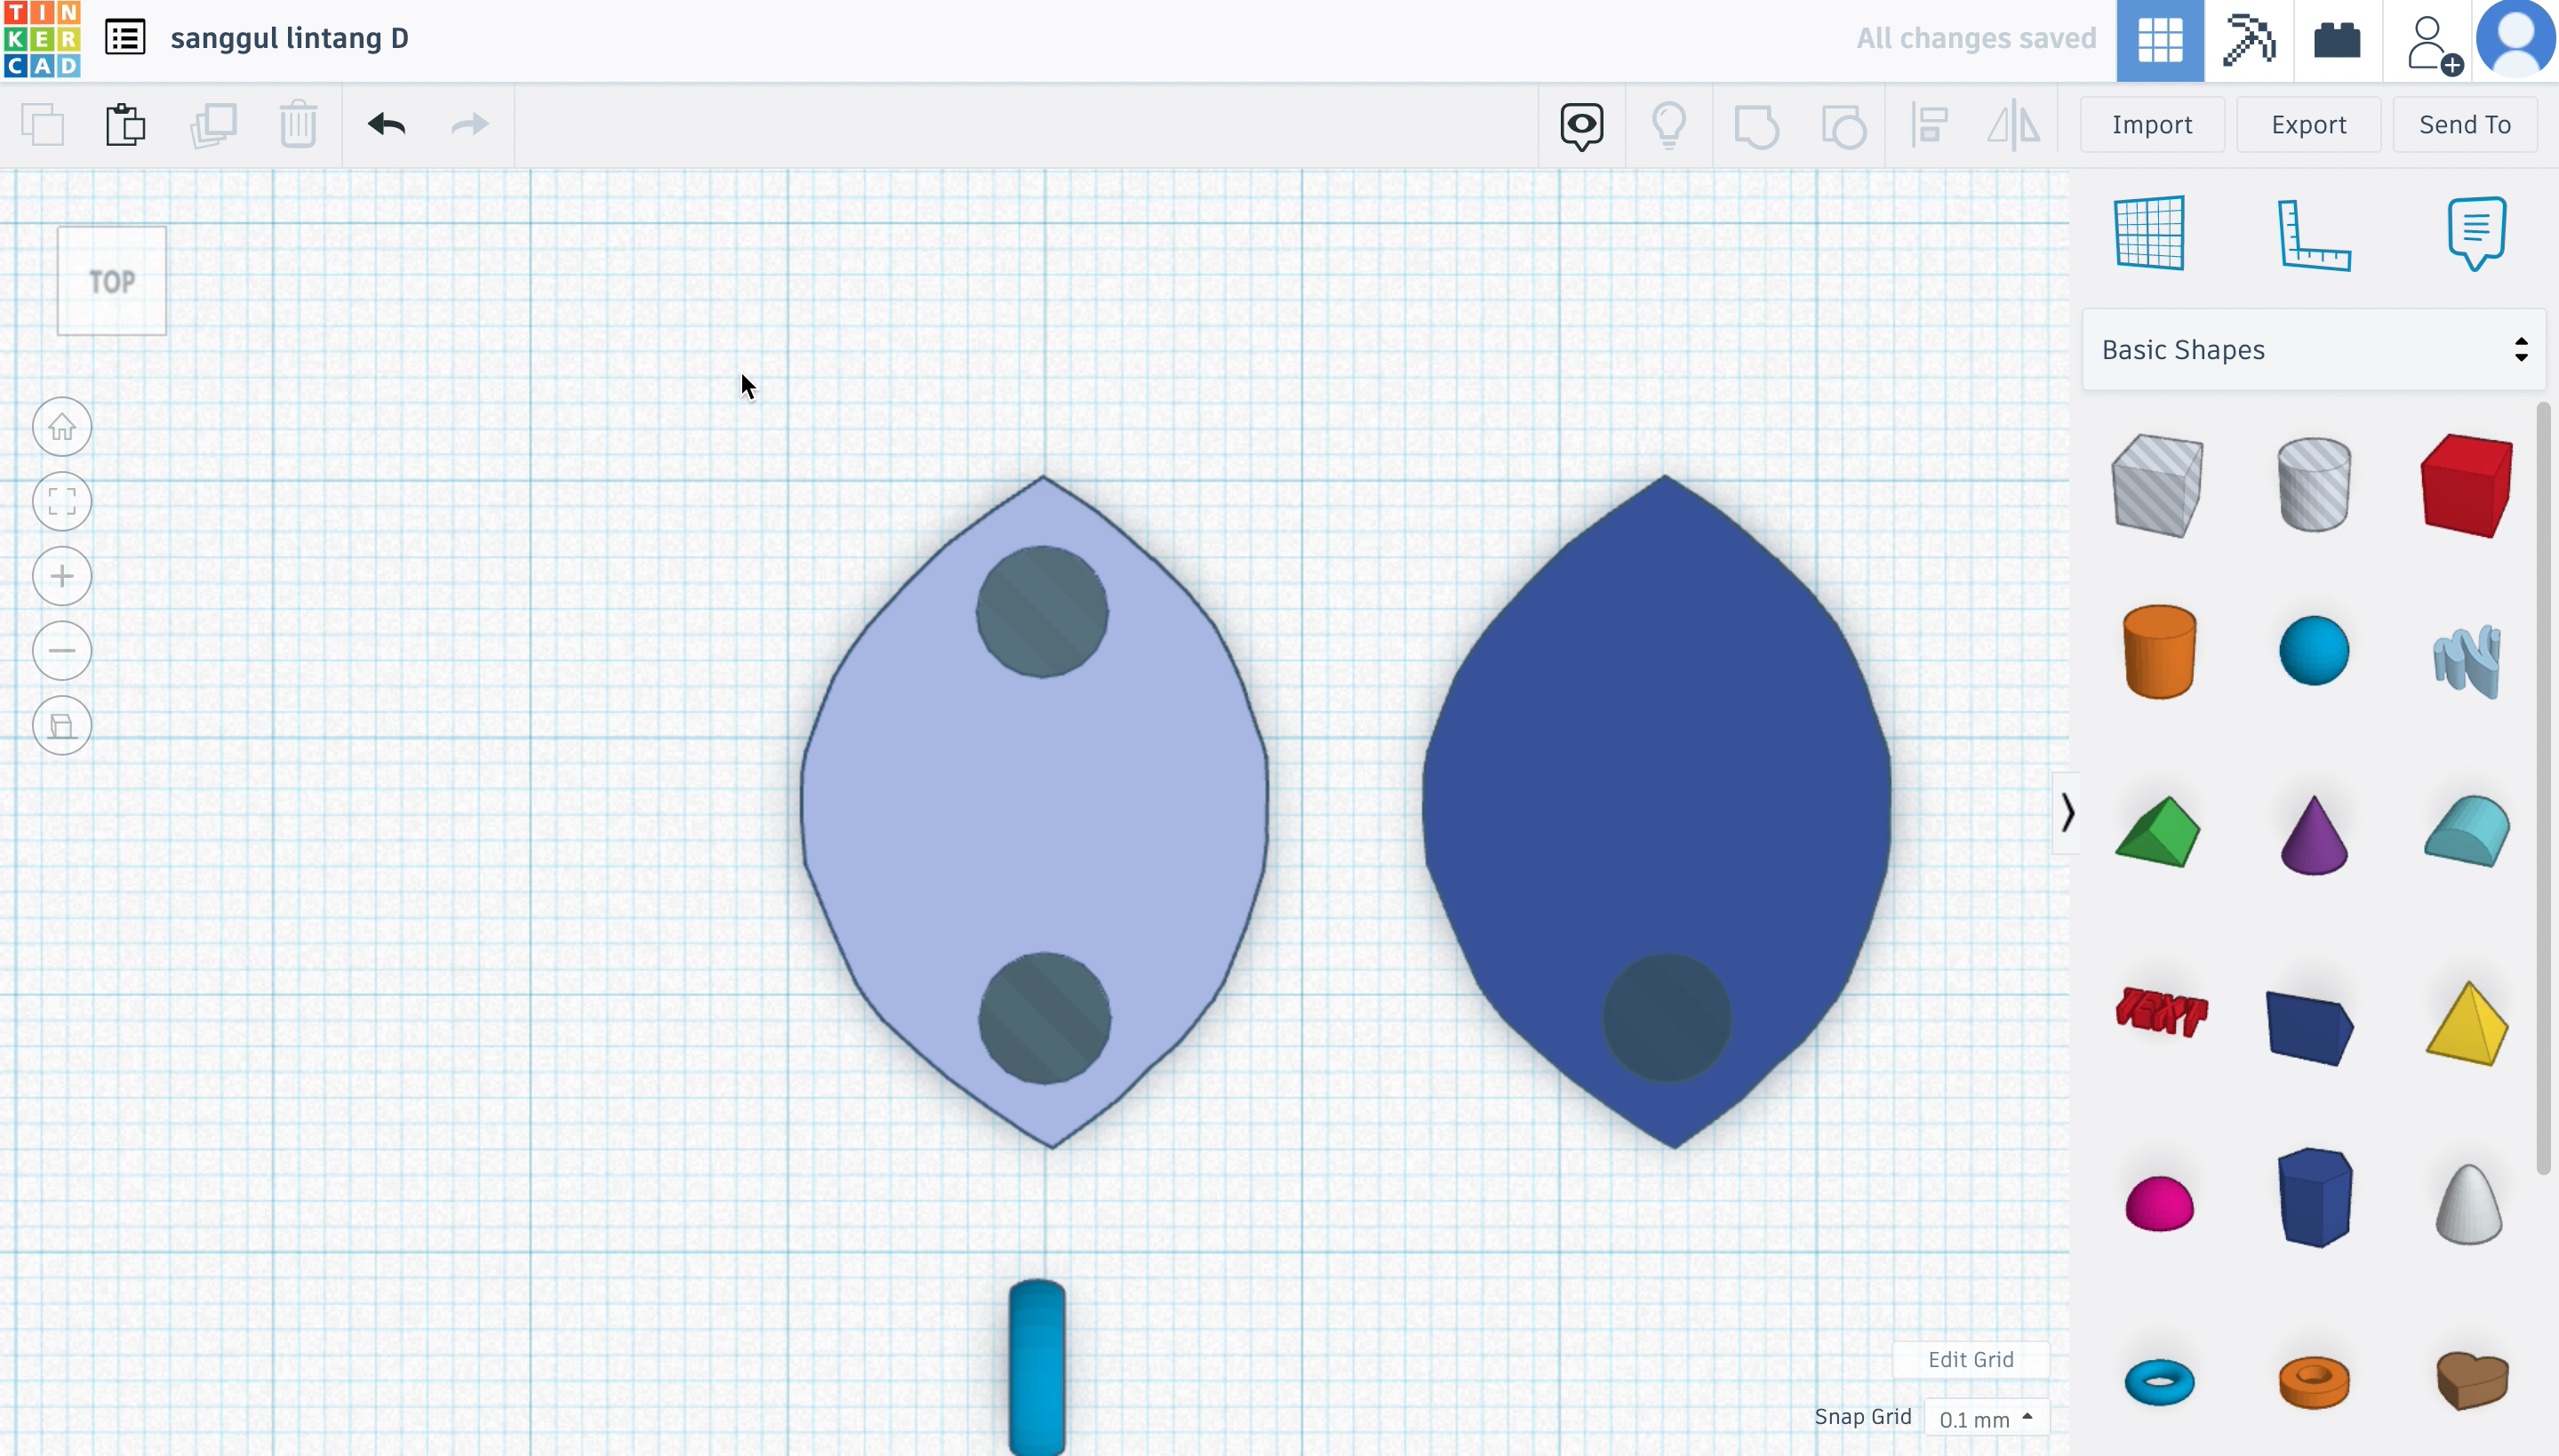
- Next, duplicate the purple shape and the 'hole' shape. I coloured one differently to my liking.
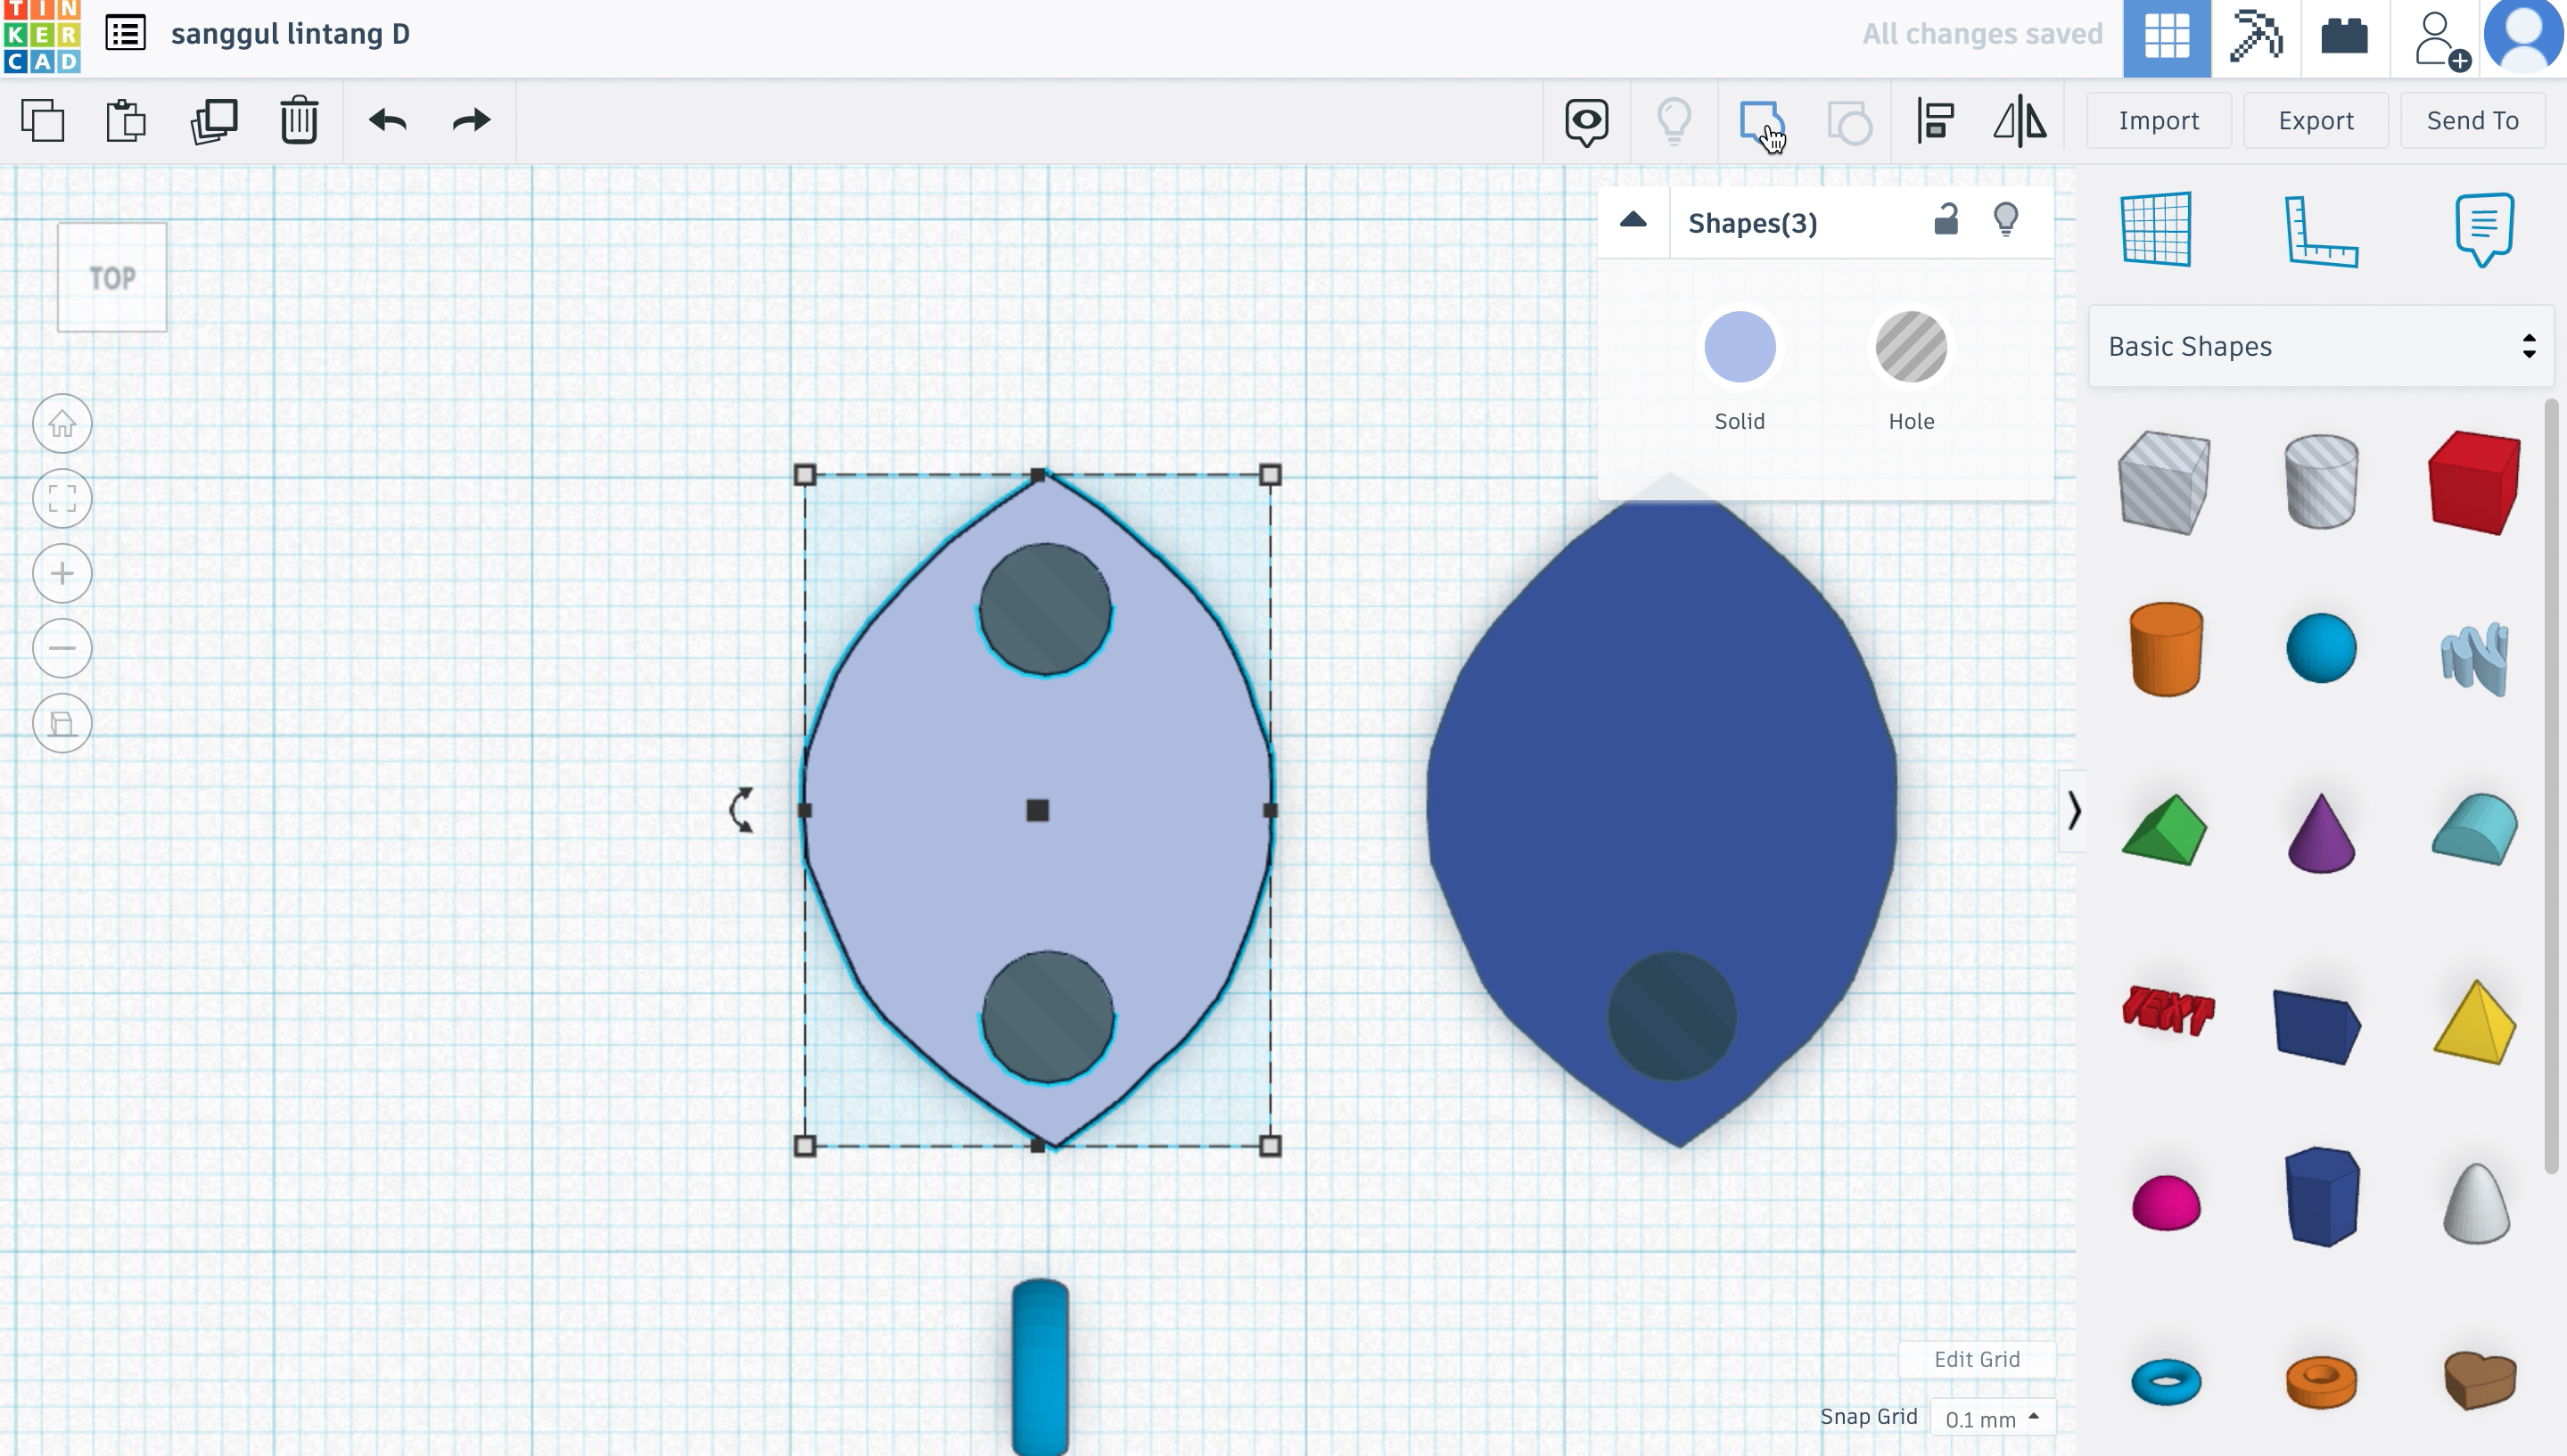
- After that, put another 'hole' cylinder on the other end of the light purple shape/ one of the shape-groups.
- Lastly, select and group each shape and their holes.
- And Finally, fit the blue ring through the holes. Do this for the other holes by simply duplicating the ring.
Sanggul Lintang D
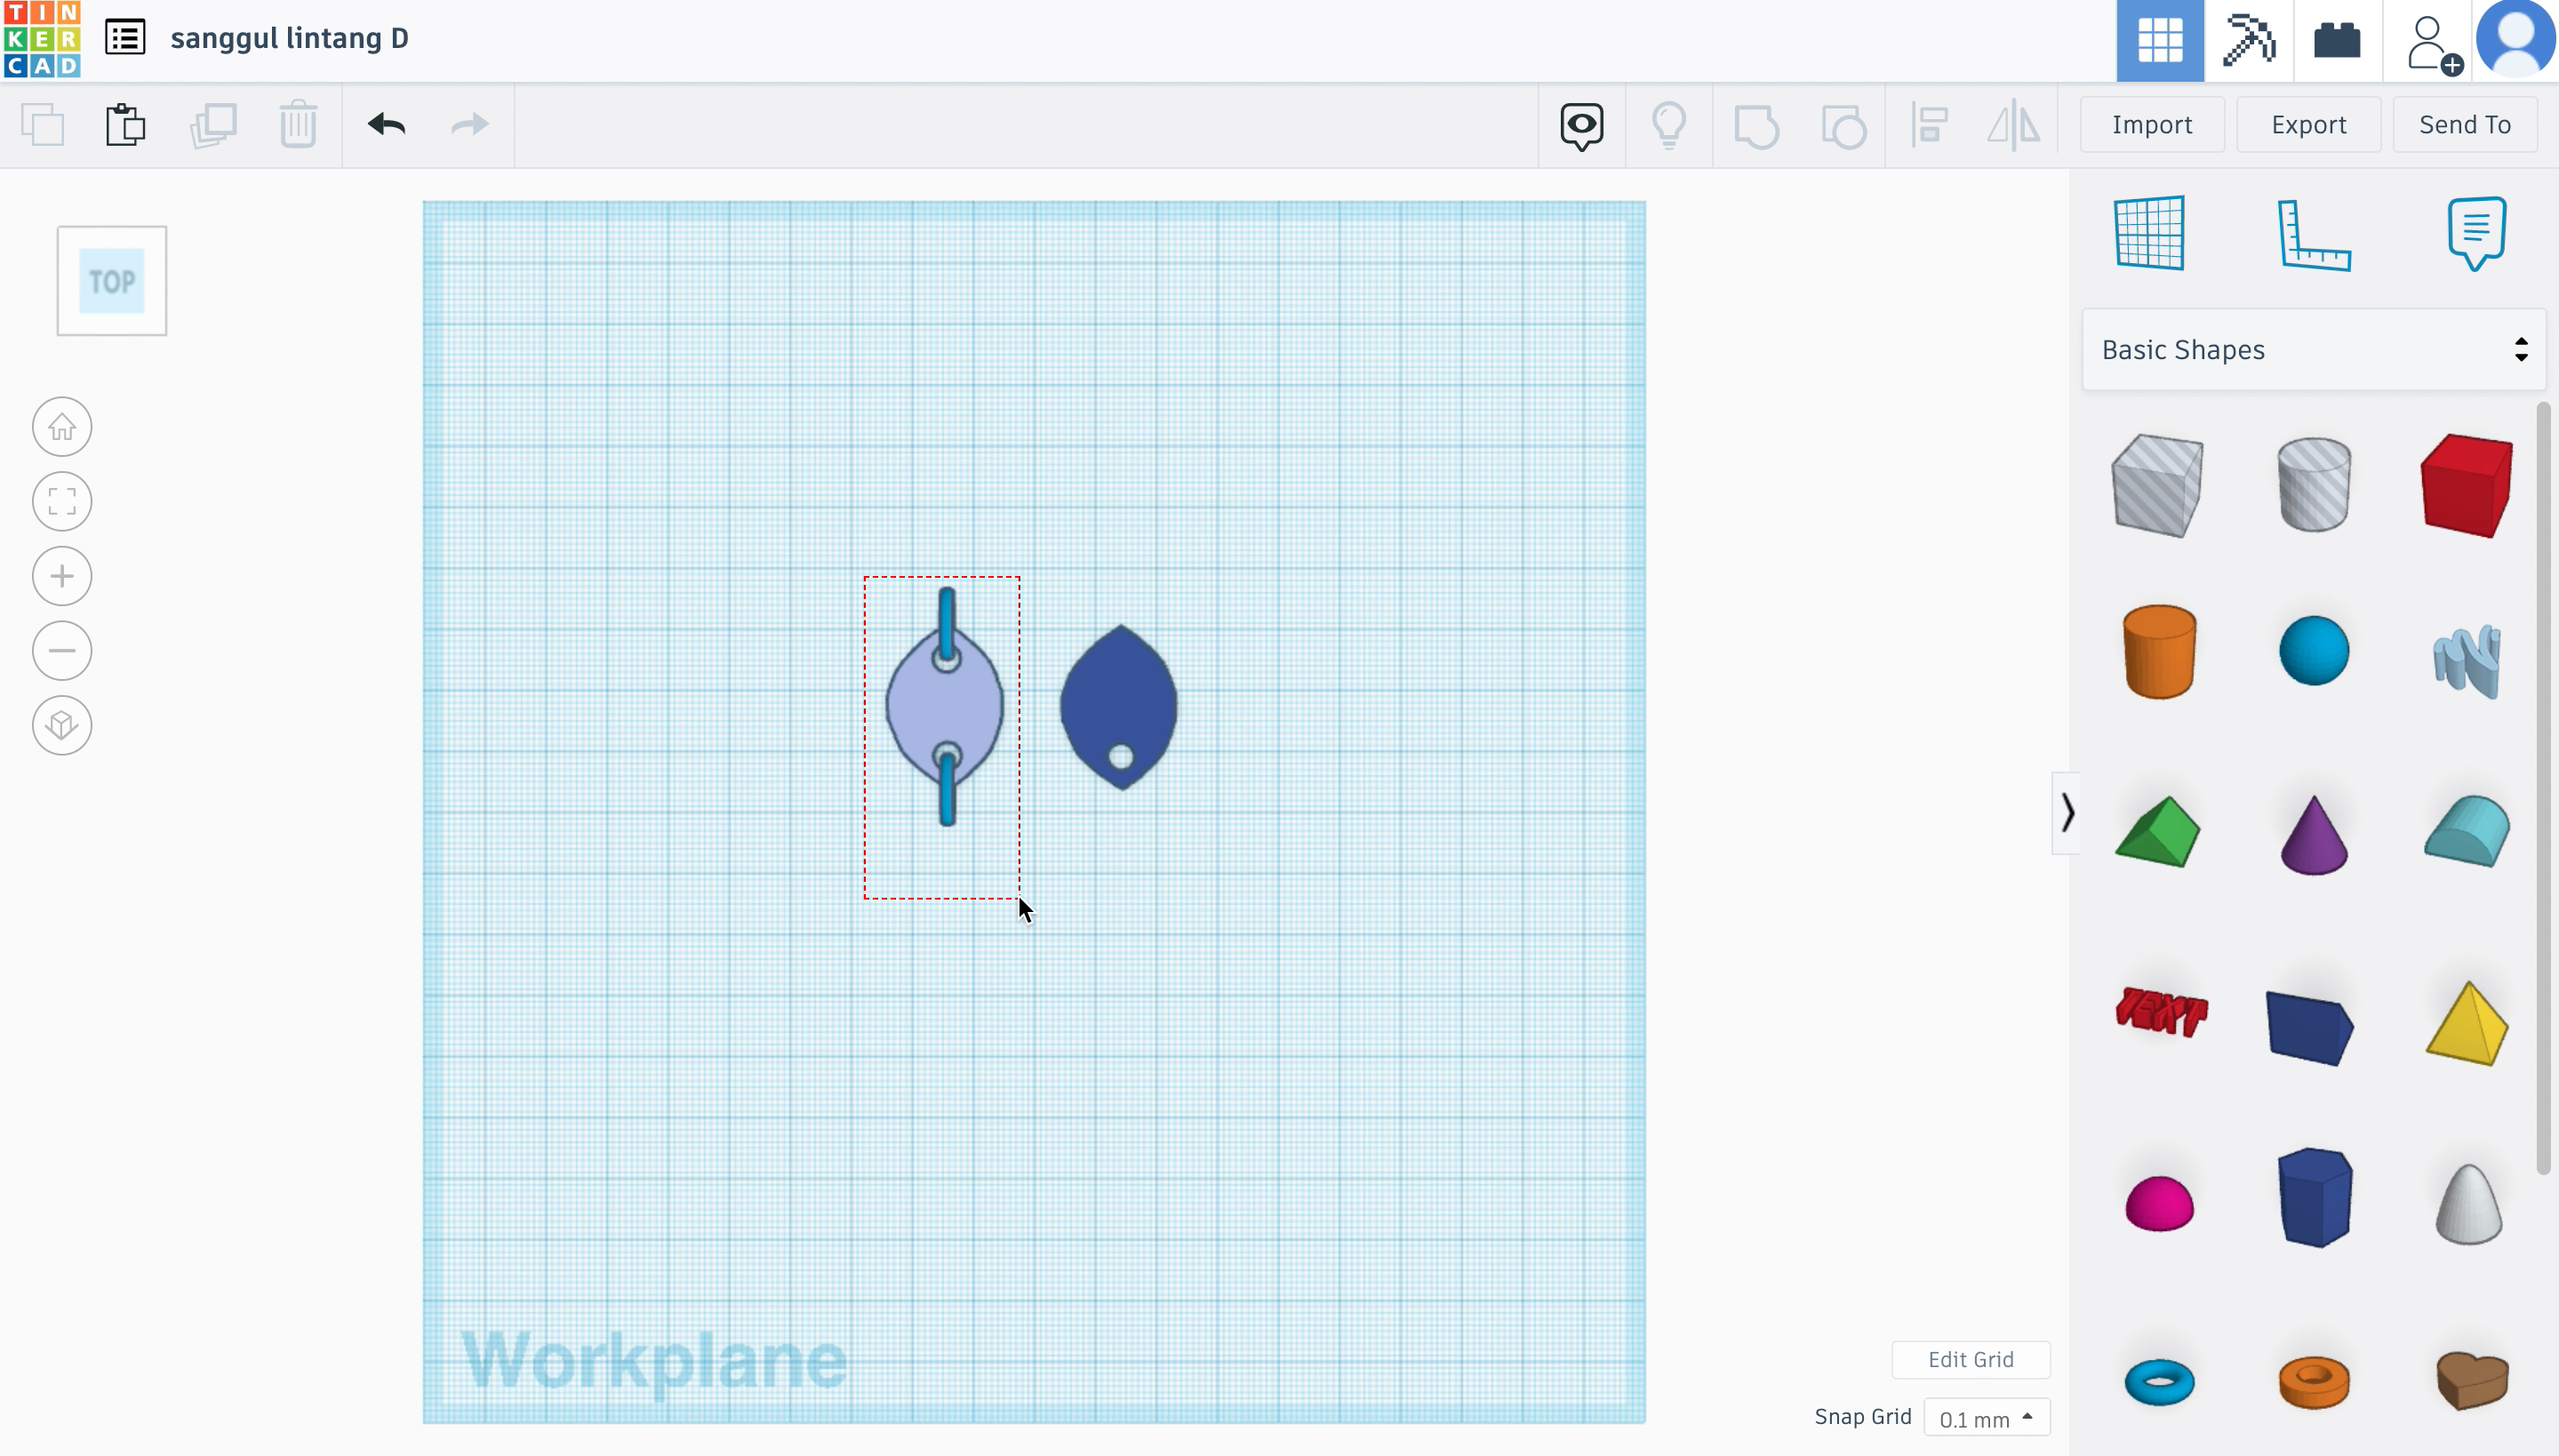
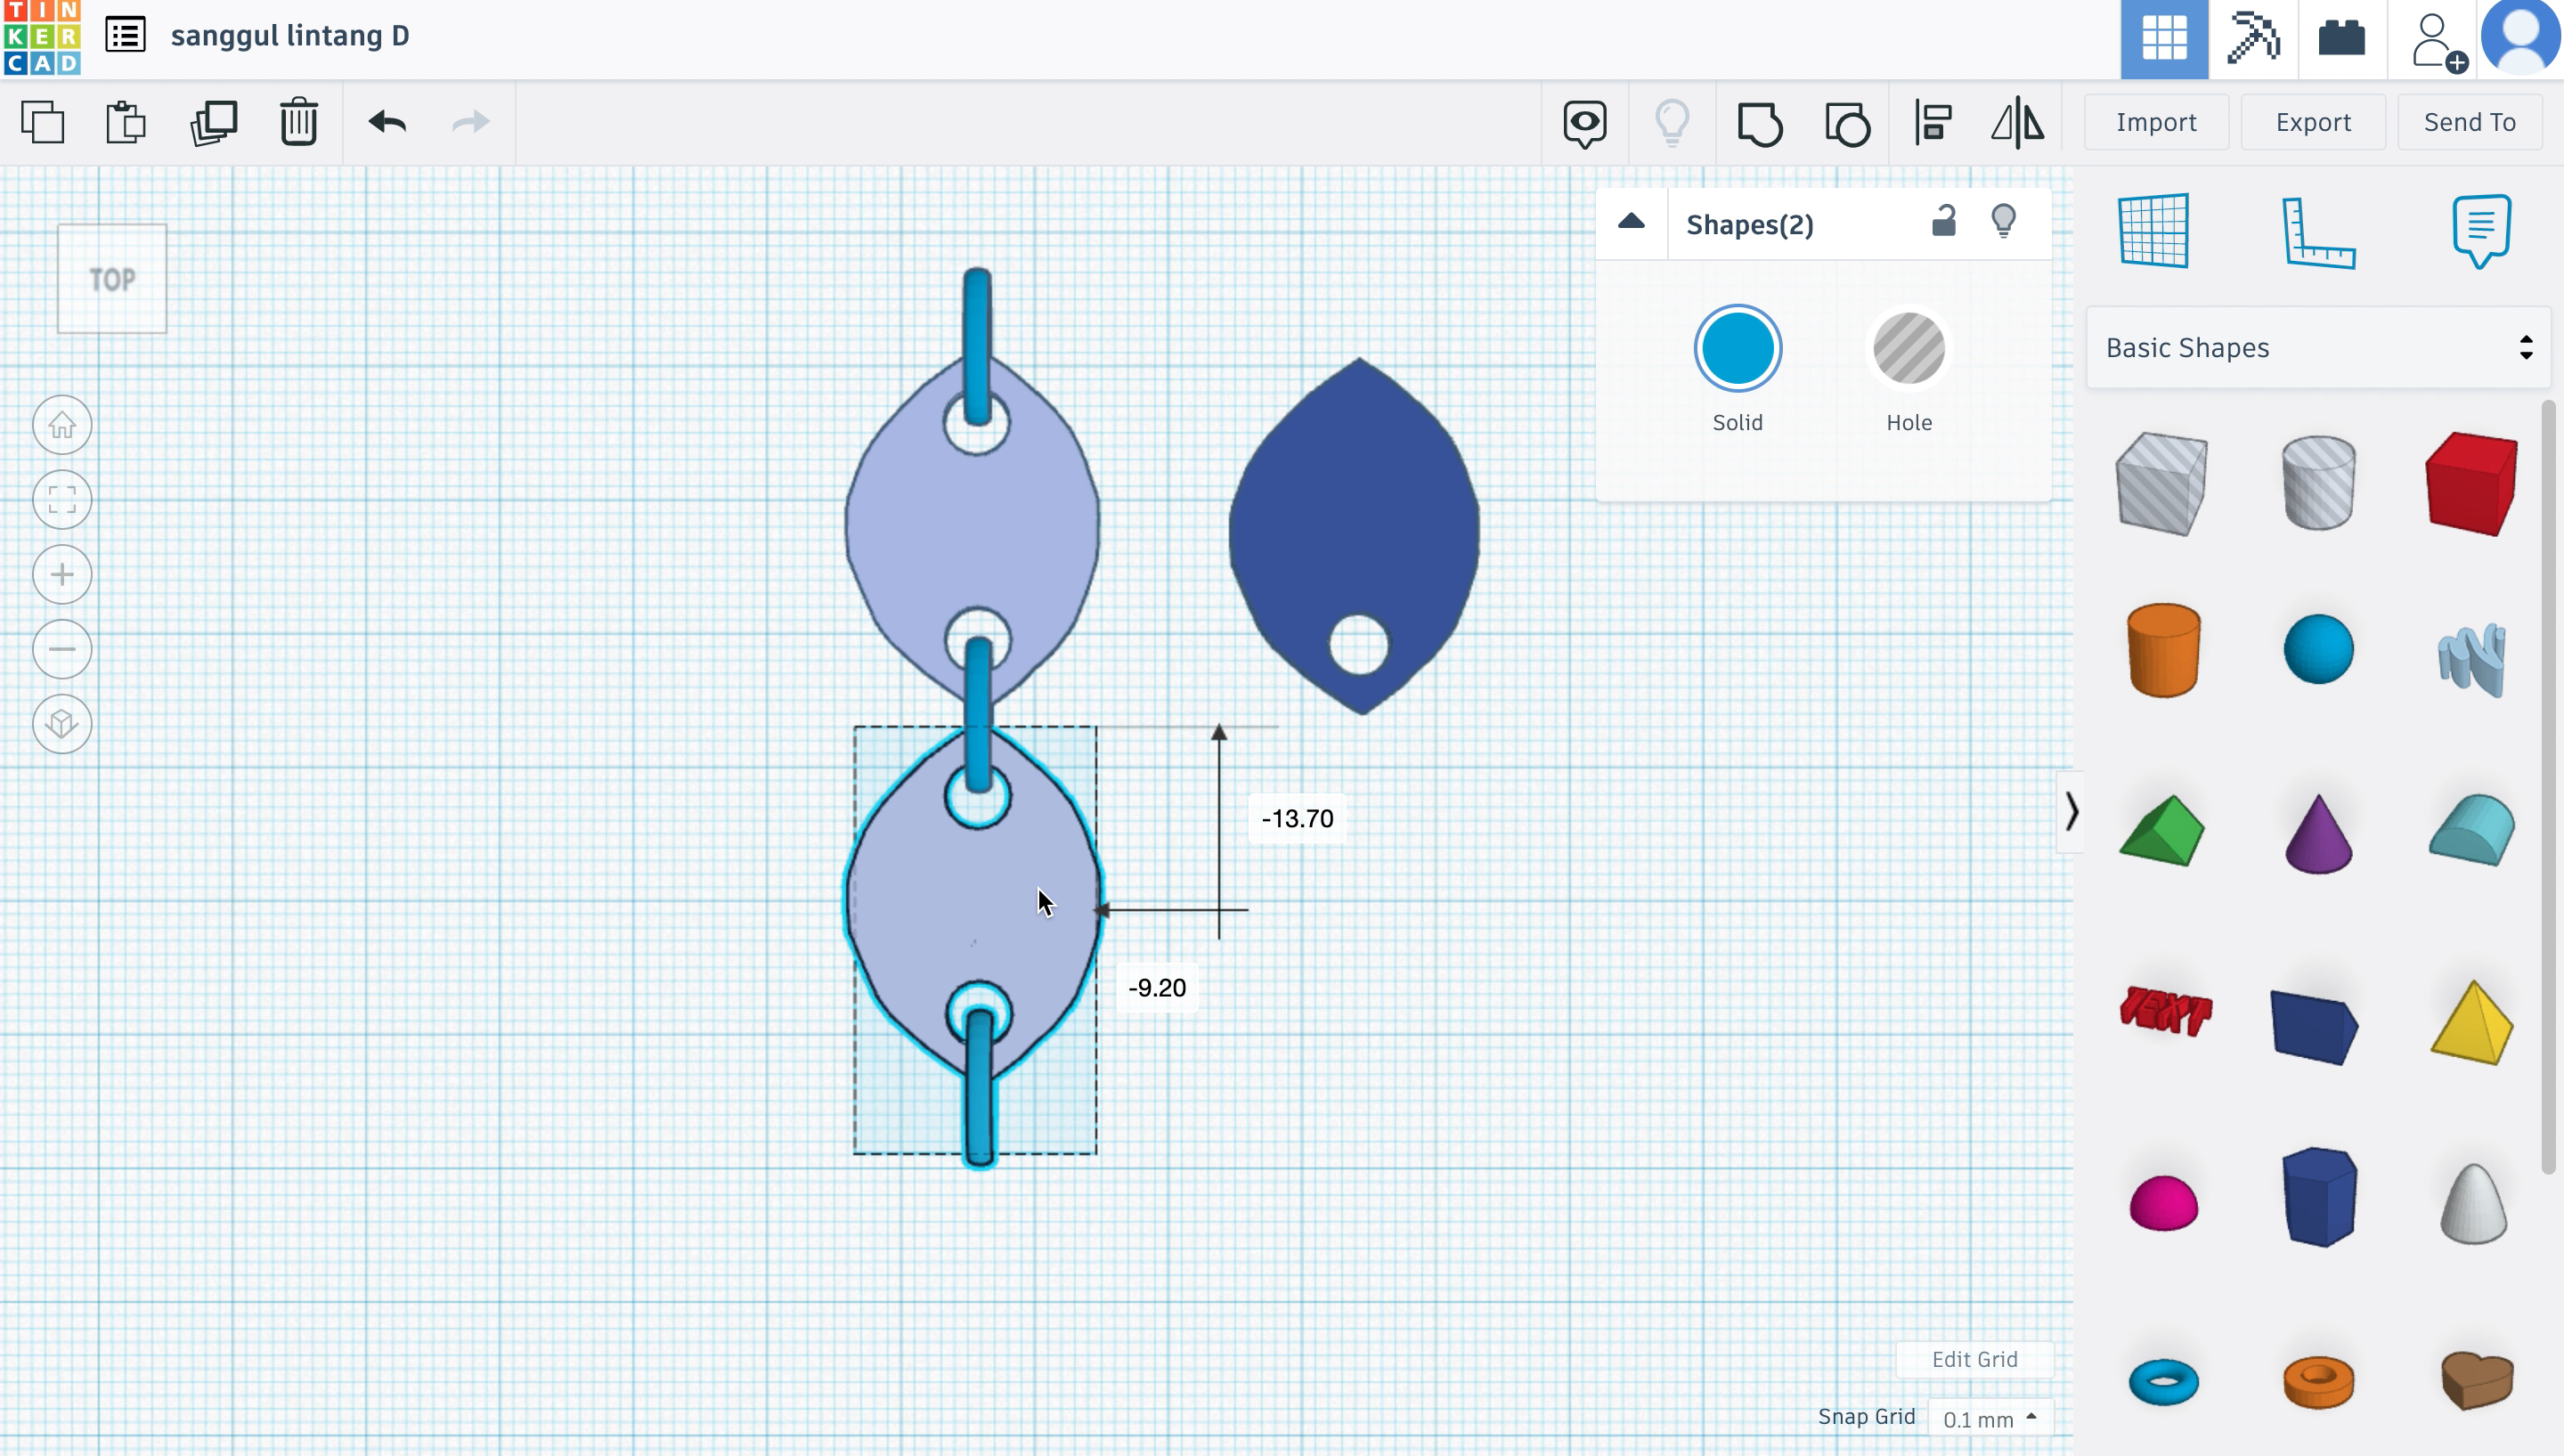
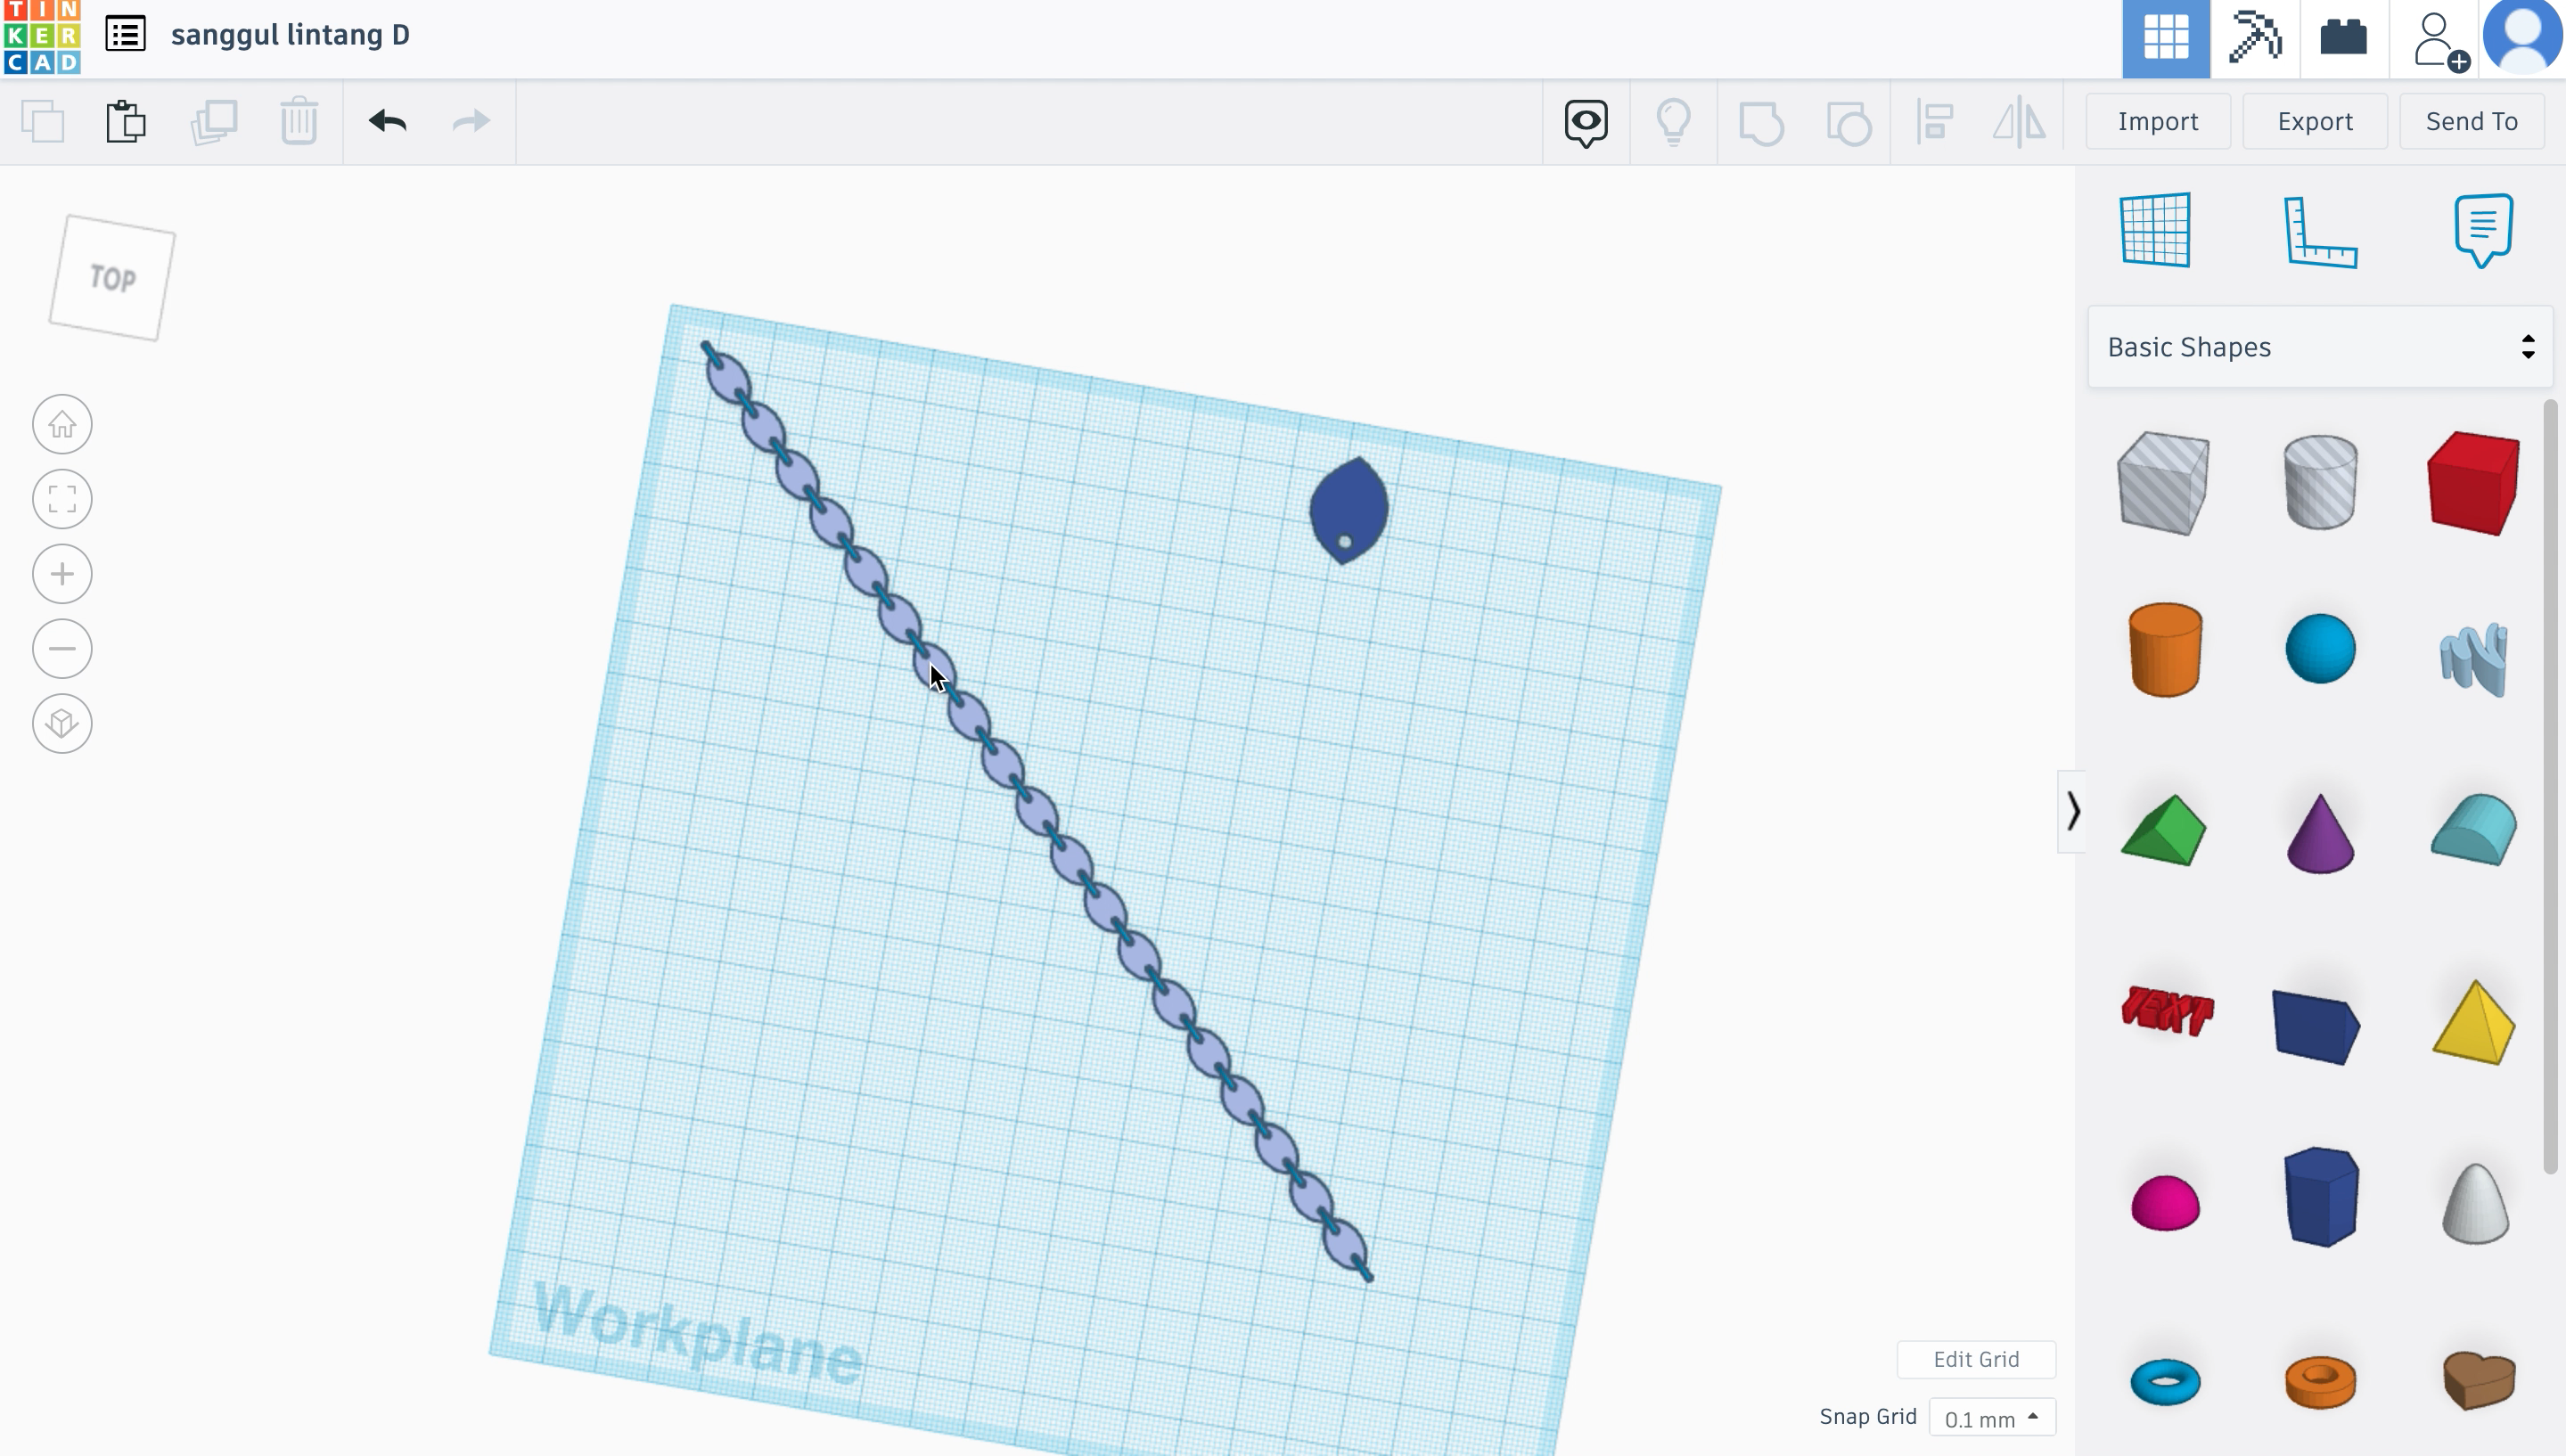
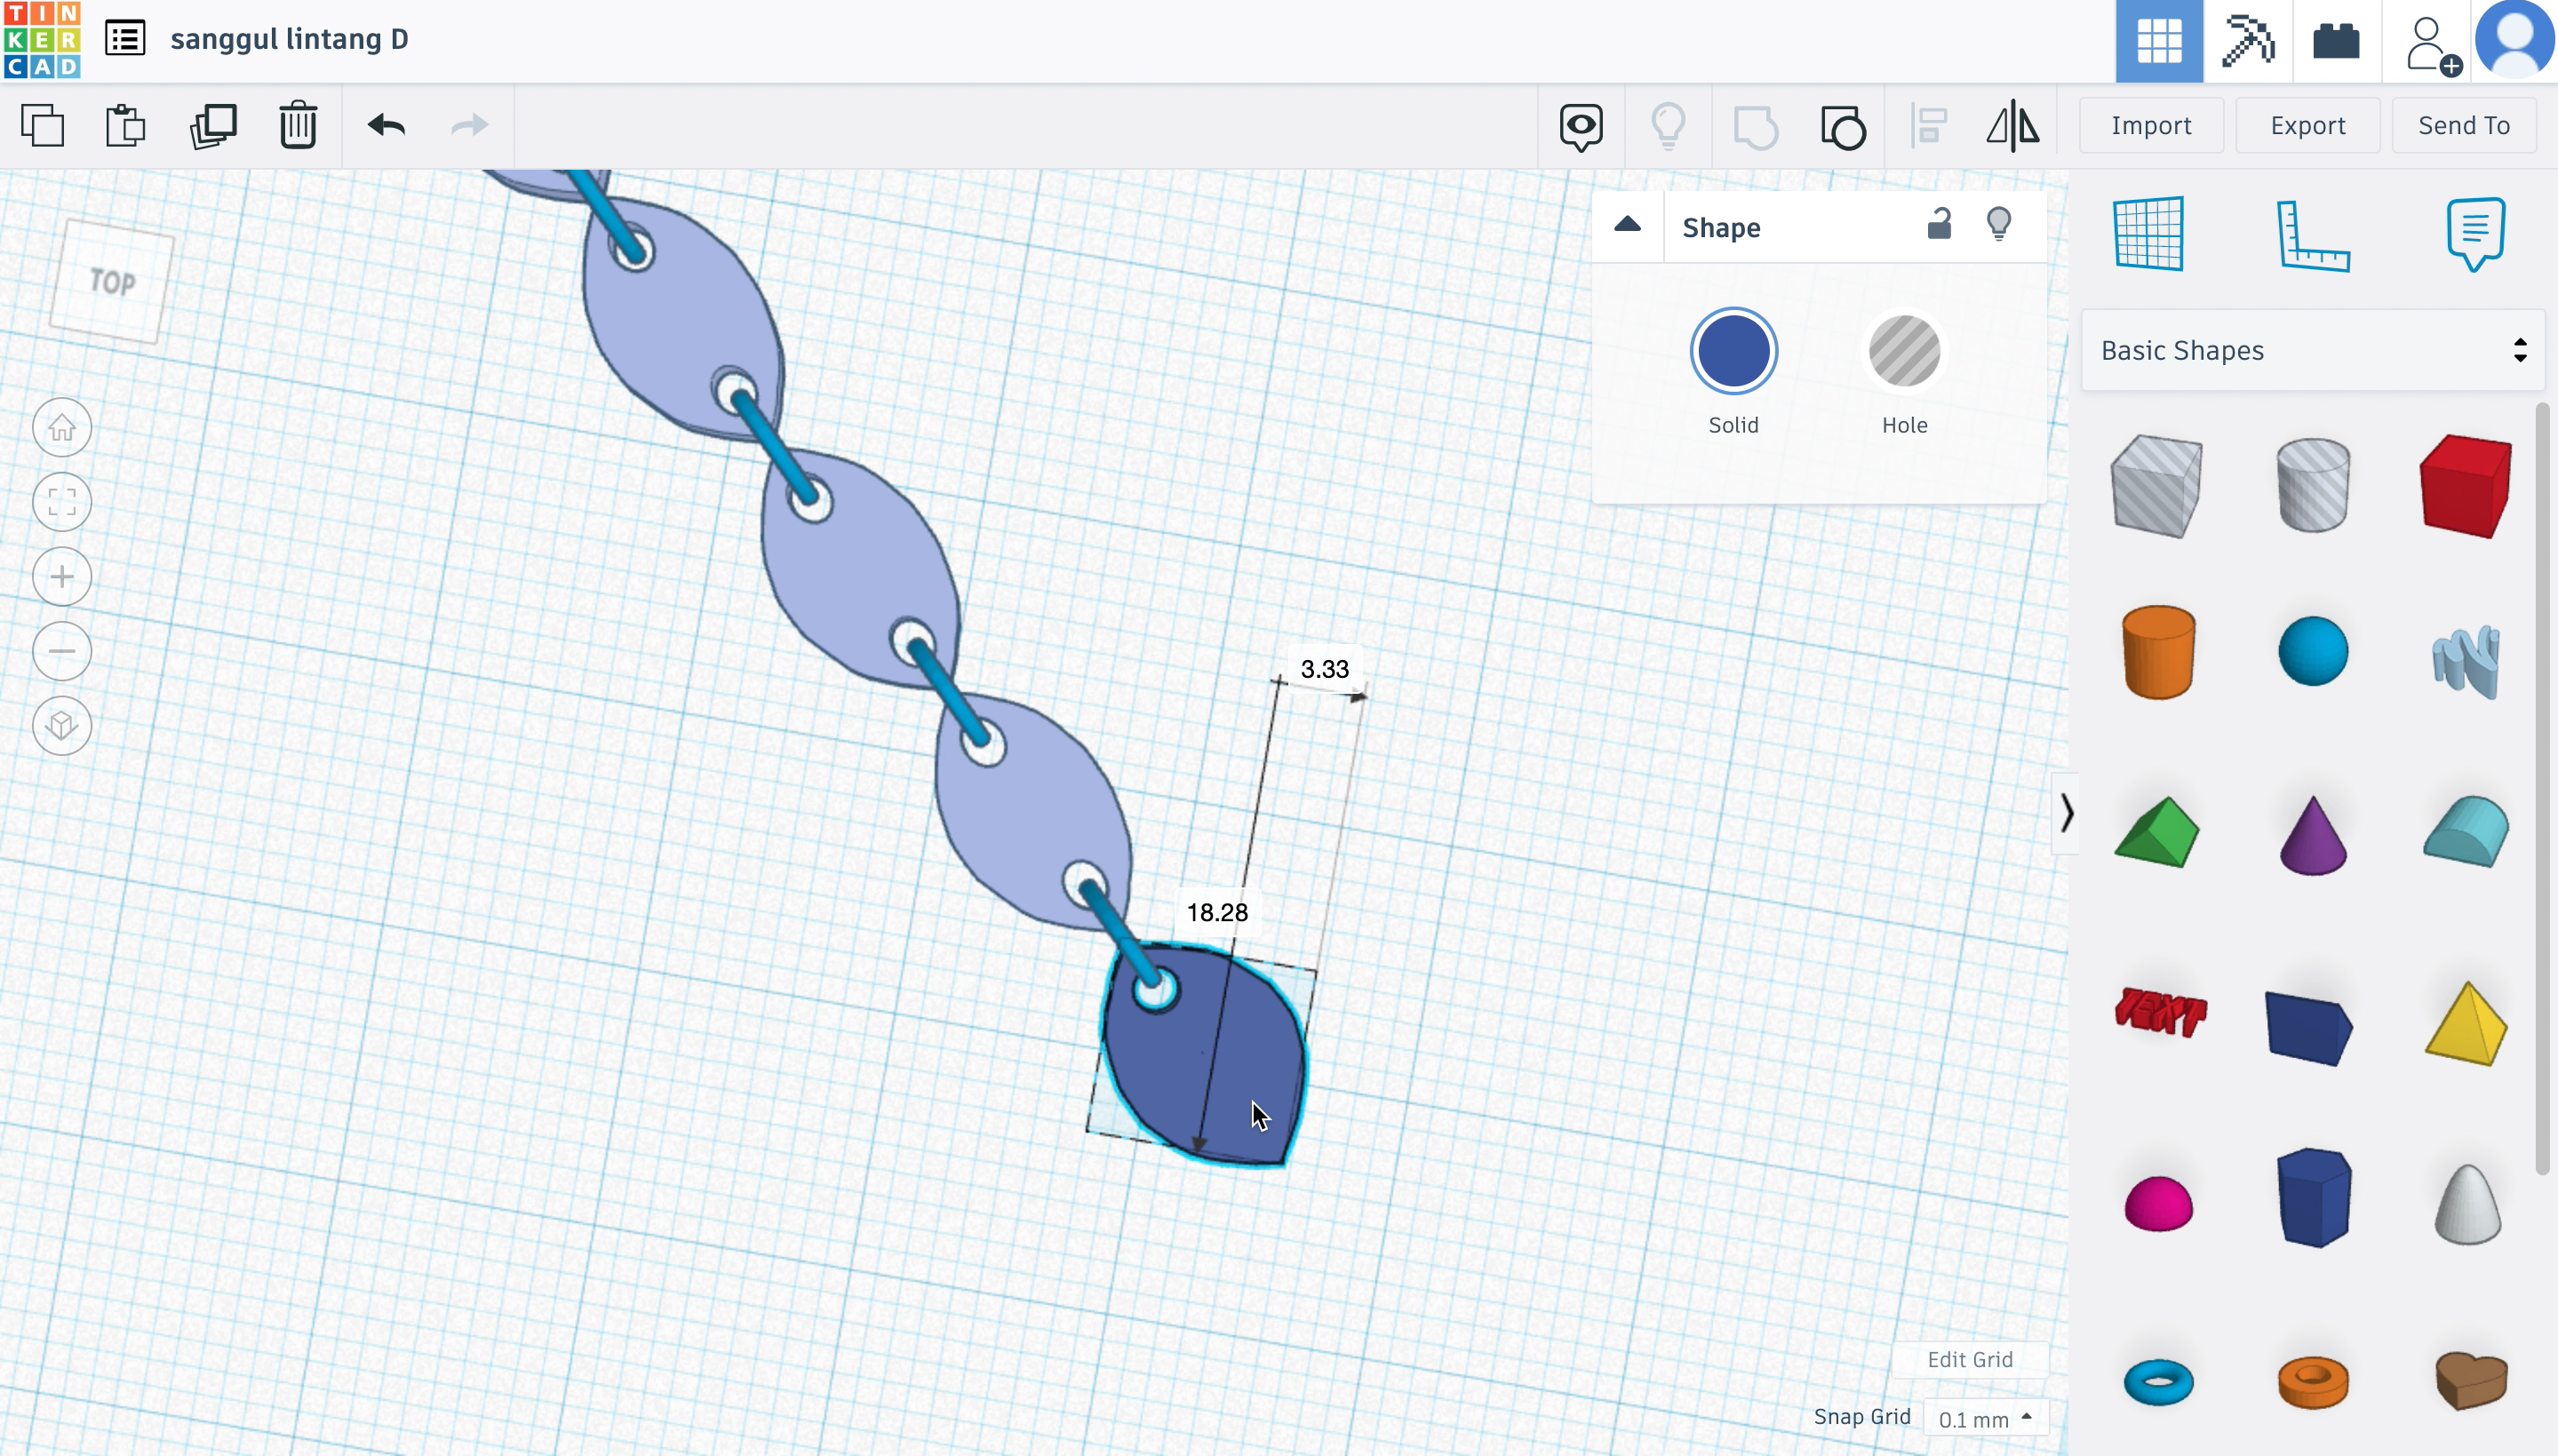
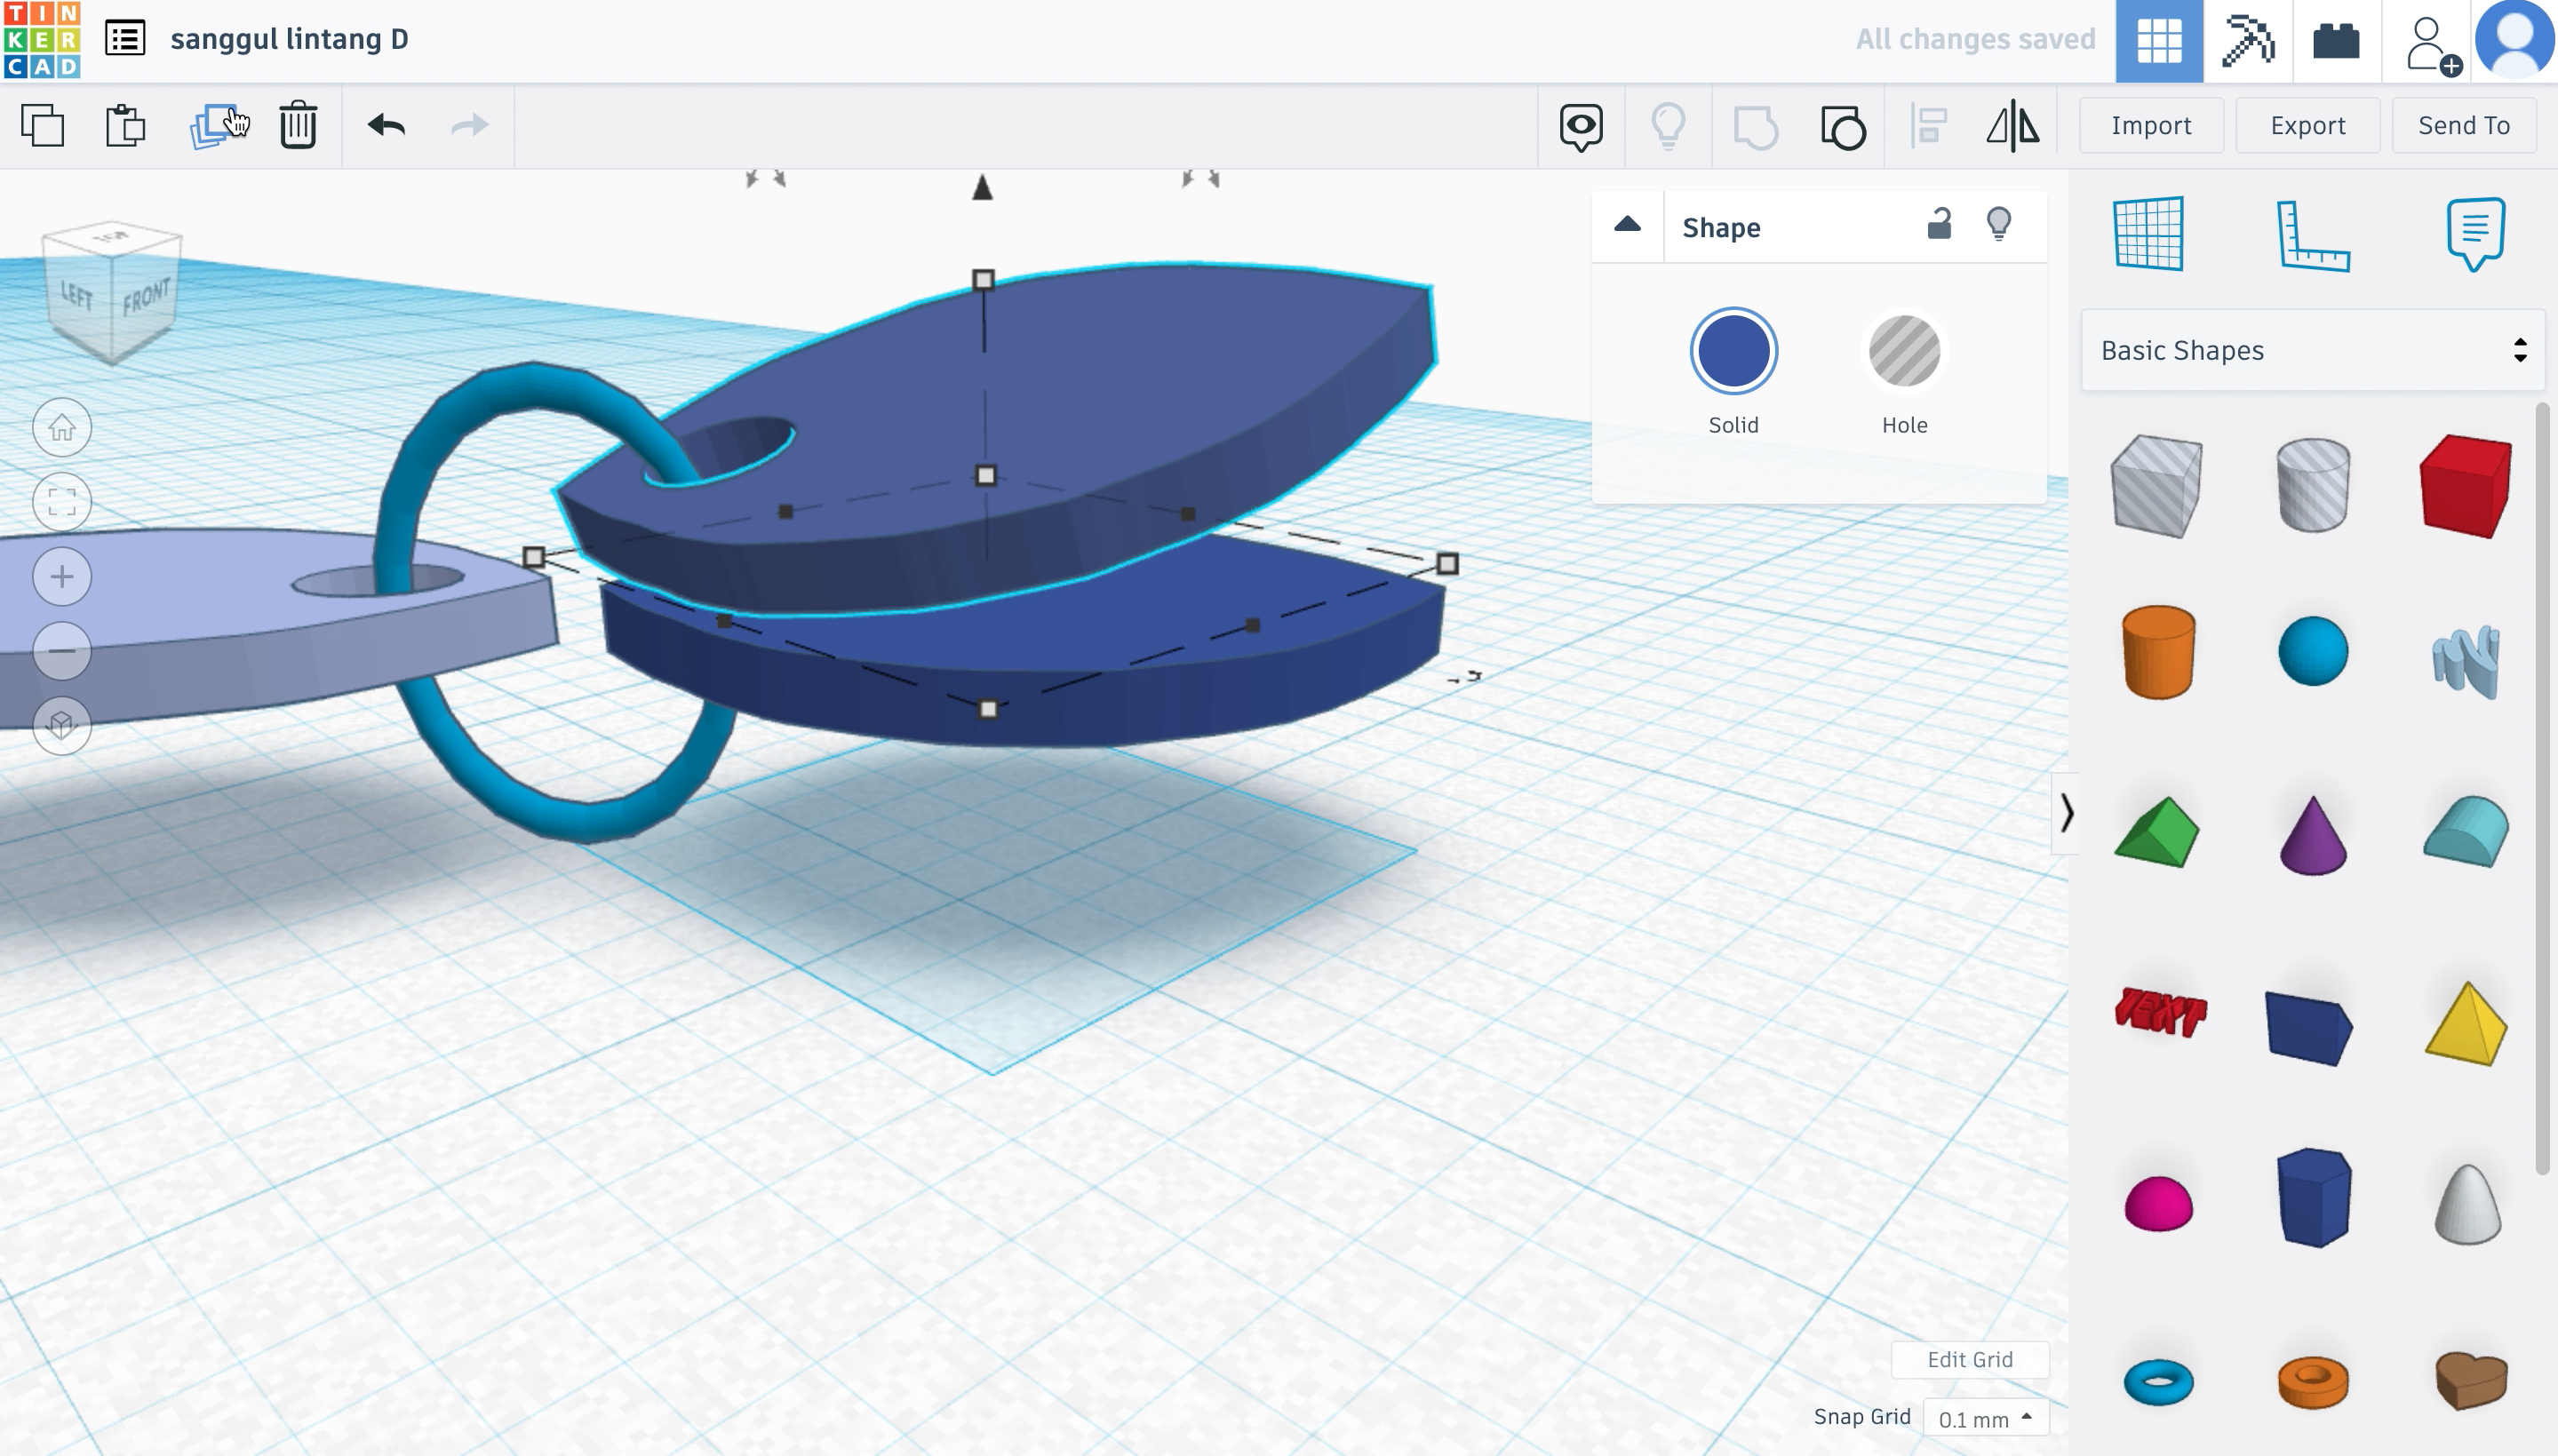
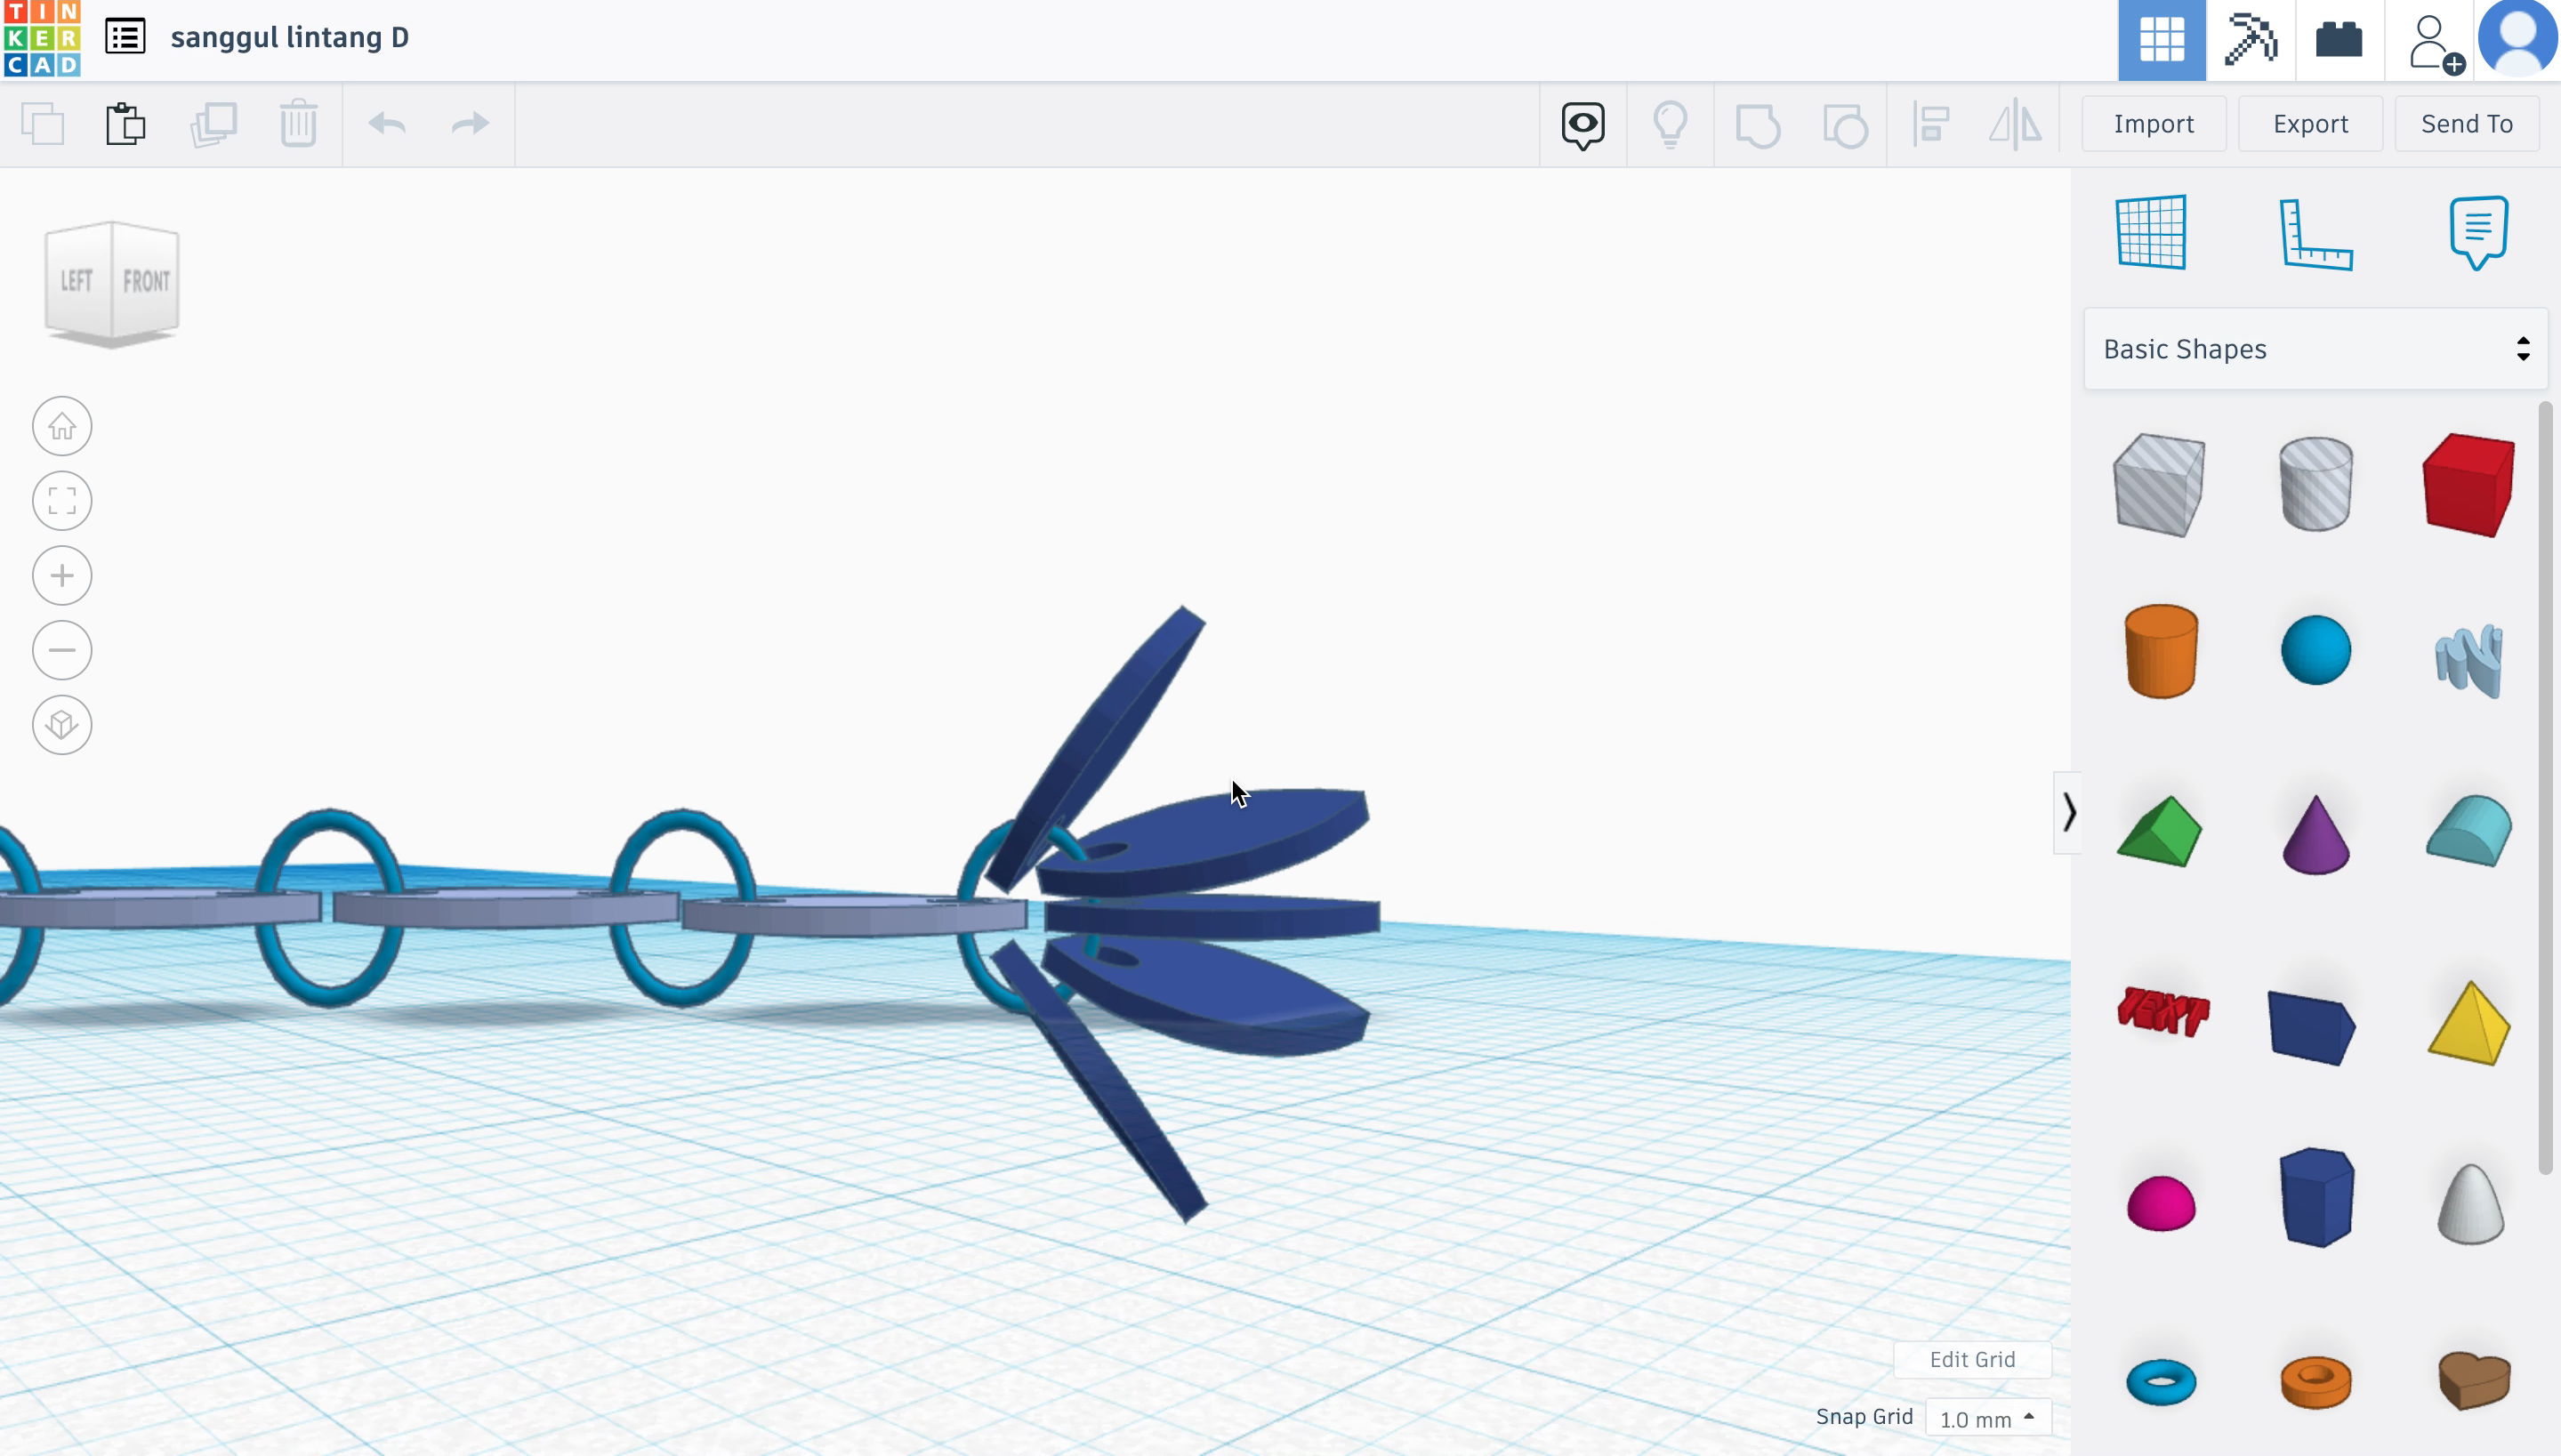
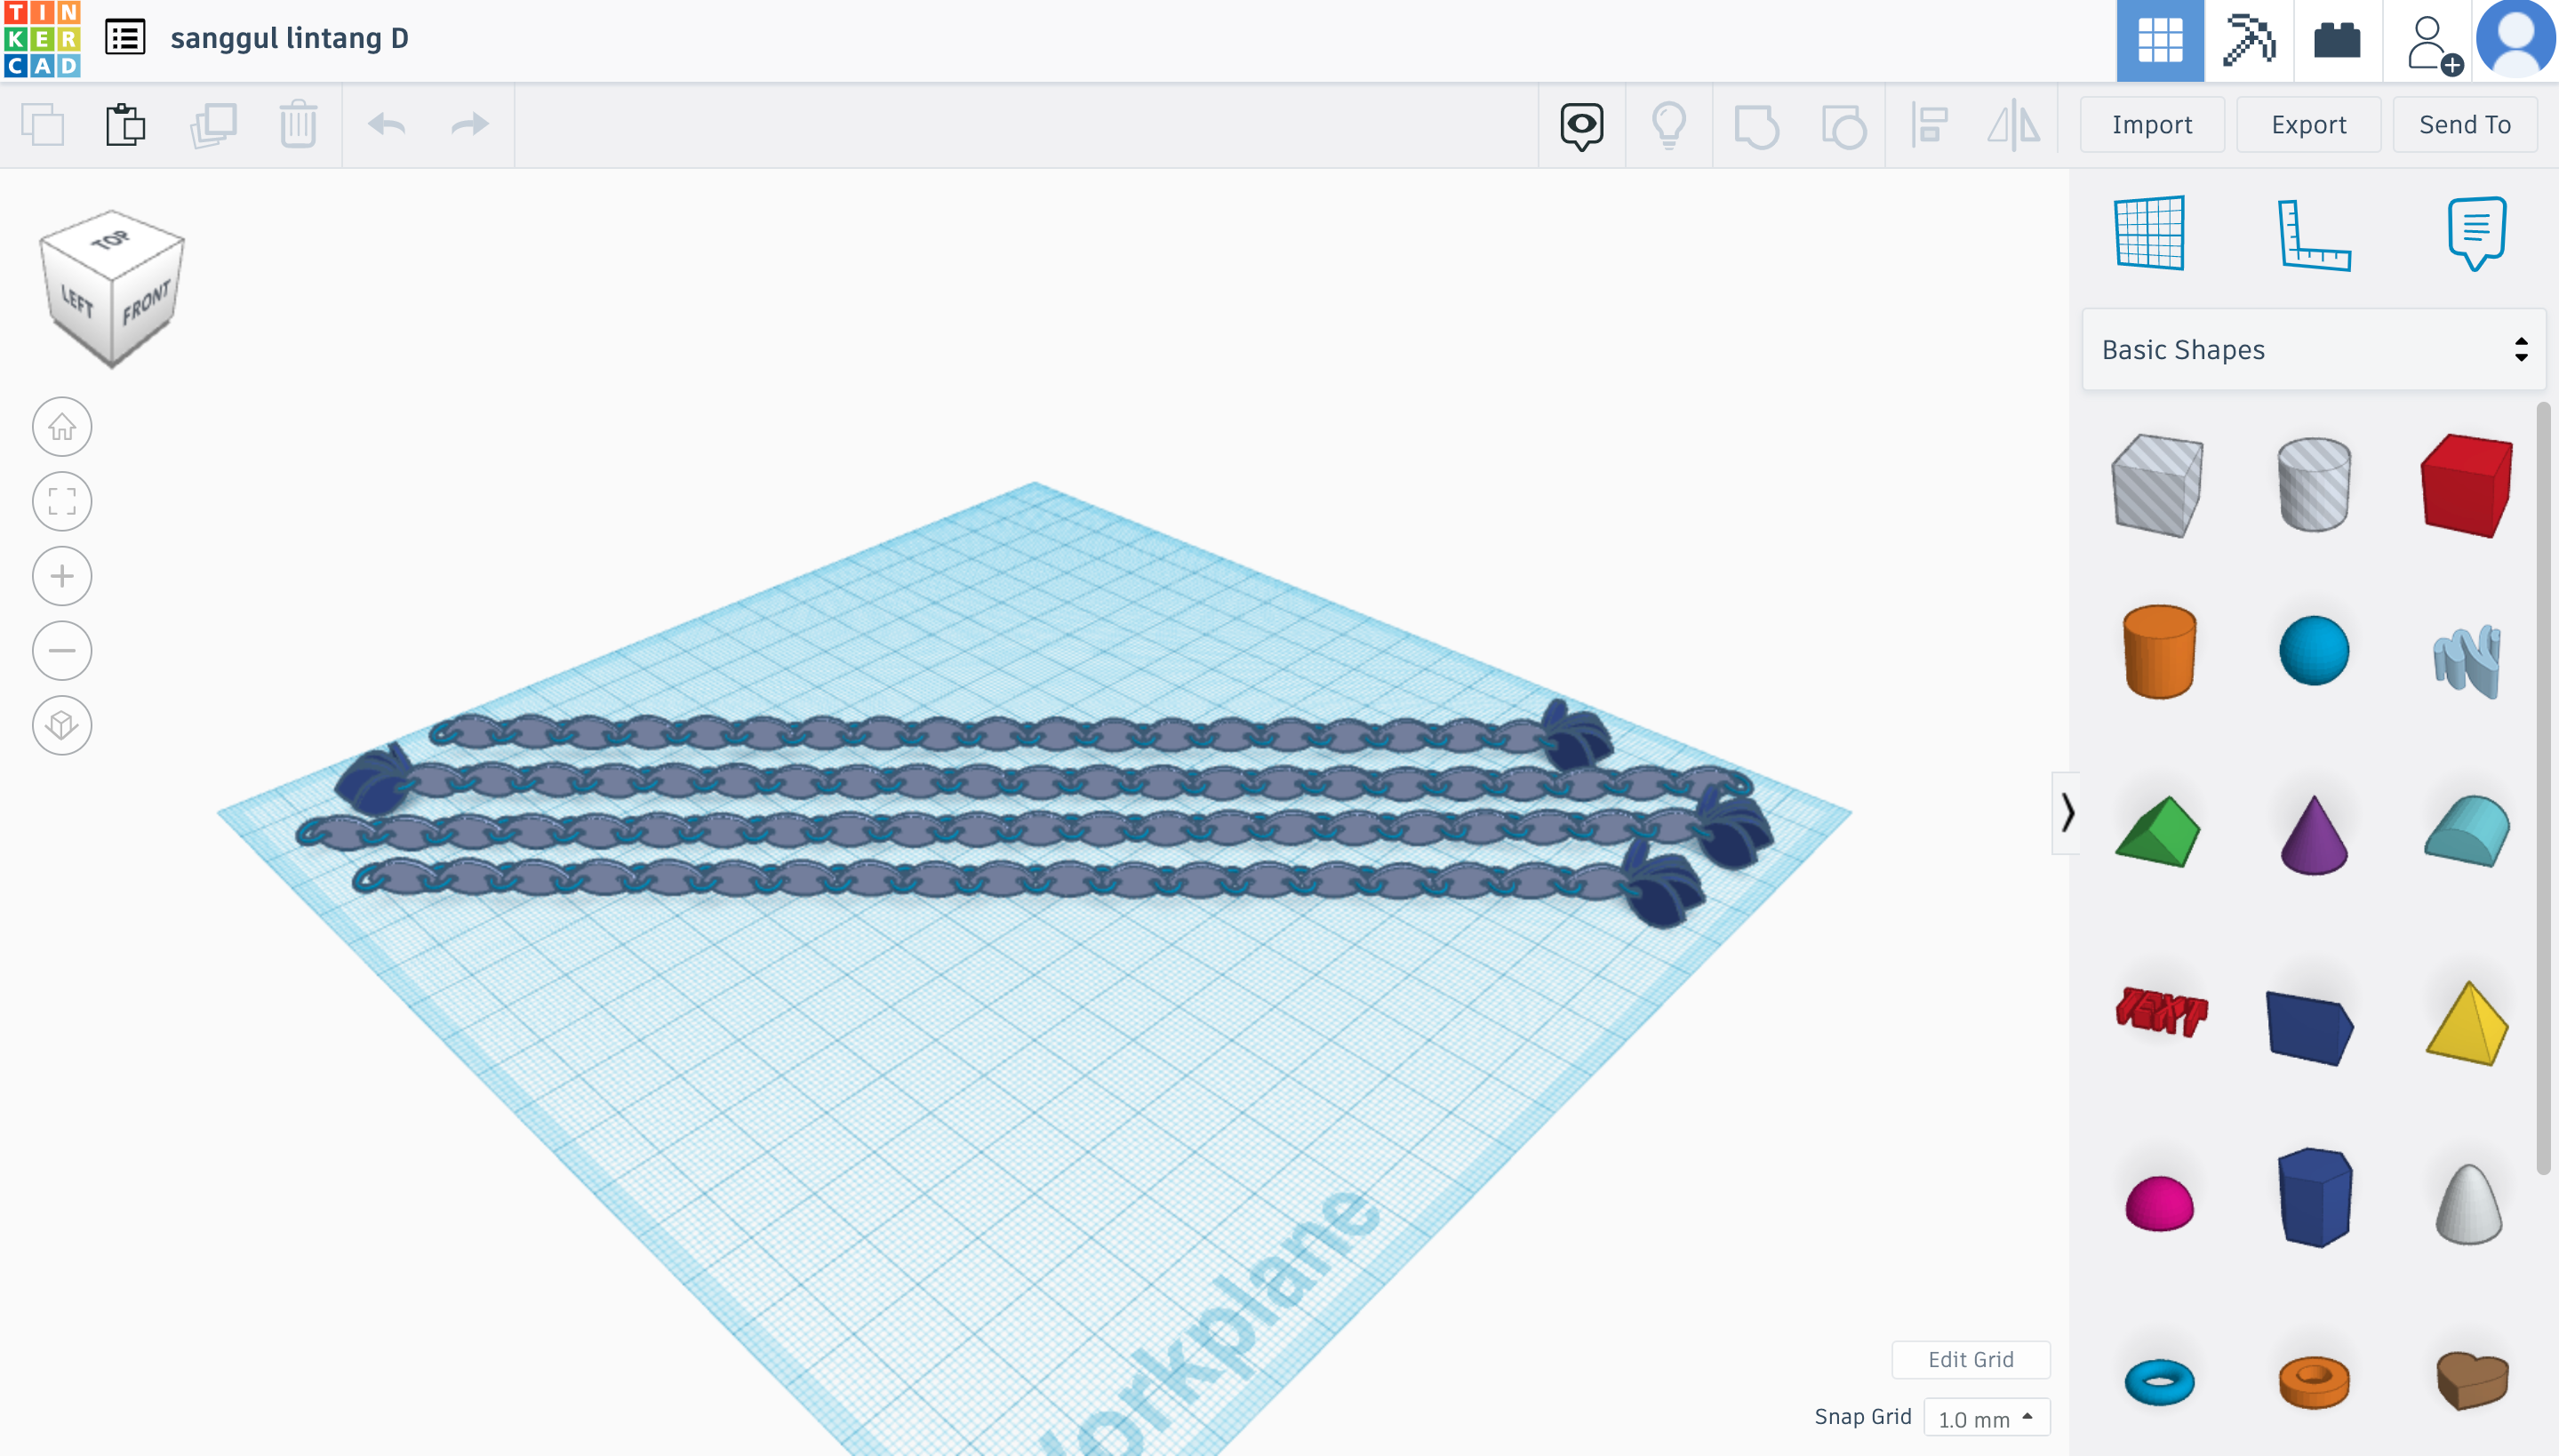
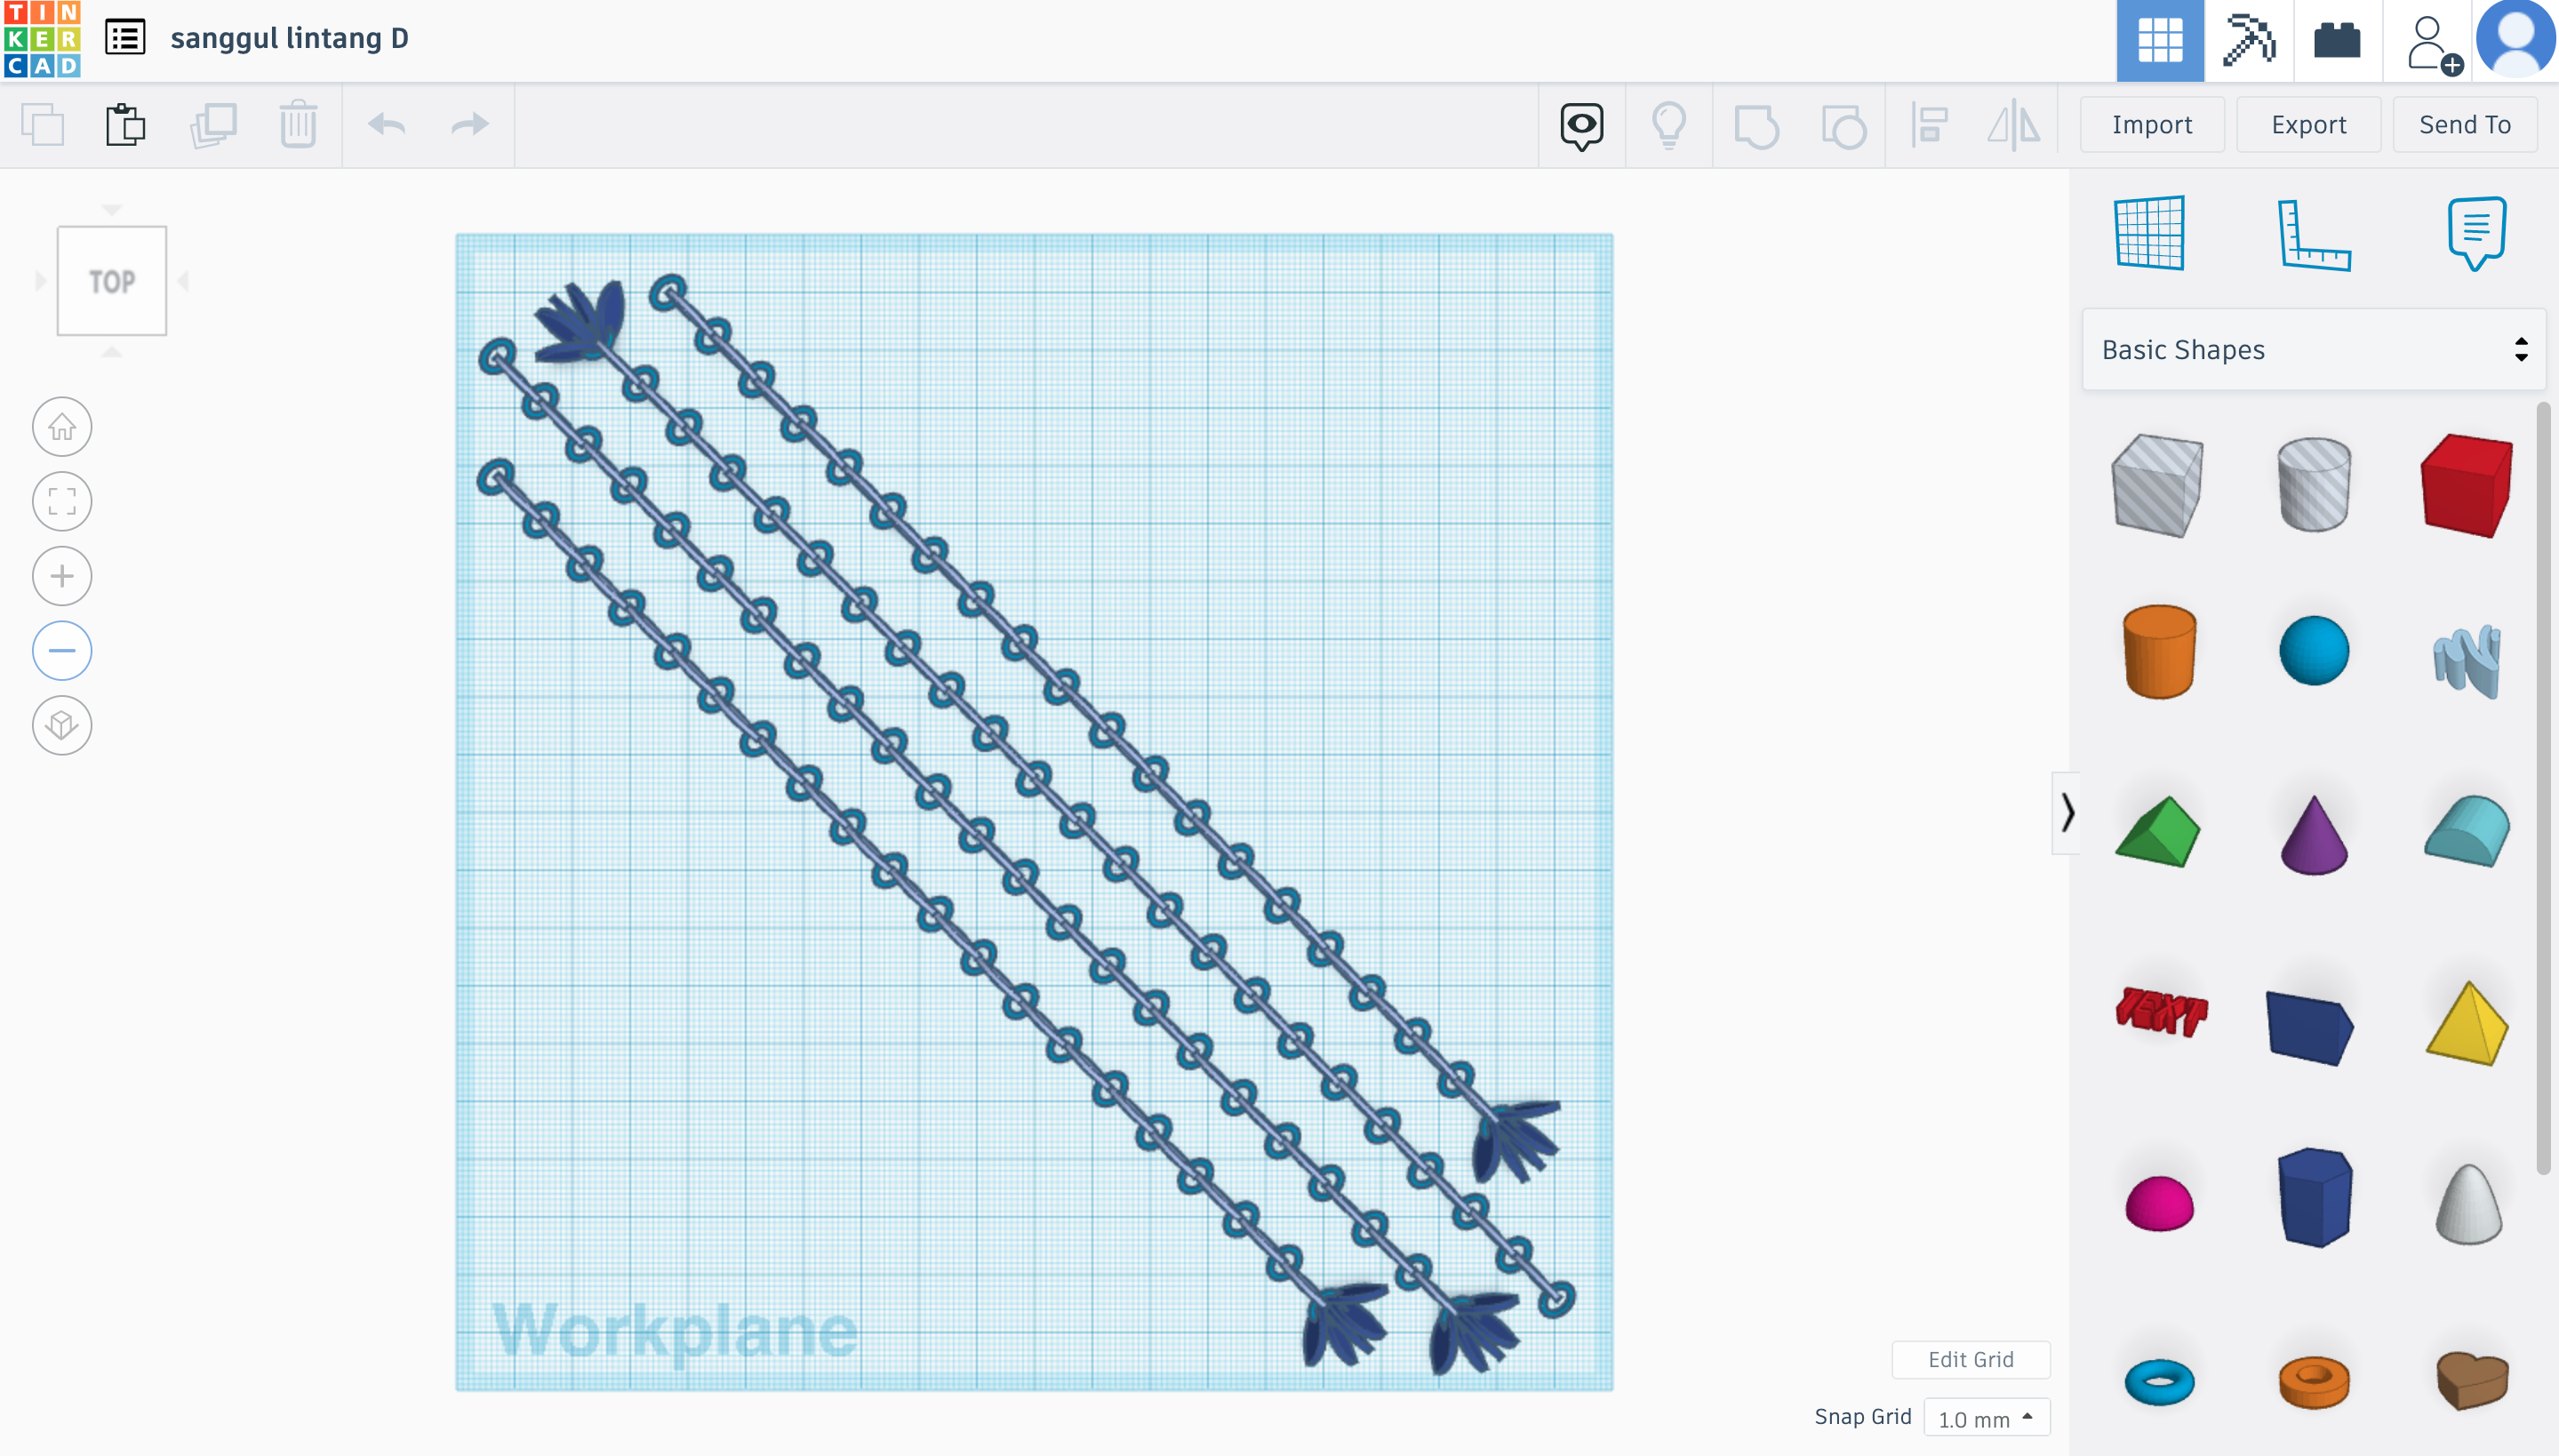
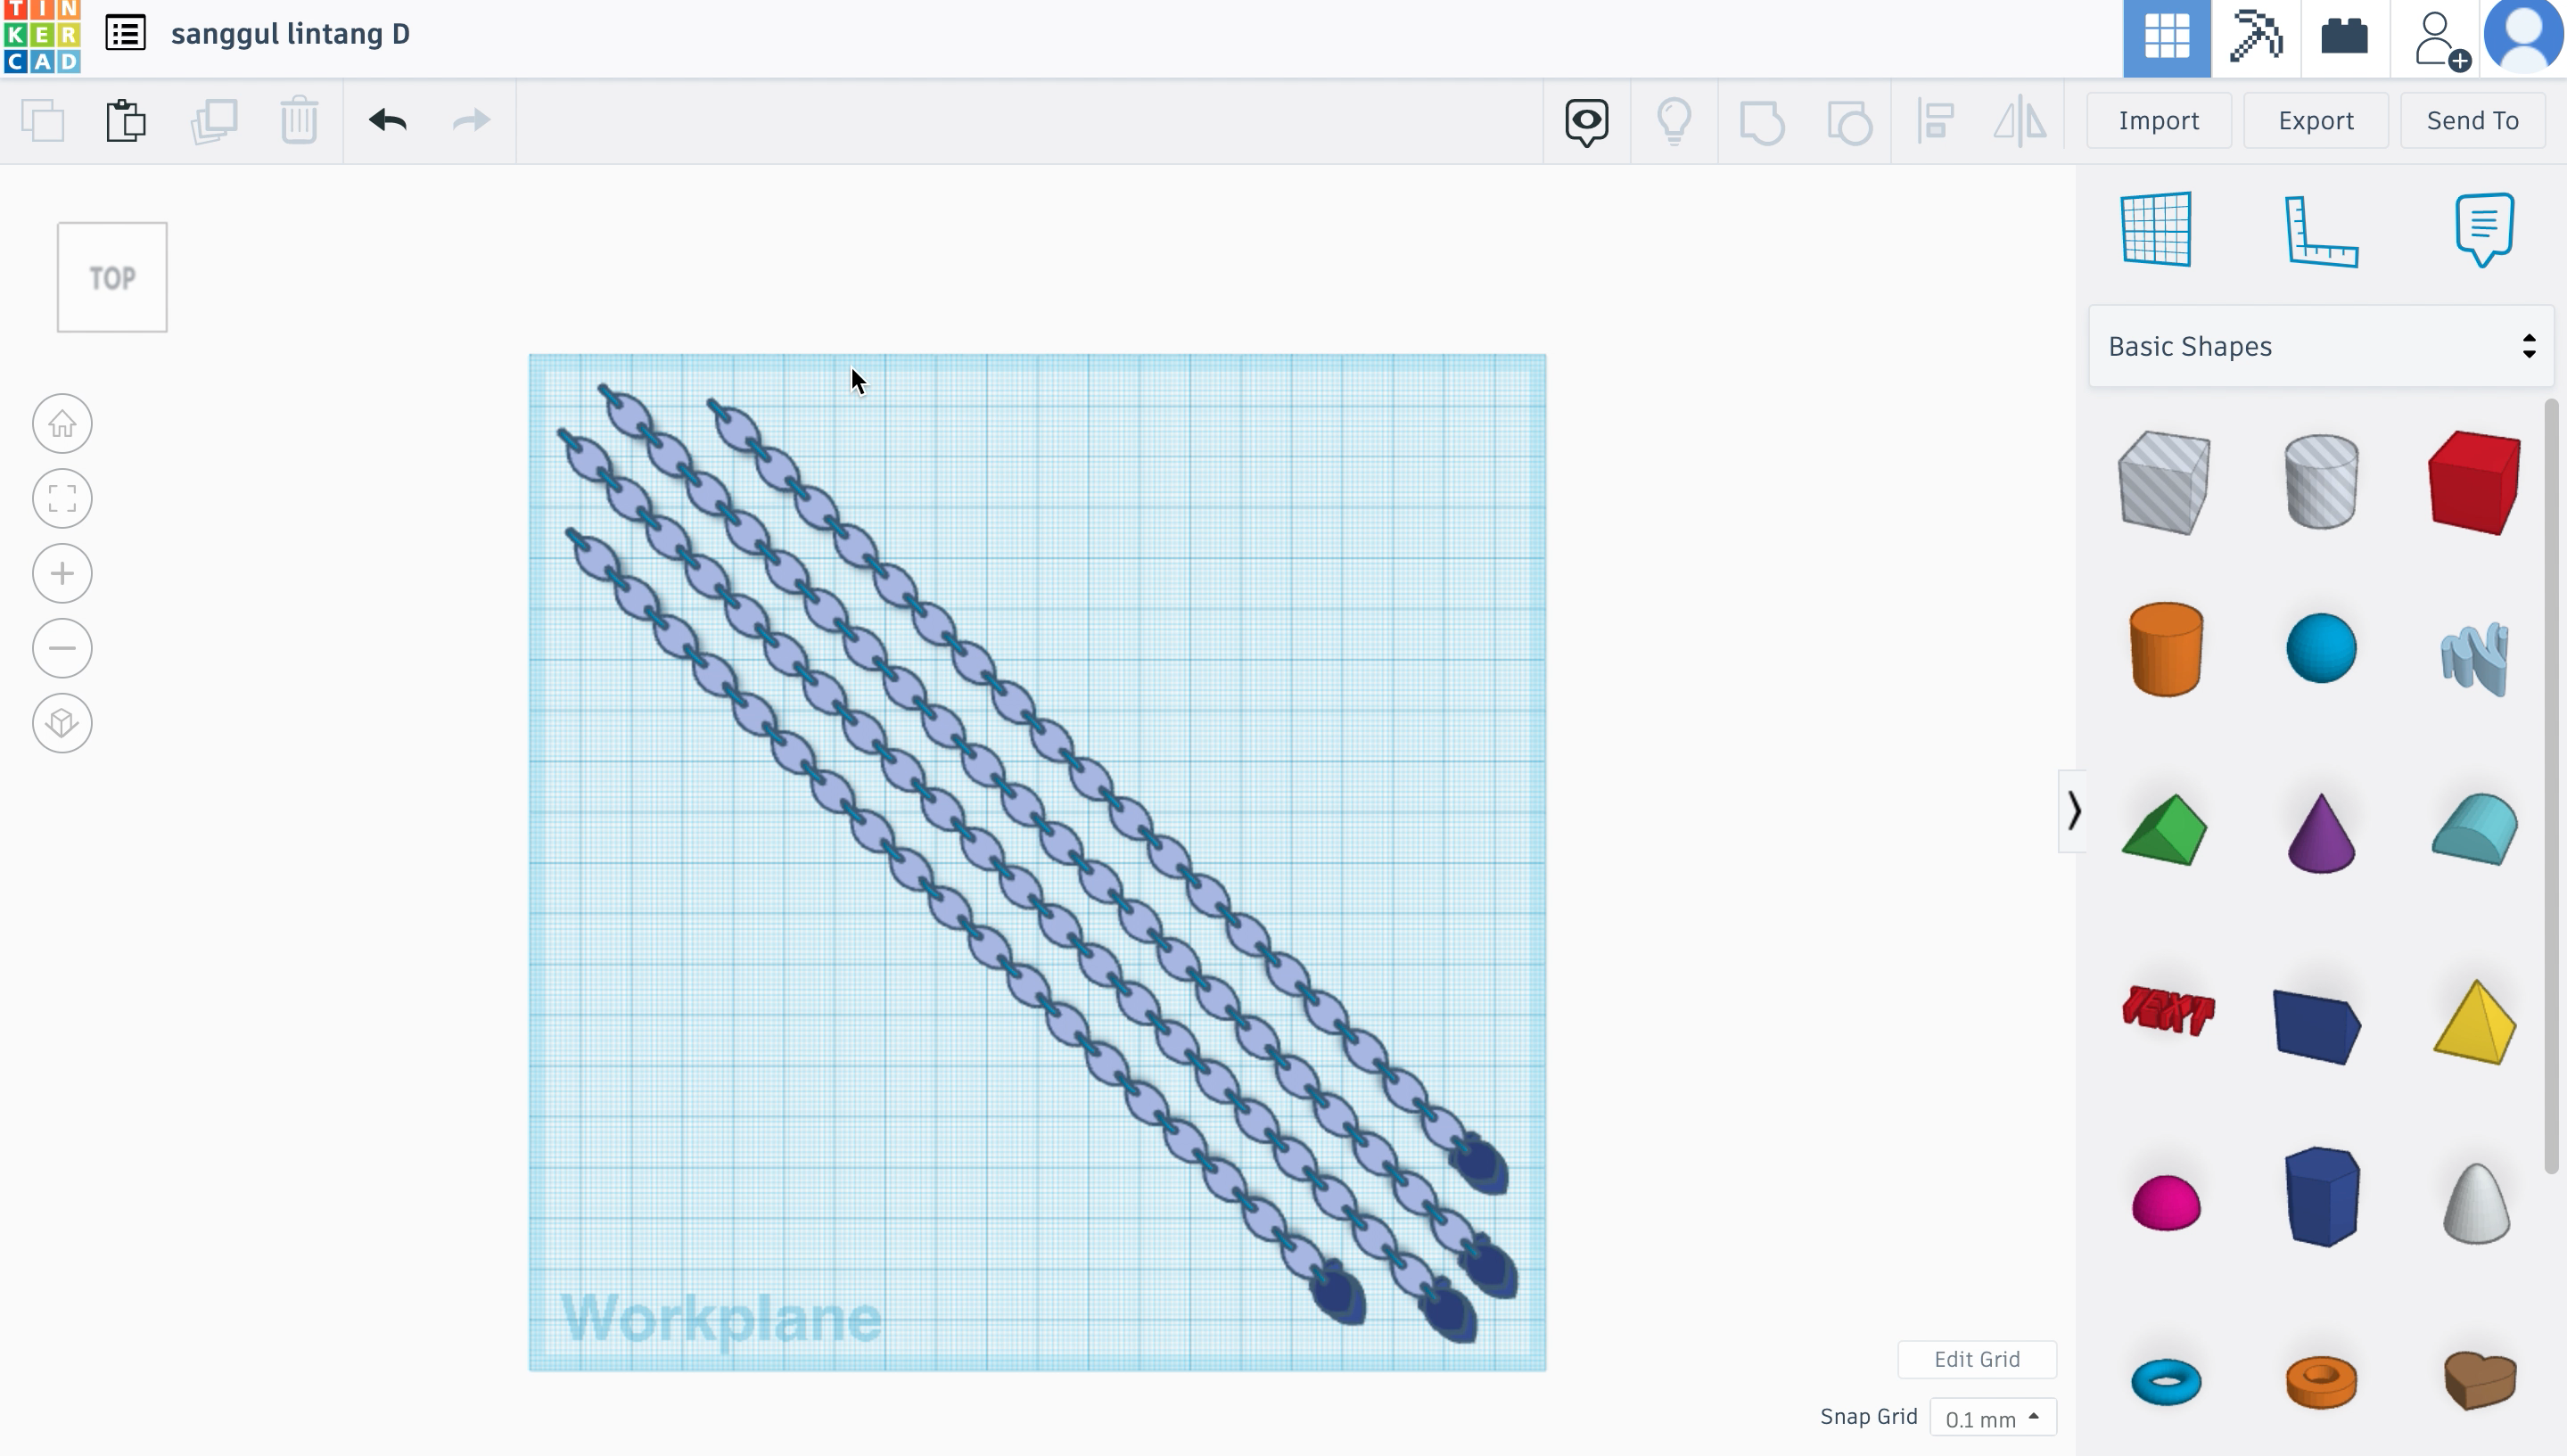
- Duplicate/ copy and paste the shapes to make a chain.
- Put the dark purple shape through a ring, and add four more of the dark purple shape on the same ring for a little flare. Refer to the image above.
- Copy and paste the repetitive part of the chain (light purple part) until it becomes the length of your liking.
Assembly
Congradulations! You should now be able to know how to design parts for a Sanggul Lintang. Whether 3D printer or crafts. Once all the parts are available, simple put them together onto a headband. (You may refer to my sketch at the very top to see the order of pieces, though I think they are self explanatory.
Thank you~