Sample Pad Controller Using Pure Data
by craighissett in Circuits > Arduino
1461 Views, 3 Favorites, 0 Comments
Sample Pad Controller Using Pure Data

In this Instructable i will be creating a controller to allow some old Roland electronic drum kit pads to trigger sounds without the original drum module that came with the kit.
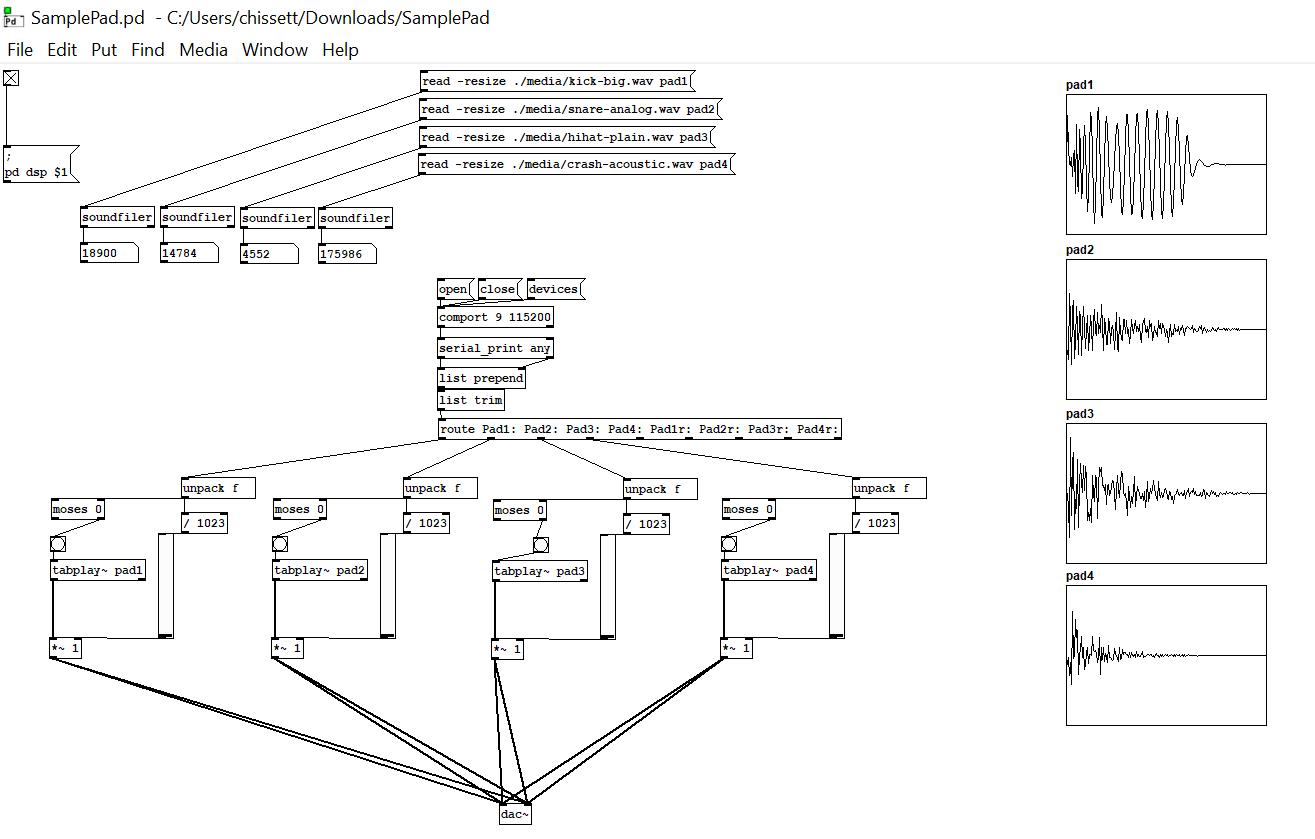
I will use Pure Data to create a patch to load some wav files and then play them when it receives input from a serial input.
The serial input will come from an Arduino, reading the pads using the analog pins and sending the values to the patch.
Supplies
Arduino Microcontroller (I have opted for the Arduino Mega, with its 16 analog pins allowing for 16 pad inputs, or 8 stereo pads in my case)
Pads for input (I am using some old Roland pads, but the same premise can be applied to piezo pads too)
A device capable of Running Pure Data - this could be anything from a Raspberry Pi to a PC. It's a great bit of software that can run on Linux, Mac or Windows. I will be using an old Windows 8 tablet.
Why Pure Data?
I have been working on music projects for a number of years, and in that time I have used all kinds of software and hardware to create my end product. Normally I would look to use Python for something like this, but on another recent project I started it was clear I'd need something more suitable to handle the processing of multiple audio files. I stumbled upon Pure Data, and have been using it for my audio projects ever since!
Its object-based style and it's visual editor make putting together your audio chain really quick and simple, and it' vast array of external libraries allow for many features to be added simply.
Pure Data makes it simple to load and play audio files, and also receive and route serial commands, so it made it's use for this project a no-brainer!
Create Your Input Device

This step will differ depending on your intended use, but the fundamentals will remain the same.
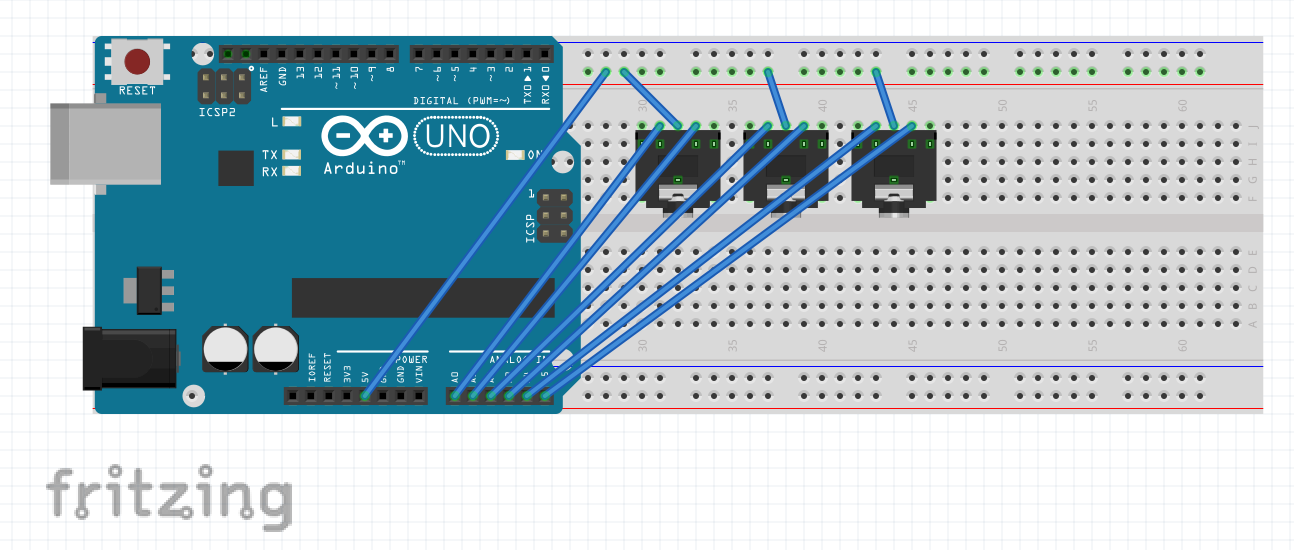
Connect your input devices to your microcontroller's analog pins and also power; when the pads are hit it will then send a value to the pins. The analog pins read values between 0 and 1023; we can use this value to determine the volume to play the sound back!
The image attached shows an Arduino Uno and three TRS input jacks; the Roland pads I am using have a main pad and a rim pad which are transmitted via a TRS jack. To us them with my arduino I have placed them on a breadboard and used breadboard wires to connect the jacks to my analog pins.
When finished the jacks will be drilled and mounted into a project enclosure and wired directly to the arduino.
Finally, upload the attached code SamplePadController.ino to your arduino. If you need to add more inputs just copy the structure in the file to add them to the serial command line sent to the patch.
Downloads
Set Up the Pure Data Device


Download Pure Data from the Pure Data website for your chosen system and then add the comport external by going to help > find externals and entering 'comport'. This will allow for your device to interact with serial.
Download the attached files, change the two .txt file extensions to .pd and open the SamplePad.pd file.
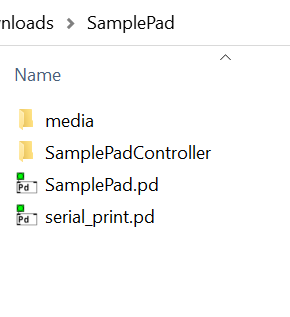
Add the wav files into the media folder - it makes it easy to address them in the patch.
Using ctrl+e to enter editing mode you can change the com port from 9 to match that of your Arduino serial port, and also change the names of the wav files for use. If you have put them in the media folder in the project's directory (in image 2) you can reference them using ./media/filename.wav
The way patch works is really simple; it opens, then loads the wav files, and then opens the serial port to communicate with the arduino. When the arduino send a string of values to it, it then routes the input to each of the pads; pad1, pad2 etc. the value received then plays the file using that as the voume, as long as the value is over 0. If the pad hasn't been hit, no sound is played. Simple!
Developing Further
The modular way in which this patch is assembled makes it easy to expand it in the future; add extra sensors to your microcontroller, and to make it usable in the patch just add the name of the value in the 'route', copy the chunk of objects of one of the existing inputs, connect them to the routing and voila!
There's so much more that the Pure Data environment can do, and I implore you all to have a look at it and give it a go. You'll be able to create some amazing audio projects!