SafetyFirst
Introduction
This project was made by two students of The Interdisciplinary Center in Herzliya, Israel, as a final IoT course project.
The project is designed for people who share their car with a new driver, and afraid for the car's safety (and for the person driving it - OBVIOUSLY ;) ), very much like myself - I share my car with my younger brother).
This is a step by step guide to building the ultimate safety system and protecting your loved ones. At the end of this guide you'll have a system that:
1. Makes sure the driver didn't consume alcohol before driving.
2. Makes sure that the level of noise in the car (either music or by people) is at a safe height.
3. Alerts if the driver is having an emergency.
- If either 1 or 2 isn't met, or the driver clicks on the "panic button" (3), an email with the car's location is sent to the contact chosen.
We connected our project to the USB port of my car - as a power source. If you don't have a USB port in your car, sell your car and buy a new one (or connect the project to a power-bank).
The safety features of the project are just the tip of the iceberg. You are more than welcome (and even highly encouraged), to be super creative and add new features to your own project.
Supplies
1 x ESP8266 Board (we used Lolin Wemos D1 mini)
1 x Micro-USB Cable
1 x "Push Button"
1 x Resistor
1 x Breadboard
1 x MQ-3 Sensor
1 x CZN-15E sensor
12 x Jumper Cables (we recommend to use as many male to female cables as possible, connected to each other in order create extensions)
Software

Adafruit IO
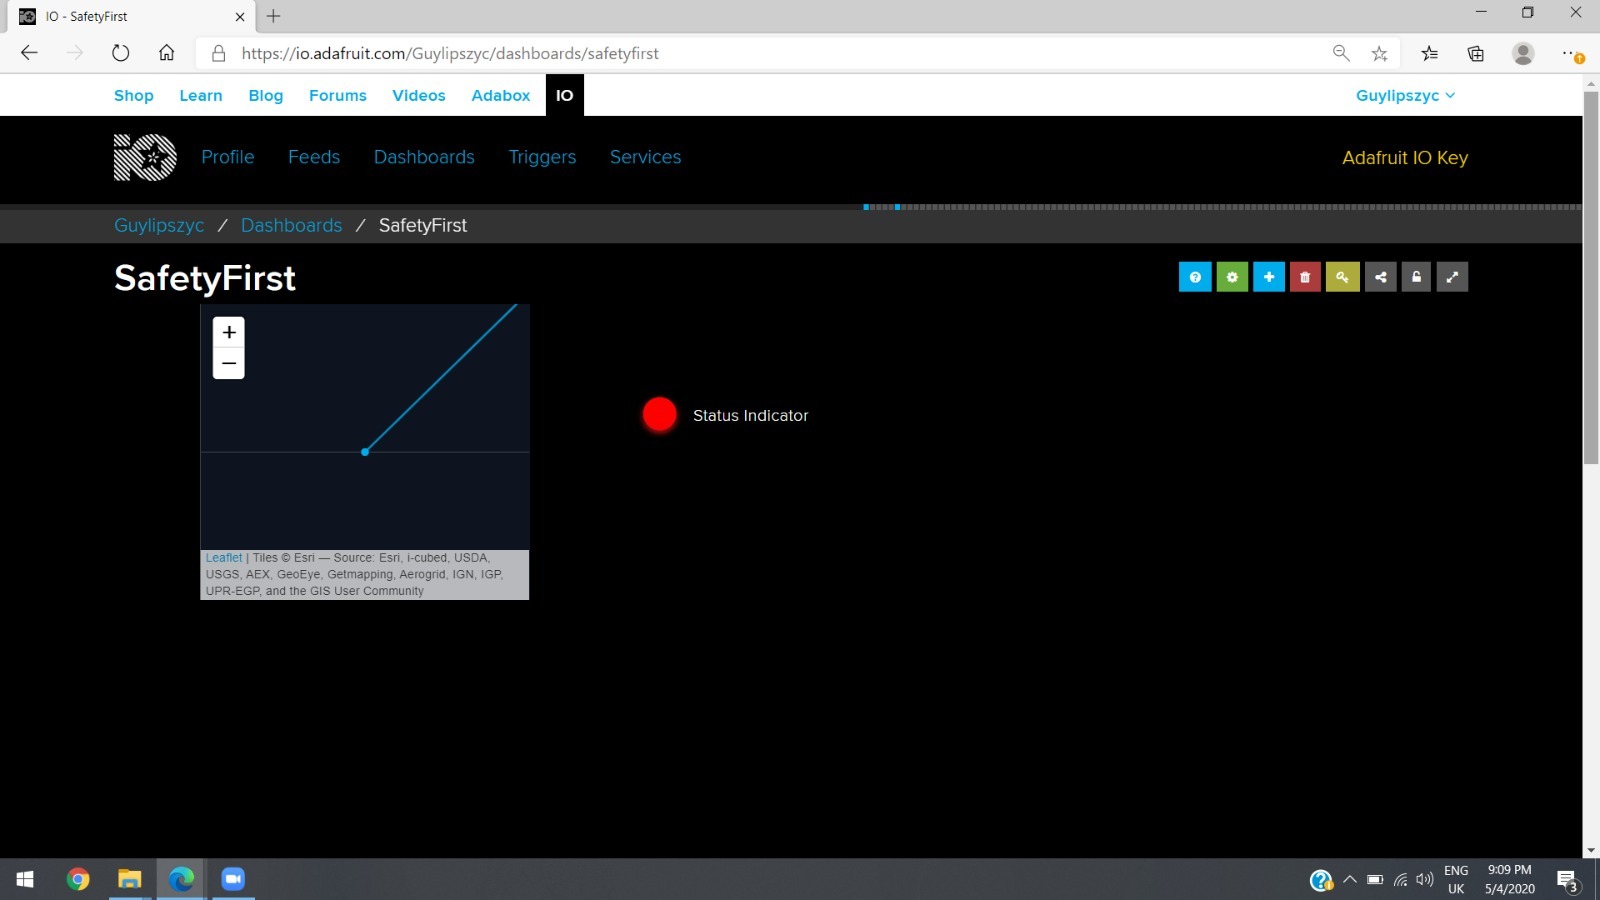
Setting up - Adafruit IO
- In the Adafruit IO website, go to "Feeds" tab and create 2 new feeds - "emergency" & "location".
- Go to the "Dashboards" -> open the "Actions" menu -> create a new dashboard.
- Name the new dashboard, adding a description is optional.
- Select "Create" -> click the new link.
- Notice in your newly created dashboard the 7 small square buttons.
- Press the yellow key button.
- A pop-up window will open.
- Save the string you see in the "Active Key" - we'll need it.
- Select the "+" button.
- Add an "Indicator" block.
- Select the "emergency" feed.
- Continue.
- Type in a title.
- In the "Conditions" menu choose "=".
- Set the value below it to "1".
- Select "Create Block".
- Click the blue "+" button.
- Add a "Map" block.
- Choose the "location" feed.
- Continue.
- Type in a Title.
- Choose 24 hours.
- Set type of map to "Satellite Imagery".
- Select "Create Block".
- Select the green gear button.
- Click "Save"
Blynk
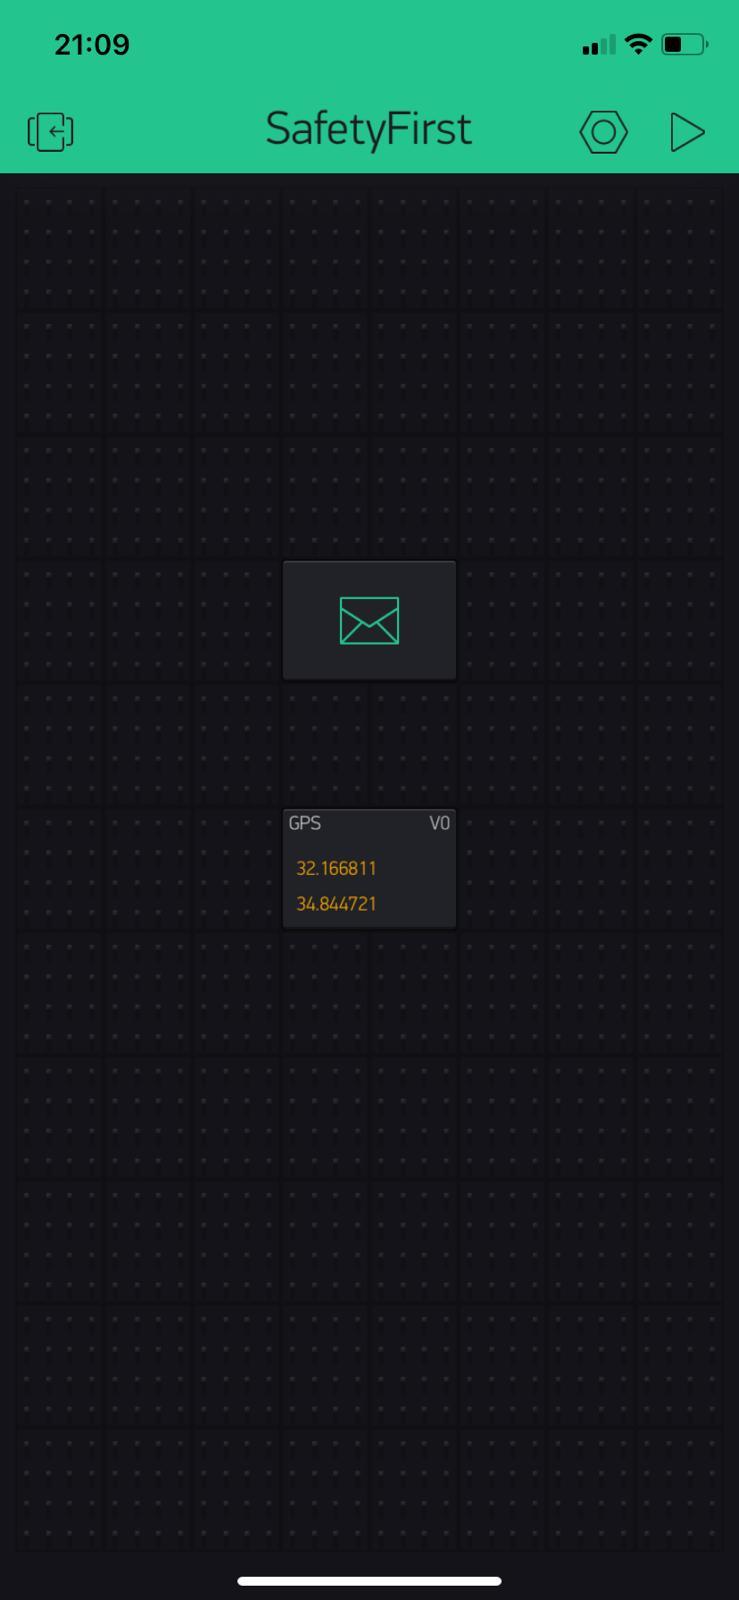
Setting up - Blynk
- Go to the Blynk app.
- Create a new project.
- Save the authentication key that is sent to your email.
- Click the small (+) button.
- Add the following widgets: Email widget & GPS Stream.
- Set the GPS Stream to virtual pin V0.
- Make sure that the email address in the Email widget is correct.
- Change the "Content Type" field to "text/plain".
The Circuit
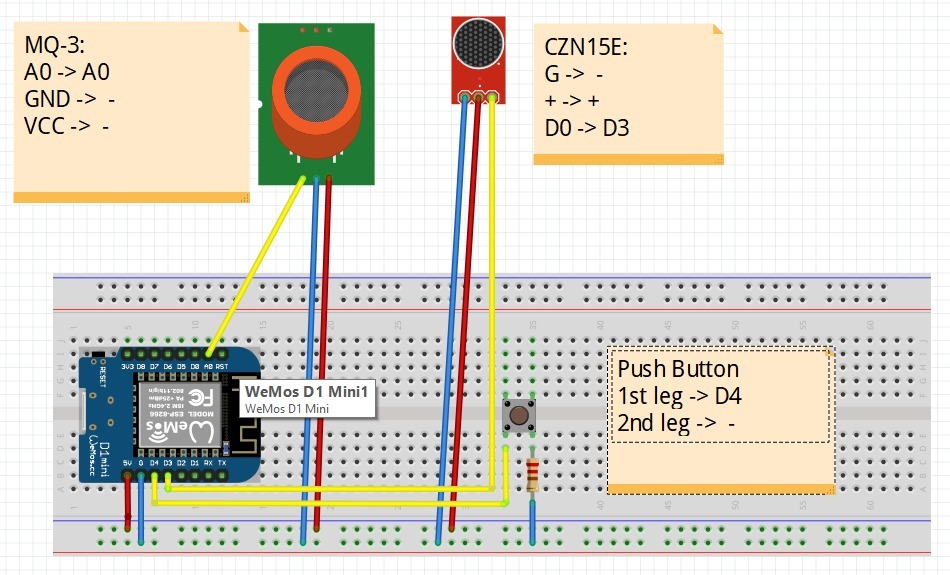
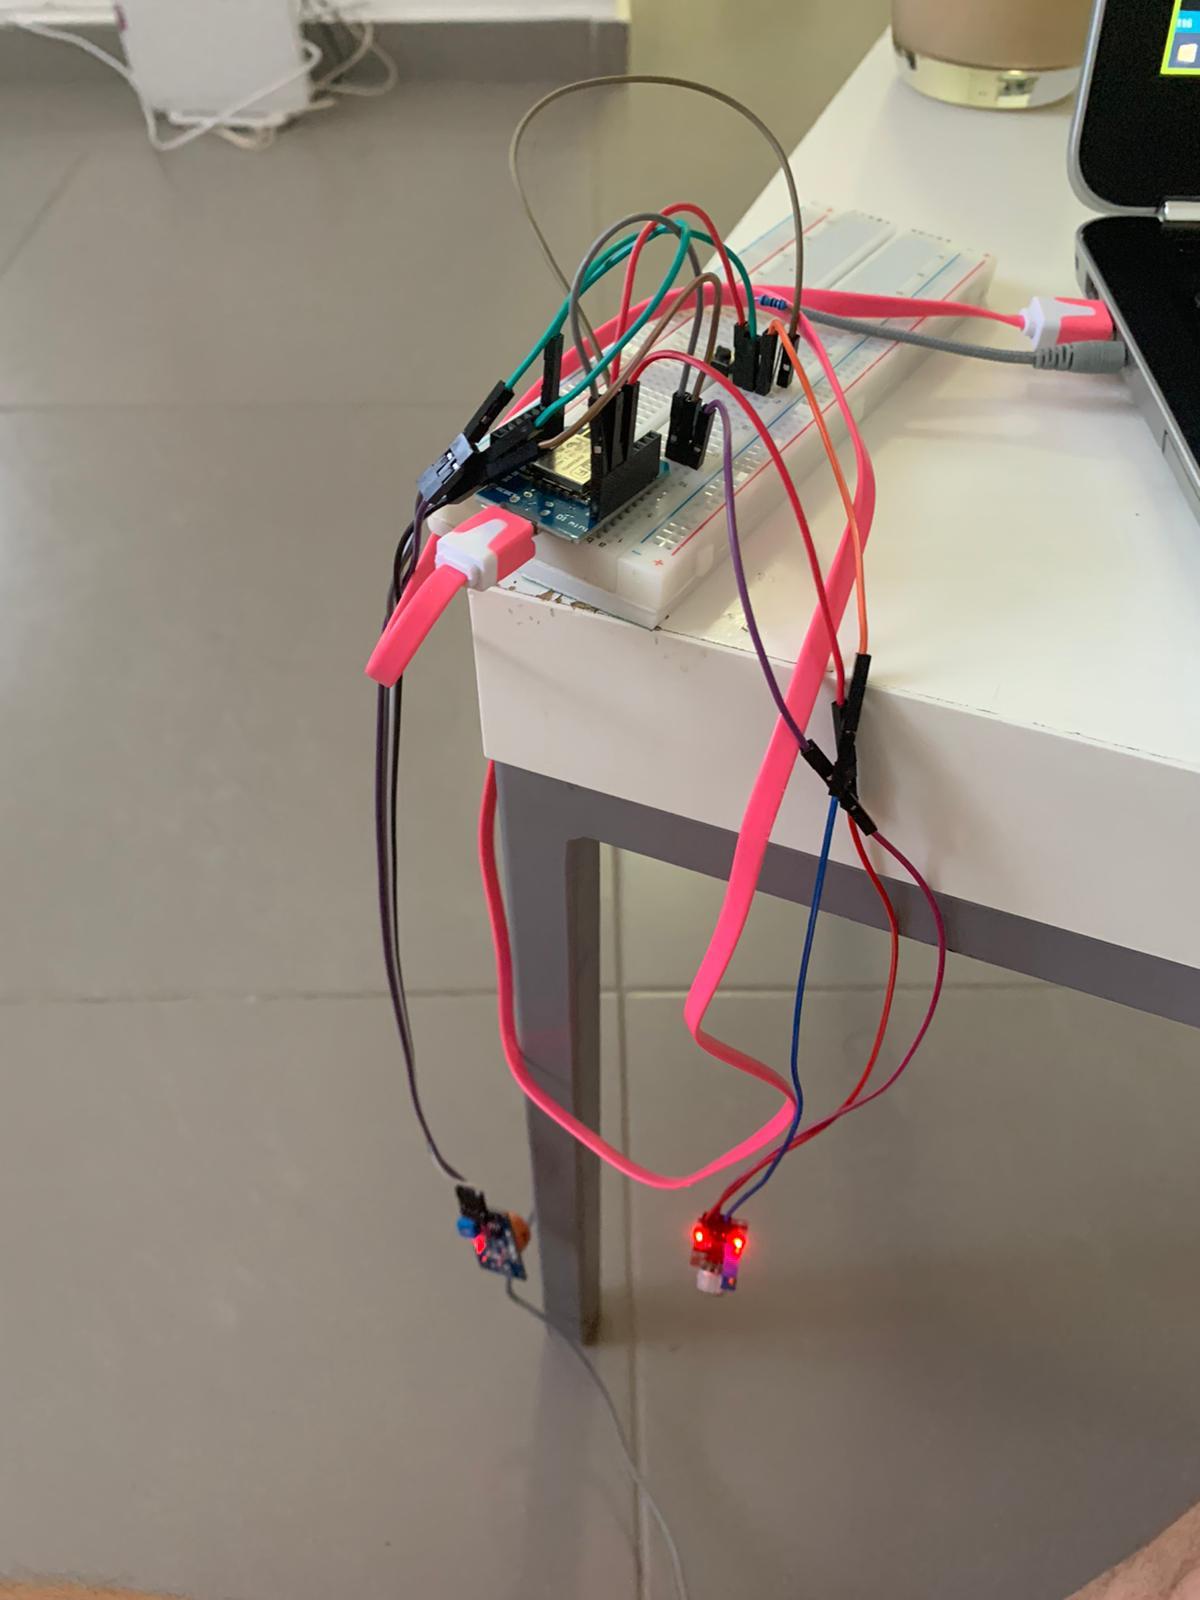
Lets connect (!) :
ESP8266:
- 5V -> +
- G -> -
MQ-3 (Alcohol censor)
- A0 -> A0 (of the ESP)
- GND -> -
- VCC -> +
CZN-15E
- G -> -
- + -> + (of the breadboard)
- D0 -> D3 (of the ESP)
"Push Button"
- First Leg -> D4
- Second Leg -> -
CODE

The necessary code is attached :)
1. Open the code in Arduino IDE.
2. Check your board configuration - make sure you're on the right one.
3. Complete the missing variables in the code:
- #define EMAIL "your email"
- char ssid[] = "your Wifi network name"
- char pass[] = "your Wifi network password"
- char auth[] = "your Blynk authorization code"
- #define AIO_USERNAME "AdafruitIO username"
- #define AIO_KEY "AdafruitIO key"
Downloads
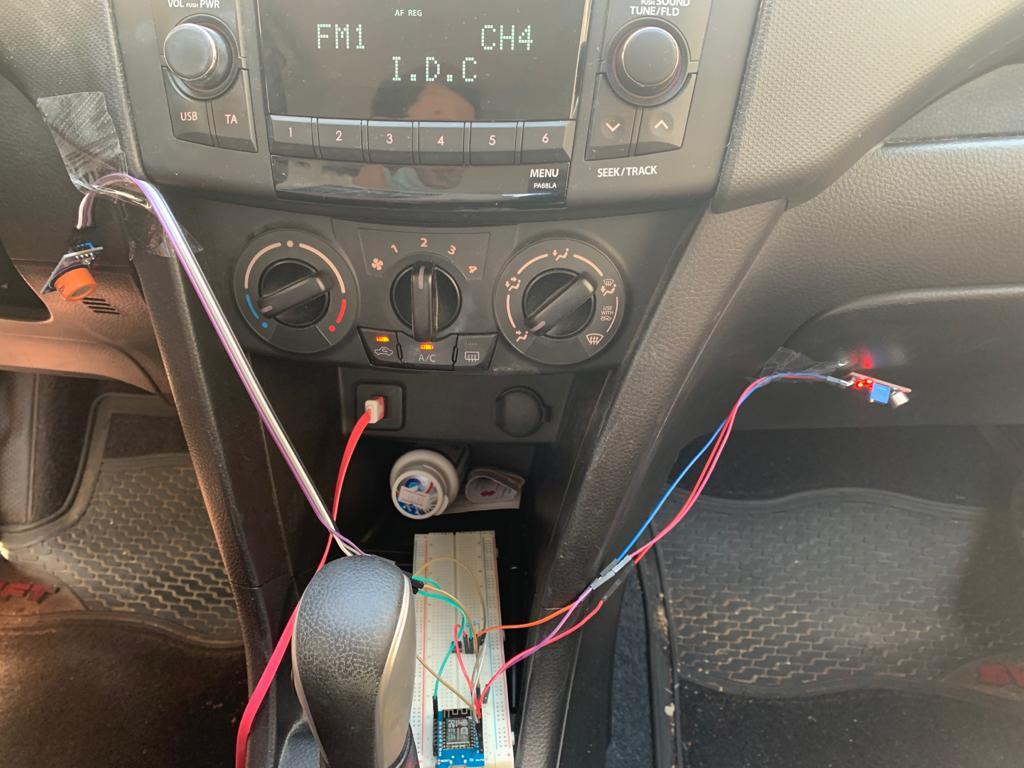
Car Setup
.jpeg)
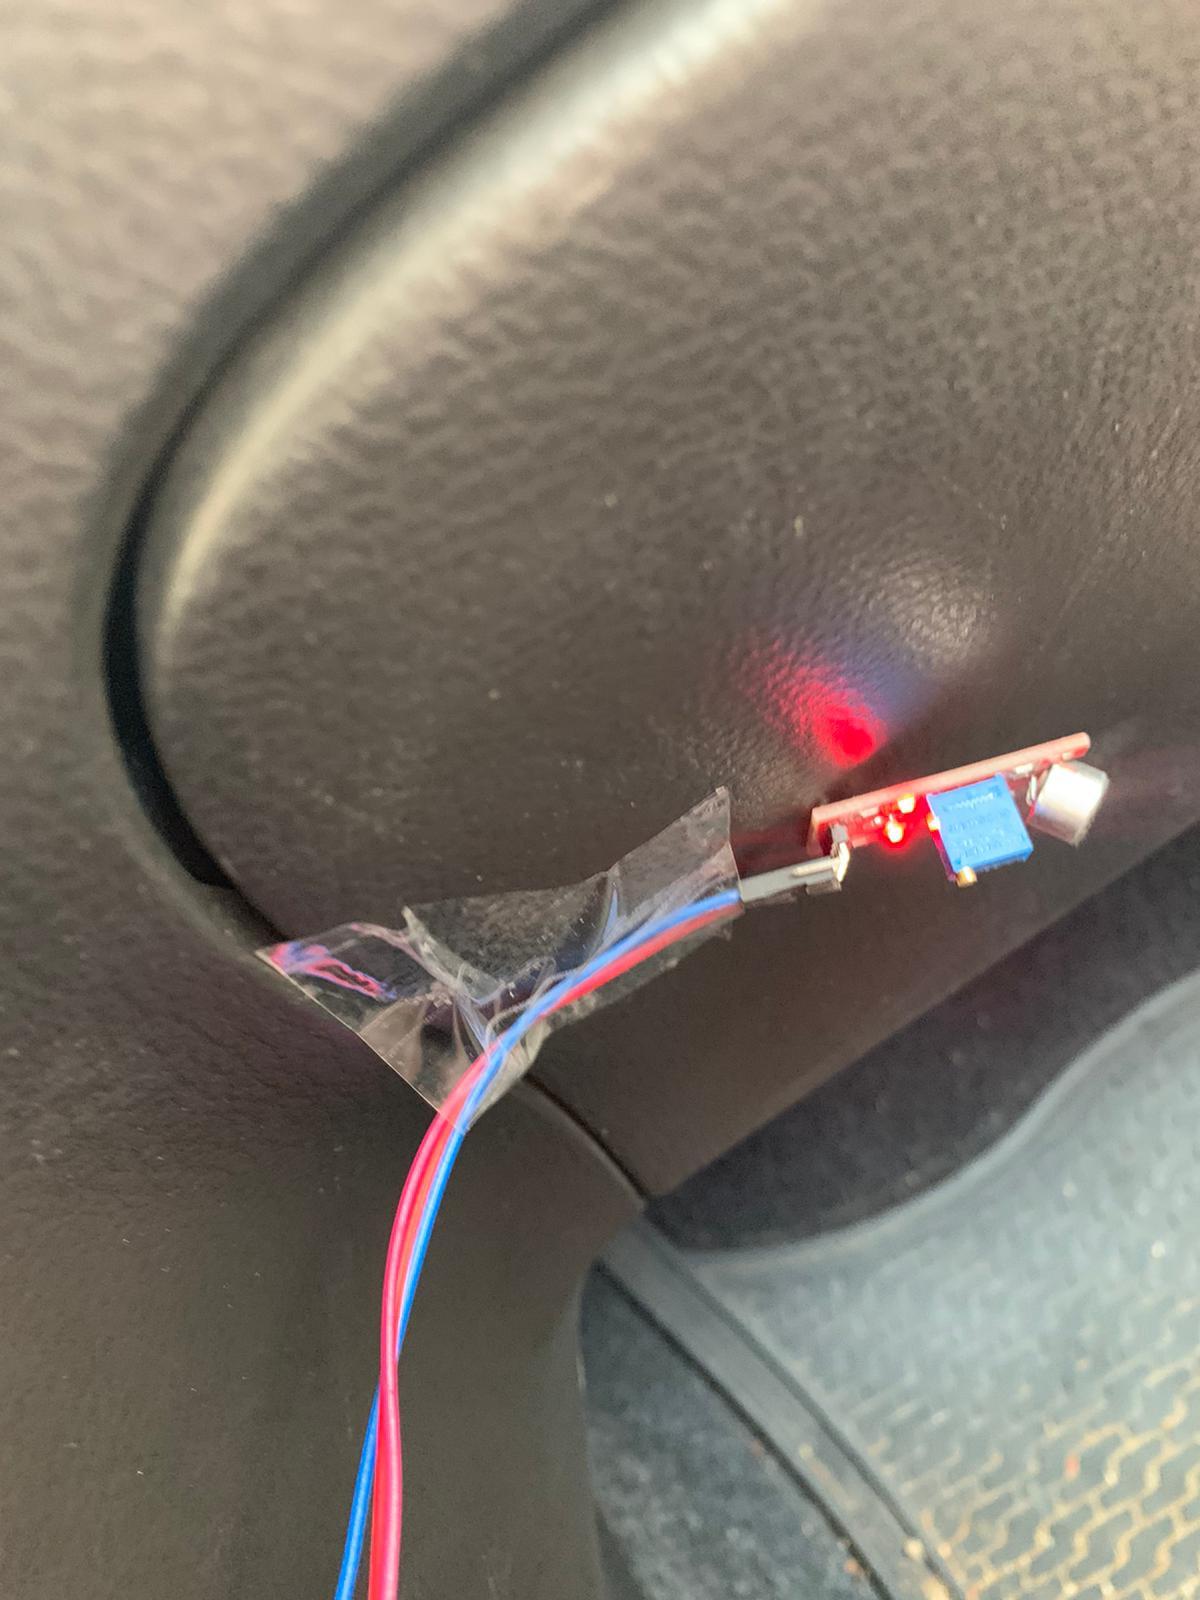
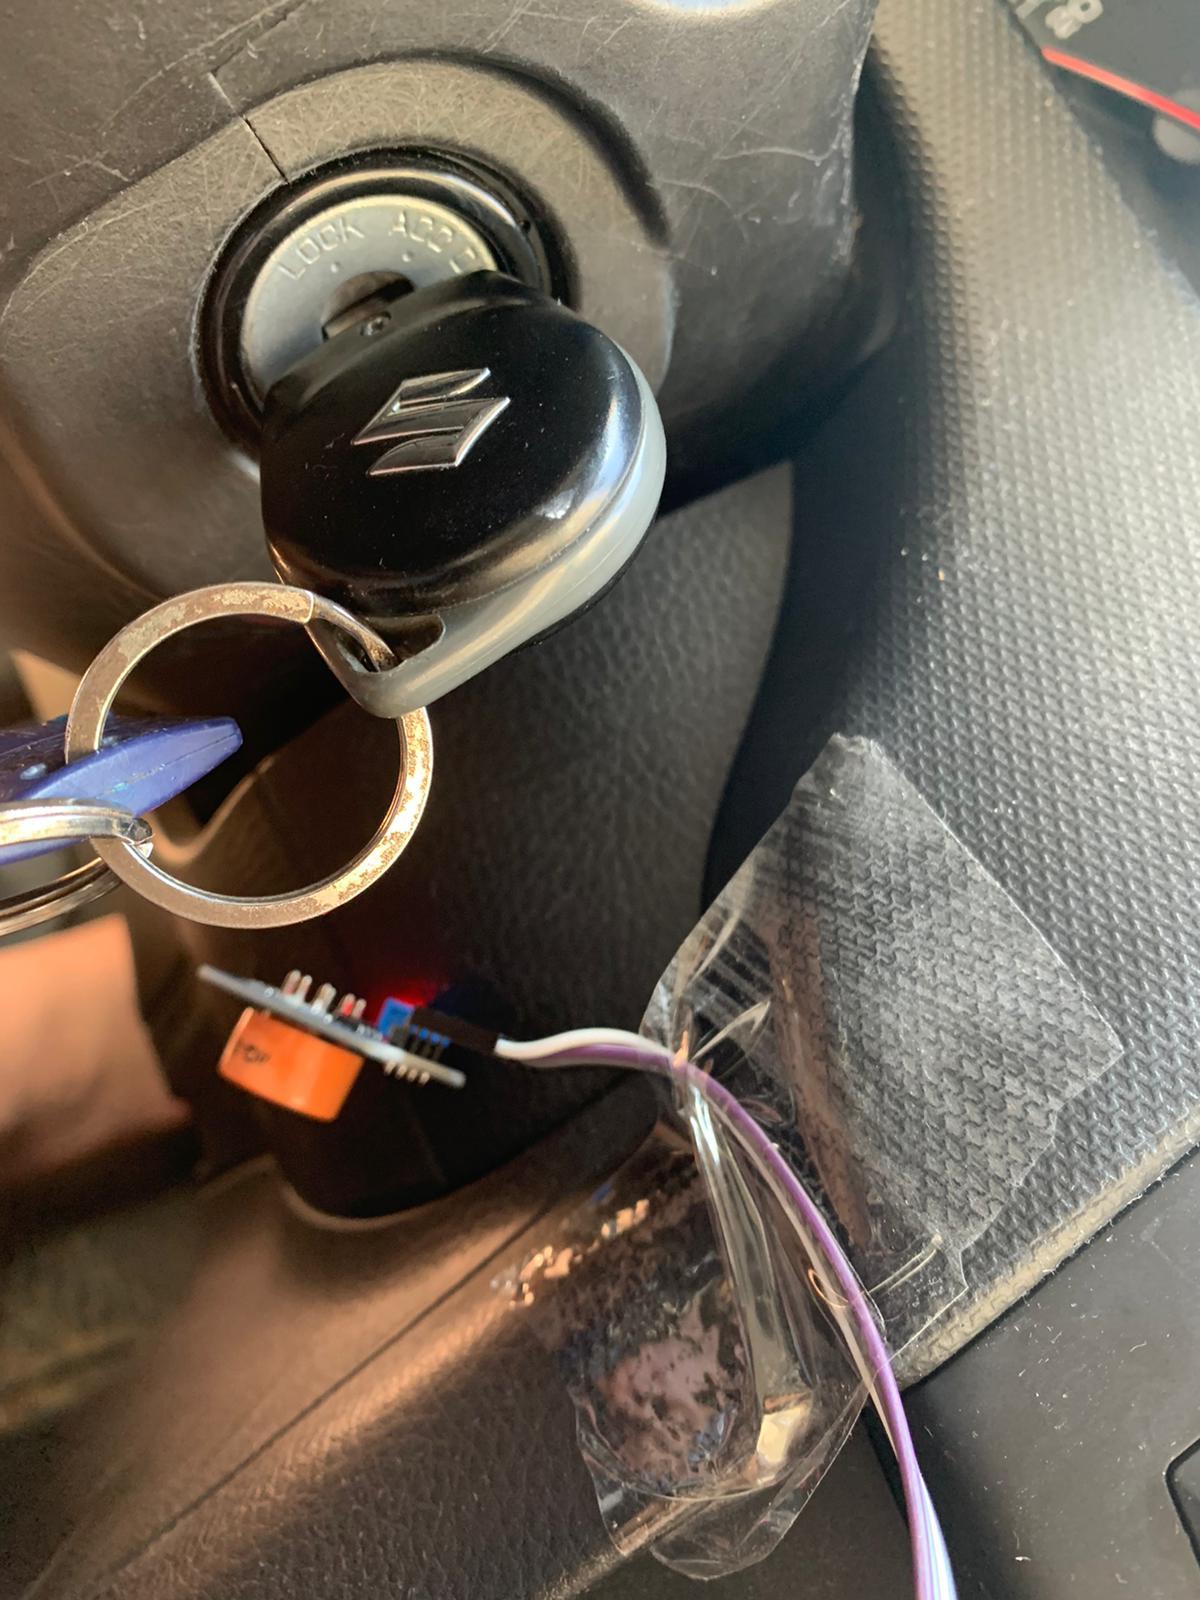
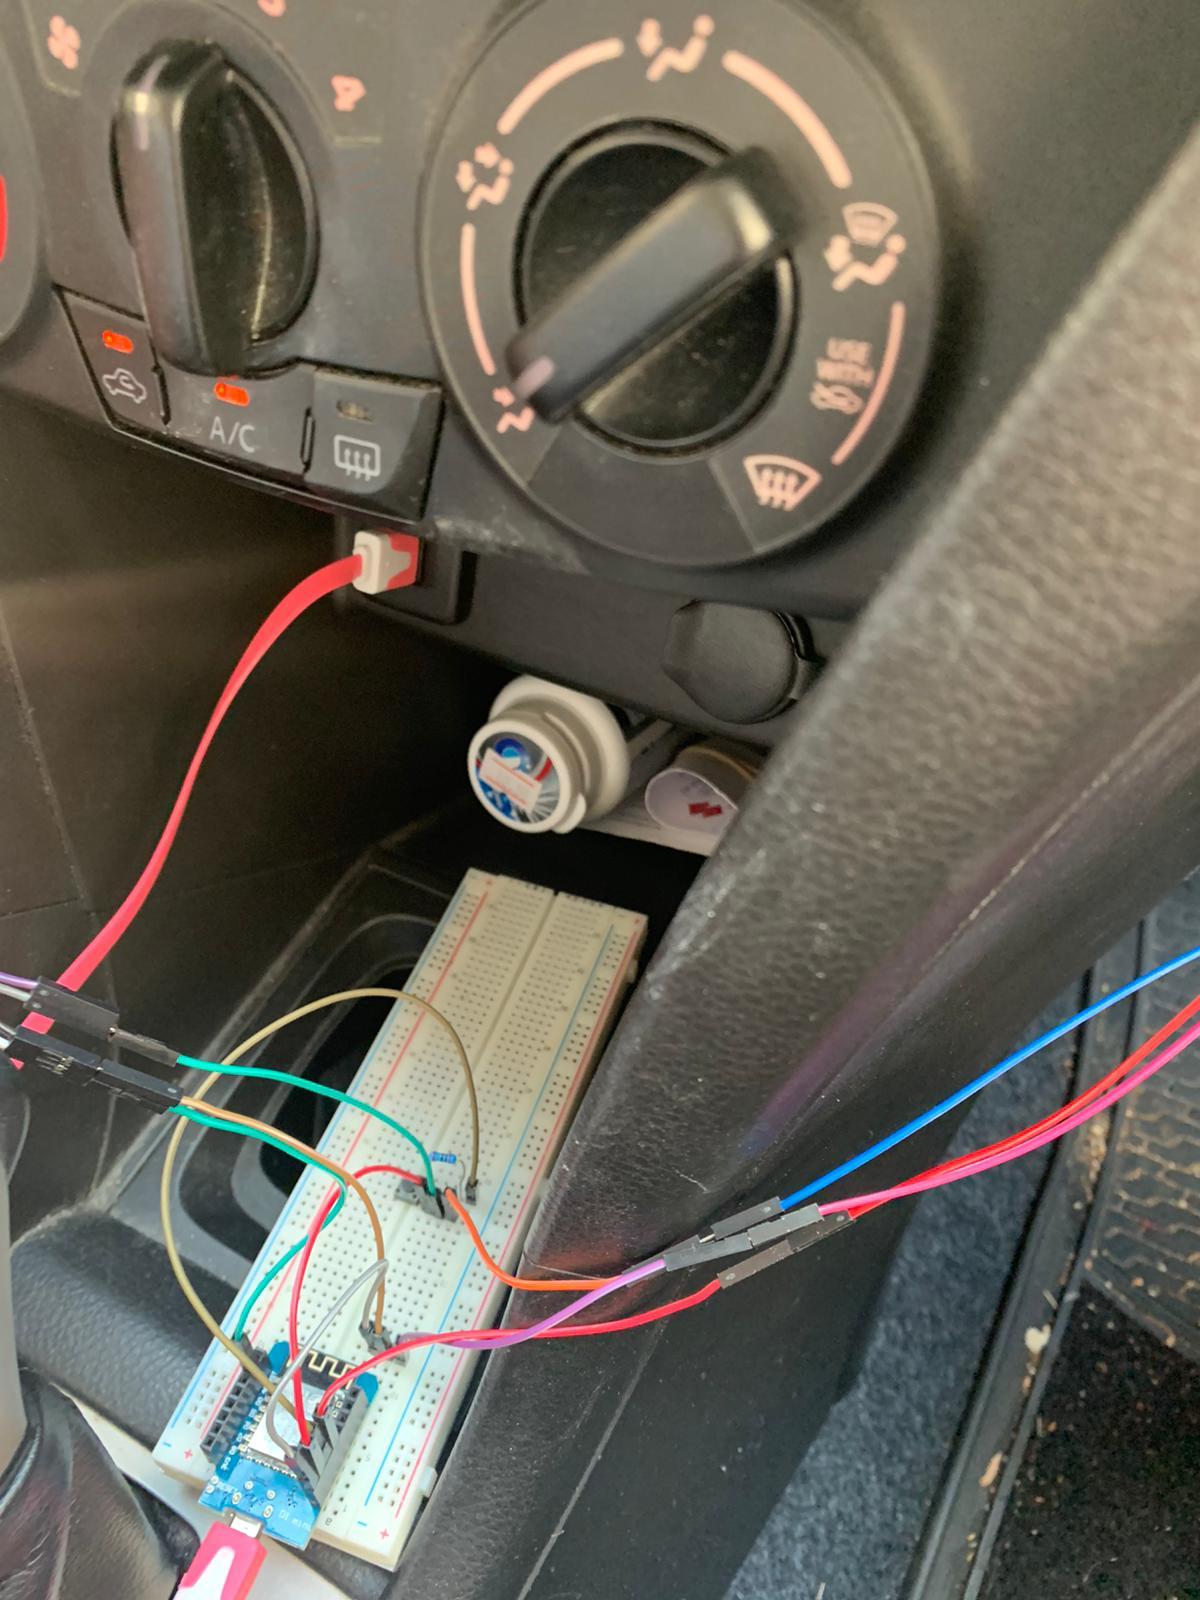
Setting the system up in your car
Our setup recommendation:
- Place the alcohol censor close to the steering wheel so it can cense alcohol levels from the hand (It often stays on the drinker's hands)
- Place the microphone near the car's speakers (high level of noise is probably caused by loud music)
- Place the breadboard and the click button close to the driver - at a reachable position (in case of an emergency the driver should press the button easily)
DRIVE SAFELY