STM32F103C8 Minimum Evaluation Board With STMCubeMX Project Genarator
by dkhairnar in Circuits > Microcontrollers
2786 Views, 9 Favorites, 0 Comments
STM32F103C8 Minimum Evaluation Board With STMCubeMX Project Genarator
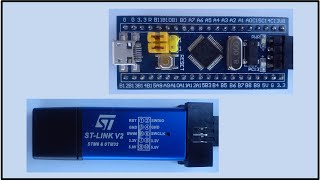
I made this indestructible for start working with STMCubeMX.
Install Download and Install STM32 Work Bench
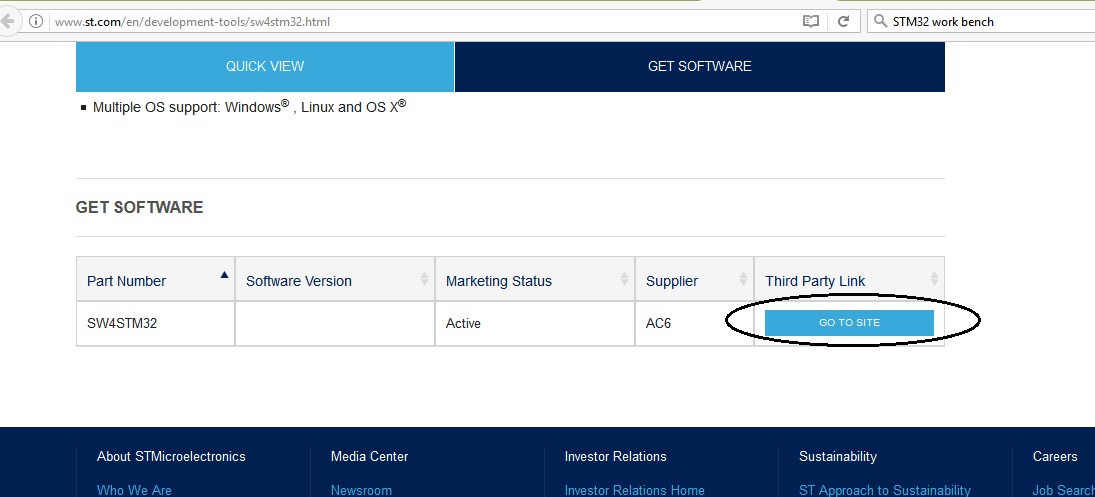
For programing STM32 you have to download and install STM work bench from http://www.st.com/en/development-tools/sw4stm32.html.
To setup STM work bench go throw this instructible https://www.instructables.com/id/STM32F103C8X-Minimal-Development-Board-ST-Link-V2-/
Install Cube MX
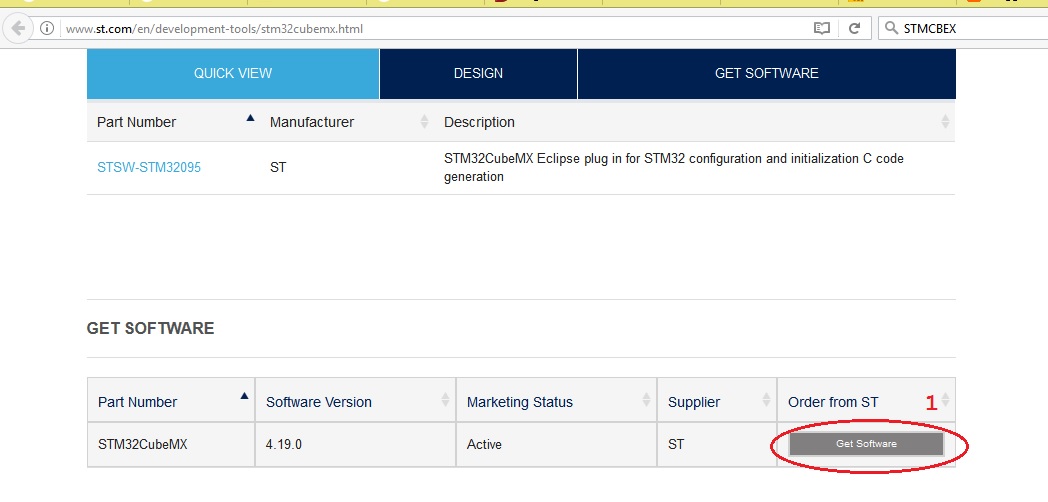
Go to this link and download STMCube MX which is automatic project generator for stm microcontrolles.
http://www.st.com/en/development-tools/stm32cubemx.html.
Extract zip file and opne setup exe.
Create New Project in STMCube MX
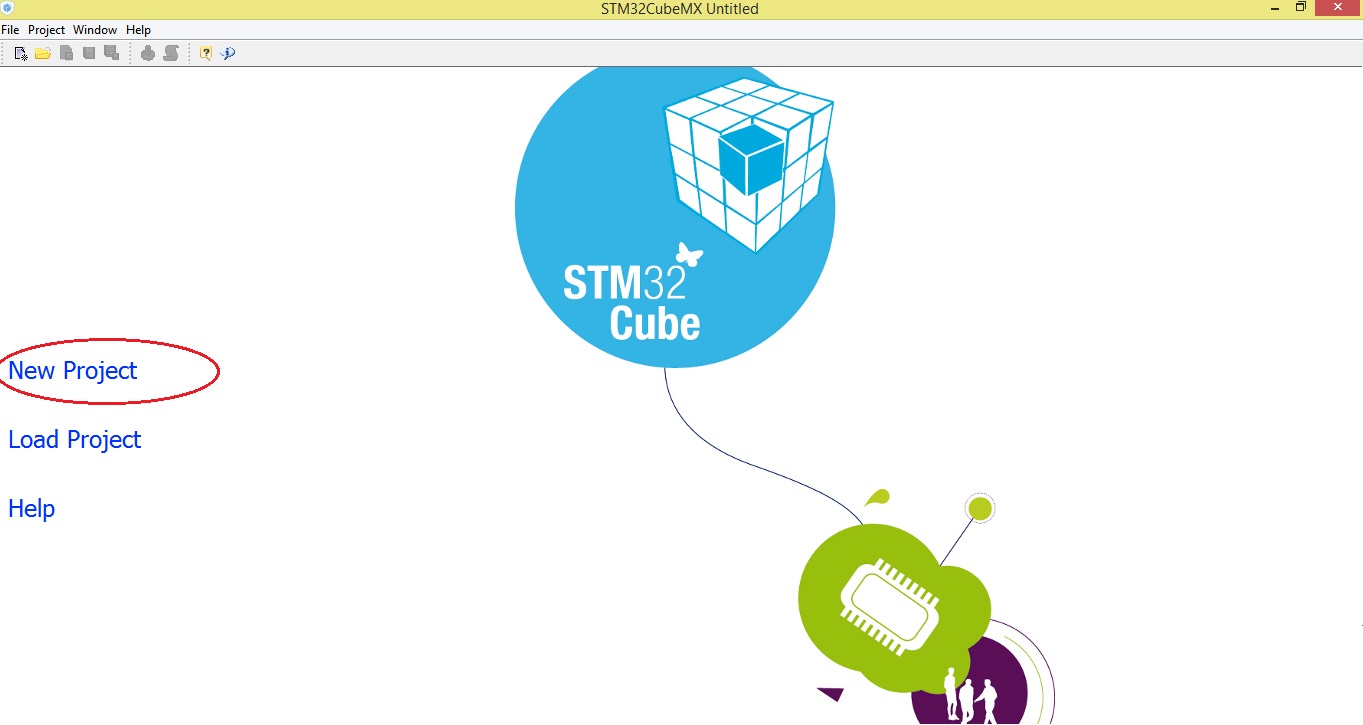
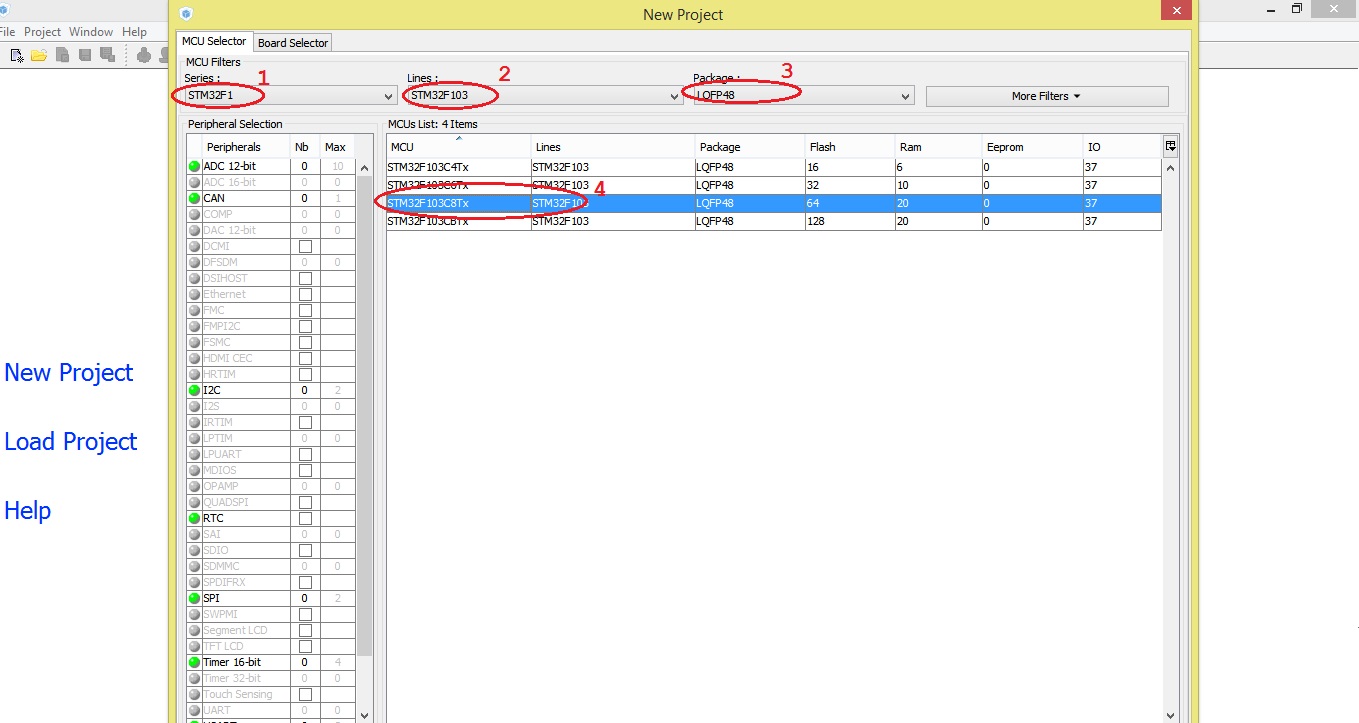
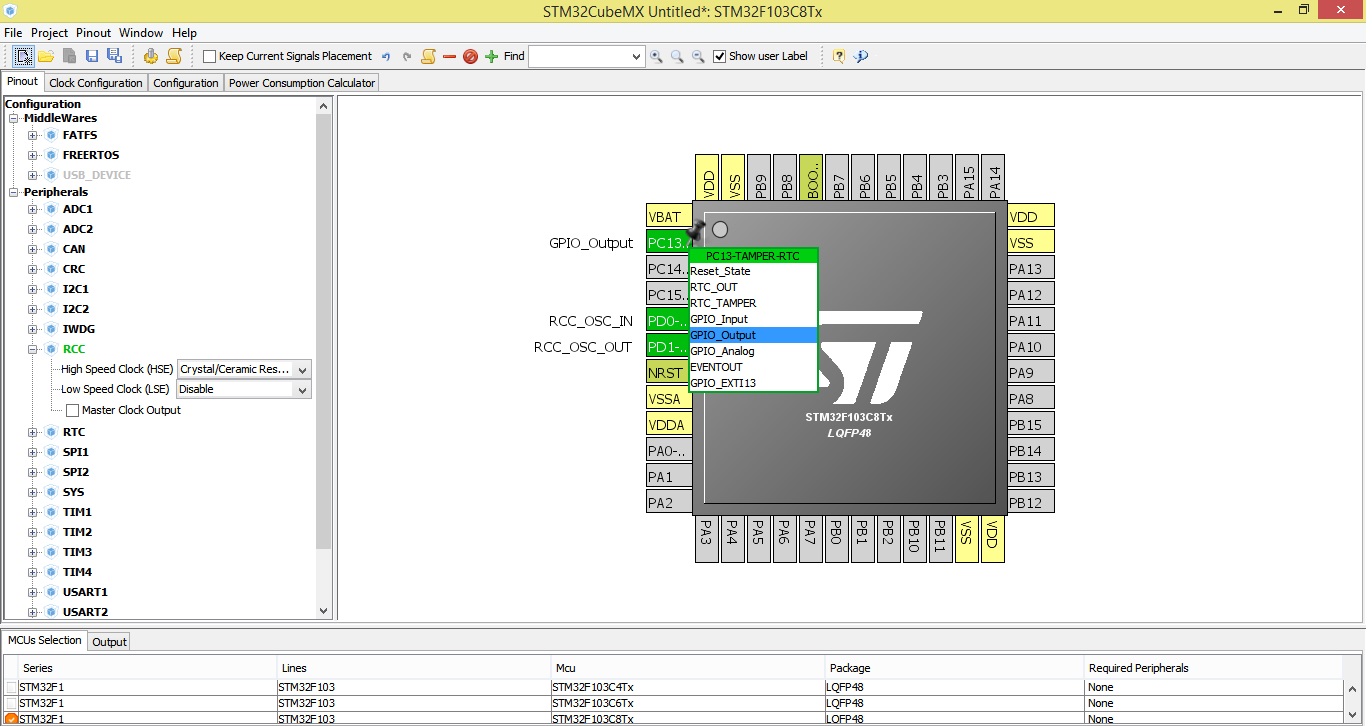
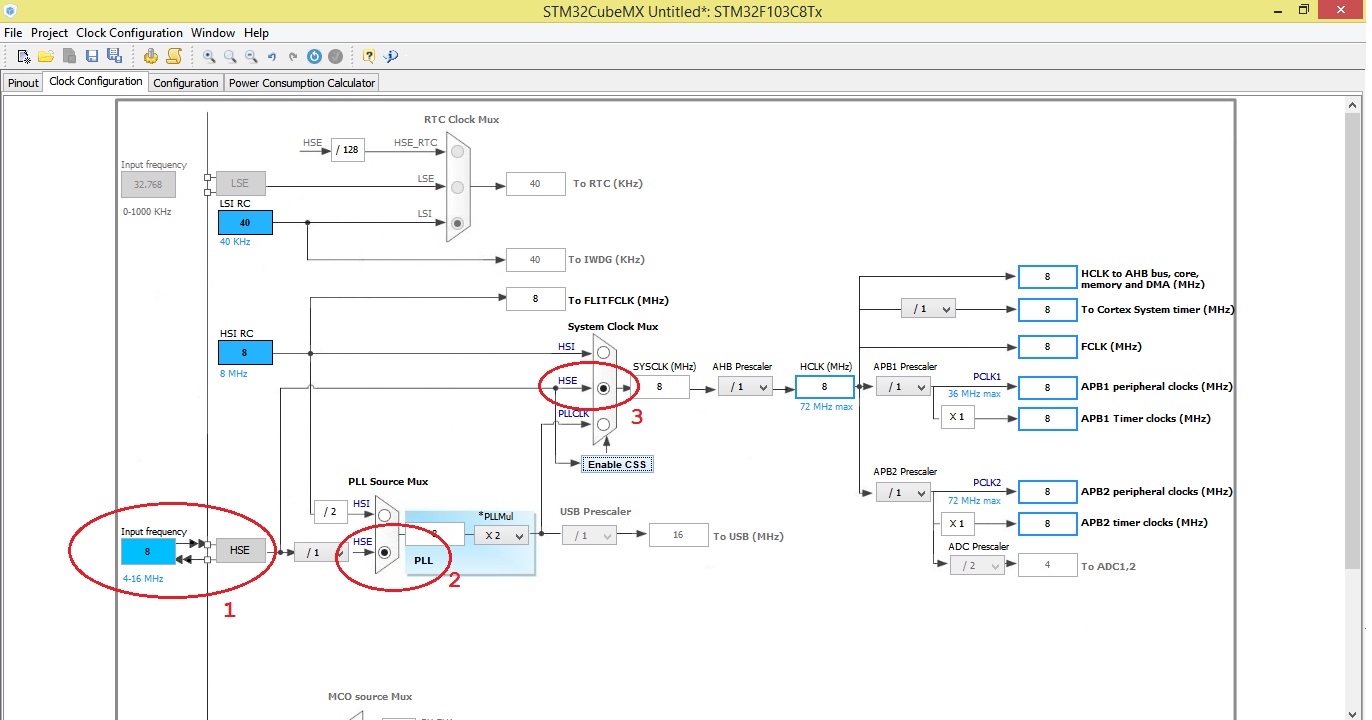
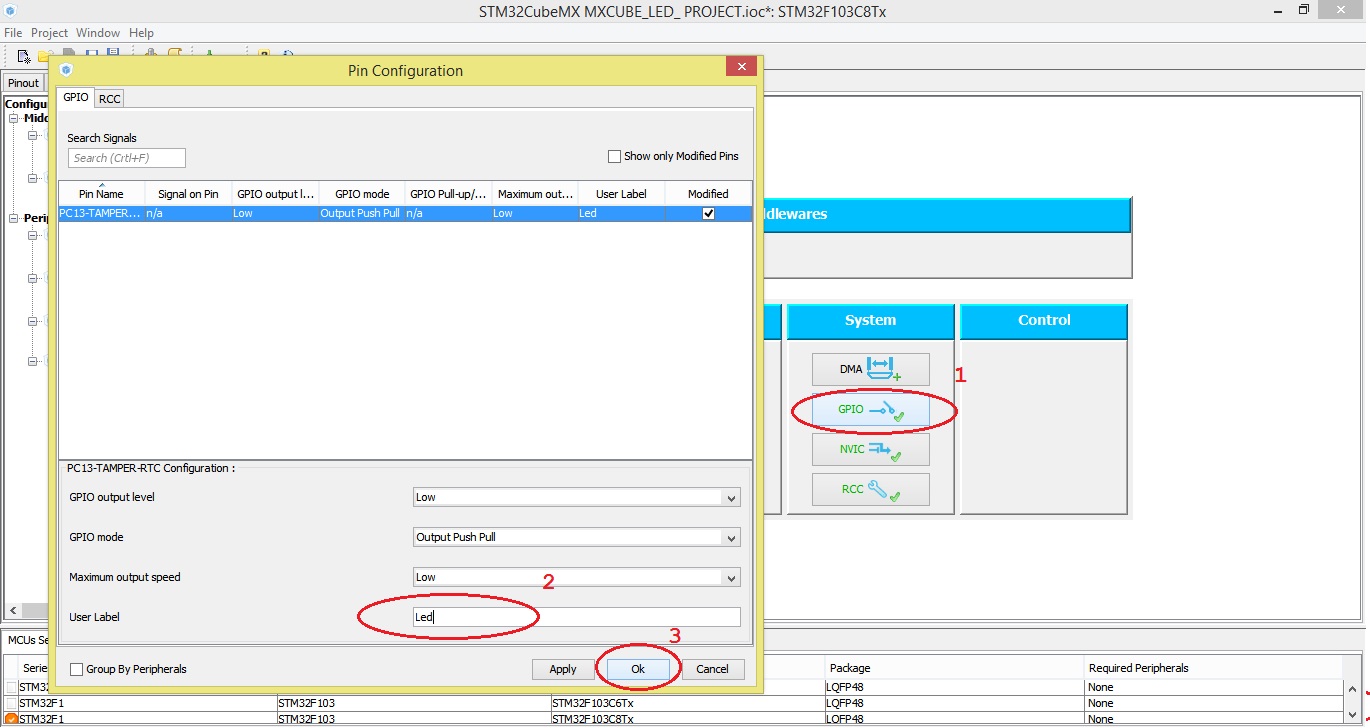
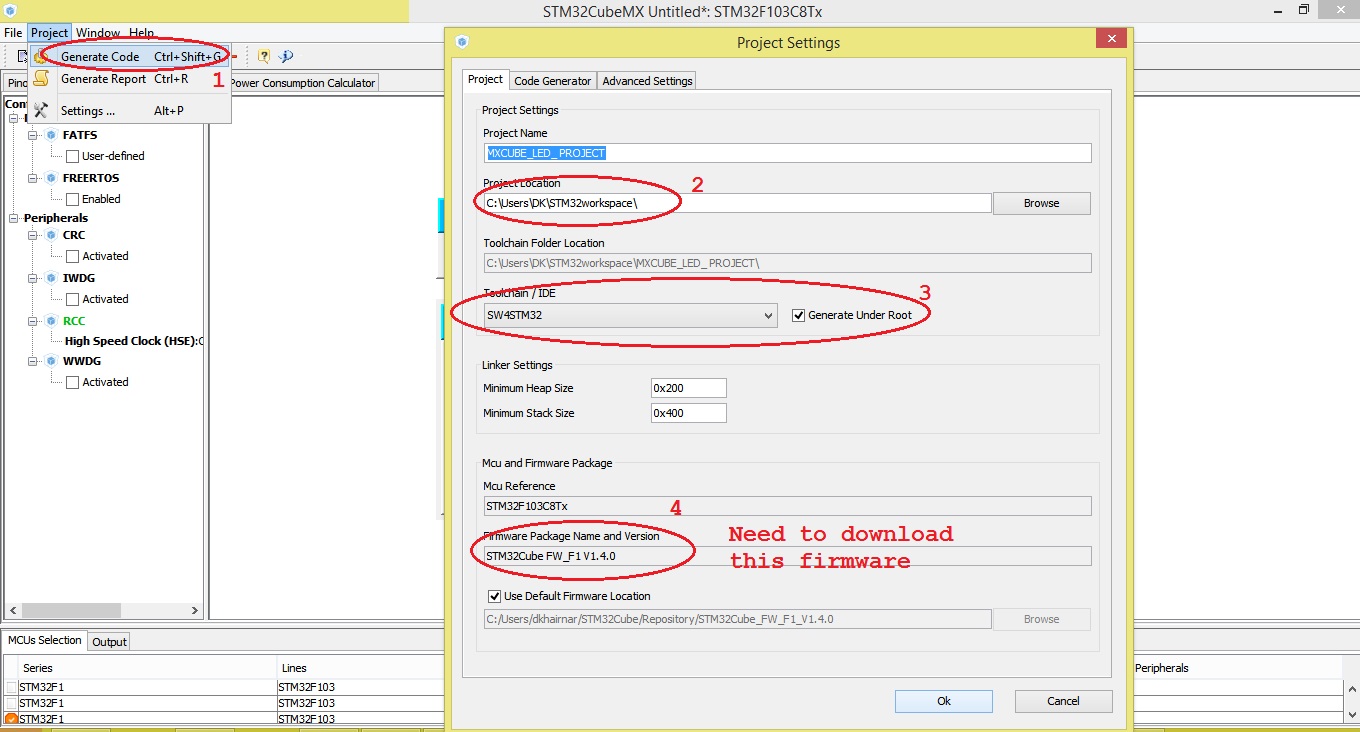
Follow the steps shown in picture to create and configure new project.
we take pin PC13 which have attached LED. We configure it as output pin.
Now after all setting generate new project. Here you need to download firmware files for STM32 std libs and hal libs it will show you link if you generate project first time.
>Select your chip ID
>Select peripherals which you want
>Configure system clock
>Configure components
>Generate code
Import Project in STM Work Bench
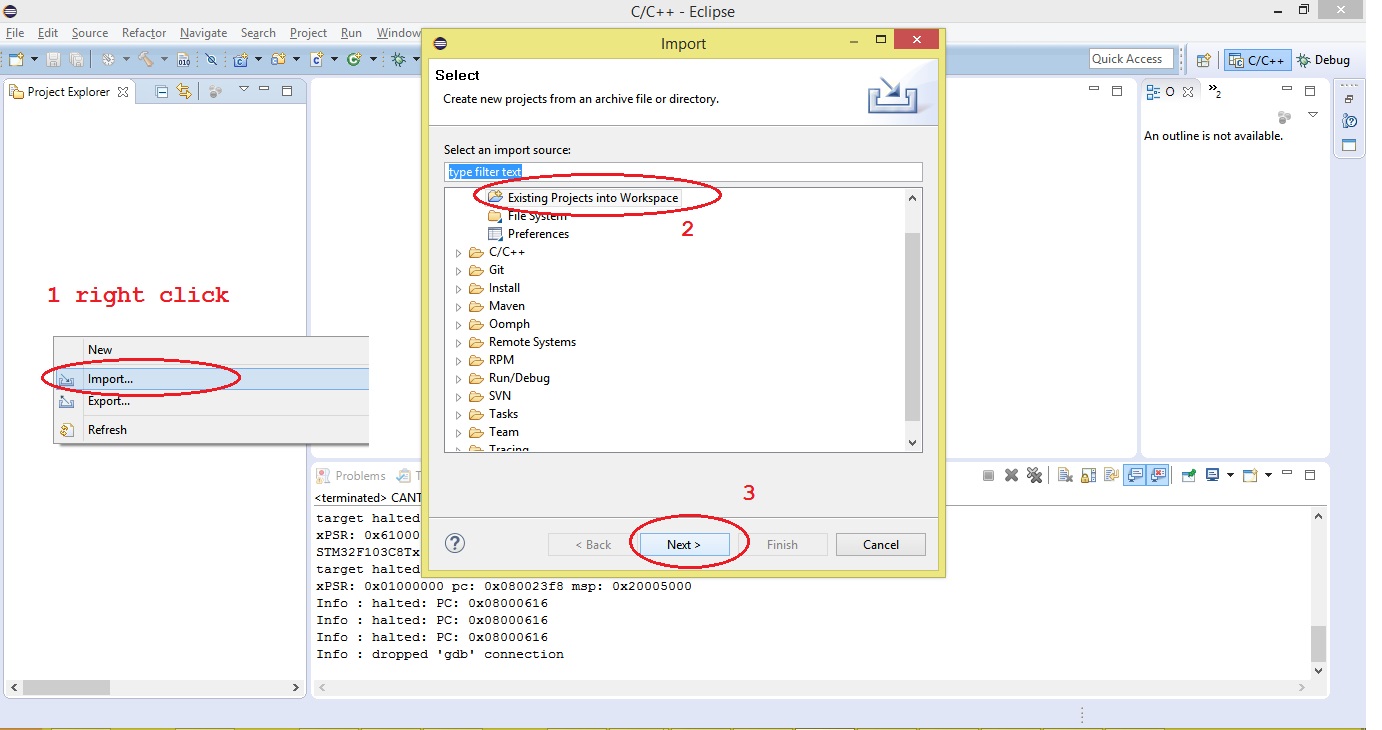
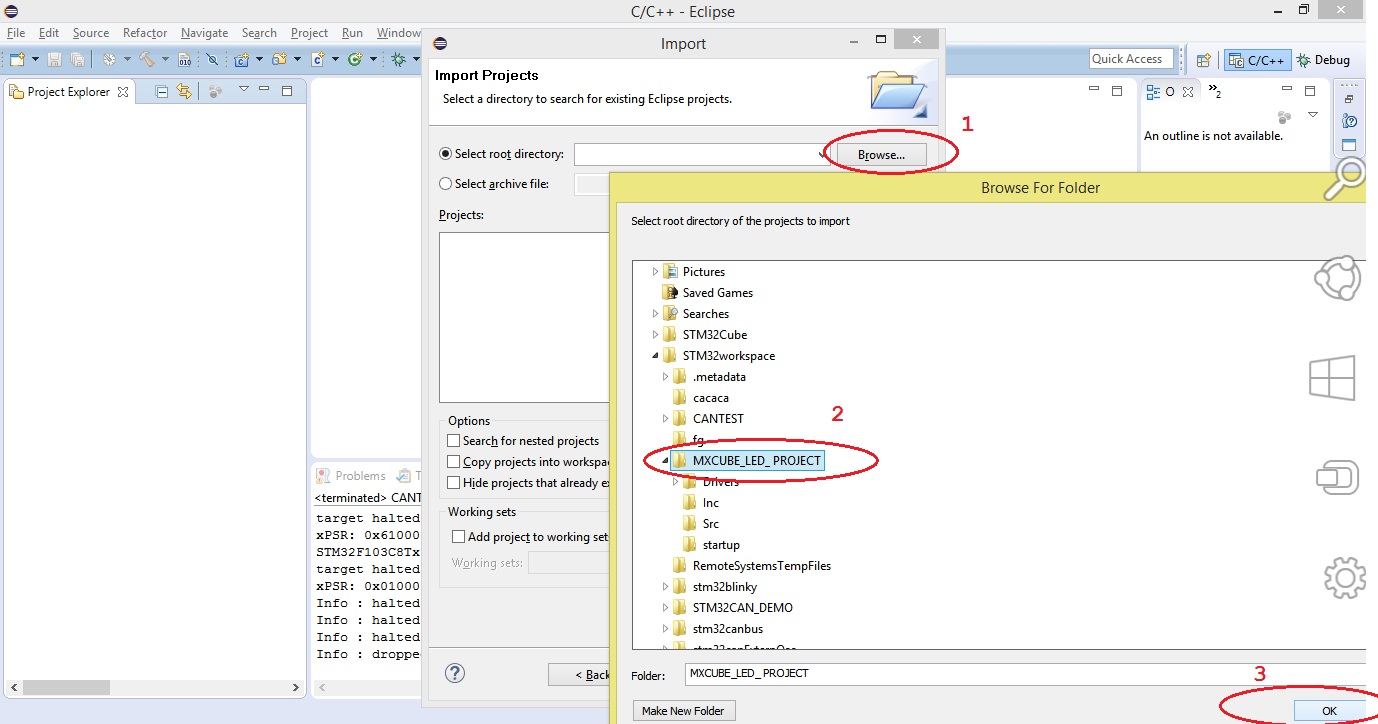
Open STM work bench. Right click on Project explorer and import project. select Exixting project into Workspace.
open main.c file
MXCUBE_LED_ PROJECT>Src>main.c
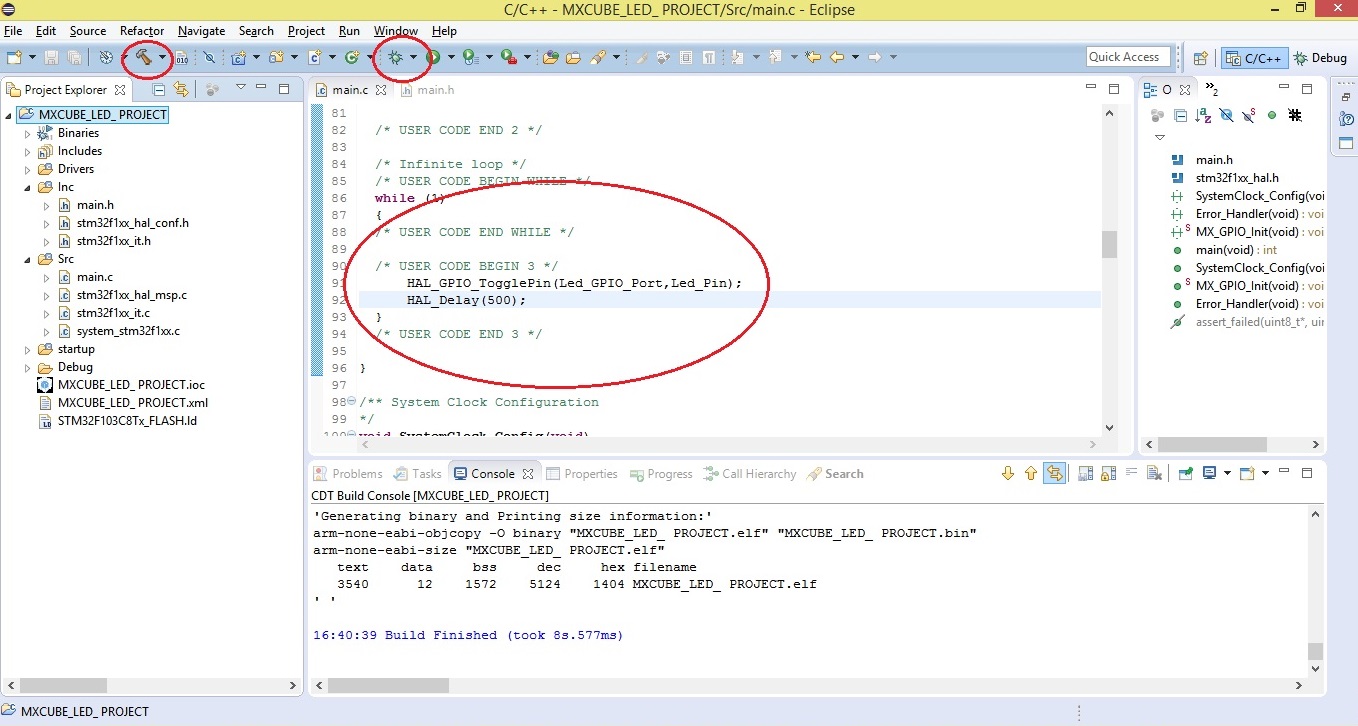
modify as shown in figure in while loop from main fuction
while (1)
{ /* USER CODE END WHILE */
/* USER CODE BEGIN 3 */
HAL_GPIO_TogglePin(Led_GPIO_Port,Led_Pin);
HAL_Delay(500);
}
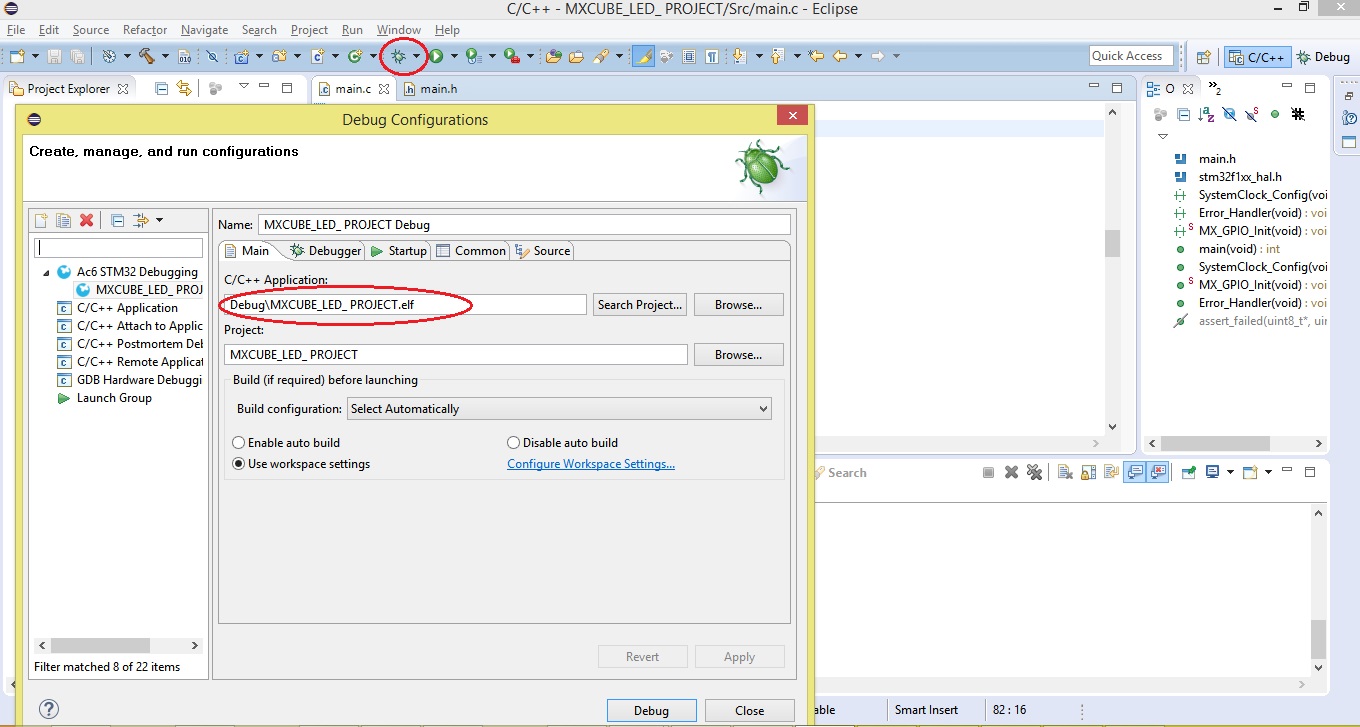
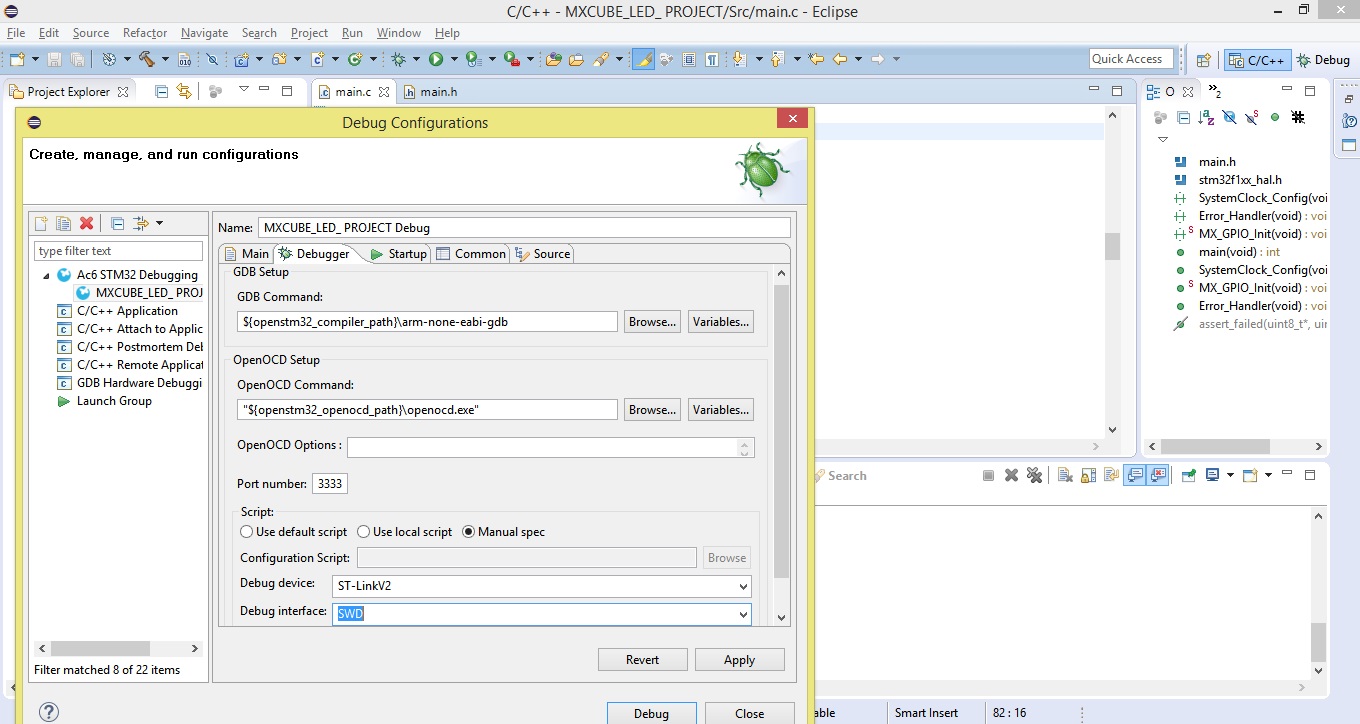
Debug configuration is shown in images.