STM32 Black Pill Board | Blinking On-board LED
by Maitali sharma in Circuits > Microcontrollers
88 Views, 1 Favorites, 0 Comments
STM32 Black Pill Board | Blinking On-board LED

This blog post is a guide to start your STM32 Black Pill and control the on-board LED using a program on STM32CubeIDE.
Supplies
Software:
- STM32CubeIDE
- STM32CubeProgrammer
Hardware:
- Desktop or a laptop
- USB-C cable
- STM32 Black Pill
Create a Project File on STM32CubeIDE
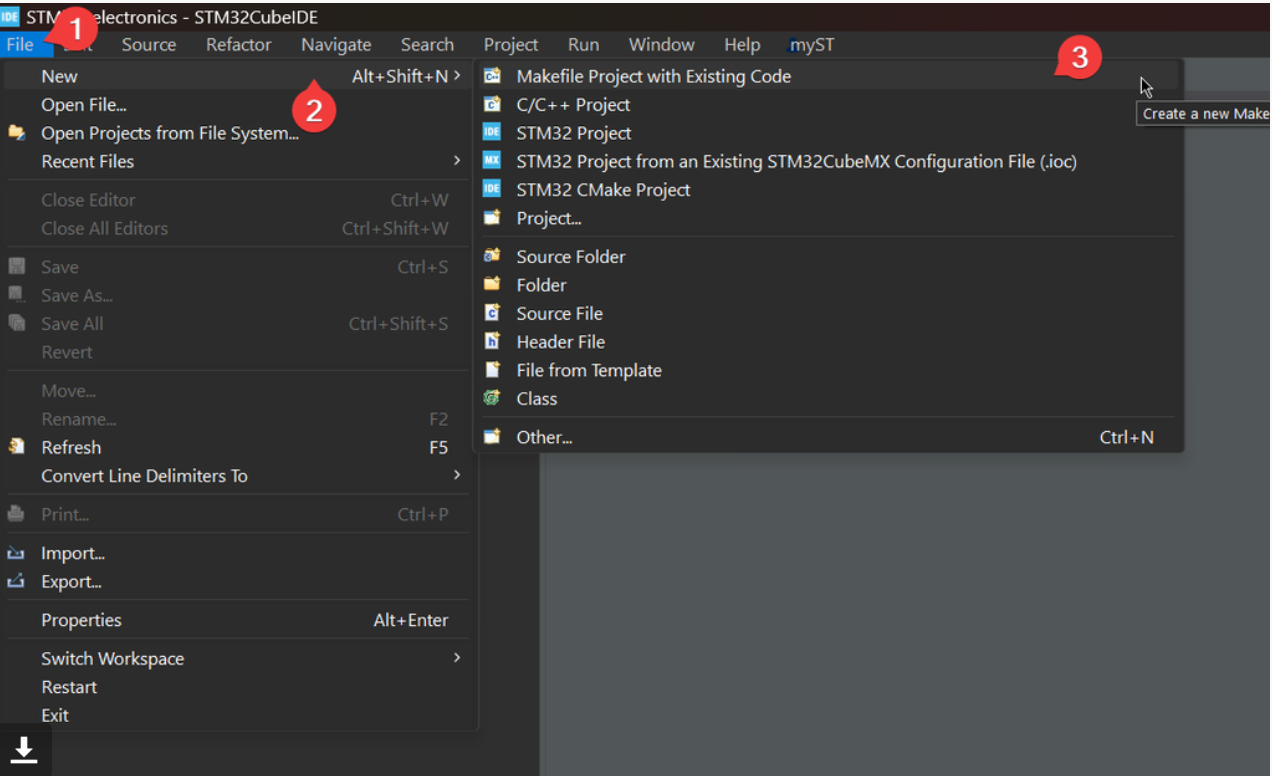
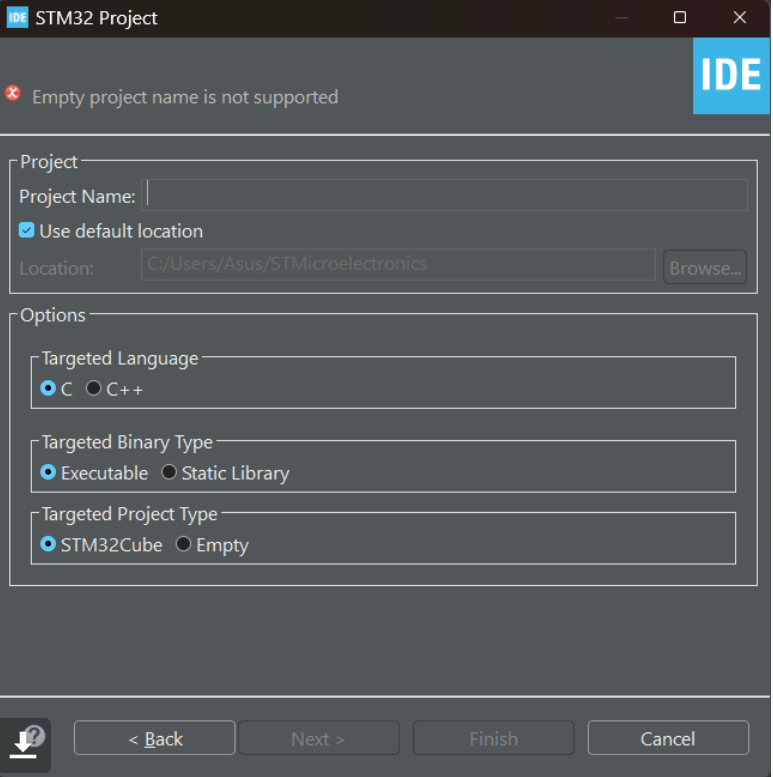
- Type the project name.
- Choose your preferred programming language, binary type and project type.
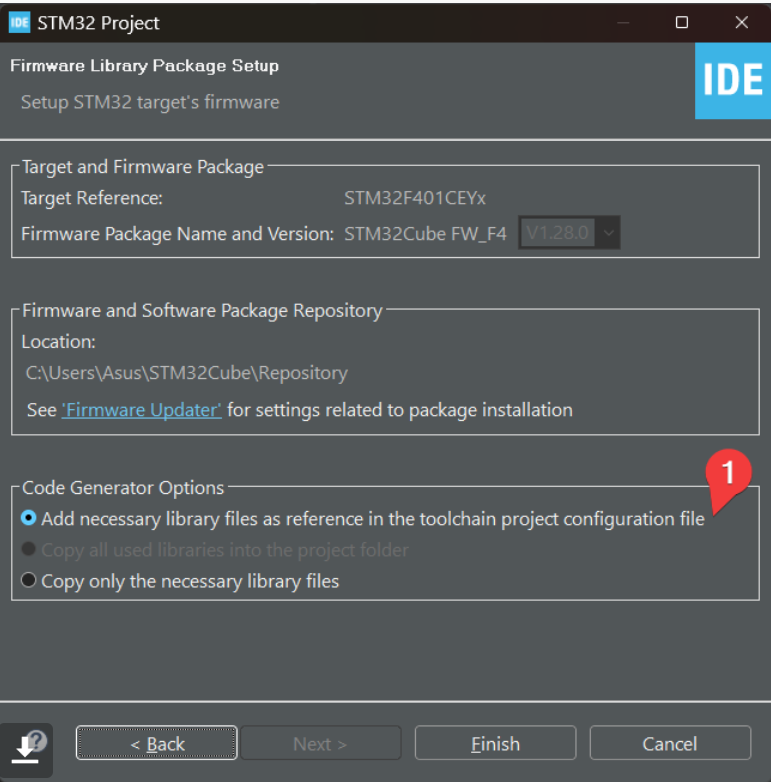
- Choose "Add necessary library files" for less errors and problems.
Pinout & Clock Configurations
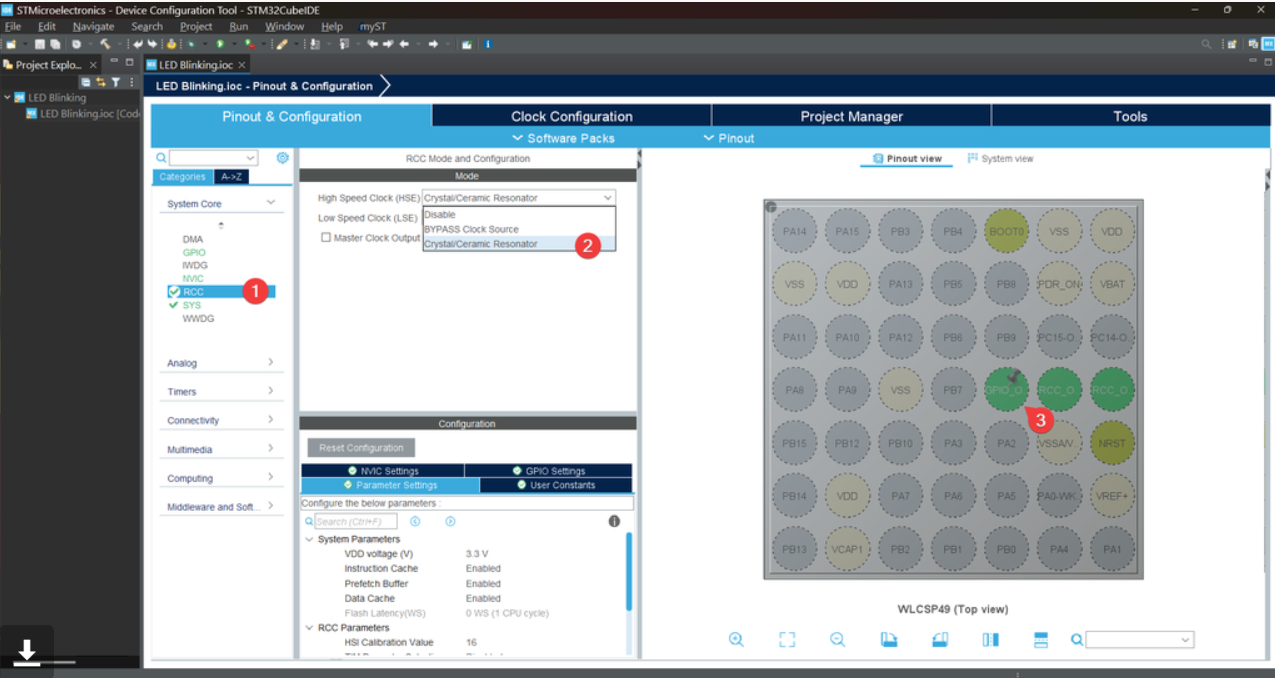
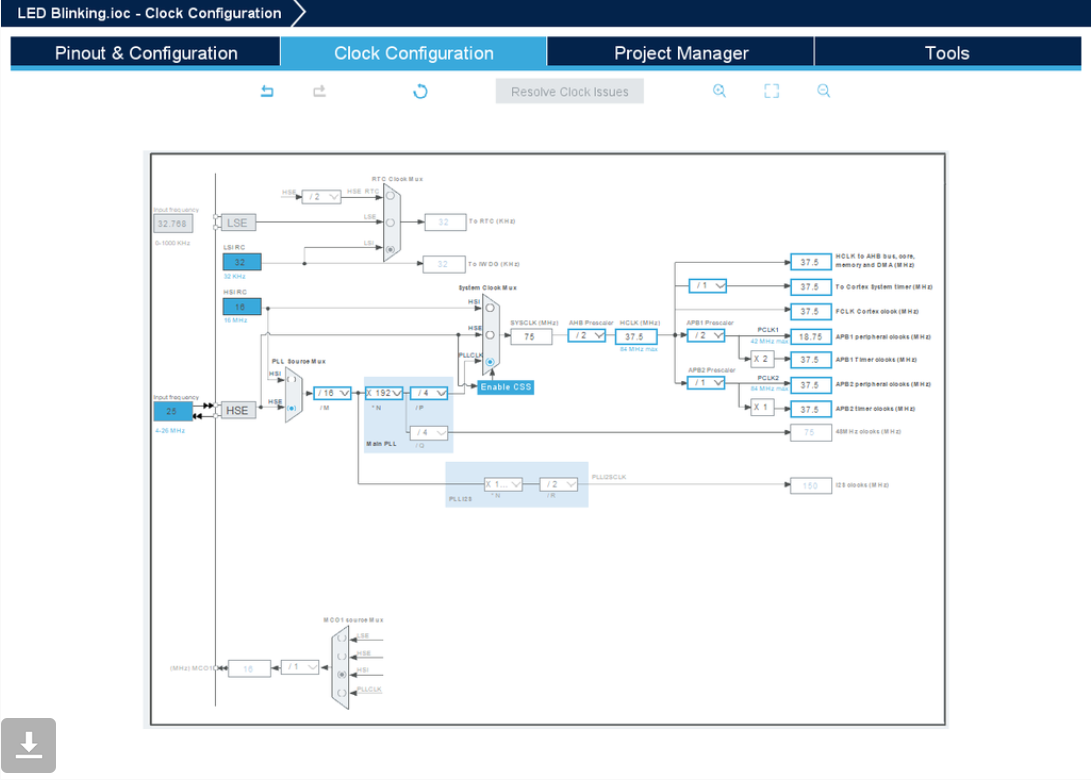
Save your file.
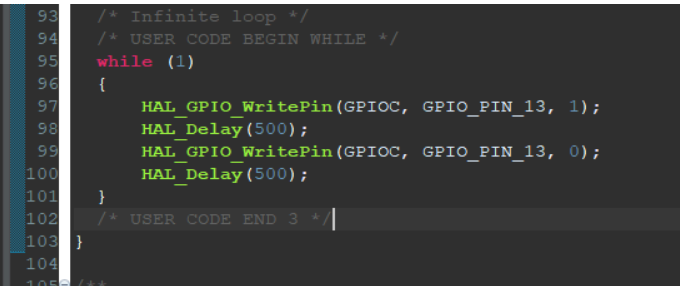
Code
![]6.png](/proxy/?url=https://content.instructables.com/FAK/3GJT/LVTJLX63/FAK3GJTLVTJLX63.png&filename=]6.png)

- Save your file, this will generate files.
- Go to Core < Src < main.c.
- Go to int main() which is around line 95.
- Change the code inside while(1).
- Debug the code .
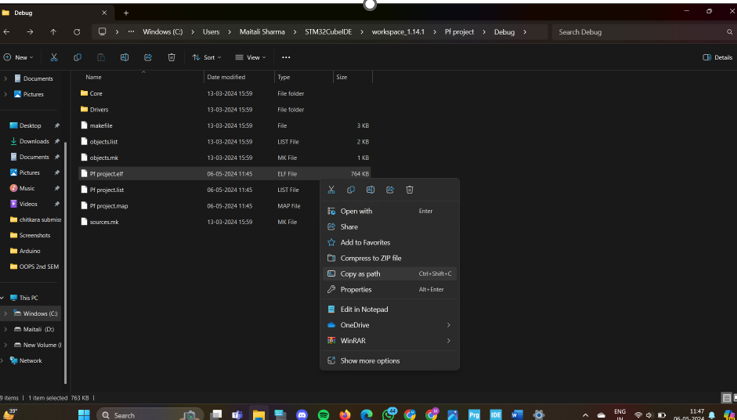
Open the Project File in File Explorer
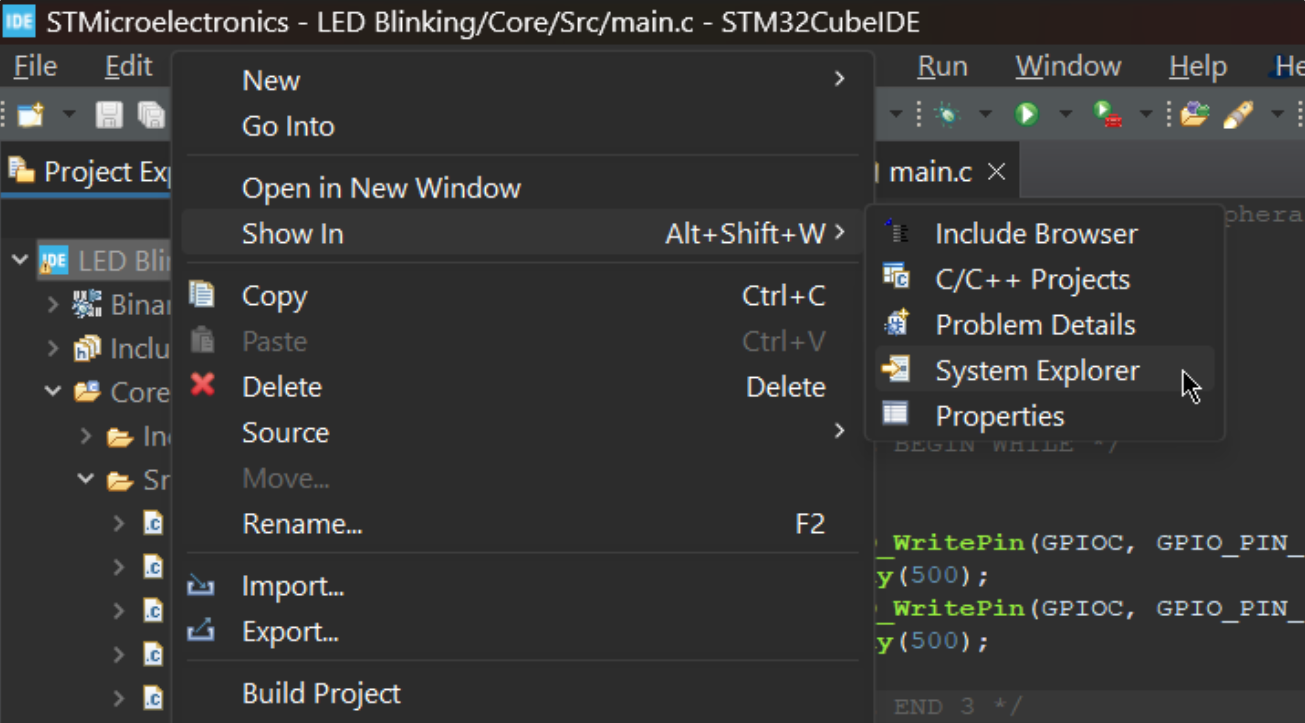
- Copy the path of .elf file.
Setup STM32CubeProgrammer
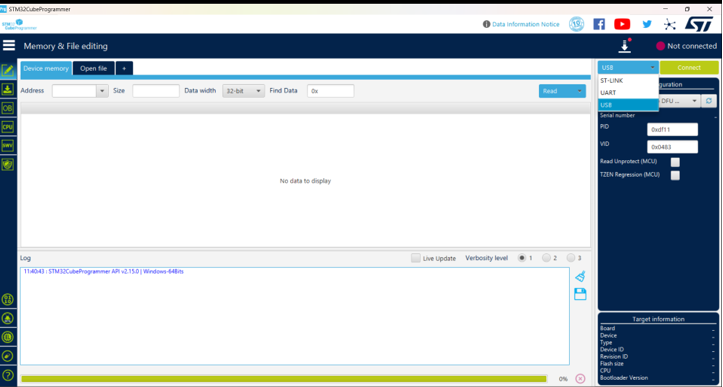
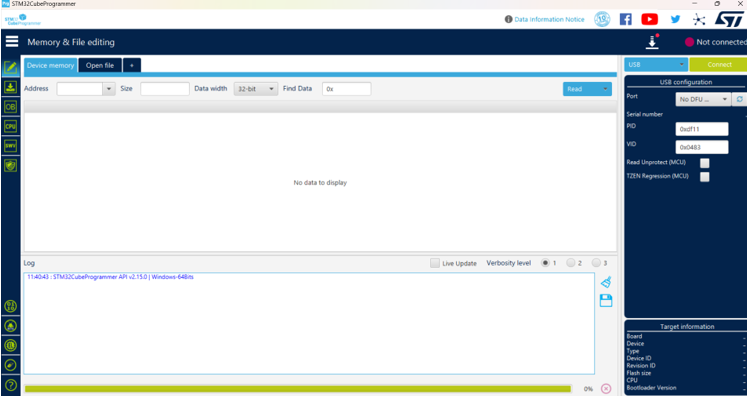
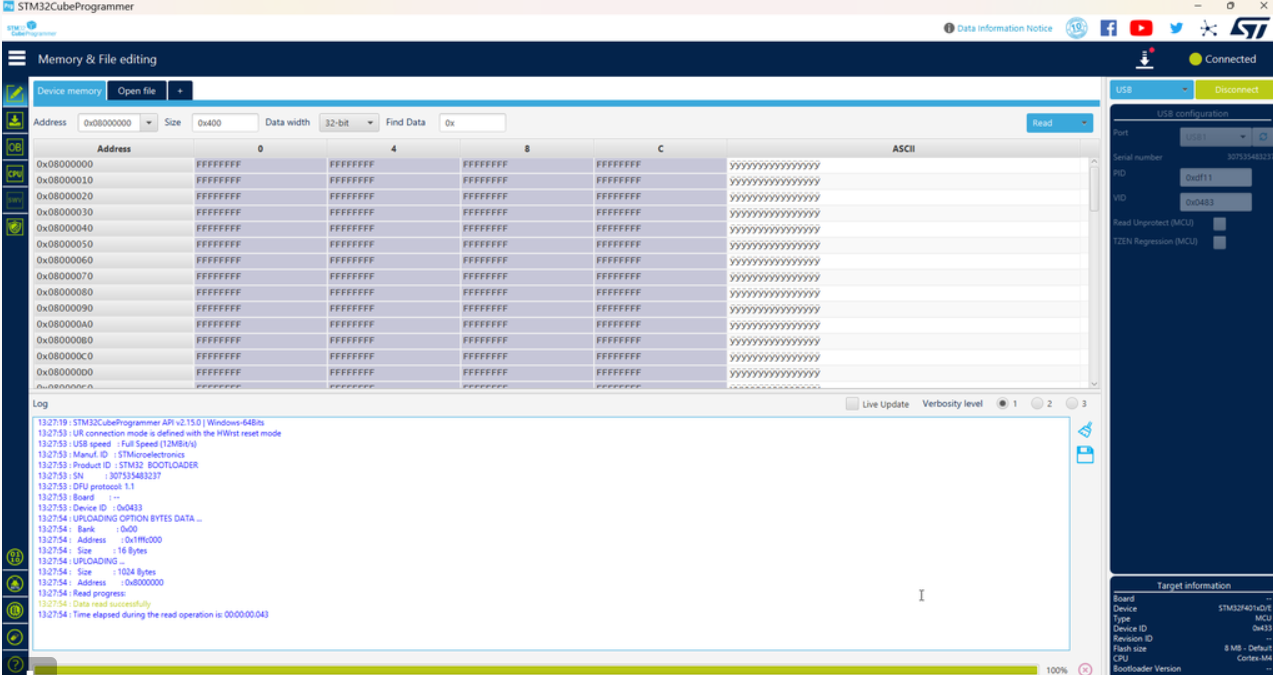
- We will bootload STM using USB, this tutorial does not use ST-Link.
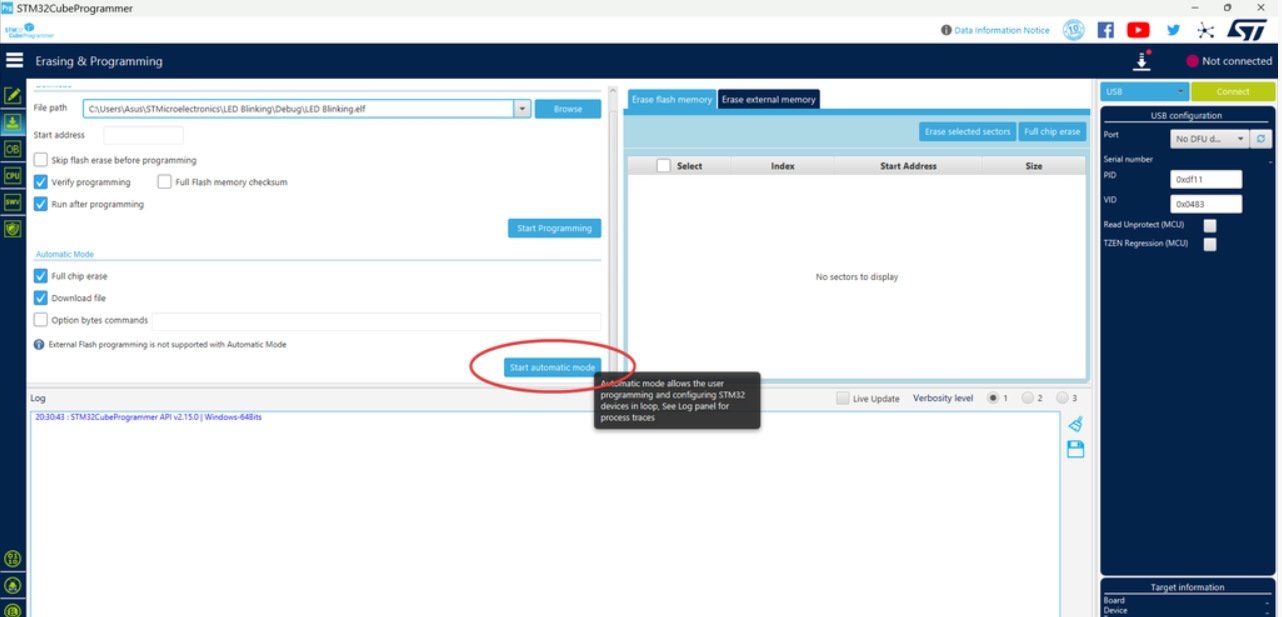
- Next, press on "Open file" and select the .elf file from the project folder.
- Press on "Download".
Result
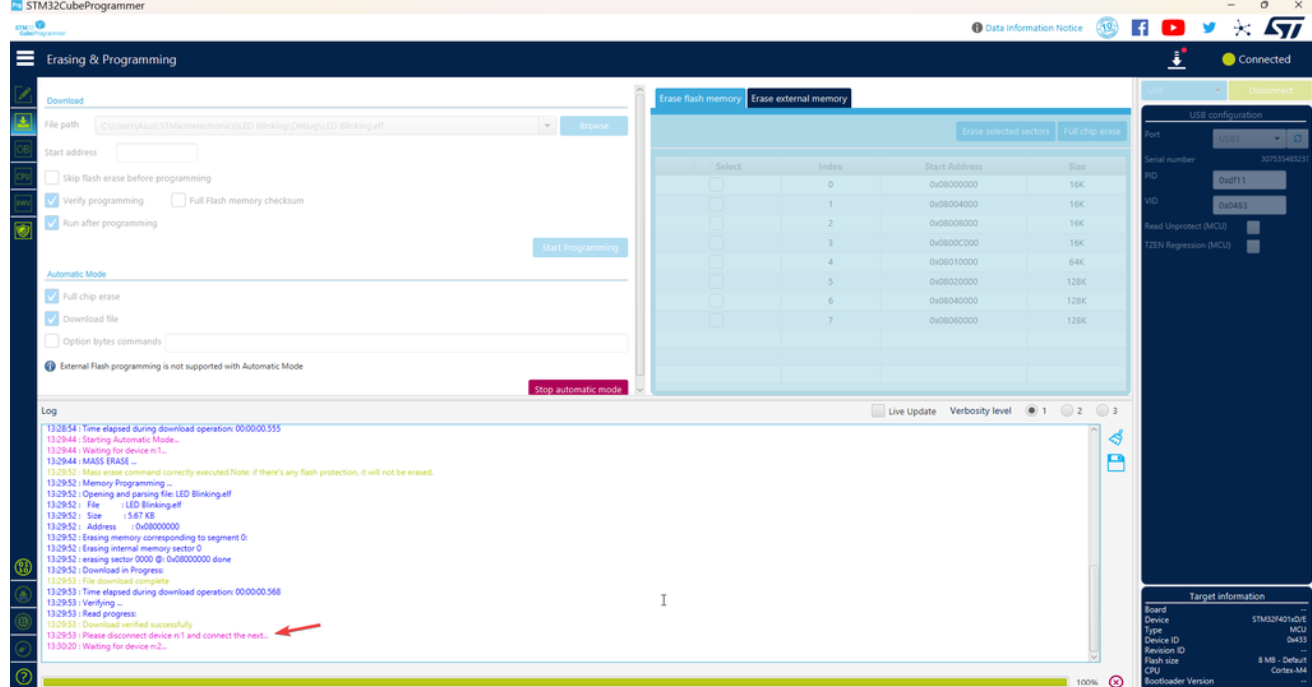
Once compiled, disconnect and reconnect the STM board using USB-C cable.
your STM32 Board's onboard LED should now start blinking.