SCALEY - the Filament Scale for 1kg Spools With ESP32
by INVESTEGATE in Circuits > Gadgets
774 Views, 10 Favorites, 0 Comments
SCALEY - the Filament Scale for 1kg Spools With ESP32


DIY Guide: A precise filament scale for weighing filament rolls to calculate the remaining filament.
Supplies
Material List:
- 1x HX711 + 5kg Load Cell (Screw hole distance 10mm)
- 1x 0,96" Inch OLED Display
- 1x Rotary Encoder Modul KY-040
- 1x Rocker Switch 10x15mm ON/OFF
- 1x ESP32 without soldered pins. DEV (With USB-C or Micro-USB)
- 1x Slide Switch 3pin 4mm
- 1x 100g Calibration Weight
- 4x Countersunk screws 2,5mm, 8mm length
- 2 x M4x16 (or x20) pan head
- 2 x M4x30
- 3 x M3x8 hex
- Wires
INTRO
Hello Makers,
you select the filament you want to measure using the dial. The result is the exact remaining filament amount. It is displayed in grams and meters. The weight of the spool is automatically deducted.
The Original is from @Whity and @KlausKoeln. Thank you for your work!
I created this remix to accommodate a larger filament list. Therefore, I used an ESP32. It also runs more smoothly than on an Arduino Nano.
PRINT SETTINGS
- 3-4 perimeters
- min. 20% Infill
- Brim
- Supports only for the TOP part.
Instructions:
Instructions:
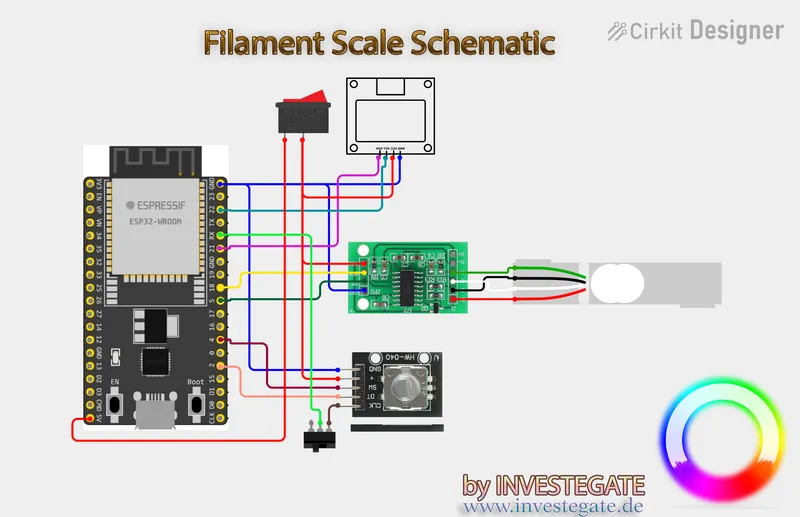
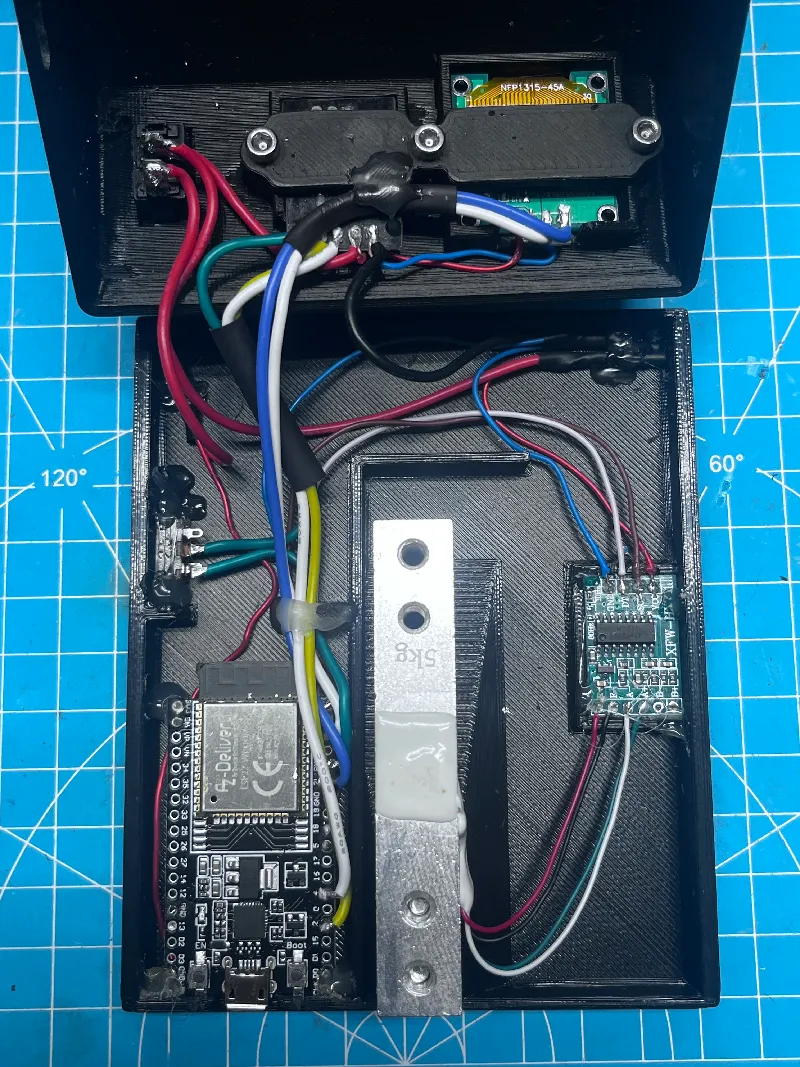
Wire everything as shown in the circuit diagram. Use hot glue to mount the ESP32, Slide Switch and the HX711 PCB.
Once you've soldered everything, you're ready to go. First, we need to flash the ESP32 with Arduino IDE. To do this, you'll need this driver: https://www.silabs.com/developer-tools/usb-to-uart-bridge-vcp-drivers?tab=downloads
Connect your ESP32 with USB to your PC.
Download the instructions for flashing the ESP32 in your language here. Follow the instructions: https://www.az-delivery.de/collections/kostenlose-e-books/products/esp32-nodemcu-kostenfreies-e-book?variant=8687877685344
You can also Download the ESP32 Board directly in the Arduino Board Manager.
In some cases you also need to install Python 2 & 3. https://www.python.org/downloads/
Now we need to calibrate the scale. Download here the Calibration.ino. Or use the preconfigured one here in the Downloads.
Download and install the following libraries in Arduino if not already present:
- HX711_ADC
- Adafruit_SSD1306
- NewEncoder (Must be installed manually from gfvalvo/NewEncoder)
Now open the Calibration.ion in Arduino IDE. Change the pins to:
- const int HX711_dout = 5; //mcu > HX711 dout pin
- const int HX711_sck = 18; //mcu > HX711 sck pin
Now go in Arduino to Tools. Set this settings there:
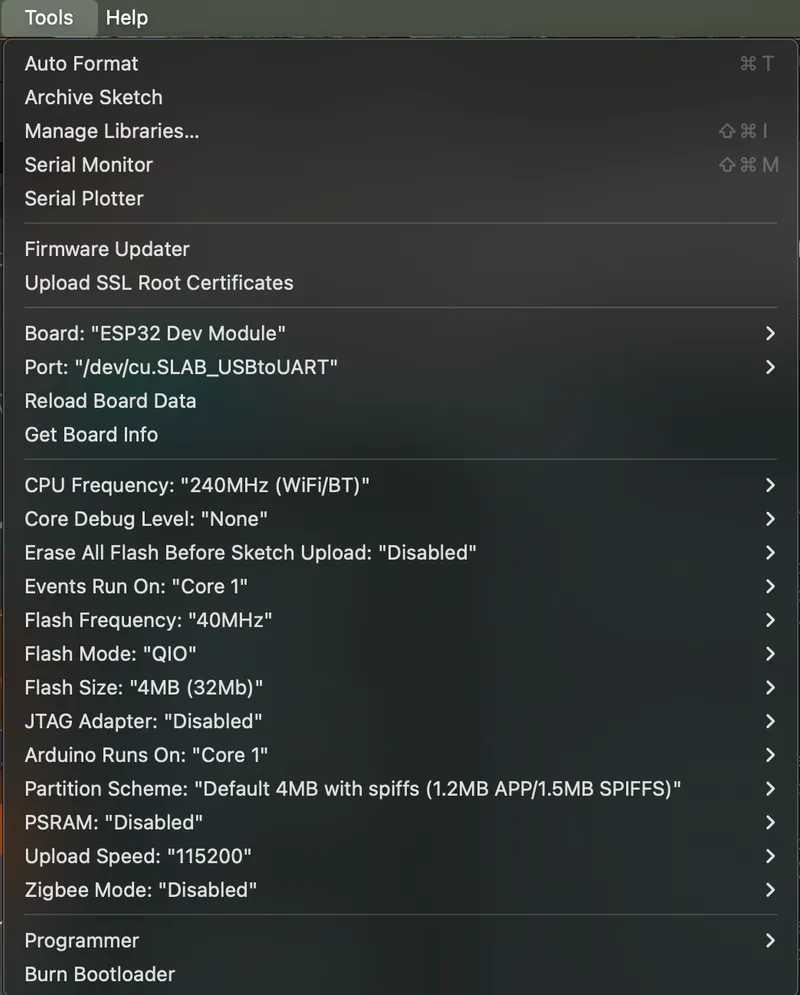
Before uploading & flashing, you need to set your Filament Scale to OFF (Rocker Switch) and the Slide Switch to OFF (P). Otherwise the programming will fail.
Now start the Upload. If the upload does not start automatically, press the "Boot button" on the ESP32 while "connection" is displayed.
After finishing, disconnect the USB cable. Now turn the ON the Rocker Switch. The Slide Switch has to stay OFF (P).
Connect the ESP32 with USB again. Now go back to Arduino IDE and open the serial monitor.
Set baud rate to 57600. (Here you can see how it looks like: https://youtu.be/sxzoAGf1kOo?si=YfpNkIc4tdpsjhBT&t=462)
Now follow the instructions of the serial monitor. Send “t”. Now place a Calibration Weight on the Scale. Enter the Weight of your calibration Weight (This could be for example 100.0)
Your calibration value will now be displayed. Write it down. If the value is negative, simply delete the negative sign.
It's normal for the scale to fluctuate slightly. If the scale fluctuates by a few grams +-5g with a weight of, say, 100g, use a value that's lower than the actual weight. It's better to have too much filament than too little ;)
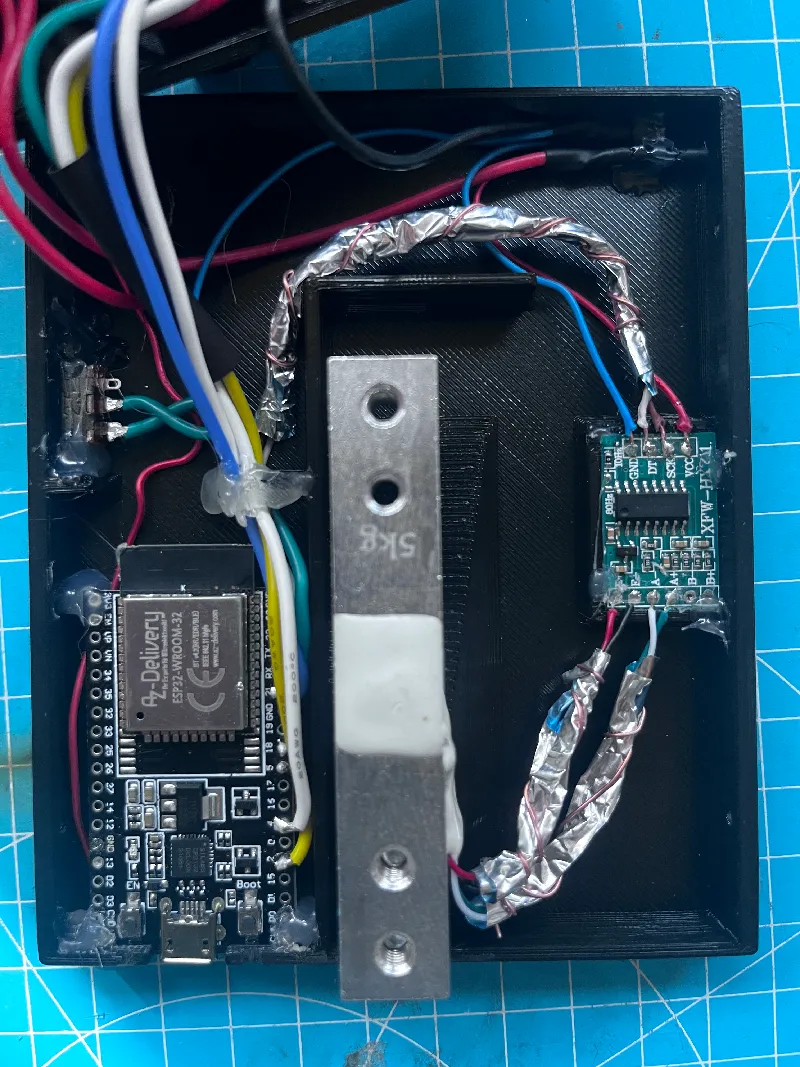
However, if the fluctuations are too large, try shielding the wires from the load cell and the HX711. See the image. You can also connect the shields to Ground. Dont use a Capacitor.
Your can also type in the serial monitor “r” for repeat calibration. Or type “c” to enter your own value.
Now the calibration is finished. Open now the Filament-Scale-ESP32.ino in Arduino.
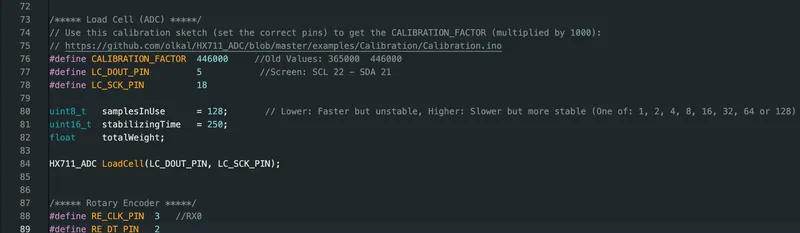
Set there your calibration value here: #define CALIBRATION_FACTOR
If the value is negative, simply delete the negative sign. If your Value is for example -446, multiply it with 1000. So in this example you need to set CALIBRATION_FACTOR to 446000.
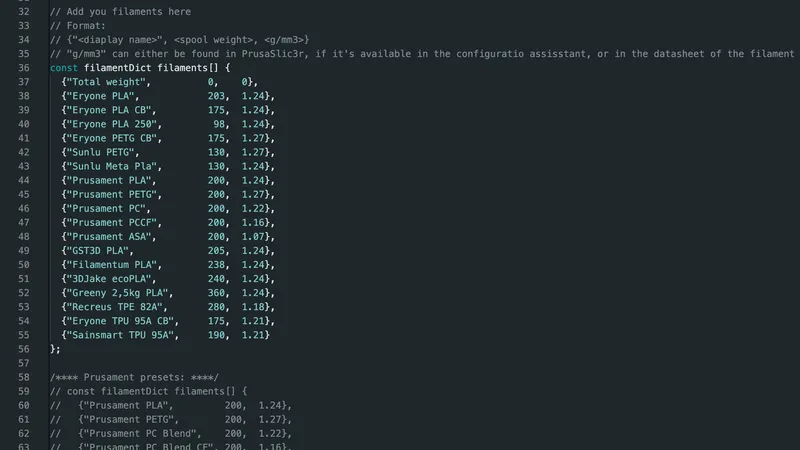
After this, set you filament list. You can of course weigh your empty spools or sometimes the manufacturer also states the empty weight of the spool.
Here you find a big list of Filament Spool Information:
- https://3dfilamentprofiles.com/filaments
- https://emptyspool.github.io
- https://web.archive.org/web/20240303062439/https://3dprintingwiki.mywikis.wiki/wiki/Spool_weight
- https://3dprinting.stackexchange.com/questions/6558/is-there-a-table-or-list-of-tare-weights-of-empty-spools-of-various-manufacturer
- https://3dprinting.stackexchange.com/questions/6558/is-there-a-table-or-list-of-tare-weights-of-empty-spools-of-various-manufacturer
The g/mm3 or g/cm3 value of the filaments do you find in your slicer. (For example PLA 1.24)
Add your filaments here. Make sure you punctuate correctly. If you don't know anything about programming, leave the first and last entries unchanged. Only change the entries in between. Simply duplicate a row and then change that one.
Before uploading & flashing, you need to set your Filament Scale to OFF (Rocker Switch) and the Slide Switch to OFF (P). Otherwise the programming will fail.
Now start the Upload. After finishing, disconnect the USB cable.
How to measure:
Now turn the ON the Rocker Switch and also turn ON The Slide Switch.
Now you can connect your Filament Scale with USB and all should work fine now :)
Select the filament you want to weigh. Now place the filament spool on the scale. Press the dial. Remove the filament spool. The measured value will now appear on the display.
If your scale drifts after a short or long period of time, it's not a problem. Simply measure again. You should then get an accurate reading for at least a few seconds. If you want to be sure, simply repeat the measurement.
ENJOY :)