Running Two Dual Hybrid Stepper Motors Using an Arduino
by BN Srikar in Circuits > Arduino
2598 Views, 2 Favorites, 0 Comments
Running Two Dual Hybrid Stepper Motors Using an Arduino
![IMG_20190118_095256[1].jpg](/proxy/?url=https://content.instructables.com/FMH/JMDT/K0ATYBT9/FMHJMDTK0ATYBT9.jpg&filename=IMG_20190118_095256[1].jpg)
![IMG_20190118_095313[1].jpg](/proxy/?url=https://content.instructables.com/FNB/J4G3/K0ATYBT3/FNBJ4G3K0ATYBT3.jpg&filename=IMG_20190118_095313[1].jpg)
Here I'm going to tell you how to control a hybrid synchronous stepper motor.
These stepper motors has 4 wires coming out namely A+ A- B+ B-. I assume that you have done research and sure about each of the wires. This is very important.
We will be using Drivers to control these motors. This is because these motors run on currents around 2.8A - 6A (check datasheet for your stepper motor).
We will be using Arduino uno serially to control.
Connections to the Driver

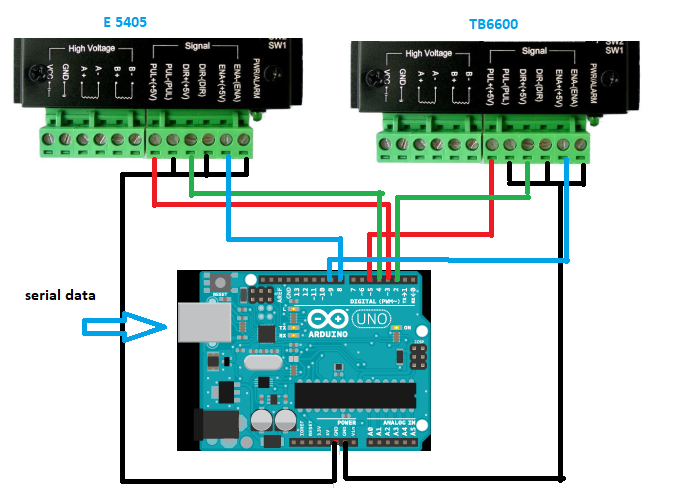
from image make the connections and check the same with the comments made in the Arduino program.
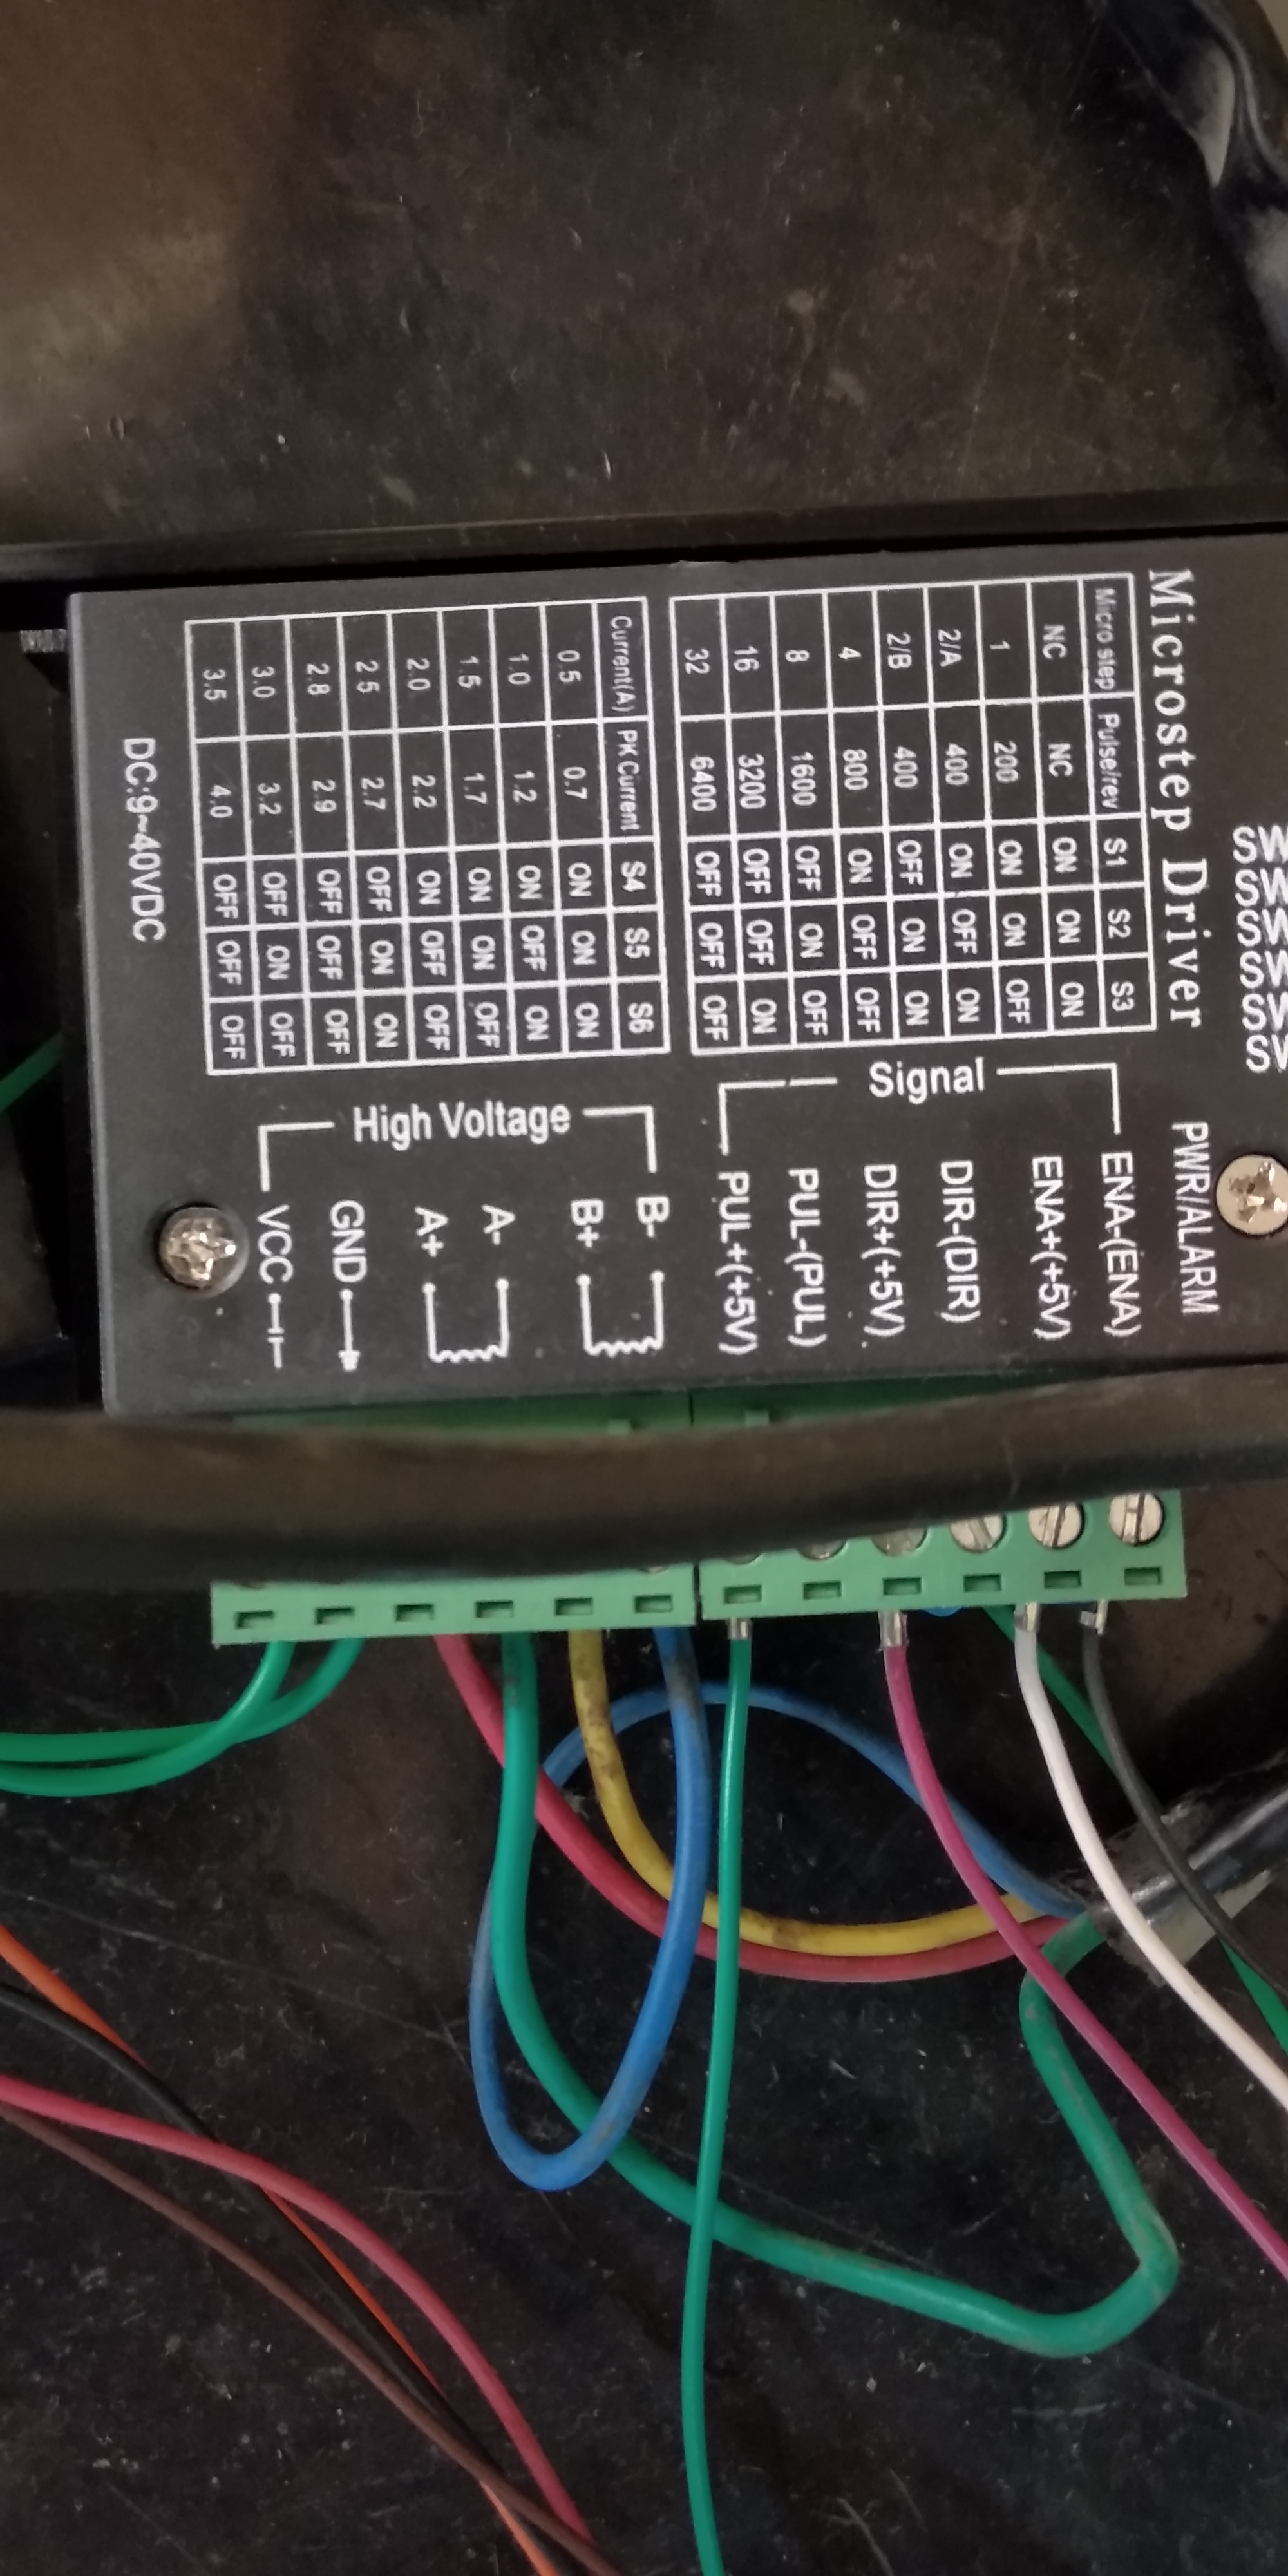
Here we will be connecting 9v power to stepper driver. These drivers also isolate the Arduino from the voltages given to the driver. The drivers have different ports like PUL+, PUL-, DIR+, DIR-, GND, EN+, EN-.
Connect PUL-, DIR-, EN- and GND to the ground of Arduino.
PUL+: Adruino generate pulses and sends to these ports. This pulses ON and OFF makes the motor rotate.
DIR+: If it is high then the motor rotates in right.
EN+ : This should be always low.
Arduino Code
// for stepper motor 1
const int stepPin = 5;
const int dirPin = 2;
const int enPin = 8;
//stepper motor 2
const int stepPin2 = 3;
const int dirPin2 = 4;
const int enPin2 = 9;
char data;
void setup() { // configure the pins
pinMode(stepPin,OUTPUT);
pinMode(dirPin,OUTPUT);
pinMode(enPin,OUTPUT);
digitalWrite(enPin,LOW); //motor1 is enabled
pinMode(stepPin2,OUTPUT);
pinMode(dirPin2,OUTPUT);
pinMode(enPin2,OUTPUT);
digitalWrite(enPin2,LOW); //motor2 is enabled
Serial.begin(9600);
}
void loop() {
if(Serial.available()>0) // we give commands through serial monitor
{
data=Serial.read(); //command from monitor
if(data=='a') //stepper 1 right
{
digitalWrite(enPin,LOW);
digitalWrite(dirPin,HIGH); //motor will rotate write
for(int x = 0; x < 48000; x++)
{
digitalWrite(stepPin,HIGH);
delayMicroseconds(500);
digitalWrite(stepPin,LOW);
delayMicroseconds(500);
Serial.print("*");
if(Serial.read()=='e') //to stop
{
digitalWrite(enPin,HIGH);
Serial.print("stop");
break;
}
}
}
if(data=='b') //stepper motor1 left
{
digitalWrite(enPin,LOW);
digitalWrite(dirPin,LOW);
for(int x = 0; x < 48000; x++)
{
digitalWrite(stepPin,HIGH);
delayMicroseconds(500);
digitalWrite(stepPin,LOW);
delayMicroseconds(500);
Serial.print("$");
if(Serial.read()=='e') //to stop
{ digitalWrite(enPin,HIGH);
Serial.print("stop");
break;
}
}
}
if(data=='c') //stepper motor 2 right
{
digitalWrite(enPin2,LOW);
digitalWrite(dirPin2,LOW);
for(int x = 0; x < 48000; x++)
{
digitalWrite(stepPin2,HIGH);
delayMicroseconds(500);
digitalWrite(stepPin2,LOW);
delayMicroseconds(500);
Serial.print("%");
if(Serial.read()=='e')
{ digitalWrite(enPin,HIGH);
Serial.print("stop");break;
}
}
}
if(data=='d') //stepper motor 2 left
{ digitalWrite(enPin2,LOW);
digitalWrite(dirPin2,HIGH);
for(int x = 0; x < 48000; x++)
{ digitalWrite(stepPin2,HIGH);
delayMicroseconds(500);
digitalWrite(stepPin2,LOW);
delayMicroseconds(500);
Serial.print("^");
if(Serial.read()=='e') //to stop
{ digitalWrite(enPin,HIGH);
Serial.print("stop");
break;
}
}
}
}
}
Conclusion


This code worked with me.
To extend this we can make our own GUI serial monitor using Processing.ide .
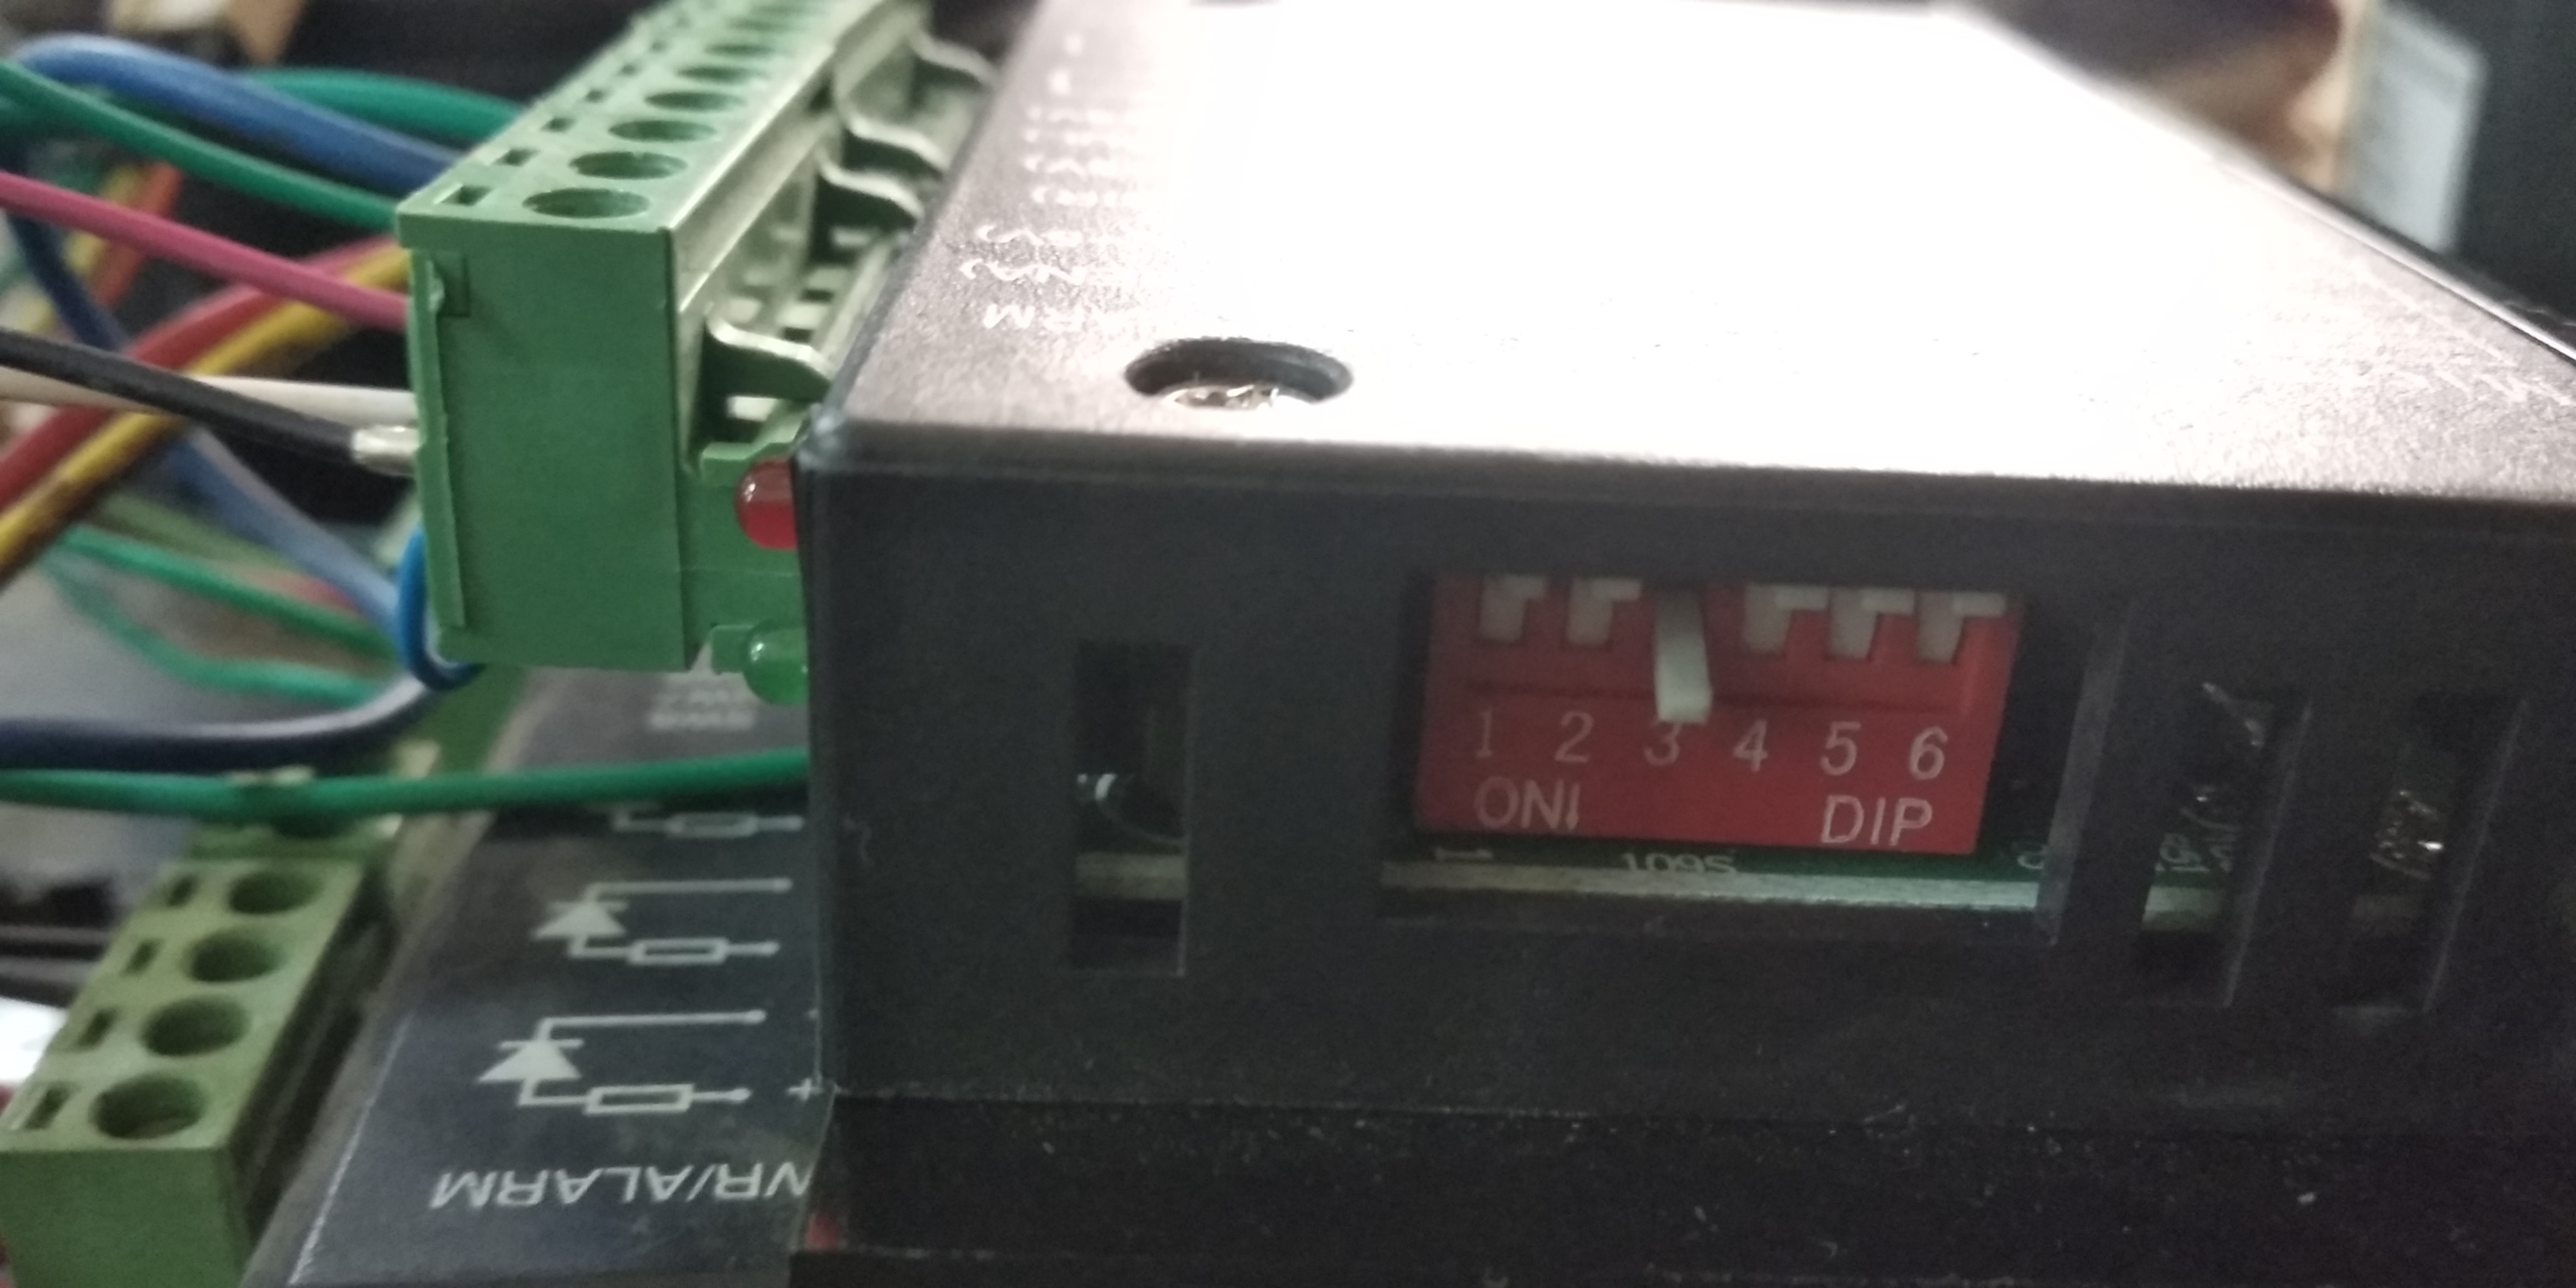
NOTE: before setting currents read the motor specifications clearly. Otherwise it may get damaged. The current and step angle can be set by the DIP of driver.
NOTE: I have not programmed according to step angle.
This programmed can be trimmed wisely for one stepper motor.