Running Programs on the DMS
by AutodeskTechnologyCenterSF in Workshop > Tools
540 Views, 1 Favorites, 0 Comments
Running Programs on the DMS
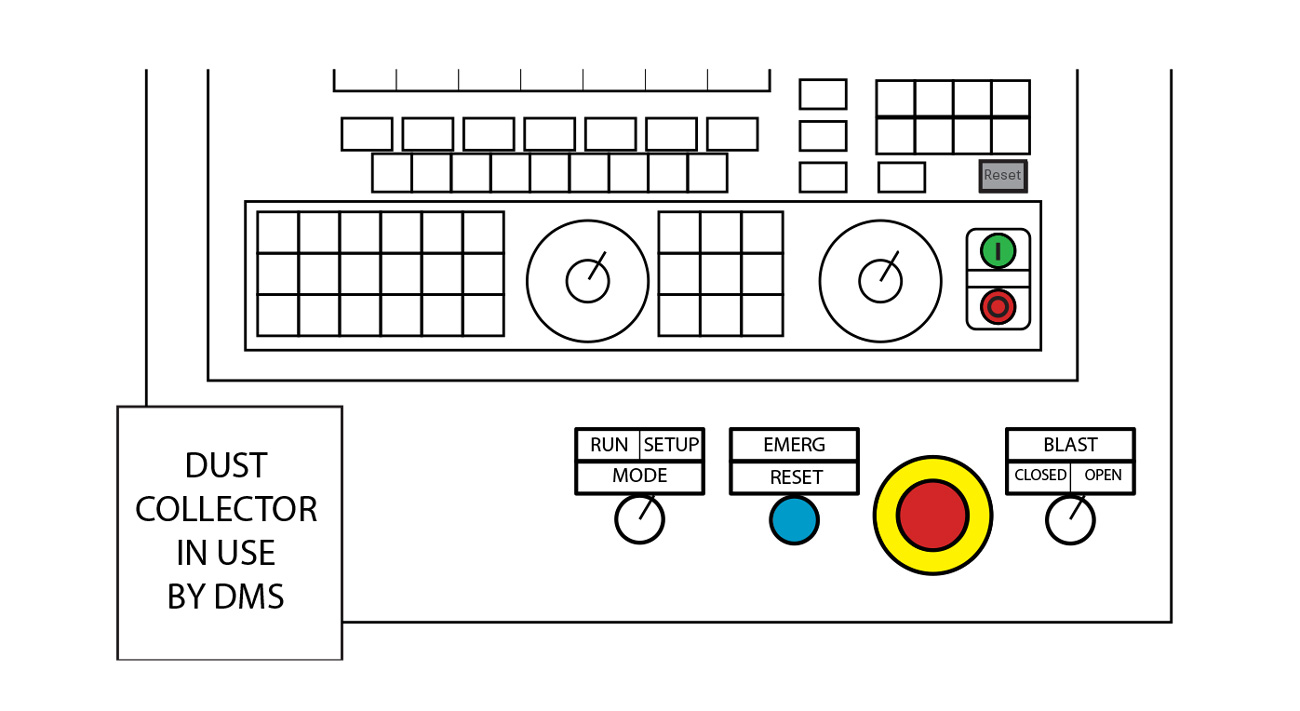
Remember to use the spindle dust collector when possible.
Warm Up the Spindle
The spindle must be warmed up before use. Follow these steps if you're the first person to use the machine for the day.
There should be a small diameter tool in the spindle.
- Turn the key to Run mode.
- The door must be closed.
- Navigate to the Main Menu.
- Press Execute. (F1)
- Use the arrow keys to select the Spindle Warmup Program.
- Press Enter.
- Press Cycle Start to run the program.
- The spindle will run for about 5 minutes.
Go over the pre-run checklist while the spindle is warming up.
Pre-Run Checklist
You're ready to run the program.
Confirm that these tasks have been completed.
- All tools have been loaded.
- Use the setup sheet.
- Confirm that the tool numbers in CAM match the numbers in the machine.
- You measured actual material size, updated the CAM program and regenerated the toolpaths.
- The tool library file is the same version that you used in the CAM program.
- All tools were measured for length.
- Work Offset (G54) has been set.
Load the Program
Post Process your file to the thumb drive from the CAM software.
- The file must be a 6 digit number. Do not use 900000 and above.
- The file must end with .pim
- The latest post processor is in the Pier 9 Tool Library Instructable.
- Insert your thumb drive into the USB slot on the side of the machine, near the power switch.
- From the Main Menu, press Utilities. (F6)
- Press Explorer. (F7)
- This will show the available memory sources.
- Navigate to USB Disk & press Enter.
- Navigate to your program.
- Press Actions. (F3)
- Select Copy and press Enter.
- Navigate to HARD DISK/prg.
- Press Actions. (F3)
- Select Paste and press Enter.
- It's OK to overwrite an existing program.
- Press Main Menu.
Run the Program
- Check that the probe cover is closed.
- Ensure the key is in Run mode.
- The door must be closed.
- Press Execute. (F1)
- Select Hard Disk. (F1)
- Type your 6 digit program number and press Enter.
- Set the Feed Rate Override to 0.
- Keep your hand near the knob until the program is running without any problems.
- Press Cycle Start.
- Slowly increase the Feed Rate Override as the tool is descending towards the material.
- Check the "To Go" Z value on the controller when the tool is descending to prevent collisions.
- If all is well, increase to 100%.
Reduce the override after every tool change.
Cleanup


Plan on 30 minutes to clean up.
Stop the dust collector
- Turn the key to Setup Mode.
- Go to MDI mode.
- Open the dust collection shroud.
- M66, Cycle Start
- Turn the Blast Gate switch to Off.
- Turn off the woodshop dust collector if it's not in use.
- Return the sign to the DMS controller.
Remove the tools
- Jog the spindle to the door.
- Press USER.
- Press Manual Tool Eject.
- Press Enable Tool Eject.
- Remove the tool from the spindle.
- Hold the tool to keep it from dropping.
- Press and release the green button on the spindle.
- Press EXIT twice to return to jog mode.
- Place library tools back into the drawer.
- Remove custom tools from the tool holder.
- Put away the tool and tool holder.
Repeat for all tools.
Clean the router & surrounding area
- Use a broom, dust pan & trash bag for the majority of the debris.
- Use a vacuum for the details.
- Use a vacuum labeled for the correct material.
Shut down the router
- Check that the spindle is empty & all tools are put away.
- Run the Goodnight program from the controller.
- From the Main Menu, press Execute.
- Press Memory.
- Select the Goodnight program.
- Press Enter and Cycle Start.
- Open the door.
- Throw the main power switch.
- Get your thumb drive while you're back there.