Rubber Band Powered Flying Thing
by Fhloe in Workshop > 3D Printing
904 Views, 10 Favorites, 0 Comments
Rubber Band Powered Flying Thing
.png)
I am a student from Portage Central Highschool taking Mechatronics Classes in Vicksburg. I wanted to challenge myself with this project. It was inspired by some other flying butterfly projects I had seen online but I went and completely reworked the design so its easier to build. After some messing around with popsicle sticks I came up with a design I thought worked well. I then used Fusion 360 to model my design and make it easier for other people to repeat and improve on. I hope you like it!
Supplies
-Rubber bands(a lot)
-Paper
-Clear tape
-Paperclip
-Pliers
-16 gauge copper wire
-Wire cutters
Downloads
-First things first you need to get the attached files for the fusion 360 models and print this guy out.
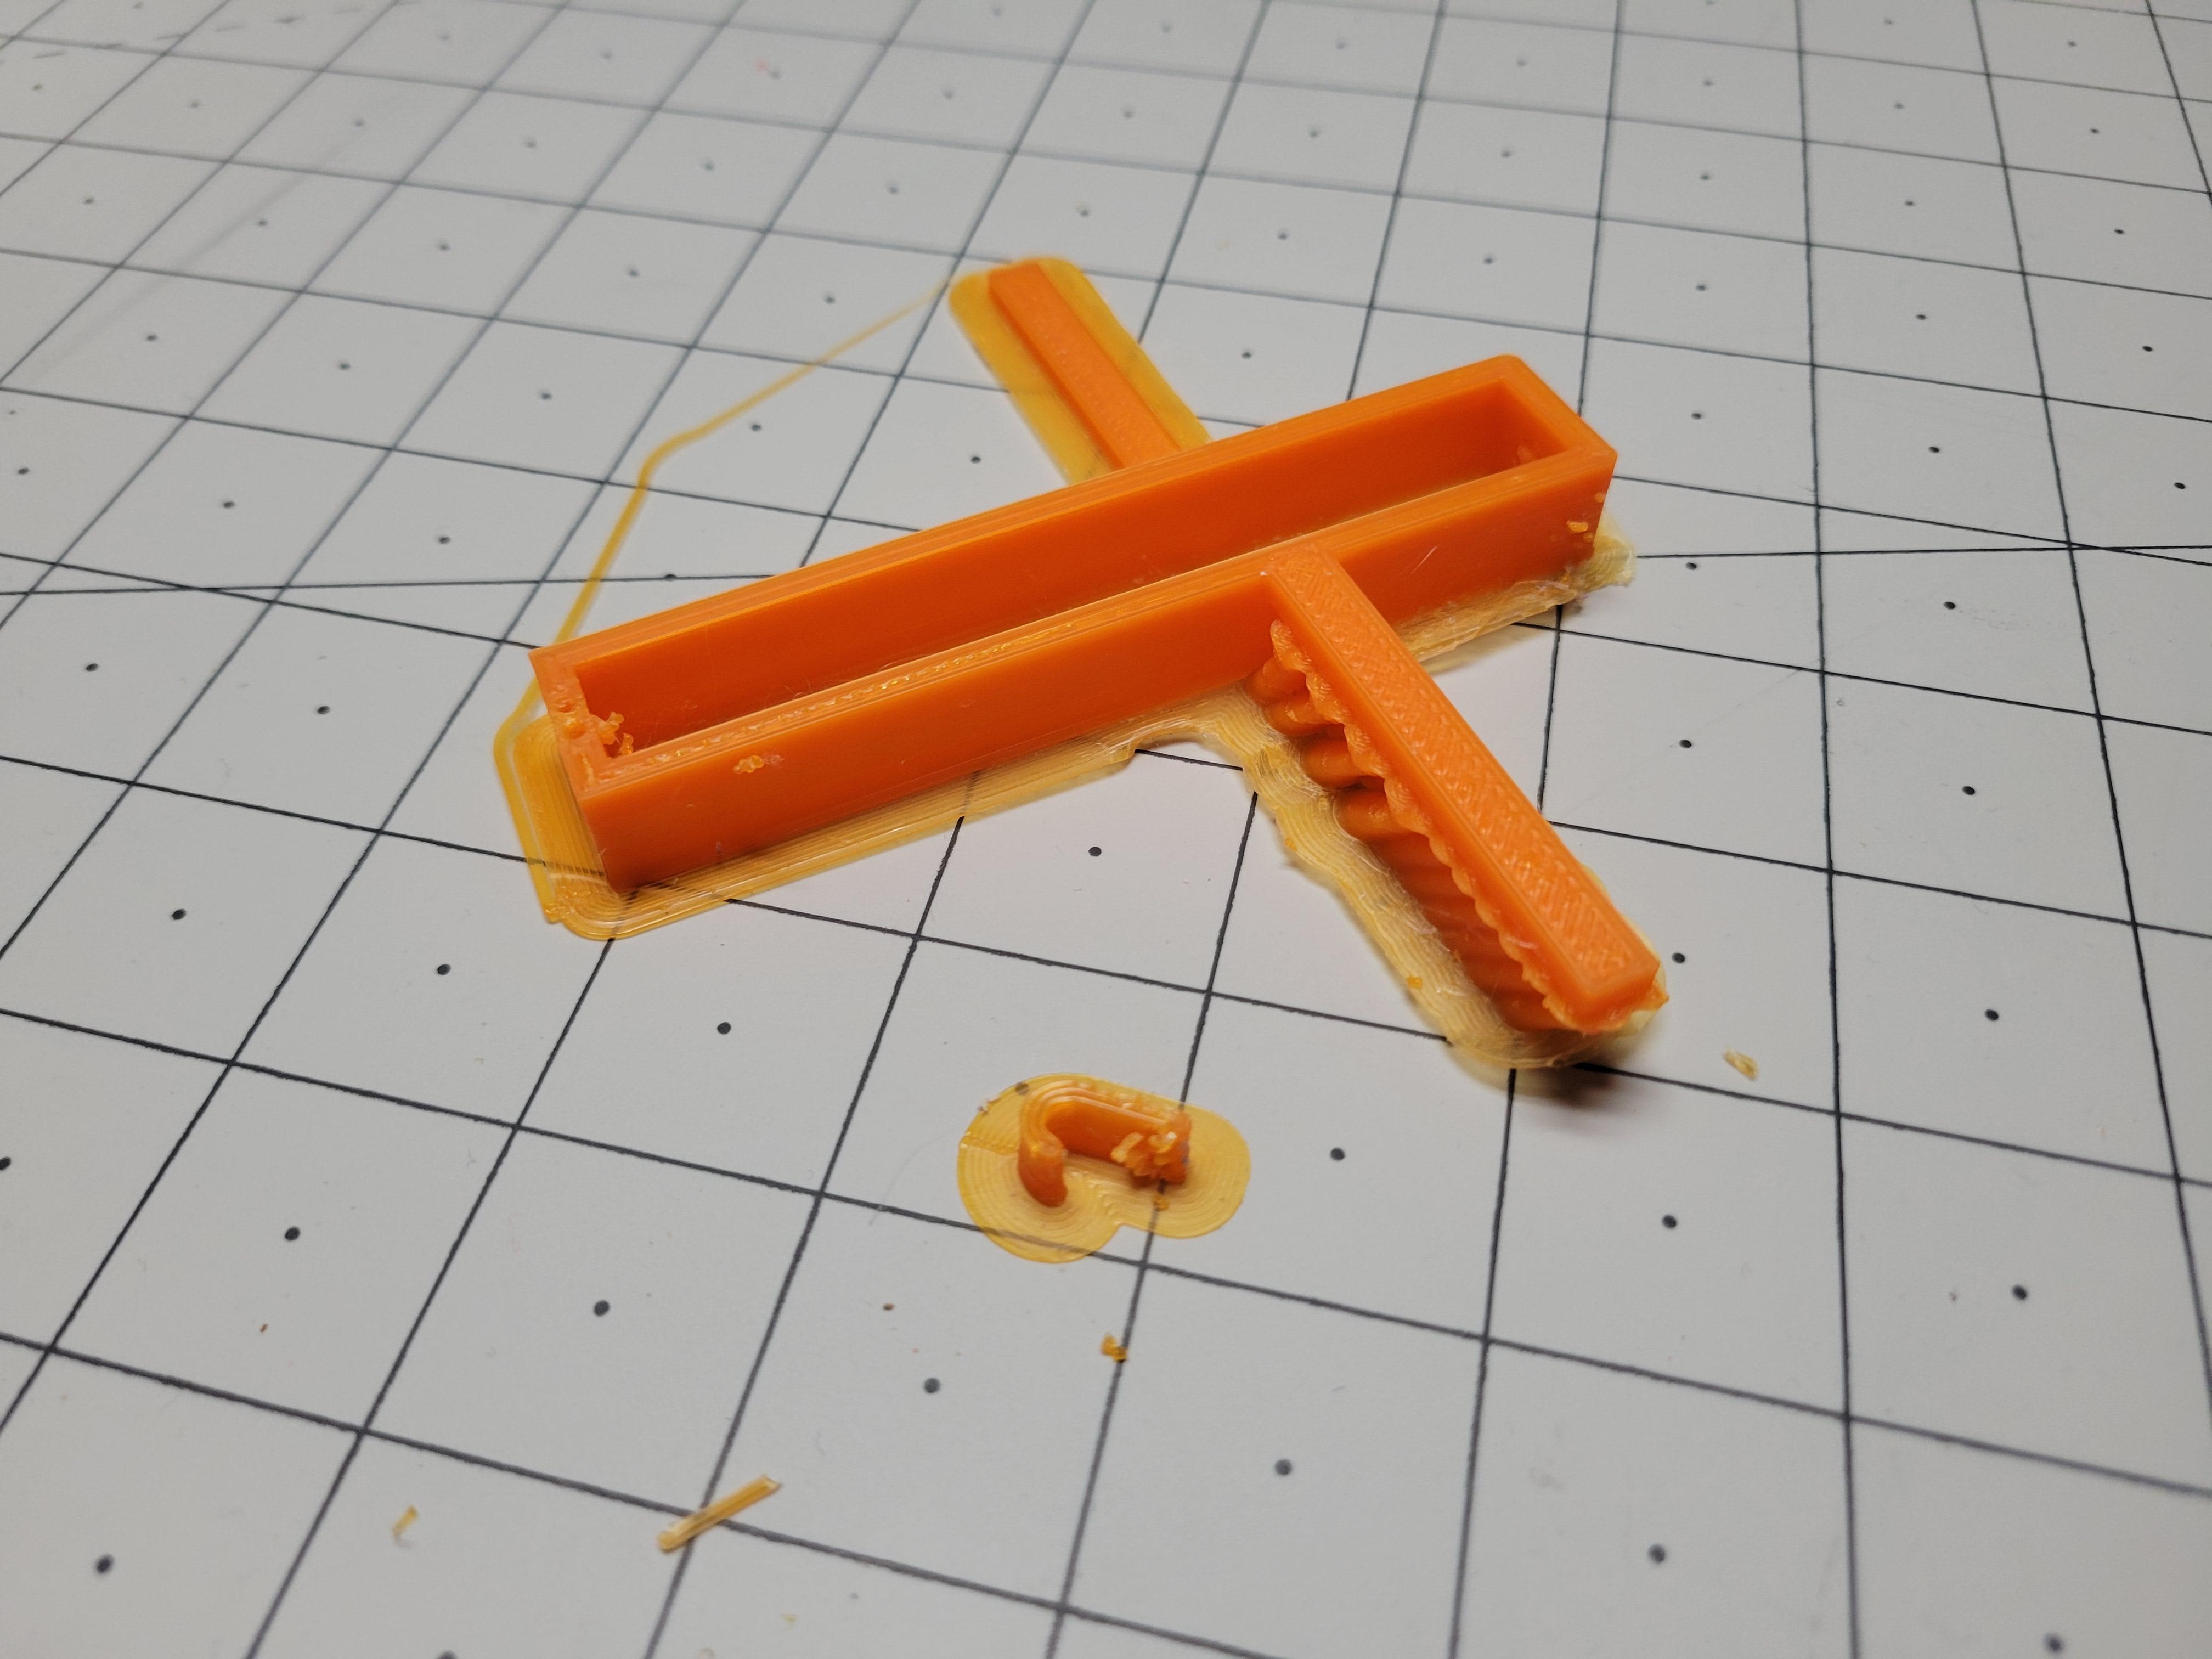
Clean Up
-Next up you need to remove all the supports and clean up all the holes so she is nice and spiffy.
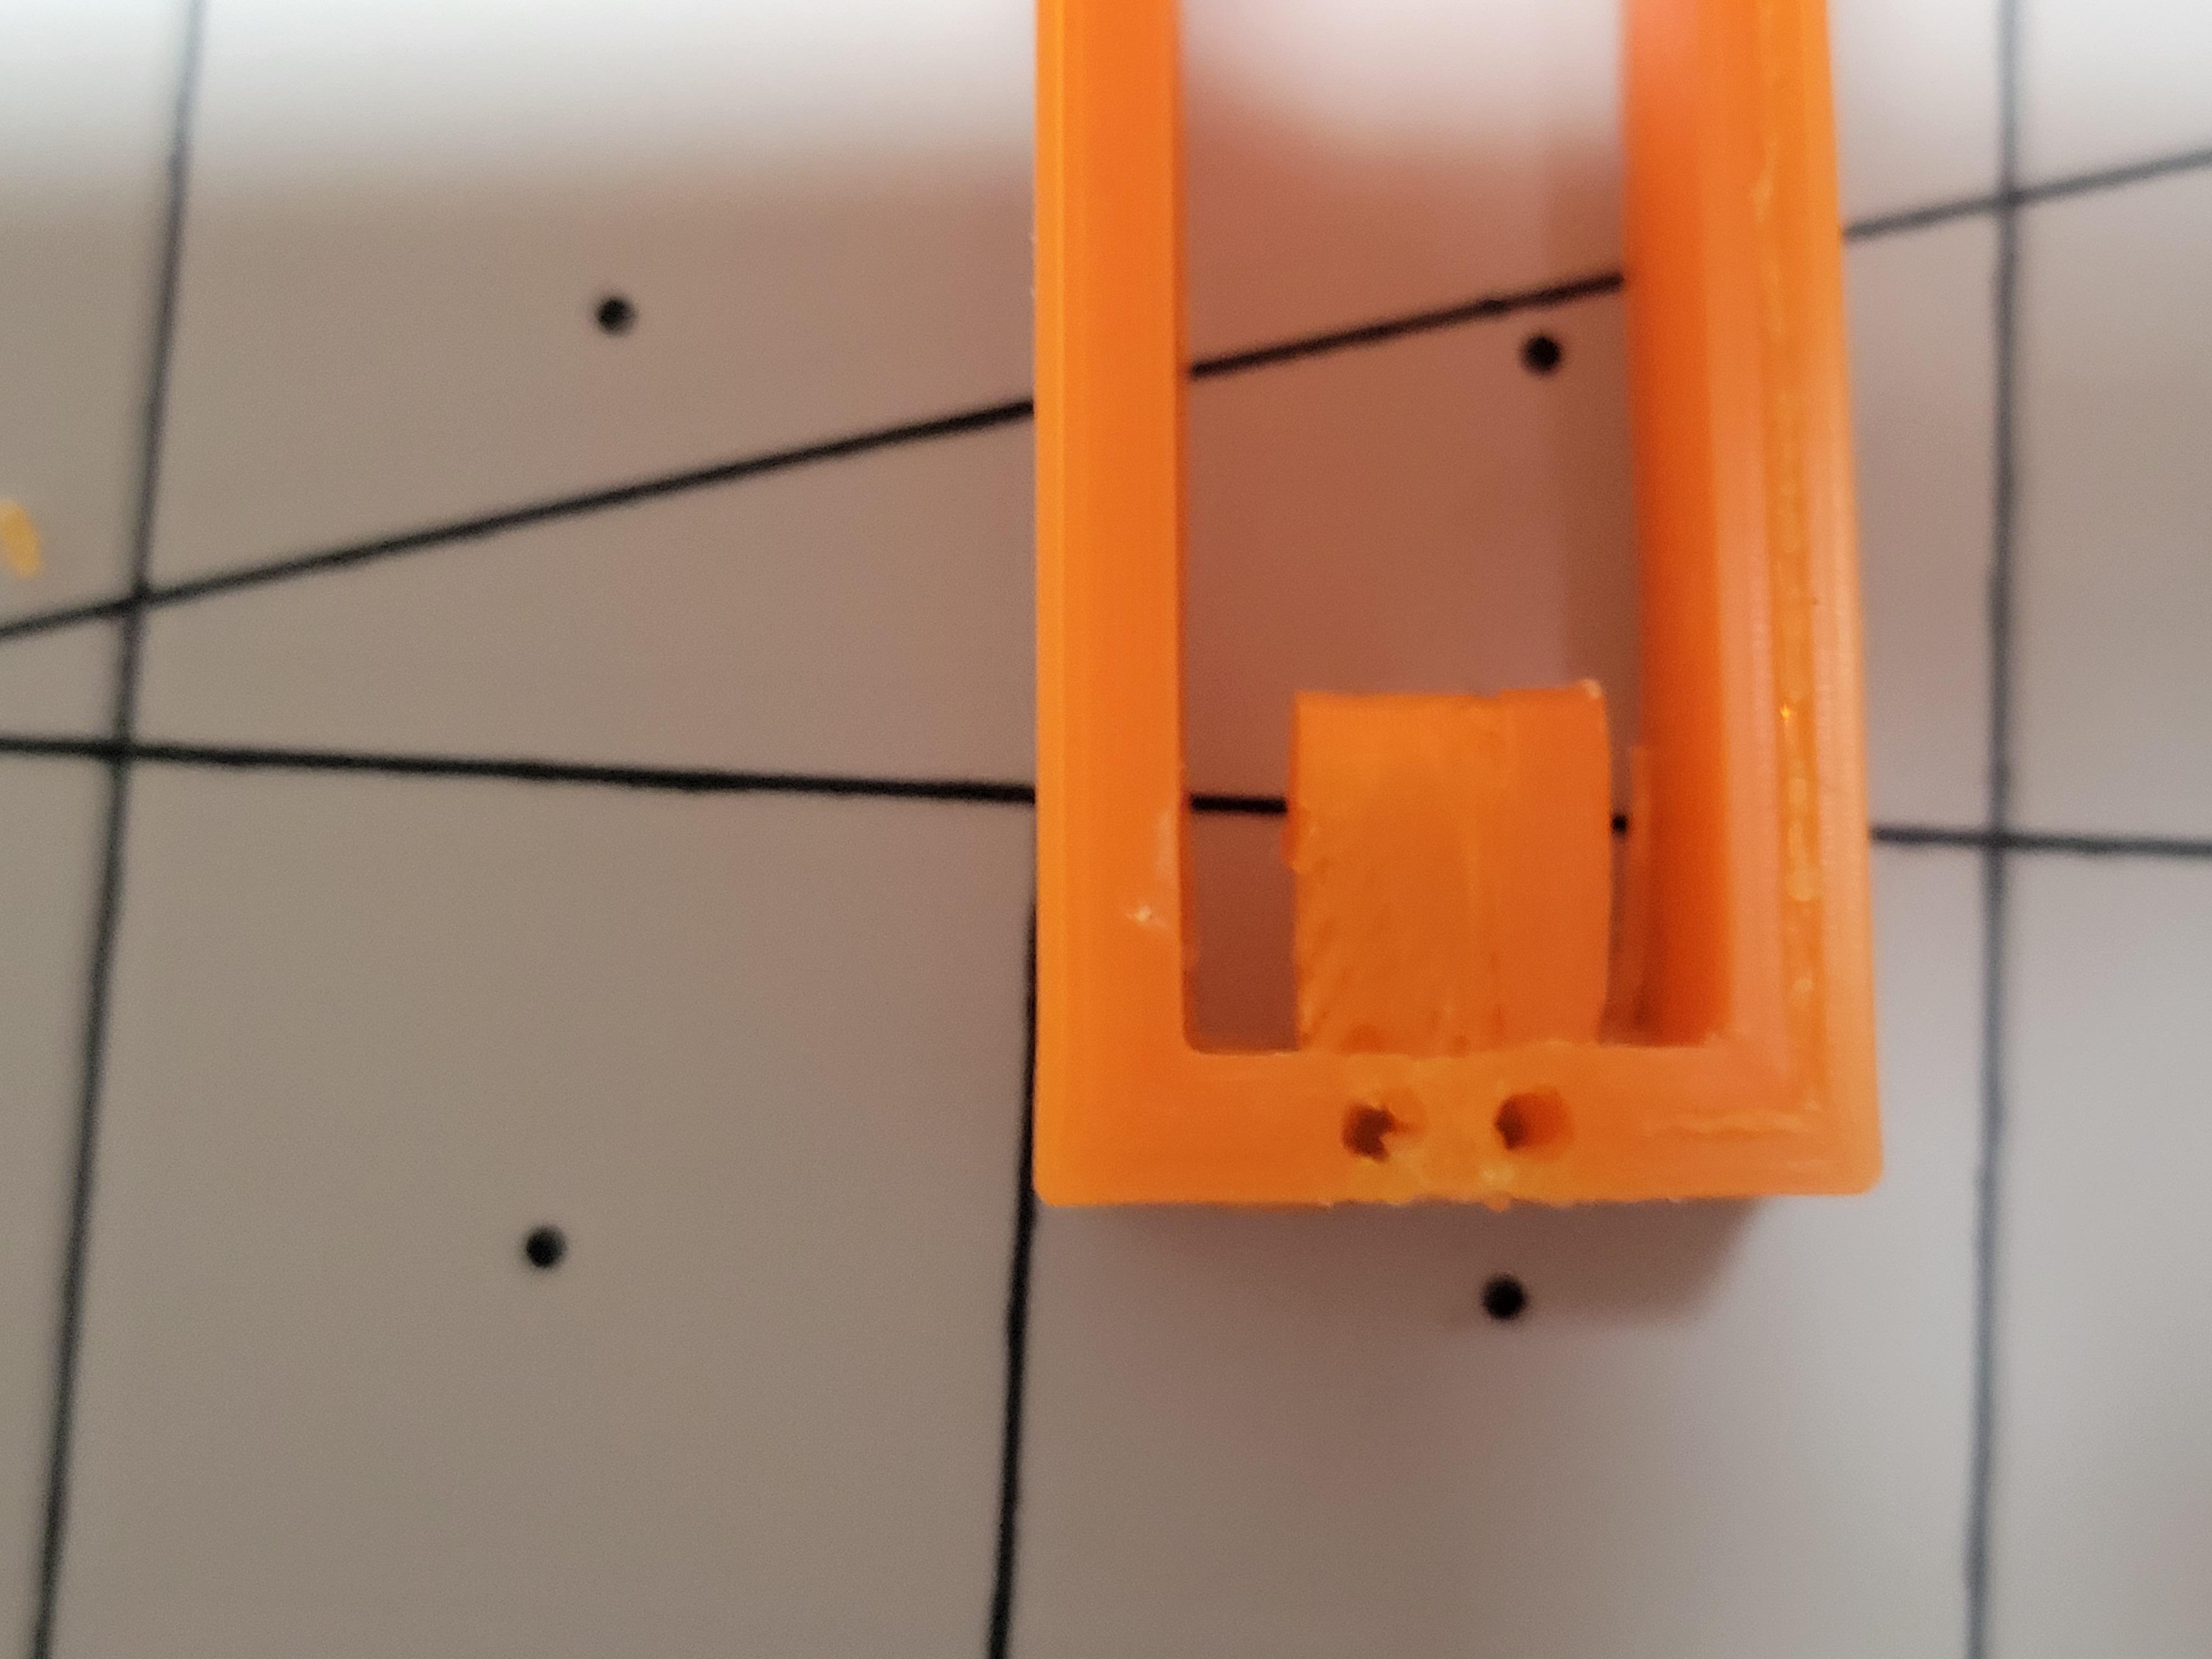
- You want to make sure the hook fits and that the holes line up and go all the way through the model.
-I prefer using an exacto knife for this step.
Attach Hook
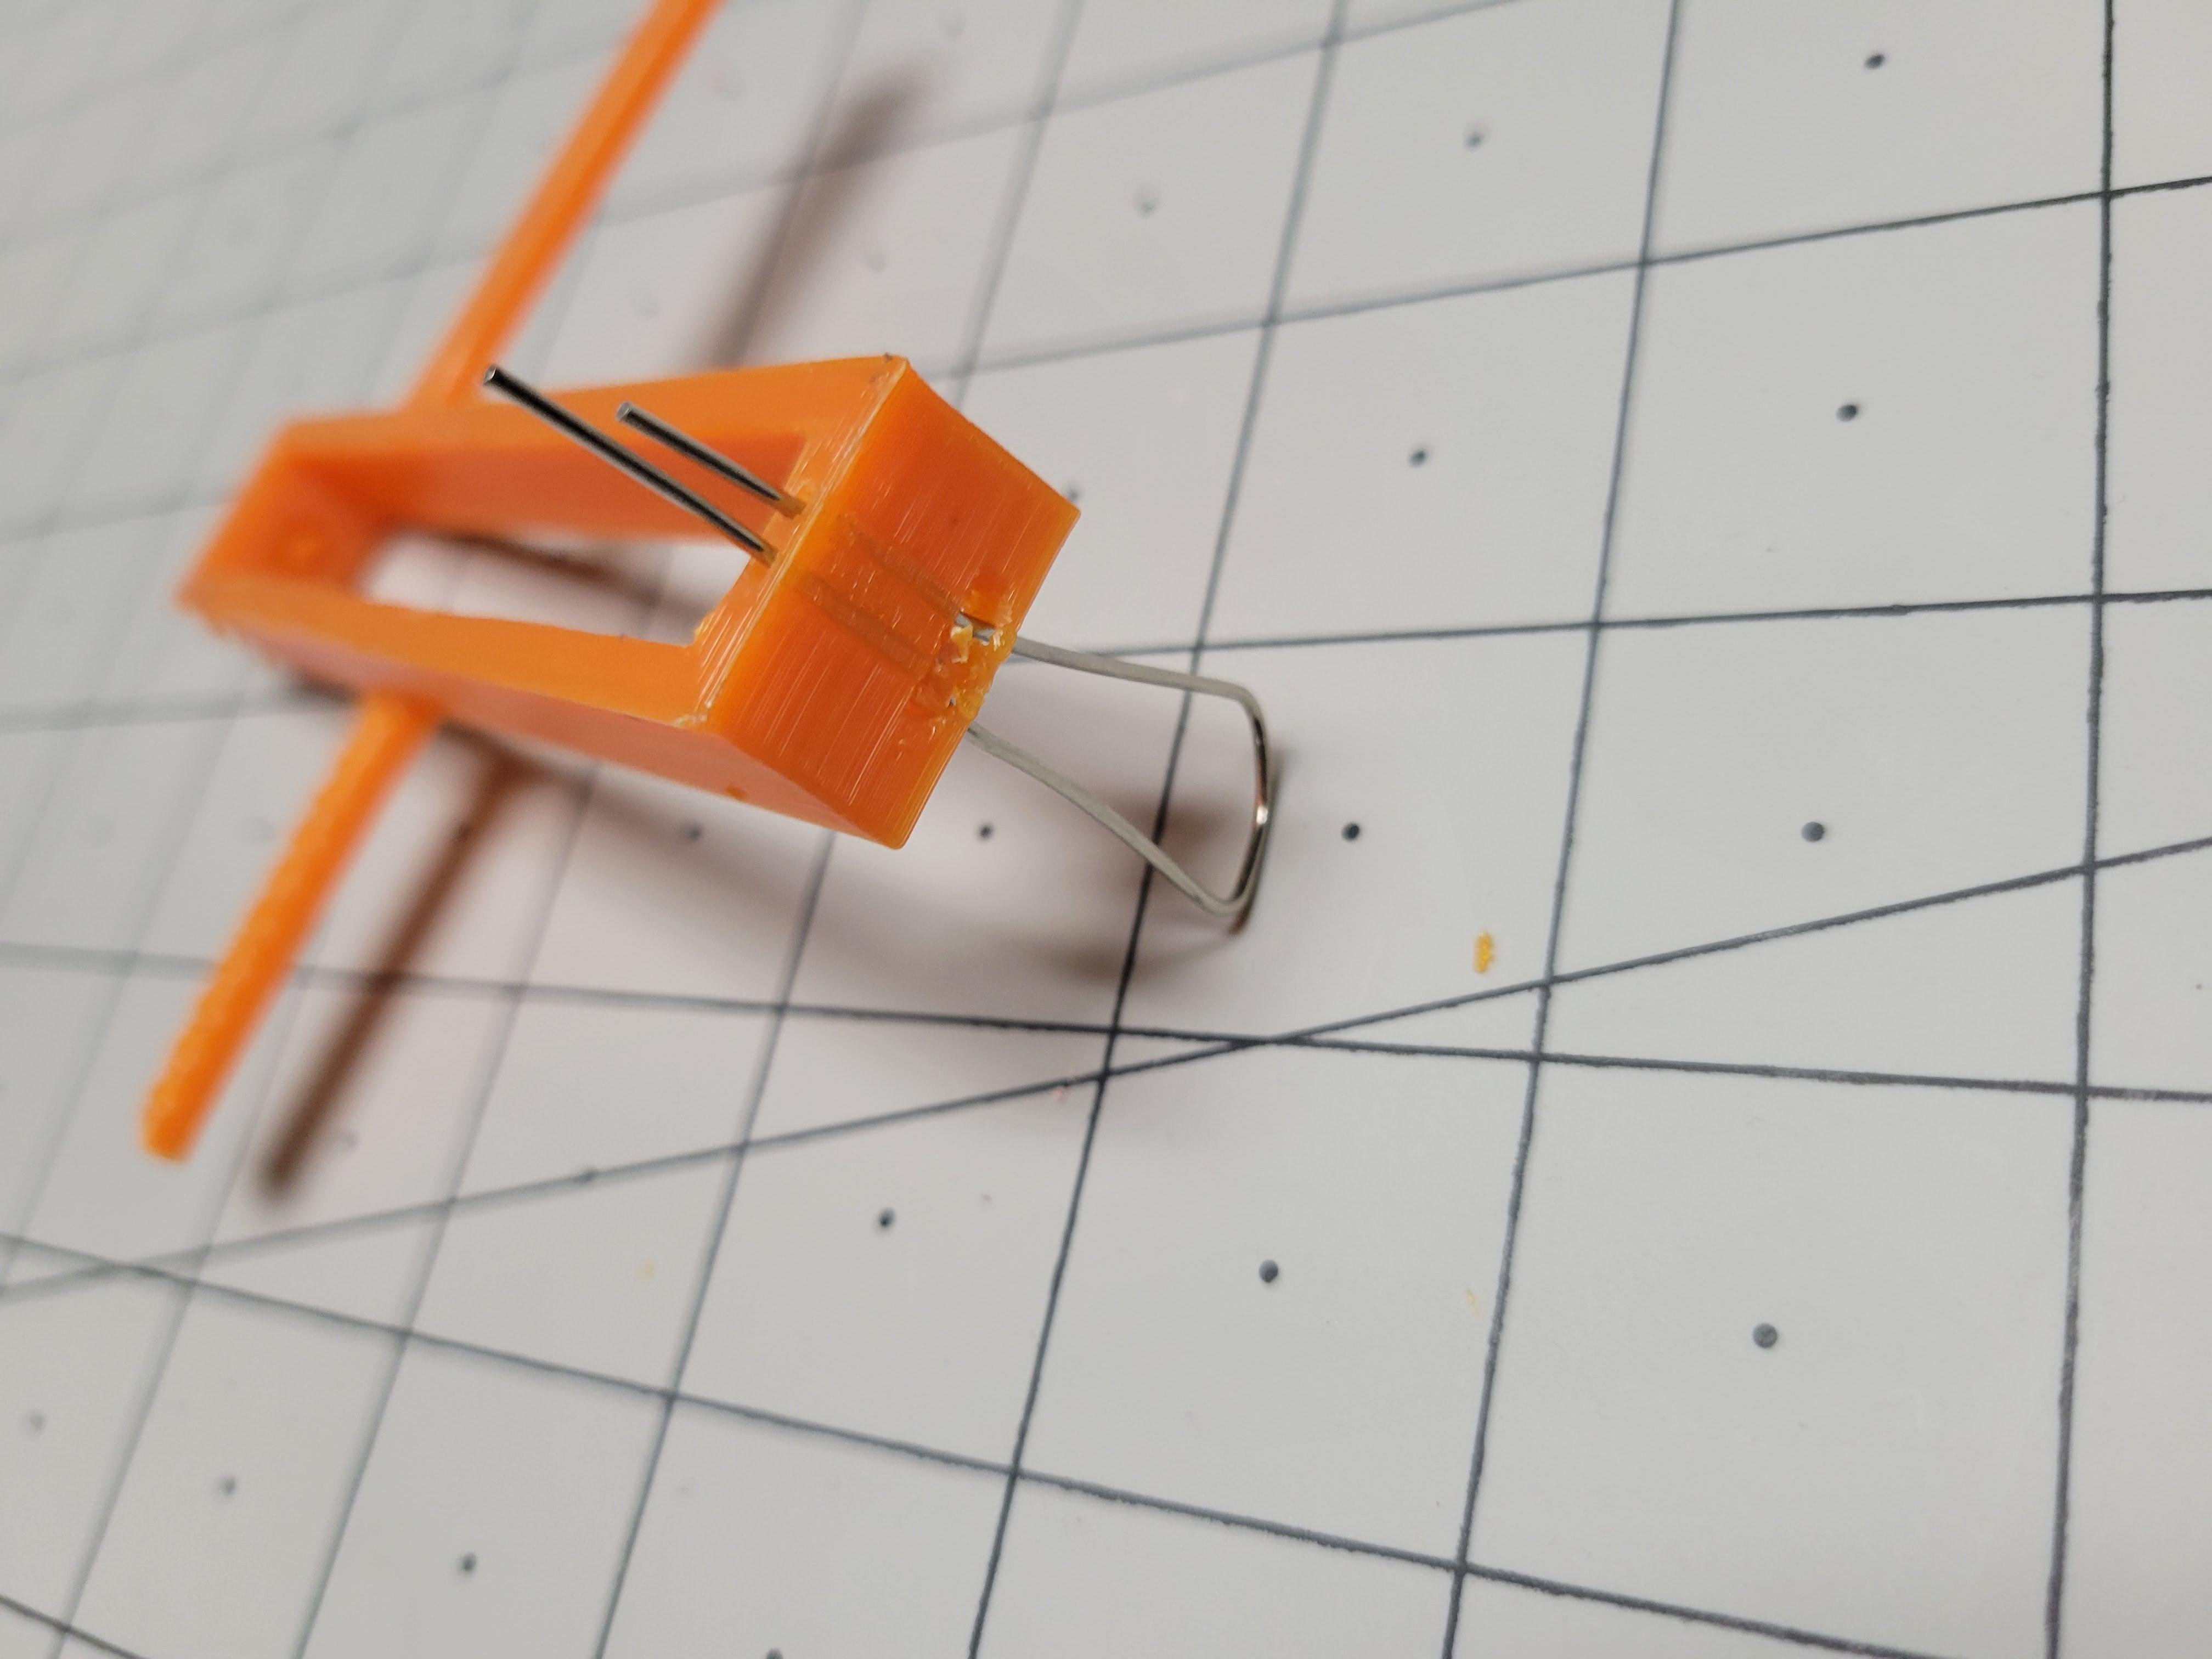

-Unfold your paperclip and bend it in half.
-Pull the paperclip through the holes in the 3D model. Its nice to use the pliers to get the wire all the way through.
-This is how we are going to get the hook to stay in place.
Clean Up Extra Wire
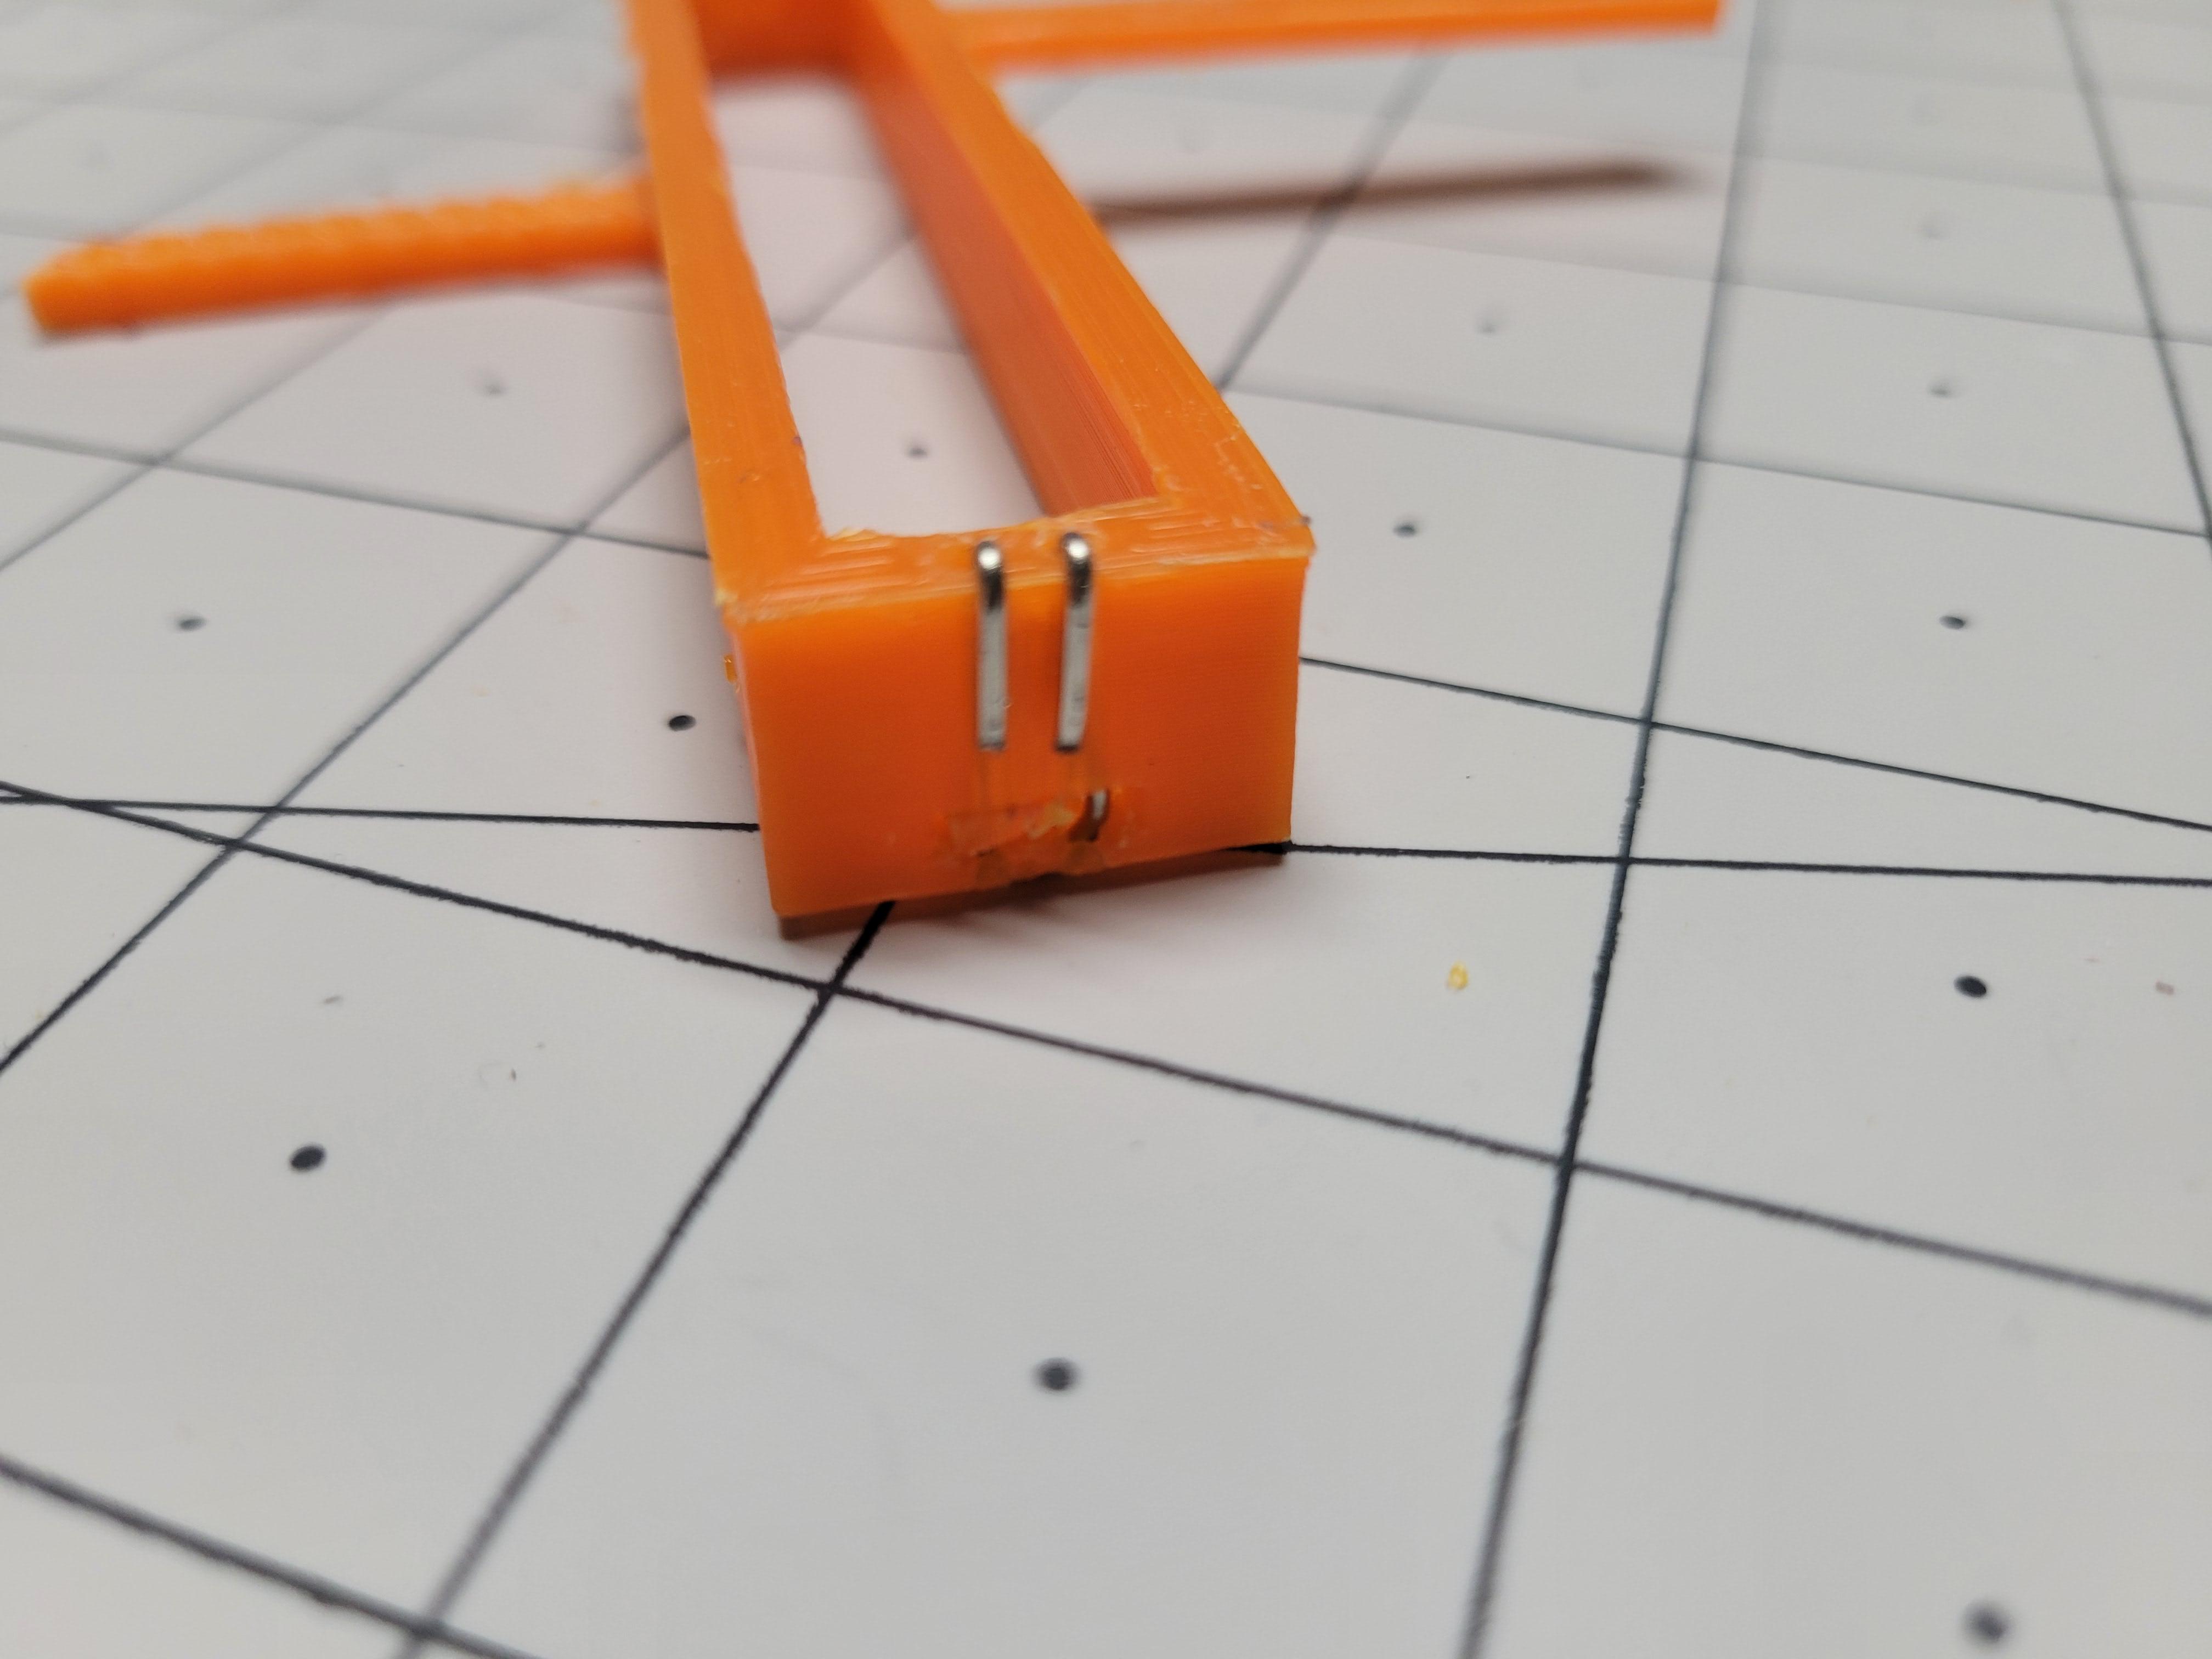
-Bend the wire over and cut it so it lays flat to the model.
Paper Flaps
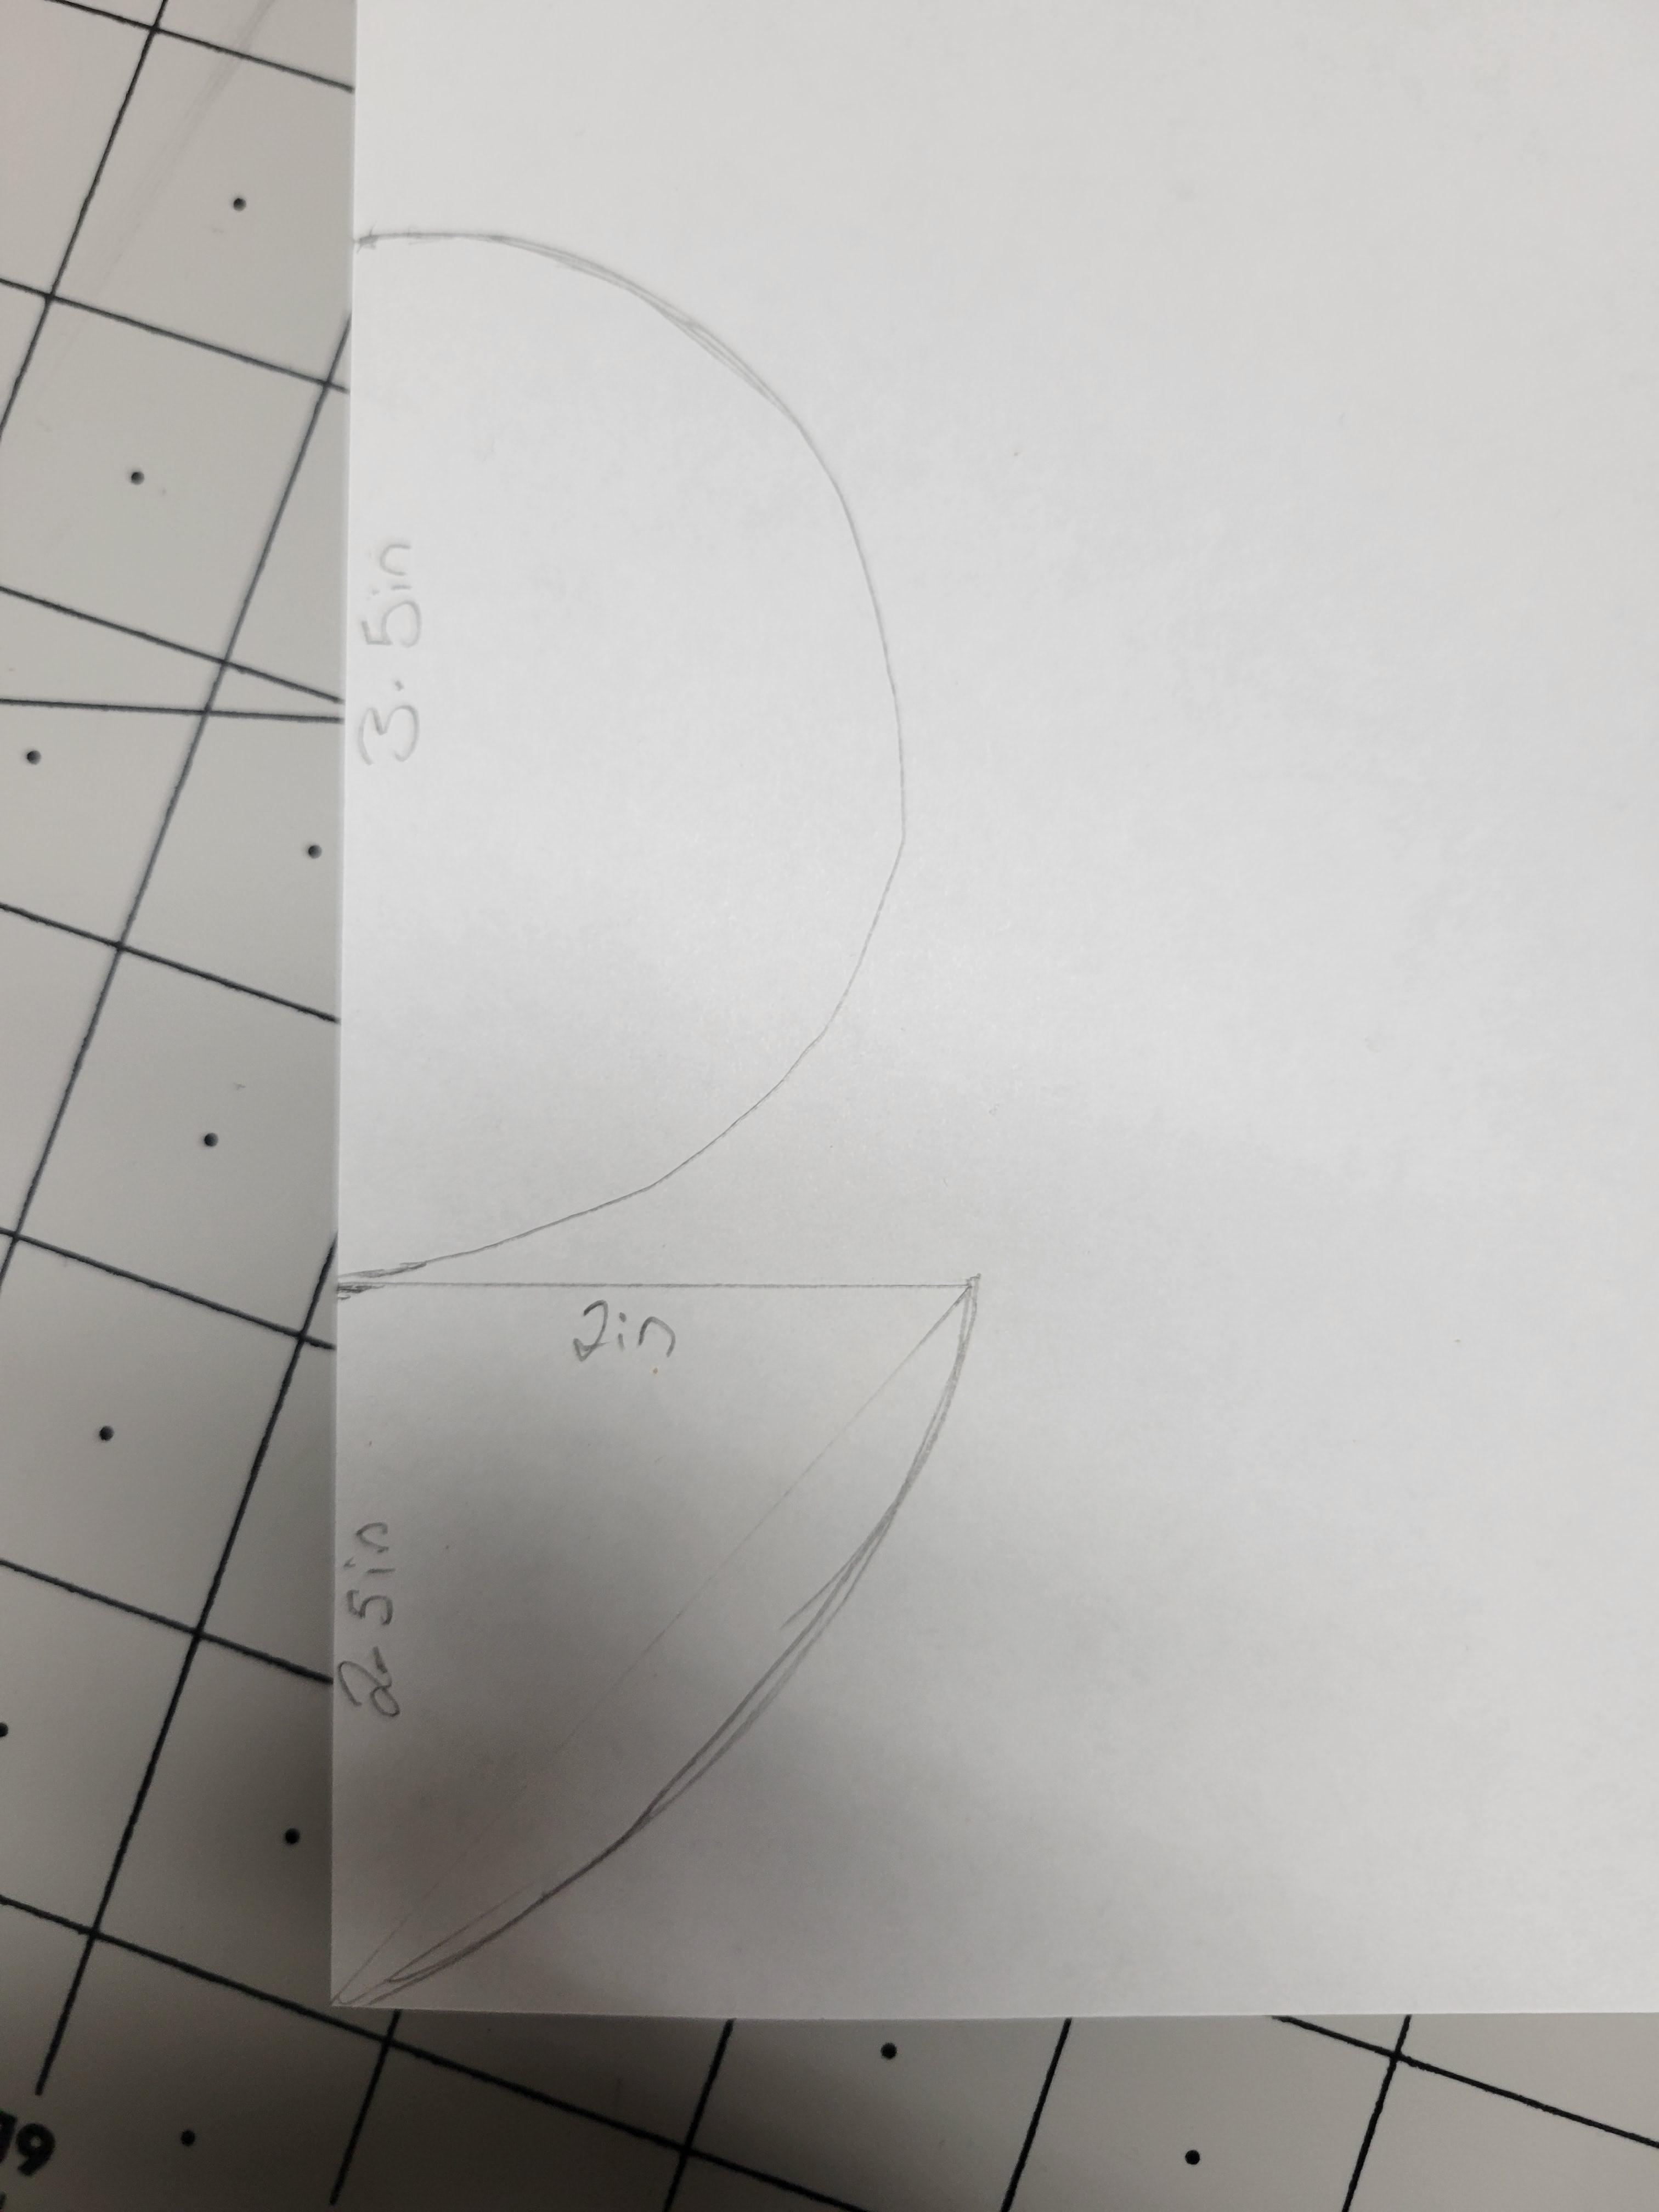
-Next you are going to need to draw out these shapes on paper for the wings.
-Before you cut them out fold the paper in half so you get two of the exact same shapes.
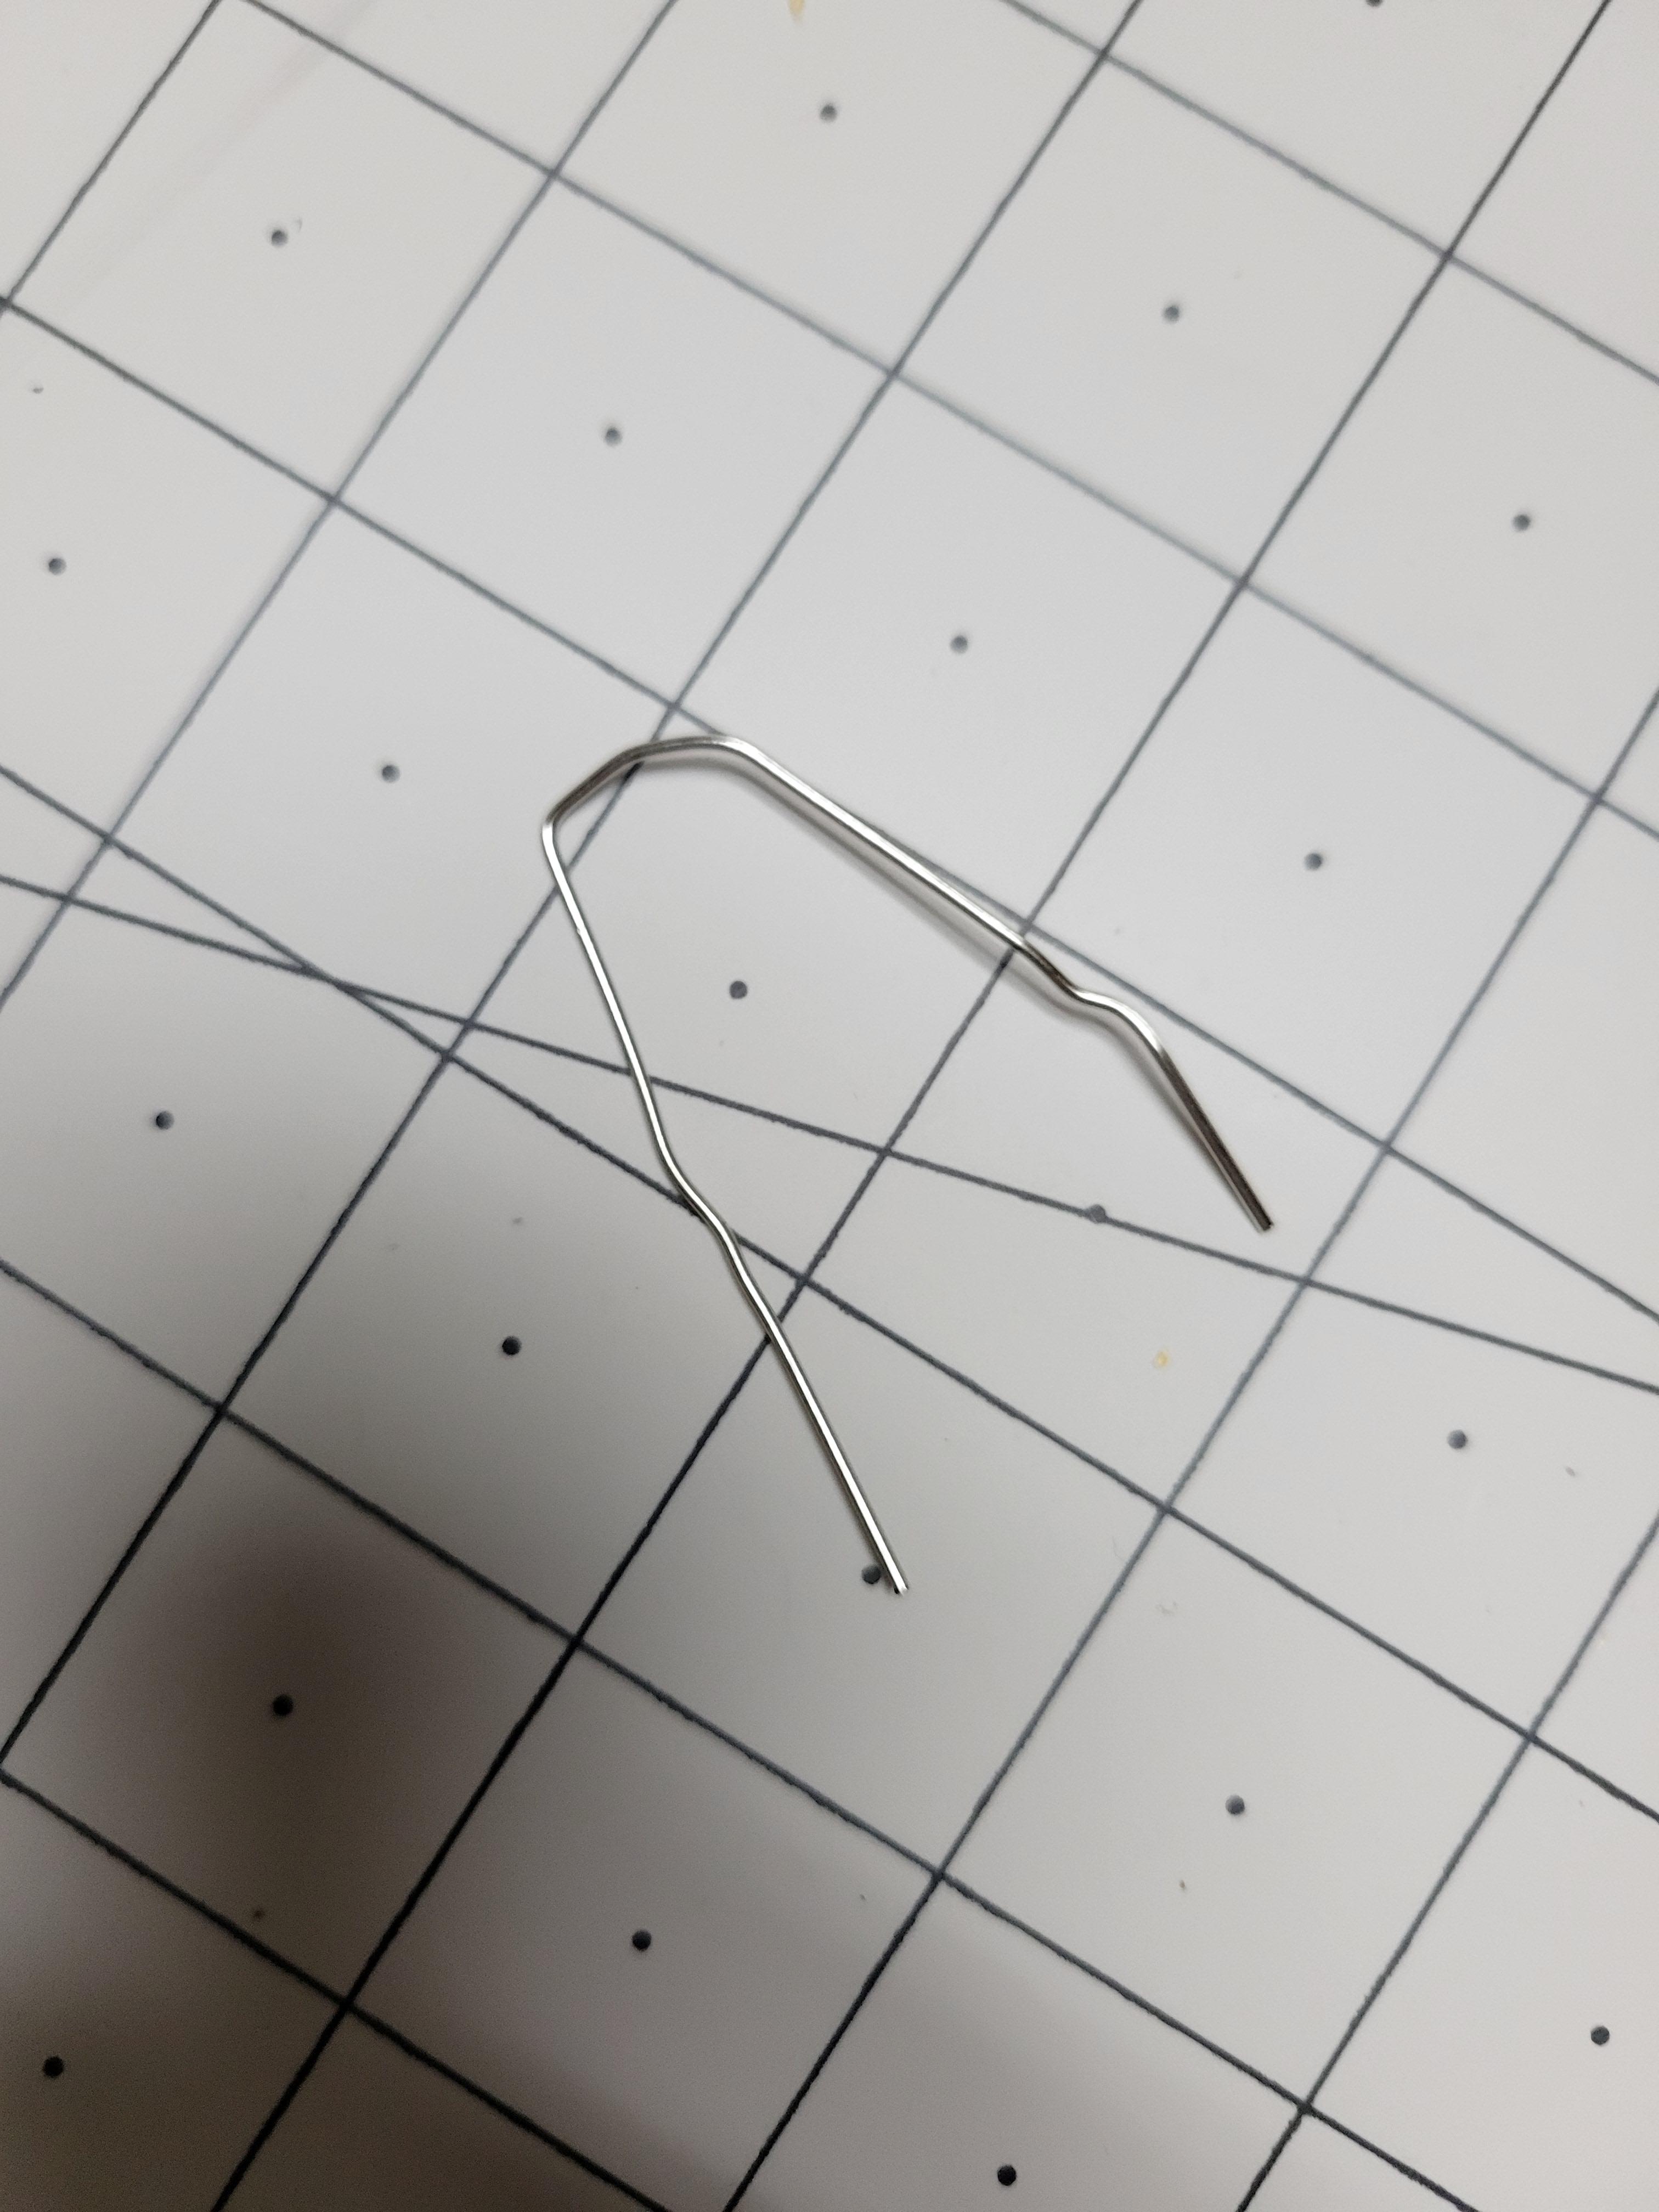
Wing Skeleton
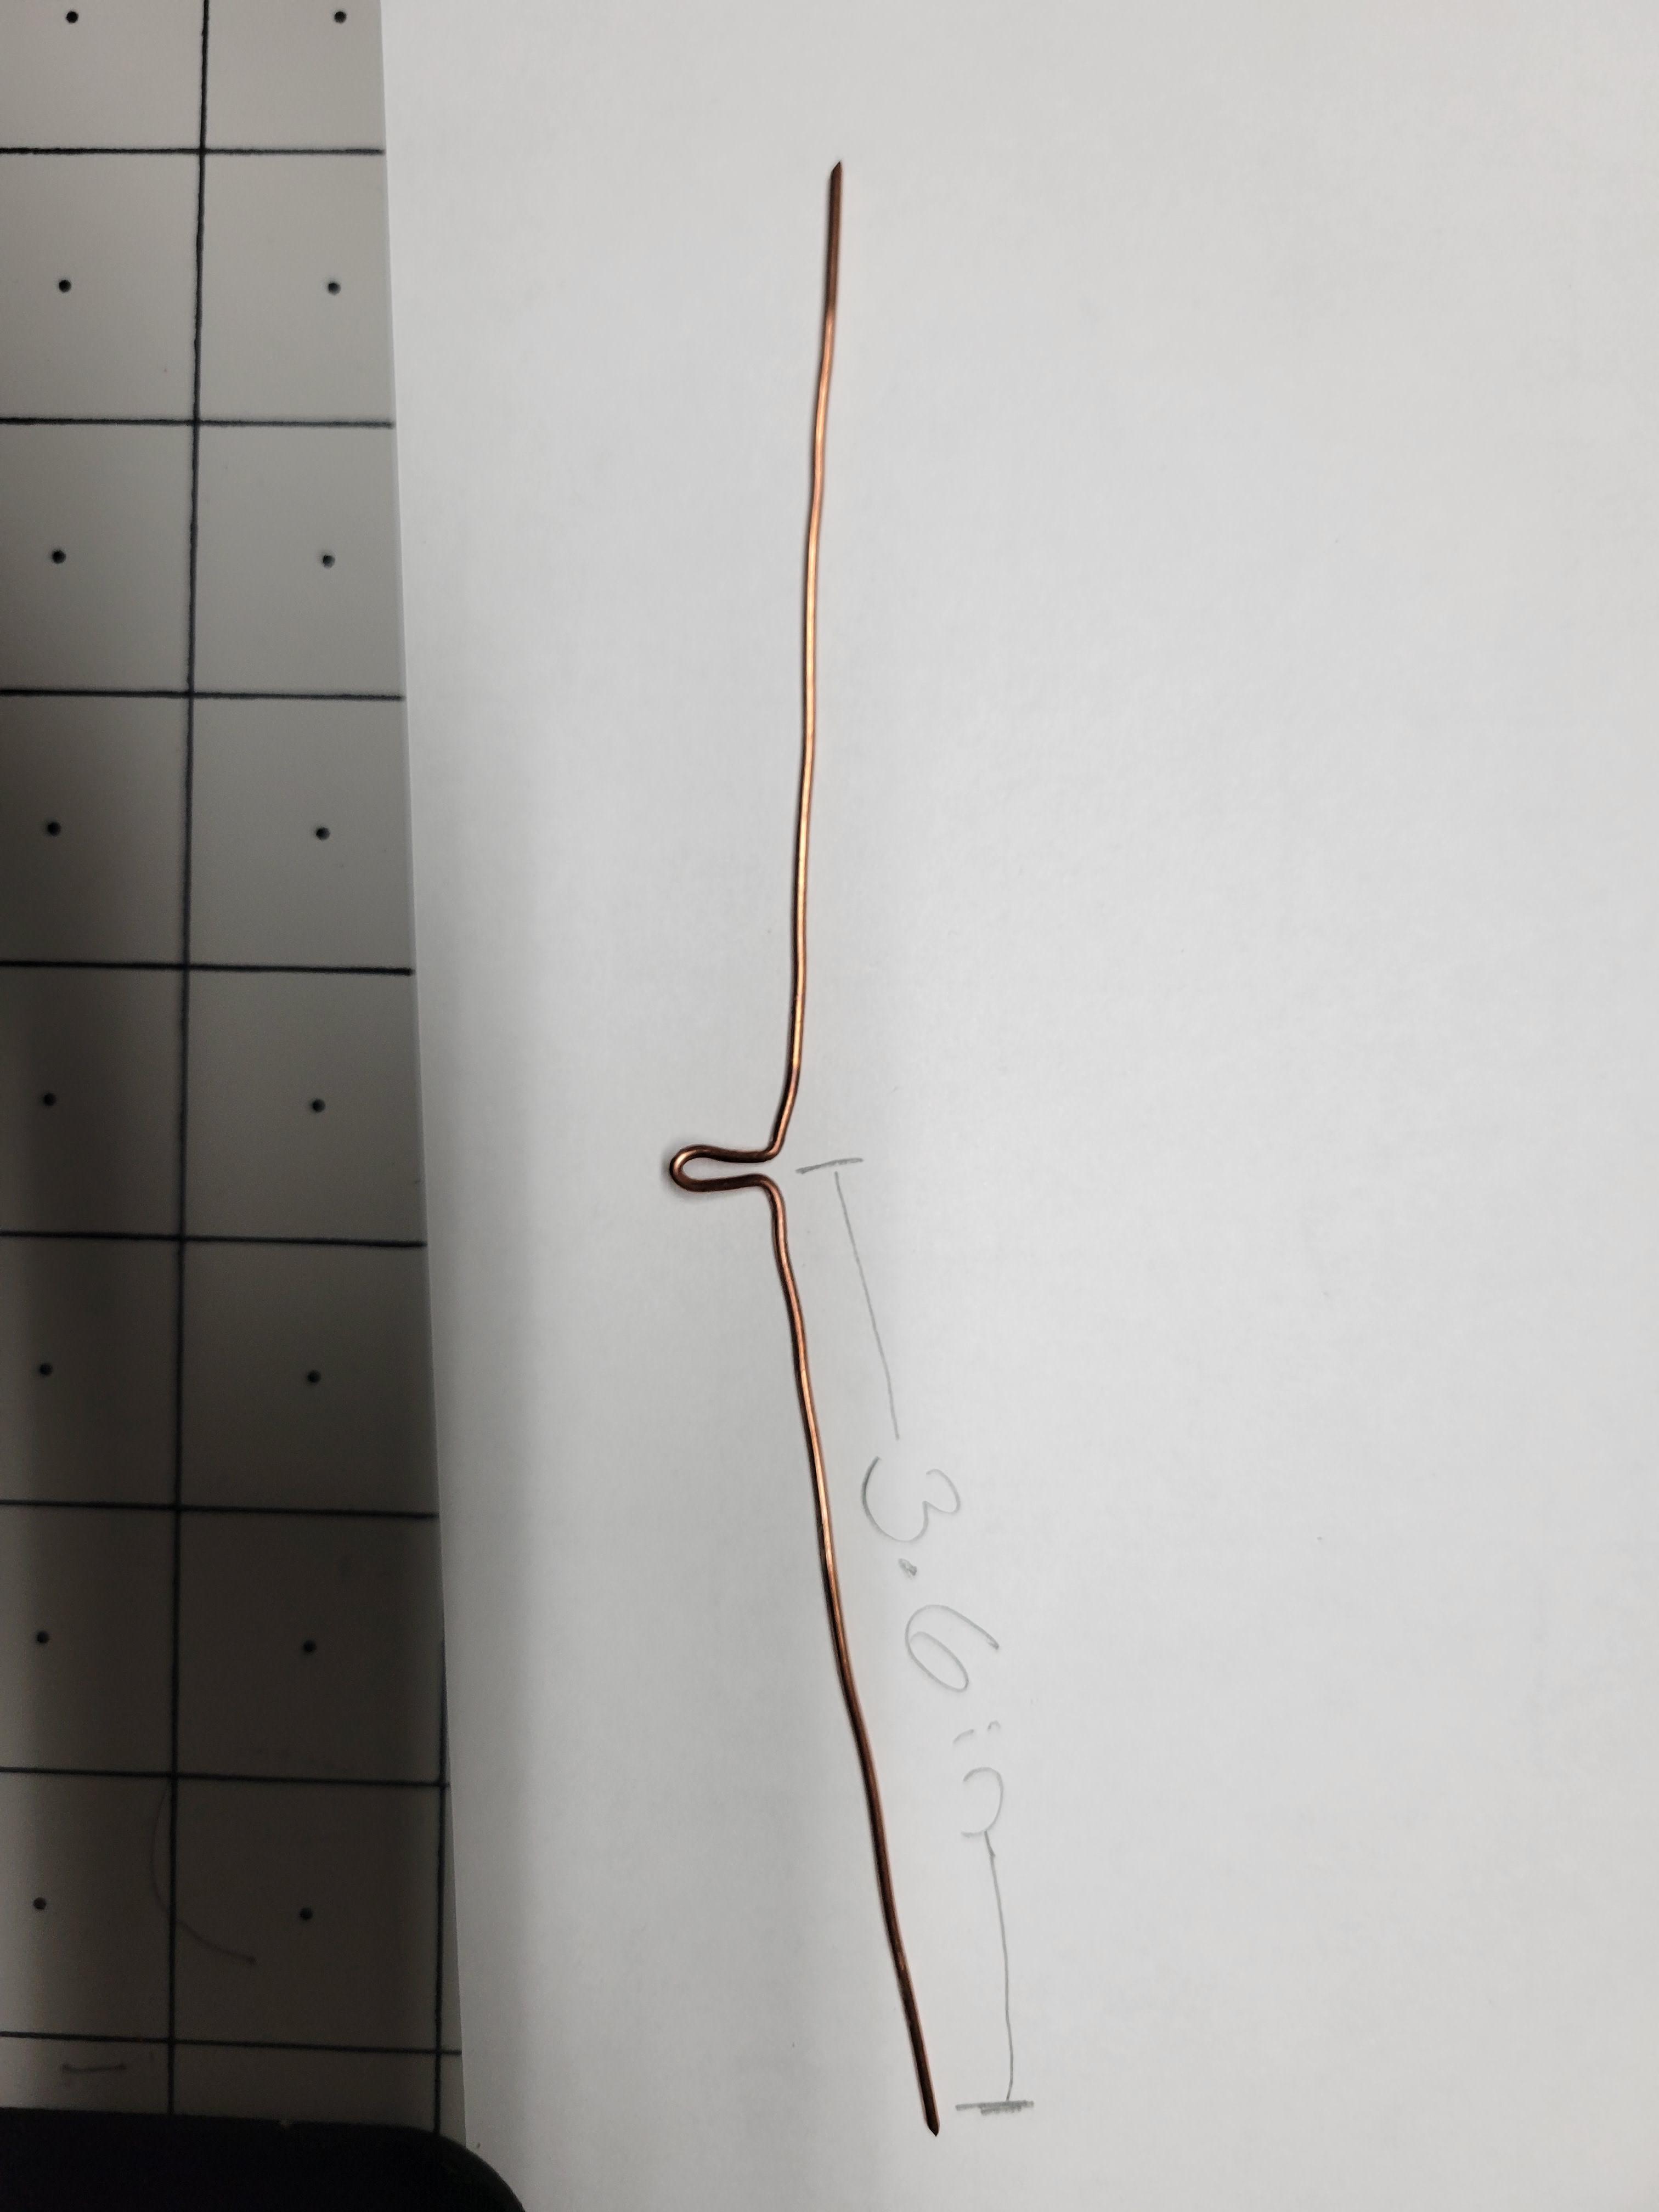
-For this step I prefer using 16 gauge copper wire because it is strong enough to hold up and not immediately bend.
-You just need to cut out a longer piece of wire at least 9 inches, make the shape shown in the picture, then measure and cut each side to be exactly 3.5 inches.
Attaching the Paper
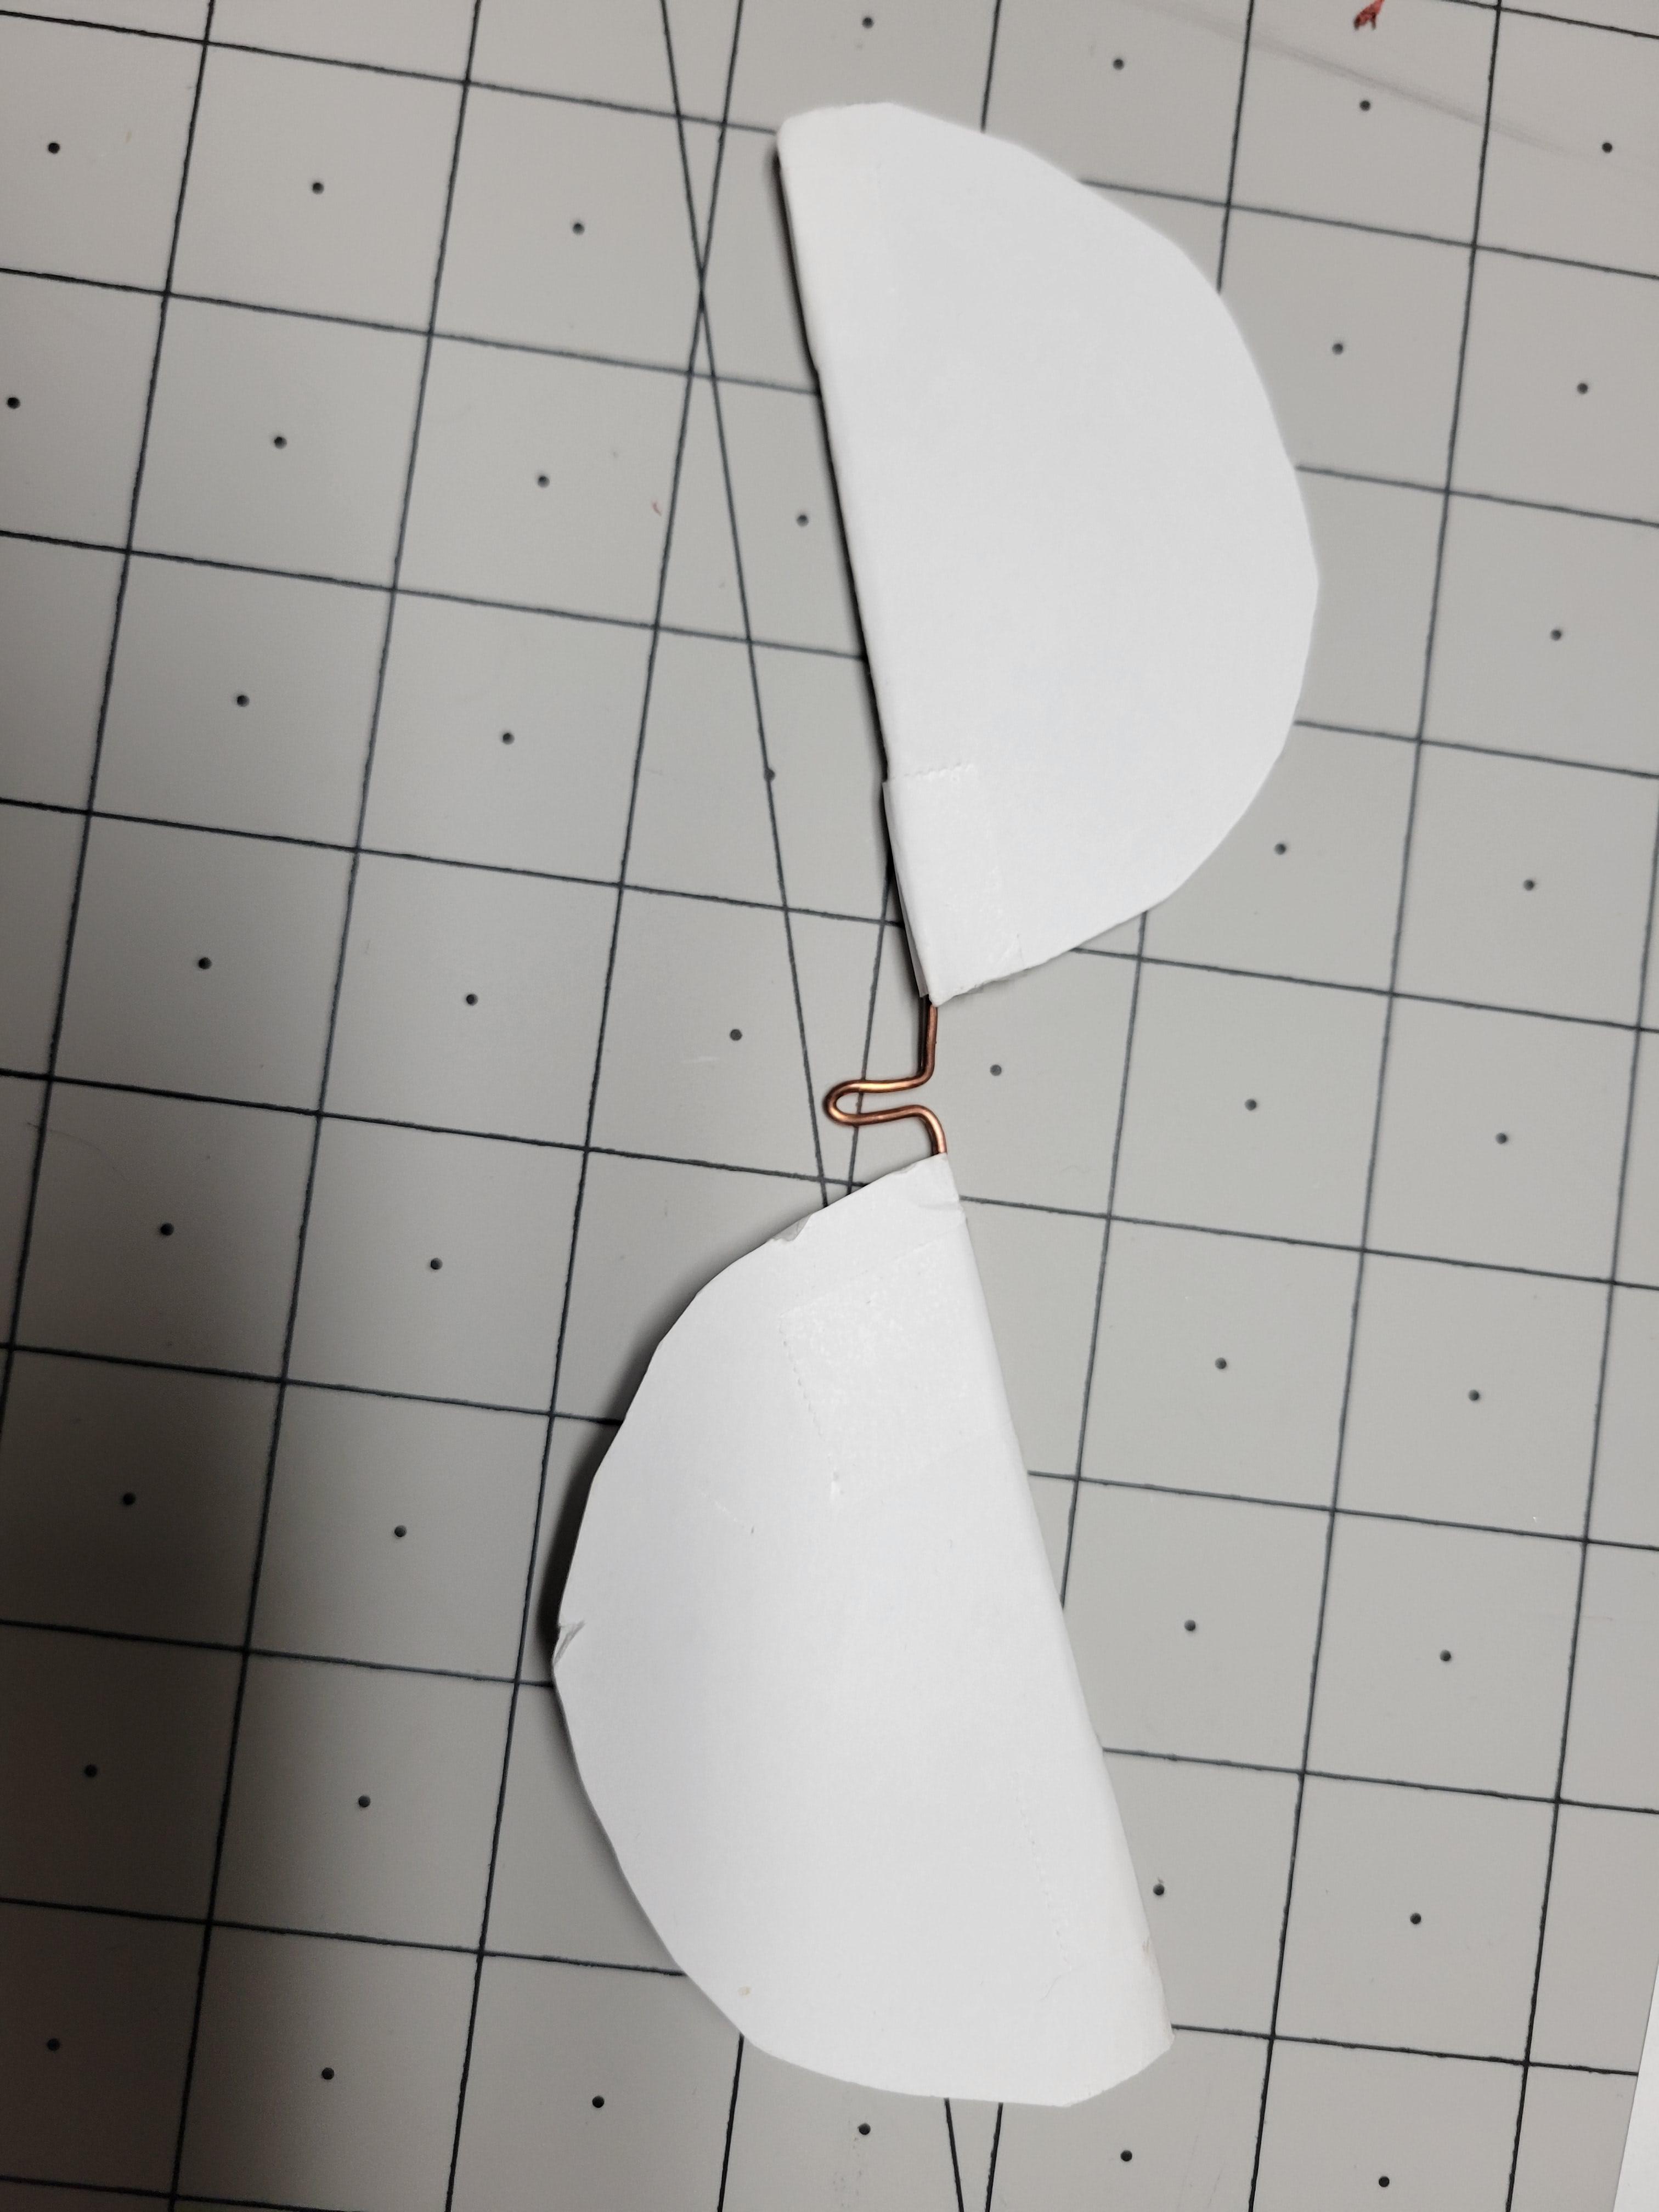
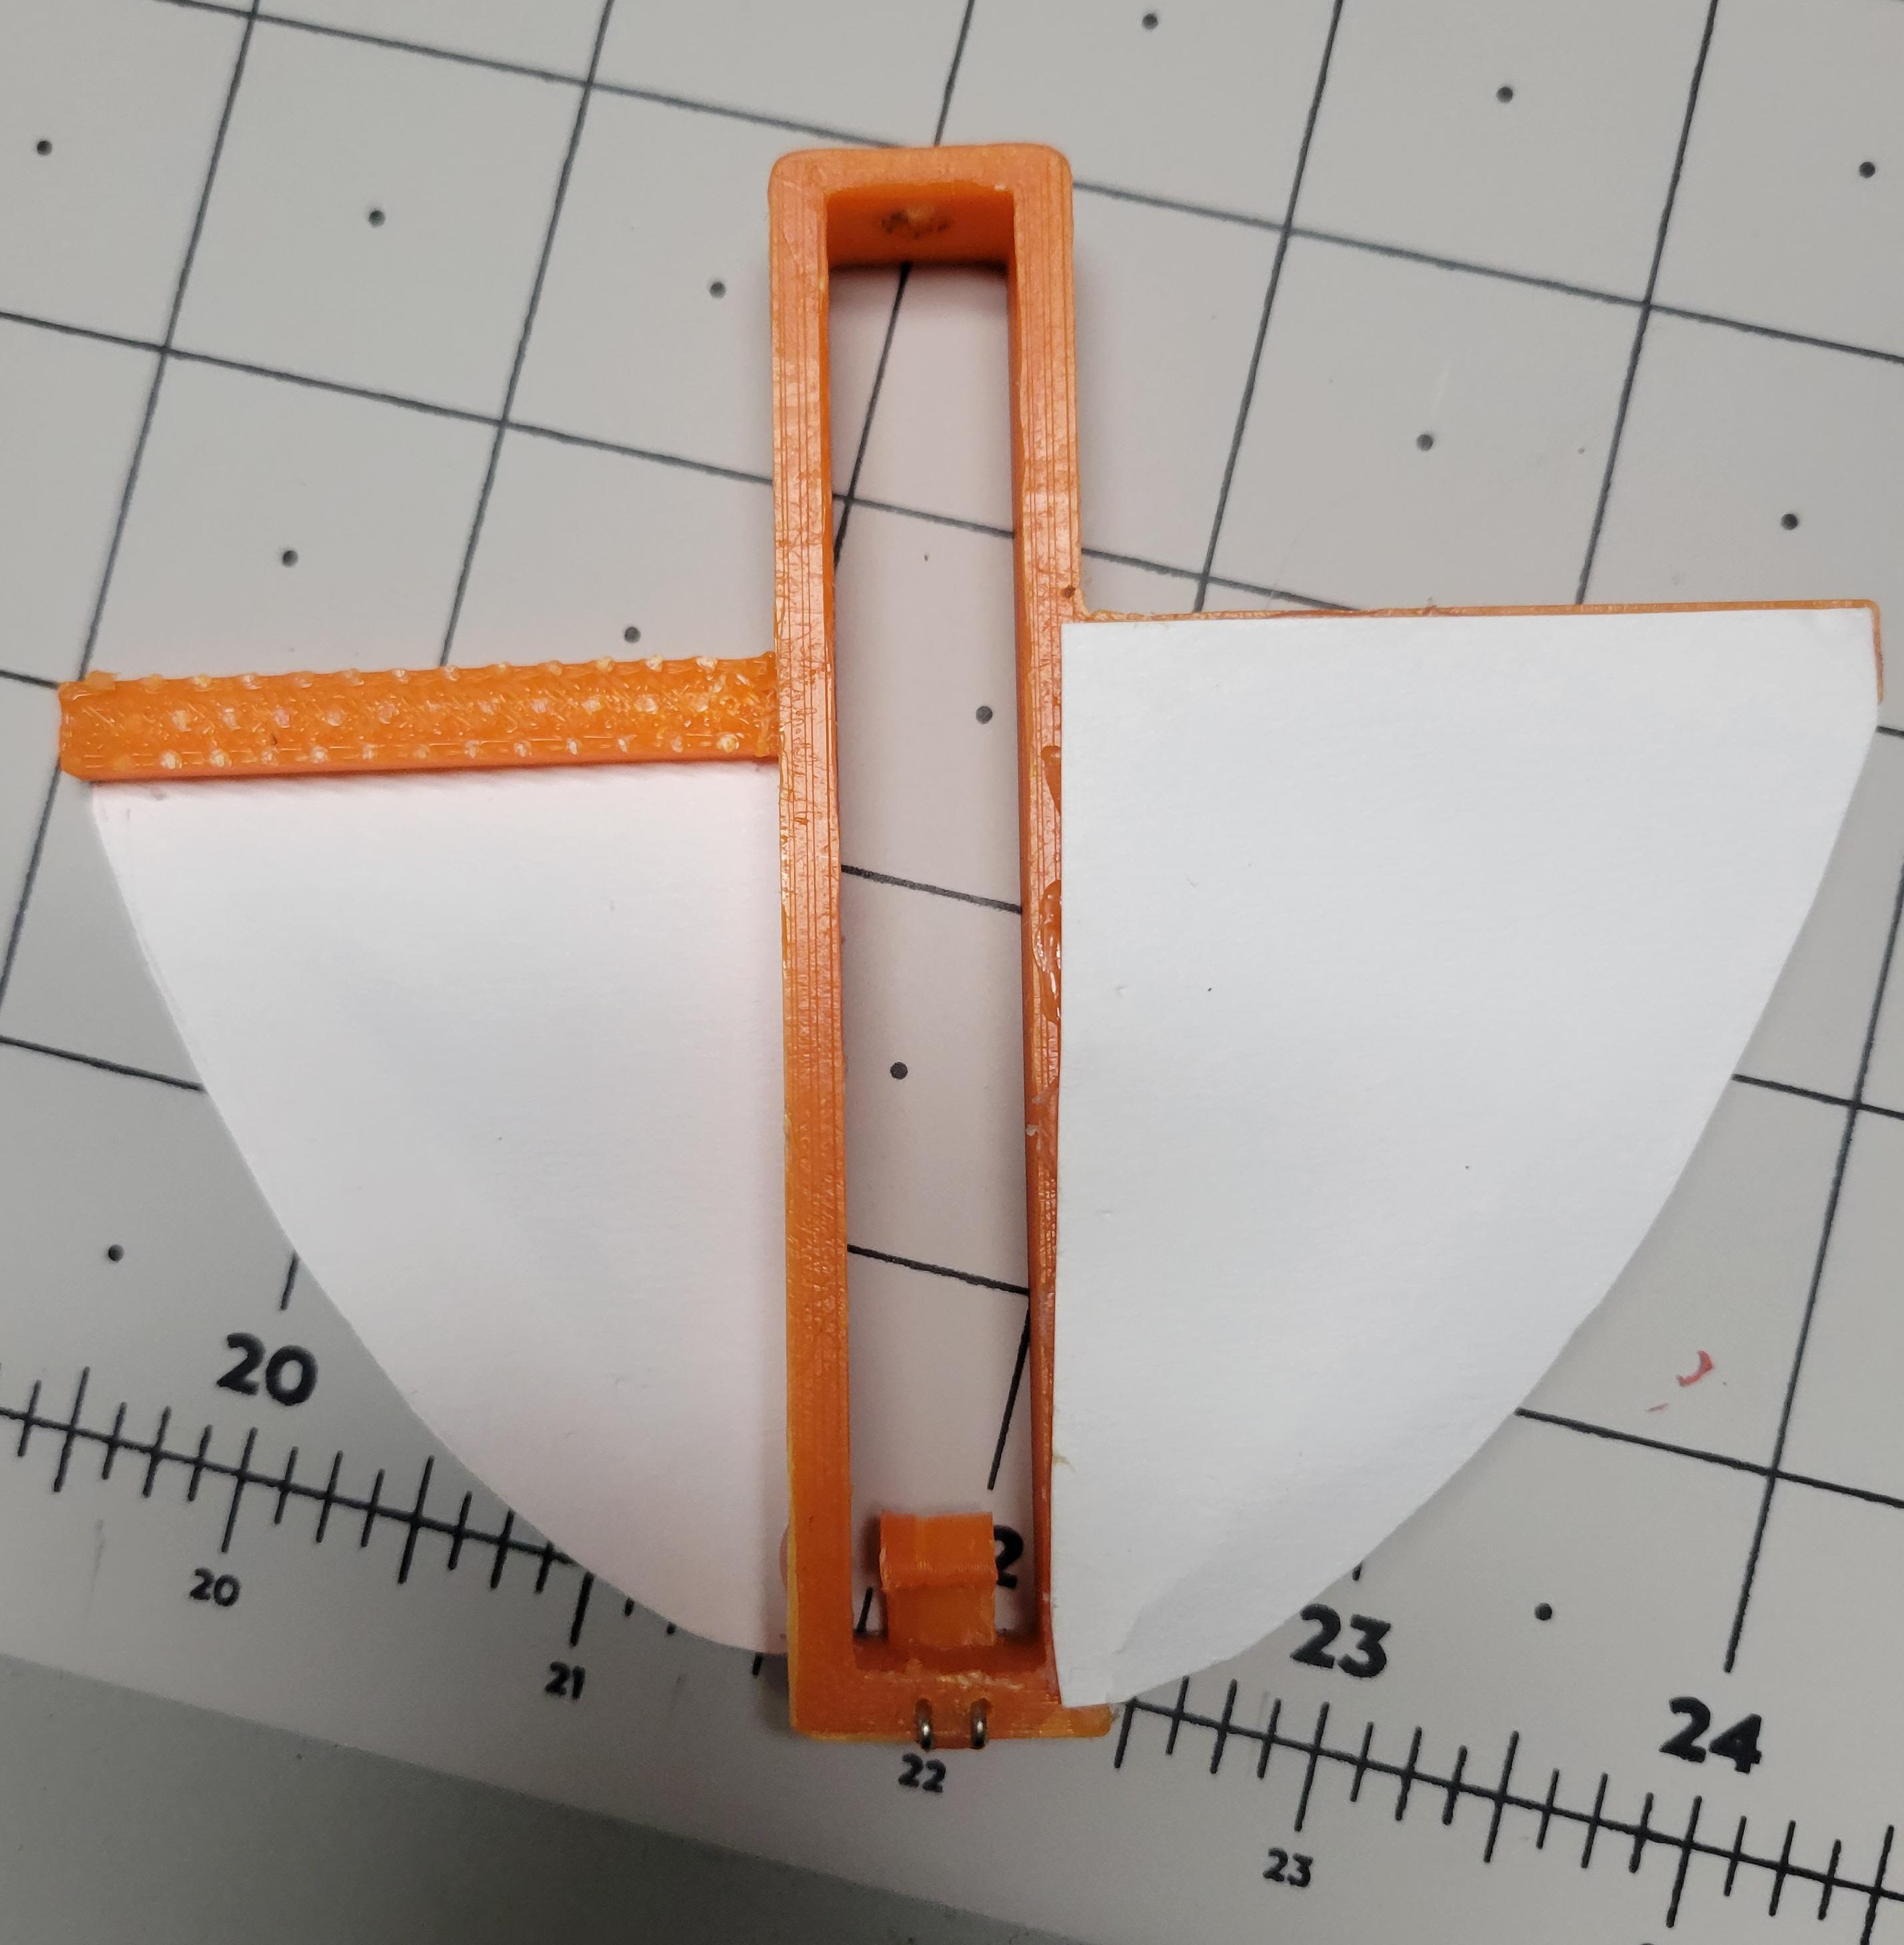
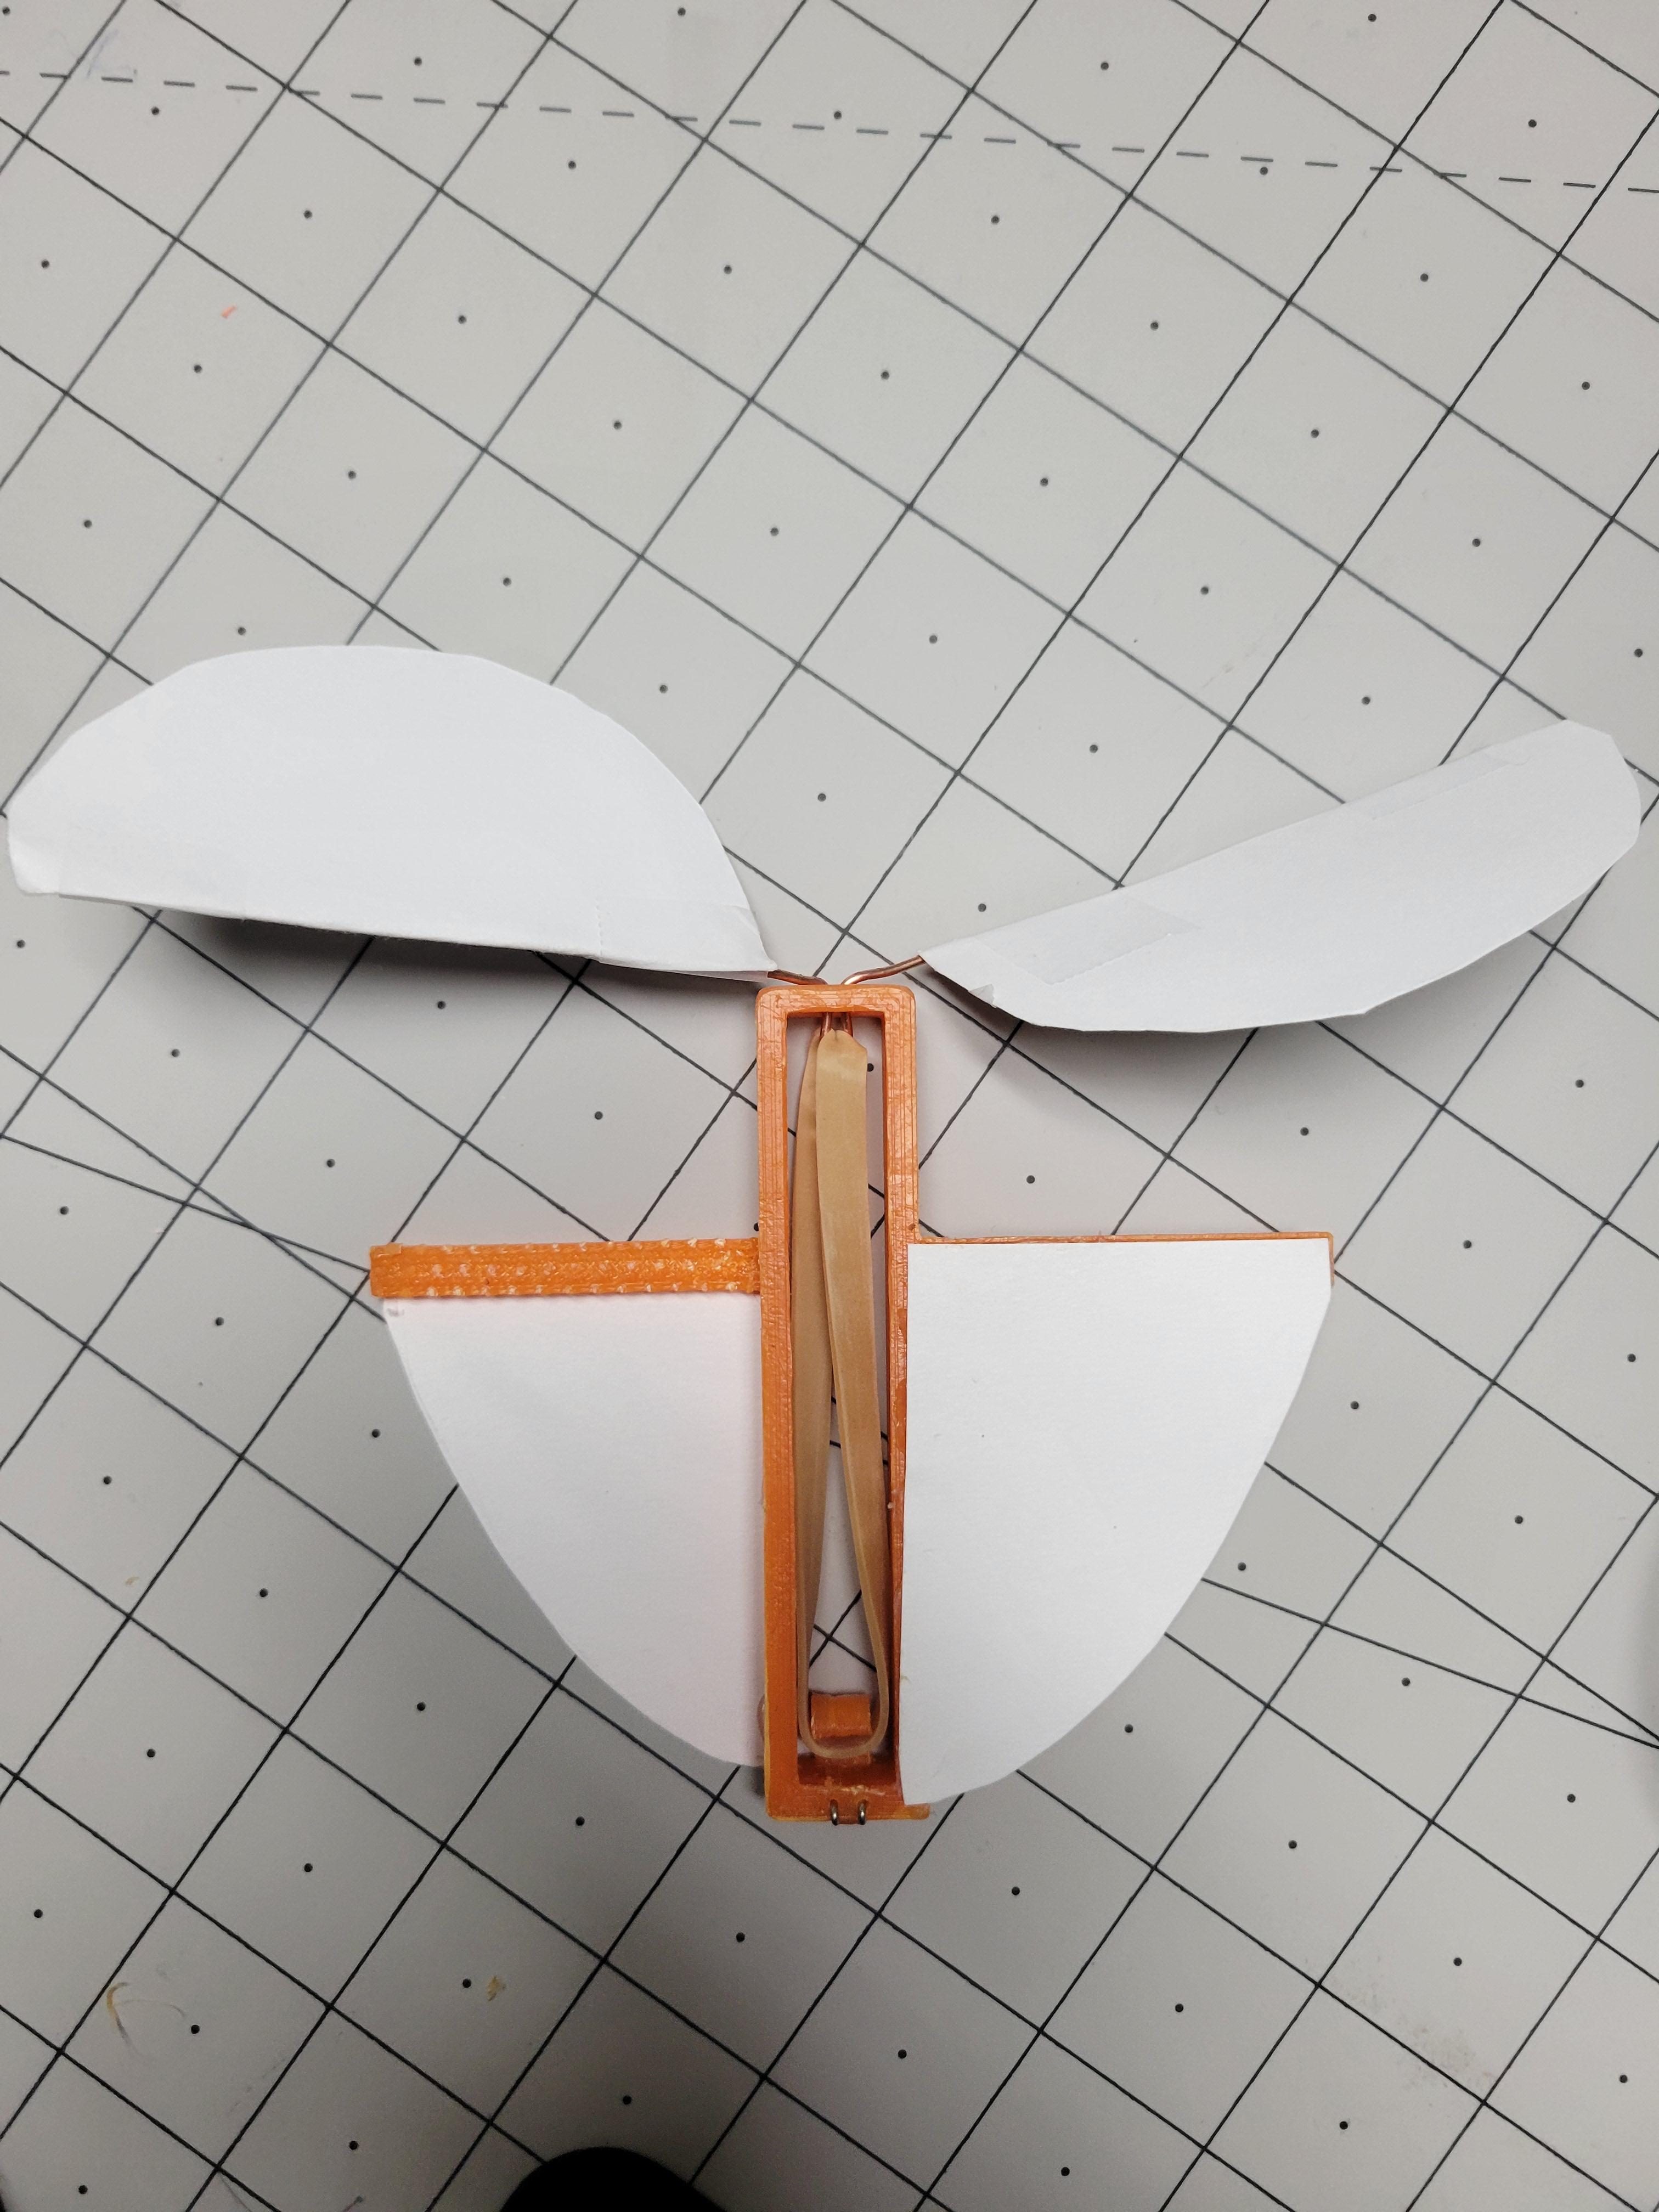
-Using the clear tape attach the circle bits to the wire facing opposite directions and the more triangle bits to the model itself.
Loading Her Up
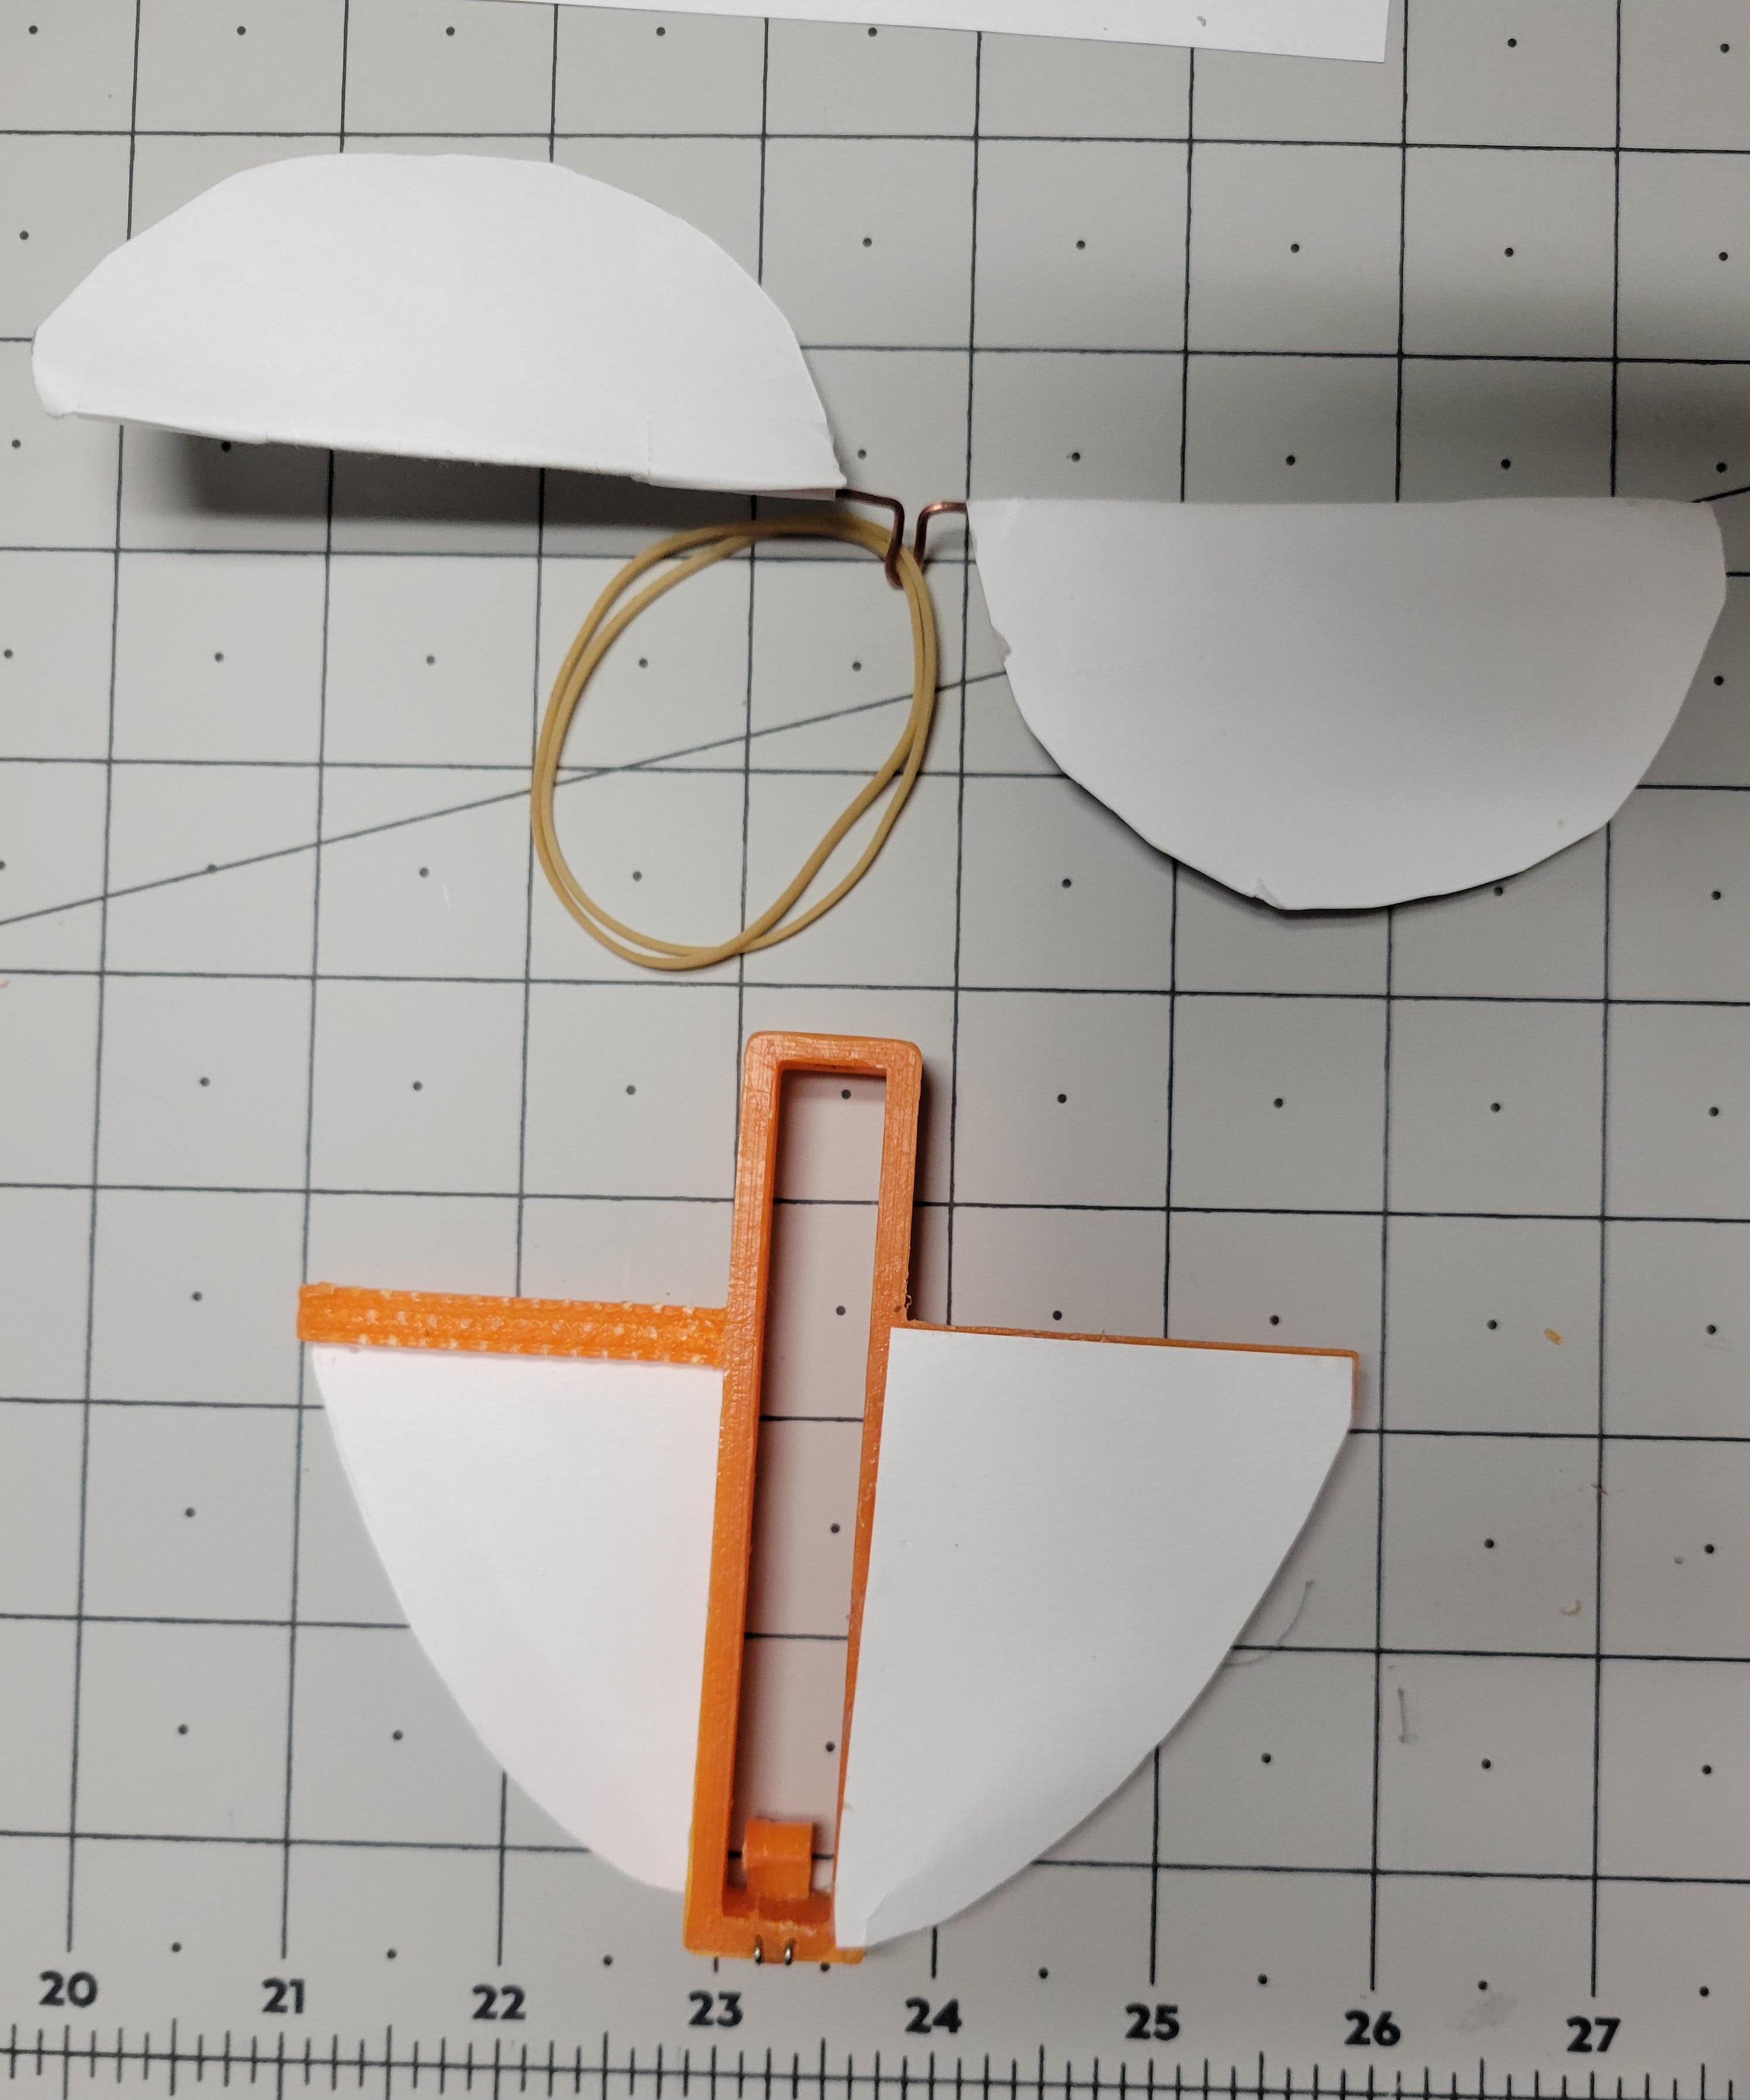
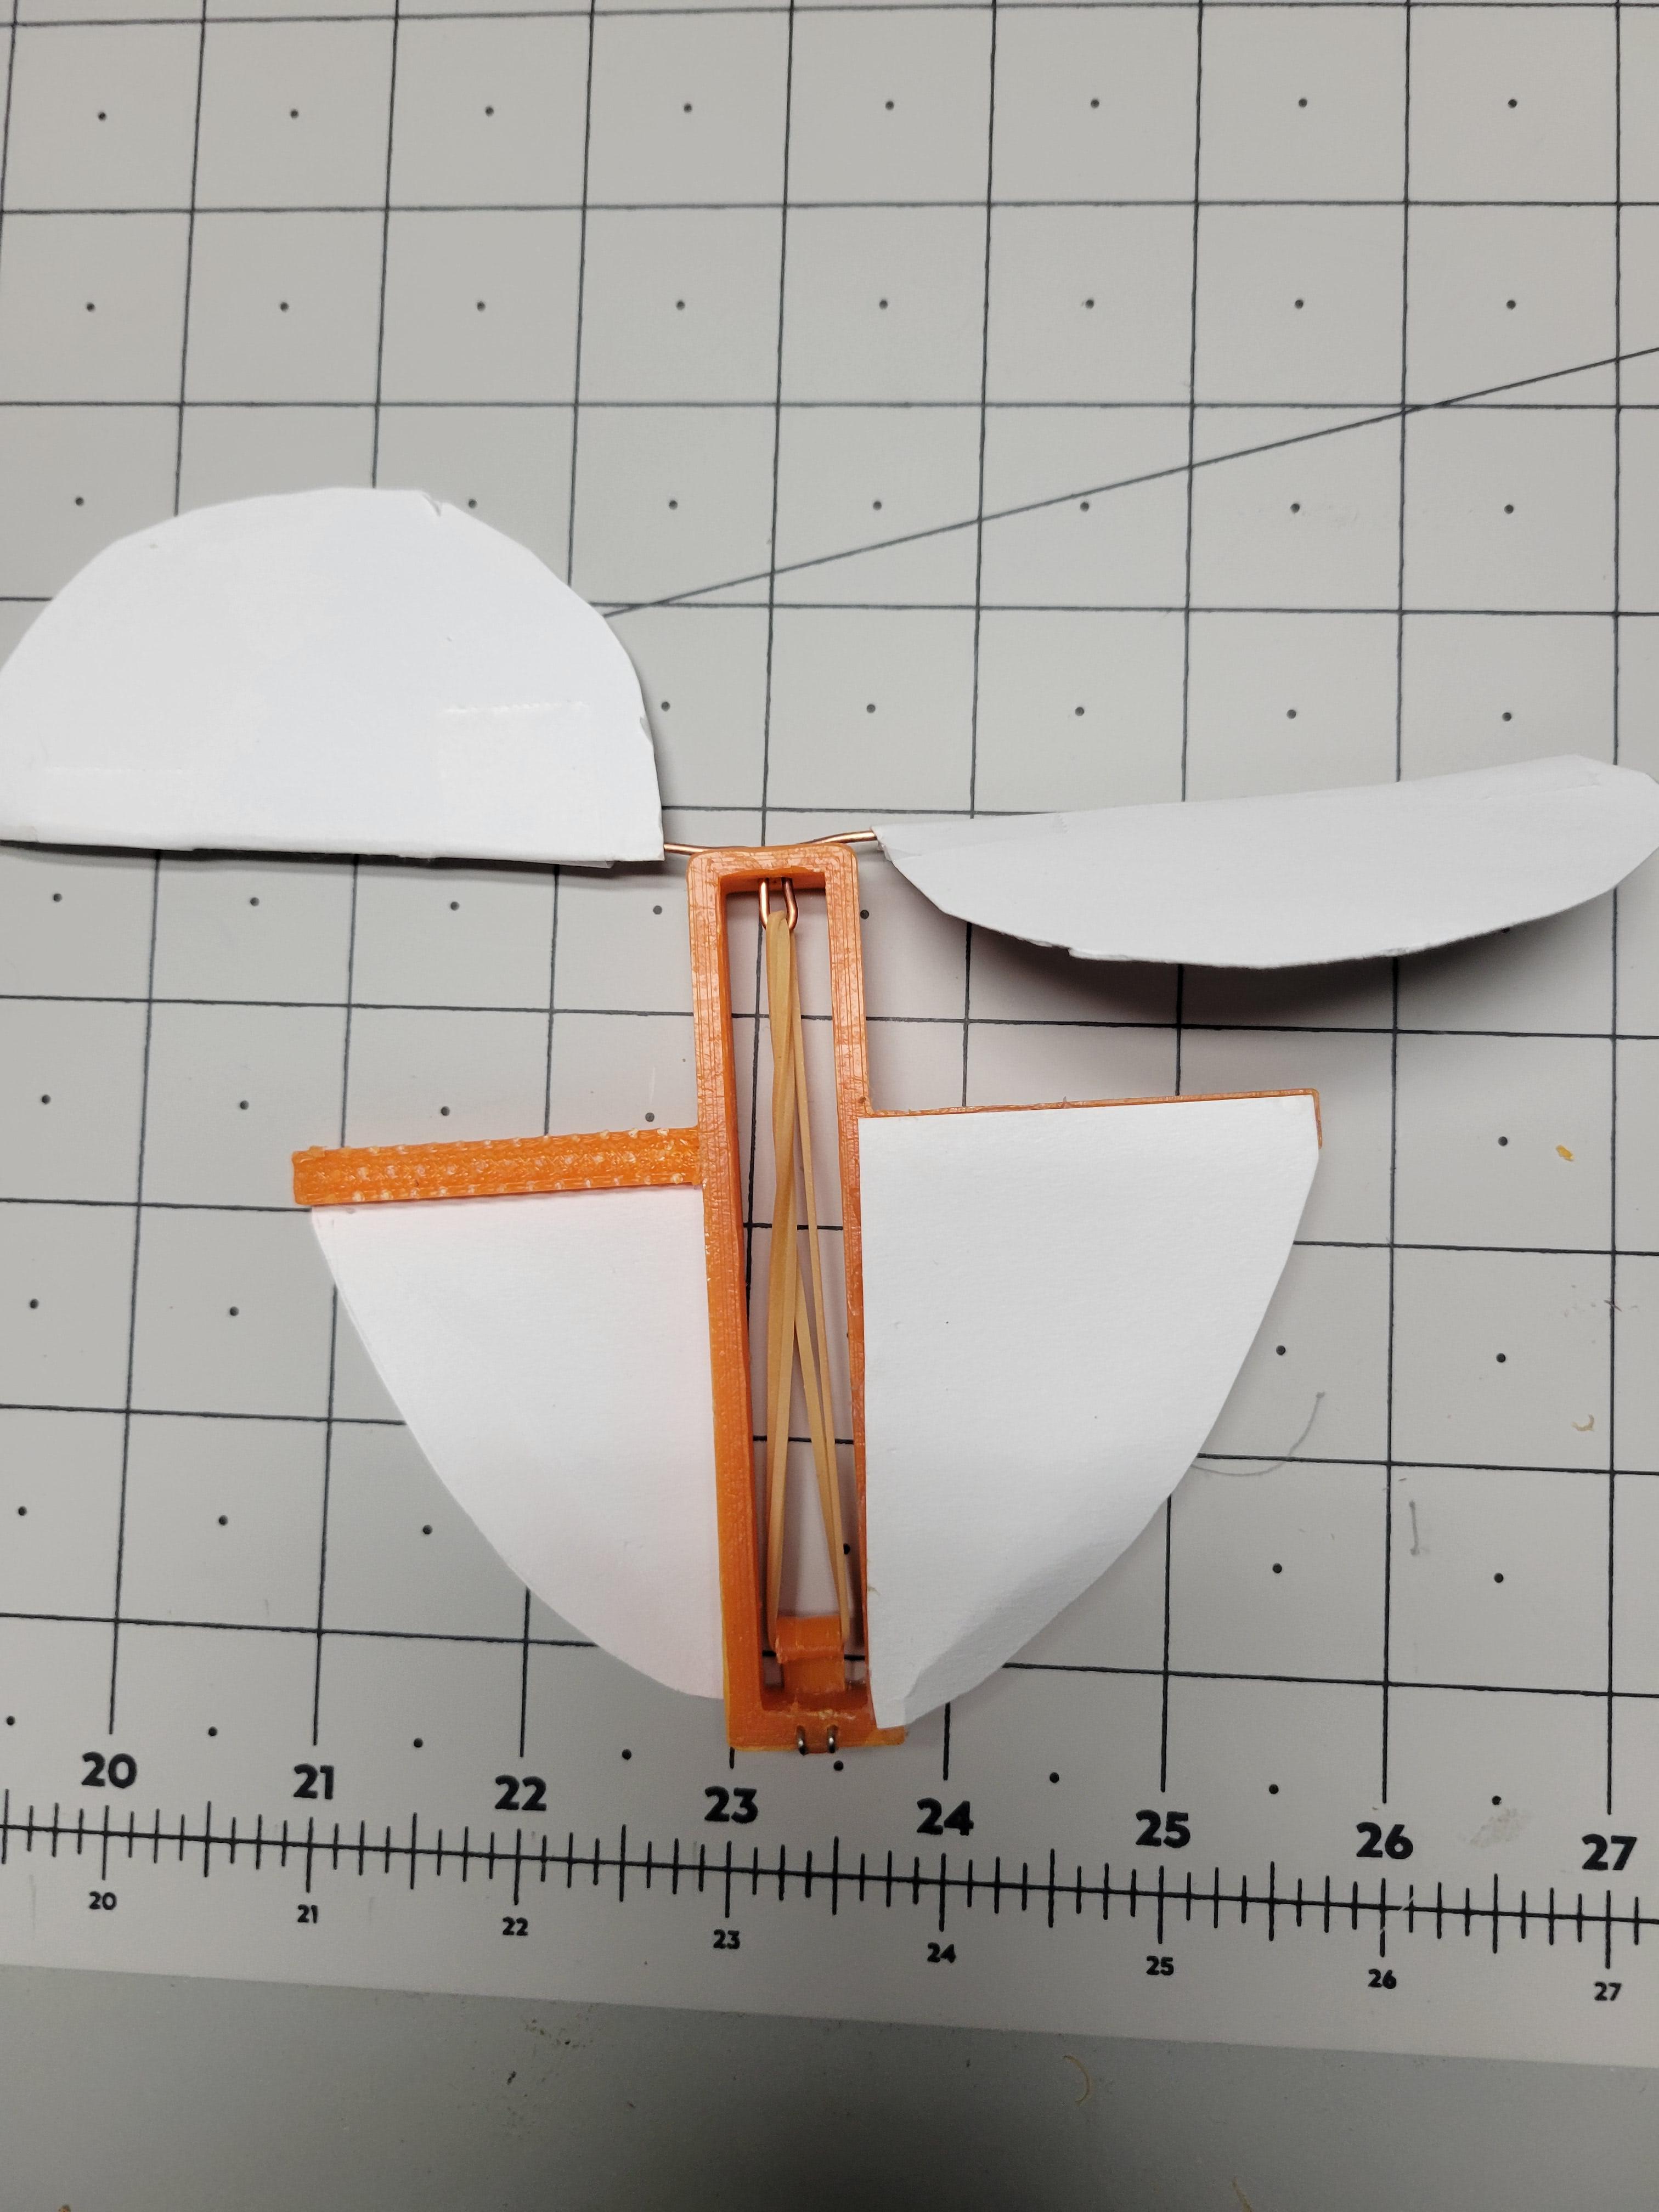
-We are almost there so now we just put 2 rubber bands around the wings into the center and thread them through the hole in the top of the model.
-Wrap the loose ends of the rubber bands onto the hook and you are ready to fly!
Make It Fly!
You made it to the end! Now all left you need to do to make it fly is turn the blades and let it go!
Some Suggestions:
-Push on the wire and not the paper part of the blade.
-Release it sideways
Have fun!