Roblox Obby
Welcome to “Furry obby," an action-packed Roblox obby that combines the thrill of a challenging obstacle course with the satisfaction of defeating furry opponents. Prepare yourself for a unique gaming experience where your platforming skills will be put to the test while taking down furry adversaries along the way. Embark on this adventure as you navigate through treacherous obstacles, conquer deadly jumps, and unleash your inner warrior to triumph over the furry invasion. Sharpen your reflexes, gear up, and get ready to conquer the obstacles while eliminating the furries in this epic Roblox obby! Are you up for the challenge? Let the fury of the "Furry Obby" begin!
Supplies
There are several tools, programmes, and websites I used to make a Roblox obby, and you may use them too. The Roblox Studio programme, which serves as the official game production environment for Roblox, is required to get started. The user-friendly interface makes creating and scripting your obby easy. Additionally, you can use image-editing programmes like GIMP to make unique textures and visuals for the items and terrain in your obby.
You'll largely use the Lua programming language in Roblox Studio to script and code your hobby. To learn and sharpen your scripting skills, consult the Roblox Developer Hub (developer.roblox.com) for documentation, tutorials, and examples. You can look through the Roblox Asset Marketplace to improve your game's graphics and playability.
Creating the End
-- Place this script in the ending place of your obby
local TeleportService = game:GetService("TeleportService")
local Players = game:GetService("Players")
local ENDING_PLACE_ID = 123456789 -- Replace with the ID of your ending place
-- Function to teleport players to the next obby or a different game
local function teleportToNextObby(player)
local nextPlaceId = ENDING_PLACE_ID -- Replace with the ID of the next obby or a different game
if nextPlaceId then
TeleportService:Teleport(nextPlaceId, player)
else
player:Kick("The next obby is currently unavailable. Please try again later.")
end
end
-- Function to handle player touching the ending part
local function onTouched(endingPart)
local touchingPlayer = Players:GetPlayerFromCharacter(endingPart.Parent)
if touchingPlayer then
teleportToNextObby(touchingPlayer)
end
end
-- Connect the onTouched function to the Touched event of the ending part
script.Parent.Touched:Connect(onTouched)
Checkpoints
-- Place this script inside the part that represents the checkpoint
-- Variables
local Players = game:GetService("Players")
local checkpointSound = script.Parent:FindFirstChild("CheckpointSound") -- Sound object placed inside the checkpoint part
-- Function to handle player touching the checkpoint
local function onTouched(checkpointPart)
local touchingPlayer = Players:GetPlayerFromCharacter(checkpointPart.Parent)
if touchingPlayer then
-- Store the player's current checkpoint
touchingPlayer.leaderstats.Checkpoint.Value = script.Parent.Name
-- Play a sound effect
if checkpointSound and checkpointSound:IsA("Sound") then
checkpointSound:Play()
end
end
end
-- Connect the onTouched function to the Touched event of the checkpoint part
script.Parent.Touched:Connect(onTouched)
To use this script, follow these steps:
1.
Open Roblox Studio and navigate to the part that represents the checkpoint in your obby.
2.
Create a new Script inside the checkpoint part.
3.
Copy and paste the script provided into the Script you created.
4.
After that I checked if a player touches the checkpoint part in your obby, their current checkpoint will be stored in a Checkpoint value within their leaderstats folder.
```lua
-- Place this script inside each plank part
-- Constants
local FALL_TAG = "FallPlank"
local WALK_TAG = "WalkPlank"
local PLAYER_HUMANOID_TAG = "Humanoid"
-- Function to handle player touching the plank
local function onTouched(plankPart)
local touchingPart = plankPart.Parent
-- Check if the touching part is a player's humanoid and the plank has the appropriate tag
if touchingPart:IsA("Model") and touchingPart:FindFirstChild(PLAYER_HUMANOID_TAG) then
local playerHumanoid = touchingPart:FindFirstChild(PLAYER_HUMANOID_TAG)
if plankPart:FindFirstChild(FALL_TAG) then
-- Fall through the plank if it has the fall tag
playerHumanoid:ChangeState(Enum.HumanoidStateType.Freefall)
elseif plankPart:FindFirstChild(WALK_TAG) then
-- Allow walking through the plank if it has the walk tag
plankPart.CanCollide = false
plankPart.Transparency = 1
end
end
end
-- Connect the onTouched function to the Touched event of the plank part
script.Parent.Touched:Connect(onTouched)
```
To use this script, follow these steps:
1. Open Roblox Studio and navigate to the parts that represent the planks in your obby.
2. For the blue and yellow planks that players should fall through, add a StringValue object as a child of each plank part. Name the StringValue "FallPlank".
3. For the green plank that players can walk through, add a StringValue object as a child of the plank part. Name the StringValue "WalkPlank".
4. Create a new Script inside each plank part.
5. Copy and paste the script provided into each Script you created for the plank parts.
6. Save and publish your game.
Now, when a player touches a blue or yellow plank with the "FallPlank" tag, they will fall through it by transitioning into a freefall state. When a player touches the green plank with the "WalkPlank" tag, the plank will become transparent and players can walk through it since `CanCollide` is set to `false` for that plank.
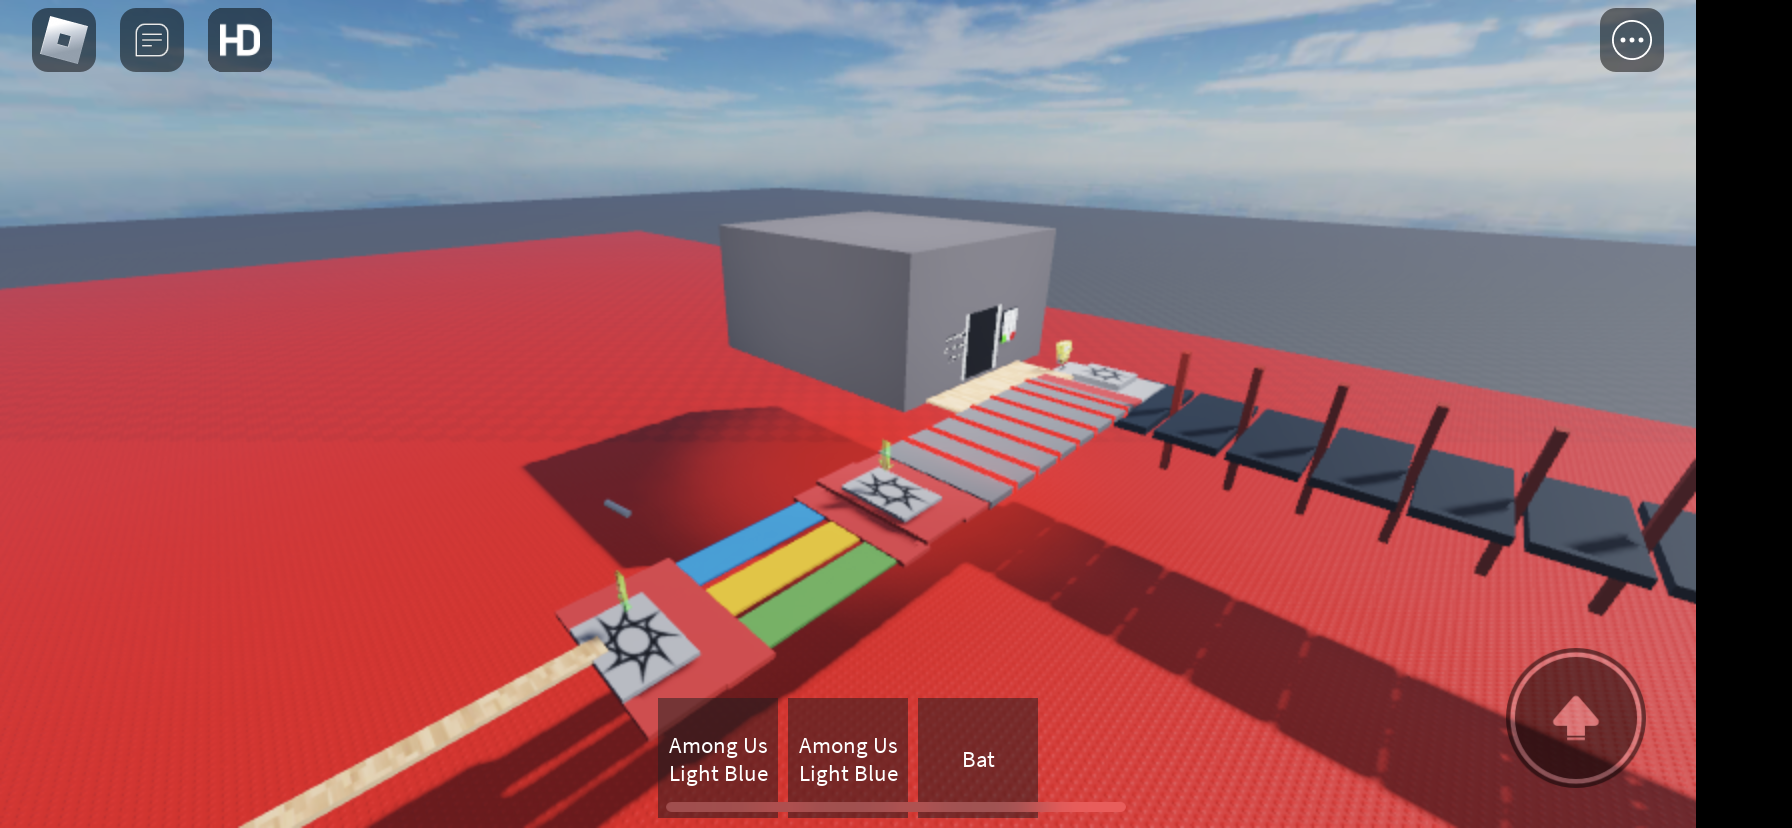
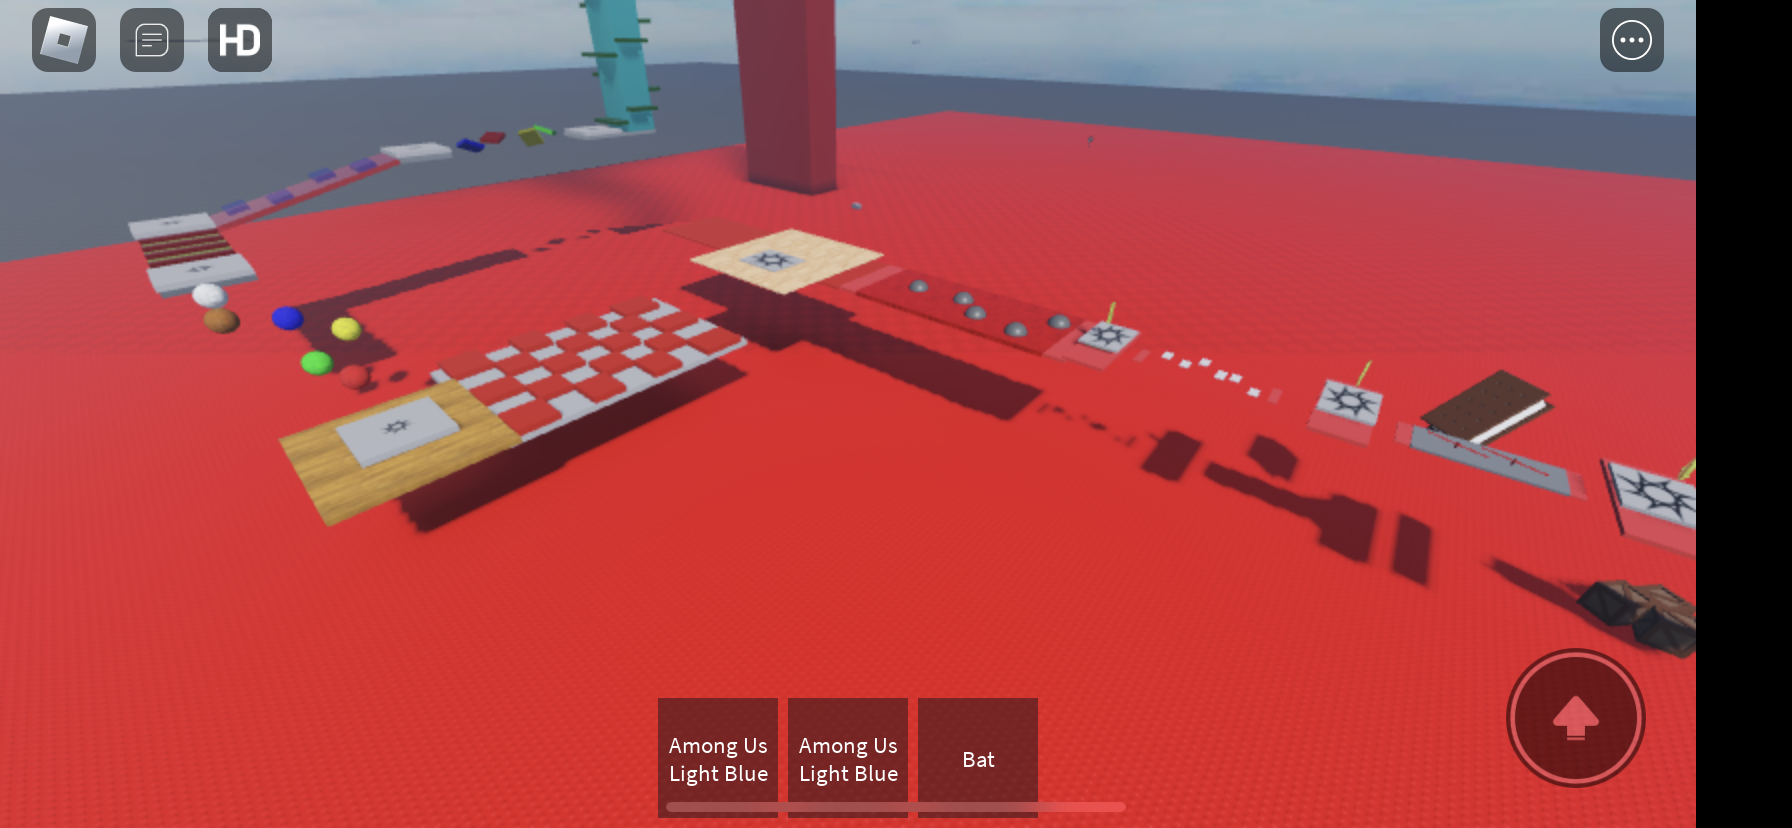
Checkered Lava
```lua
-- Place this script inside the lava obby piece
-- Constants
local LAVA_DAMAGE = 10 -- The amount of damage the lava should deal to players
-- Function to handle player touching the lava obby piece
local function onTouched(lavaPart)
local touchingPart = lavaPart.Parent
-- Check if the touching part is a player's humanoid
if touchingPart:IsA("Model") and touchingPart:FindFirstChild("Humanoid") then
local playerHumanoid = touchingPart:FindFirstChild("Humanoid")
playerHumanoid:TakeDamage(LAVA_DAMAGE)
end
end
-- Connect the onTouched function to the Touched event of the lava obby piece
script.Parent.Touched:Connect(onTouched)
```
To use this script and create a basic checkered lava obby piece, follow these steps:
1. Open Roblox Studio and create a new part to represent the lava obby piece.
2. Customize the appearance of the part to resemble your desired checkered lava obby piece.
3. Create a new Script inside the lava obby piece part.
4. Copy and paste the script provided into the Script you created.
5. Save and publish your game.
Now, when a player touches the lava obby piece, their `Humanoid` will take damage based on the `LAVA_DAMAGE` constant you set. You can adjust the `LAVA_DAMAGE` value to change the amount of damage the lava should deal to players.
Remember to duplicate this lava obby piece and arrange it to create your checkered lava obby section.
And use regular floor peices for the parts your able to jump on.
Spawn in With a Bat
Certainly! Here's an example of a Roblox script that makes a character spawn in with a bat when they join the game:
```lua
local function onCharacterAdded(character)
local humanoid = character:WaitForChild("Humanoid")
-- Create and position the bat
local bat = Instance.new("Tool")
bat.Name = "Bat"
bat.Parent = humanoid
-- Adjust the position and rotation of the bat
bat.GripForward = Vector3.new(-1, 0, 0)
bat.GripPos = Vector3.new(0, 1, 0)
-- Customize the bat's appearance (optional)
-- Replace "rbxassetid://123456789" with the ID of your desired bat asset
local batHandle = Instance.new("MeshPart")
batHandle.MeshId = "rbxassetid://123456789"
batHandle.Parent = bat
-- Allow the player to equip and use the bat
humanoid:EquipTool(bat)
end
game.Players.PlayerAdded:Connect(function(player)
player.CharacterAdded:Connect(onCharacterAdded)
-- In case the player is already in the game
if player.Character then
onCharacterAdded(player.Character)
end
end)
```
In this script, we create a function called `onCharacterAdded` that is triggered whenever a player's character is added to the game. Inside this function, we create a bat tool and parent it to the player's humanoid. We then adjust the position and rotation of the bat to make it look like the character is holding it.
Additionally, you can customize the bat's appearance by setting the `MeshId` property of the `batHandle` variable to the ID of your desired bat asset. Make sure to replace `"rbxassetid://123456789"` with the appropriate ID.
Finally, we connect the `onCharacterAdded` function to the `CharacterAdded` event for each player that joins the game. This ensures that the bat is given to the character when they spawn. We also call the `onCharacterAdded` function immediately if the player is already in the game when the script runs.
Remember to place this script in a ServerScriptService or a LocalScript if you want it to work in a local game.
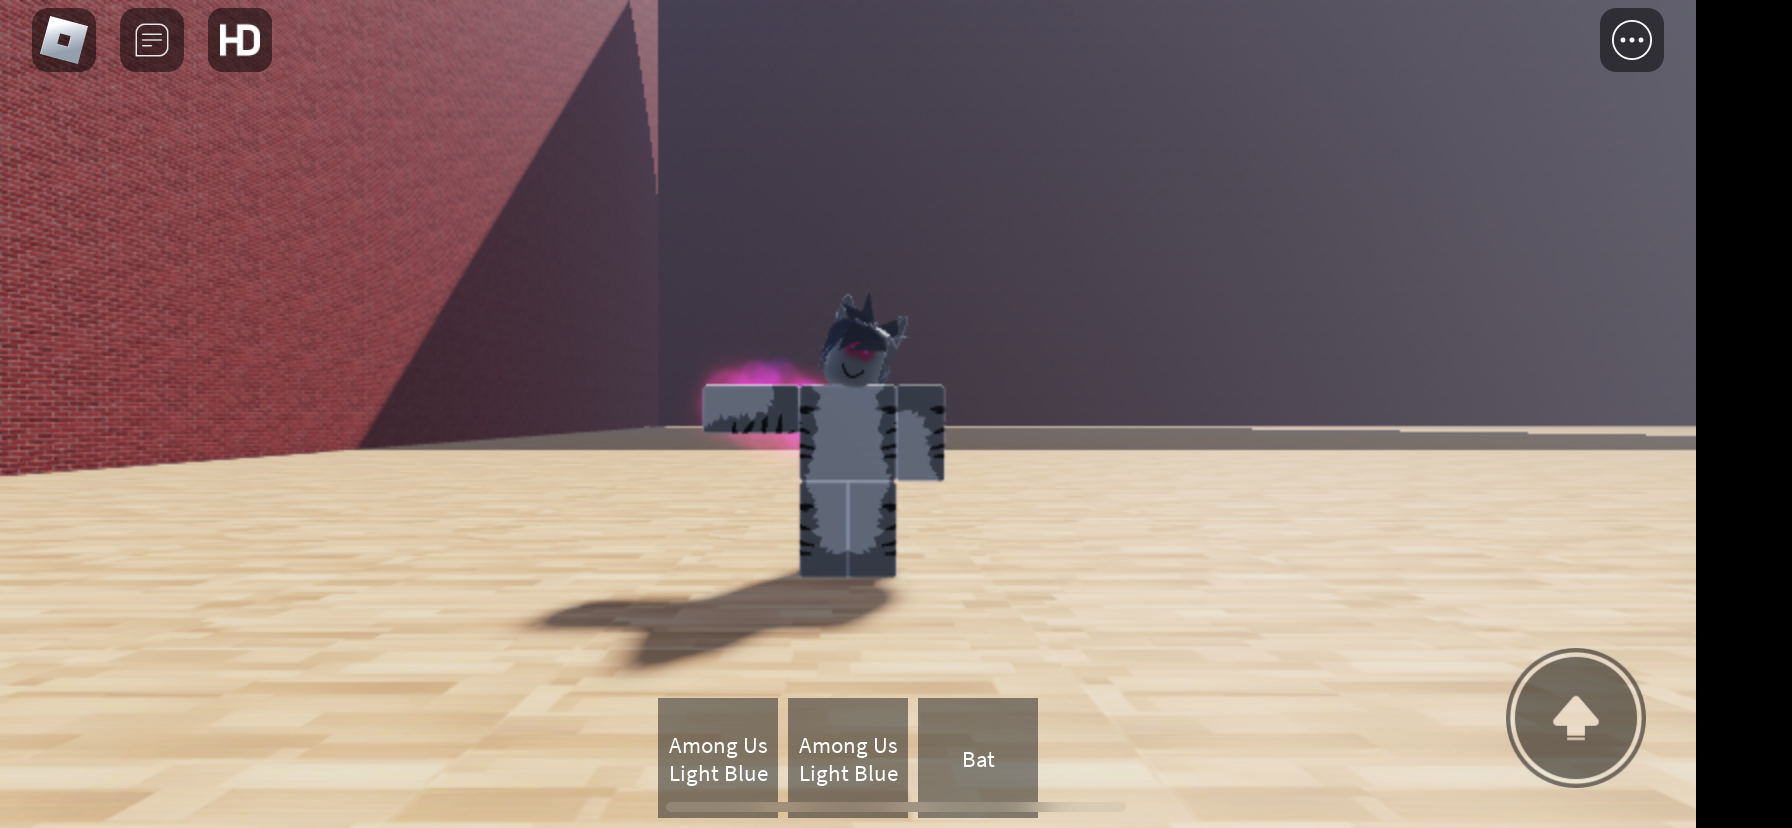
Creating the Boss
```lua
-- Create a furry boss with a health bar of 1000 that can kill the player
local furryBoss = script.Parent -- Assumes the script is a child of the furry boss object
local healthBar = Instance.new("IntValue", furryBoss) -- Create a new IntValue object for the health bar
healthBar.Name = "Health"
healthBar.Value = 1000 -- Set the boss health to 1000
local function onTouched(hit)
local character = hit.Parent
local humanoid = character:FindFirstChild("Humanoid")
if humanoid then
humanoid.Health = 0 -- Kill the player when touched by the boss
end
end
local function onHealthChanged(health)
if health <= 0 then
furryBoss:Destroy() -- Destroy the boss when its health reaches 0
end
end
furryBoss.Touched:Connect(onTouched) -- Connect the Touched event to the onTouched function
healthBar:GetPropertyChangedSignal("Value"):Connect(onHealthChanged) -- Connect the health value change event to the onHealthChanged function
```
This script sets the furry boss's health to 1000 and listens for the "Touched" event. When the furry boss touches a player, it will kill the player by setting their health to 0. Additionally, the script listens for the health value change event and destroys the boss object when its health reaches 0.
Admin Commands

To add the commands I used Roblox game, you can utilize Lua scripting. Firstly, create a script and insert it into a tool in Roblox Studio. Inside the script, define a list of admin usernames, replacing the placeholders with actual usernames. This list will determine who has admin privileges. Next, implement a function called "isAdmin" that checks if a player is an admin based on their username. This function iterates through the list of admins and returns true if a match is found.
To create specific admin commands, define functions for each command you want to implement. For example, you can have a "teleportCommand" function that takes a player and destination as arguments. Within this function, check if the player is an admin and if so, use the "MoveTo" method to teleport their character to the specified destination. Similarly, you can create a "spawnCommand" function that allows admins to spawn items in the game. Again, check if the player is an admin, and if so, use the appropriate Roblox API methods to create and position the desired item in the game world. To tie everything together, use the "game.Players.PlayerAdded" event to add the admin commands to each player upon joining. Inside this event, create a folder called "AdminCommands" for the player and add the specific admin commands to that folder. Use the "Changed" event of each command to execute the corresponding function when the command's value is modified.
Examples on what I did
-- Insert this script into a Tool in Roblox Studio
-- Define the list of admins (replace with actual player usernames)
local admins = {
"Admin1",
"Admin2",
"Admin3"
}
-- Function to check if a player is an admin
local function isAdmin(player)
local playerName = player.Name
for _, admin in ipairs(admins) do
if playerName == admin then
return true
end
end
return false
end
-- Command to teleport a player
local function teleportCommand(player, destination)
if isAdmin(player) then
local character = player.Character
if character and destination then
character:MoveTo(destination.Position)
end
end
end
-- Command to spawn an item
local function spawnCommand(player, item)
if isAdmin(player) then
local workspace = game:GetService("Workspace")
if item and workspace then
local newItem = Instance.new("Part")
newItem.Name = item
newItem.Position = player.Character.HumanoidRootPart.Position
newItem.Parent = workspace
end
end
end
-- Add admin commands
game.Players.PlayerAdded:Connect(function(player)
local adminCommands = {}
-- Teleport command
local teleportCmd = Instance.new("StringValue")
teleportCmd.Name = "TeleportCommand"
teleportCmd.Value = "teleport"
teleportCmd.Parent = adminCommands
teleportCmd.Changed:Connect(function()
teleportCommand(player, teleportCmd.Value)
end)
-- Spawn command
local spawnCmd = Instance.new("StringValue")
spawnCmd.Name = "SpawnCommand"
spawnCmd.Value = "spawn"
spawnCmd.Parent = adminCommands
spawnCmd.Changed:Connect(function()
spawnCommand(player, spawnCmd.Value)
end)
-- Create admin commands folder for the player
local playerFolder = Instance.new("Folder")
playerFolder.Name = "AdminCommands"
playerFolder.Parent = player
-- Add the commands to the player folder
adminCommands.Parent = playerFolder
end)
Leader Board
```lua
-- Insert this script into a ServerScriptService
-- Leaderboard dictionary
local leaderboard = {}
-- Function to update the leaderboard
local function updateLeaderboard(player)
local playerName = player.Name
local leaderStats = player:WaitForChild("leaderstats", math.huge)
local playerScore = leaderStats:WaitForChild("Score").Value
if leaderboard[playerName] then
leaderboard[playerName].Score = playerScore
else
leaderboard[playerName] = {
Player = player,
Score = playerScore
}
end
end
-- Function to sort and display the leaderboard
local function displayLeaderboard()
local sortedLeaderboard = {}
for playerName, data in pairs(leaderboard) do
table.insert(sortedLeaderboard, {
PlayerName = playerName,
Score = data.Score
})
end
table.sort(sortedLeaderboard, function(a, b)
return a.Score > b.Score
end)
for i, data in ipairs(sortedLeaderboard) do
local rank = i
local playerName = data.PlayerName
local playerScore = data.Score
print(string.format("Rank %d: %s - Score: %d", rank, playerName, playerScore))
end
end
-- Update leaderboard when player joins or their score changes
game.Players.PlayerAdded:Connect(function(player)
player.leaderstats.ChildAdded:Connect(function()
updateLeaderboard(player)
displayLeaderboard()
end)
end)
-- Update leaderboard when player leaves
game.Players.PlayerRemoving:Connect(function(player)
leaderboard[player.Name] = nil
displayLeaderboard()
end)
```
The above script creates a leaderboard system in Roblox. It defines a dictionary called "leaderboard" to store player data, including their scores. The "updateLeaderboard" function is responsible for updating the leaderboard by retrieving the player's score and storing it in the dictionary The "displayLeaderboard" function sorts the leaderboard data based on scores in descending order and then prints the rank, player name, and score for each player. The script uses Roblox's events to update the leaderboard when a player joins or leaves the game, as well as when their score changes. Whenever a player's score changes, the leaderboard is updated and displayed by calling the respective functions.This leaderboard system can be customized further by adding additional fields or functionality, such as displaying player avatars or implementing a GUI-based leaderboard display in the game.
Note: Make sure to place the script in a ServerScriptService to ensure it runs on the server and not the client.
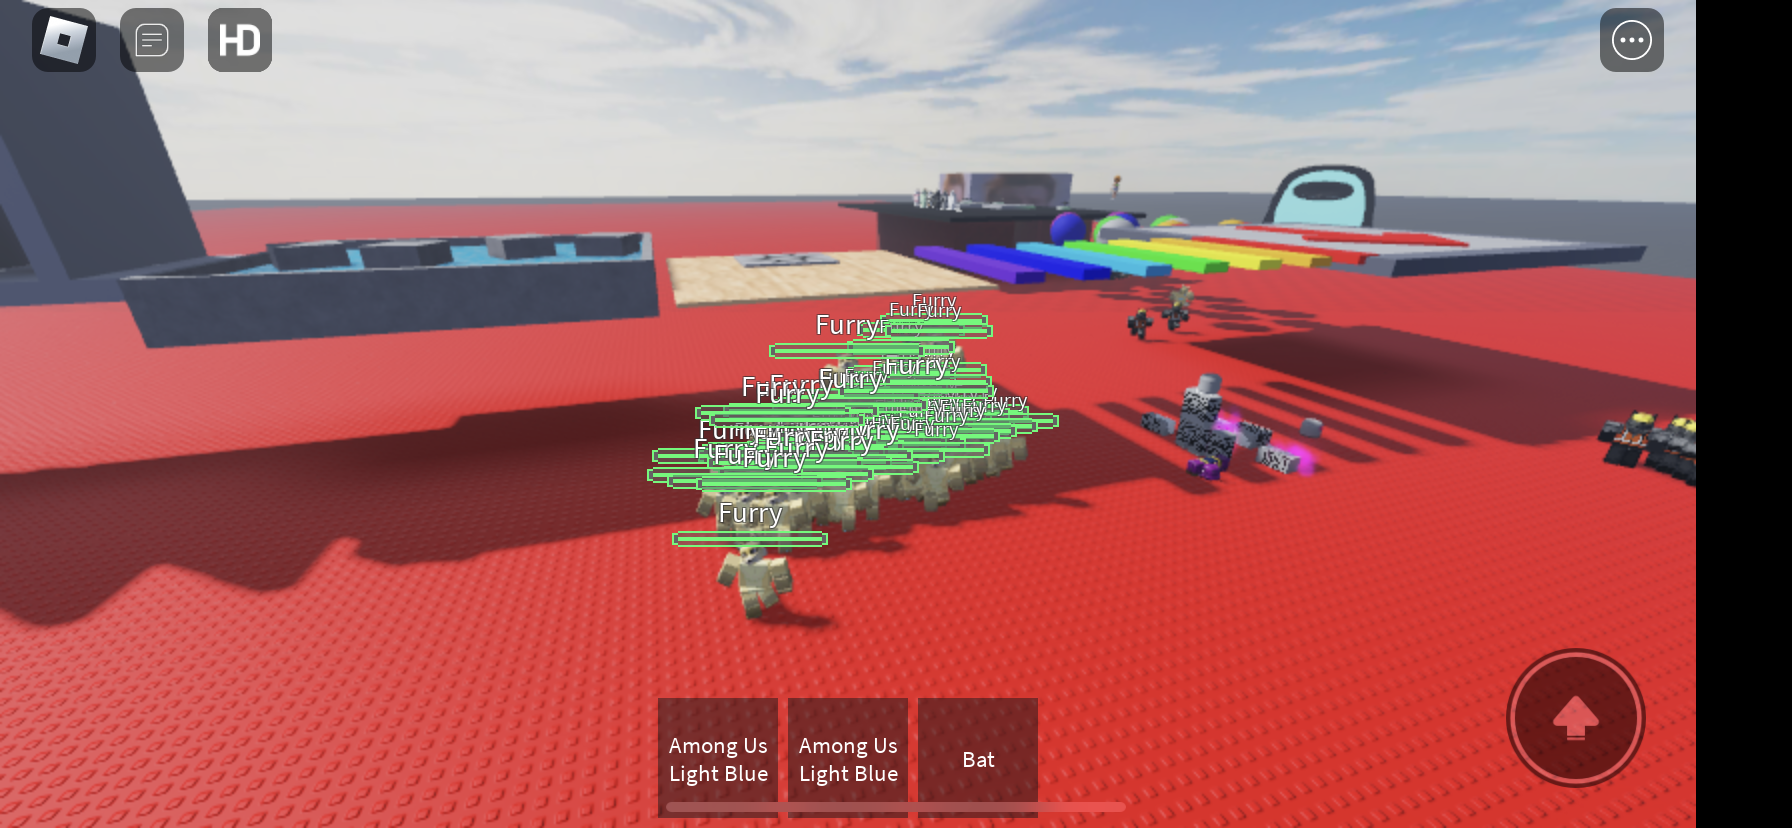
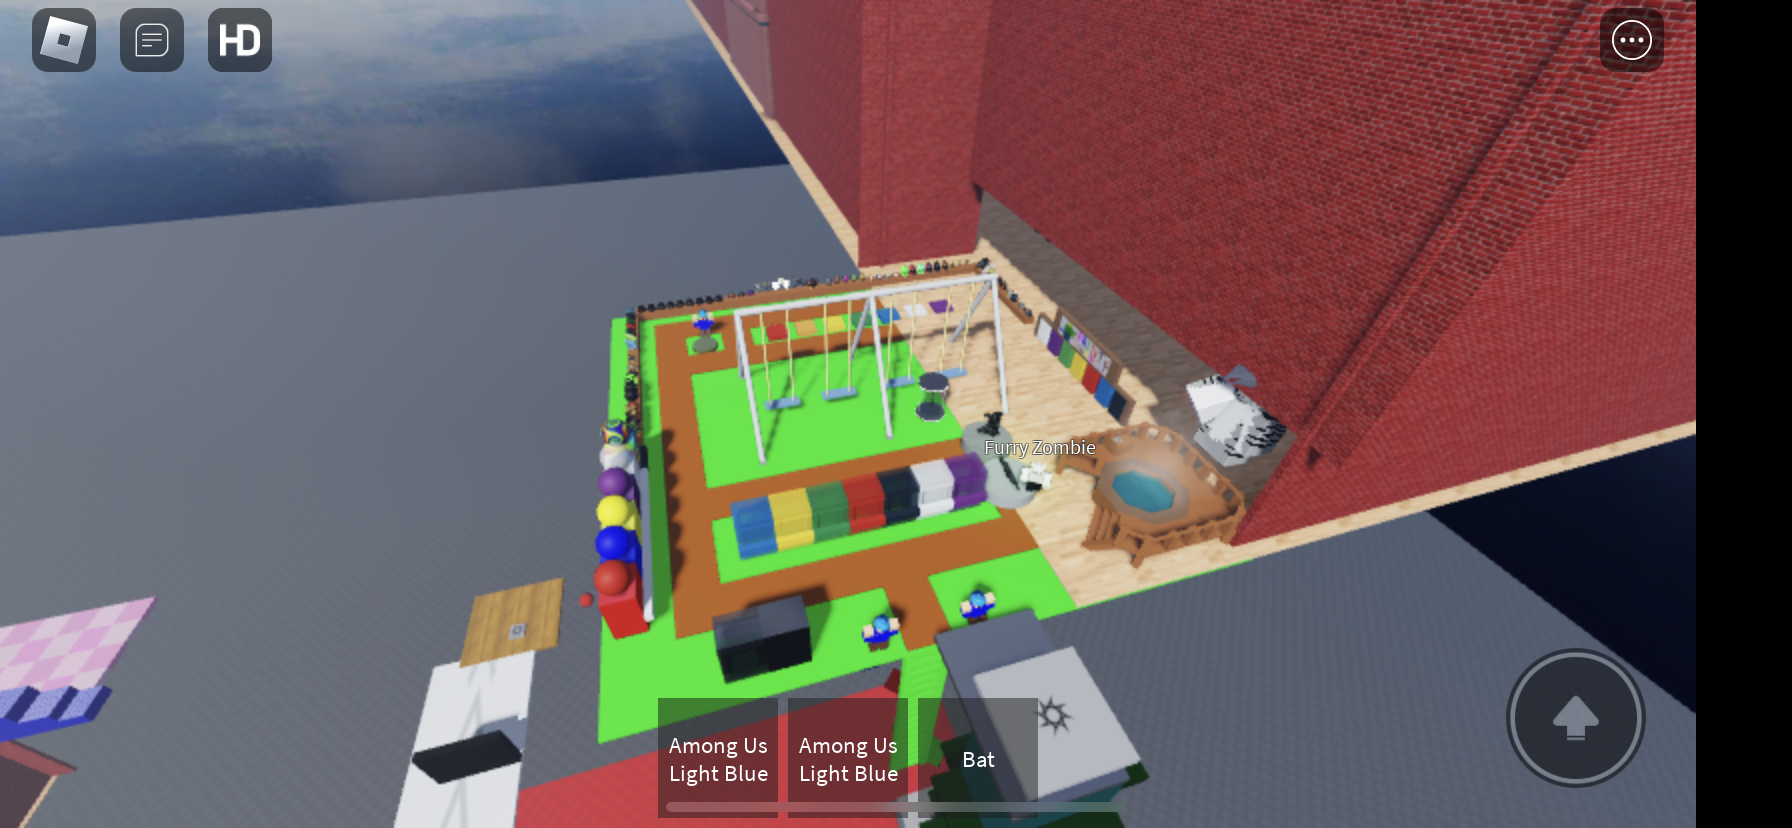
Furry Killer Room
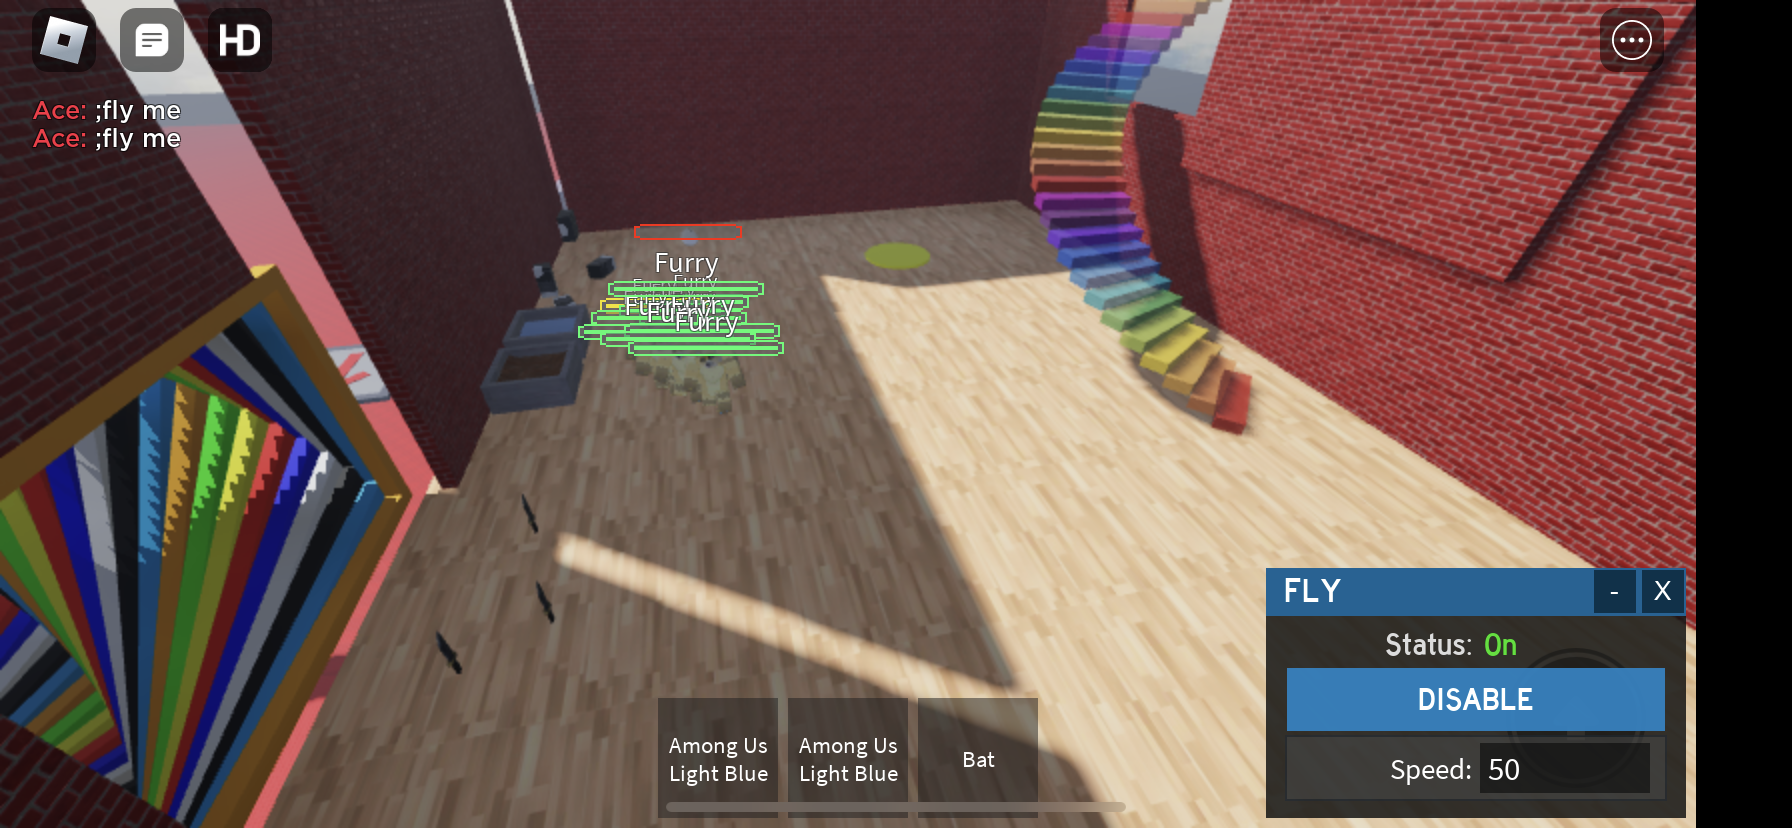
To create a platform with four walls, a disappearing staircase, and furries running around in a separate room, you can use Roblox Studio and Lua scripting. Here's the script I used.
```lua
-- Insert this script into a Part in Roblox Studio
-- Variables
local platform = script.Parent
local stairs = platform:WaitForChild("Stairs")
local furriesRoom = script.Parent.Parent:WaitForChild("FurriesRoom")
-- Disappearing staircase
local function disappearStairs()
stairs.Transparency = 1
stairs.CanCollide = false
end
-- Trigger event when player steps on the stairs
stairs.Touched:Connect(function(part)
local player = game.Players:GetPlayerFromCharacter(part.Parent)
if player then
disappearStairs()
end
end)
-- Furries in the room
local function createFurries()
for i = 1, 5 do
local furry = Instance.new("Part")
furry.Name = "Furry" .. i
furry.Size = Vector3.new(2, 2, 2)
furry.BrickColor = BrickColor.new("Bright orange")
furry.Parent = furriesRoom
end
end
-- Function to move furries randomly
local function moveFurriesRandomly()
local furries = furriesRoom:GetChildren()
for _, furry in ipairs(furries) do
if furry:IsA("BasePart") then
local randomPos = furriesRoom.Position + Vector3.new(
math.random(-10, 10),
furry.Size.Y / 2,
math.random(-10, 10)
)
furry:MoveTo(randomPos)
end
end
end
-- Move furries randomly every 5 seconds
while true do
wait(5)
moveFurriesRandomly()
end
-- Create furries and move them initially
createFurries()
moveFurriesRandomly()
```
In this scenario, the script assumes you have a platform with four walls and a staircase as a child of the script's parent. Additionally, there should be a separate room called "FurriesRoom" within the same hierarchy where furries will be spawned.
The script includes a function called "disappearStairs" that makes the stairs transparent and non-collidable when a player touches them. This function is triggered by the "Touched" event of the stairs.
The script also creates five furry NPCs in the "FurriesRoom" using the "createFurries" function. These furries are represented by orange-colored parts. Another function called "moveFurriesRandomly" moves the furries to random positions within the room.
Starting Screen

The script utilizes Lua, the scripting language of Roblox, and Roblox Studio, the development environment. By following a step-by-step process, you can create a script that triggers the appearance of the furry boss and makes it laugh upon a player joining the game. The script listens for the "PlayerAdded" event, which fires when a player joins the game. When this event occurs, the script searches for a model named "FurryBoss" in the game's workspace. If found, it retrieves the humanoid part of the boss and plays the designated laughing animation or sound. This creates an immersive and entertaining experience for players as they are greeted by the humorous and lively furry boss upon entering the game world, for a quick 8 seconds.
local function onPlayerAdded(player)
-- Create the furry boss model
local furryBoss = game.Workspace:FindFirstChild("FurryBoss")
if furryBoss then
-- Play the laughing animation or sound
-- Replace "LaughAnimation" with the actual animation name or sound ID
furryBoss:FindFirstChild("Humanoid"):LoadAnimation(game.ReplicatedStorage.LaughAnimation):Play()
end
end
game.Players.PlayerAdded:Connect(onPlayerAdded)
Red Killer Floor

```lua
local floor = script.Parent -- Assumes the script is placed inside the floor part
local function changeFloorColor()
floor.BrickColor = BrickColor.new("Bright red") -- Change floor color to red
end
local function onPlayerTouch(part)
local player = game.Players:GetPlayerFromCharacter(part.Parent)
if player then
player.Character.Humanoid.Health = 0 -- Set player's health to 0 to make them die
end
end
wait(5) -- Wait for 5 seconds
changeFloorColor()
floor.Touched:Connect(onPlayerTouch)
```
This script is written in Lua, the scripting language used in Roblox. It creates a functionality where touching the floor causes the player to die, and after 5 seconds, the floor changes its color to red.
The script starts by assigning the parent object of the script (the floor) to the `floor` variable. This allows us to refer to the floor easily.
The changeFloorColor() function changes the `Brick Color` property of the floor to Bright red using BrickColor.new(). This function is called after waiting for 5 seconds using the (wait)function. The onPlayerTouch() function is triggered whenever the floor is touched by a part. It checks if the part's parent is a player's character, using game.Players:GetPlayerFromCharacter(). If the player is found, it sets their character's Humanoid.Health to 0, causing them to die.
Finally, the script connects the `Touched` event of the floor to the `onPlayerTouch()` function, so that it is executed whenever the floor is touched. With this script, when a player touches the floor, they will die instantly, and after 5 seconds.