Reusable Wedding Invitations
by NemaliNew in Craft > Parties & Weddings
10534 Views, 43 Favorites, 0 Comments
Reusable Wedding Invitations
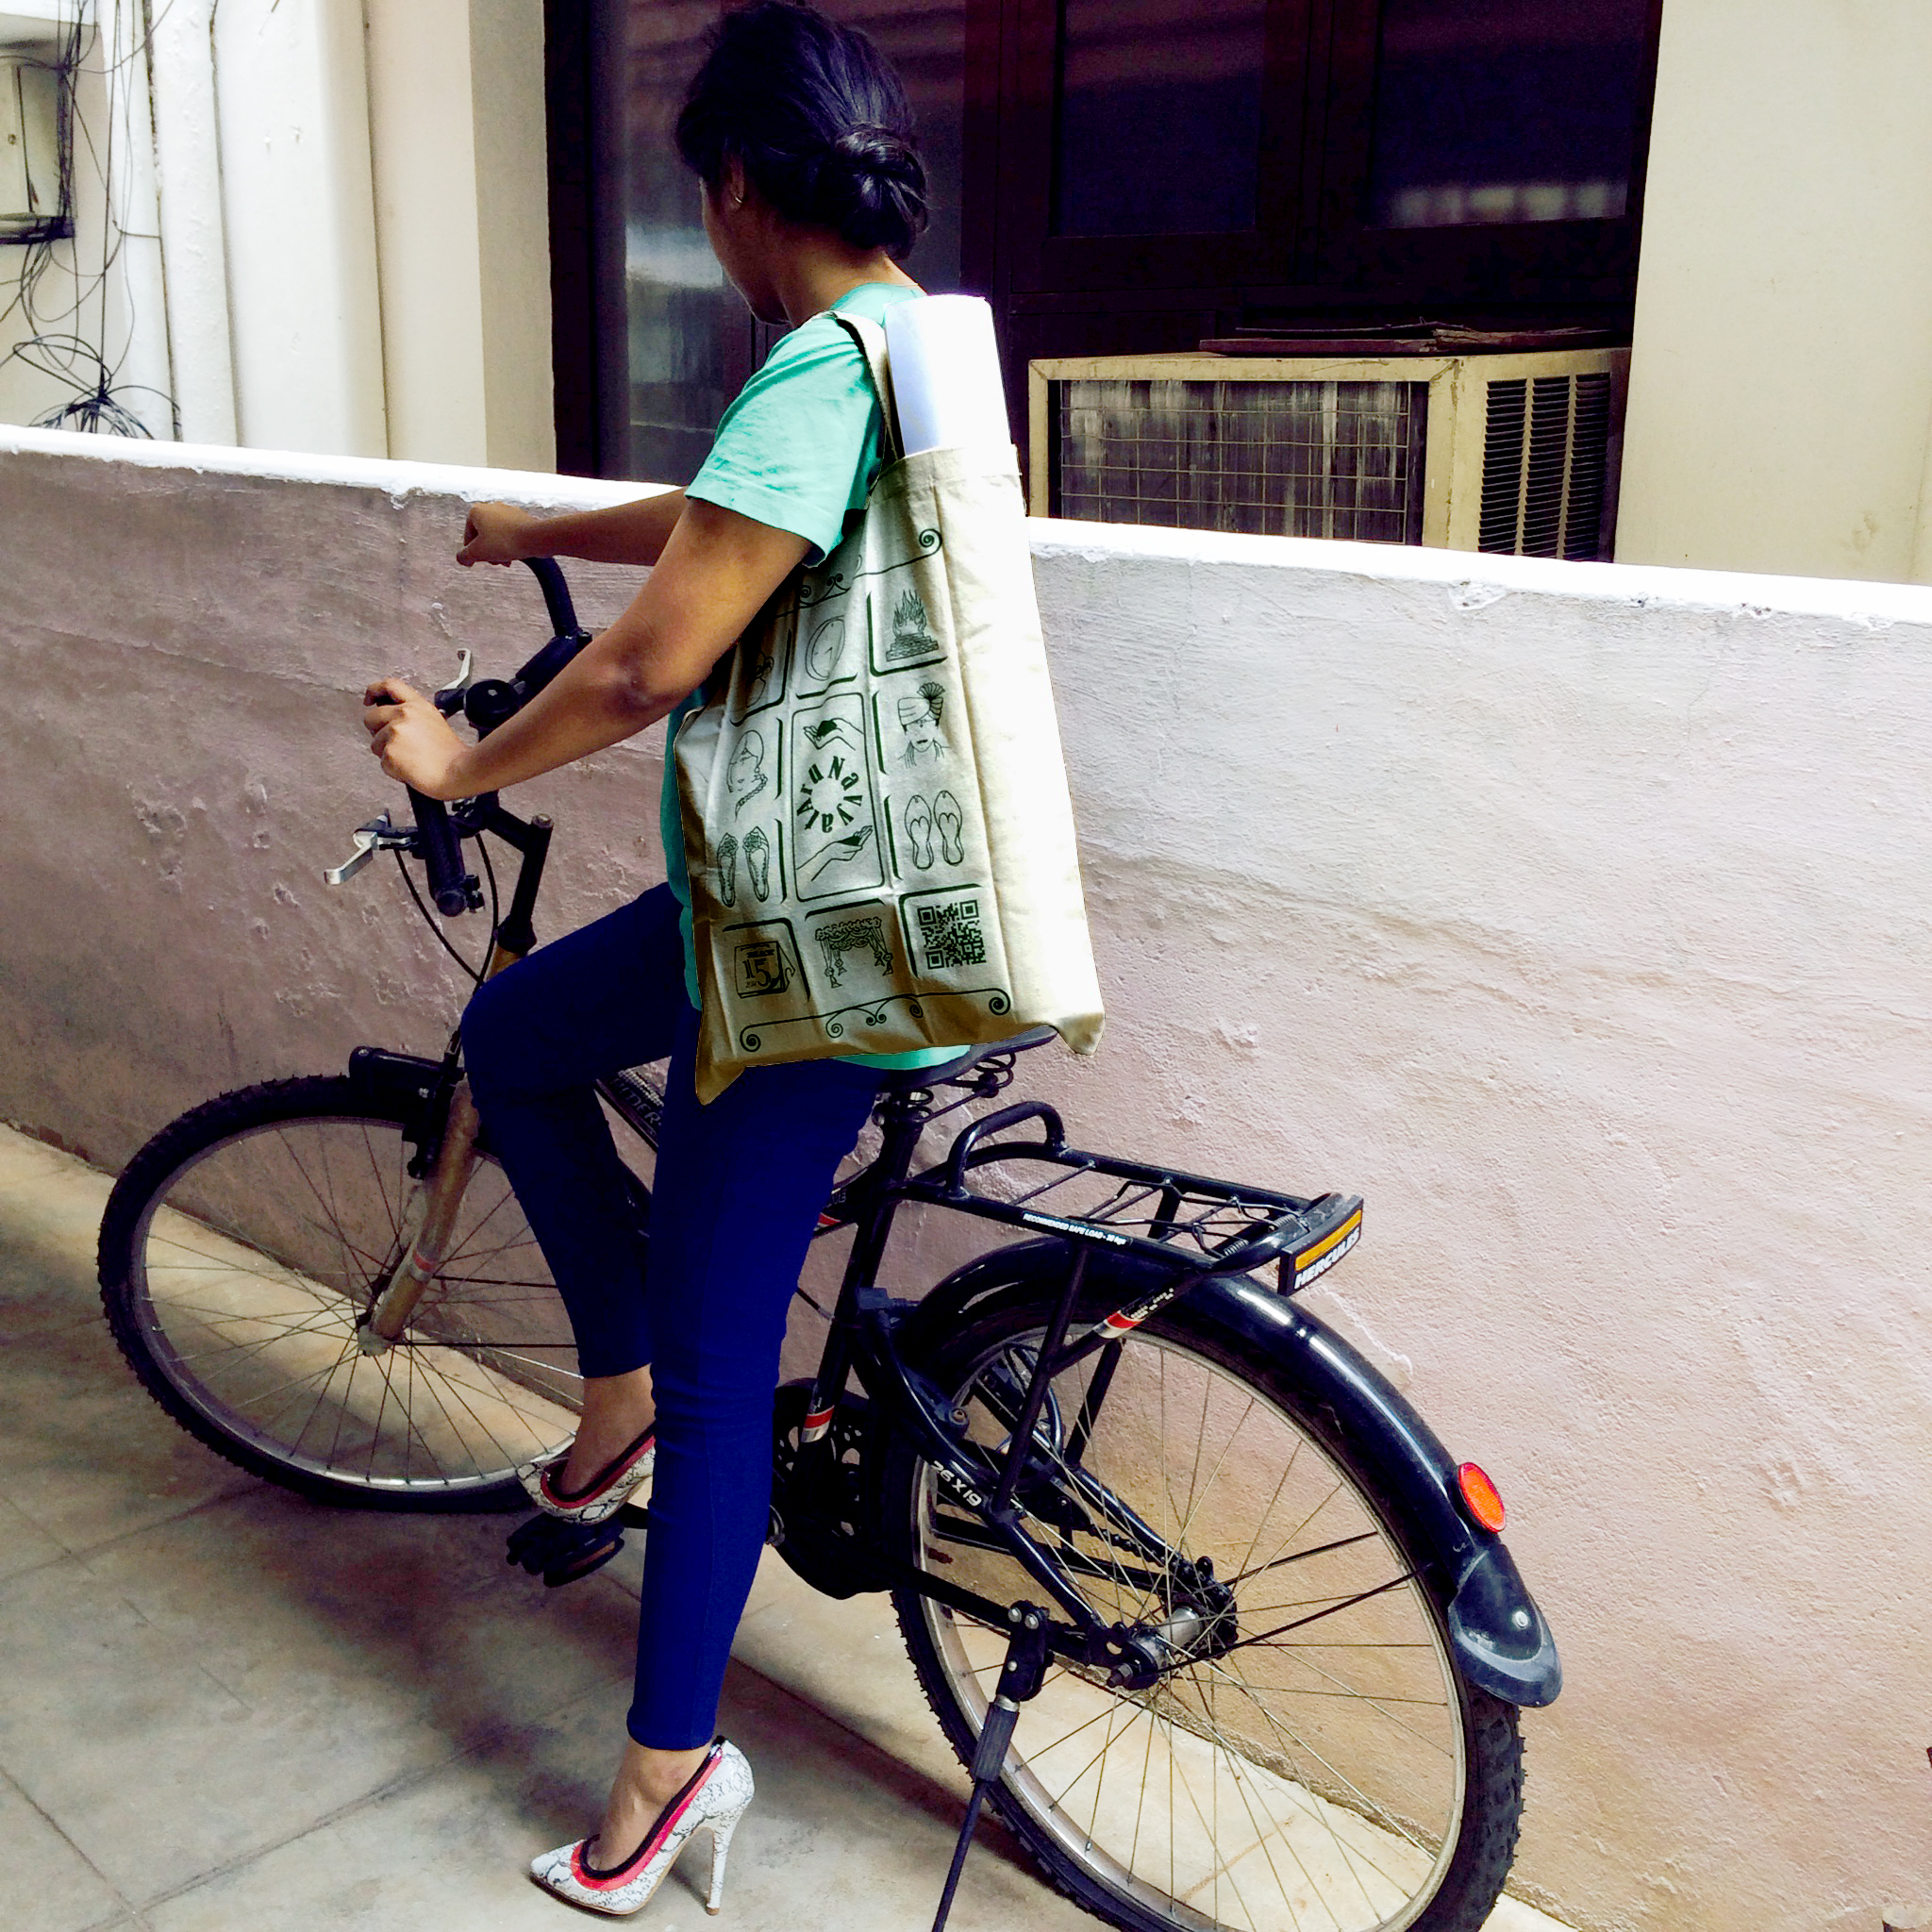
I am a big fan of two words "don't throw". As a child I always collected invitations because I did not like throwing them away. A card's life span is hardly few minutes or until the wedding date. (i.e if you are asked to carry the invitation to the venue). This was in my mind when I was thinking about designing my Wedding Invitation.
I came up with this idea so that my wedding invitations could be used later. This way I feel good about not wasting paper, increase the usability of the invitation and also this stays as a memory with all the once who mean a lot to me.
Get Ready to Start
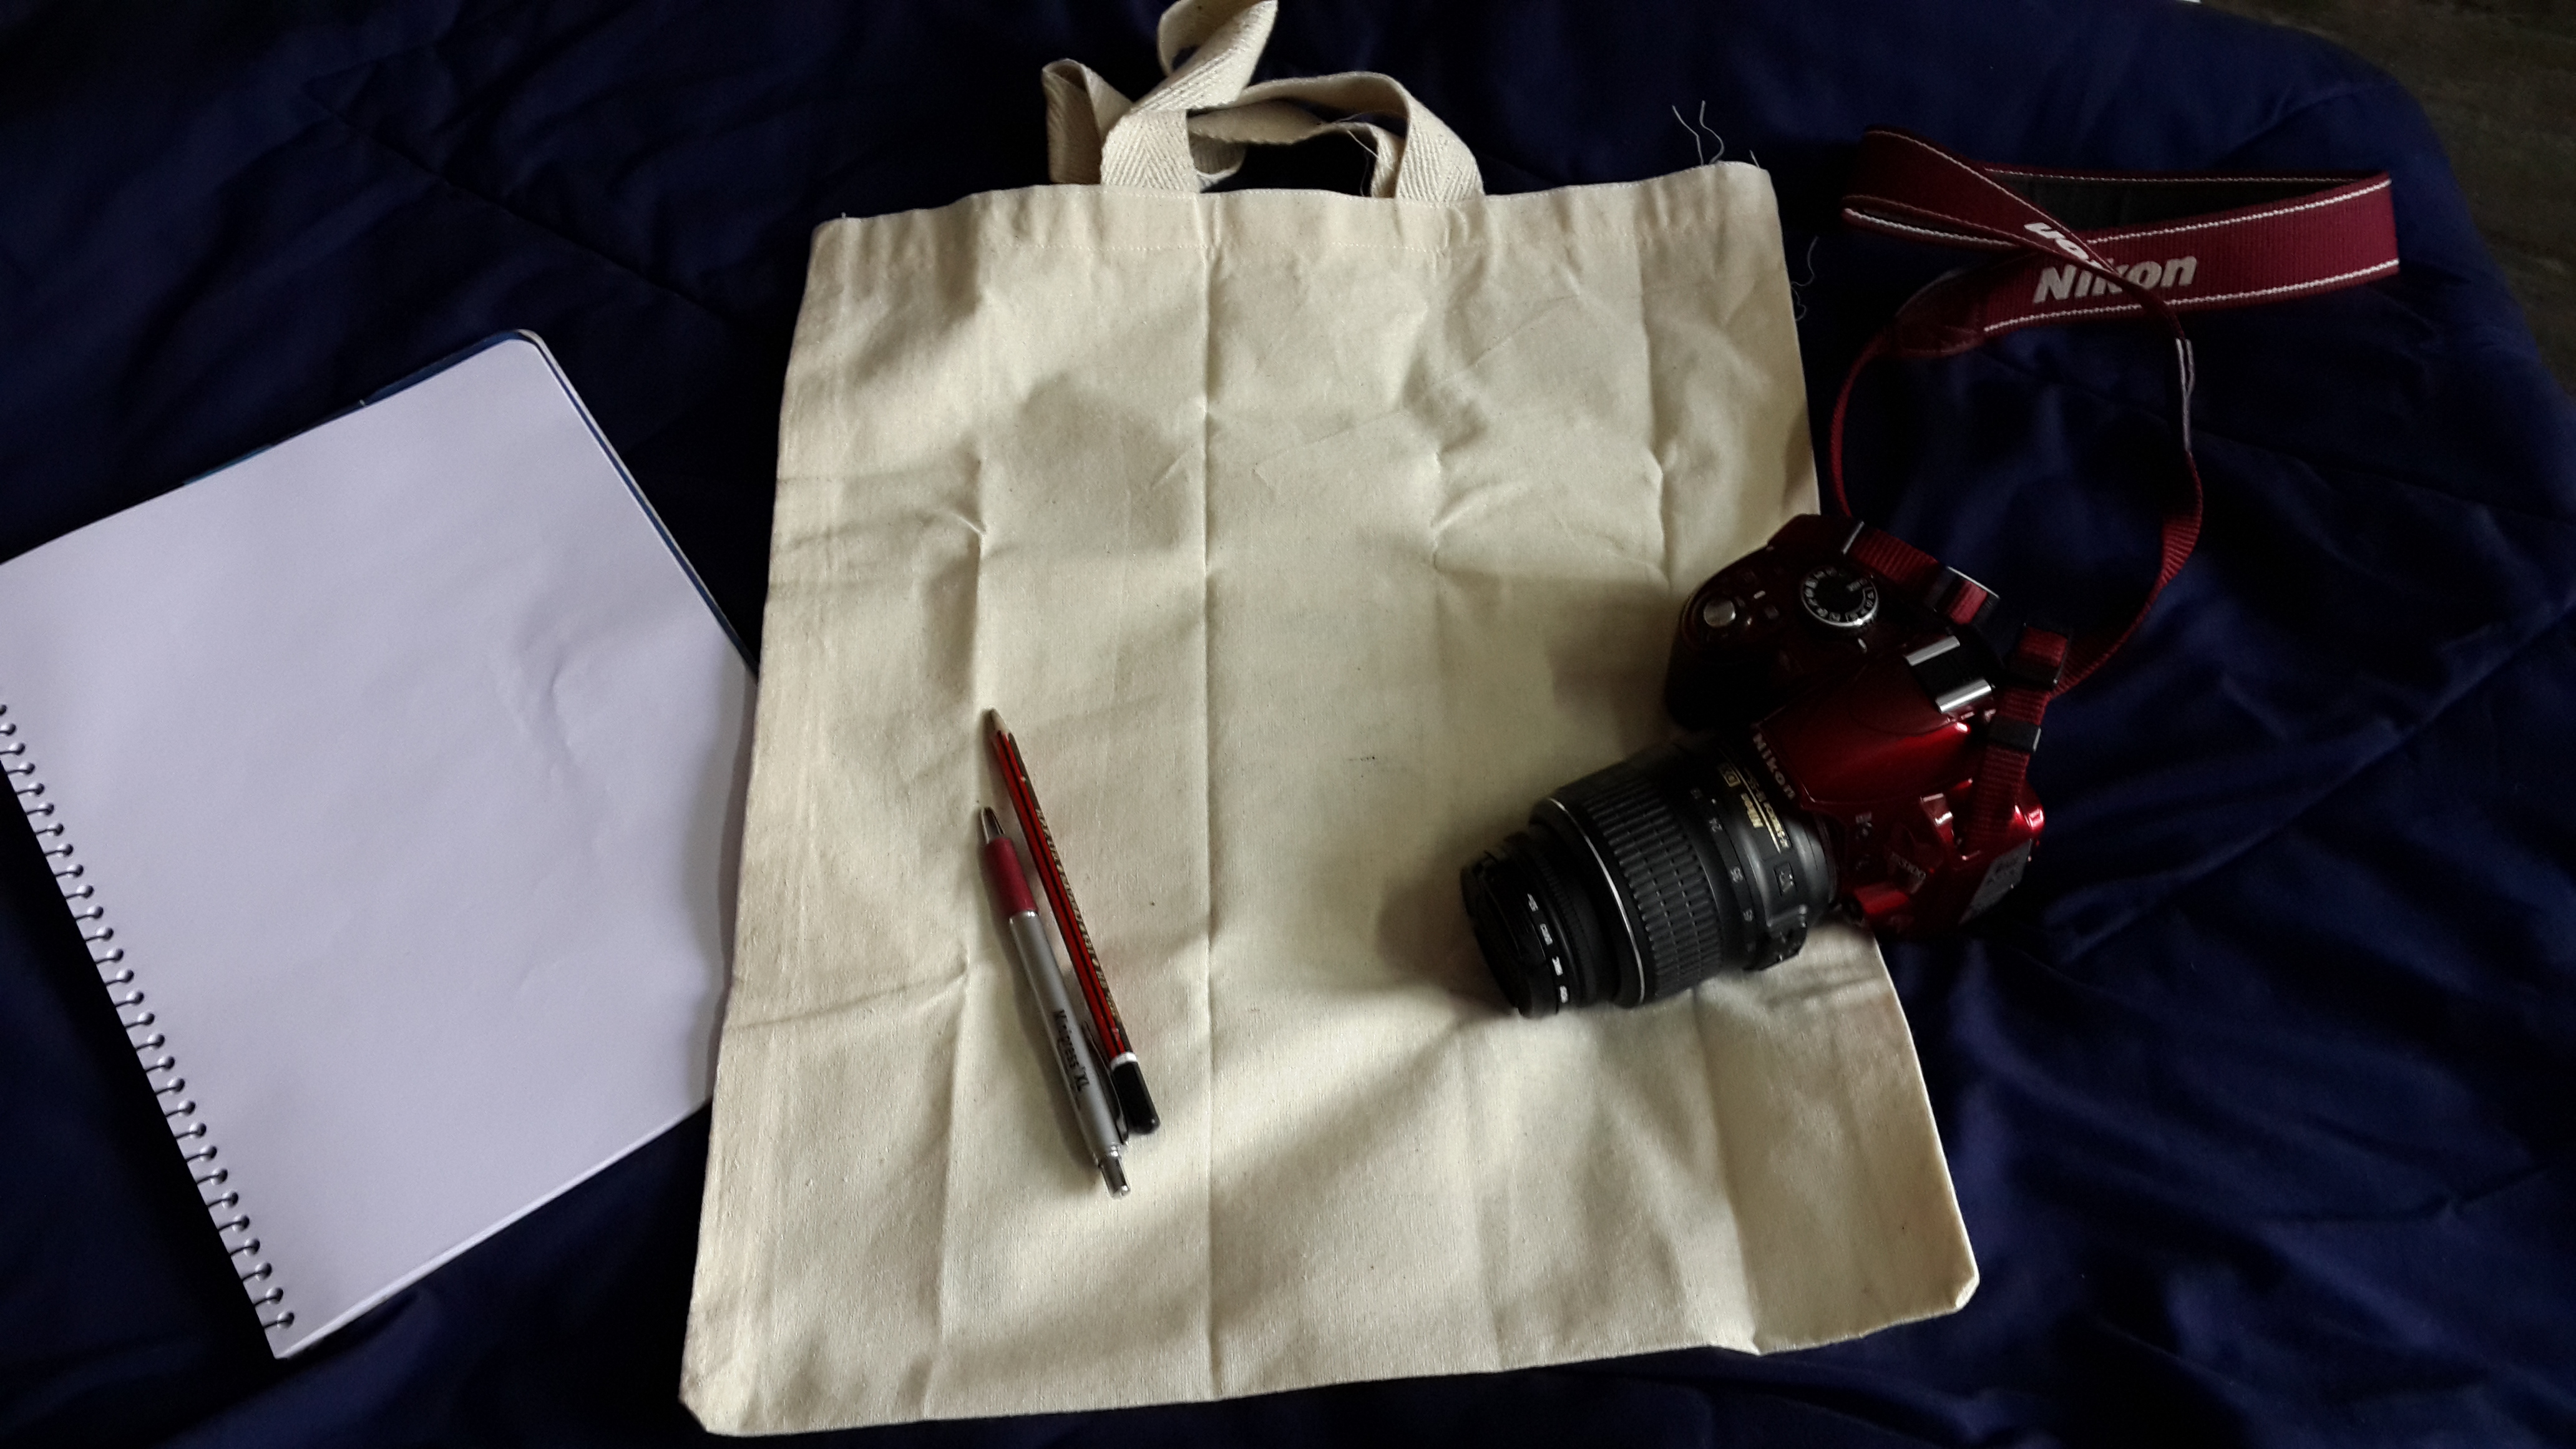
You will need -
- Pencil, Pen, Eraser and other stationary.
- White papers.
- I used a simple cotton rectangular carry bag. Size - Width: 14 inch, Height: 17 inch.
- Laptop.
- Adobe Illustrator software.
- Screen Printing equipment or a source through which you can get the screen printing done.
Note:
- I bought the cotton carry bags from Rewheel. They make Eco friendly hand stitched bags.
- For screen printing I took the help of my uncle's friend. As I don't have the Screen printing equipment.
Plan the Design
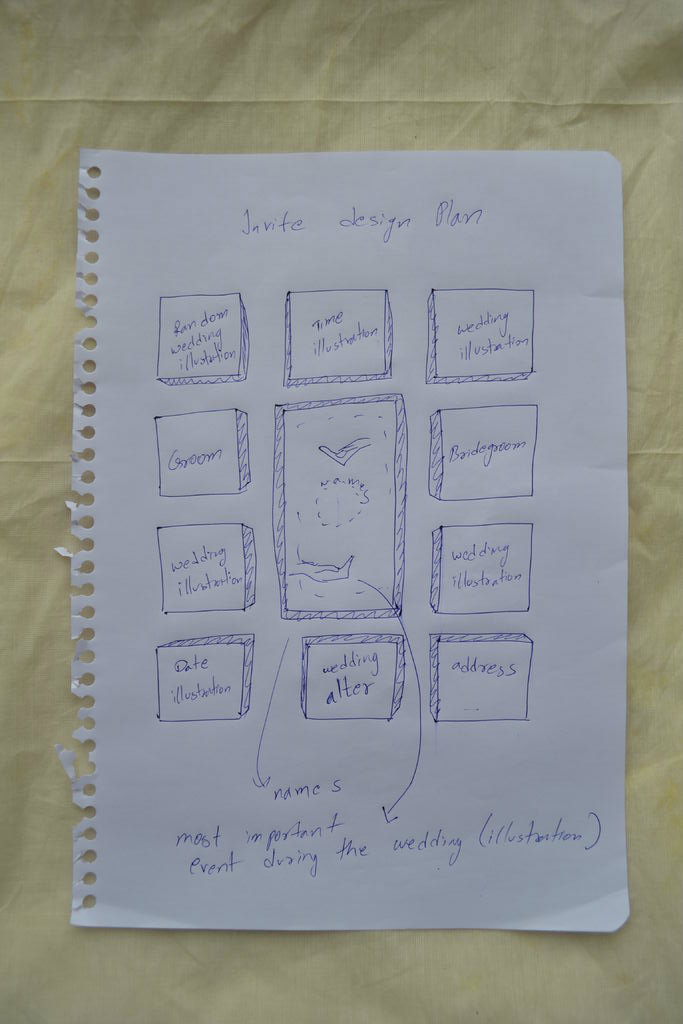
Before you start a project it is very important to have a basic plan. The plan can evolve later while working at it though. So here I tried to sort out the things I want to see on my invite.
Important -
An invitation should have three basic things.
- Date of the event.
- Time of the gathering.
- The Venue.
Design Structure-
- Canvas size - In this case the bag size is 14" by 17".
- Design size on the canvas - On the 14" by 17" bag size the design will occupy 9" by 14".
How you wish to represent-
- I tried to keep the design as simple as possible. So used squares, rectangles and simple wedding illustrations.
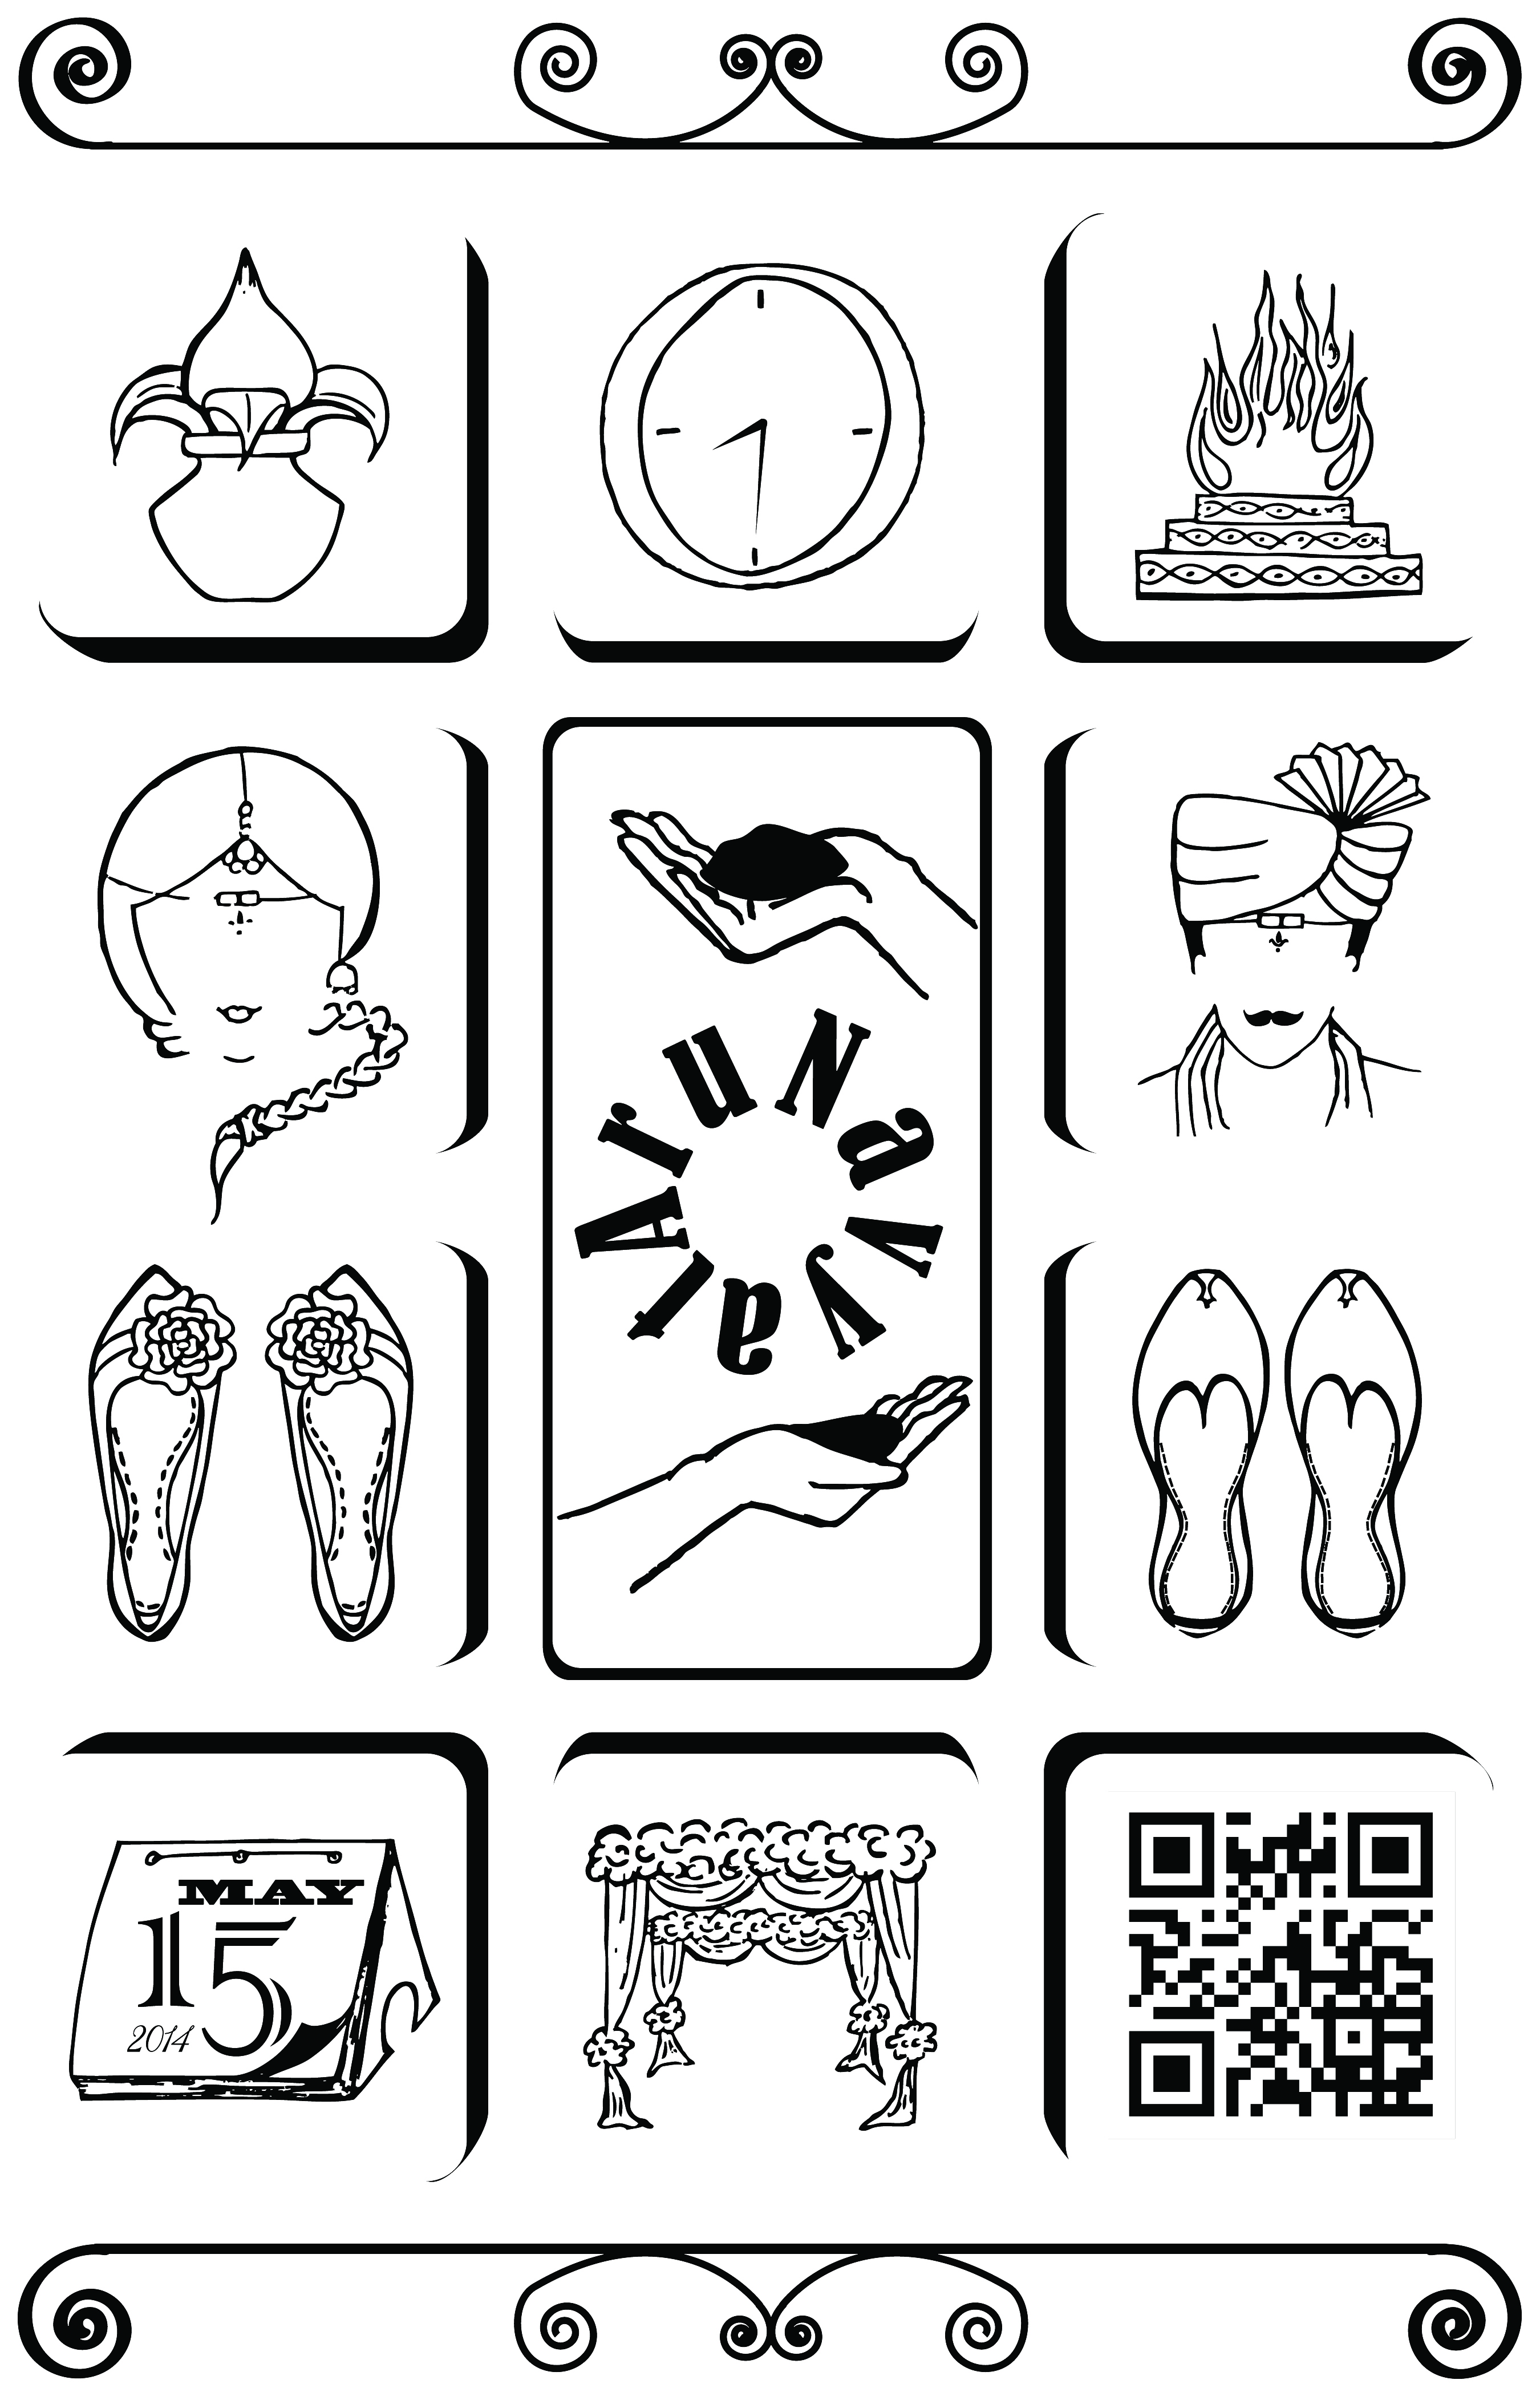
- In this rough sketch I planned to use 10 squares to represent the wedding icons and one rectangle to place the names. This is just the over all design frame.
Icons and Their Meaning
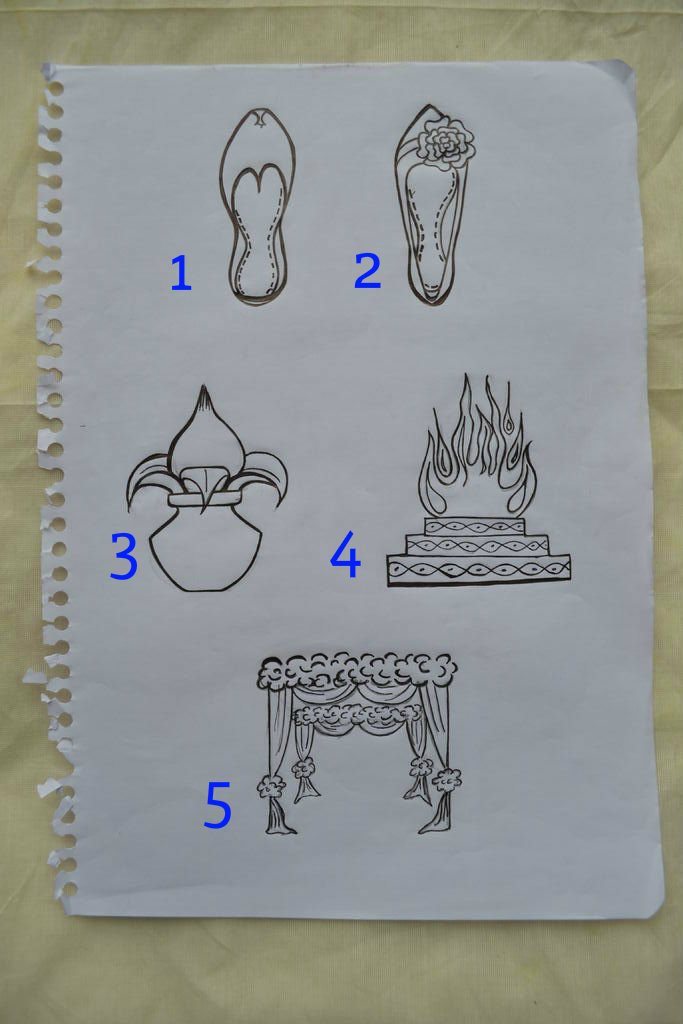
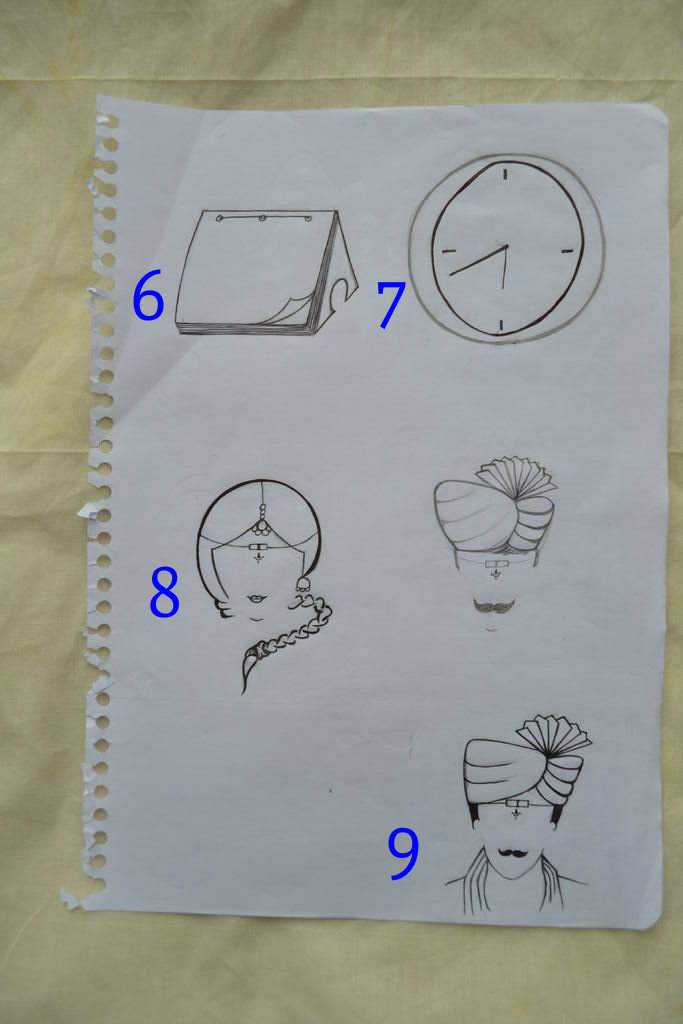
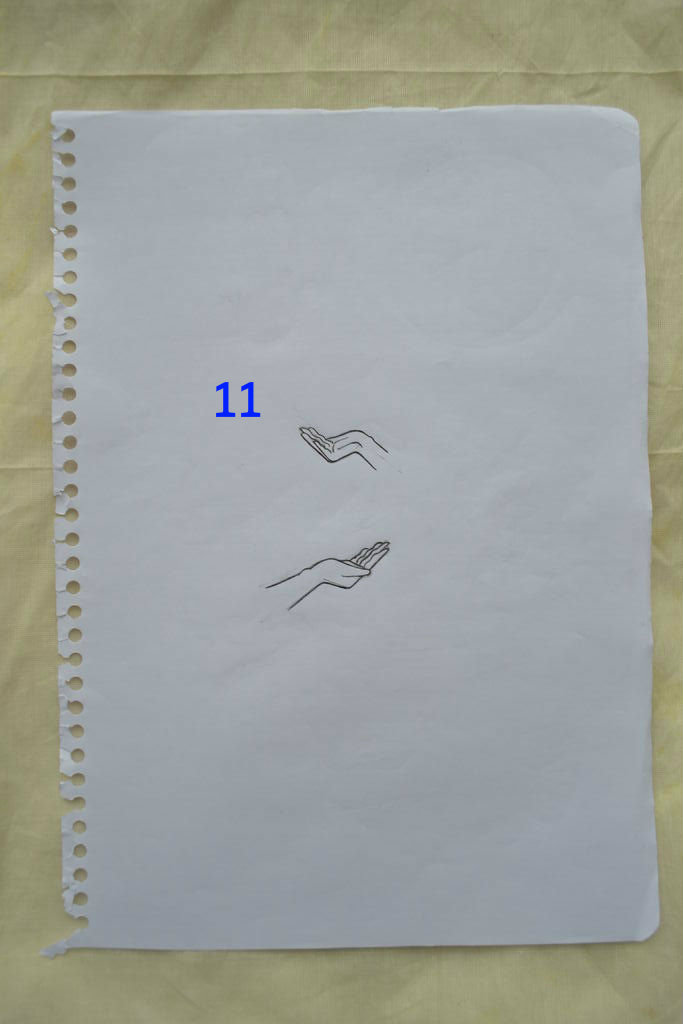
These are the Icons I designed to fill in the spaces in my final design. Each icon represents a part from the wedding celebrations.
- Jooties - There are bridegrooms traditional footwear for the wedding day. Top view sketch.
- Stilettos - A bride's footwear for the day. Top view sketch.
- Kalasam - A pot with half filled water and betel leaves along with the coconut arranged on top of it. Check out this Google images link to get an idea of what it is. What it signifies? - The top of a temple is typically of this shape. And that is also called as a "Kalasam". Hence, during rituals in the wedding alter, this is placed to represent a temple. The bride and the bridegroom pray in its presence.
- Homam/Havan - Sketched a small sacred pit of fire. What it signifies? - Immediately after the wedding the bride and the bridegroom go around the fire pit while they make their wedding vows.
- Wedding Alter - Sketched out a simple wedding alter as it is a huge part of the wedding celebration.
- Calender - I have sketched out a calender to represent the date of the event. The text will be added to it while using the software.
- Clock - This shows the "Sumuhurtham"(An auspicious time for marriage) time.
- Bride - A subtle sketch of how a bride looks on the wedding day
- Bridegroom - A subtle sketch of how a bridegroom looks on the wedding day.
- QR code - Quick Response Code, I used a QR code generator to generate a code for the address. Later used this to represent the venue of the event.
- Jeelakarra(cumin seeds) and Bellam(Jaggery) - A sketch of the bride's and bridegroom's palms holding betel leaf with a paste made by grinding cumin seeds and jaggery. What it signifies? - An auspicious time for marriage is pre-chosen which is known as "Sumuhurtham". At this time, after the priest recites the wedding shlokas from the Vedas, the bride and groom are given a beetel leaf each with the Jeelakarra(cumin seeds) and Bellam(Jaggery) sitting on it. They then place the leaf with the past on each other's head. This slightly bitter cumin and sweet jaggery when ground together turn into an inseparable mixture. The custom signifies that bride and groom are supposed to become inseparable through life's bitter and sweet times. Other reason being, Positive Electric charge emanates when cumin seeds and jaggery are combined to form a paste. In the crown of the head, where it is the place for a a subtle or esoteric aperture, this paste is sits on the top of this esoteric aperture to give way to a flow of positive energies. The bride and groom, looks at each other, their wave lengths coincide, they think alike and there are no contradictions. This gives them a pleasurable married life.
Designing the Icons in Adobe Illustrator
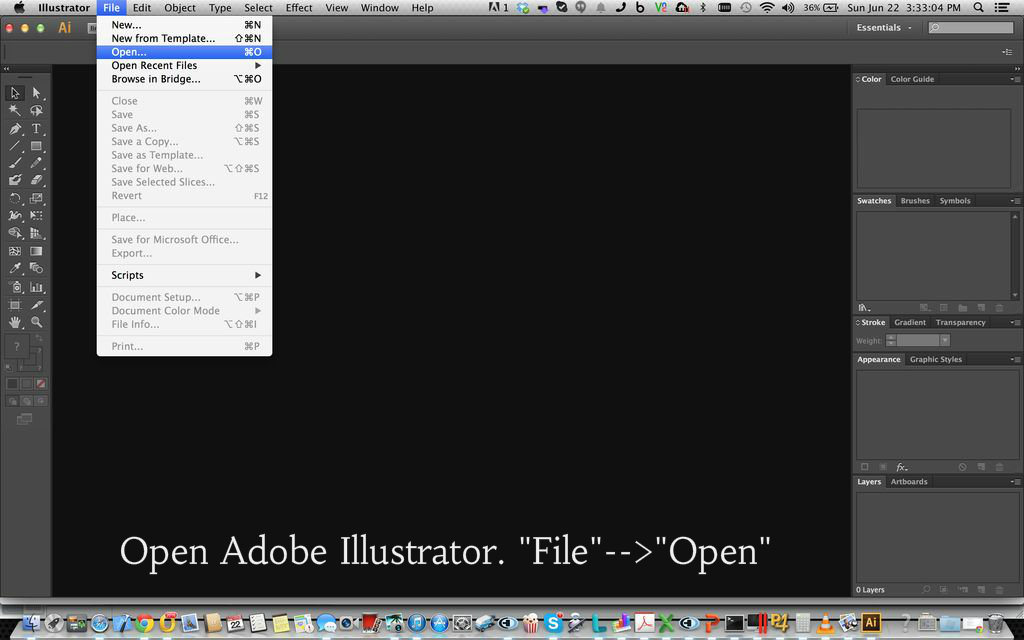
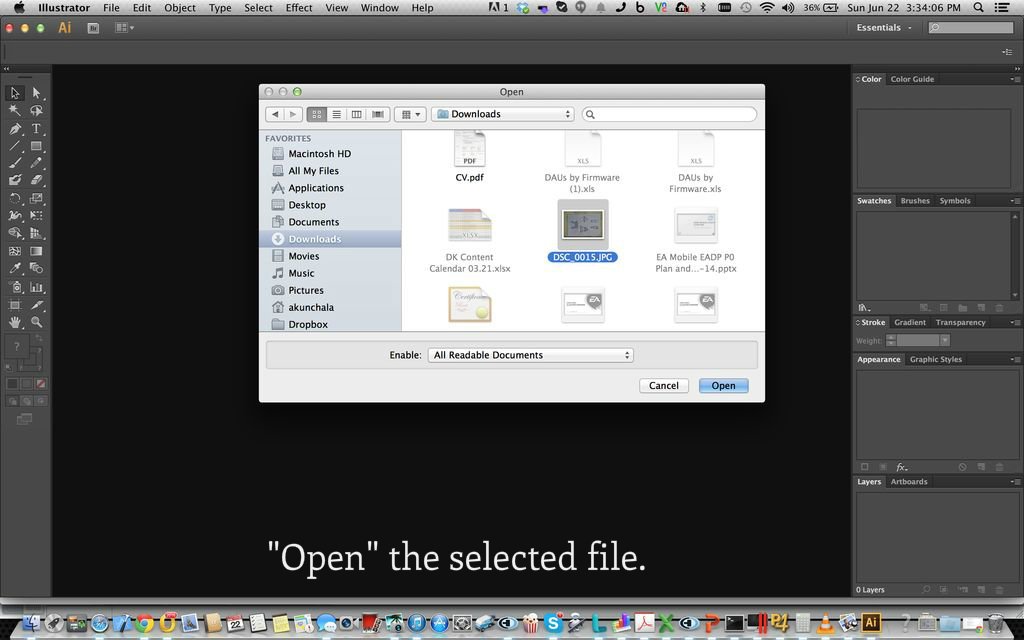
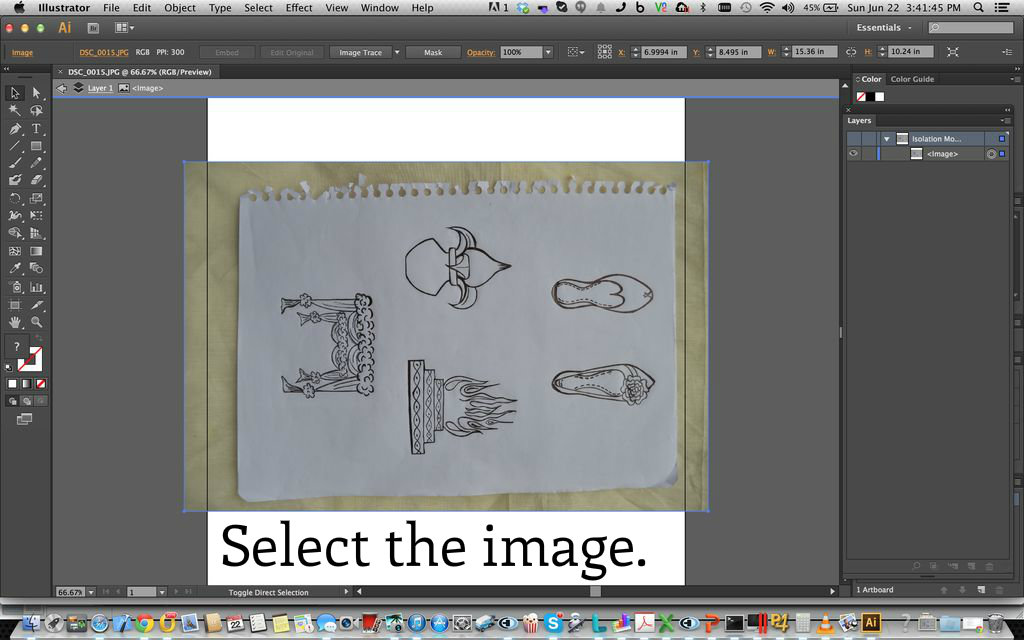
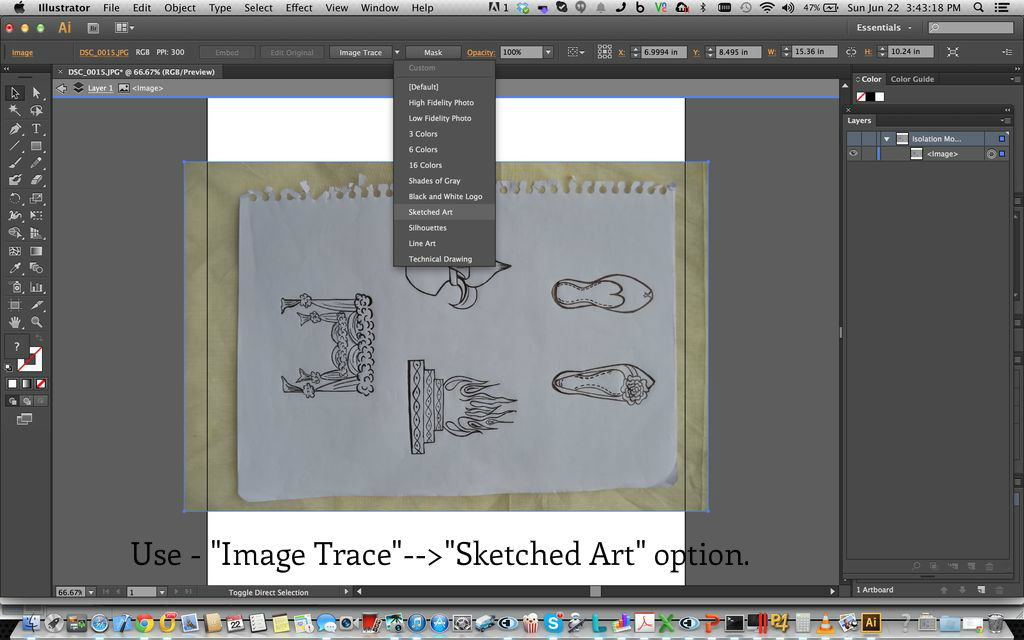
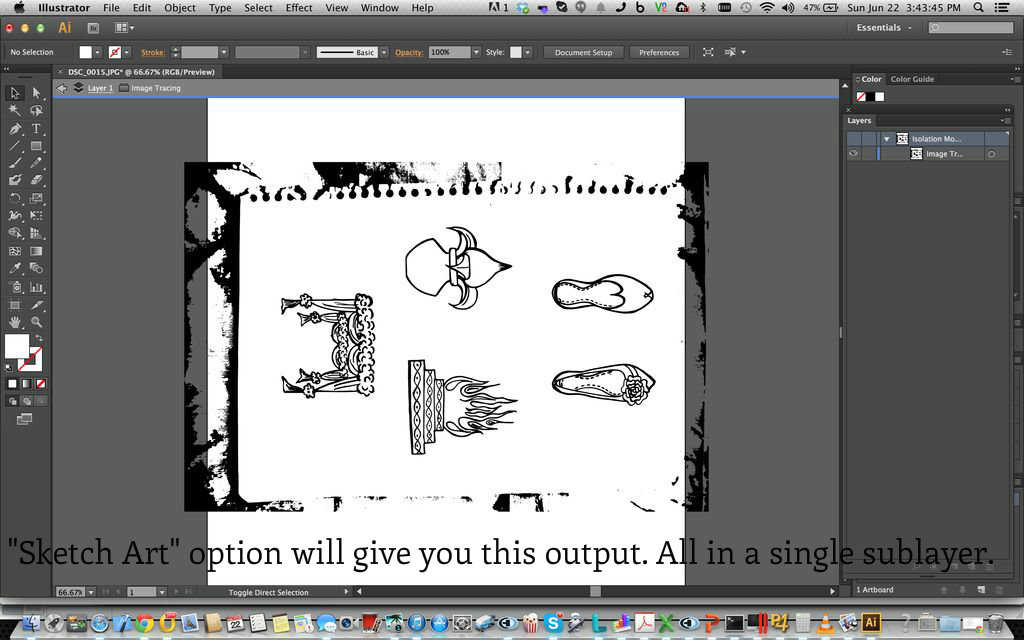
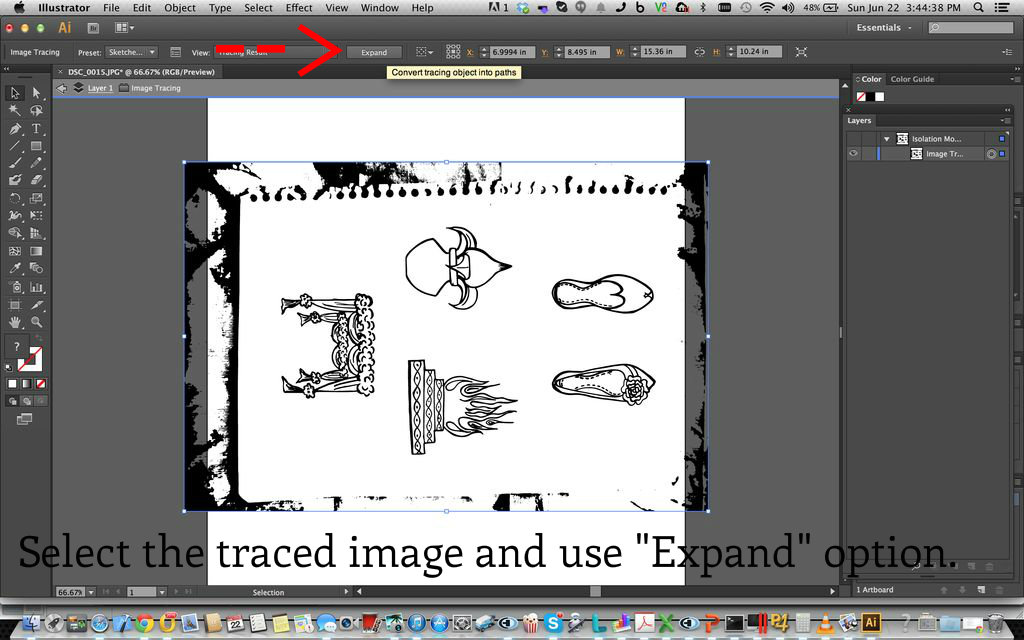
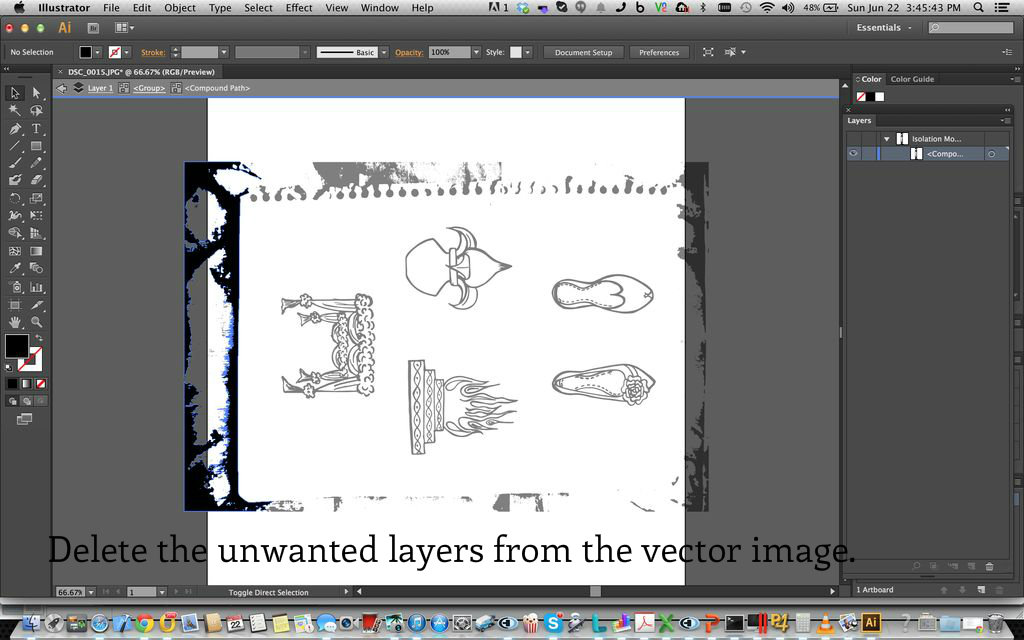
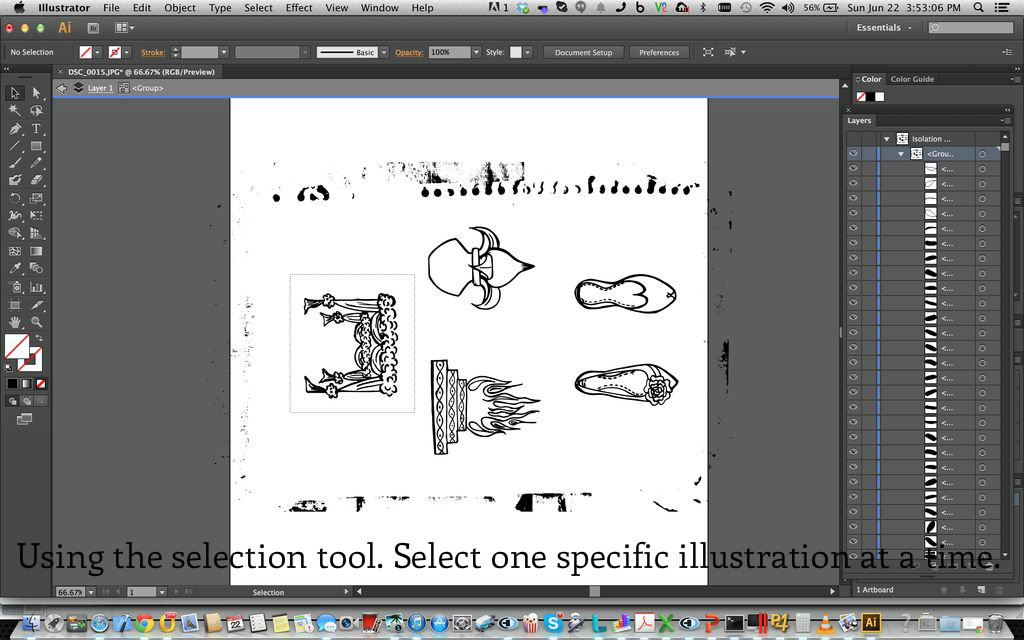
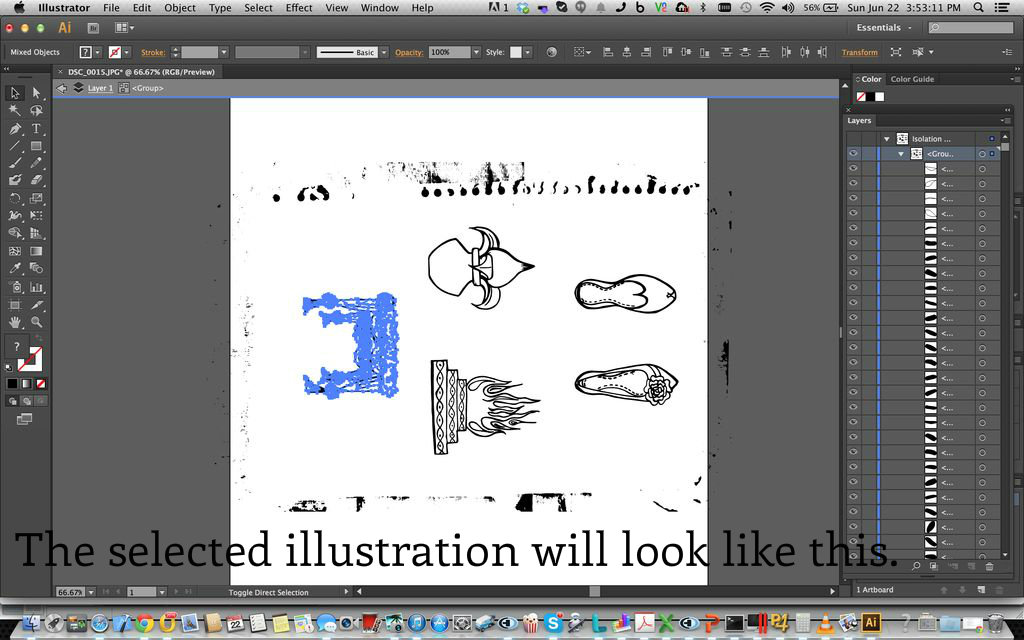
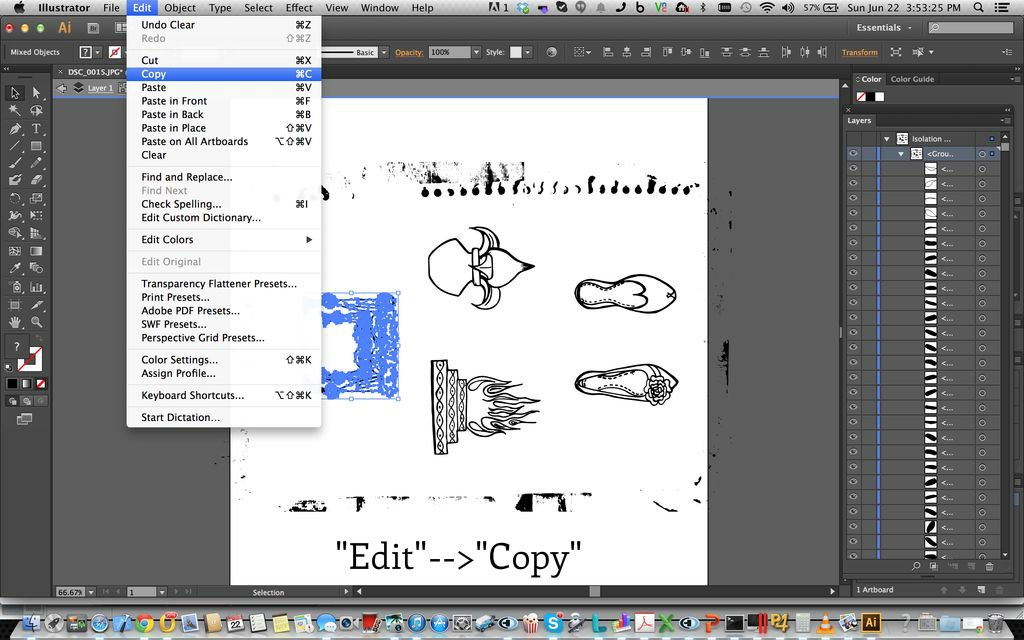
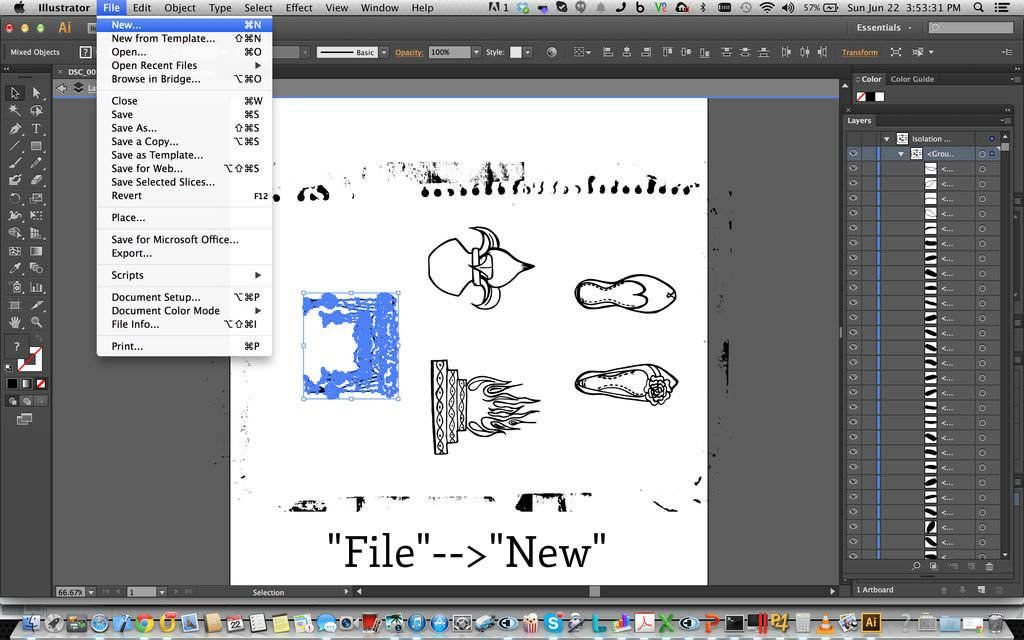
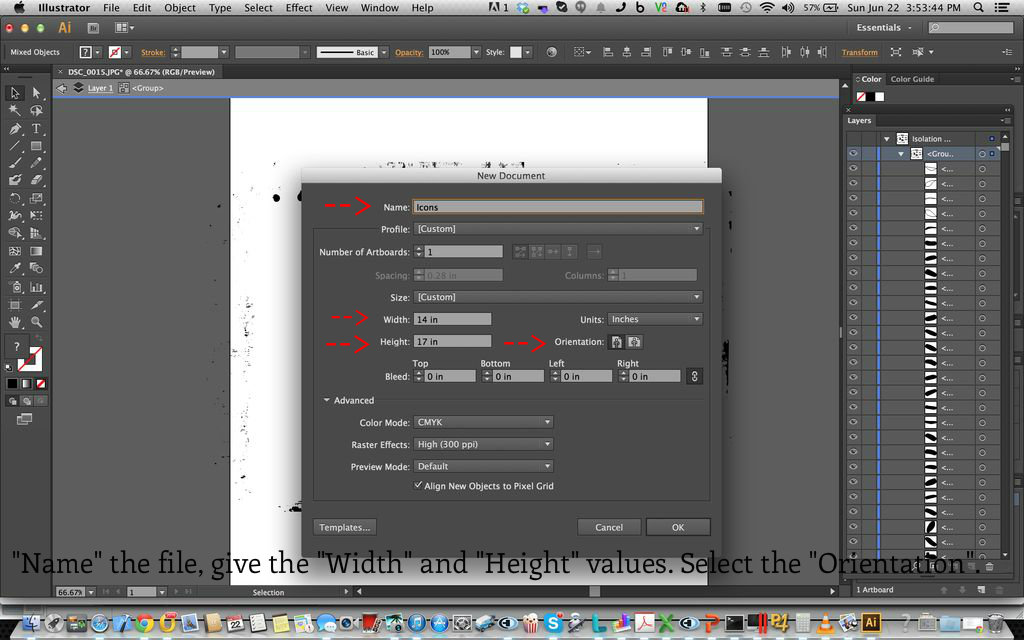
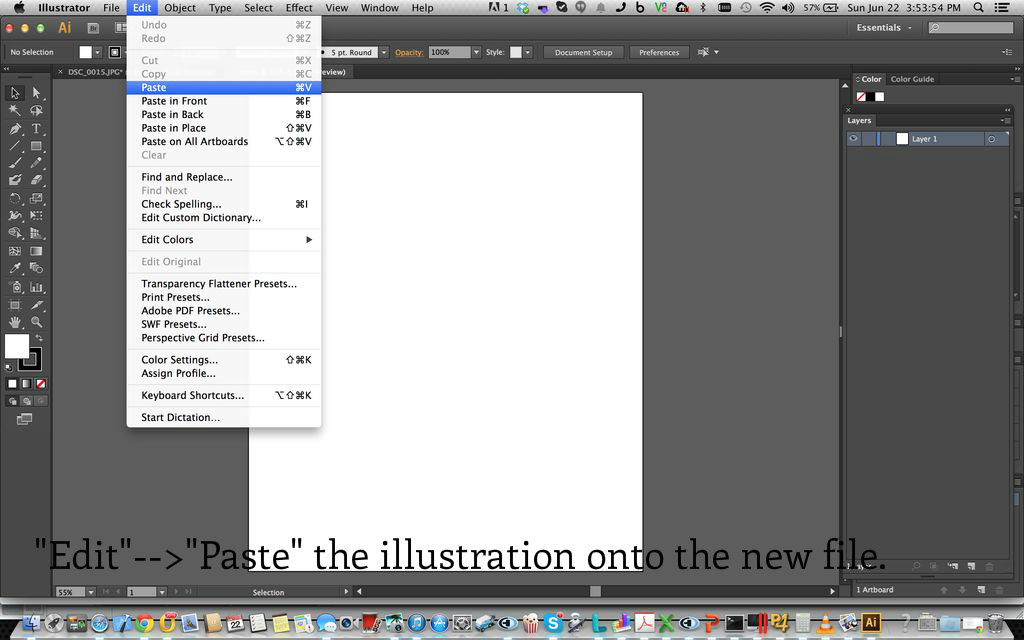
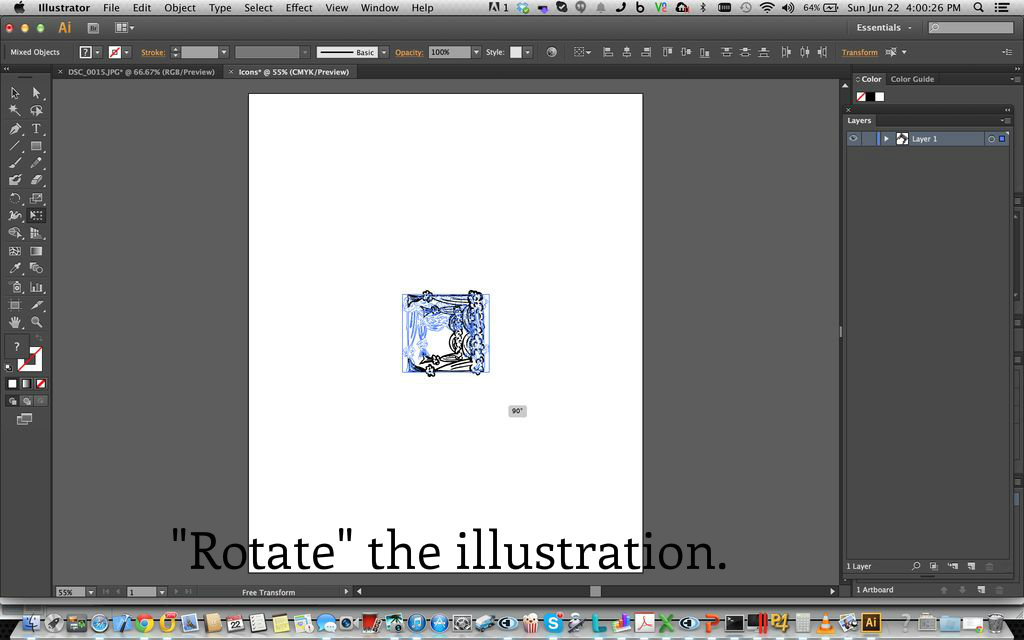
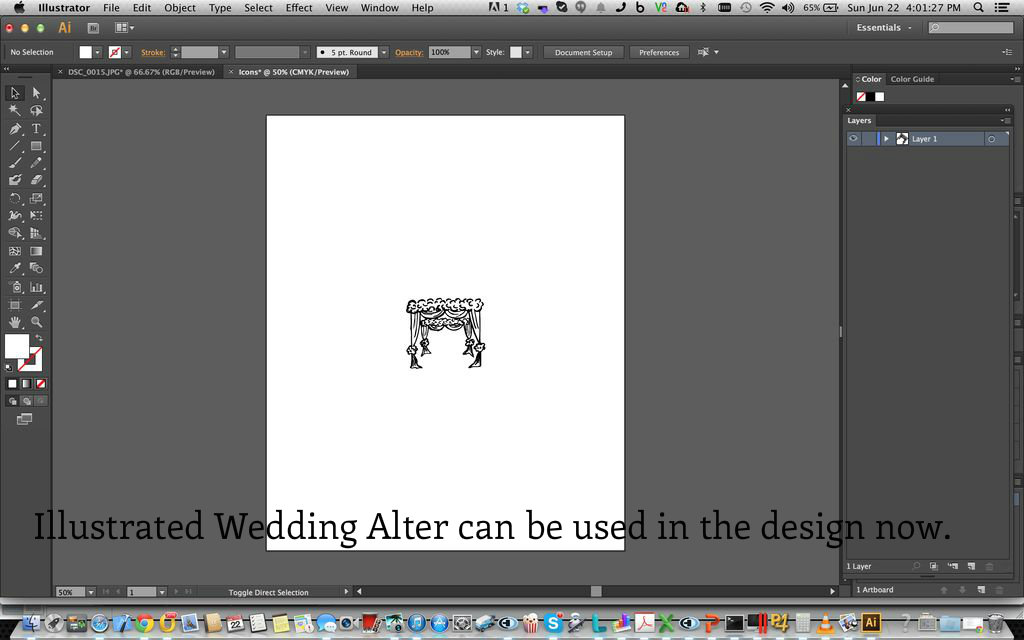
Now that the over all design and the individual icon designs are ready. It is time to convert them into vector illustrations. The method I am following is a very simple one. You will be able to design a vector image even if you are not that familiar with "Adobe Illustrator".
To start, you will need Adobe Illustrator software. If you don't have the software and you think you might not use it in the future. Then you can download the trial version from Adobe's official website.
Design Process-
- Open Adobe Illustrator. Go to "File"-->"Open".
- "Open" the selected image.
- Select the Image. When you select the image the outline will show in blue. Indicating that the image has been selected.
- When you select the image you will find "Image Trace" option on the top. Go to "Image Trace"-->"Sketched Art". Note: The "Image Trace" option will appear only after selecting the image. You can experiment with other available options too.
- The "Sketched Art" will give you the output in one single sublayer.
- Now select the traced image and use "Expand" option. This will extract the image into vector layers. Each vector in a different sublayer.
- Double click on a specific vector shape to select it. Select the unwanted vector shapes and delete them.
- Using the select tool. Select a specific vector icon you would like to work with.
- The blue represents the selected vector shape.
- Go to "Edit"-->"Copy", This image.
- Go to "File"-->"New", specify the "Name", "Width", "Height" and "Orientation" option.
- Go to "Edit"-->"Paste" it into the new file.
- Rotate the vector using "Rotate option".
- Now the Wedding alter vector illustration is ready.
Follow the same steps to get the vector illustrations of the other icons too.
The Final Design
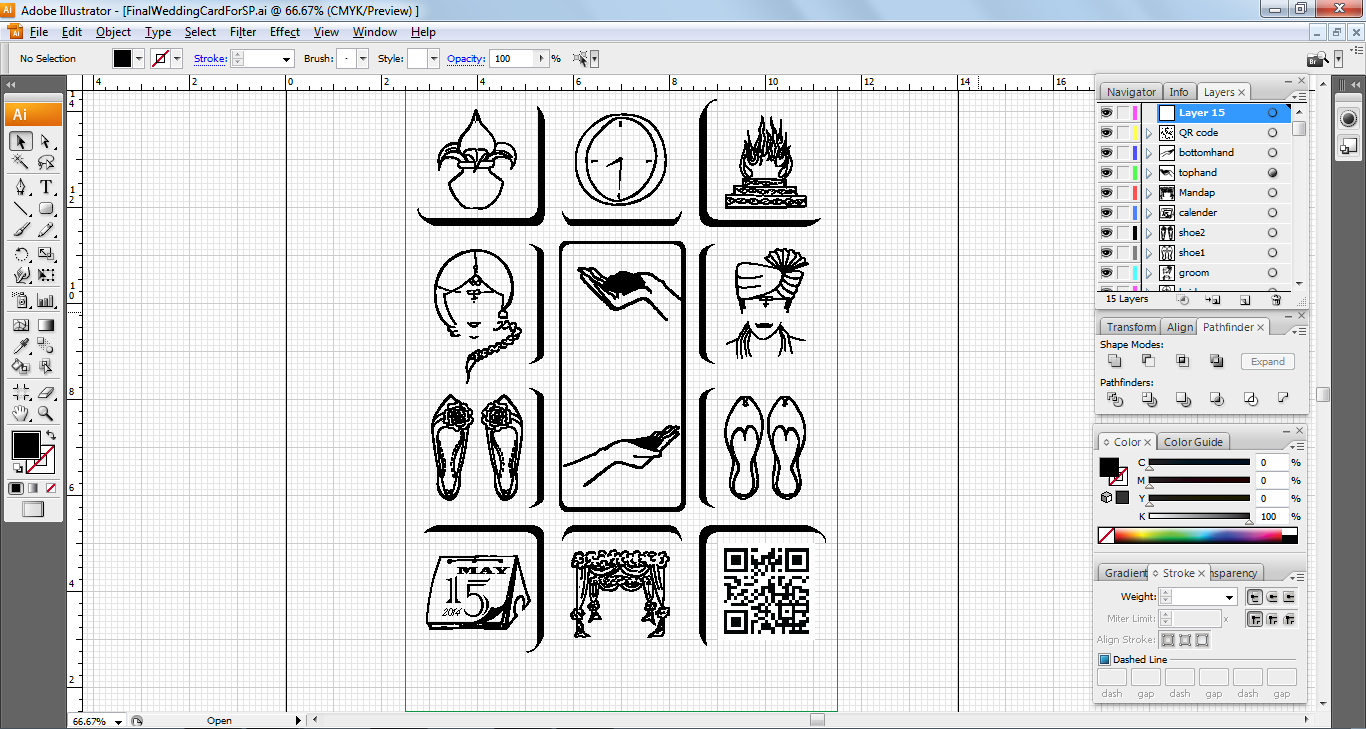
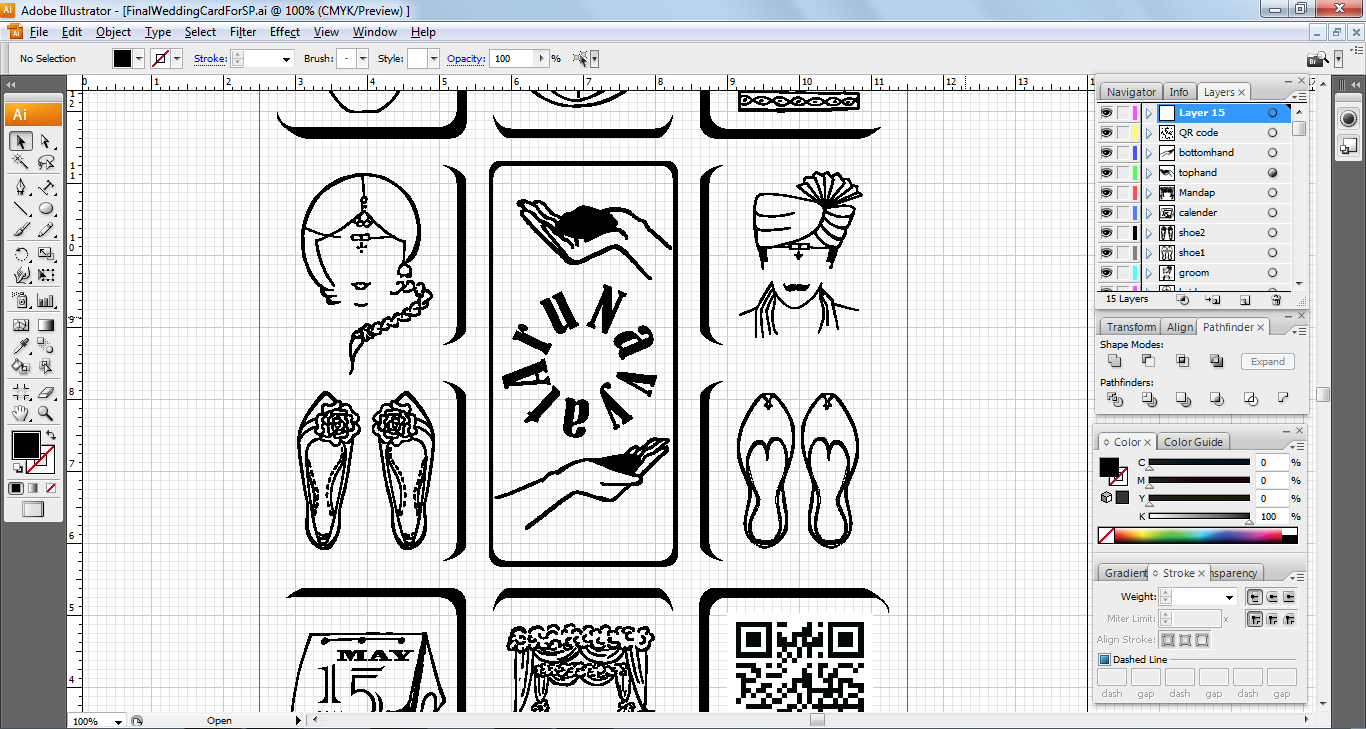
We have all the icons ready. Lets start designing the final output.
Process -
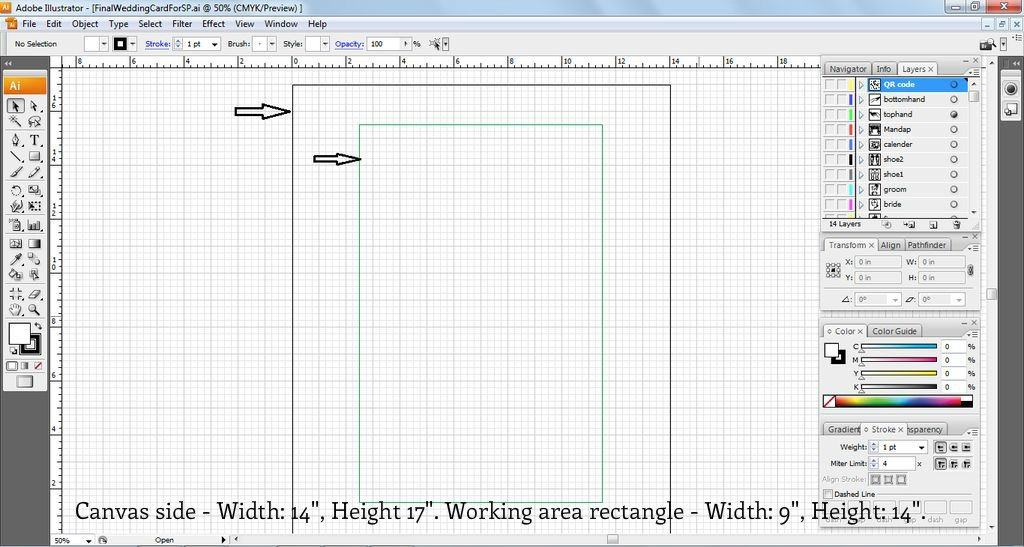
- Open Adobe Illustrator. Mention the file "name", "width", "Height" and "Orientation". Take the width and height as 14" by 17" (Cotton carry bag size).
- Draw a rectangle around the work area. Width: 9 inches and Height 14 inches.
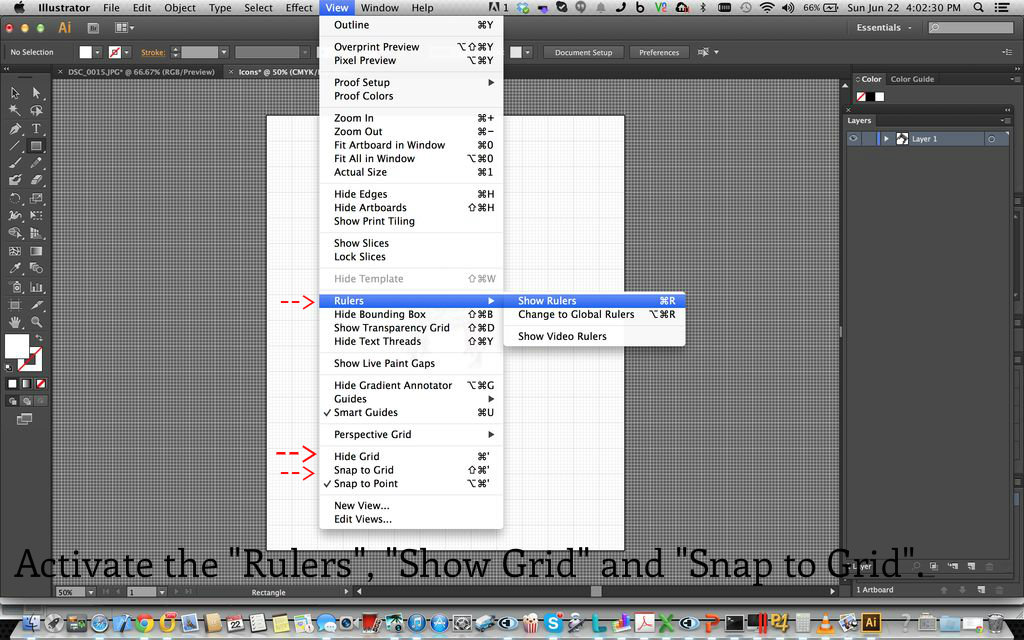
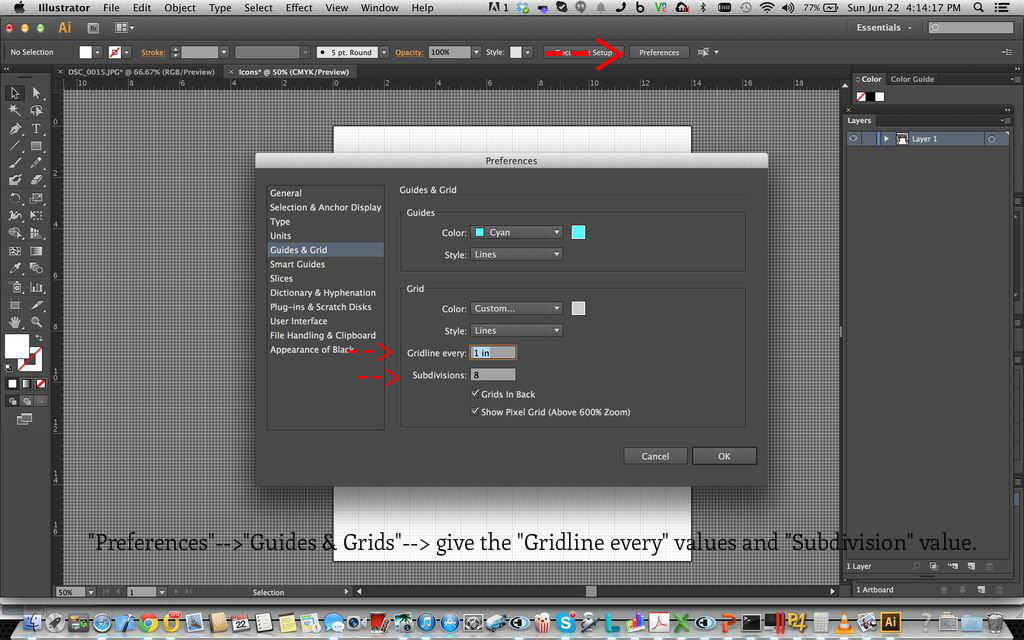
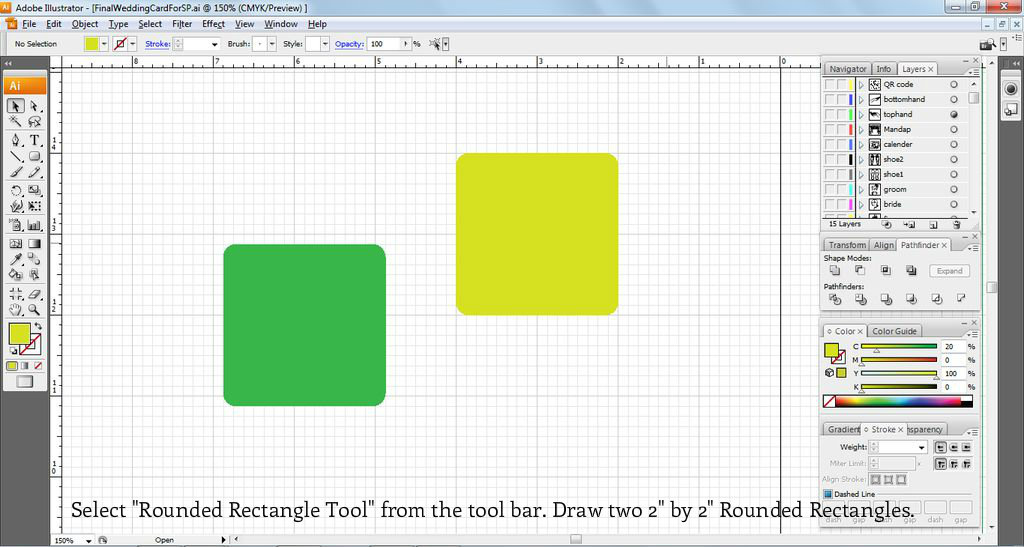
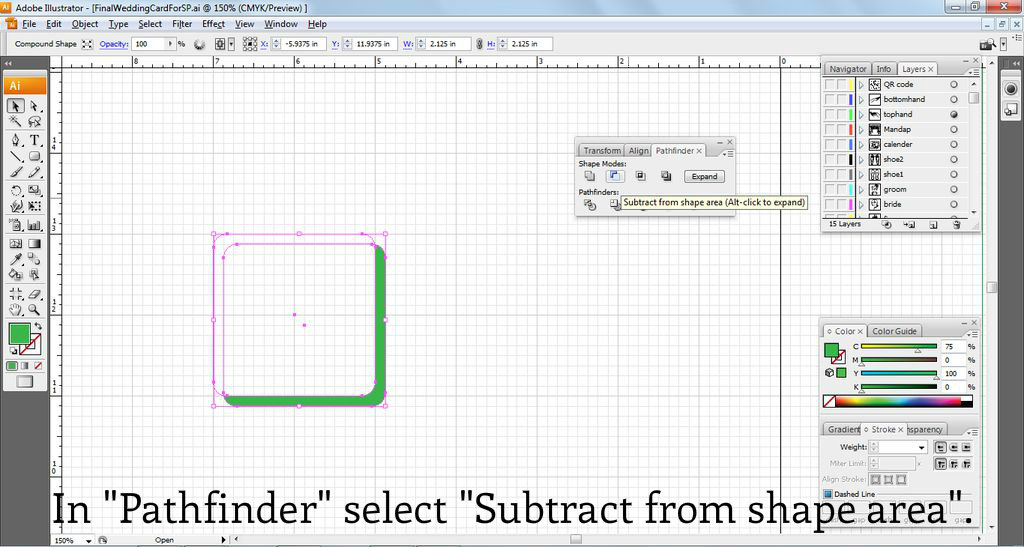
- Select "Rounded Rectangle Tool" and draw two 2" by 2" Rounded rectangles. As the "Snap to grid" option is activated it is easy to adjust the size.
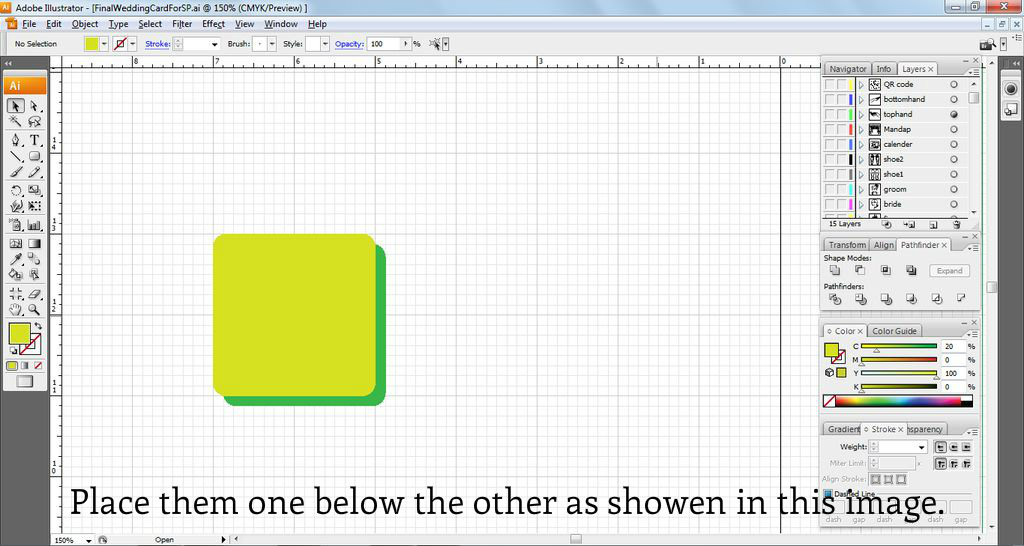
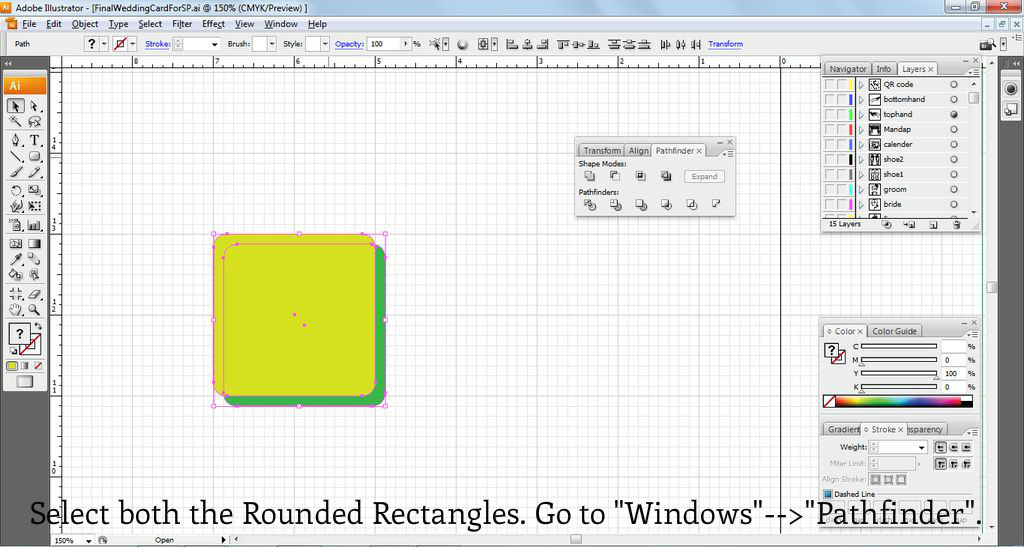
- Overlap the two Rounded Rectangles as shown in the picture above. Go to "Windows"-->open "Pathfinder".
- Select both the Rectangles. Under "Pathfinder" select "Subtract from shape area". You can use this method to obtain any shape you want.
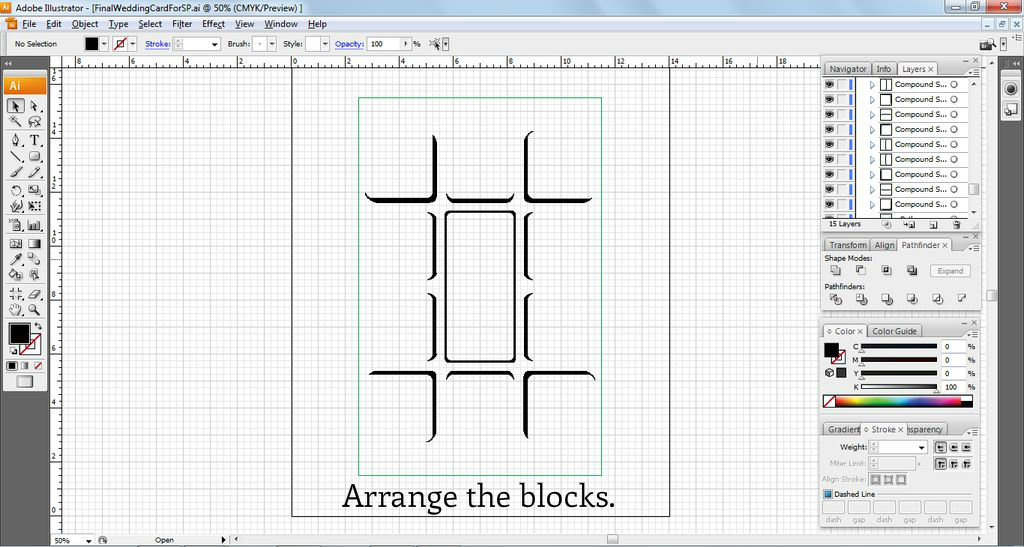
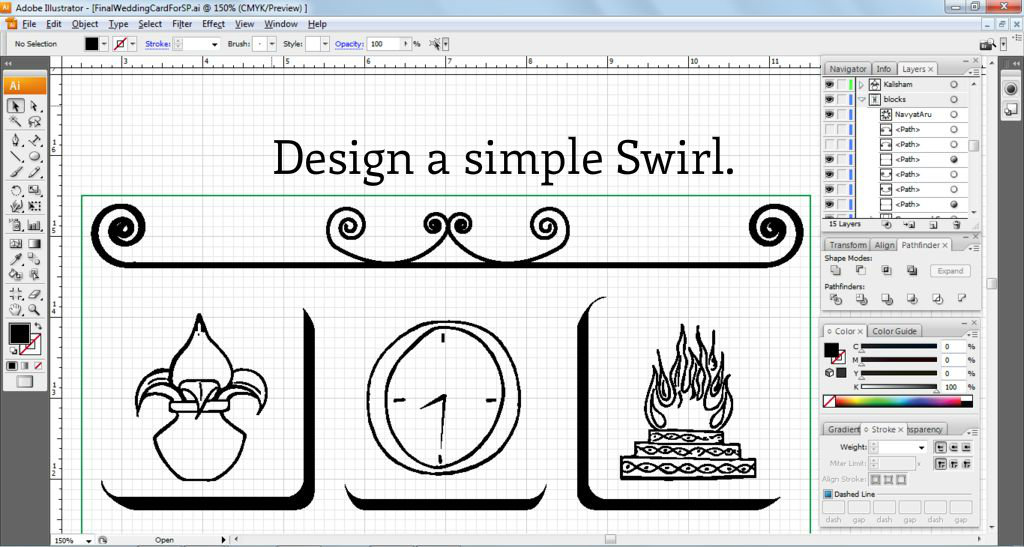
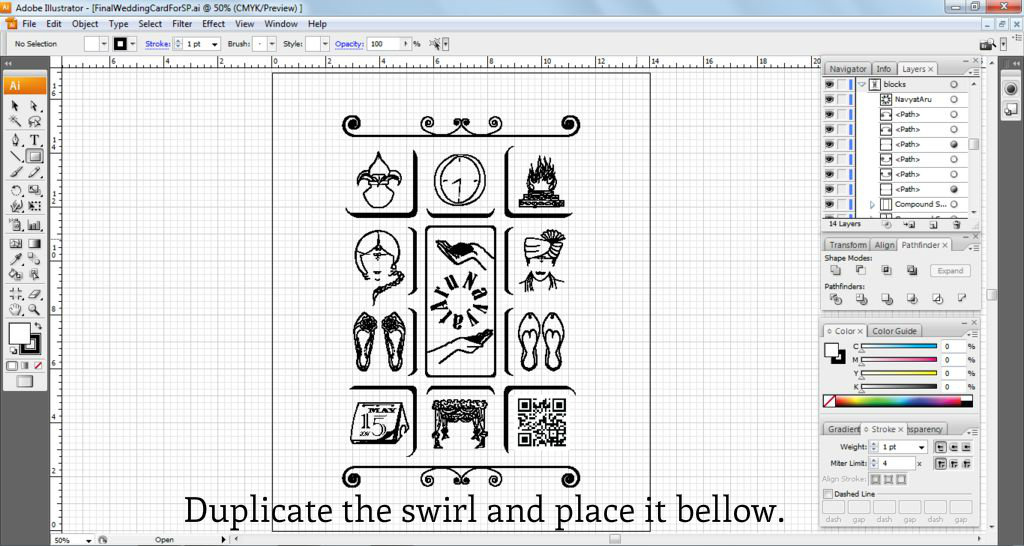
- Use the existing vector shape and duplicate it for all four corners. Design the other vector shapes using the same method.
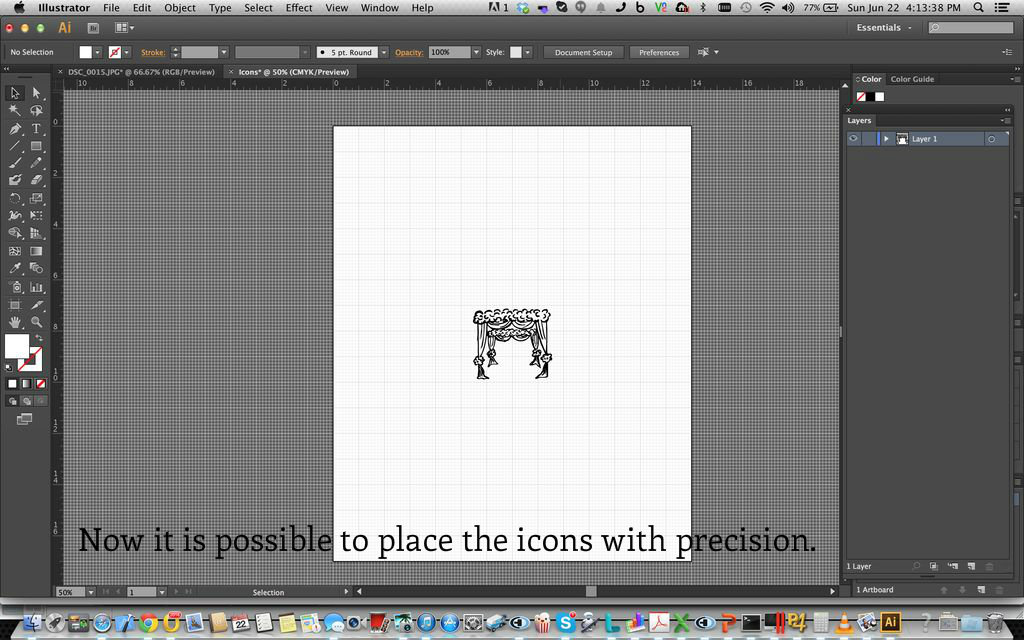
- Once you have all the vector blocks arrange them in order. The "Rulers", "Show Grid" and "Snap to grid" options will help in arranging the blocks accurately.
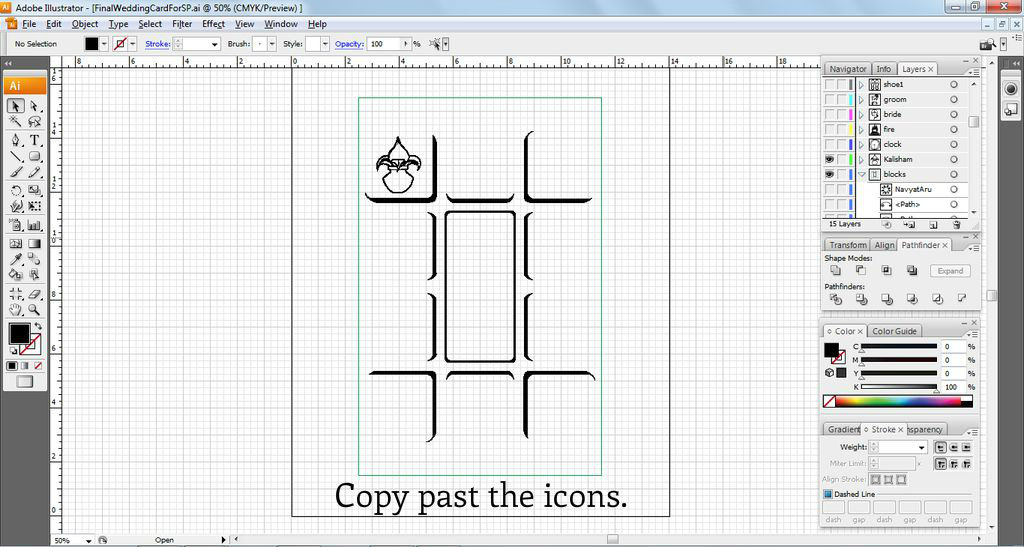
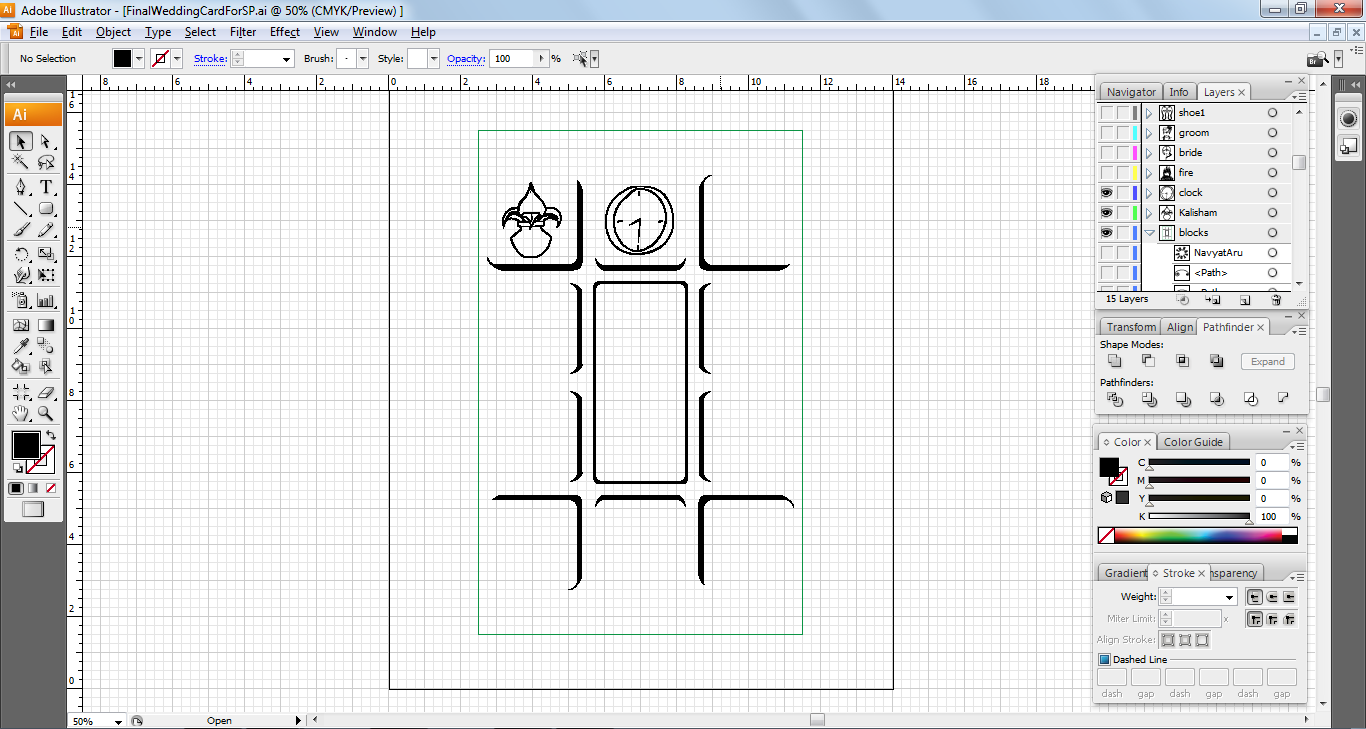
- Follow the same to arrange all the icons in place.
Designing the Text -
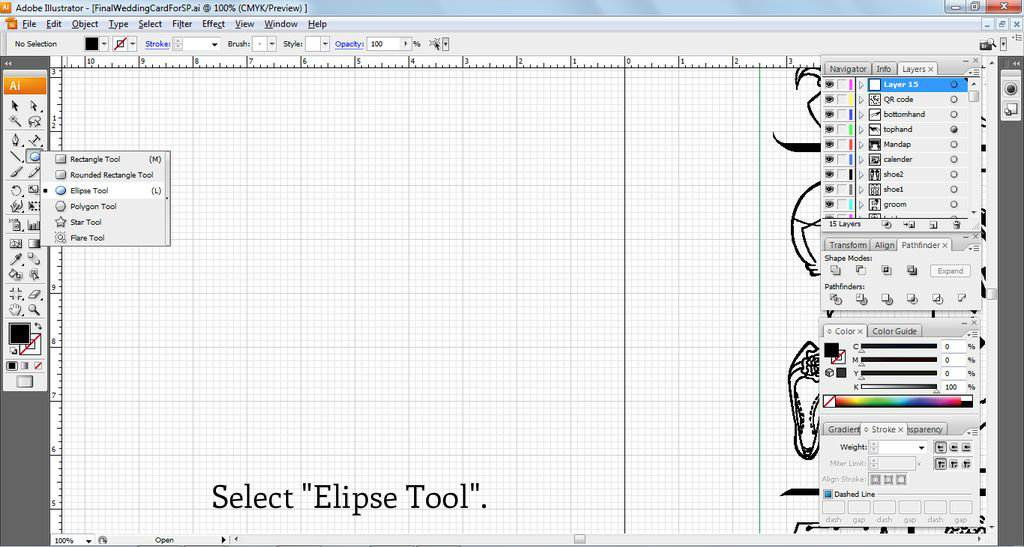
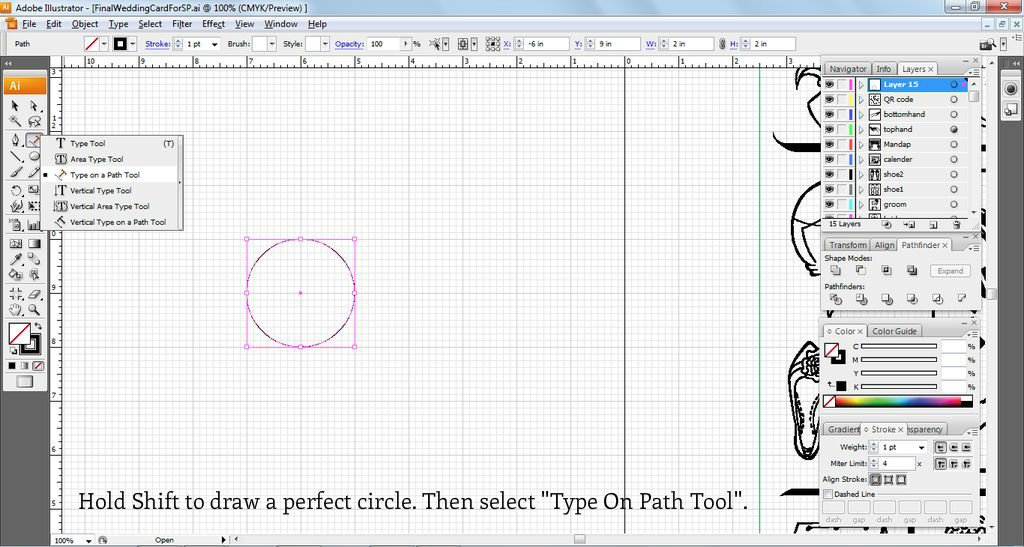
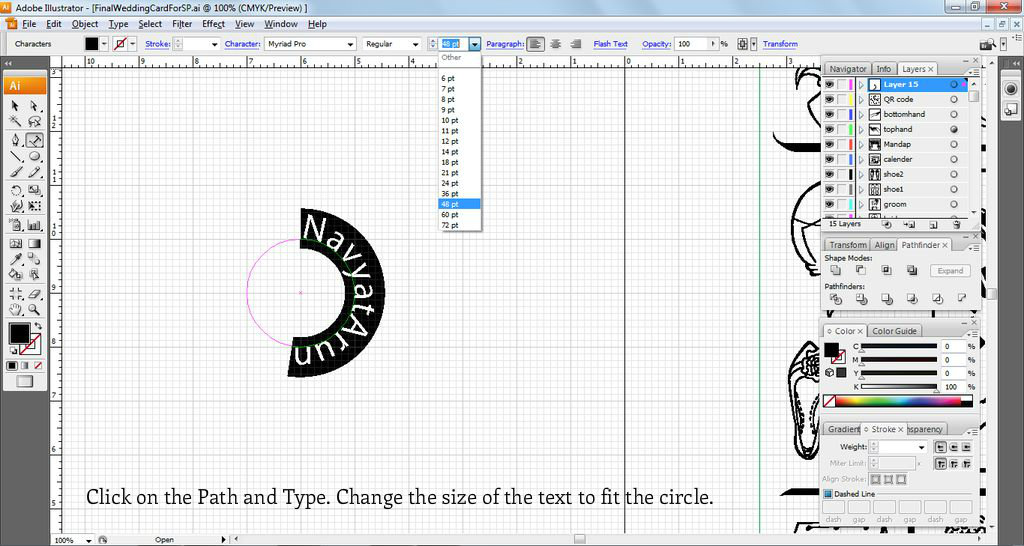
- Select "Ellipse Tool". Hold onto Shift to draw a perfect circle.
- Now Select "Type on a Path Tool". Click on the circular path and start typing.
- Increase or decrease the size of the text to fit the circle.
The final design is ready for screen printing. Save an extra copy of this file in Adobe Illustrator format. Use the PDF output of this file for screen printing.
Go to "File"-->"Save as"-->name your file "File Name" and under "Save as type" select "Adobe PDF (*.PDF)
Final Product
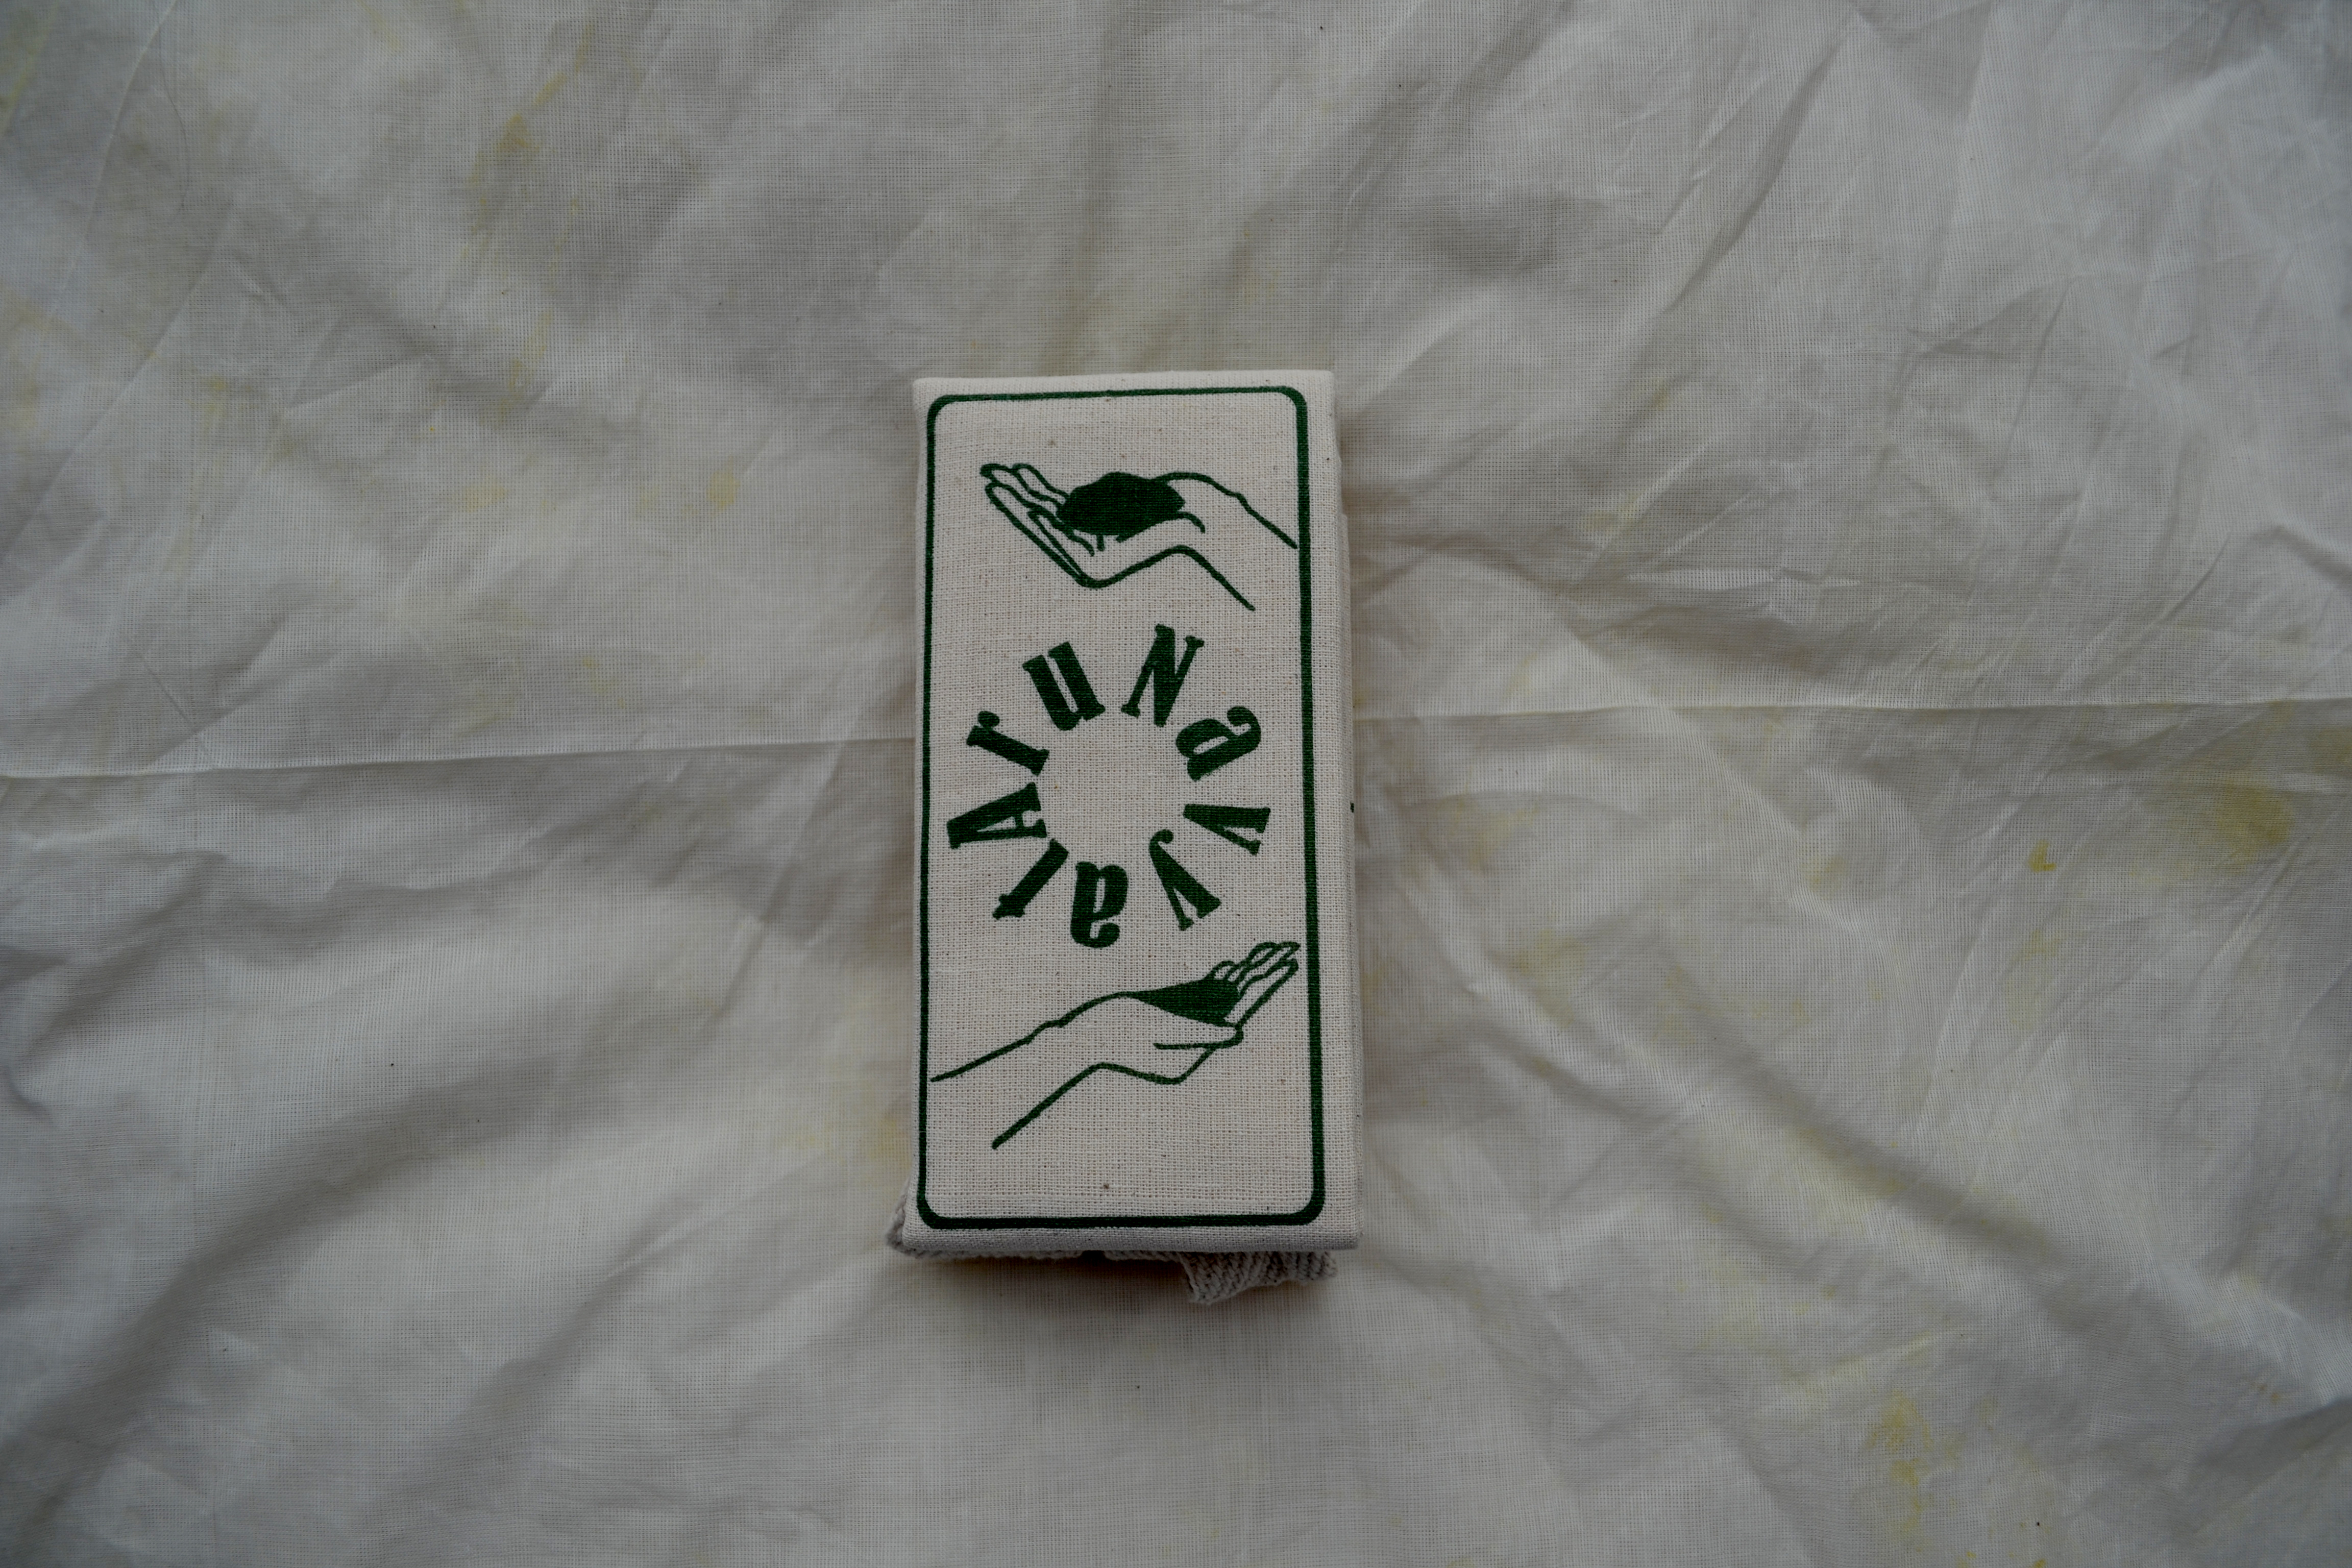
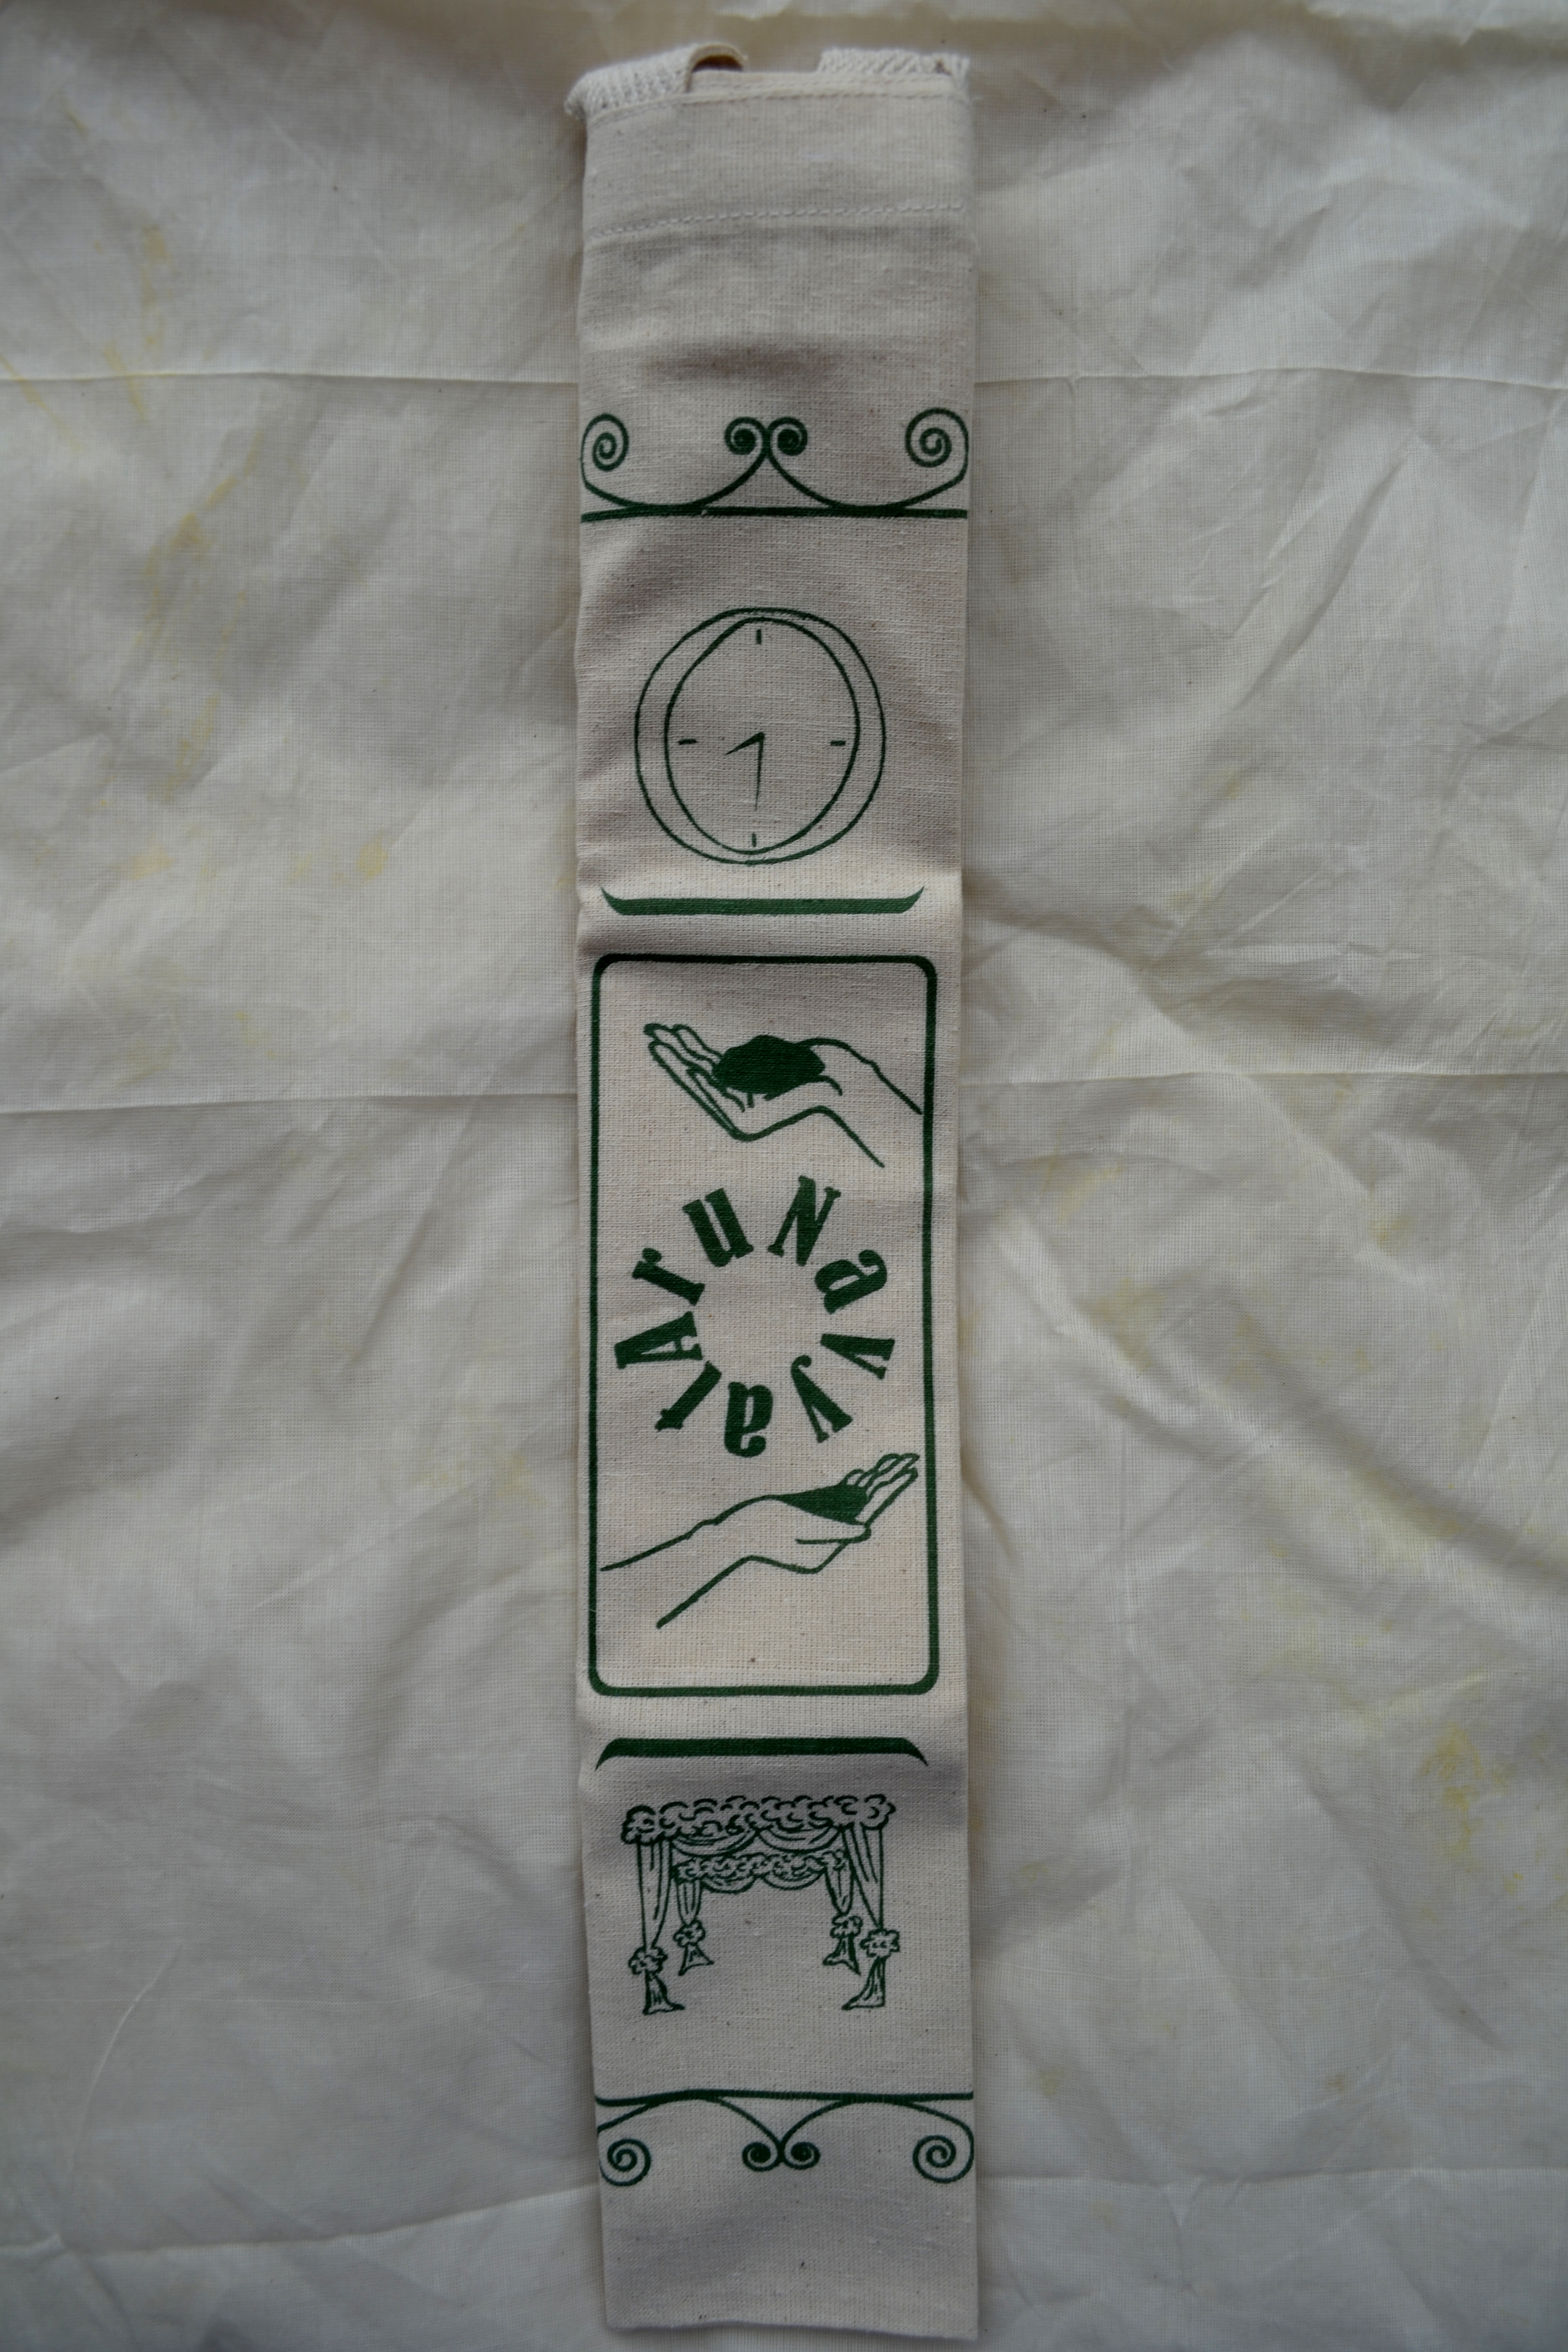
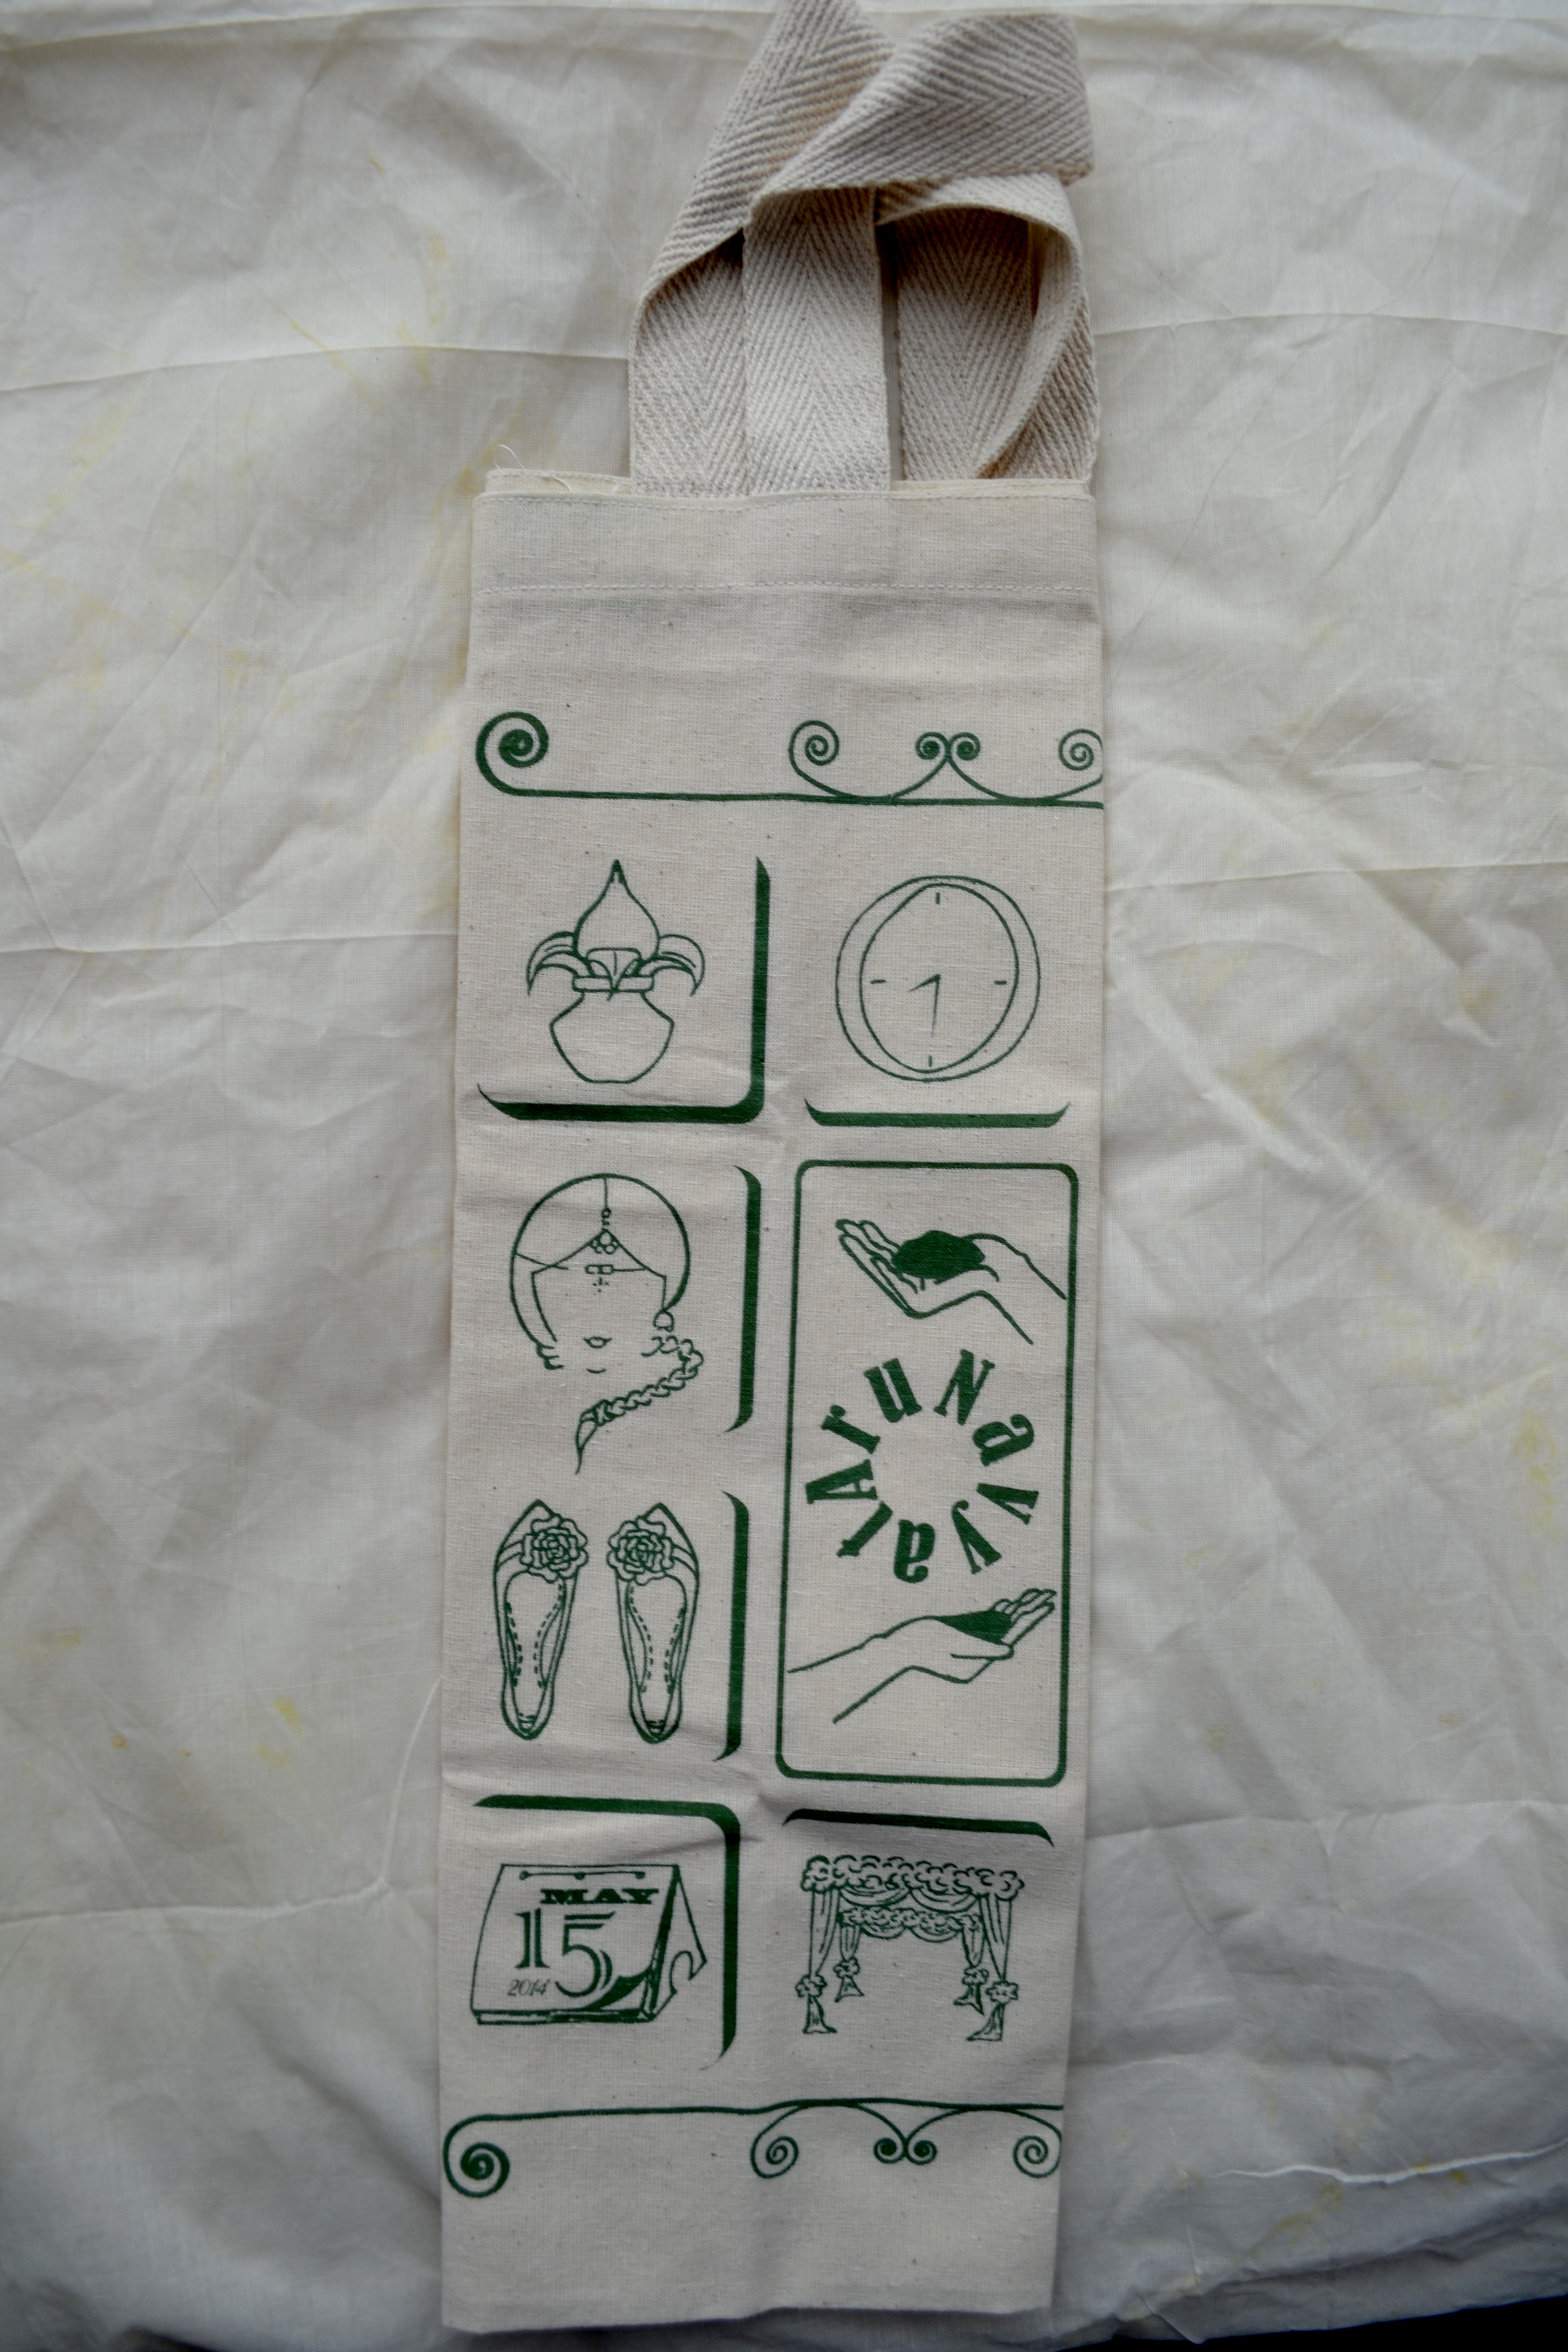
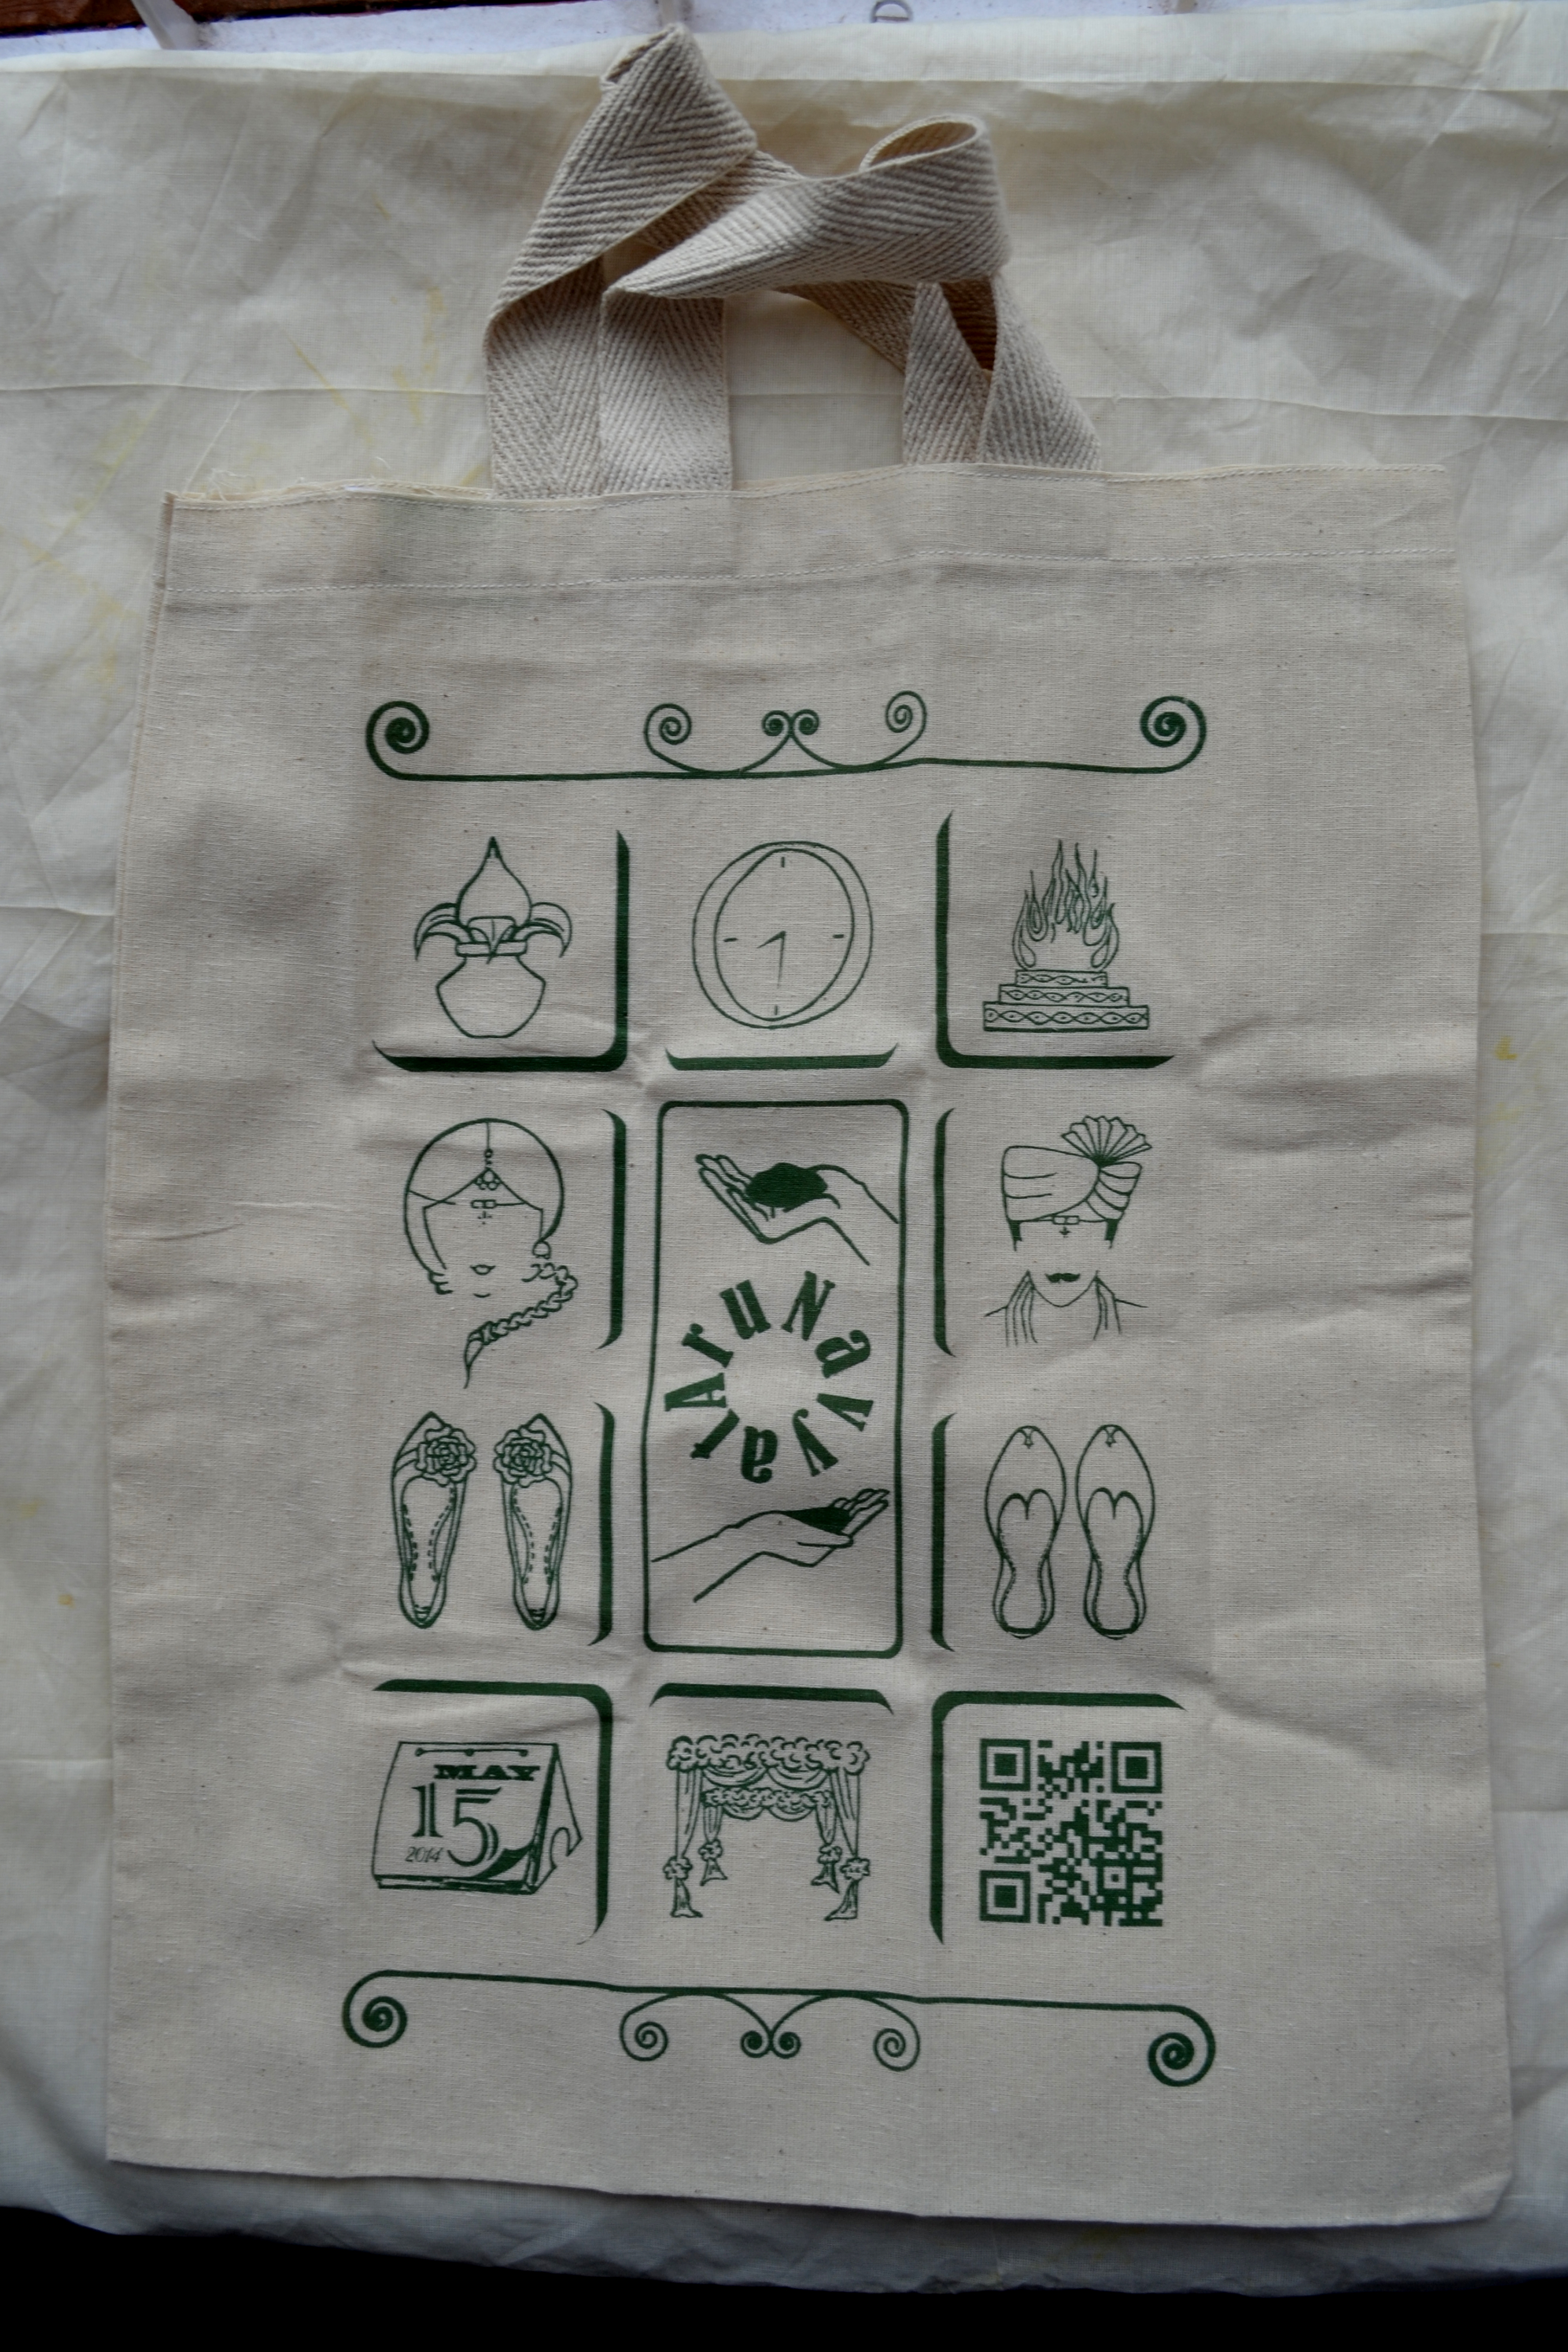
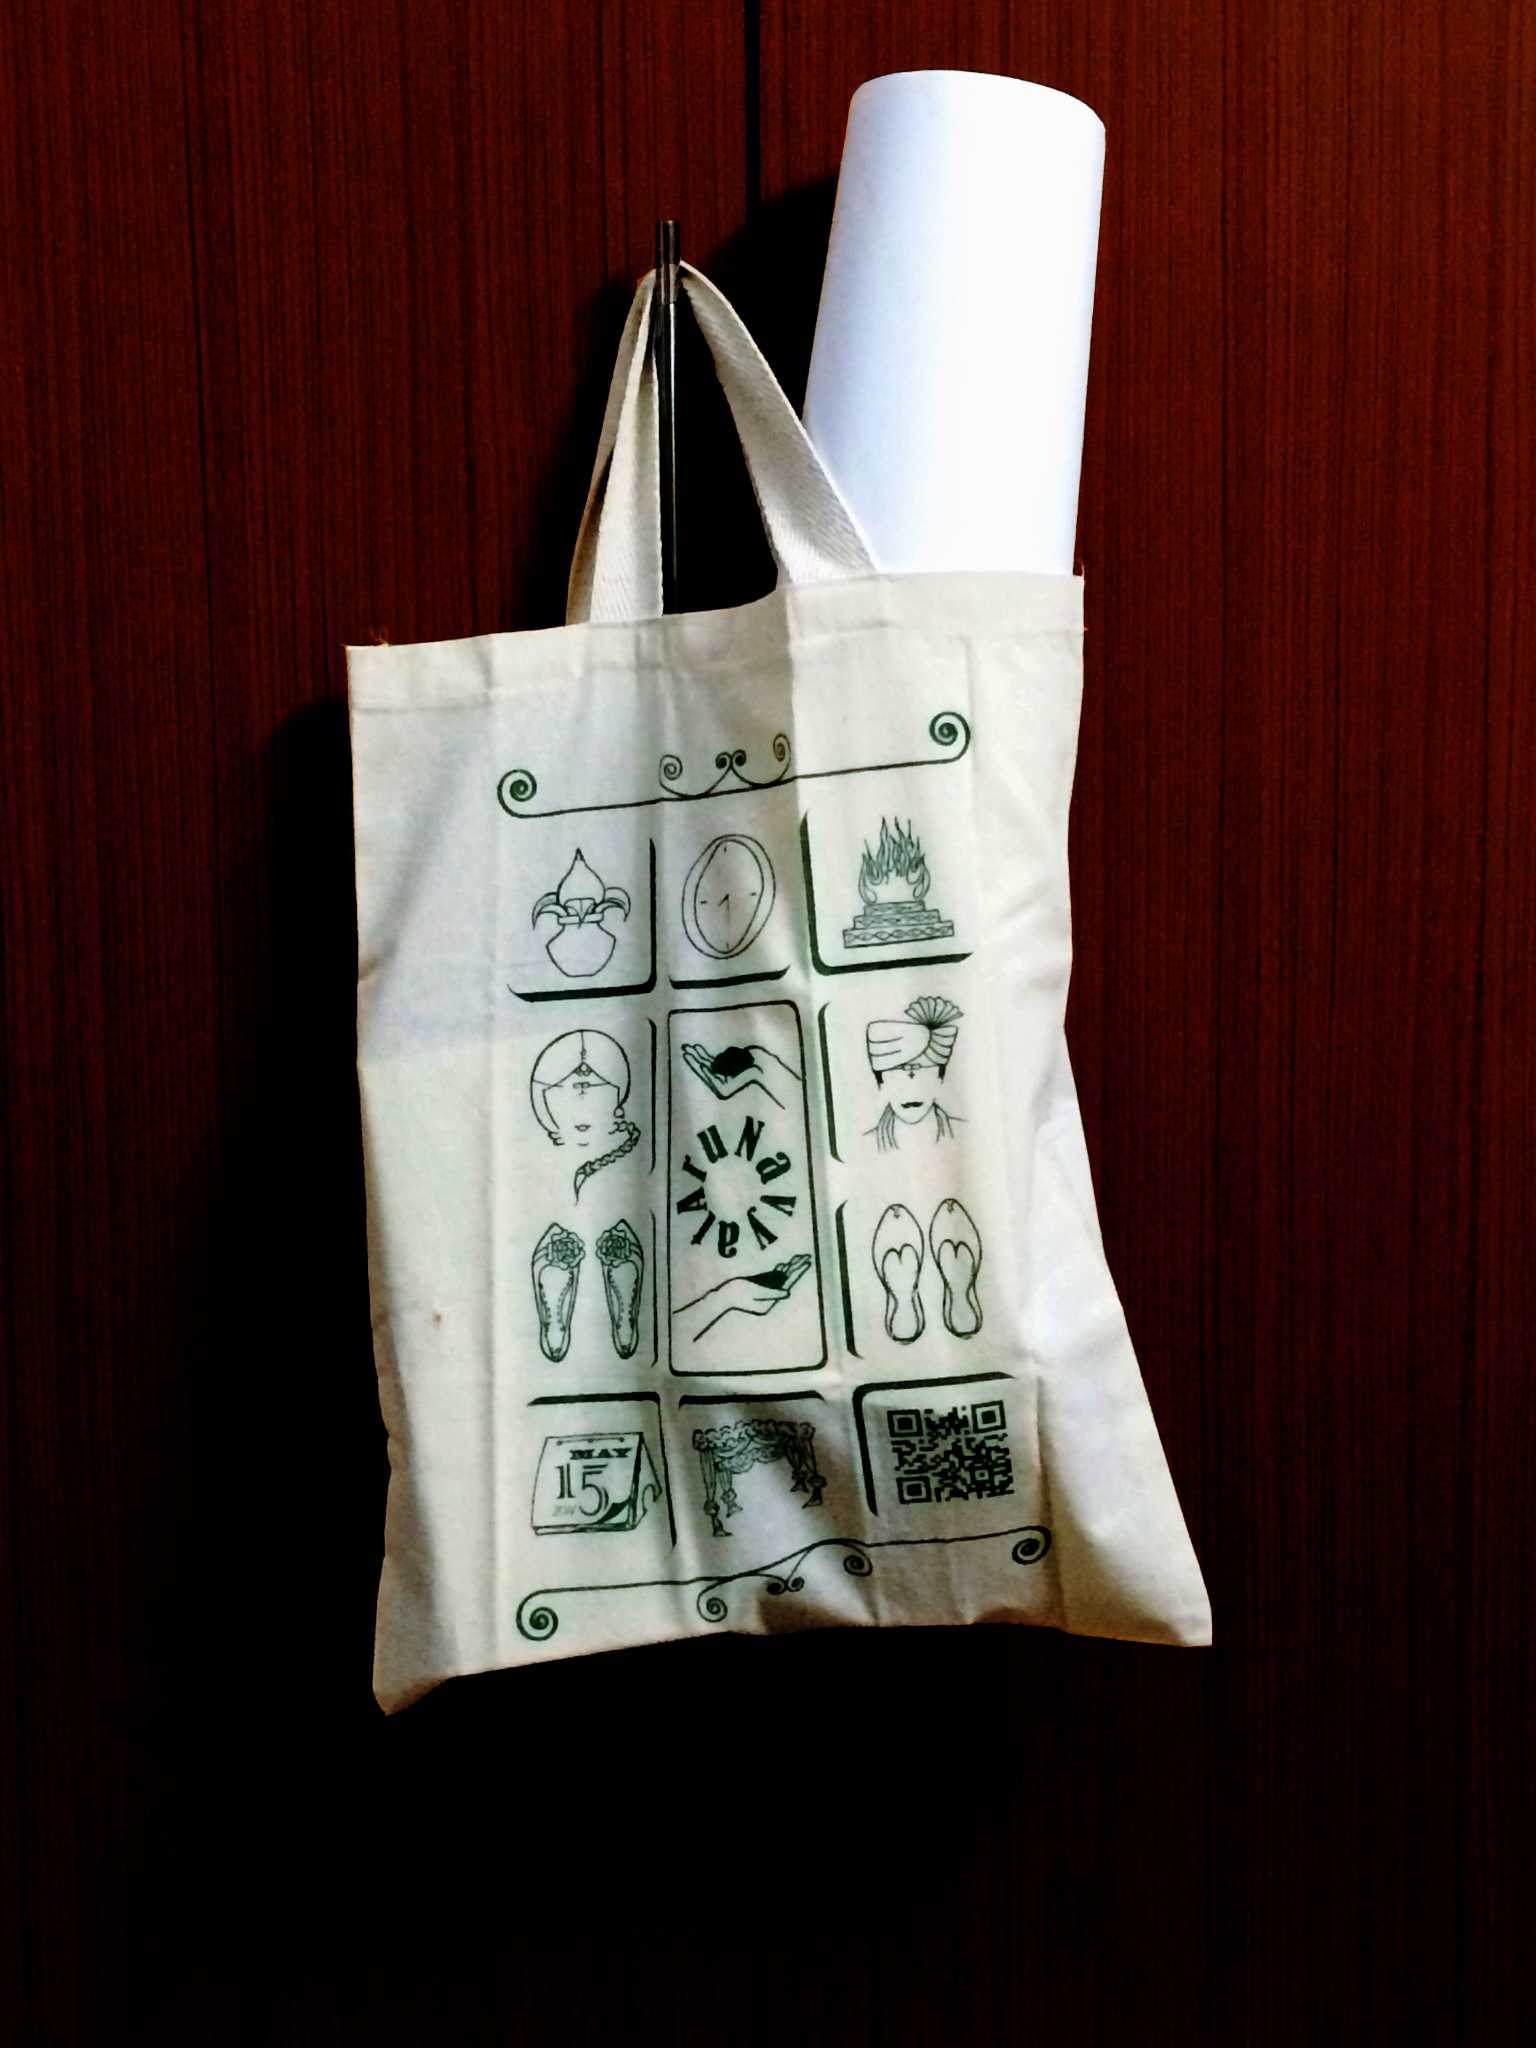
I used the PDF output from the above step to get a Screen done. A screen is a sheet attached to the frame for screen printing. It can be made in different sizes depending on the design. As I wanted to keep the design simple. I used a single color.
I took my uncle's friends help to get the bag screen printed as I don't have the screen printing equipment.
Note:
- I gave the PDF file for screen printing.
- I selected the colors from the available standard "Screen printing colors list" that I found on Google.
- Be very precise with the measurements.
And there it is, an useful wedding invitation.