Resize and Print a Pattern Image Without Photoshop
by kcullivan in Craft > Sewing
369 Views, 1 Favorites, 0 Comments
Resize and Print a Pattern Image Without Photoshop
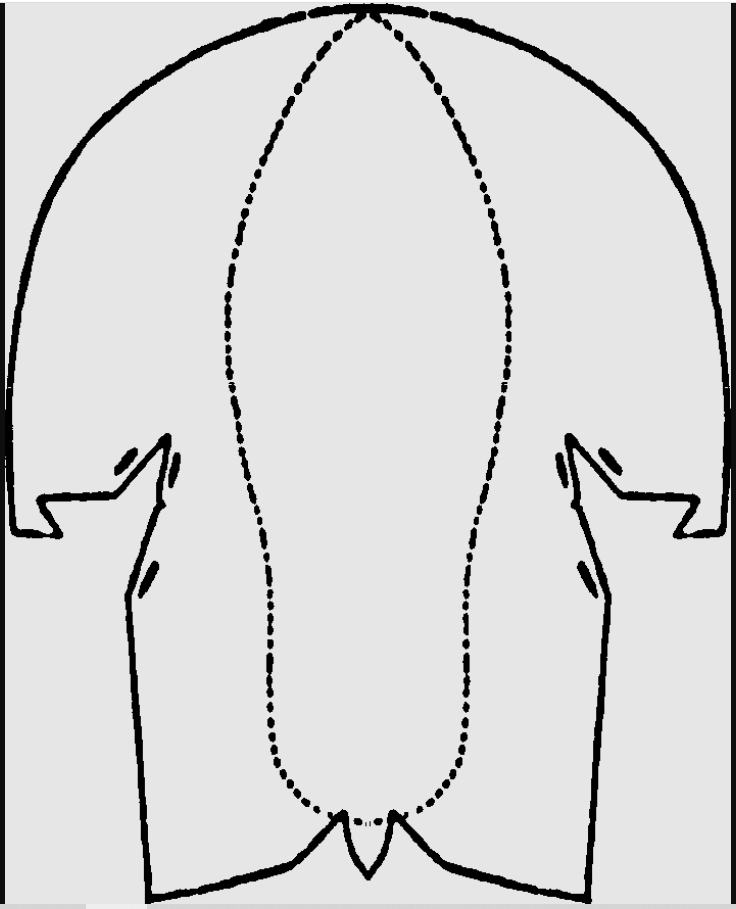
In order to print and assemble a number of free patterns and diagrams online (like this historic shoe from Ballymacomb), you have to be able to print a large image broken up into multiple sheets.
This is easy using Photoshop’s tiling function, but not everyone has Photoshop or is confident using it. What if you just want to print your pattern out without having to navigate a new software program?
There's a simple way to print out your image at full scale on multiple sheets without needing to learn Photoshop first. Anyone with Windows can do it. All you need is Paint.
Resize Your Image
(If your image is already the size you want it, skip to Step 2.)
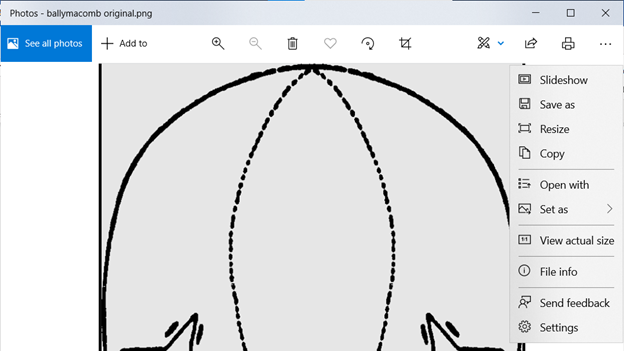
- Open the image from its folder and click the three dots in the upper right corner. Select “resize” from the pulldown menu.
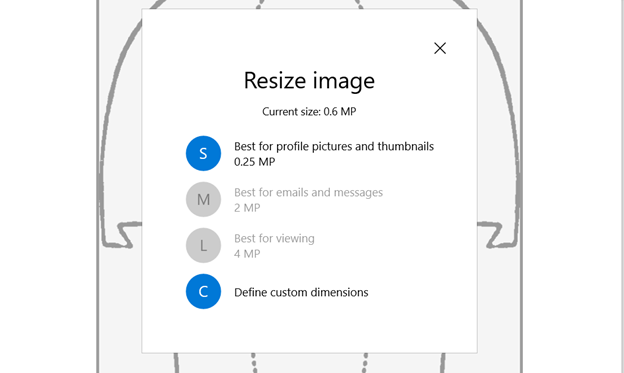
- Choose “Define custom dimensions”.
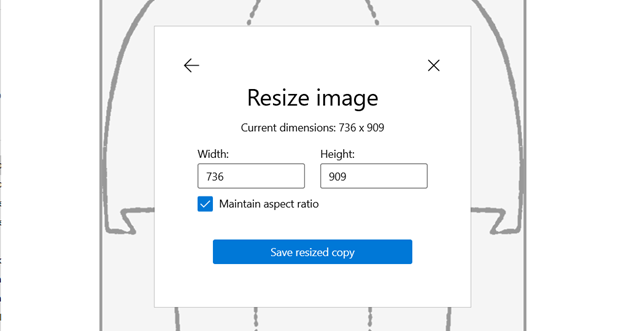
- Increase the dimensions as desired. For example, to increase the image by 200%, multiply each number by 2. Keep the “Maintain aspect ratio” box checked. Save a copy.
Adjust Your Page Setup
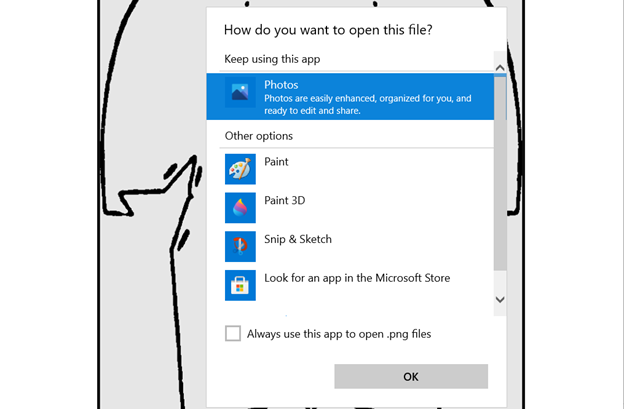
- Open the resized copy of the image. Open the three dot menu again. Select “Open with”. Open with Paint.
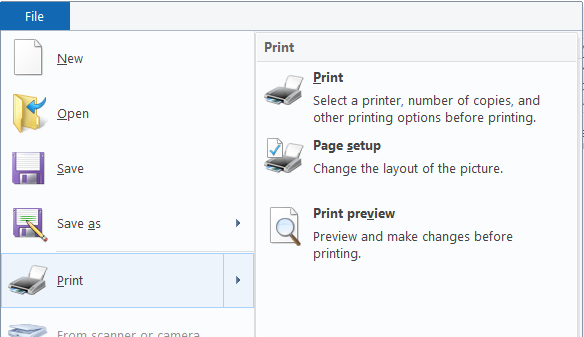
- From the File tab, choose Print and then Page Setup.
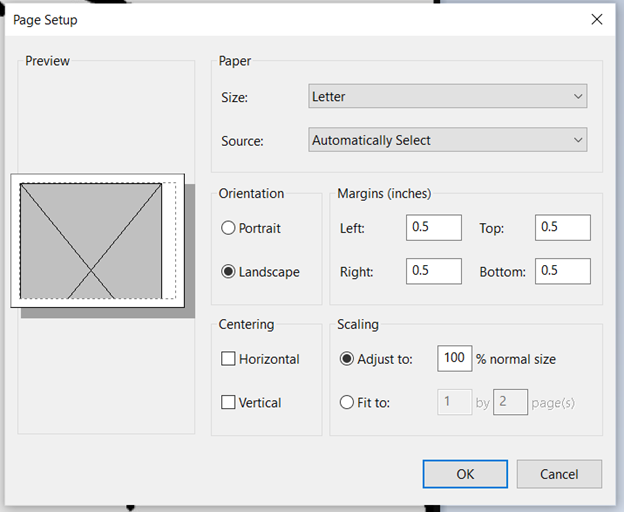
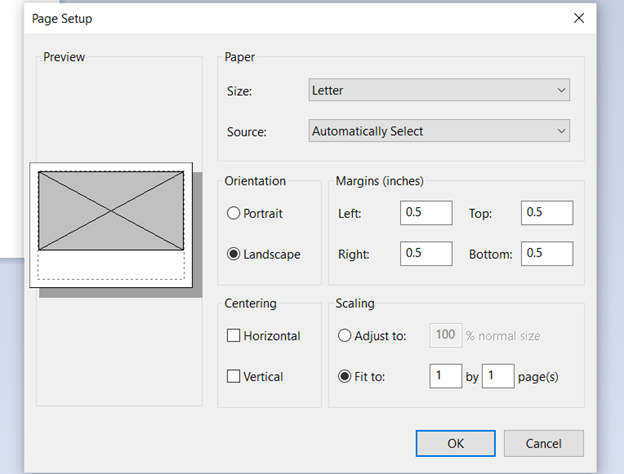
- Adjust "Fit to” to your estimate of the pages required by the image. You can always come back and adjust again if you get it wrong.
- IMPORTANT: After you adjust “Fit to”, select the option for “Adjust to 100% normal size”.

- Print your image, trim excess margins and tape your pattern pages together.
- Compare the pattern’s dimensions to your body size to check for fit.
- If the size is off, go back and adjust the image resizing again using the previous steps.
Photo by Clay Banks on Unsplash