Resin Art Box

This is a simple project with lots of room for creativity it is just a simple box manufactured on a CNC router with a little bit of CAD and CAM skill you'll be able to get this done relatively quickly as well as put any form of resin art on the top.
Supplies
You will need some plywood about a quarter sheet(I used 1/4 inch)
CNC router
Basic CAD and CAM skills
Resin
Wood glue
Basic hand tools(To make putting together easier)

Create a new component and a new sketch that looks like this. (Or if you are familiar with Fusion360 make one that's the size you want)

Add these tabs to the box that will fit together. Make sure the extend out by your material height.

Create a center line and use it to mirror the geometry.

Extrude it with the same material height we used a few steps ago.

Use the move tool with the "Create copy" box ticked and move it over 8 inches.

Create a new component and a new sketch on this plane if you can(if not don't worry select the plane perpendicular to the solids).

Project the vertices from the outer edges of the solids then create a rectangle from point to point.

Extrude by the material height.

Move the solid 12 inches away and check the create copy box.

Use the move tool to line all the parts with each other if they are not already in line.

Create a new component and a new sketch on the bottom plane to create the solid at the bottom of the box. Use the inner corners of the model as a reference.

Using center lines, mirroring, and other sketch tools create this geometry for the bottom.

Extrude by material hight.


Use the combine tool and combine the sides to the bottom, Make sure the "keep tool" box is clicked and the operation is set to "cut." This puts the tabs on the box allowing it to fit together.


Use the same process on the sides.


Create a new component and new sketch for the top, this will be the cut-out in the top of the box for the resin to sit in.

.PNG)
Grab the outer box and extrude to the martial hight, and the inner box to half that.

Move the solid to the top of the model.


Go to the manufacturer workspace and create a manufacturing model. Edit the manufacturing model this part is tedious you need to create these little circles called dog bones as well as offset each inner tab to allow for parts to fit together and tools to reach all edges.

Turn all your bodies into components in the manufacturing model using this method. If you do not what we are going to do next will not work.


Under the envelope tab click on the plane and set the bounds to the measurements of the material you will be using.


Create a "new setup" and make sure your stock is the same height as your material height as well as the width and length being able to fit the model. When selecting your CAM origin use the bottom of a corner.
(16000).PNG)


Using a half-inch flat endmill with these settings (Pic one) do a 2d contour around this geometry(Pic 2) and an adaptive clearing around this geometry(pic 3). Make sure to add tabs to your work.
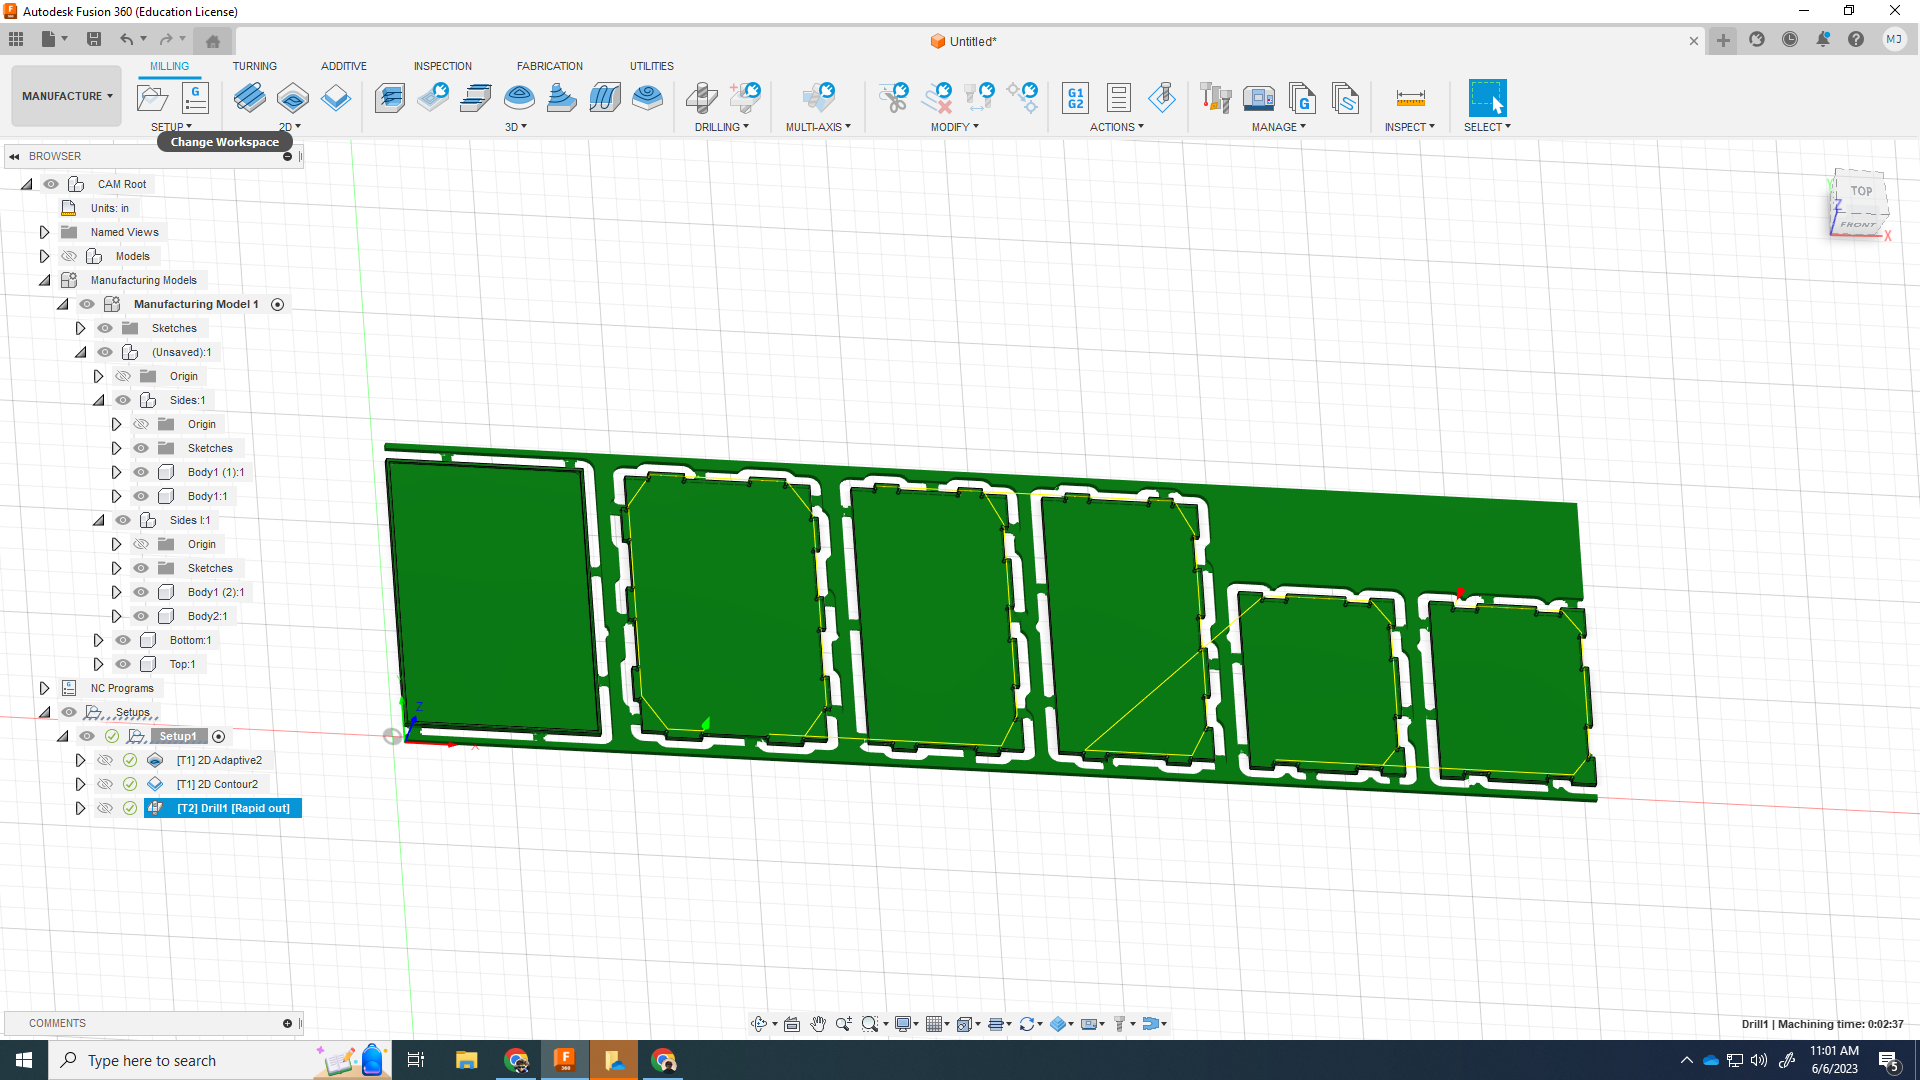
Use a drill operation with the 1/8-inch endmill to cut out your dog bones. Then using a 2D do a fishing pass around the model using the same 1/8-inch endmill. Make sure the Tab settings are the same for both contours.
You can then post prosses and cut out your part.
![IMG_8709[1].JPG](/proxy/?url=https://content.instructables.com/FT6/3H9O/LIOKWLJ3/FT63H9OLIOKWLJ3.jpg&filename=IMG_8709[1].JPG)
![IMG_8710[1].JPG](/proxy/?url=https://content.instructables.com/FQ5/M9T4/LIOKWLJ4/FQ5M9T4LIOKWLJ4.jpg&filename=IMG_8710[1].JPG)
![IMG_8711[1].JPG](/proxy/?url=https://content.instructables.com/F2W/CRB1/LIOKWLJ5/F2WCRB1LIOKWLJ5.jpg&filename=IMG_8711[1].JPG)
![IMG_8712[1].JPG](/proxy/?url=https://content.instructables.com/FAU/54X7/LIOKWLJ8/FAU54X7LIOKWLJ8.jpg&filename=IMG_8712[1].JPG)
Remove parts from the router, and assemble the box. use the top pocket to do your resin art! Put it all together and there you go! Make sure to add some cleats so the lid stays on! Use wood glue to hold everything together.