Resetting Your Password in Ubuntu
by Pettrocity in Circuits > Linux
12220 Views, 9 Favorites, 0 Comments
Resetting Your Password in Ubuntu
We've all been here before: Your just getting started at you computer, you get to the log on page, and......wait, what's my password again? Uh-oh, this is bad. Getting locked out of your computer is a very bad thing. Luckily, if you are running Ubuntu, our favorite Linux fork (feel free to comment if you disagree) resetting your password is a piece of cake, and can be done in a snap. All that is needed is some patience, and a little knowledge of Linux terminal commands.
NOTE: This is provided as an educational tutorial. Using the steps in this Instructable, it is possible to reset someone else's password. Never do this on someone else's computer without their permission. I am not responsible for how you choose to use this information, or if you damage your computer in the process of this.
I am not sure how to do this for other Linux distributions, or if will even work. The only OS that I have tested this with is Ubuntu 12.0.
I did not come up with this. I am simply distributing this tutorial to people in the hopes that they find it useful The original can be found here.
Booting in Recovery Mode
The key to making this work is to boot Ubuntu in recovery mode. This is accessed by starting up your computer in a special way.
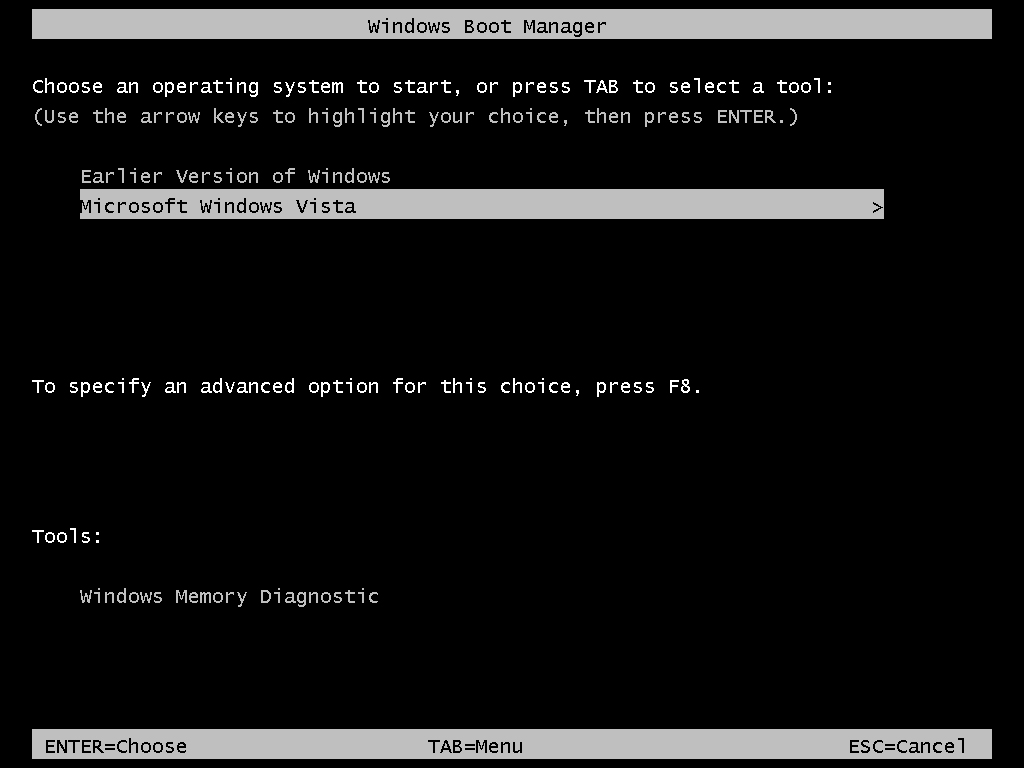
If you are running Ubuntu alongside another Operating System, like I am, then accessing the Ubuntu specialized boot menu is fairly easy. First, start up your computer, and wait for the standard boot menu to appear. Use the arrow keys to highlight the Ubuntu option. Then hold down the Shift key, and press enter, selecting Ubuntu as your start-up option. Keep holding until you see a Ubuntu Grub menu appear.
If you are running Ubuntu as your only Operating System, then accessing the Ubuntu specialized boot menu should be just as easy. However, I am not running Ubuntu as my only OS, so I am not 100% sure of the following steps. If the Ubuntu Grub menu appears automatically, then you can just skip this step. If it does not, then try holding down the Shift key during start-up, This should get you to the Ubuntu Grub Menu.
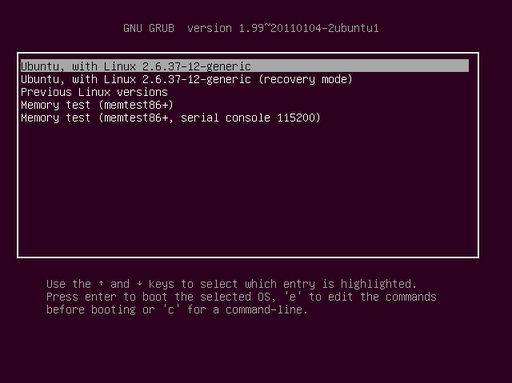
Once you are at the Ubuntu Grub Menu, you should see one of two things. You may see something that says:
Ubuntu, with Linux x.x.x-x-generic
Ubuntu, with Linux x.x.x-x-generic (recovery mode)
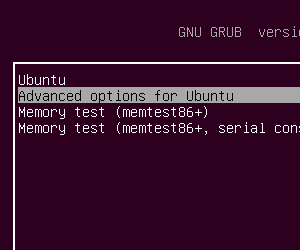
or something like this:
Ubuntu
Advanced options for Ubuntu
If you see the first option, then select [Ubuntu, with Linux x.x.x-x-generic (recovery mode)] by clicking enter. If you see the second option, then select [Advanced options for Ubuntu]. This will take you to a page that looks like the first option
Once you have done that, there will probably be a frighting string of white text on a black screen scrolling by at high speeds. Do not panic, this is completely normal. After some time, a BIOS-like menu will pop up. This is where we want to be.
Using the Root Shell Prompt
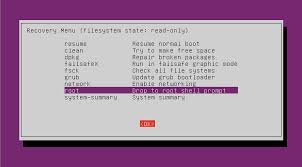
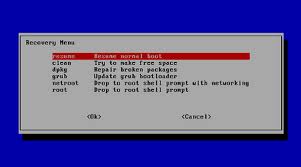
Once you have the Recovery Menu on your screen, the first thing that we want to do is to take note of the very first line of the menu. It will say something like this:
Recovery Menu (filesystem state: xxxxxxx)
If you see that the menu says read-only in the place of the 'xxxxxxx', then we have to change it. To change the filesystem state, use the arrow keys to select the menu item that says:
root Drop to root shell prompt
by clicking enter. On my computer, it is the second from the bottom. Once you select it, a black bar will appear at the bottom of your screen, with white text that says something like:
root@ubuntu:~#
Now, your almost done.
WARNING: Please be careful here. As many computer-savvy people know, root is the level above administrator, at the very top of the account pecking-order. Once in the root shell prompt, it is possible to damage your installation of Linux, so BE CAREFUL!
Changing the Filesystem State
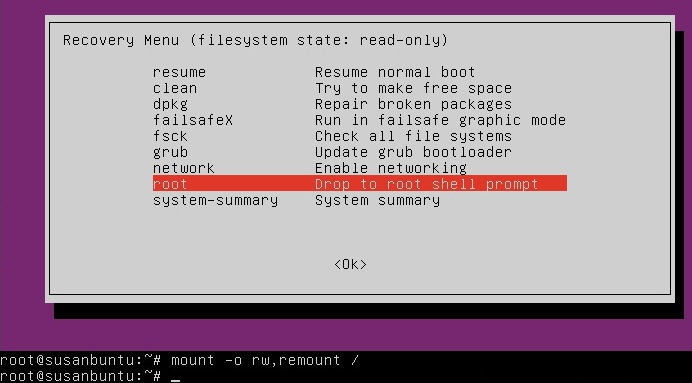
In the newer versions of Ubuntu, the filesystem sate has been defaulted to read-only. This means that we can only see the files on the computer from the root shell prompt, not edit them like we need to. If the filesystem state is set to read-only, then a simple set on commands can change that.
If you need to change the filesystem state, then enter the following commands after the root@ubuntu:~#:
mount -o rw,remount /
Now, you have read/write filesystem privlages.
If you need to change the filesystem state, then enter the following commands after the root@ubuntu:~#:
mount -o rw,remount /
Now, you have read/write filesystem privlages.
Resetting the User Password

Now, the only thing left to do is to reset the user password. In order to do this, you must know the name of your user account EXACTLY, otherwise this will not work. If you are at all unsure about this, type in the following commands:
ls /home
(That is a lowercase 'L', not a capital 'I') This will print out the names of all the user accounts registered in Ubuntu. If there are multiple users (excluding guest accounts), then use yours from the list. If you are the only user, then your account name will be the only one displayed. To change the password for your account, type in the following commands:
passwd username
Where 'username' is replaced by your account name. If 'username' is a valid account, the you will be prompted to enter a new password, and it will look like this:
Enter new UNIX password:
Now, enter your new password (that you will hopefully not forget) and hit enter. Note that you will not see anything happen when you type in your new password, but it is being recognized by Ubuntu. It is the equivalent of a password box displaying * when you type in a password. Now you will be prompted to Retype your password. Hit enter again. If all is successful, then you will be greeted with this message:
passwd: password updated successfully
Now, to exit the root shell prompt, just type:
exit
and click enter. You will then return to the Recovery menu. This time, select:
resume Resume normal boot
A notification will appear, alerting you that you will exit recovery mode. Hit enter, and you will return to a normal boot. Now, only one thing is left. As the notification stated, some of the Ubuntu graphics drivers will require a full reboot. This means that you will have to restart your computer. If you get to a point in the normal boot where you have no option to restart, or you can't do anything, unplug (for desktop computers) and take out the battery (for laptops). Re plug and insert the battery. Now, you can boot just like normal. Once you get to the log on page, enter your newly changed password. If it is not accepted (or you forgot it again), simply repeat the process, and your good to go.