Replacing a Faulty Compass on Your DJI Phantom 3 Quadcopter
by Scot L in Circuits > Robots
6756 Views, 11 Favorites, 0 Comments
Replacing a Faulty Compass on Your DJI Phantom 3 Quadcopter
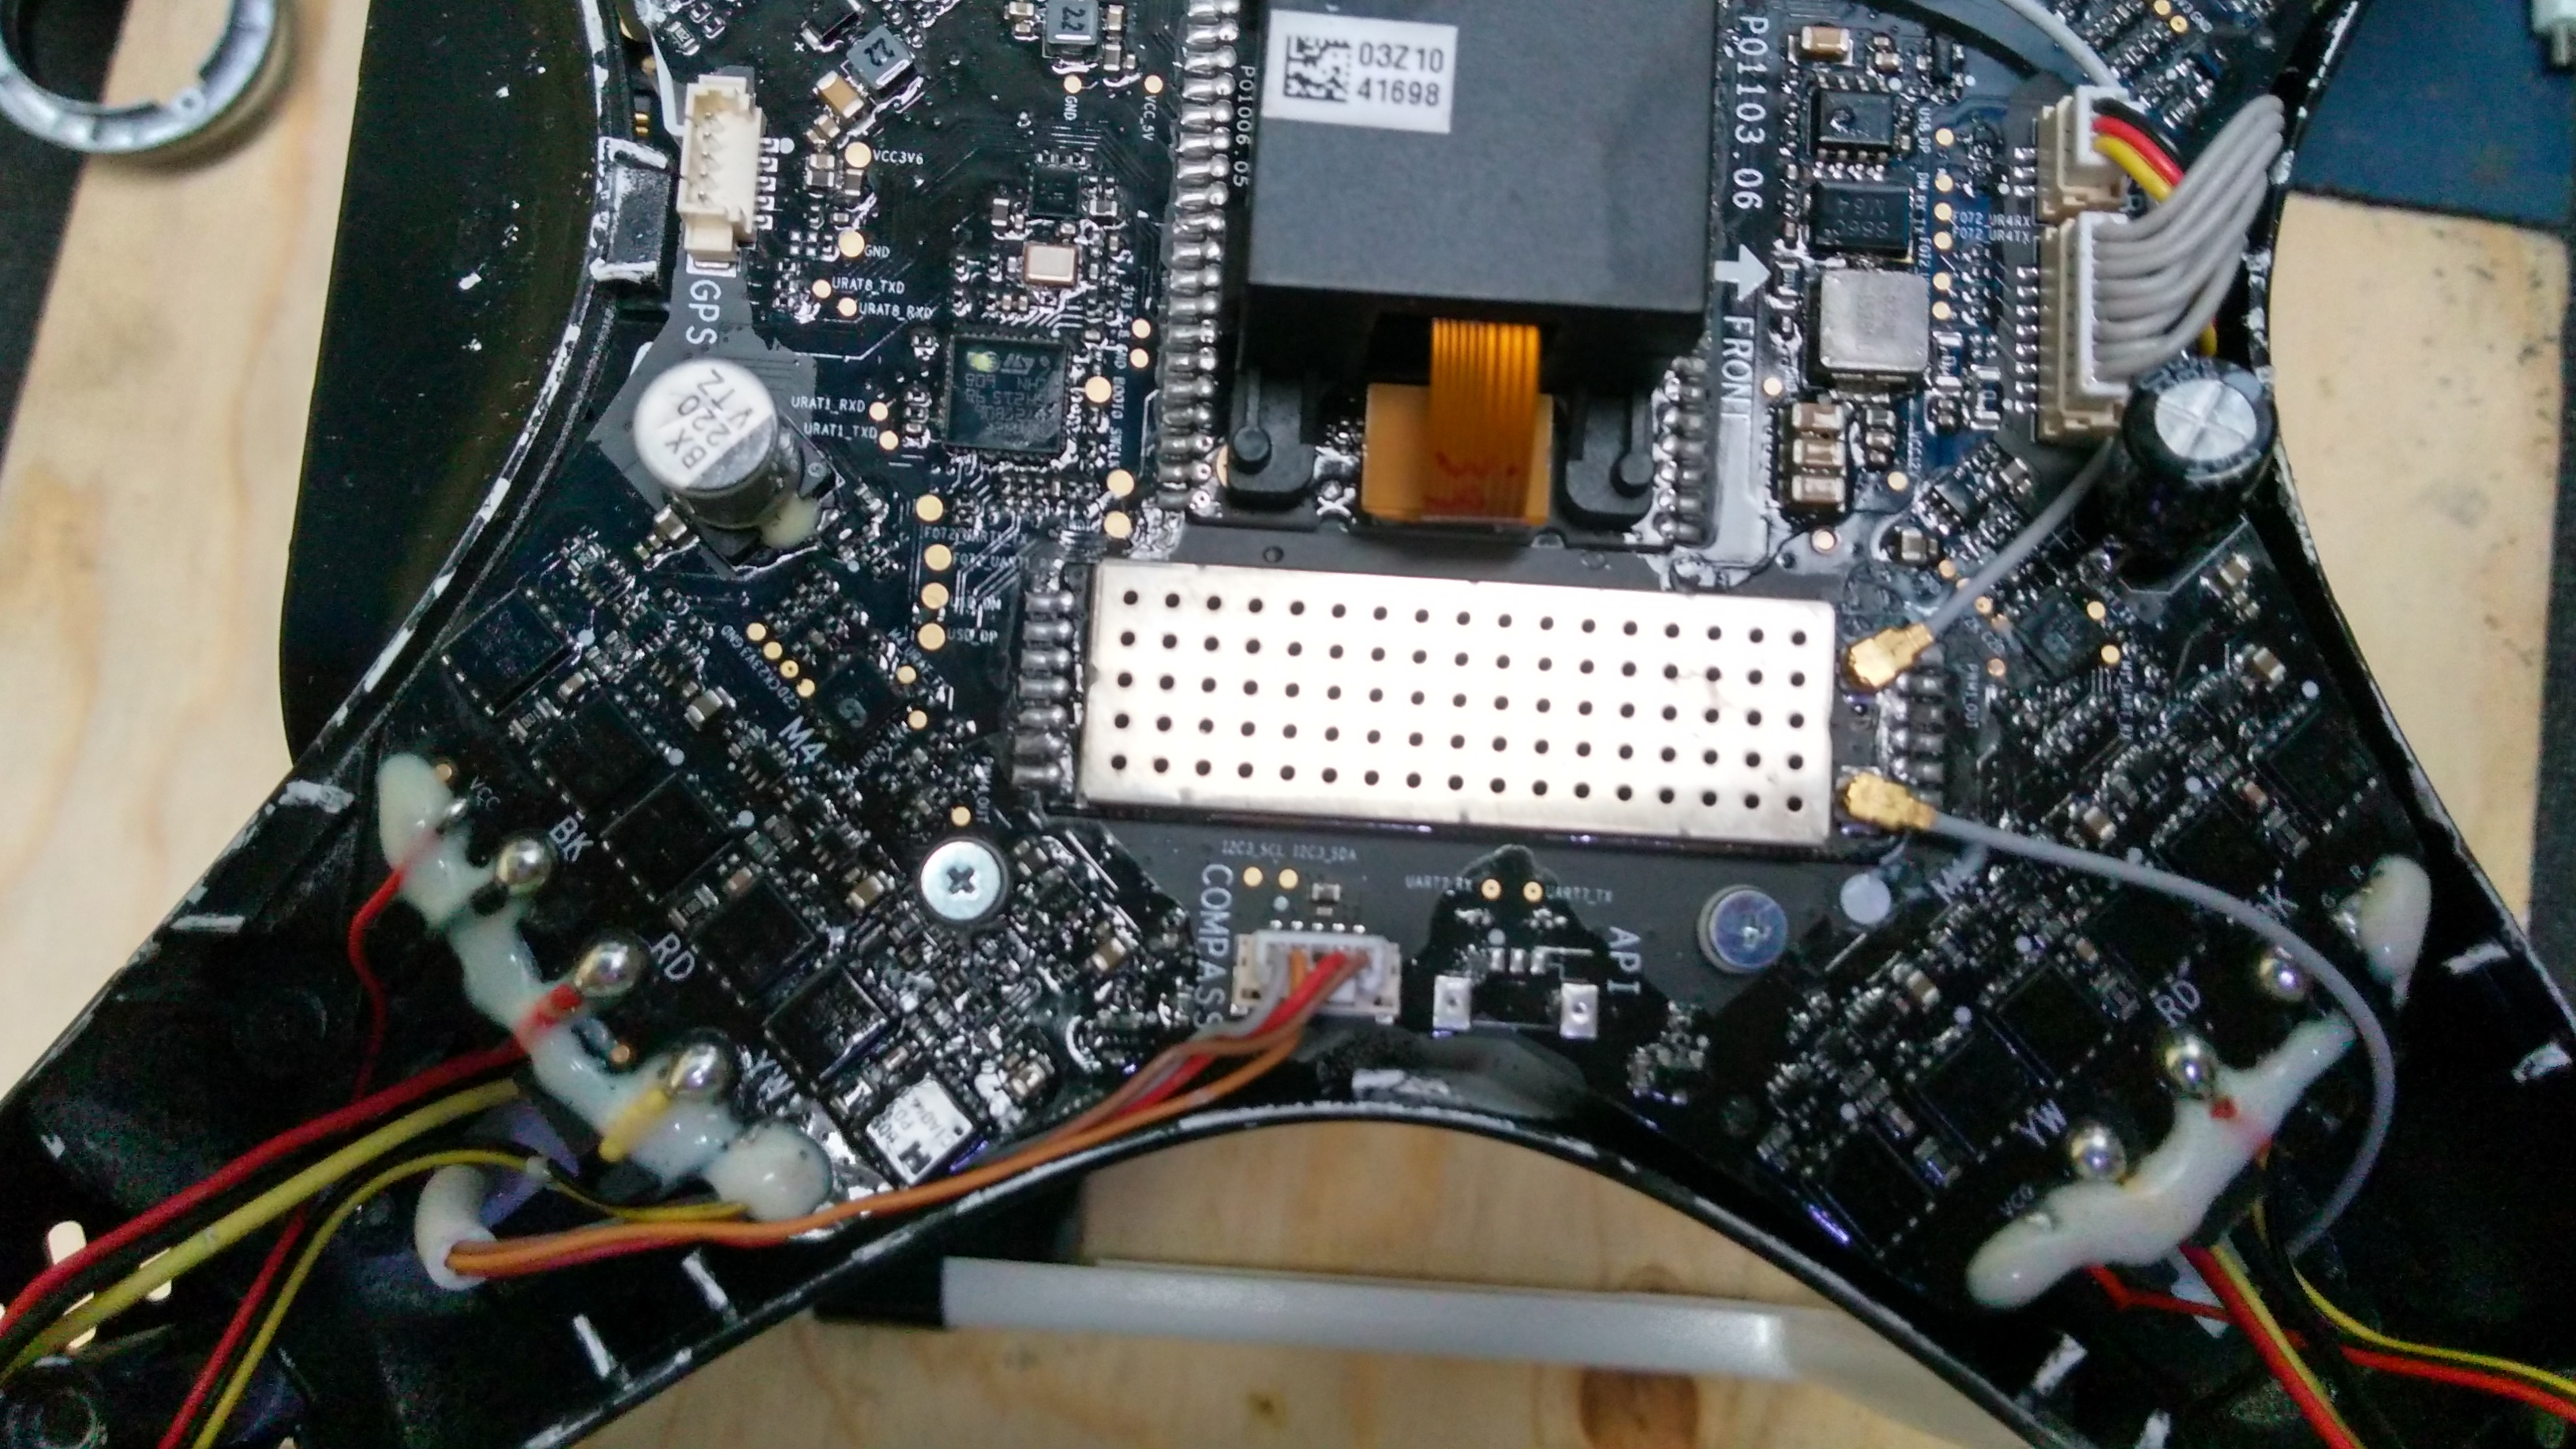
In this instructable I'll be working with a Phantom 3 Standard Quadcopter. however it is applicable to all four models of the Phantom 3 line.
If you haven't been able to fly your aircraft and getting the warning message that there is too much electromagnetic interference, no matter where you go to fly, you may have a faulty compass. To determine whether it is the compass module itself or something in the controller board that is faulty, you'll need to check the sensors state on the DJI Go app. With the aircraft and controller both on go into your DJI Go app. On the top right hand corner is a pull down menu and from there go to → quadcopter → advanced. Take a look at the sensors state, if your compass has zeros in all four boxes, it is your compass module that isn't working and you will need to replace it. You can order a new stock compass module, or if you're impatient like me and also live walking distance from a Frys electronic superstore (I wouldn't recommend living close to a Frys) you can get a 3rd party electronic compass module that will do the job just as well. Maybe better, but that doesn't matter if the stock module already outputs measurement data at a higher resolution than the controller operates with.I couldn't find any specs online for the stock compass and DJI customer service doesn't seem to have any information on their their products or components. At any rate, from my observations the performance of the OSEPP electronic compass module at least equals that of the stock module. Your choice of compass will depend on how much value you put on aircraft aesthetics. The OSEPP module didn't exactly fit well, so I had to cut away a little plastic and use gorilla tape, but it works great and in fact it's sturdy enough to withstand 3 crashes since, Most recently I flew it in a tree accidentally where I found out a quadcopter doubles as a quite a fine tree trimmer. However the compass fix remained perfectly intact (as well as everything else) and I was flying it after recharging the battery and wiping the limbs and foliage off. A quite durable aircraft.
You'll need
1) A #6 and #9 Torx bit
and either
2) Stock compass module replacement
OR
3) OSEPP compass sensor module available at Frys, or any electronic compass that has an I²C connector interface (4 connections; power, ground, data in, data out)
if you choose the last option you'll also need solder, iron and some Gorilla tape.
For those wondering why mine is black, I did paint it, disassembled everything and painted the aircraft with a primer coat and three coats of eggshell black, it looked nice for a while, but as you can see from the pictures, crashes have messed it up a bit. If anyone wants me to make an instructable on how I disassembled and reassembled the entire aircraft let me know. Or if you want me to put some color your aircraft and you live near Roseville, Ca, message me and maybe we can work something out for a decent price. I've been tearing apart RC aircraft and doing repairs, modifications and new designs and looks as long as I can remember
Remove the Aircraft Upper Casing
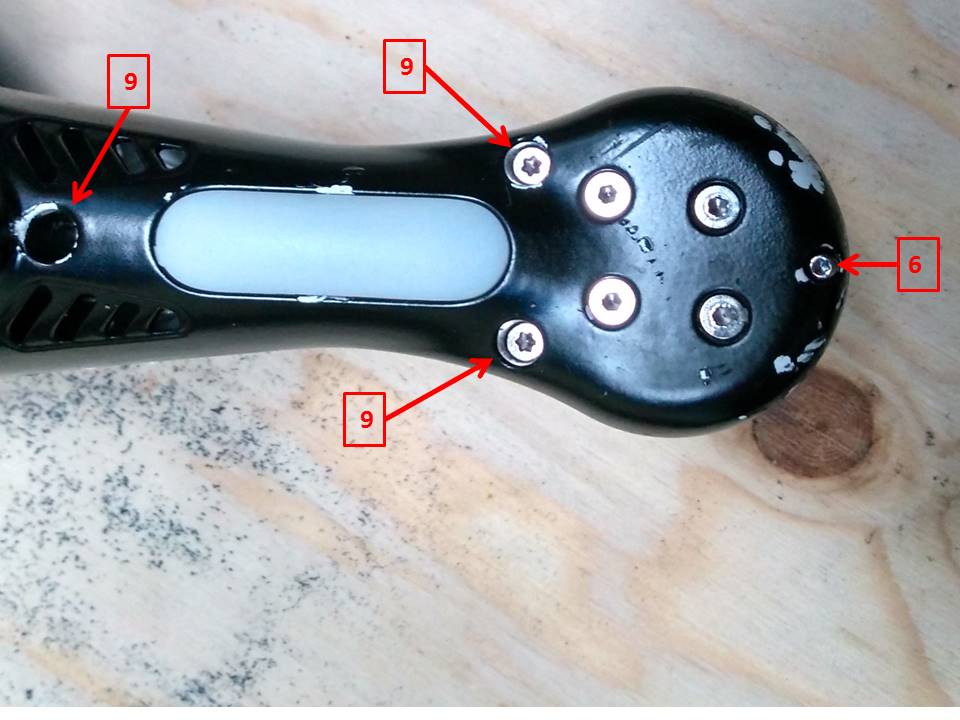
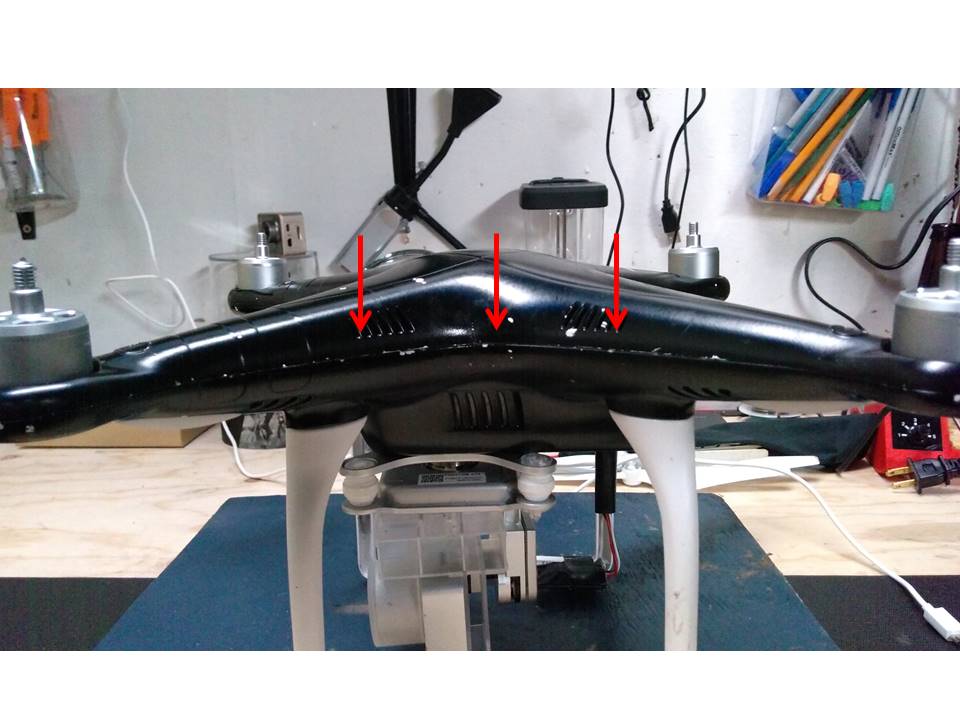
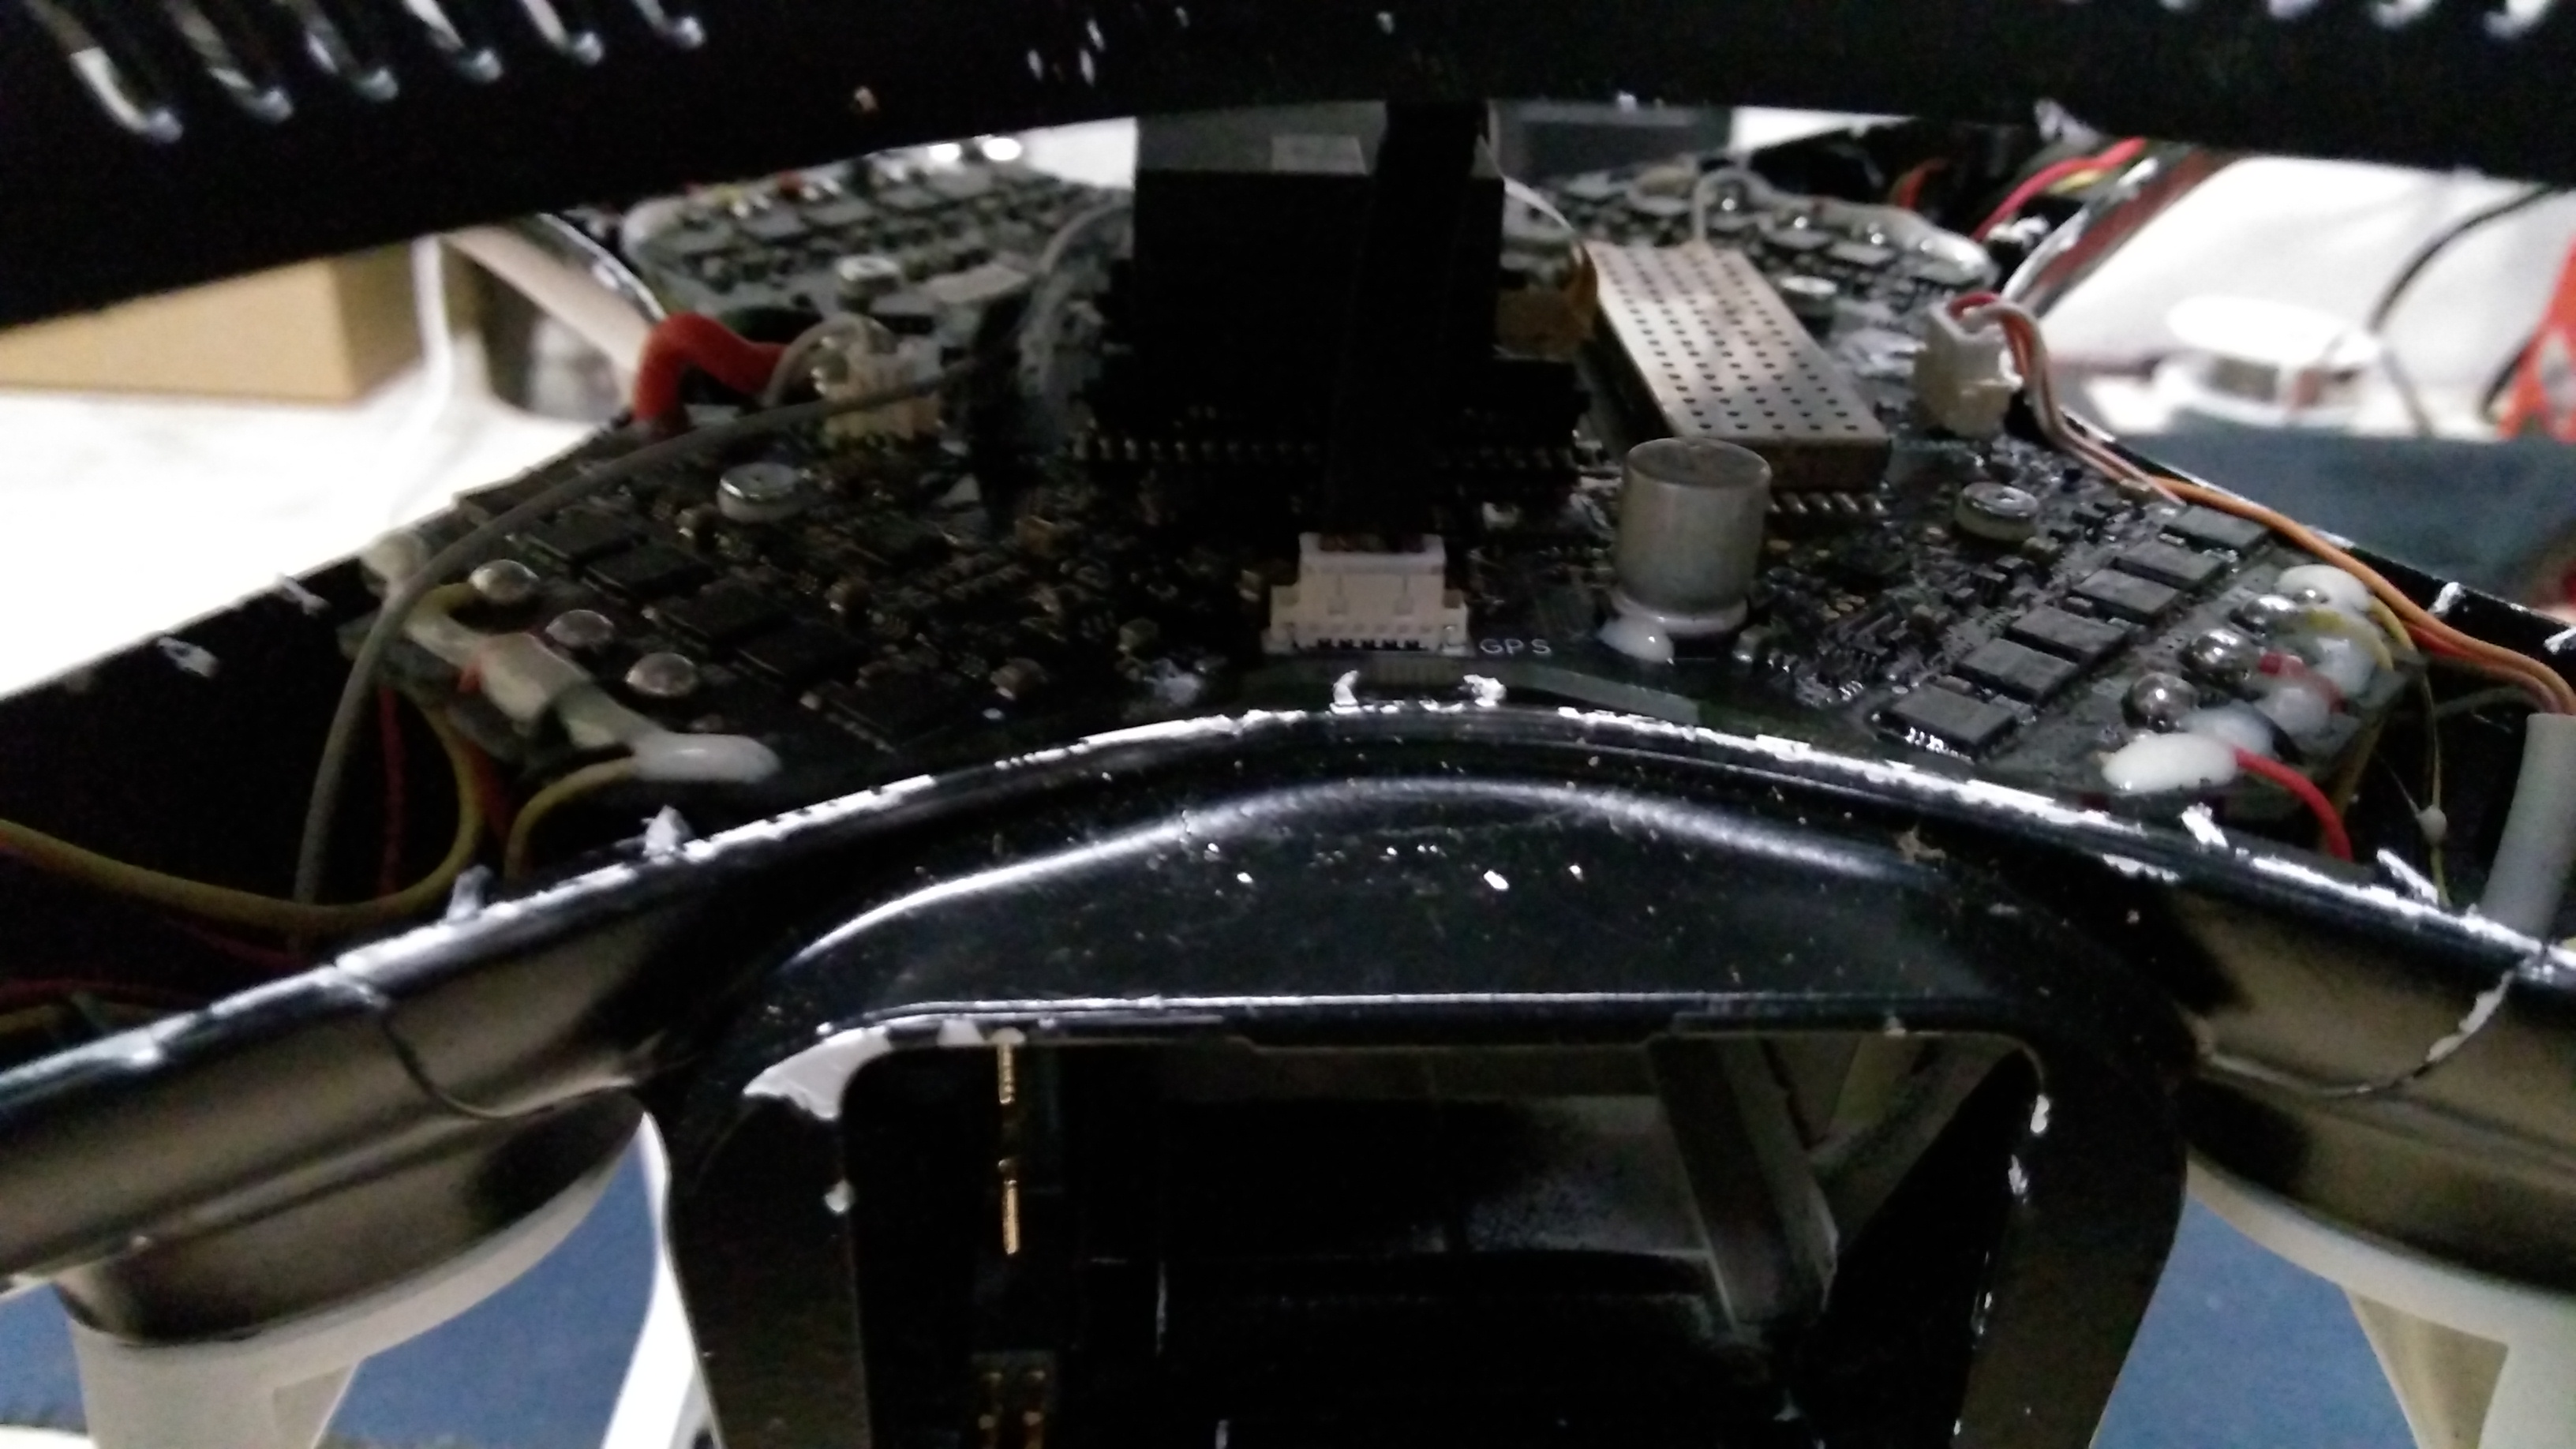
This part is a little tricky because you will have to disconnect the upper and lower casing by systematically working open each of the 3 clips on the inside of all four sides at the positions located by the arrows in the picture.
However before you begin that, there are 4 screws on each arm that will need to be removed, I put arrows on the picture to show where the screws are and labelled the size of torx bit you'll need to use. After you remove the 16 total screws you can then put the aircraft upright and begin the process of unclipping the upper and lower casings.
You'll have to go about removing the upper casing by applying pressure with your fingers on the upper casing where the clips are and kind of manipulating the pressure with your hands while simultaneously using a screwdriver (or something similar) to unclip them. I was quite forceful with a screwdriver while pressing on the clip positions with the other hand. Although each one sounded like it broke off, they were all intact when I was done, so you can use a little force popping them off with the screwdriver, but be careful not to gouge into the casing plastic with the screwdriver. As you unclip each one, use a playing card, guitar picks or something similar to stick between the upper and lower casings to keep that section from clipping back down as you progress through the clips. As you move through the clips around your aircraft continue to leave the cards or picks in place
(optional) In my case I also decided to cut down all the clips after removing the upper casing so I don't have to have to go through the same ordeal when I need to go back into it. When I put it back together the screws hold the casings together just fine without the clips, Ive never had a problem.
Once you have the upper casing free, you'll have to reach in and unplug the connector that goes from the GPS unit (affixed to the middle of the top casing) and the controller board to fully remove it.
Removing the Faulty Compass
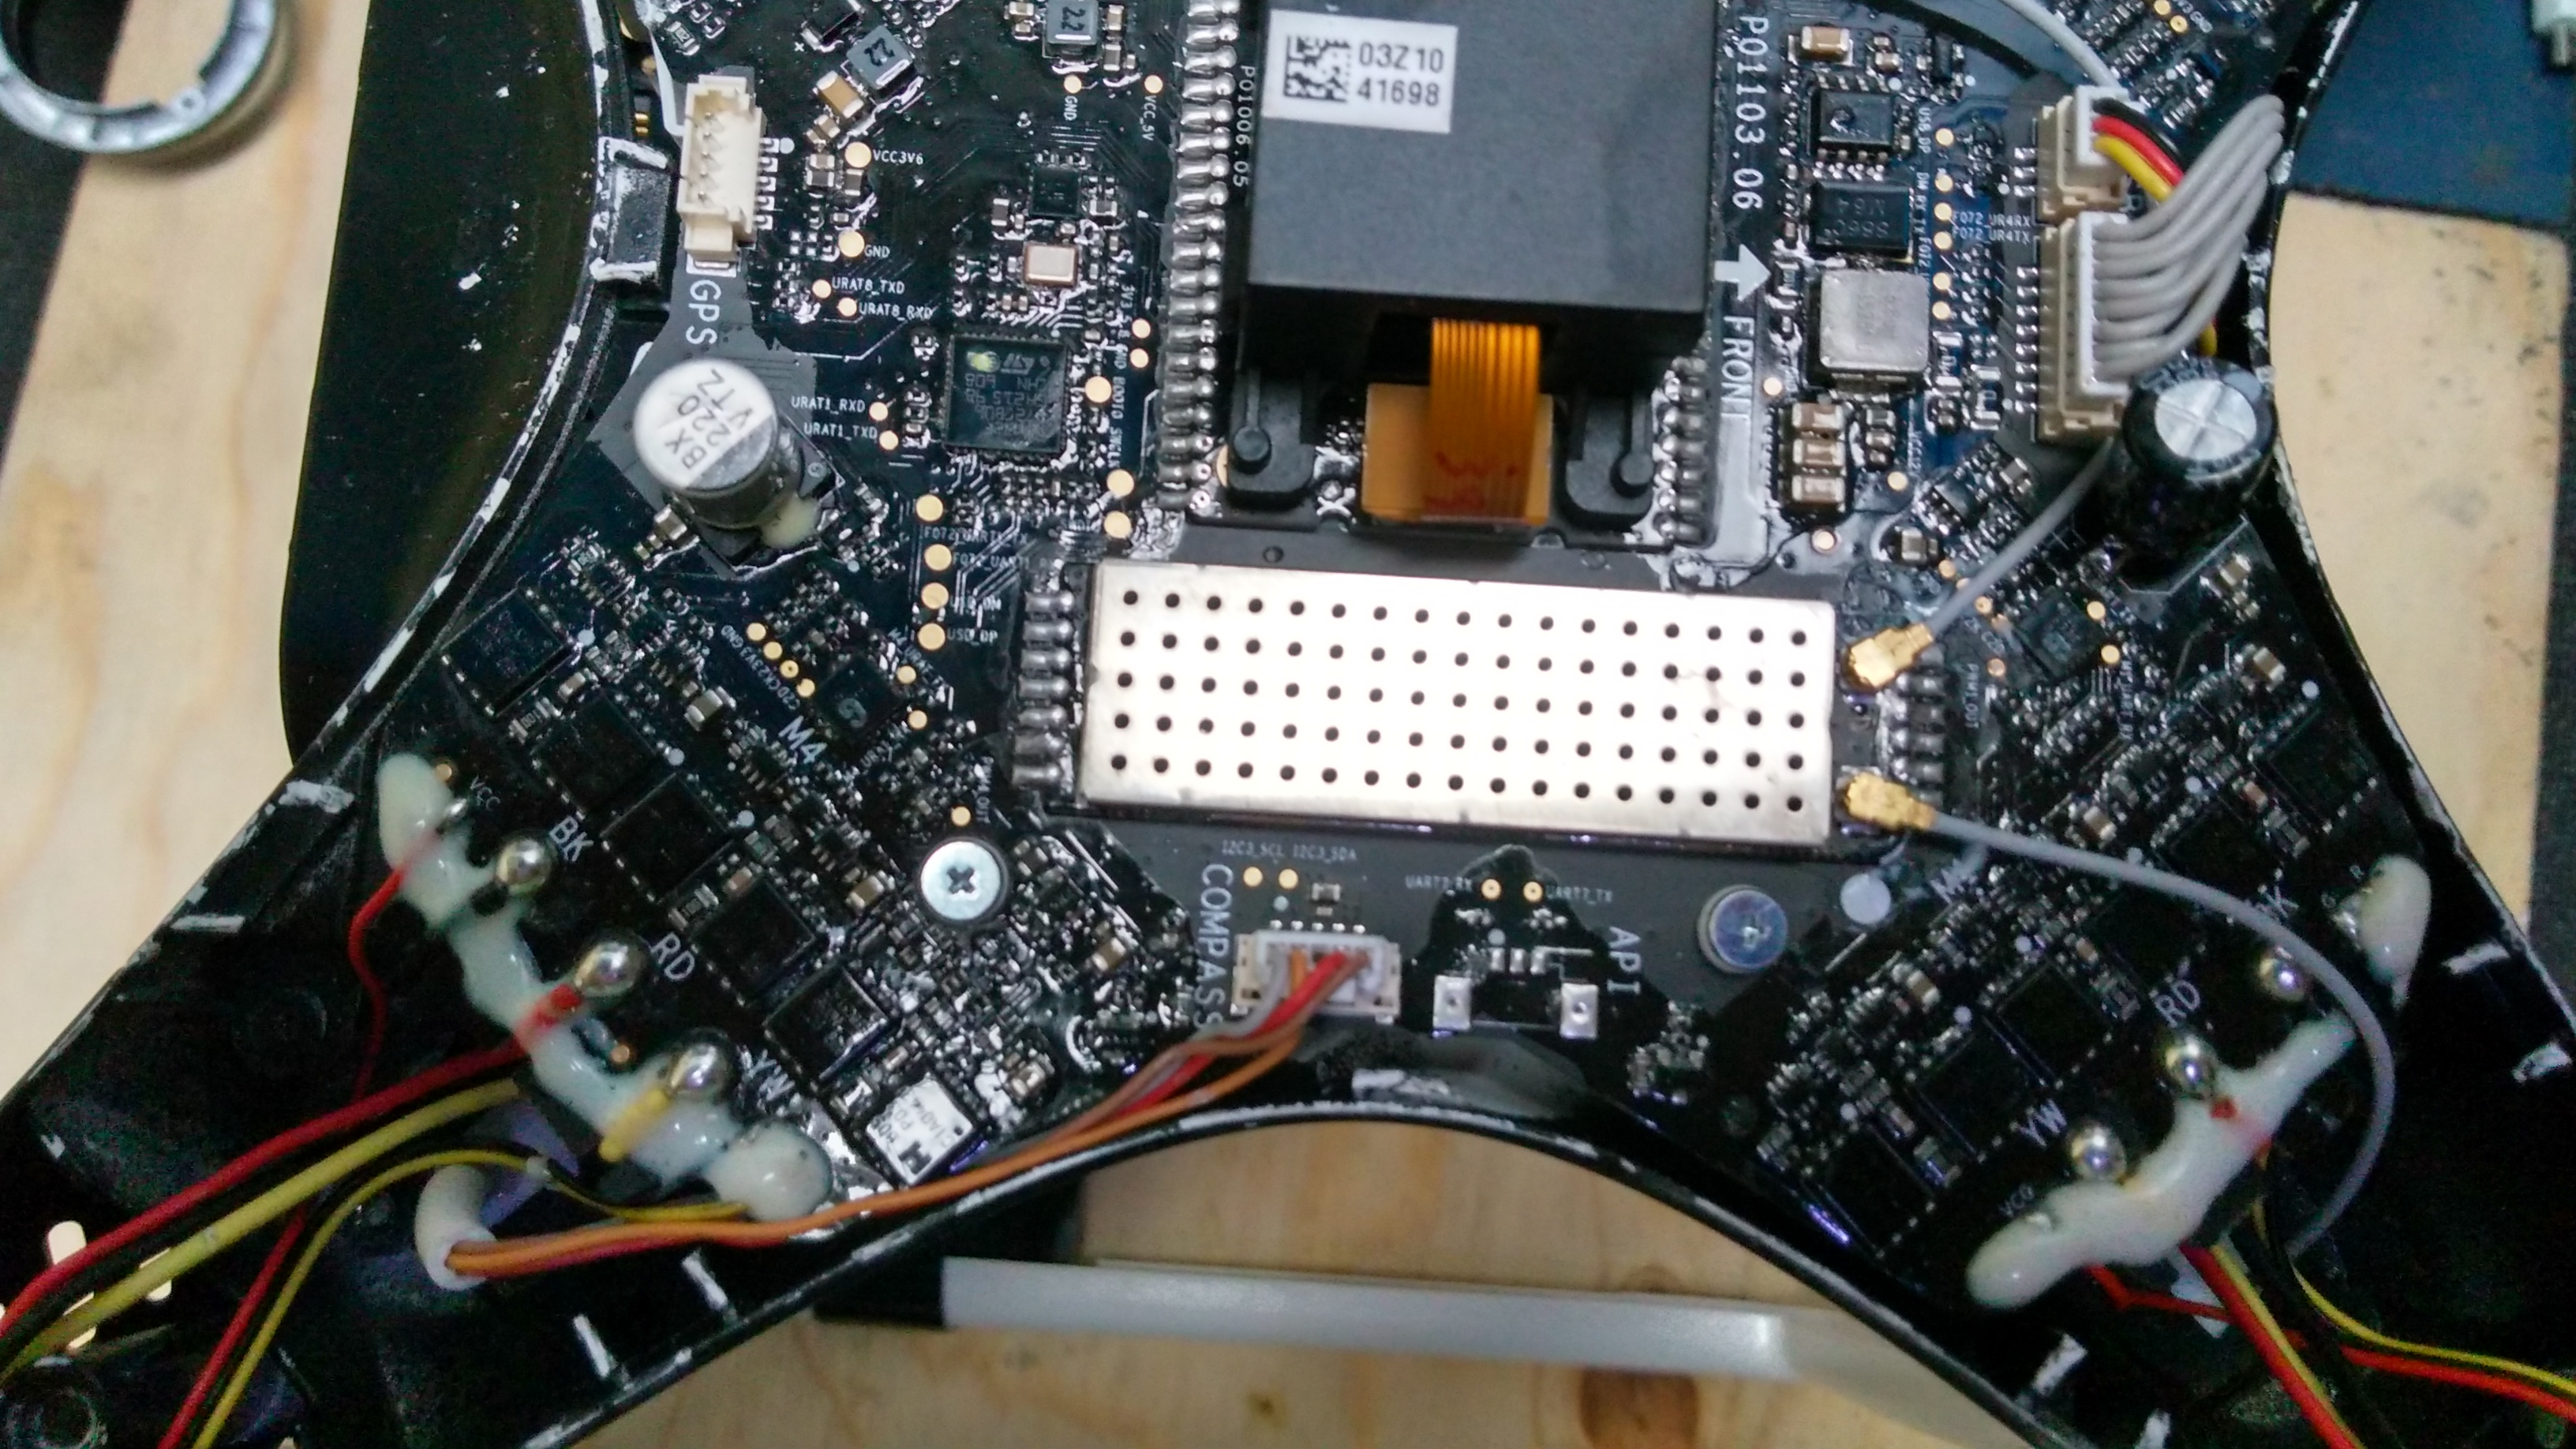
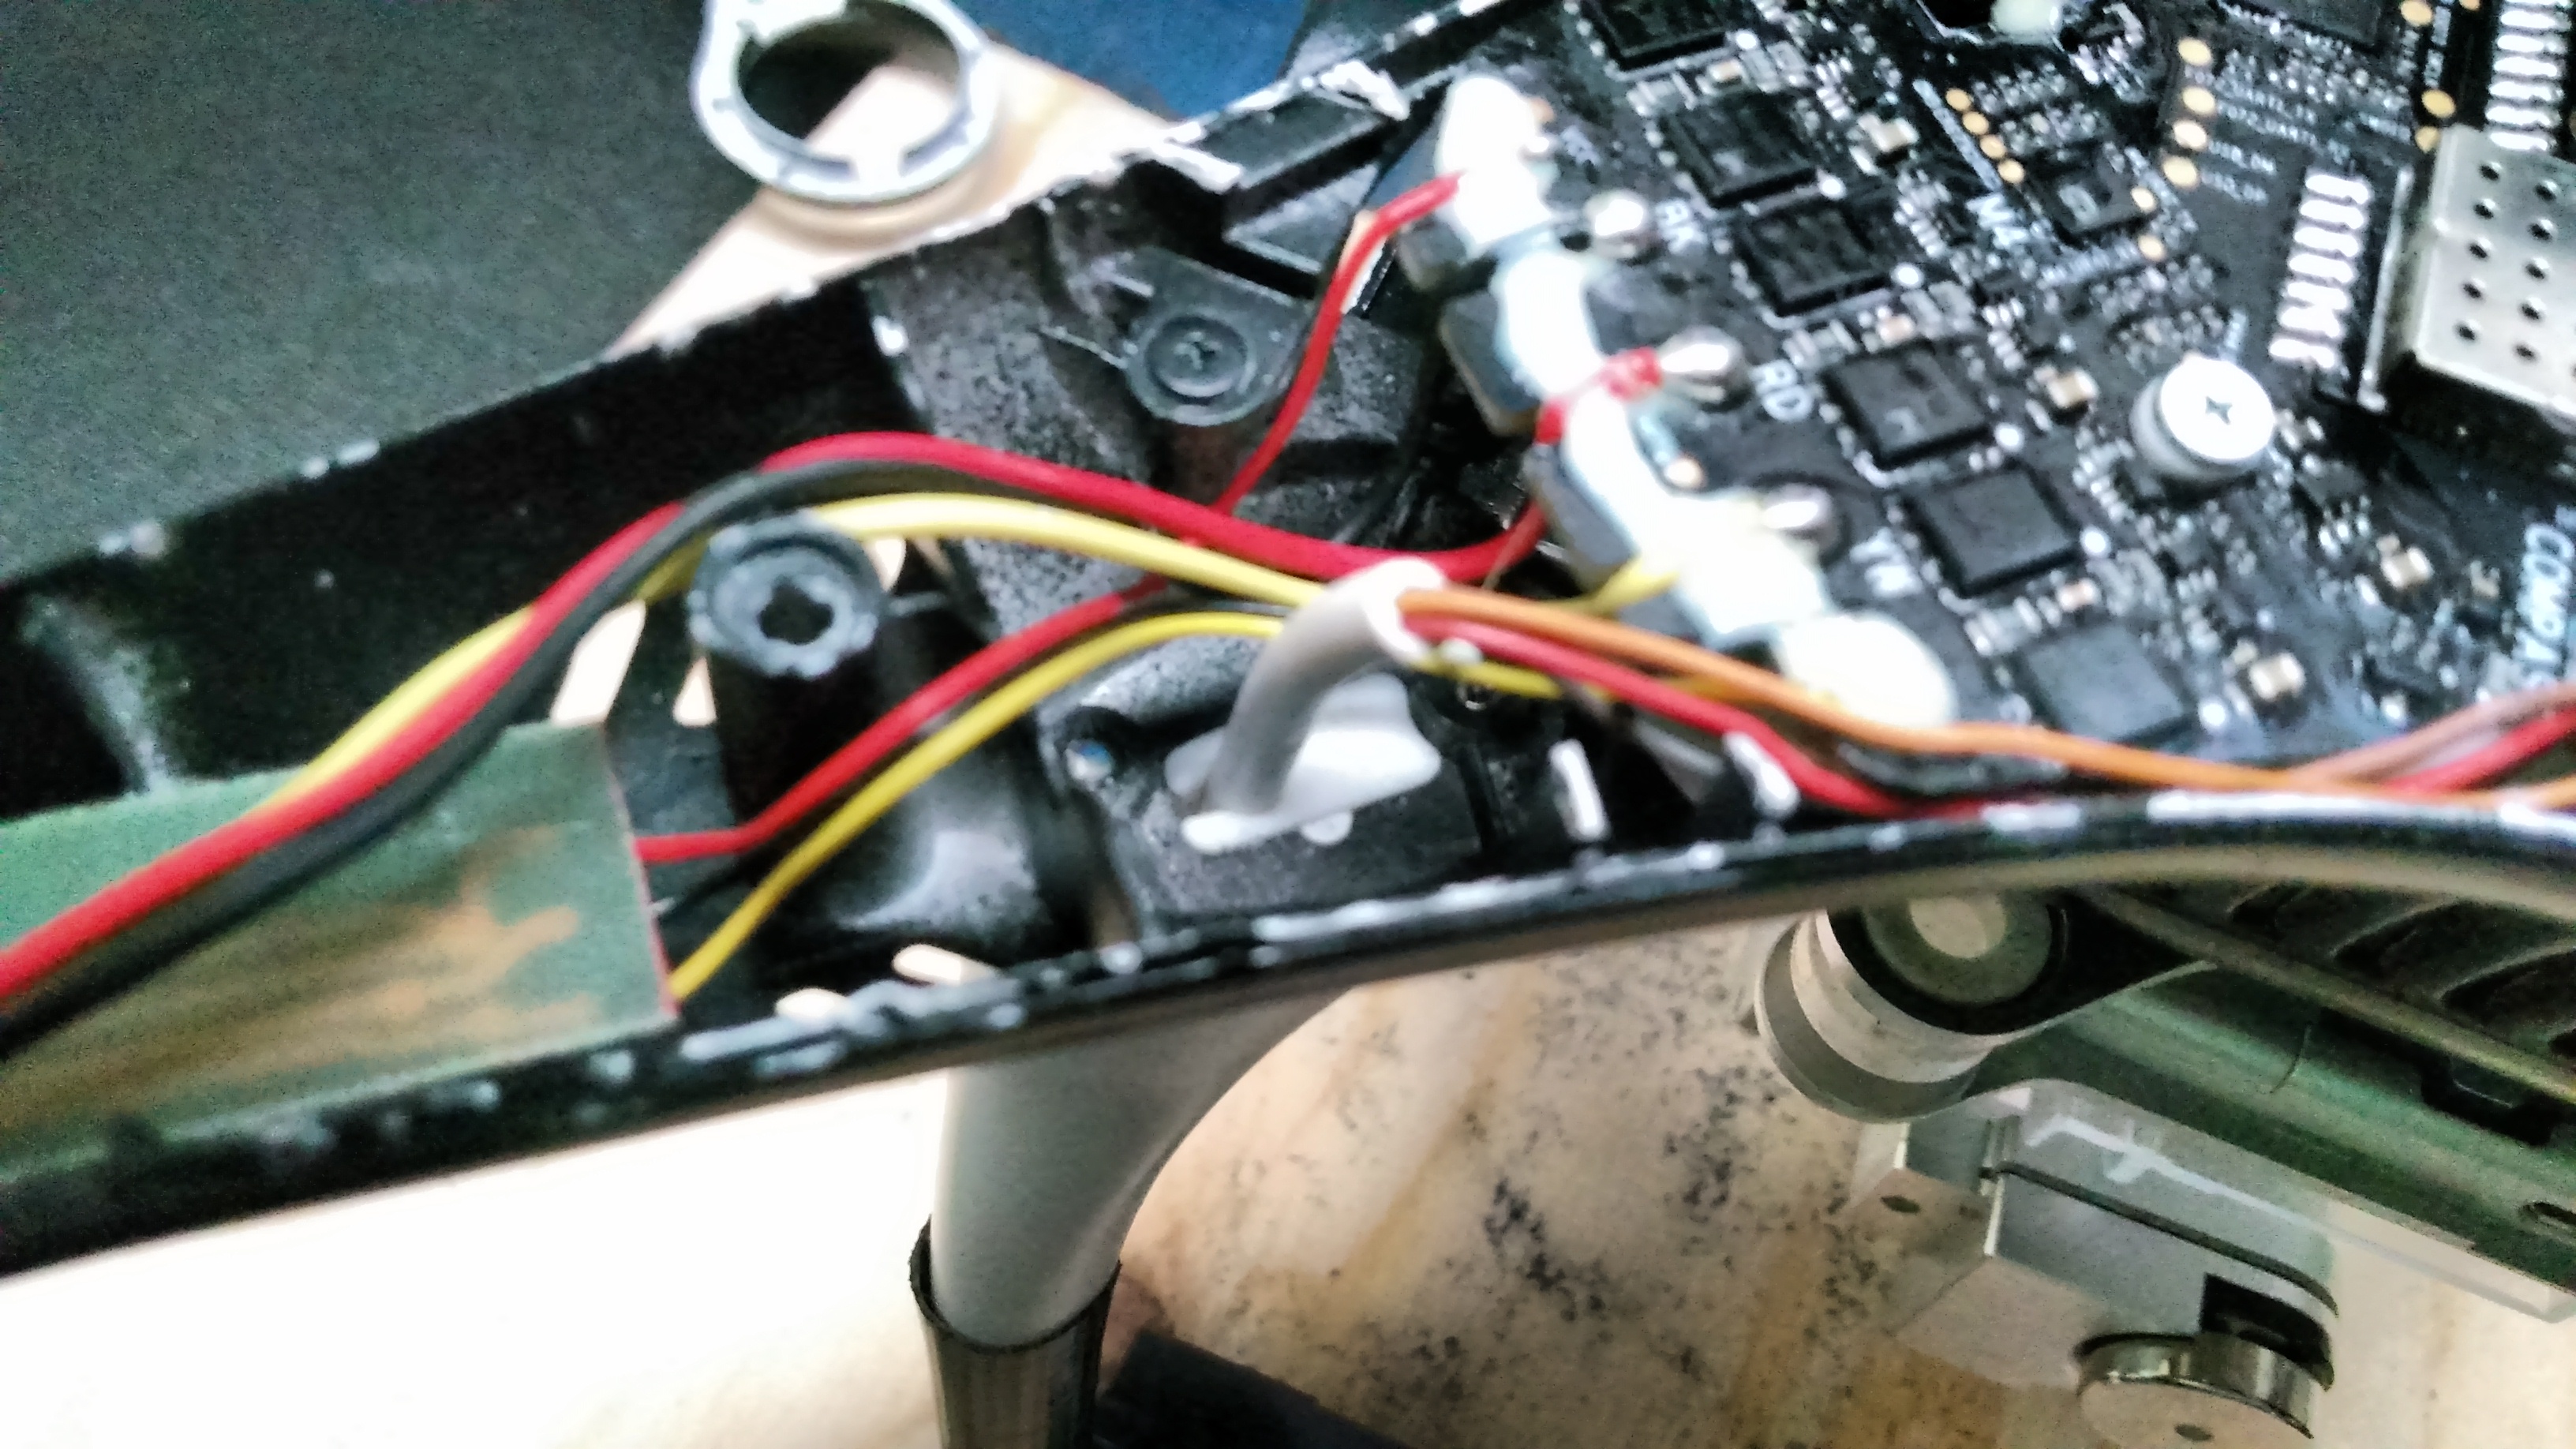
This part is the easiest of the whole operation. Unclip the compass module connector from the controller board shown in the picture. Then there is a white rubber gasket that fits in the opening where the compass wiring goes between the body and legs of the aircraft shown in the picture. Push that through from the top using a screwdriver and then pull the wiring through that opening from underneath.
You wont need to remove the leg in order to replace the compass module, but if it's easier for you to do so you'll also have to remove one of the receiver antenna wires from the controller board, pop out the rubber gasket it goes through to the leg just like you did with the compass and pull the antenna wire through. The legs have their own type of screw, it looks like a star bit, but I don't have that size of star bit, so I just used my #9 torx bit and it worked fine. Note that in order to remove the antenna you'll have to very carefully remove (scrape, cut and pull off) the silicone adhesive they used to hold the wiring onto the controller board. I used a small pair of needlenose pliers and a small screwdriver to do this. Slowly picking away the silicone from the wire but use extreme care because you do not want to damage the controller board itself. Ive never been able to find that same silicone adhesive, but you can use hot glue in the same spot where the silicone adhesive was when you plug the antennae wire back in. It is electrically inert and will work fine for this application.
The compass module is enclosed in a chamber on the bottom part of the leg, the plastic cover has a very small phillips screw holding it in place, so you'll have to use the teeniest phillips head screwdriver you can find and the screw is easy to strip if its not small enough and you do not apply enough pressure unscrewing it. Once you remove the cover you'll be able to see module itself, basically a small PCB board with four wires soldered onto it. You will have to remove the board from the silicon adhesive they've used to hold it in the chamber, since the compass module does not work you can be little more rigorous removing the silicone. You'll also want to scrape out any remaining silicone in the chamber to place your new compass in there. You can then just use a little hot glue instead when you replace it. If anyone knows the exact adhesive used by DJI, please let me know.
Bonus Fix: Replacing a Bad or Broken Off Capacitor on the Main Controller Board
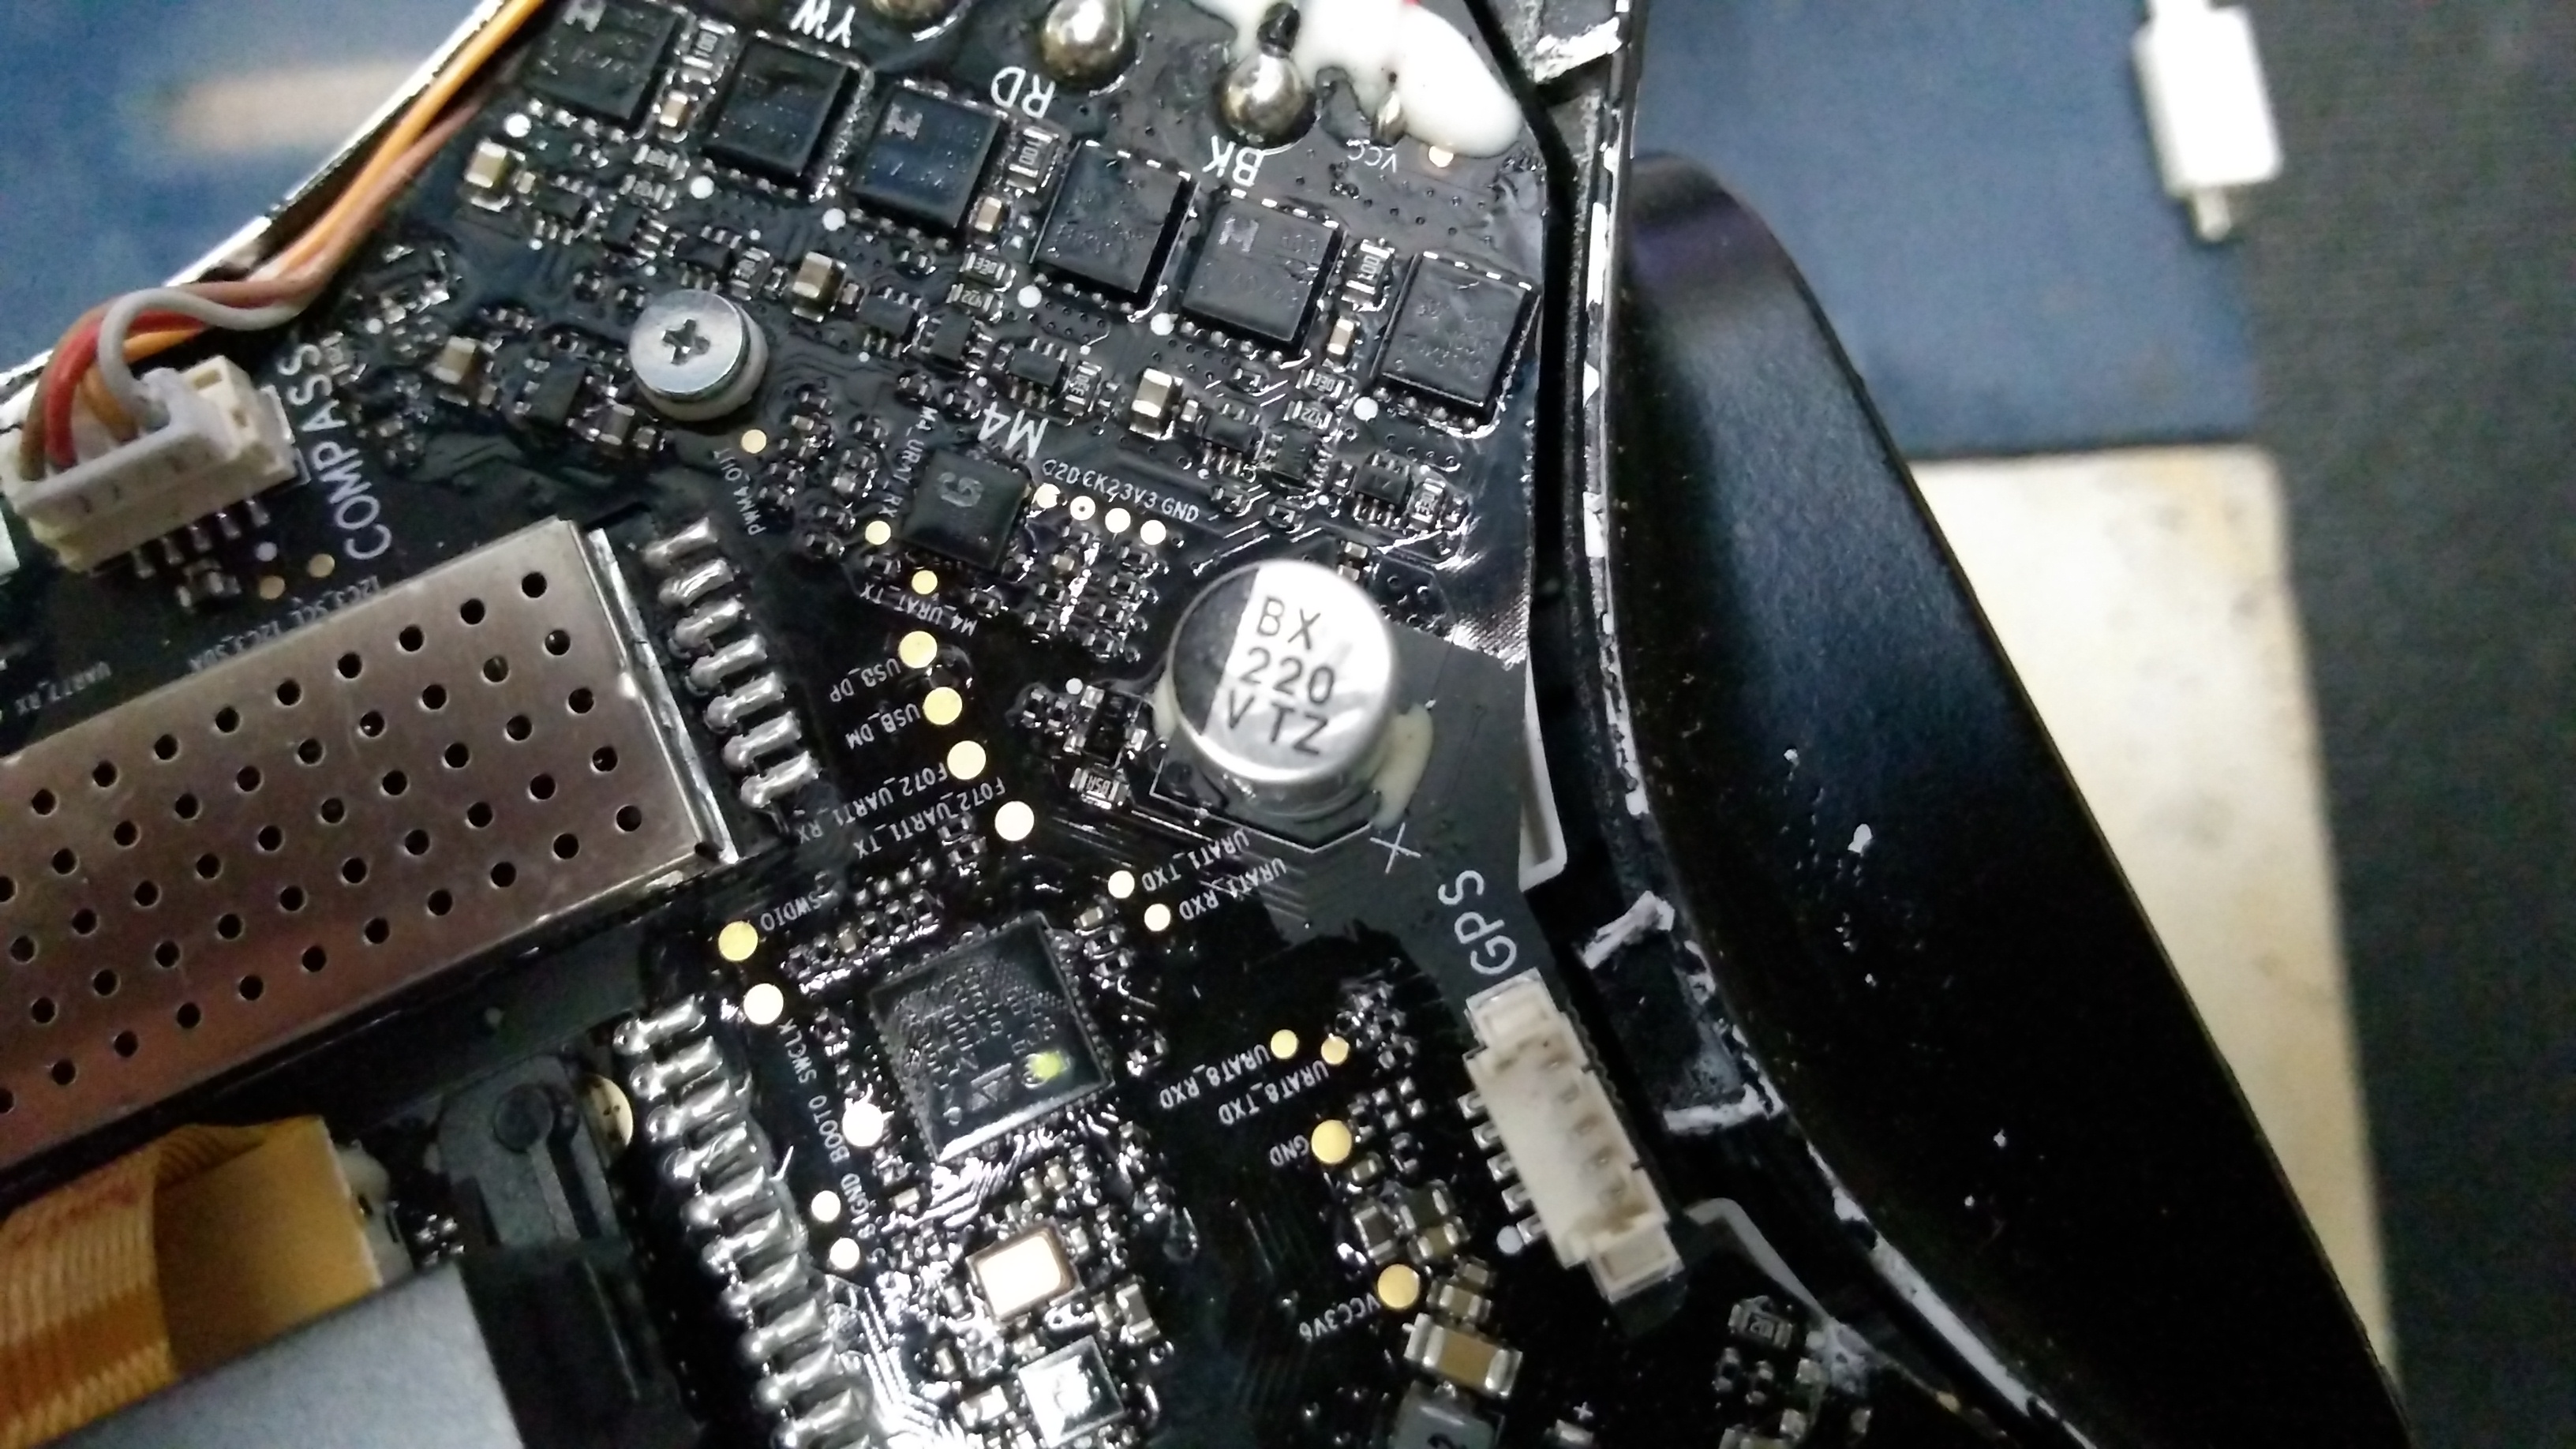
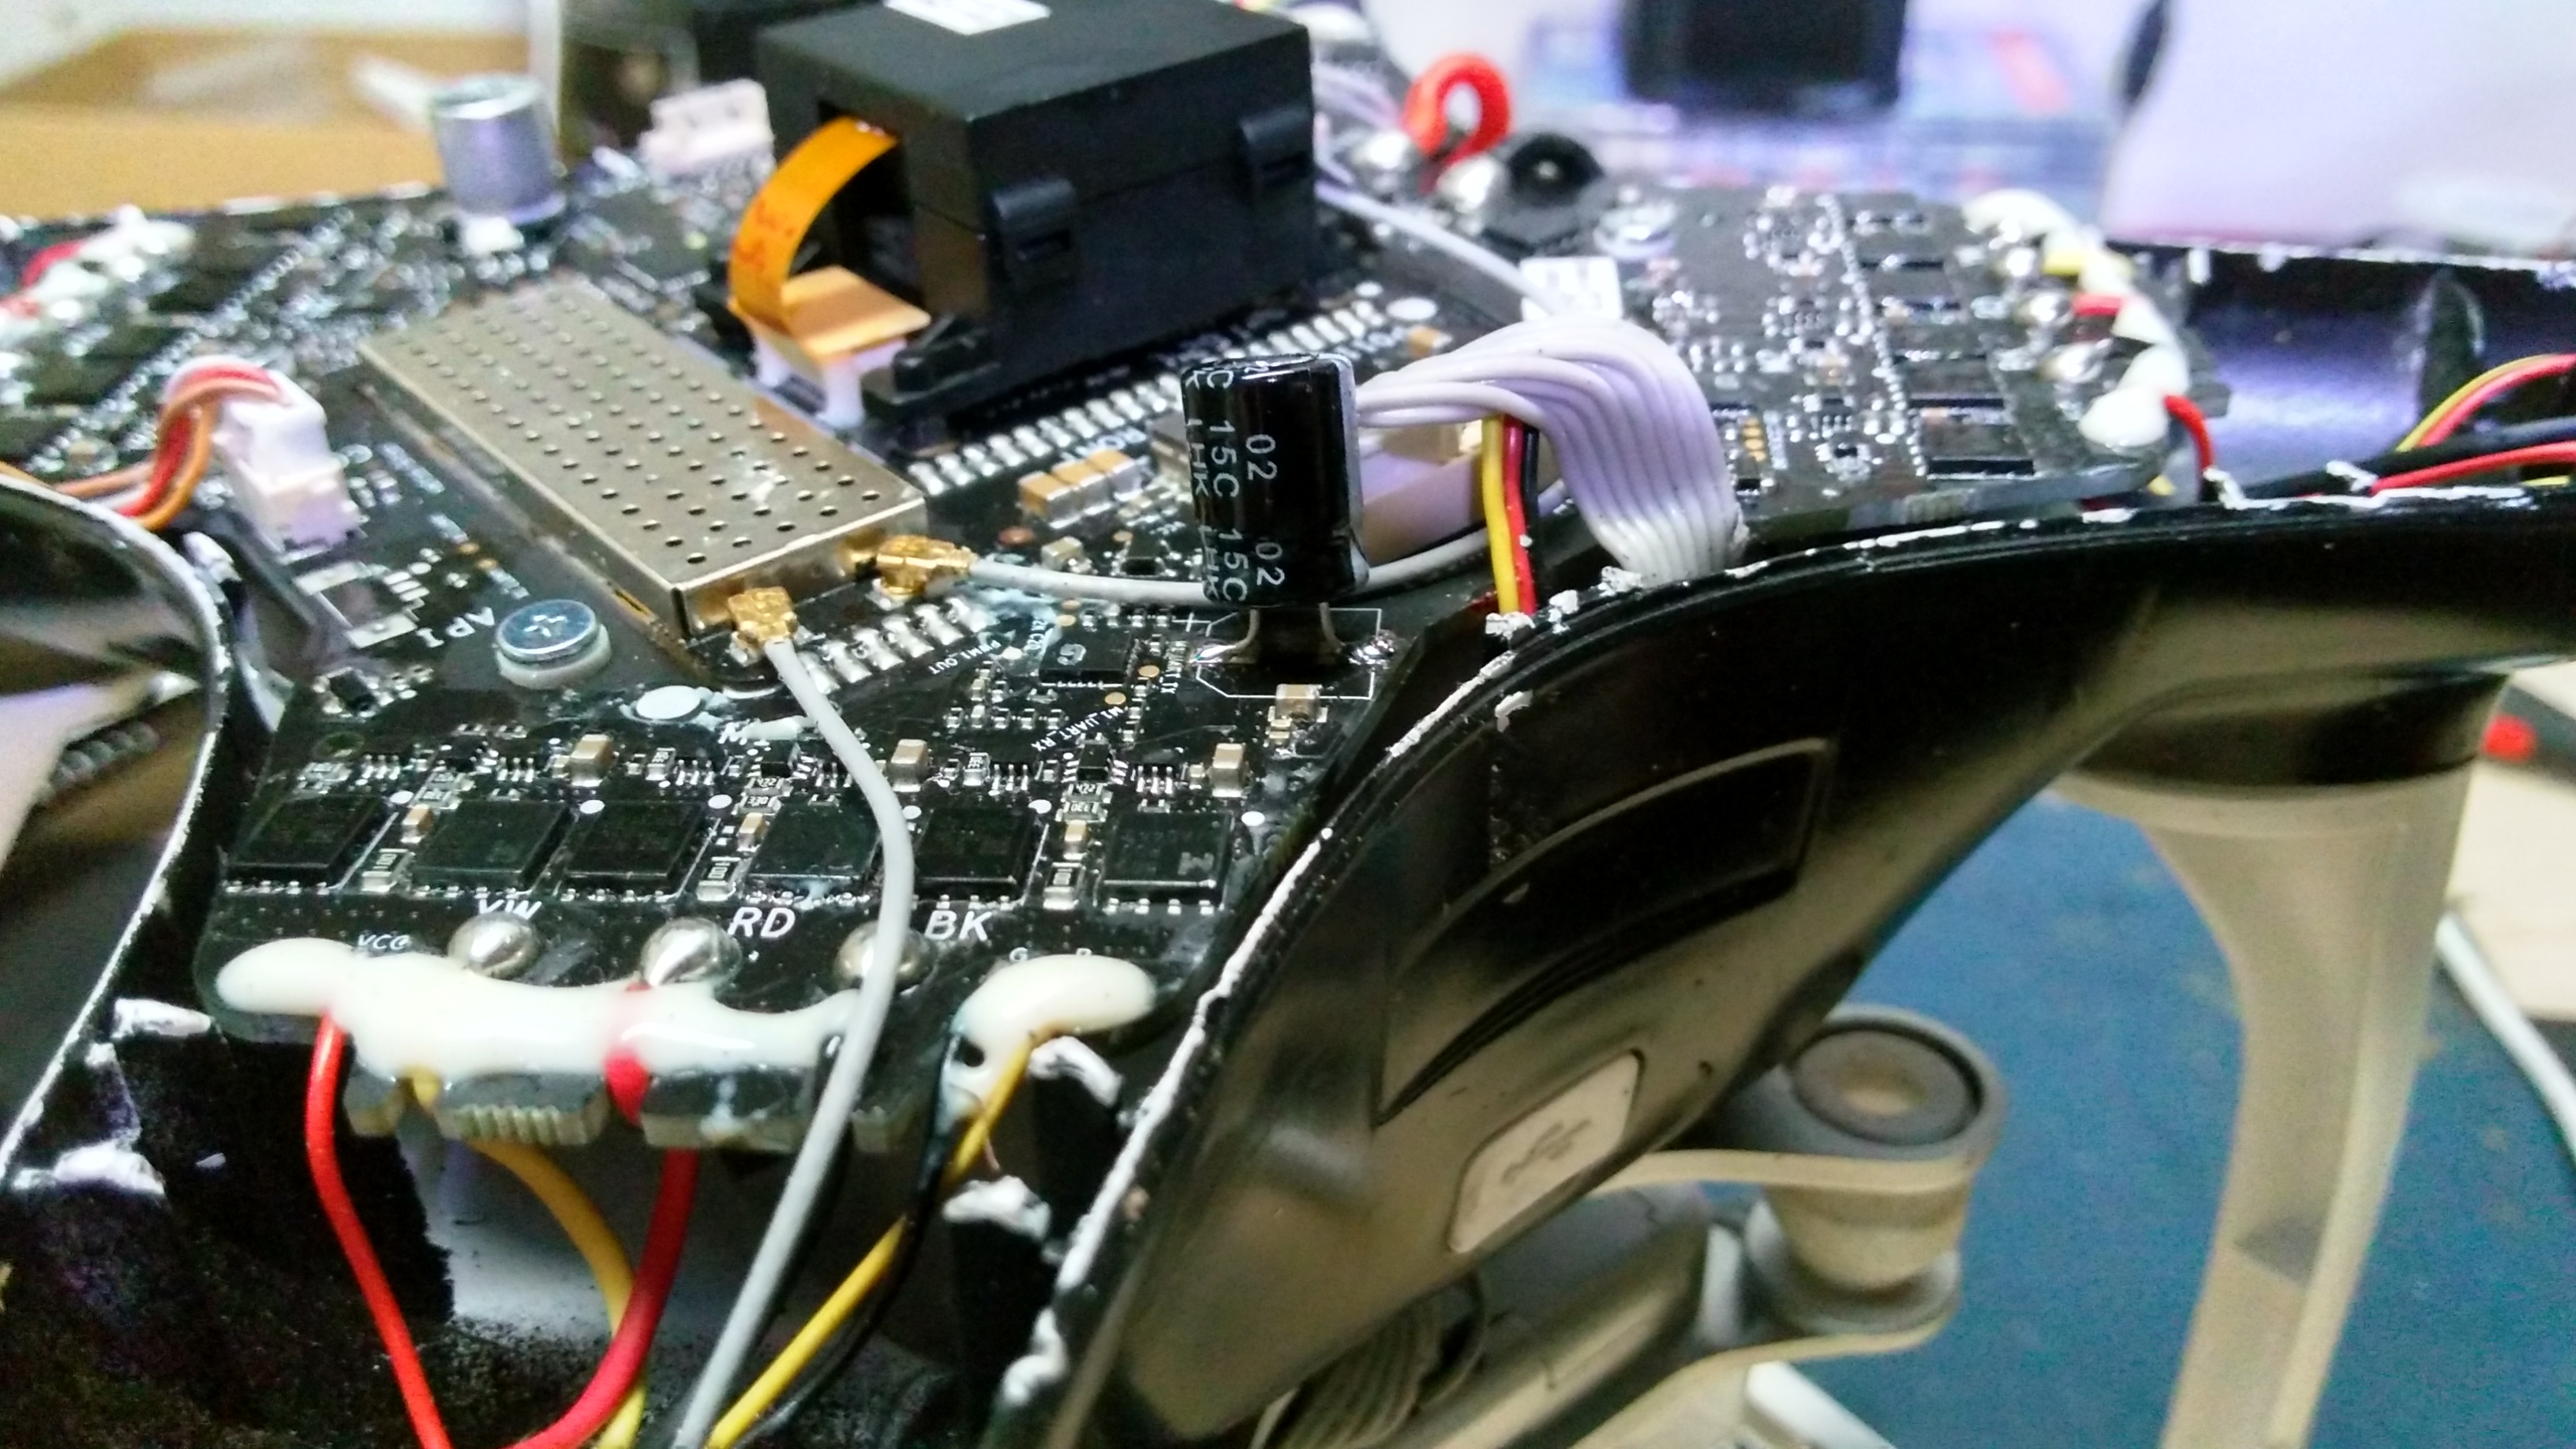
During the process of this fix or just taking apart your aircraft, you may find that a capacitor looks a little loose and as you mess with it or for whatever reason it is now broken off. The capacitors on DJI aircraft do not use the same labeling conventions the rest of the world uses and trying to find out specs by calling up DJI is a complete waste of time, but luckily we can deduce the 220 written on the stock capacitor is the capacitance in micro-Farads since that is a fairly common capacitance in electronics. The only missing piece of information is the voltage, but the voltage for a capacitor used in electronics is simply the maximum potential that can be applied across it. Since the actual voltage across it is usually determined by the circuitry, you just need to replace a bad capacitor with an equal or higher voltage rating, but you must use the same exact capacitance. So I just got a 220uF capacitor with the largest Voltage rating I could find at Frys which happened to be 35V and it is highly unlikely 35V is being applied across these capacitors on this specific board, so I replaced the stock capacitor with a 220uF, 35V capacitor I purchased at Frys and it works great. In my case, the capacitor was not blown (you can tell by looking at the top and if it looks a little puffed up and not flat it is no good), but the leads coming off of it were so short it would've been impossible to solder it back on. When you buy a new one it has long leads you can clip to whatever length you need. This controller board has the capacitors surface mounted and so its slightly more difficult to solder a new one on. Here are the steps:
1) Desolder the contacts on the board. This is exrtemely important, you do not want old solder left on it, I used a copper desoldering braid you can find at any electronics store. It should look very clean when finished.
2) Clip the leads so that you can bend the bottom of each one such that it will look like a leg and a foot and set on the board nicely with each foot sitting on the contacts and there is some space between the capacitor and the board. Enough to solder each foot without your soldering iron touching the board or the capacitor
3) These are polar (directional) capacitors so be sure you place the new capacitor in the same direction as the old one, the positive side is labelled on the board. I held it in place with a clip attached to a rod and stand and then soldered the feet to the contacts using as minimal of solder as possible, see the pic showing my new capacitor soldered onto the board
and now you're good to go ! The stock capacitor had a plastic piece between the capacitor and the board, which is probably a good thing, but not necessary, just make sure the capacitor has some space between it and the board.
My aircraft has functioned perfectly with this capacitor fix
Installing Your New Electronic Compass Module
Option 1: new stock module
If you have purchased a stock replacement module, putting it in is quite easy. Simply the reverse of removing the faulty one. You will need to put the module in keeping mind that the chamber has been designed to fit the compass board, so make sure you are putting it in so that it fits excatly the way the old one did, youll have to carefully locate the points it is fitted into the chamber and make sure it is firmly held in there. Add a little hot glue to keep it in place and then screw the cover back on. Put the wires through the opening to the body, plug it in and then put the rubber gasket back in from the outside and the gasket is placed such that the opening the wires go through in the gasket is farthest away from the body.
Reattaching the top casing (applies to both options)
When you replace the top casing be sure it is totally clipped back in and both casings are flush on the outside (or aligned in place as it should if you have cut off the clips as I did) before putting screws back in because if it is offset a little it will be noticeable when you tighten the screws and you'll have to unscew them and fiddle with it until it is flush all the way around.
Option 2: 3rd party module
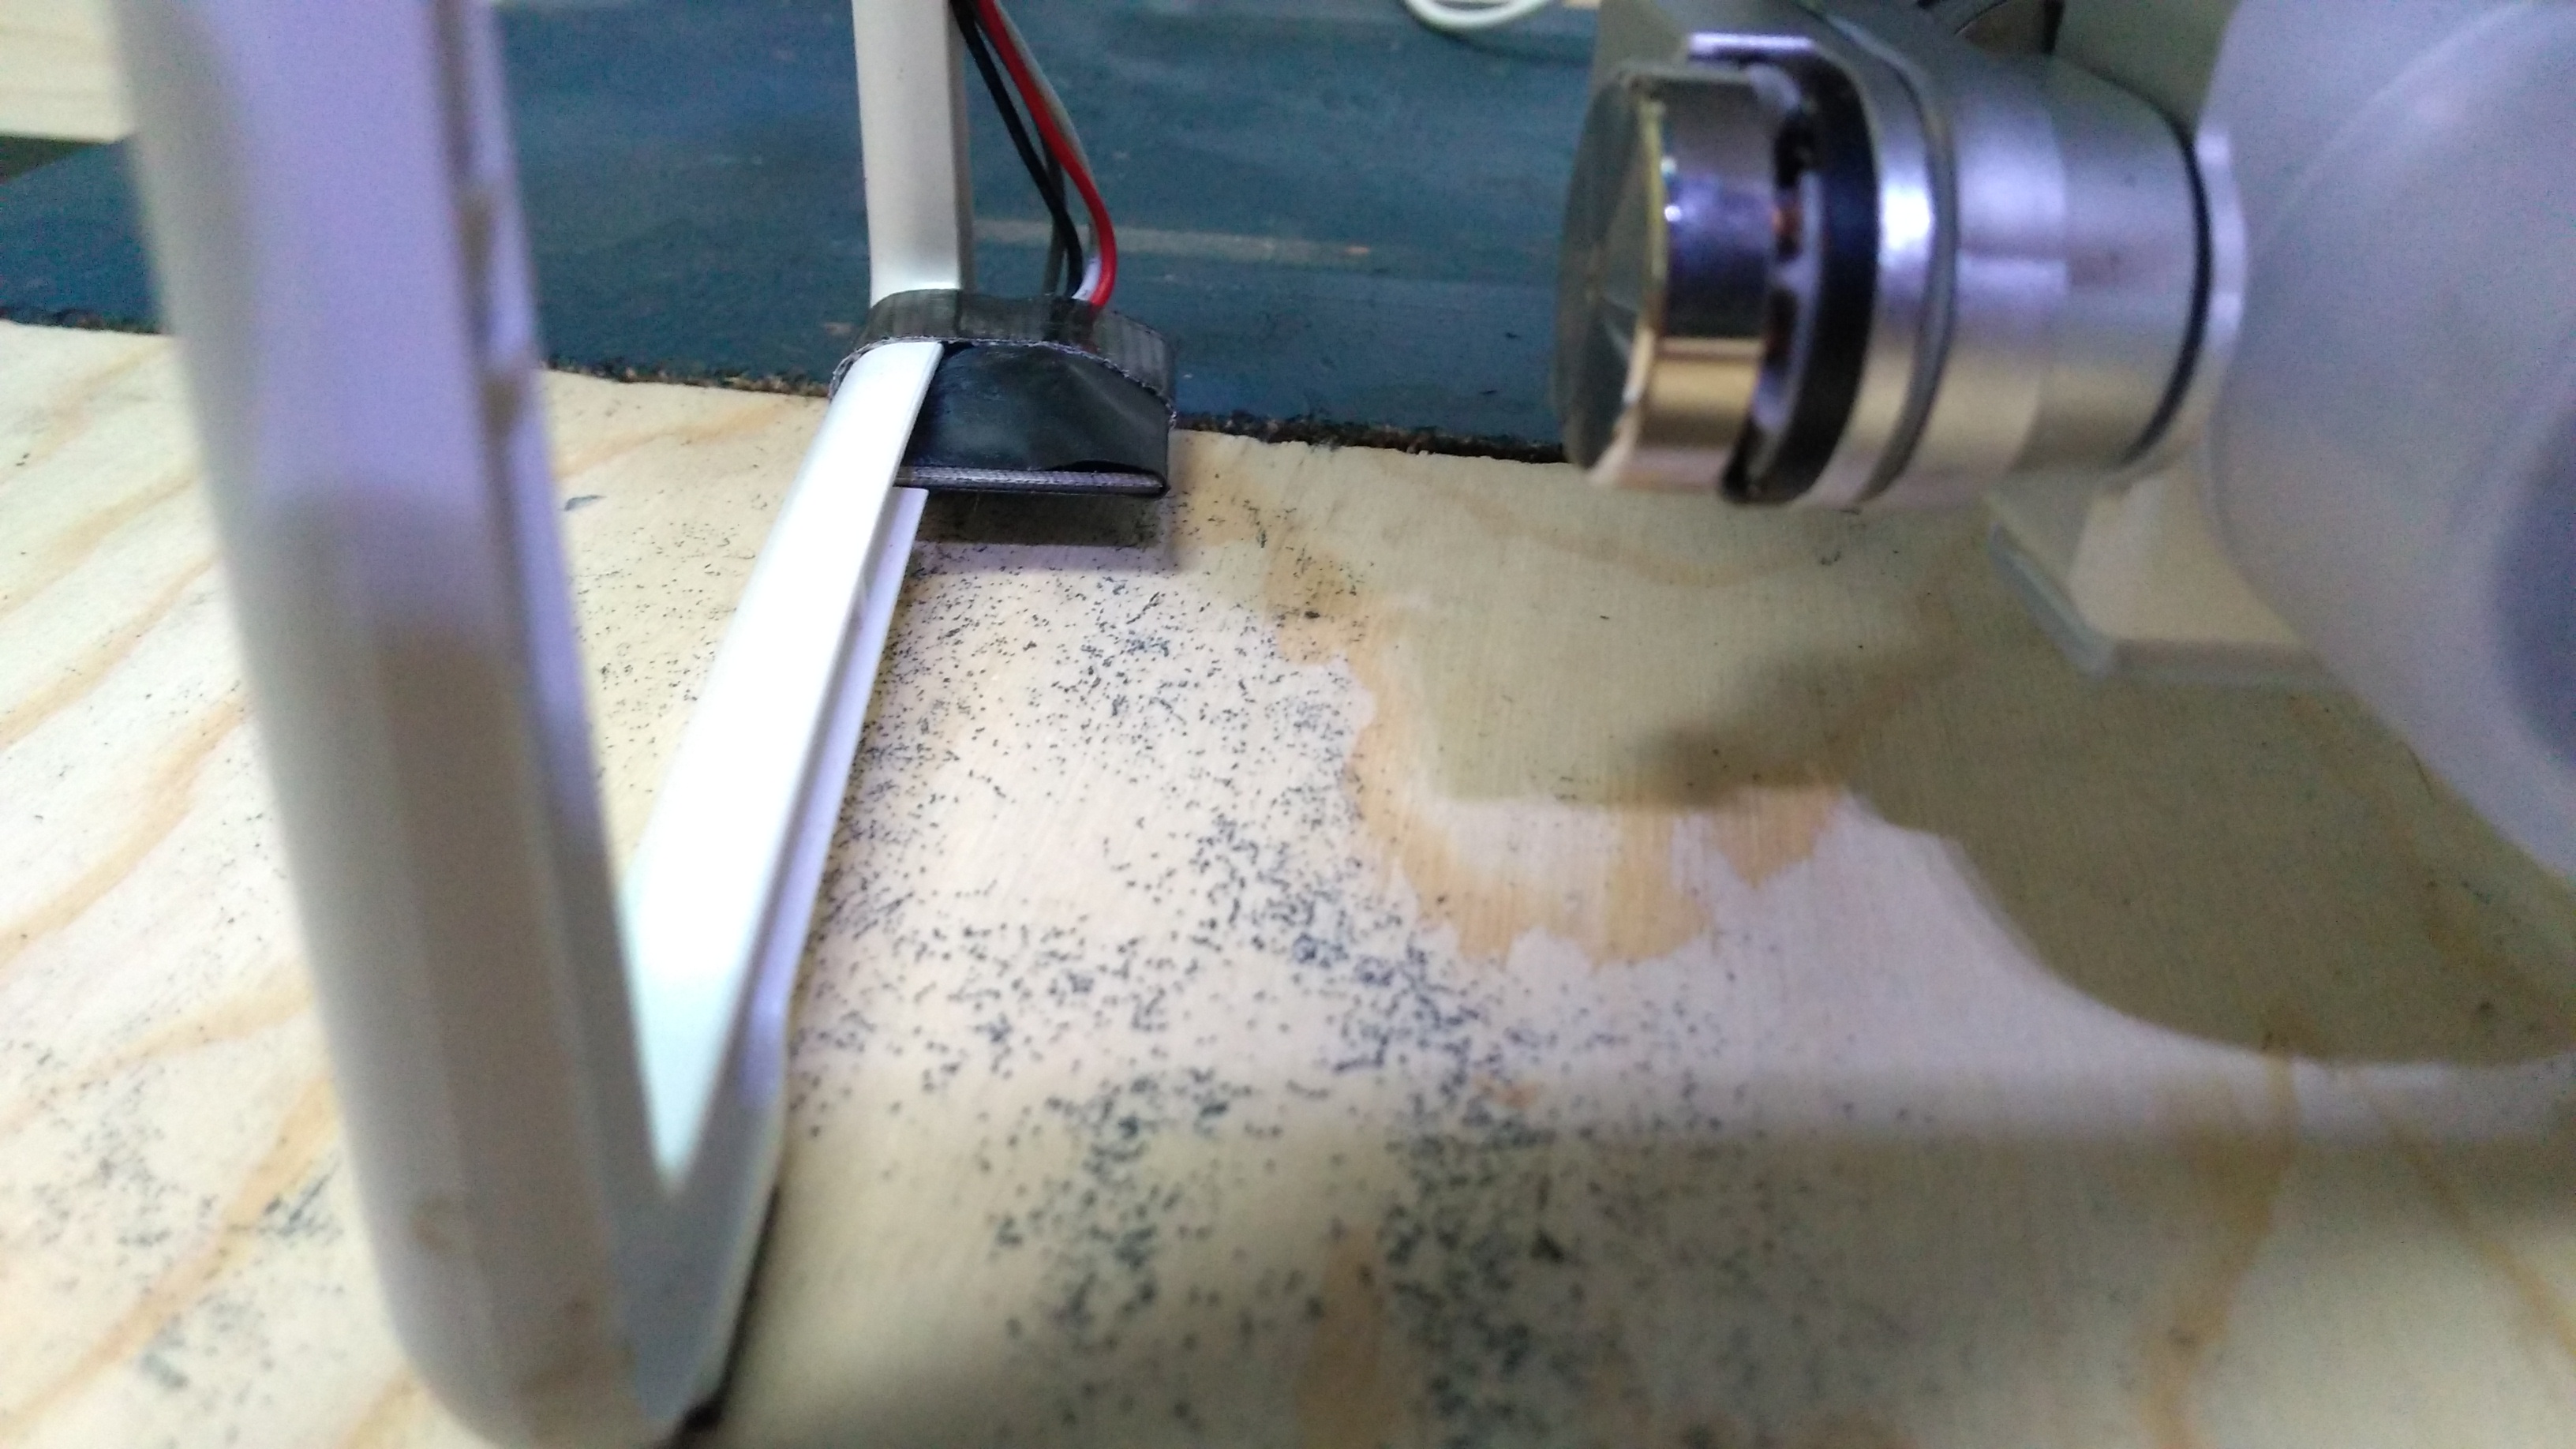
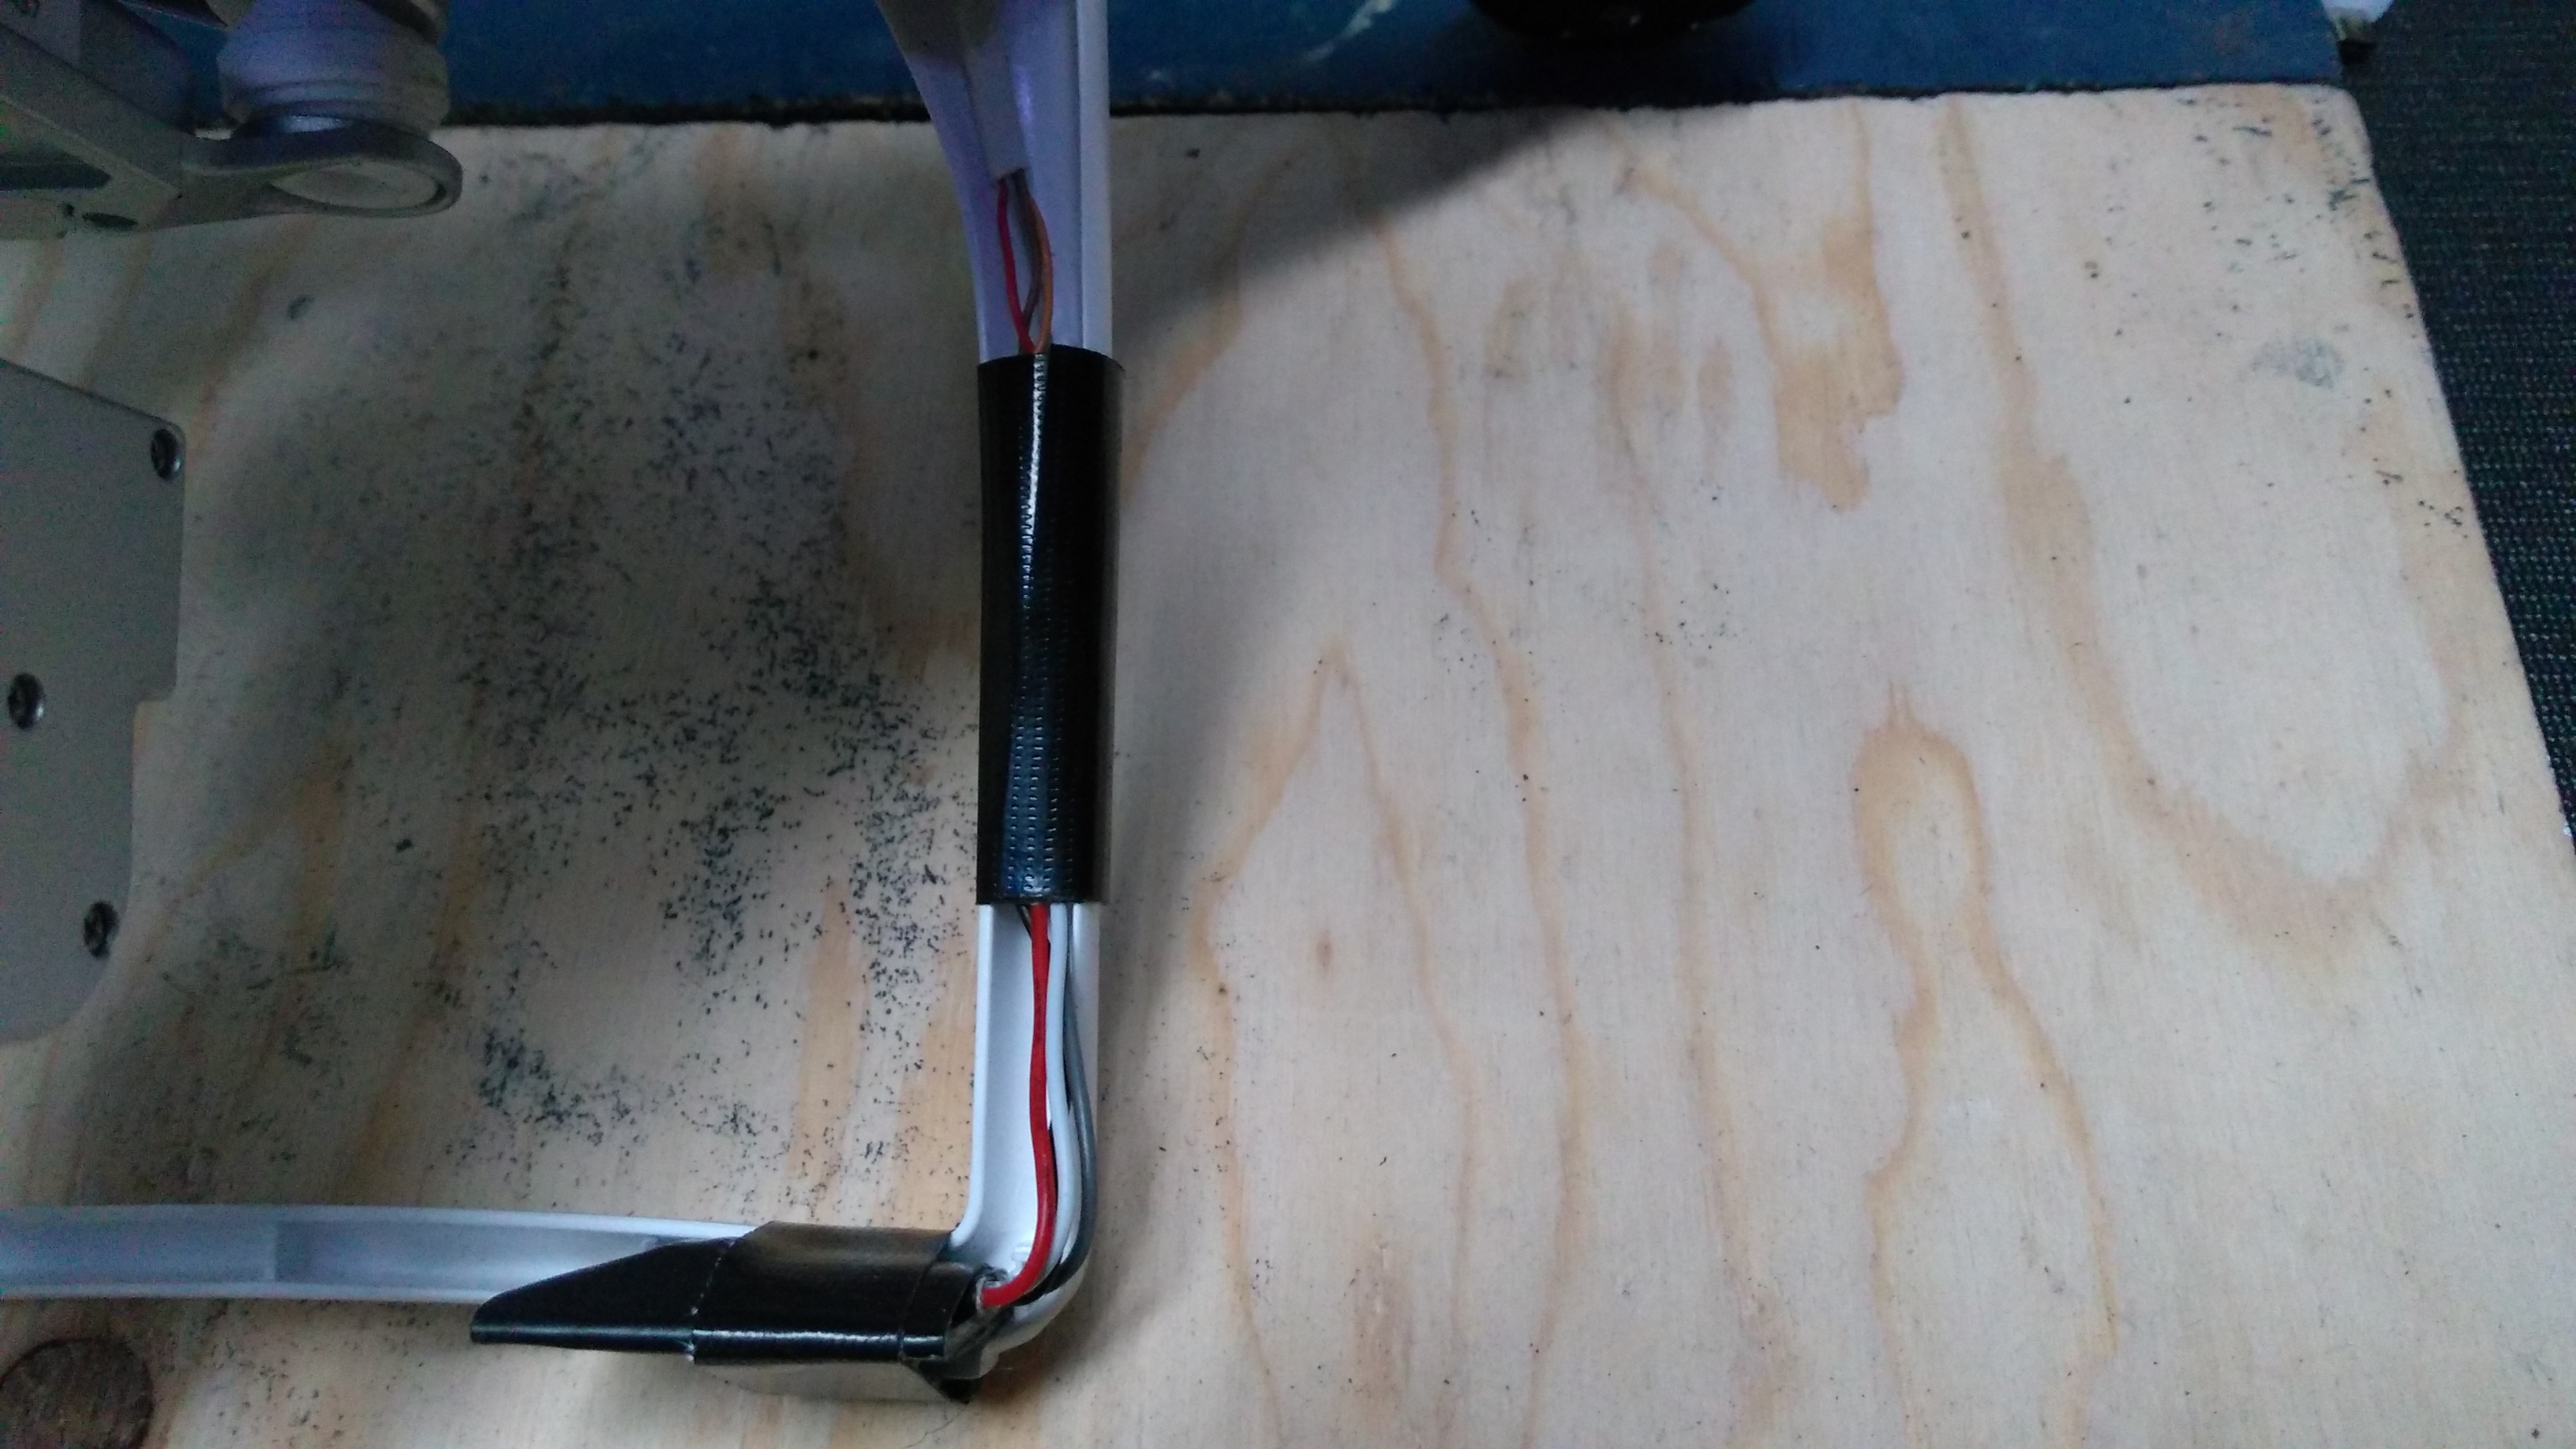
You can use any compass module with an I²C interface. I found an OSEPP module at Frys that works. it is a little bigger (OK maybe a lot bigger), so I modified the module and the leg a bit. Critical to the placement is that the x-axis of the module board needs to be placed pointing towards the front of the aircraft. With the OSEPP module this meant the connector was coming out of the front of the compass module (the other connector is for chaining it to something else), so to streamline it a bit I cut off both of the plastic connectors affixed to the compass module board (it took a while, cutting a little off at a time, gotta be careful) and also clipped the leads going to the compass board so that I could solder the wires to the leads in a way that the wire was coming out towards the back. The wire coloring and order of the wires is different between DJI stock and OSEPP compass modules, so you would have to do at a minimum an inline splice between the wires coming off the controller board connector and the wires coming off the OSEPP board connector. Here are the colors you need to match for an inline splice between the two connectors
DJI wire colors first and OSEPP wire colors second
Orange - Red
Red - Black
Grey - White
Brown - Grey
Actually putting the new module on is a bit tricky, the main things youll have to make sure of are
1) The x-axis of the OSEPP board is pointing exactly forward
2) The module is level
I cut out the plastic on the landing gear of the aircraft, well rather I gouged out so that the board would fit nicely according to the above two conditions. I then wrapped the board with its soldered wires with Gorilla tape (I would highly recommend Gorilla Tape brand, it is very strong and durable) then I put some Gorilla glue on the taped edge stuck it in there and aligned it perfectly then I also added some more Gorilla tape wrapped around the module and the landing gear (U shaped leg). See pictures of my finished fix, it doesn't look as pretty but it works great, very solid and no problems at all, in fact there is no noticeable difference in performance of the aircraft at all between the new and the old compass modules. I'm more about things working well than looking good. Unless the color is some bland white, in which case I paint it, but other than that. Nobody will be seeing the compass module while it is flying anyways (unless you leave white which may draw attention to it, but stealth mode black makes it all better). I apologize I do not have any pictures of the wires soldered onto the actual compass module, but I did the fix before I decided to write this and you know what they say about messing with things that are working fine; avoid at all costs, you only mess up fixes by fussing with it too much.
Good luck and have fun flying your newly fixed aircraft. You'll feel much better fixing it yourself rather than sending the whole thing to DJI, waiting for days to get it back and getting some ridiculous bill for fixing it.
Scot