Repair Radio Aux Jack / Add Media Bluetooth Receiver Behind Dash
by Boaticus in Circuits > Audio
19149 Views, 50 Favorites, 0 Comments
Repair Radio Aux Jack / Add Media Bluetooth Receiver Behind Dash
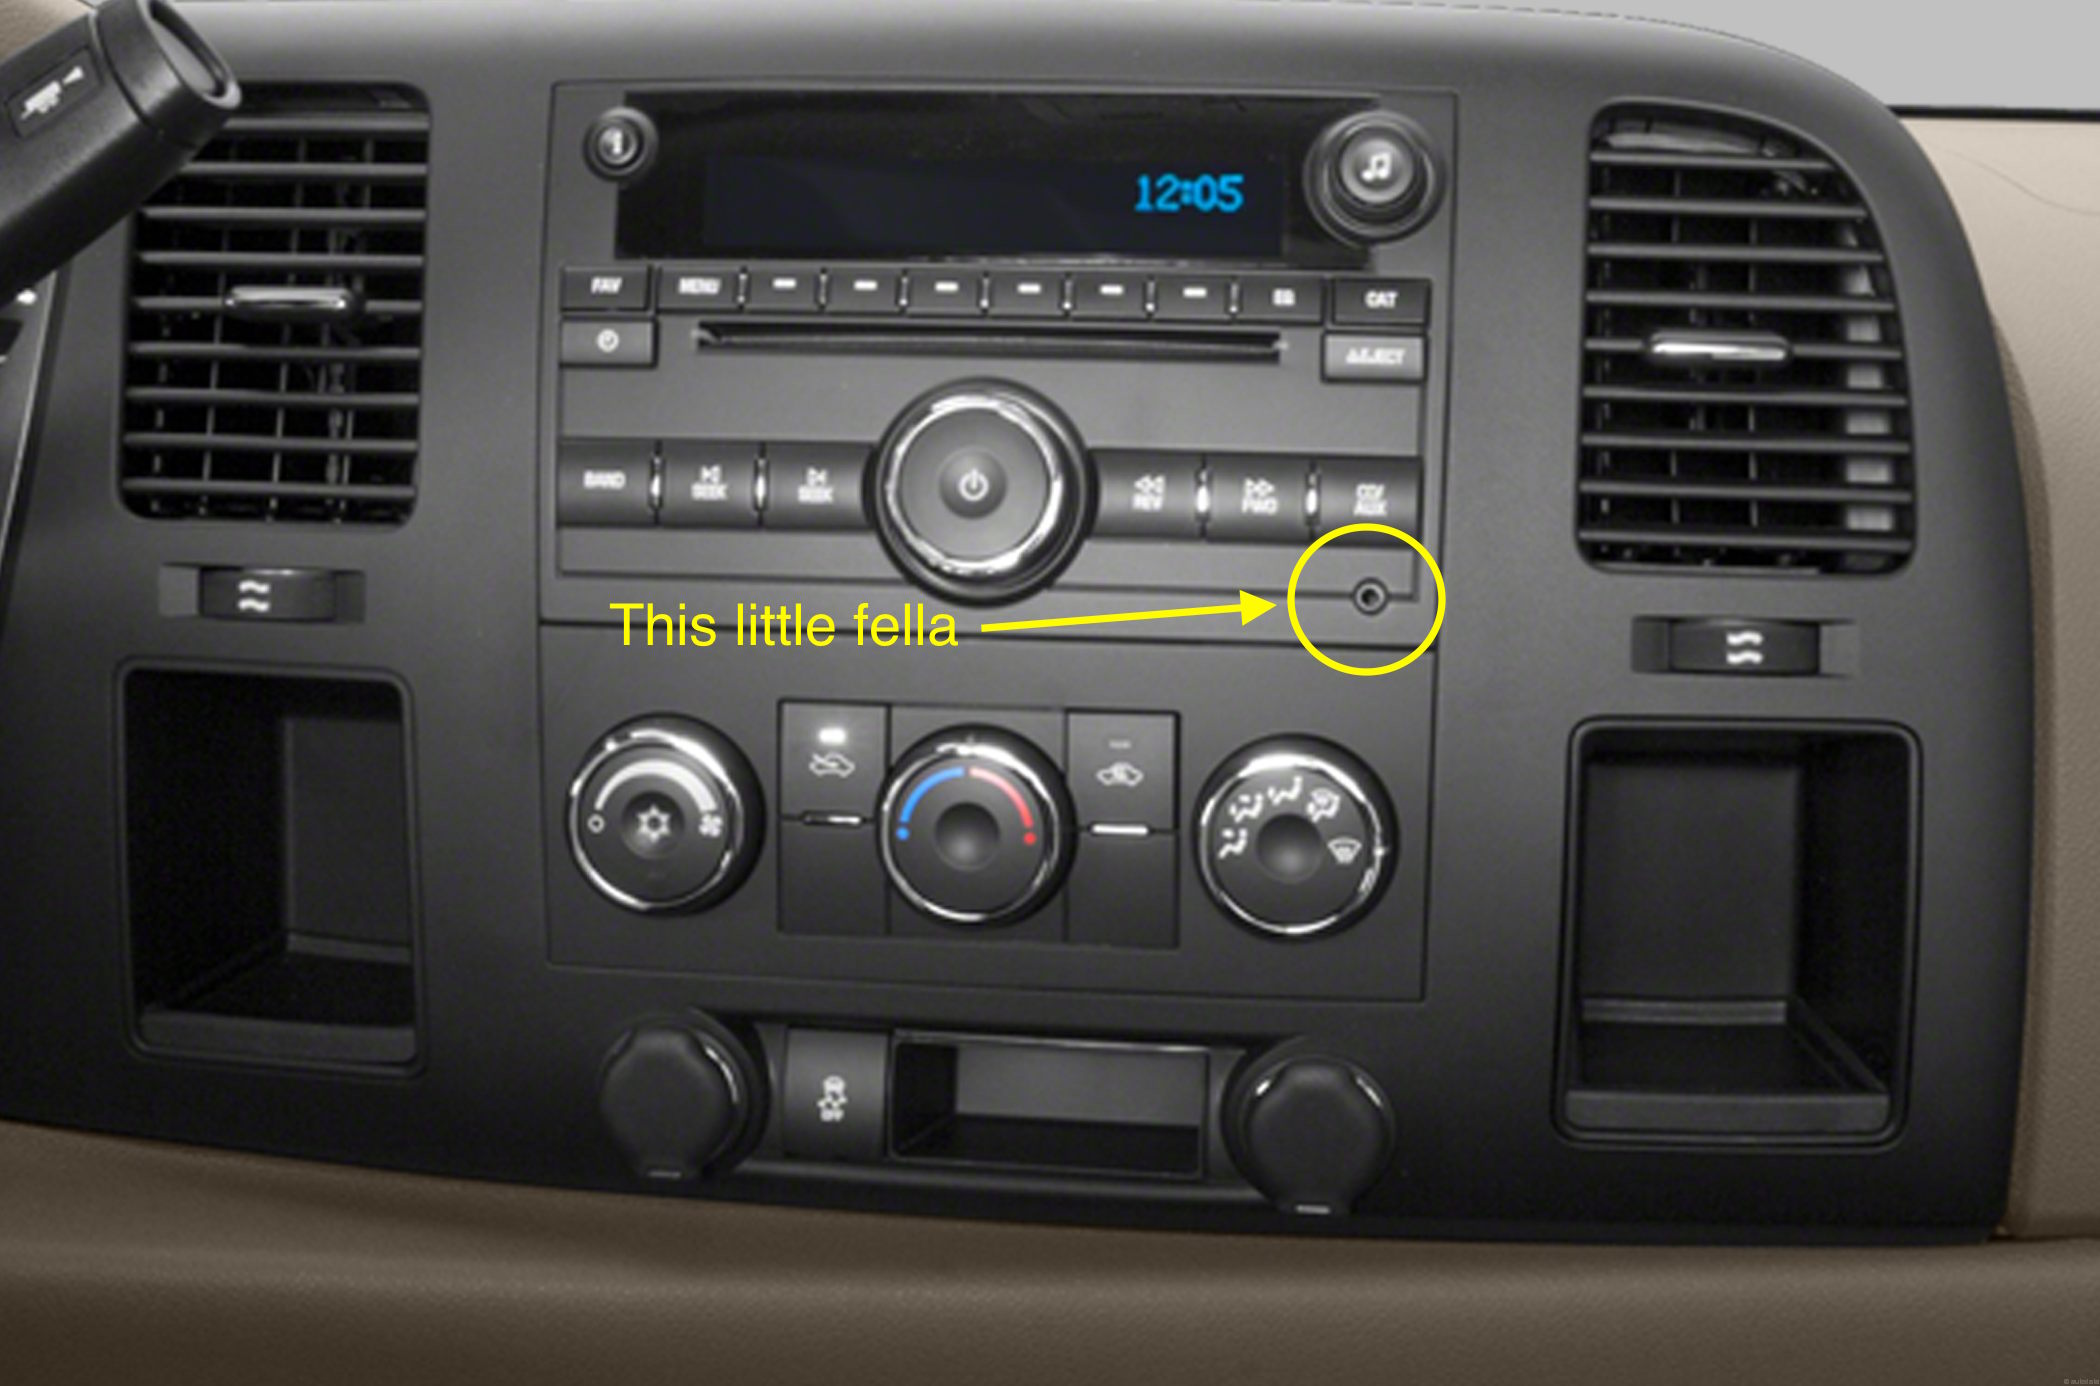
I recently noticed that my 2013 Silverado aux jack was loose. It didn't come as a surprise since I use it frequently and just leave the aux cord hanging from the jack. To fix it, I just needed to take a few panels off the dash, remove and take apart the radio, and then re-solder the aux jack pins back to the circuit board. But then I thought "Why not add media Bluetooth support?" Sure I could just plug a Bluetooth receiver into the aux jack on the front of my radio, but that doesn't look very aesthetic to me. So I decided to put it all behind the dash, which means I had to wire in a second aux cord and some way to power the receiver. This Instructable will show you how to do that on a 2007-2013 Silverado stock radio. However, you can do this with any make and model of vehicle as long as the radio has an aux jack.
What You'll Need:
Tools:
- Safety Glasses
- Small Flathead Screwdriver
- Phillips Screwdriver
- 7mm Socket
- 10mm Socket
- Small Needle Nose Pliers
- Wire Strippers
- Soldering Iron
- Solder
- Heat Shrink Tubing or Electrical Tape
- Multimeter
Materials:
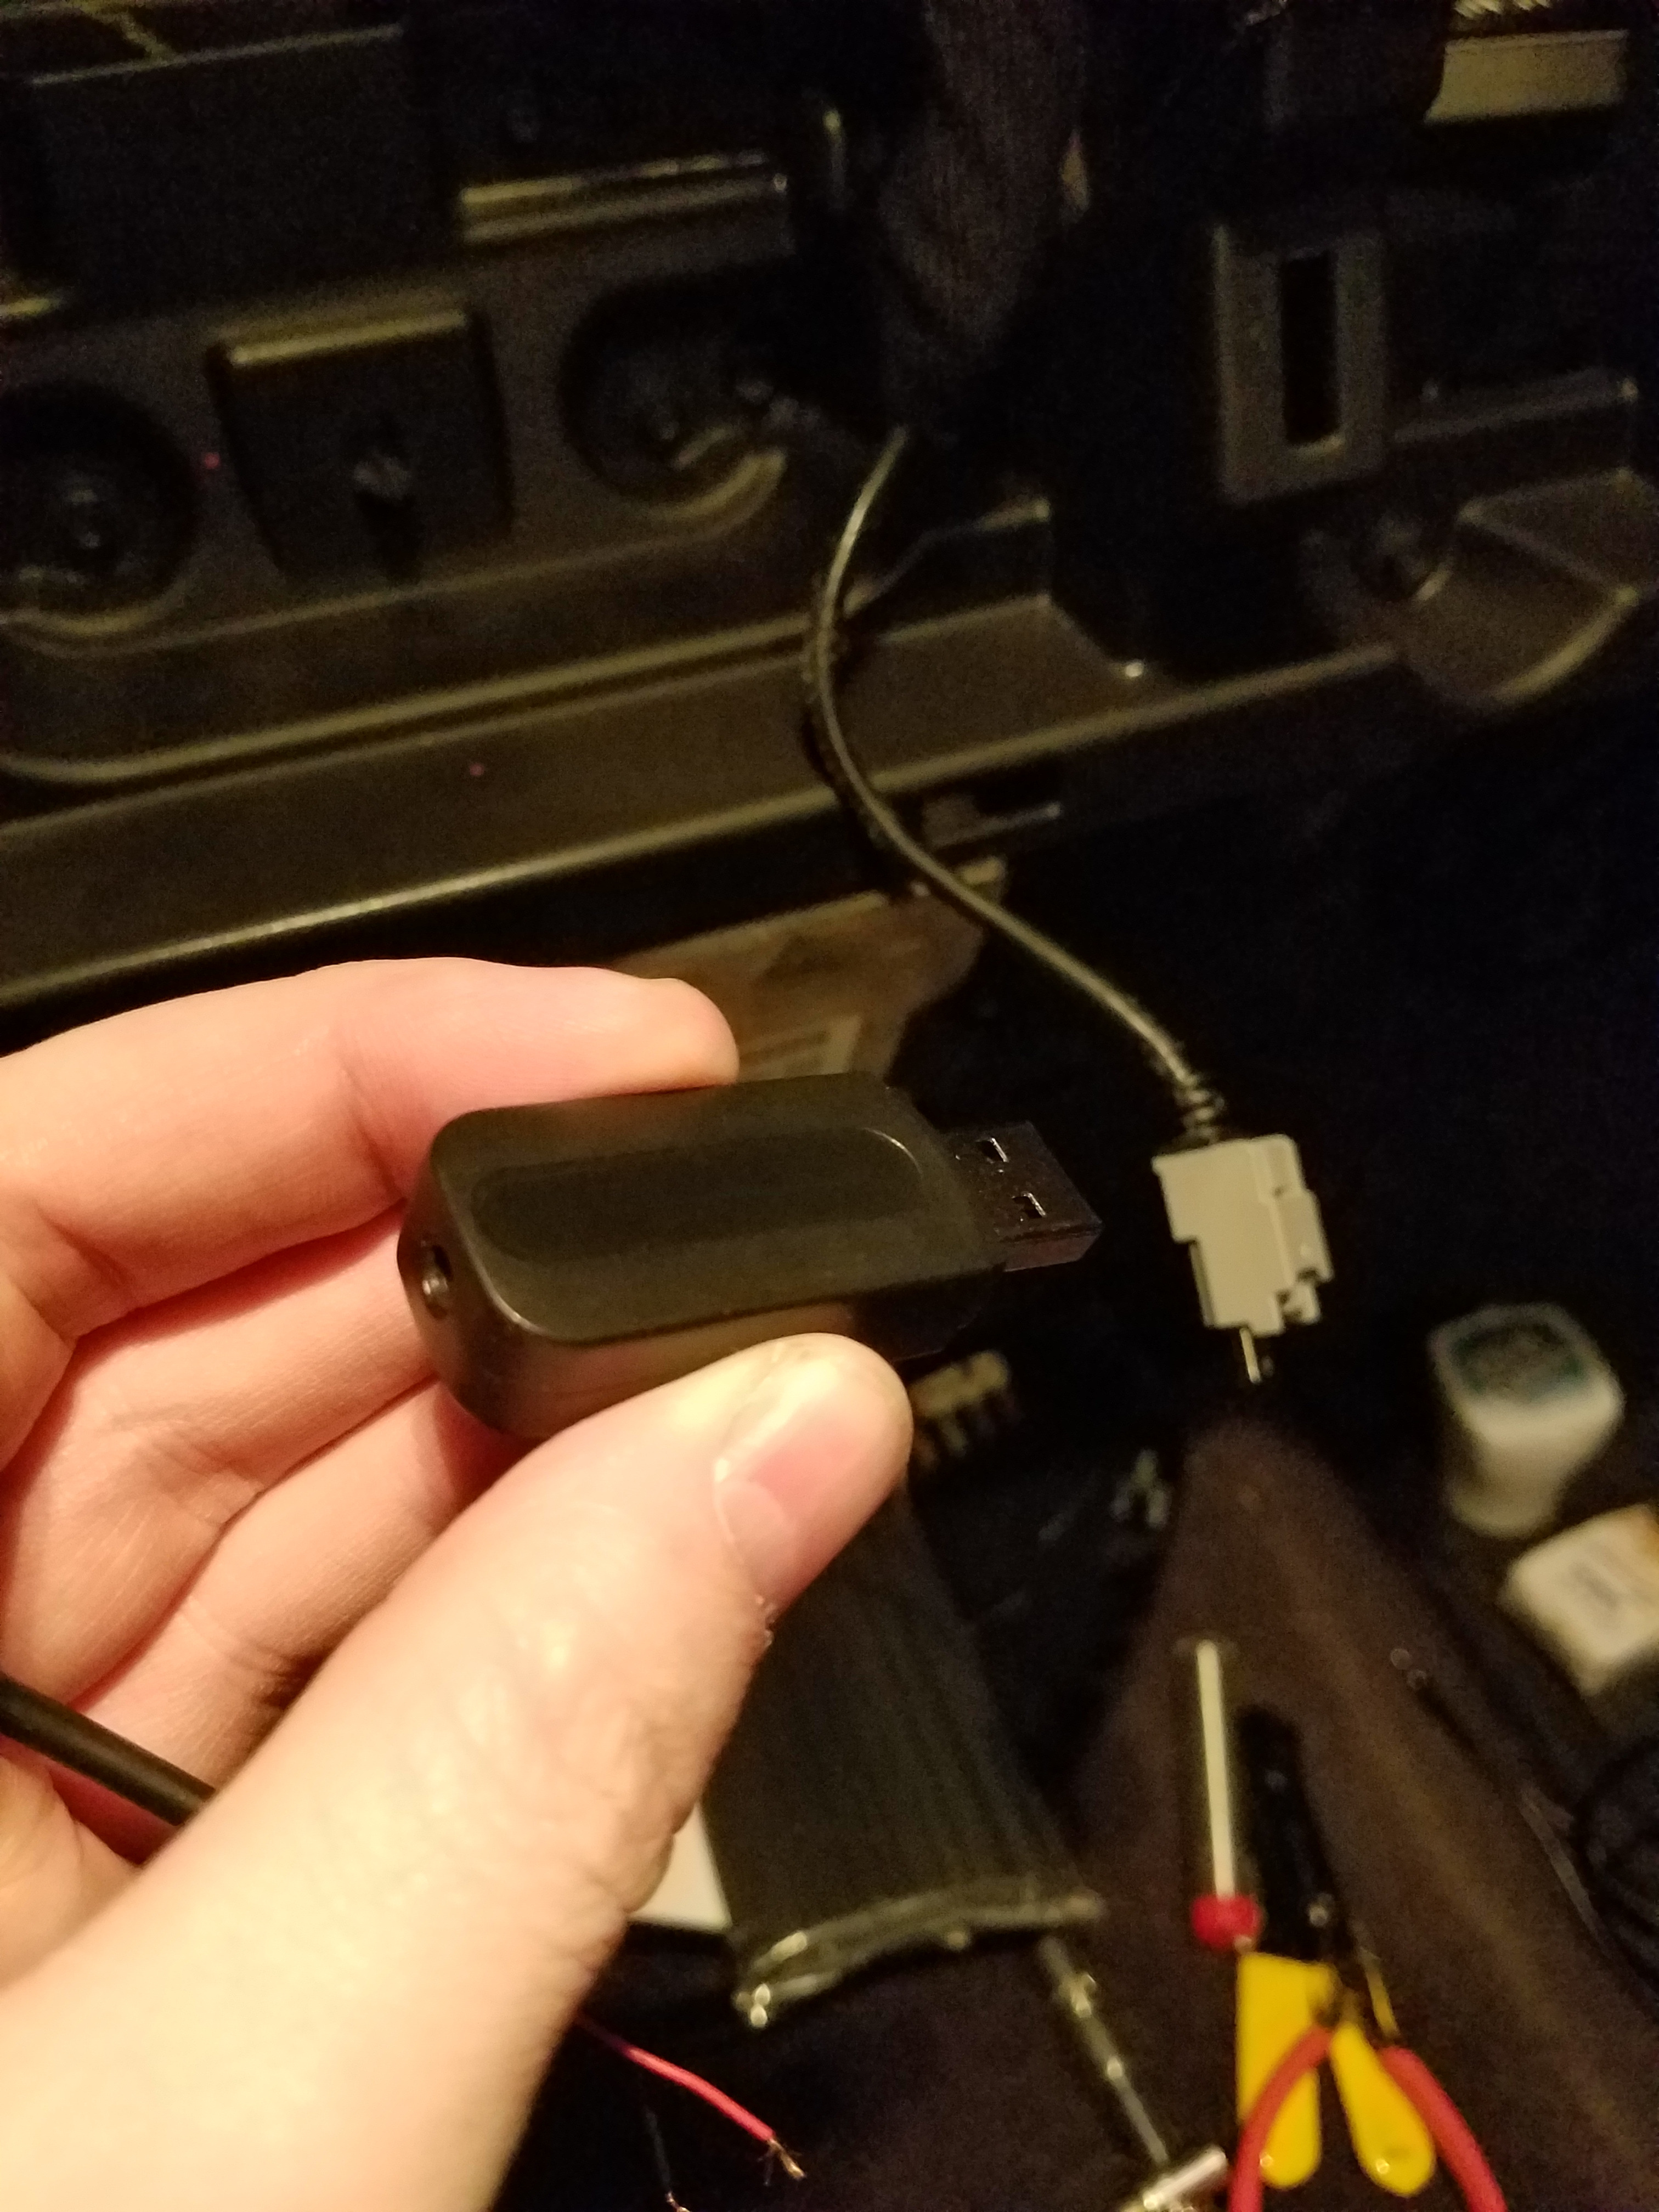
- Bluetooth Receiver: I chose this one because of the comments in another Instructable similar to this one. The author had trouble with the one he chose because it had a rechargeable battery in it. When the car was turned off, the battery would drain and then he had connection issues. So this one has no battery, is powered by 5V from a USB, and has no buttons that you have to press in order to connect. It even comes with a short aux cord you can use with this project.
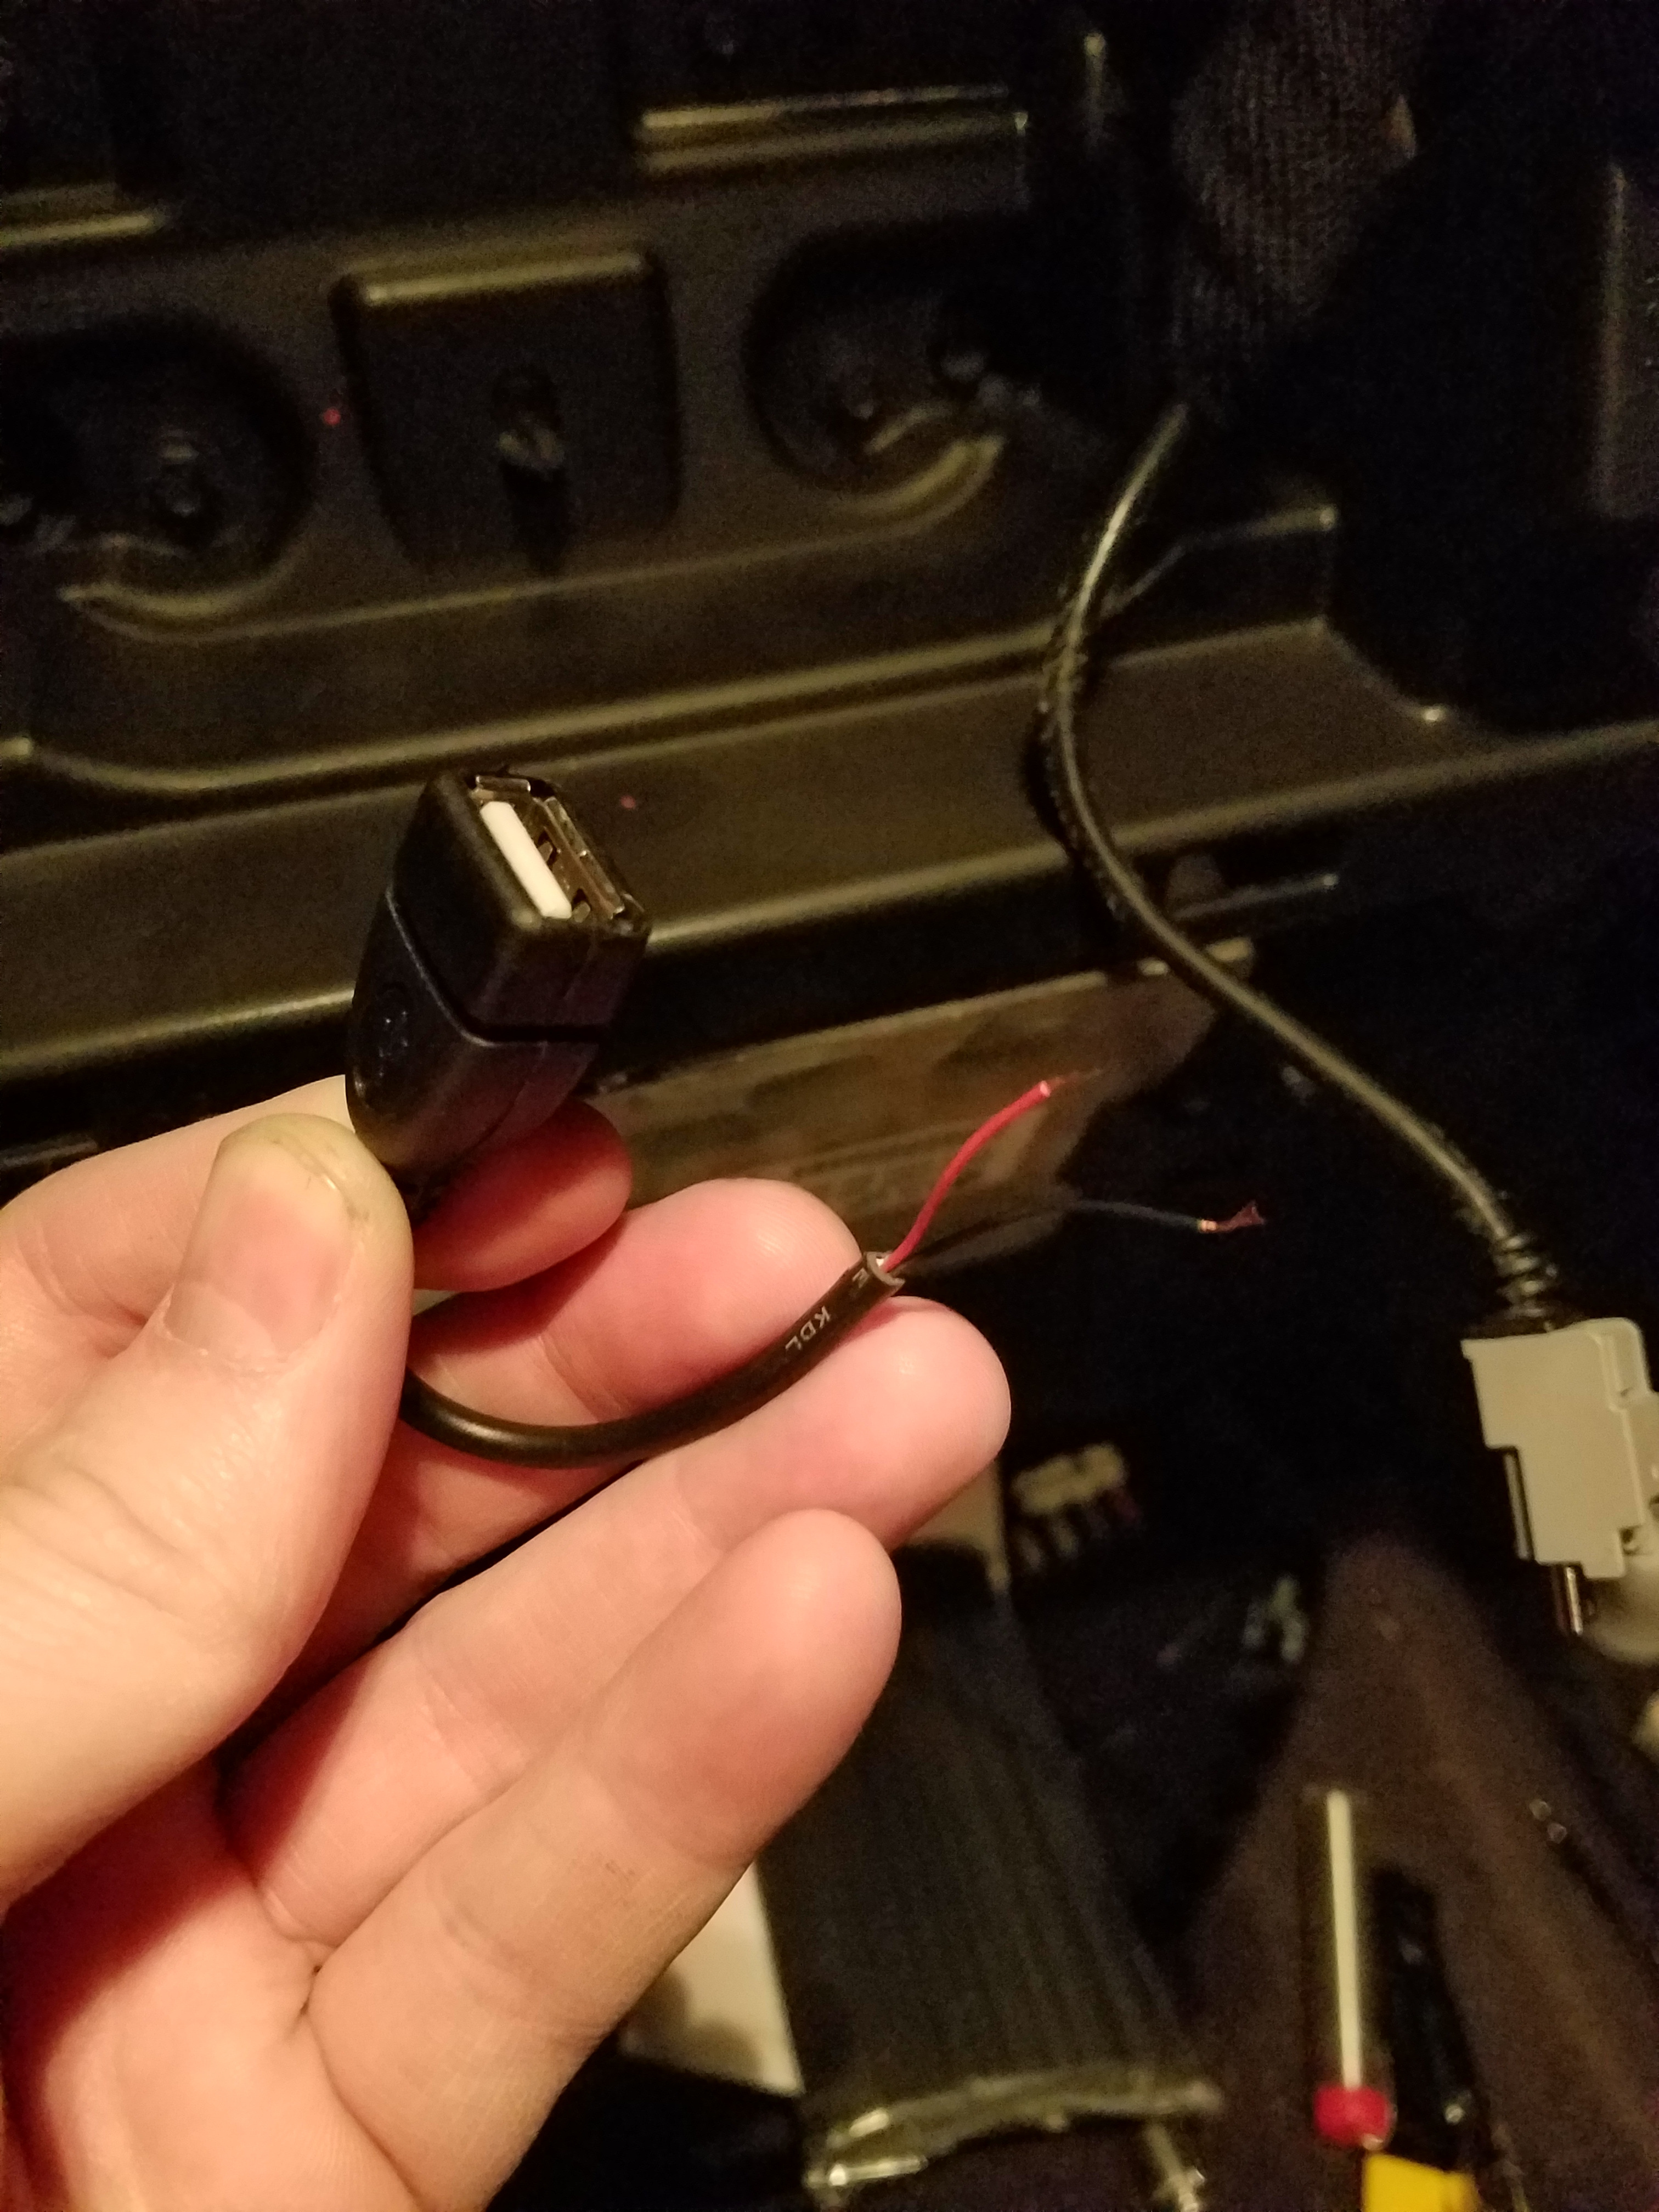
- USB Cable with Type A Receptacle (female): I already had this lying around and don't remember why. It doesn't have to be this one exactly, but you do get four of the female receptacles for around the price of just a regular cable with a female receptacle.
In case you don't have a USB port on your dash:
- Small Prototyping PCB
- 5V Regulator (7805)
- Two 10uF Electrolytic Capacitors
Getting the Radio Out
Well first, if you're adding the Bluetooth receiver you'll want to plug it in and confirm that it works in the first place. Then watch the video. It really is that simple to get to the radio.
Opening the Radio
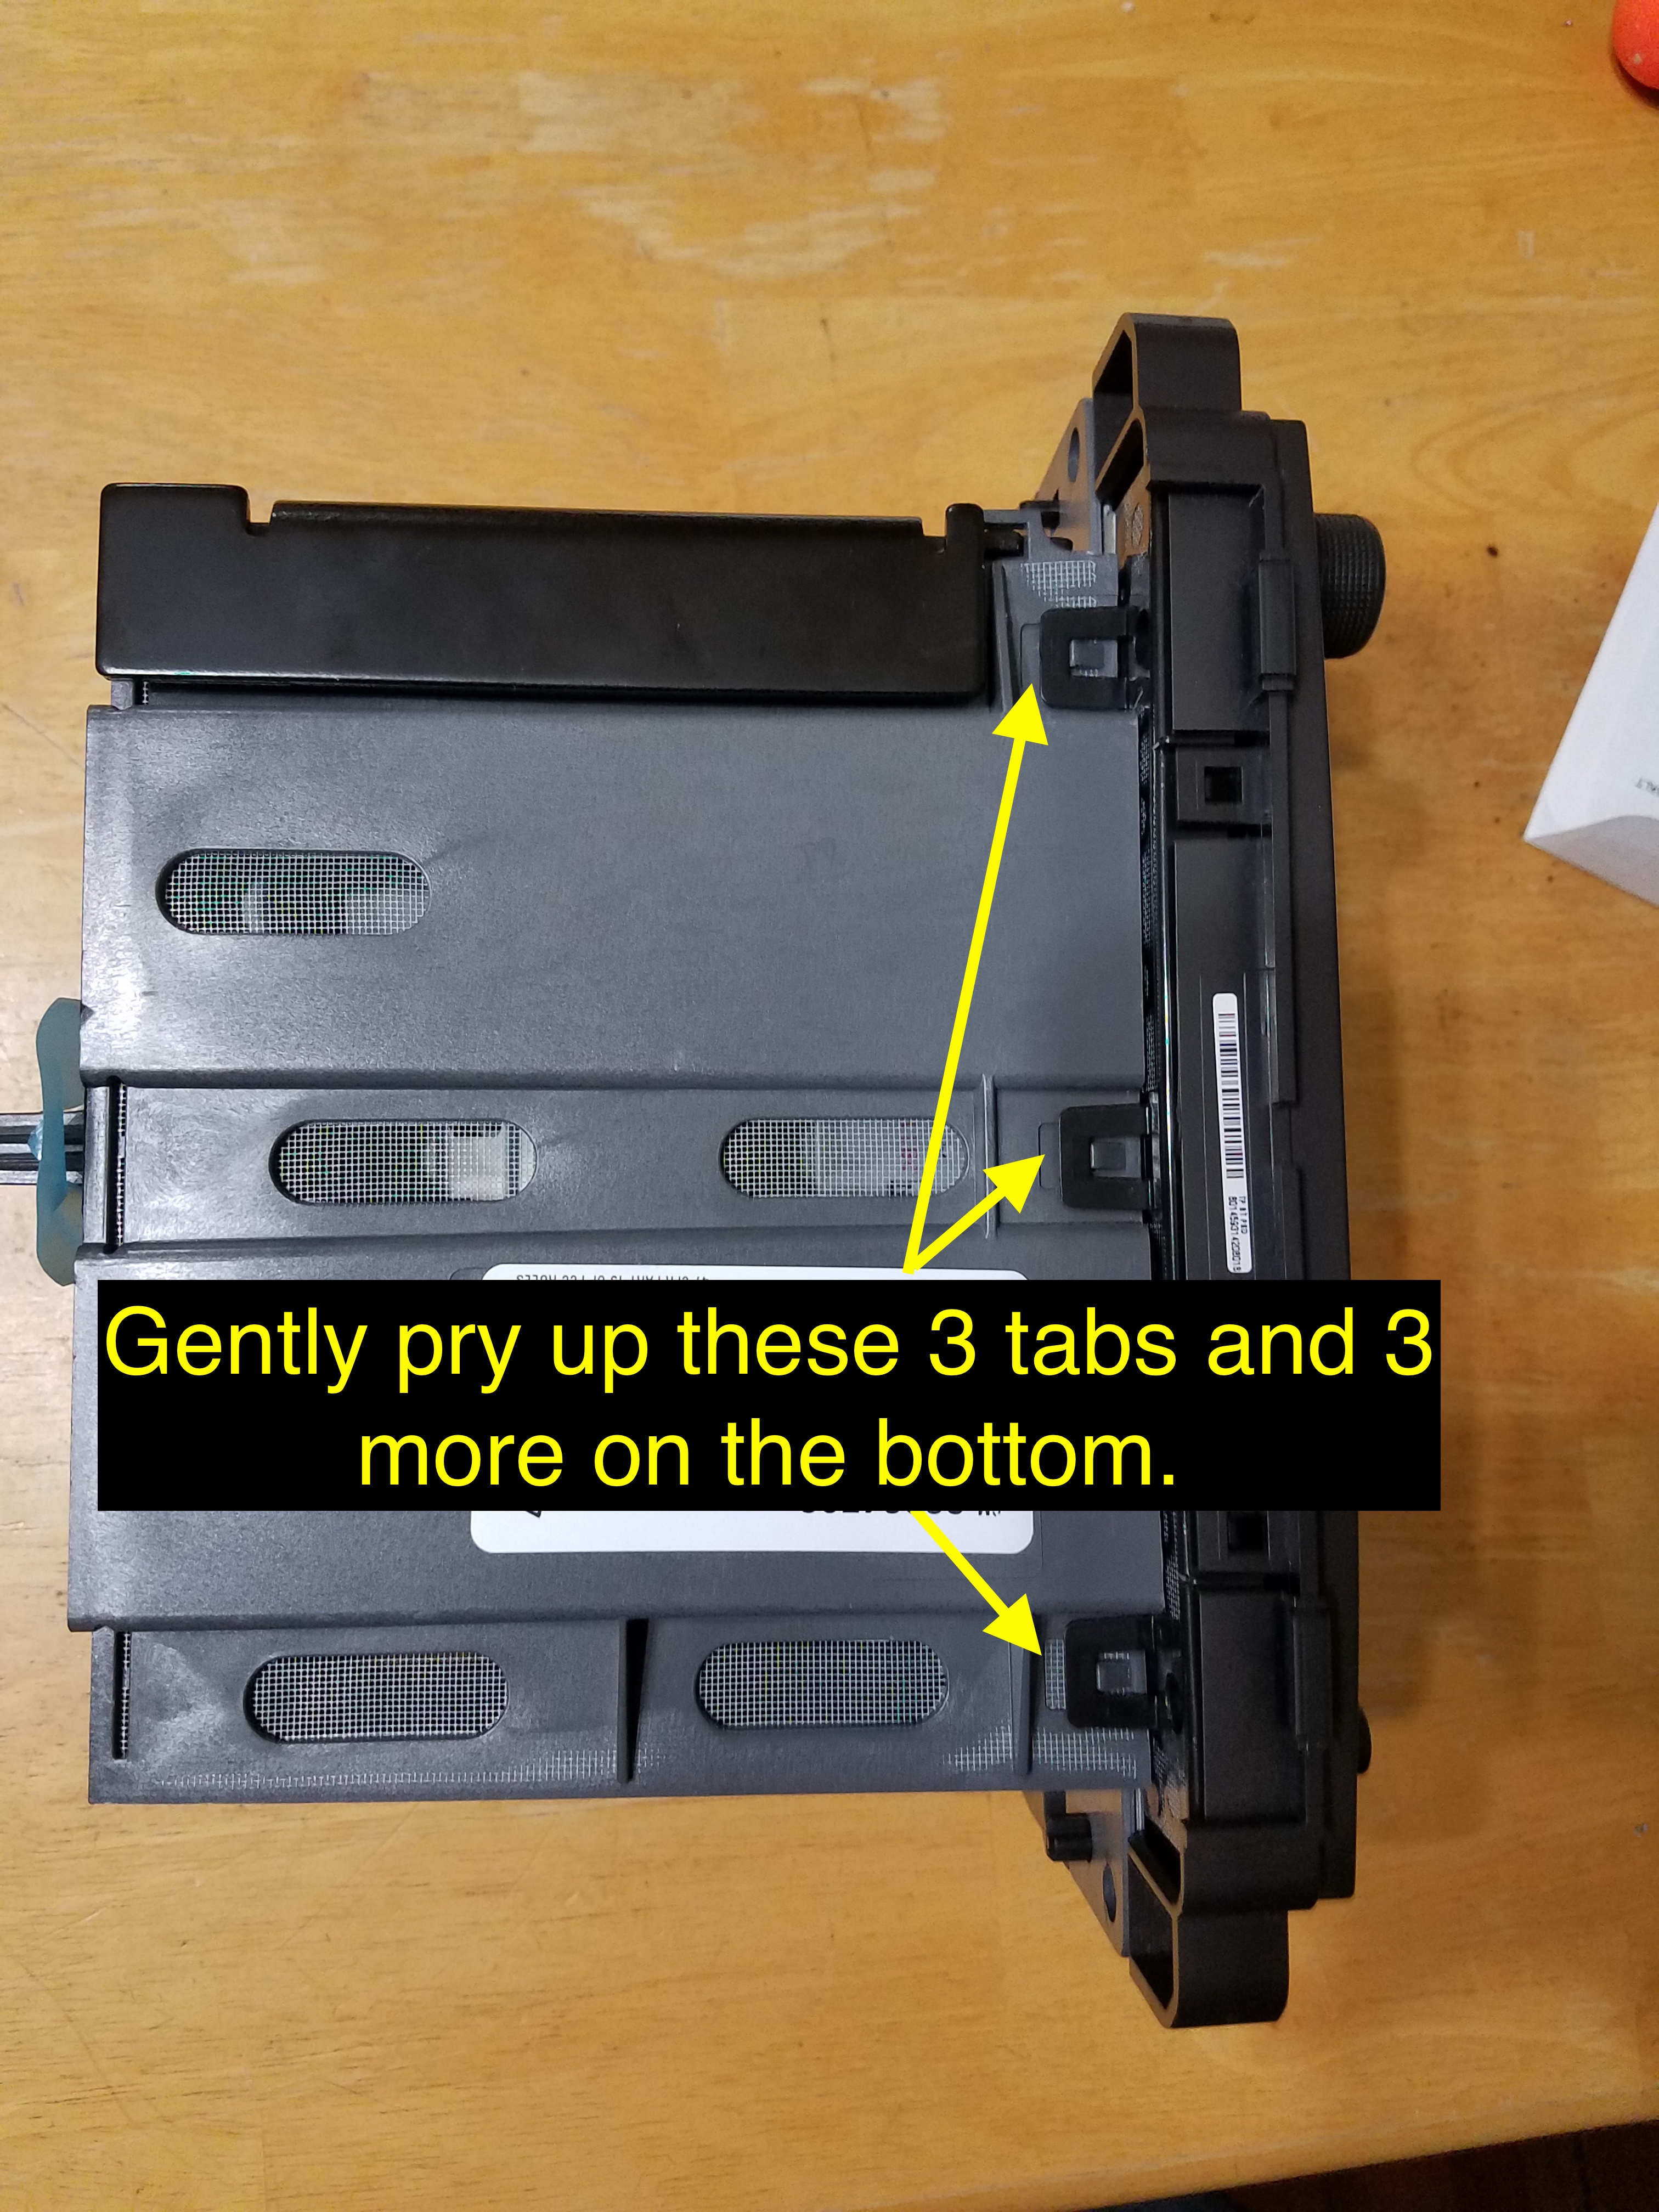
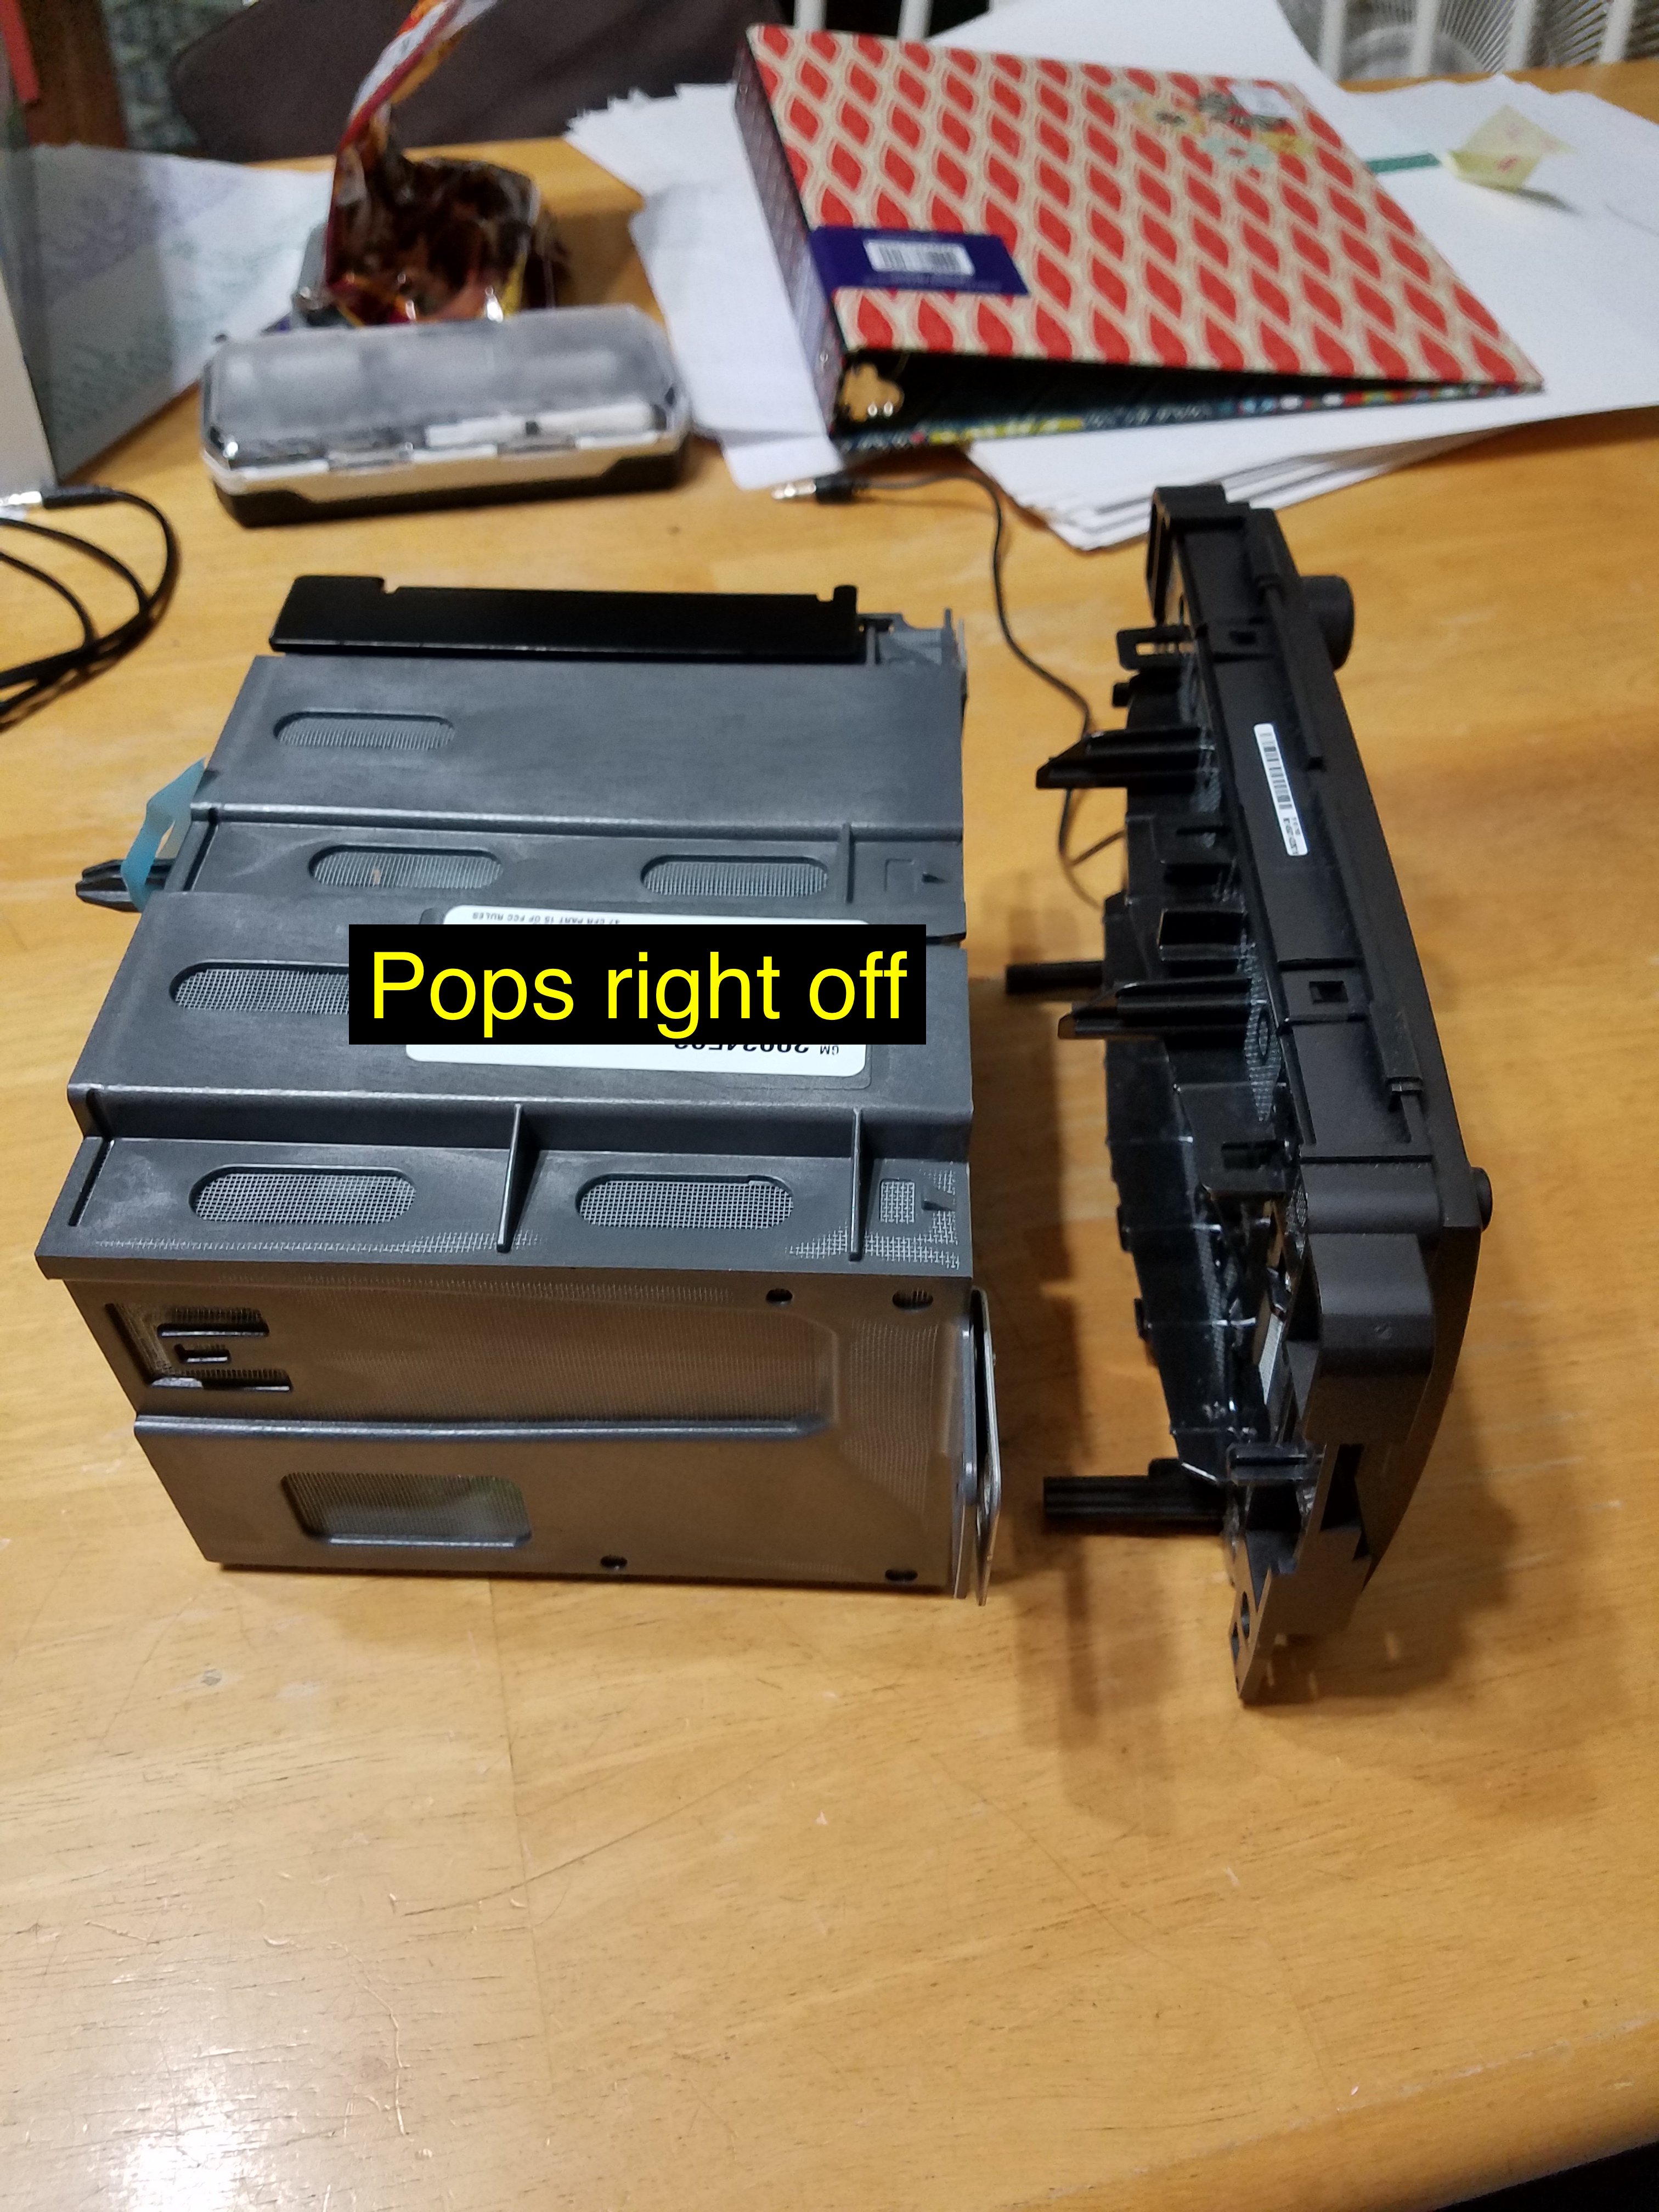
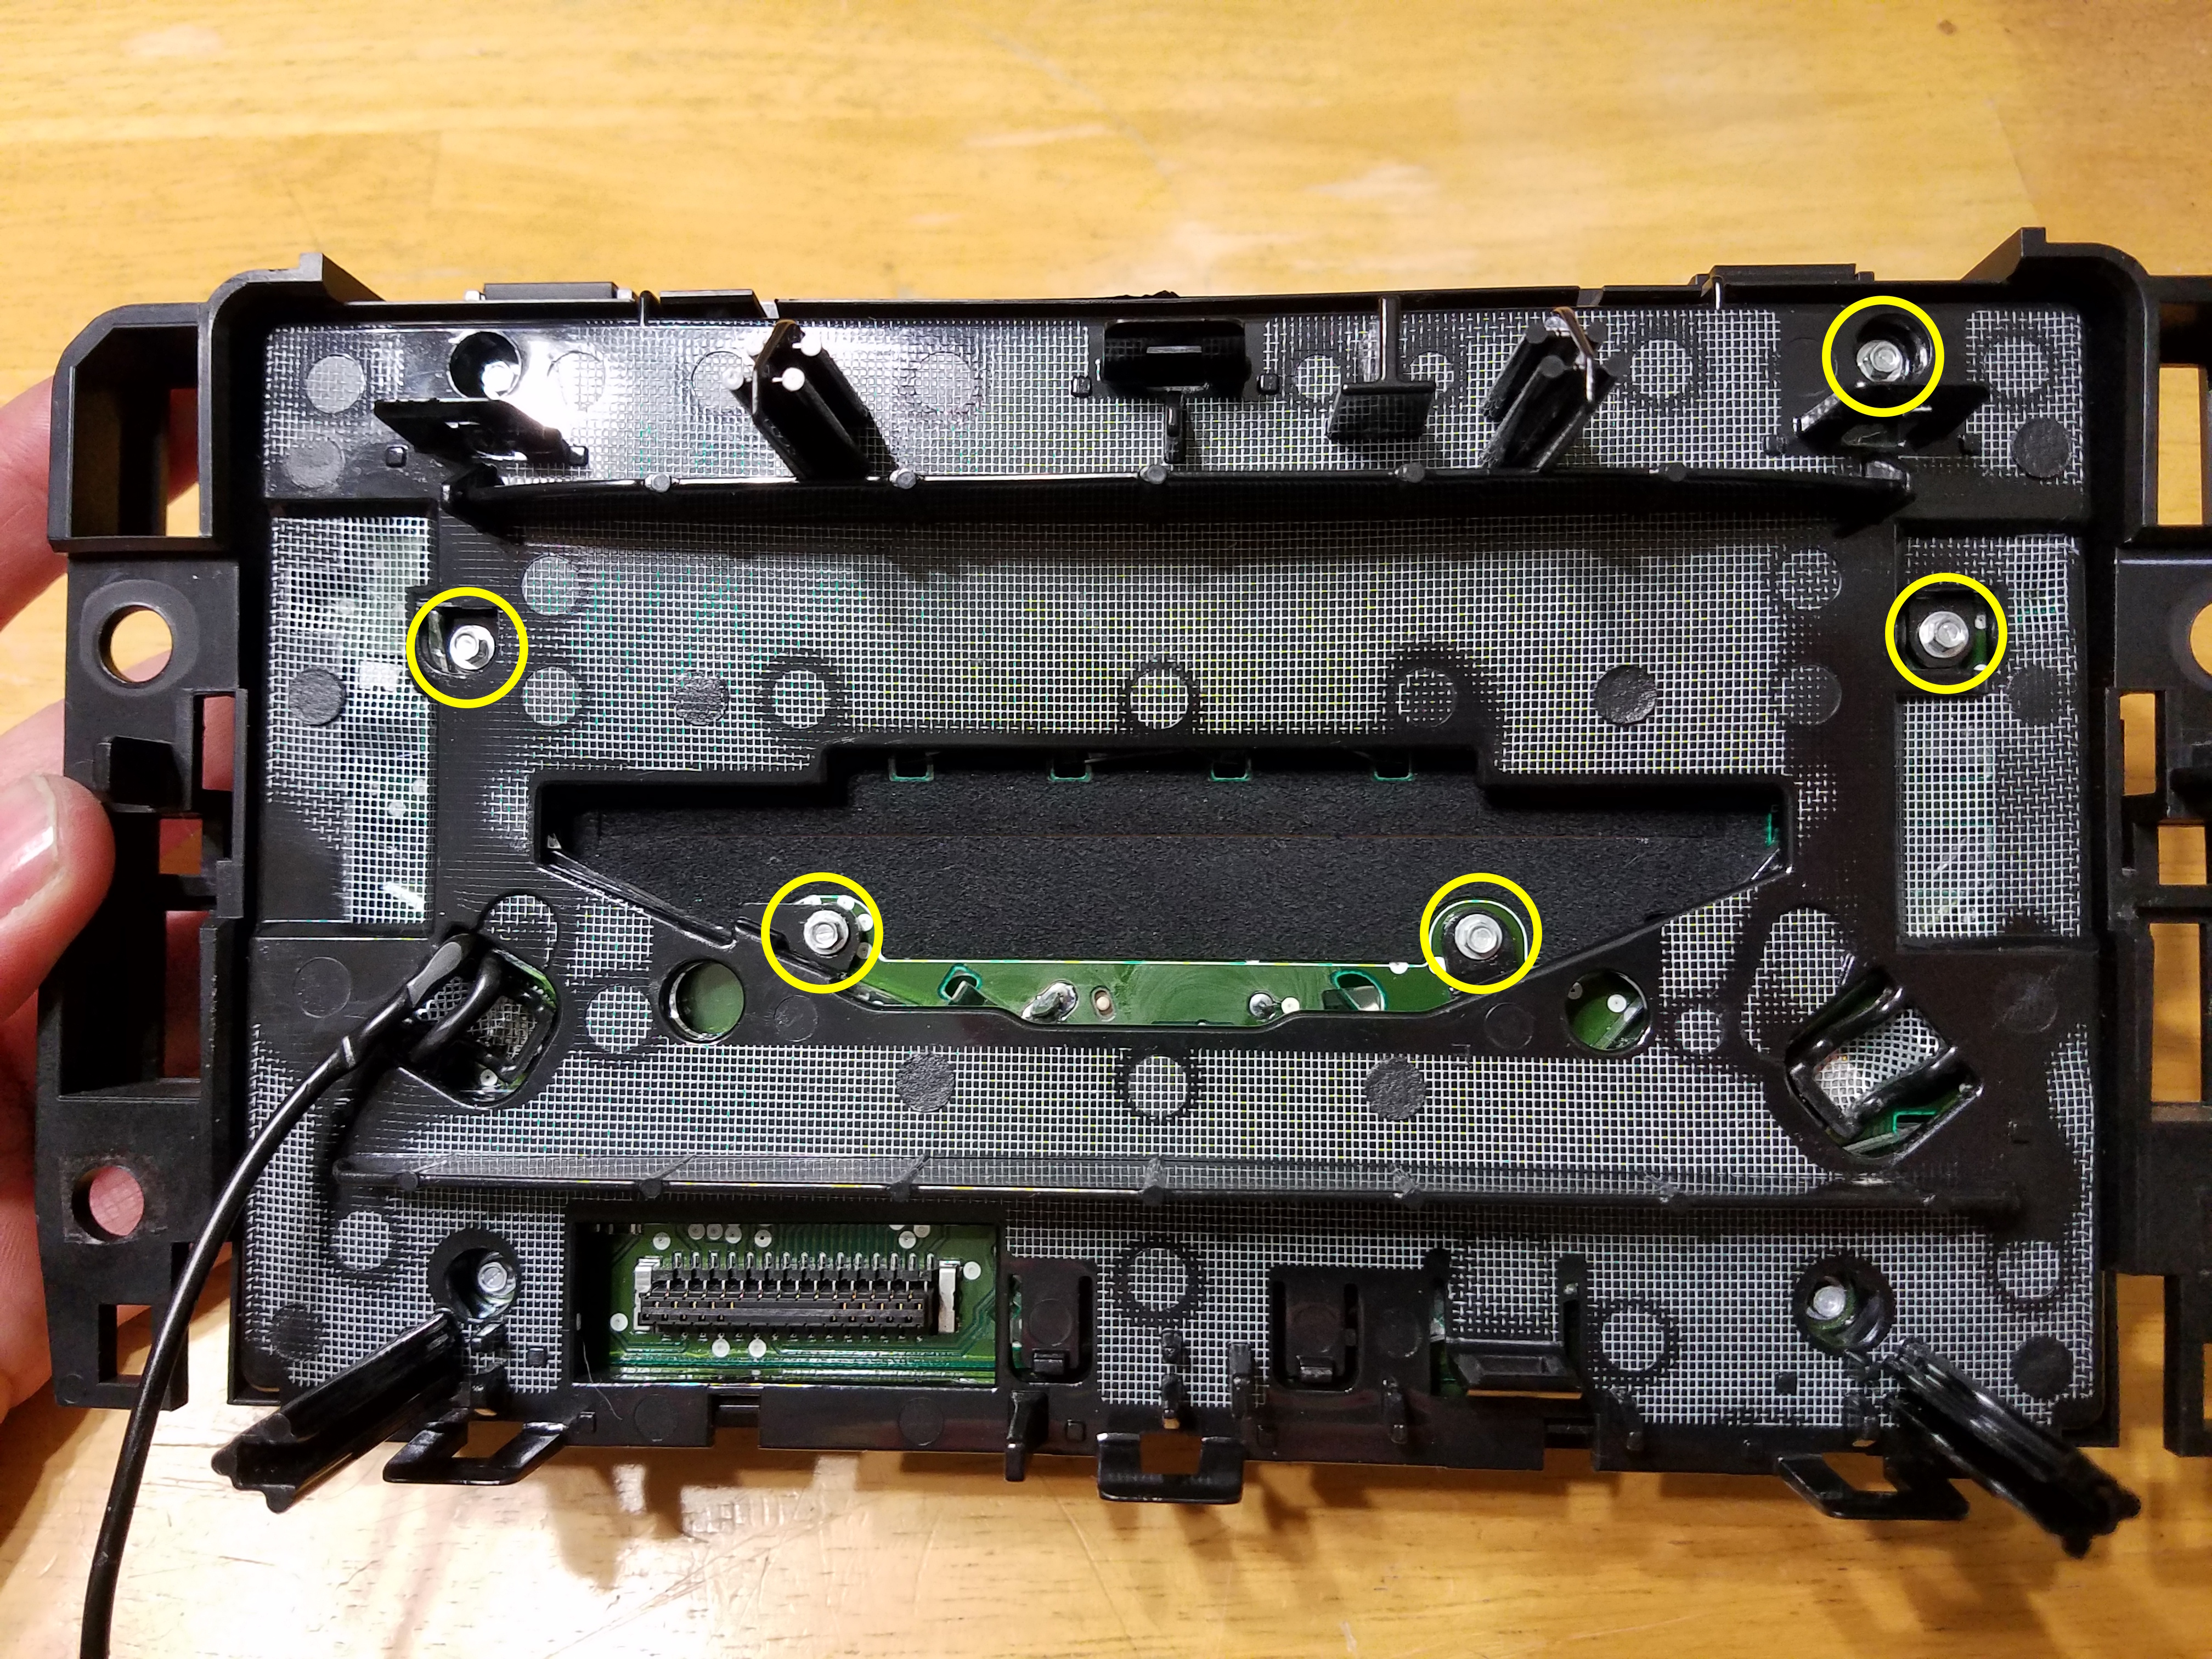
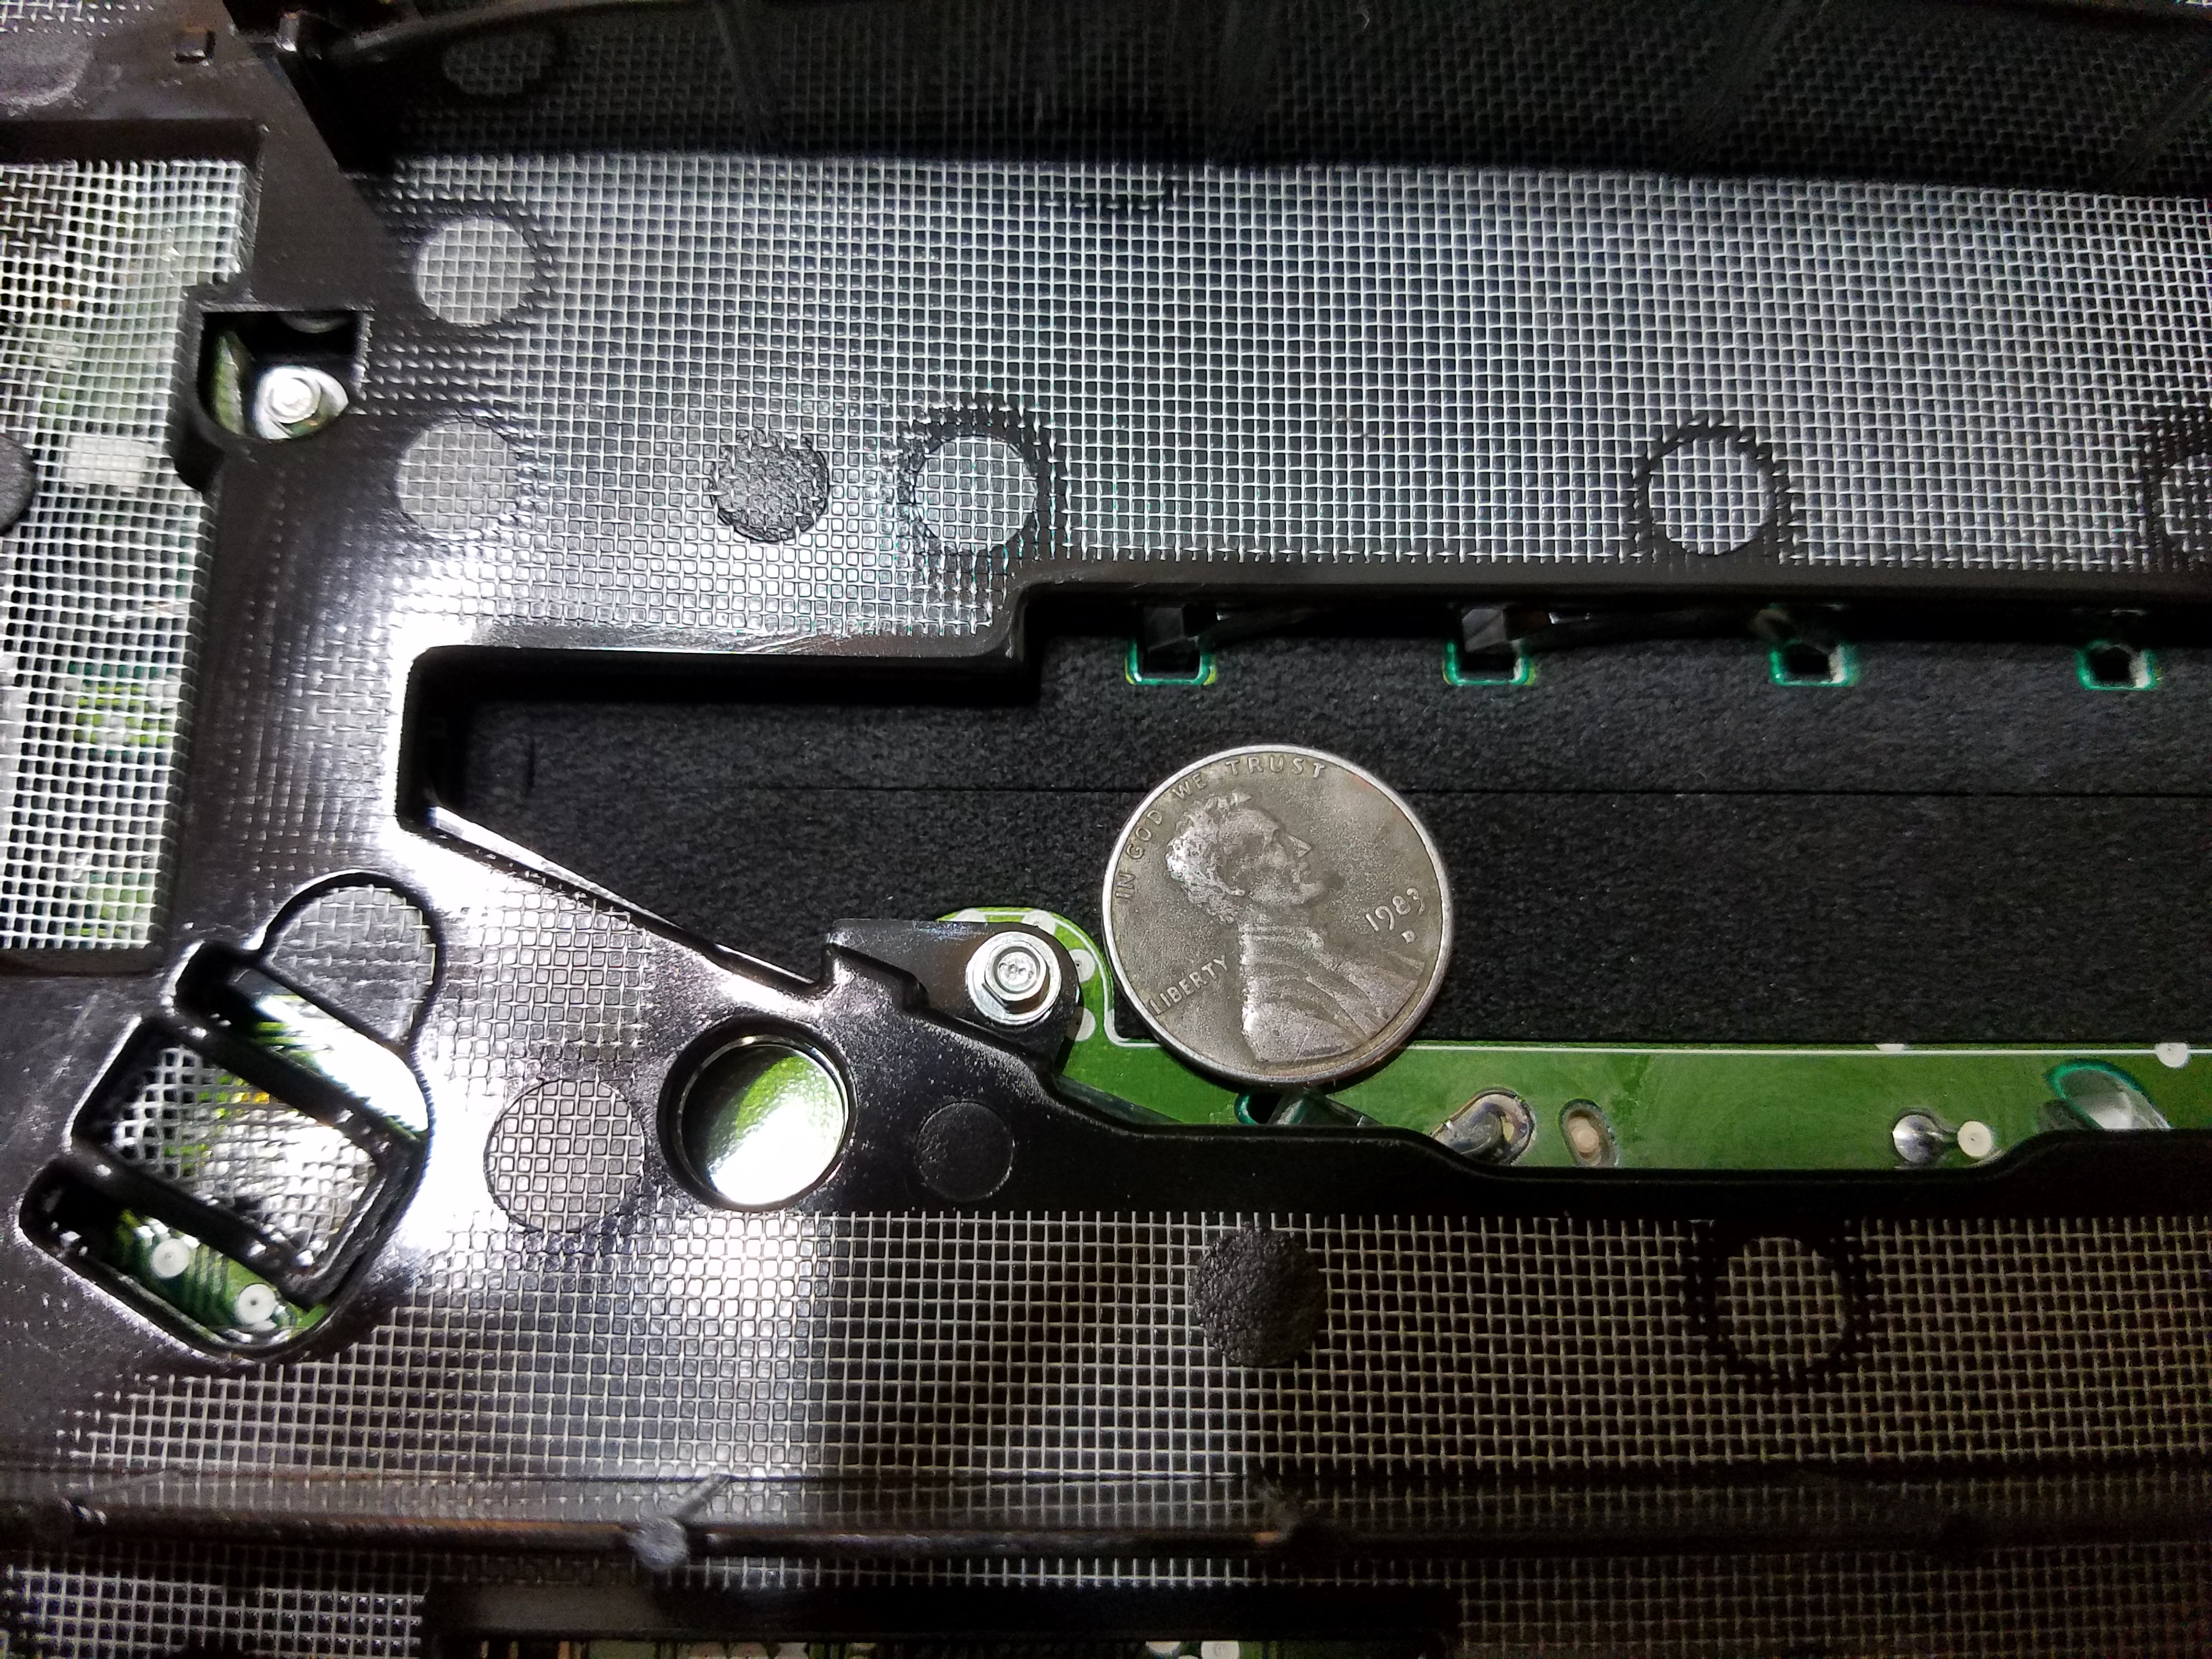
First of all, I had already soldered on the extra aux cord when I decided to make the Instructable. So just pretend it isn't there for now.
- Gently pry up 3 tabs along the top and 3 more along the bottom to remove the face plate and its pcb.
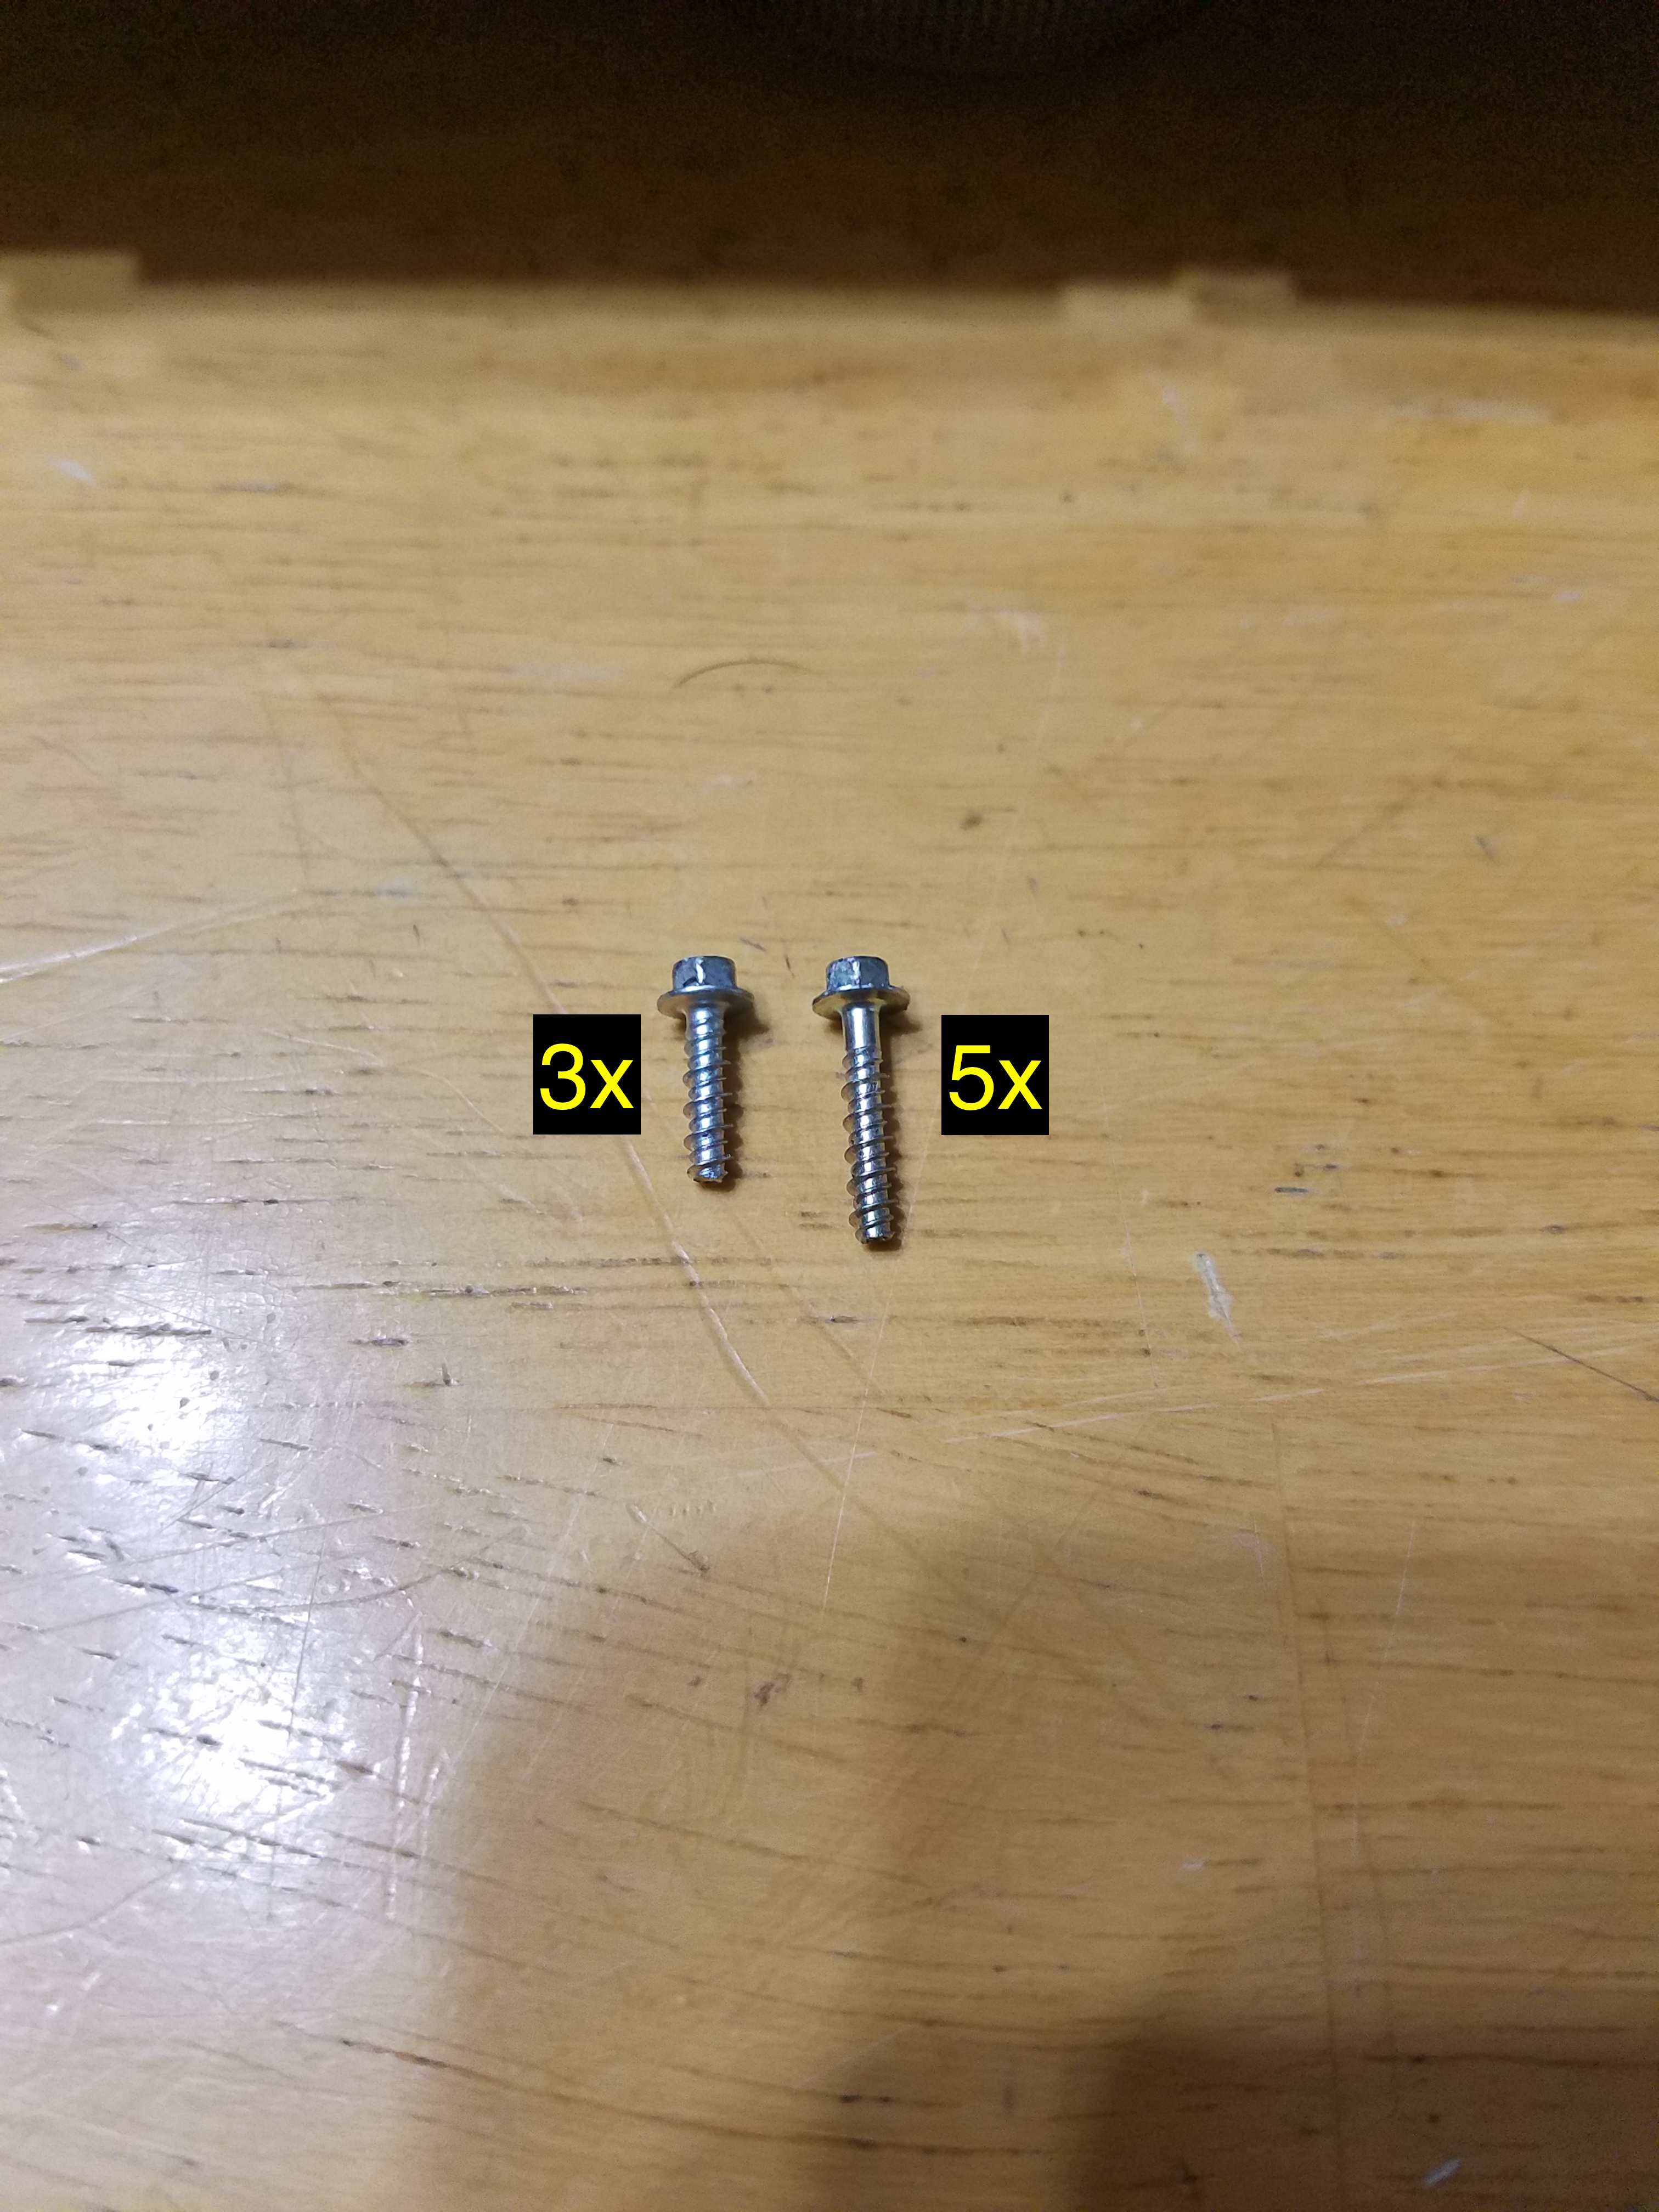
- Unscrew the 5 screws that I have circled. (note: I have no idea what size those little buggers are! Don't bother getting a set of mini sockets from Radio Shack! I got that set and one size was too small, and the next size up was too big! Just use a small pair of needle nose pliers and a little care and patience.)
- There are 2 more tabs to pry open on the top and bottom to get this plastic cover off.
- You should be able to do what you need without taking out the last 3 screws to pull the pcb out. However, if you do need to for some reason be warned. First, those 3 screws are shorter than the first 5. Second, there are several small pieces between the face plate and the pcb that are only held in place by the pcb being screwed to the face plate. So take it easy.
Re-solder the Aux Jack / Add New Aux Cord
.png)
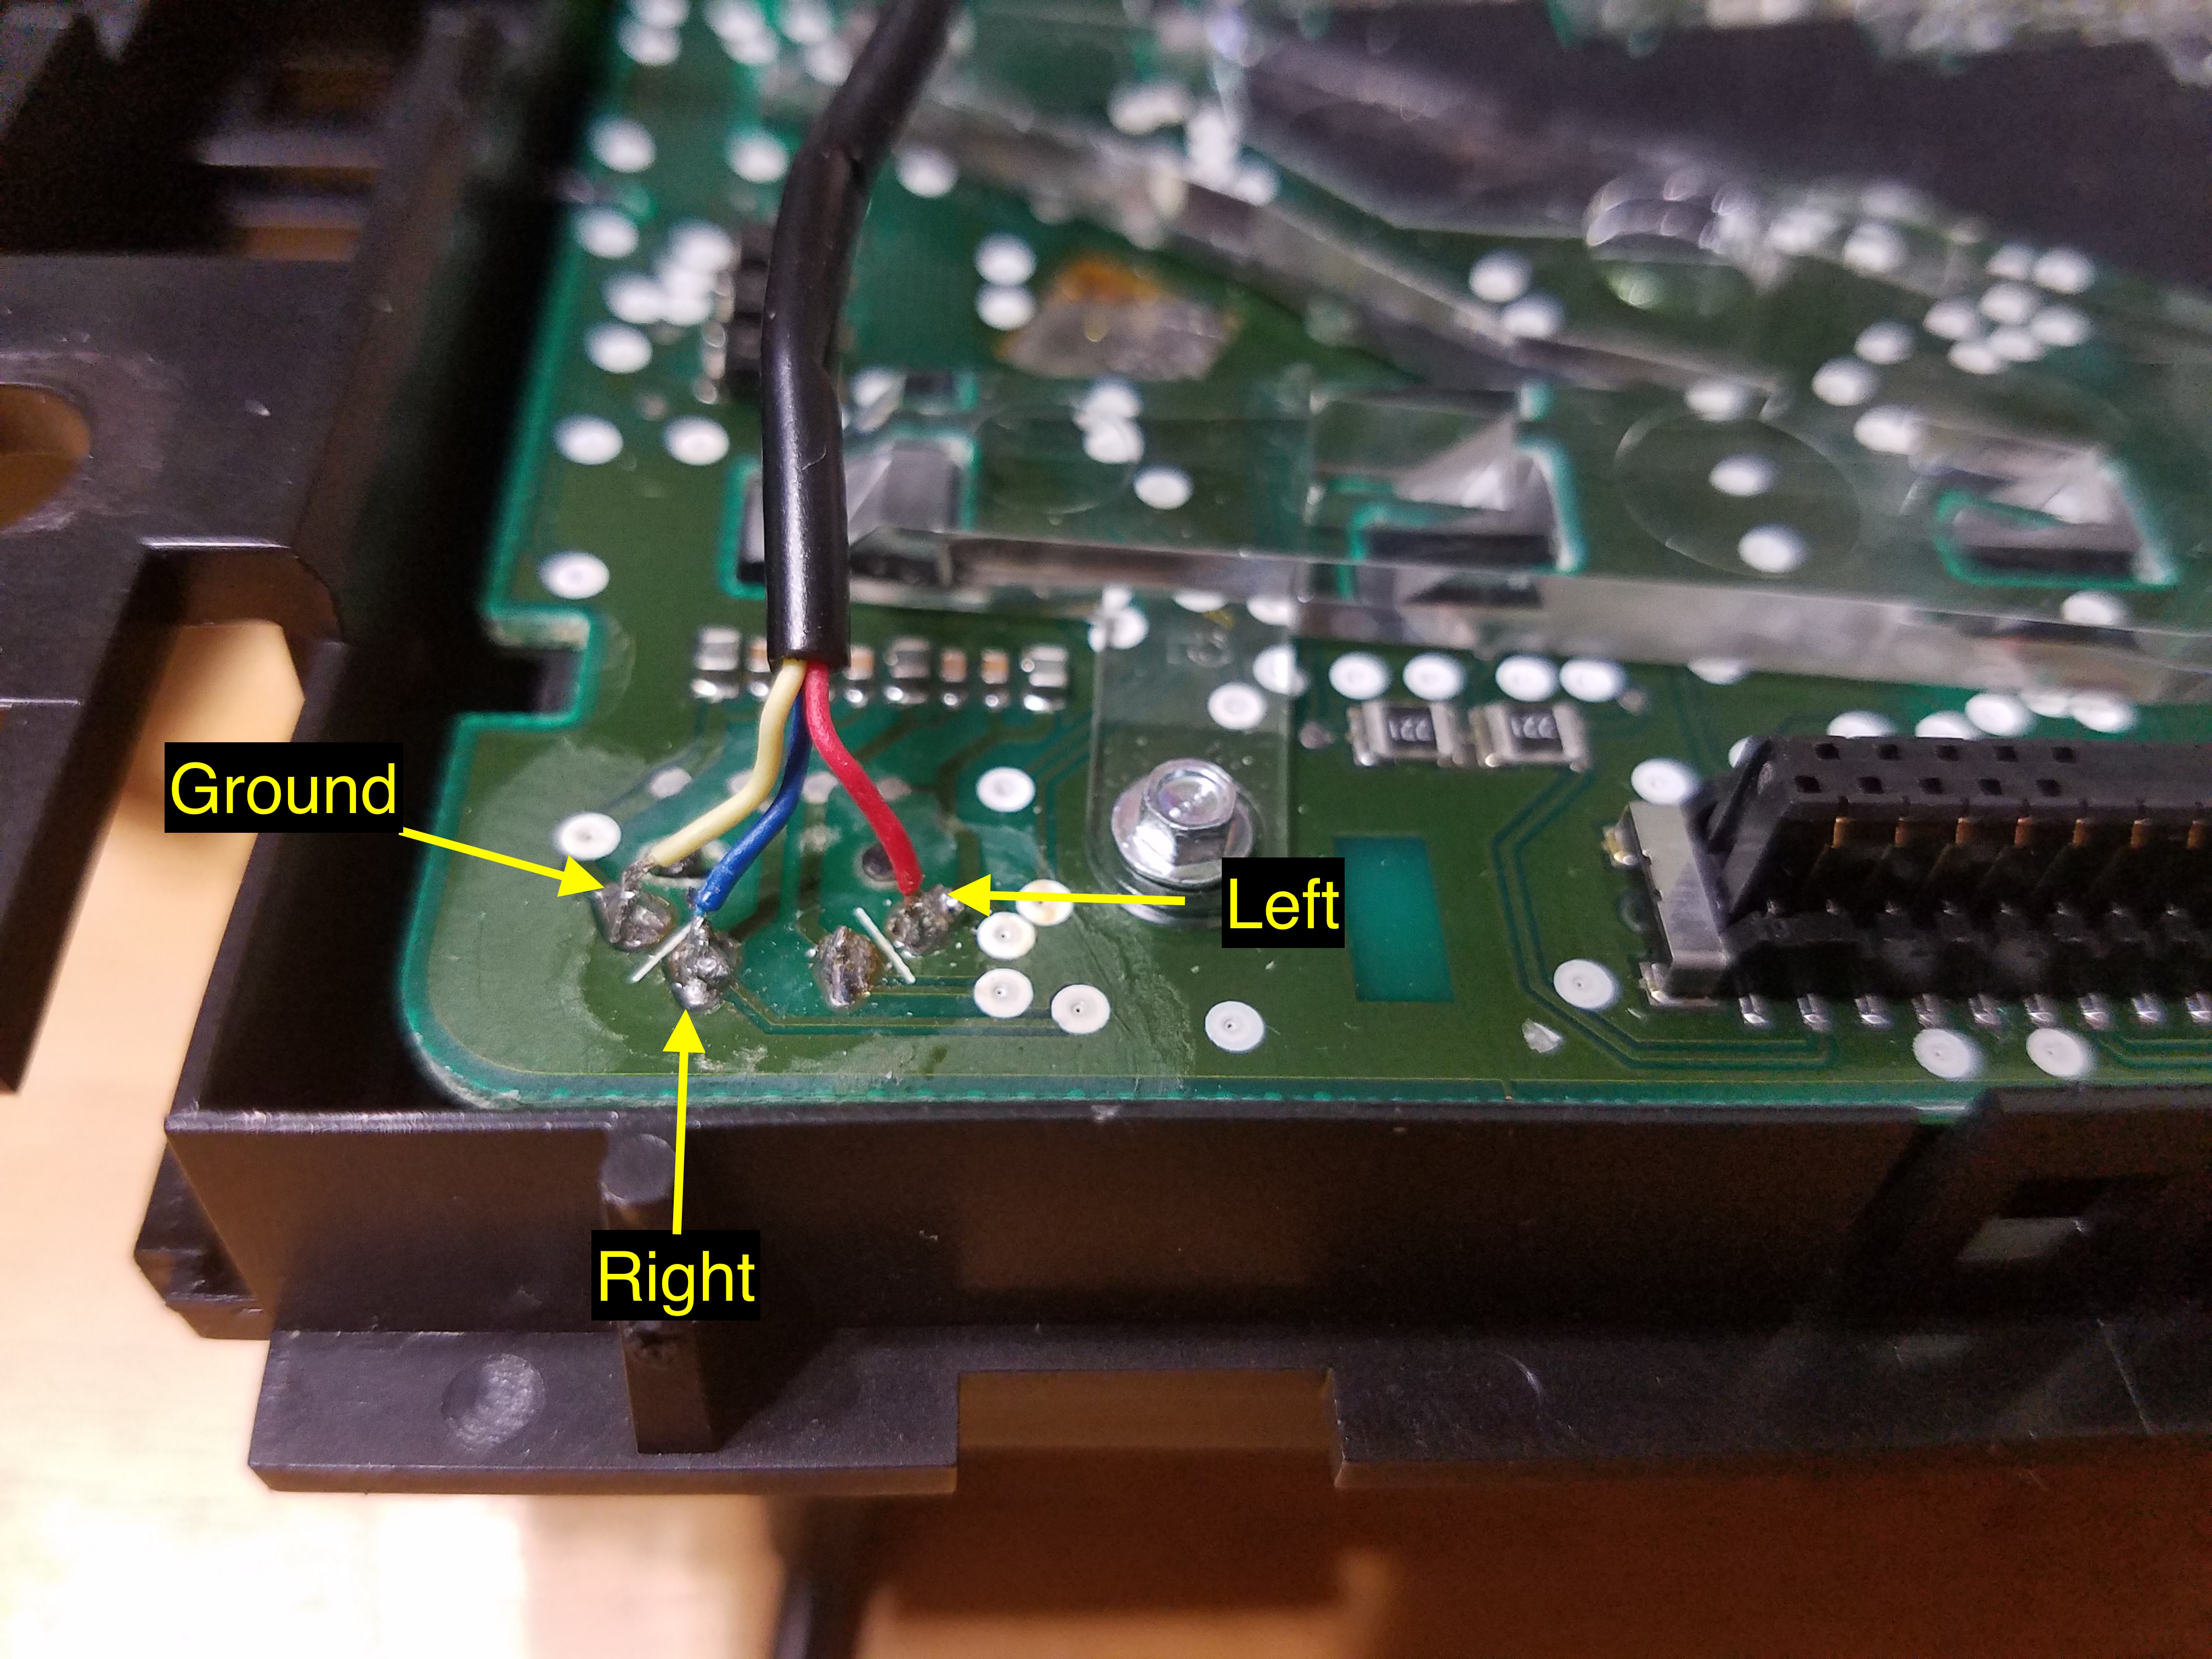
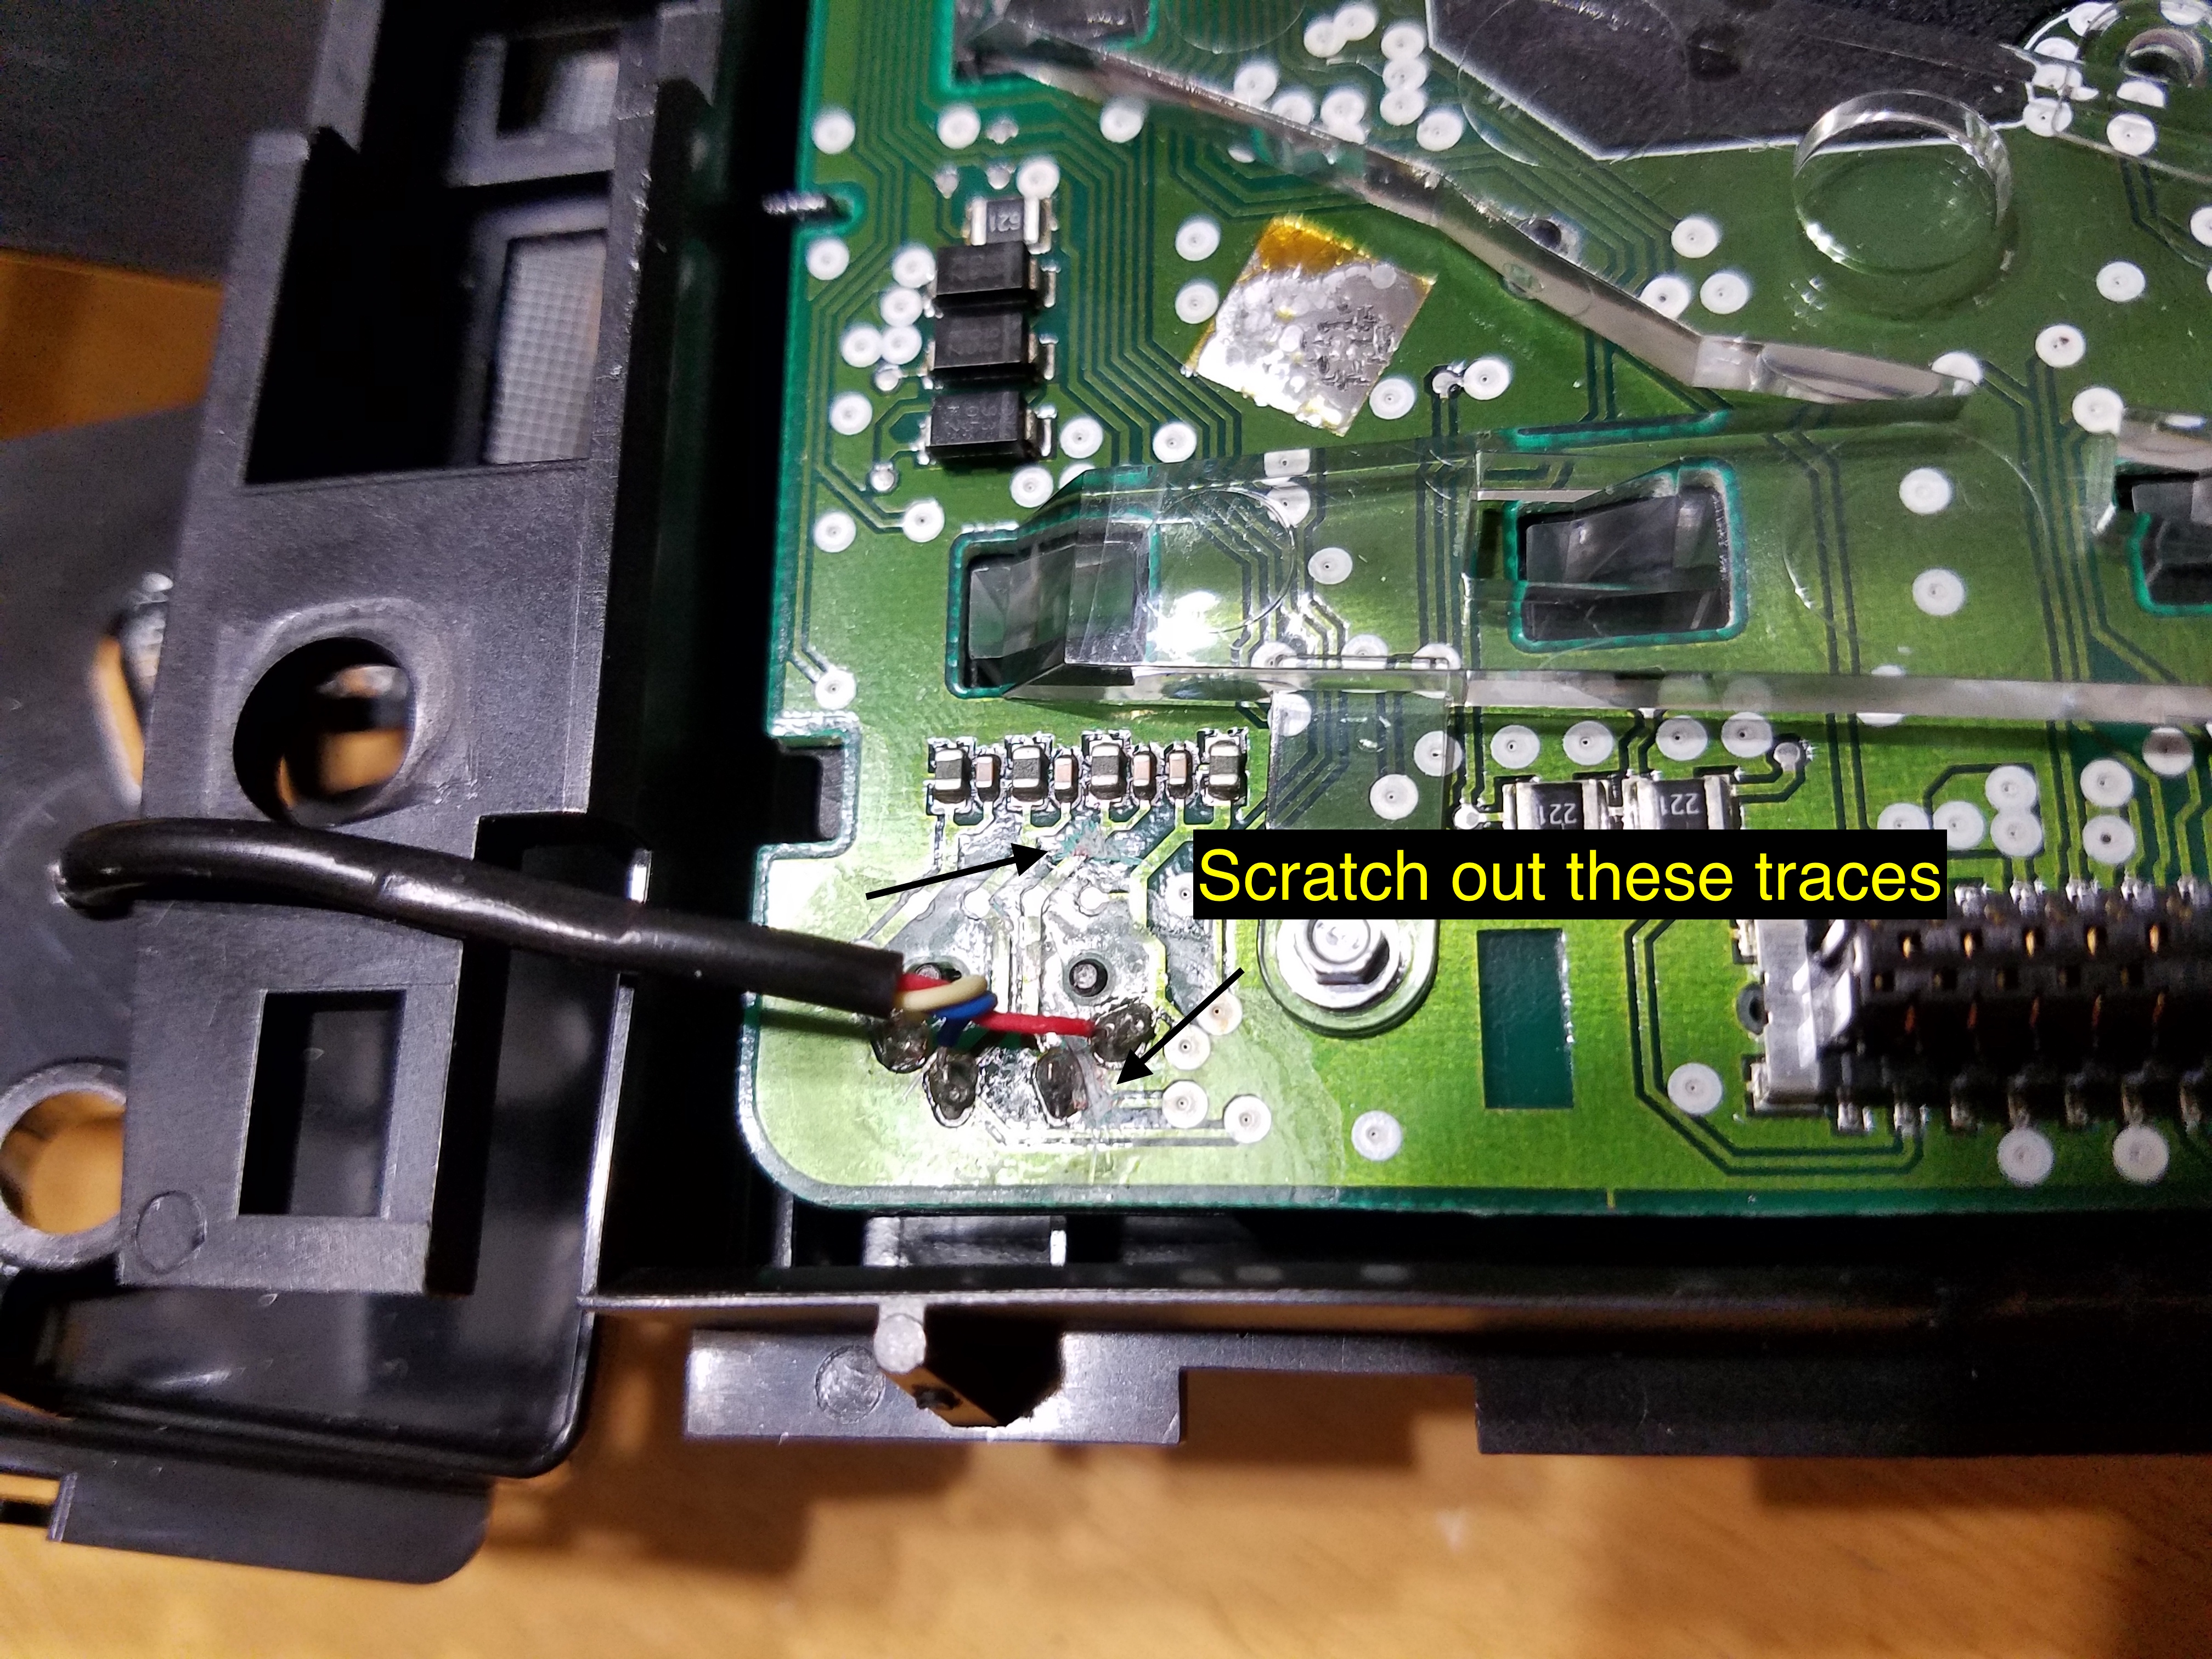
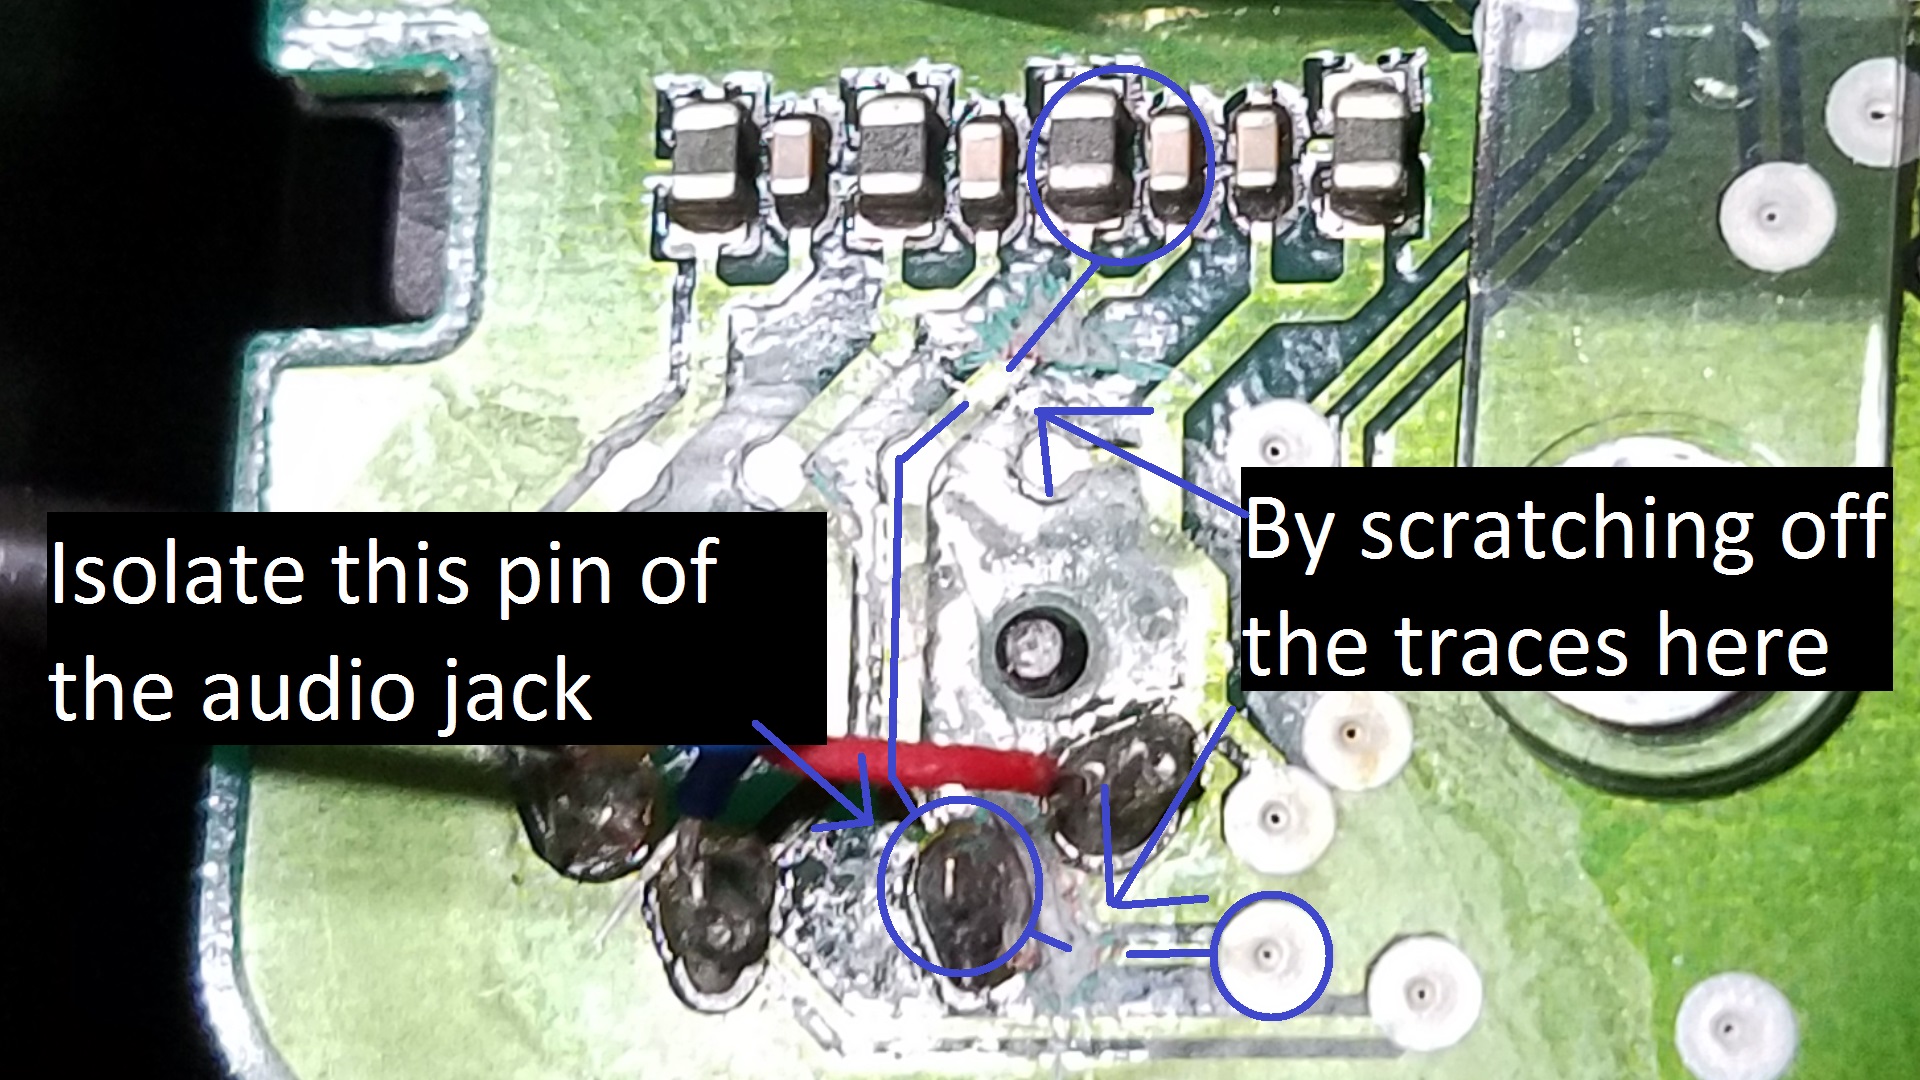
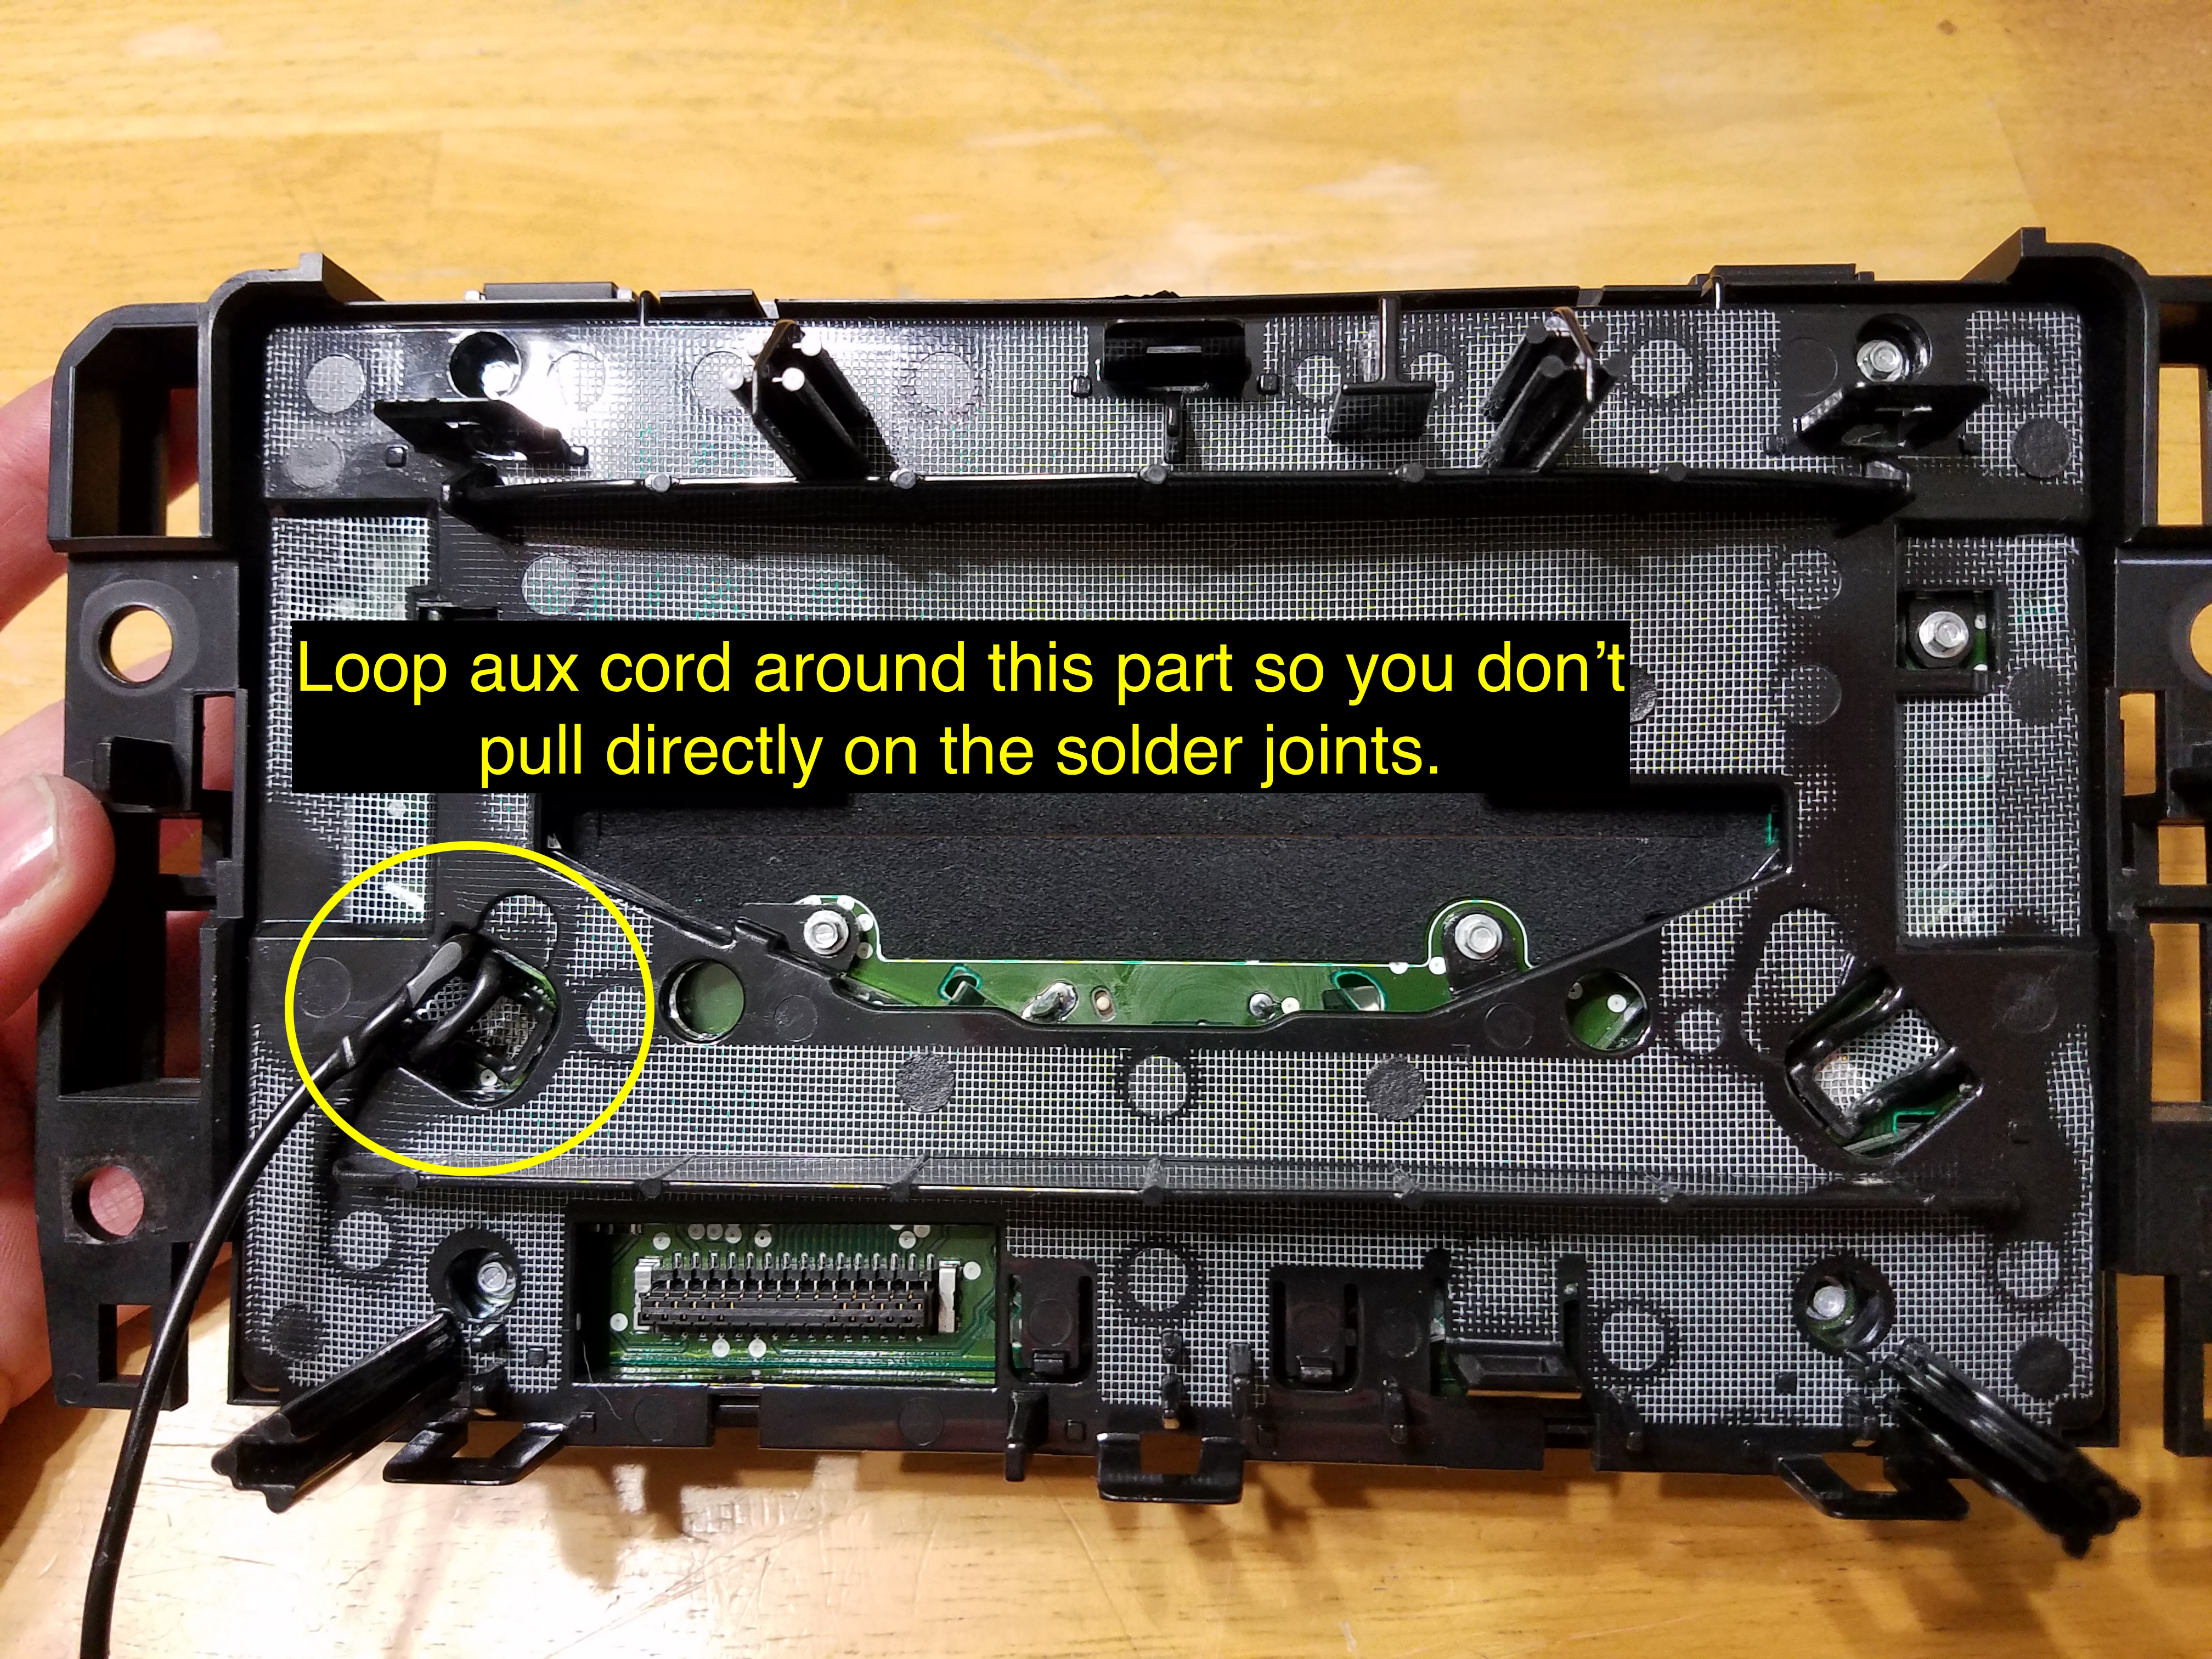
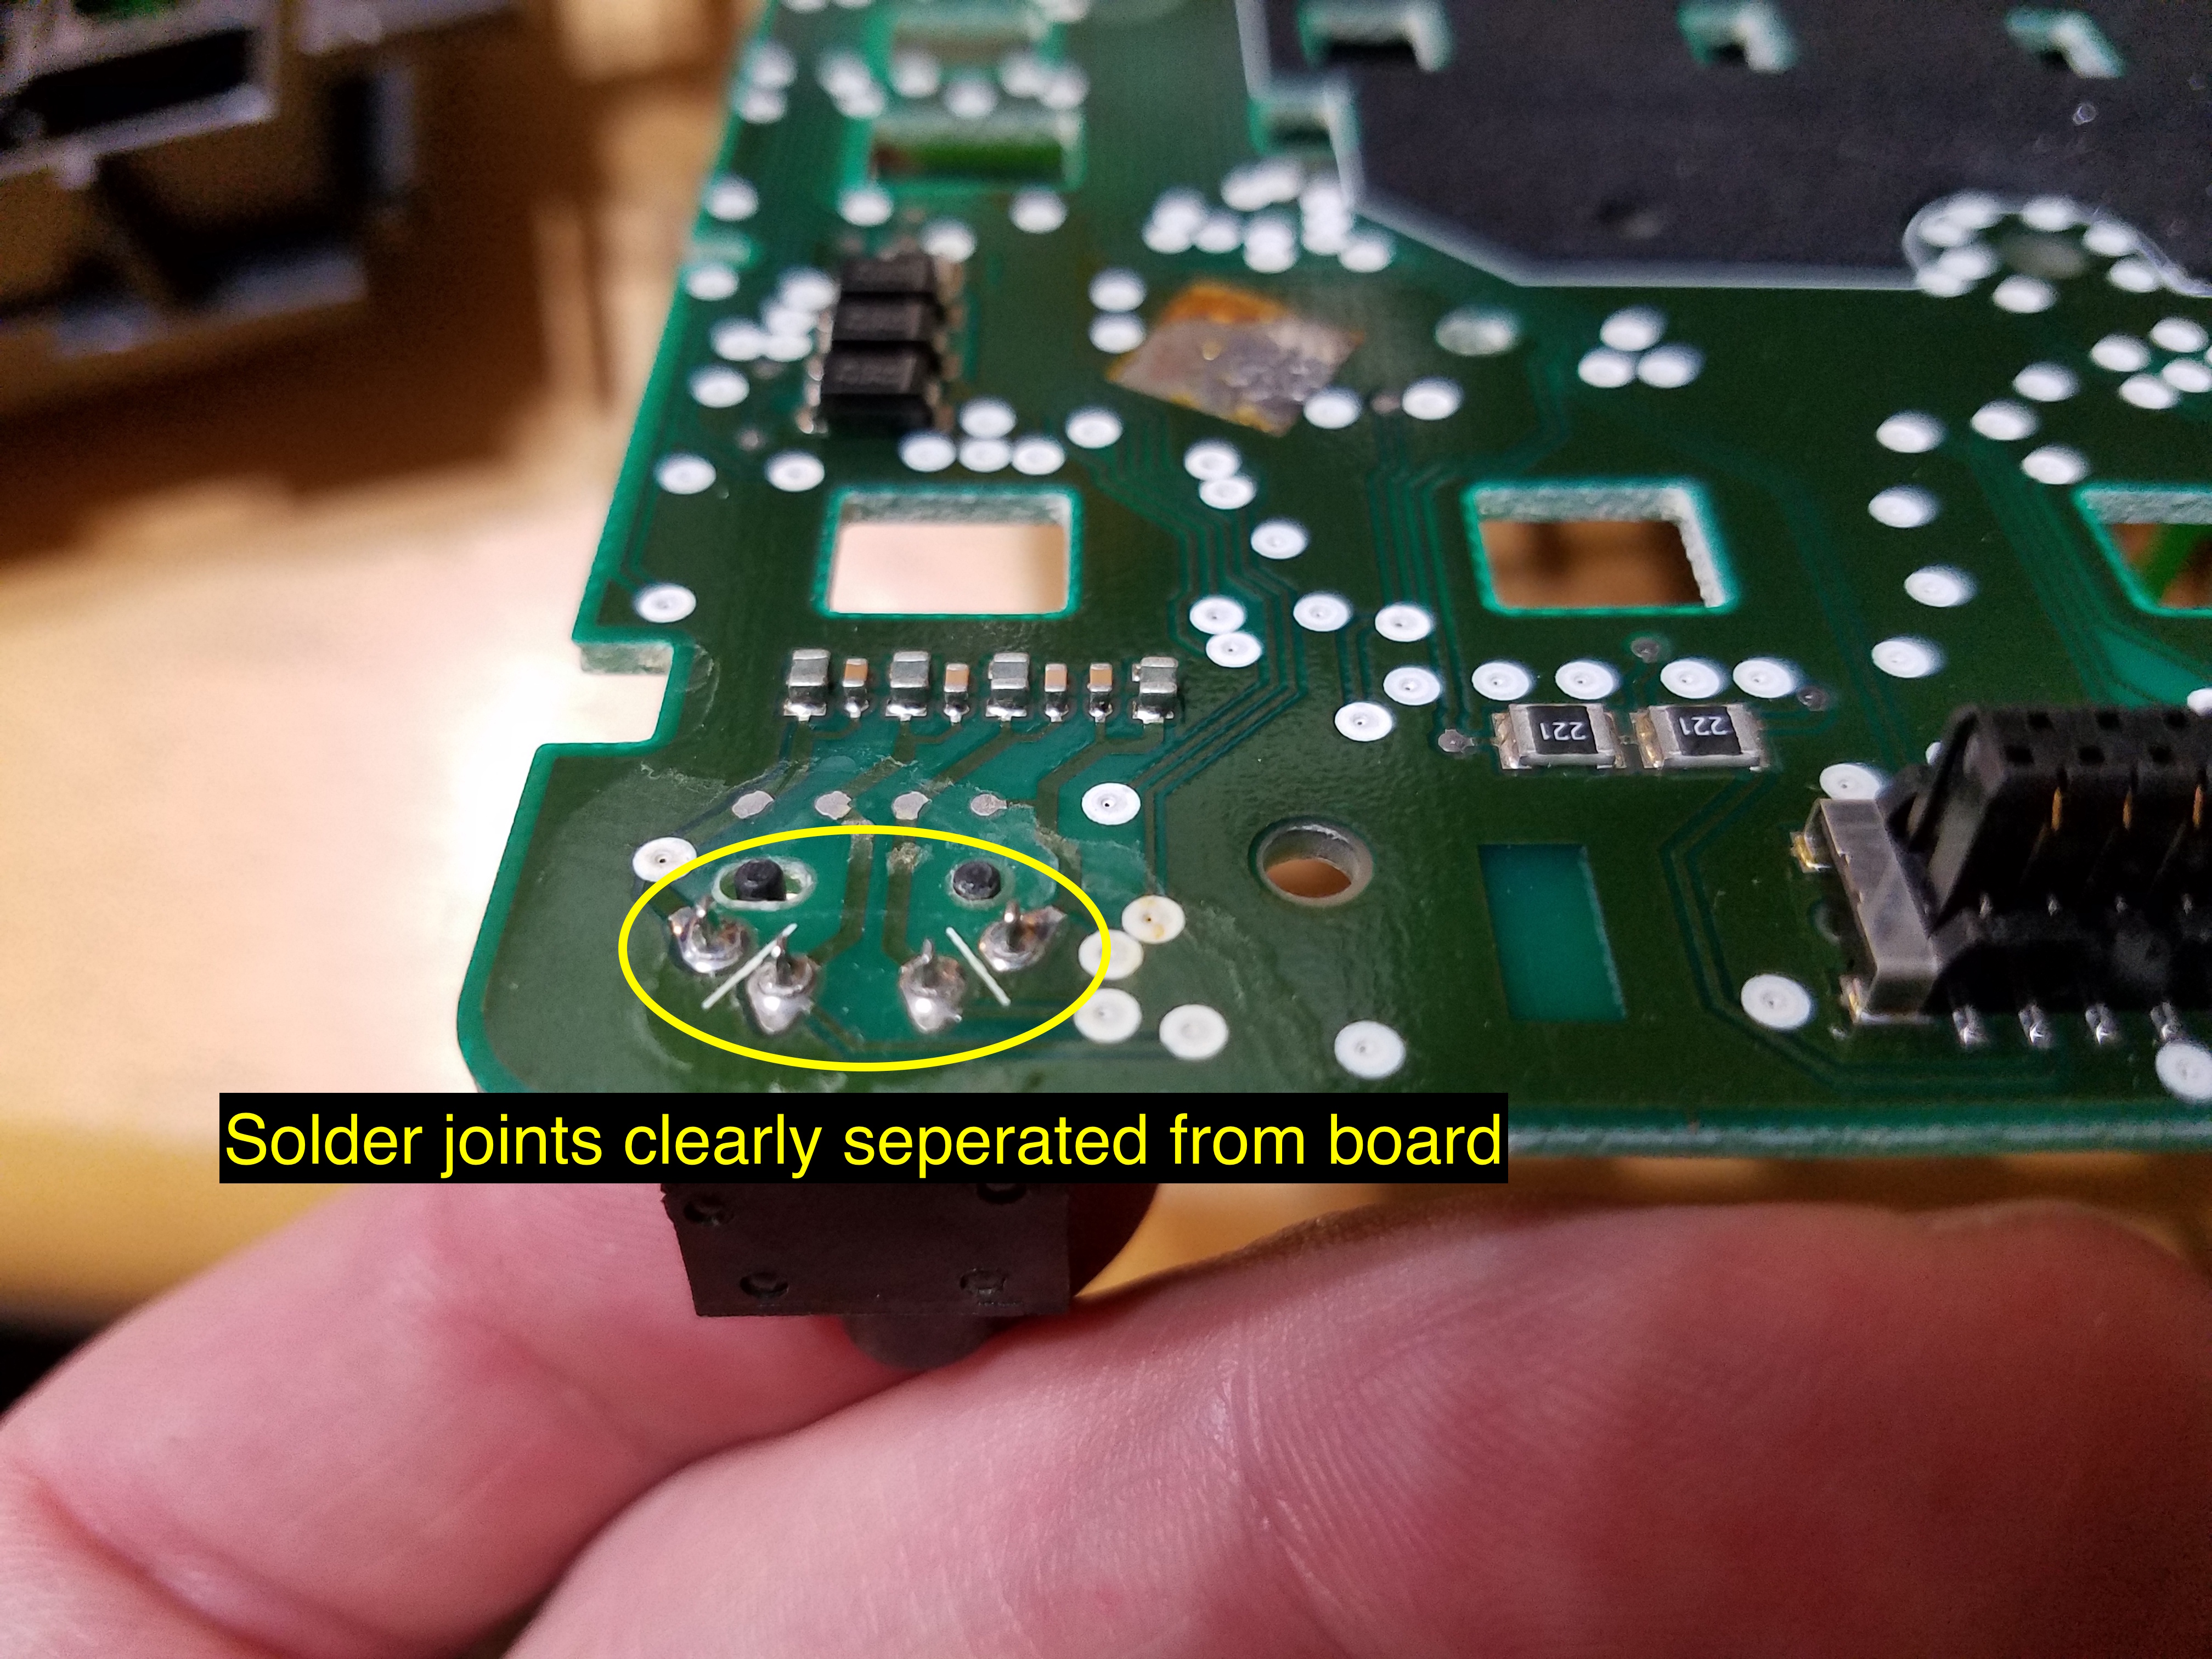
Now that you can see the pcb, you should be able to quickly locate where the aux jack is placed. In order to fix the loose jack, just heat up each pin with a soldering iron and then add a small amount of solder. If that is all you were wanting to do, then you're done. Put it all back together.
However, if you are willing to put in just a little bit more time and money, you can be rid of having to use the aux cord at all.
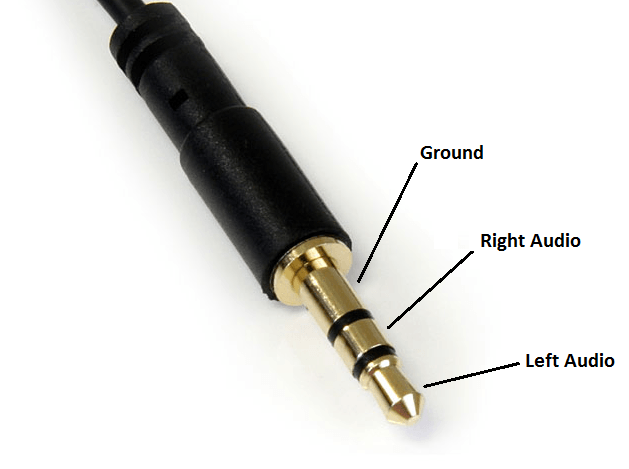
- Plug an aux cord into the jack and then use a multi-meter to figure out which part of the cord goes to which pin of the jack. Or if you're doing this to a Silverado, just look at the pictures.
- Cut one end of the aux cord off, and then solder its wires to the correct pins of the jack.
- The one pin of the jack that doesn't get a wire soldered to it is how the radio senses when an aux cord is plugged into the jack. When there is nothing in the jack, that pin is connected to the left channel pin. When you plug in the aux cord, the connection is opened and the radio automatically switches to the aux input. However, when there isn't anything in the jack, it will not let you manually switch to aux input because there isn't one detected. So you're going to need to scratch off one or more traces from the pcb to fool the radio into sensing there always being something plugged into the aux jack. (don't worry, you'll still be able to switch to fm/am/cd/ipod) I scratched off a trace on both sides of that pin just to be sure. (sorry my phone couldn't zoom in more without it being too blurry)
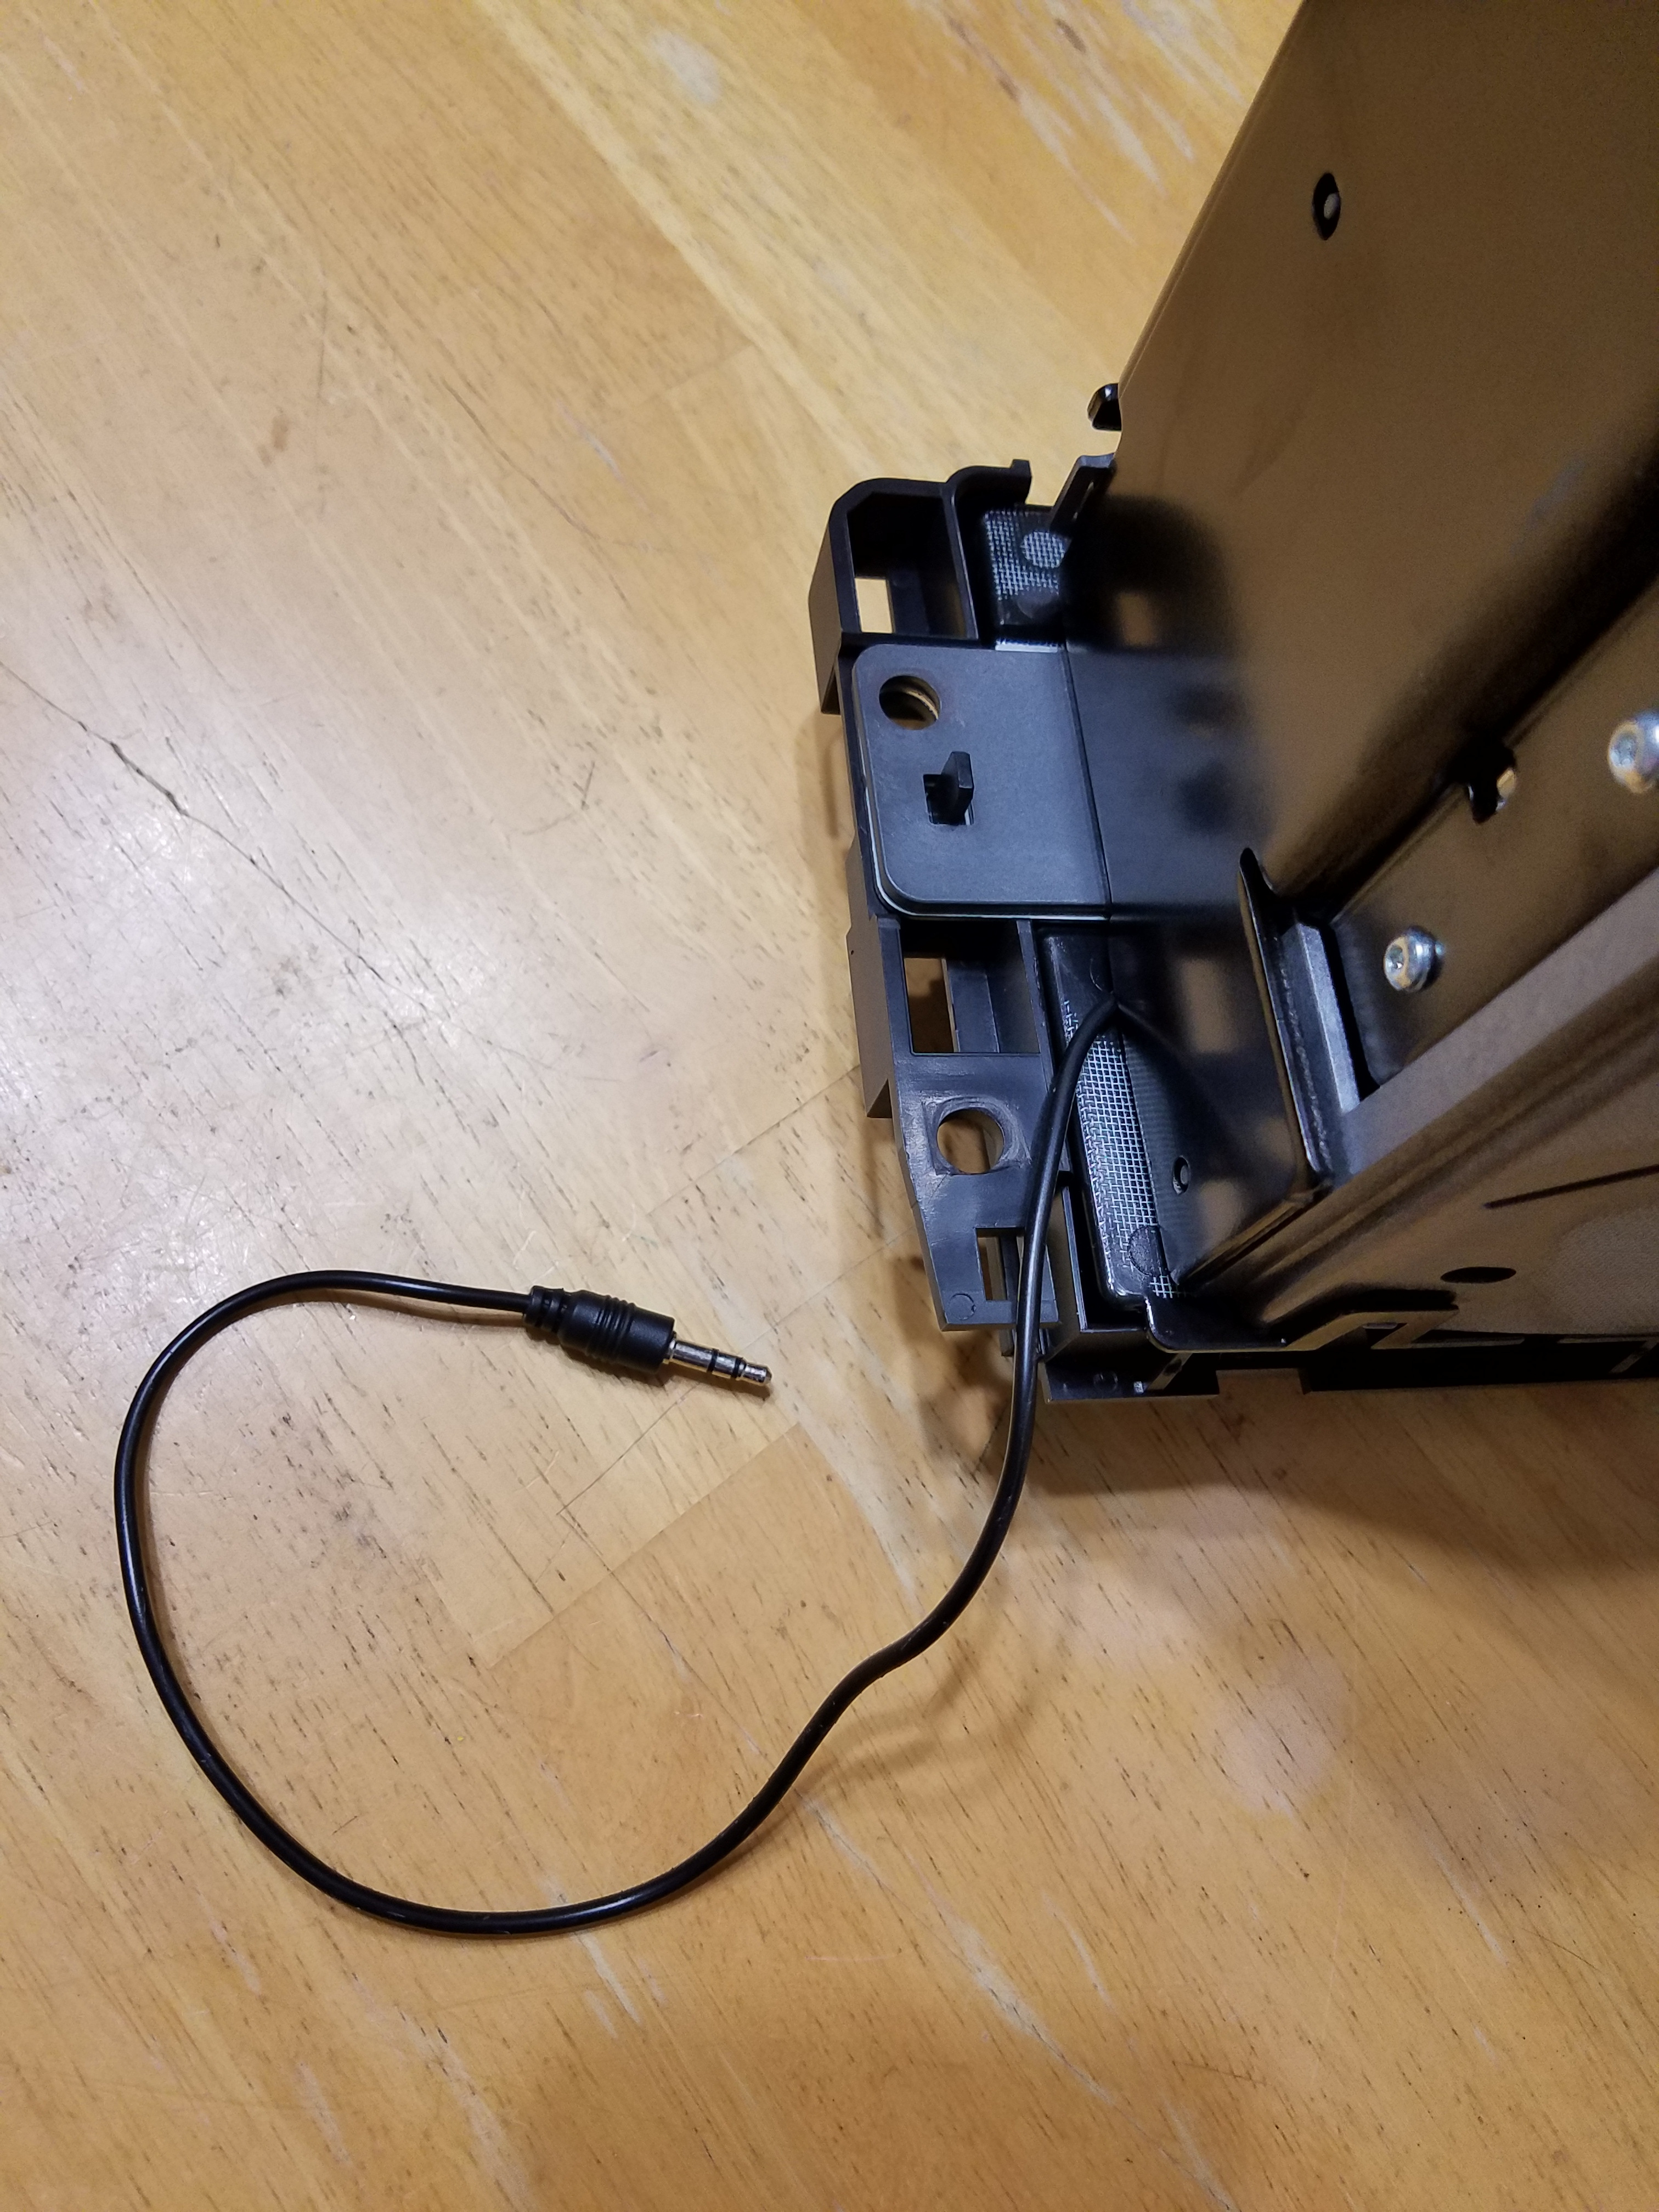
- When you start putting it all back together, wrap a loop of the new aux cord around something so when you're installing in the truck you aren't pulling on the solder joints themselves.
- Finally, snap the face plate back onto the rest of the radio, and leave the new aux cord dangling to the side.
Getting Power to Your Receiver
.jpeg)
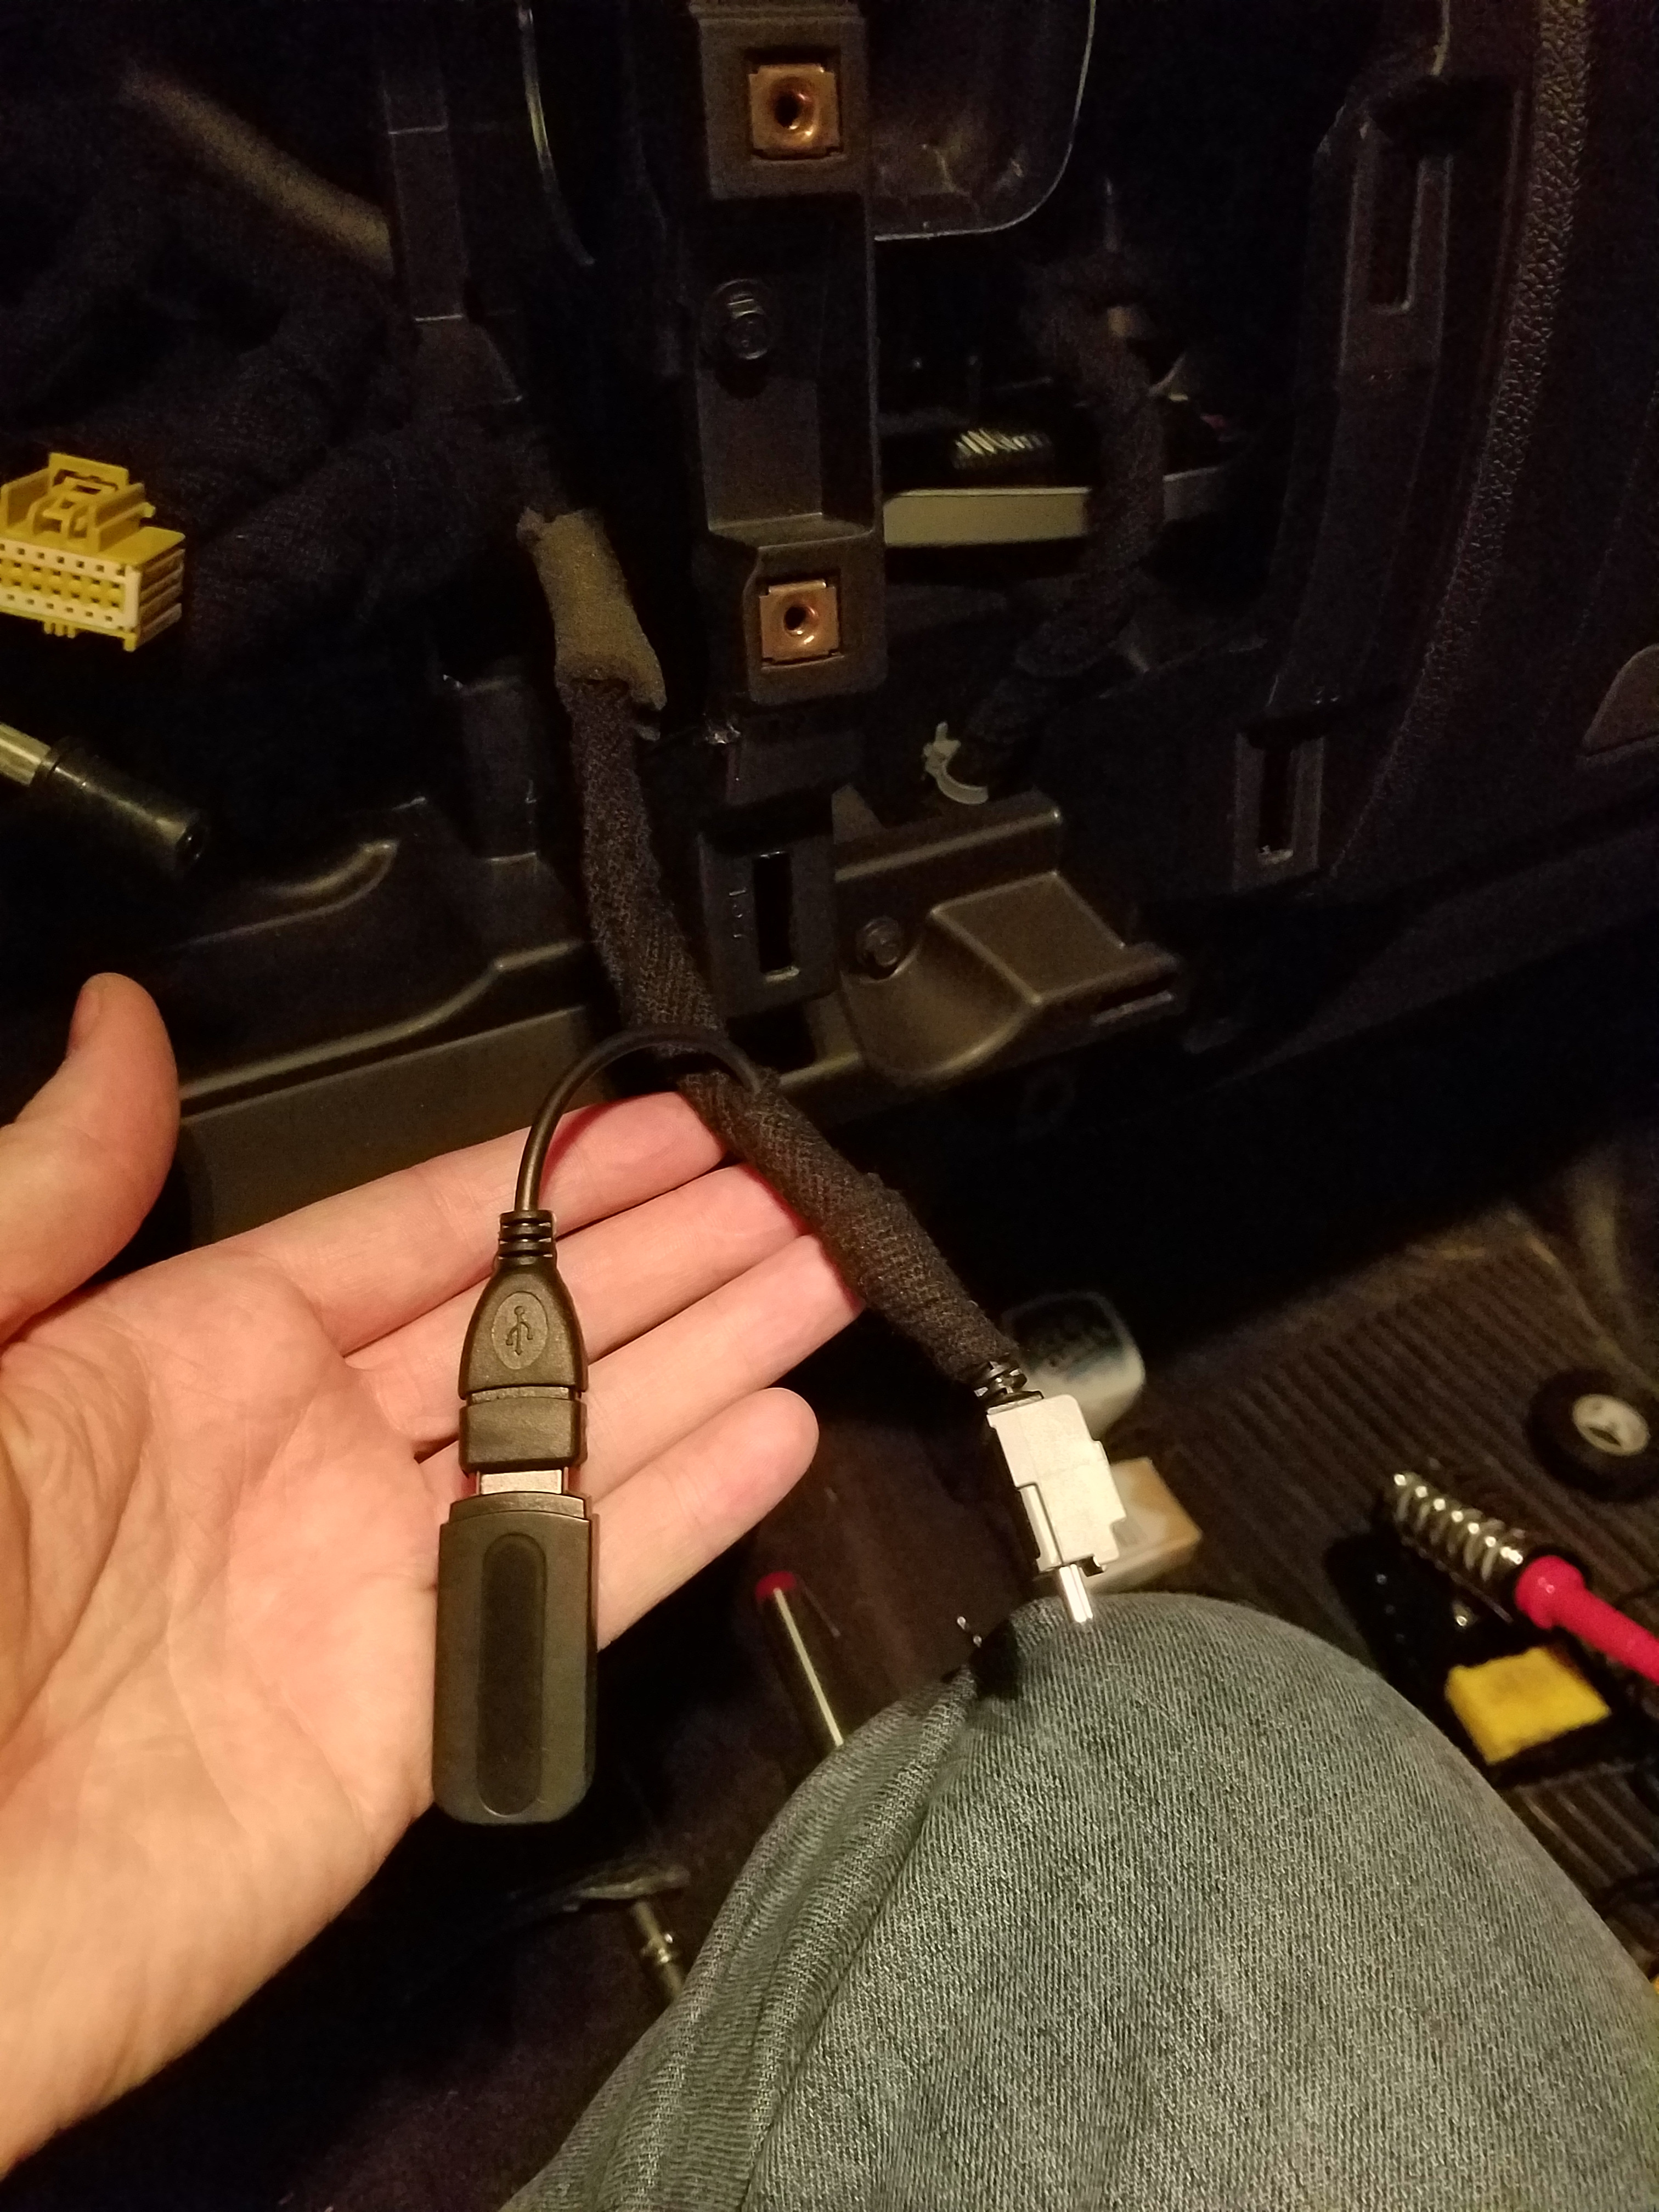
My truck has a USB port on the dash, so I just soldered the new female connector to the cable connected to that. In a USB cable, red wire is 5V and black wire is ground. The white and green data wires aren't needed for the receiver, so I cut them back.
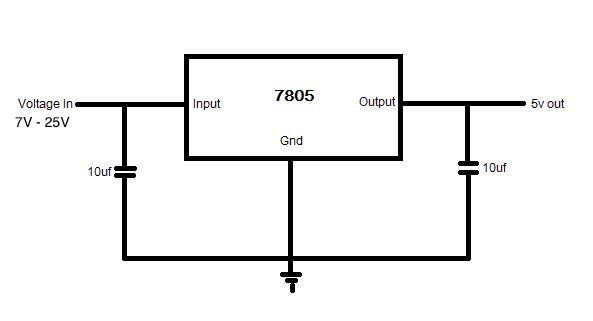
If your truck or car doesn't have a USB port, then you'll need to use your multi-meter to find one of the 12V wires. There is more than likely one going to the radio itself. Then tap into that wire and connect it to the input of a 7805 5V regulator. The capacitors on the input and output are to smooth out the voltages. You then connect the output to your new USB female connector.
Plug It All in and Test
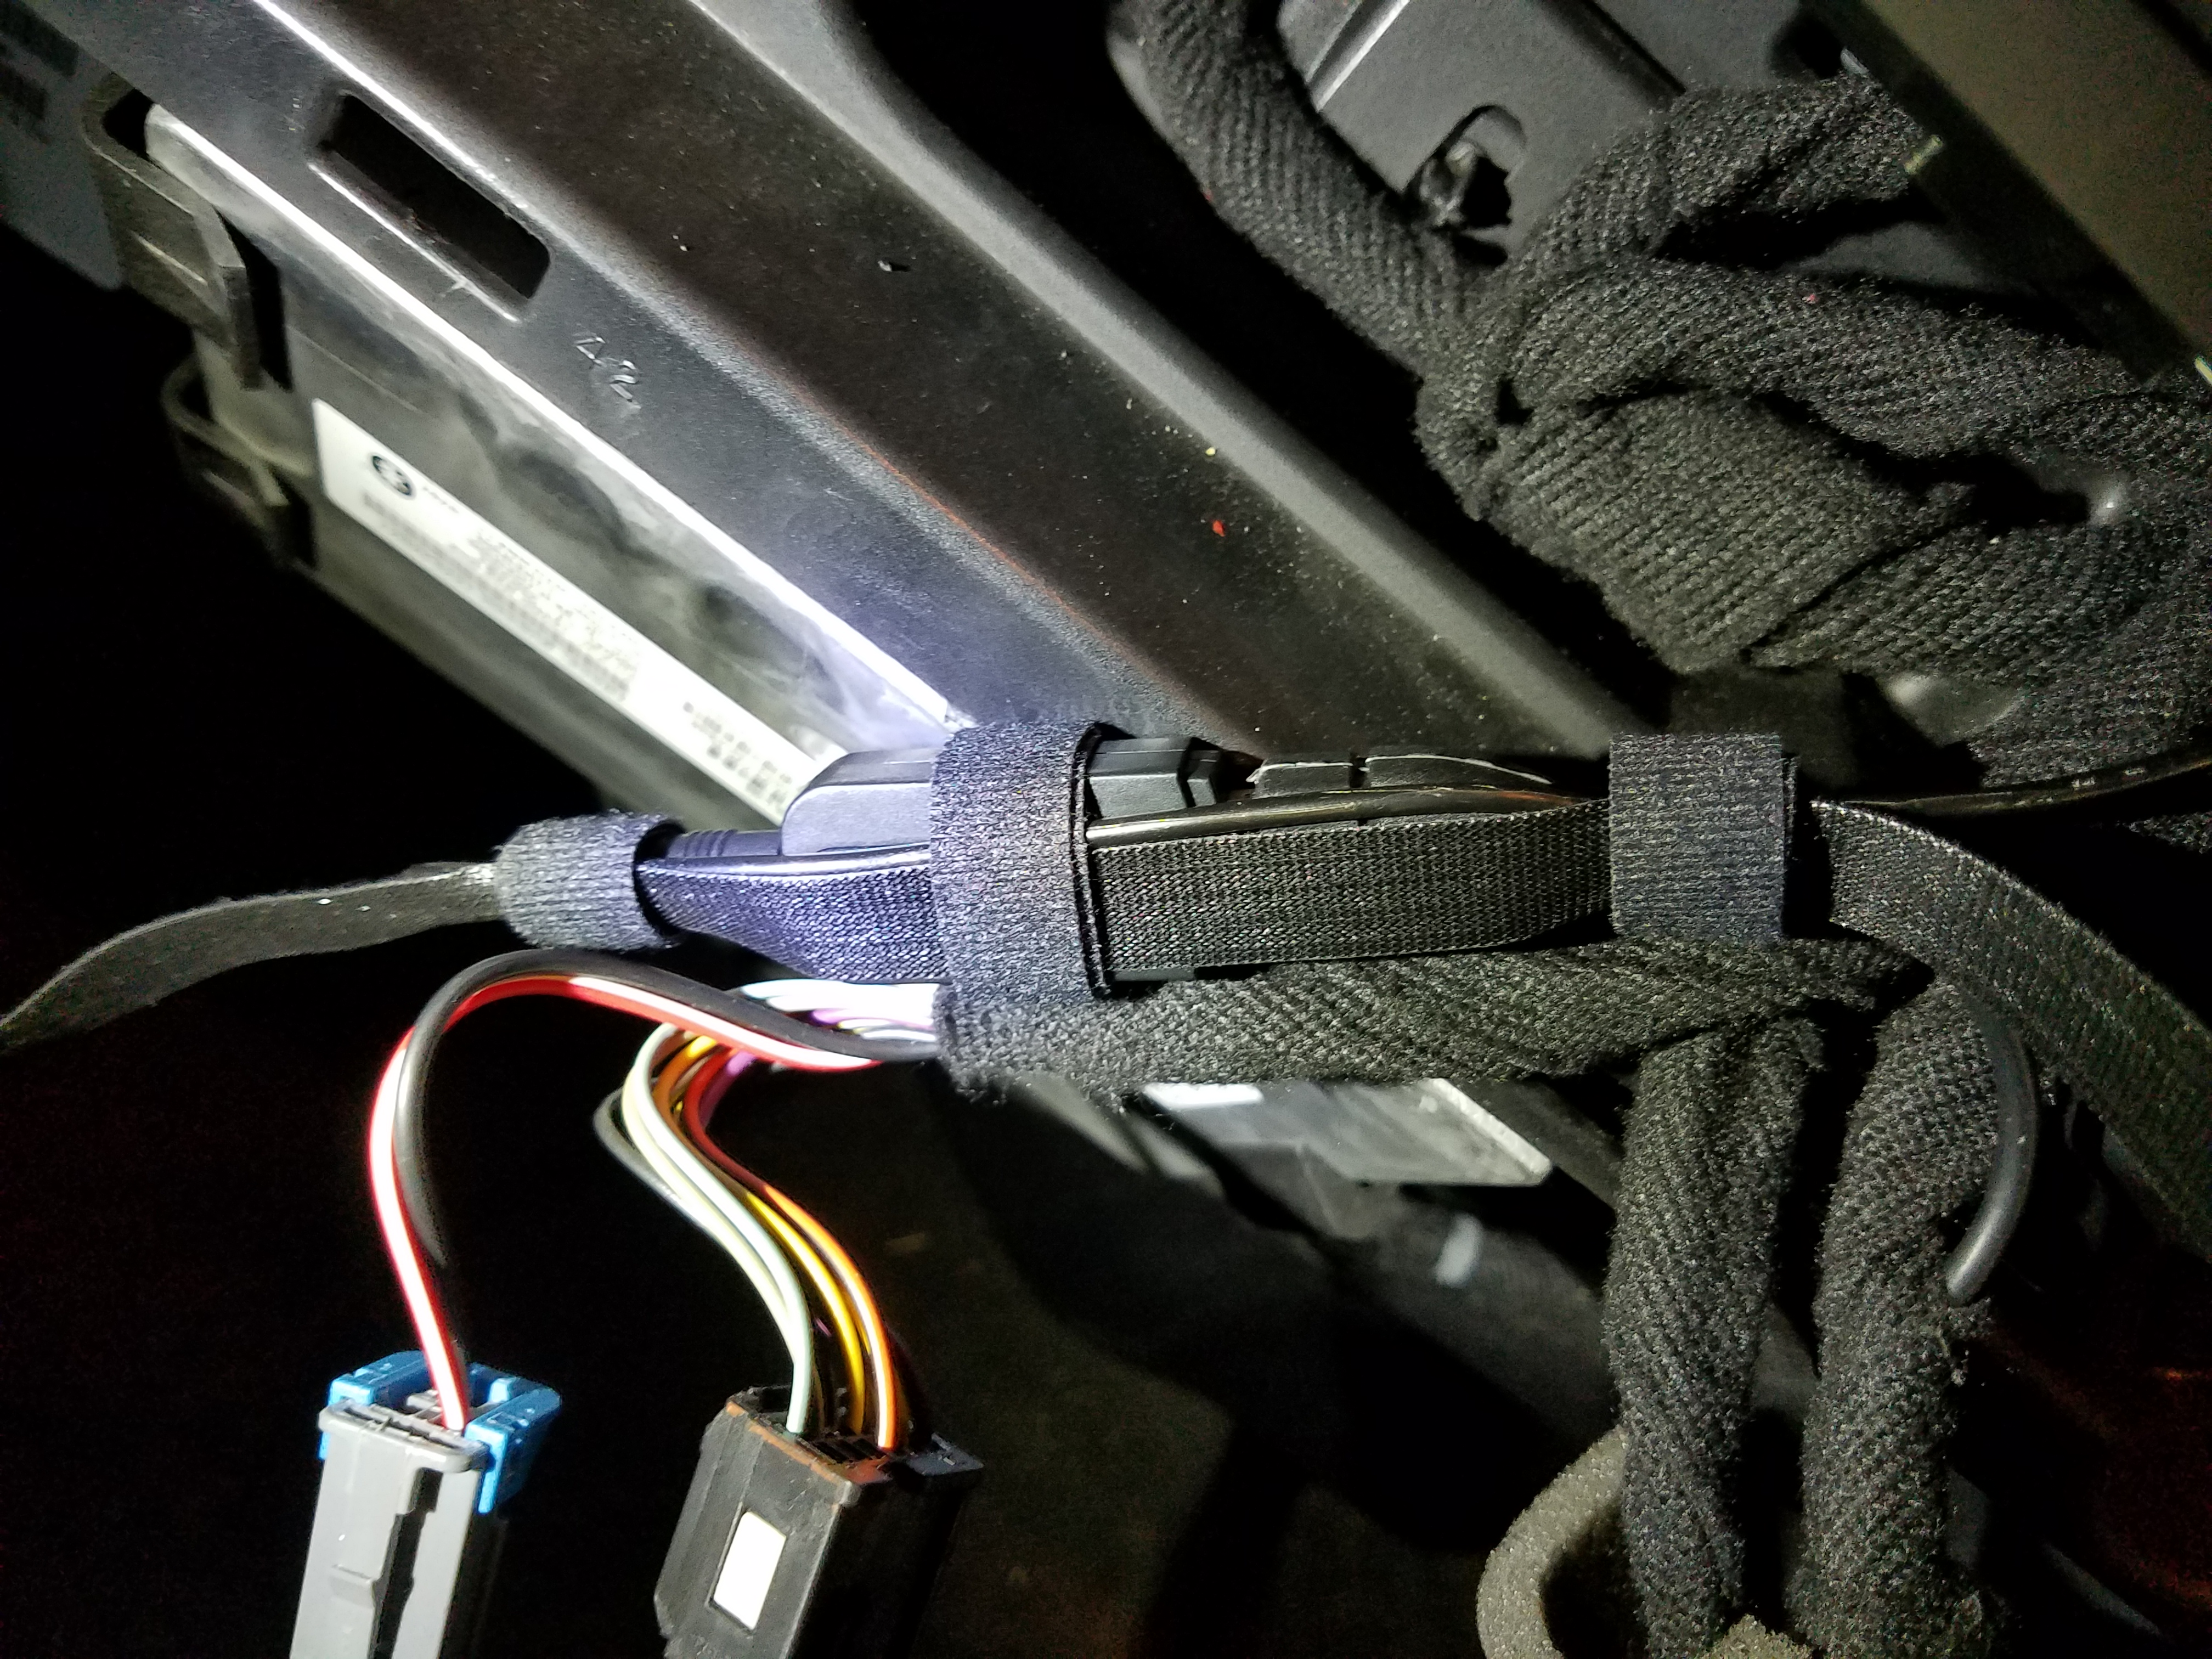
Once you're sure that it works properly, find a spot to stash it behind the dash. This shouldn't be hard since it's literally the size of a thumb drive. Then begin putting all of the dash panels back on and you're done! You no longer need to use an aux cord dangling from your radio in order to listen to your music.