Rendering Realistic Machined Parts in Fusion 360 (Basic)
by Anne Pauley in Design > Digital Graphics
4502 Views, 13 Favorites, 0 Comments
Rendering Realistic Machined Parts in Fusion 360 (Basic)

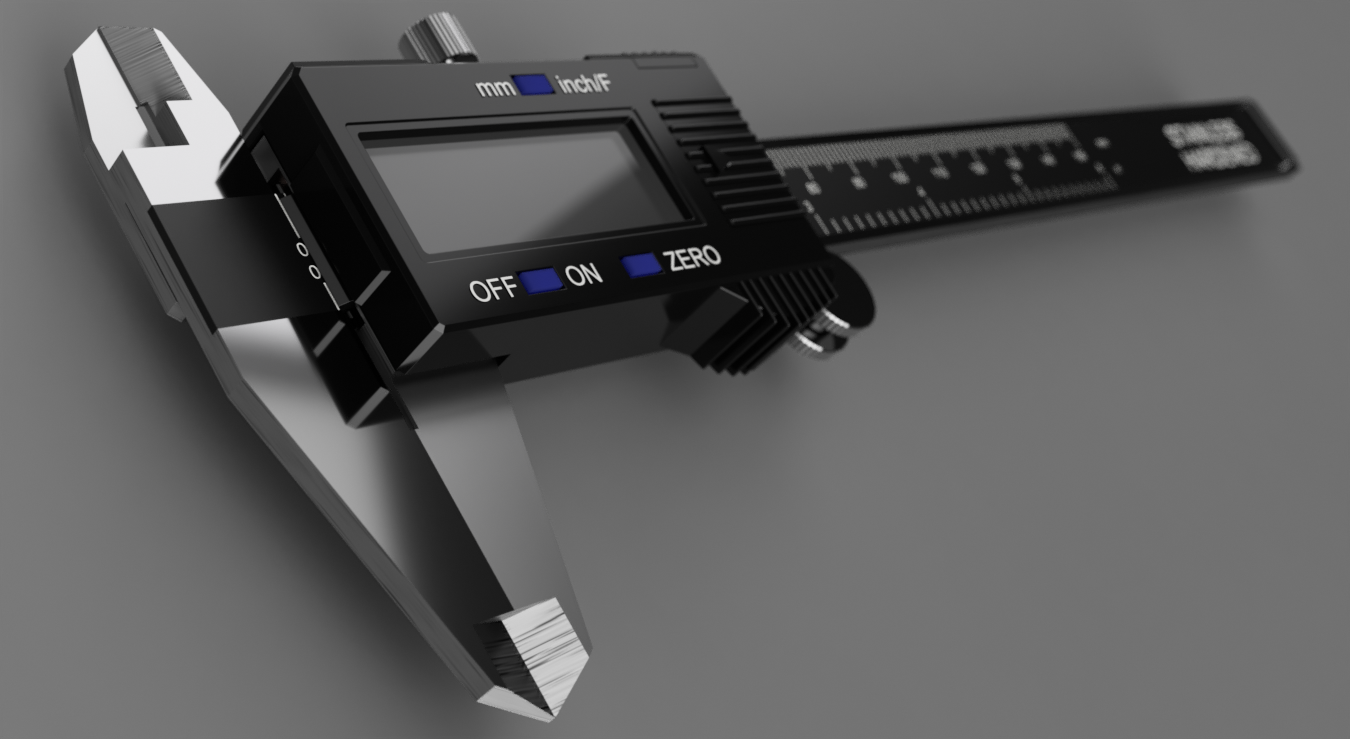
Learn how to strategically apply appearances in the Fusion 360 rendering environment to create more realistic part renders!
Open Your Fusion 360 Model
Open your part in Fusion 360! This can either be a part that you modeled yourself, or a pre-existing model.
Sources for modeled parts:
1. Fusion 360 Example Models:
Example model files can be found in the "Samples" section at the bottom of the Data Panel
2. Fusion 360 Gallery:
https://gallery.autodesk.com/fusion360/projects
3. Other CAD model sites (GrabCAD, Thingiverse, ect.)
To open downloaded files in Fusion 360: File > New Design From File
Switch to Rendering Environment
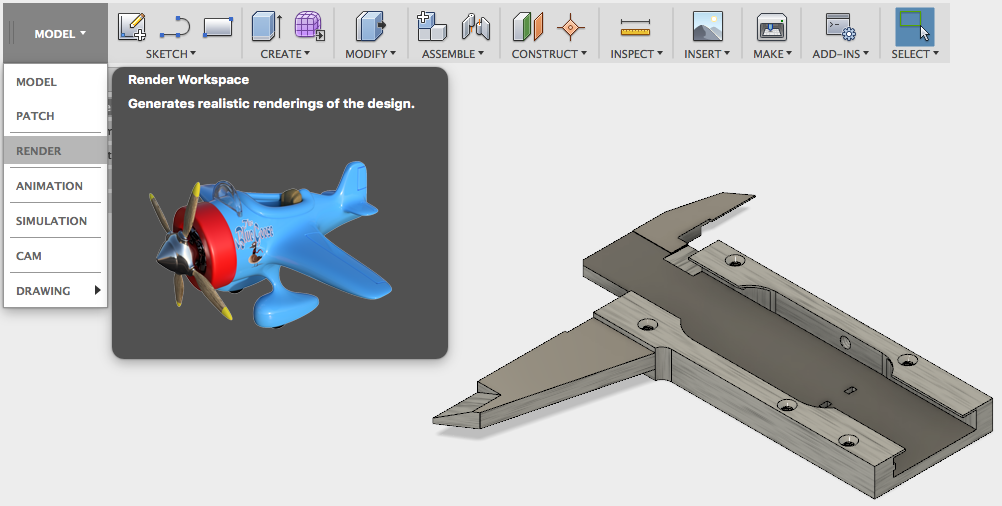
Your file will automatically open in the modeling environment, so switch to the "Rendering" environment in the upper left menu as shown.
Parts can be positioned by dragging the viewcube in the upper right corner or by using the positioning toolbar in the bottom middle of the screen.
Appearances
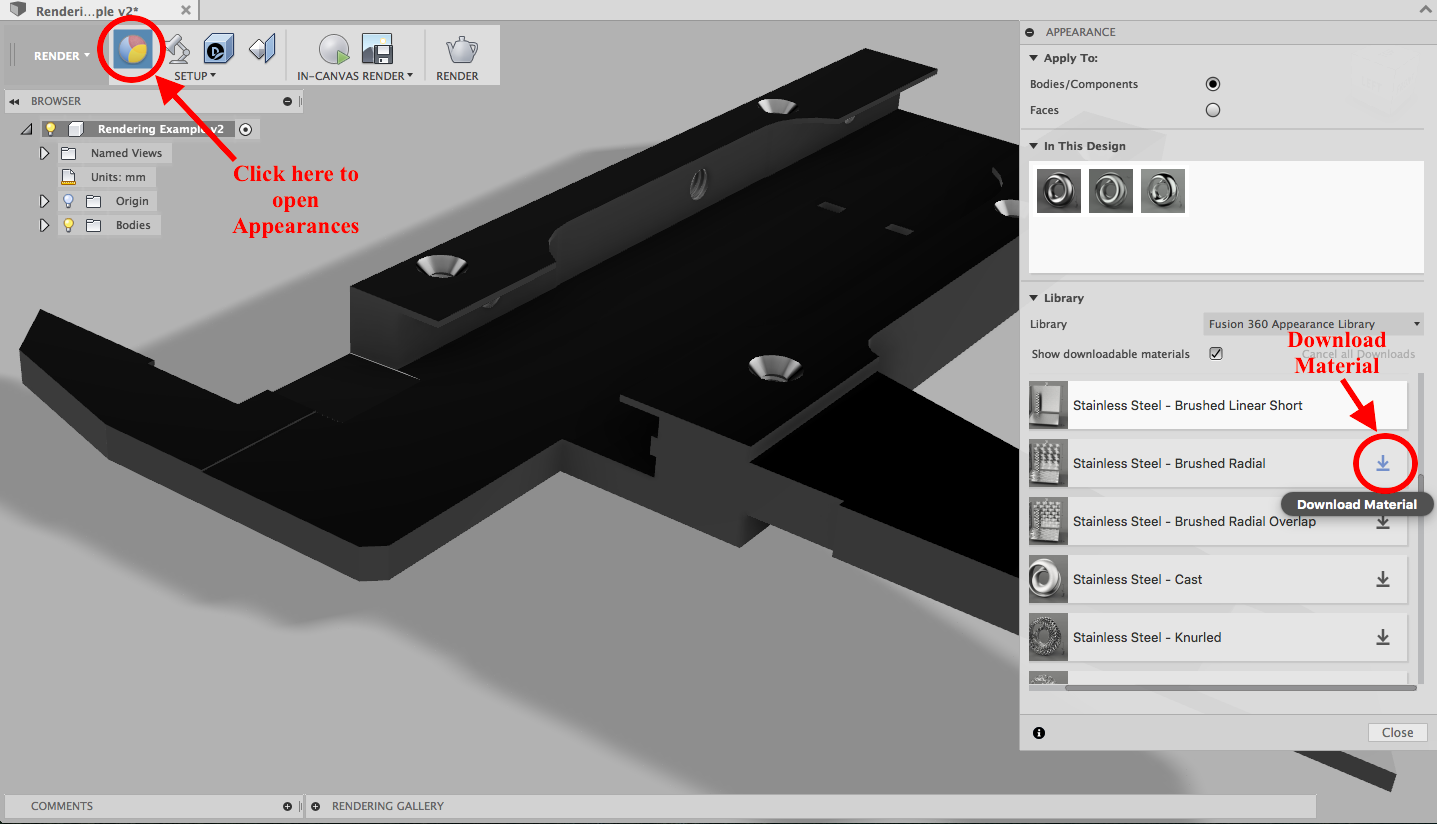
Fusion 360 toolbars are designed to show the order of commands from left to right, so first start by clicking the left Appearances button.
For this project, the main material of choice was stainless steel. The appearances used here can be found in Metal > Stainless.
If the appearances for Polished, Satin, Brushed Linear Long, Brushed Linear Short, and Brushed Radial are not yet downloaded, click the "Download Material" button for each.
Assign Appearances
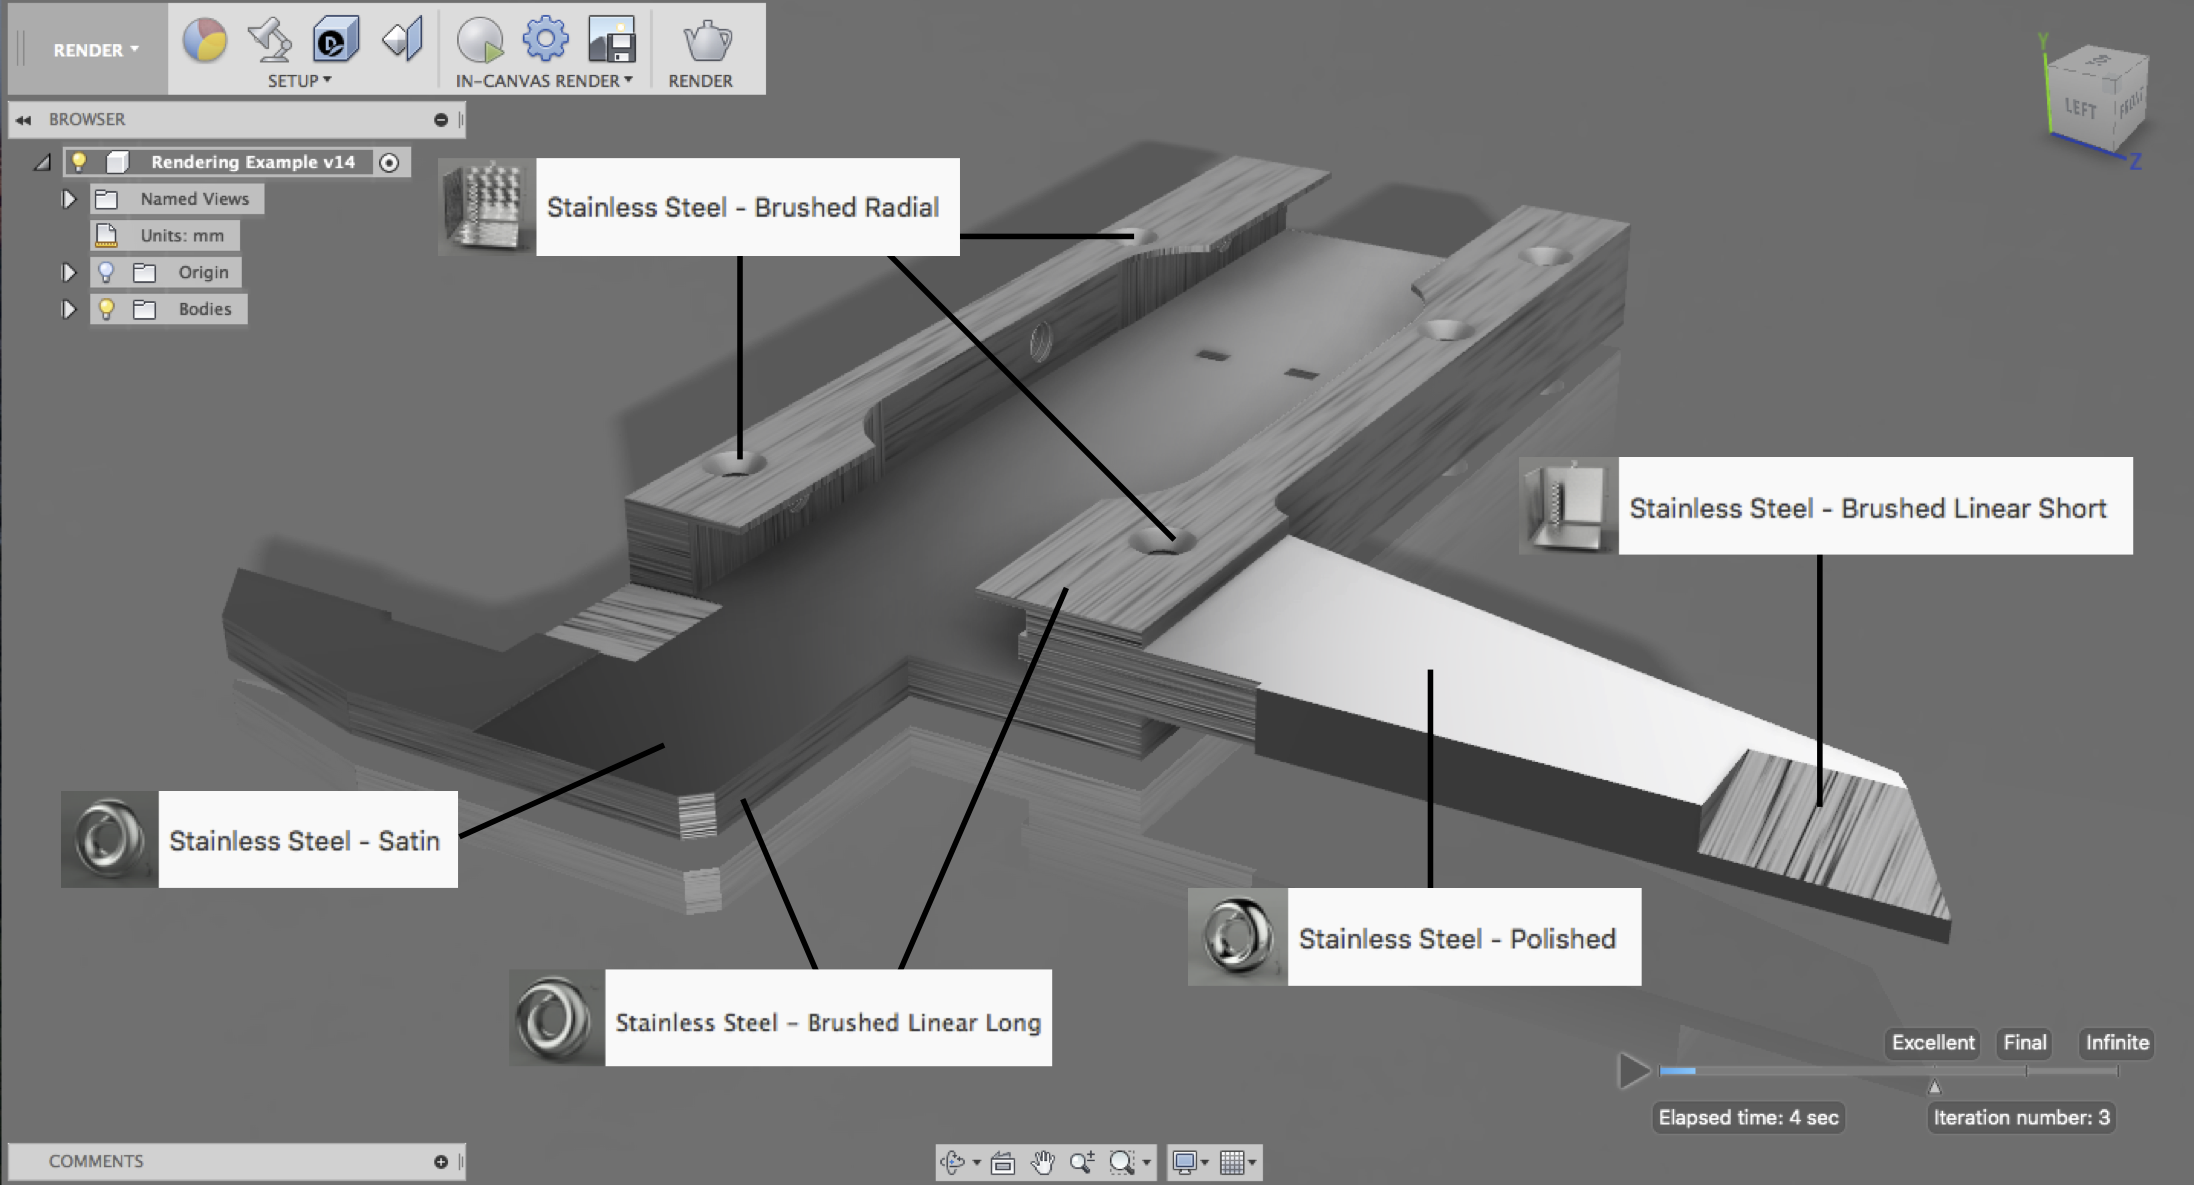
Drag appearances to bodies or faces on part(s)
Switch between bodies and faces at the top of the Appearances window
Using different surface finishes to make your render more realistic:
Polished:
Use for polished flat faces
Satin:
Use for flat faces with a brushed finish
Brushed Linear Long:
Use for long or wide unpolished surfaces that have been cut, ground, or filed
Brushed Linear Short:
Use for short narrow unpolished surfaces that have been cut or ground (ex: ground angles
Brushed Radial:
Use for round surfaces (ex: countersunk holes)
Scene Settings
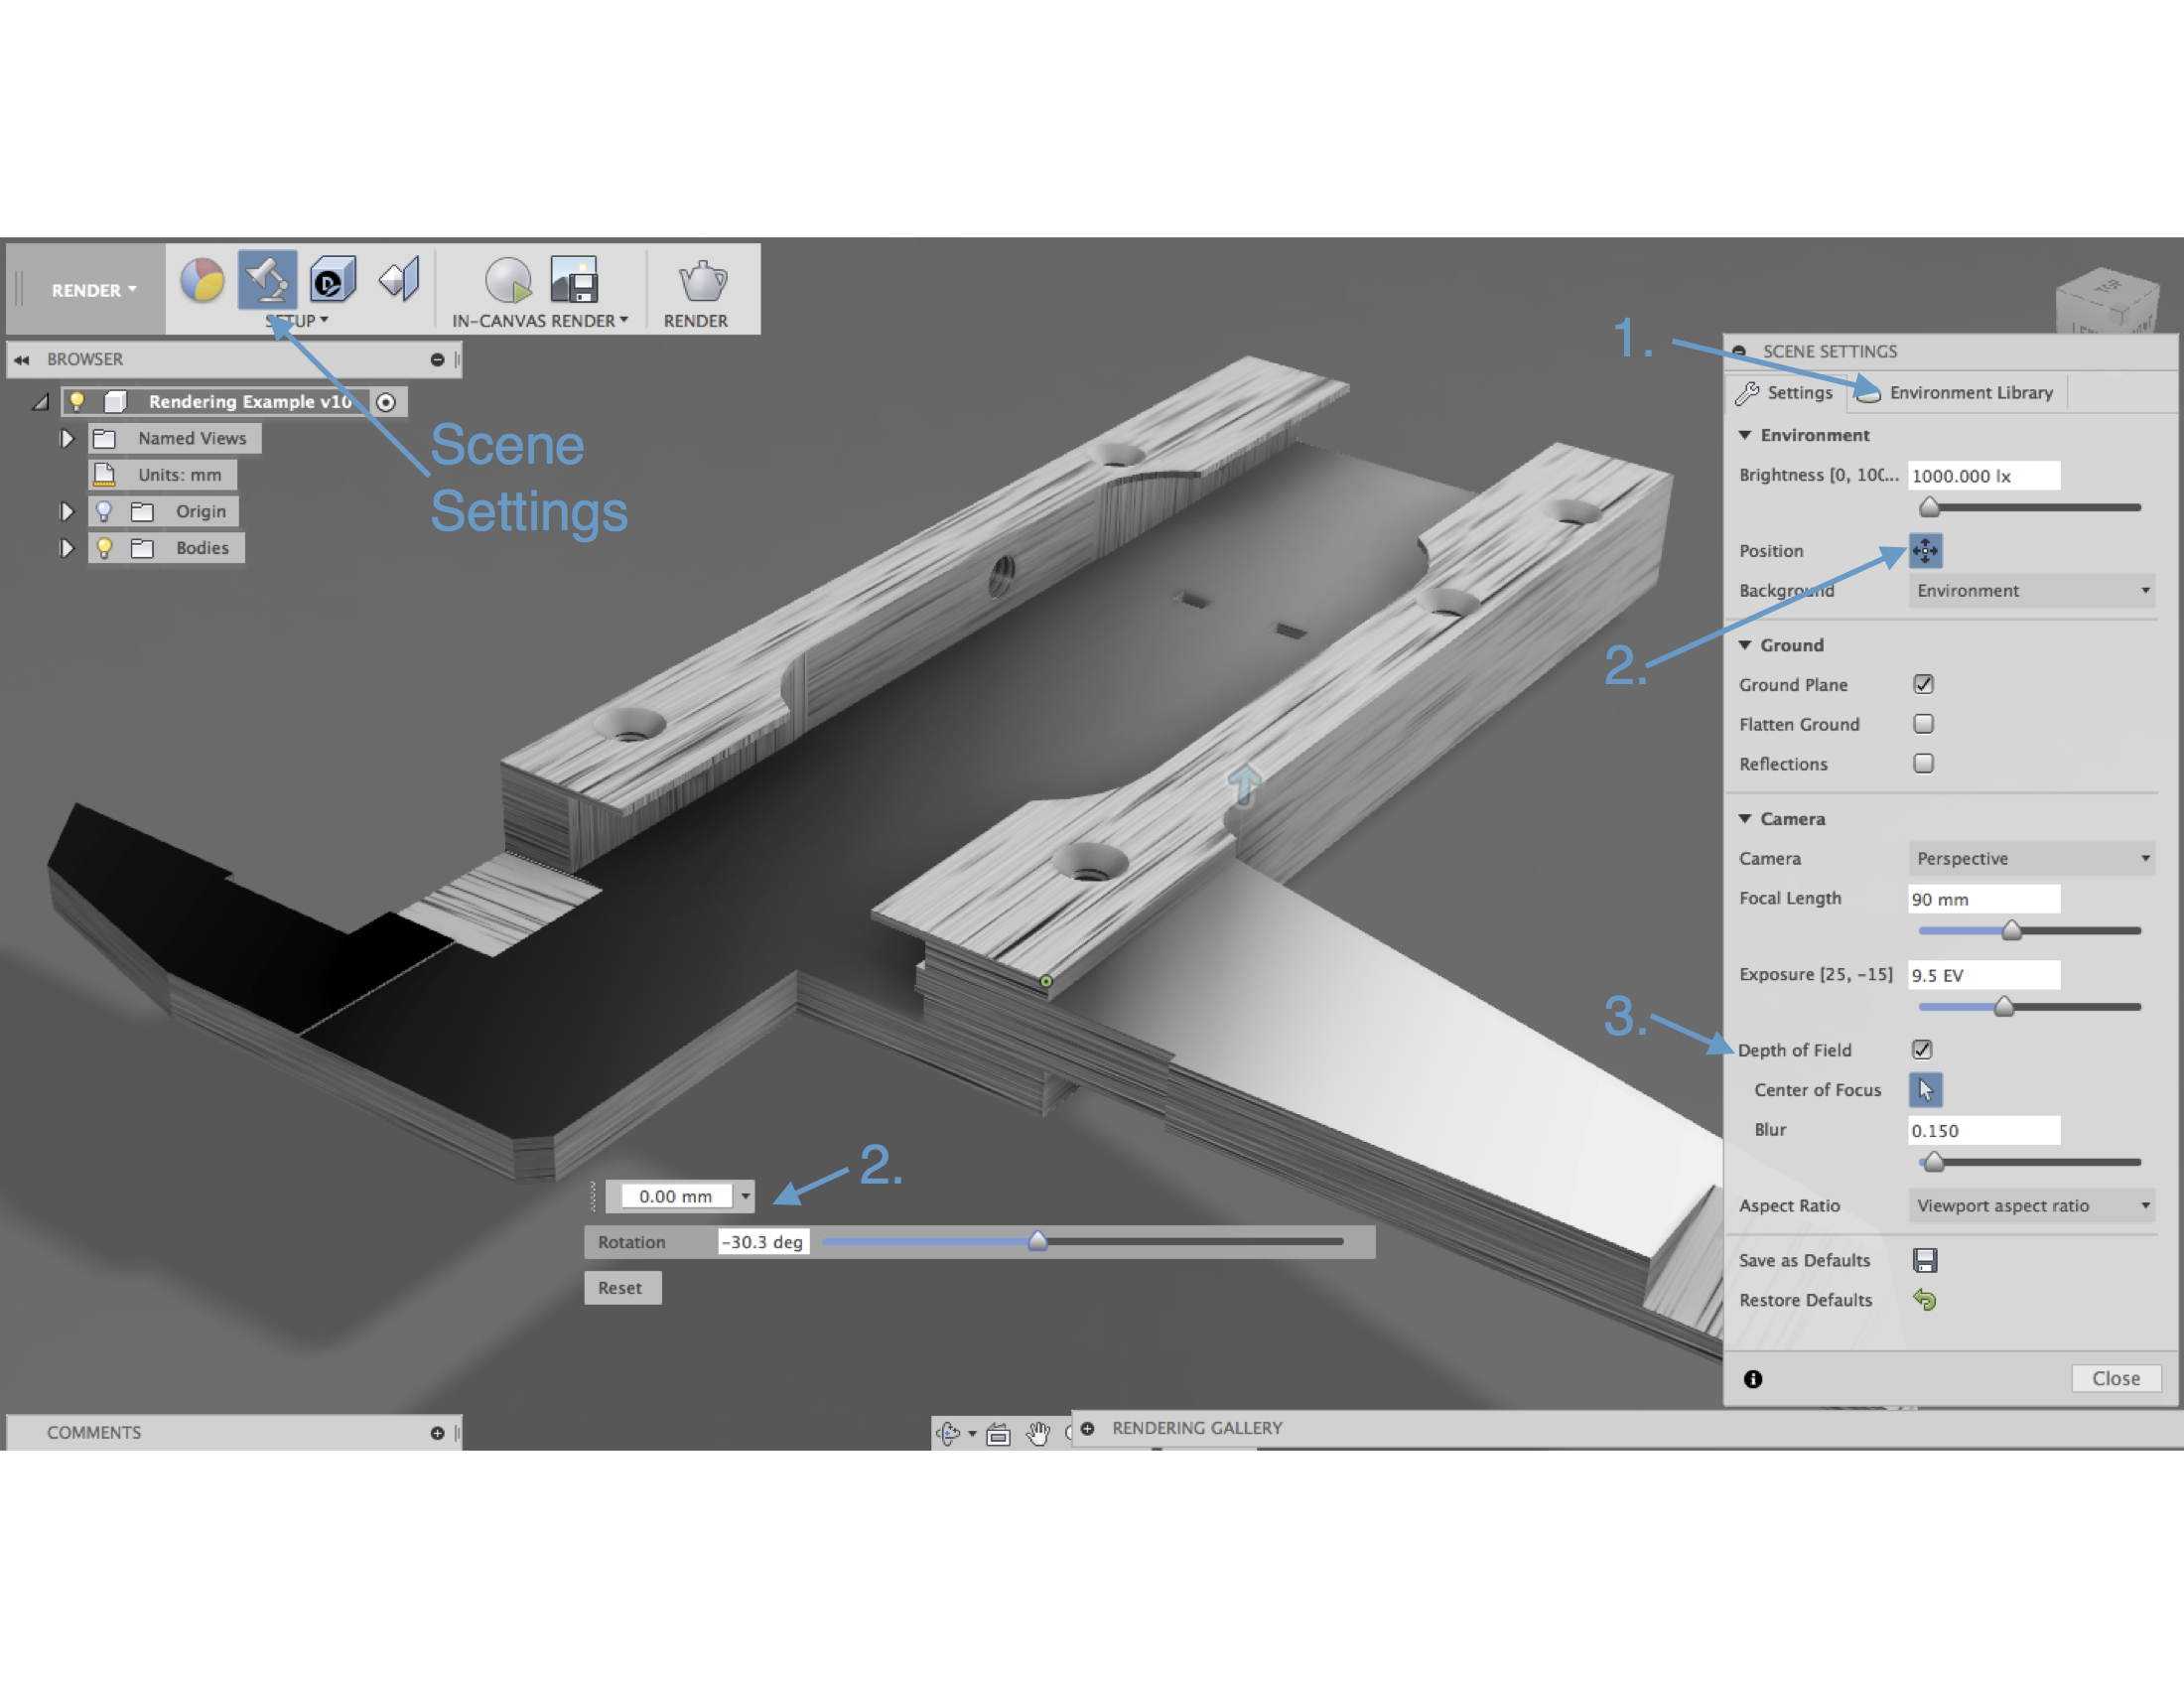
In the top toolbar, click the lamp icon to the right of the Appearances button to open the Scene Settings.
1. Environment: Select and environment from the top environment tab and drag it into the main screen
2. Environment Position: Clicking the Position button will open the environment positioning controls. Experiment to find the best lighting for your part, controlling the ground level and angle. For metal parts, the best lighting is typically falls across the flat edges from the side to get the most contrast between surfaces.
3. Depth of Field: Check "Depth of Field" to create a focal point in the render and set focus point by moving the bright green dot that will appear on your part. Adjust the amount of blur with the slider... a setting of .150-.200 is typically a good starting point. Note that this feature will only affect the final render and not be shown in an in-canvas render.
Optional: Recommended to stay at default for the first render and adjust these settings later if desired
Create reflections by checking the "Reflections" box... this will show the reflection of the part on the ground plane.
Change environment brightness using the slider at the top of the window.
Experiment with changing Focal Length and Exposure
Render
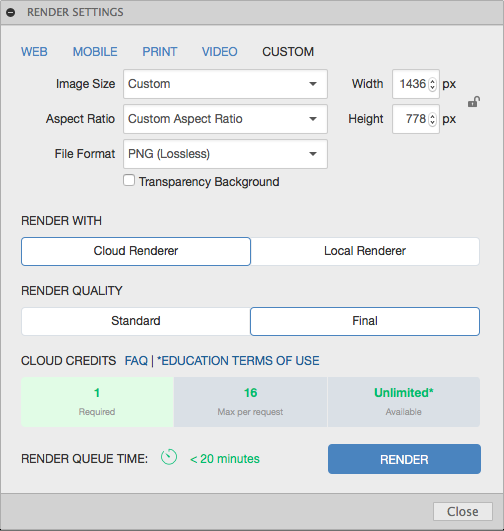
Click the "Render" coffeepot button on the top toolbar
Sizing: Set the desired aspect ratio and, file format, and pixel resolution. In Fusion 360, there is the option to send your render to the cloud as long as there is an internet connection available. This is recommended because it does not use your computer processor.
Transparency Background: This will remove the background from your render, leaving only the rendered part visible.
When to use Local Rendering: Local rendering is best for when there is no internet connection or when running a render at extremely high resolutions that use too many cloud credits.
Recommendation: After completing the previous steps, run one render at the default settings to get a better idea of what settings you may want to modify before running a higher resolution render that will take longer to process.
Congratulations! You have finished your rendered metal part!