Remote Robot Using Android
by sfeelectronics in Circuits > Robots
2670 Views, 28 Favorites, 0 Comments
Remote Robot Using Android
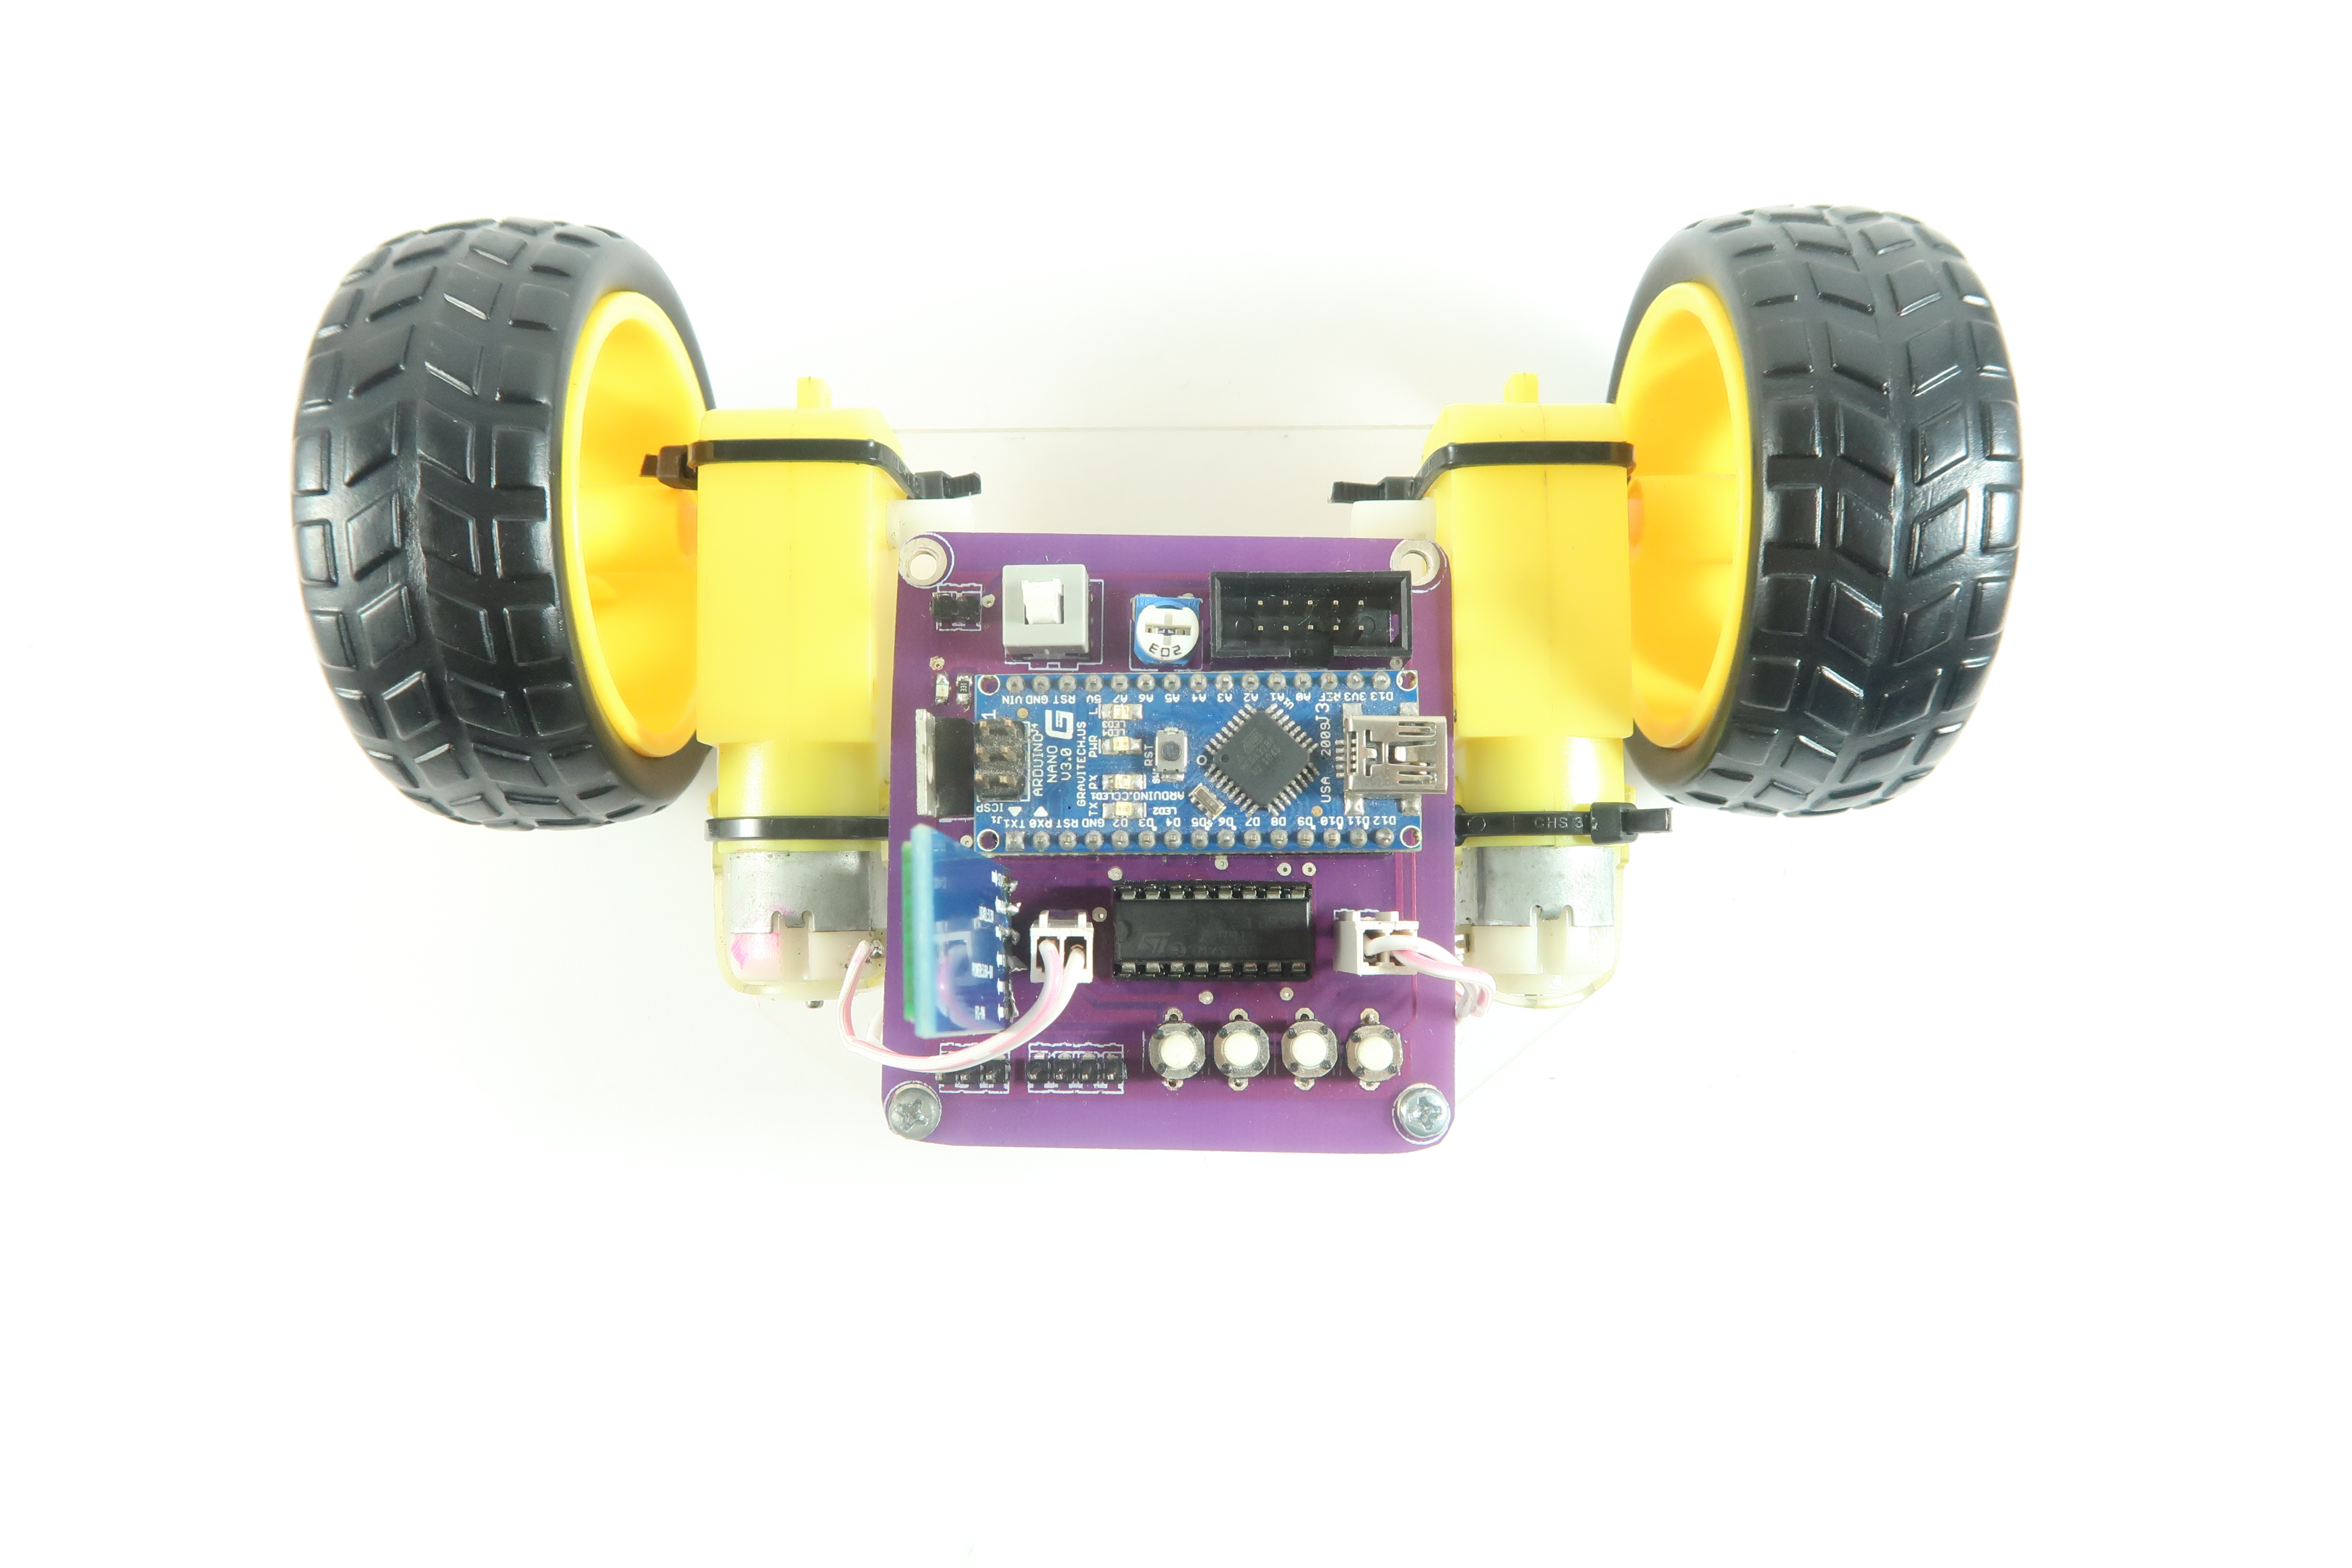

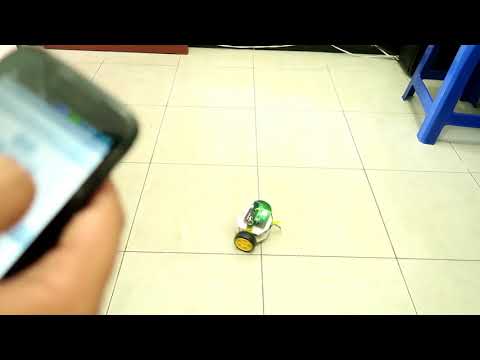
In this tutorial, we will share a tutorial about robotics combined with smartphones, which is how to control the robot by using the smartphone via Bluetooth. Smartphones are installed with applications to transmit data from smartphone to robot. Then the robot will read the commands from the HC-05 Bluetooth Module. The commands used are forward, backward, rotate left, turn right and stop.
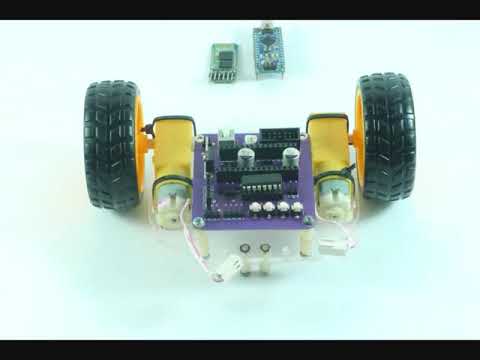
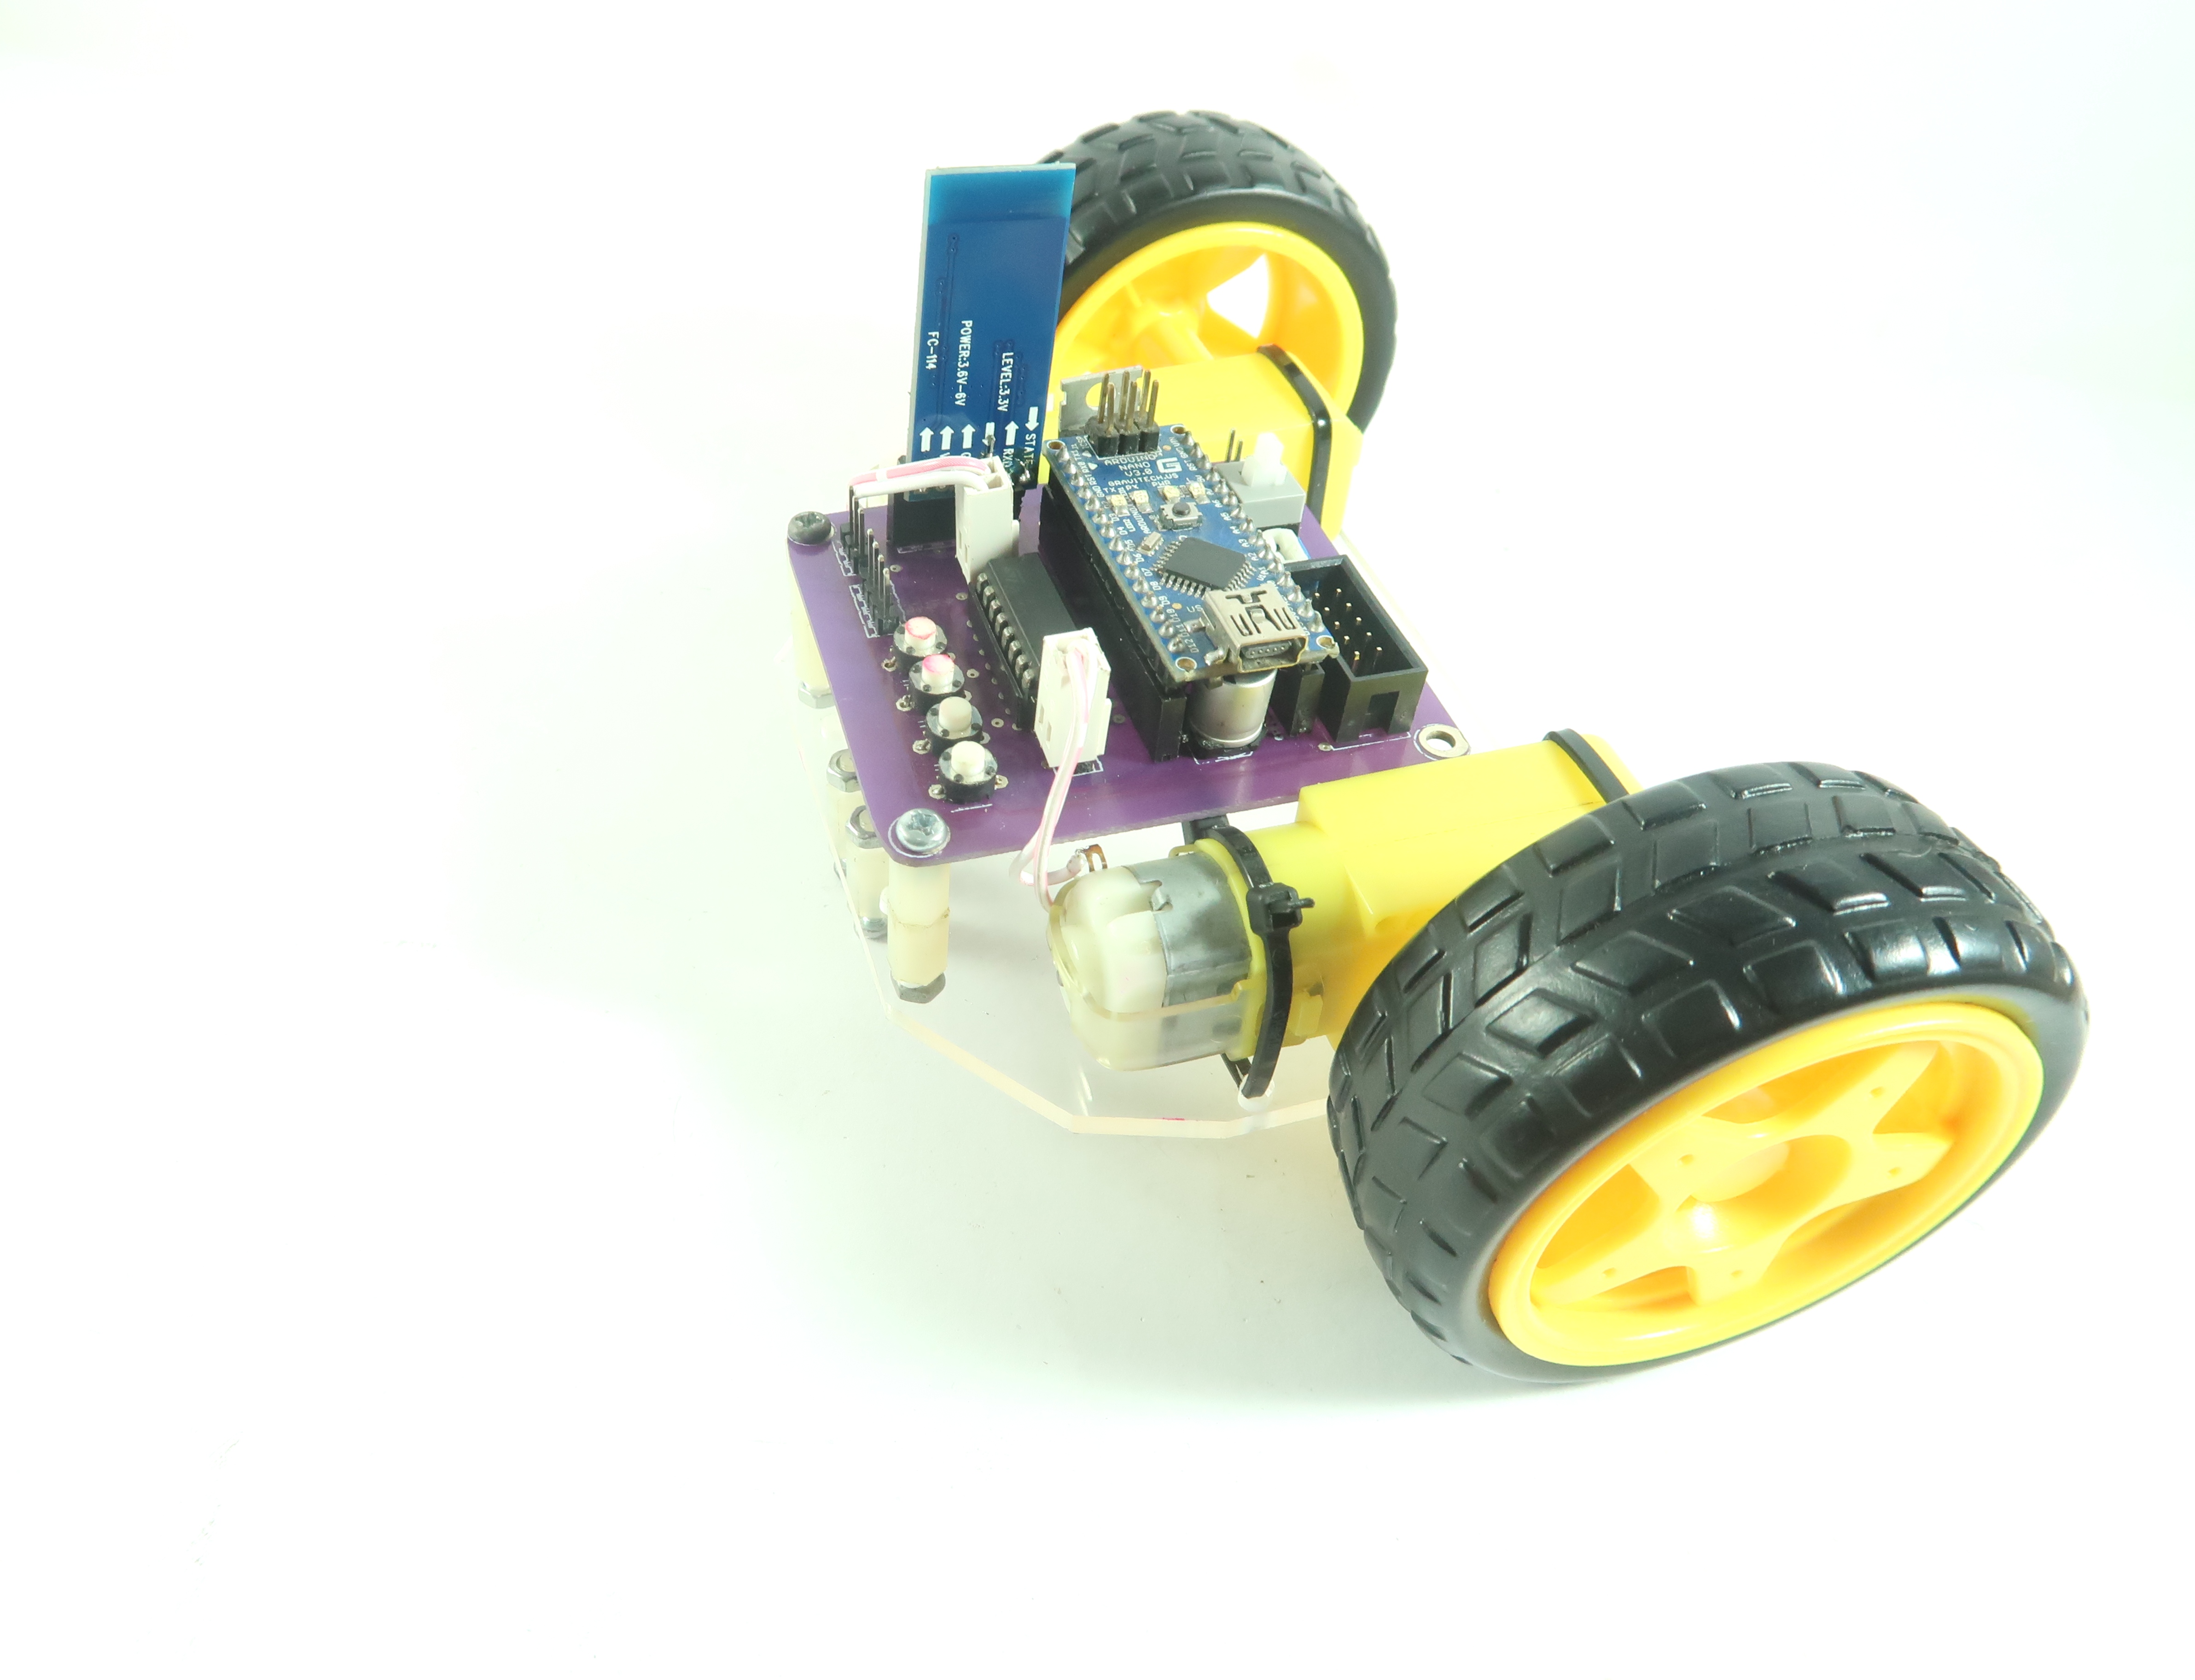
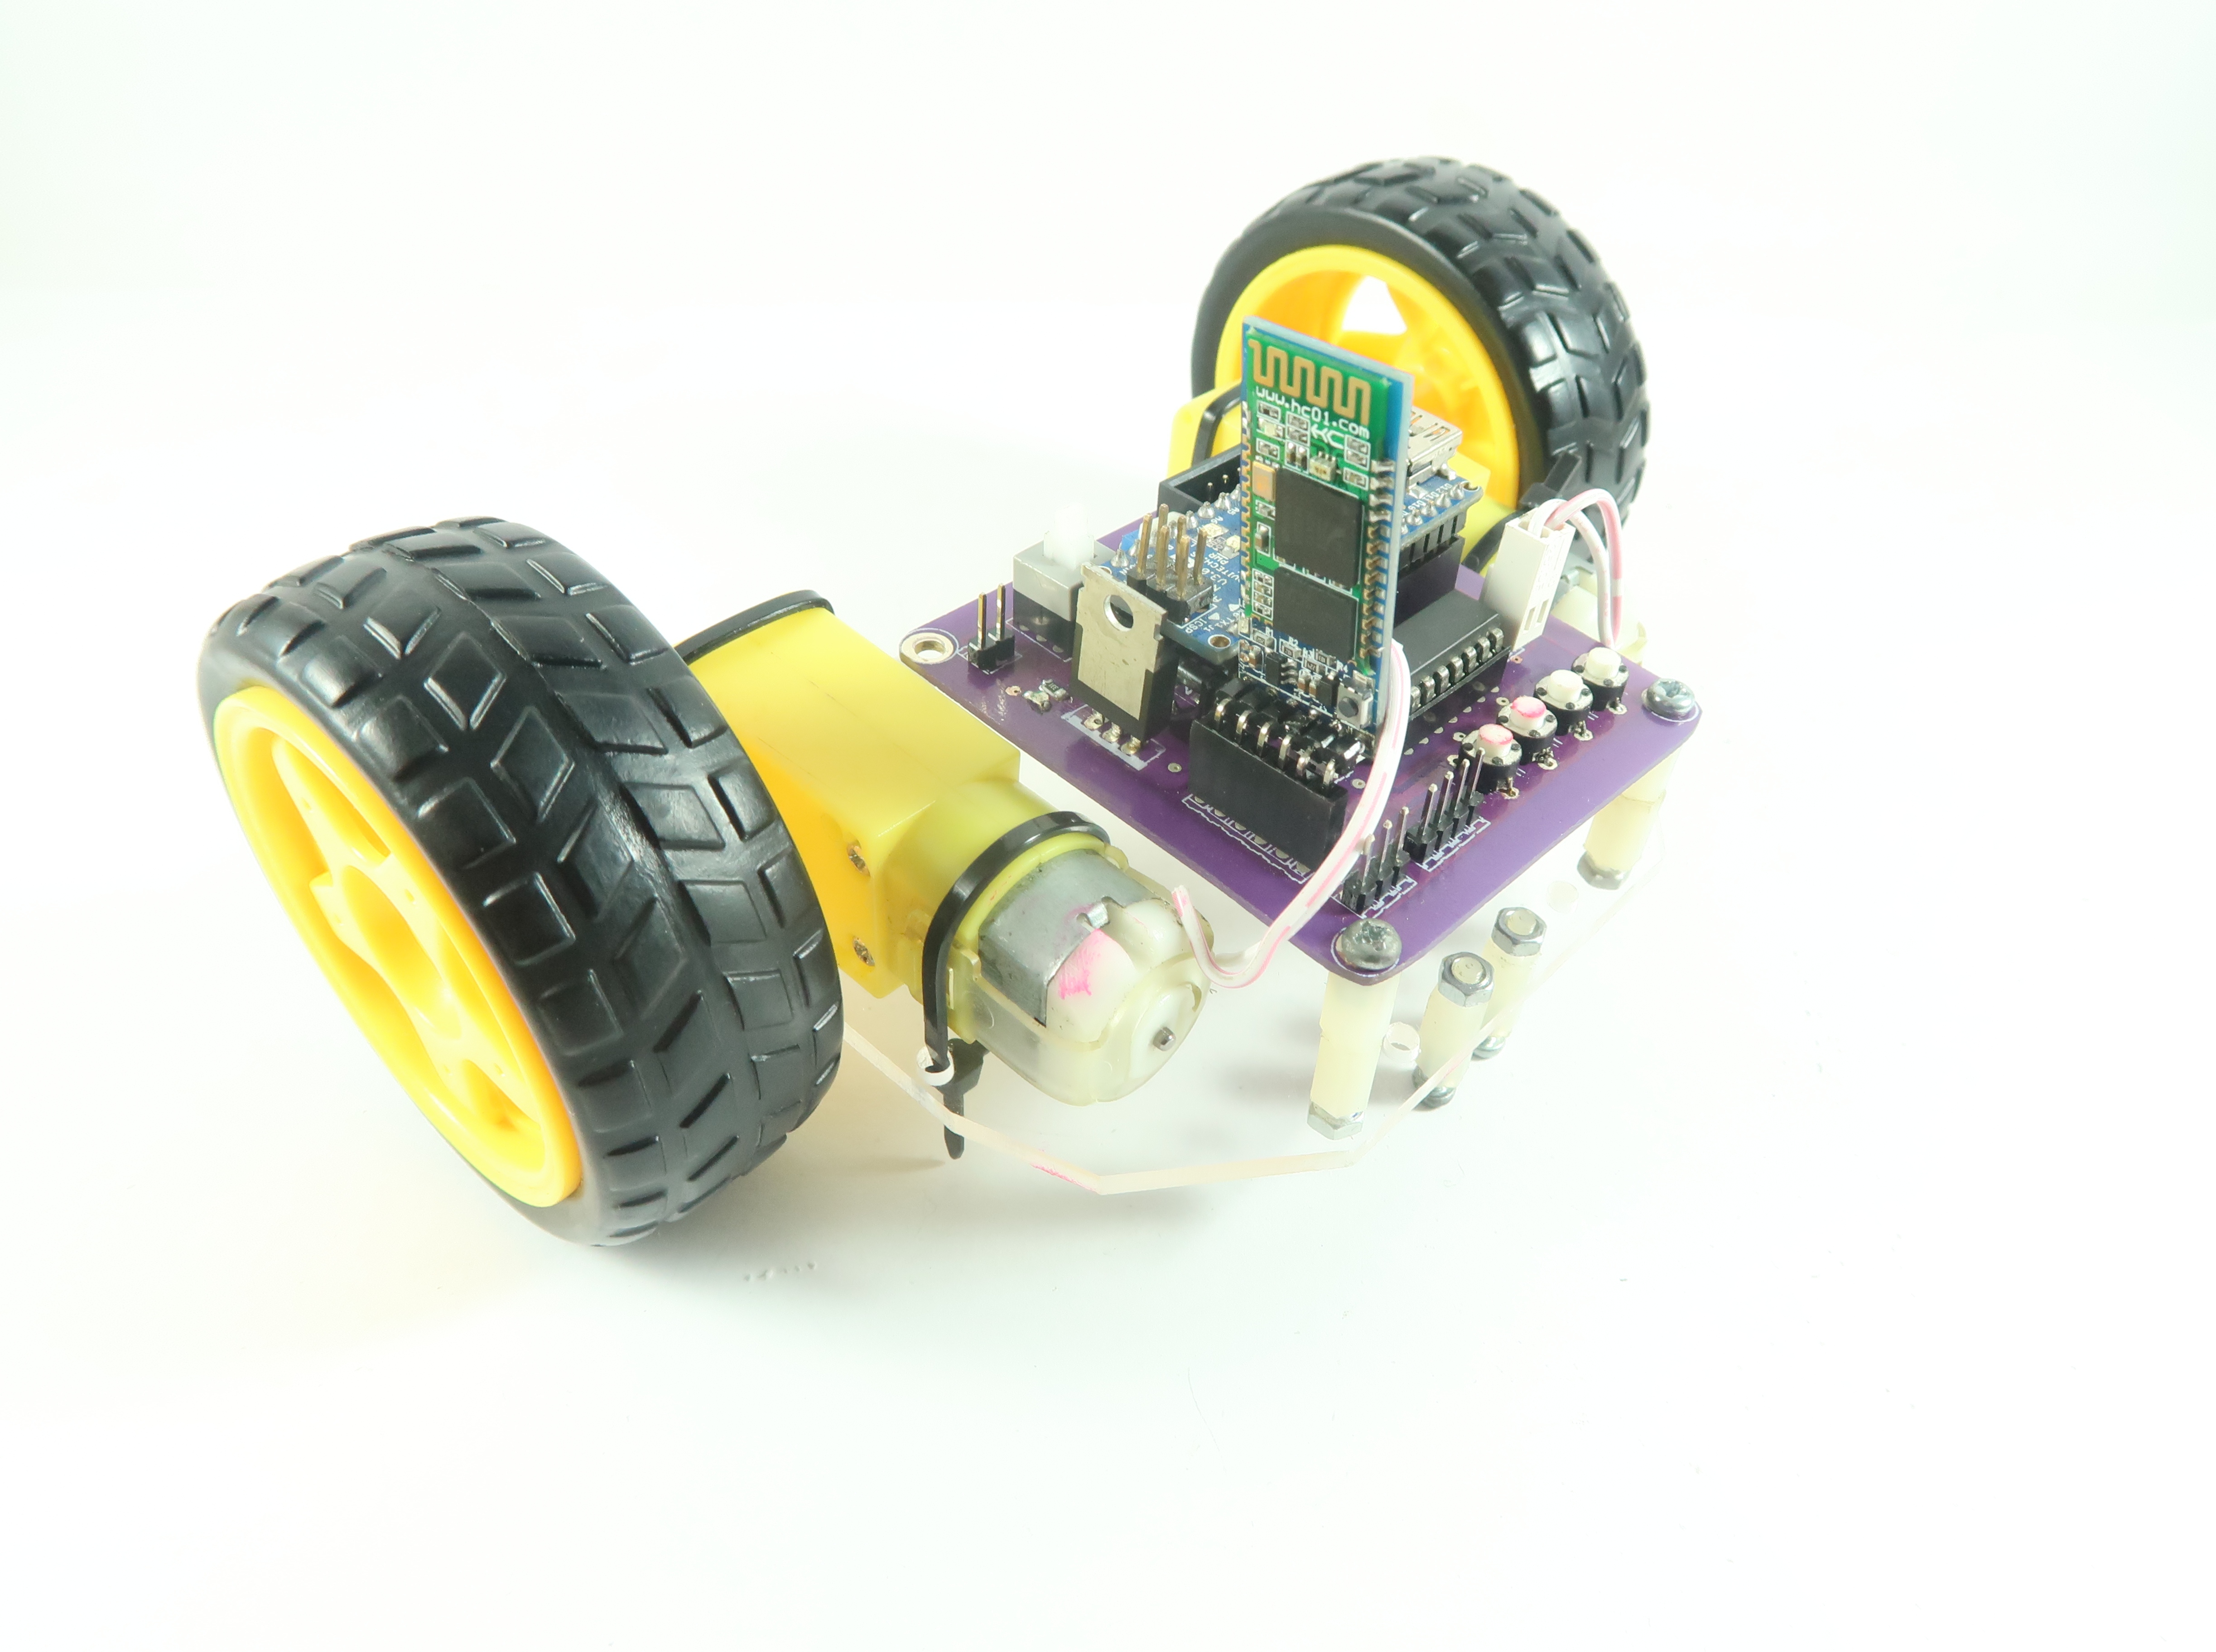
Materials You Need
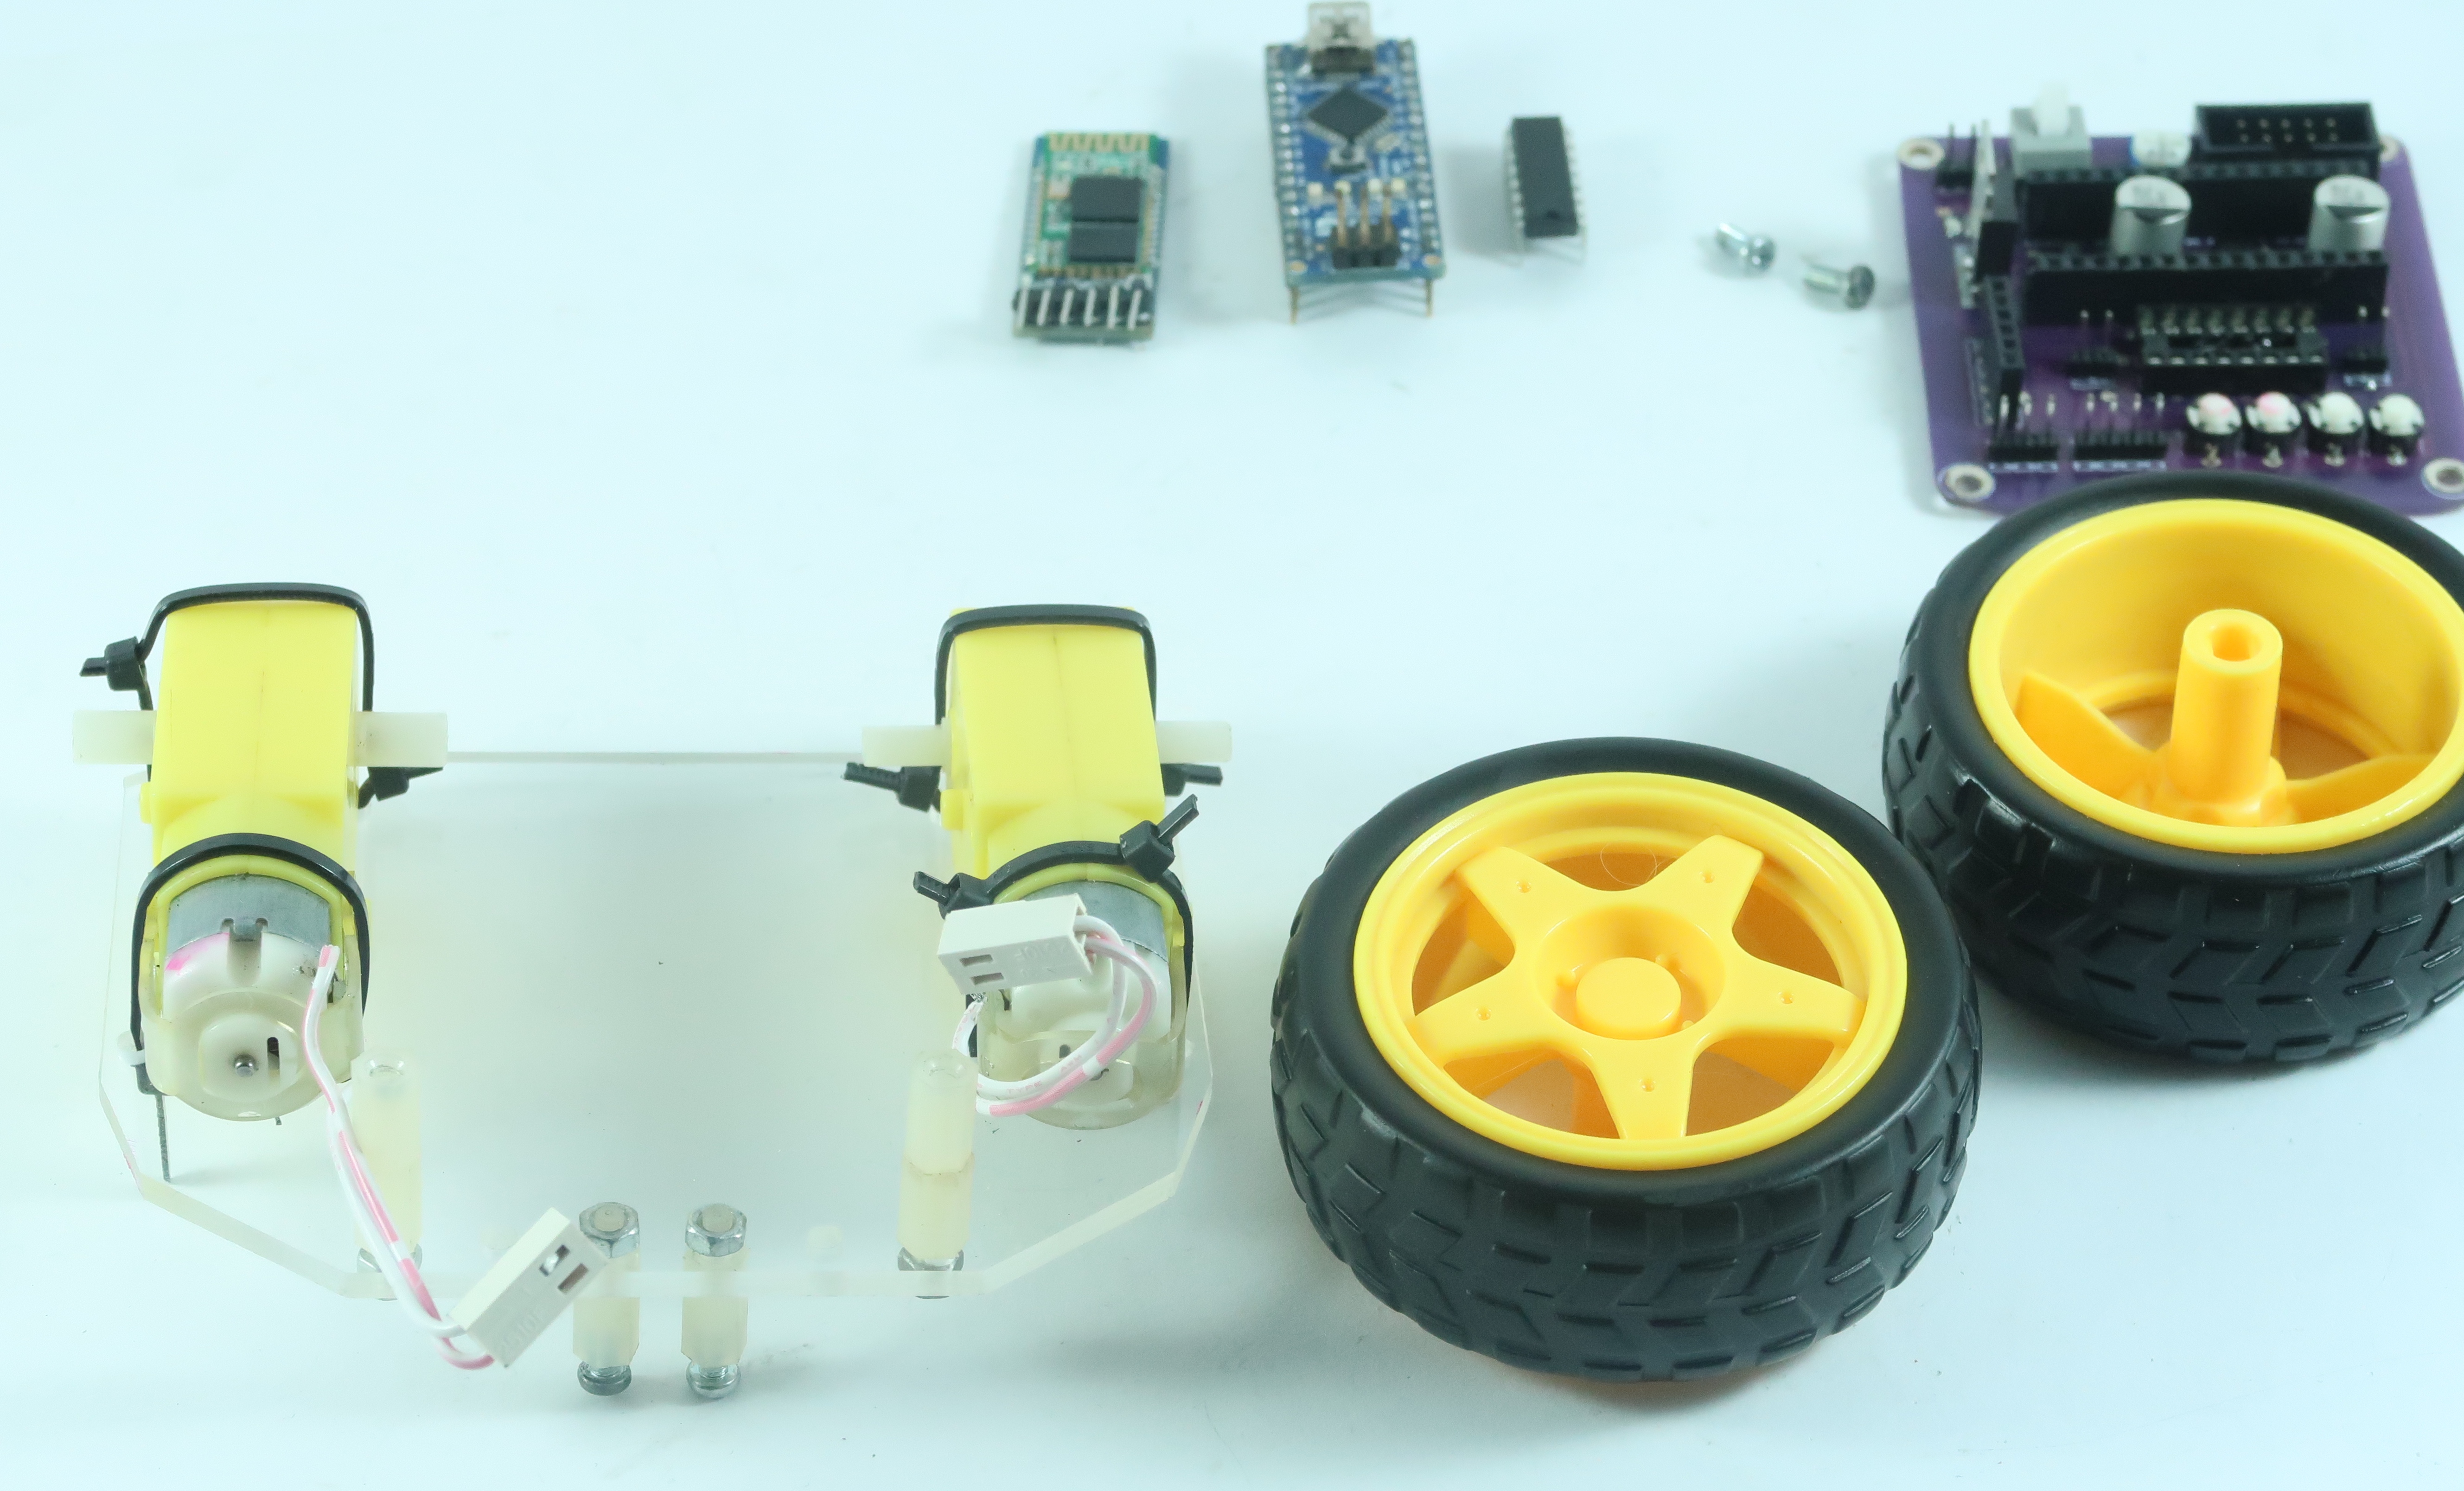
You will need:
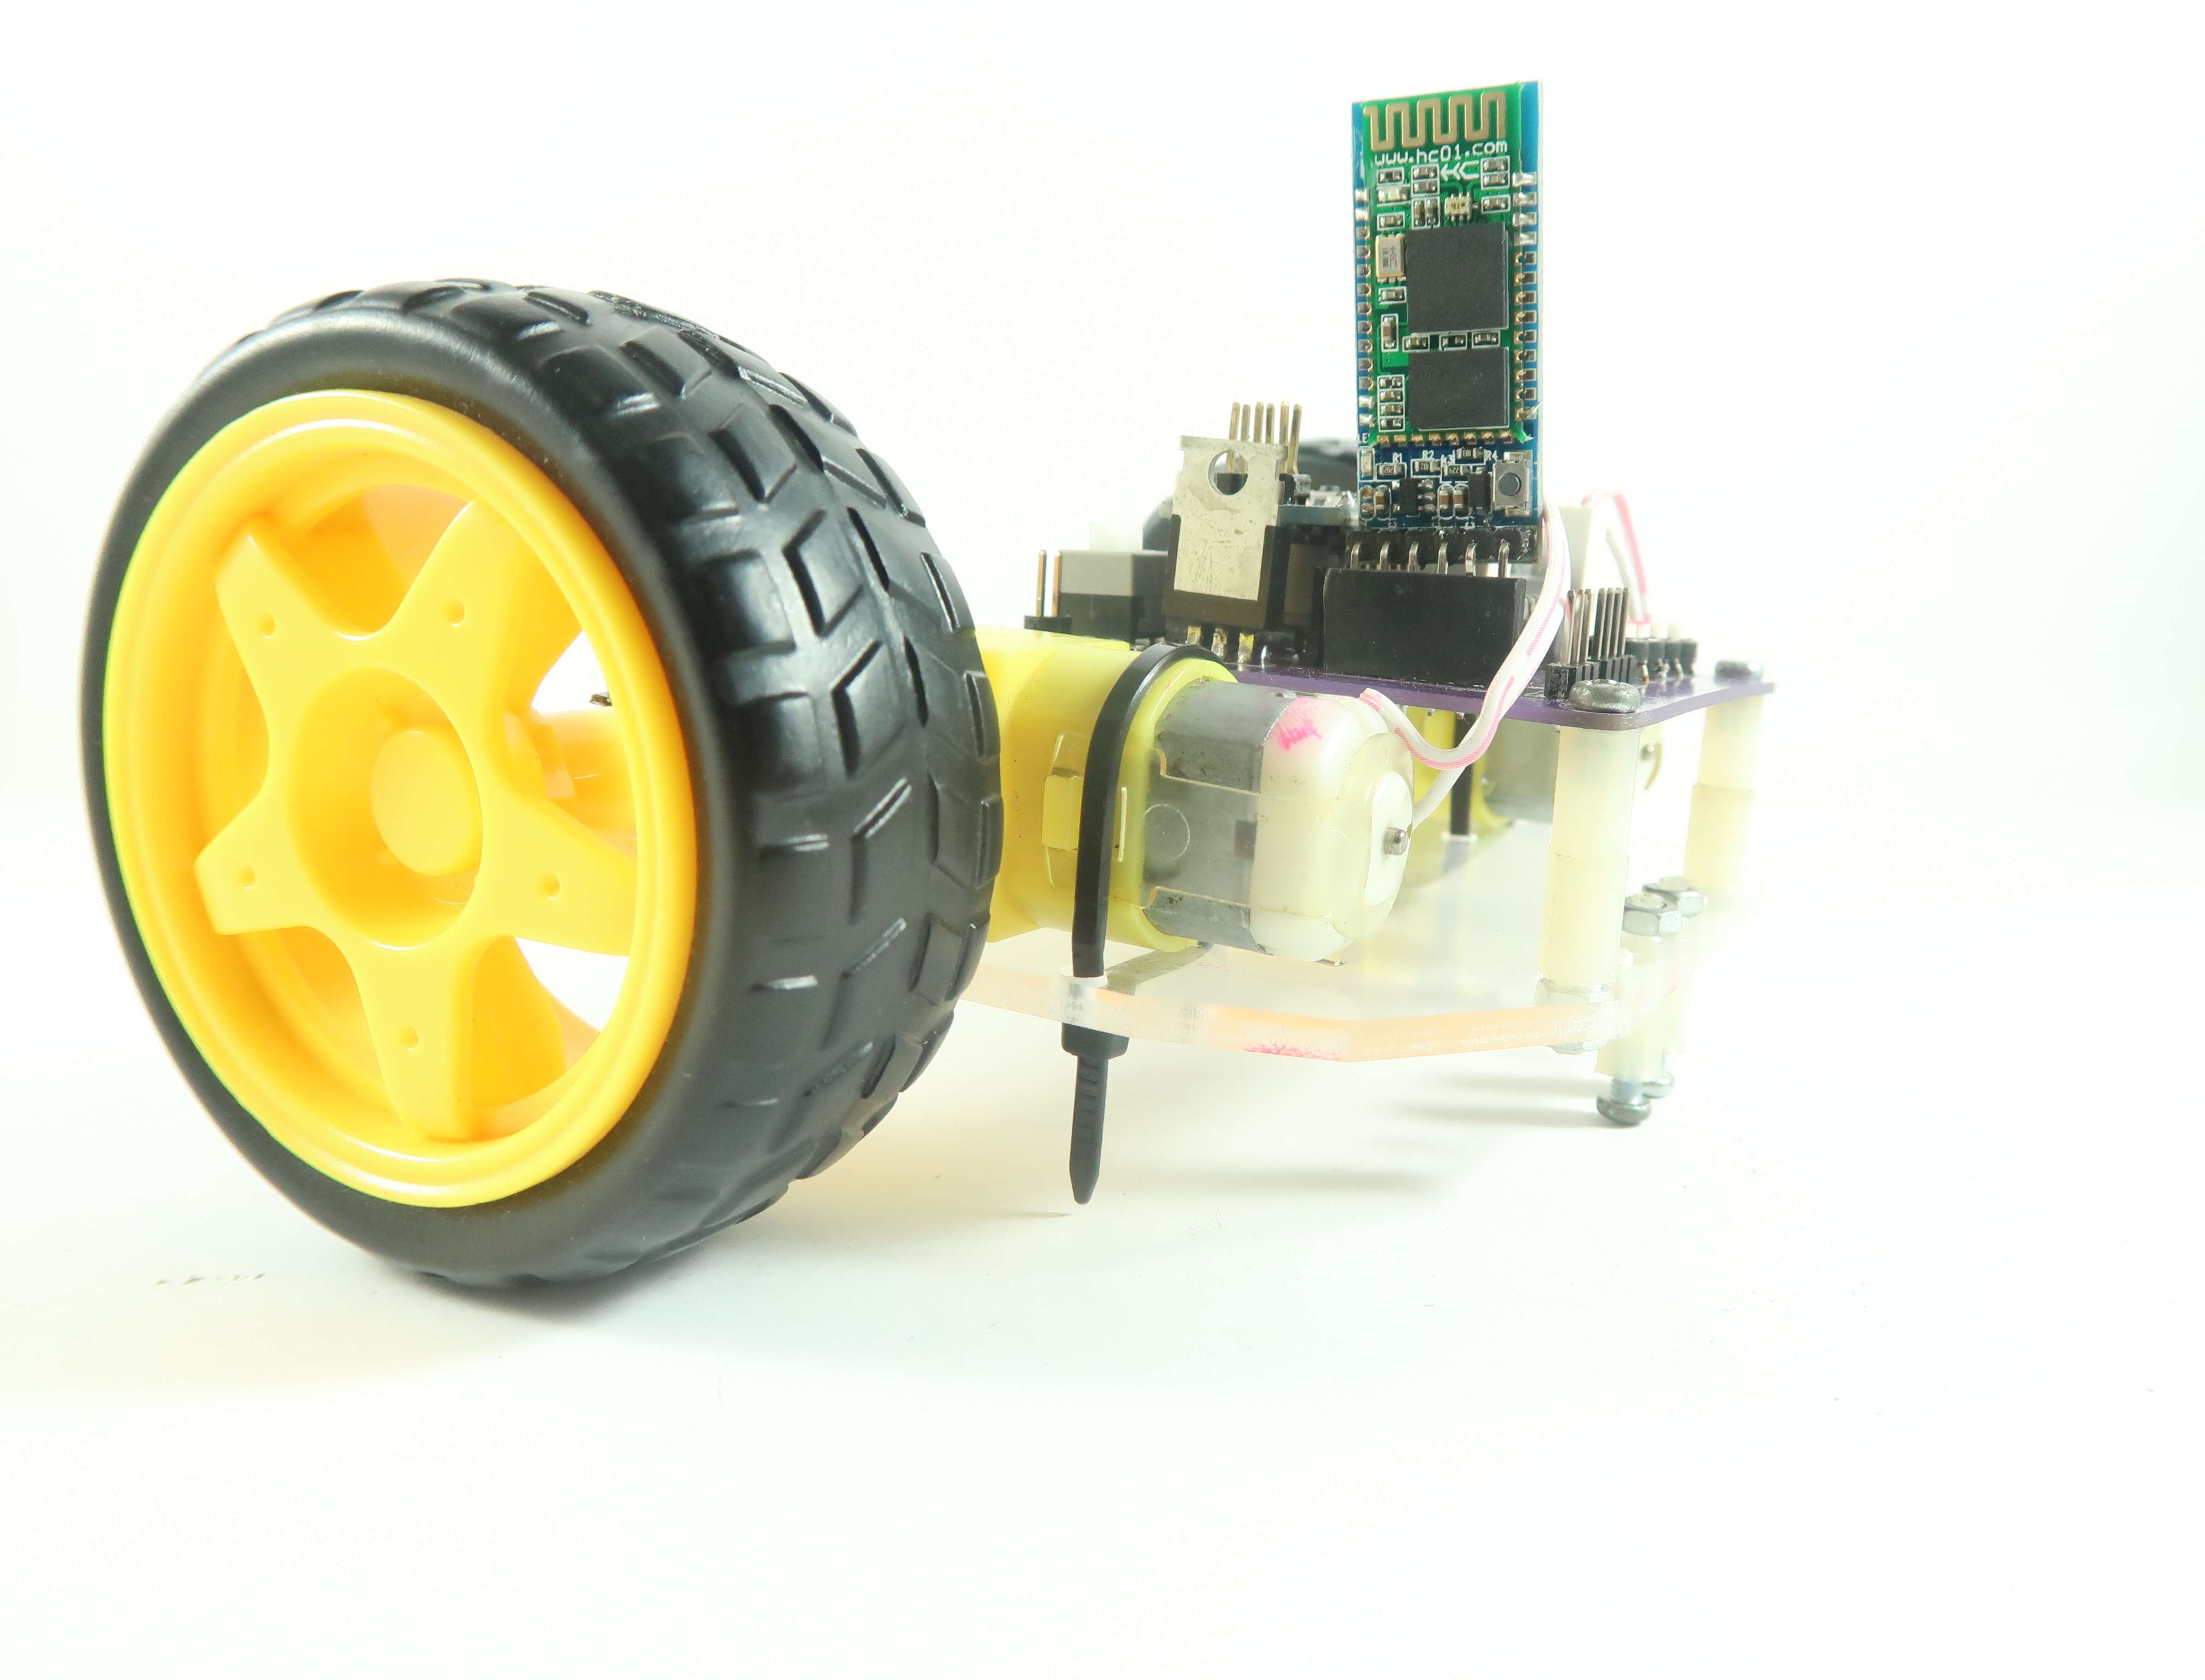
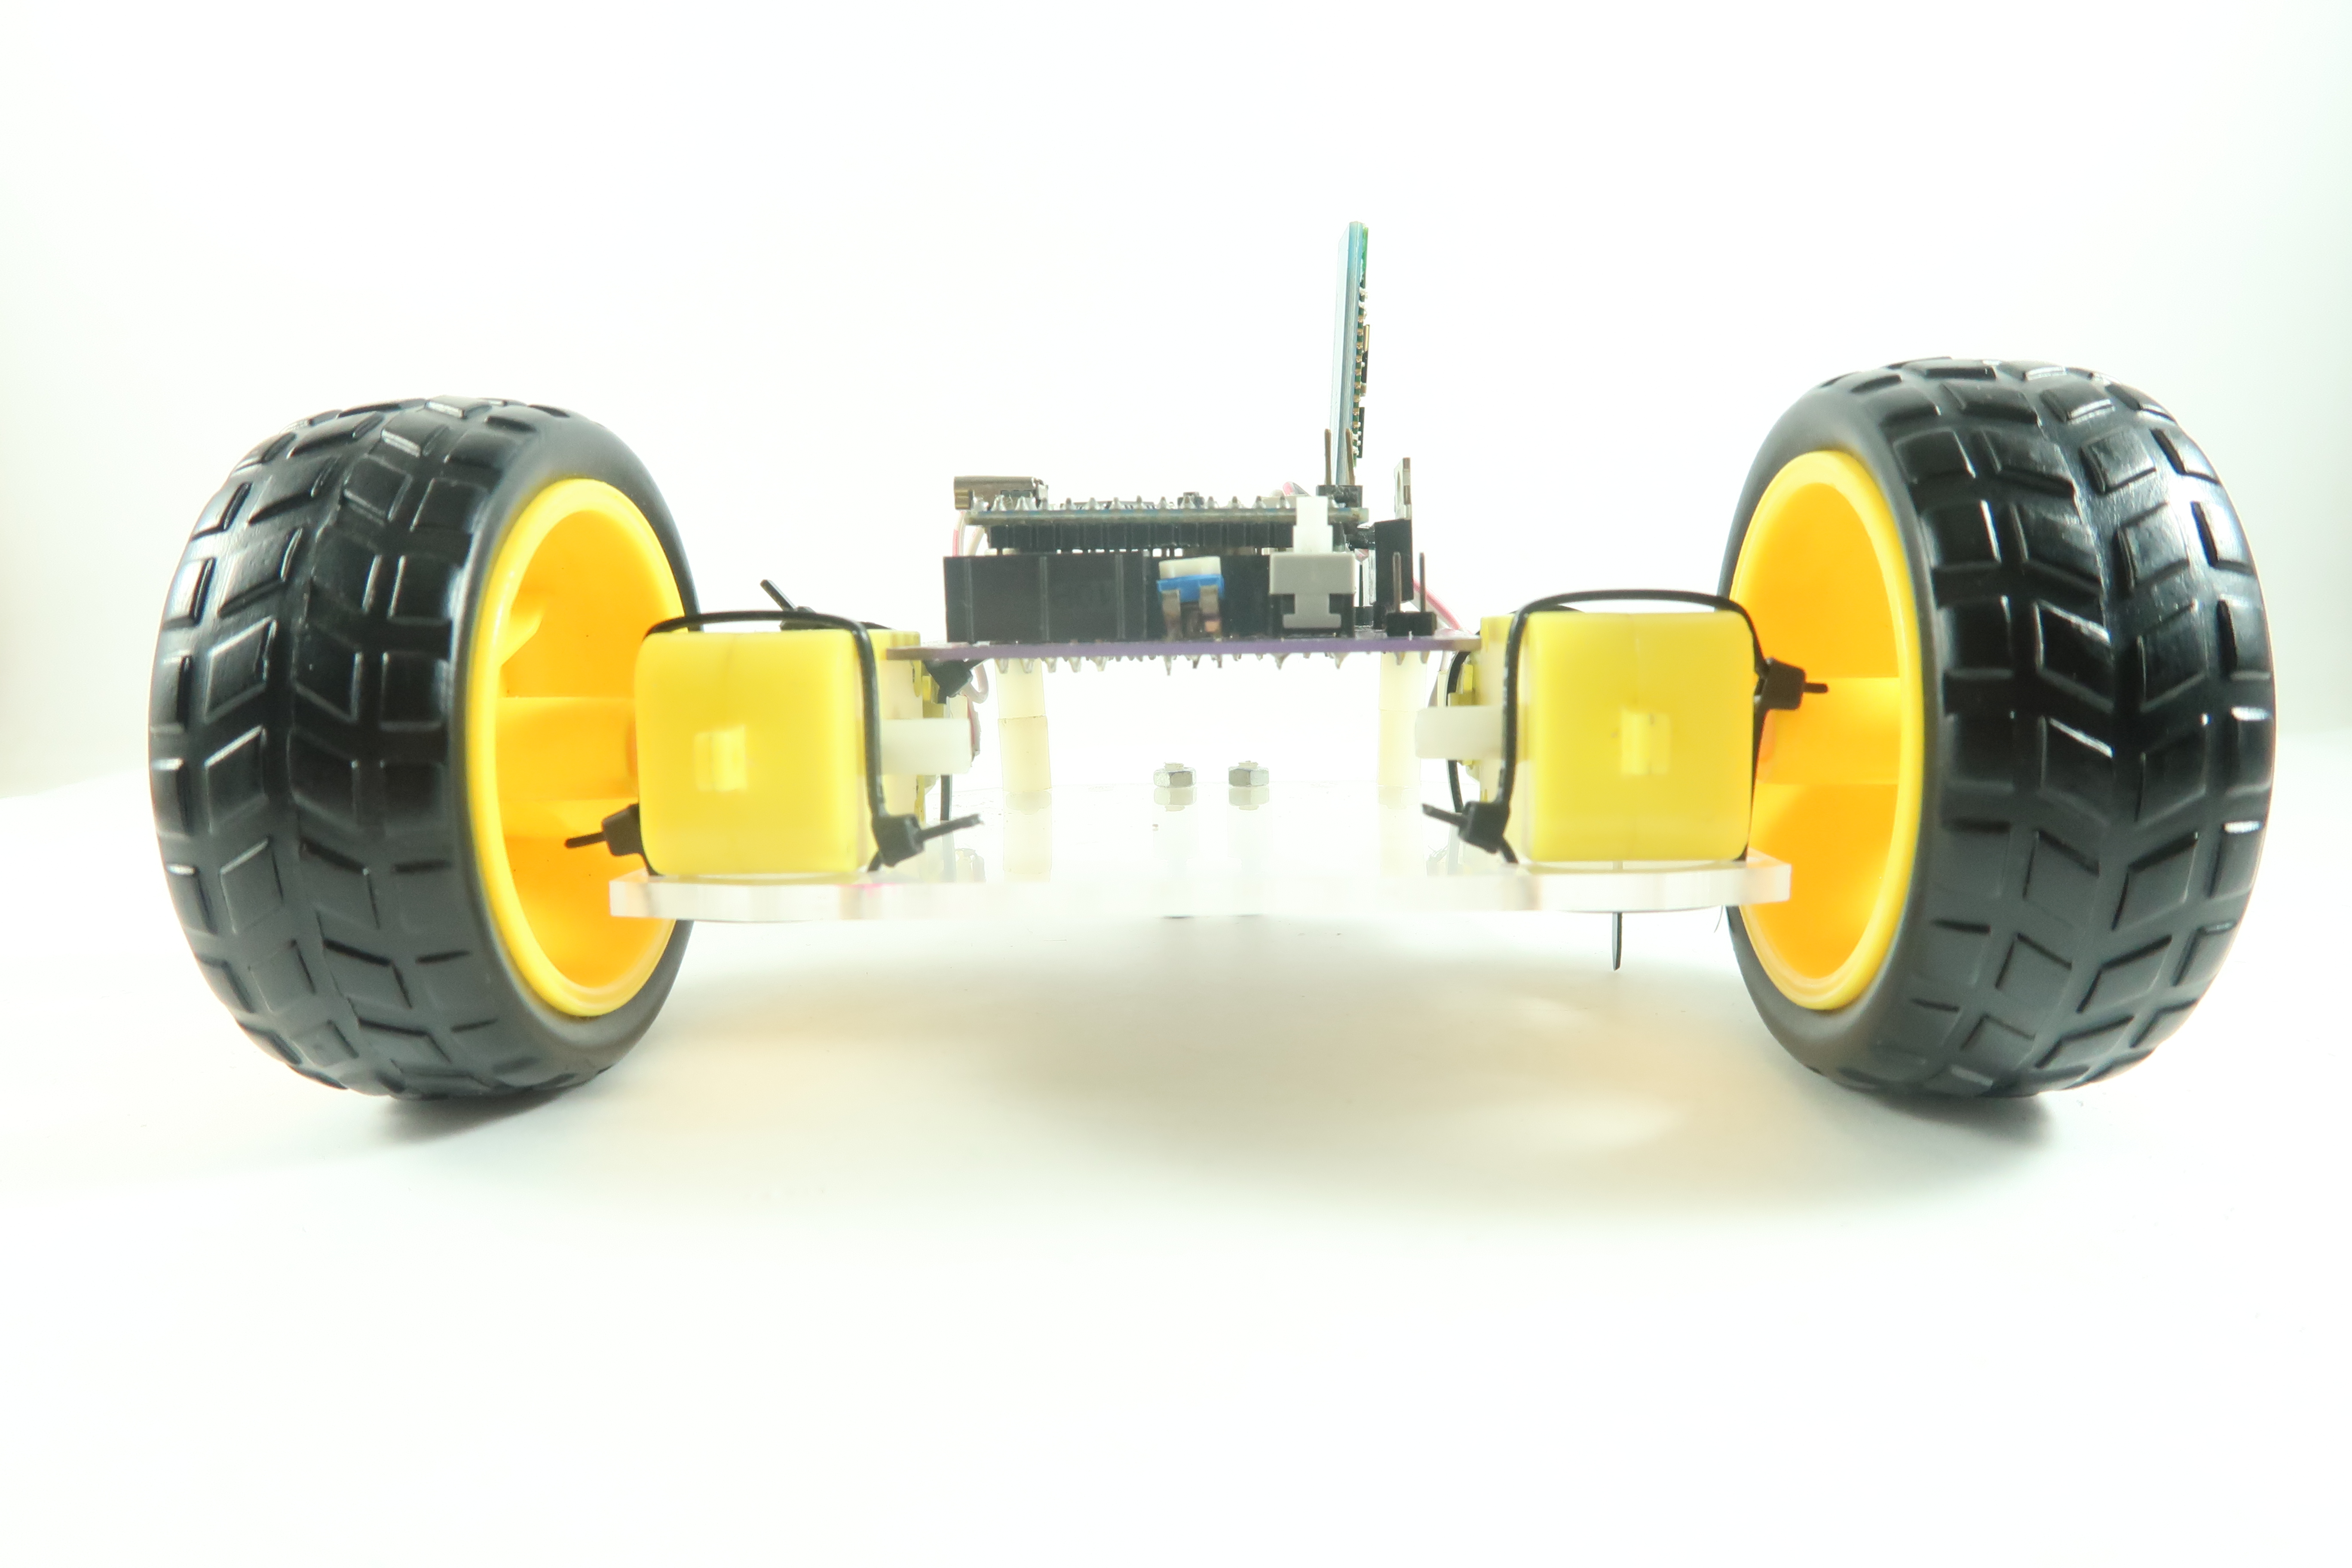
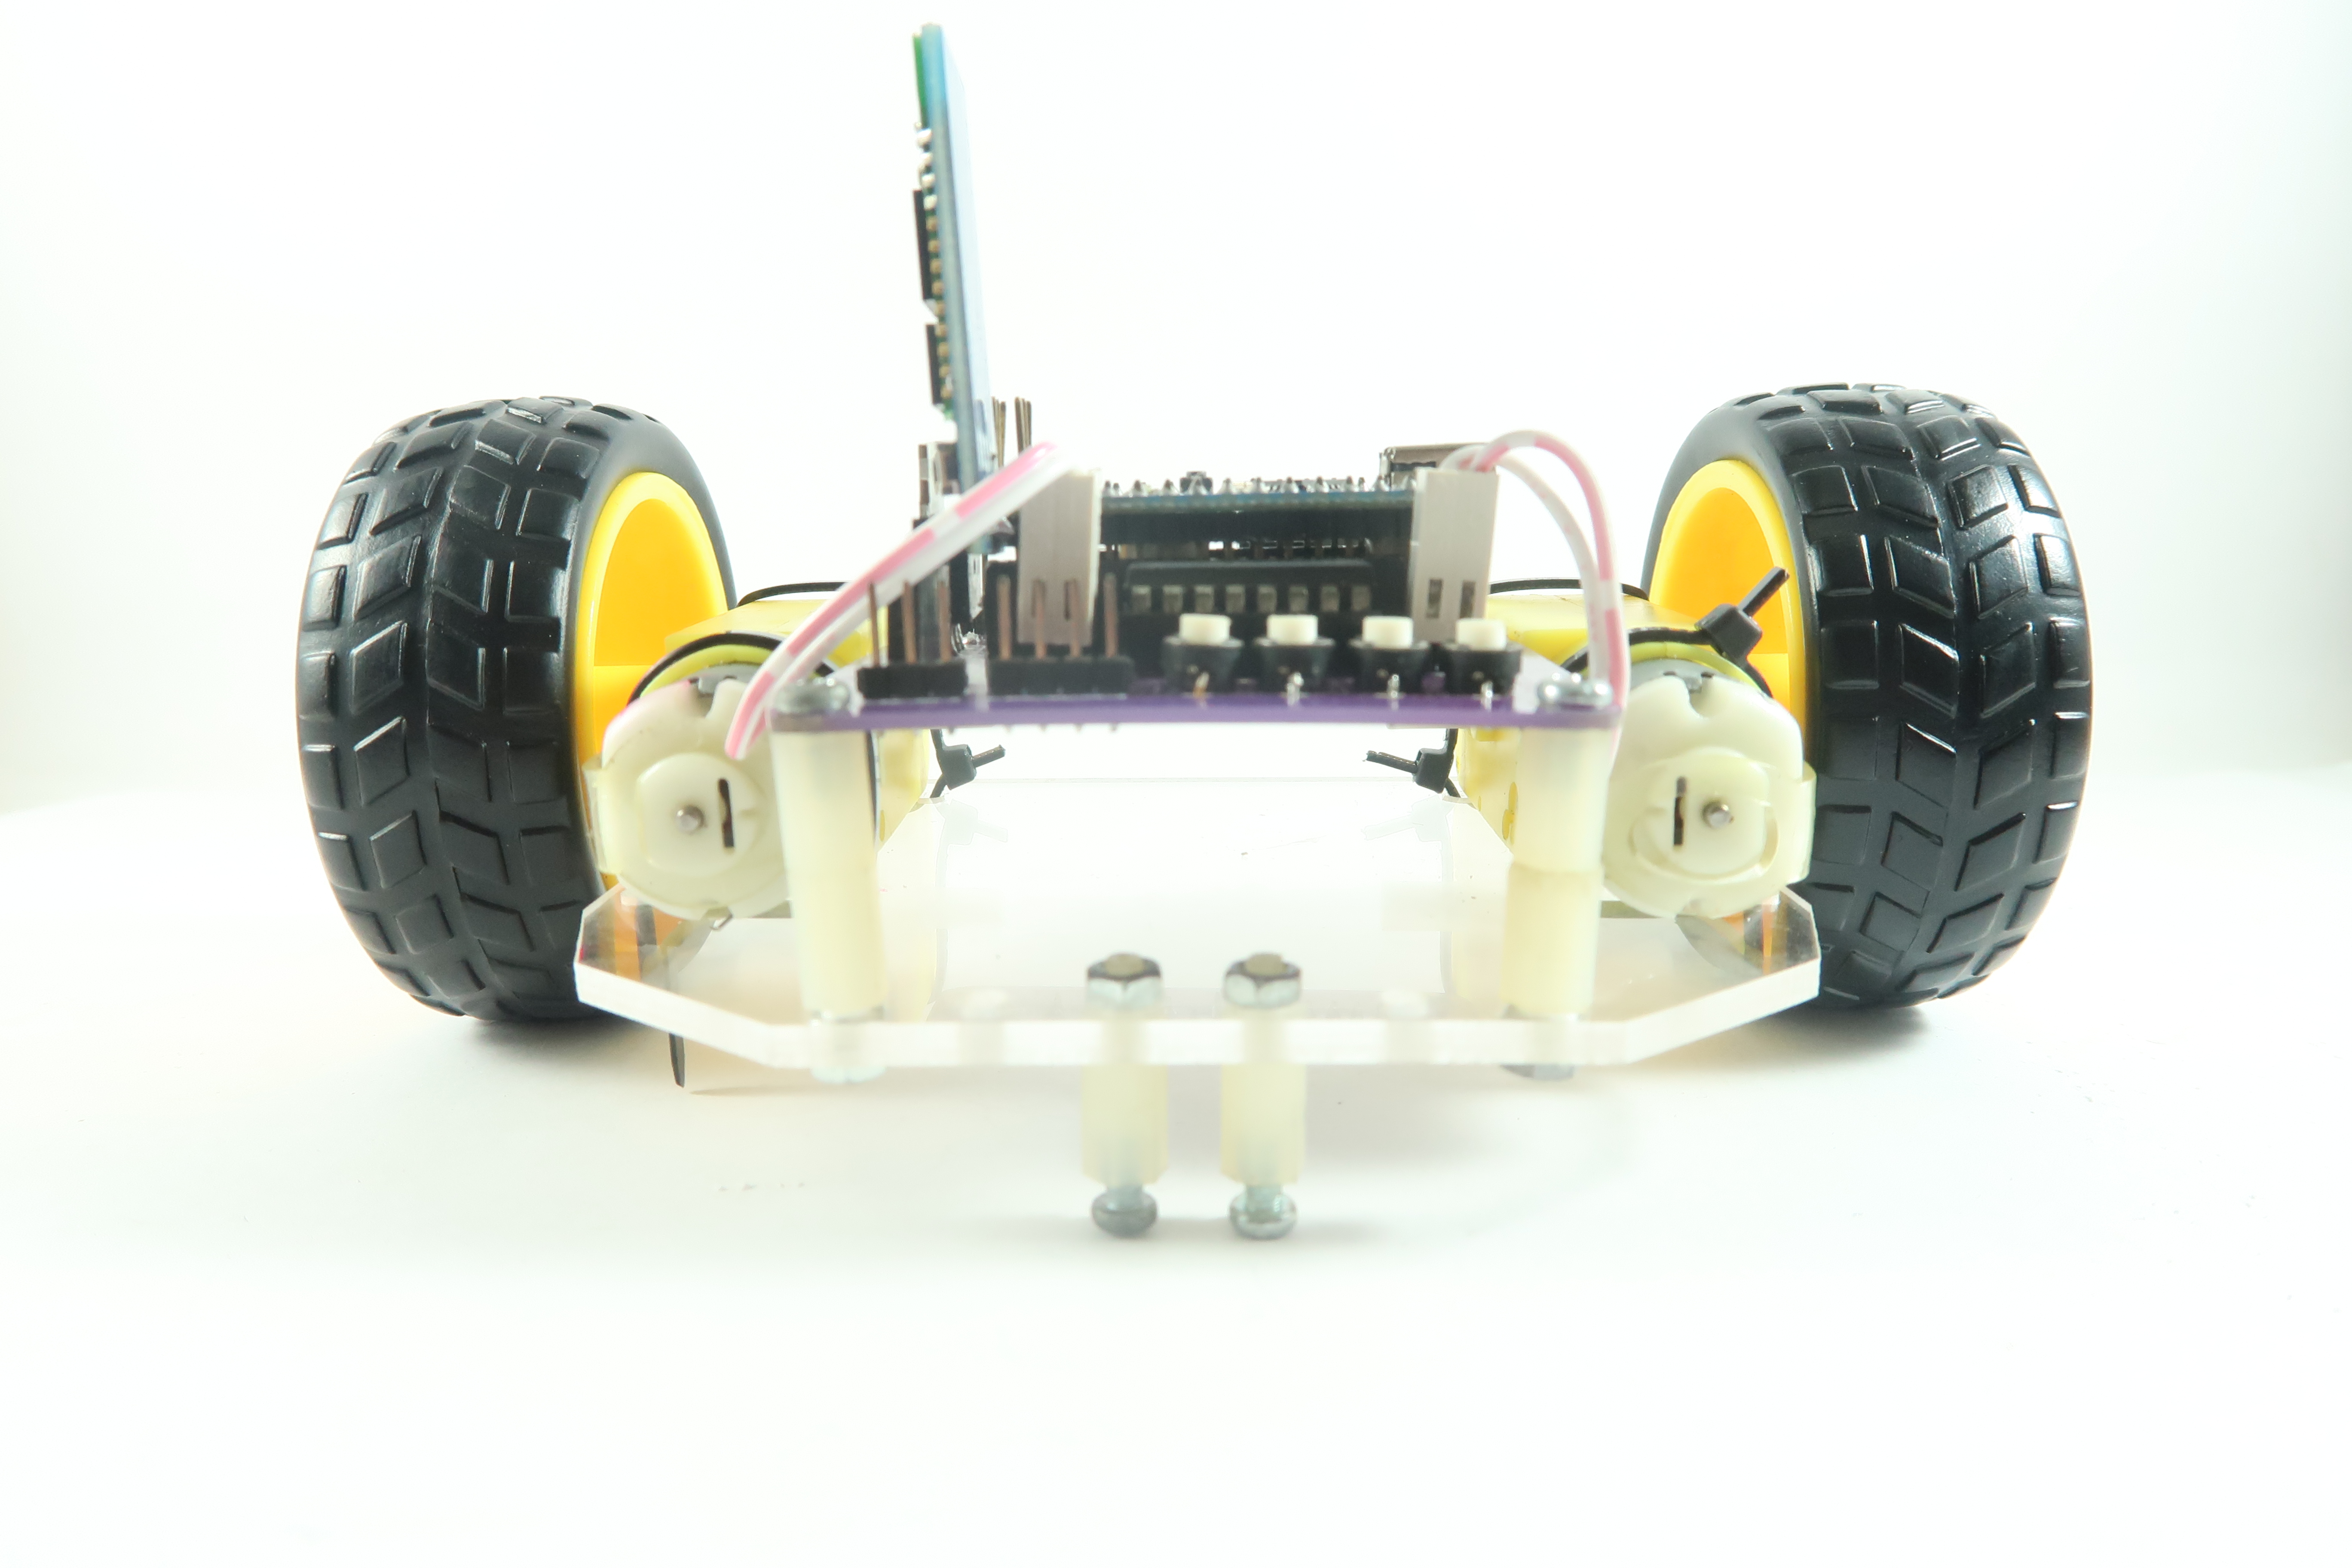
- HC-05 Bluetooth Module
- Board BlueBot
- Arduino Nano
- Motor DC 5 Volt
- BlueBot Mechanics
Schematic
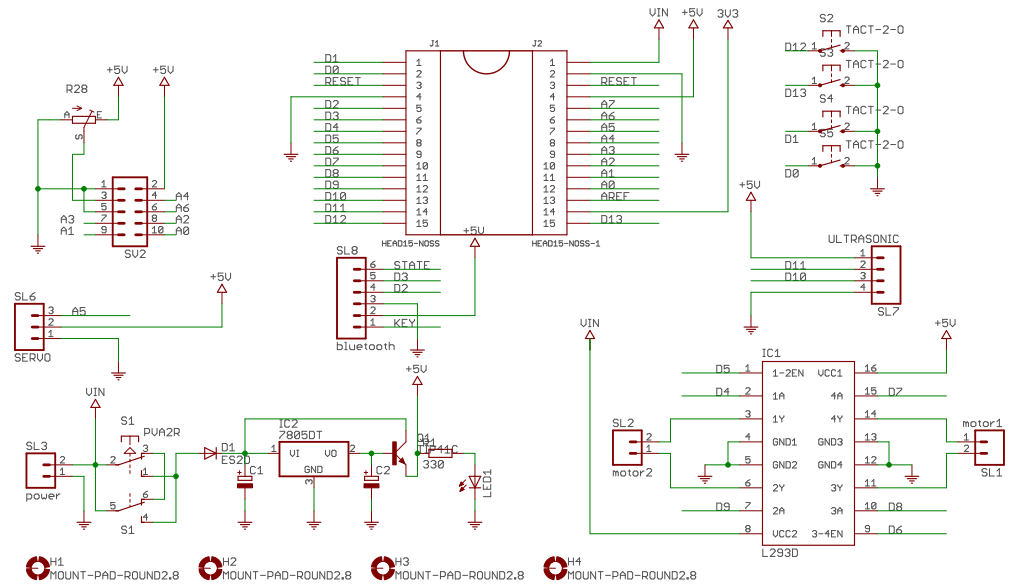
Once the components have been collected, connect each component according to the schematic above.
Step by Step
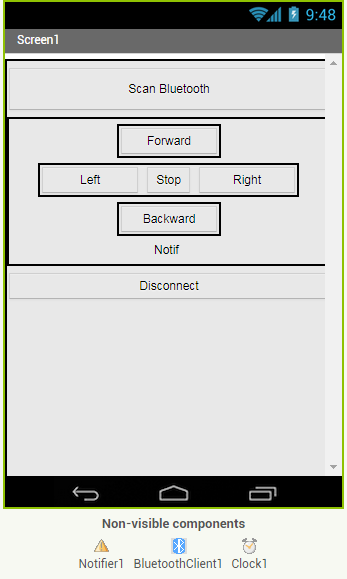
First, create a view on your smartphone using MIT App Inventor as follows.
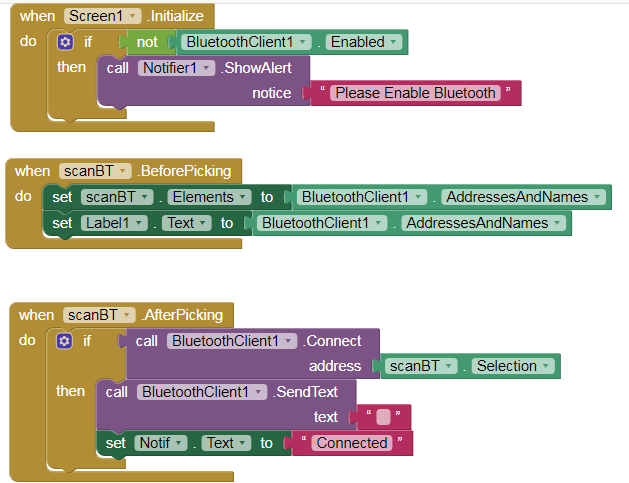
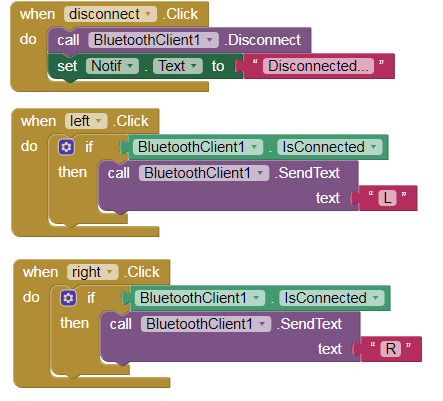
Second, as for the controller blocks that need to be made is a notification when the software first run, it will show a notification to turn on bluetooth if not yet on. The second block is ListPicker component that is used to see the list of bluetooth available (block before picking). Block after picking is used to pick up the bluetooth to be connected. The next block is the disconnected block, which is the block used to disconnect the smartphone with the HC-05 bluetooth module.
In the left.Click block is used to send the letter L from smartphone to Arduino via HC-05 Bluetooth Module. Likewise with right.Click is used to send the letter R to Arduino and for other functions just change the letter to be sent. Then build project into APK.
Sketch

After creating the program for android, the next step is the receiver program in arduino. In this arduino program is quite simple because it only read the serial commands that are sent bluetooth. Here's the program listing on arduino.
#include <SoftwareSerial.h>
 SoftwareSerial mySerial(2, 3); // RX, TX
#define button1 13
#define button2 12
#define pwmOne  5
#define inAOne  4
#define inBOne  9
#define pwmTwo  6
#define inATwo  8
#define inBTwo  7
void setup() {
// put your setup code here, to run once:
pinMode(button1, INPUT_PULLUP);
pinMode(button2, INPUT_PULLUP);
pinMode(pwmOne, OUTPUT);
pinMode(inAOne, OUTPUT);
pinMode(inBOne, OUTPUT);
pinMode(pwmTwo, OUTPUT);
pinMode(inATwo, OUTPUT);
pinMode(inBTwo, OUTPUT);
Serial.begin(9600);
mySerial.begin(38400);
}
char readSerial;
void loop() {
if(mySerial.available())
{
readSerial = mySerial.read();
}   switch(readSerial)
{
case 'F': forward(70,70); Serial.println("F"); break;
case 'B': reverse(70,70); Serial.println("B"); break;
case 'L': turnLeft(70,70); Serial.println("L"); break;
case 'R': turnRight(70,70); Serial.println("R"); break;
case 'S': stopRun(); Serial.println("S"); break;
}
}
void forward(int valLeft, int valRight)
{
digitalWrite(inAOne, LOW);
digitalWrite(inBOne, HIGH);
analogWrite(pwmOne, valLeft);
digitalWrite(inATwo, HIGH);
digitalWrite(inBTwo, LOW);
analogWrite(pwmTwo, valRight);
}
void reverse(int valLeft, int valRight)
{
digitalWrite(inAOne, HIGH);
digitalWrite(inBOne, LOW);
analogWrite(pwmOne, valLeft);
digitalWrite(inATwo, LOW);
digitalWrite(inBTwo, HIGH);
analogWrite(pwmTwo, valRight);
}
void turnRight(int valLeft, int valRight)
{
digitalWrite(inAOne, LOW);
digitalWrite(inBOne, HIGH);
analogWrite(pwmOne, valLeft);
digitalWrite(inATwo, LOW);
digitalWrite(inBTwo, HIGH);
analogWrite(pwmTwo, valRight);
}
void turnLeft(int valLeft, int valRight)
{
digitalWrite(inAOne, HIGH);
digitalWrite(inBOne, LOW);
analogWrite(pwmOne, valLeft);
digitalWrite(inATwo, HIGH);
digitalWrite(inBTwo, LOW);
analogWrite(pwmTwo, valRight);
}
void stopRun()
{
digitalWrite(inAOne, HIGH);
digitalWrite(inBOne, HIGH);
analogWrite(pwmOne, 0);
digitalWrite(inATwo, HIGH);
digitalWrite(inBTwo, HIGH);
analogWrite(pwmTwo, 0);
}
Check Video to Know More