[Arduino Project]#Remote Monitoring of Ultrasonic Sensor Value Using IoShield-A & Cloud Server
by irinak1 in Circuits > Arduino
4343 Views, 31 Favorites, 0 Comments
[Arduino Project]#Remote Monitoring of Ultrasonic Sensor Value Using IoShield-A & Cloud Server
My post explains how to monitor ultrasonic sensor value remotely using Arduino, ioShield-A & Xively Server.
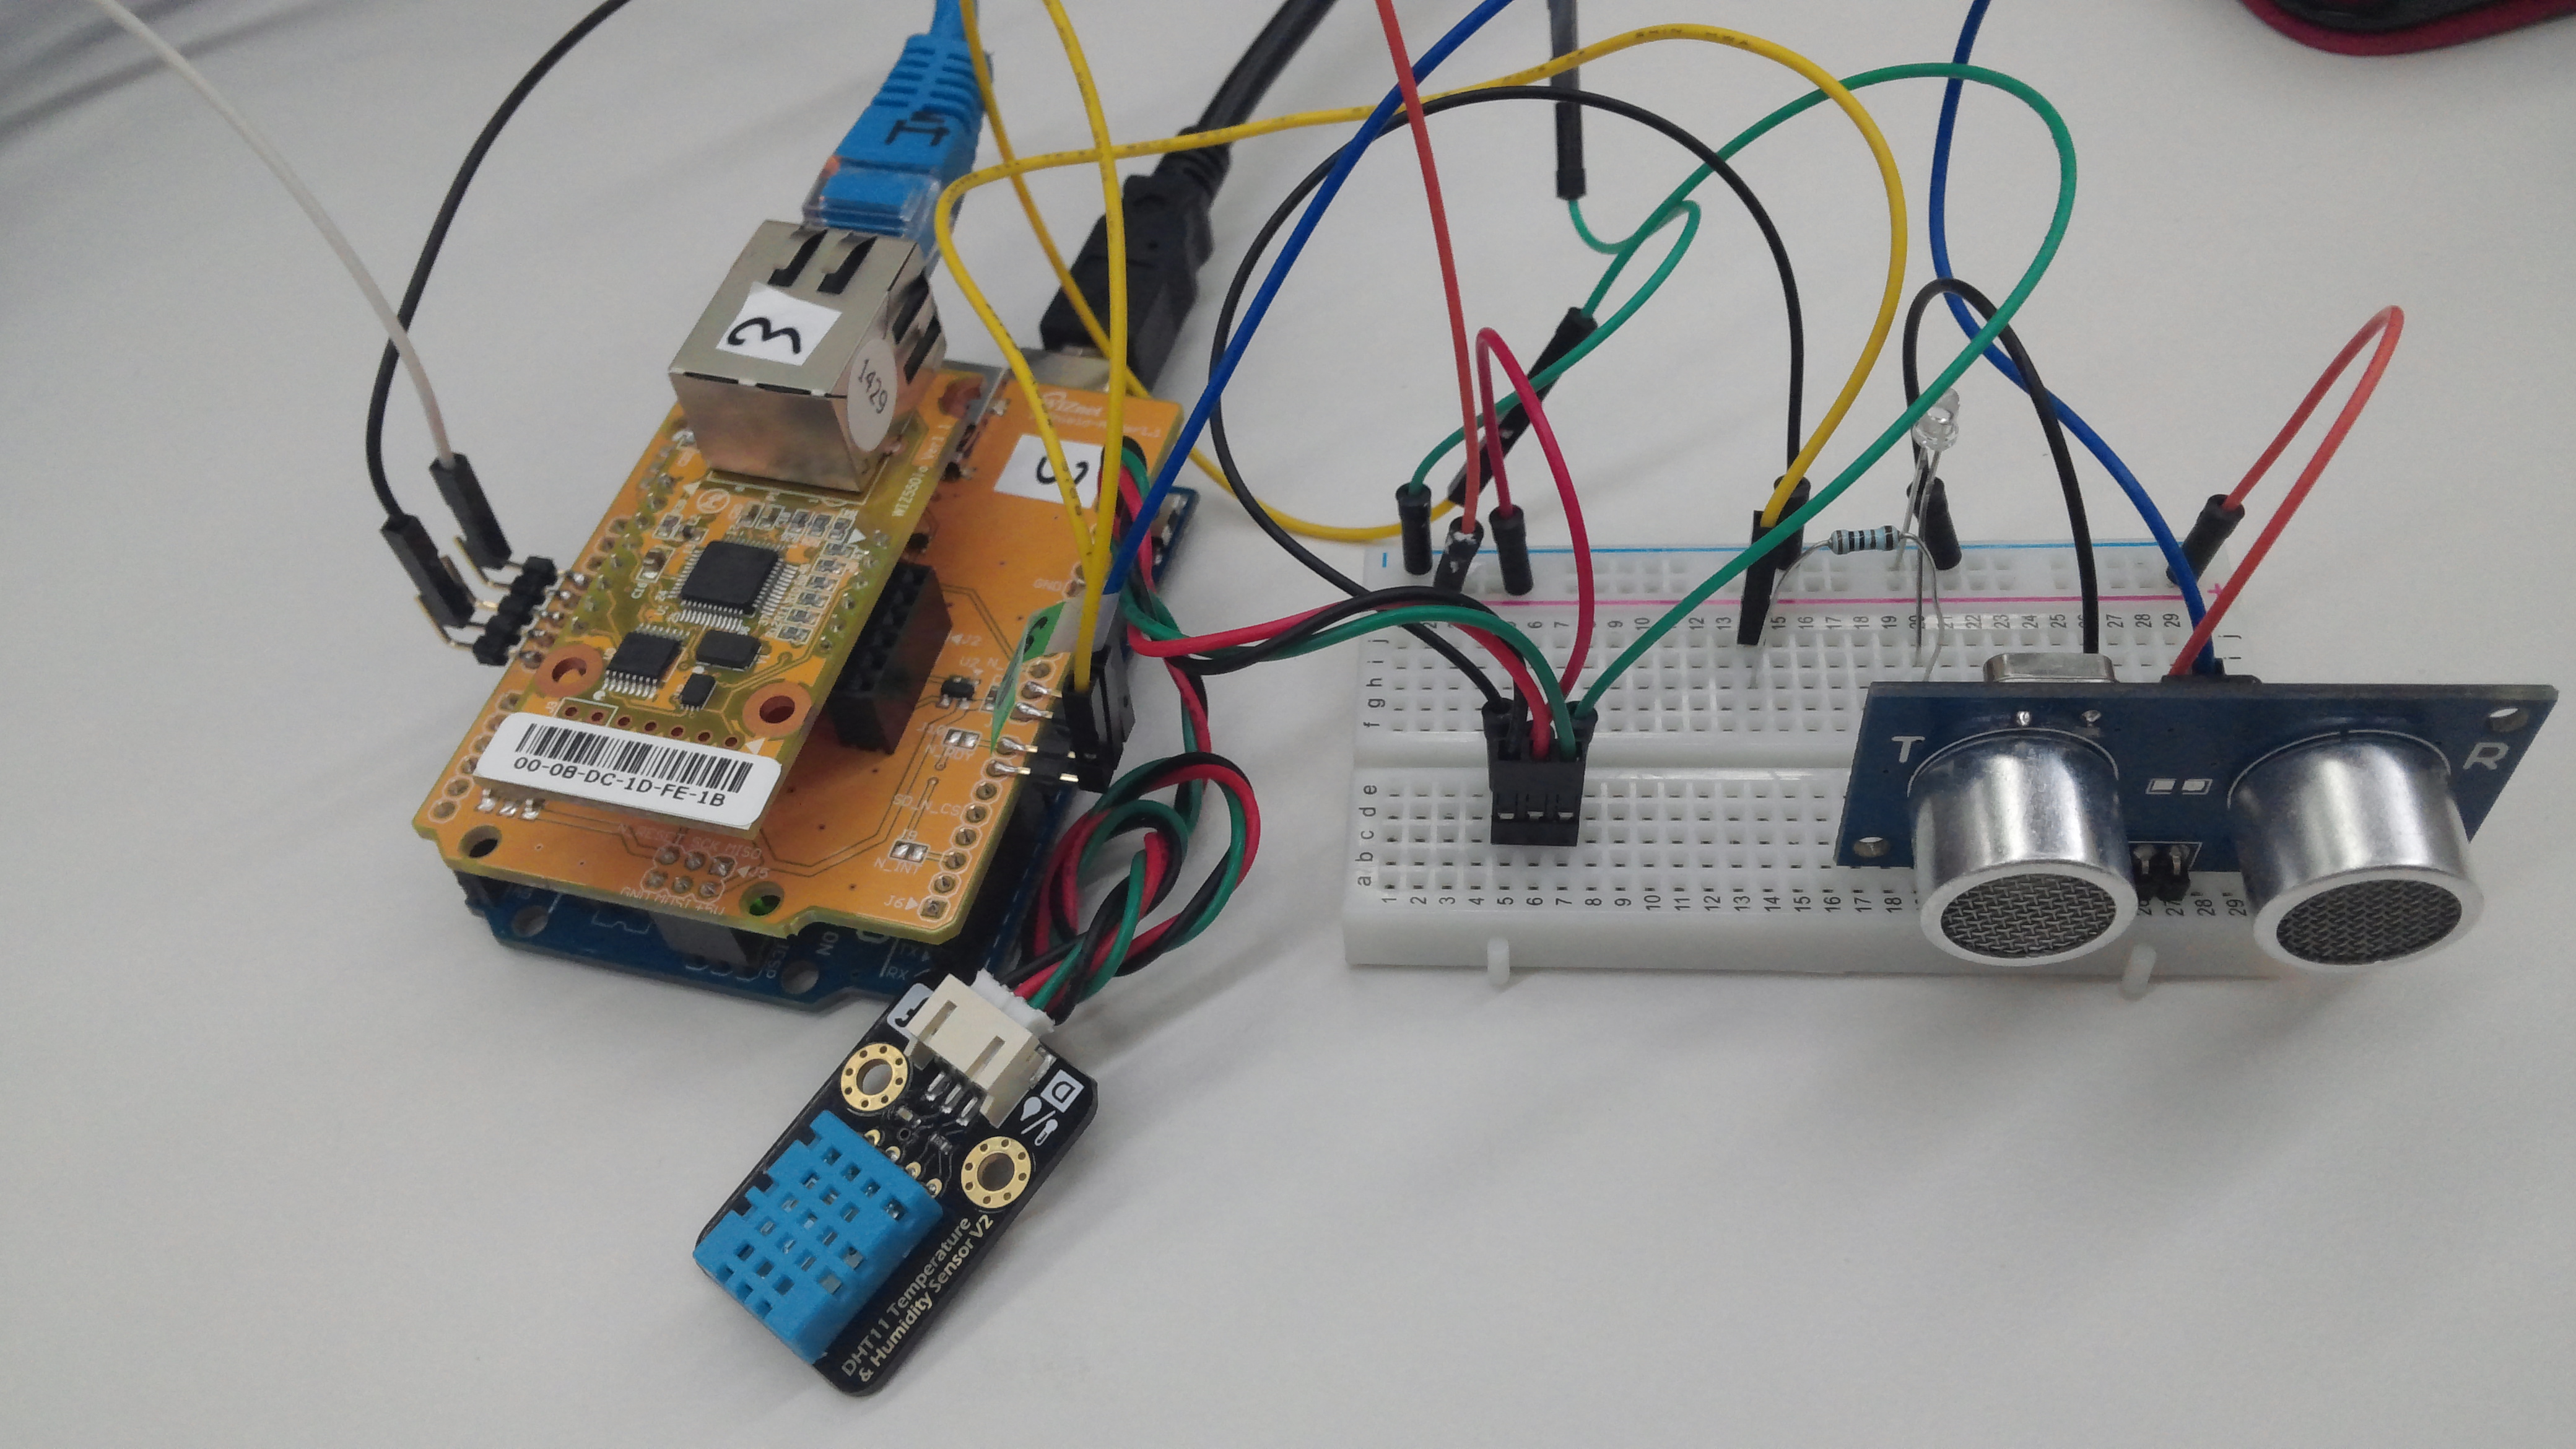
Arduino Uno board is used for controlling whole system and measuring the sensor value. I'm using ioShield-A (which is based of W5500) for processing the TCP/IP connection.
Parts & Program
- Arduino Uno (MCU) : http://arduino.cc/en/Main/ArduinoBoardUno
- Ethernet Shield (ioShield-A / WIZnet) : http://www.shopwiznet.com/ioshield-a
- Ultrasonic seonsor (NT-TS601, OEM) : http://www.datasheetarchive.com/datasheet/NT+TS601...
- Temperature (DHT11, DFRobot) :
- Library : http://playground.arduino.cc/main/DHT11Lib
- Datasheet : http://www.micropik.com/PDF/dht11.pdf
- LED, Resistor
- Jumpers
- breadborad
- Fritzing : http://fritzing.org/home/
- Arduino Sketch : http://arduino.cc/en/Main/Software
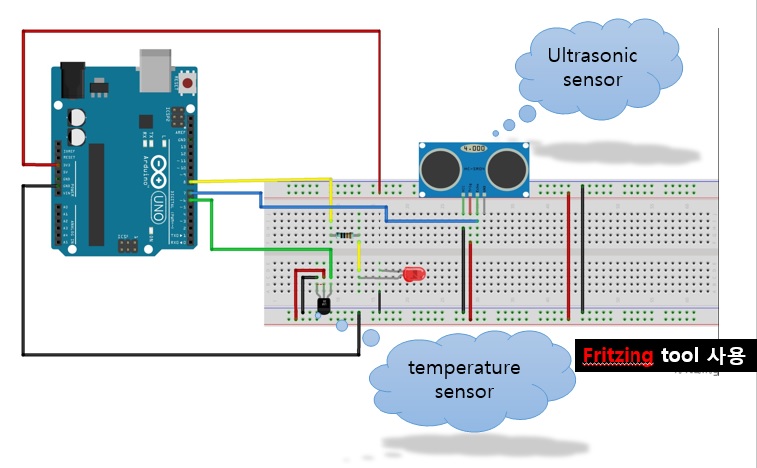
I drew the schematic at the Fritzing.
Operation Block Diagram
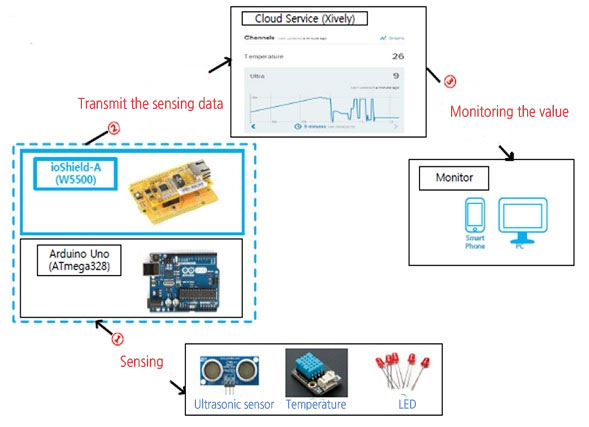
Each node and part operate and communicate as shown in below block diagram.
Method the Using Xively 1/6

Now, I will connect to Xively(cloud service), one of the most popular cloud service in the world.
1. Connect to http://xively.com
Method the Using Xively 2/6

2. After log-in, go to “Development Devices”
Method the Using Xively 3/6

3. Input the “User Agent”, “Feed ID” & “APIKEY” in the Arduino Sketch
Method the Using Xively 4/6
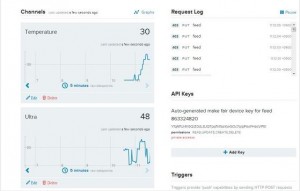
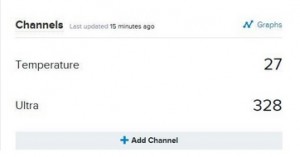
4. Now, you can remotely monitor the change of the sensor value.
Method the Using Xively 5/6
// replace your Xively api key here
#define APIKEY “YfqMfUI4h9QIZ0dL8JQTpqfhIfaeXwGOc7qrpPeoFHecVPEI”// replace your feed ID#define USERAGENT “make fair”
// user agent is the project name
#define FEEDID 863324820
Below code is to turn on the LED if the sensor value is under 10cm.
In case of String dataString = “Ultra,” and dataString += “\nTemperature, “, they must be same with the channel name that you made at the Xively
Method the Using Xively 6/6(video)
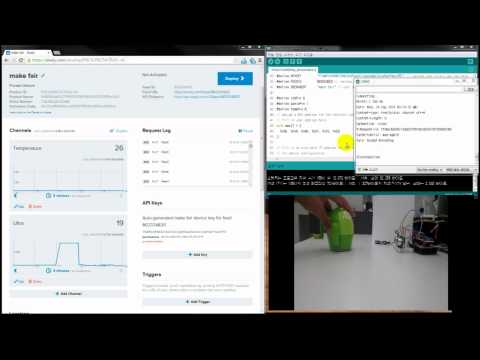
The monitoring of sensor using the xively(HW - WIZ550io +Arduino uno)
Attached file
- dht11.zip : temperature library
- XivelyClientString_temperature.zip : arduino source code.
Please refer to attached video.