Remote Controlled Human (powered by Spark Core)
by garriaga in Circuits > Remote Control
52694 Views, 399 Favorites, 0 Comments
Remote Controlled Human (powered by Spark Core)
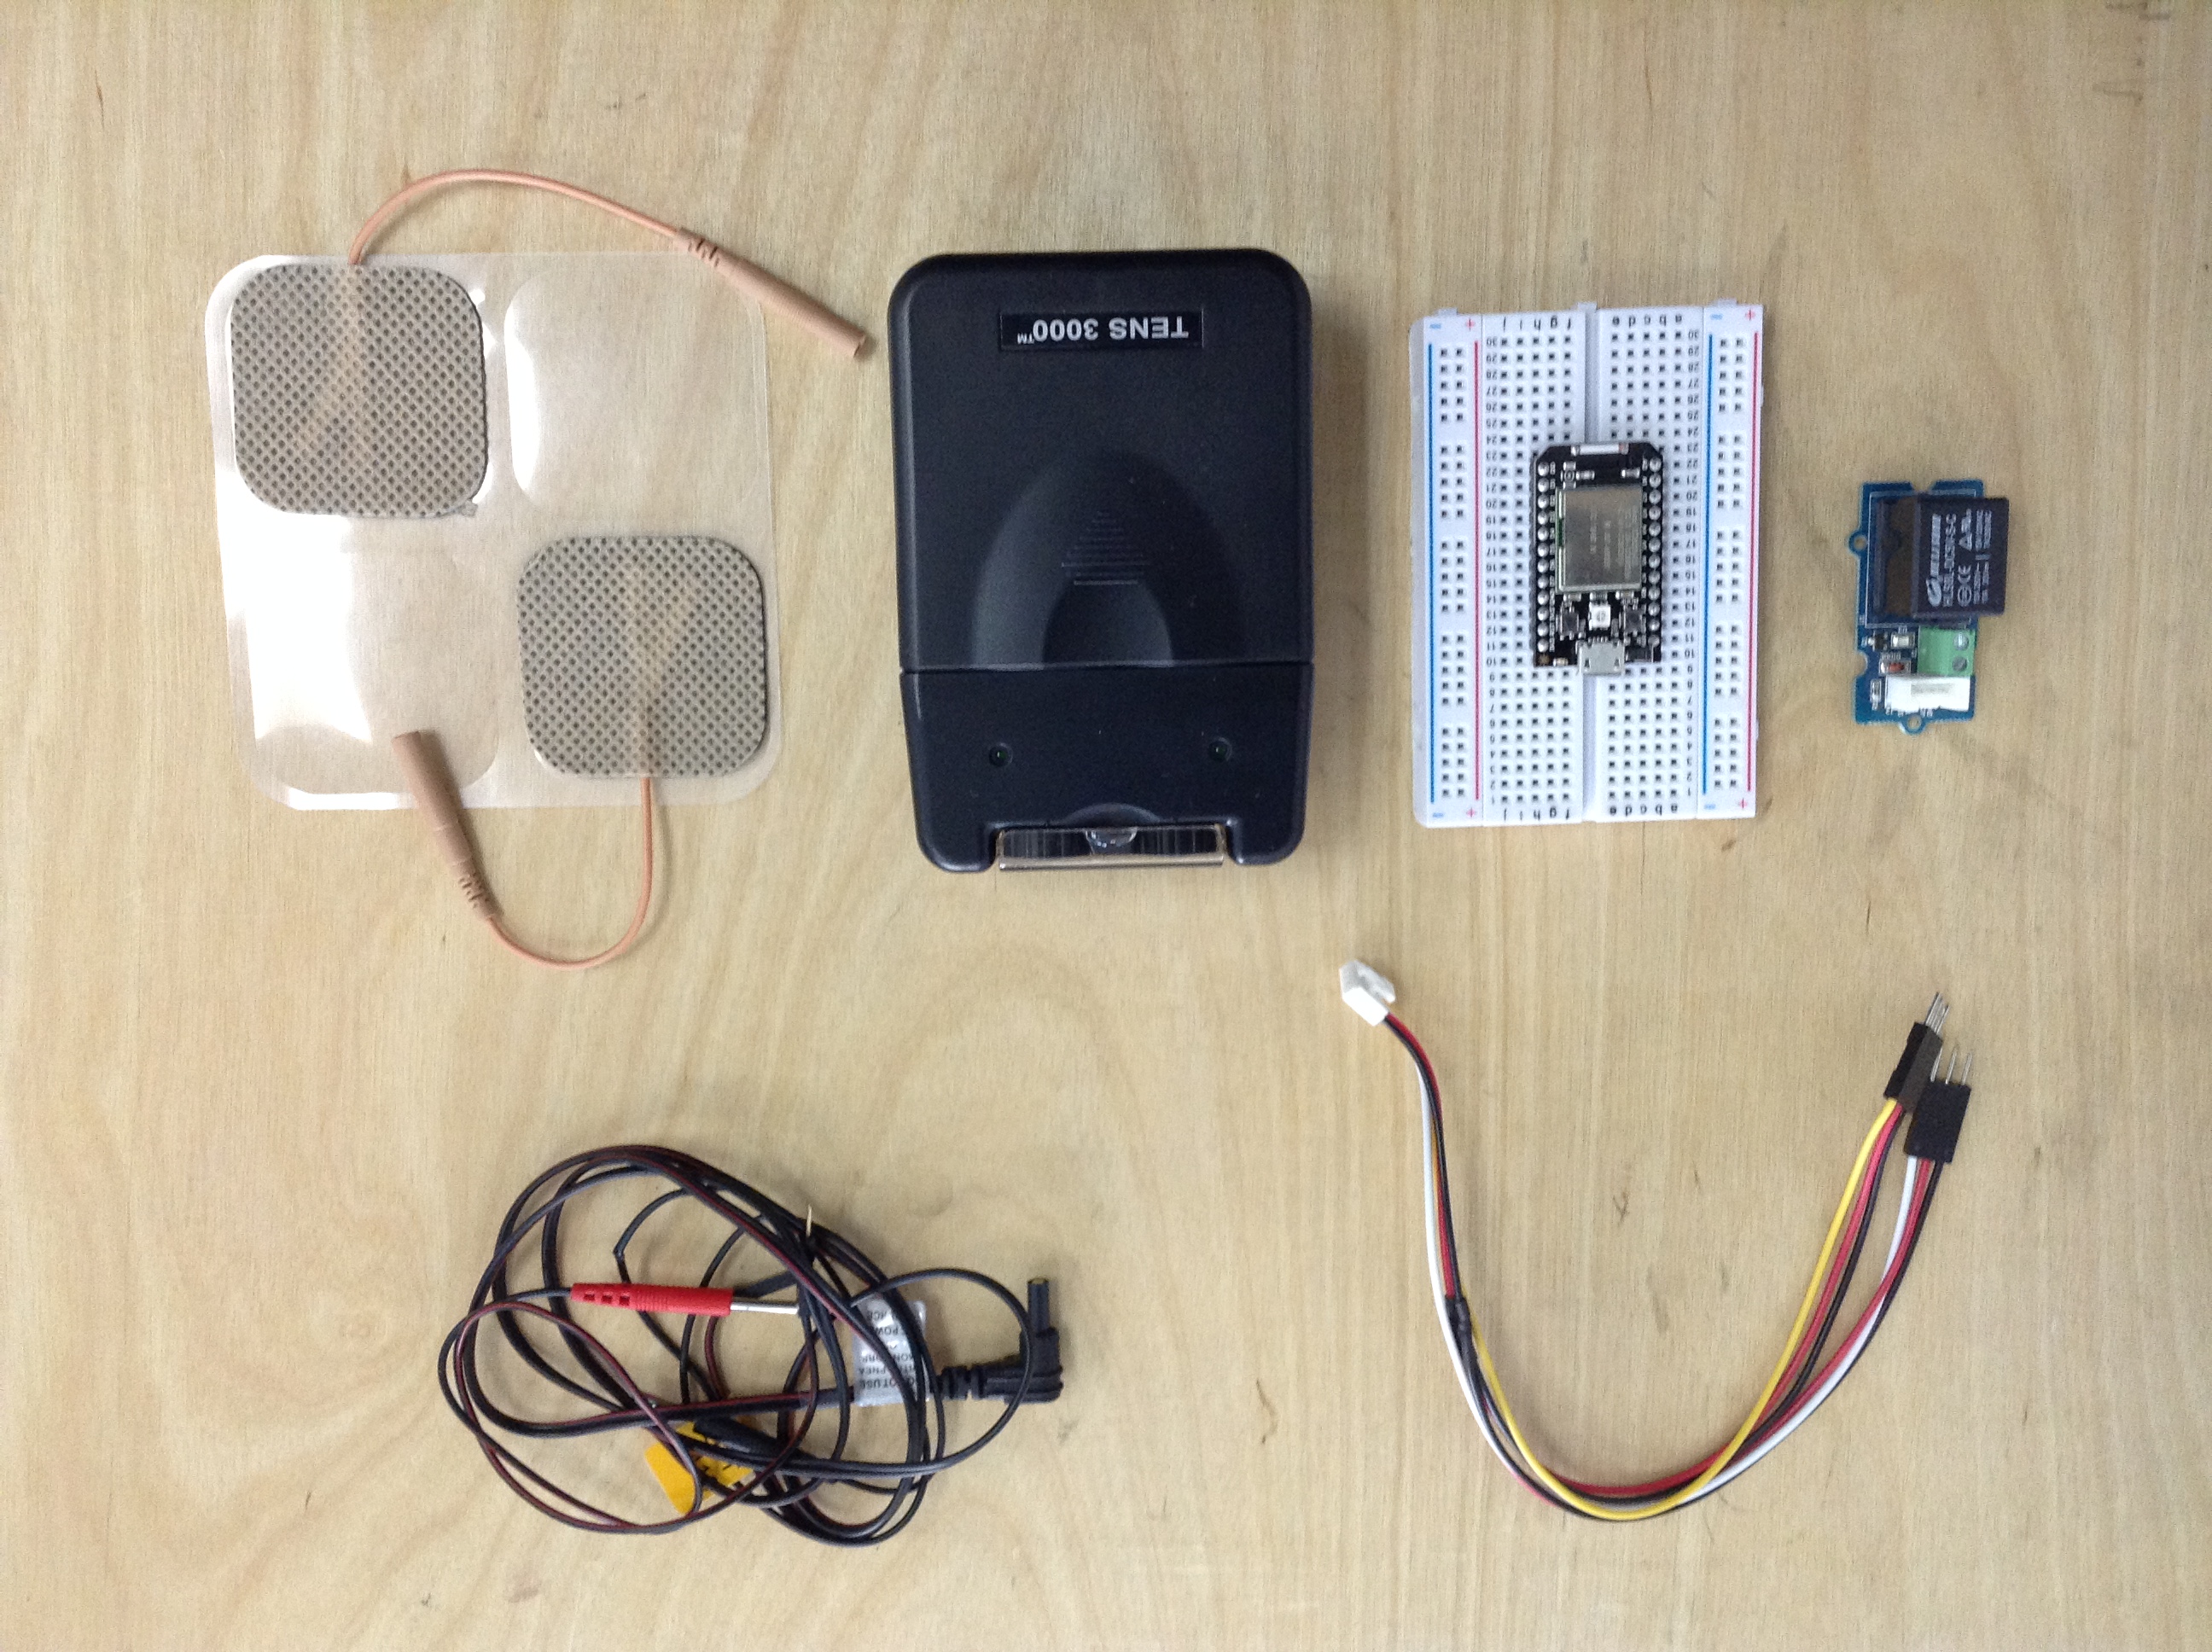
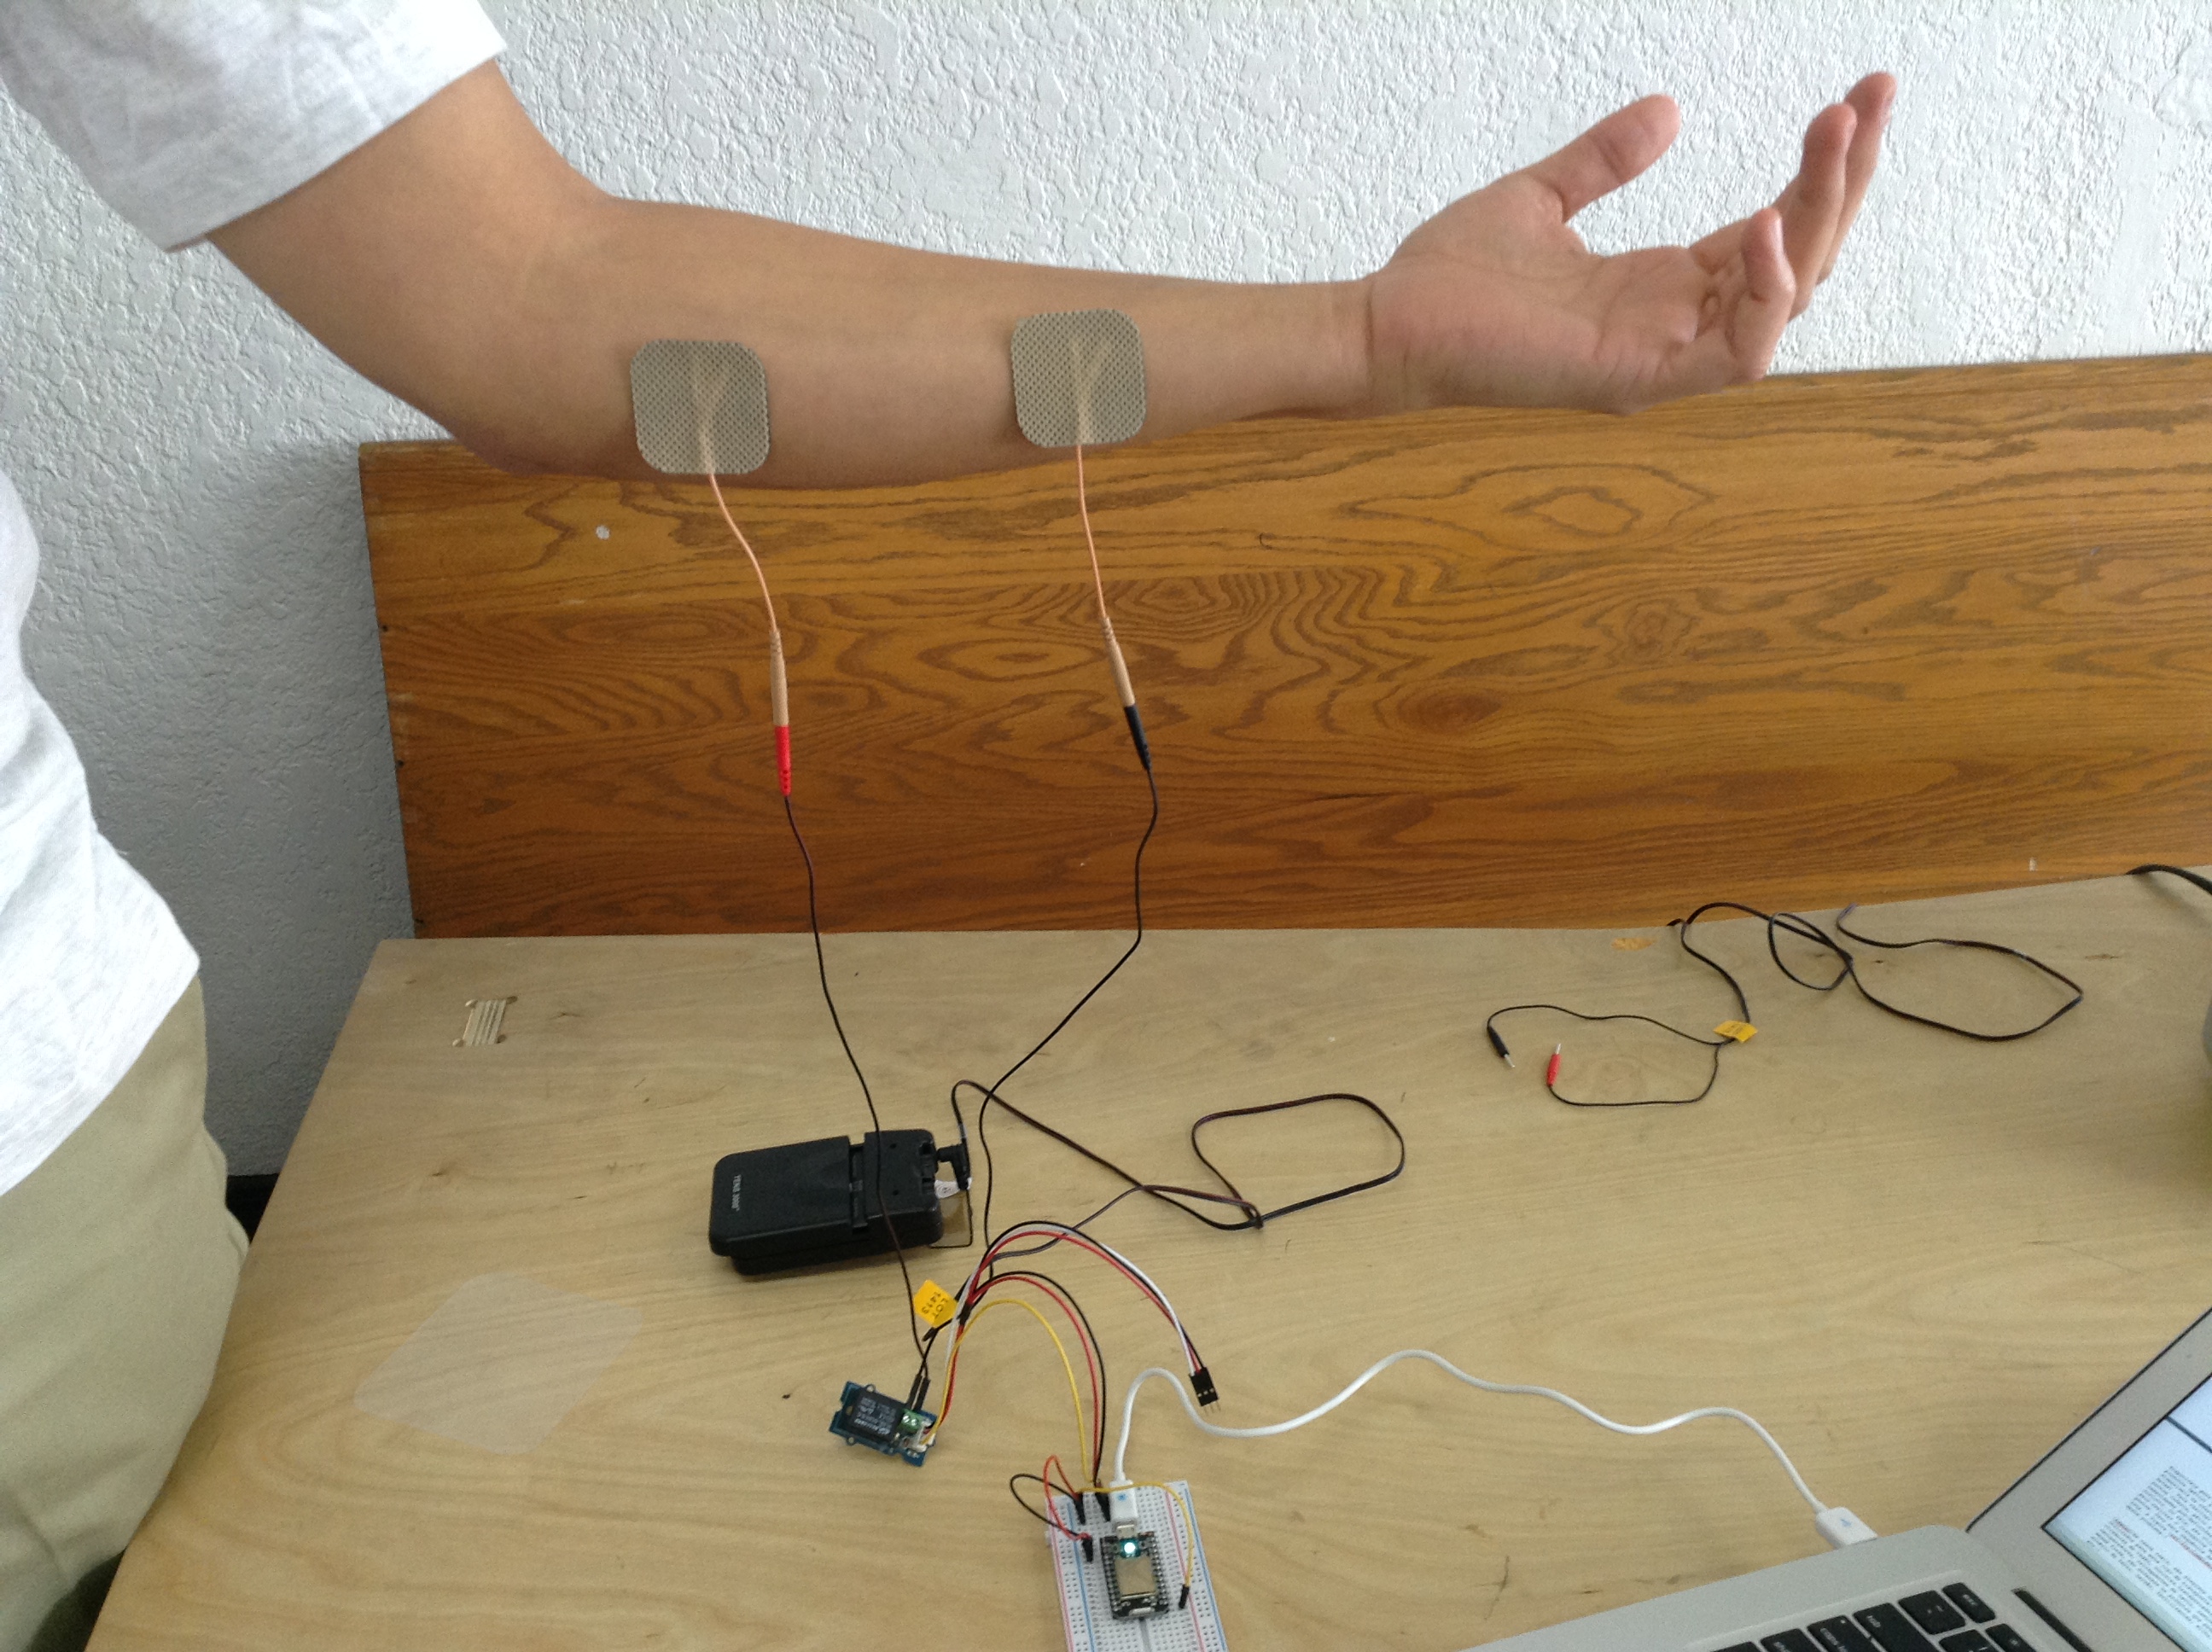
In this Instructable we'll use a Spark Core, a TENS (Transcutaneous Electrical Nerve Stimulation) unit, and a simple relay to remotely control a human minion over WiFi. Mwuahahaha!
The Spark Core connects your minion to the Internet of Things. The TENS unit stimulates involuntary muscle movements, and the relay acts as a bridge between the two.
SAFETY ADVISORY: TENS is the use of electric current produced by a device to stimulate the nerves for therapeutic purposes. We're gonna hack this for nefarious non-therapeutic purposes but remember that the comfort, health and safety of your cyborg minions always comes first. Follow all safety guidelines provided with your TENS unit and always start at a lower current and ramp up to avoid pain or discomfort.
OK...now let's have some fun!
A remote control human can be built in about 10 minutes with the following ingredients:
1 Spark Core (https://store.spark.io/)
1 TENS unit (http://www.tenspros.com/TENS-3000-Best-Analog-3-Mo...
1 GROVE relay unit (http://www.seeedstudio.com/depot/Grove-Relay-p-769...
1 GROVE breakout cable (http://www.seeedstudio.com/depot/Grove-4-pin-Male-...
3 Male-to-Male jumper cables
2 Male headers
Wire cutters/strippers
Small slotted screwdriver
Prepare the TENS Cable
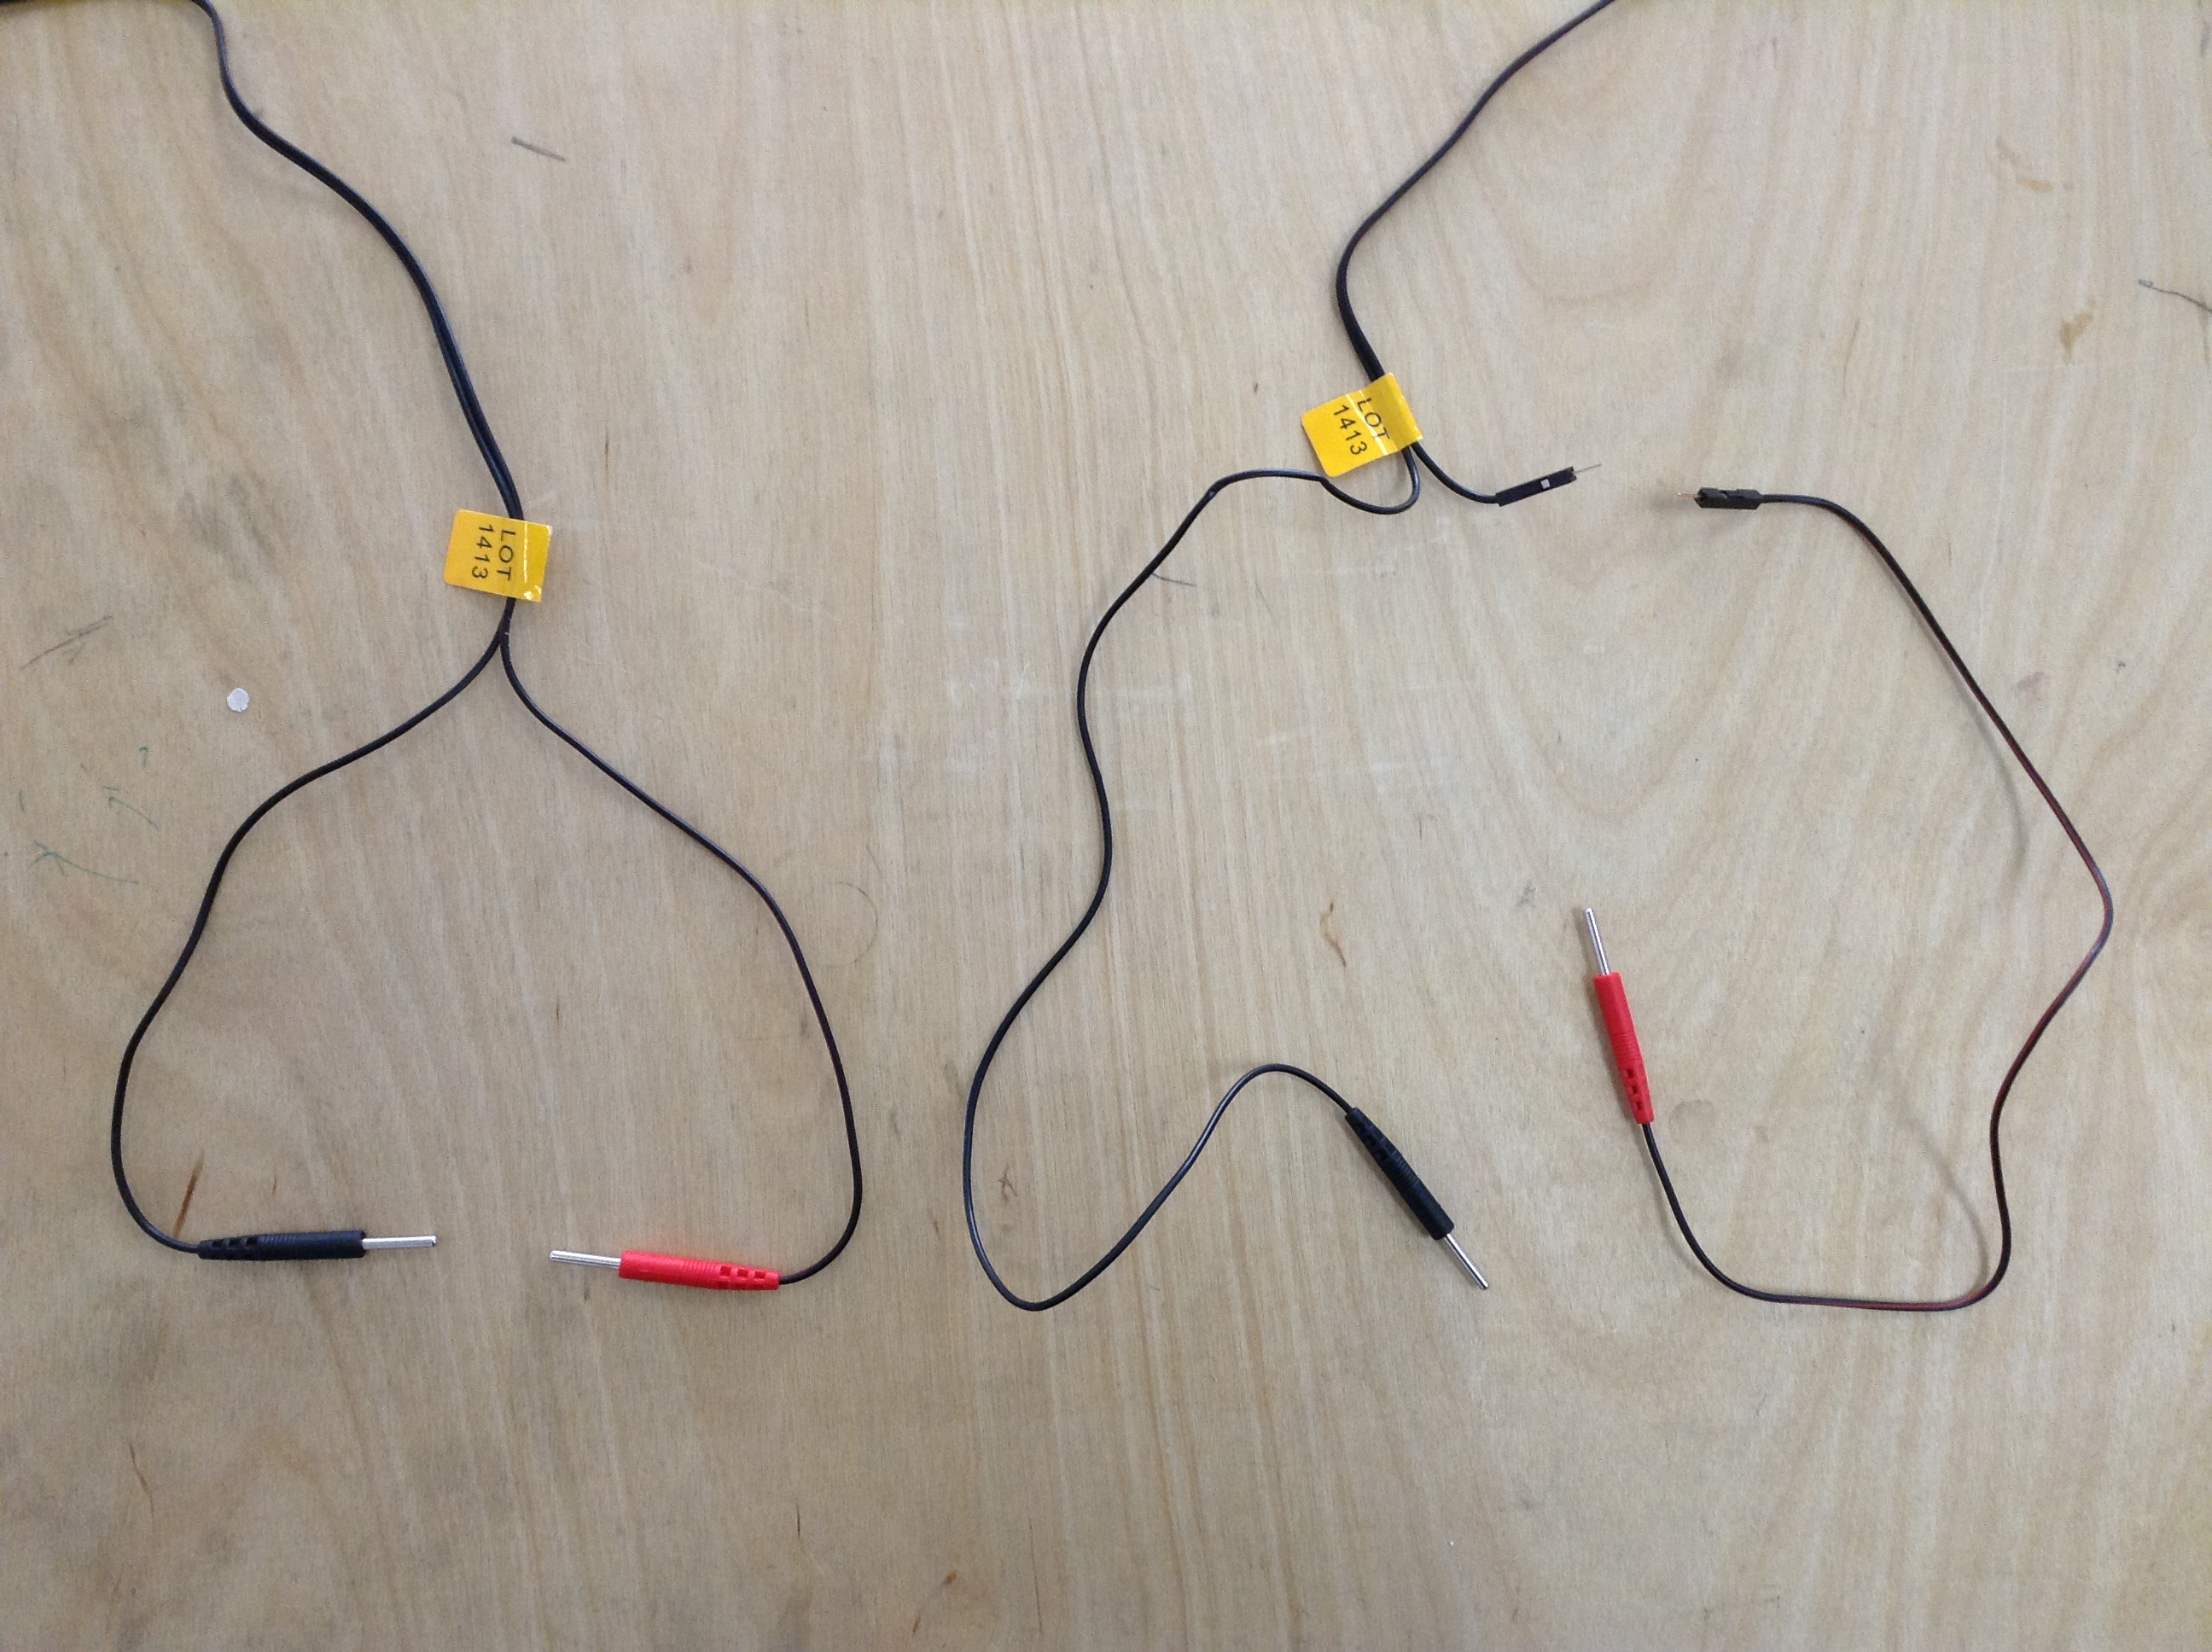
You'll need to cut one lead of the TENS unit electrode lead cable. Cut the RED lead and install a Male pin on each of the severed ends. The length of the free wire will determine the distance between the relay and your minion, so make it long enough; you can pull the black and red wire apart further if you need a longer lead.
The picture shows what the electrode lead cable should look like before and after preparation.
Wire Electrodes to Relay
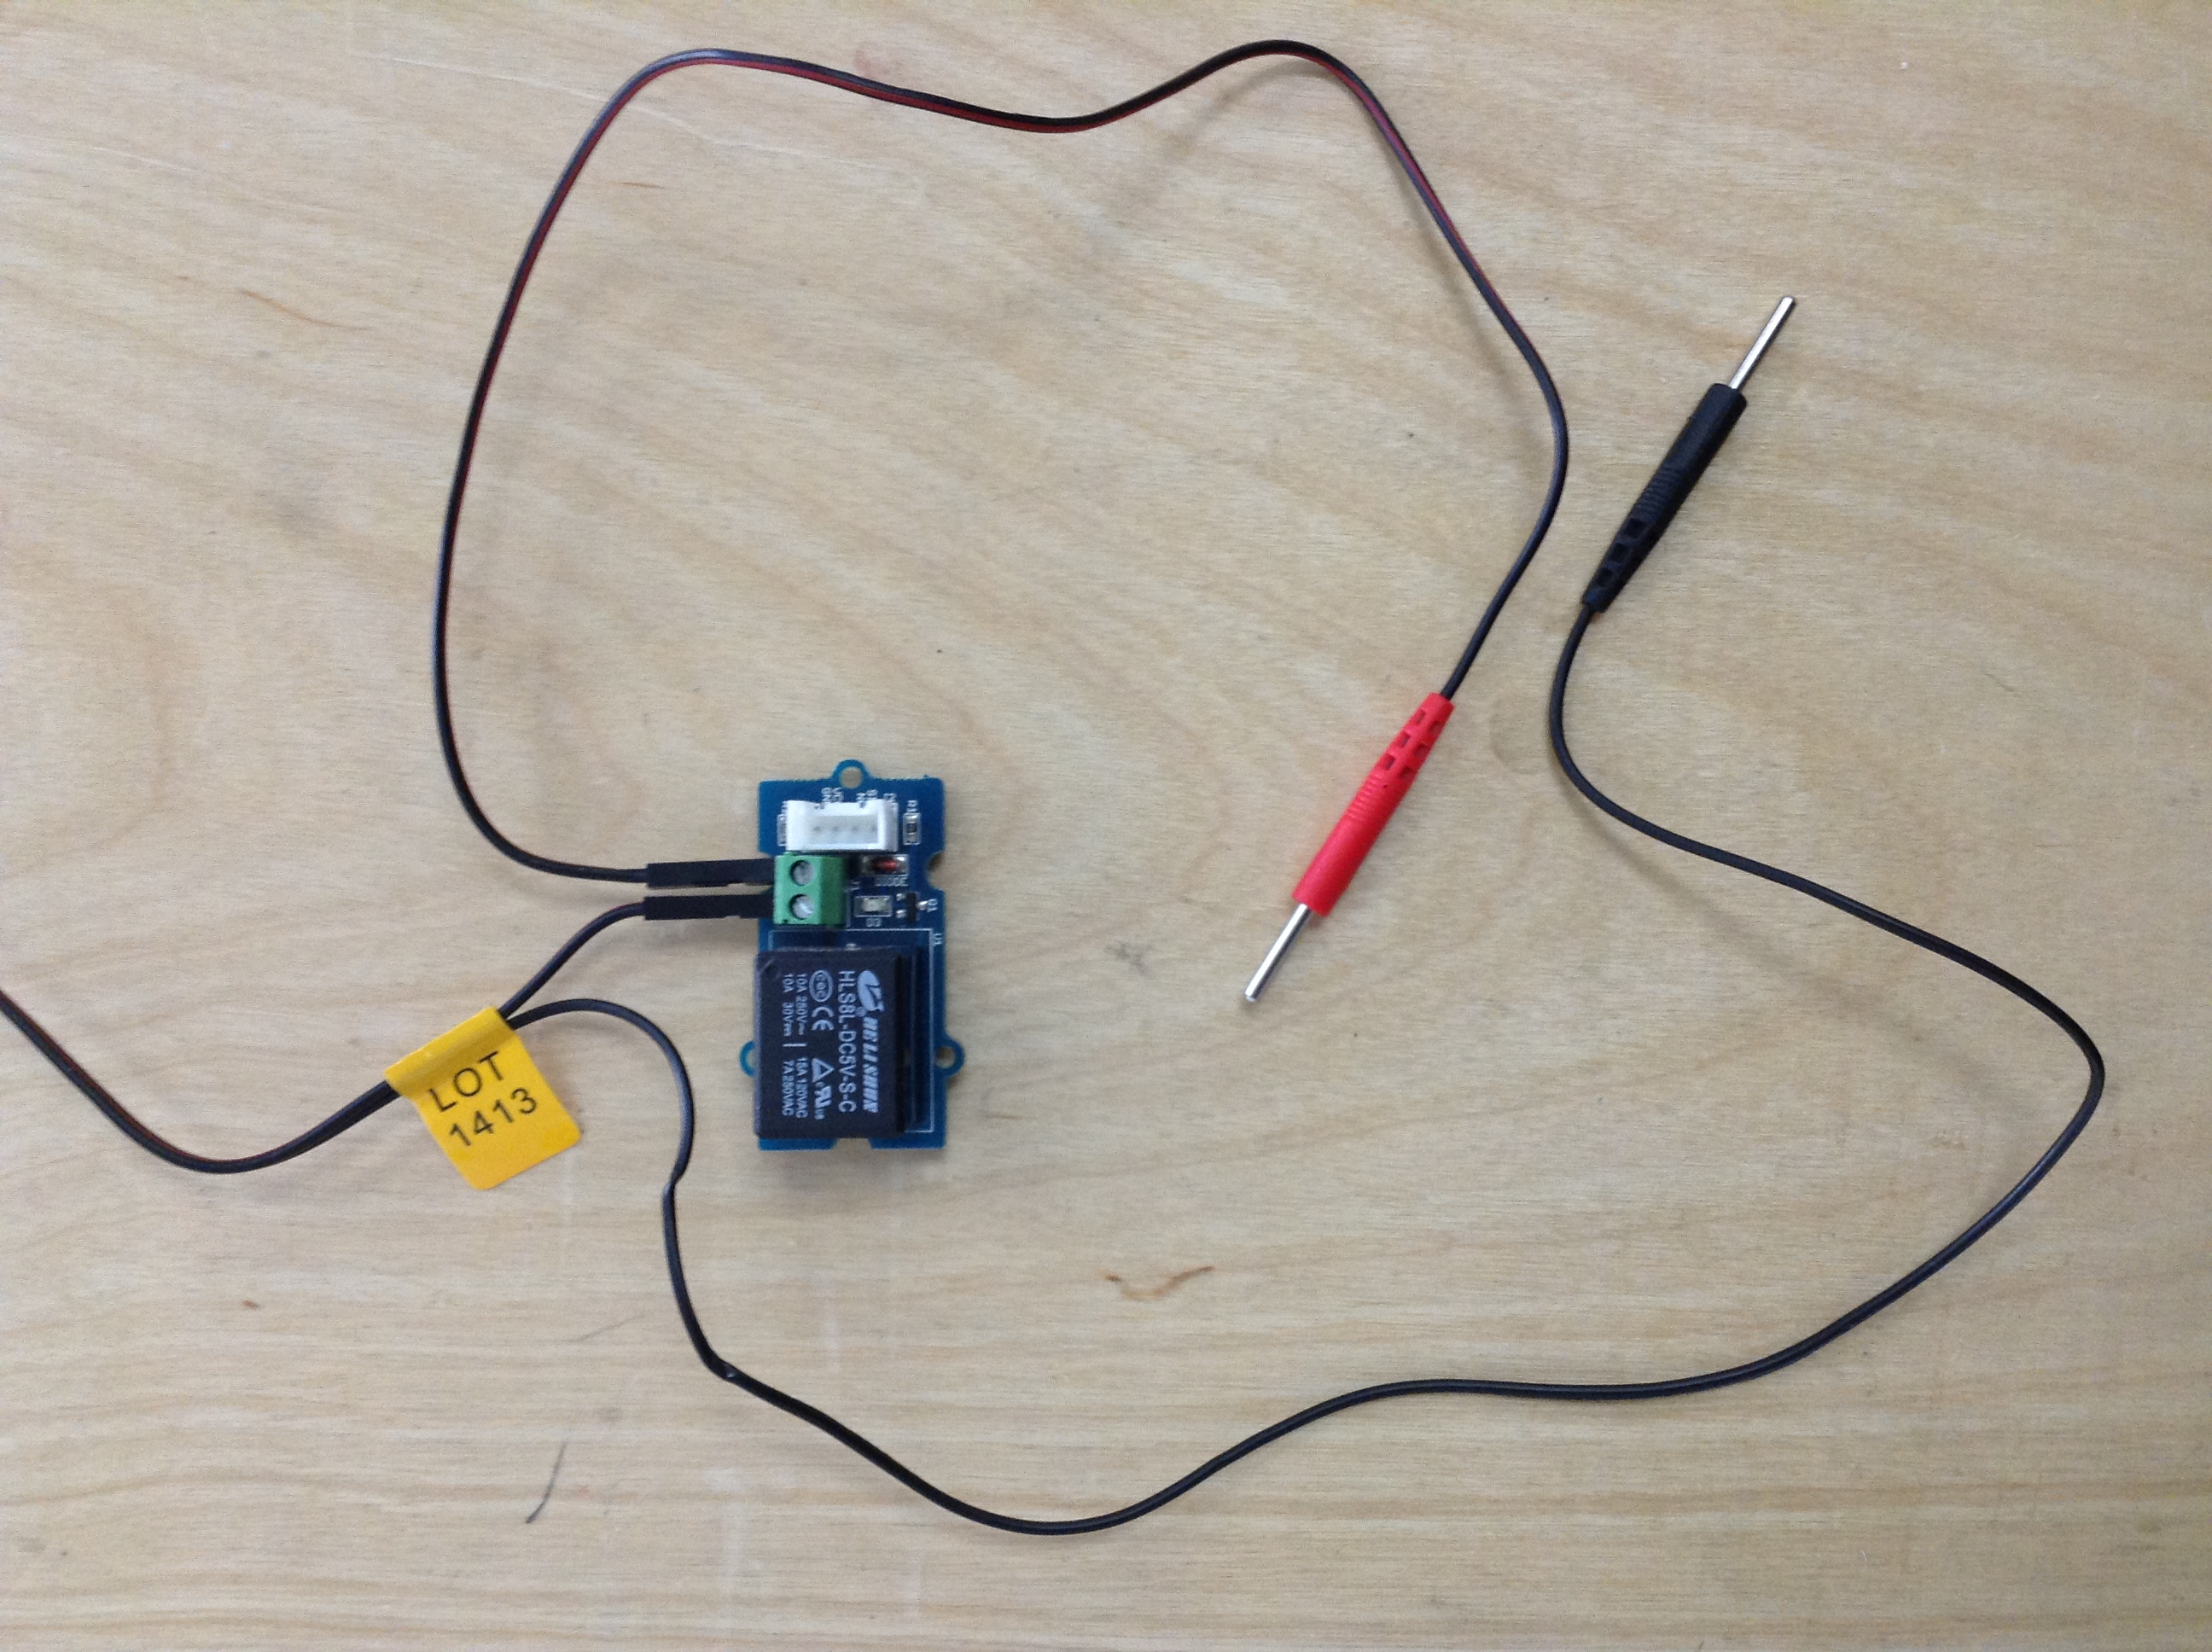
Take each of the male pins from the electrode lead cable and wire them into the screw terminal on the GROVE relay unit. It doesn't matter which end goes where, just make sure you screw them down tight.
Connect Relay to the Spark Core
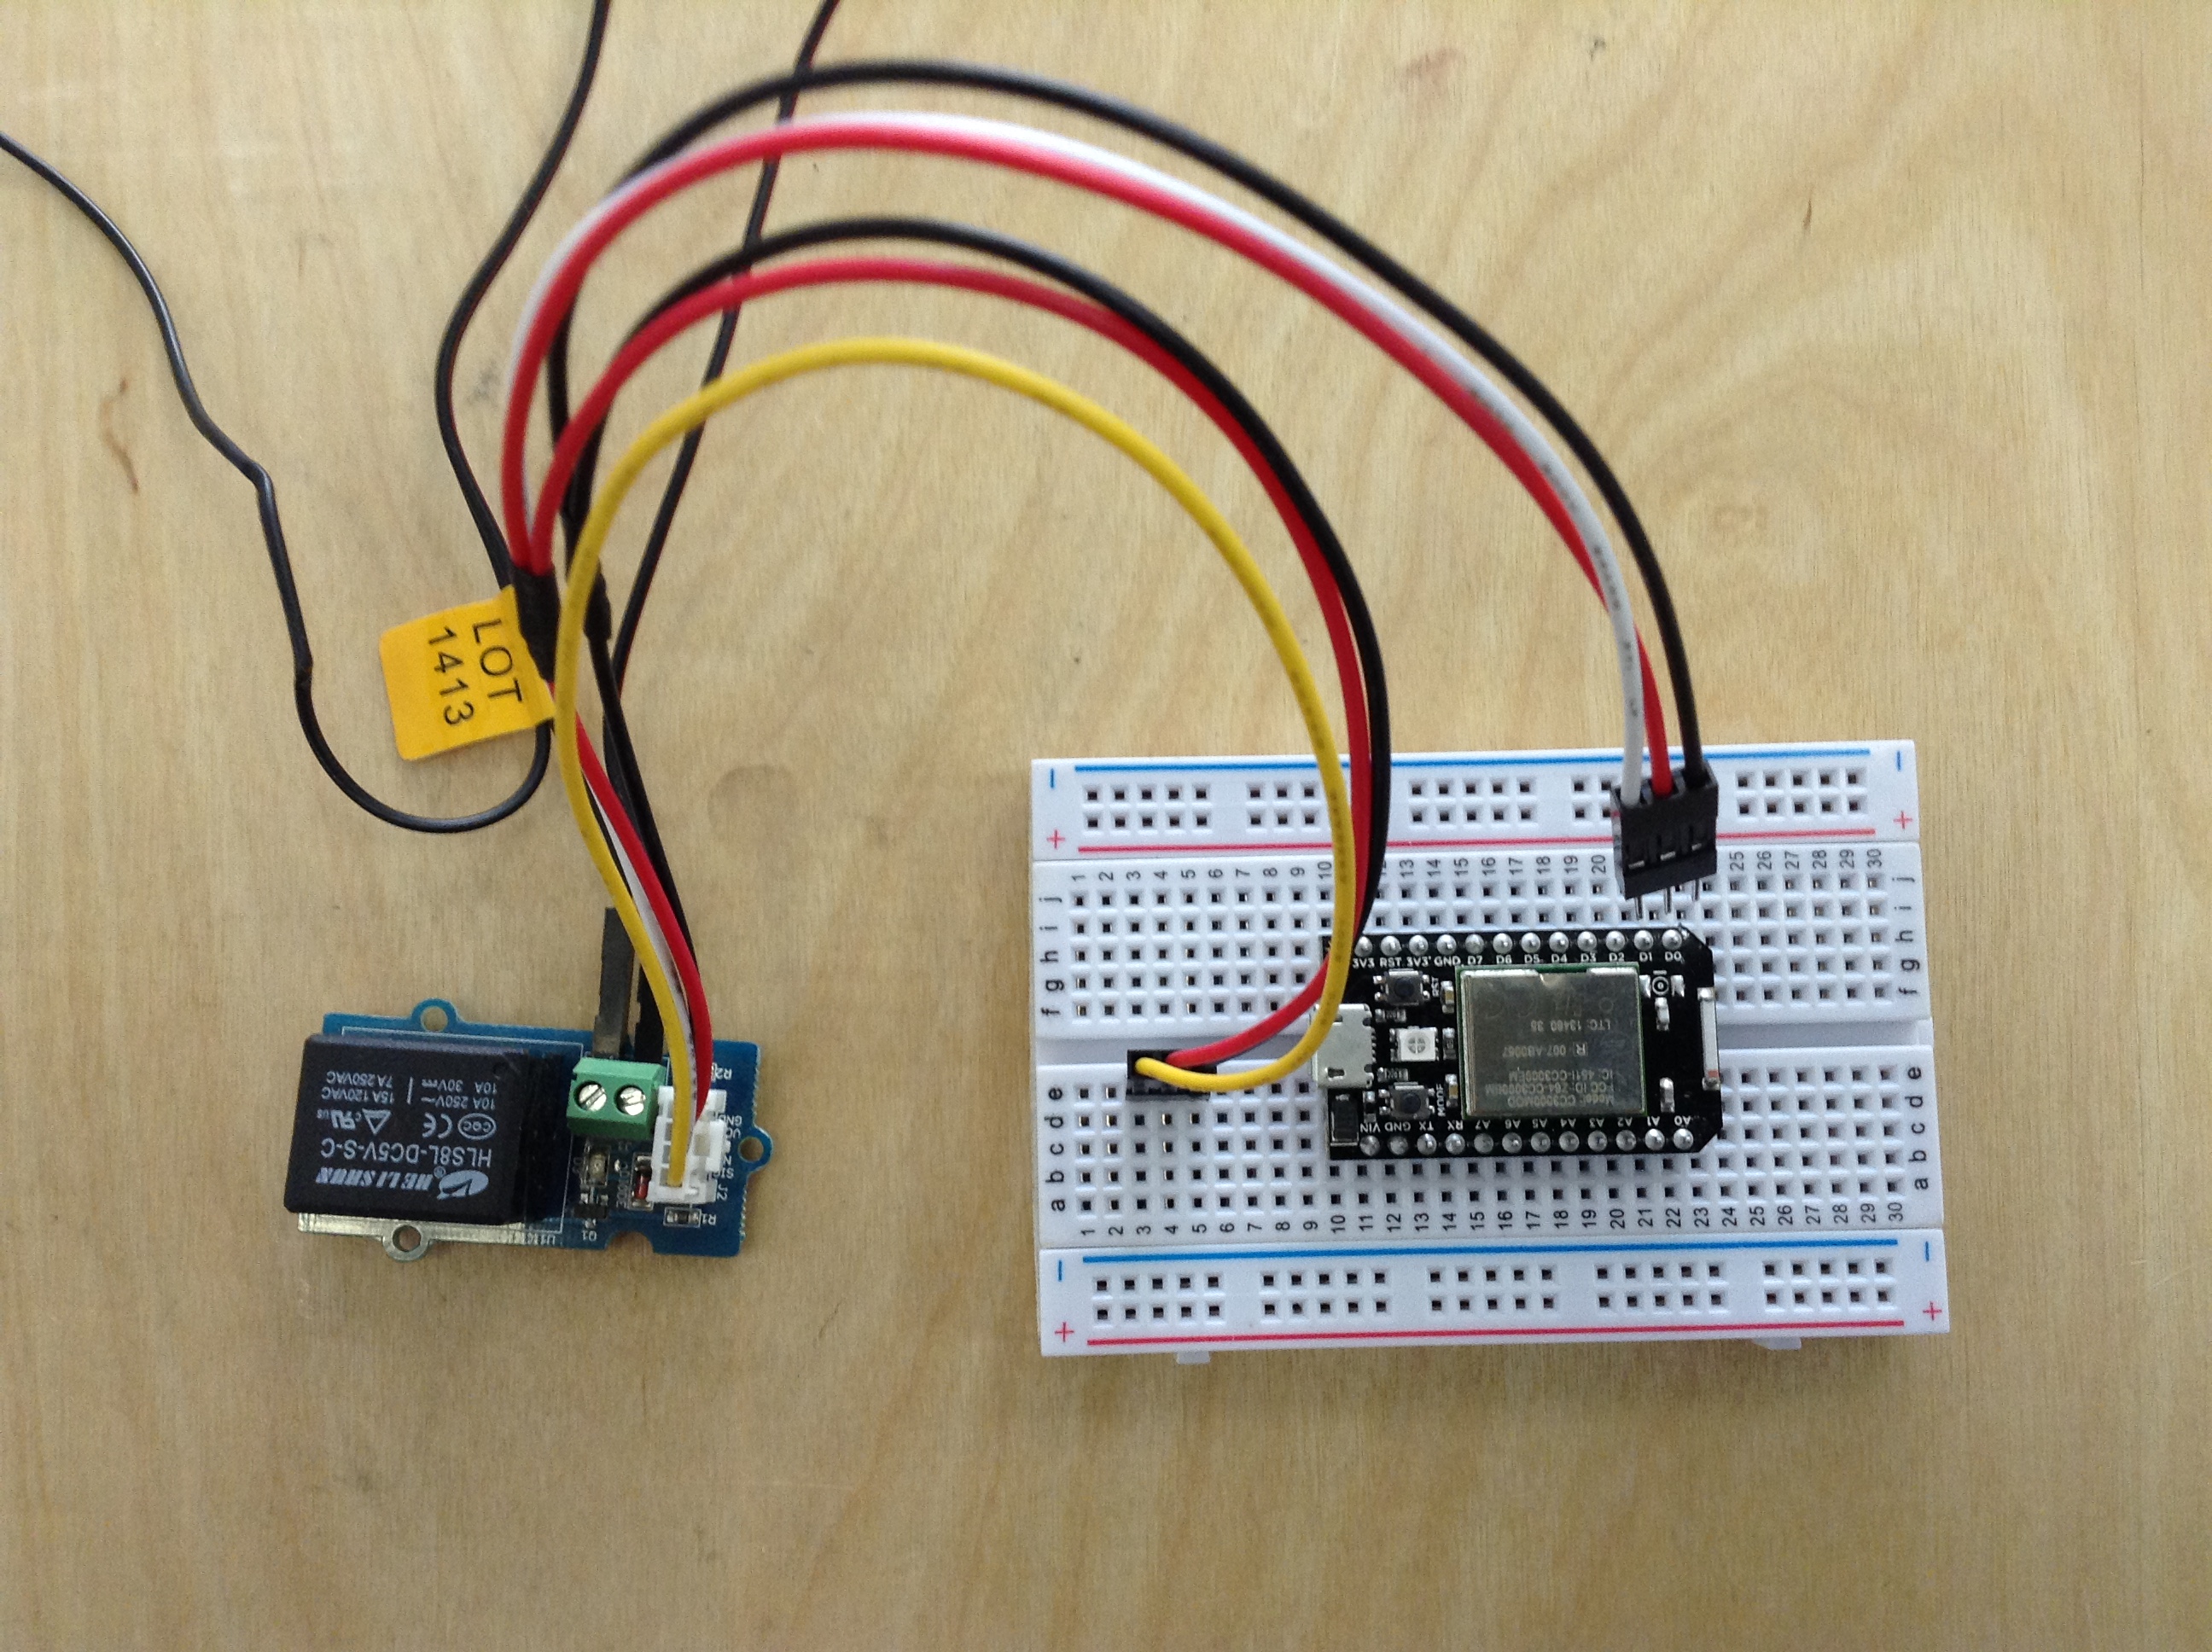
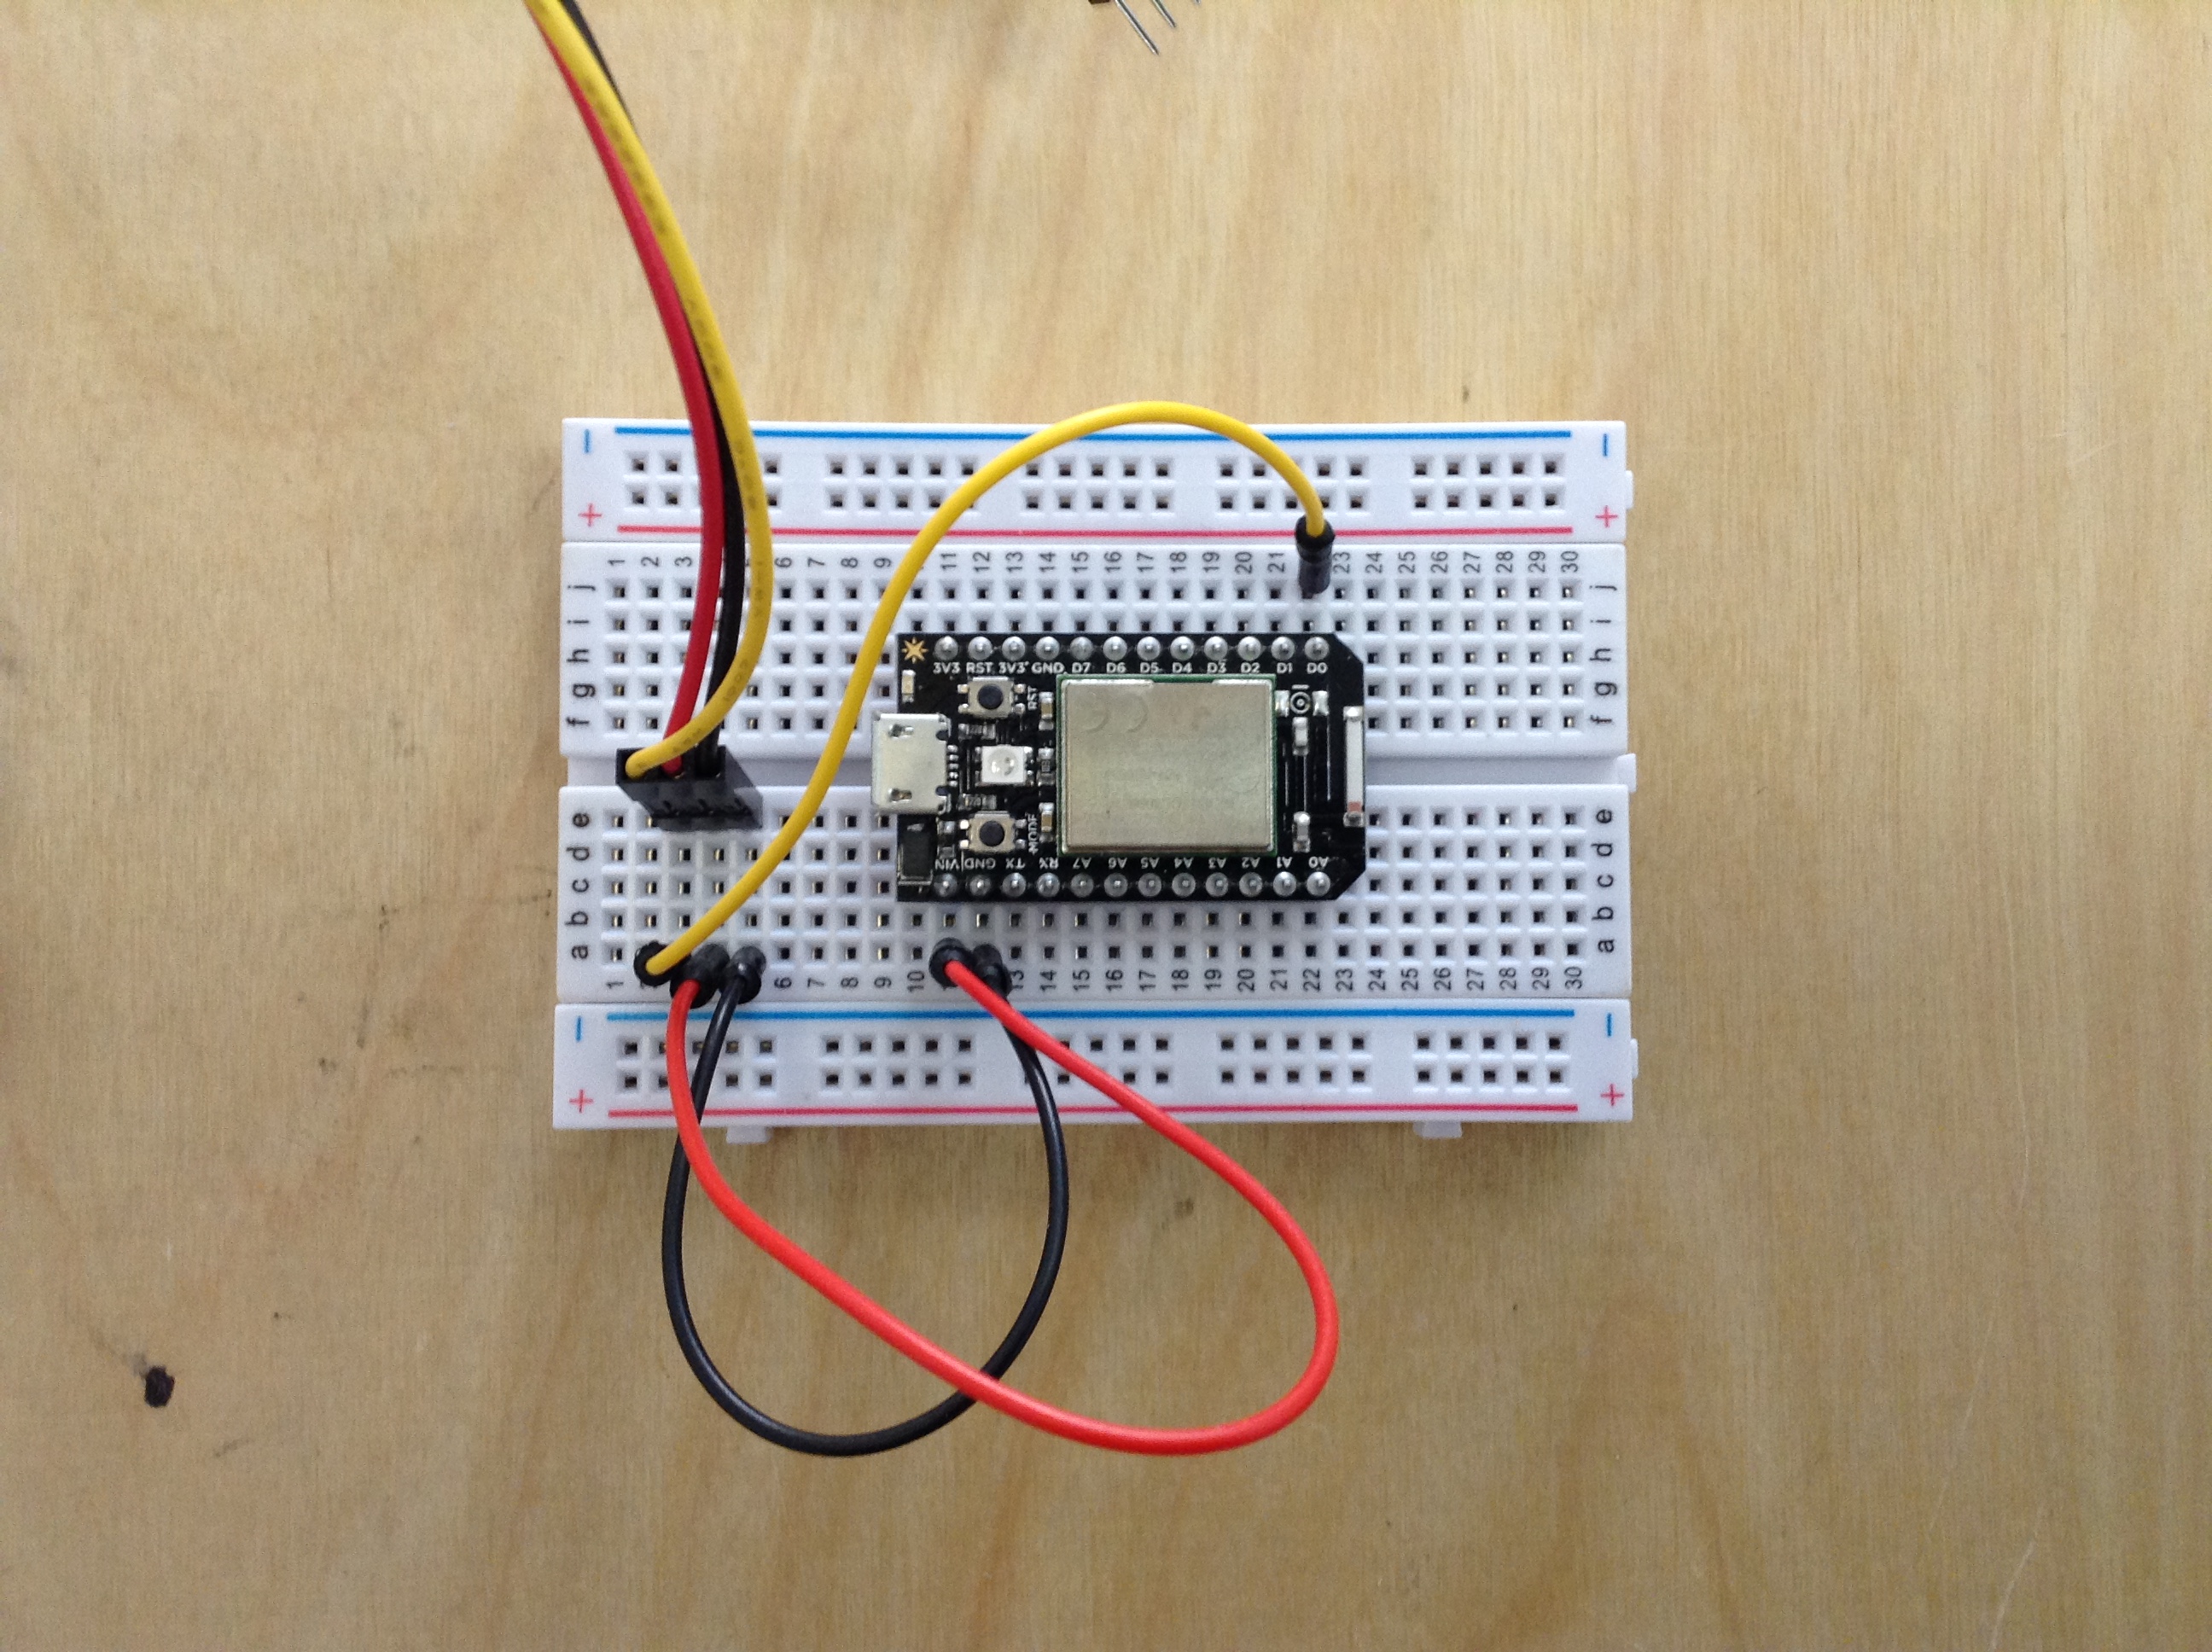
Use the GROVE breakout cable to connect the relay to some free rows on the breadboard holding the Spark Core. Then take three male-to-male jumper cables and wire them as follows: VCC on relay to VIN on Spark Core; GND on relay to GND on Spark Core; SIG on relay to any digital pin on Spark Core (here we use pin DO).
Test Relay Function
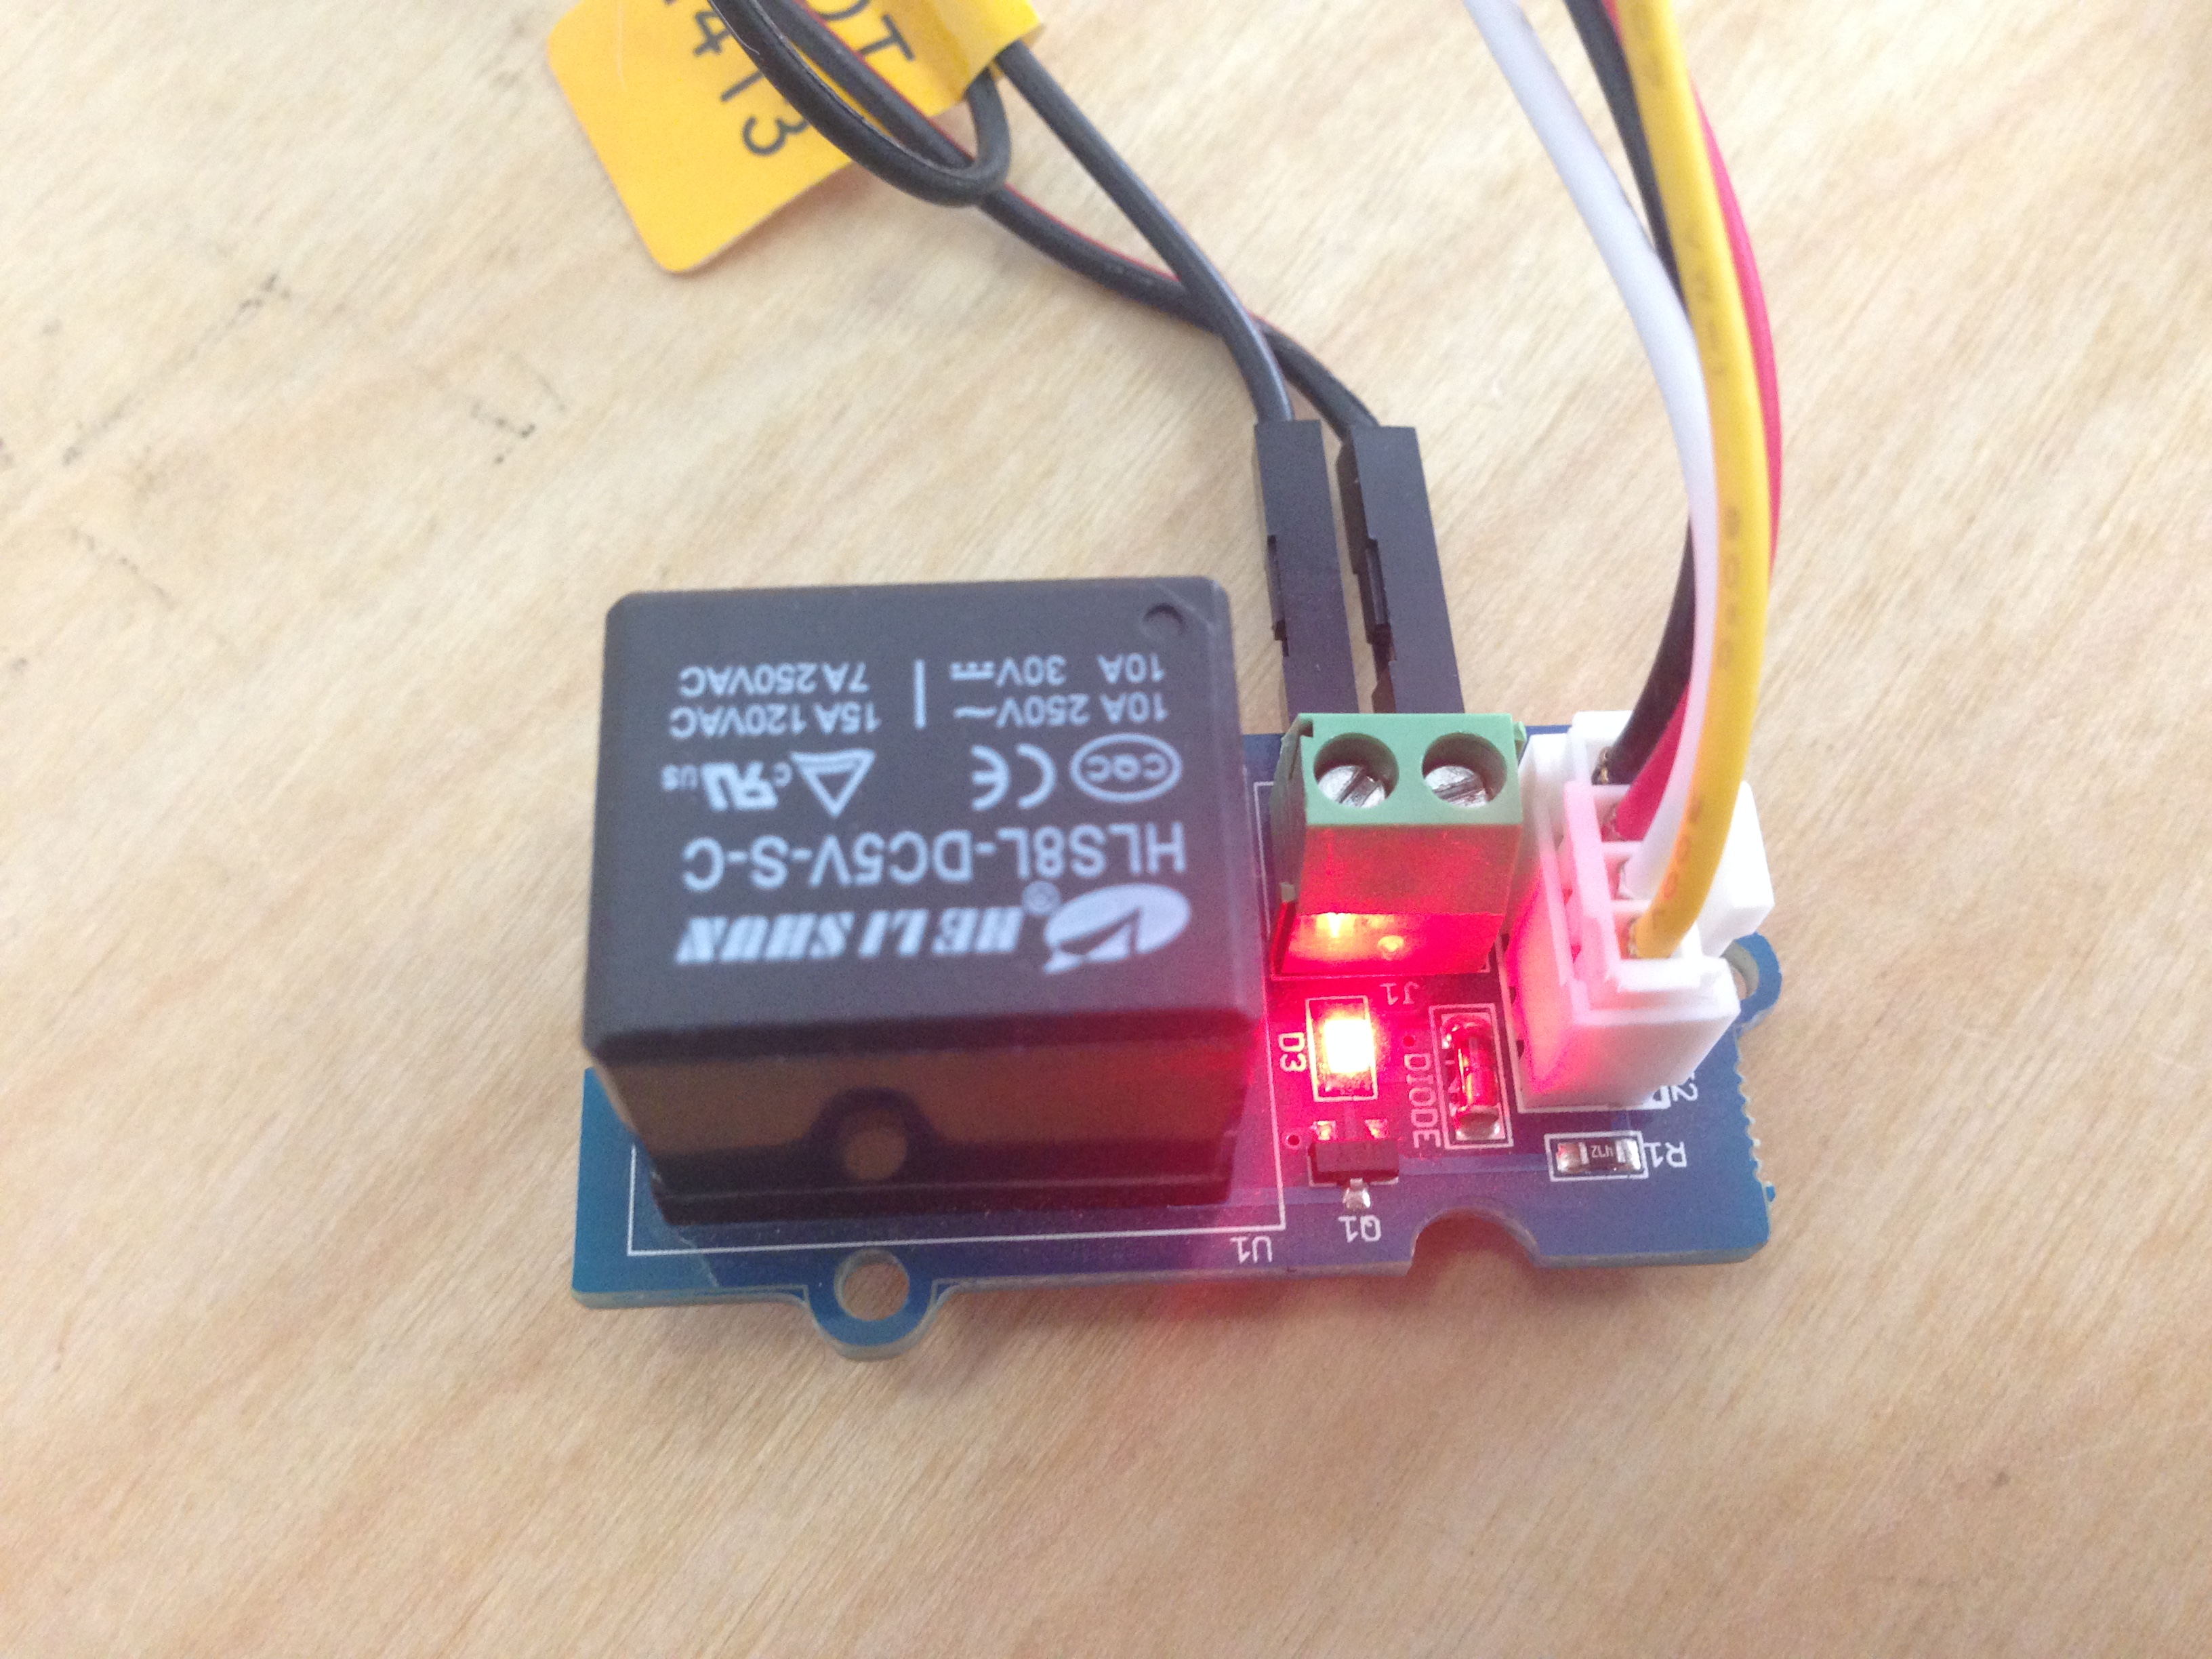
Follow the instructions that came with your Spark Core to capture it with your wireless device (it should breathe blue like in the video if the process was successful). Once connected through the Spark Core App, tap D0 in the Tinker interface. Select option "digitalWrite". You should see a red circle and the word "LOW" on D0. Tap D0 to switch the pin to HIGH. At this point you should notice an audible click of the relay switching on, and the red indicator LED on the GROVE relay unit should turn on.
Make sure you switch pin D0 back to "LOW" before proceeding!
Downloads
Connect and Test the TENS Unit
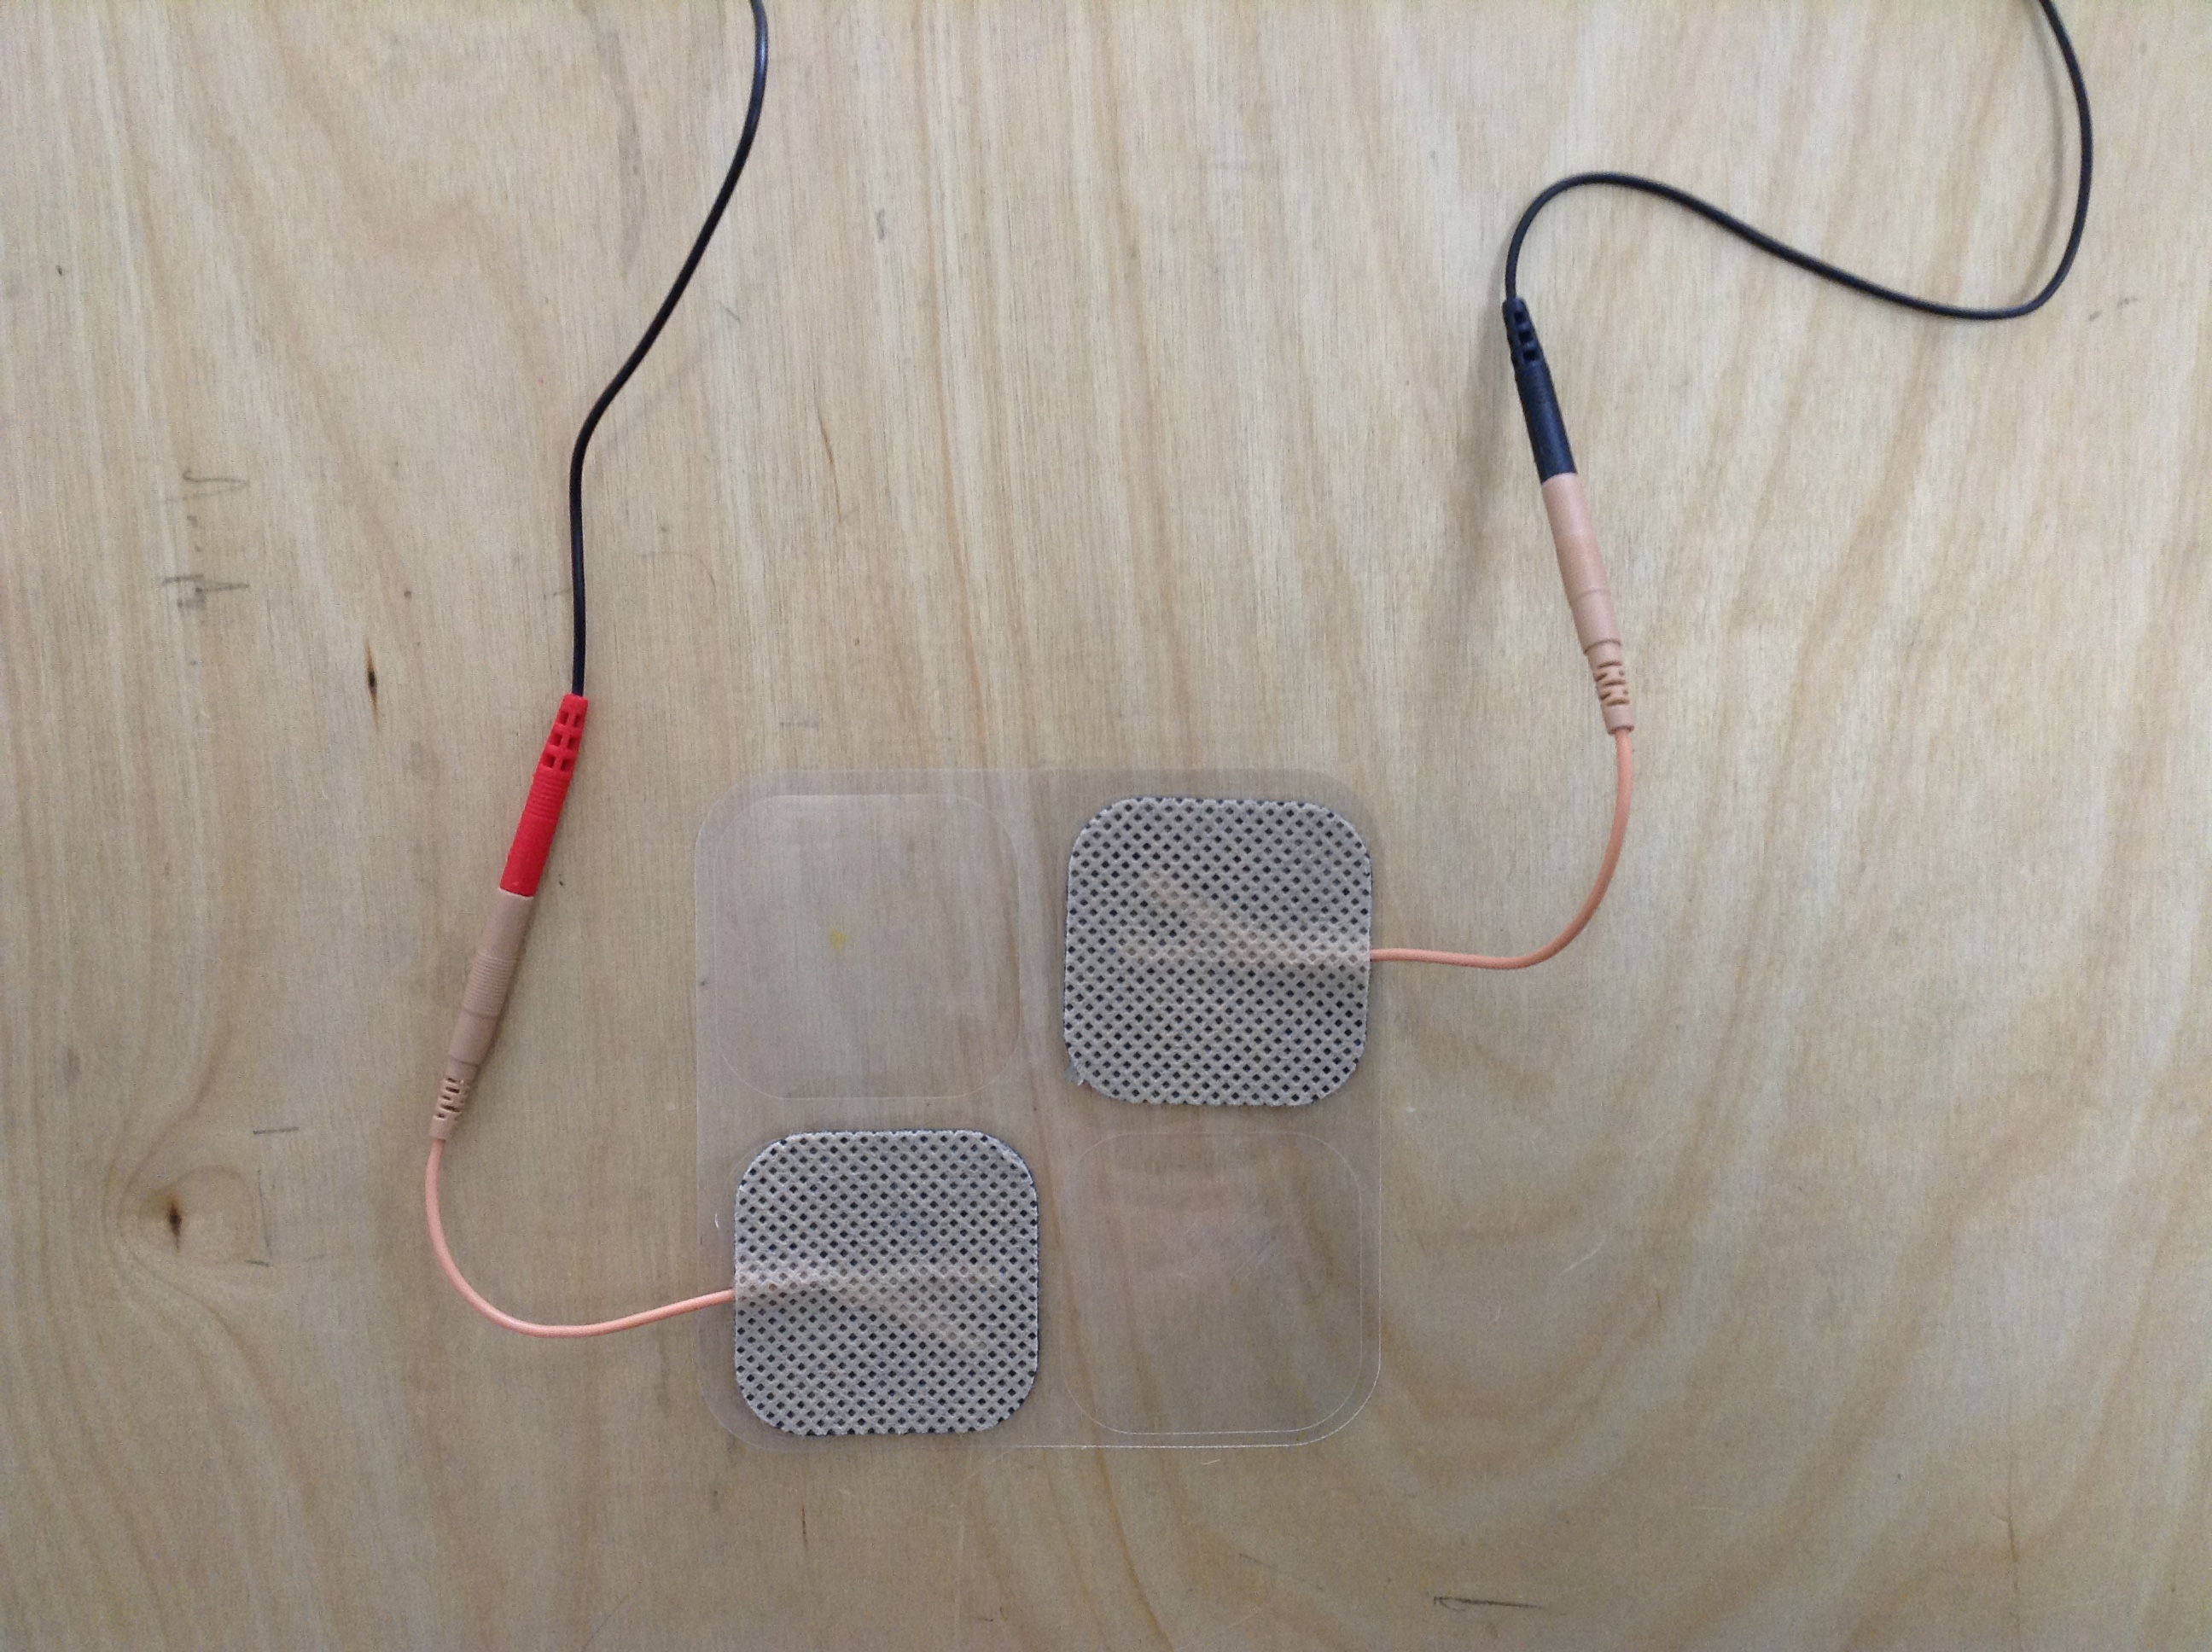
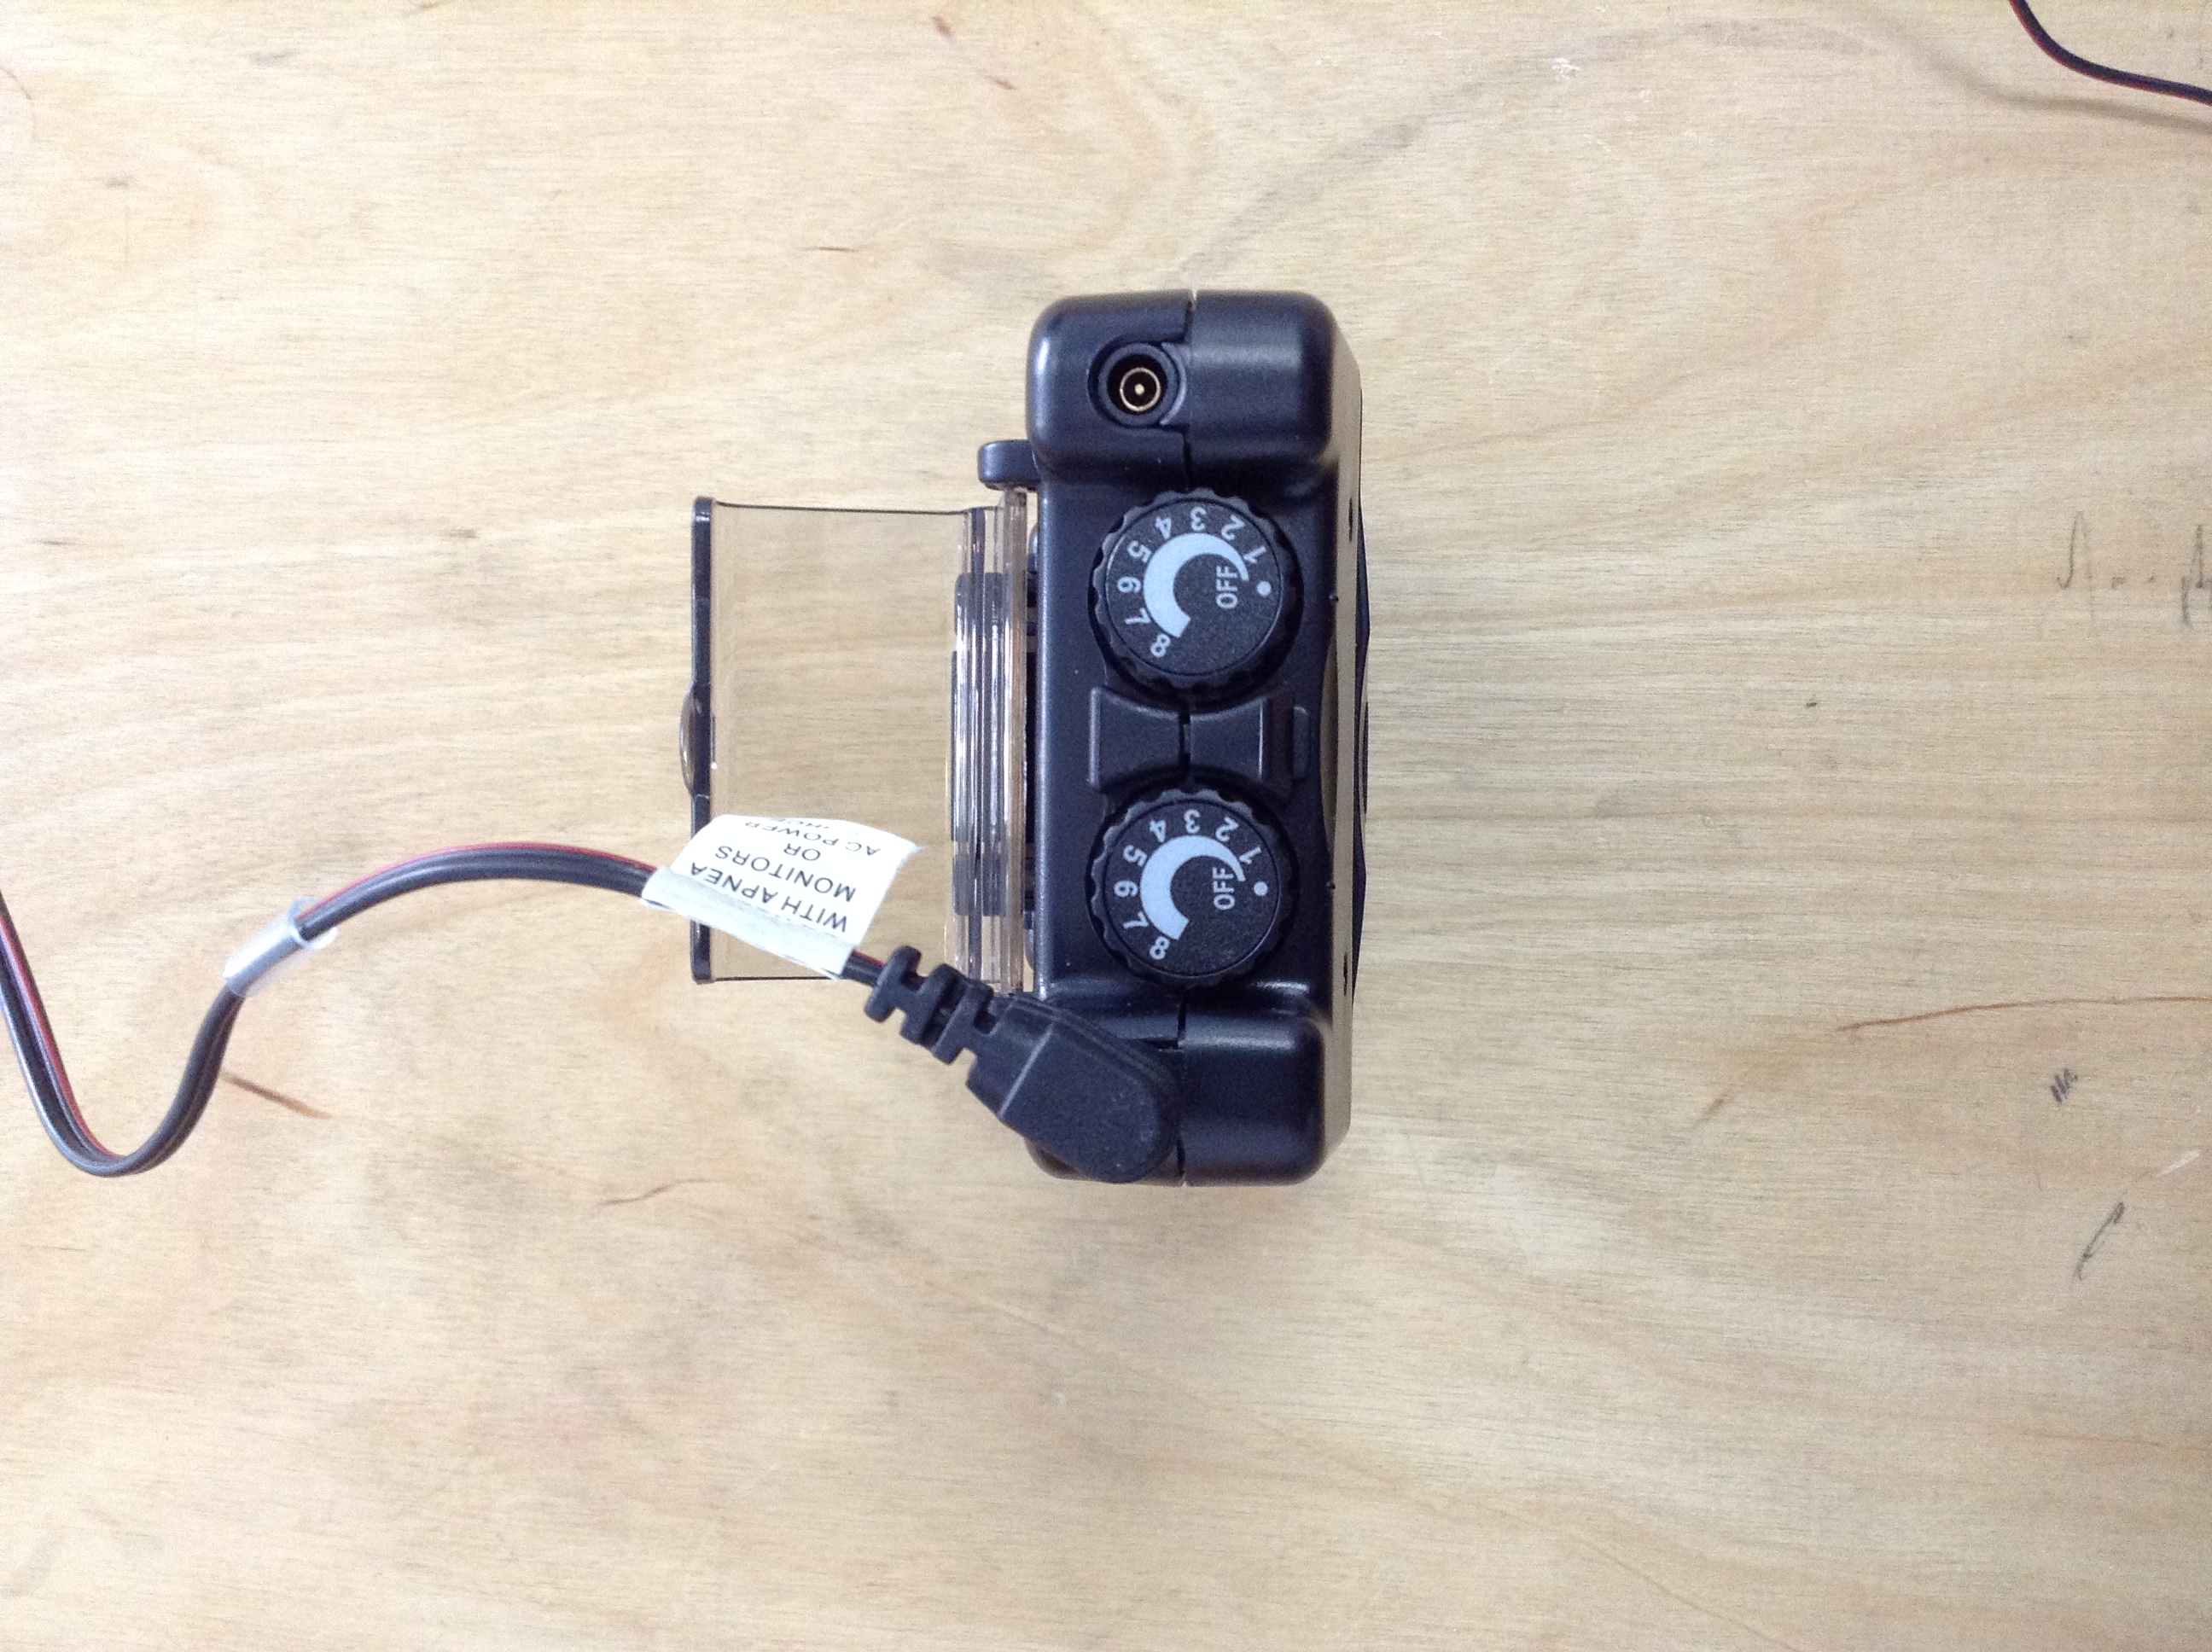
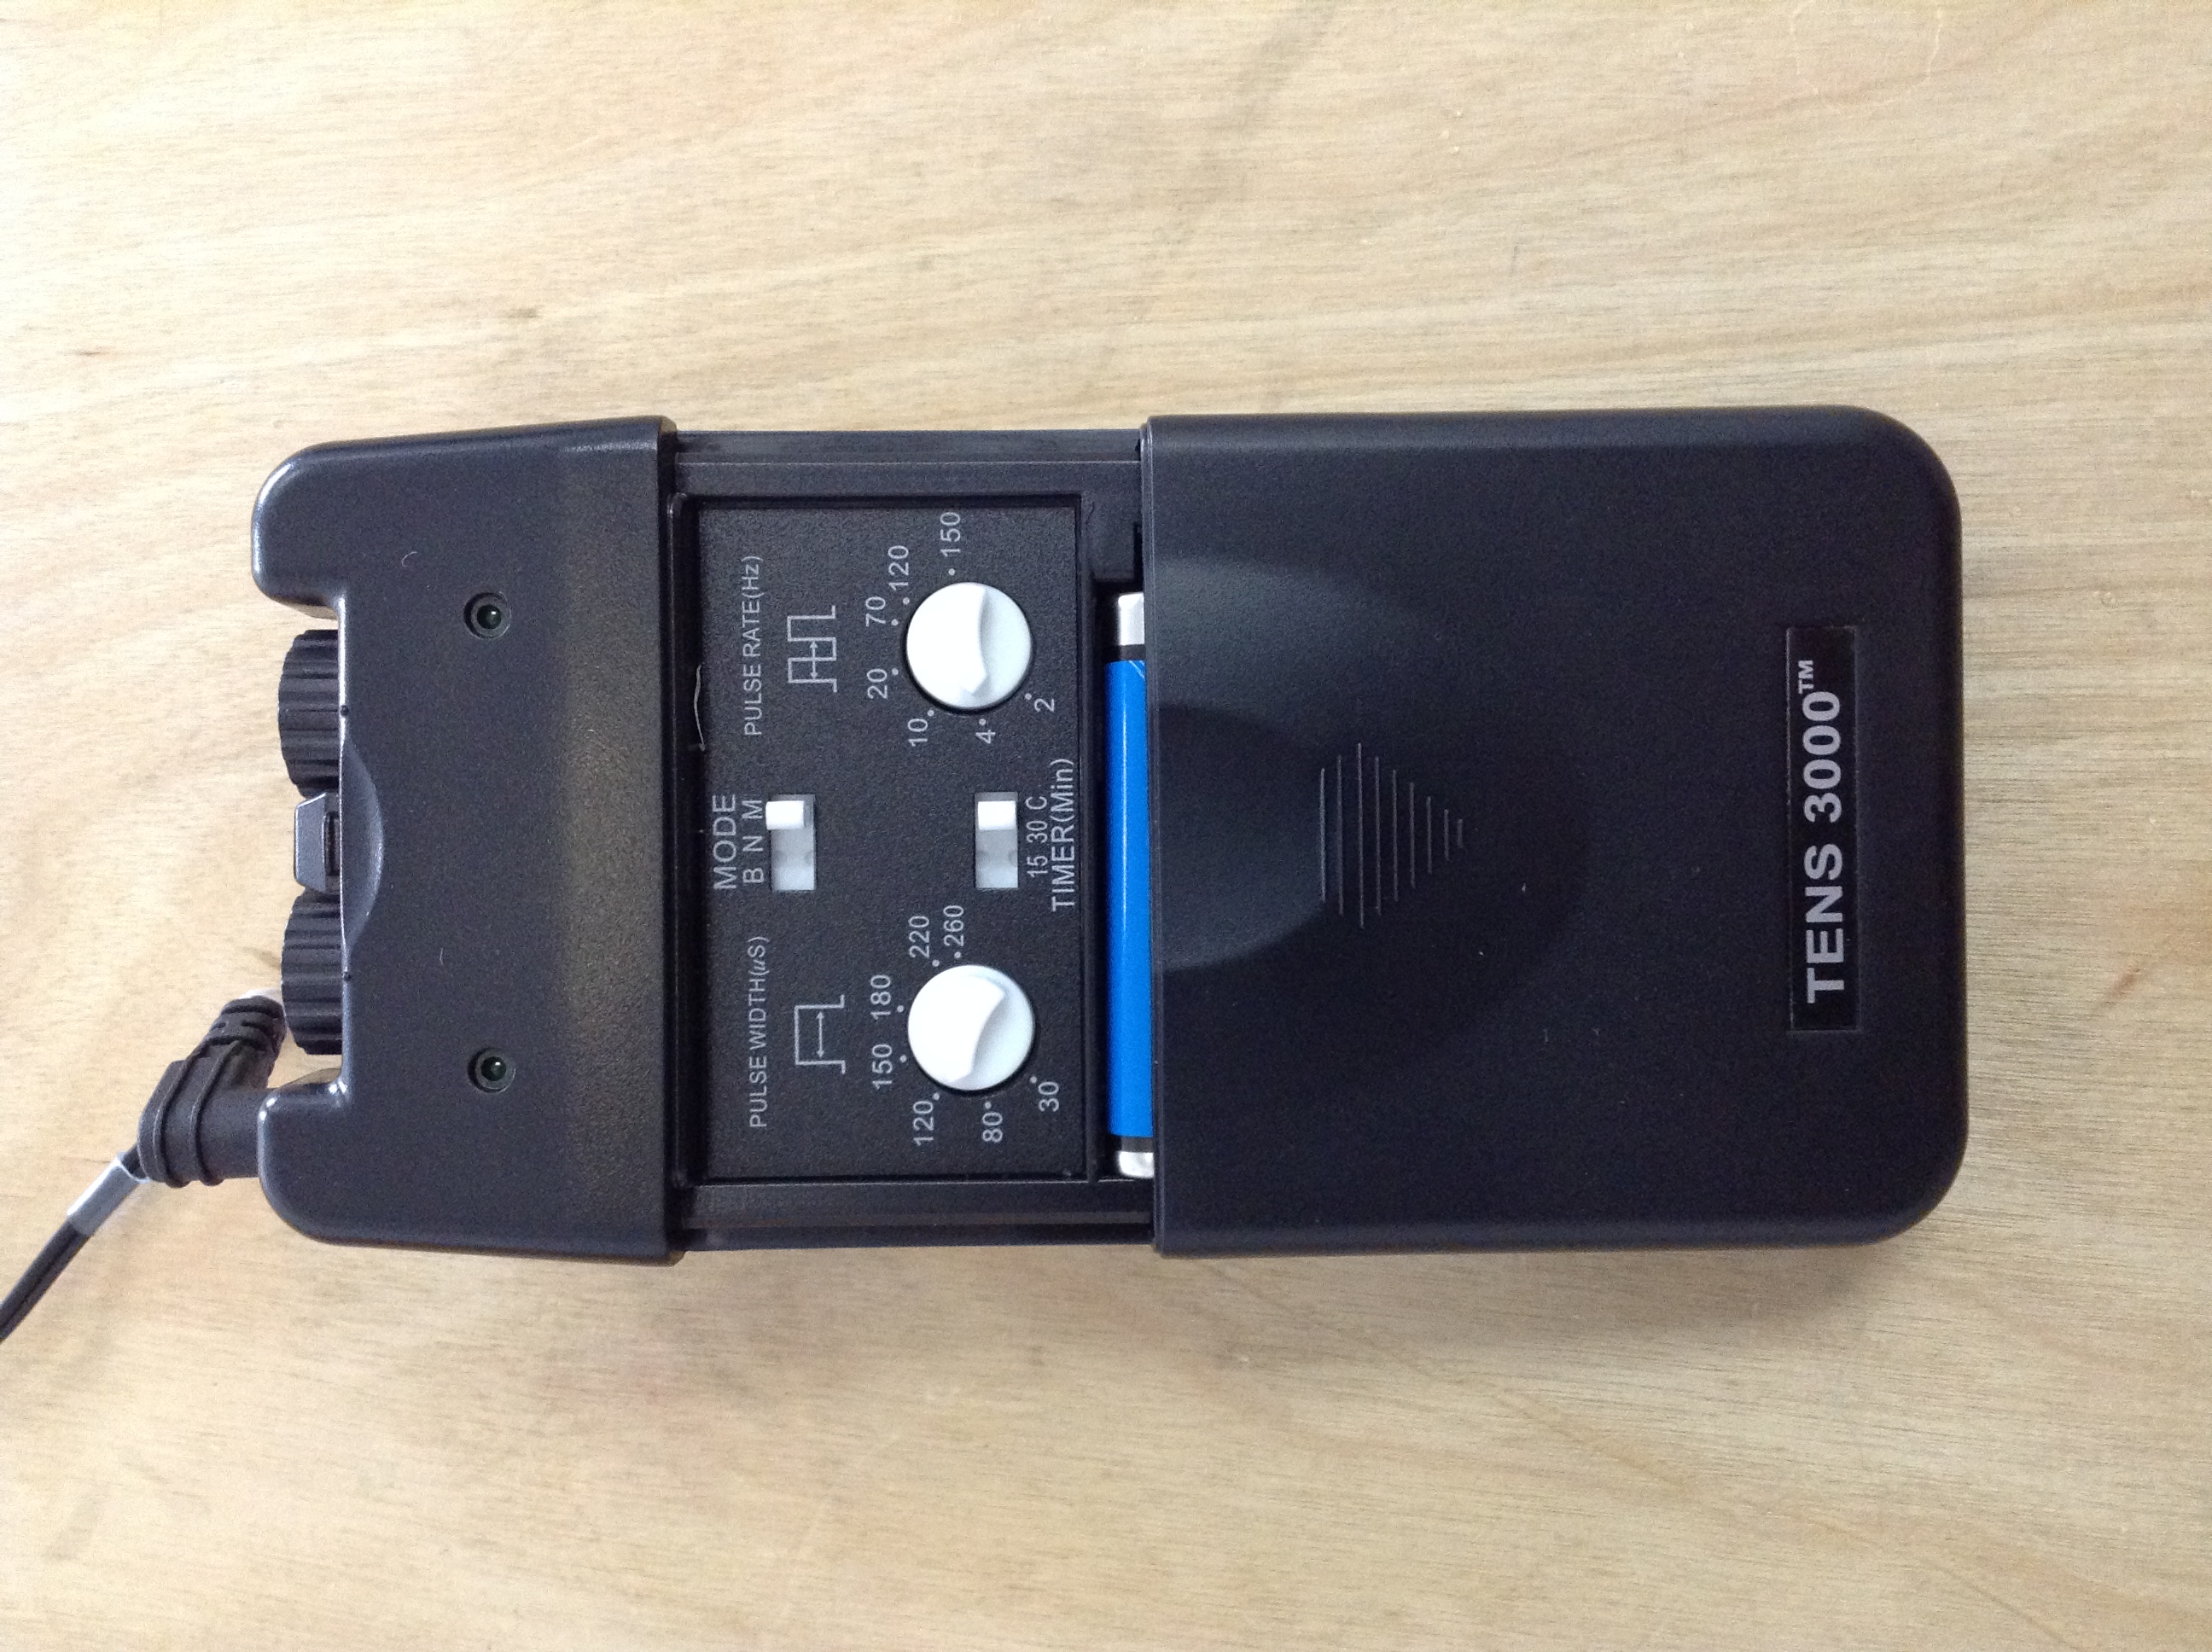
Connect the electrode lead cable to the electrodes. It doesn't matter which lead is connected to which electrode. Connect the other end of the lead cable to either of the outputs on the TENS unit. Make sure the dials on top are dialed all the way down to the OFF position. Dial in the settings on the front of the unit (the picture shows a good safe place to start). Now turn the dial on top of the TENS unit up to a low level (1 or 2 is sufficient) and the light should start blinking, indicating when the unit is trying to send current through the electrodes. No current will actually reach the electrodes at this point because the relay pin is LOW and the relay is open.
Downloads
Wire Up Your Minion
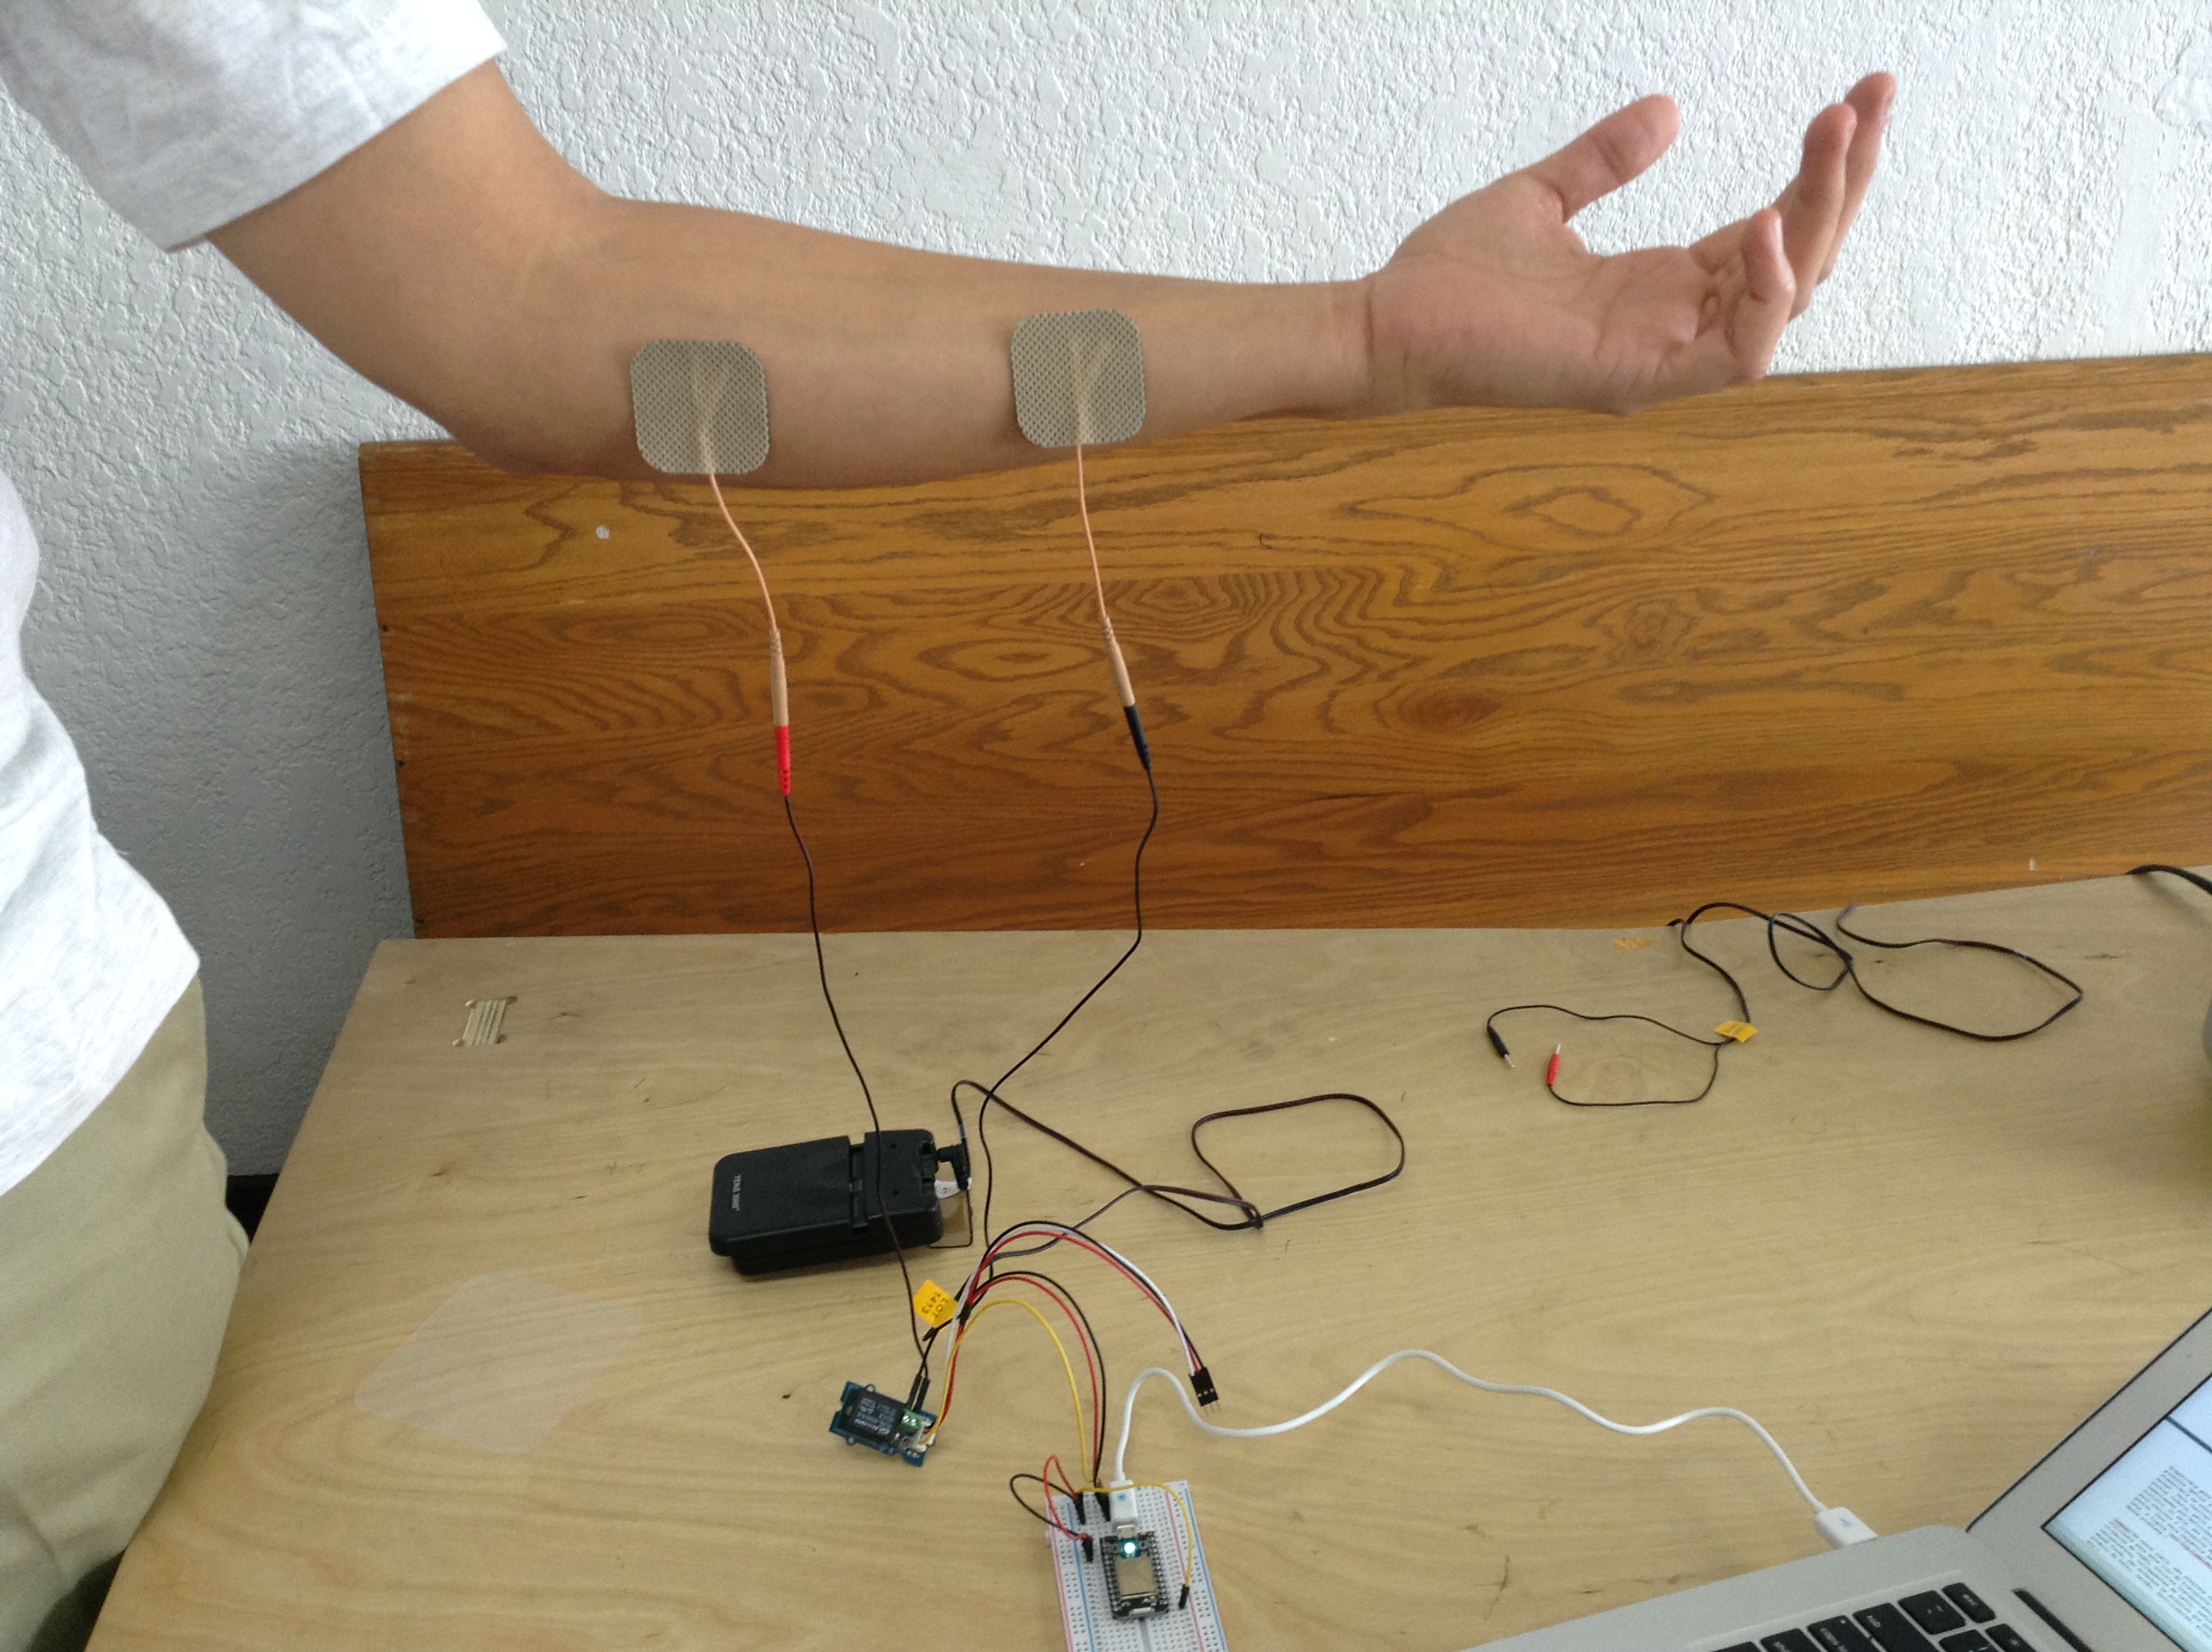
Connect the two TENS electrodes across the muscle group or nerve you want to stimulate. The ulnar nerve (http://en.wikipedia.org/wiki/Ulnar_nerve) is really convenient for stimulating because it is the largest unprotected nerve in the human body. It runs right through your elbow and down your forearm, so place the electrodes as shown in the picture. The ulnar nerve is directly connected to the little finger, and the adjacent half of the ring finger, so you should expect one or both of these fingers to move when you turn on your cyborg minion.
Make sure you have the TENS unit dialed down to 1 before turning your minion on! You can always dial the power up slowly to a level that elicits muscle movement without causing pain or discomfort.
Now, press D0 in the Tinker interface of the Spark Core App. The pin should switch to HIGH, the relay should close, current should flow through the TENS electrodes and stimulate the ulnar nerve to involuntarily move your cyborg minion's finger(s)! It's alive. Now go take over the world.
Remember, you have a whopping 8 digital pins on the Spark Core, so with 4 TENS units and an 8 relay board you could independently control 8 different muscle groups in you cyborg minion. Mwuahaha (x8).
You can also hook up sensors and write your own sketches via the Spark IDE to control your minion based on all kinds of conditions. For example, is one of your cyborg minions rhythmically challenged? Hook up a sound sensor to your Spark Core and make sure they never dance off beat again. The possibilities are endless!