Relief Map on a CNC Router Using Fusion 360
9742 Views, 54 Favorites, 0 Comments
Relief Map on a CNC Router Using Fusion 360
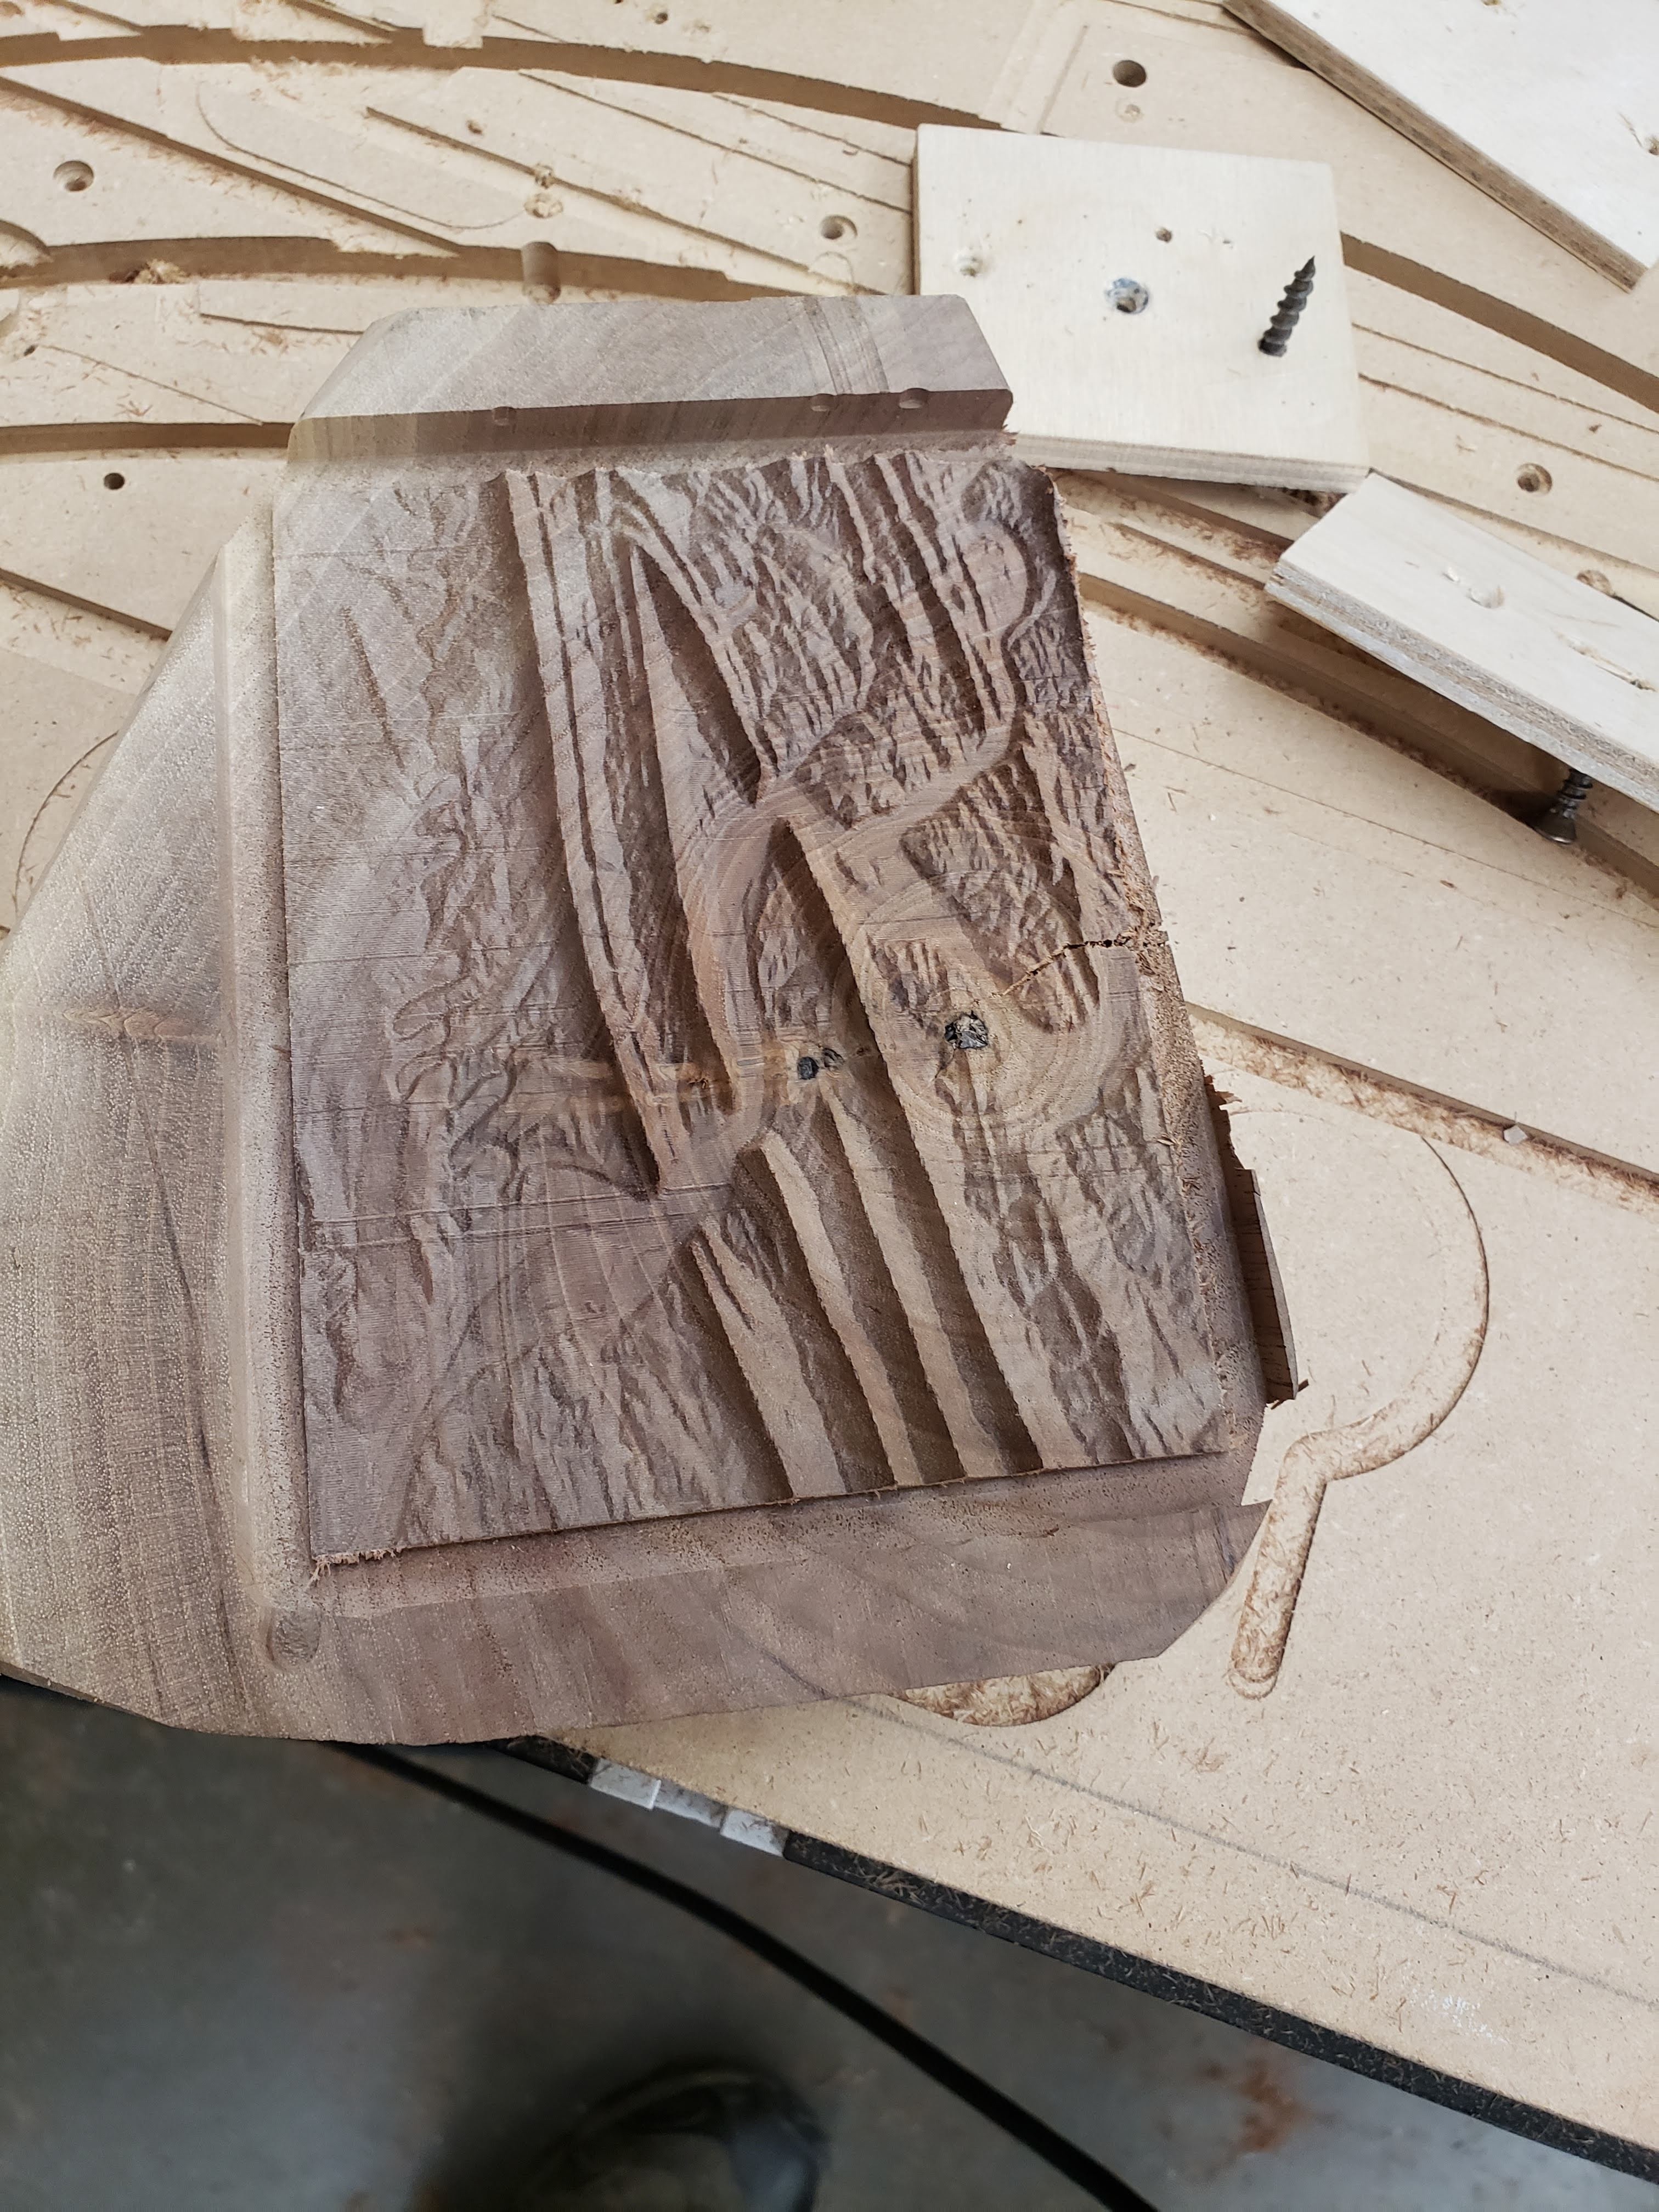
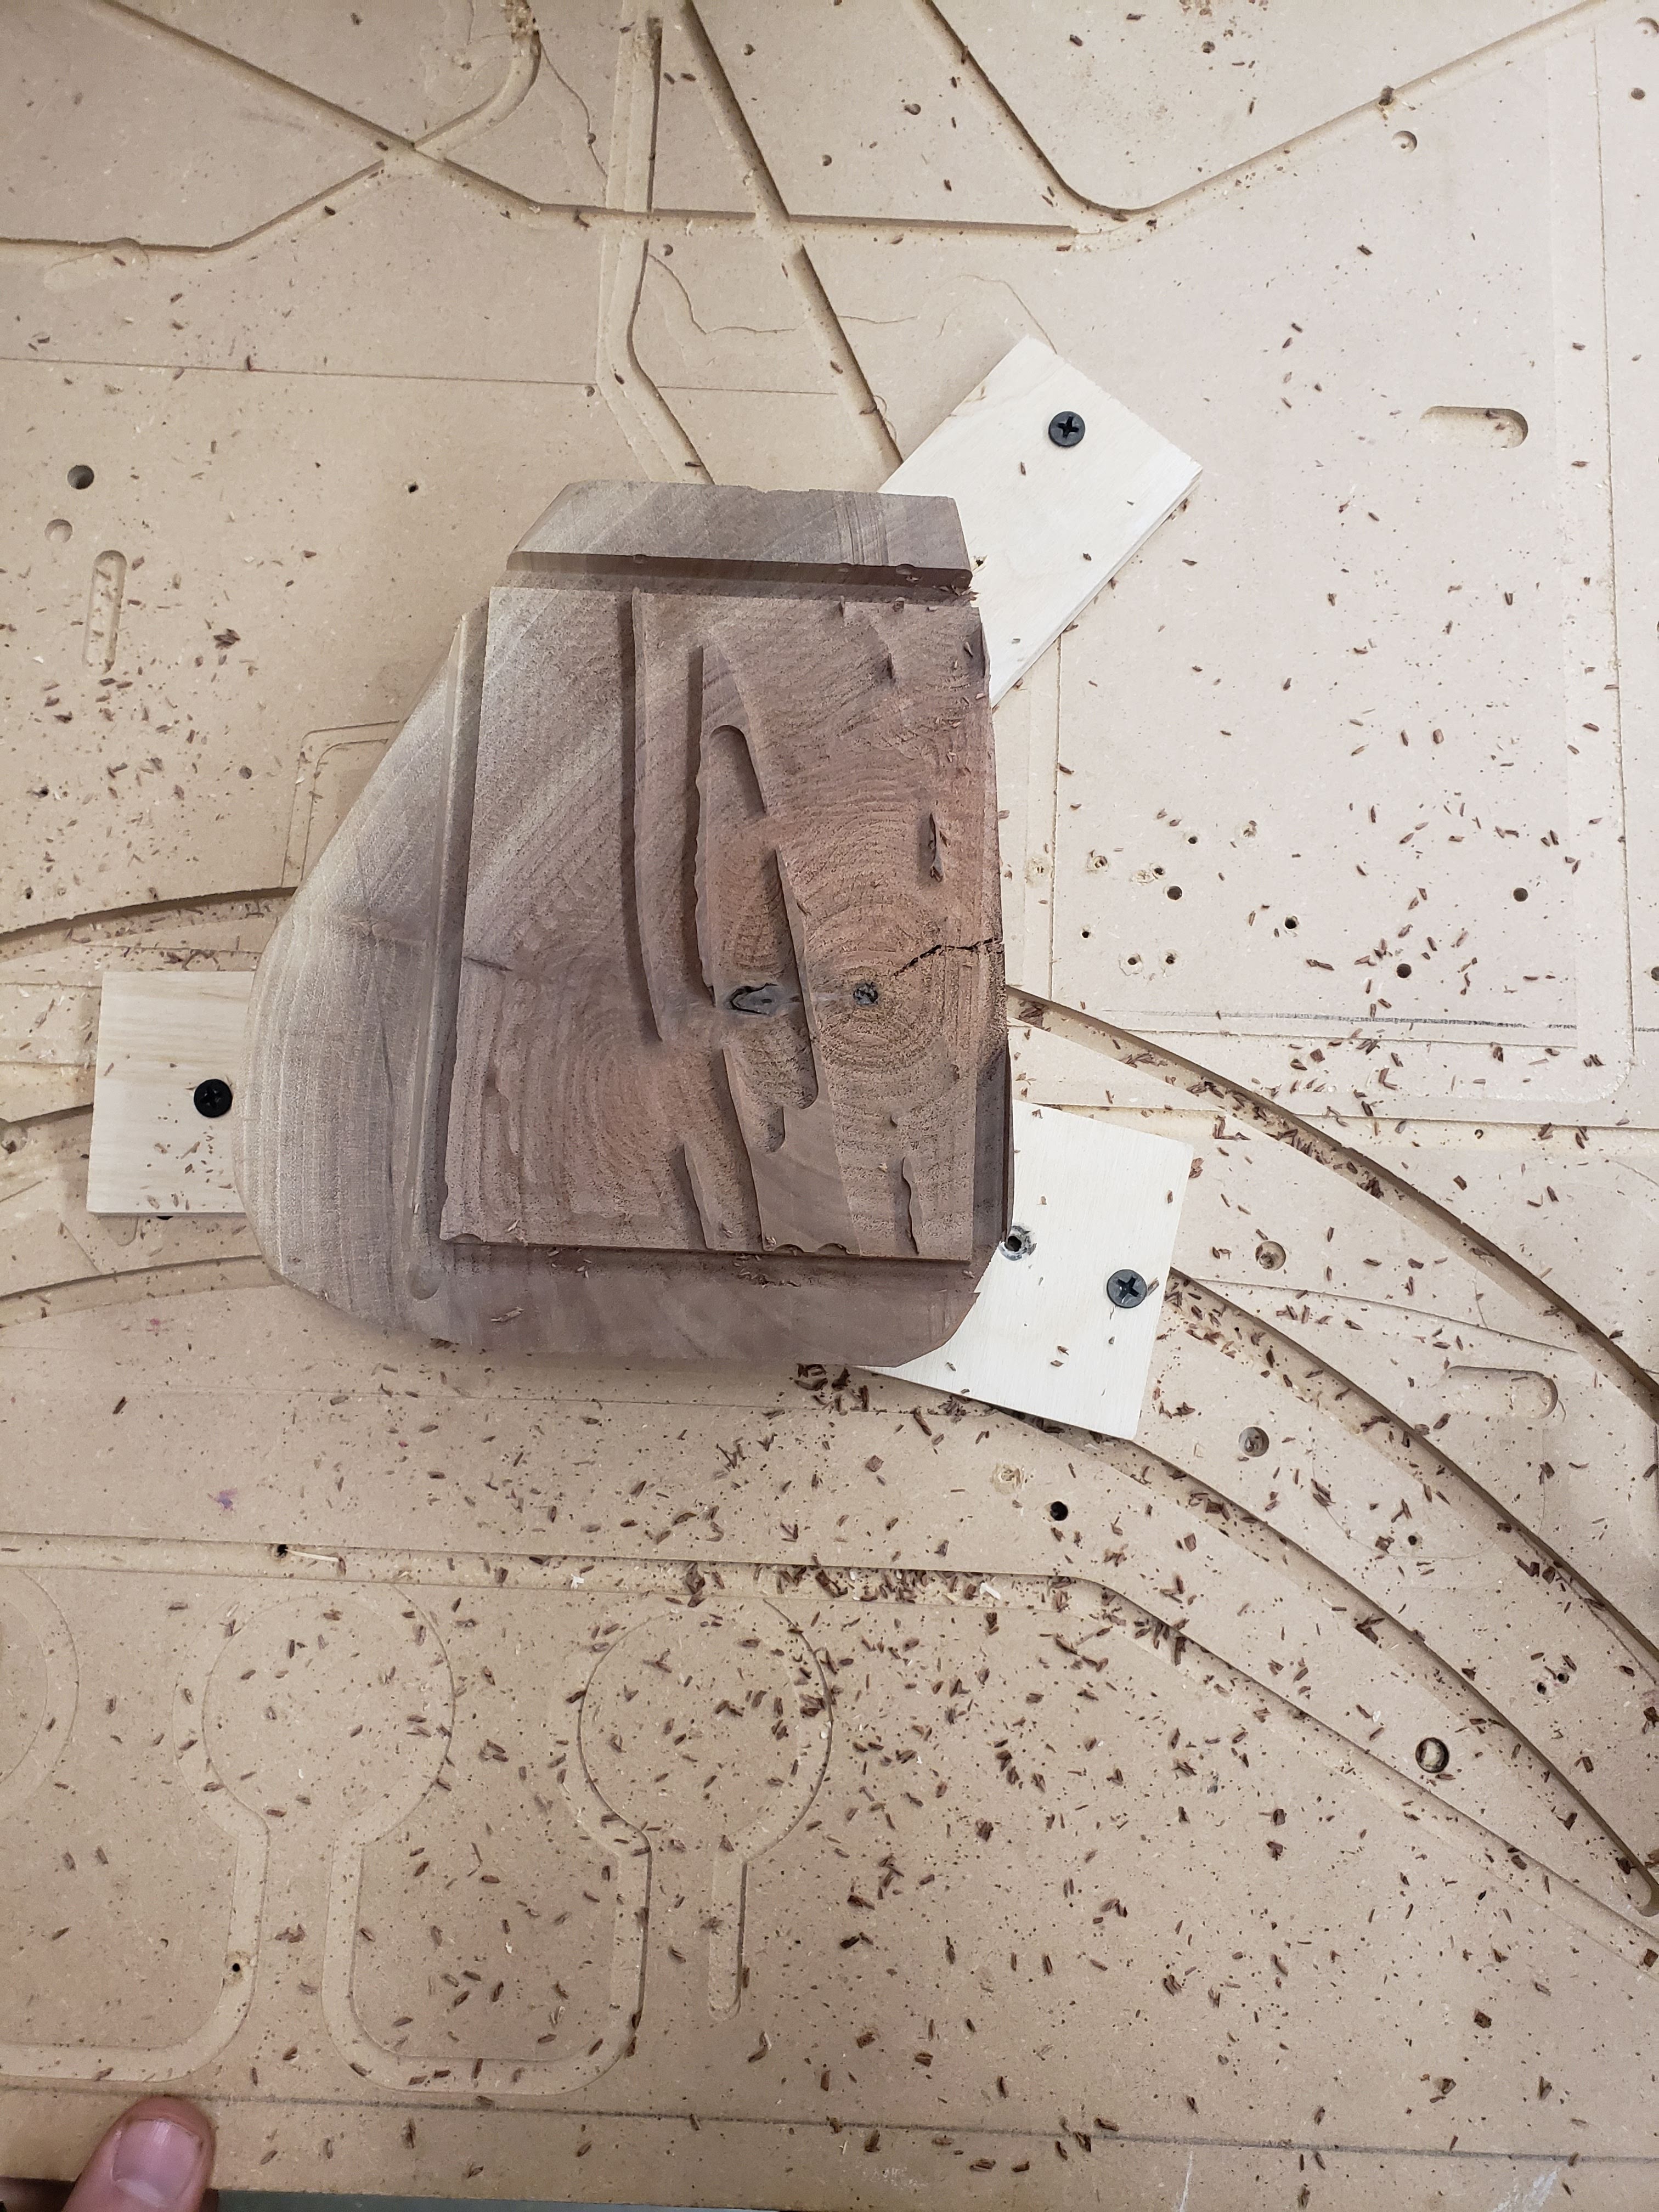
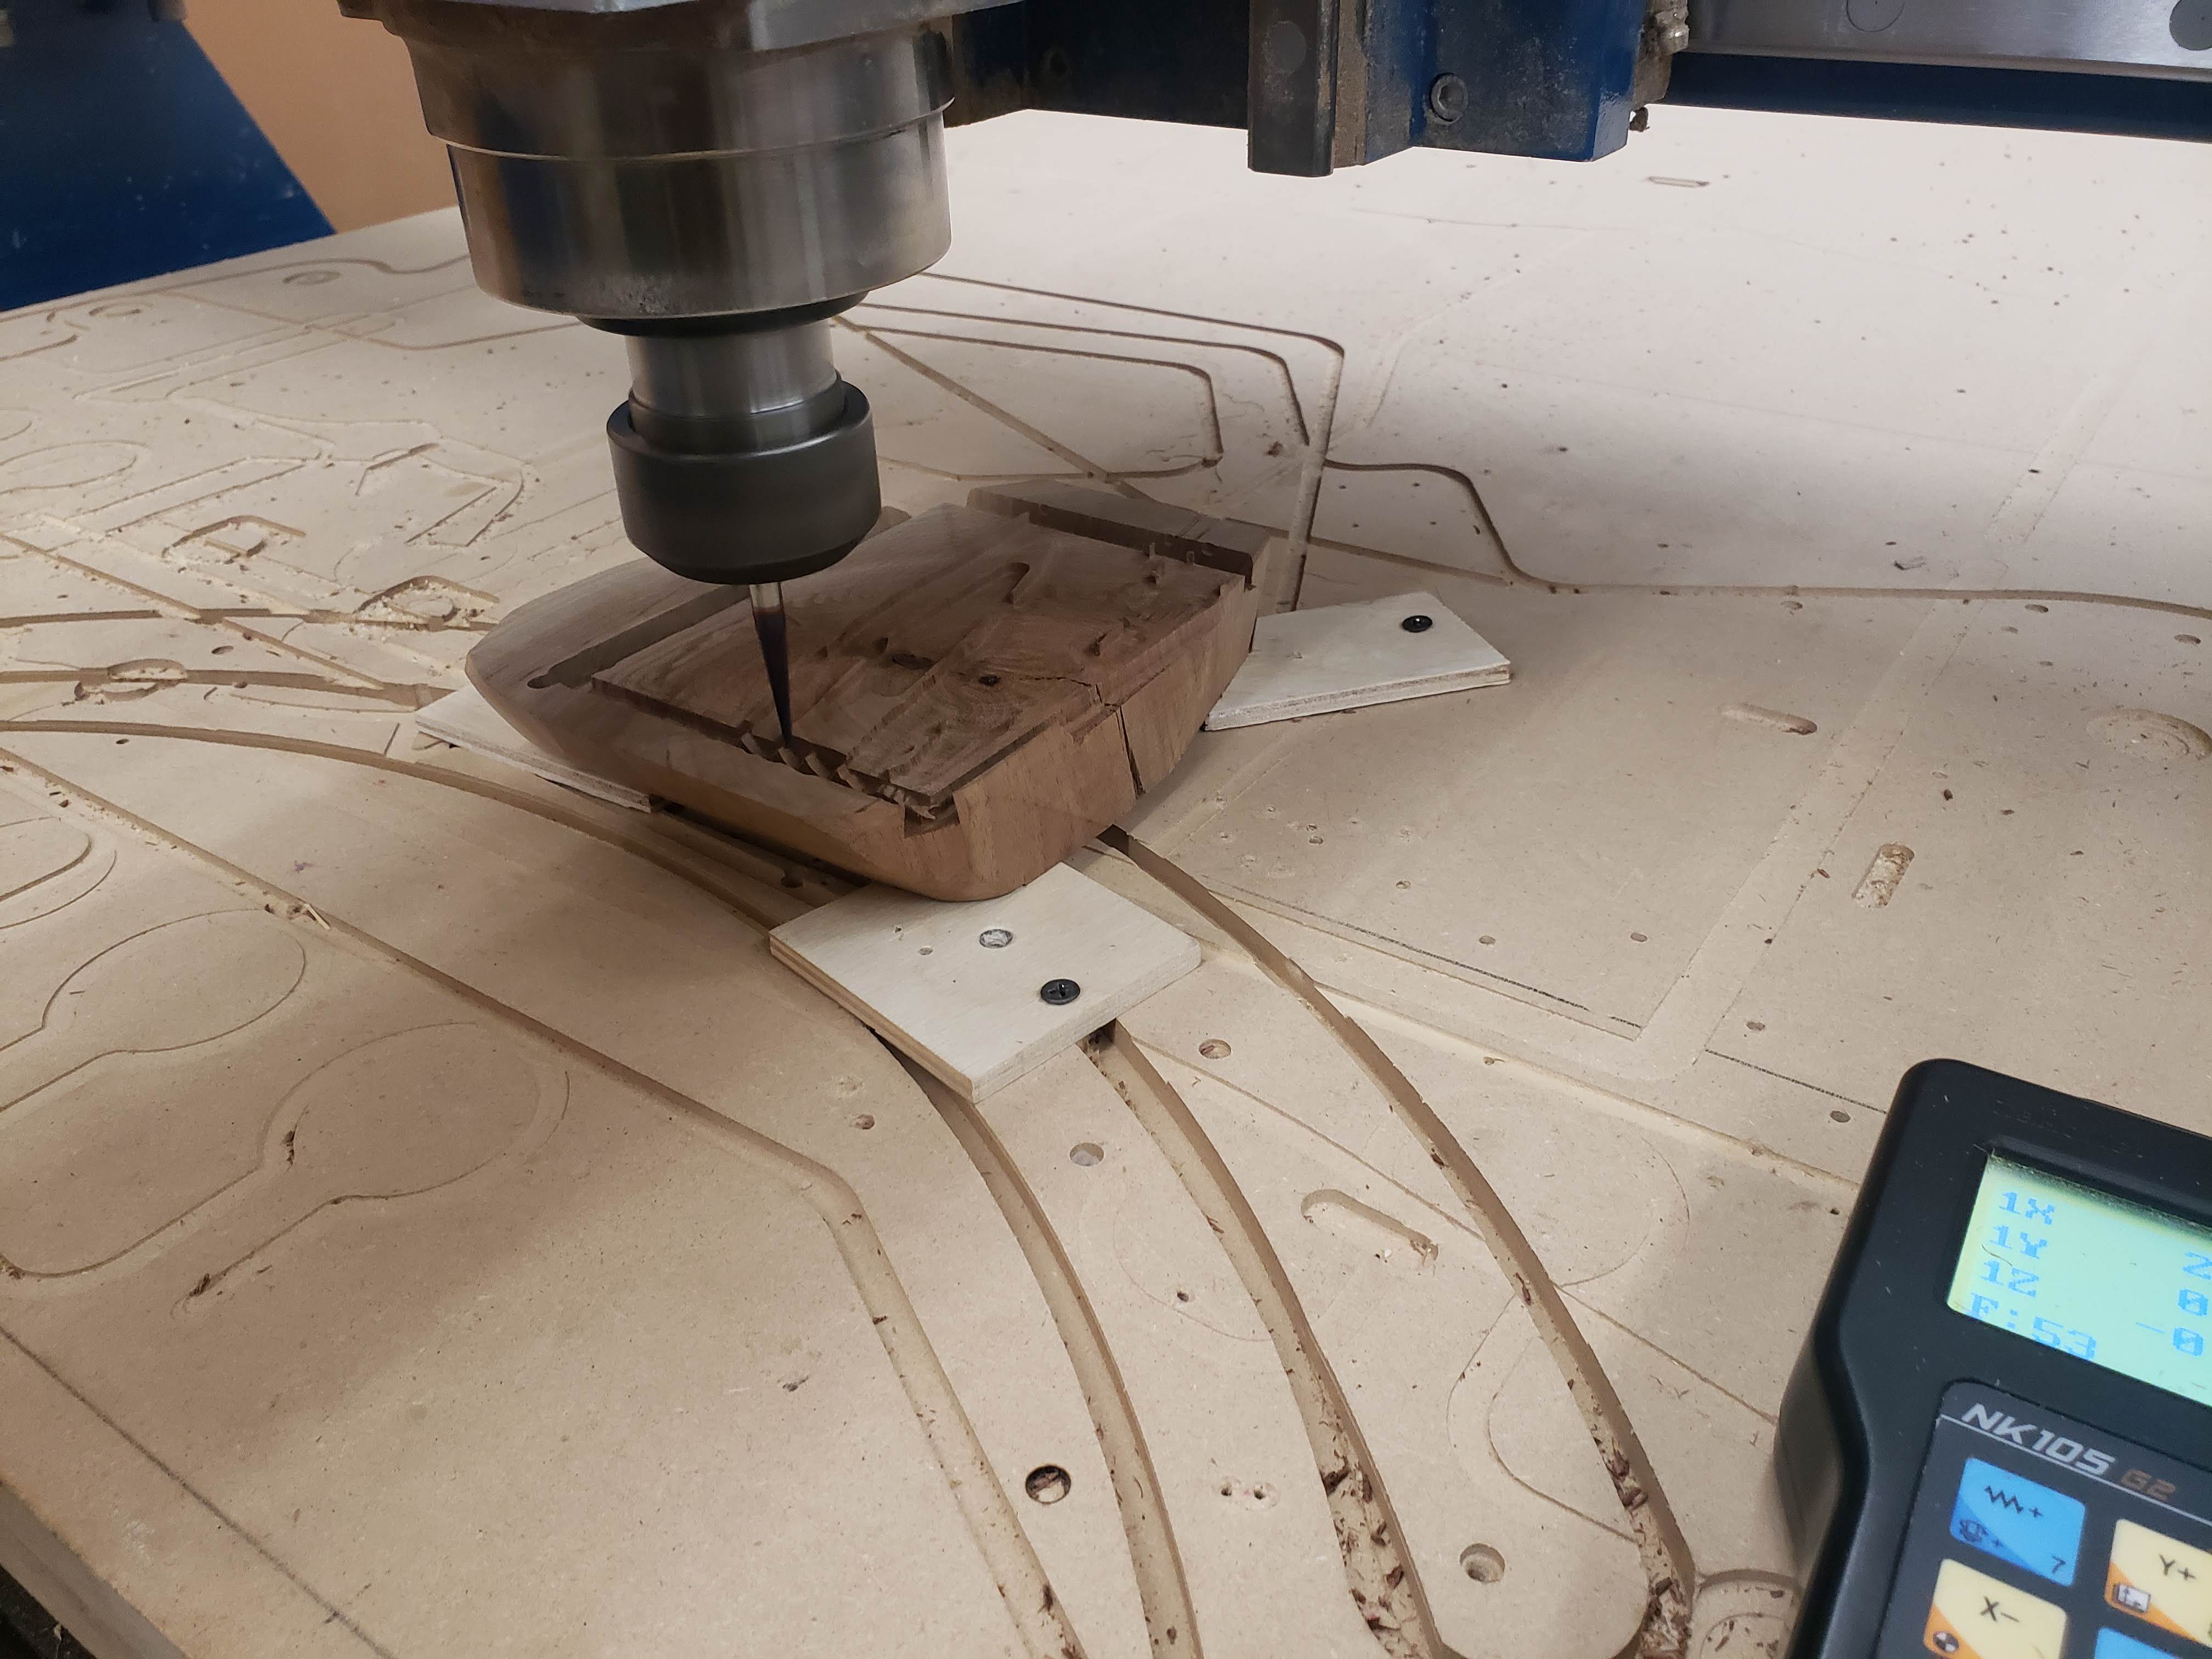
Since I first saw an example on social media, I wanted to figure out how to make my own relief cut map. I wasn't able to find a great guide online, but by combining a couple of different tutorials I was able to make it work. Hopefully this guide will help anyone else who would like to do the same!
Though it looks complex, it is a pretty simple process to go from a STL download to cutting a map out on a CNC router.
**I am by no means a Fusion 360 expert, I am fairly new to the software and just stringing together info from a few tutorials. Feel free to point out anything that isn't best practice in the comments.**
Supplies
Autodesk Fusion 360
Baleigh CNC Router
Scrap Walnut
1/4" Sharp 2 Flute Endmill
Amana 1/16 Tapered Ballnose Endmill P/N #46282-K
Scrap wood and 6 screws for workholding
Download a STL Version of the Area You Would Like to Cut
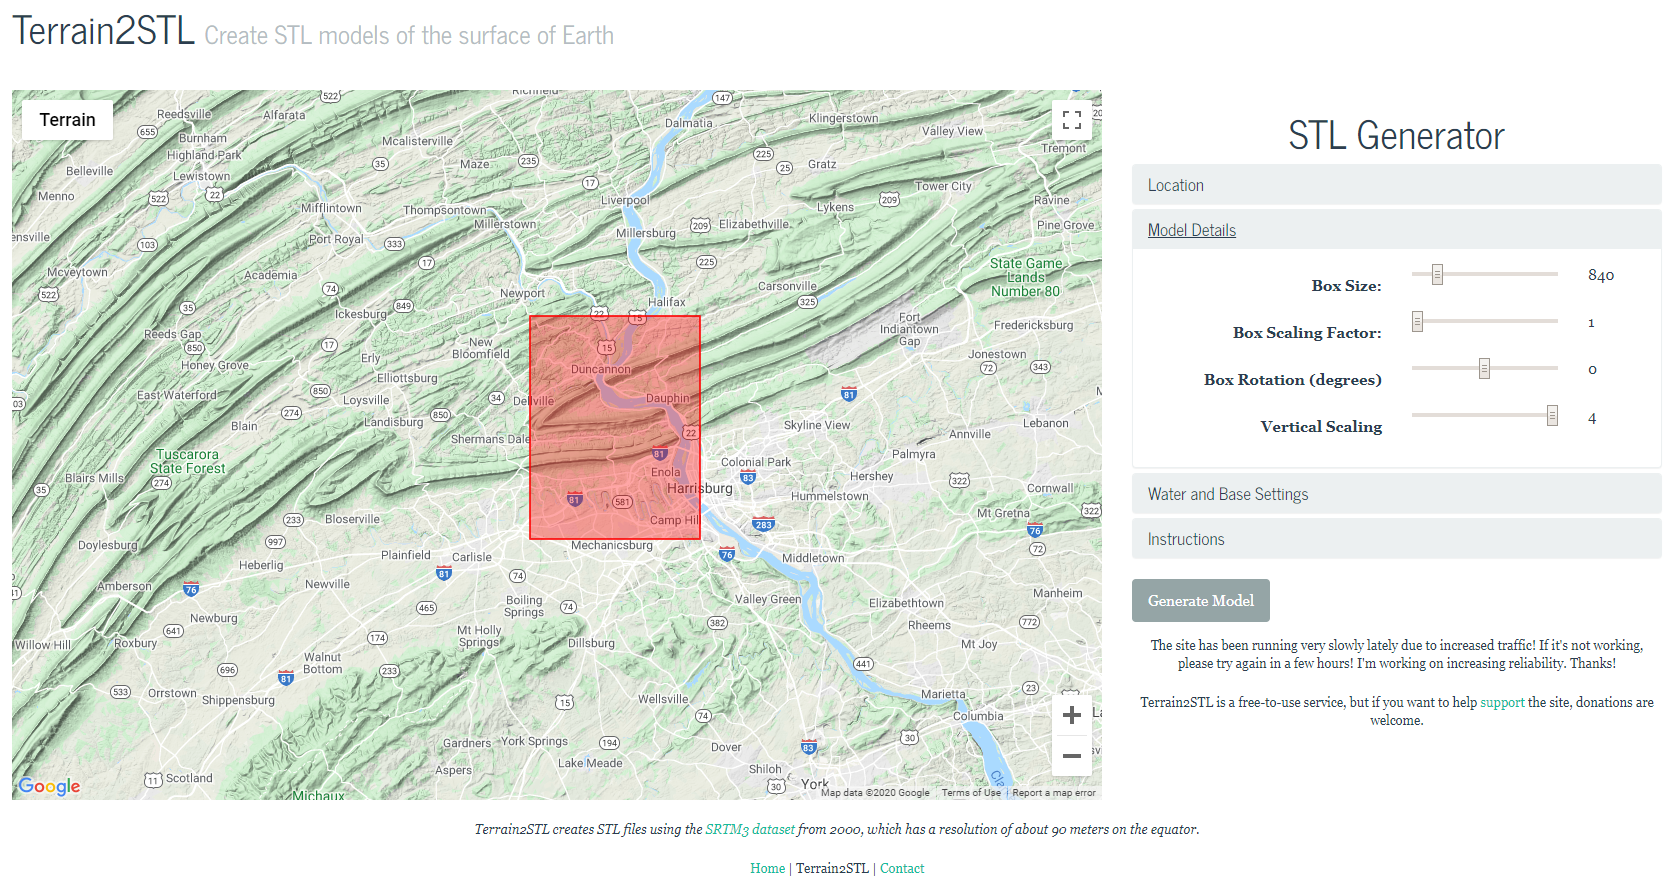
I wanted to cut a relief map of the Appalachian Mountains in Central Pennsylvania. This area has some interesting features that I thought would make for a cool map.
Search online for Terrain2STL or visit jthatch.com/Terrain2STL, pick your area and choose your settings.
Settings I used:
Box Size: 840 (I've tried larger ones in the past and my computer really struggled)
Box Scaling Factor: 1
Box Rotation: 0
Vertical Scaling: 4
I maxed out the vertical scaling to exaggerate the mountains.
Water and Base Settings:
Water Drop: 5
Base Height: 1 Again, I wanted to maximize the contrast in my mountains.
When you get everything just right, you are ready to click Generate Model. Take note of where you saved the file.
Import Model Into Fusion 360 and Reduce Faces
Open and extract your .stl model.
Click File --> Upload, and navigate to the location of your downloaded model.
Click the Show Data Panel at the very top left of the screen if your model doesn't load automatically.
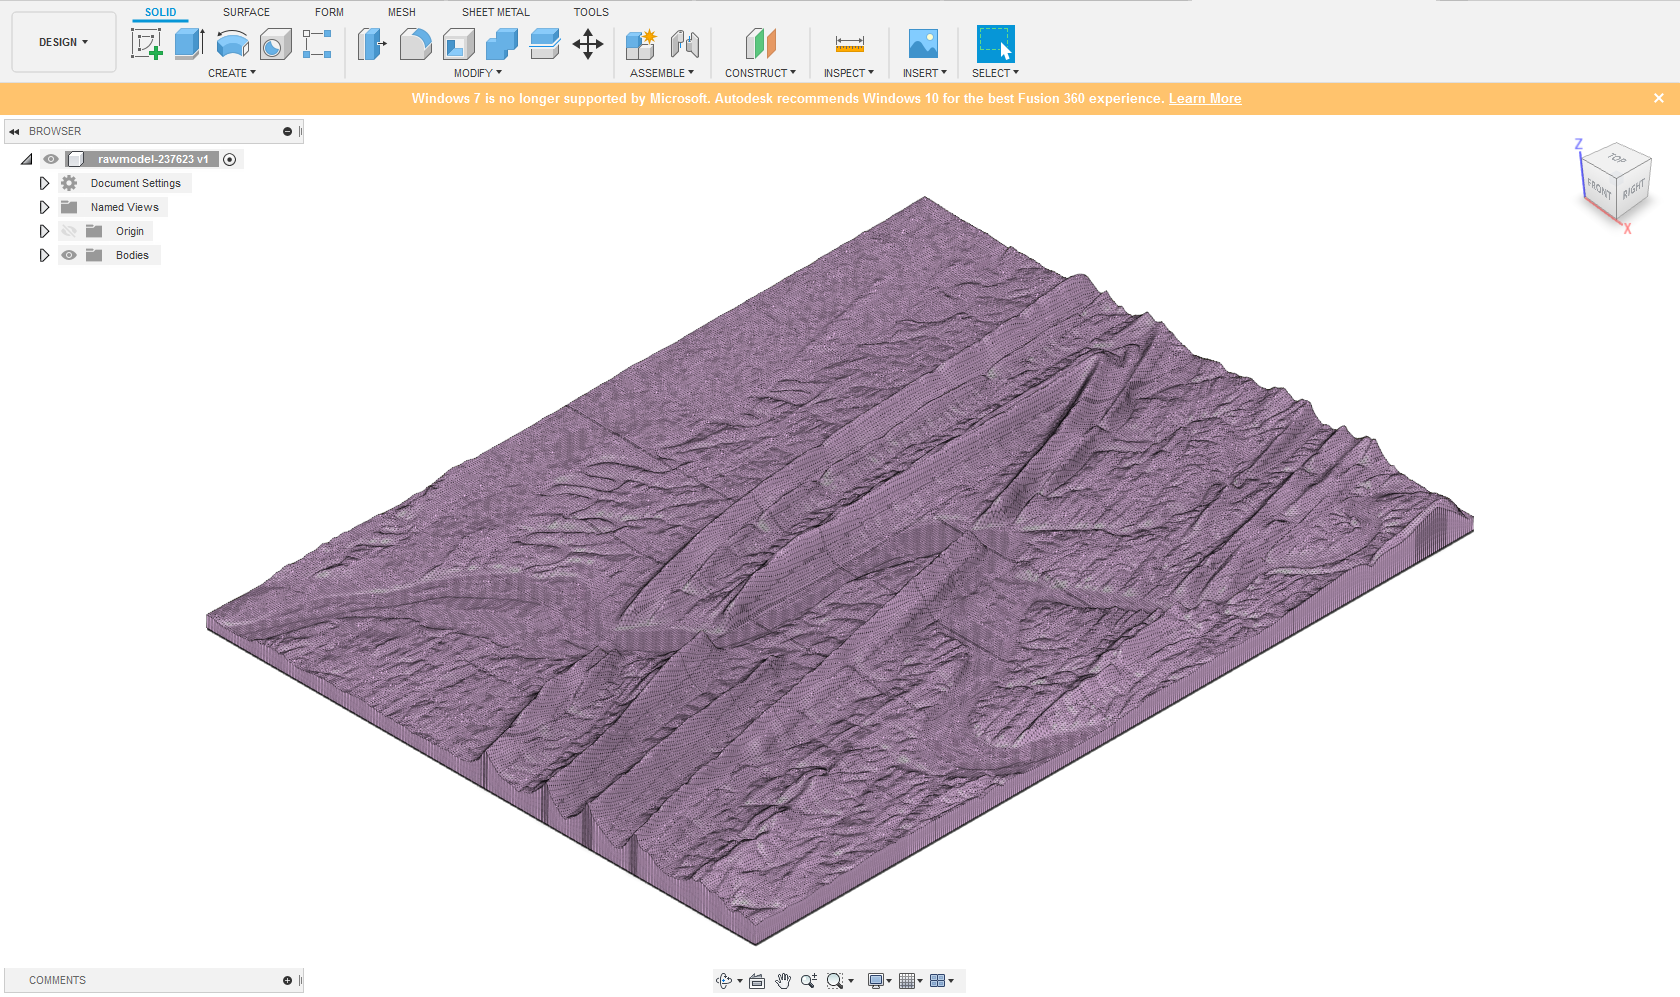
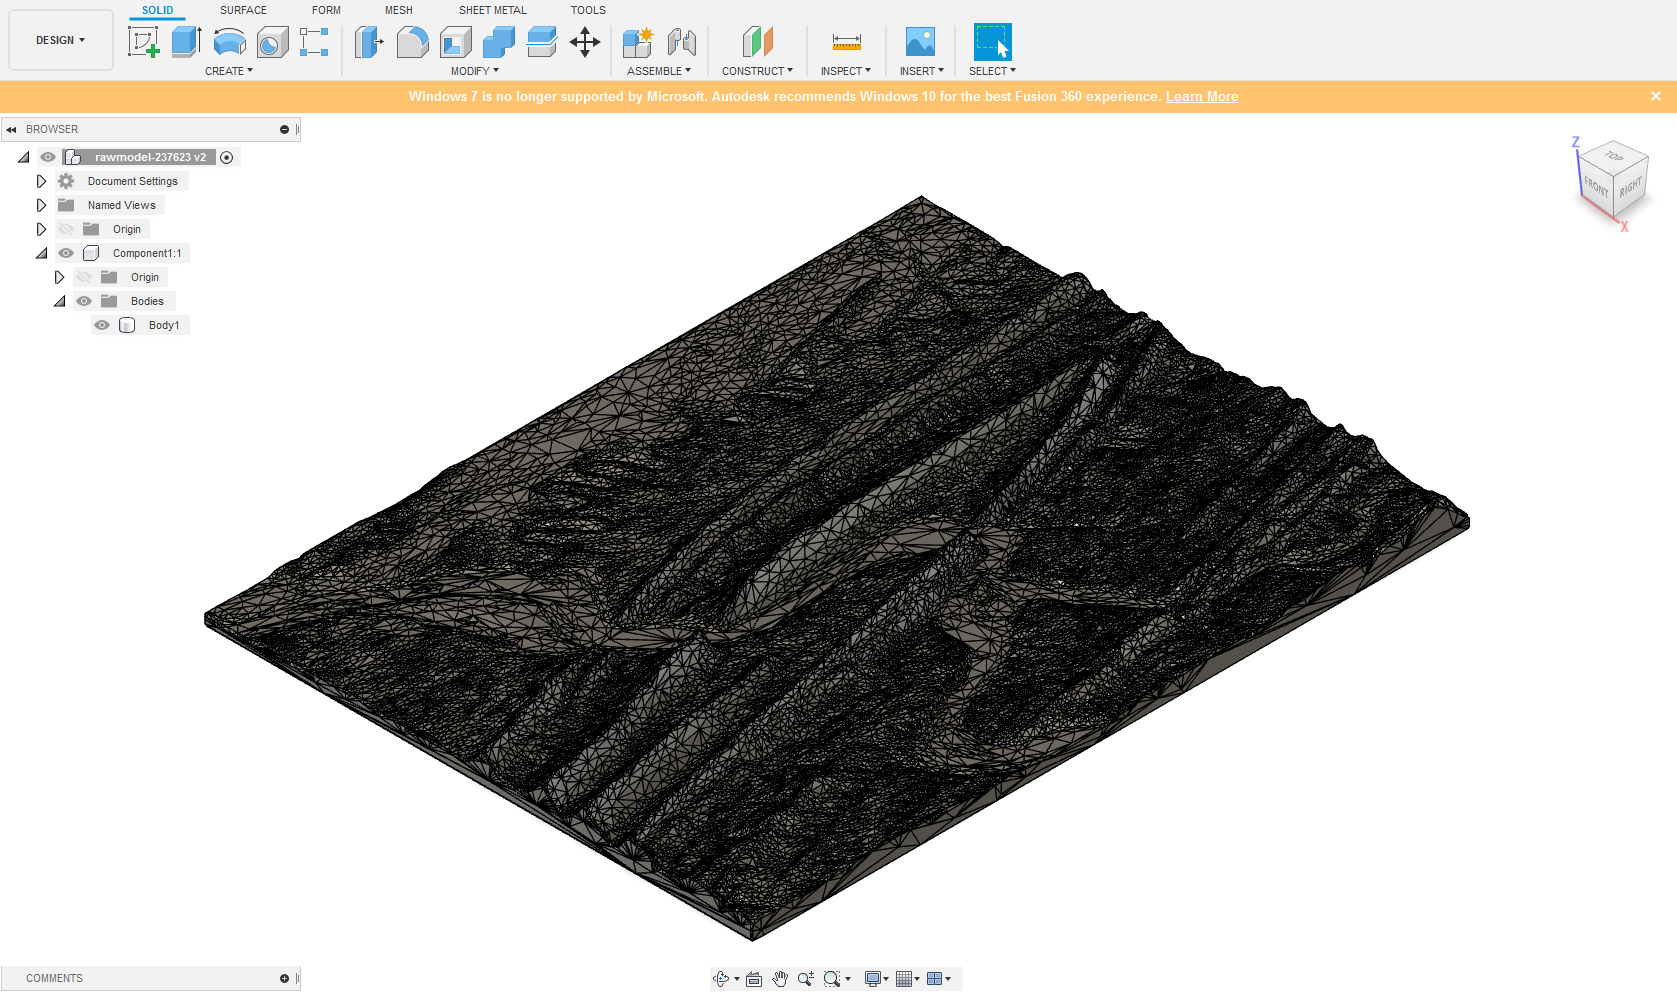
When your .stl model is first uploaded into Fusion it should look like the Image 1 above. This is comprised of thousands and thousands of 'faces' (over 260 thousand for my model). In order to assign advanced toolpaths, we first need to convert it from a mesh of faces into a solid body.
First click the drop down under Bodies to display MeshBody1. Right click MeshBody1 and click Properties. This should display a Facet Count among other info. To convert a mesh body into a solid body, Fusion 360 requires fewer than 50,000 facets. Chances are that your model has much more than that, so we will need to reduce the number of faces.
Next navigate to the Mesh tab at the top of the program. The first thing we will need to do is select 'Make Closed Mesh' under the modify tab. This is not always necessary, but I have run into trouble when converting the model if this step is skipped. MeshBody1 should automatically be selected, if not click MeshBody1 under the Bodies folder on the left hand side.
I used a Rebuild Mode of Standard and a Density of 256. You may want to reduce the density if your computer struggles to execute this command, but a low density may soften some of your scene's detail.
A new MeshBody should have been created, named MeshBody2. Delete MeshBody1 to take some of the strain off your computer.
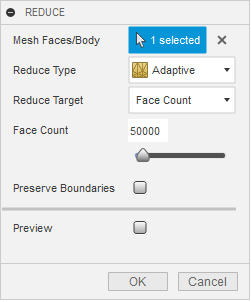
Next click the arrow beside Modify and select Reduce. Once again your model should automatically be selected, if not make sure to select MeshBody2 from the left hand side. Use a Reduce Type of Adaptive, and change Reduce Target to Face Count. Enter 50,000 or less for the target face count (Image 2). This will remove some detail from your model, but hopefully not too much.
Scale the Model and Convert to a Solid
We now have a mesh model in 3D space, but no idea of how big it is in real terms.
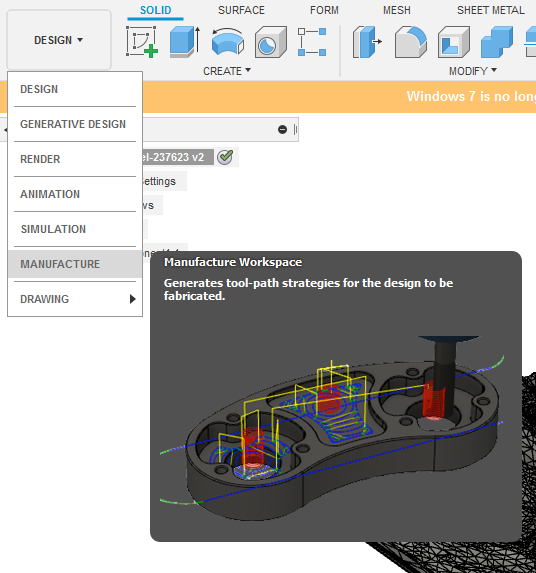
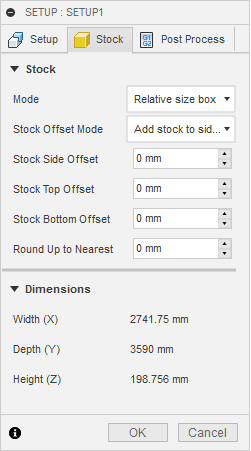
First go to the Manufacture dropdown menu (Image 1). Click the folder icon on the menu at the top above Setup. We're just looking for the Dimensions here, so go to the Stock tab and record the dimensions at the bottom.
We will edit the rest later, so after you've written down the dimensions click OK.
My dimensions imported at (Image 2):
X: 2741.75 mm
Y: 3590 mm
Z: 198.756 mm
No idea if that's a standard or not. Regardless, that is WAY bigger than the part I want to cut.
Decide on a length for your map. Choose one direction to 'drive' and the other will scale proportionally. For example, I wanted the width of my scene to be 4 inches (101.6 mm).
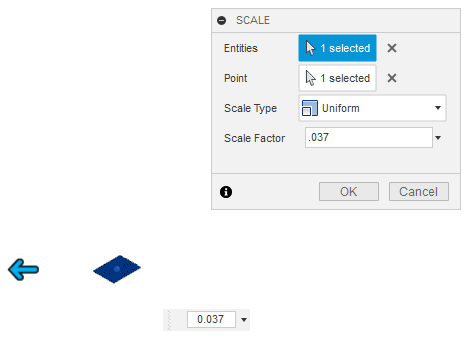
Next return from the Manufacture workspace back to Design. Click the arrow beside Modify and select Scale from the drop down menu. Select MeshBody2 from the design tree on the left. No need to select a point. Ensure Scale Type is Uniform (Image 3).
To calculate a shrinking Scale Factor, you need to divide your desired value (4 inches) by the current value. Do the opposite if you need to enlarge the part. You can enter this directly into the scale factor dialog box. I input 101.6/2742.75.
We are now ready to convert the mesh into a body. Using the Solid tab at the top of the screen click the dropdown menu beside Modify, place arrow over Mesh, and select Mesh to BRep. Select MeshBody2 from the design tree and select New Body. You may get a message warning you that doing this may cause slow performance, but go ahead and click OK.
Congrats! We now have a model that Fusion 360 knows how to interact with. The color of your model should have changed from pinkish to greyish (Image 4). This gives us the ability to assign advanced 3D toolpaths. You can now delete MeshBody2 to take some strain off your computer.
Assign Toolpaths and Simulate
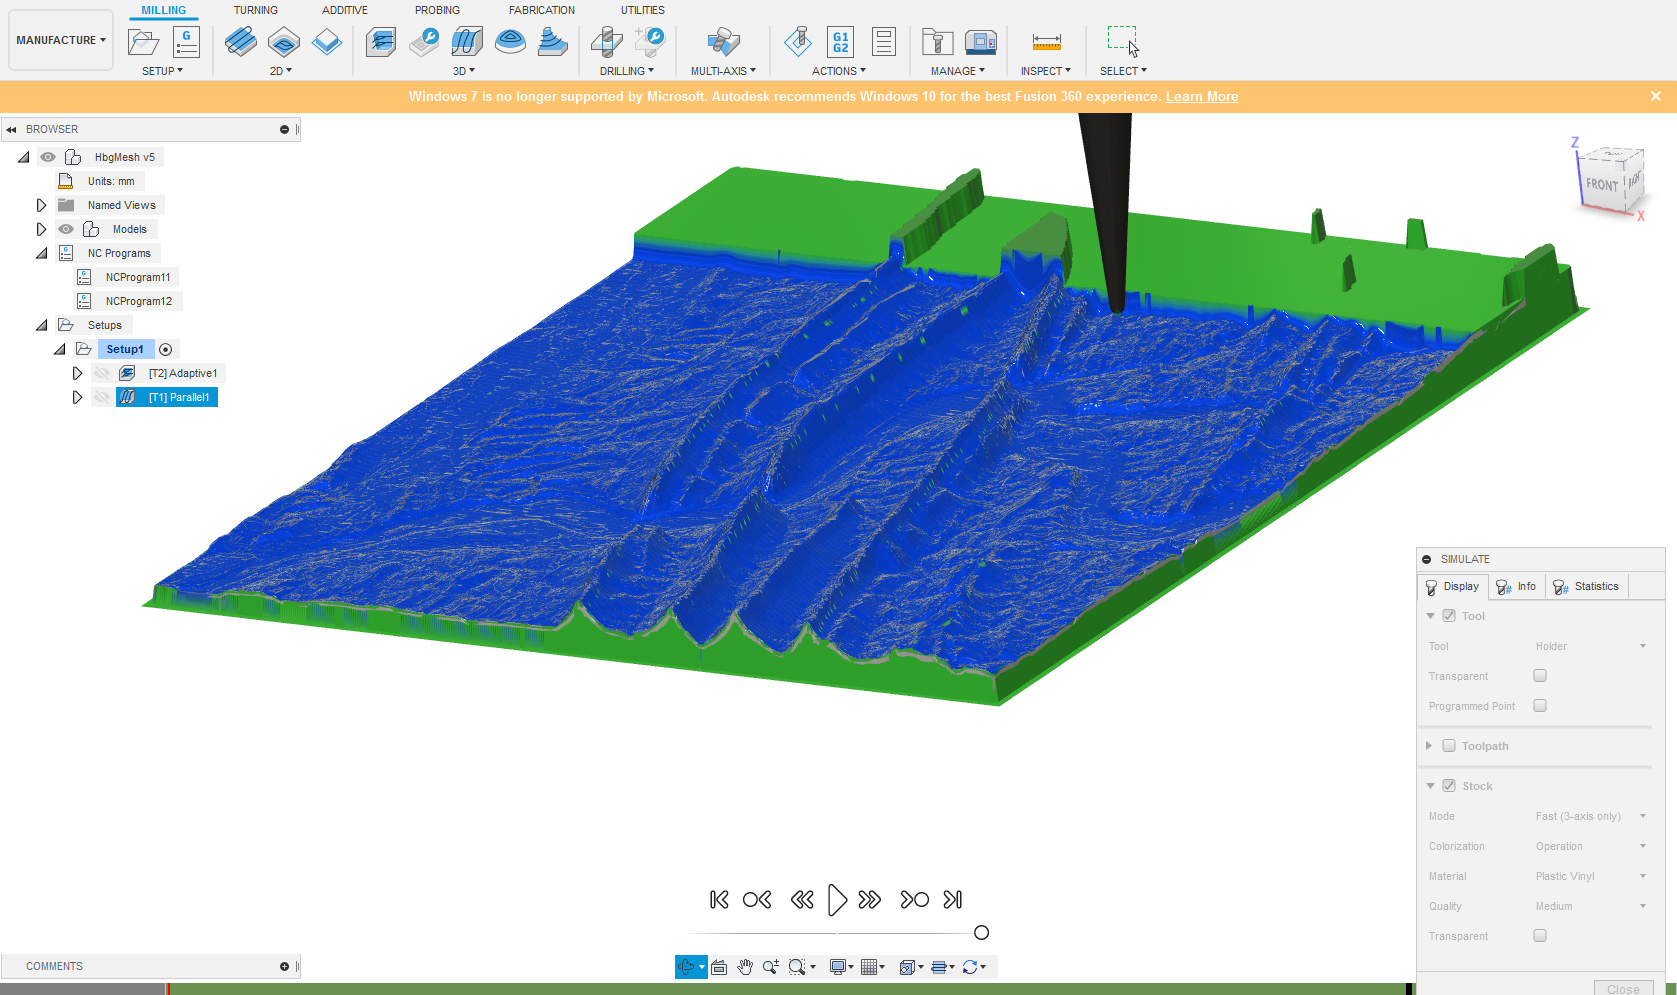
Return to the Manufacturing workspace.
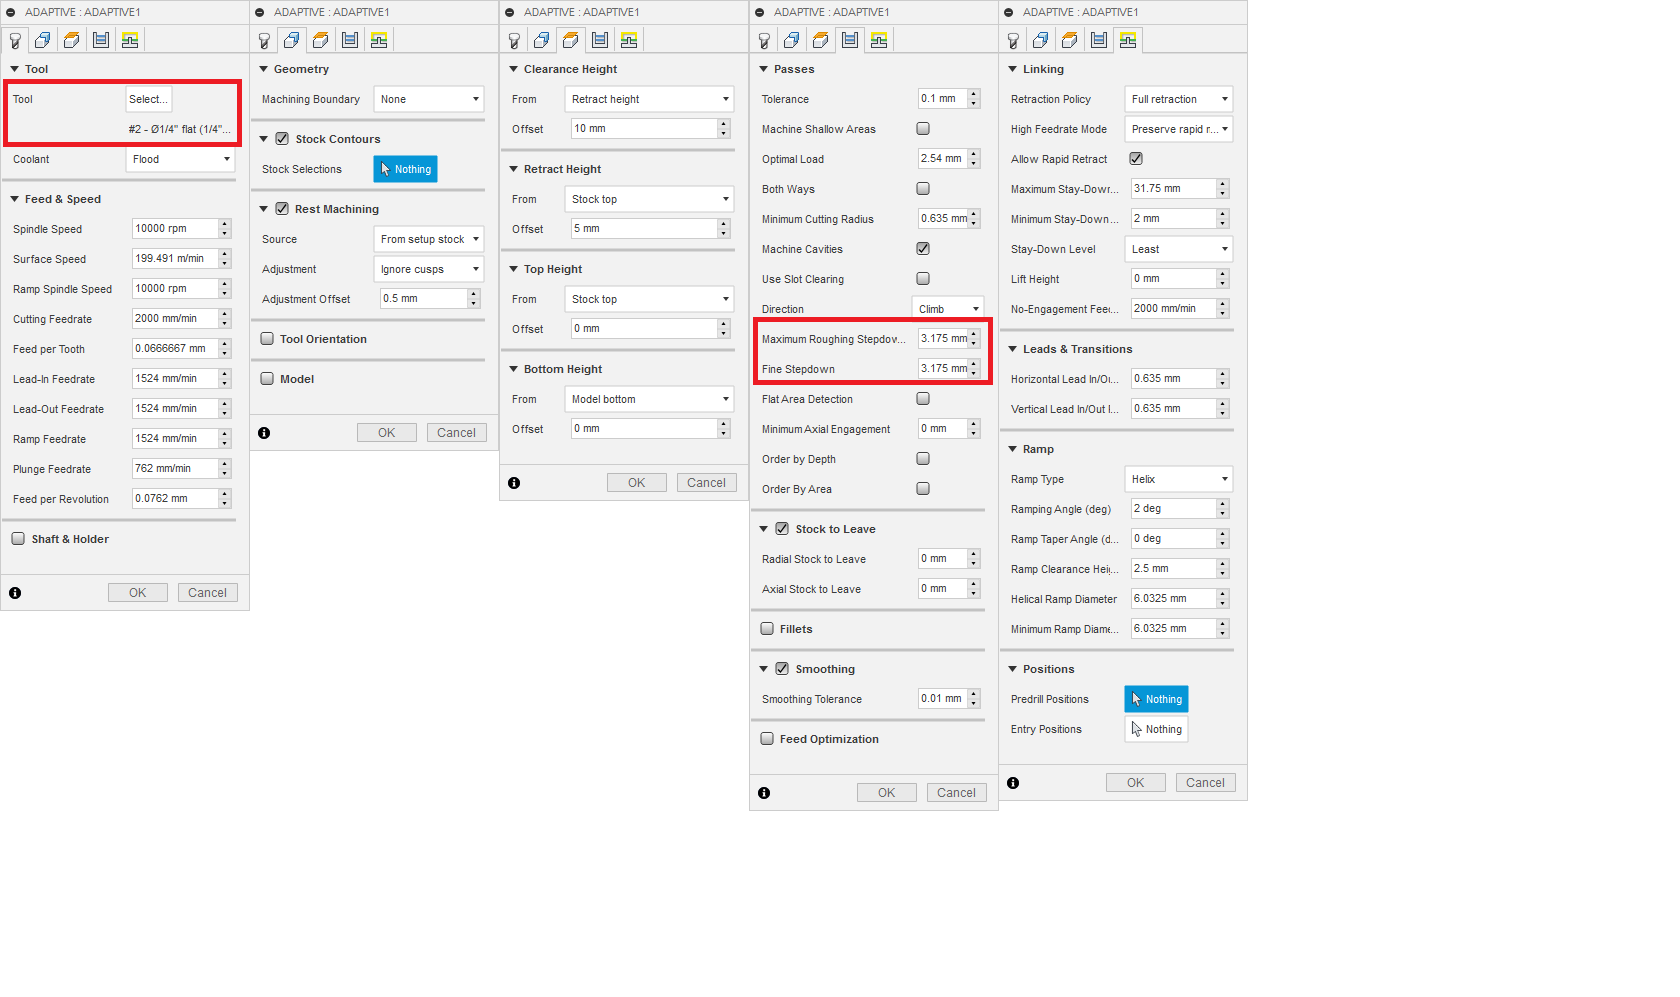
Under 3D Toolpaths select Adaptive Clearing. Tool selection, RPM, and Feed Rates will vary greatly depending on your machine, material and workholding. The above parameters (Image 1) are for cutting a 4" x 5.5" piece out of walnut with a 2 flute 1/4" sharp endmill.
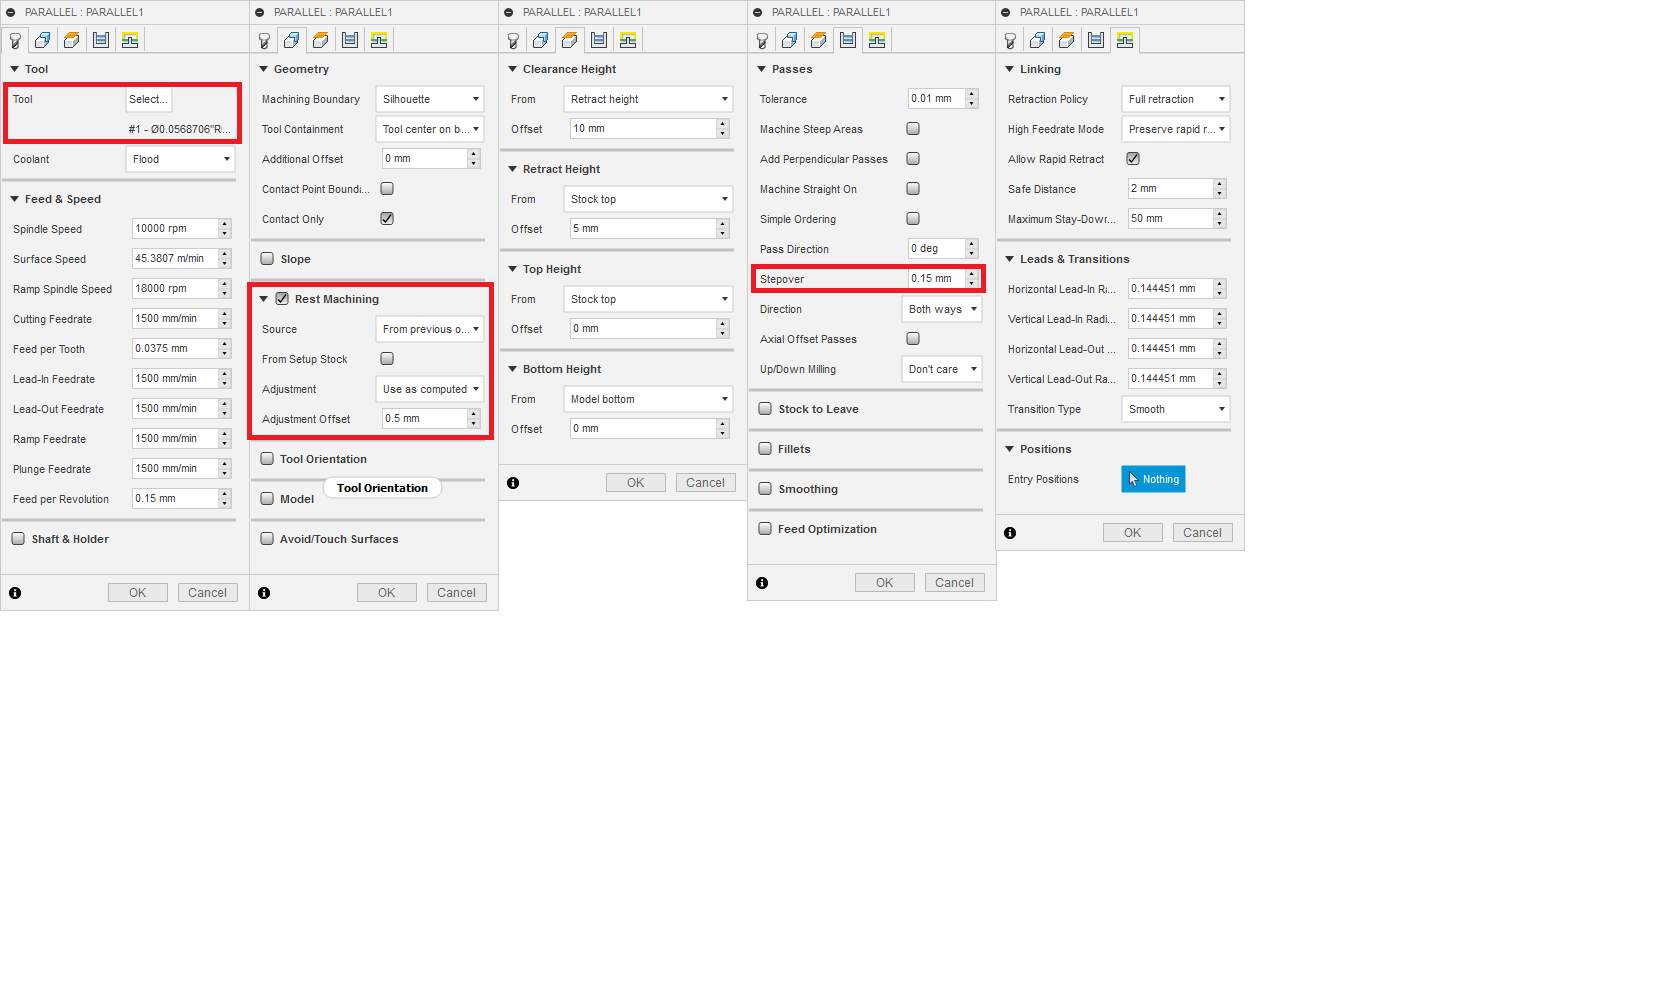
After the adaptive clearing select the Parallel toolpath under the 3d menu. I used a tapered ballnose endmill from Amana Tool Item #46282-K and the settings above (Image 2).
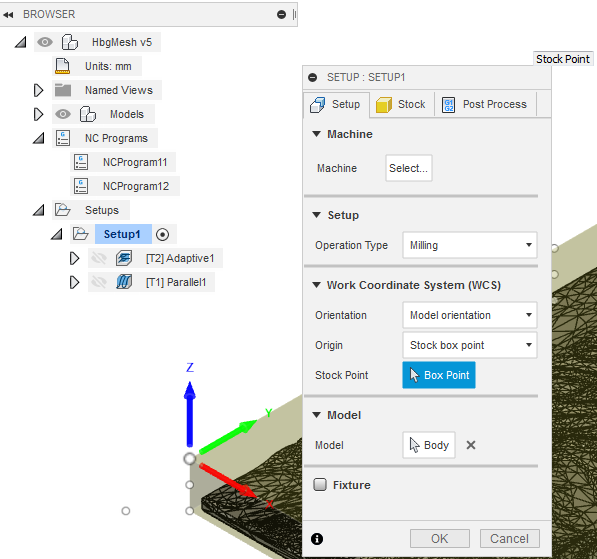
It's up to preference, but I found it was easiest to place my origin at the bottom left of the part. The default origin is at the center of the part. If you'd like to change it right click Setup1 and select edit. On the Setup tab select the bottom left corner of the stock using the stock point snap point. Make sure that the Z level remains at the top of your stock (Image 3).
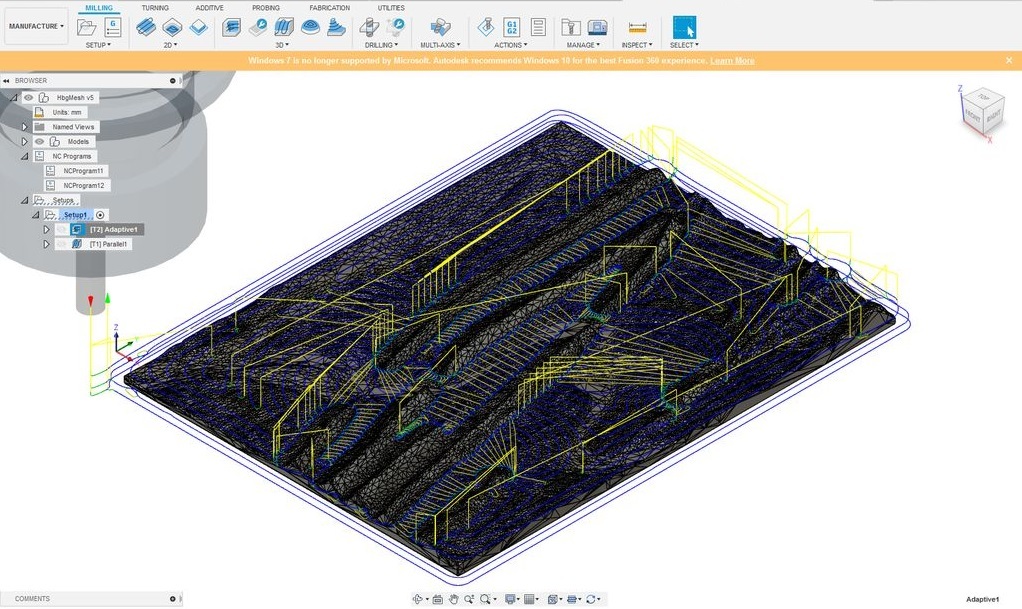
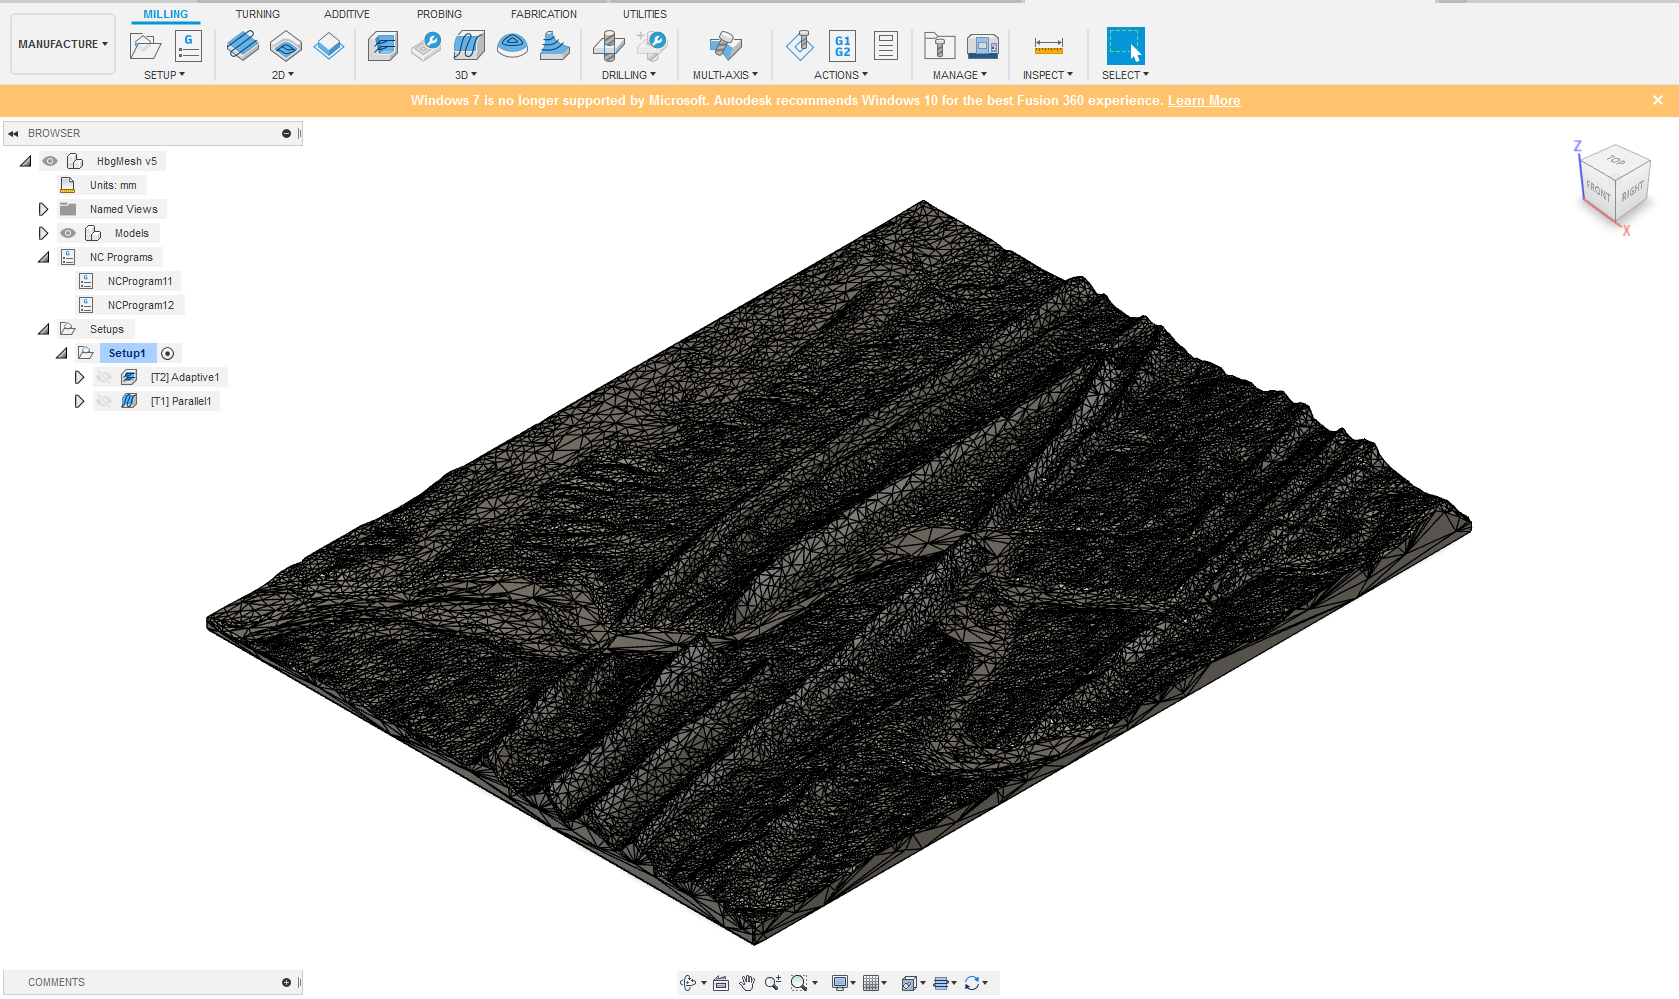
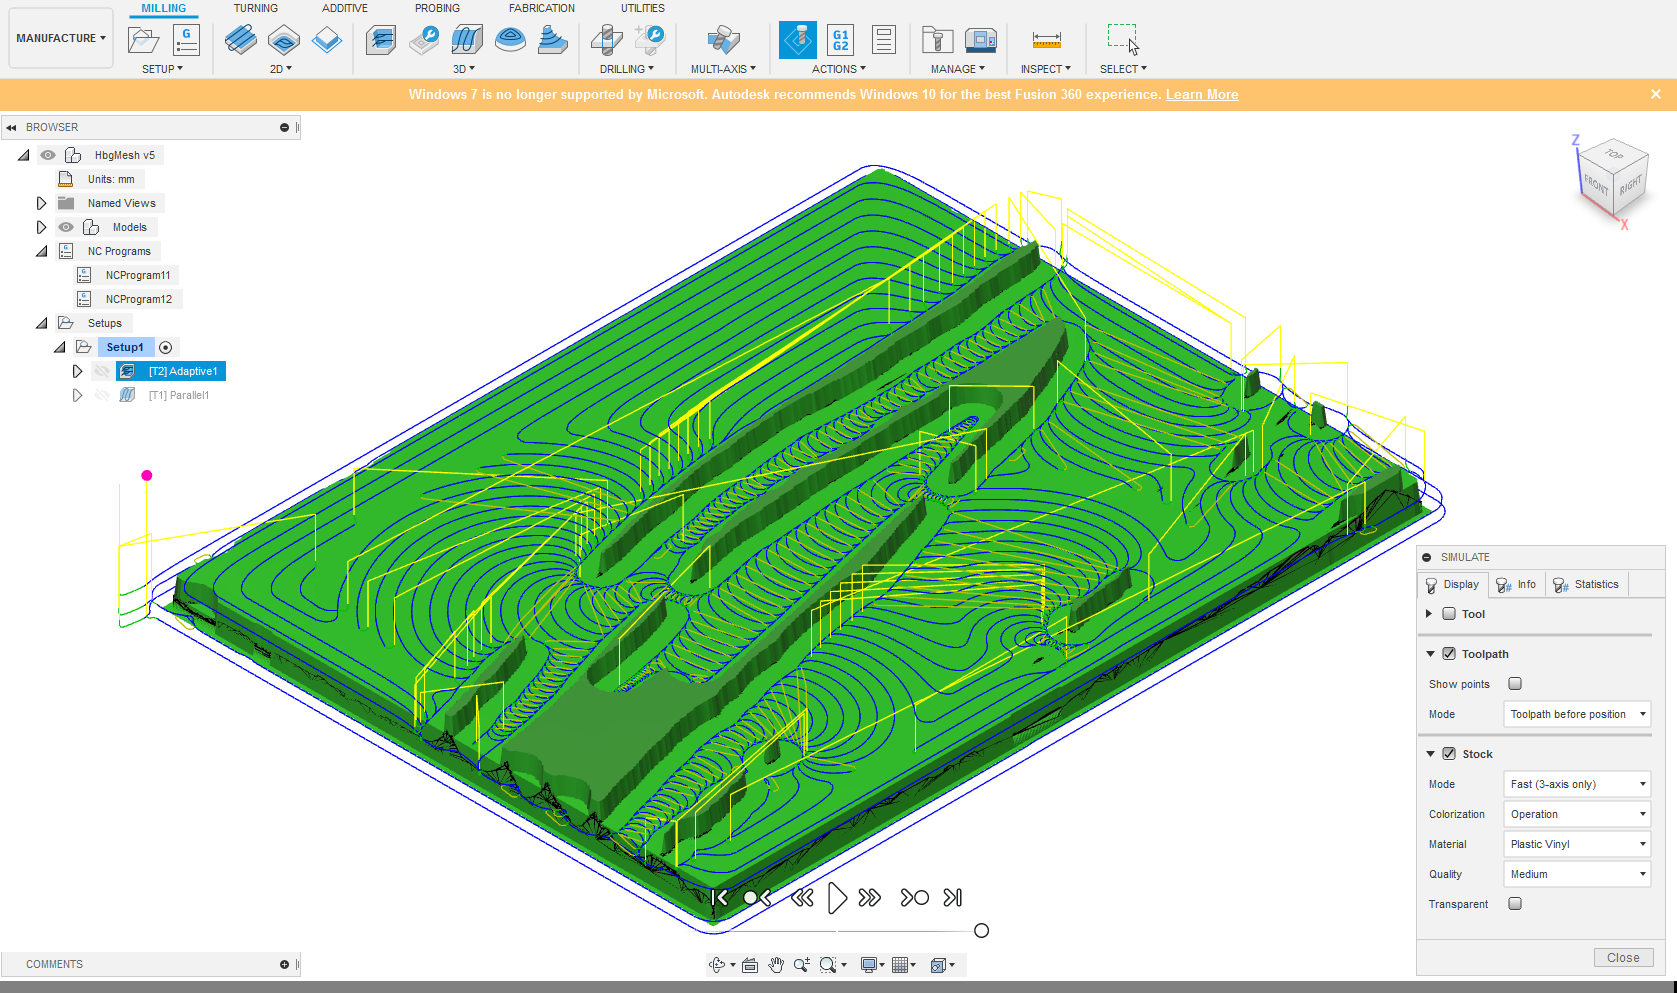
You can now simulate your toolpaths. If you click on one it should give you a preview of the cut path (Images 4&5). If you select both (hold shift) then click the simulate button at the top in the Actions menu you can do a simulation that includes the stock removal (Images 6&7)
Setting Up the Router and Holding the Part
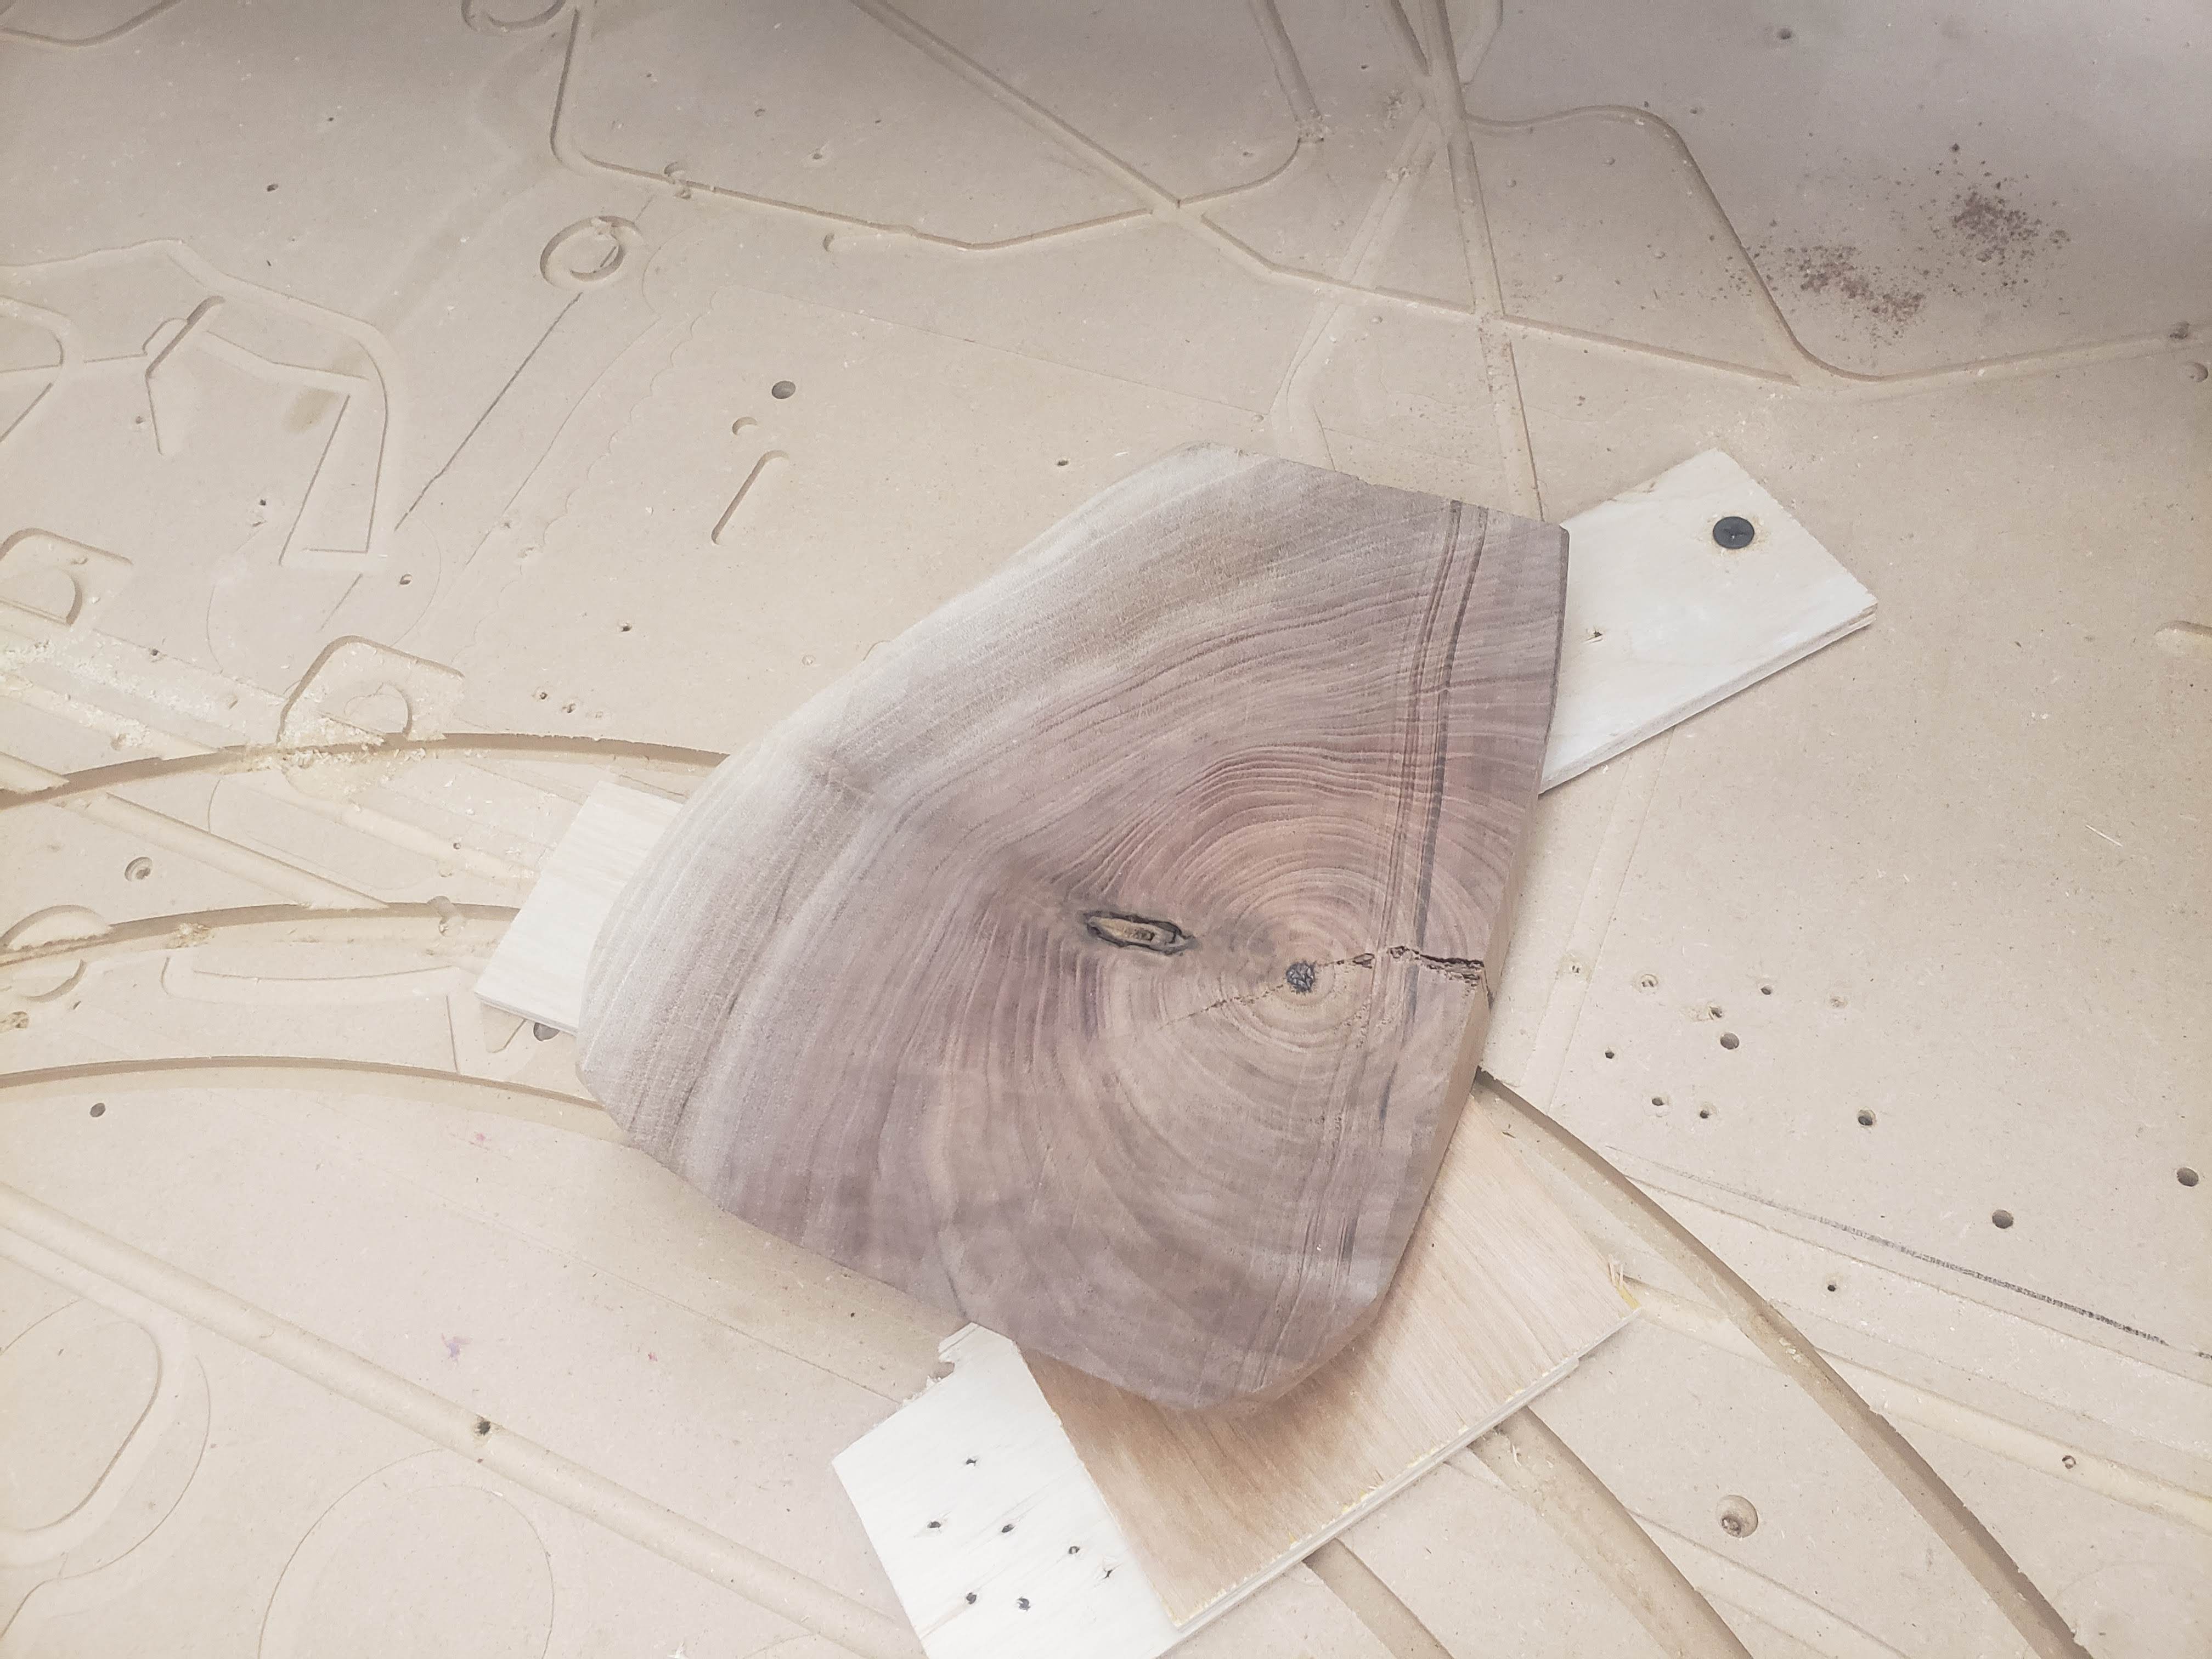
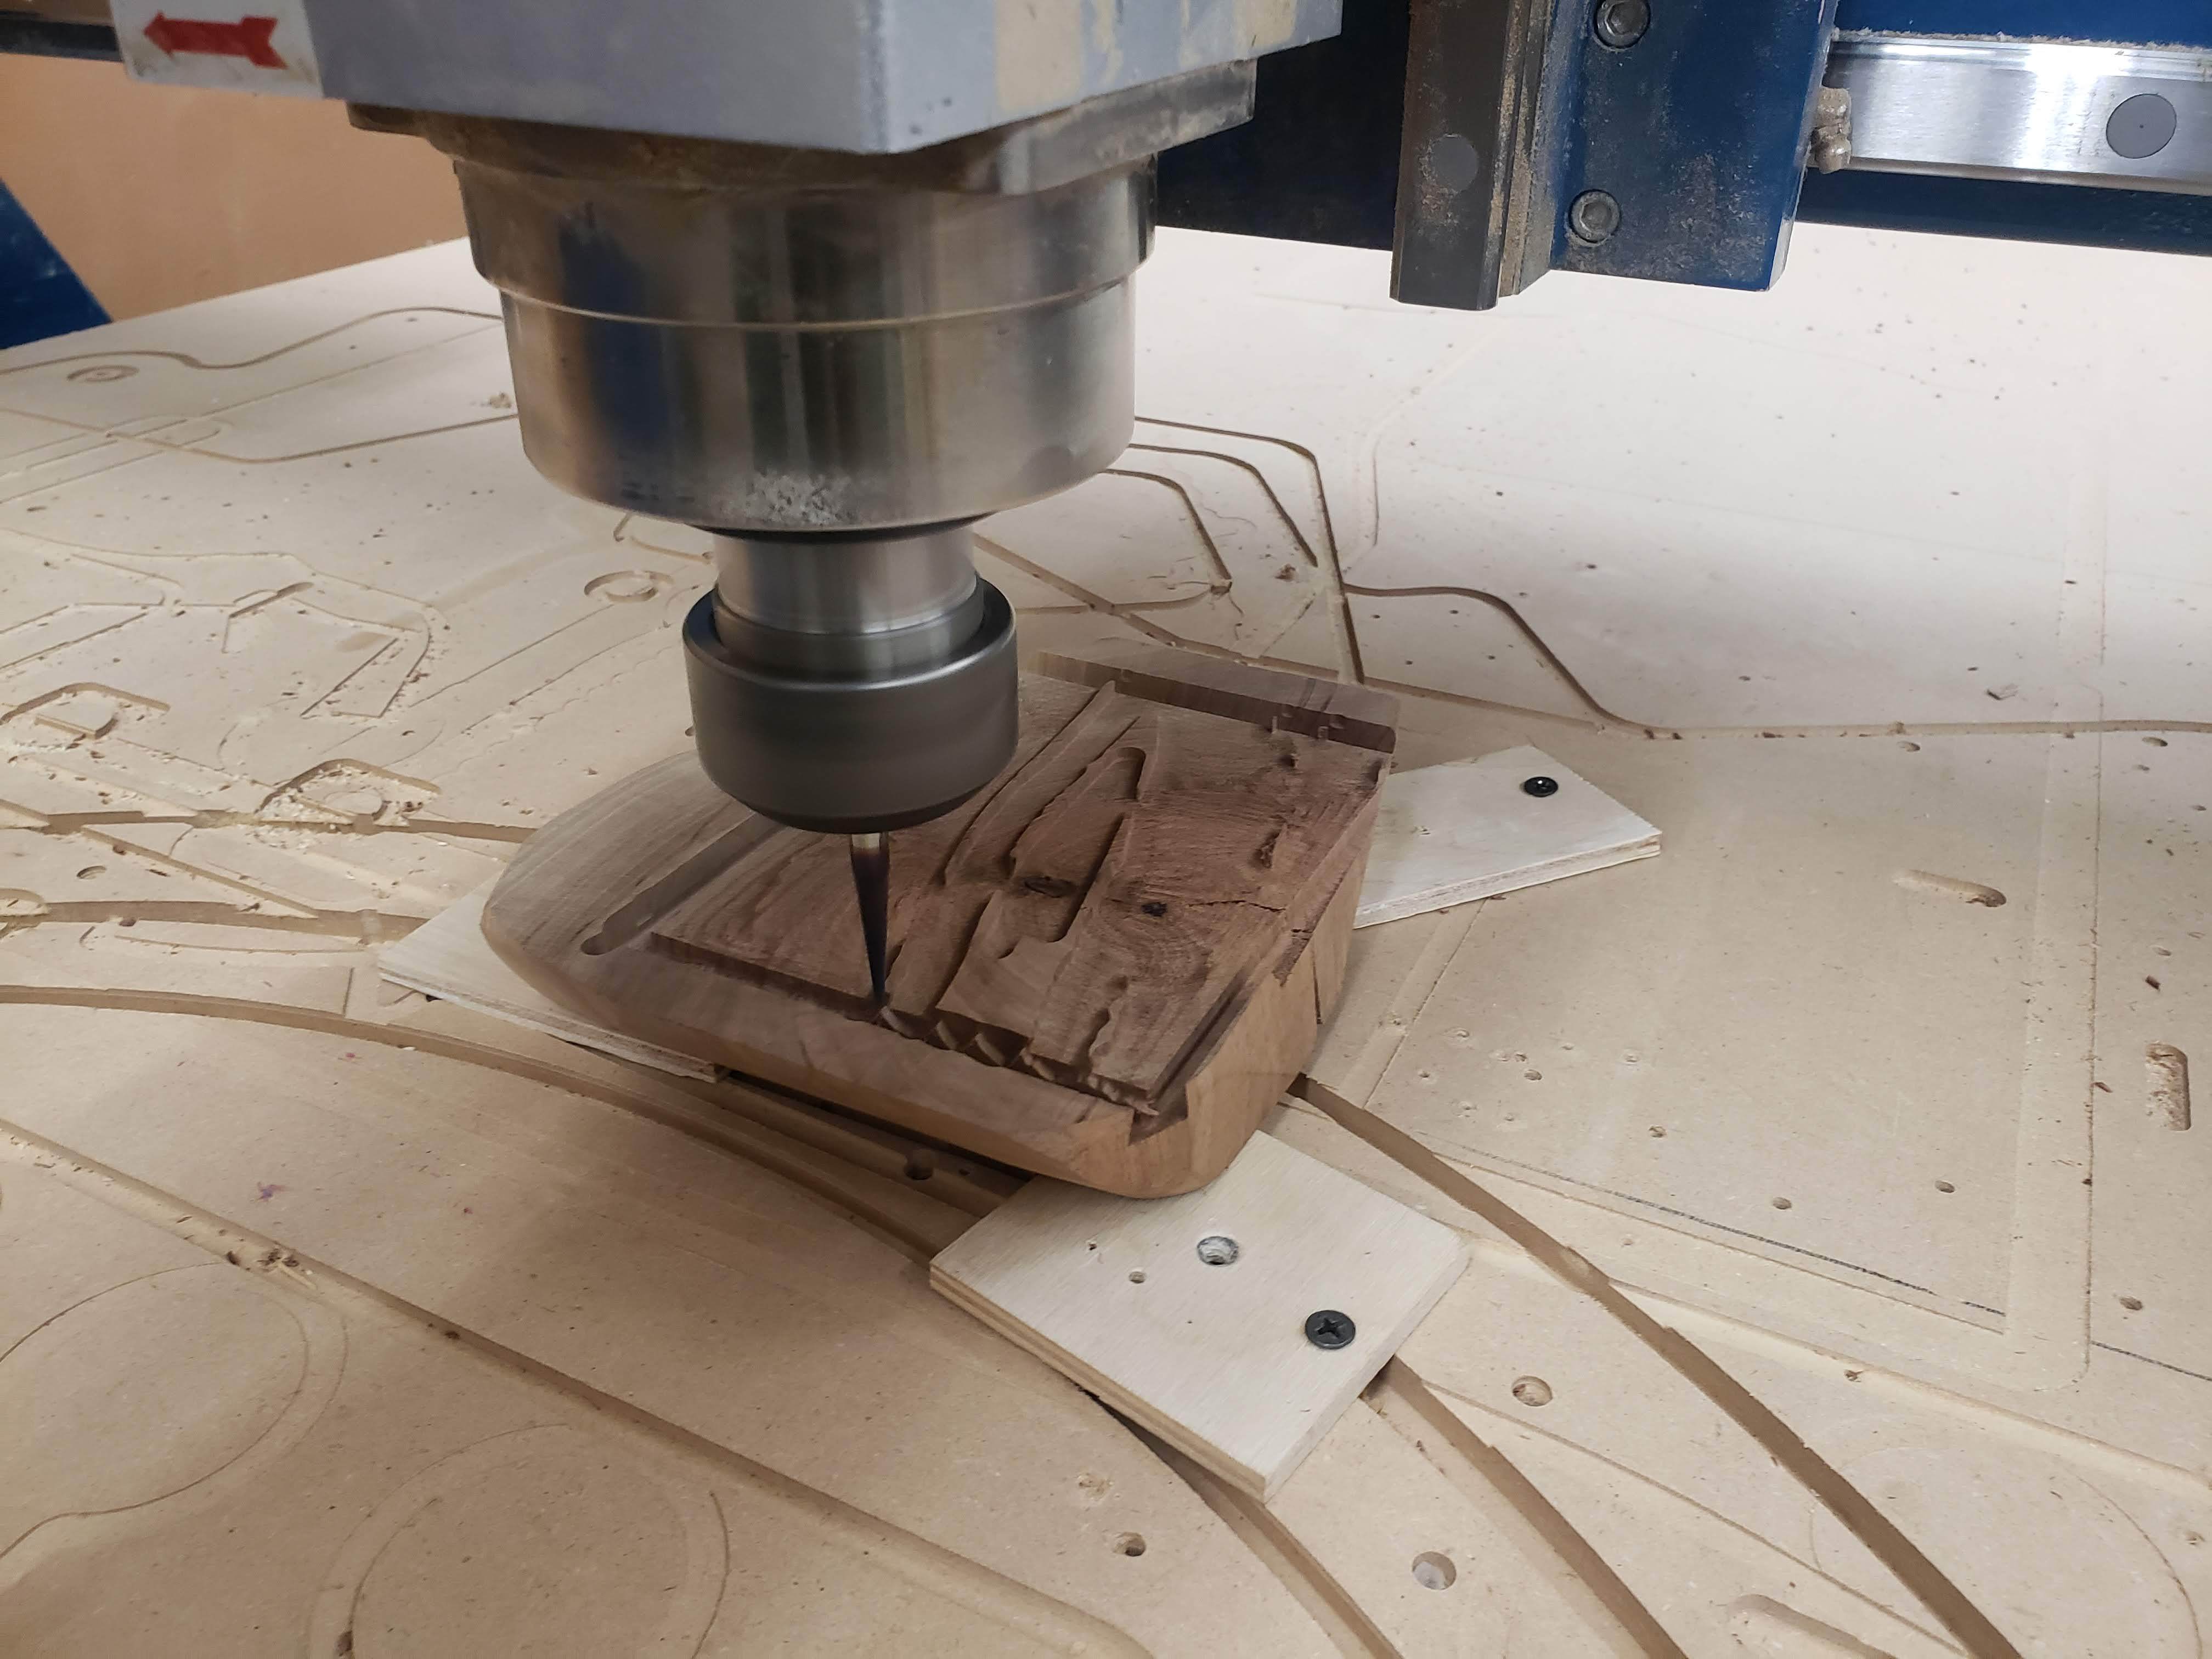
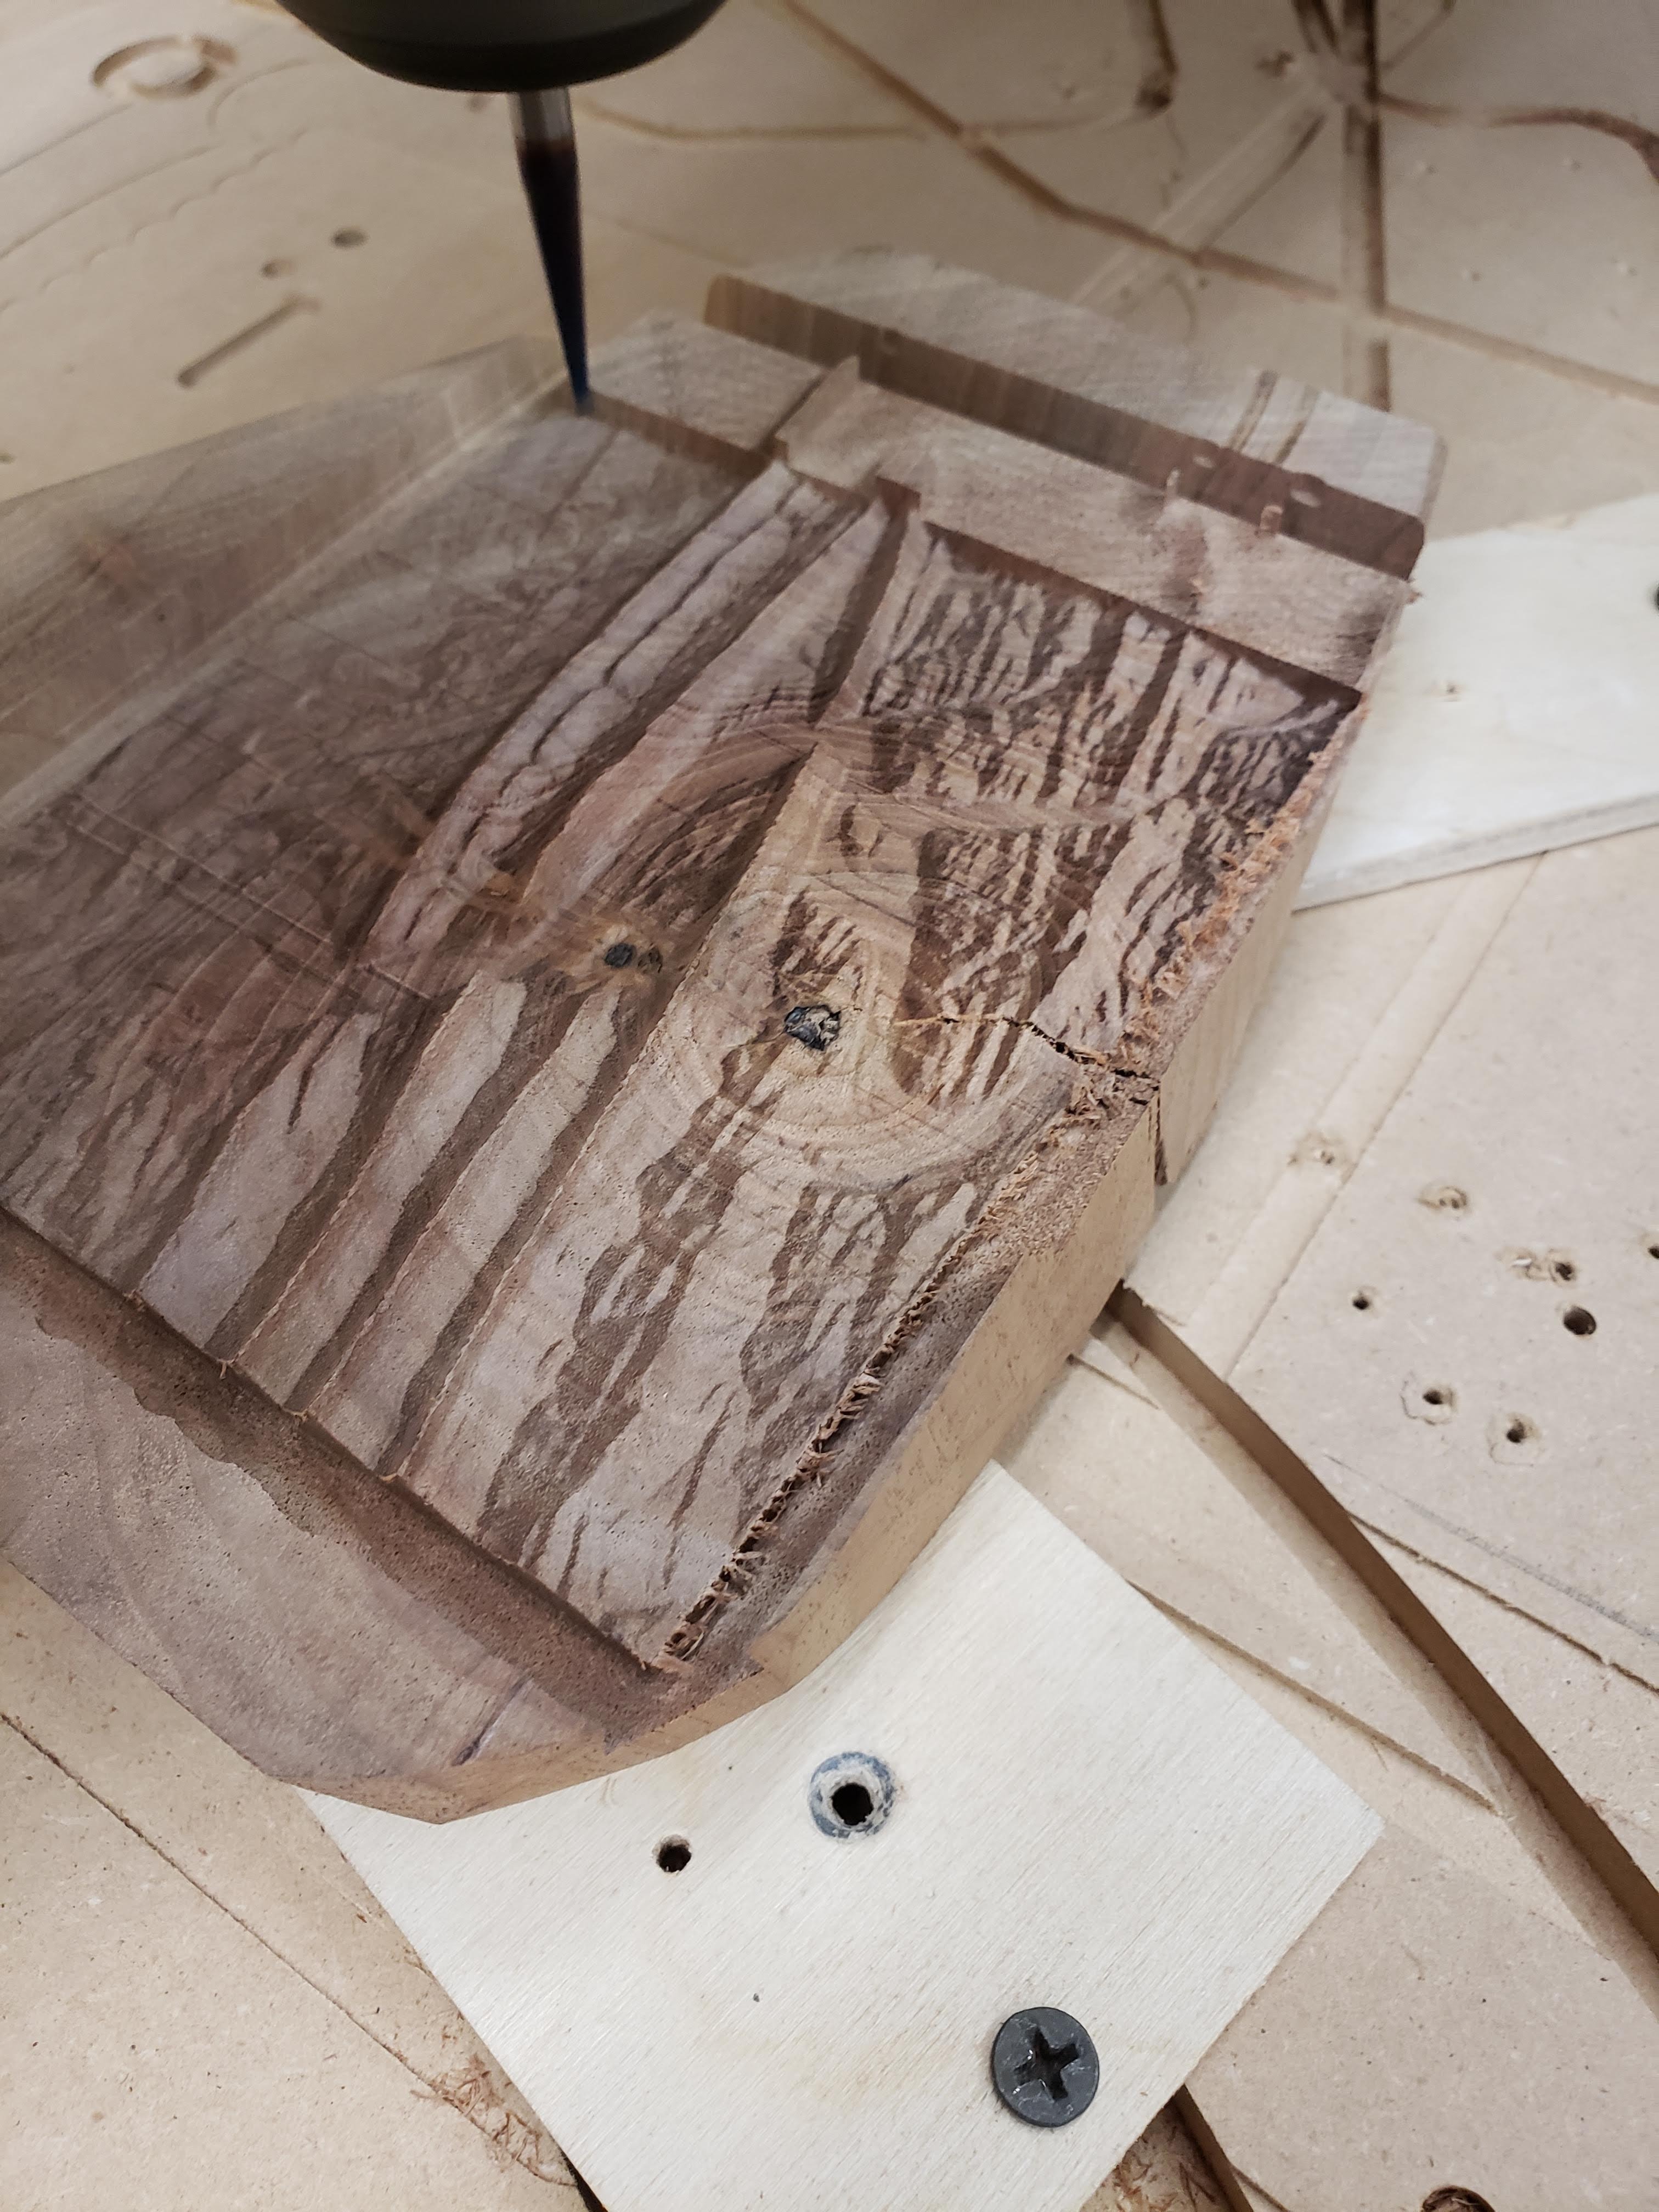
Chances are that you will not have the same type of CNC router, so I am going to keep this section fairly short.
To secure my part to the table, I drilled 3 blind holes into the underside of my stock and used some short wood screws to attach a piece of scrap material. I then repeated the process on the other side of the scrap material and screwed them into the spoilboard. Make sure the 3 pieces are the same thickness. If you're having trouble securing your stock in a way that looks flat use a shim or consider adding a facing pass.
Since I knew I had extra stock that would not be cut, I used the tool touch-off probe. If you will not have any excess stock at the Z level, you will need to touch off your first tool to a known value, record Z, and measure the offset from that value to the top of stock as your Z value.
For Example: Bring the tool down to 3 inches using a 123 block, and record the absolute Z value. Then jog your tool down until it touches the top of the stock and record that absolute Z value. Your Z offset will be the difference between those two values. Now when the top of your stock has been machined, you can bring the second tool down to the 123 block and add that same offset.
Because the parallel toolpath takes such a small amount of material off, it is very important that the two tools are touched off on the same plane.
Once your X Y and Z are set, do a dry run. If everything looks good you're ready to start making chips! Using a parallel toolpath like this takes a ton of time, but seems to be the most common method.
Conclusion
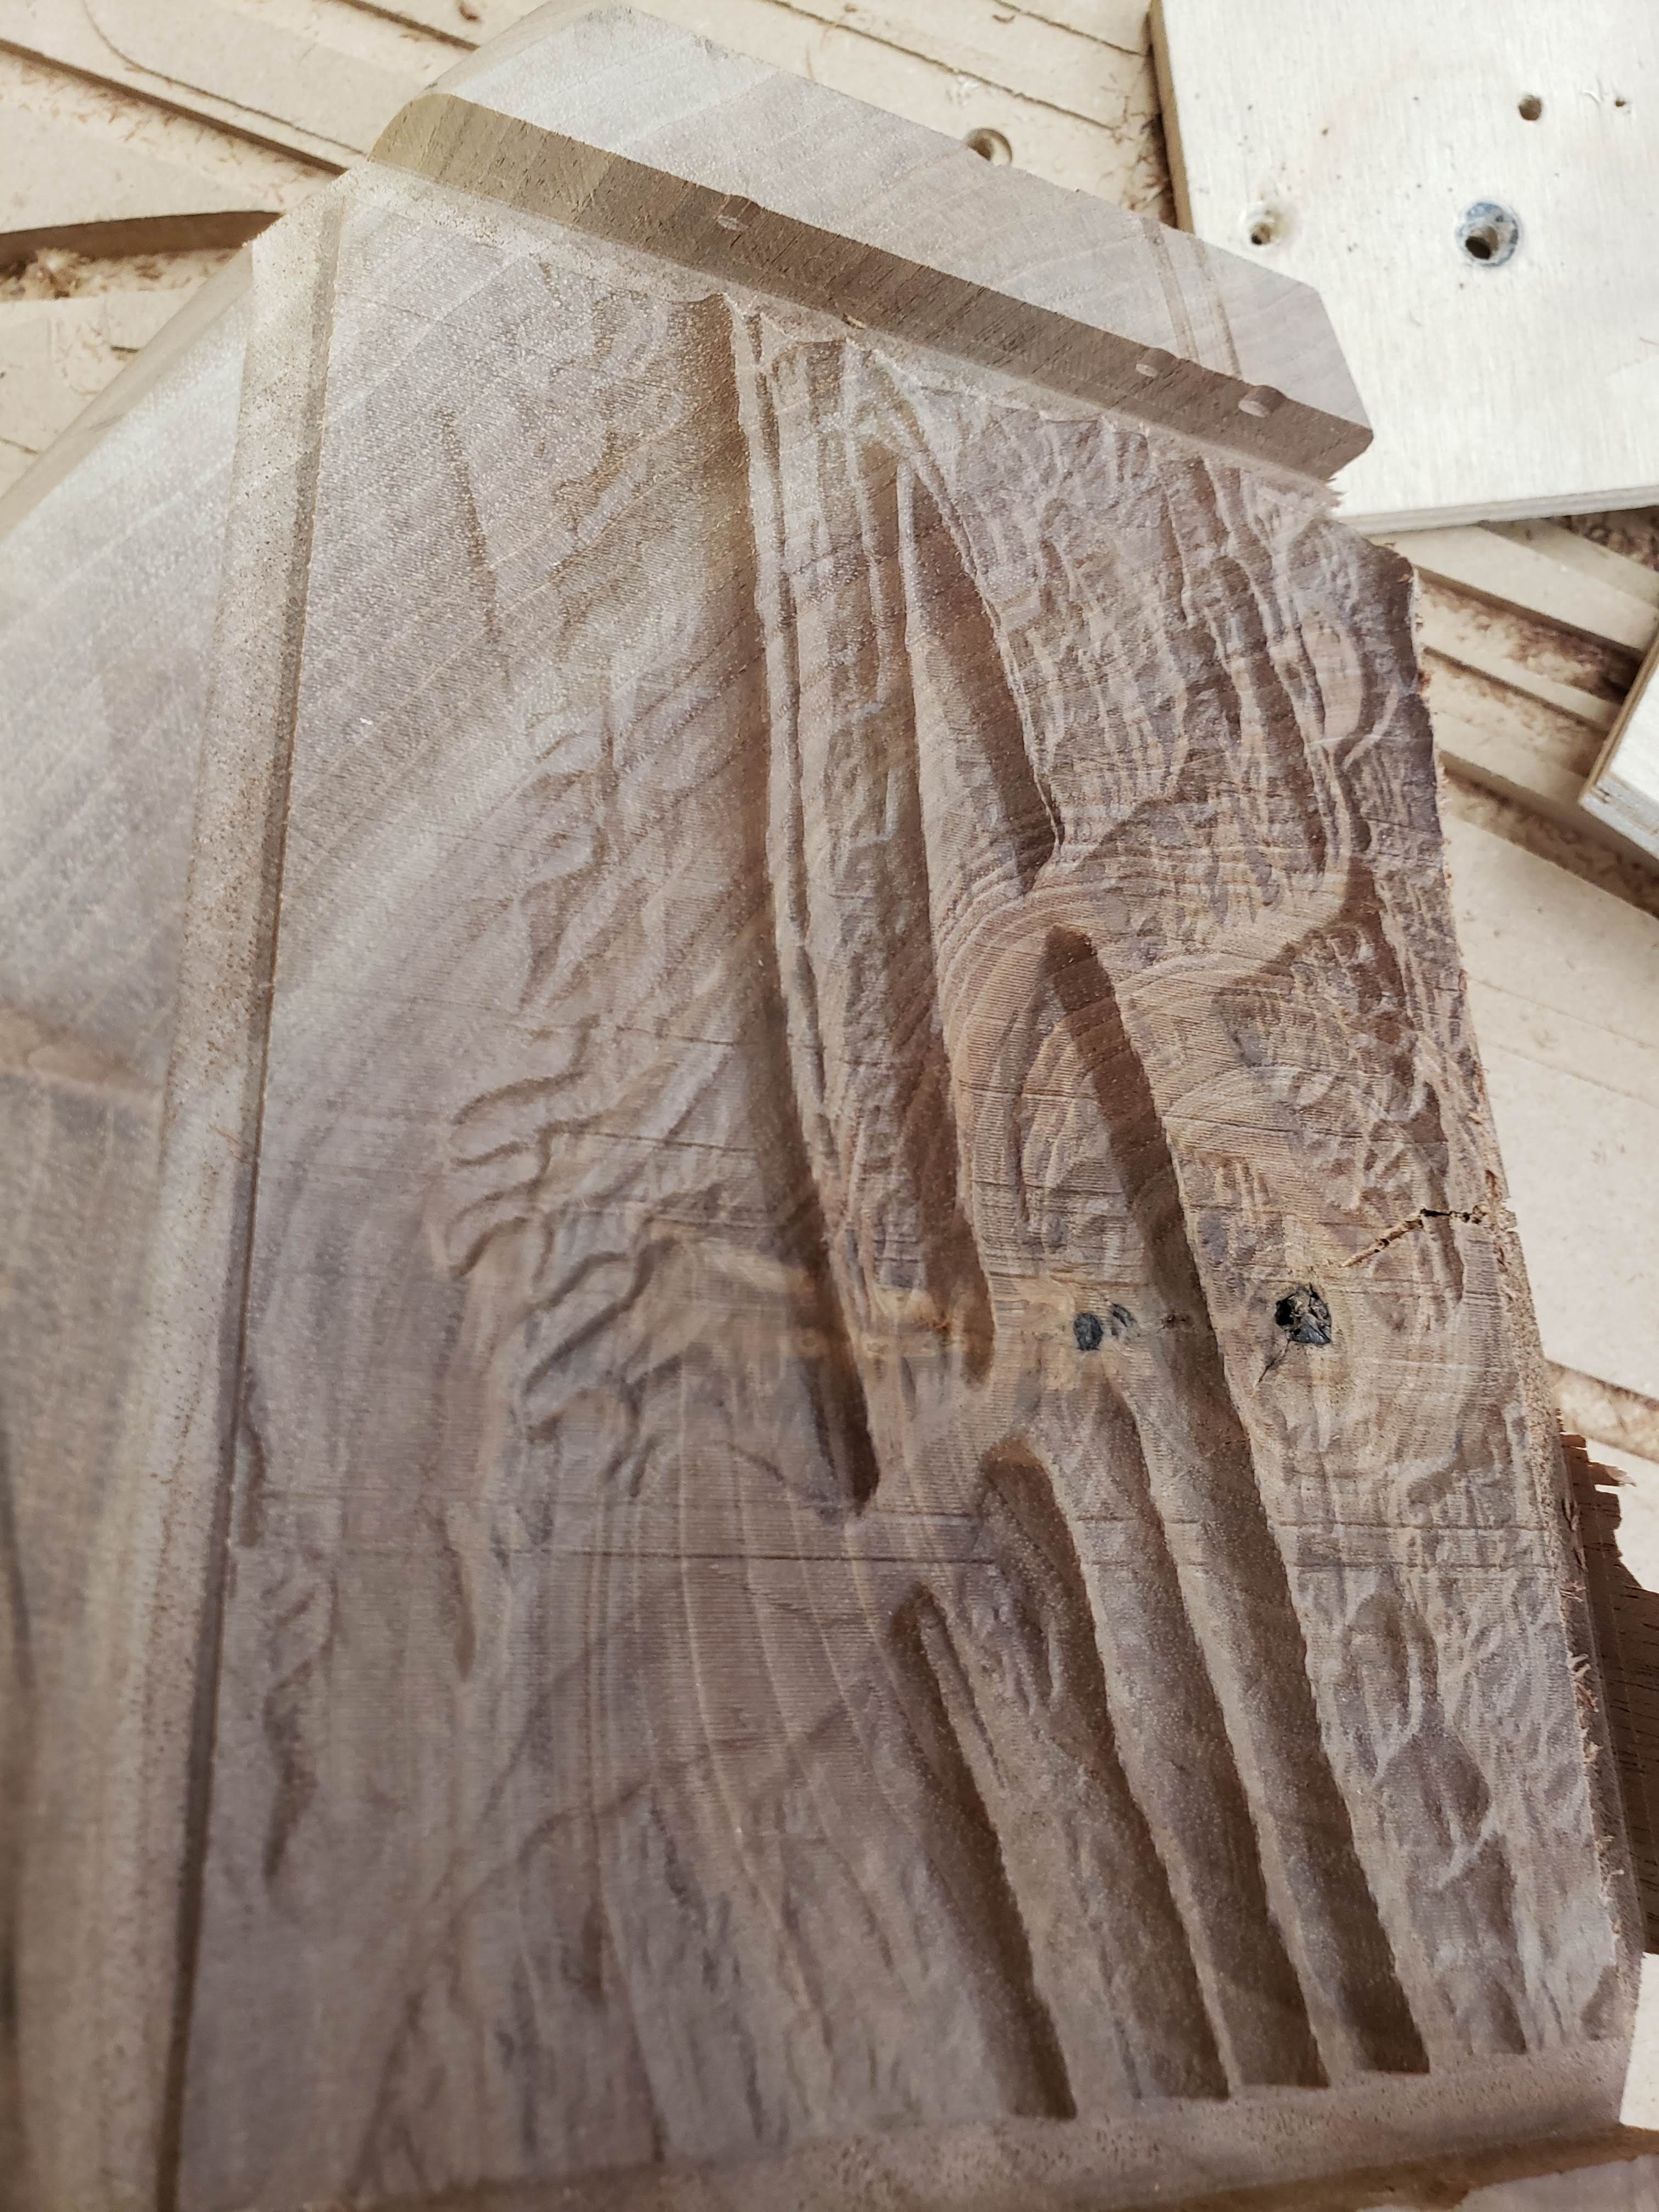
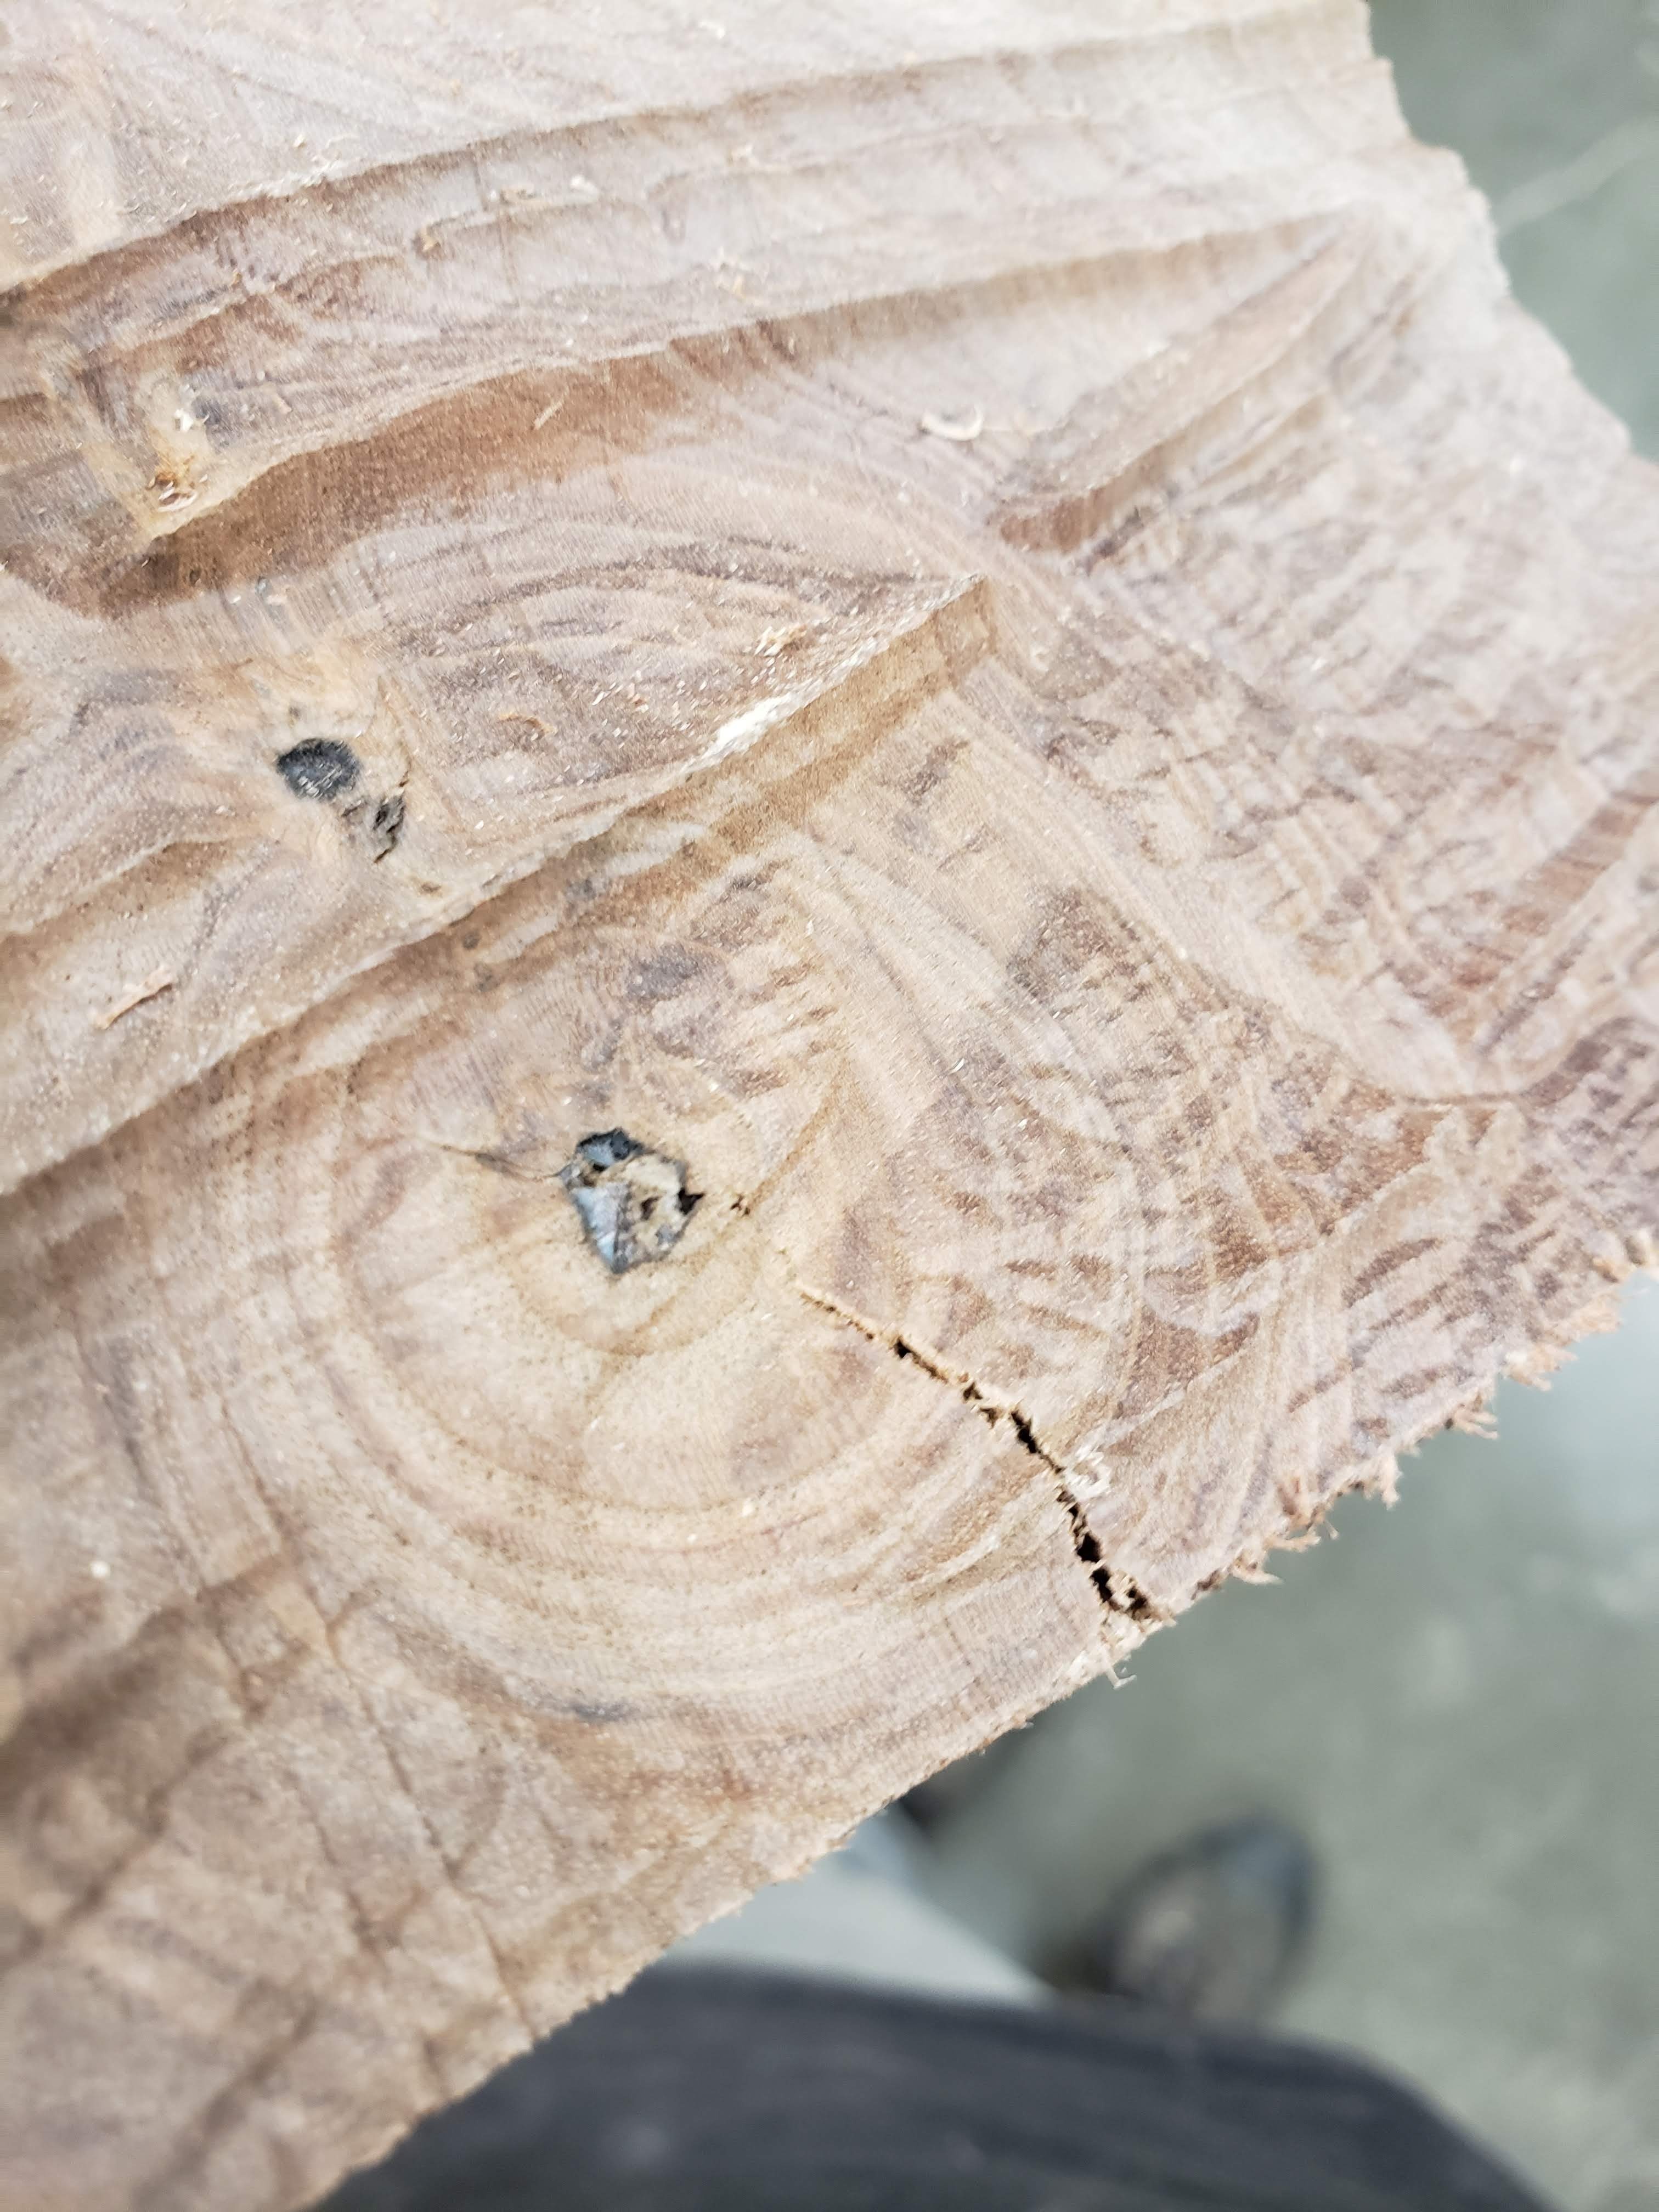
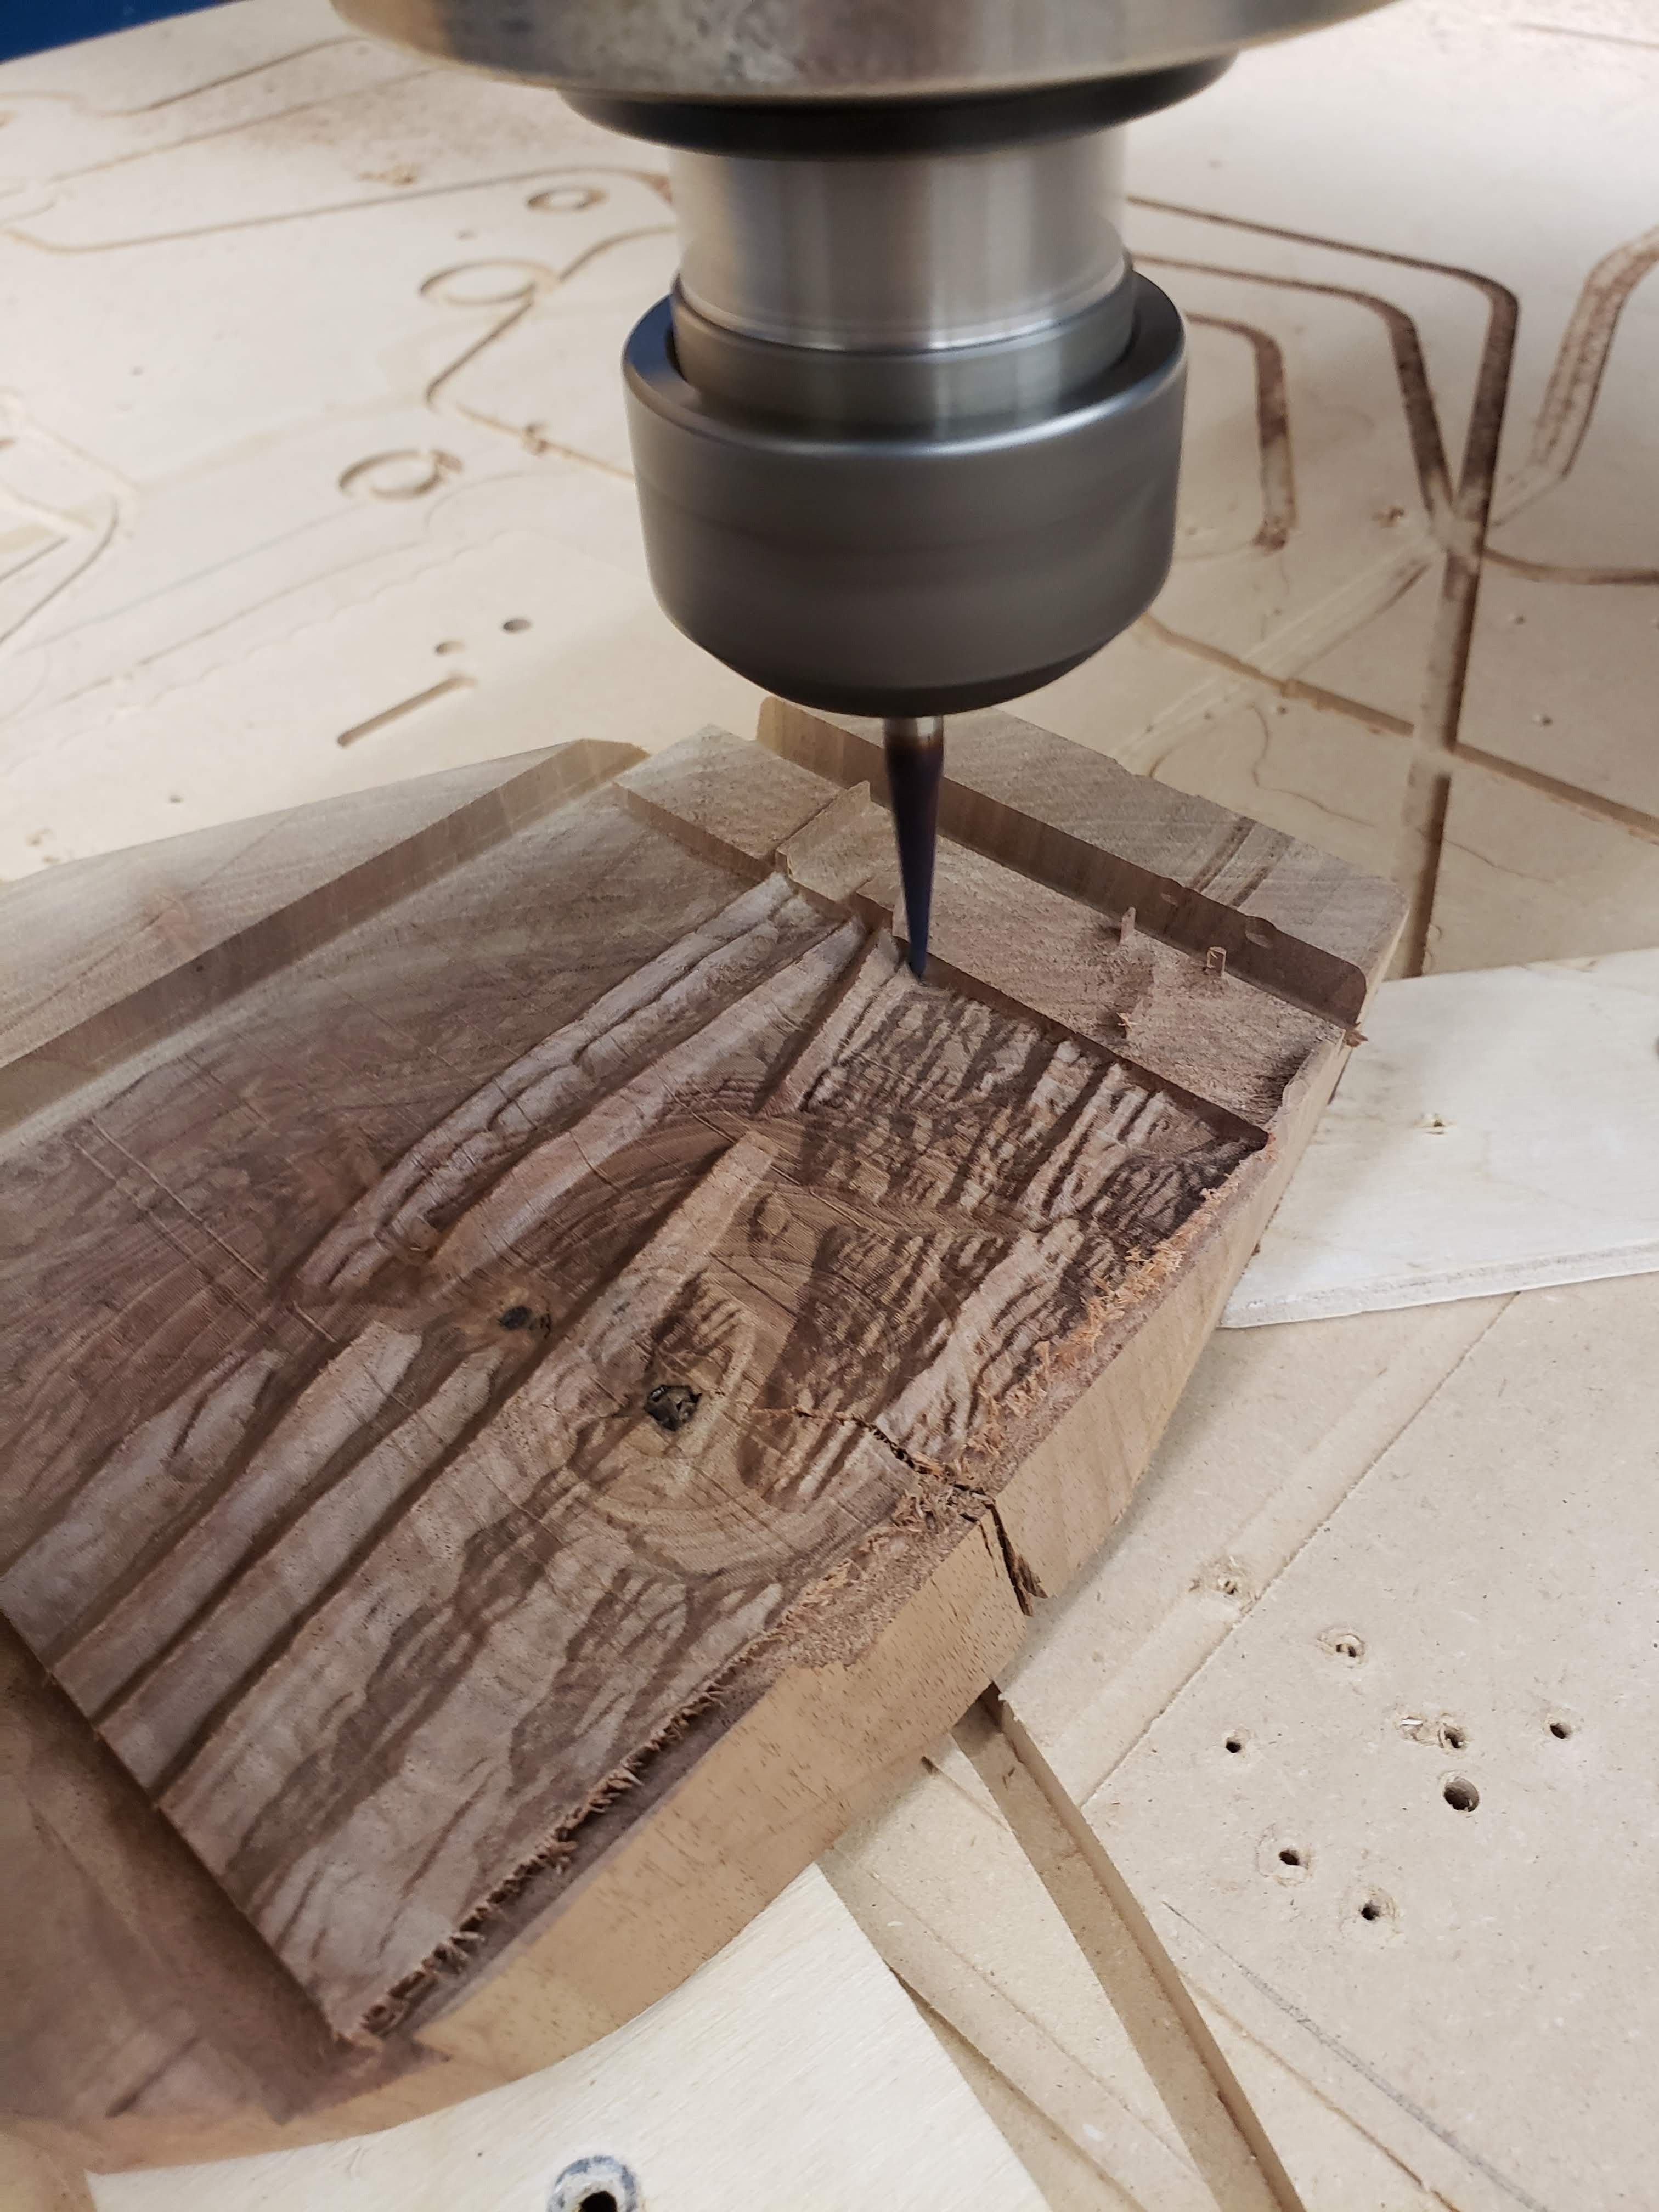
If you look closely you can see some ridges going horizontally across my part. I think this is caused by the Z motor missing a step, but am not sure. My stock had a knot in it that ended up causing a crack in my final part, but if you plan ahead, the rings could add a cool effect to a feature.
My code ended up being 317 thousand lines! Some CNC controllers may struggle to input that much code, so you may need to figure out a way to split it up.
If I were to do it again I think I may try to scale my Z height a bit more to further exaggerate the water and mountains, but overall I am very happy with how my relief map turned out.
I used this video for toolpath settings and parameters and tool selection.
Thank you to http://jthatch.com/ for the awesome Terrain2STL tool.
There are many ways to generate the model and I'm sure plenty are better than the method I chose. I found some tutorials that make models from heightmaps with Blender or Fusion 360 plugins. These quickly became tough for me to follow.
Once again, I am far from a Fusion 360 wiz, so if you see anything I did that could be done better please let me know in the comments. Good luck, hope you enjoy!