Recycled Plastic Christmas Wreath
by jackie1050 in Craft > Reuse
1253 Views, 7 Favorites, 0 Comments
Recycled Plastic Christmas Wreath

This is a Christmas Wreath made from recycled plastic - carrier bags and other LDPE for the foliage, with the lid of a plastic sweet tub for the base.
As I'm a member of DoES Liverpool Makerspace, I have access to heat presses and laser cutters, so I've used those where it makes things easier. The wreath can be made without them though, so I'll try to tell you how to do that too
Supplies


Materials:
- Wire - Florists' wire is probably best as it's fine but easy to bend into shape, and it's green. When I didn't have any available, I used fine stainless steel wire
- Paper fasteners
- Lid from a polypropylene Christmas sweet tub e.g. Roses, Celebrations, Haribo, Miniature Heroes. In the UK, Christmas sweets are generally sold in large plastic tubs - these are still widely available despite pressure on the manufacturers to provide other formats. You might have other single use plastic lids, e.g. from paint.
- Coloured soft plastic (LDPE), such as worn plastic bags. If you're going for a traditional Christmas palette you'll need red (e.g. carrier bags from Wilko or TK Maxx), dark green (Marks and Spencer) and pale green (Oxfam).
- Lots of clear or white soft plastic (LDPE) such as bubble wrap and polythene sheet (e.g. mattress wrapping).
Tools:
- Good quality scissors
- Something for making holes in leaves/petals: bradawl, Japanese hole punch, leather punch or drill
- Laser cutter (optional)
- Heat press or iron and cardboard sheet
- Silicone baking sheets and/or silicone baking paper
Create the Base


Use a laser cutter to cut a central circle from the sweet tub lid, and make holes in the remaining part so that you can attach foliage later. You can use the attached svg (this also contains concentric rings which can either be used for additional smaller wreaths or for string art - my original plan).
The svg is designed for sweet tub lids of around 240mm diameter. It doesn't matter if they're round or octagonal as the foliage will hide the shape anyway.
If you don't have a laser cutter then you could make the holes using a drill. You probably don't need this many! Either cut out the central circle with a knife - again it doesn't have to be that neat as it will be hidden by the foliage, or leave it - still looks good!
Downloads
Fuse Soft Plastic


If you're using a heat press then, in a well-ventilated area:
- Heat to 170C
- Place one silicone baking sheet on base
- Cut coloured plastic to size and place on baking sheet (facing down)
- Cover with one or 2 layers of clear plastic
- Place another silicone baking sheet on top
- Close heat press and heat for a couple of minutes - this will depend on the qualities of the particular plastics used, but don't leave it too long as this will cause fumes
- Open the press, take the silicone / plastic sandwich out, and leave for a few minutes so that you can easily peel the plastic from the silicone sheet
- Add another layer of plastic and repeat. After each layer has cooled, check the rigidity of the sheet; it needs to be still quite thin so it's easy to cut, but able to hold it's shape - at that stage you can apply another sheet of coloured plastic so that both sides of your sheet are coloured
If you're using an iron:
- There are lots of tutorials around on how to do this. Here's a good one: https://www.plasticshed.org/plastic-waste-wallet. You'll need to make bigger pieces and again make sure to use coloured plastic on the outside
Repeat to produce dark green, light green and red sheets (or whatever colours you want to use)
Cut Out Foliage Shapes


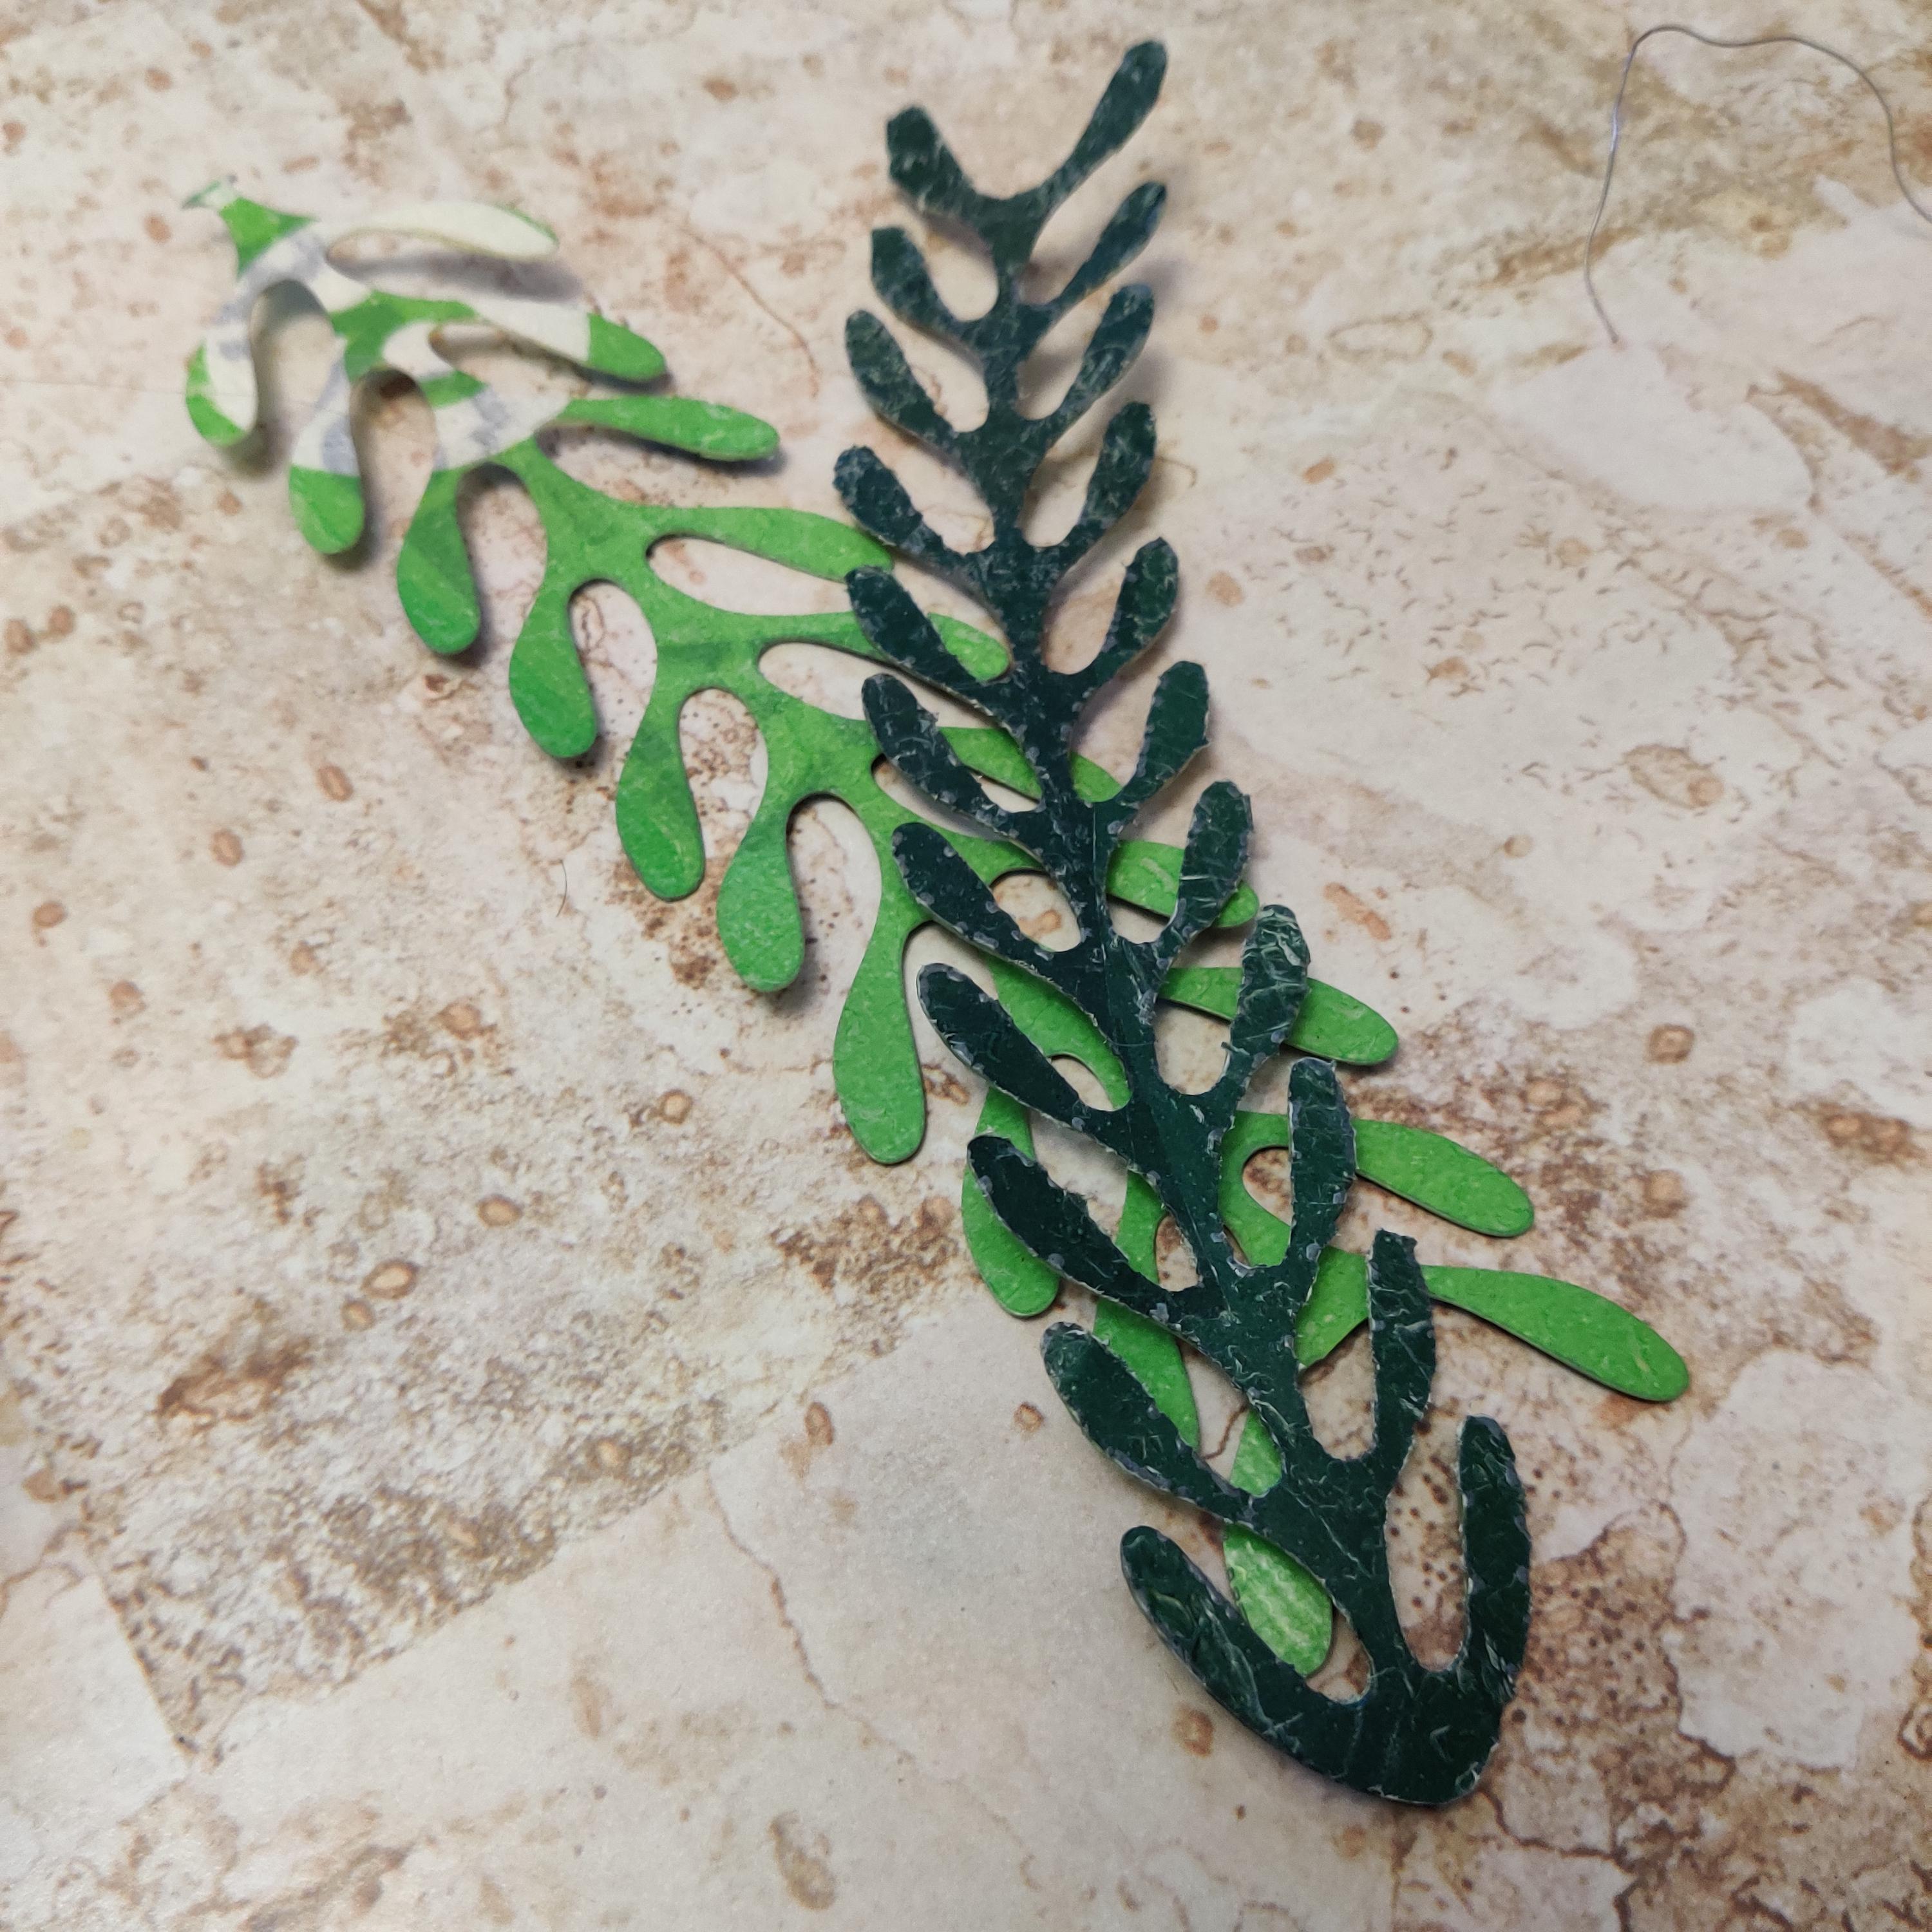
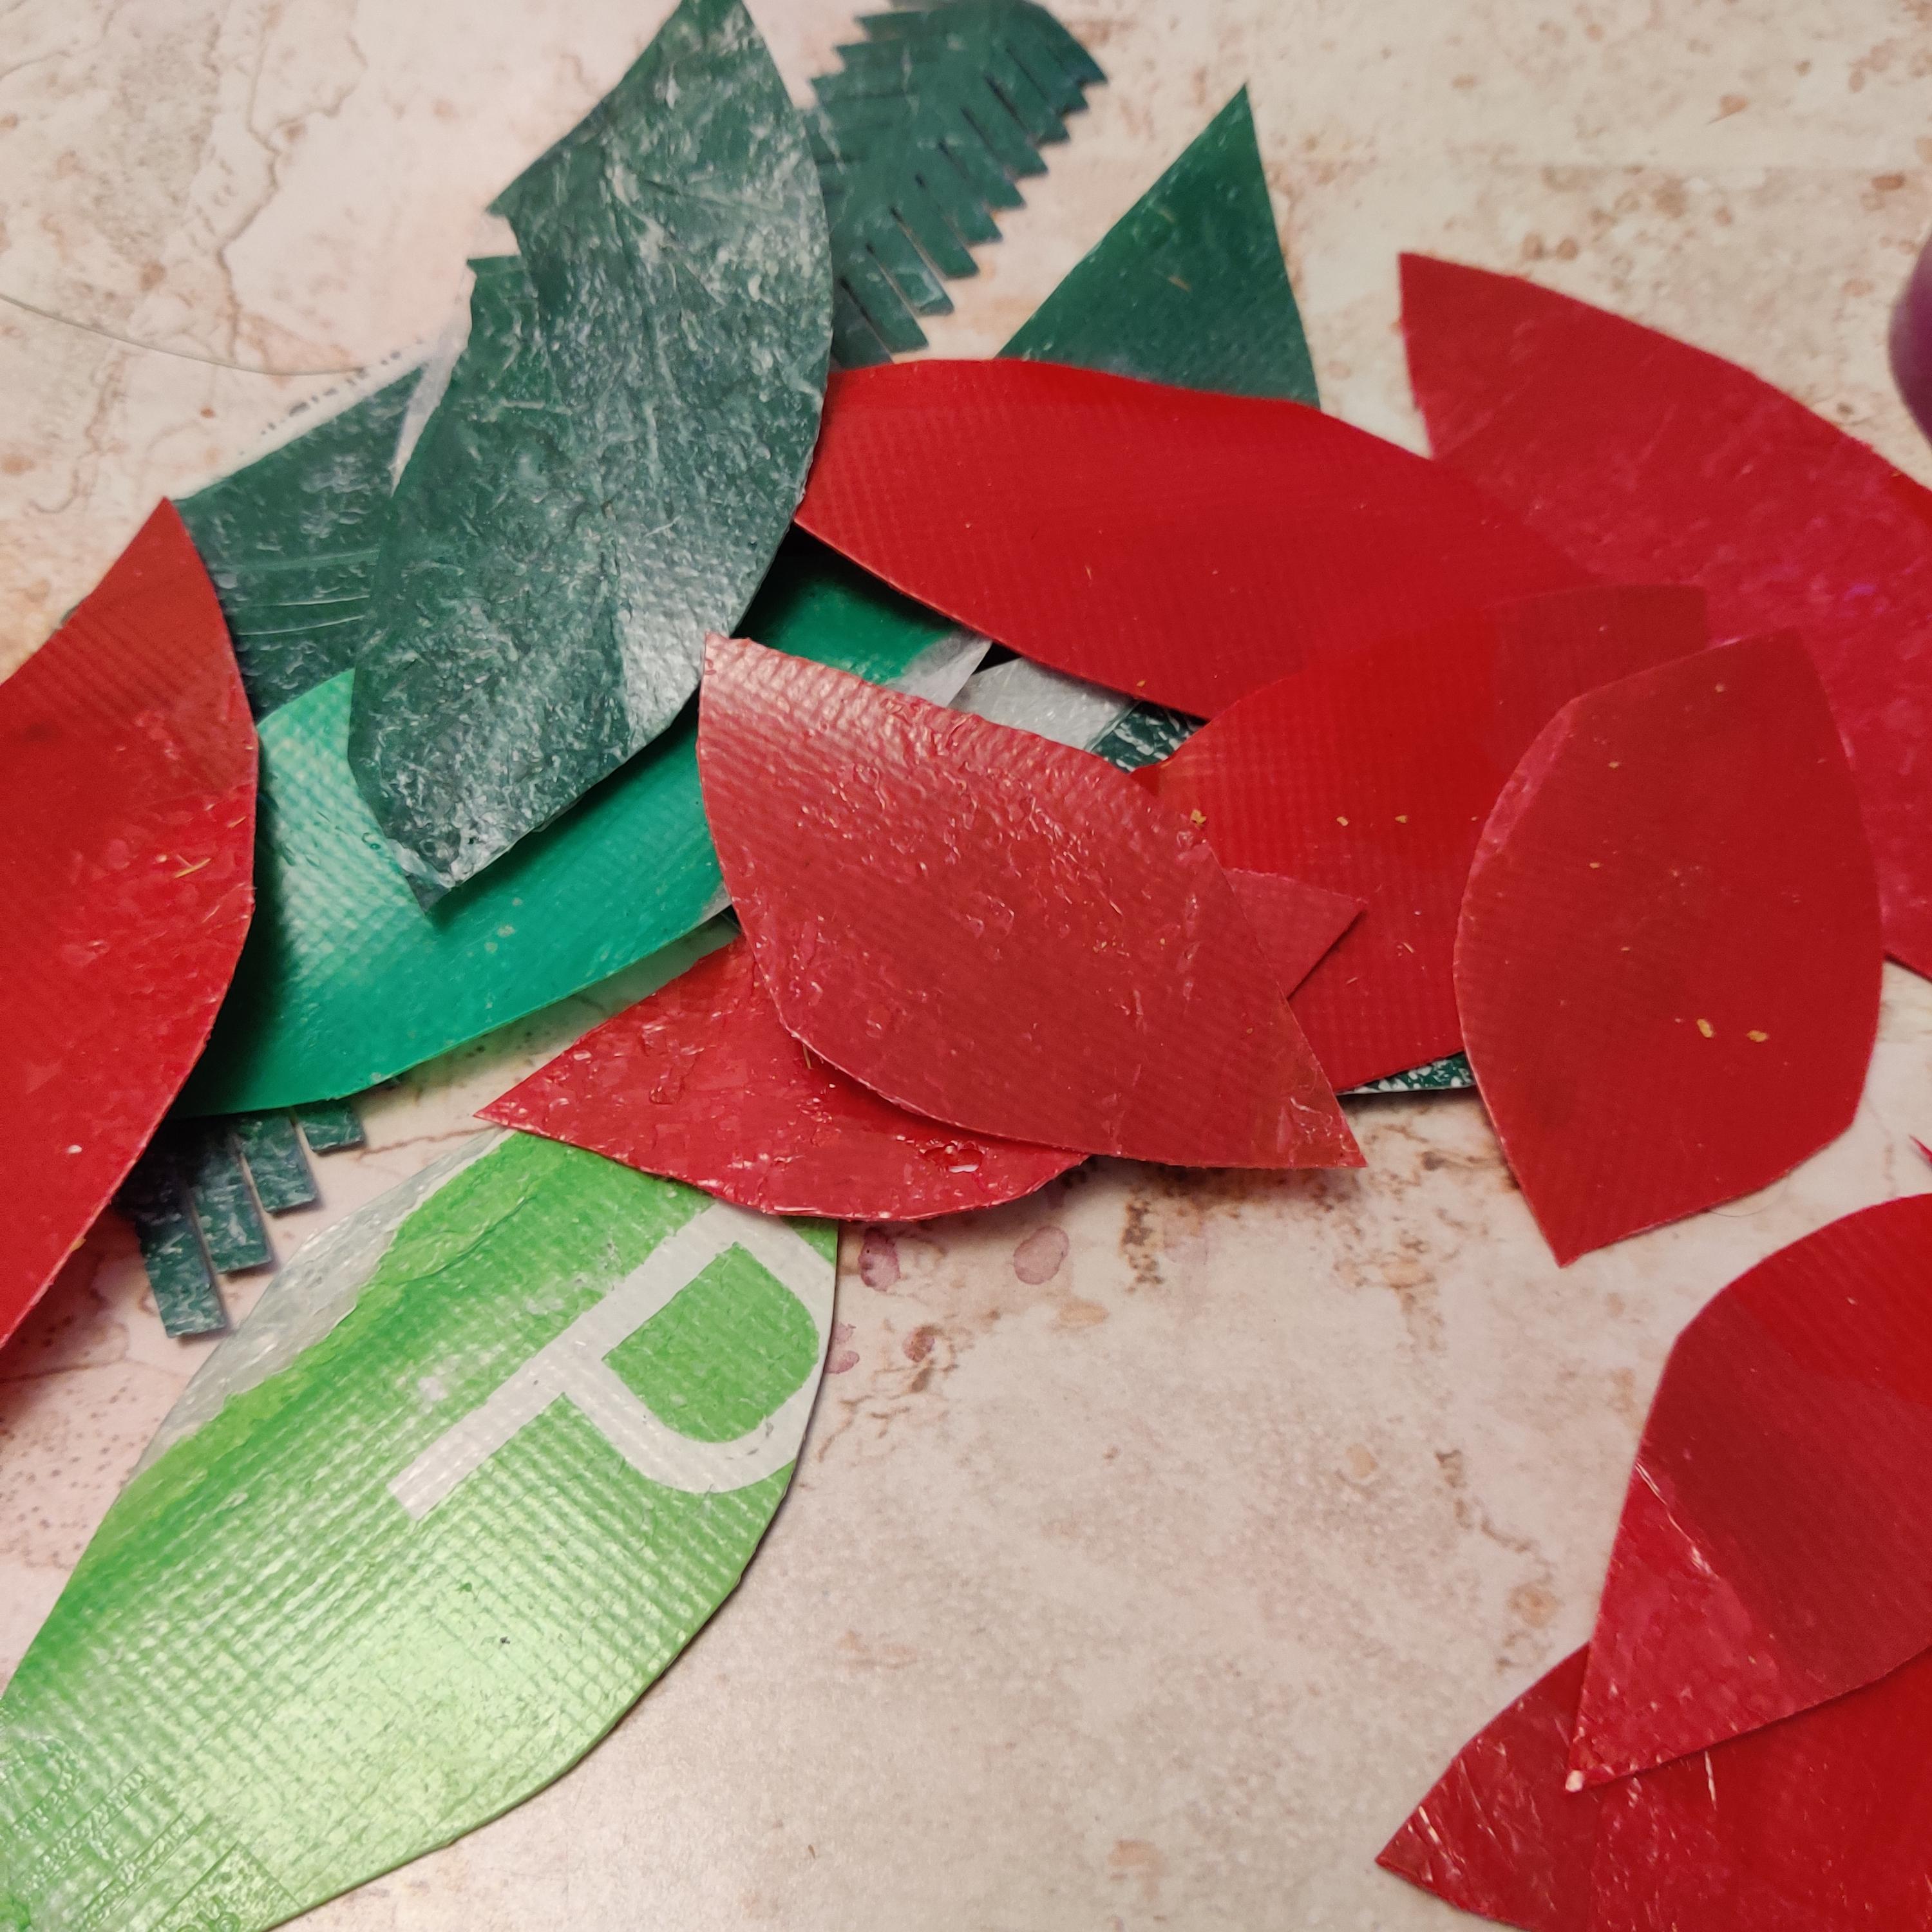


Laser or hand cut foliage shapes from your coloured plastic sheets. I've uploaded some of the files I've used (including one by Sanna that she's created for the workshop we're doing), but other leaf shapes could be interesting too. Even if you're using a laser cutter, it's worth handcutting simple shapes from any leftovers
The leaf and petal shapes need to have a hole at one end for a paper fastener - either laser cut this or use a punch/bradawl etc.
Note: If you don't use plastic bags these days, then you could use waste coloured cardboard, or even make shapes out of watercolour paper and hand colour them
Attach the Fir Sprigs


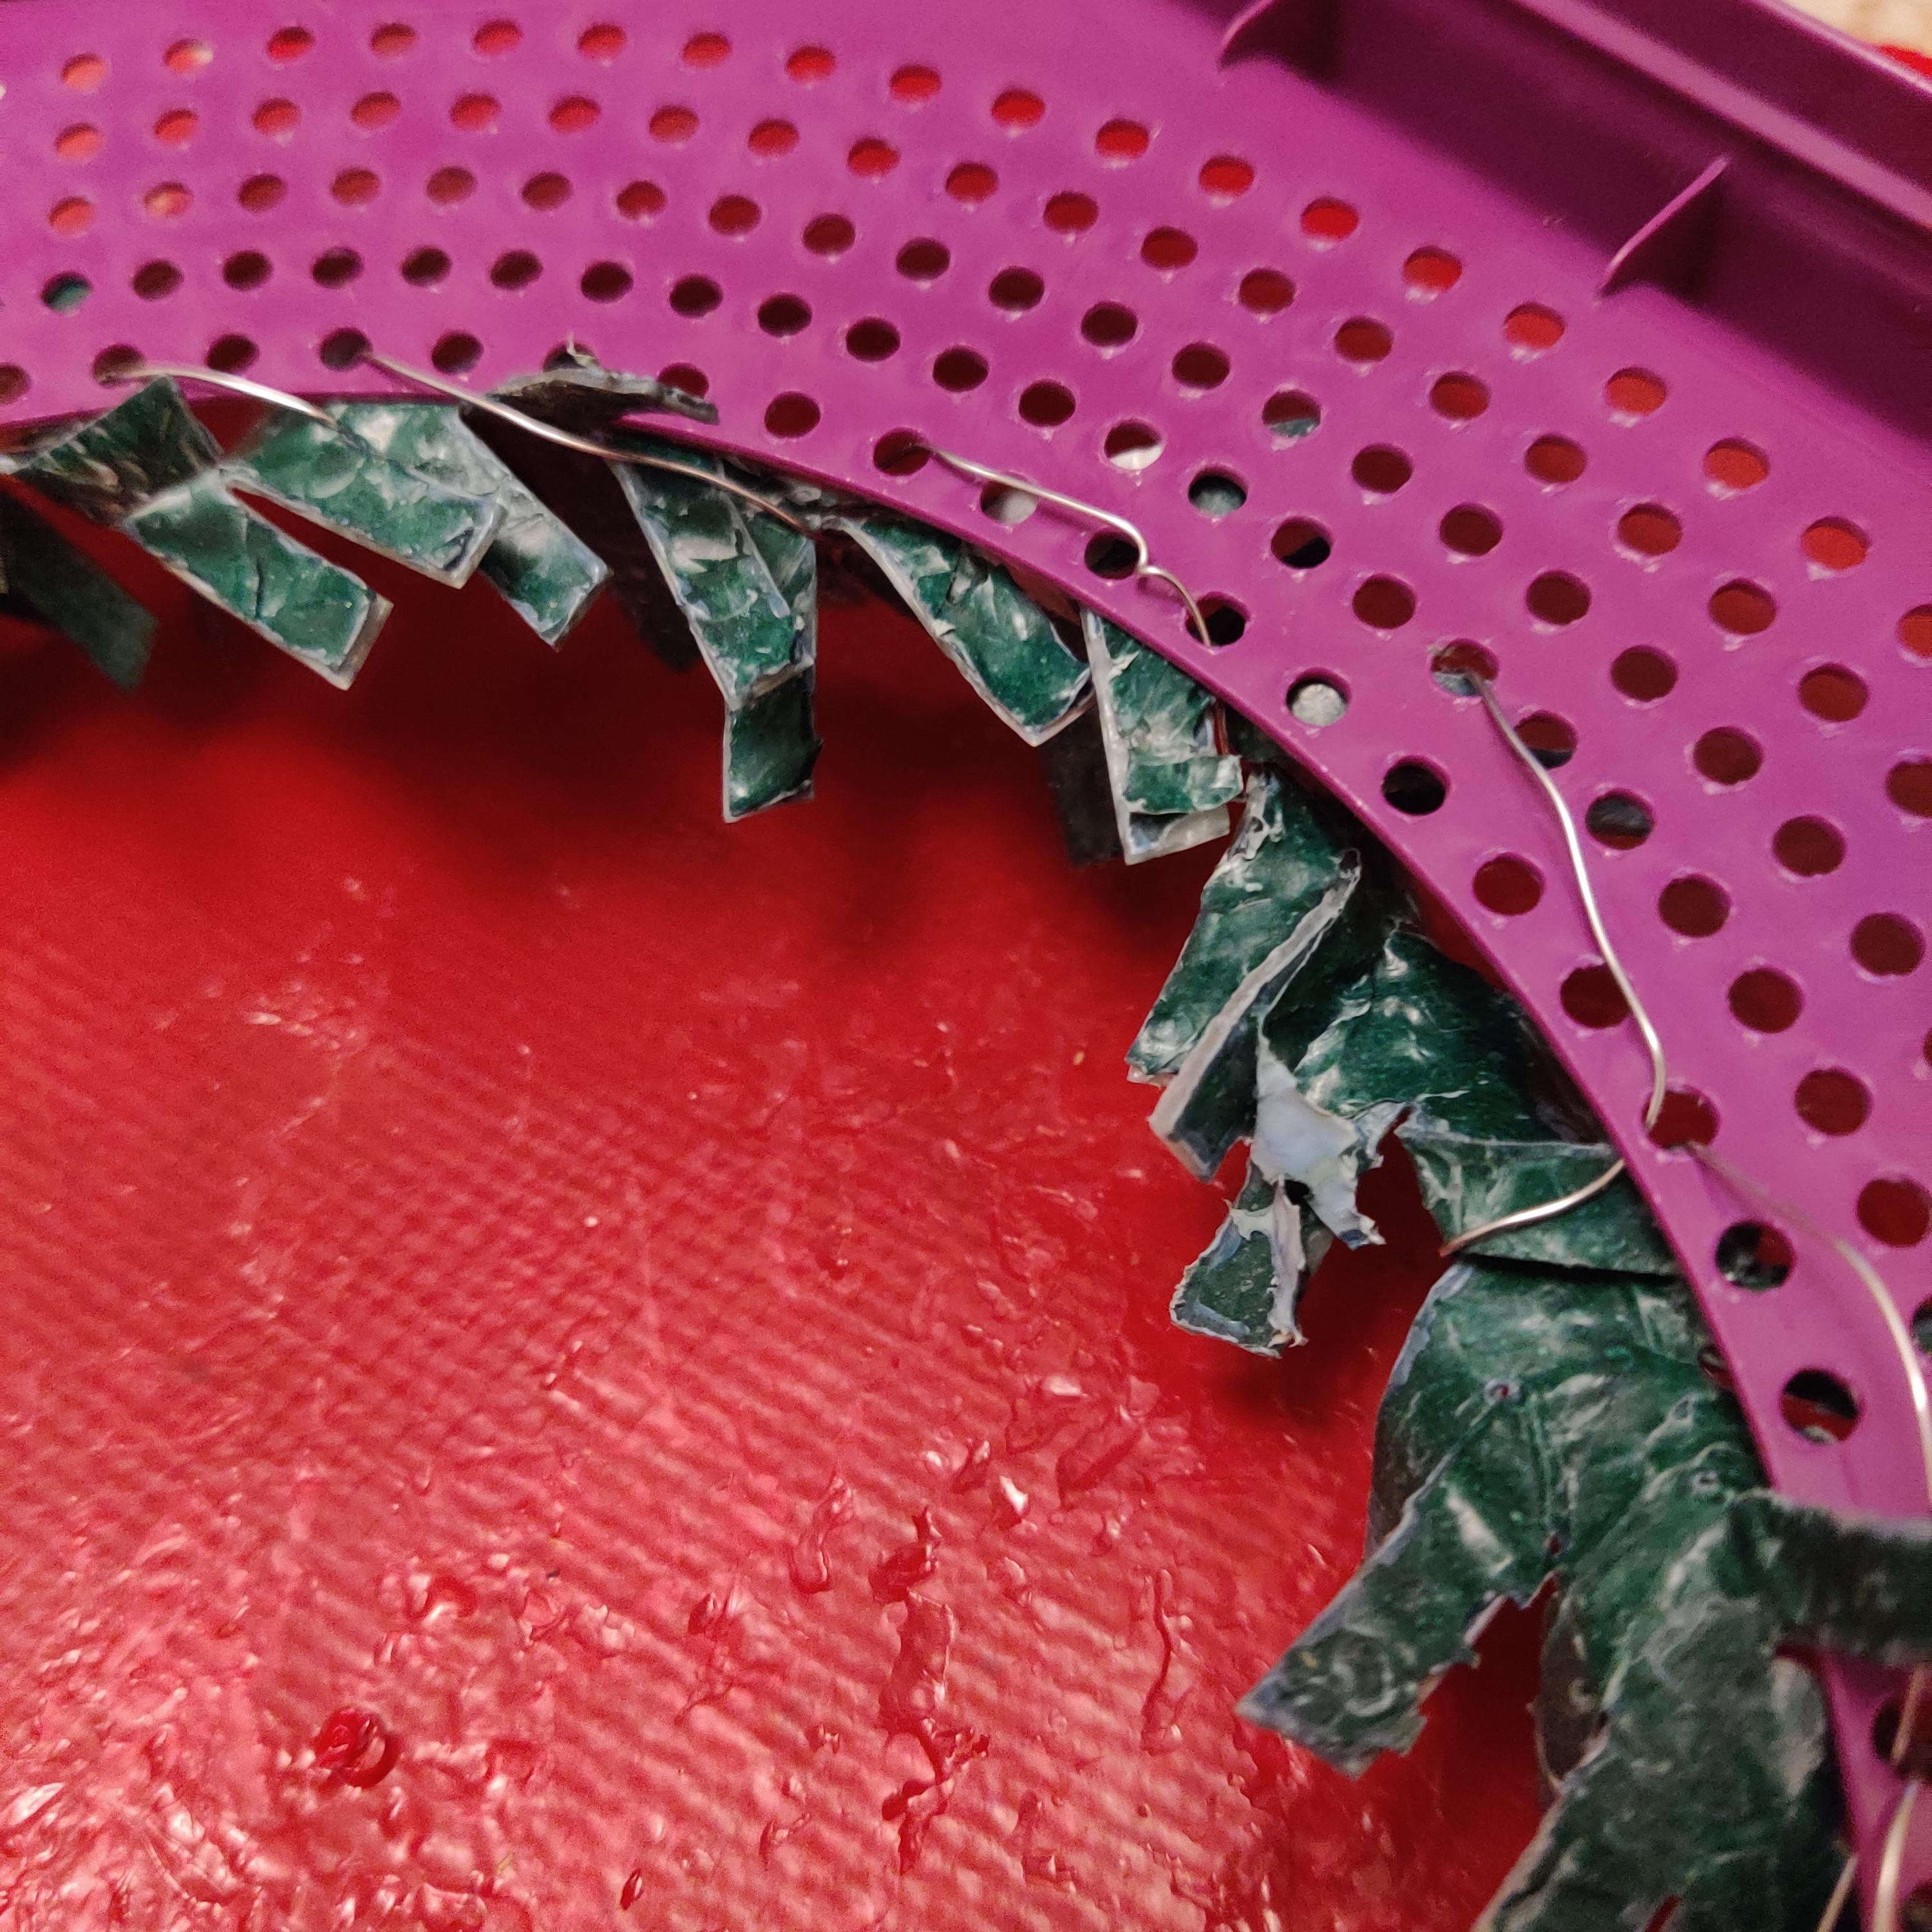

- Bend the "needles" of the fir sprigs to create a 3d object
- Twist the end of the wire into a knot shape so that it won't go through the holes in the base, then use it to "sew" the fir sprigs round the centre of the base
- Tuck the end of the wire underneath the previous stitches
Attach the "Mistletoeish" Sprigs


Repeat the process to attach the "Mistletoeish" (a bit like Mistletoe...) sprigs, a little bit further from the edge. Leave a space for the poinsettia
Build and Attach Poinsettia


- You'll need 4 smaller red poinsettia petals (actually "bracts") and 4 larger ones, then 4 green leaves, slightly larger again
- Hold the paper fastener upside down and add the smaller then larger petals, then the leaves
- Turn the poinsettia over, and then use the paper fastener to attach it to the base
Attach Leaves


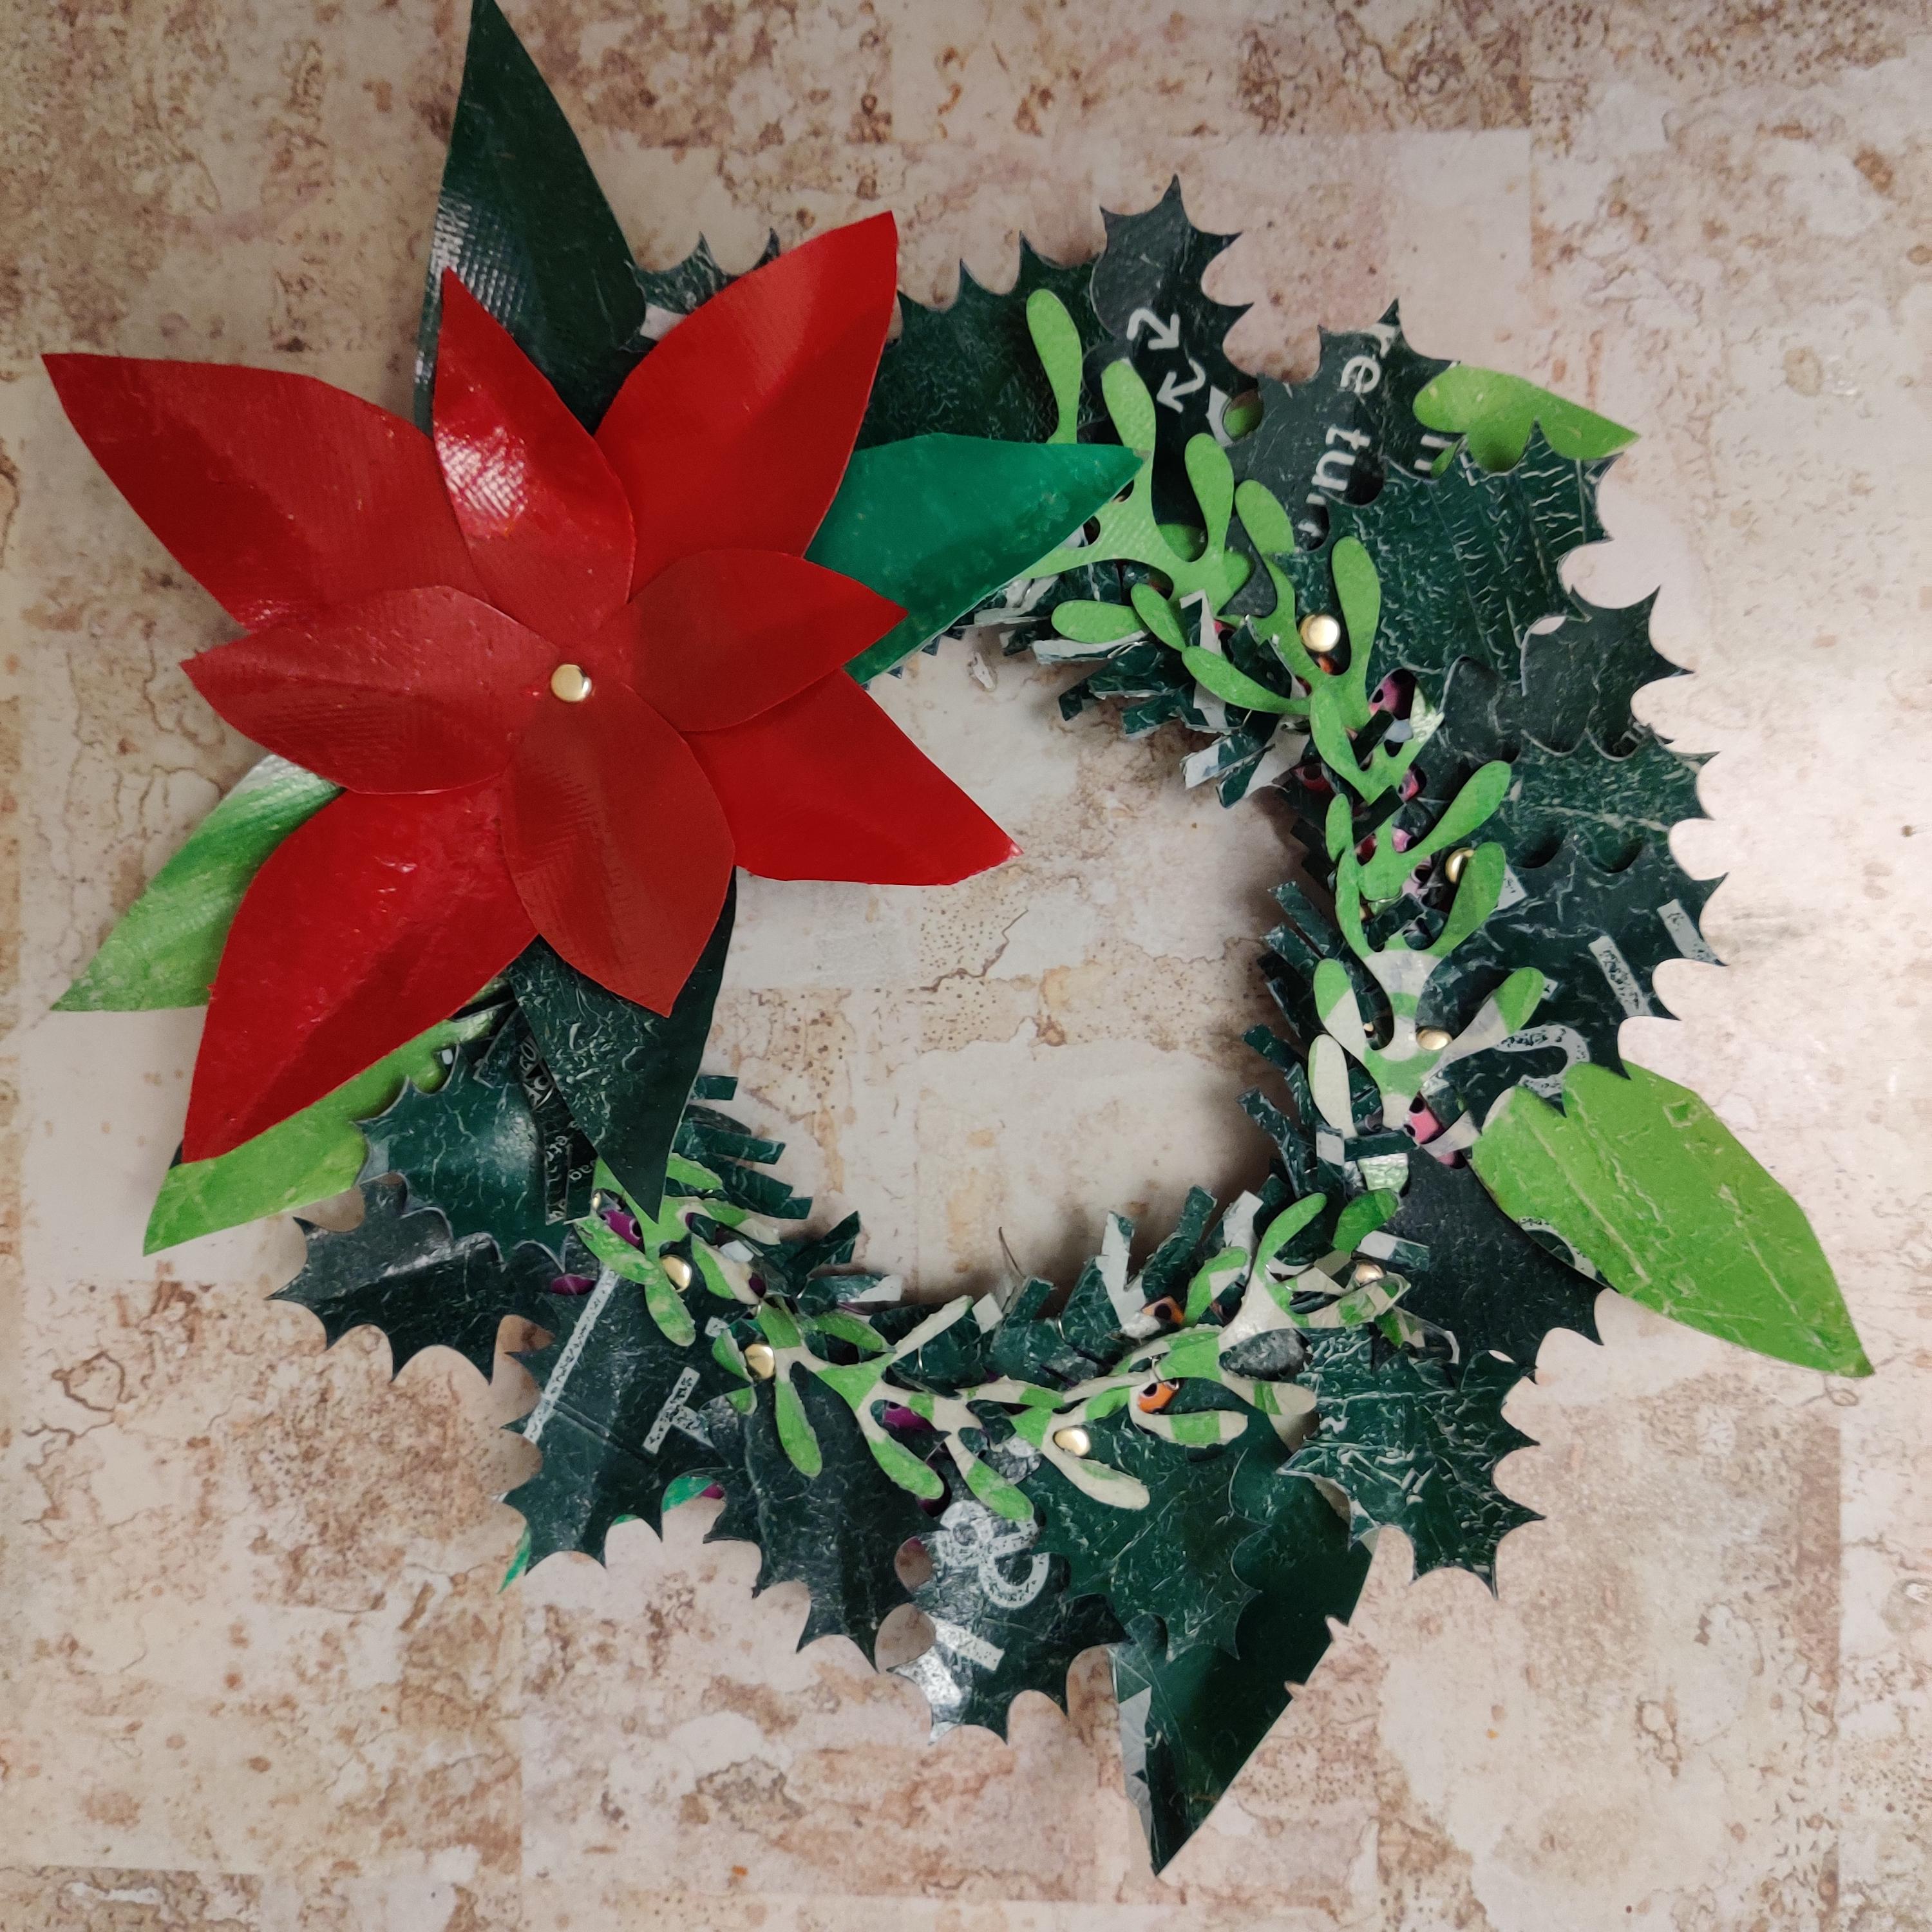
- Use paper fasteners to attach holly and other leaves round the outside of the base, filling in any gaps (no need to be too careful as sweet tub lids already look festive!). You can put more than one leaf on each paper fastener
- You can colour the paper fasteners in with a red acrylic pen to make them look more like holly berries, but gold looks good too
Bend Leaves and Petals Into Shape

Bend the leaves and petals along their centres to give a more 3d shape
Smaller Wreath

Here's a smaller version of the wreath - it might look good with some small Christmas roses made from milk carton plastic
Plastic Tactics
I made this wreath as the basis of a workshop for Plastic Tactics, a Liverpool-based CIC who aim to "encourage people to use and reuse plastic responsibly, through access to useful information, practical equipment and collaborative relationships".
In the workshop people will use some precut plastic, and hand cut some themselves. Sanna, who'll be presenting the workshop, came up with a lovely leaf design, and improved on the original poinsettia. If there are any further improvements, I'll try to add them to this Instructable. I'd like to hear any ideas from the Instructables community too