Recording a Song Onto an IPad
by TheMutedMan in Circuits > Audio
9920 Views, 7 Favorites, 0 Comments
Recording a Song Onto an IPad
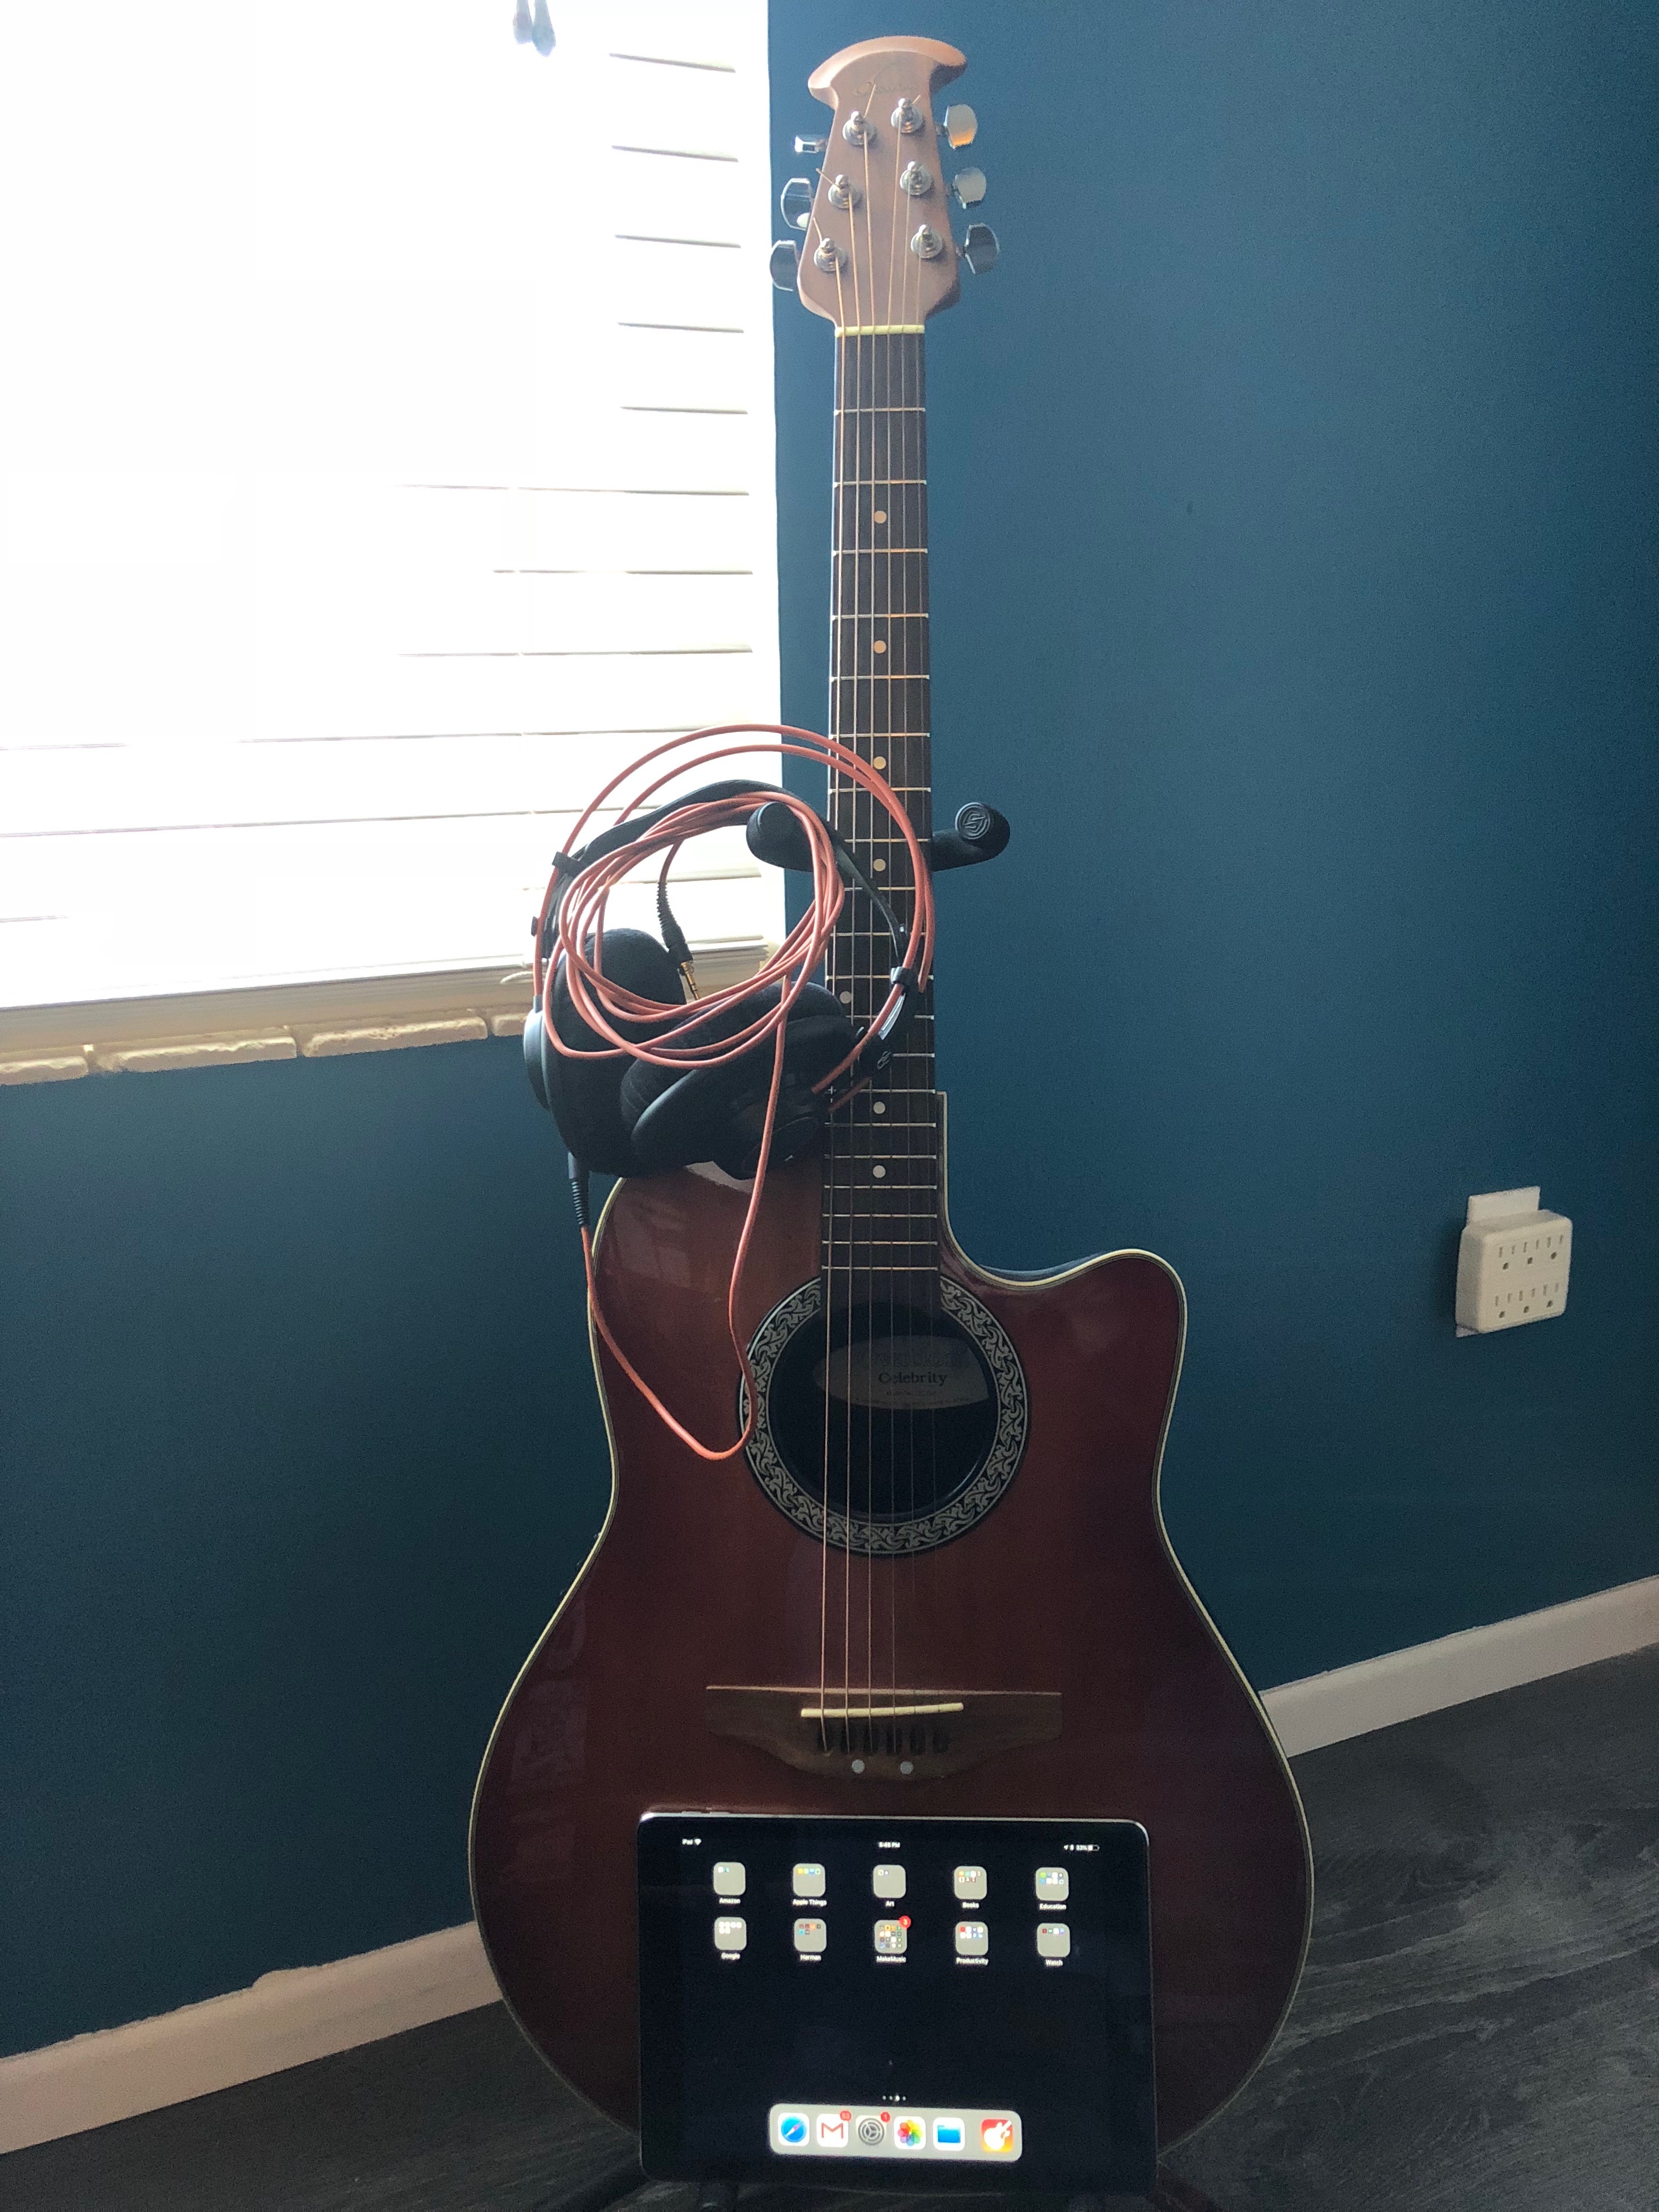
A friend of mine recently asked how she could record some of her songs with just a guitar and an iPad. I asked her if she had any other recording hardware such as a microphone and recording interface. Unfortunately, the answer was no, and she's not sure how much she really wants to invest in recording hardware.
It's never easy investing in something if you're unsure that you'll continue using it, but thankfully iPads feature a built-in mic and Apple has also been kind enough to make GarageBand a free download in the App Store. GarageBand is a fairly capable Digital Audio Workstation (DAW) that enables users to record and mix up to 32 tracks of audio. You can record an instrument using the iPad's built-in mic or using a recording interface and you can also record virtual instruments such as keyboards and drums provided in GarageBand. Ultimately, if you already have an iPad, GarageBand provides a nice litmus test in and of itself for whether or not you should invest in better recording equipment.
In this instructable, we'll take a look at the steps involved to get you to record your next hit. We'll also consider some cost-effective upgrades in the event that you can't put down GarageBand, and want to up the quality of your productions.
What you'll need to get started:
- An iPad
- Download GarageBand in the App store
- A pair of headphones (preferably wired)
- An instrument such as an acoustic guitar (technically optional as we'll later see)
- Apple Camera Connection Kit (optional)
- MIDI keyboard (optional)
Who this will benefit:
- Those on the fence wanting to learn how to record
- The creative person interested in trying something new
- Someone on the road having a dull night in a hotel room
What this is not:
- A user-guide for GarageBand; it's up to you to dive further down the rabbit hole.
- A lesson on music theory, or a lesson to play an instrument
- A lesson in song writing
Launch GarageBand
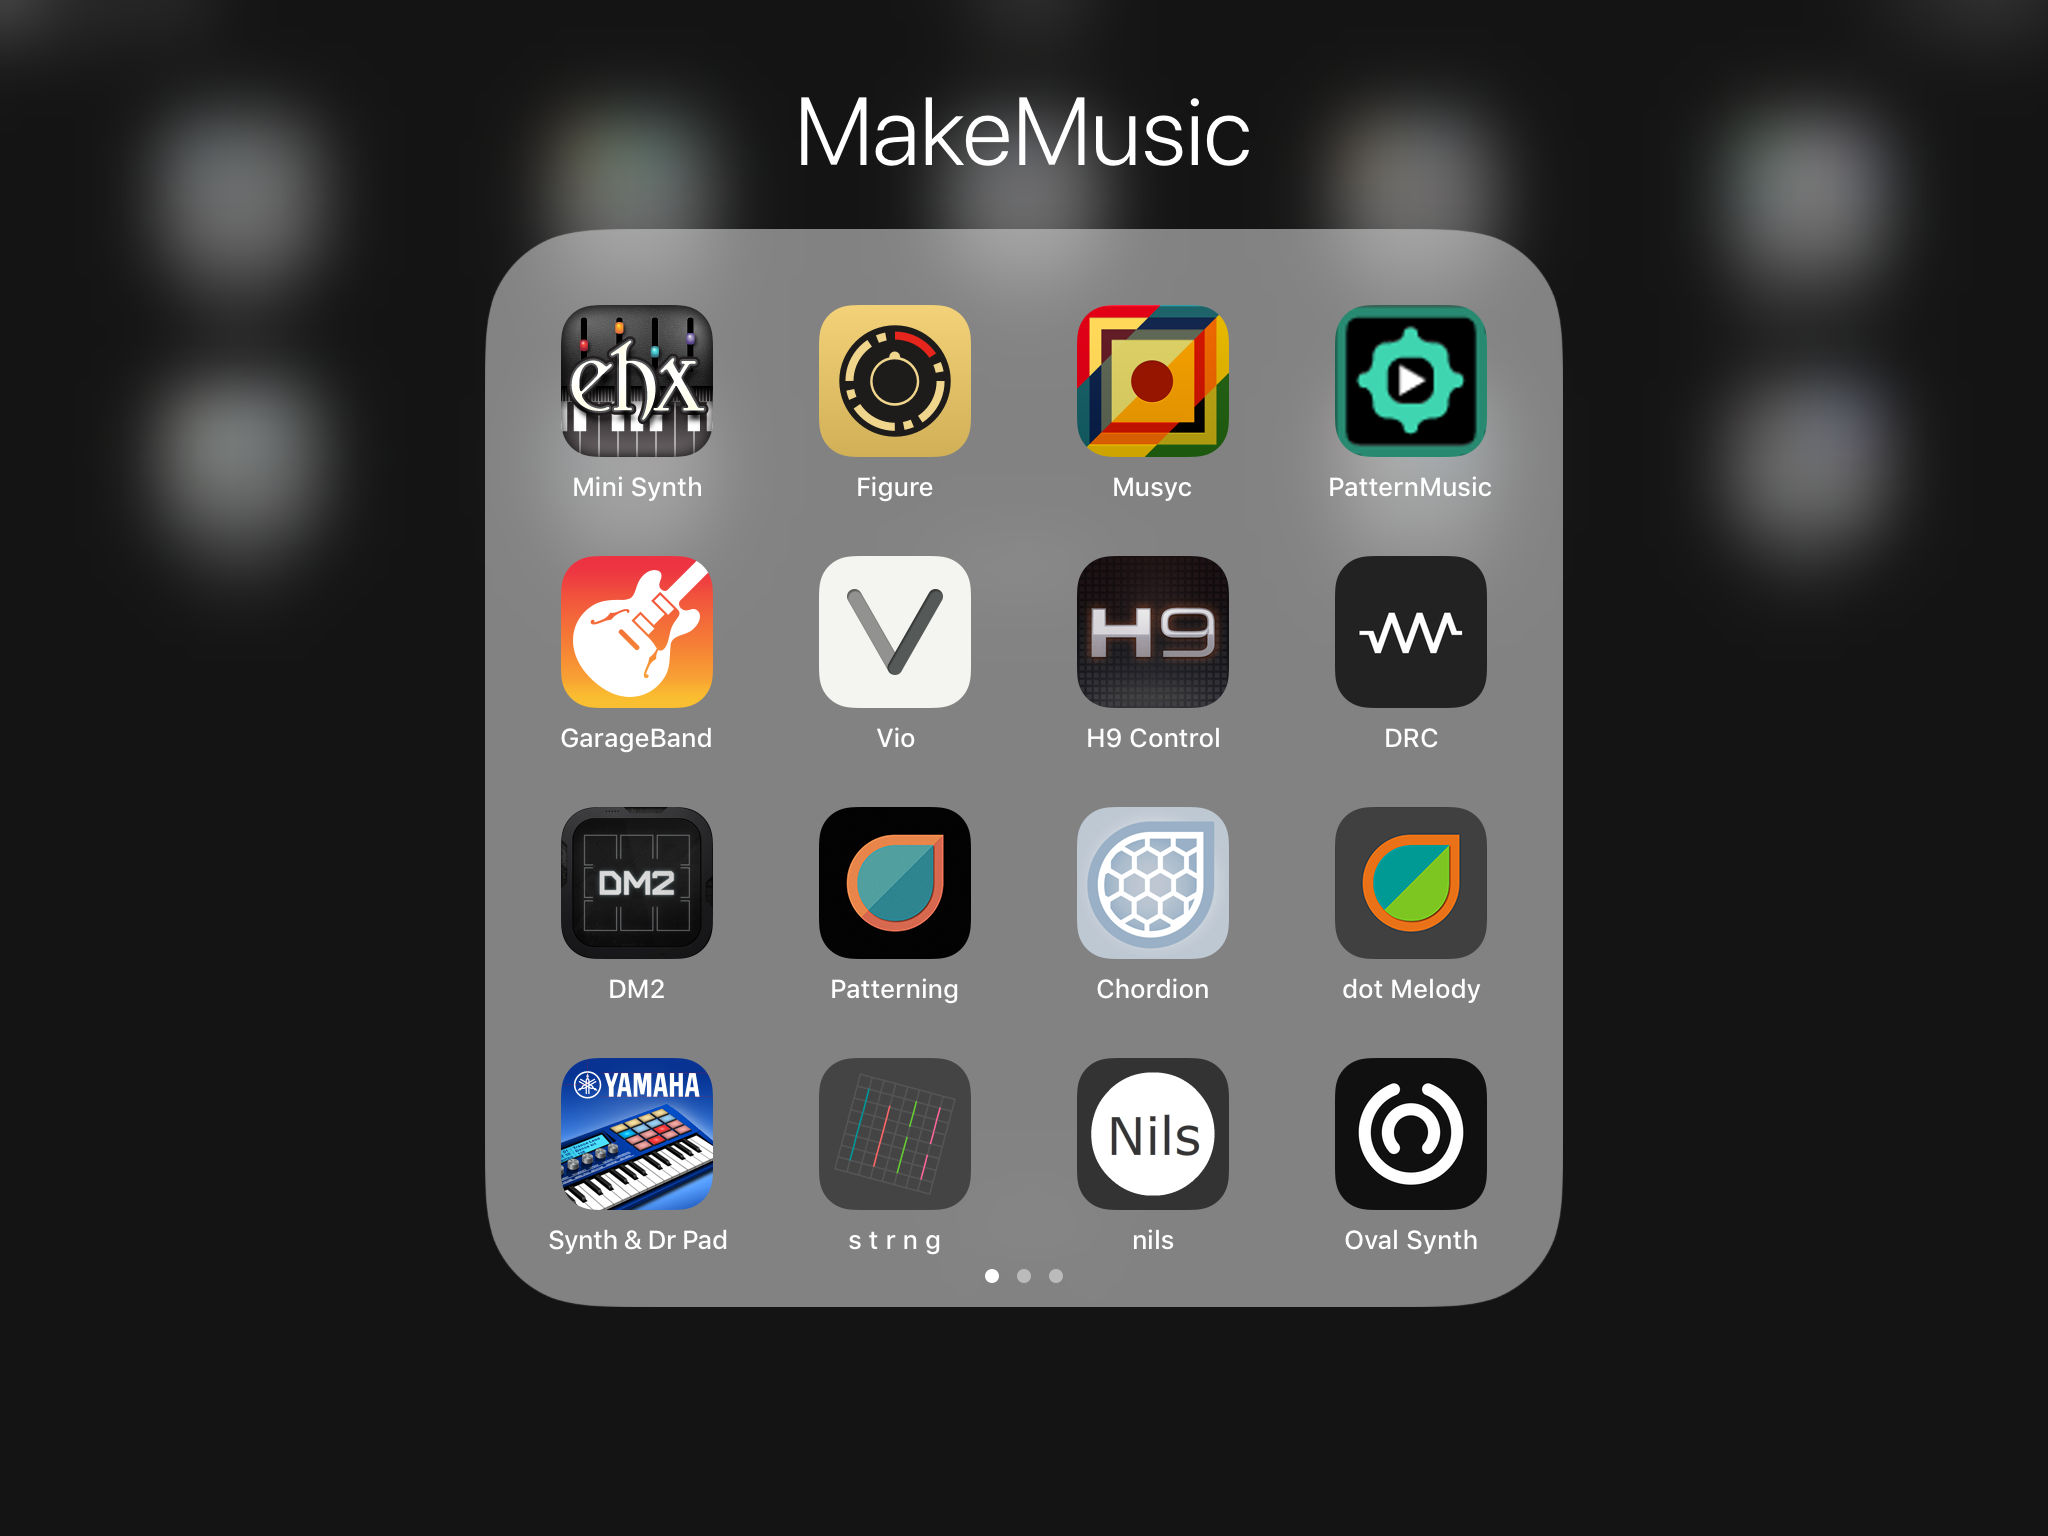
This is kind of a no-brainer, but we have to start somewhere right? Oh, don't forget to connect your headphones.
Create a Project
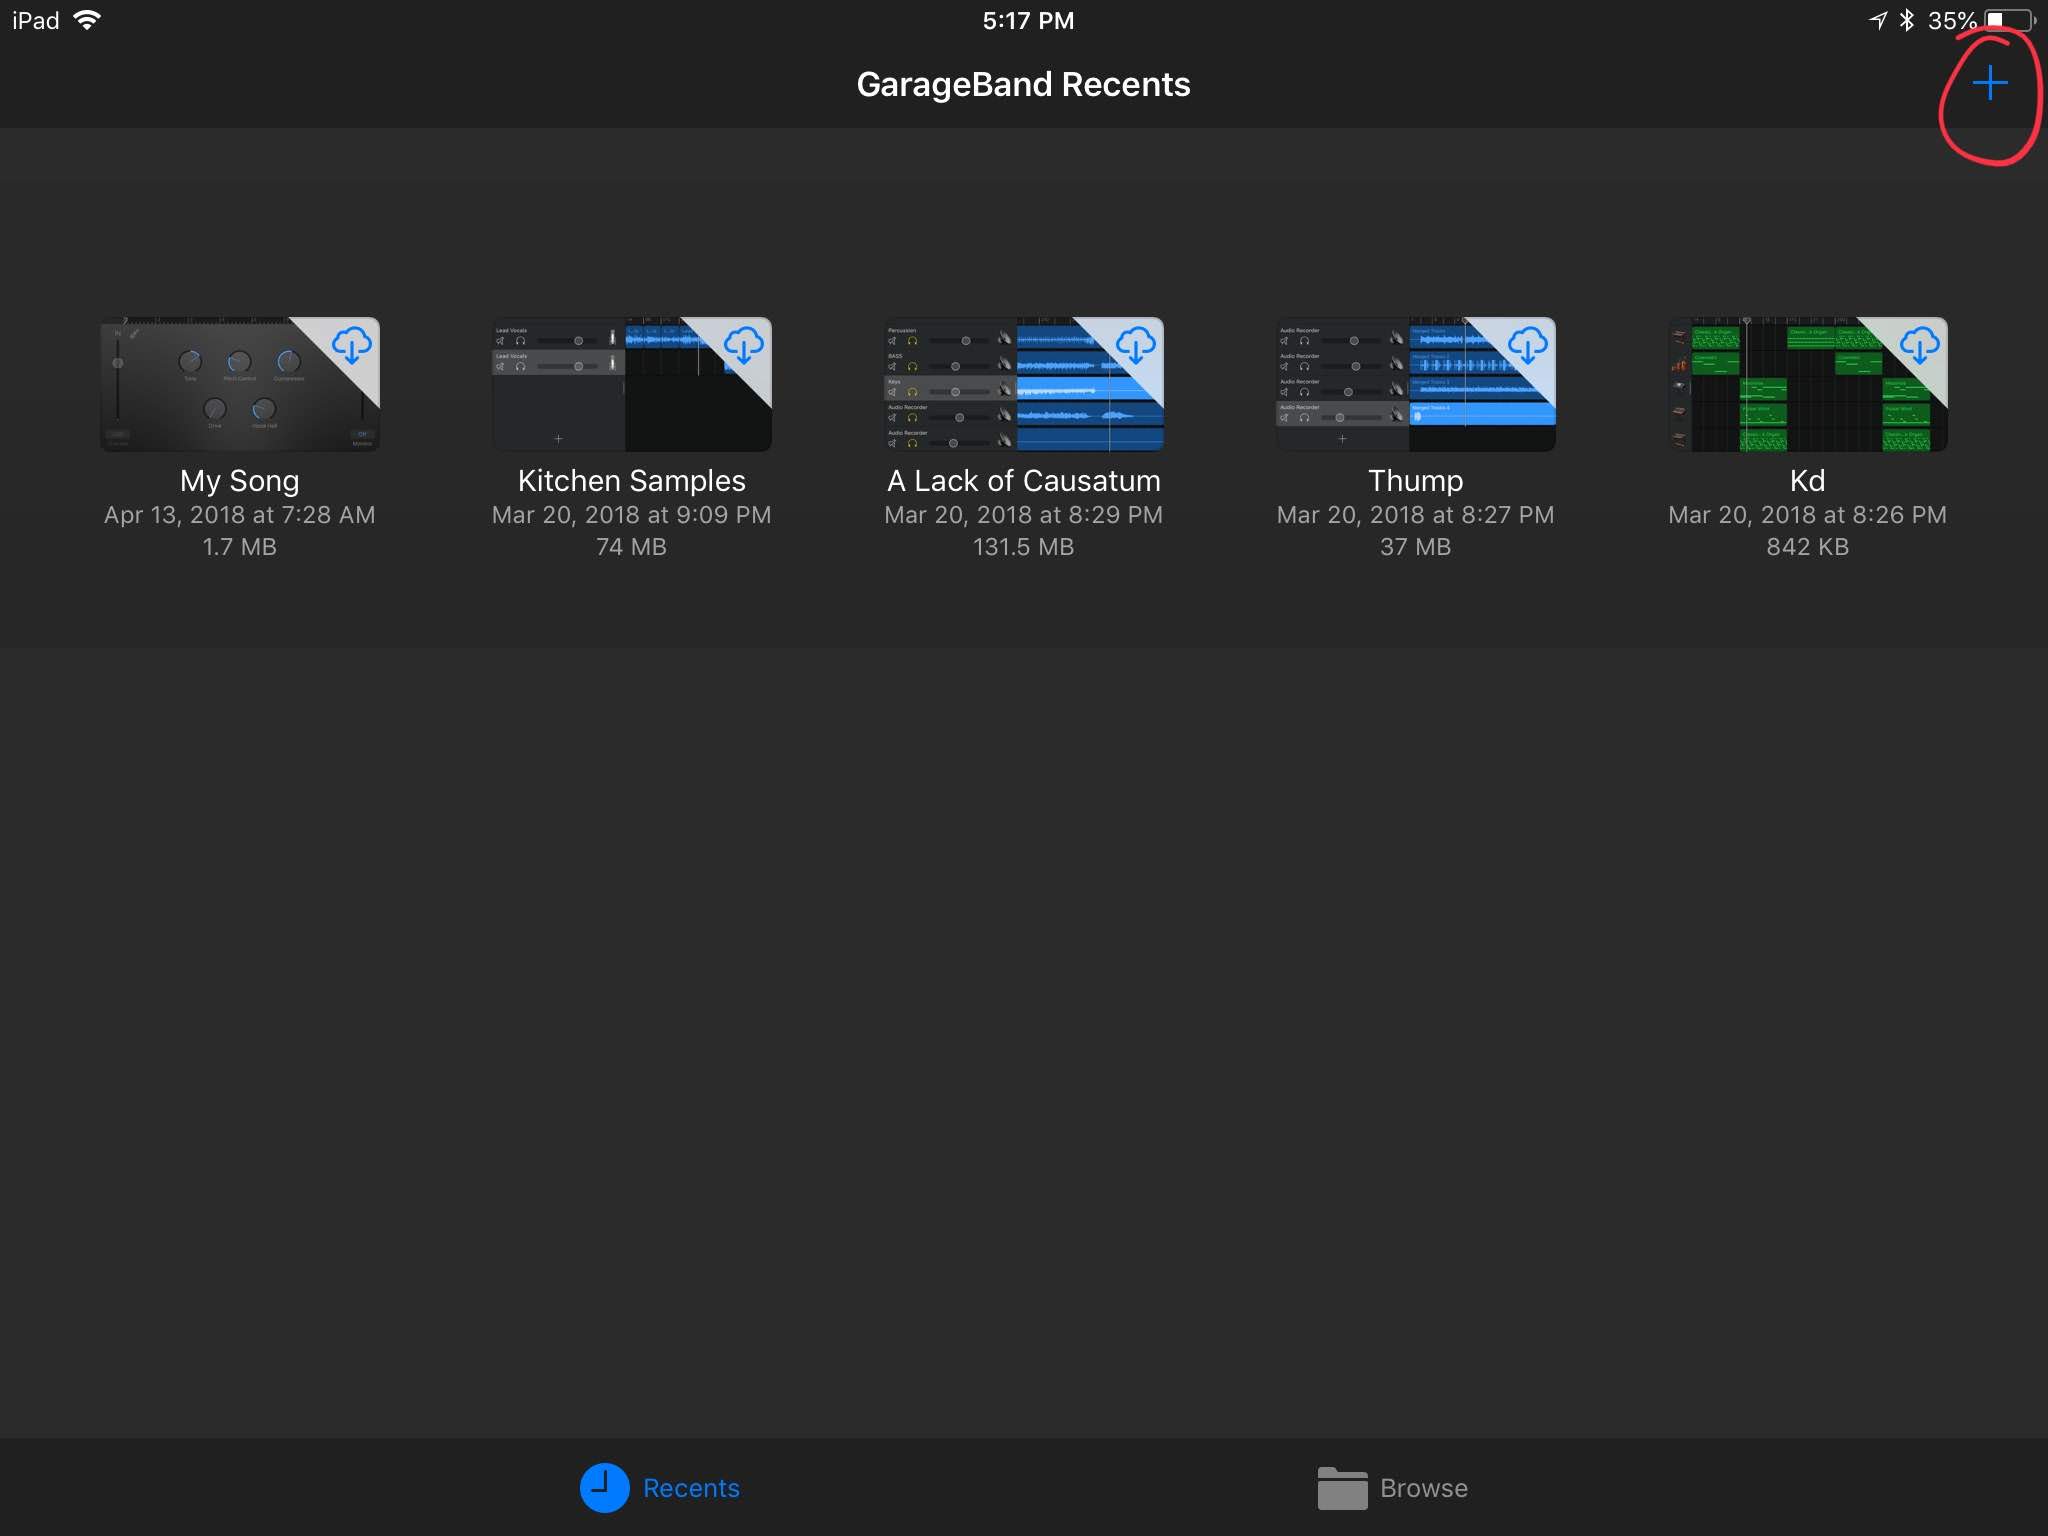
Assuming you're new to GarageBand, you'll probably either see a demo song or nothing at all. Please forgive my memory.
As you can see in the provided image there are a few projects available from my iCloud. Let's click on the + symbol in the upper-righthand corner to create a new project.
Select an Instrument
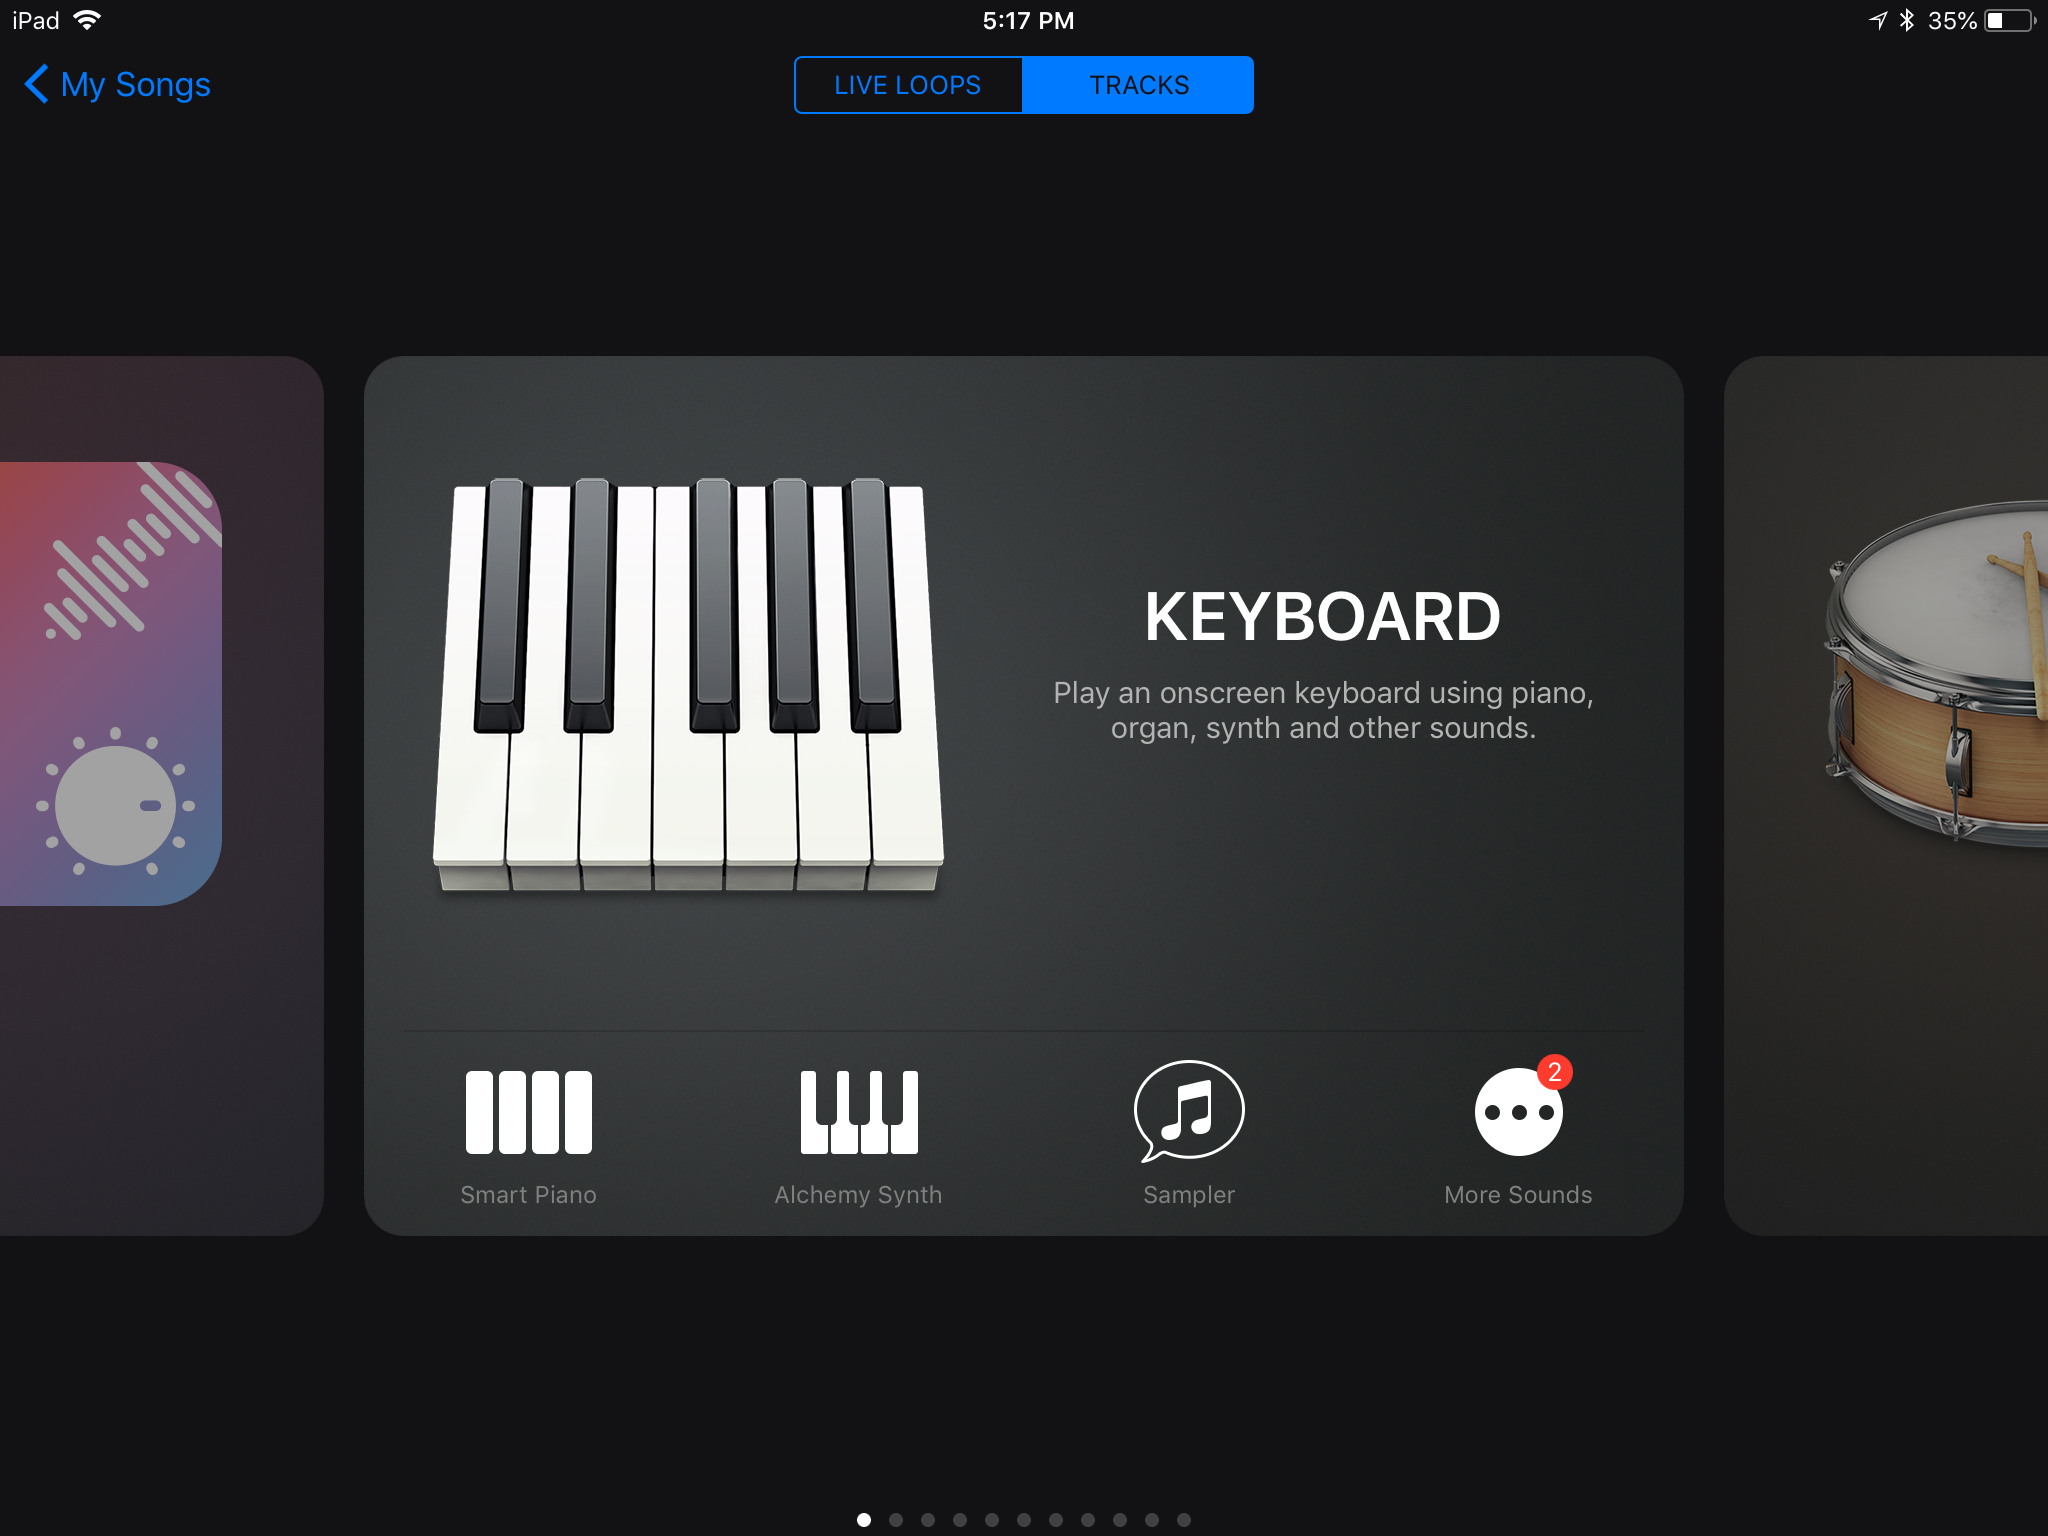
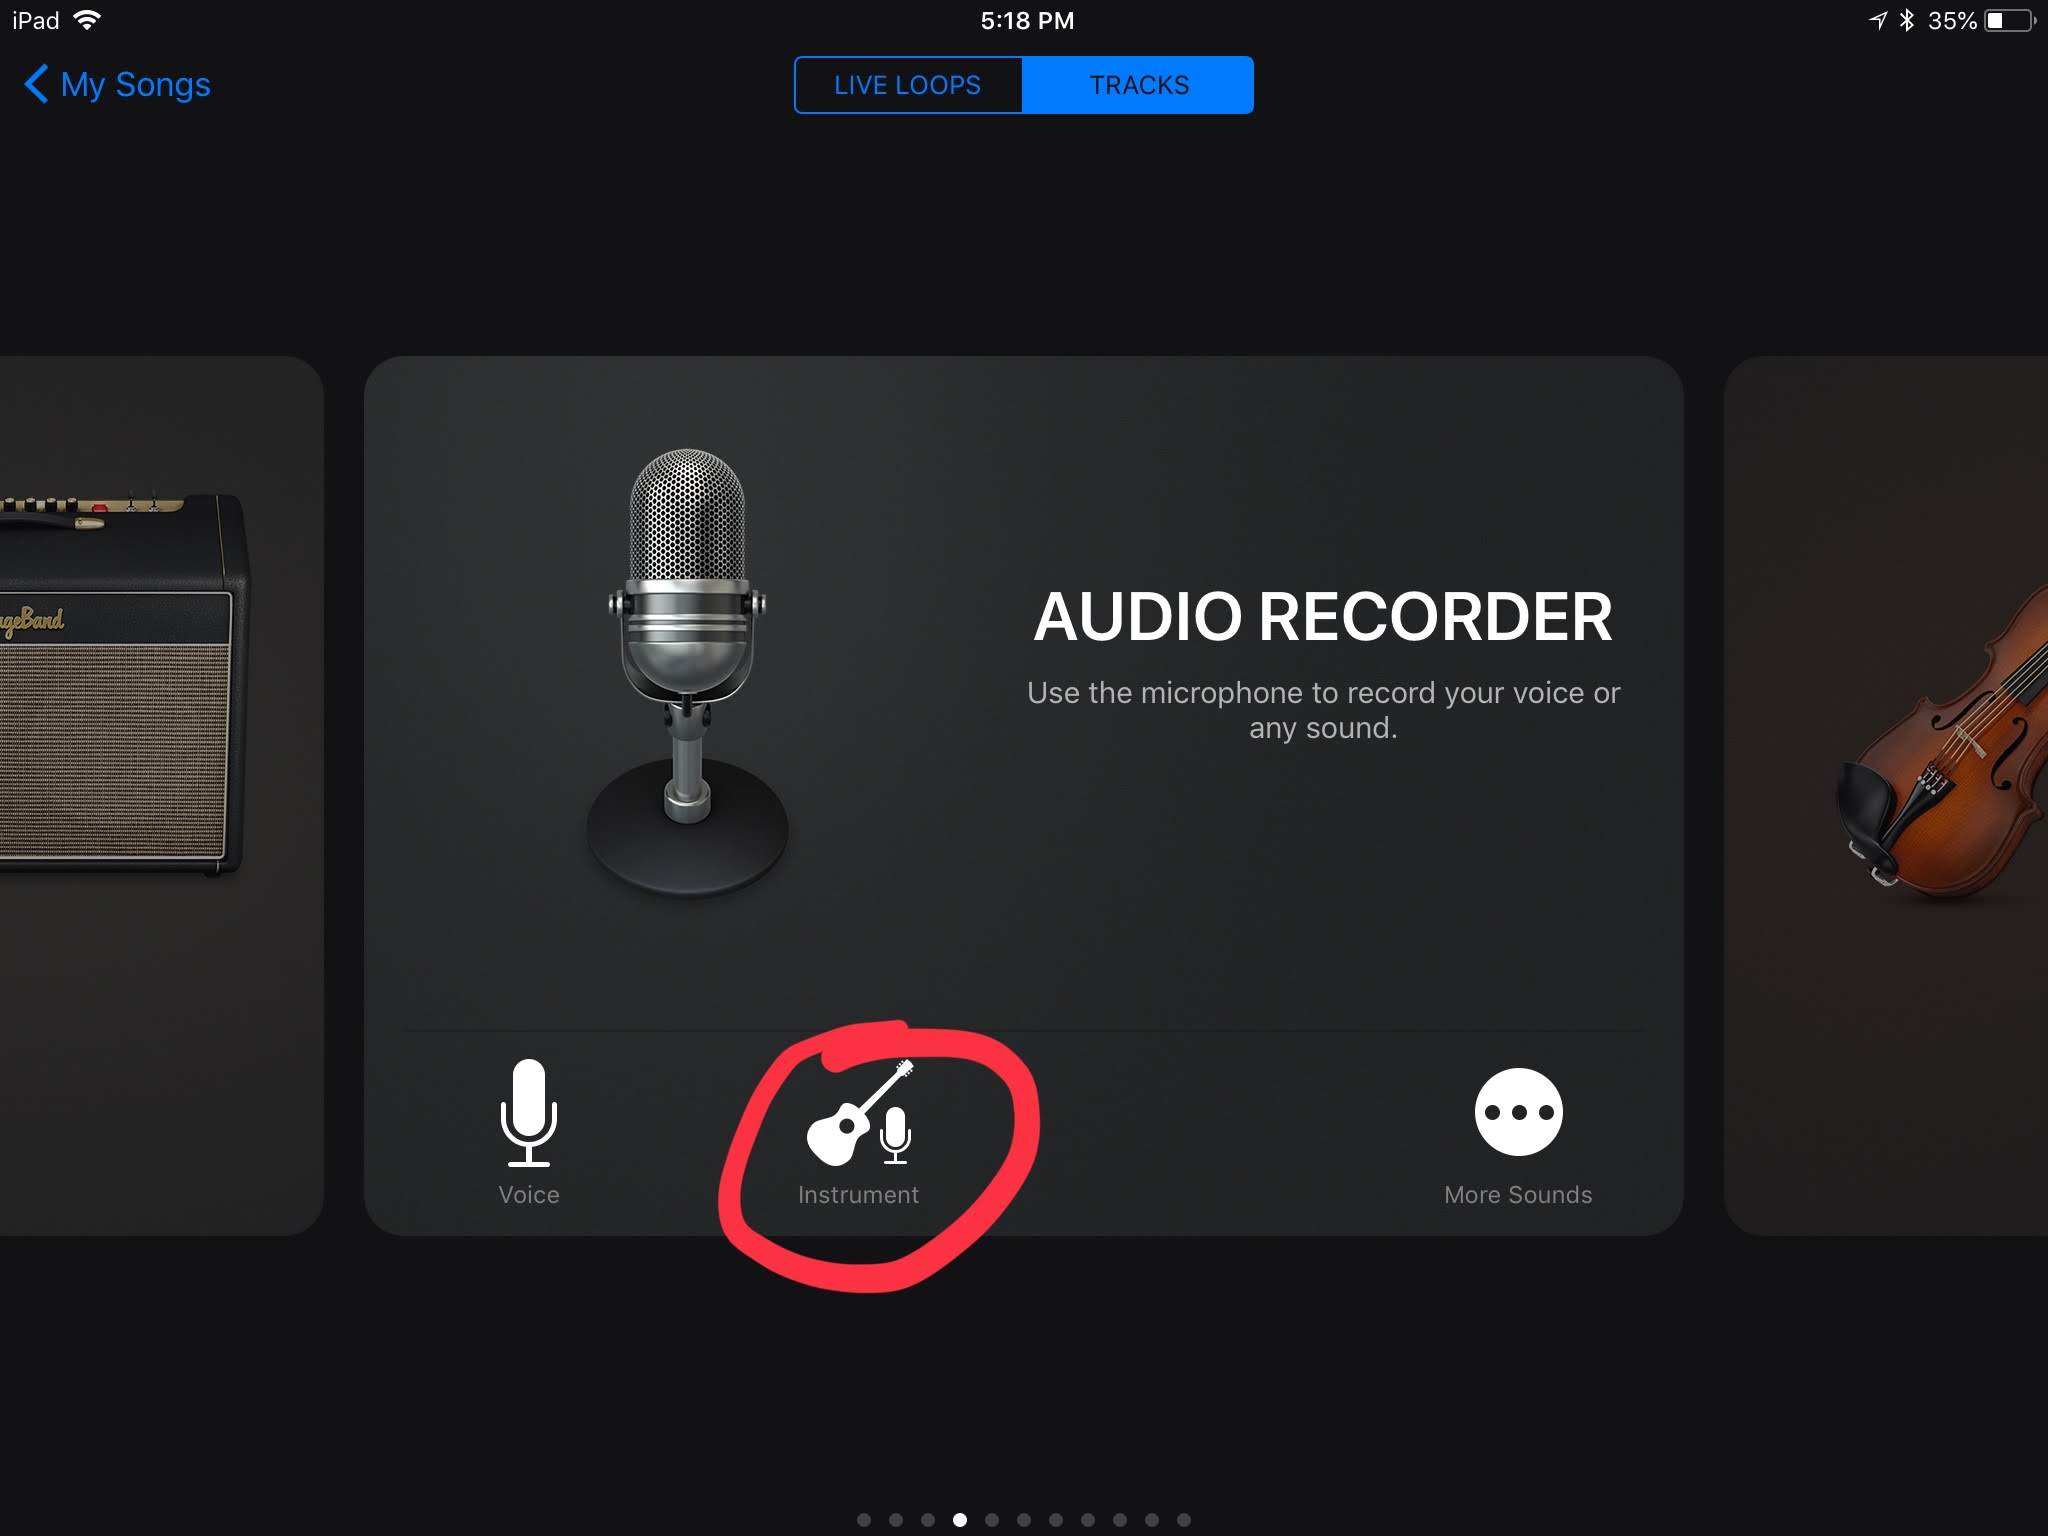
GarageBand provides a pretty impressive amount of virtual instruments. These types of instruments can be played directly on the screen or they may be controlled using an external MIDI controller like the K-Board connected to the iPad using a USB cable and the Apple Camera connection kit.
What's a MIDI controller, you ask? They come in many shapes, sizes, and configurations. A large majority provide keys that look like they belong to a piano. MIDI is a communication protocol that allows you to send control messages. In this case, you could use a MIDI controller to send note data to a virtual instrument. It can actually send much more than that like velocity (how hard you press a key) and pitch (variations in how sharp or flat a note is).
Enough of that. If you're wanting to record an instrument like a guitar, then swipe right until you see Audio Recorder, and select the instrument option.
You could have also selected AMP, but personally, I don't care for the effects on an acoustic guitar. It works better for electric guitar and bass guitars. With that said, some of the coolest sounds and greatest songs have been recorded due to not following the rules and experimenting. So give it a whirl if you so dare. Oh, and the amp does feature a tuner. For the love of all things sacred, tune your guitar.
Did You Pick the Right Instrument?
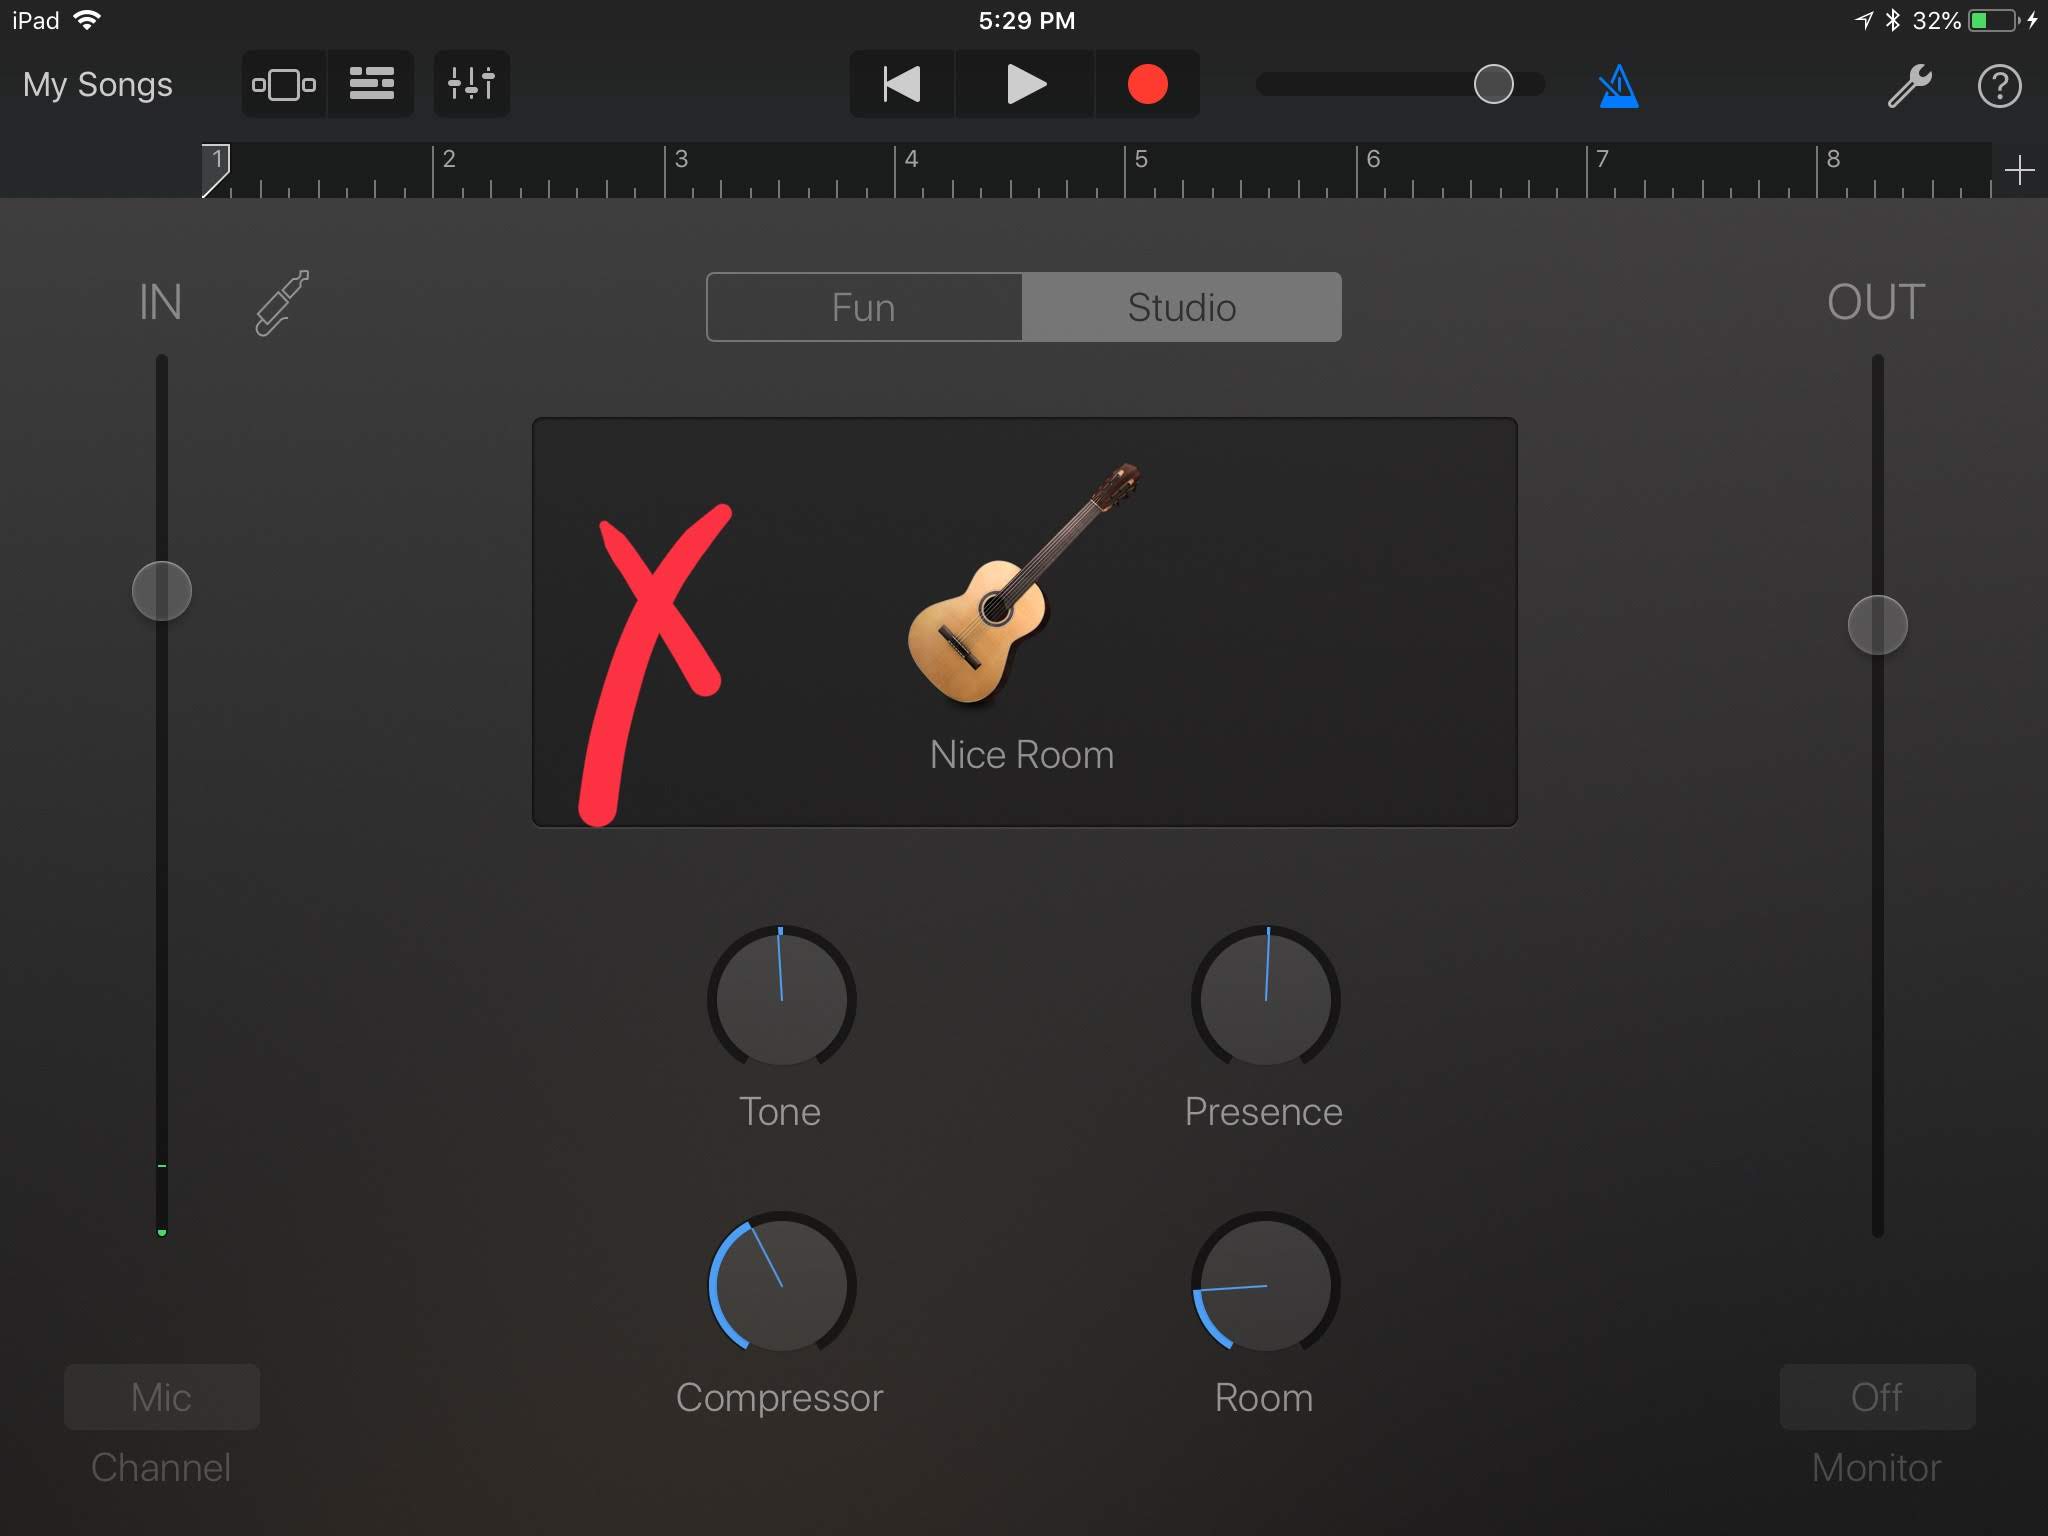
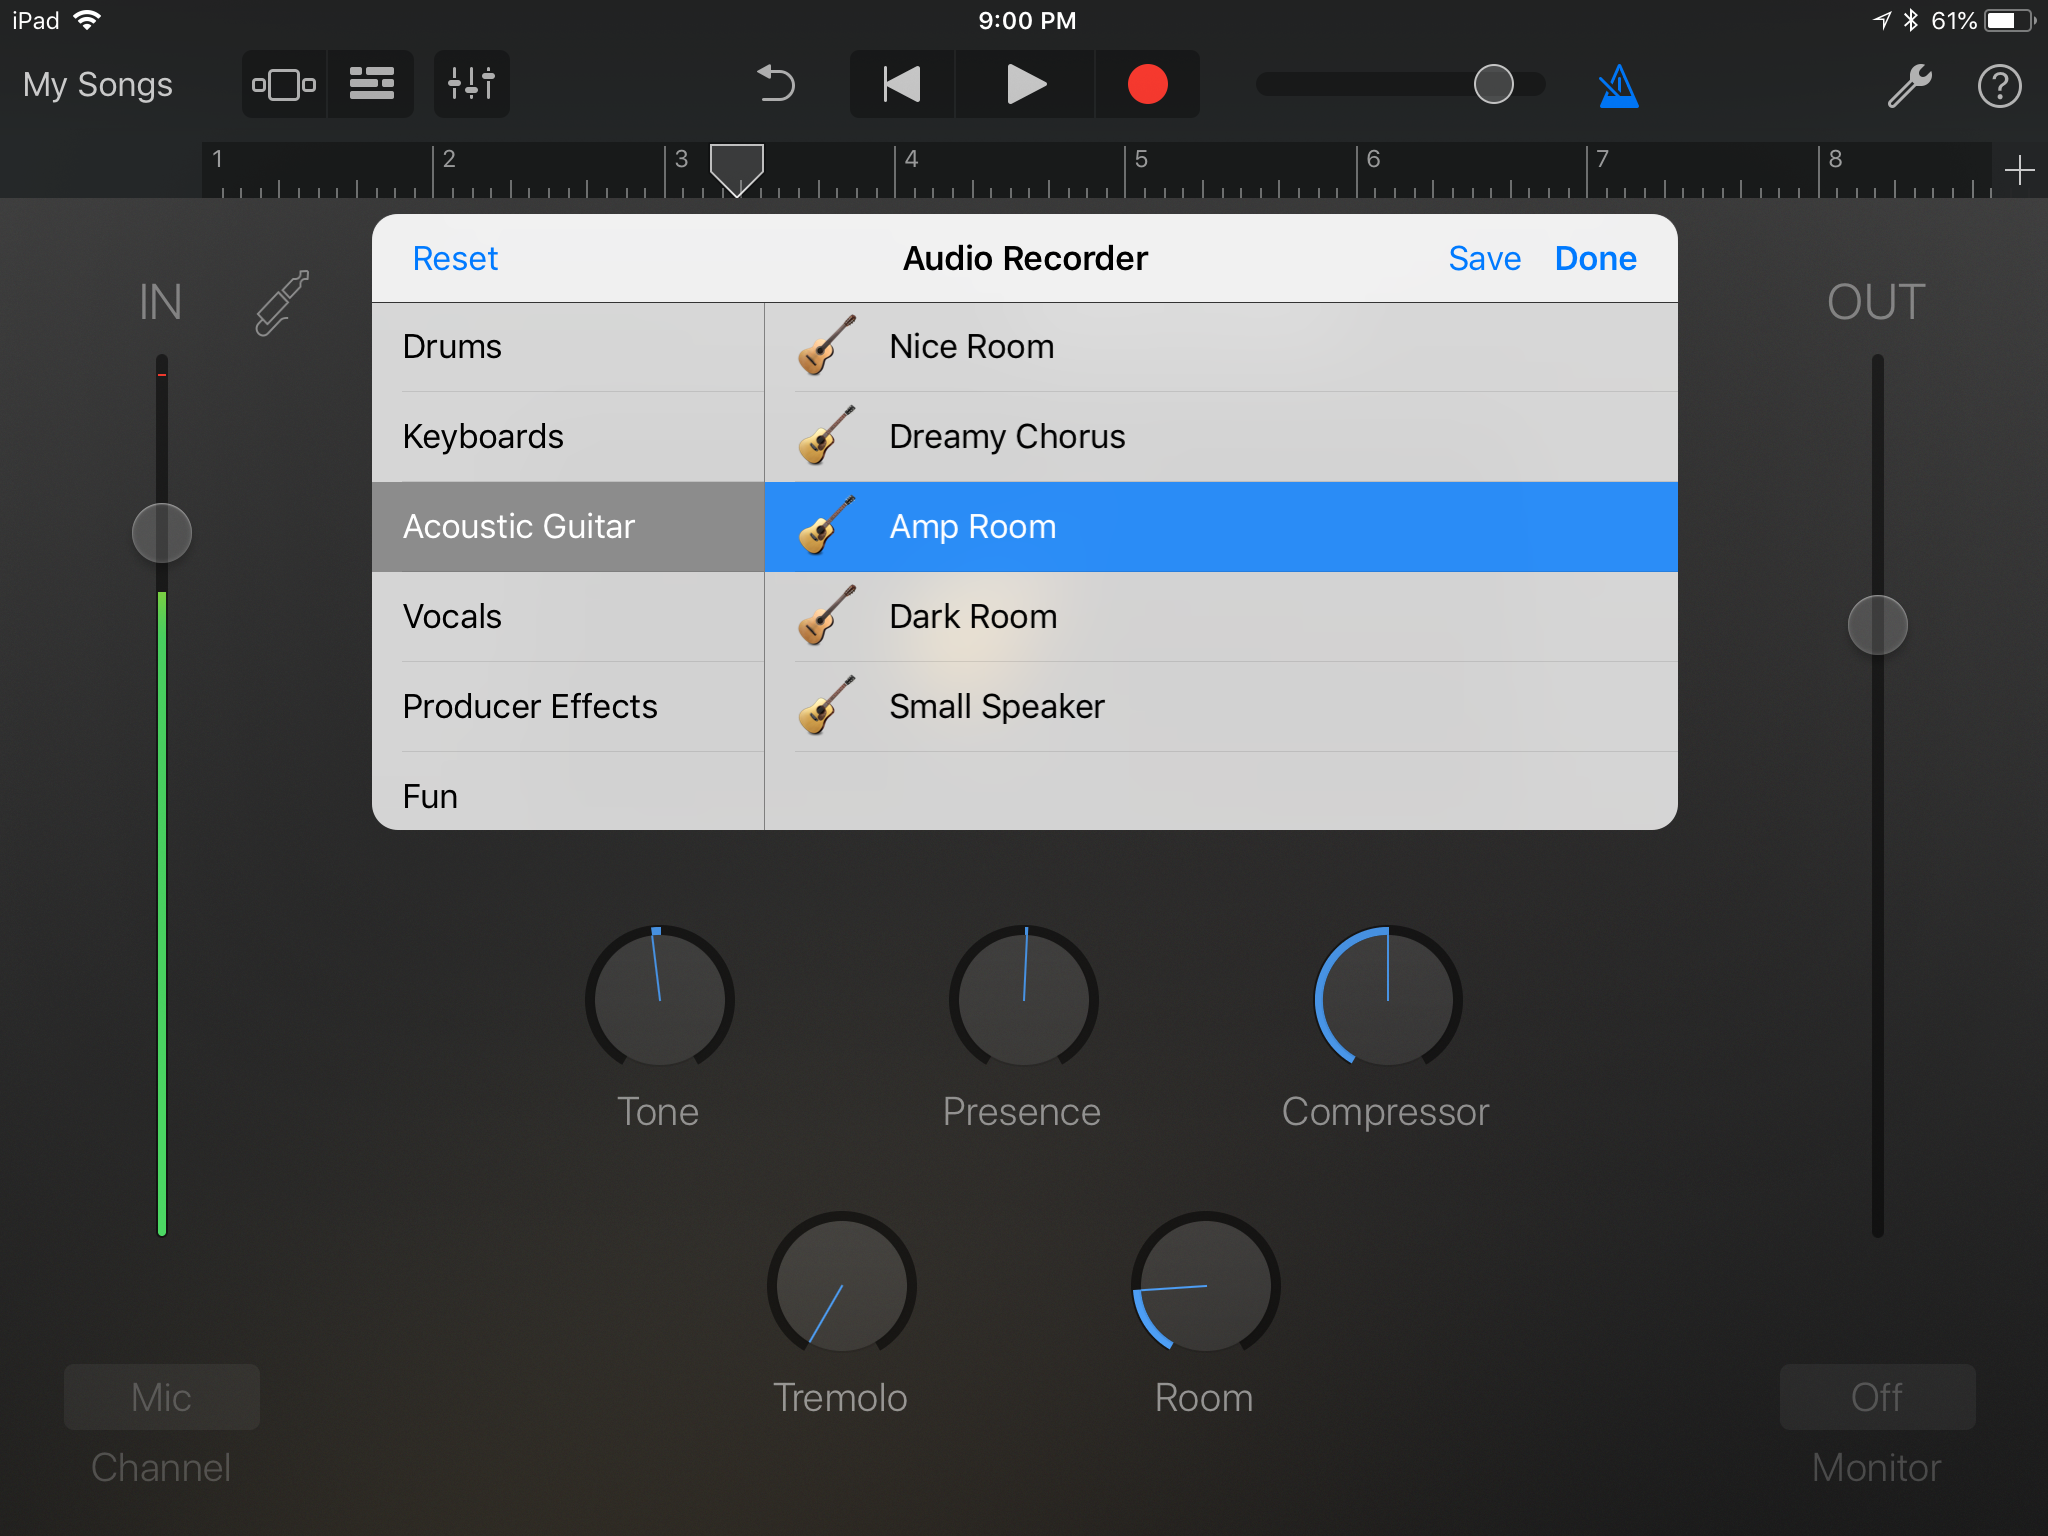
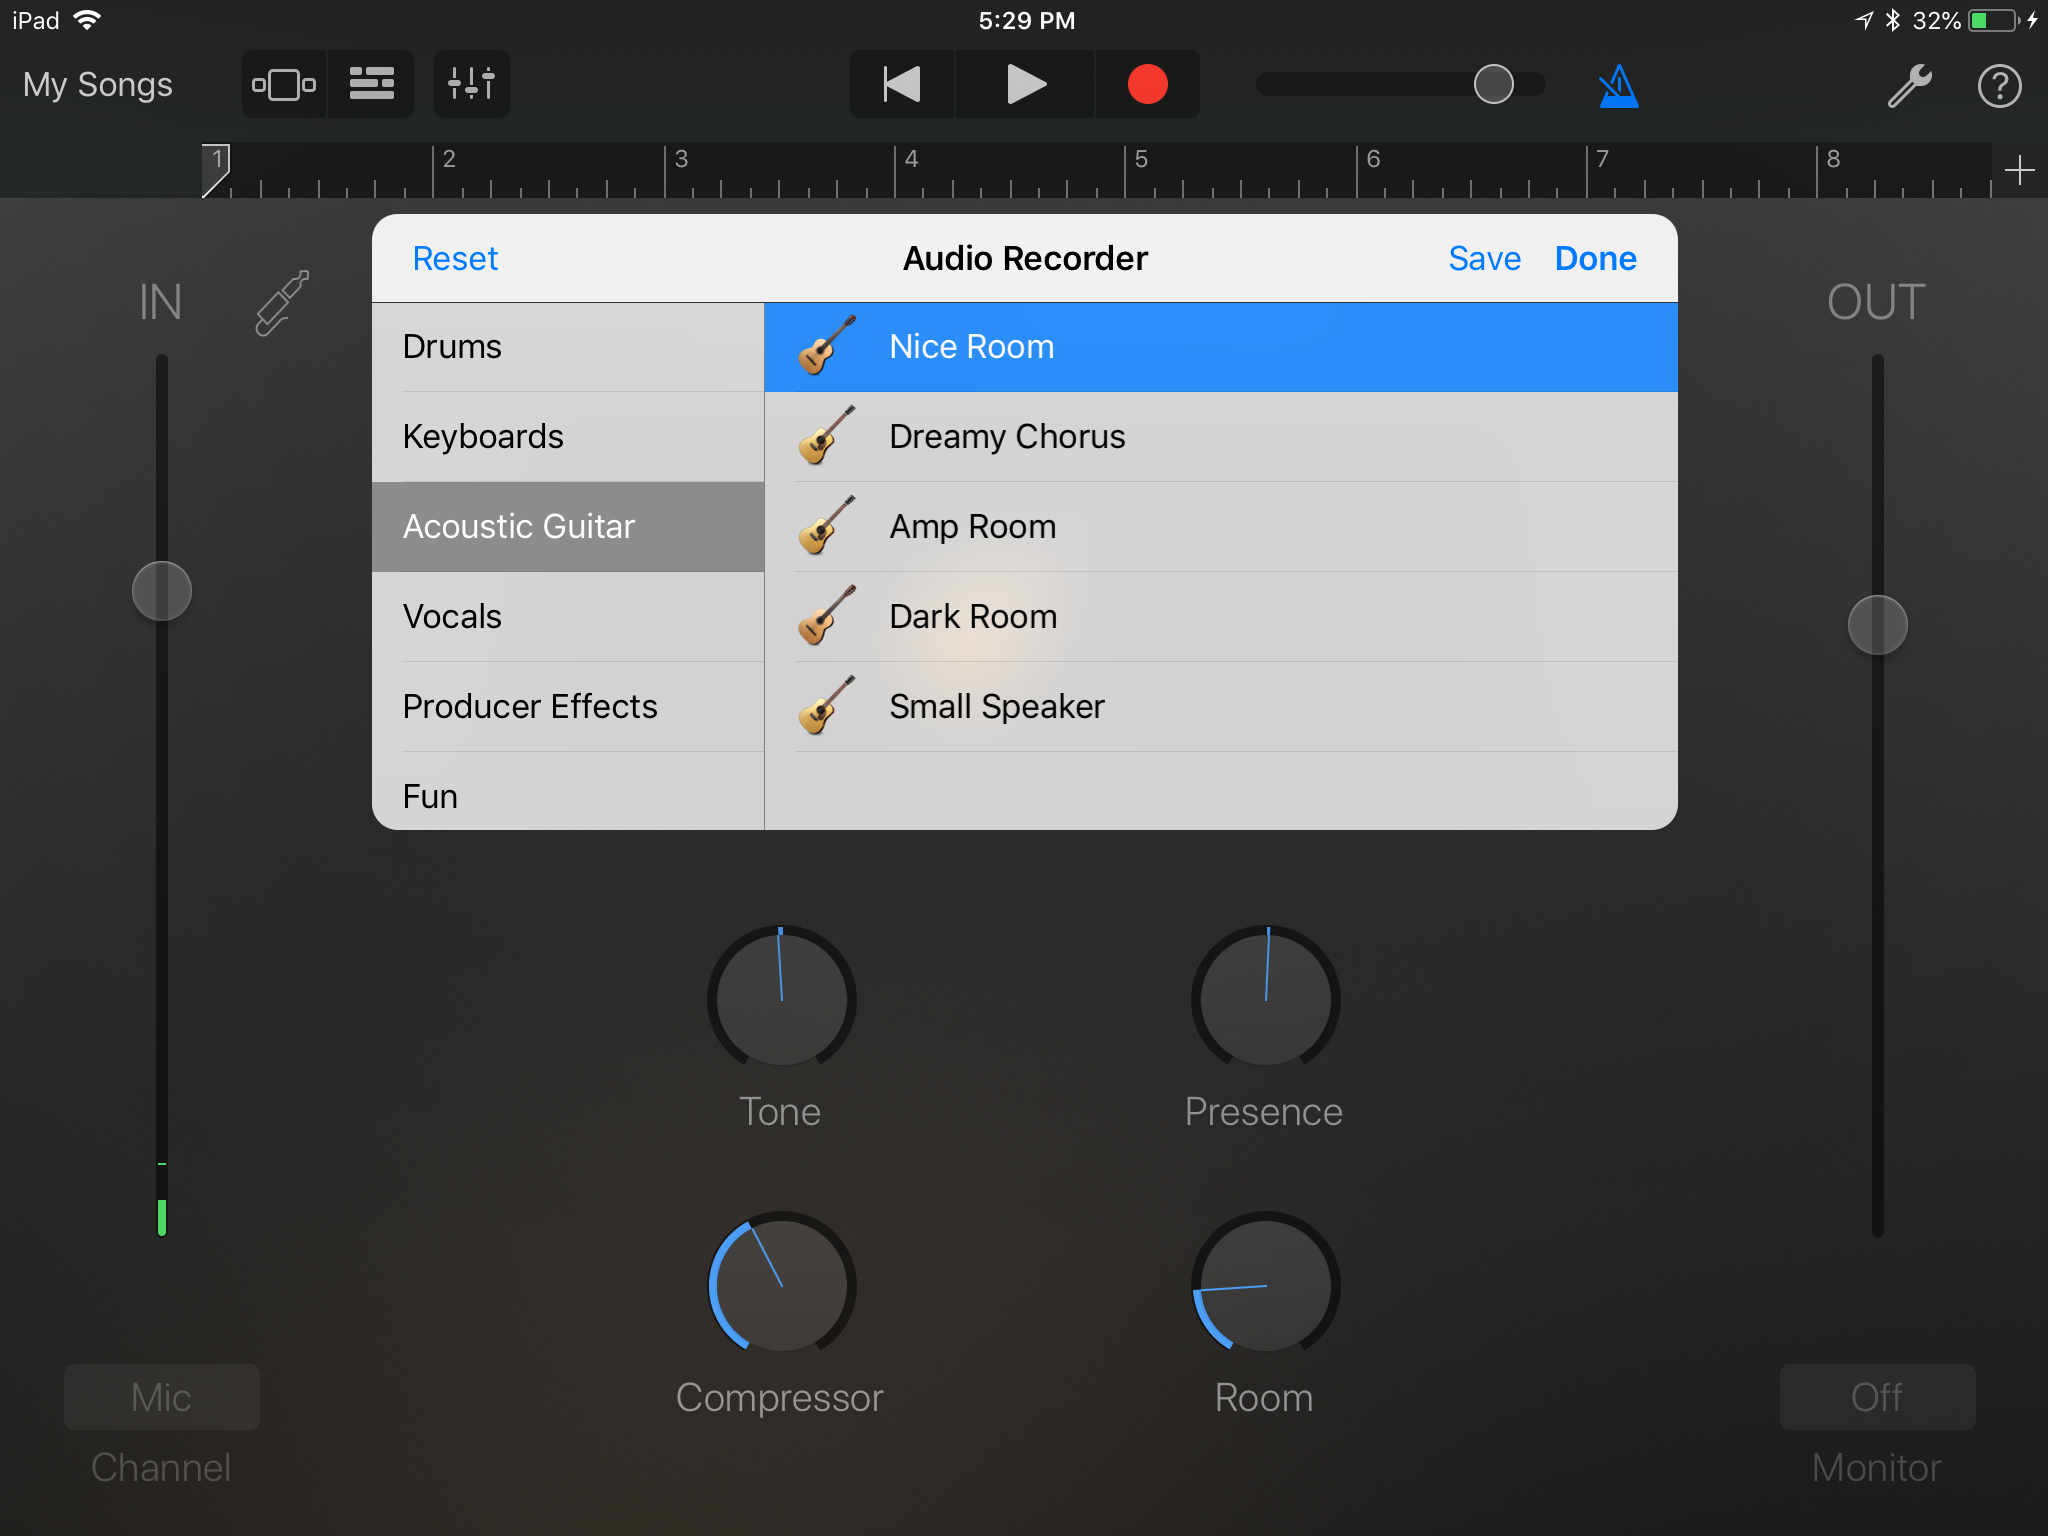
After selecting instrument you'll be presented with the image of an acoustic guitar above a Nice Room label. If you tap that, you'll see several Audio Recorder options.
Think of these as nothing more other than presets. As you select each one, you'll see the controls below. For our purposes, we'll just continue with the Nice Room. Be aware, GarageBand provides non-destructive editing. That means you can record, and then change the settings afterward to alter the sound. Unlike crippling student debt tying you down, you won't find that here with GarageBand.
Timing, Timing, Timing
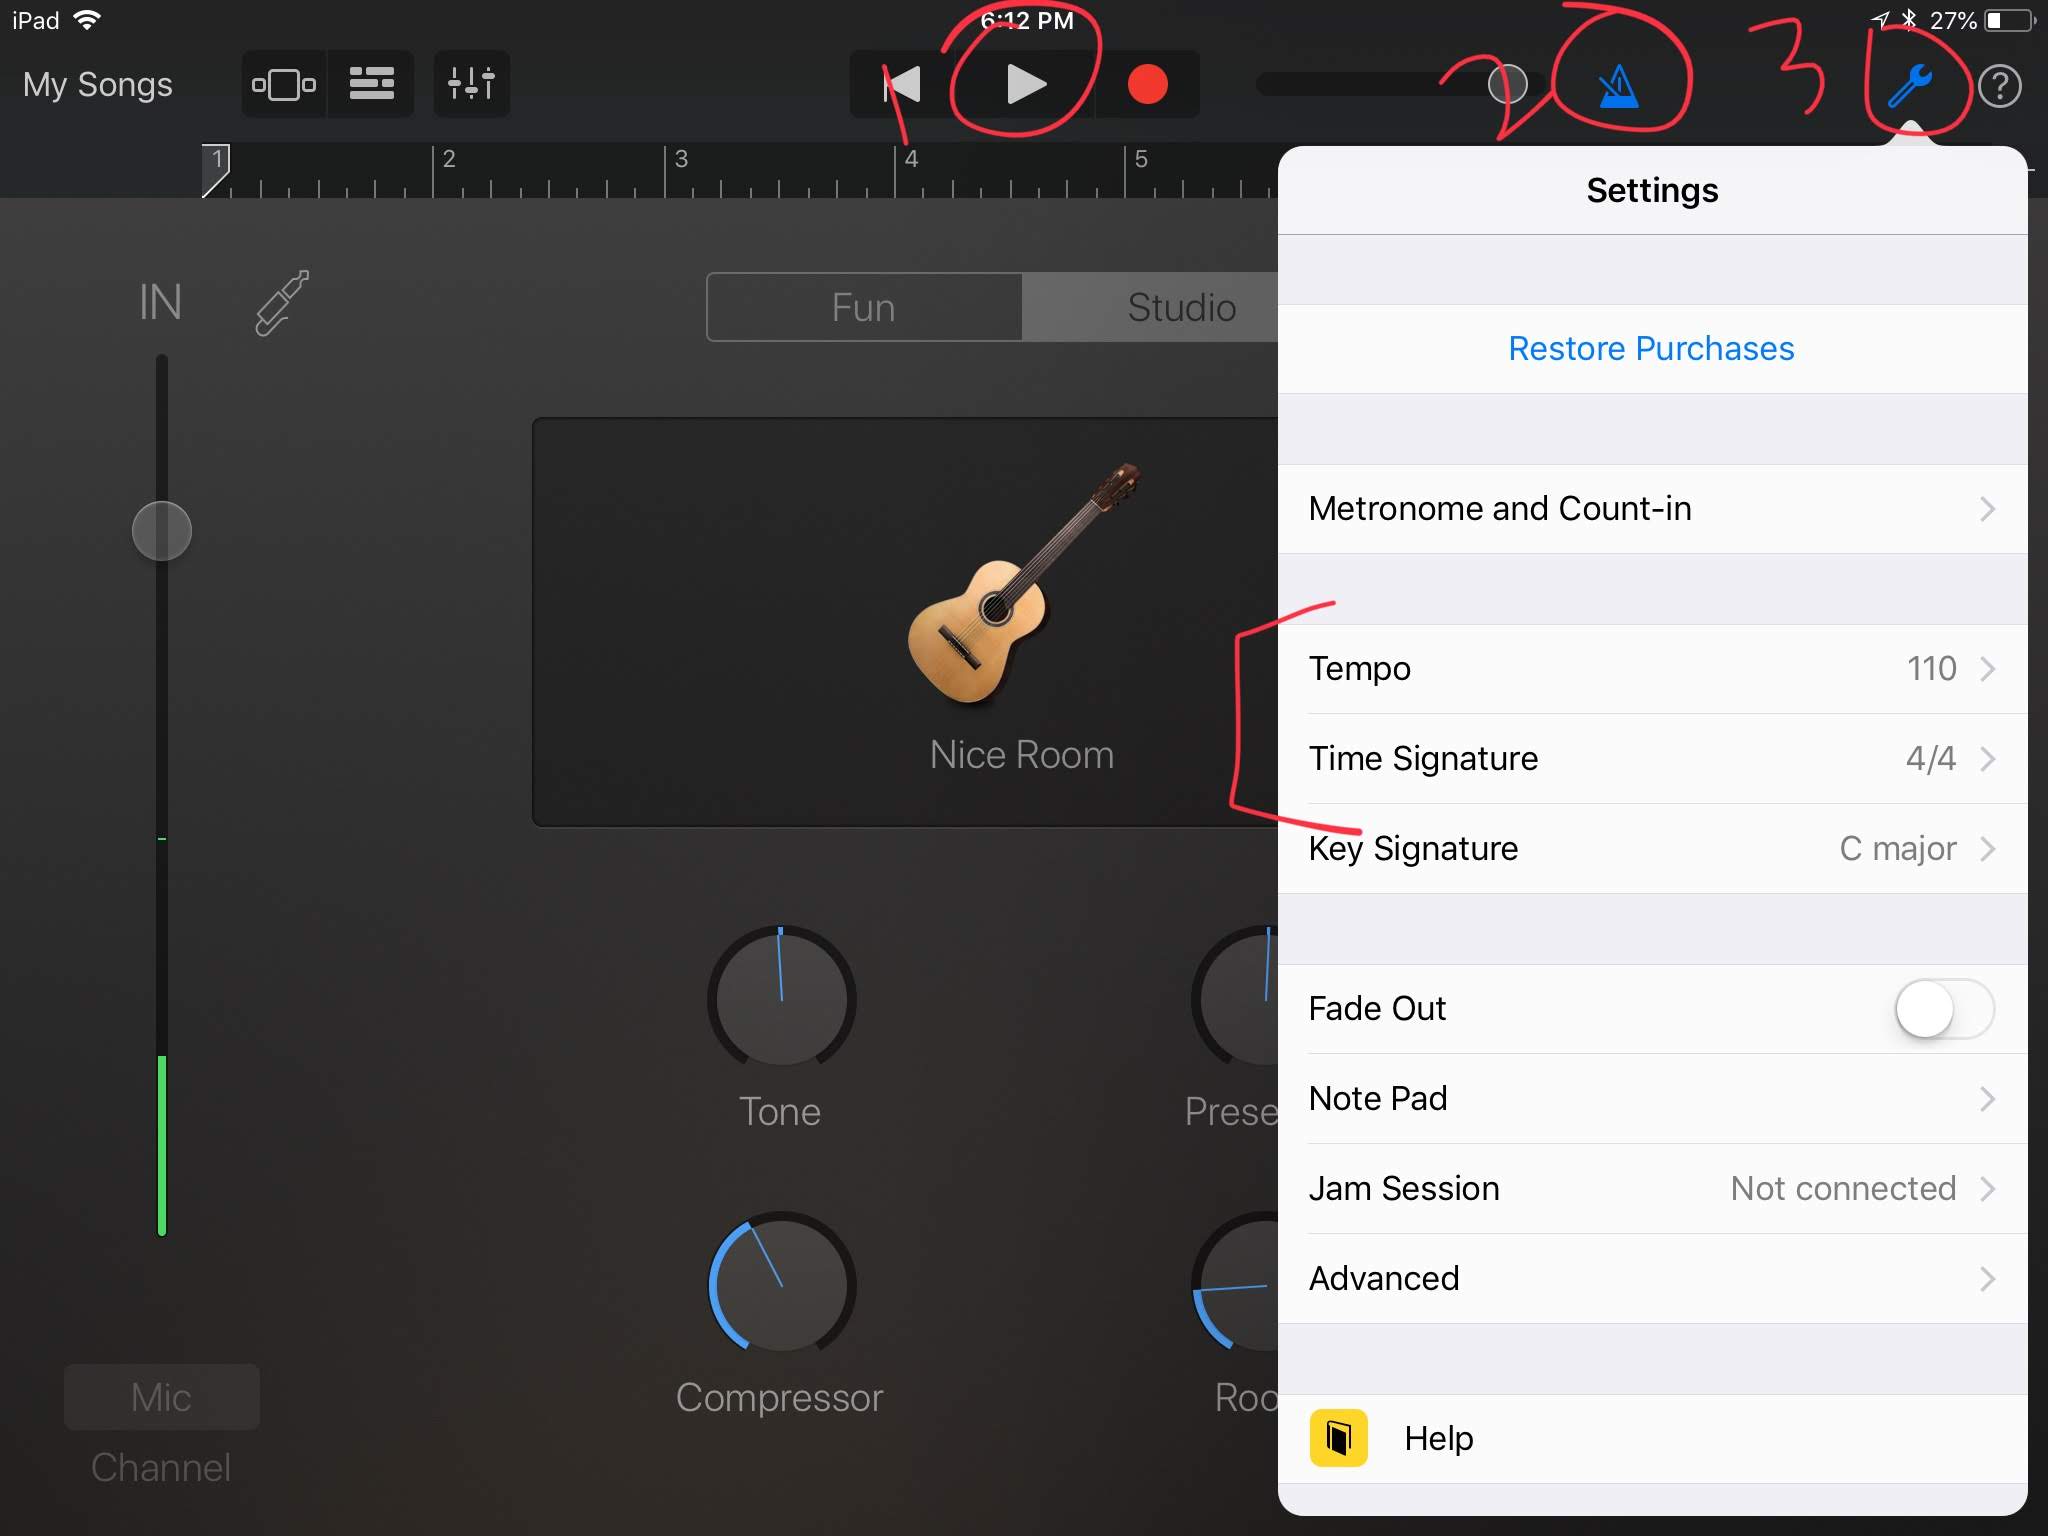
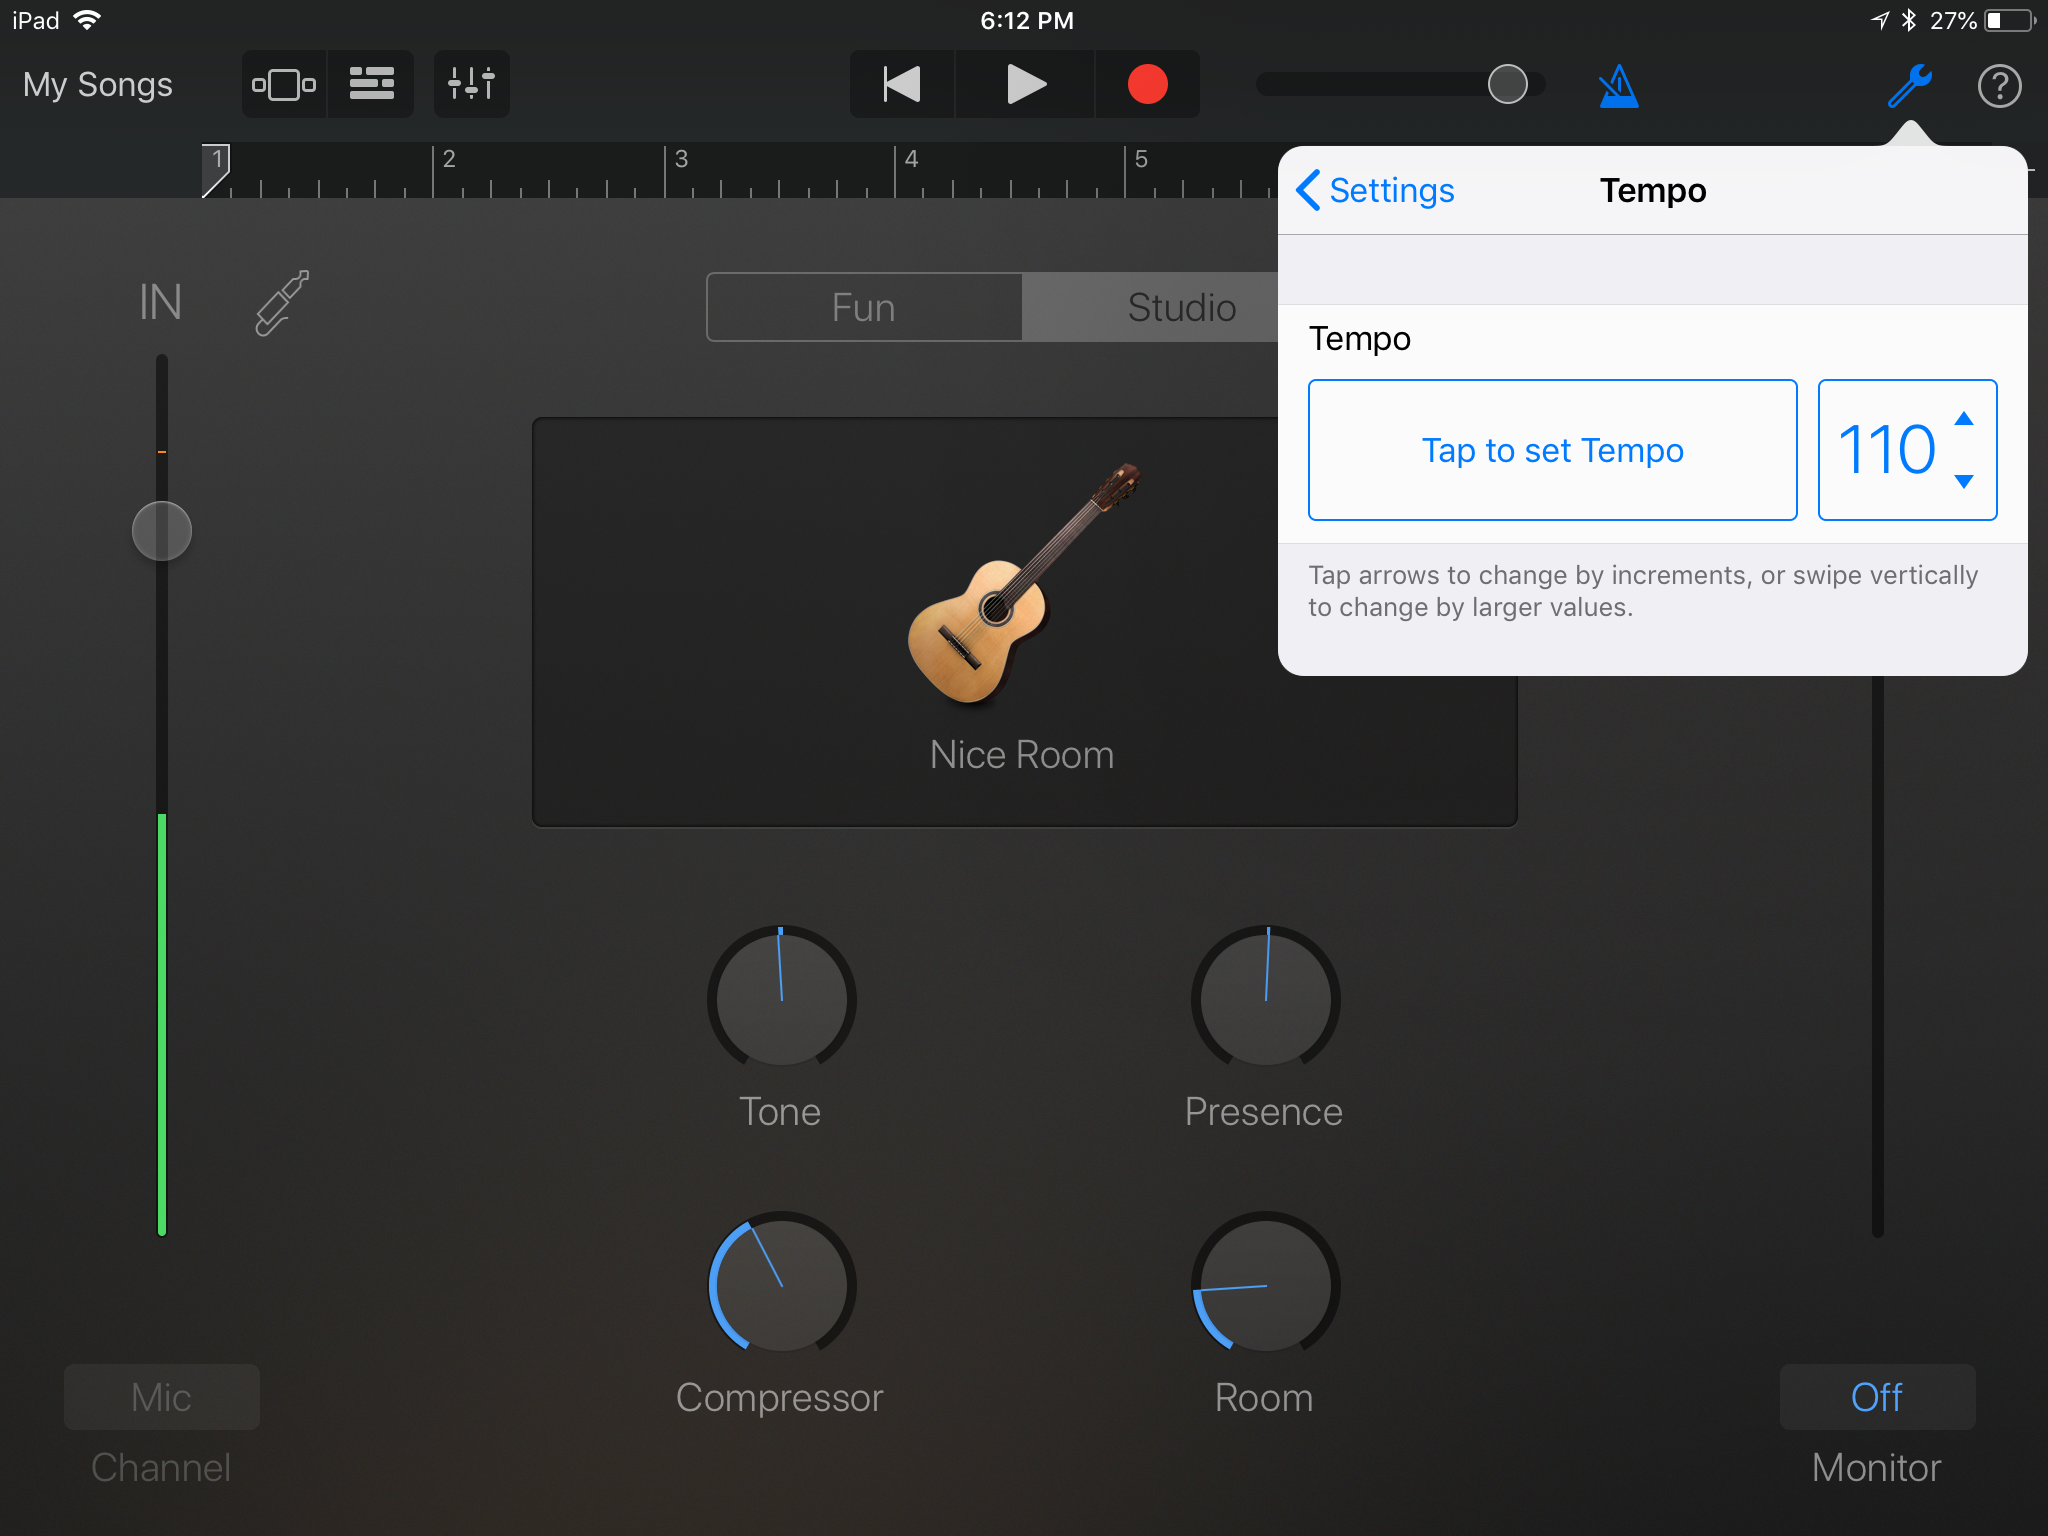
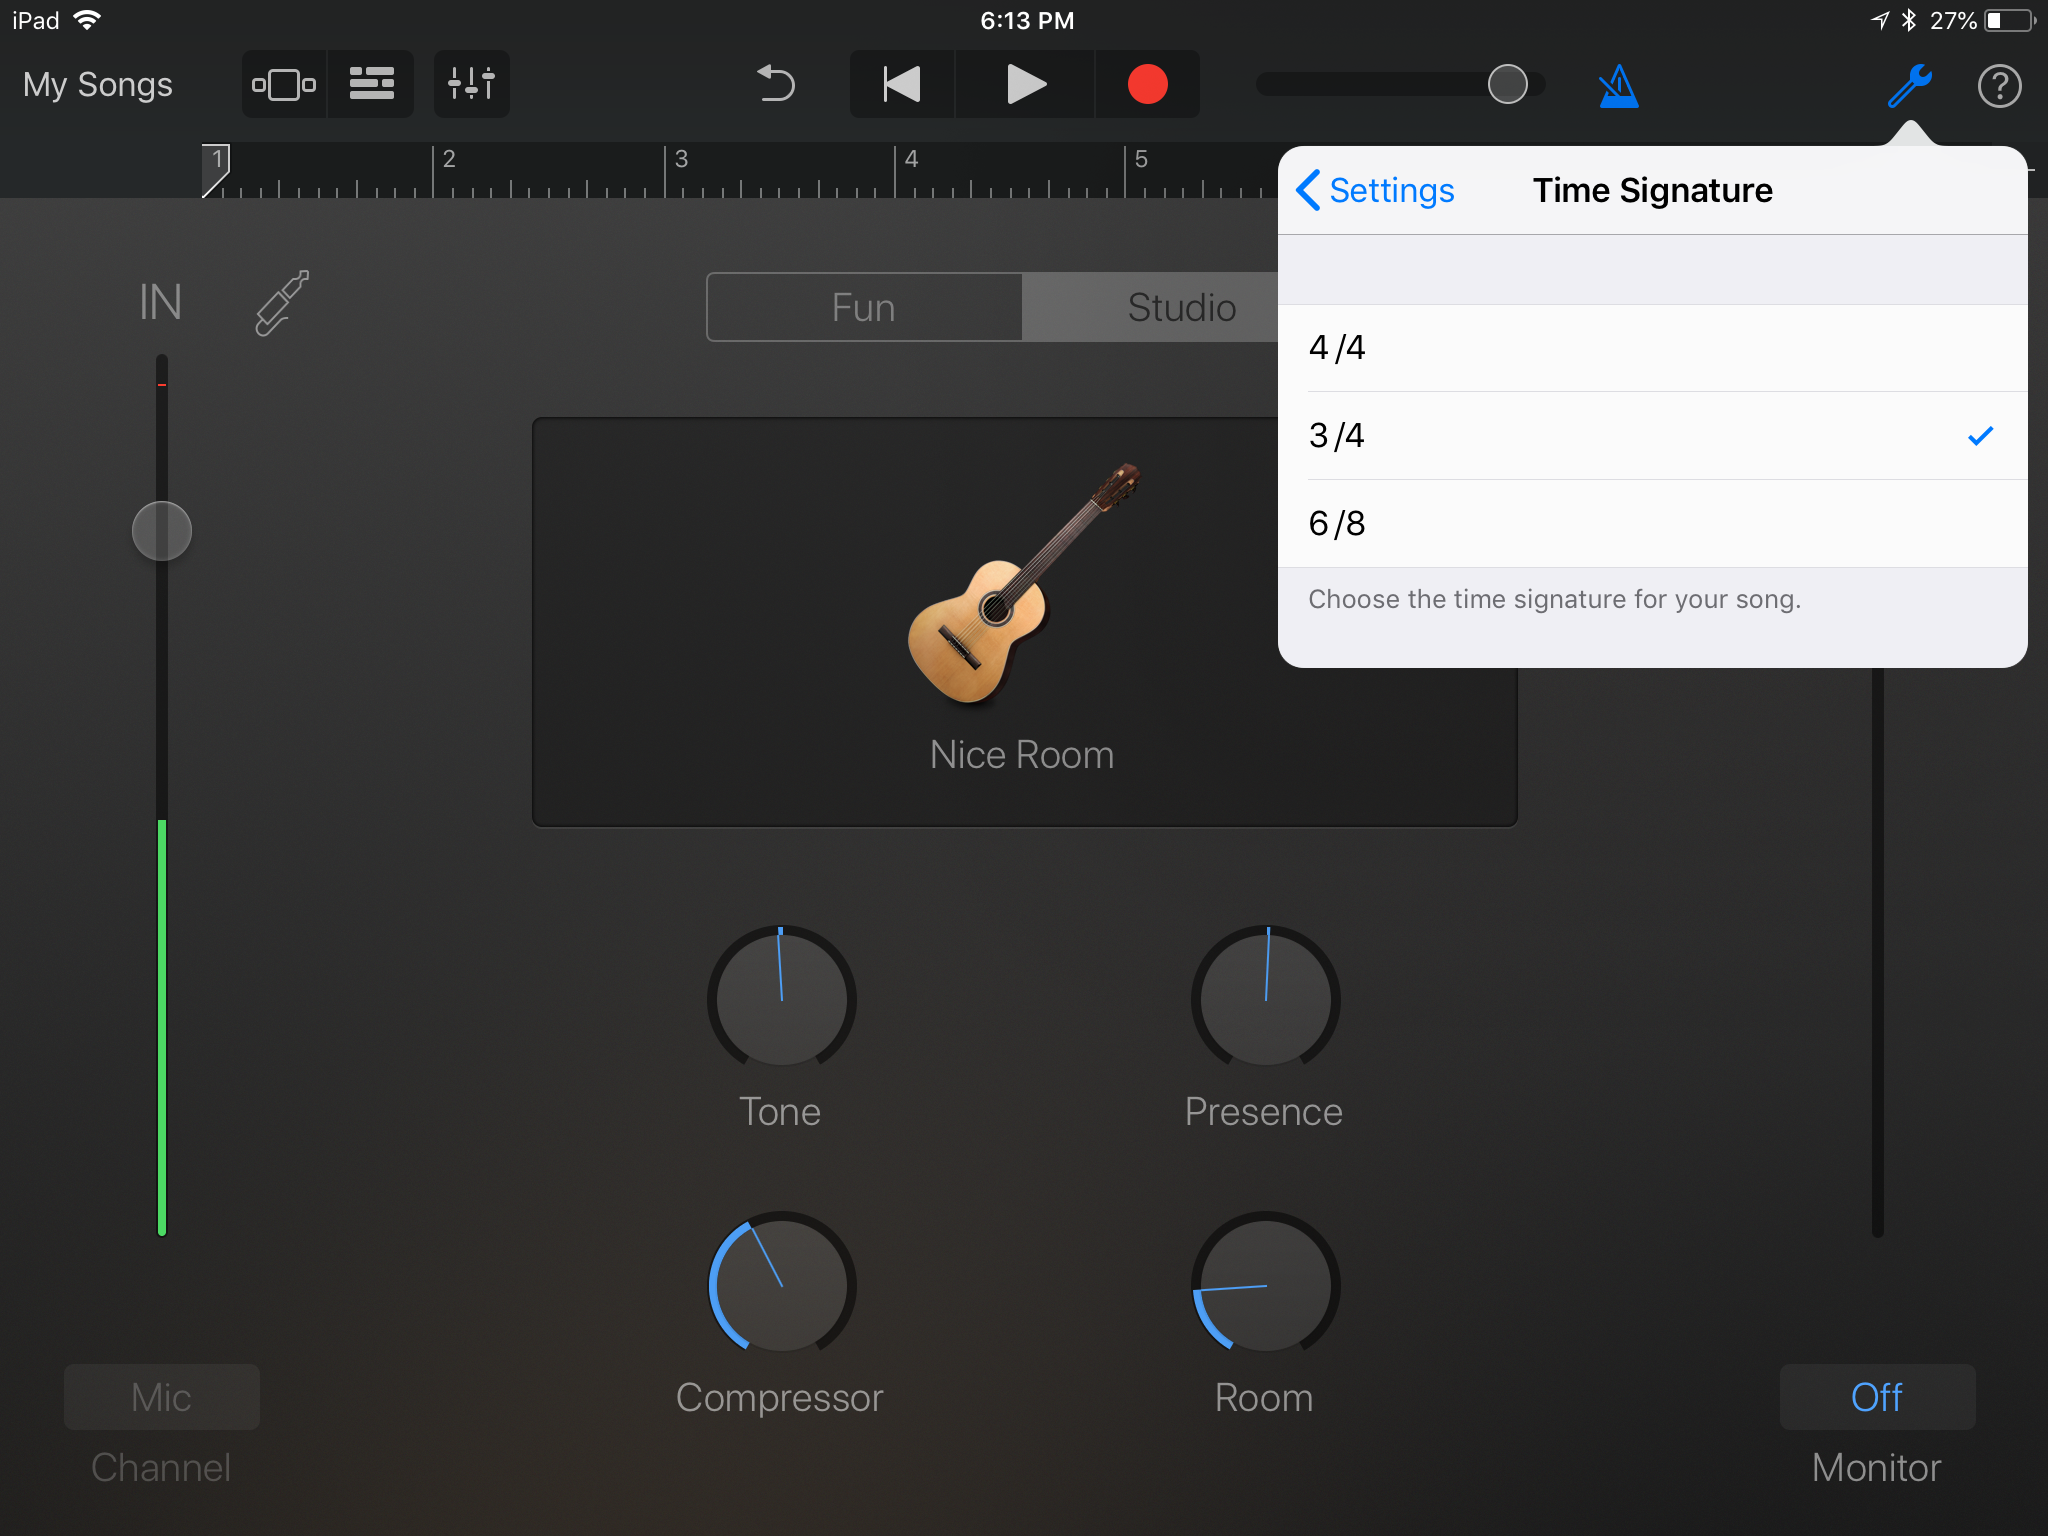
Assuming you have something in mind that you would like to record, and you want to add a beat (drums, percussion) and other virtual instruments to it to make a song then you'll want to play in time. This is where you'll want to strap on your headphones.
- Tap play
- Make sure the metronome is on (you should hear a sort clicking sound)
- Choose the settings icon
- Here you can change the sound of the metronome
- More importantly, you can adjust the tempo and time signature.
- Tempo describes how fast a song is played. You can select it and then tap in a tempo.
- Time signature describes how time is counted out. "1-2-3-4-1-2-3-4" or "1-2-3-1-2-3" otherwise known as 4/4 and 3/4 metering, respectively.
We don't have time to describe tempo and time signature to the nth degree, so feel free to read up on them at the following links: tempo and time signature. Be sure to set them according to what you're playing.
Not Too Hot
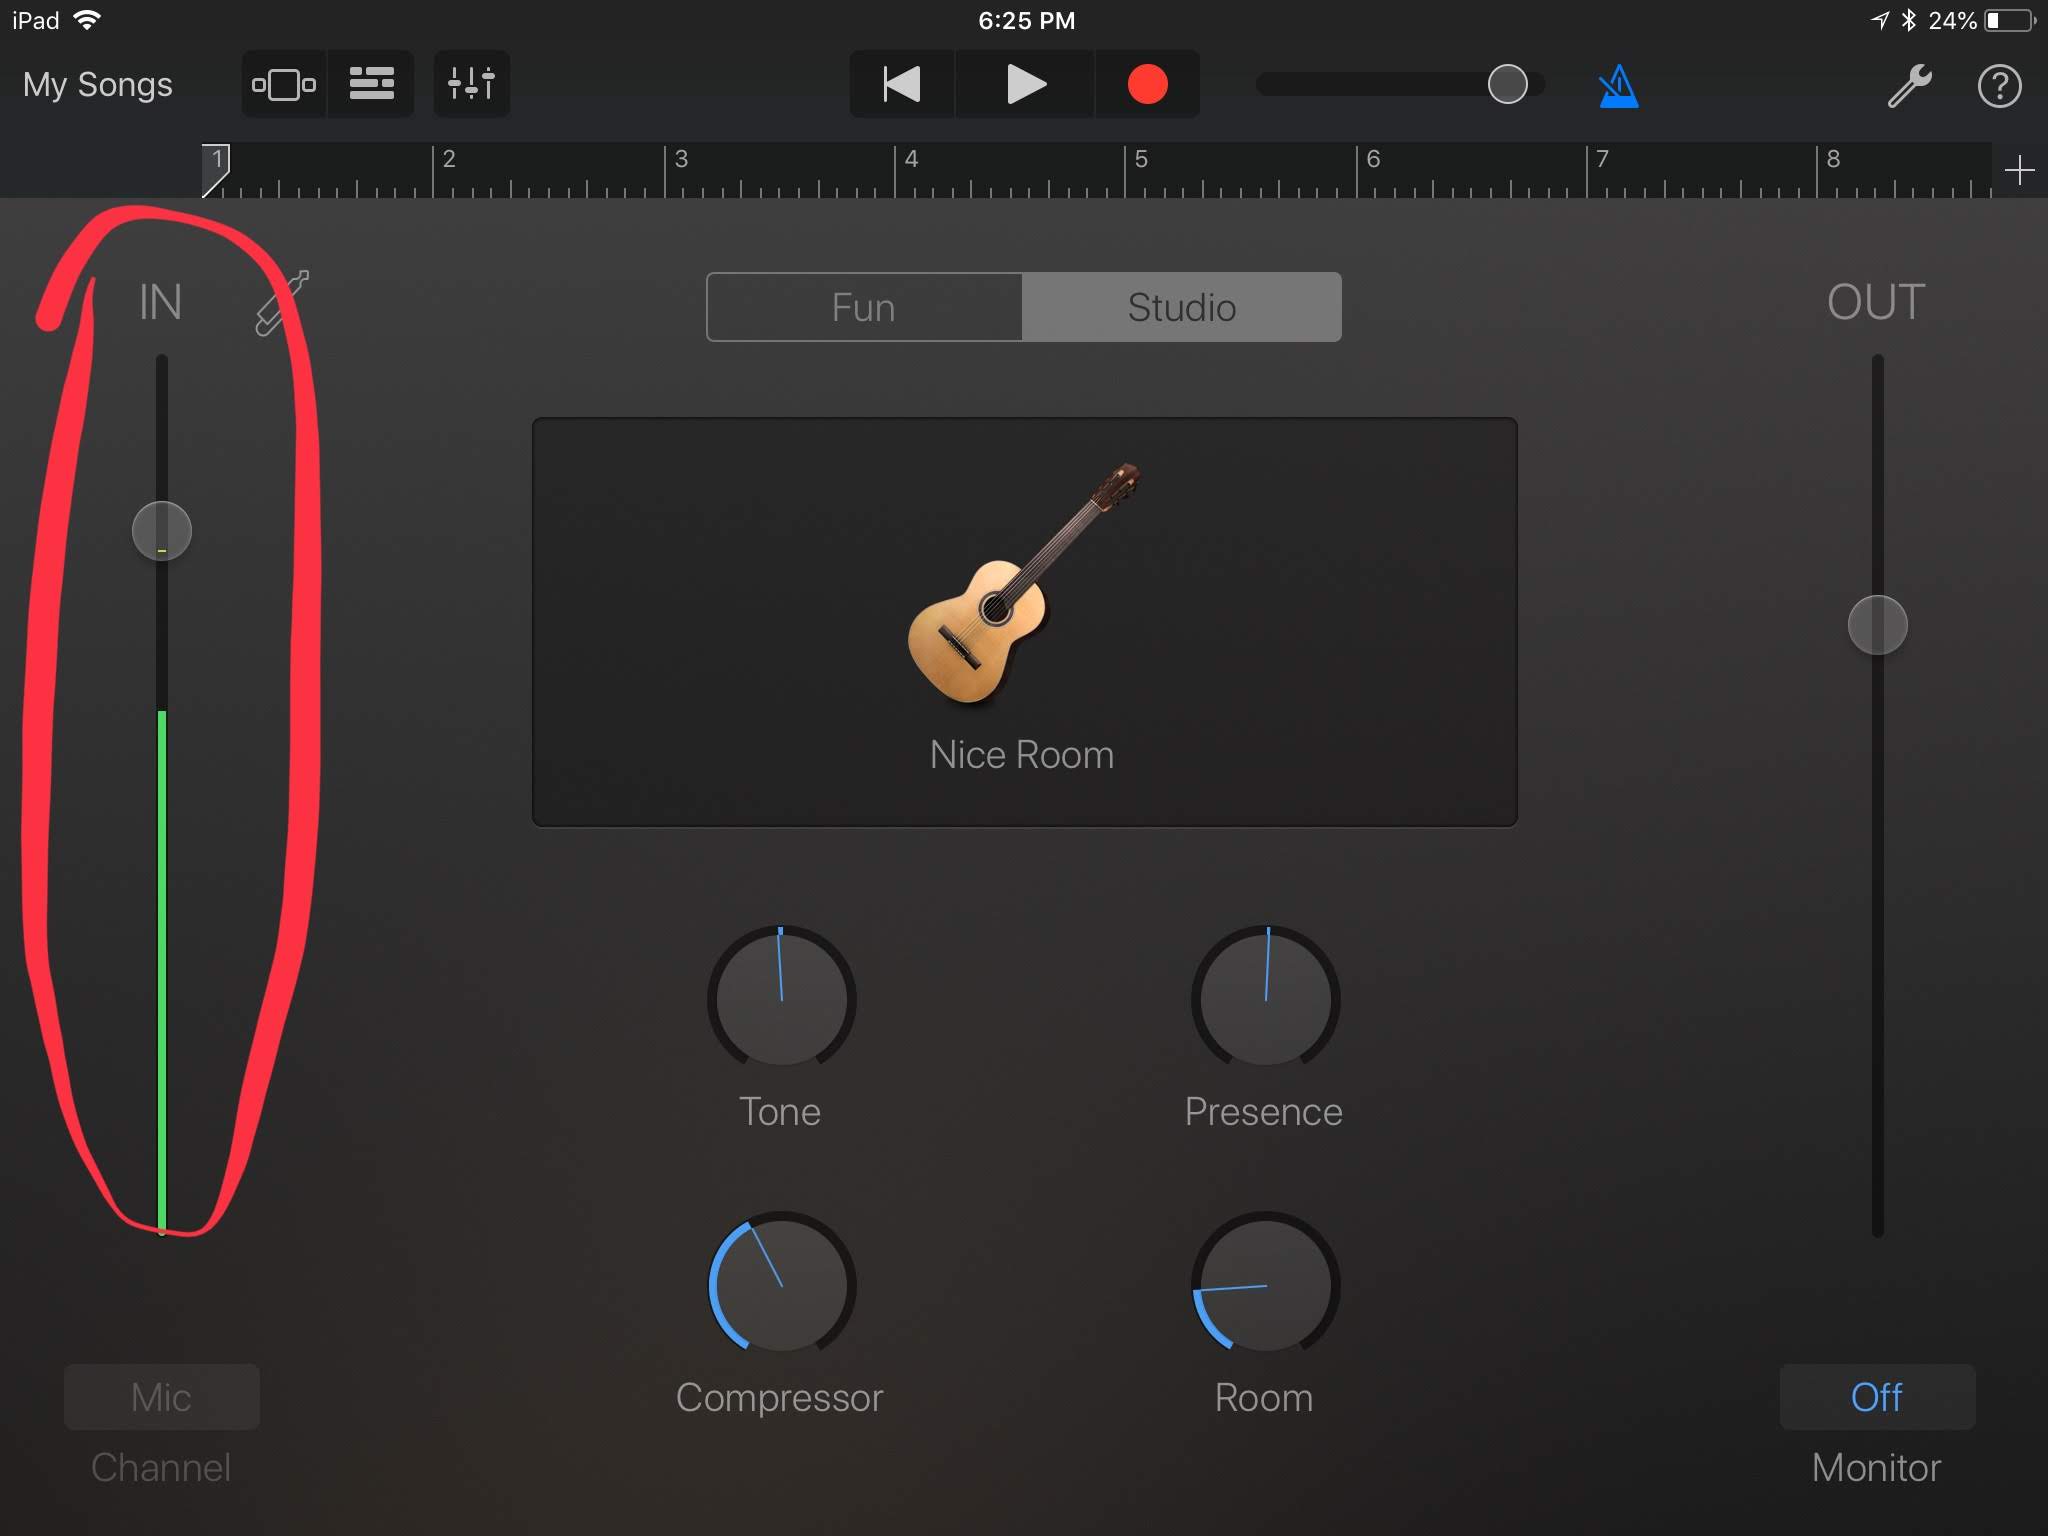
Now depending on the model of iPad you own, the microphone will be located in different areas. The first two generations feature the mic on the top of the iPad near the headphone output, while 3 and newer feature the mic near the volume buttons.
You'll want to make sure the mic is facing towards the instrument producing sound, and that it's close enough to accurately pick up the sound but not so close that the input meter is clipping causing the meter to light up red towards the top.
Play as loud as you believe you will, and watch the meter. If it hits red, either lower the input slider (the circle on the meter) or move the mic away from the instrument. The meter you see in the image represents approximately 12" from the soundhole on my guitar.
Note: If you want to hear the guitar in your headphones then turn on the monitor control in the bottom-righthand corner. Personally, I can hear the guitar enough without it in the headphones that I'll leave this off.
Let's Lay Down a Track
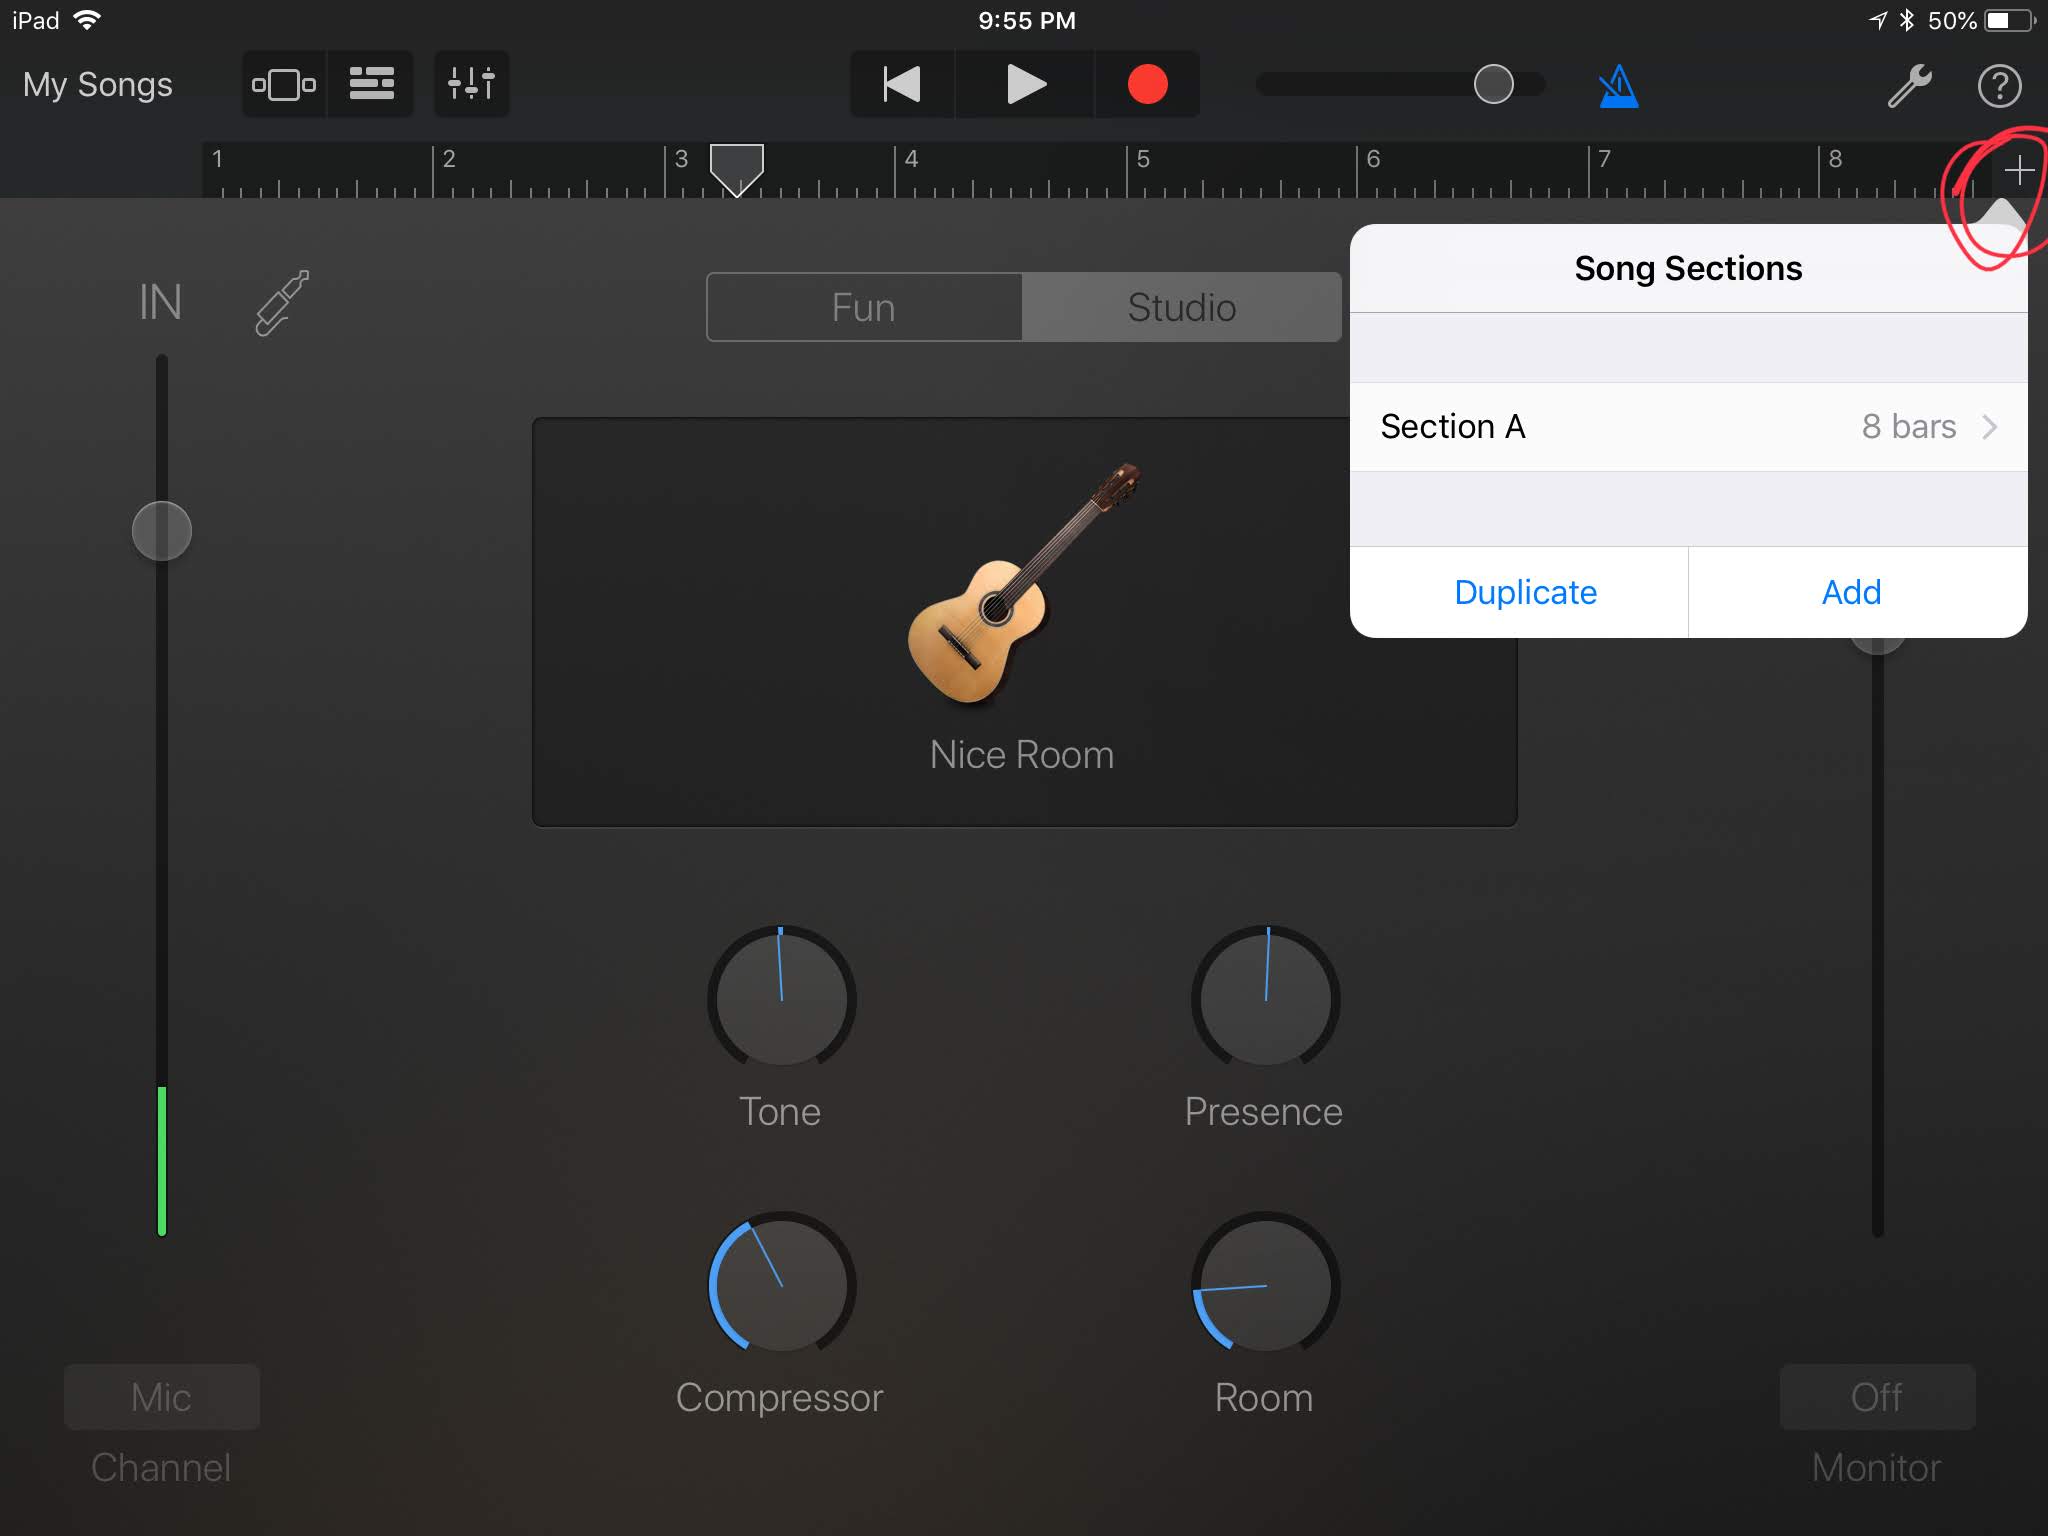
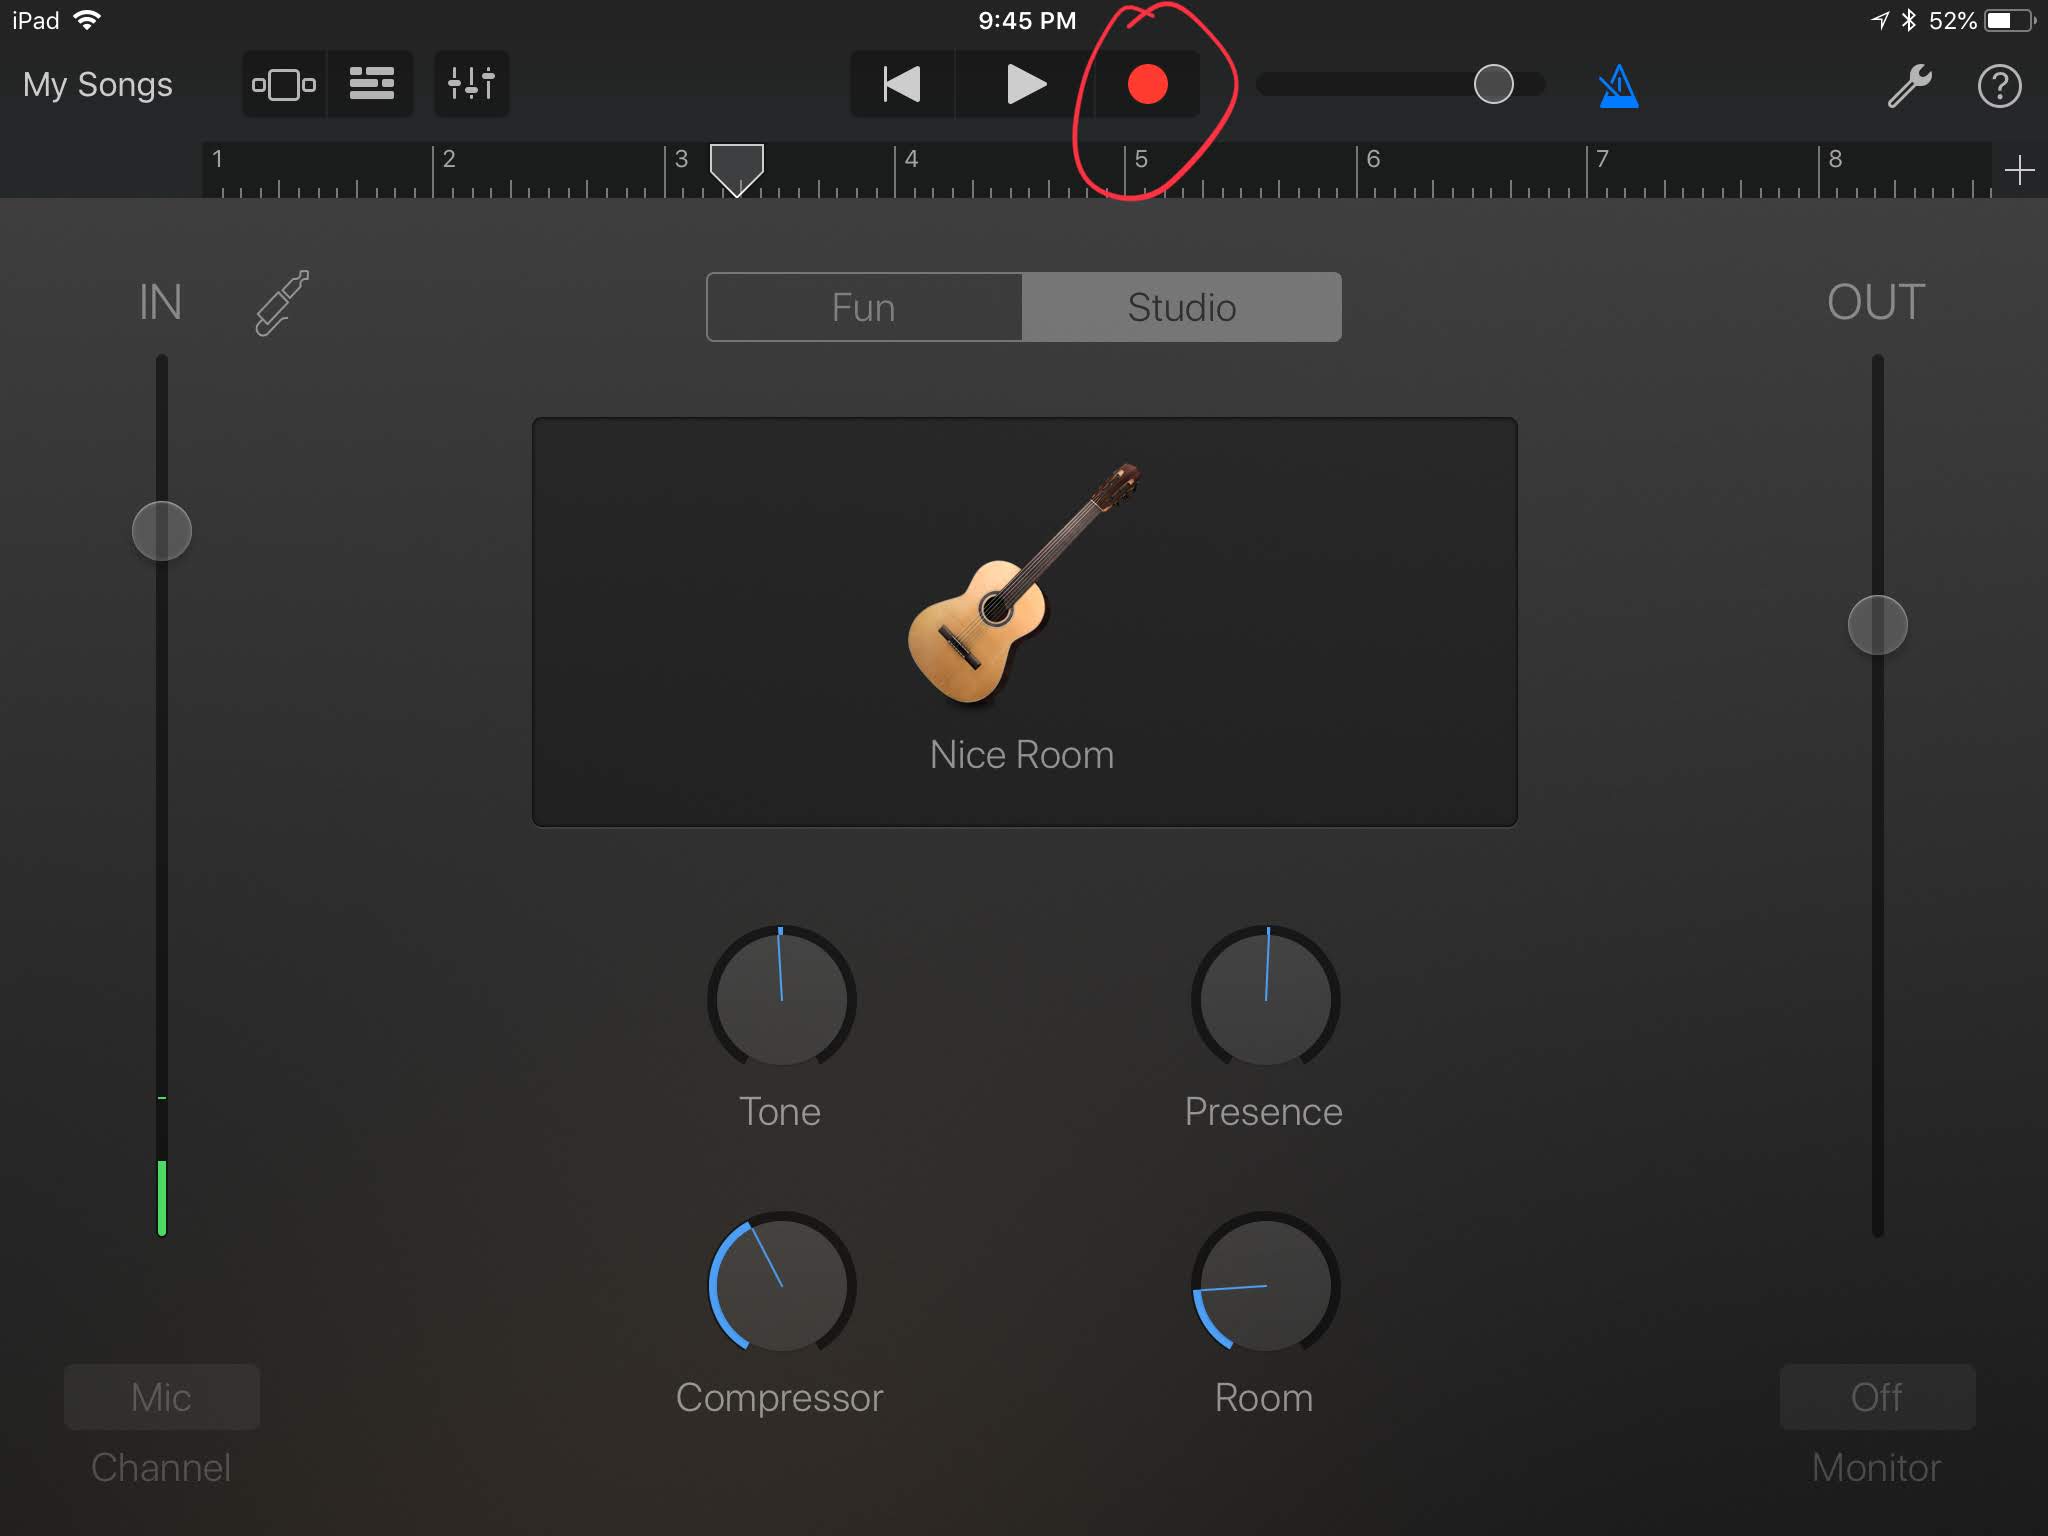
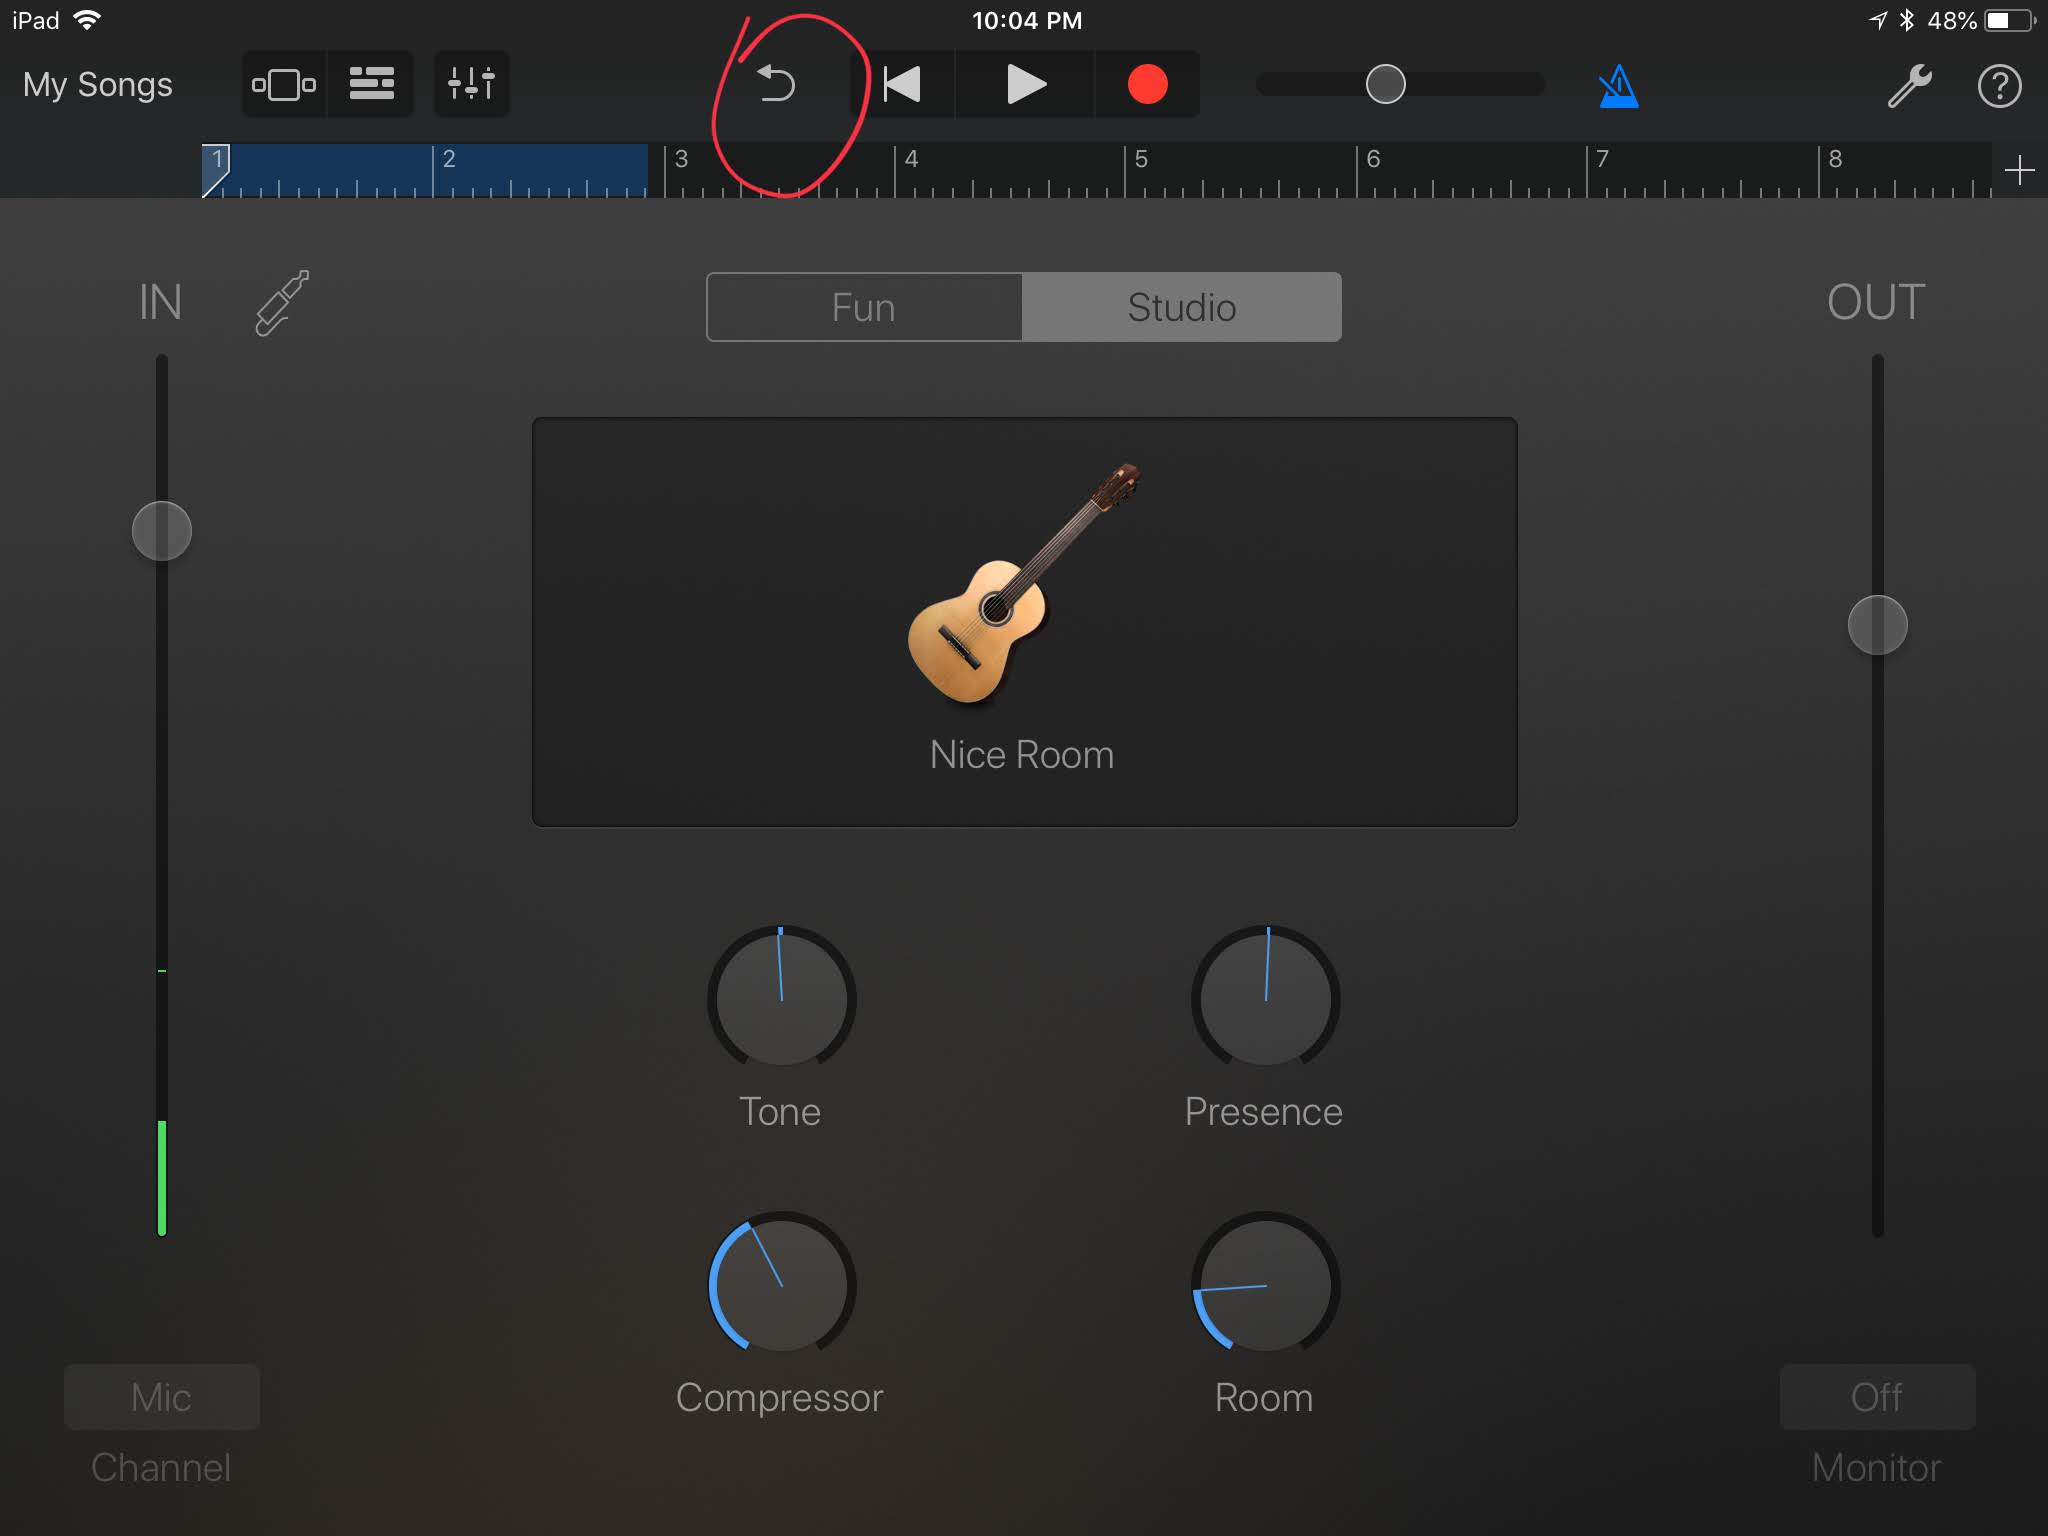
These days most songs are recorded in sections. It takes a bit of pressure off playing it perfectly, although, you should really try to play it perfectly all the way through. Keep in mind, songs aren't performed in sections. All that to say, by default GarageBand gives you one section of 8 bars (measures).
Depending on how you want to record this will need to be adjusted so that it's long enough for how much you're wanting to record. Click on the + symbol and adjust accordingly. After recording, you can duplicate sections to experiment with the arrangement or you can add new sections to do just that, add to the song. Intro, Verse, Chorus, Verse, Bridge, Chorus, Outro. You get the idea. There are many different patterns for writing songs.
Time to hit Record!
You'll get a 1 bar count-in before it's time to record. Just enough time to adjust hands on the instrument. Listen carefully to the metronome and play along.
If you mess up, just hit the undo button and try again.
Let's Add a Beat
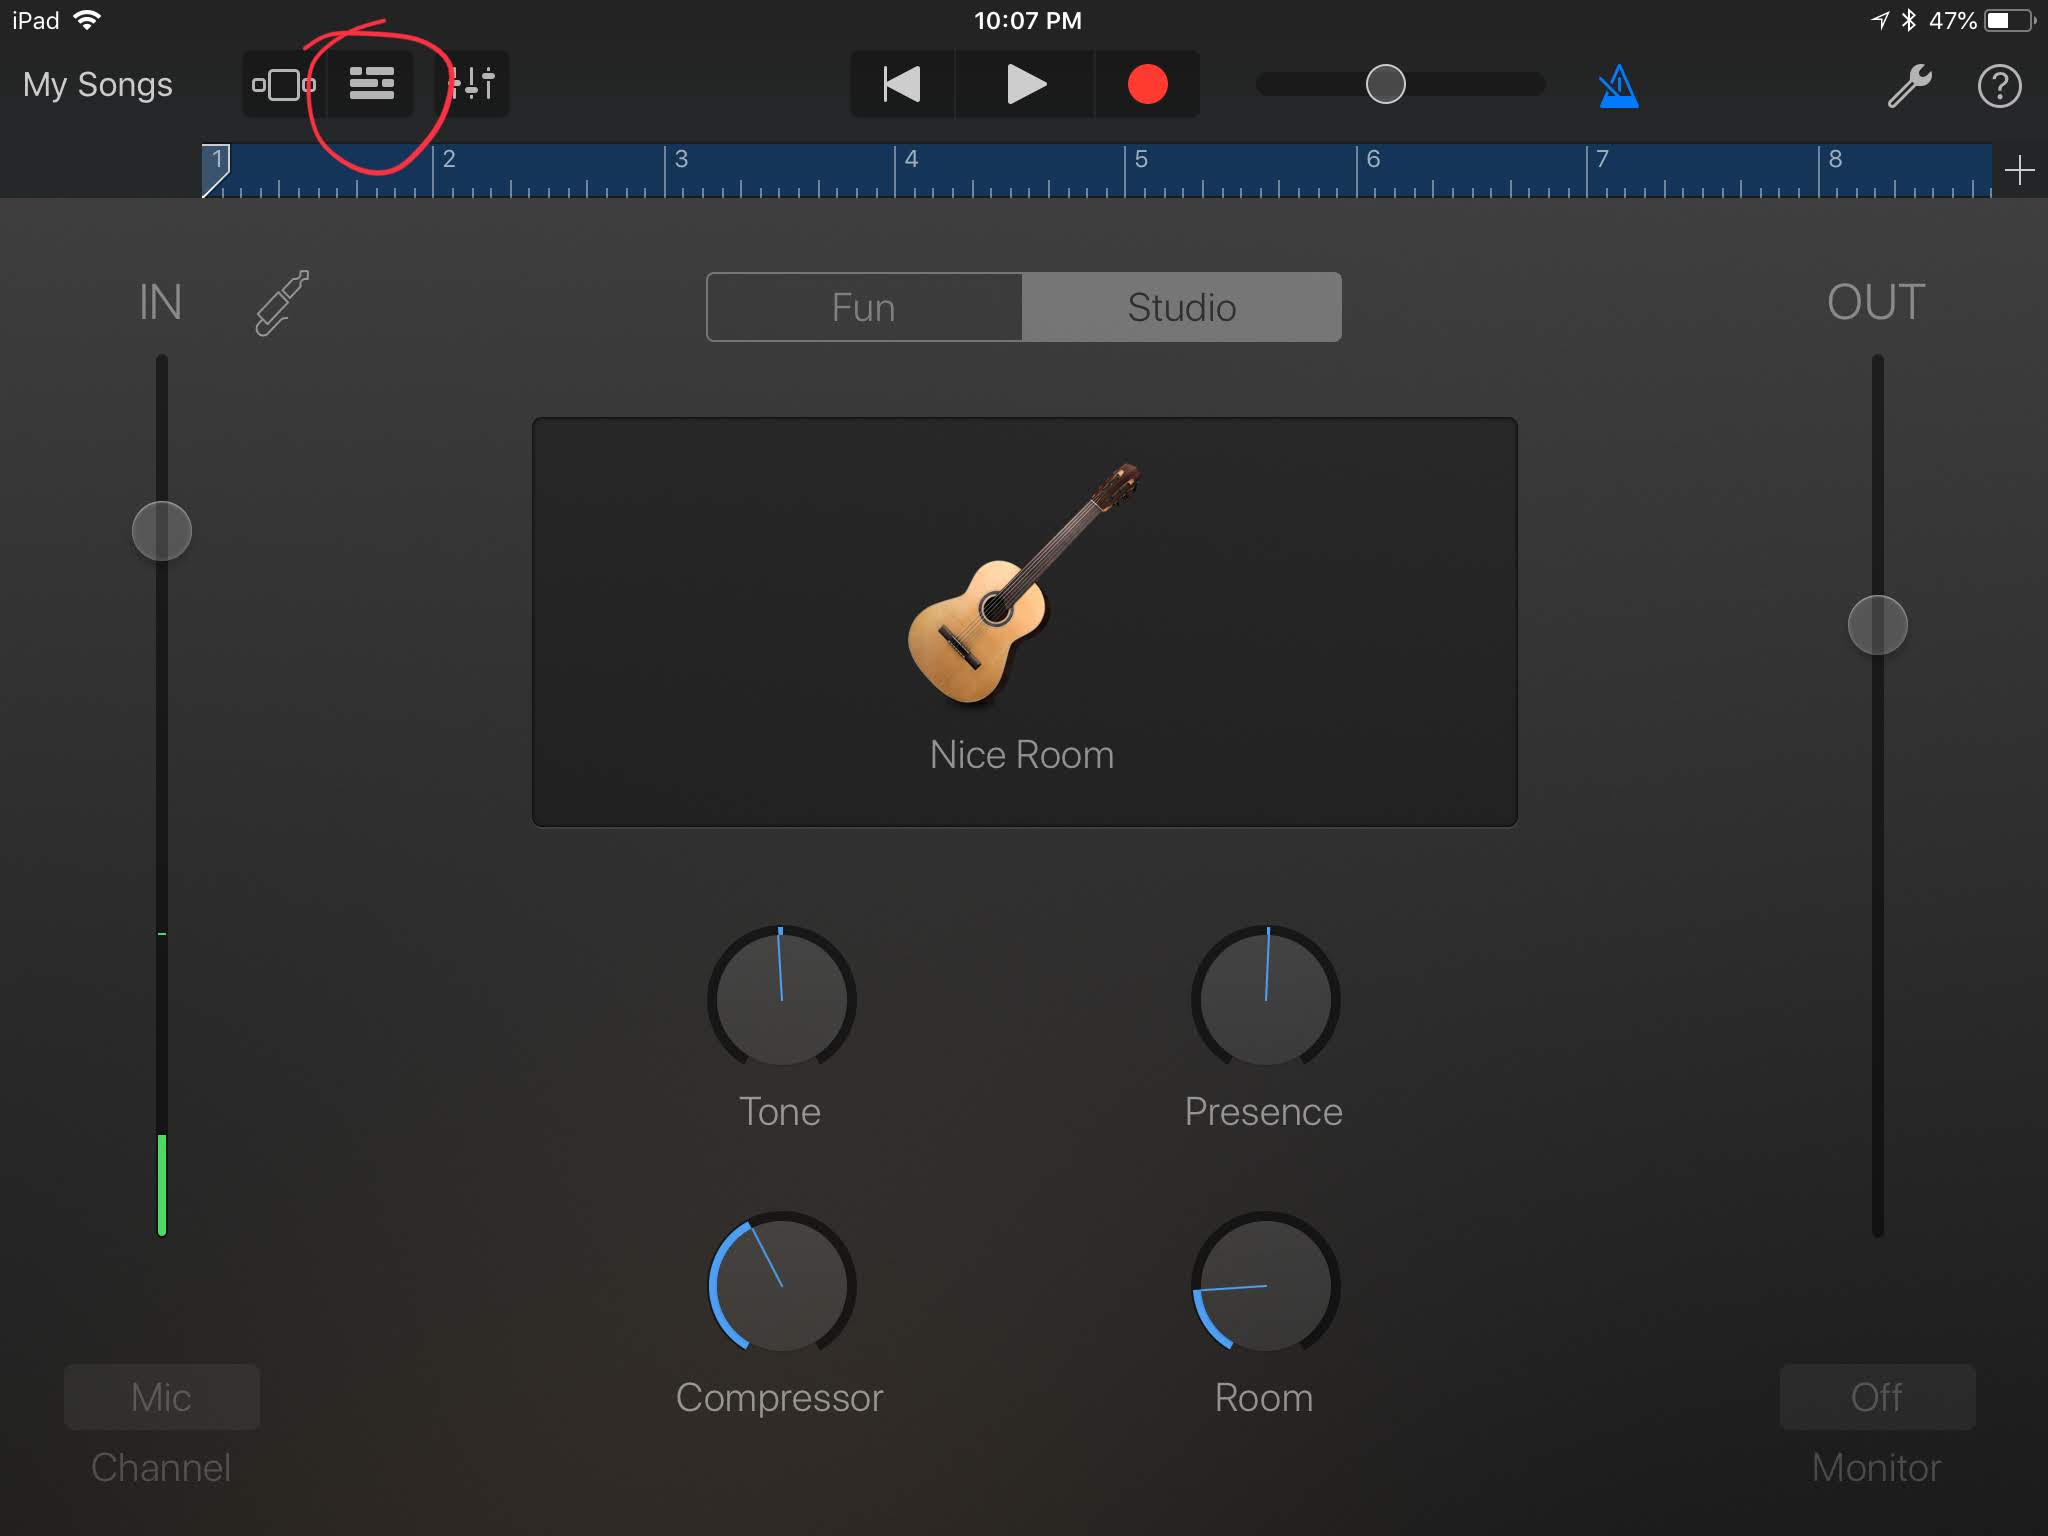
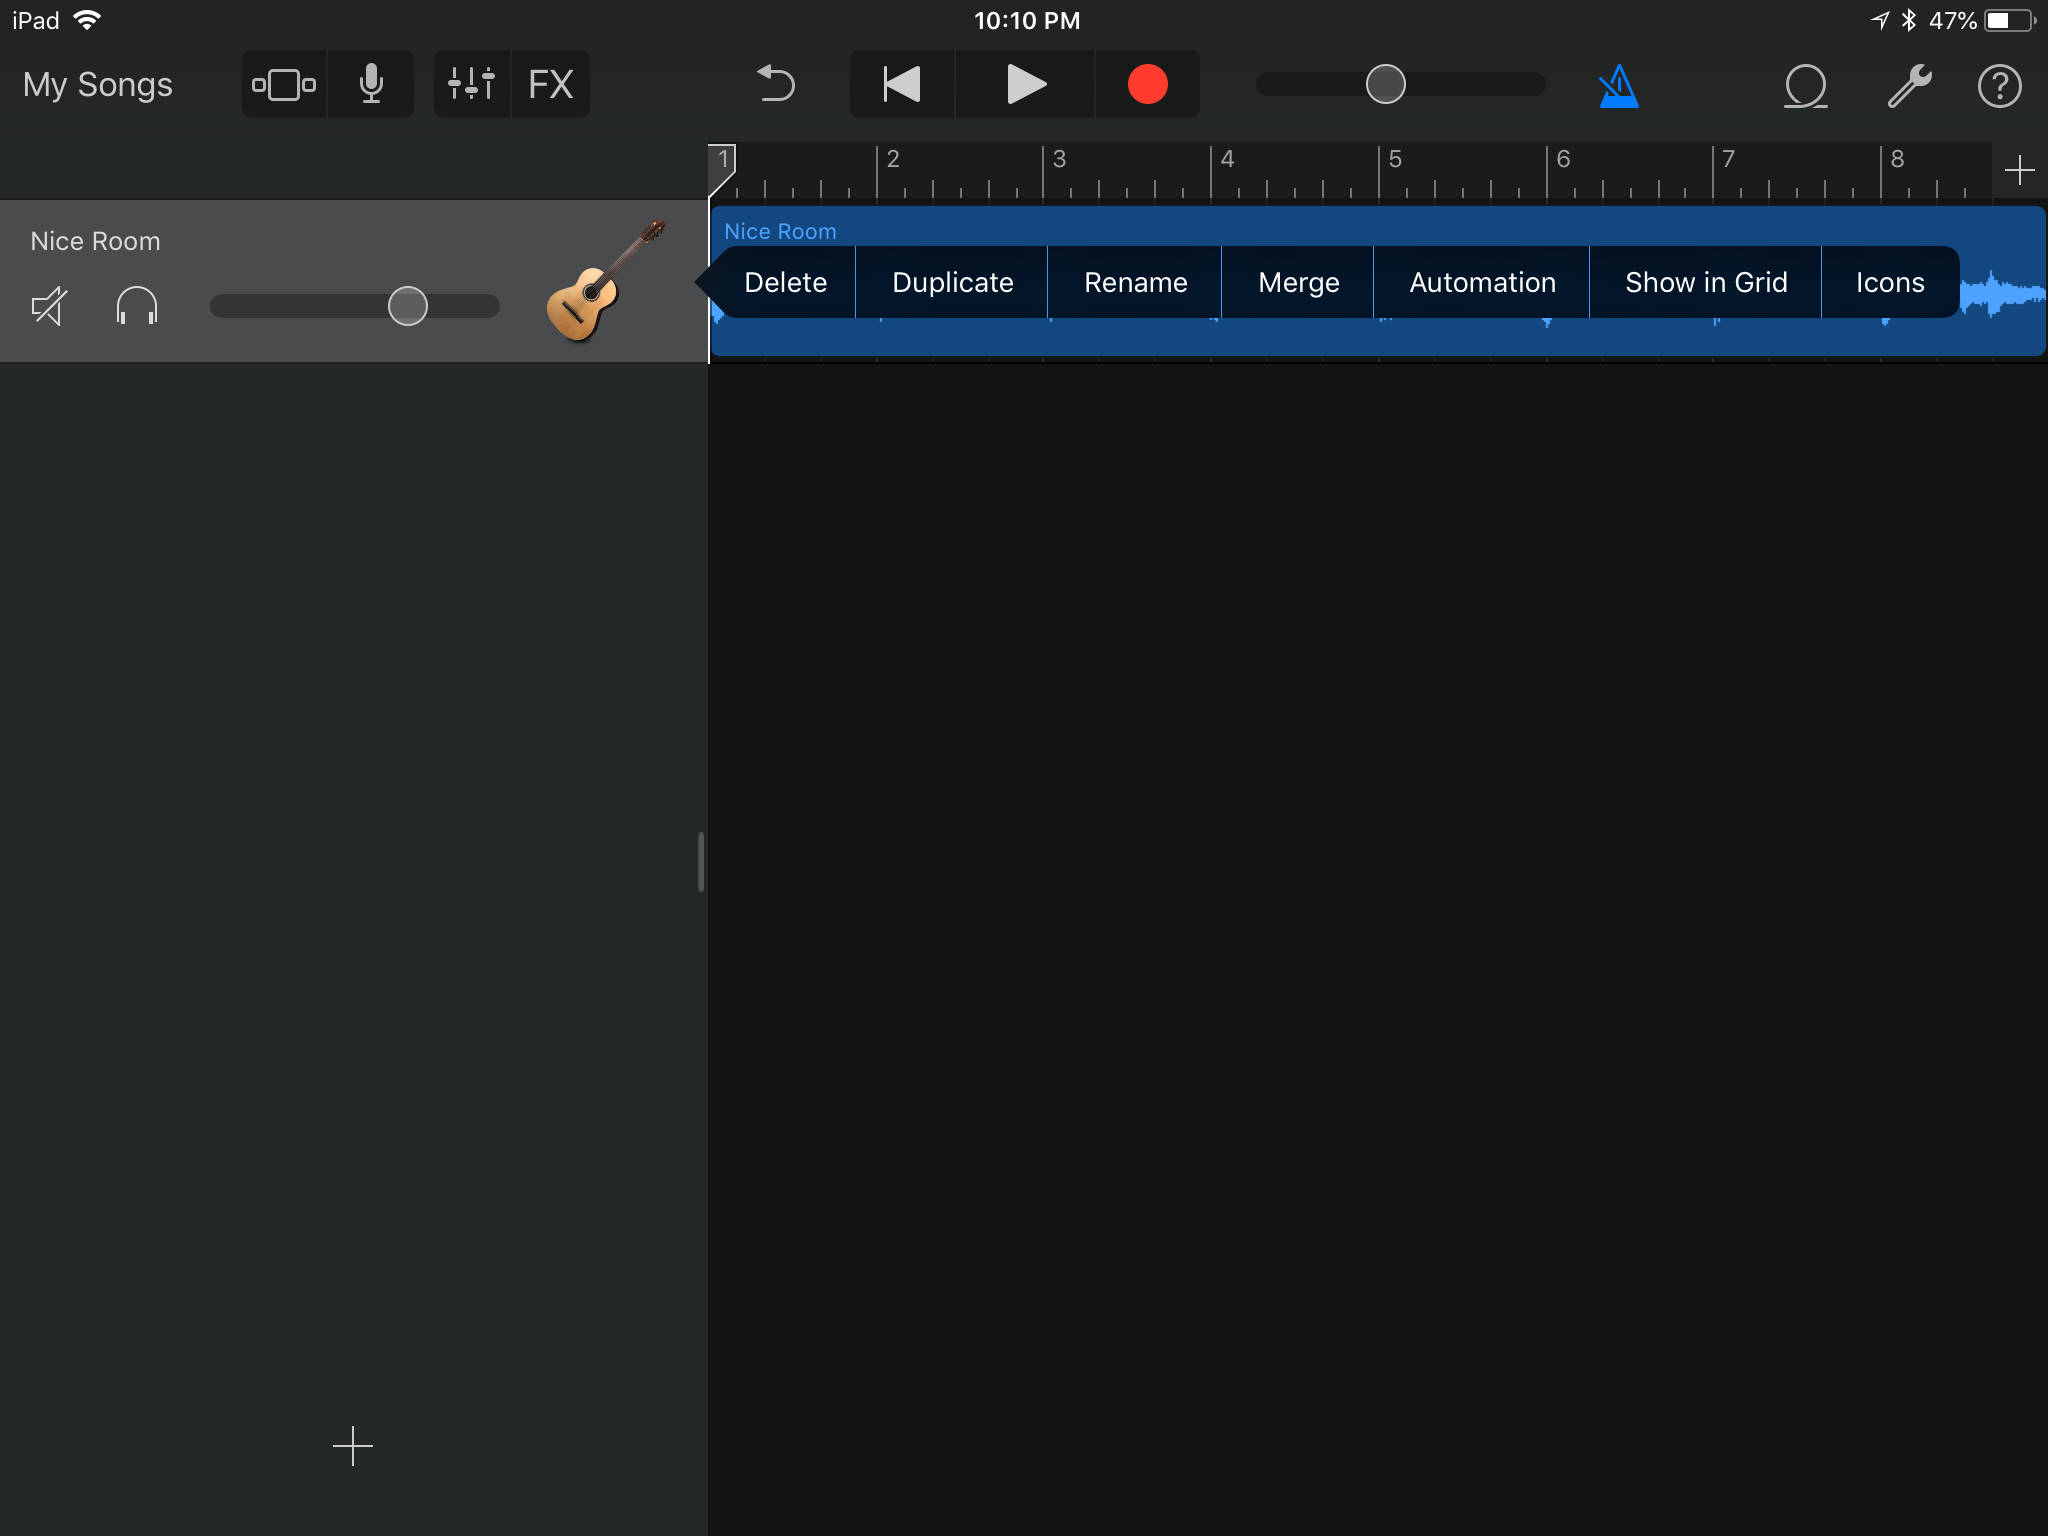
Tap the Tracks View button. You should now see a waveform. If you want to rename the track, double tap (hold on the second tap) to reveal several options. It'll just rename the track, not the clip. Double-tap the clip if you want to rename that too.
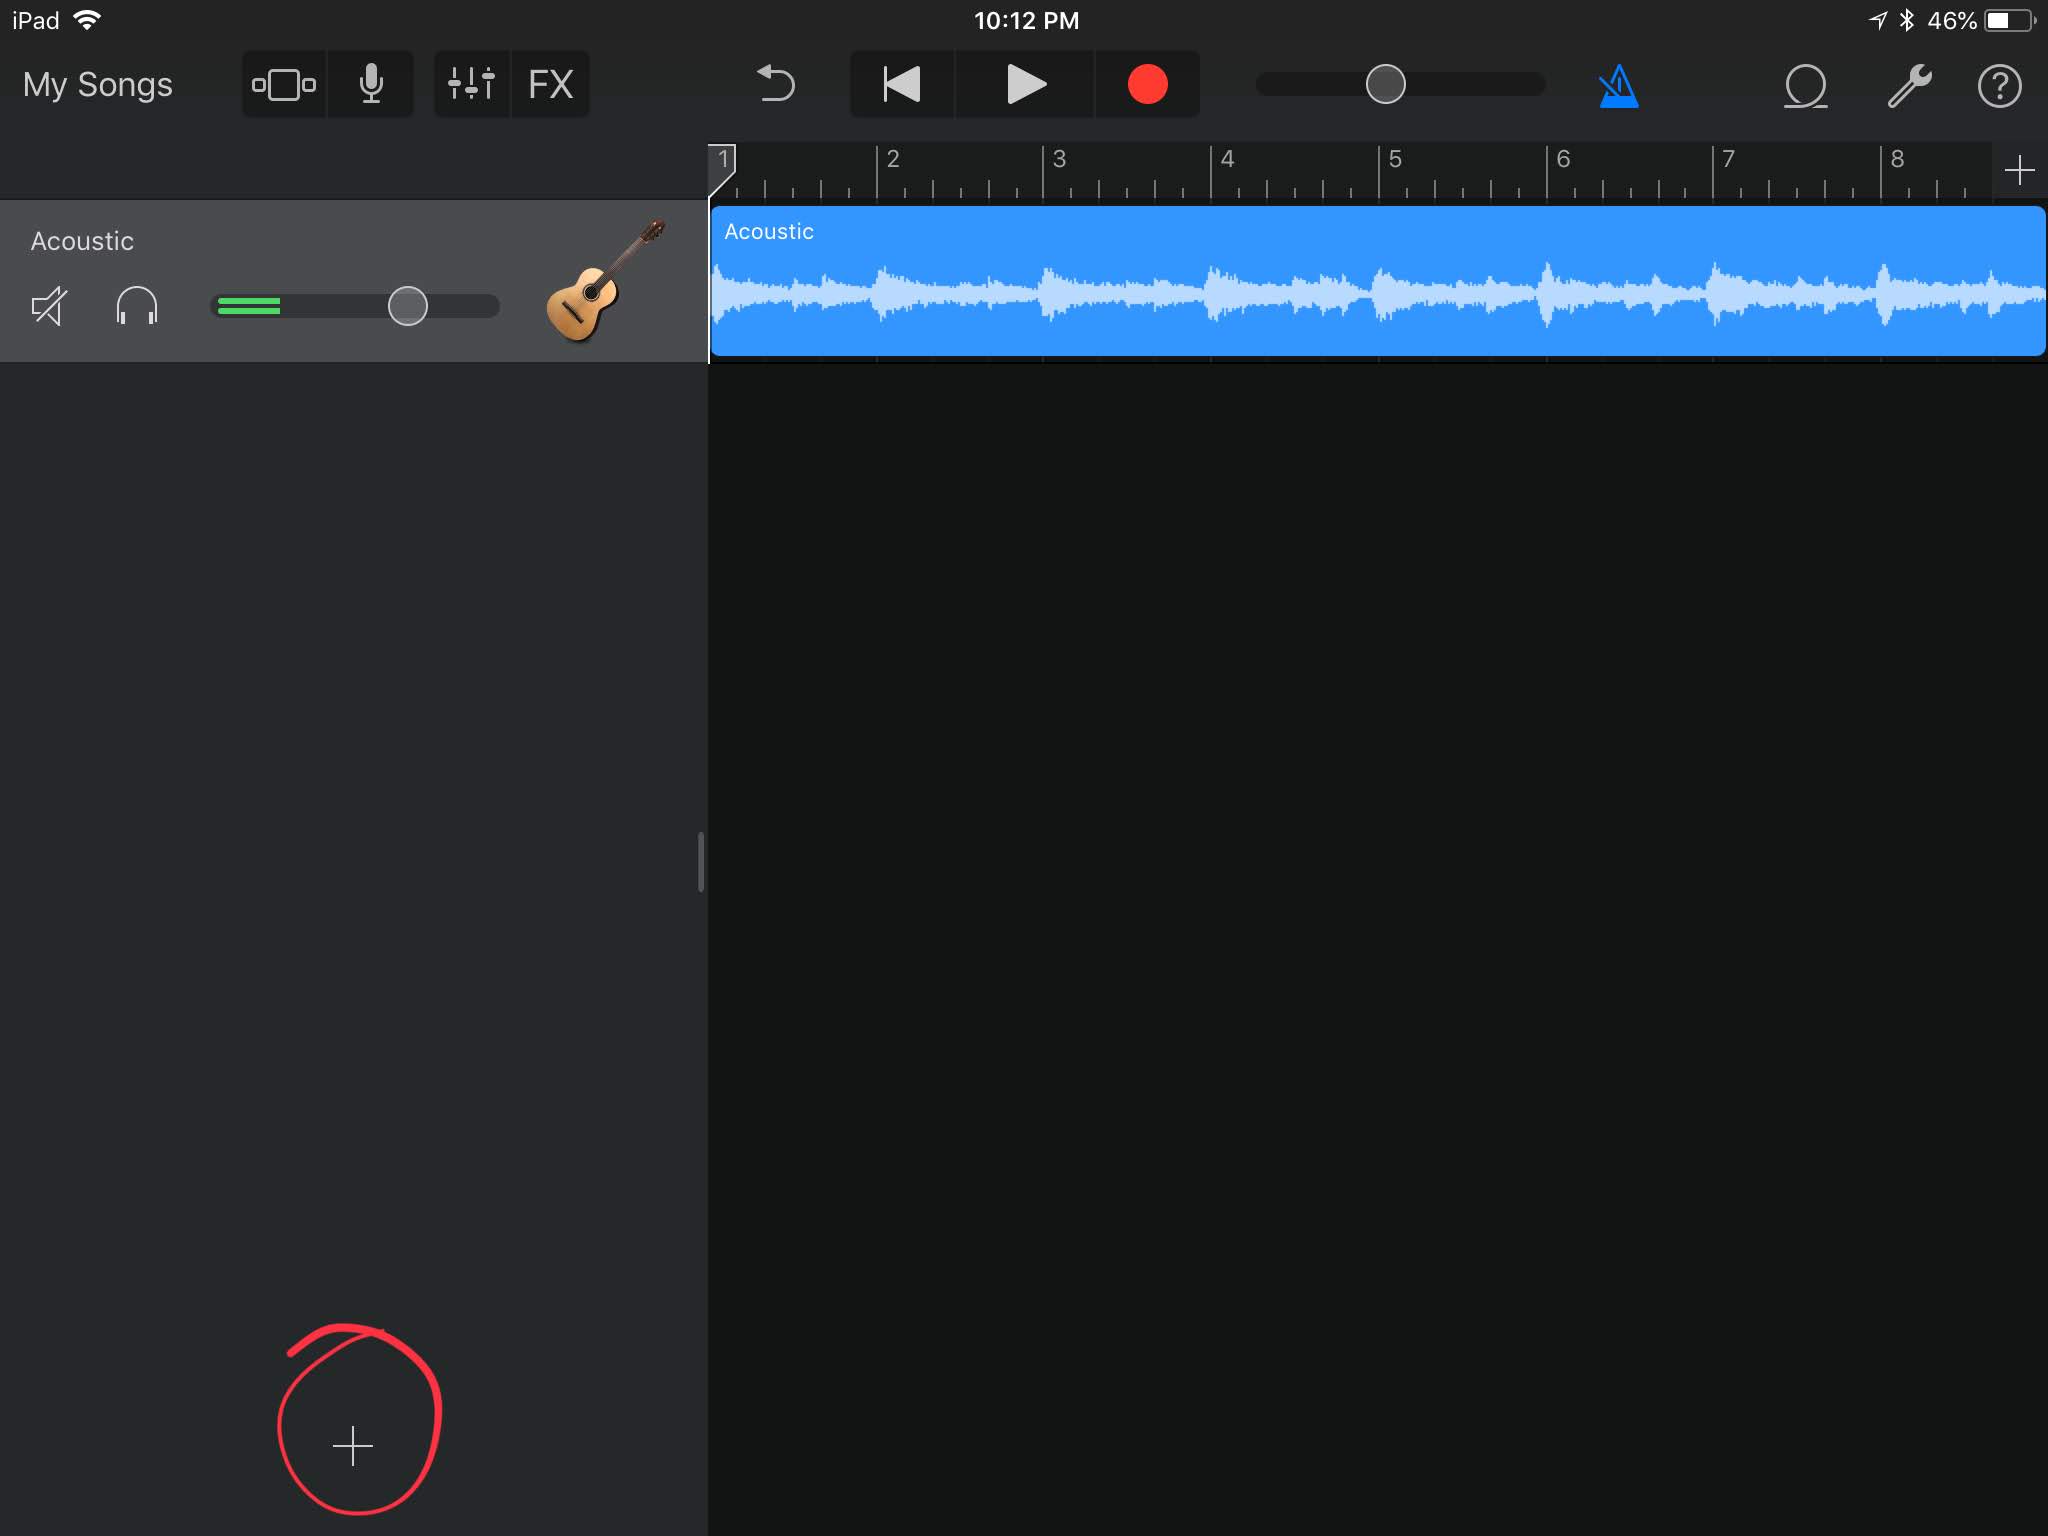
Next, let's add a little beat. Click on the + symbol in the bottom-lefthand corner.
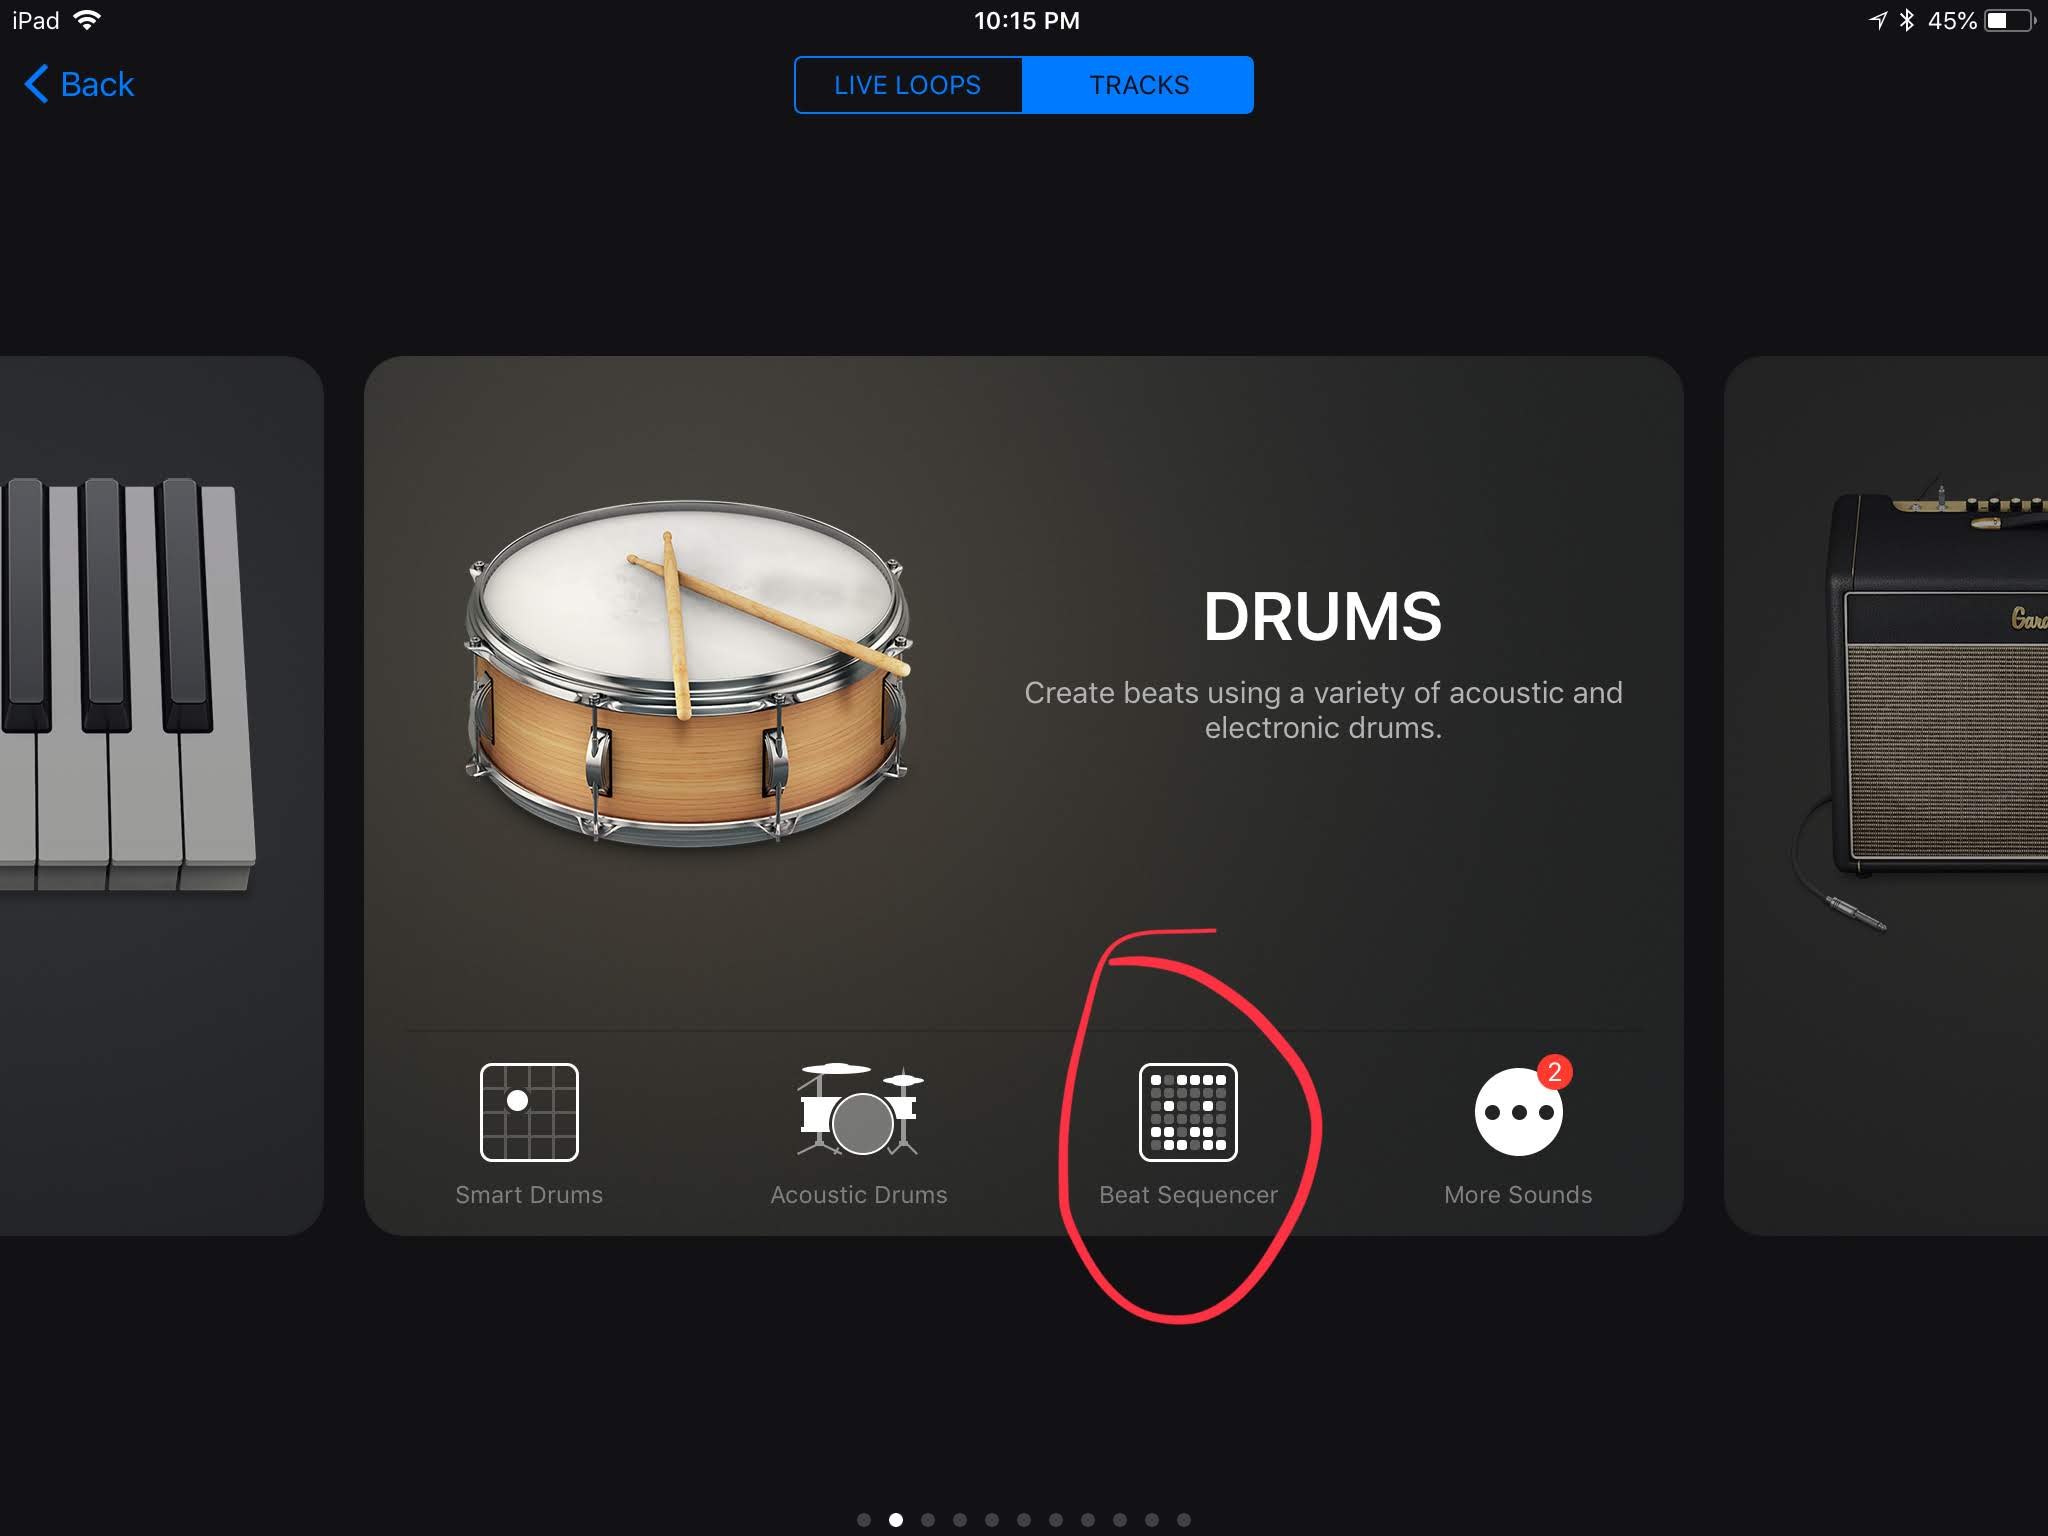
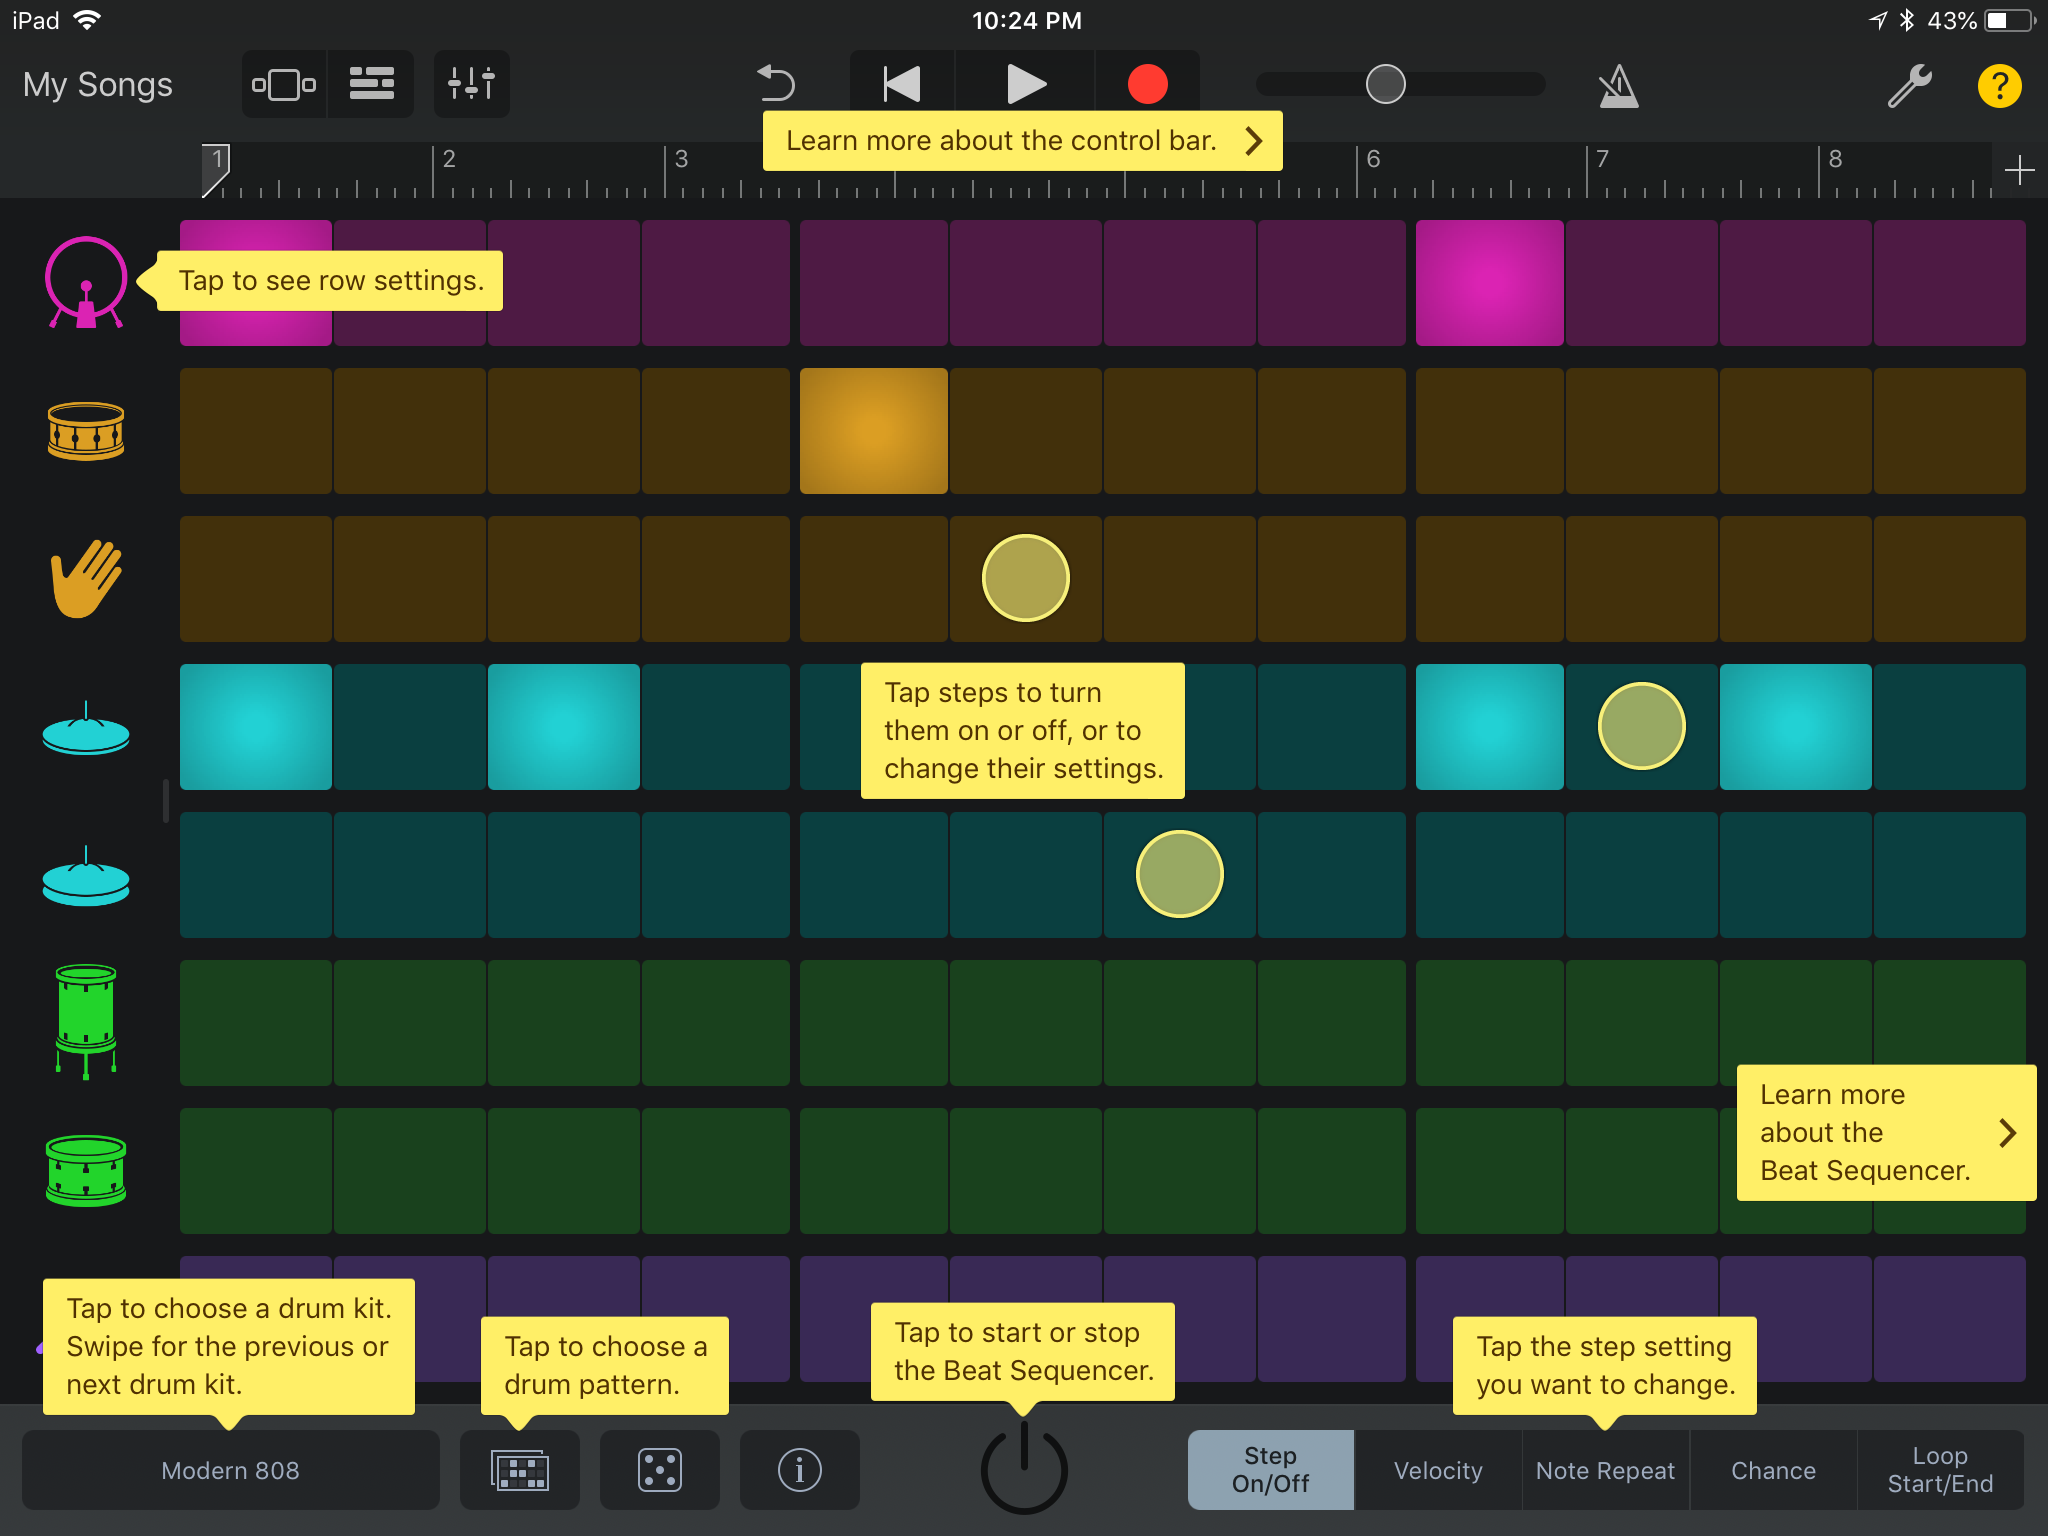
Swipe until you see drums. There are several ways to play in drums. All of them allow you try out different sounds, but each one allows you to interact with a beat in a different way.
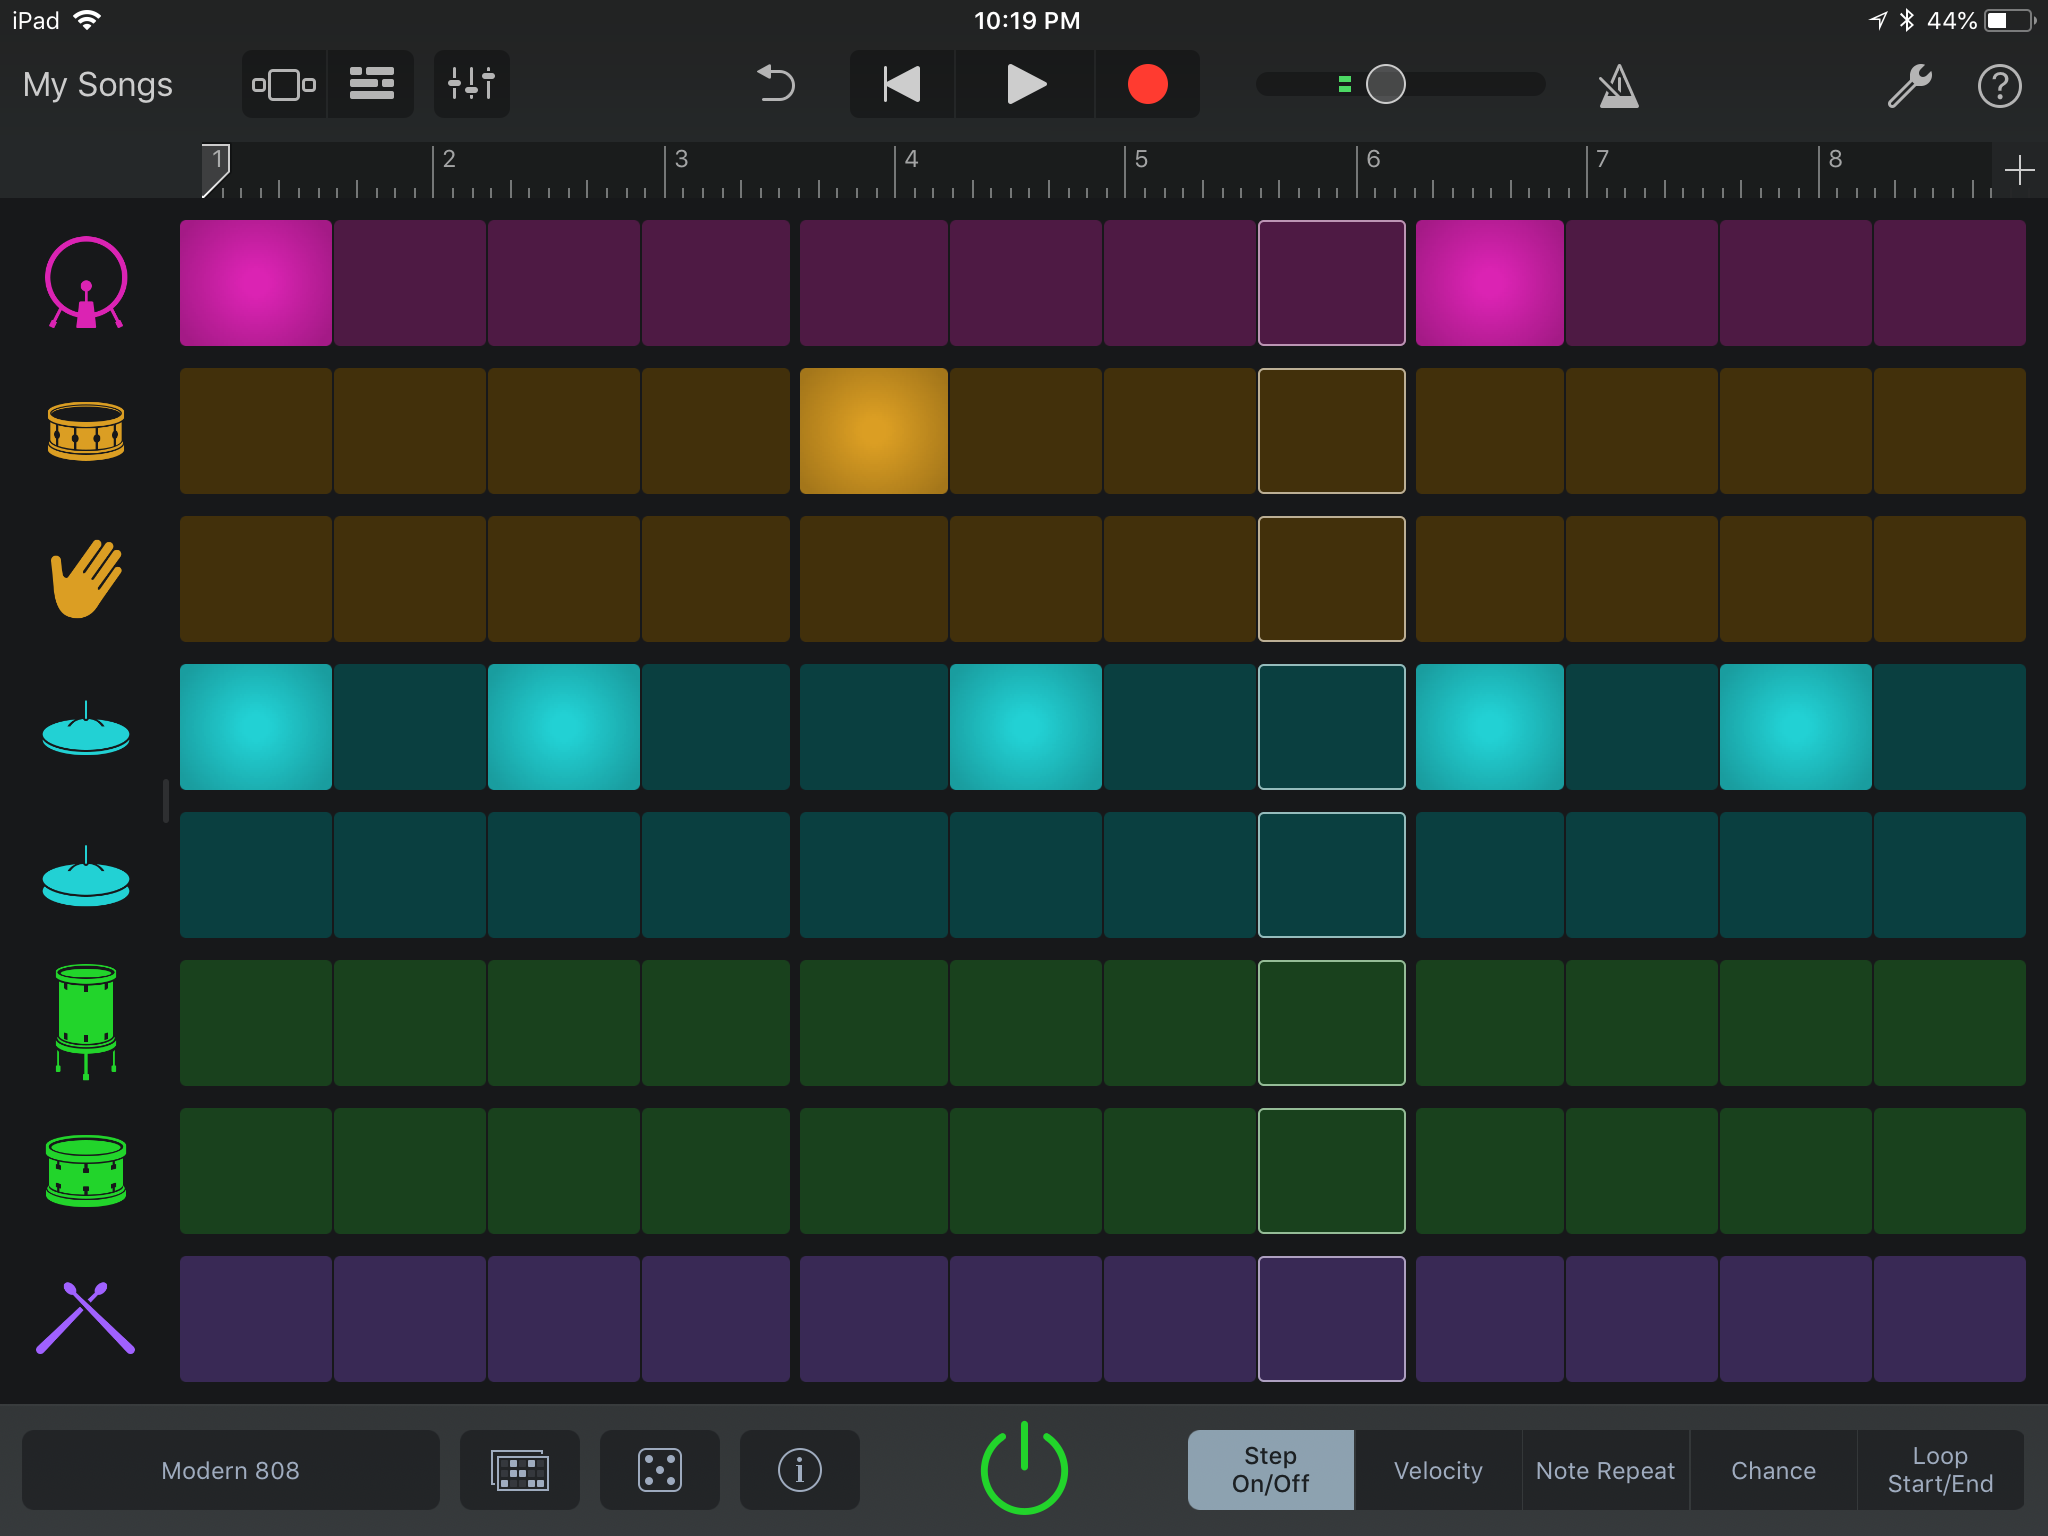
My favorite is the beat sequencer because it offers the most visual control.
Leaving it on the 808 (remember it can always be changed) I'm going to draw in a simple beat using the kick, snare, and hi-hat.
Now compared to other sequencers it's pretty rudimentary, but at the same time, I could probably write an instructable on the beat sequencer alone. There's a lot that can be adjusted to affect the way your beat plays out. Anytime you want to know something more about a feature in GarageBand just hit the question mark.
Once you're happy with the beat, hit record.
To Add or Not to Add? Working Towards a Rough Mix
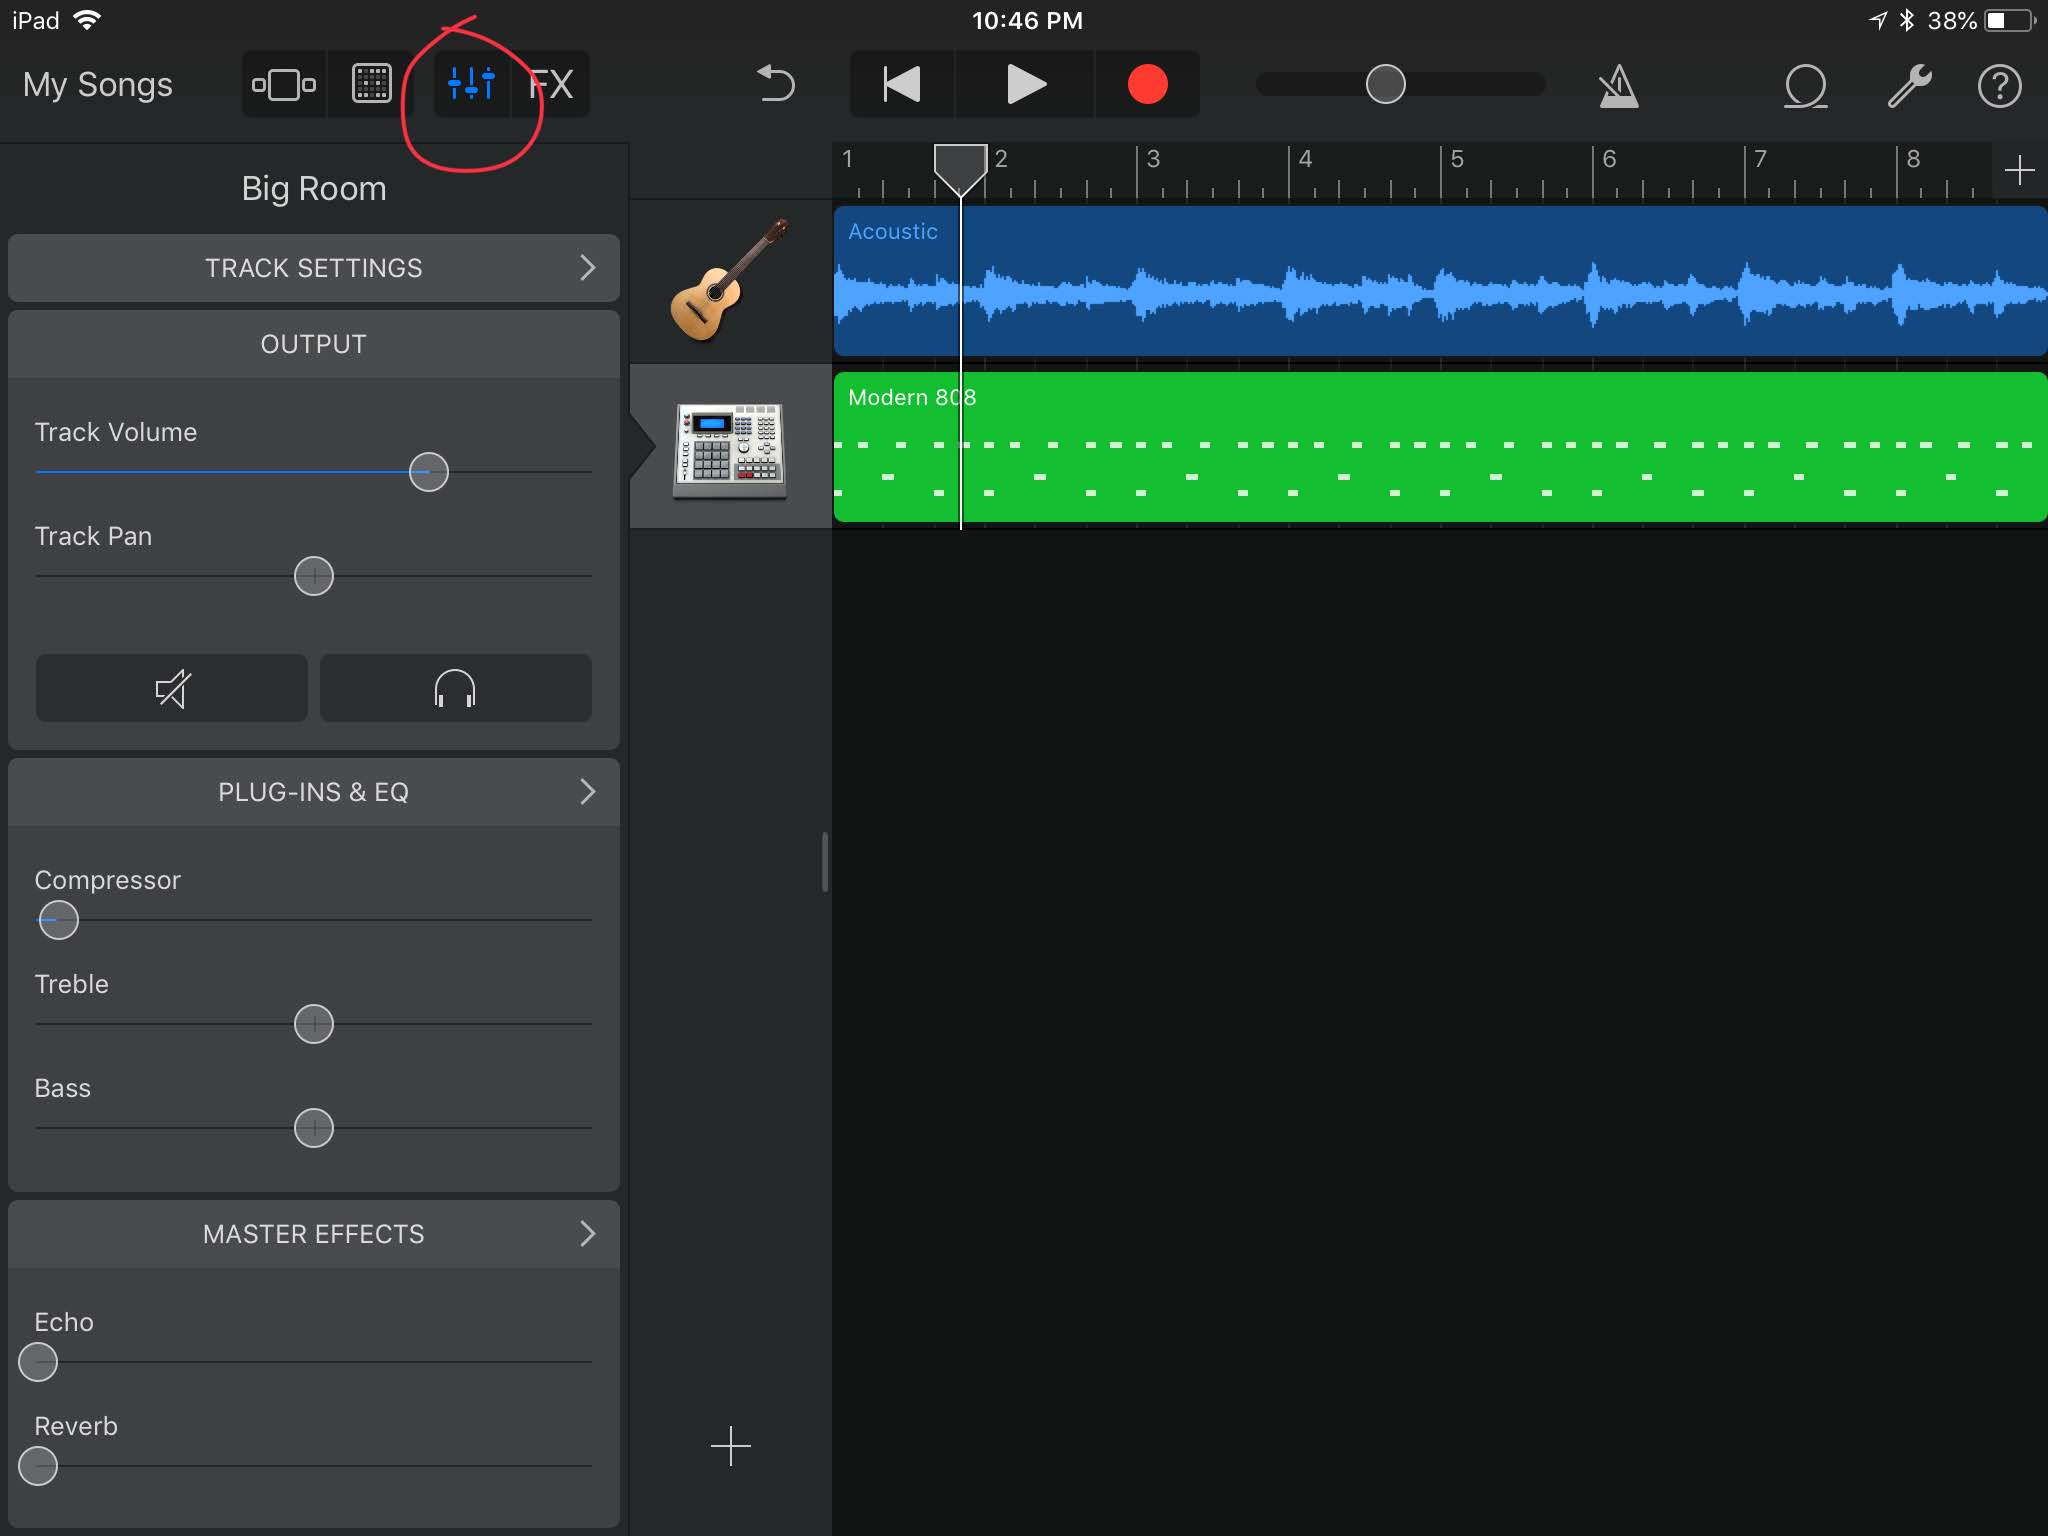
After recording the beat, tap the Track View icon again. Now depending on the style of song you're writing, maybe adding a beat was too much. Maybe you just wanted to continue on with the guitar, and that's perfectly ok. Maybe you decided to instead add a vocal track. Or maybe you duplicated the first section, and then added an accompanying guitar track on section B.
What I'm getting at is that you know how to add multiple tracks now. What you add really comes down to the style (genre) of song and what you're wanting to hear. Once you have the tracks and all the sections in your project. You'll want to mix it. Now the subject of mixing could very well be an instructable just I like I mentioned earlier with regards to the beat sequencer, but let's look at a couple basics.
Tap the track controls button to reveal a number of different controls and effects. Two of your most important controls are right at the top for every track; the output controls, volume, and pan.
Use the volume of each track to balance tracks against one another. Consider lowering other tracks before turning up one track. You can only turn up so much before you run out-of-room.
Use the pan to adjust where the track is in the stereo image, or in other words, how far to the left or right a track lives. Panning allows us another method for getting instruments out of each other's way. Rhythm guitars may be panned left and right, while bass guitar is more towards the center, vocals are in the center, and drums get spread out from left-to-right (GarageBand handles the drums for you). There are lots of resources to teach you panning techniques, and basic guide is provided here.
Setting track volume and pan for each track is often referred to as setting up a rough mix. It can provide a general idea for how the song will flow, and give you an idea of what finder details need to be worked out.
Speaking of Those Finer Details
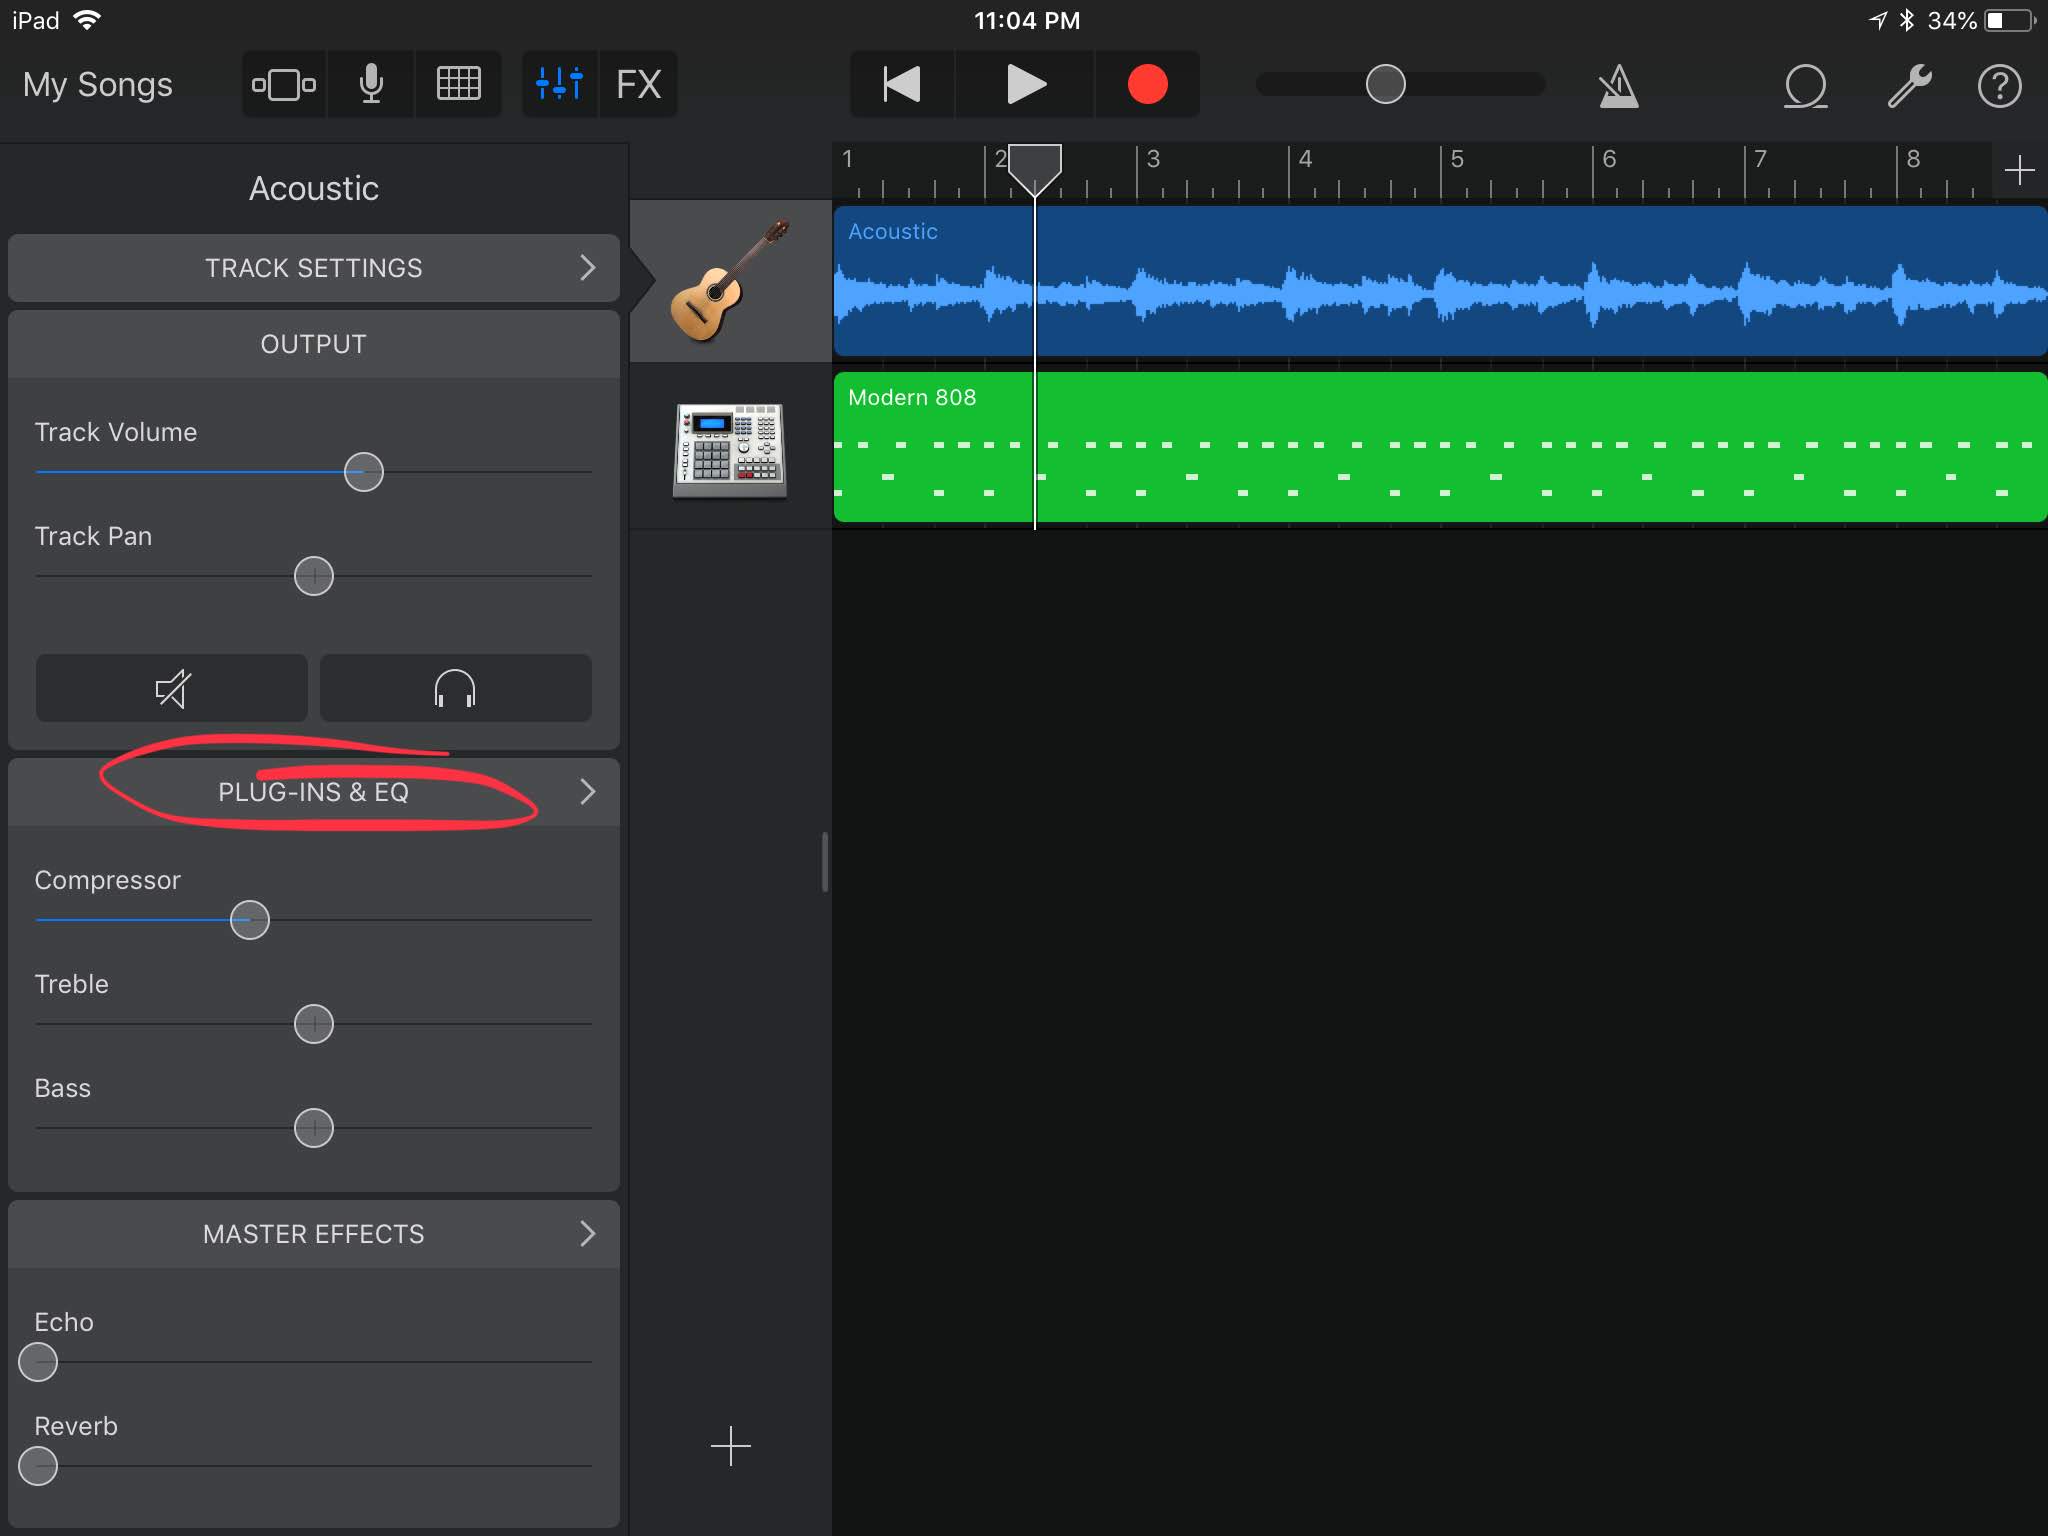
You'll notice a couple other sections under the track settings such as Plug-Ins & EQ and Master Effects.
By default, you are provided basic compression and EQ controls on each track. Tapping on Plug-Ins & EQ will allow you to adjust more advanced controls for each type of effect, turn off effects, add more effects (hit edit to add GarageBand effects or use other music making app effects), or even reorder effects(hit edit). Effect order does make a difference. Normally a track like a guitar might first hit a noise gate to remove any unwanted sounds during a moment you weren't playing (damn Air Conditioning, but seriously try to play in a quiet place away from other ambient sounds) then onto a compressor or eq (or eq and then compression, lots of audio geeks argue about this order) and then maybe something to give it a little space like reverb or delay. Each track can have its own sets of plug-ins to bring out different qualities of each instrument.
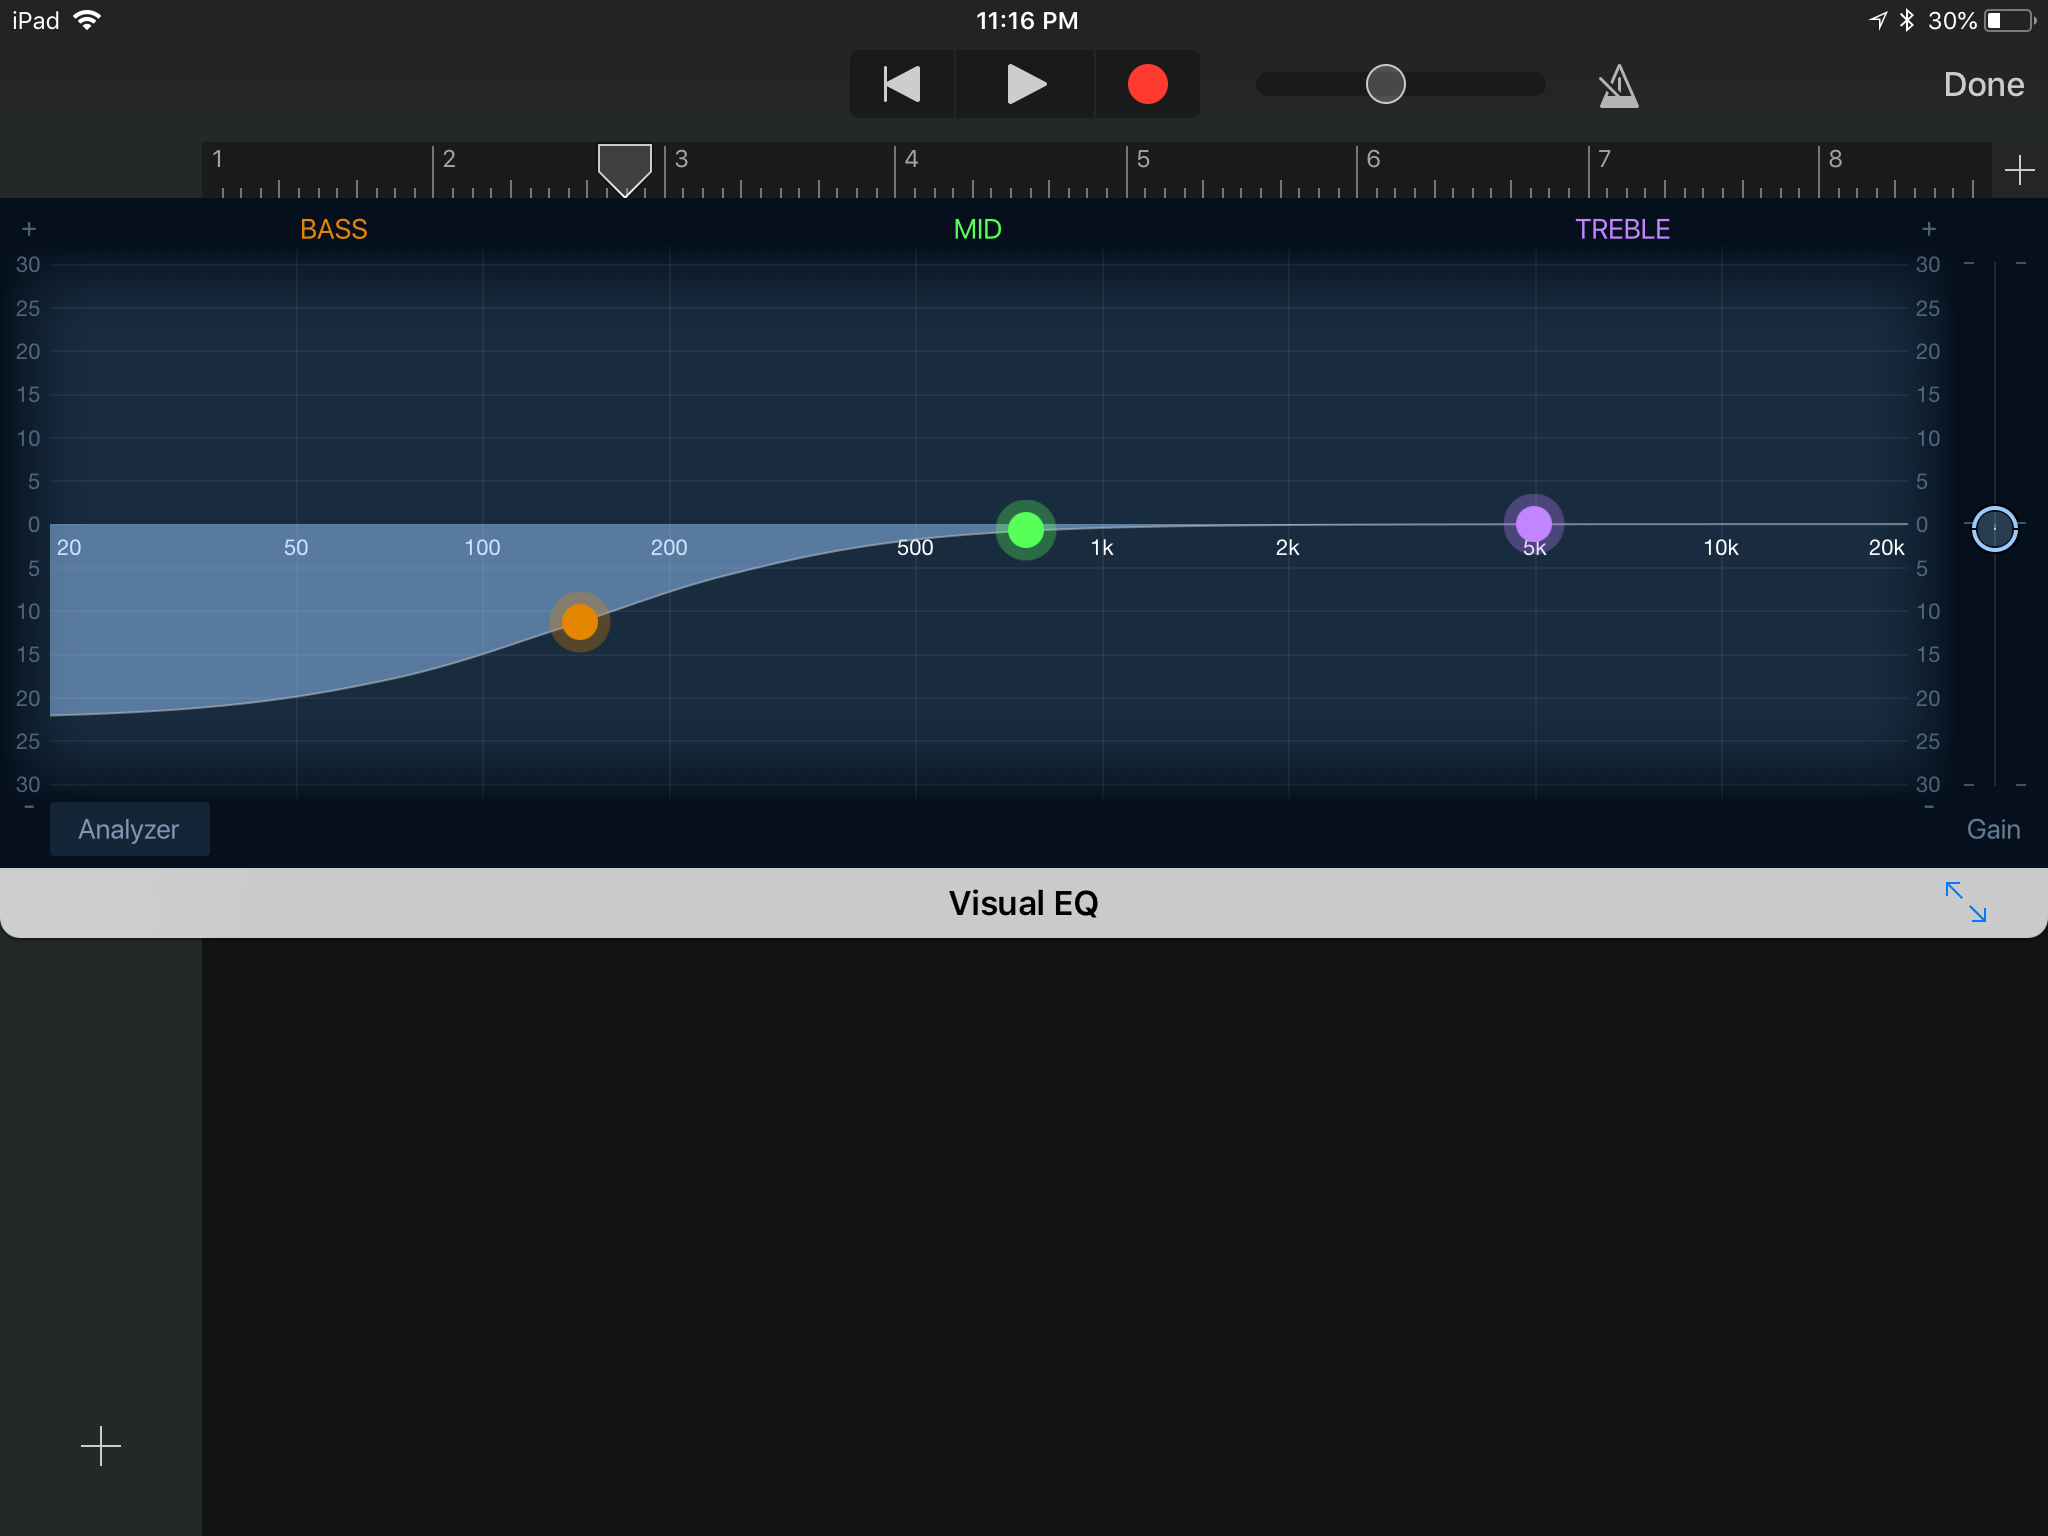
Ultimately a compressor allows us to control the dynamics of an instrument, typically used to average the loudness of an instrument but can be used in many other ways. EQ, short for equalization, allows us to change the frequency signature of an instrument.
On acoustic guitar, I'll typically roll off some of the low-end as pictured. This helps make room for a kick drum and/or bass guitar in the mix. A good rule-of-thumb to follow is to cut before boost, but if you do end boosting just pay attention to your track levels.
Lastly, there are master effects such as echo and reverb. You can send a small or large amount of a track to each of these effects, but the type of echo or reverb used will be the same for each track. Tastefully using the reverb can help tie together tracks that sound like they weren't in the same space, to begin with. And that's really what you're trying to accomplish here, fooling the listener into thinking all these different tracks belong together.
Are You Happy With It?
When is a song done? You could ask a painter a similar question, how do they know when they're finishing with their masterpiece? Well, that's up to you, or your client. This may be every artist's dilemma; when to know to walk away.
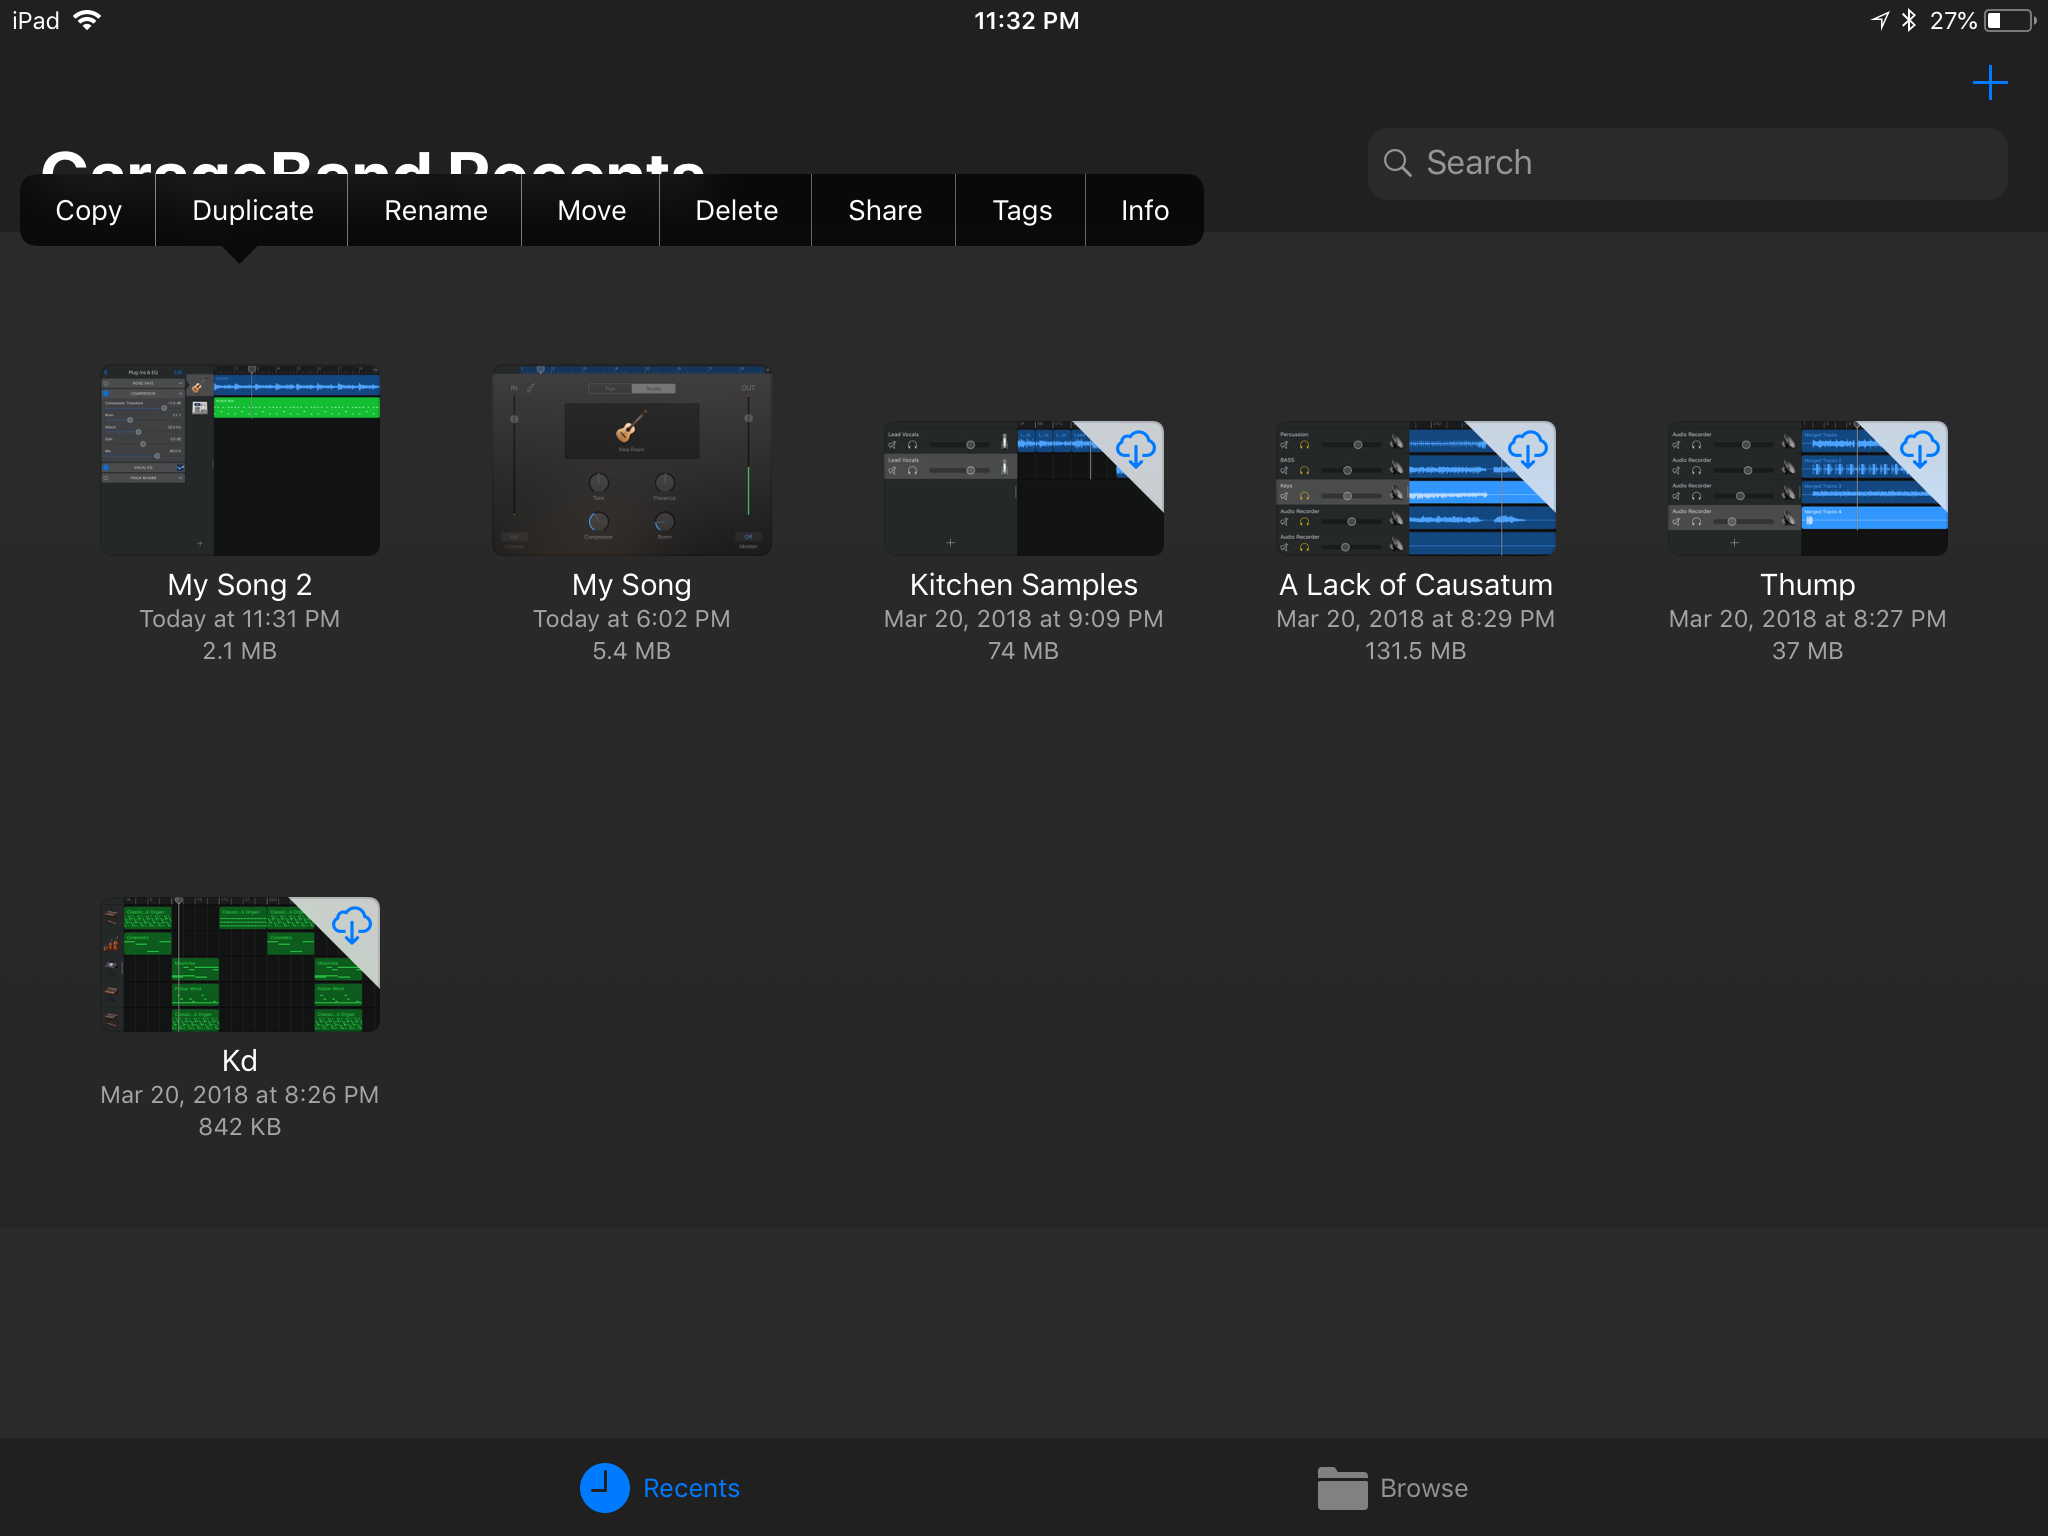
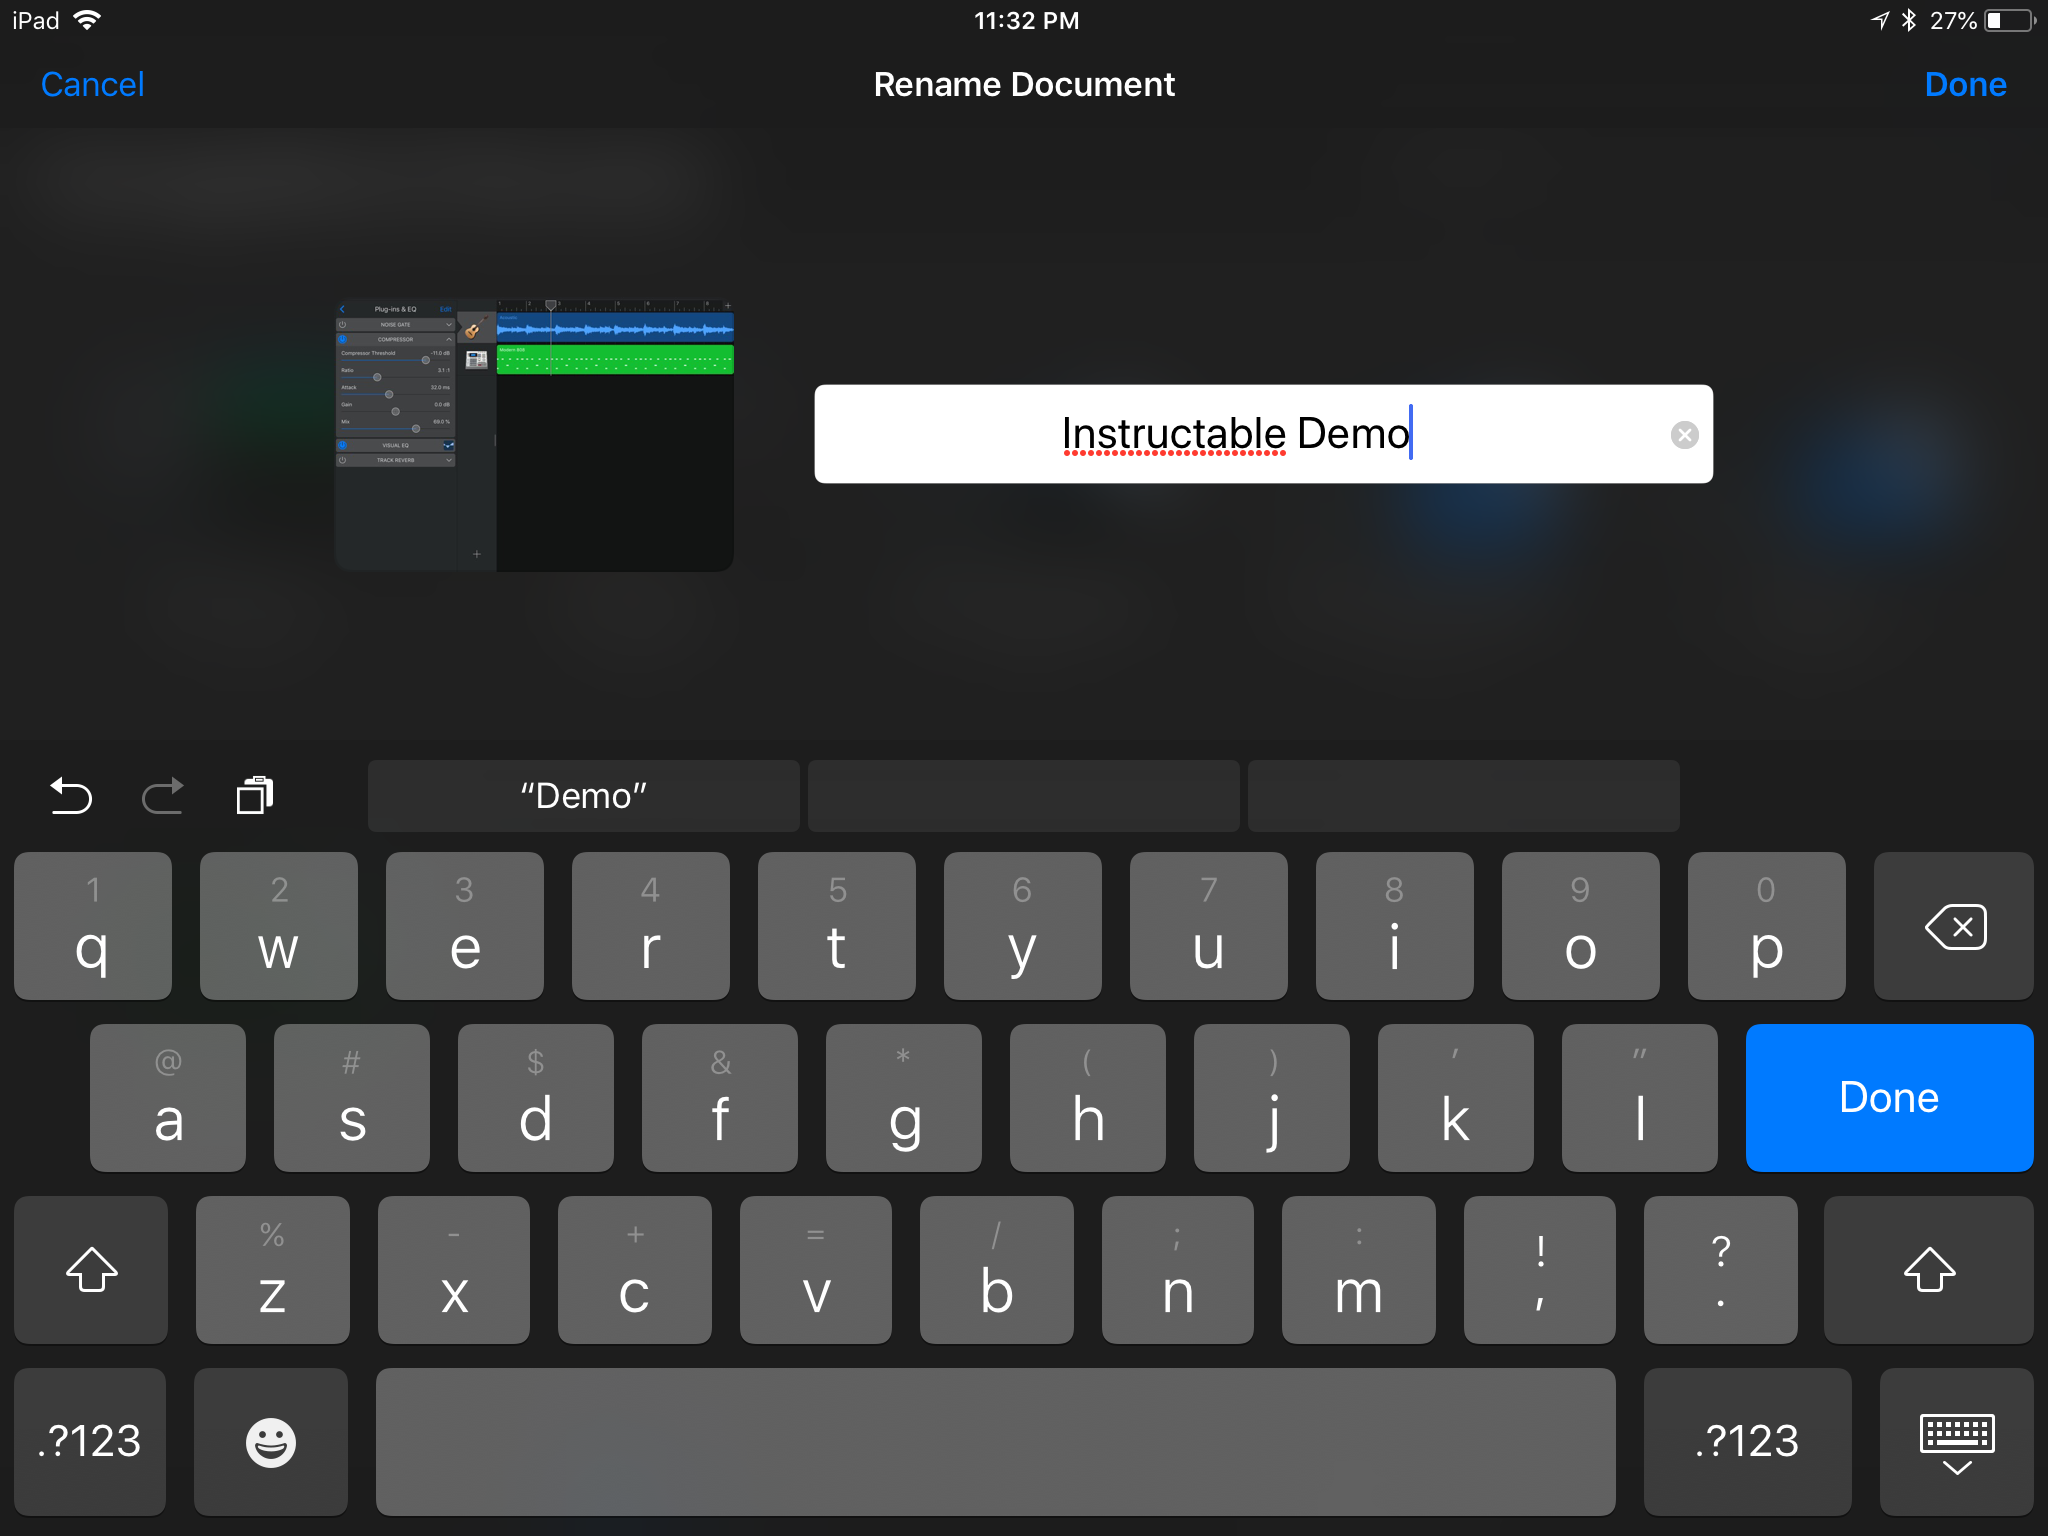
When you are ready to walk away, tap on the My Songs button. Lightly hold down on the project, and rename it.
As you can see there a few other options, such as sharing it to another location like your Google Drive or sharing it with the world the using Soundcloud. You can even share it with another music app to mangle it some more.
Now we barely scratched the surface, but hopefully, you found this provided a decent introduction to using GarageBand.
With that said, if you find yourself recording more and more you may then want to consider upgrading your recording rig. Even something as small as the Shure MV51 can make a world of difference when compared to the iPad's internal mic. There are actually a ton of different mic solutions specifically created for iOS as well as recording interfaces. A recording interface can allow you to record higher quality audio, plug in an electric guitar, and use studio-quality microphones. Check IK Multimedia and Apogee for several different affordable options.
The folks over at Macworld also have a decent overview for turning your iPad into a nice portable recording solution with upgraded recording hardware.
While GarageBand is only available on iOS and MacOS platforms, you may also want to consider upgrading to a different DAW (the recording software) that opens up many new doors. Personally, I love using Ableton Live for my music production, and I tend to use Reaper for voiceover recording/editing. They both are extremely powerful while living on opposite ends of the cost spectrum, and can work on MacOS or Windows. I believe Reaper is even available for Linux!
Have fun, make noise, and if you have any comments or suggestions then I'm all ears.