Record Muscle Signals (EMG) Using Muscle BioAmp Blip
by Upside Down Labs in Circuits > Sensors
850 Views, 0 Favorites, 0 Comments
Record Muscle Signals (EMG) Using Muscle BioAmp Blip

In this tutorial, we are going to show you how to create a simple EMG system at your home so that you can easily record and visualize muscle signals in real-time using Muscle BioAmp Blip and Arduino Uno.
But before moving forward, let's understand a brief about Electromyography.
What is Electromyography (EMG)?
Electromyography is a technique that measures muscle response or electrical activity in response to a nerve’s stimulation of the muscle. We can use this electrical activity to detect neuromuscular abnormalities or create solutions for some crazy real-world problems like making artificial limbs for amputees.
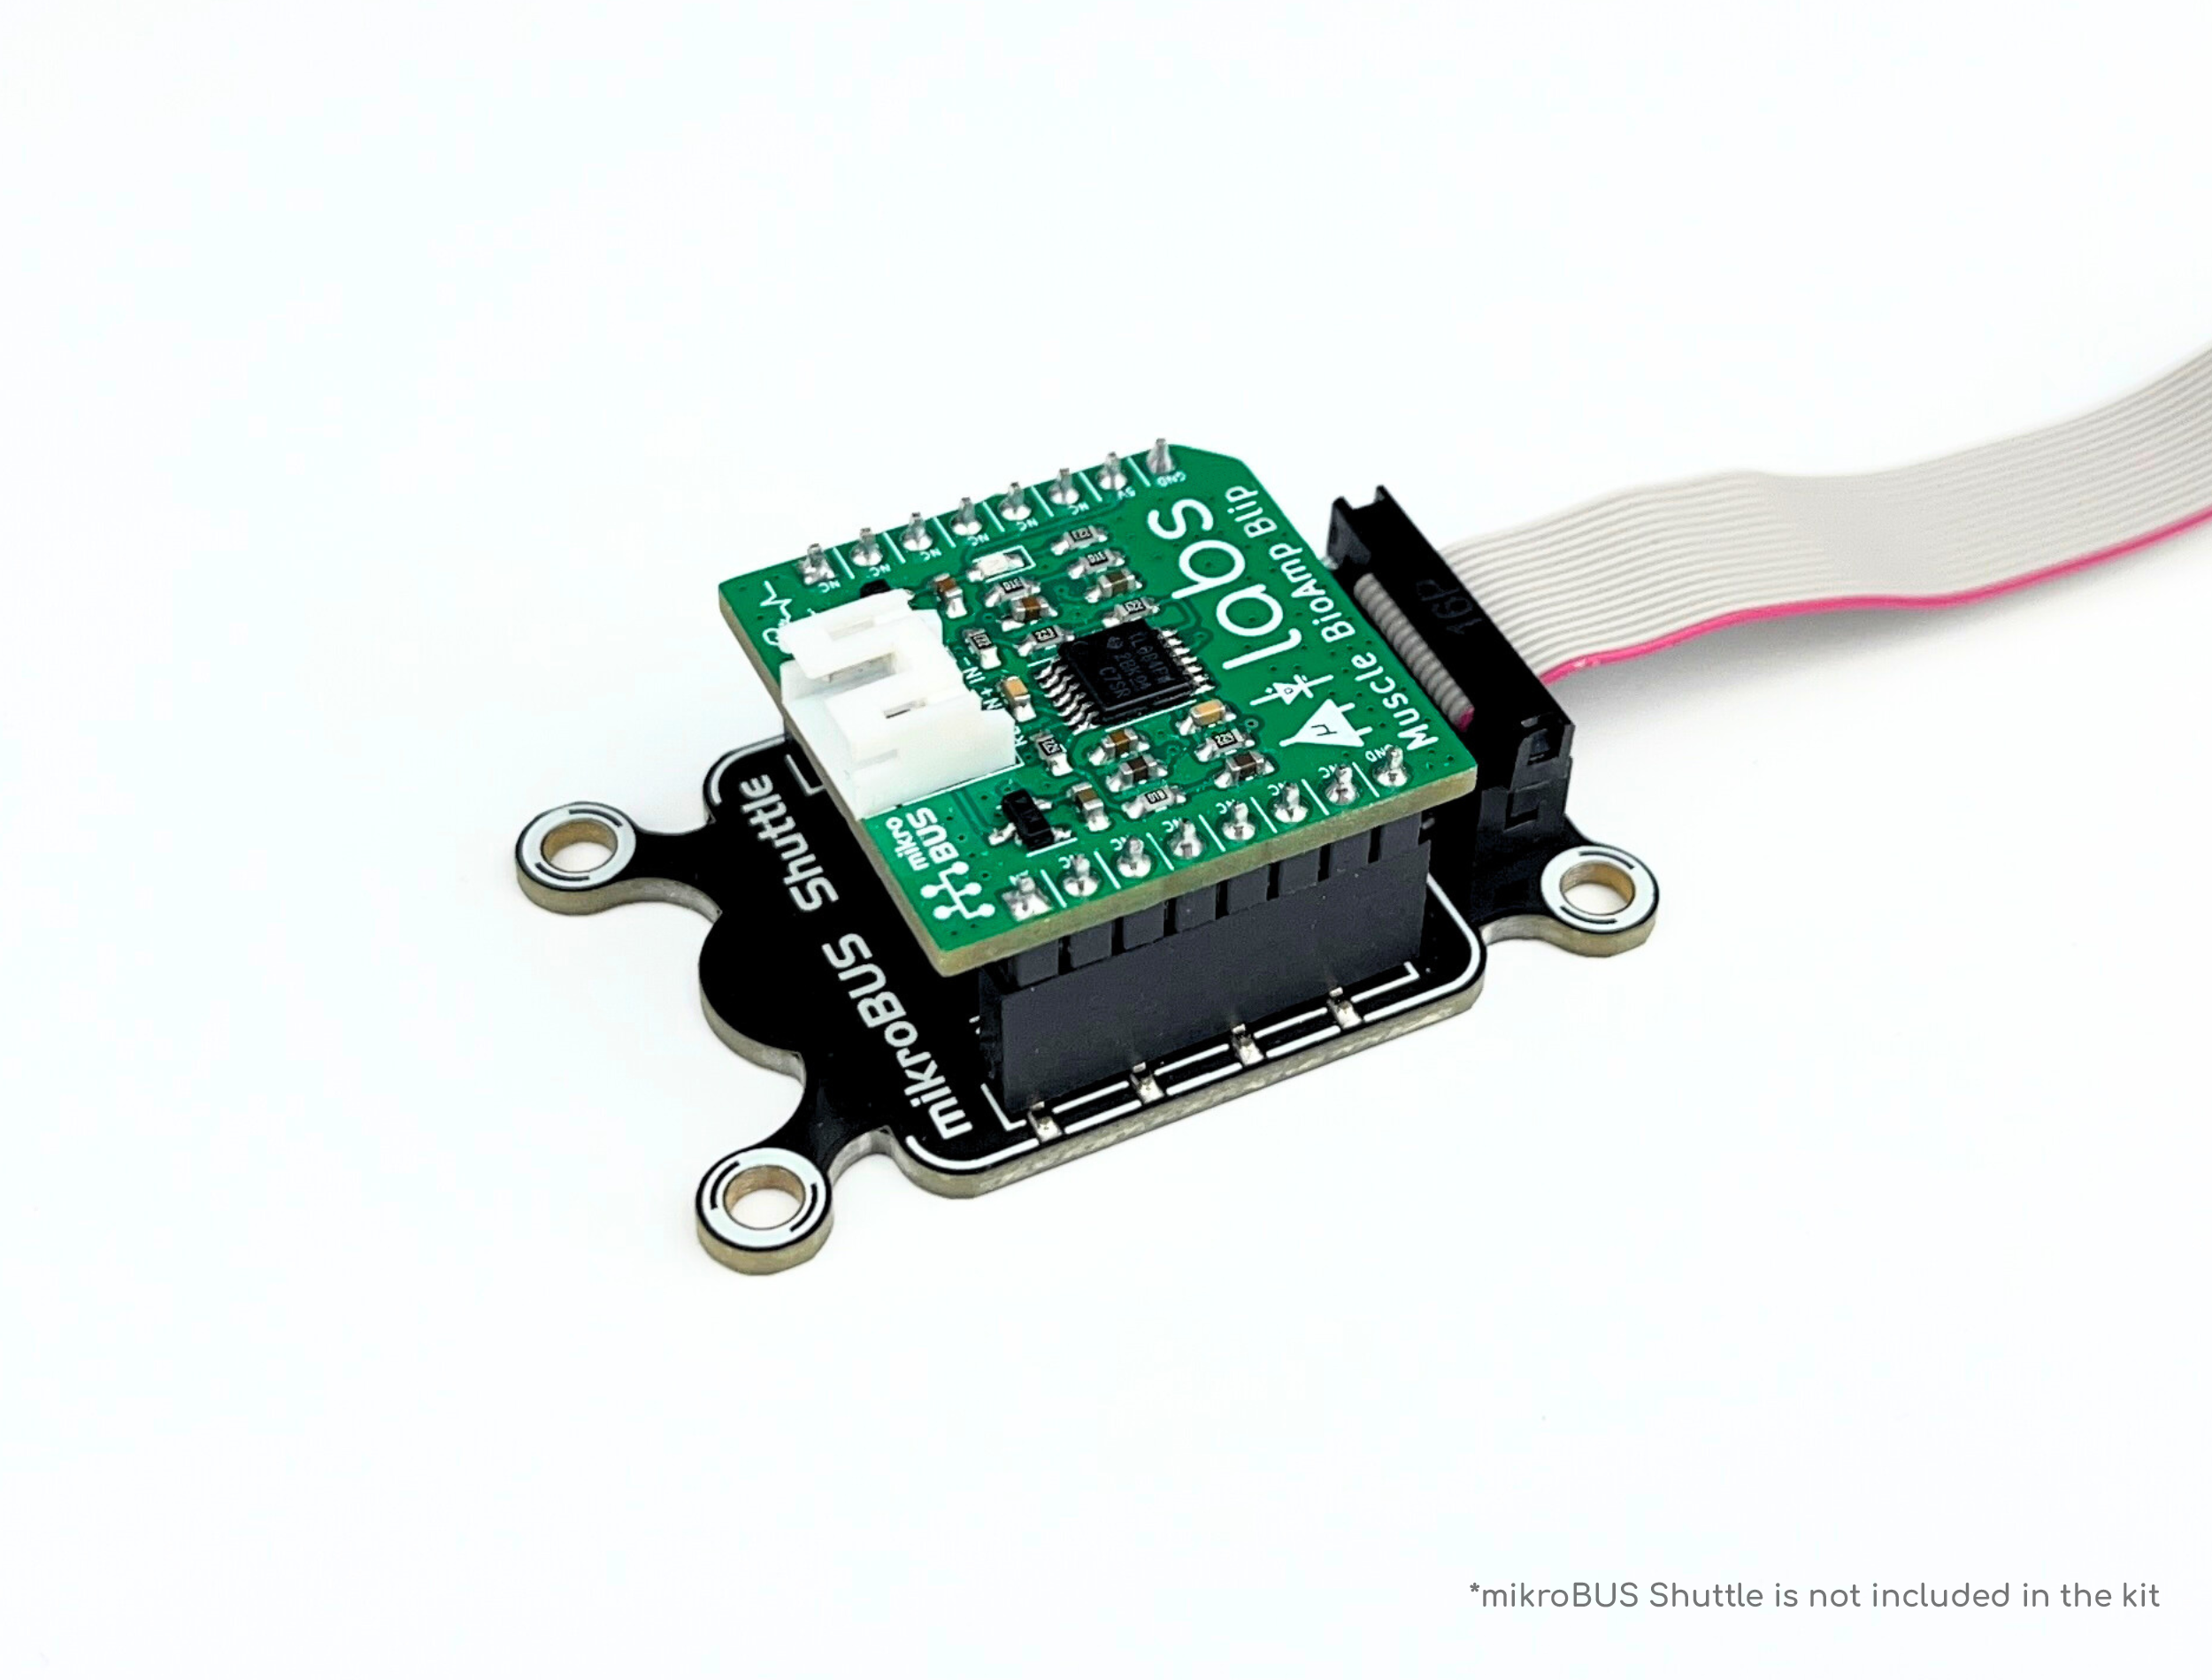
About Muscle BioAmp Blip:
Muscle BioAmp Blip is a single channel mikroBUS™ compatible ElectroMyography (EMG) sensor for precise recording of muscle signals. It allows you to add the EMG functionality to your projects at ease. You can either connect it to any mikroBUS port or even a breadboard to get started.
Supplies
HARDWARE:
1 x Muscle BioAmp Blip Kit (Upside Down Labs Store | Tindie Store)
- The Kit includes:
- Muscle BioAmp Blip x 1
- BioAmp Cable v3 (100cm) x 1
- Boxy Gel Electrodes x 6
- Muscle BioAmp Band x 1
3 x Jumper cables
1 x Arduino Uno R3 with USB cable (Type A to Type B)
1 x Laptop (not connected to the charger/AC power supply)
1 x Breadboard or hardware with mikroBUS port (like mikroBUS Shuttle)
SKIN PREPARATION KIT & ELECTRODE GEL:
1 x NuPrep skin preparation gel (Upside Down Labs Store | Tindie Store)
1 x Wet wipe
1 x Electrode Gel (only if using Muscle BioAmp Band) (Upside Down Labs Store | Tindie Store)
SOFTWARE:
Arduino IDE v1.8.19 (Legacy IDE)
Connecting Electrode Cable

Connect the BioAmp Cable to Muscle BioAmp Blip as shown in the connection diagram. We also have other variants of the BioAmp Cable so don't go with the color coding and focus on the REF, IN+ and IN- written on the Muscle BioAmp Blip.
Skin Preparation

Apply Nuprep Skin Preparation Gel on the skin surface where electrodes would be placed to remove dead skin cells and clean the skin from dirt. After rubbing the skin surface thoroughly, clean it with a wet wipe.
About Nuprep Gel:
Nuprep skin preparation gel is a mildly abrasive, highly conductive gel that should be applied before placing the electrodes on the skin to improve measurements. When applied gently, it strips away the top layer of skin and moistens the underlying skin layer which reduces the skin impedance with minimal skin irritation and discomfort.
Electrode Placements


We have 2 options to measure the EMG signals, either using the gel electrodes or using dry electrode based EMG band. You can try both of them one by one.
Measuring EMG using Gel electrodes:
- Connect the BioAmp Cable to gel electrodes,
- Peel the plastic backing from electrodes
- Place the IN+ and IN- cables on the arm near the ulnar nerve & REF (reference) at the back of your hand as shown in the connection diagram.
Measuring EMG using Muscle BioAmp Band, a dry electrode based EMG band:
- Connect the BioAmp Cable to Muscle BioAmp Band in a way such that IN+ and IN- are placed on the arm near the ulnar nerve & REF (reference) on the far side of the band.
- Now put a small drop of electrode gel between the skin and metallic part of BioAmp Cable to get the best results.
Connections for Muscle BioAmp Blip


There can be various ways of connecting the Muscle BioAmp Blip. Some of the options are given below:
Option 1: Directly connecting jumper cables
You can directly connect the jumper cables (male to female) on the header pins of Muscle BioAmp Blip on the points mentioned below:
- 5V
- GND
- AN
Option 2: Using a breadboard
If you are thinking to connect more components/sensors and want to integrate Muscle BioAmp Blip in the complete circuit then it will be better to use a breadboard. Snap the Muscle BioAmp Blip on the breadboard and connect the jumpers (male to male) on the points mentioned below:
- 5V
- GND
- AN
Option 3: Connecting via mikroBUS port
You can also connect the Muscle BioAmp Blip to any hardware that has mikroBUS port like mikroBUS shuttle, mikroBUS Arduino UNO Click Shield to name a few.
Connecting With Arduino UNO R3

Now connect the Muscle BioAmp Blip to Arduino UNO R3 as directed below:
- 5V to 5V
- GND to GND
- AN to A0
Download Arduino IDE

Download the Arduino IDE from the link given below:
https://www.arduino.cc/en/software
(We have used Arduino IDE version 1.8.19 for this project)
After downloading, connect the Arduino Uno to your laptop using the USB Cable (Type A to Type B)
Note: Make sure your laptop is not connected to a charger and sit 5m away from any AC appliances for best signal acquisition.
Coding Time!!
Copy paste any one of the Arduino Sketches given below in Arduino IDE:
- EMG Envelop: https://github.com/upsidedownlabs/BioAmp-EXG-Pill/blob/main/software/EMGEnvelop/EMGEnvelop.ino
- EMG Filter: https://github.com/upsidedownlabs/BioAmp-EXG-Pill/blob/main/software/EMGFilter/EMGFilter.ino
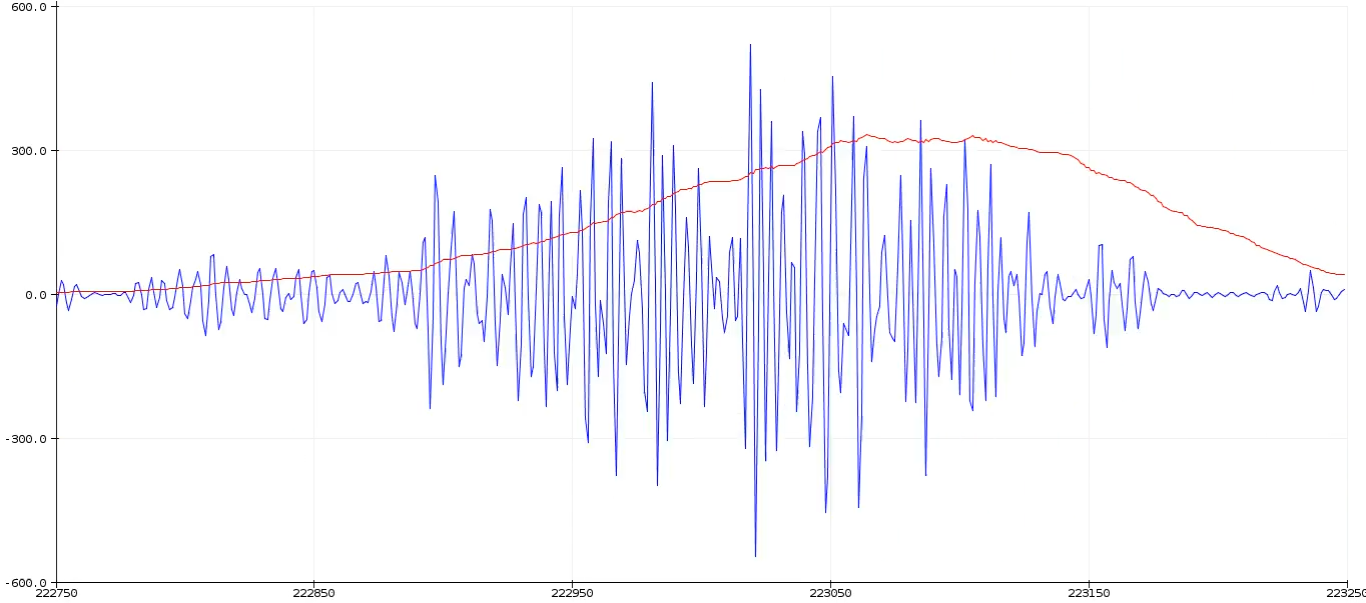
After flashing the code, open the serial plotter to visualize the EMG signals.
Note: Make sure when you open the serial plotter, the baud rate is set to 115200
Flex Your Arm

Enjoy, finally you have completed the project. Now flex your arm to visualize the muscle signals in real time on your laptop. Similarly you can try to record EMG from other parts of your body like biceps, triceps, cheeks, thighs, etc.
You are all set to explore on your own and make amazing HCI projects at the comfort zone of your home.
Let us know your feedback in the comments and feel free to ask any questions.
You can also mail us at support@upsidedownlabs.tech for any kind of support while you are making this project.