Recolor Photos Using Layers in Photoshop
by WhiteWolfeFCO in Design > Digital Graphics
3540 Views, 12 Favorites, 0 Comments
Recolor Photos Using Layers in Photoshop

In this Instructable, we will take a step by step look at
recoloring images in Photoshop. The purpose of this Instructable is to provide an accessible guide for Photoshop beginners to use in order to recolor an image using layers. While this guide will focus on producing a black and white image with a colored subject, the steps can be translated to any layer-based recoloring.
In the last 10 years it seems as if everyone either has a digital camera or a smart phone capable of taking high resolution photos. Practically everyone wielding a smart phone or digital camera can now be a photographer. Technology such as cameras and smart phones have become so easy to use even infants are capable of becoming the next Anna Leibowitz. However, taking the photos is the easy part. What takes real skill is the process of editing your photos. A skill that could come in handy regardless if you’re a student or a professional.
As taking photos becomes more popular, so does the process of editing them afterwards. What was once only a job reserved for professionals, editing photos is now a skill set that anyone can learn. Today, all you must do is provide the photo, as most personal computers come standard with some form of photo editing software.
In these instructions, I am going to advise you through a step by step process in which you will take a colorized photo, render it black and white, then recolor the subject of the photo. In this case, I will be working with an unedited photo of a car racing down a street. The goal is to render the photo black and white, followed by recoloring the car back to its original color.
Follow these instructions step by step without any deviation and you will have the same result with your photo!
Key Terms
Photoshop has hundreds of unique tools and functions that allow users to edit their work. However, you will only need to be familiar with the following tools for this tutorial.
Adjustment Layer- A tool that allows users to add layers to a photo without editing the original photos.
Brush Tool- A tool that allows users to manipulate specific parts of an image.
Quick Selection Tool- A tool that allows users to group significant portions of an image simultaneously.
Time Requirements
A novice user may take anywhere from 10-15 minutes to complete the tutorial. A user more familiar with Photoshop could complete the tutorial in less than five minutes. The more you practice the quicker you will be able to complete your editing.
Since some images may be too small or large, you may need to adjust the images size. In order to do this, double-click the image percentage at the bottom left hand corner of Photoshop. Using the digits on your keyboard you can Increase or decrease image percentage to your liking. It is recommended you make the image large enough so you can see the smallest details.
Import Image
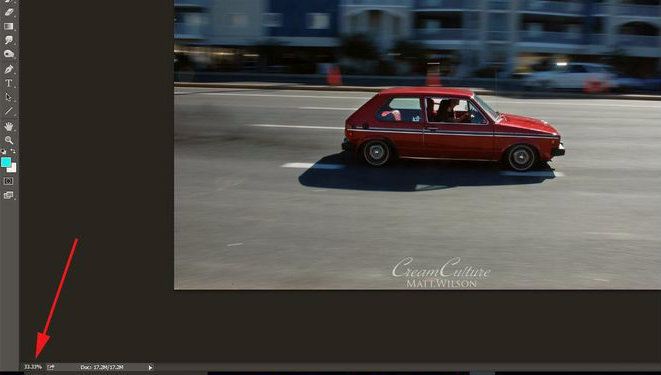
In order to complete any Photoshop project, an image must be selected for editing. To do this, select the File option in the top left hand corner of Photoshop. From there, select the Open option, and double-click the image you desire to edit.
Since some images may be too small or large, you may need to adjust the images size. In order to do this, double-click the image percentage at the bottom left hand corner of Photoshop. Using the digits on your keyboard you can Increase or decrease image percentage to your liking. It is recommended you make the image large enough so you can see the smallest details.
Select the Adjustment Layers Icon
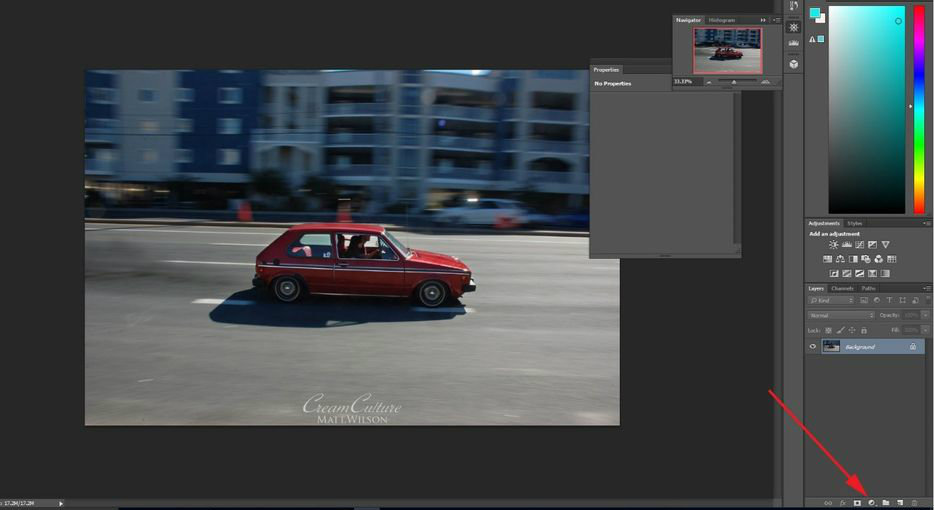
Once the desired image is selected and sized appropriately, the recoloring process can begin. Begin this process by adding a new layer. To do this, select the fourth icon in the properties tab, which is located at the bottom right hand corner of Photoshop.
Add Desired Layer Effects
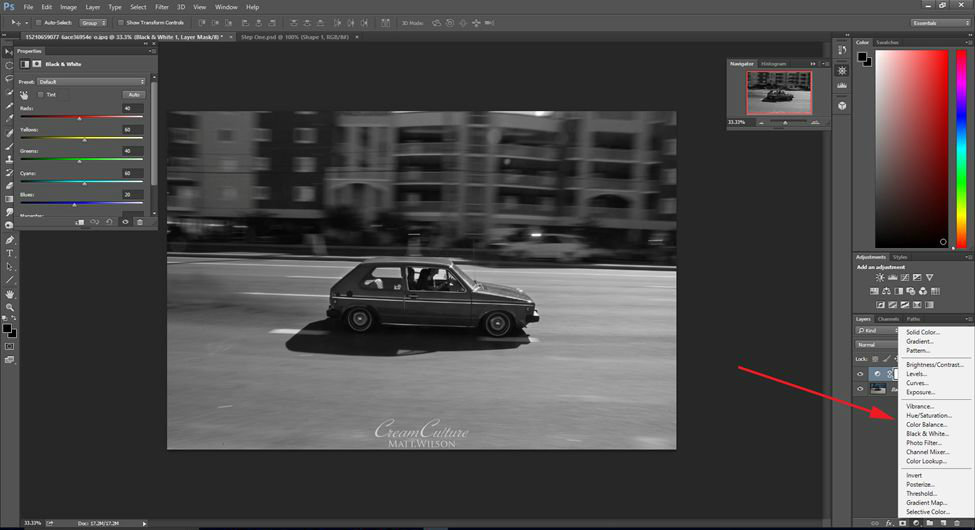
After selecting the layers icon, a variety of options will appear. For this process, we will add two layers: Black and White and Hue/Saturation. The Black and White option will add a Black and White layer of your image, but will not alter the original image. The Hue/Saturation option will allow you to adjust the lightness, hue, and saturation of the image (via slider bars) to your liking without altering the original image. In order to achieve your desired lightness, hue, and saturation, experimenting with each slider bar may be necessary.
Select the Quick Selection Tool
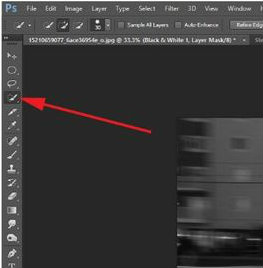
When the desired layers are added, we can now begin to recolor the subject of the image. To complete this task, we will utilize the quick selection tool. The quick selection tool can be found on the vertical toolbar on the left hand side of the screen. We will use the quick selection tool to select the subject of the photo for editing
Chnage Fill Color
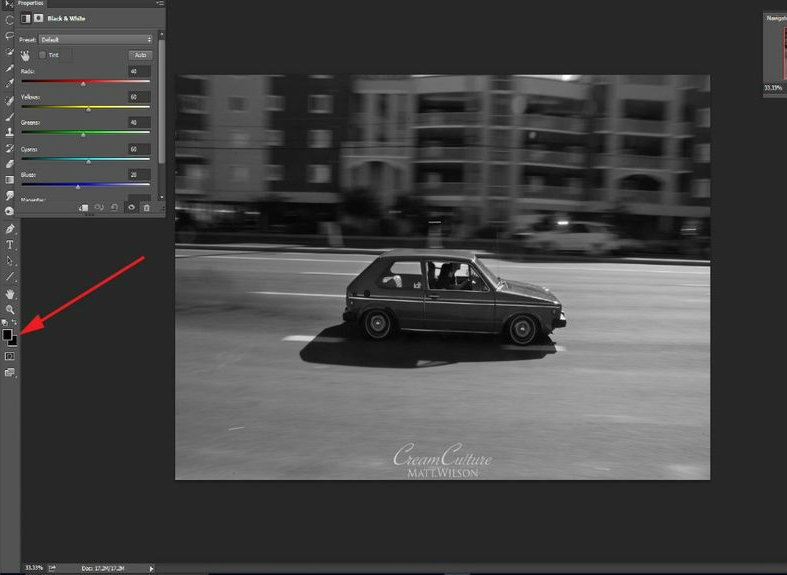
After selecting the quick selection tool, we must change the fill color to black. This a vital part of the process, as it will allow us to return the subject to the original color of the image. To do this, select the fill box at the bottom of the vertical toolbar. The fill box icon contains two rectangles overlapping each other. Select the uppermost rectangle and change the fill to black.
Recolor the Image's Subject
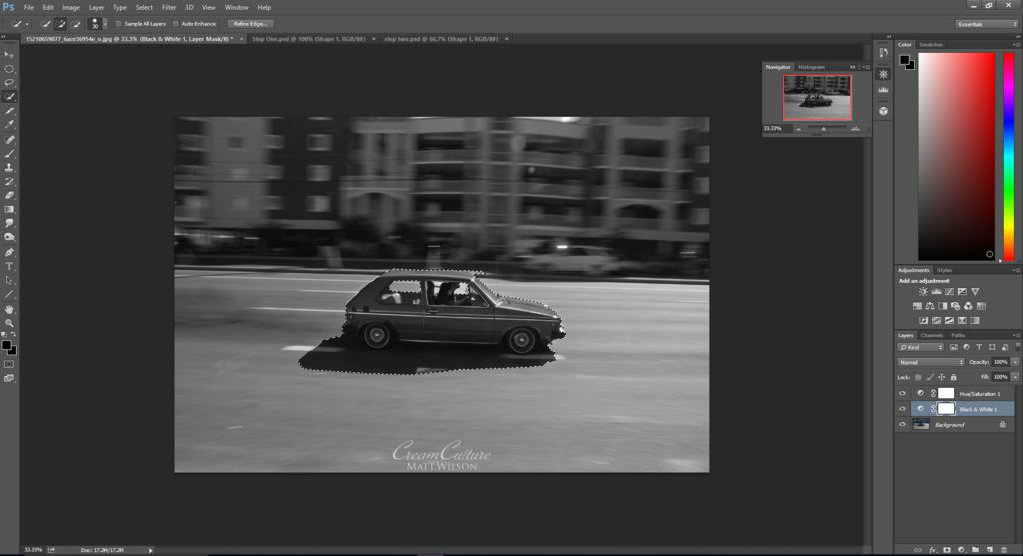
Once the proper fill is selected, it is time to recolor the subject of the image. To begin this process, click on the subject you wish to colorize (in this case the car) with the quick selection tool.It may be necessary to click multiple portions of the image before the quick selection tool selects the desired subject completely. When this is done, the subject of the image will become outlined in a dotted line.
Undo Quick Selection Mistakes
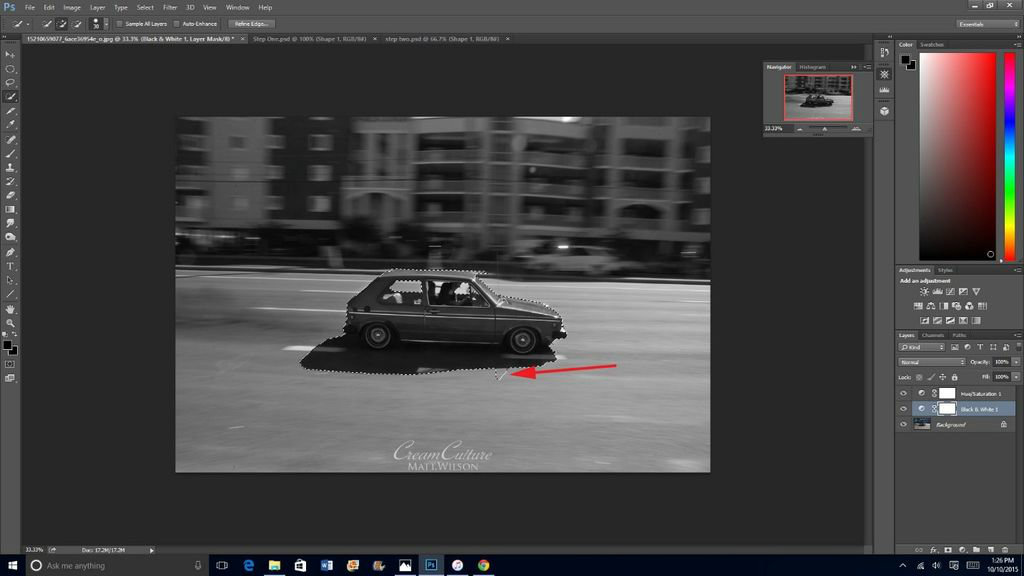
If you accidentally select an unwanted portion of the image with the quick selection tool, there is a quick fix available. Simply click Ctrl+Z on Windows or Command+Z on a Mac to undo the unwanted section.
Remove Adjustment Layer From the Image's Subject
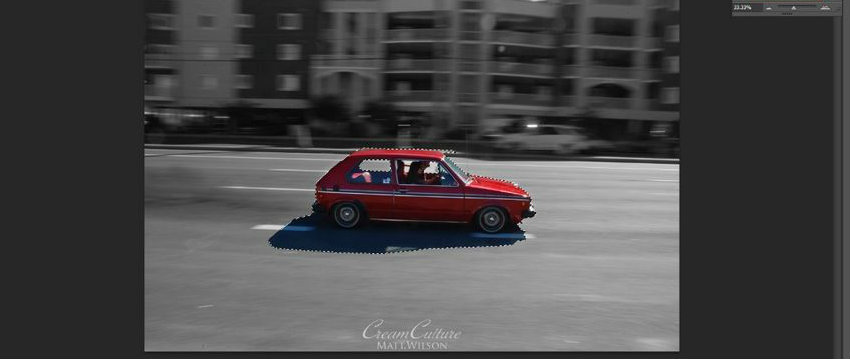
After outing the subject of the image, we must bring the original color back to the subject. To achieve this, simply click alt+backspace on Windows or option+delete on a Mac to remove the layer of Black and White within the dotted outline. Doing so will retrieve the original color of the outlined subject
Finished Product

Upon completion of step seven, the image will have reached the desired outcome. Now, you have a black and white image with a recolored subject to do with as you please!