Re-Engineering a Serial Based Device
by Anred Zynch in Design > Software
3122 Views, 10 Favorites, 0 Comments
Re-Engineering a Serial Based Device
Reengeneering a Serial interface
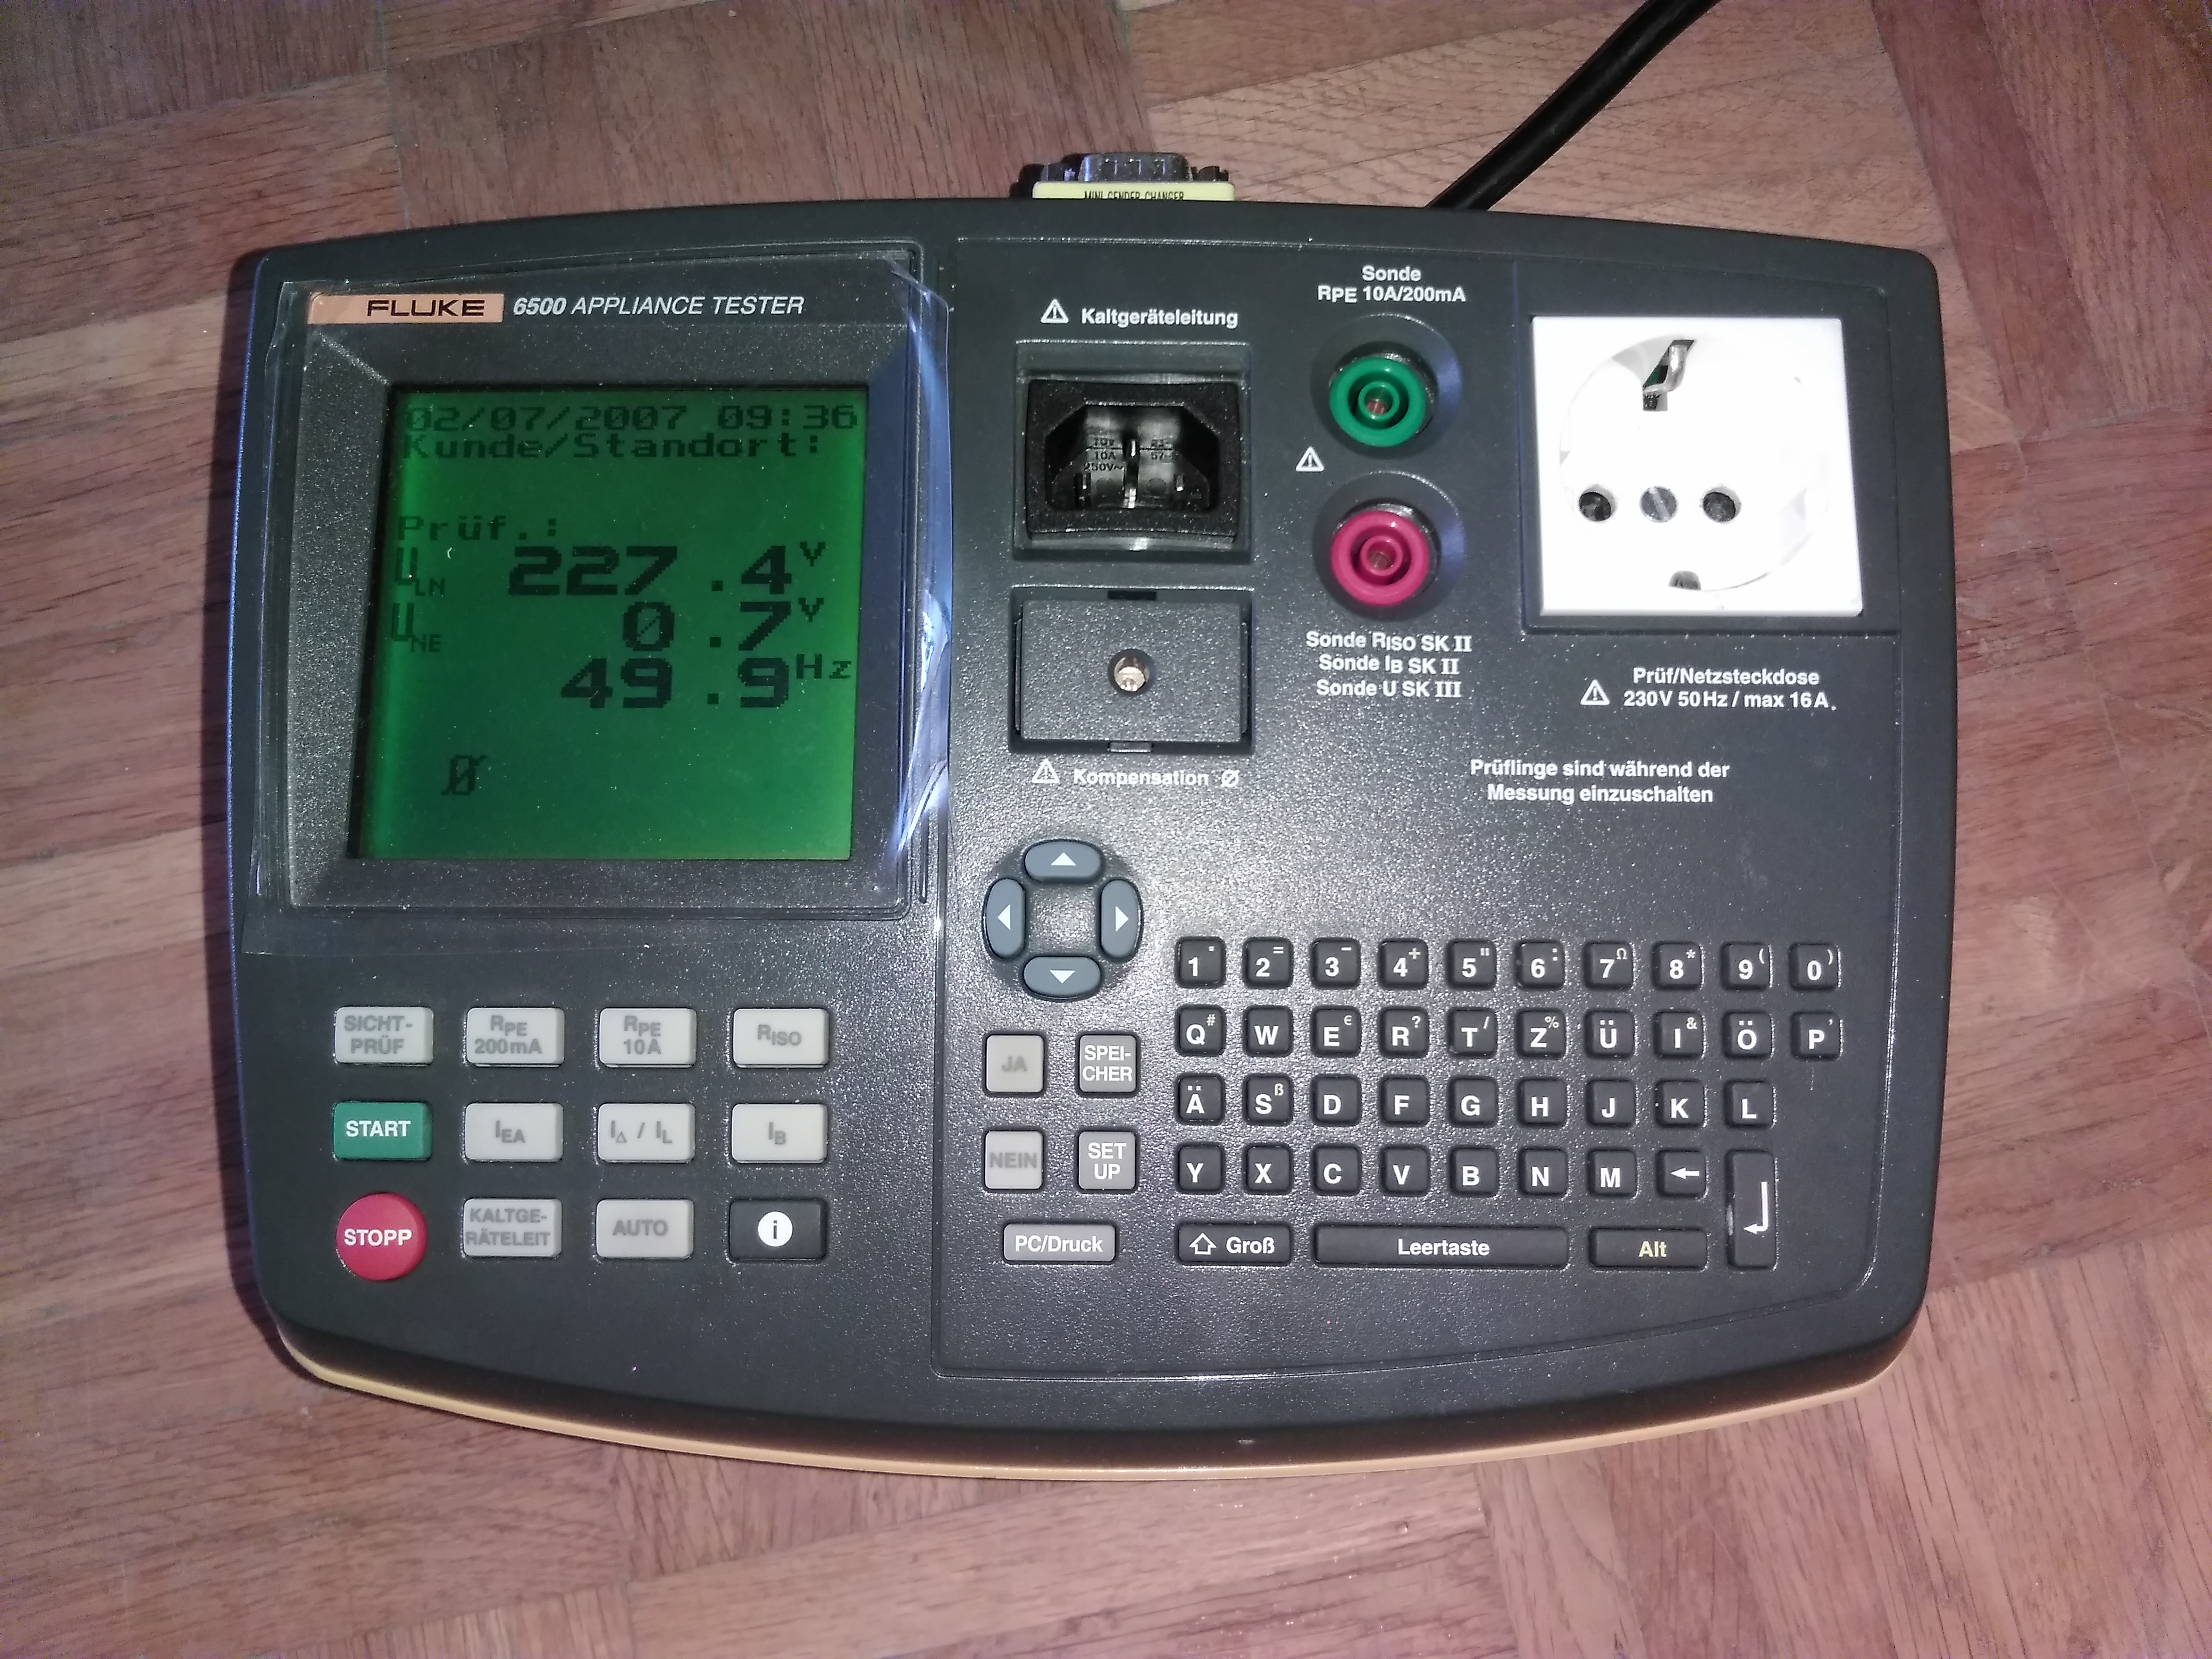
Targed for reengeneering Fluke 6500 I will do this becouse the Fluke original software is very "user unfriendly, not intuitive" or how my co-worker says "f*d up". Lets start the mystery.
Step 1: Research
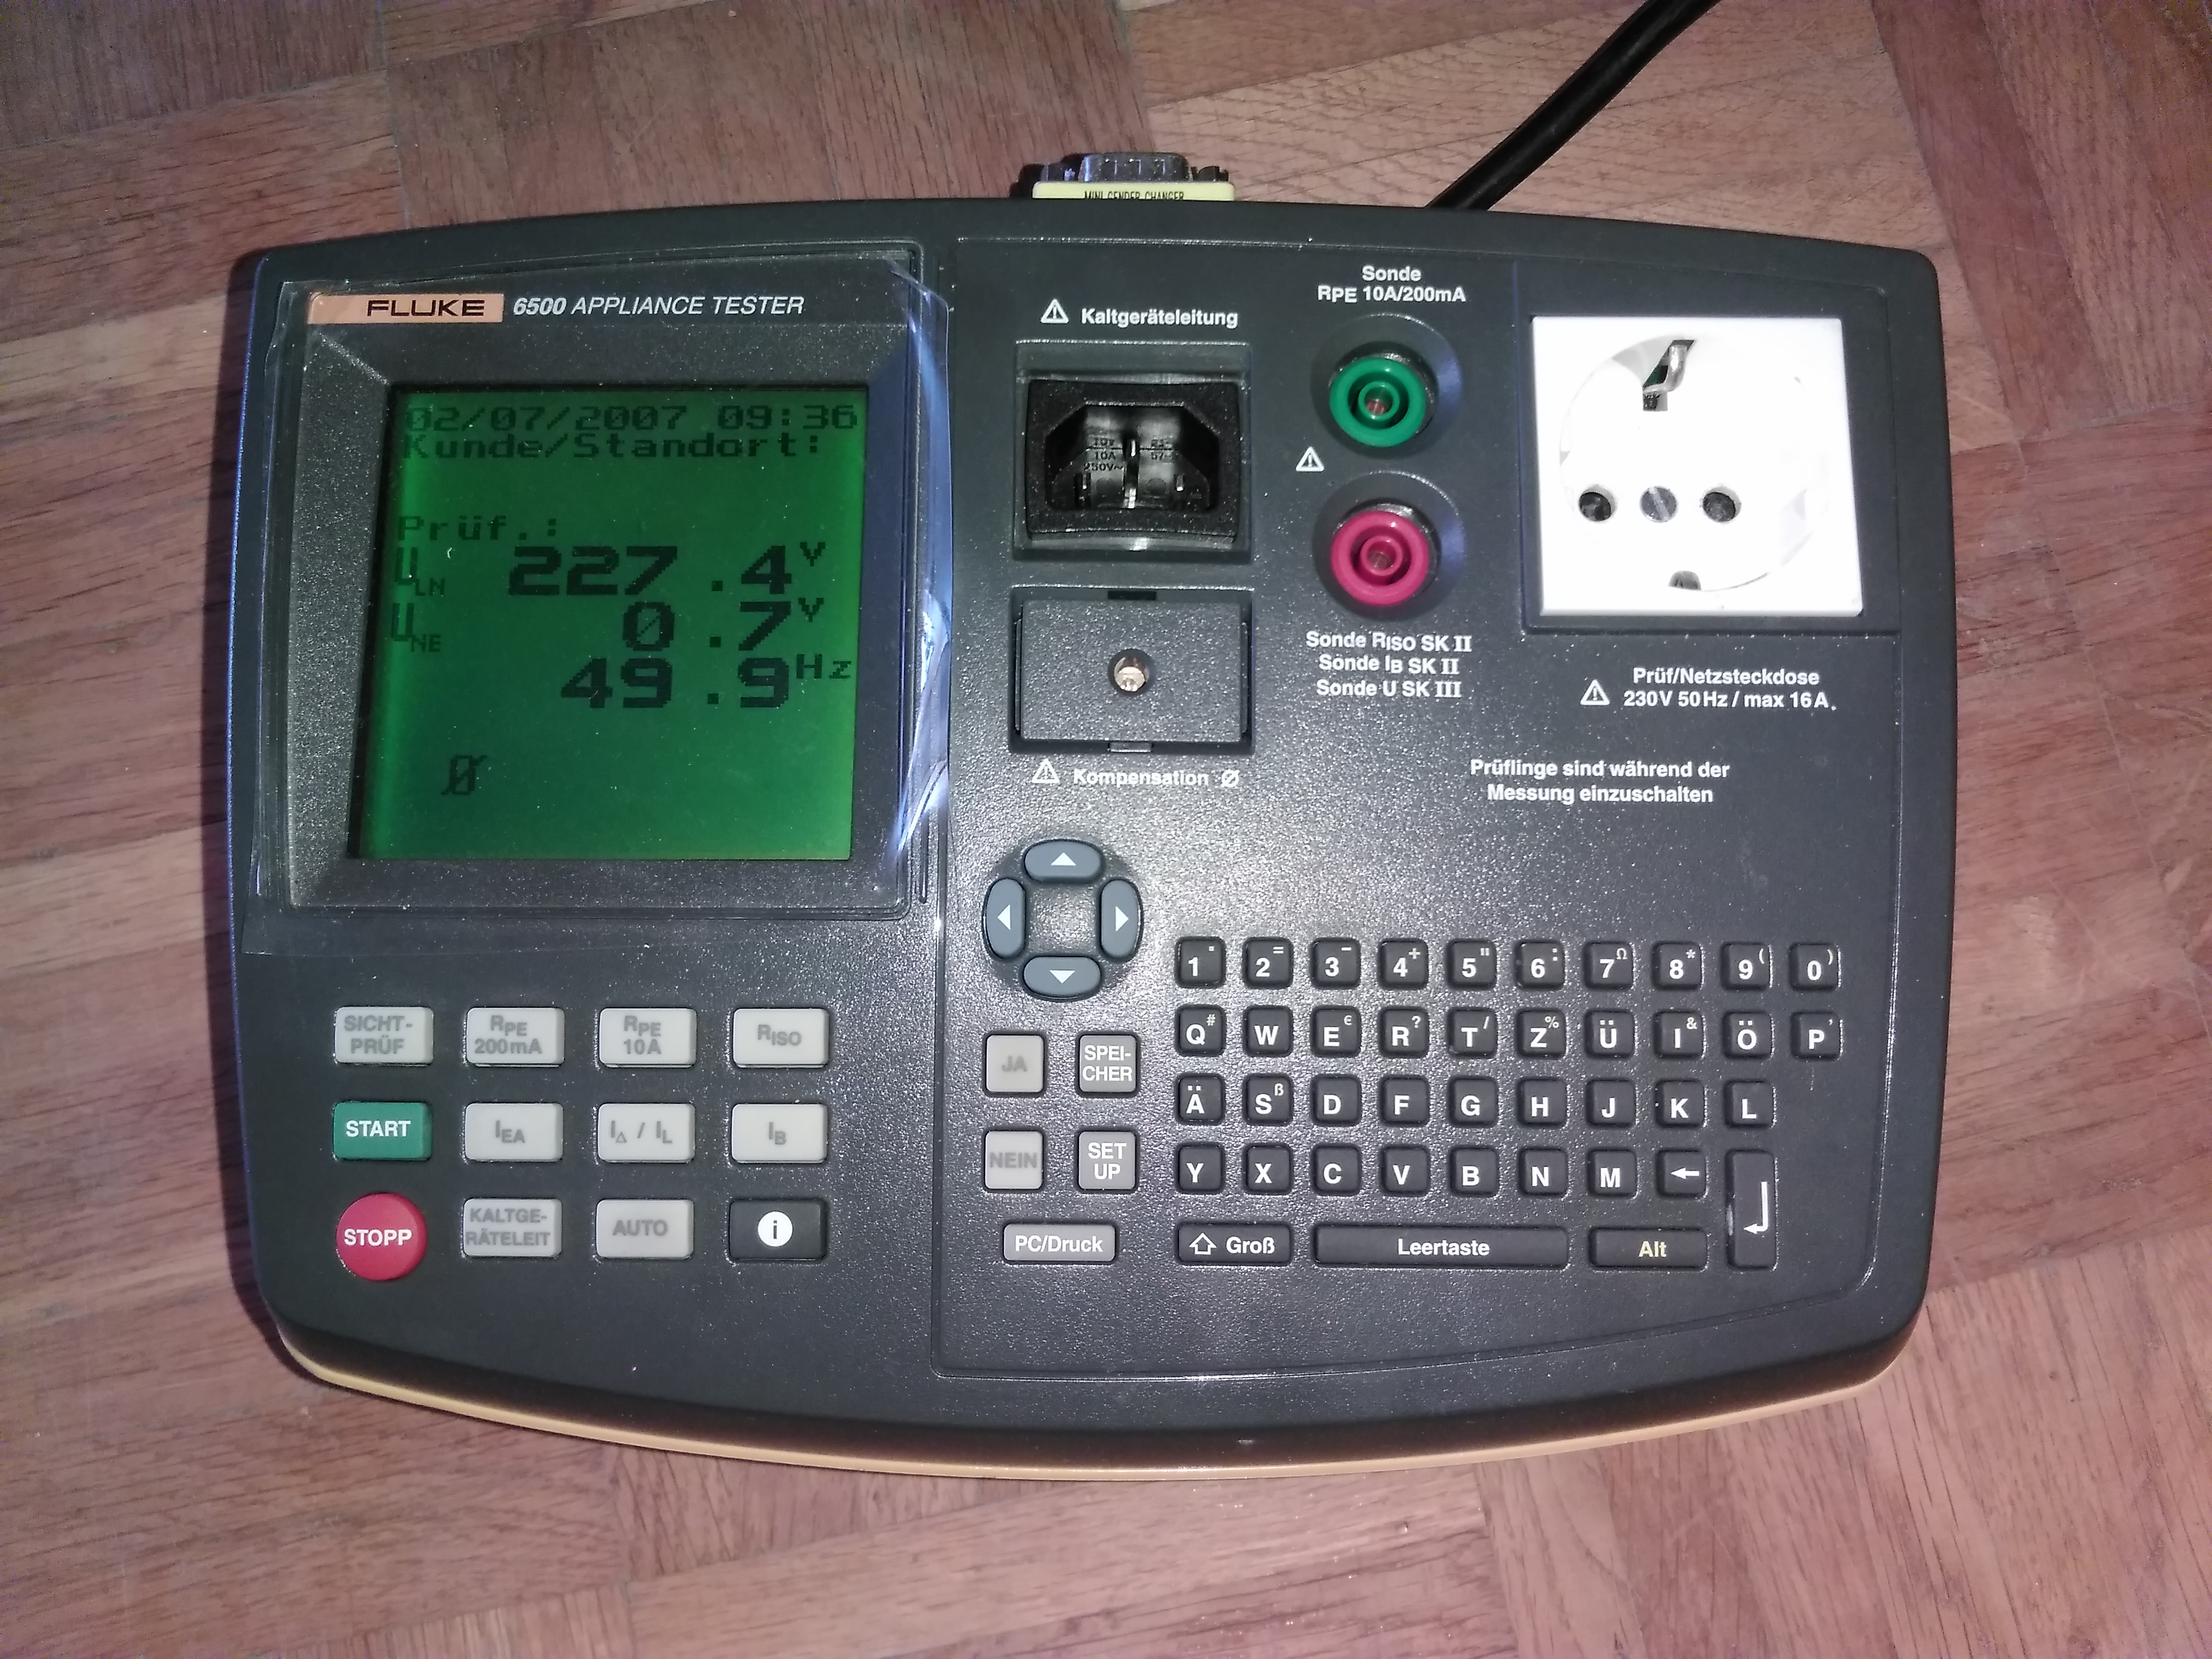
My Device is Fluke 6500-2 Portable Appliance Tester.
Searching for information about the device and the company.
Often the devices are only Labeld by another company. Then we have to some more investigating. This seems to be a original.
The Appliance Tester hardware is different in some countries because plugs are diffenent.
There are at least 2 versions, first with and one without a keyboard. The newest version is build with an USB-Port but I think the send data still the same.
For our device we will find not very much. Only price, shops, original software, informations about mesurement and manuals. sadly I found nothing important about the serial interface. Only for other devices but the interfaces are very differend. An I find the settings for the Com-Ports.
Step 2: Connect the Tester to PC.
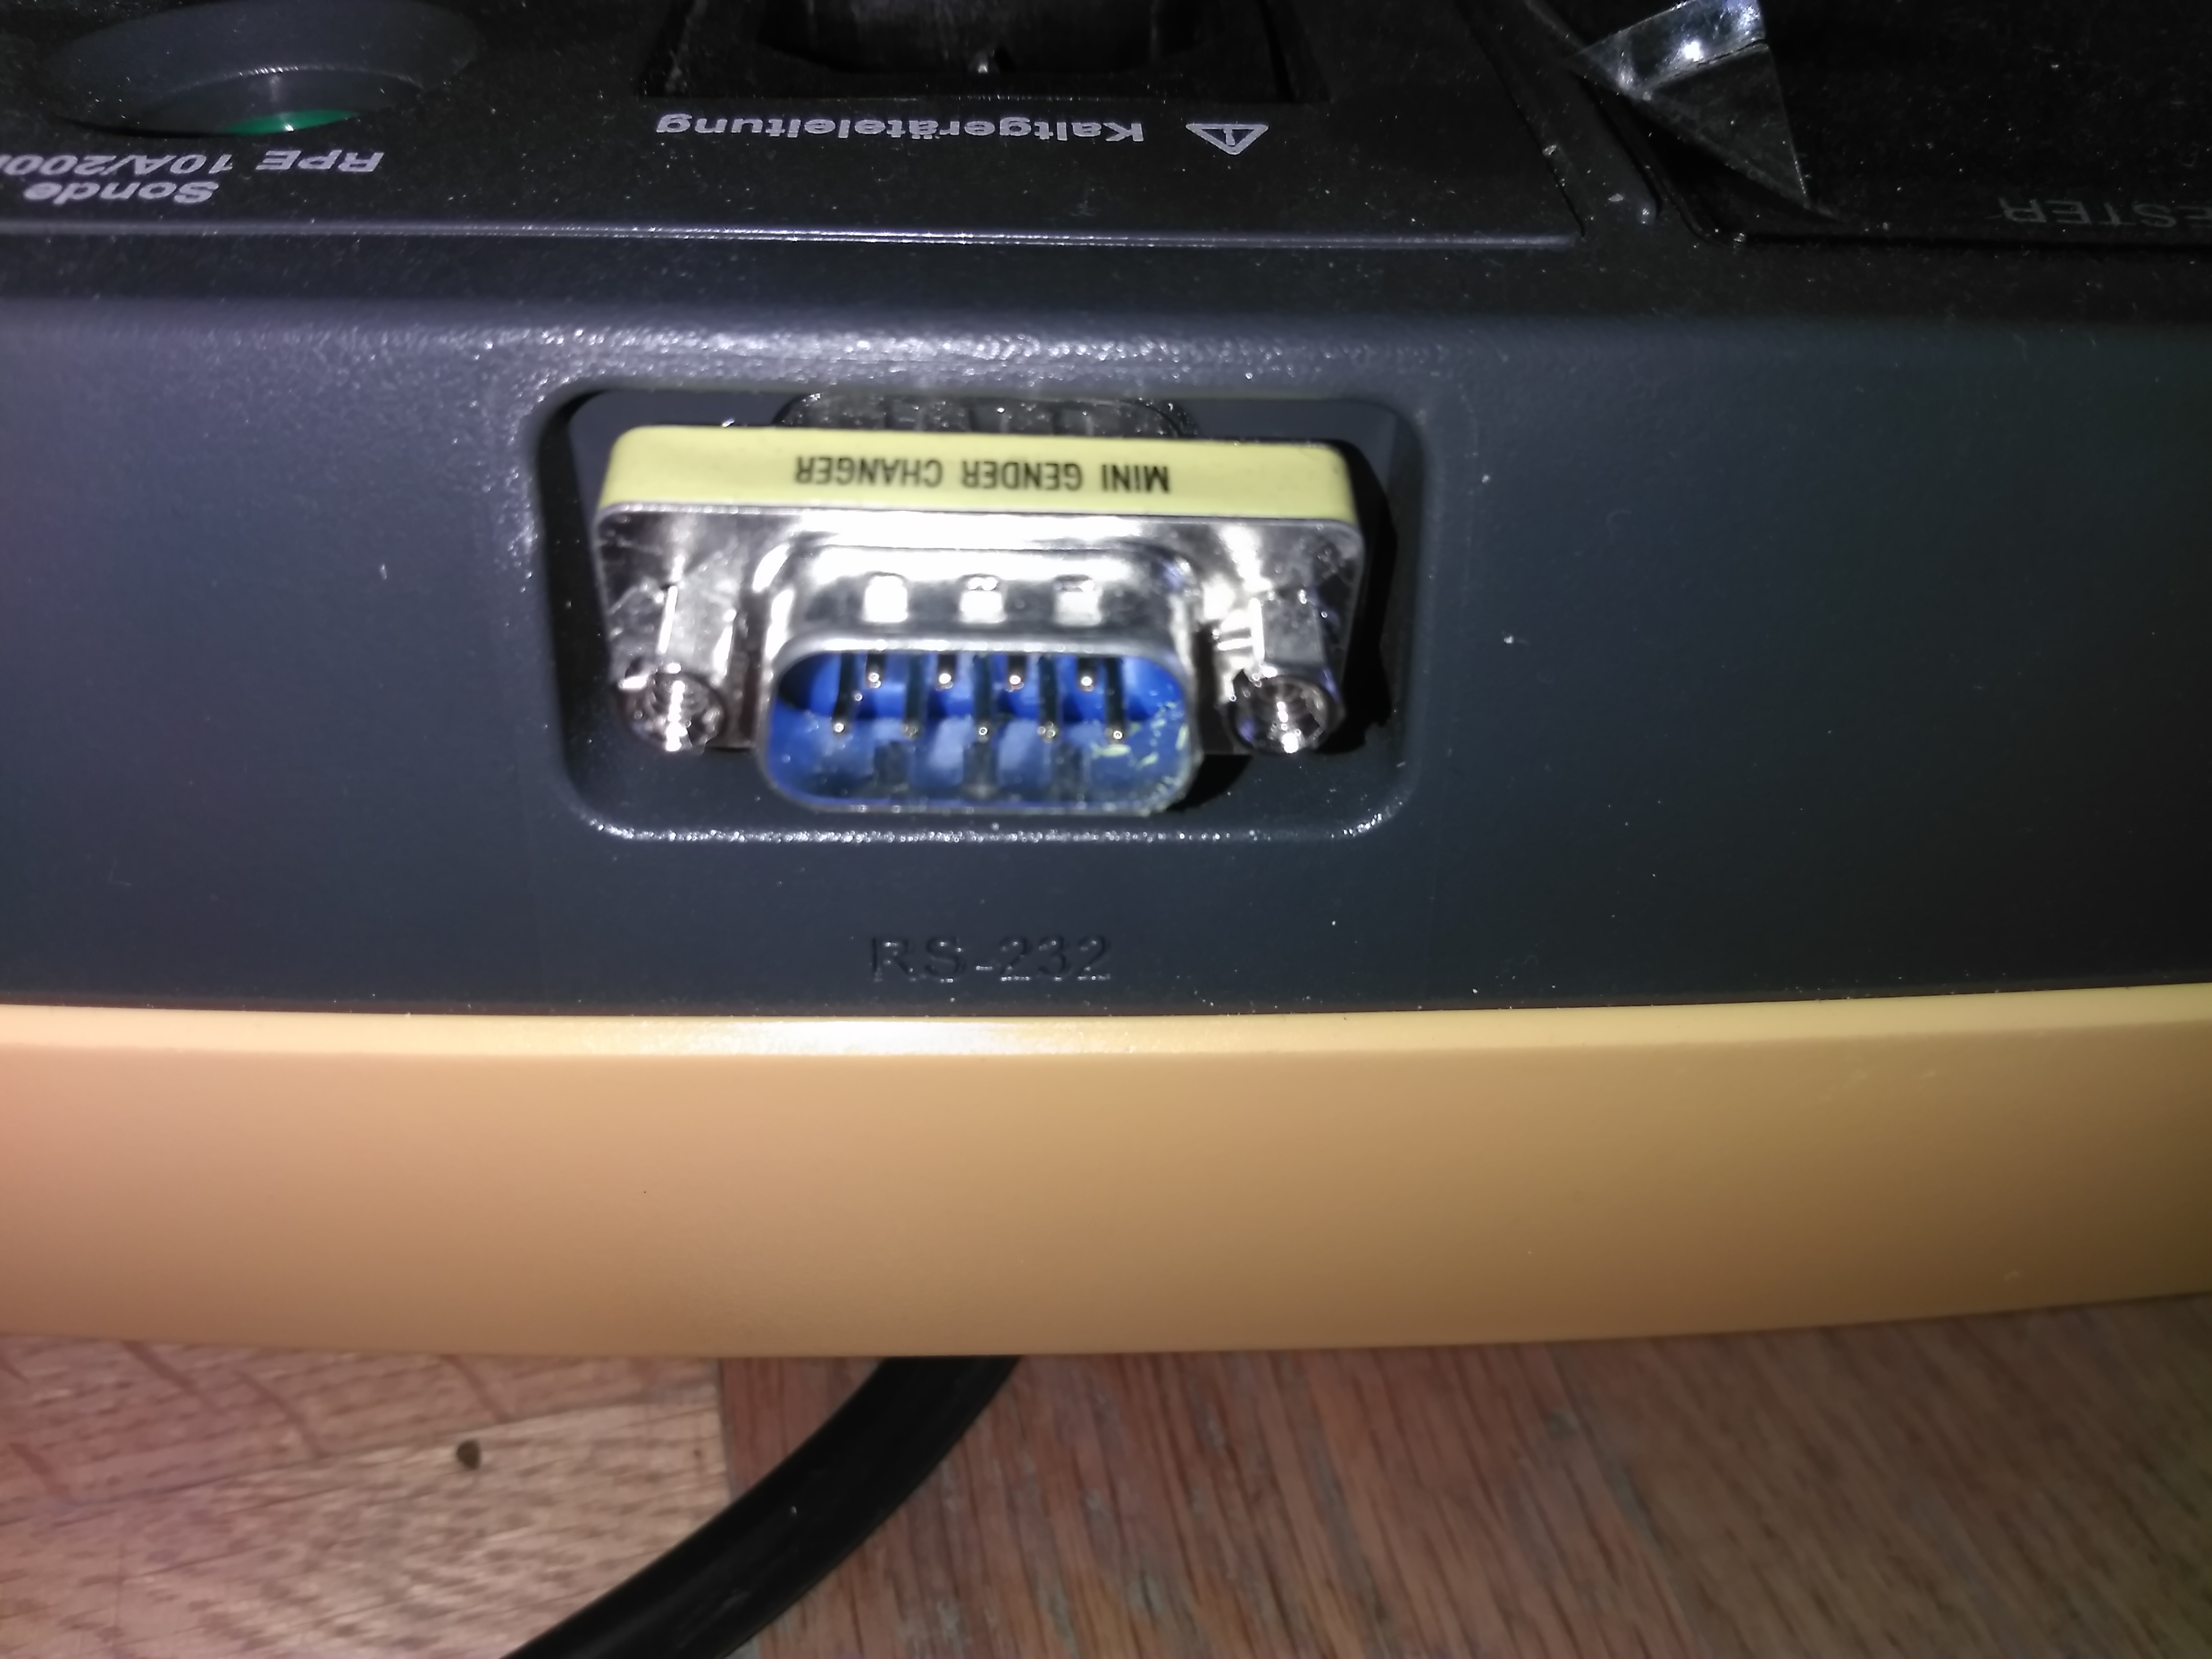
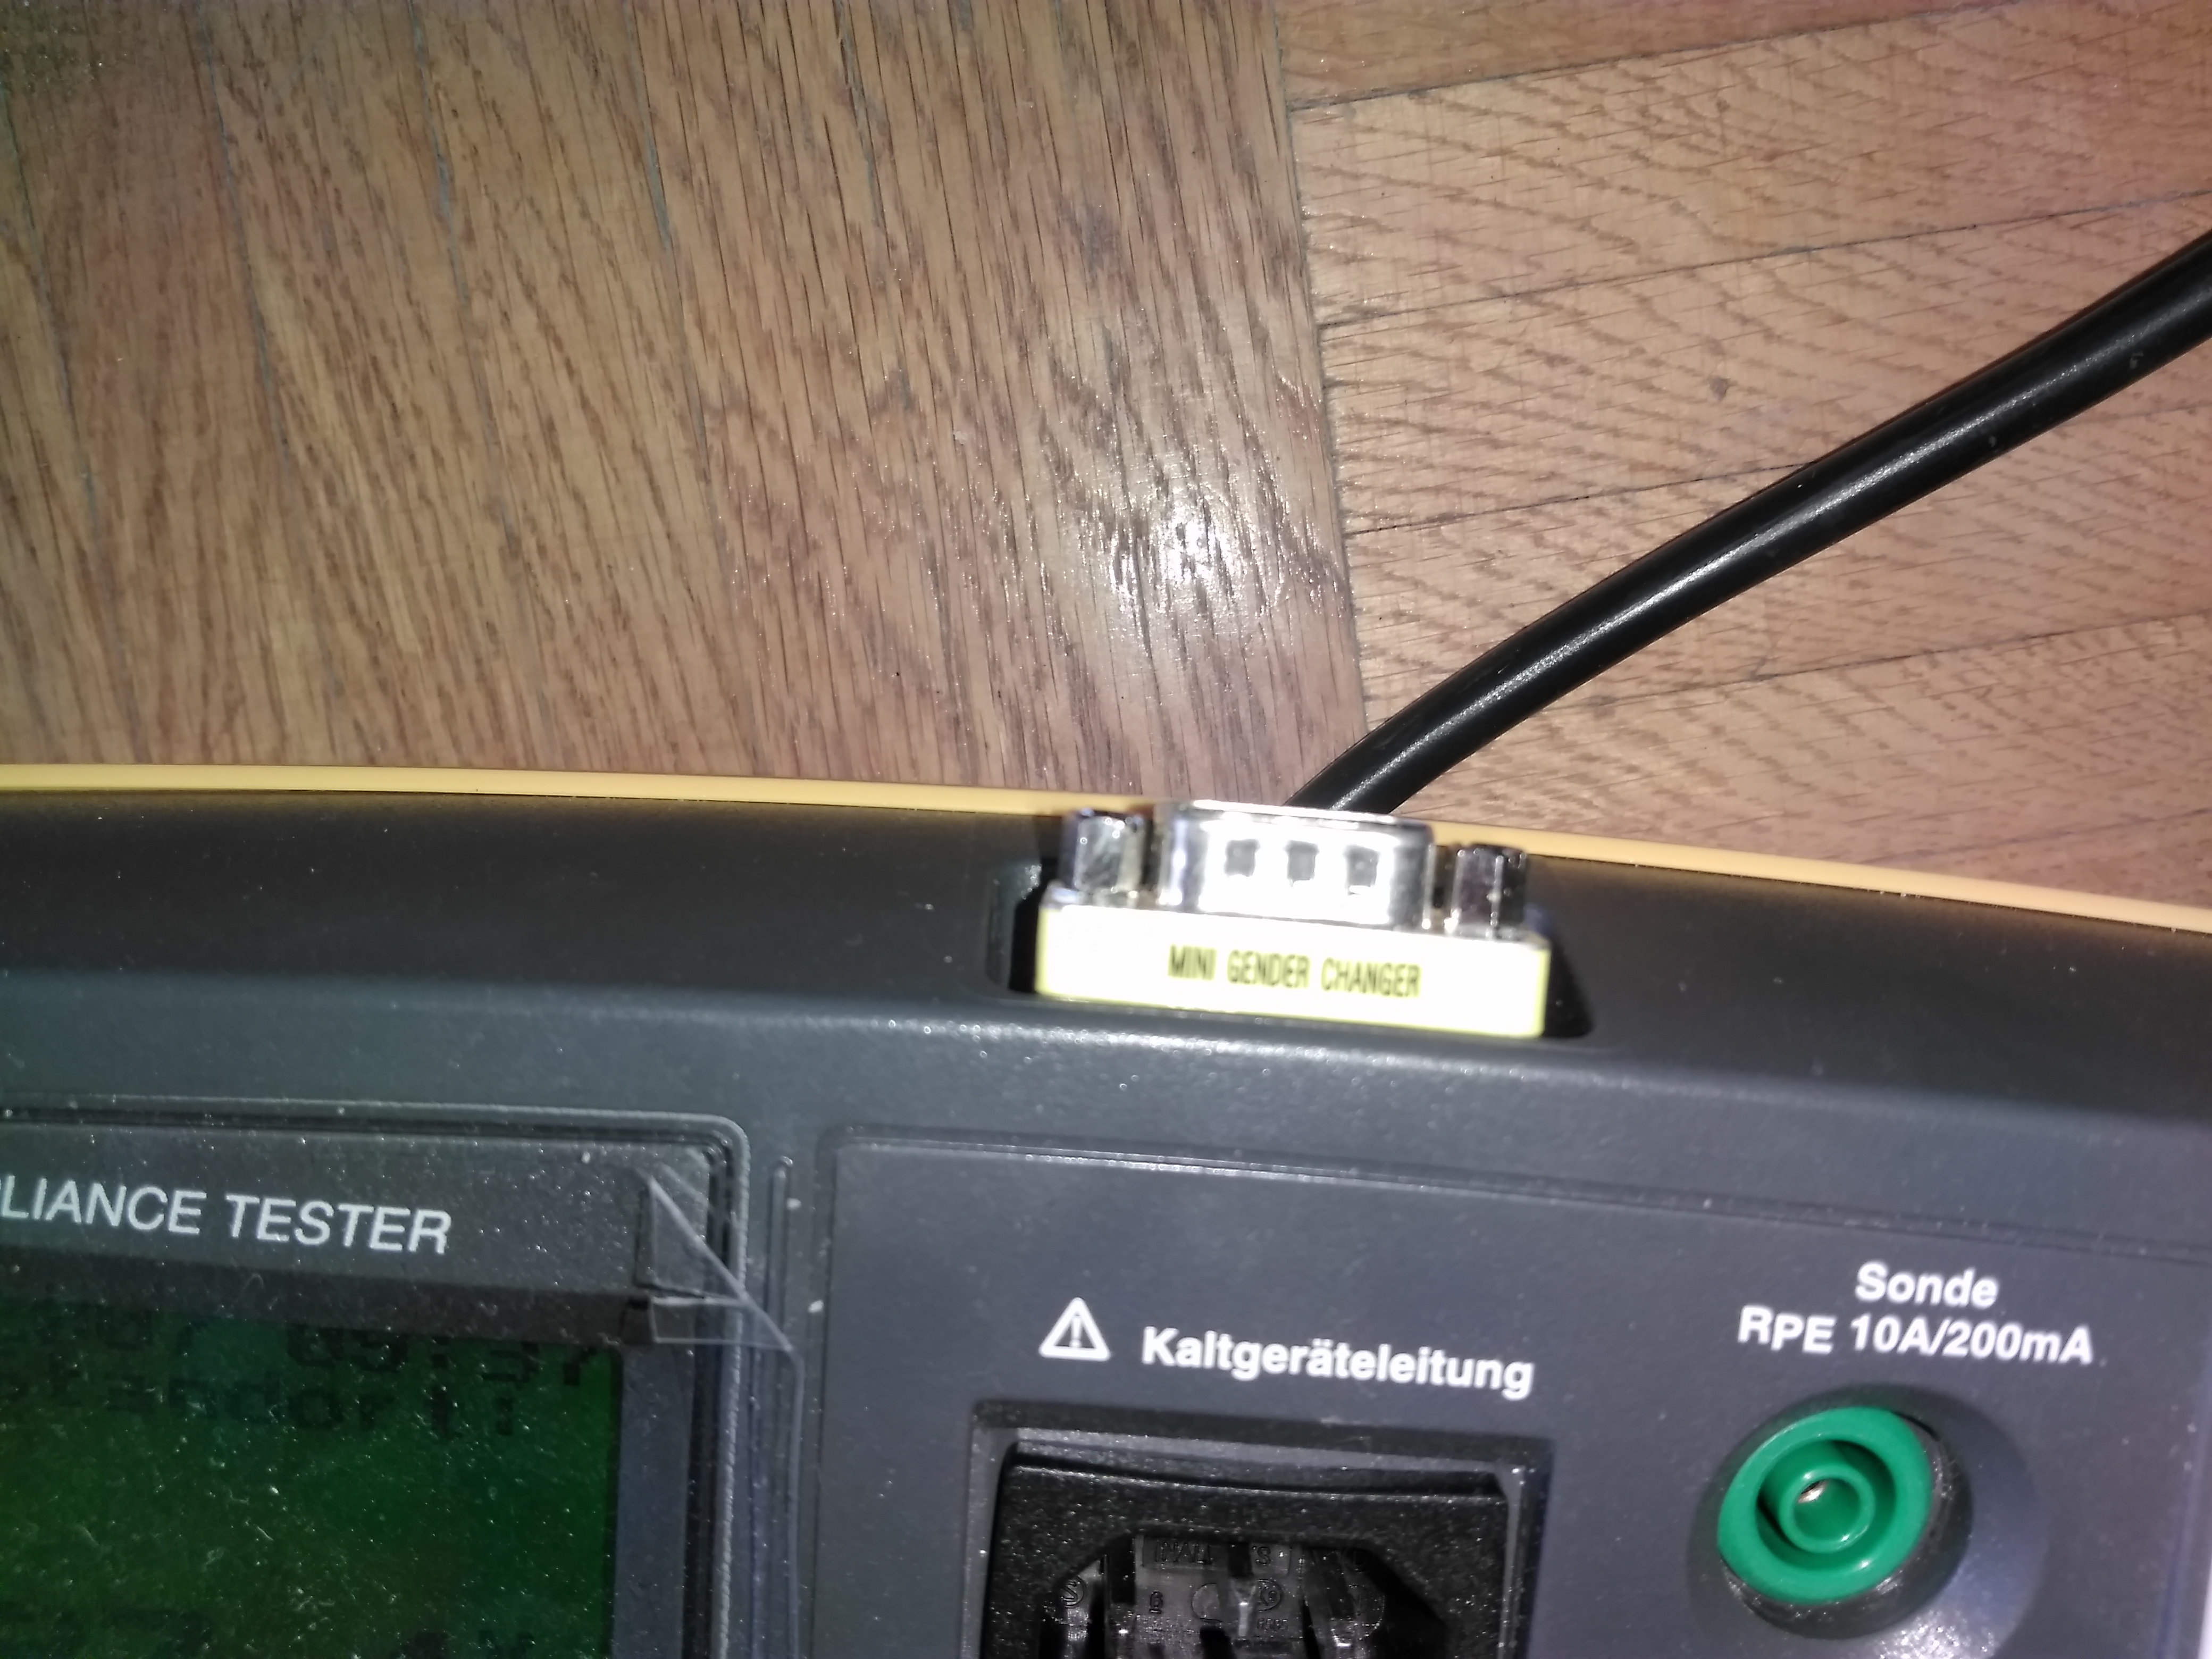
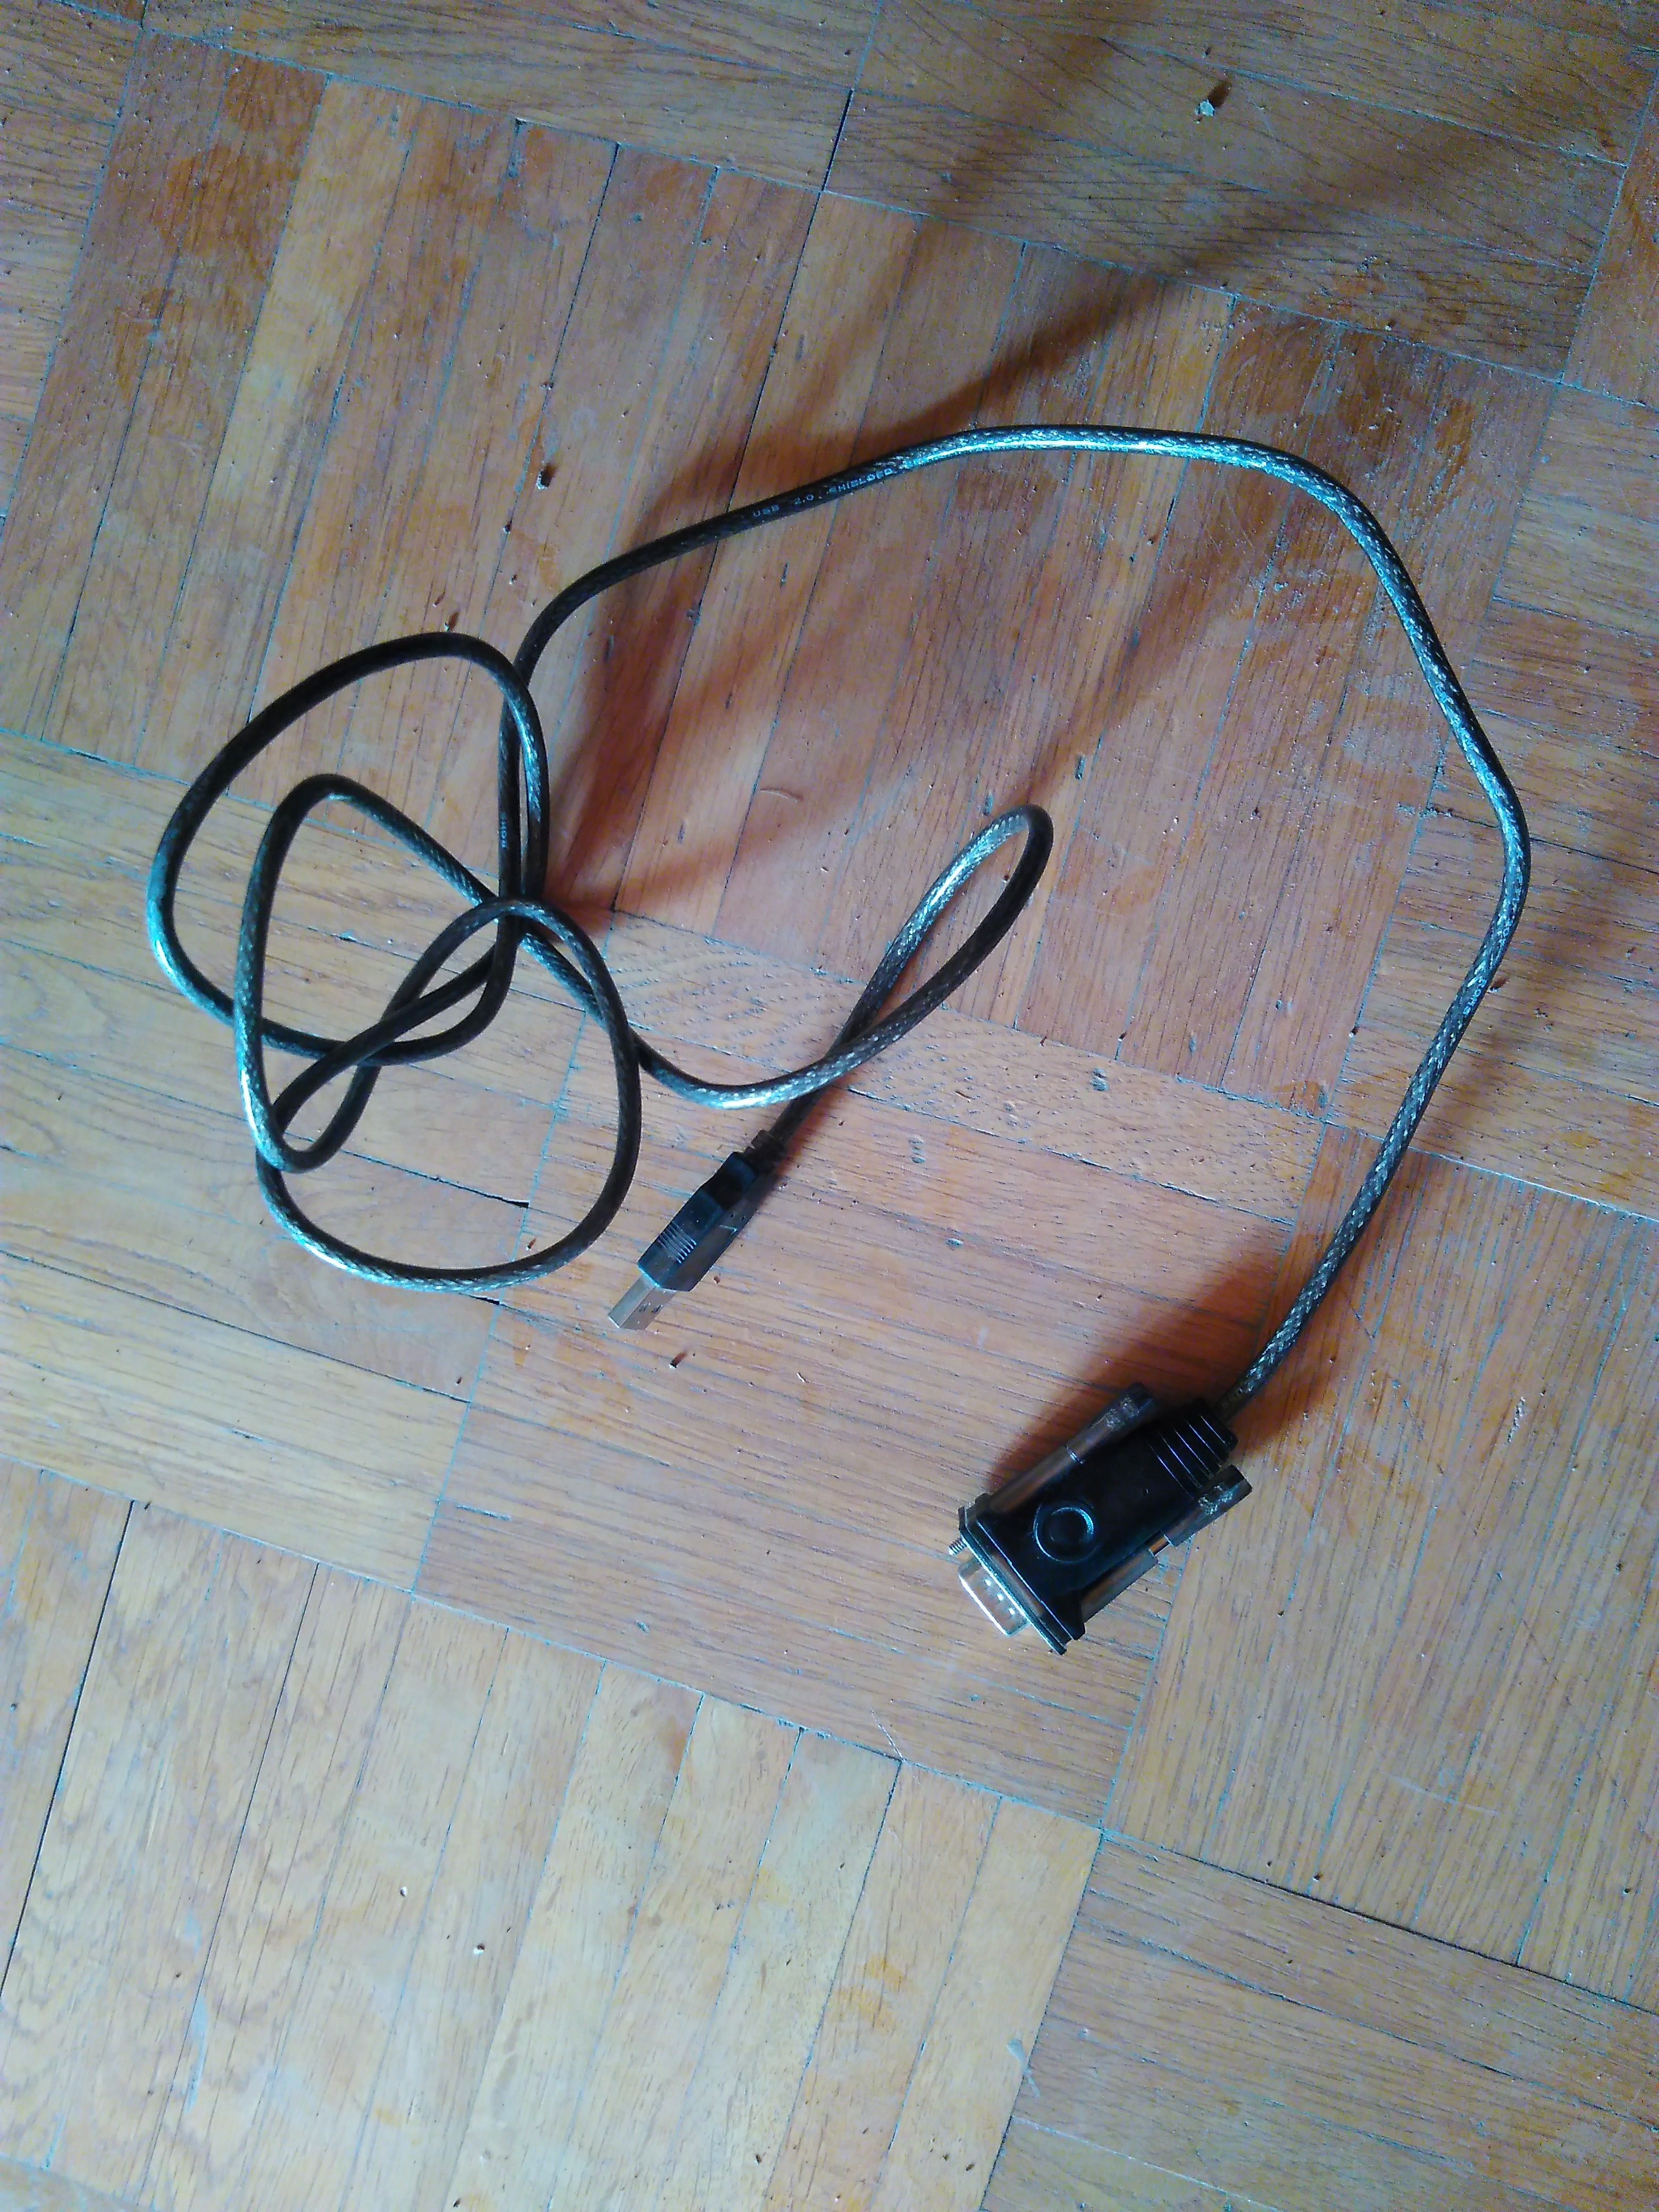
The device interface is female and my wire is male, so I need a GenderChanger for the RS232.
My PC have no RS32 so I need a adapter to USB (around 10€). The USB adapter need a Driver for Windows.
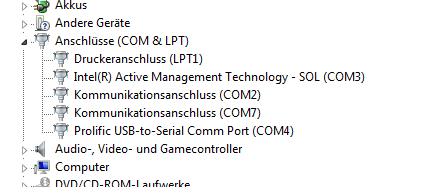
Once installed we try to see if hardware is ok. We open device manager in Windows.
Here we should see interface (COM & LPT) (I'm not sure if this is rigth in english Version, I only have a german) if we plug in our device there have to pop up one new point. For me it calls: "Prolific USB-to-Serial Comm Port (COM4)" the Com number is not fix and change if you use another USB-Port or something else.
Step 3: Install a Terminal Software.


Here is a freeware Terminal:
http://circuitdesolator.blogspot.com/2010/12/termi... thank you very much for this br@y.
Settings schould be standard (and i found a verification online), or at least nothing unusual
COM-Port: 4 (see device manager)
Baudrate: 9600
Databits: 8 Parity: No parity or n
Flow control: None Stopbits: 1
Click at Connect Button. Now we listening to the Com-Port.
At the Application Tester we have to start the communikation via:
"PC/Druck" (or PC/Print)
"Start" pre chosed Data -> PC
"Start" pre chosed all data (all records)
"Start" pre chosed (last Format) i use FLUKE DMS
Now we see that the device is sending something.
The Terminal have to show something. (see Pictures)
To possible Formats:
the device can send .csv, .FLK, .PRN.
in fact .FLK is only a text file,
in .csv mode i miss information, so i dont use it
the .prn is only a print file for direkt printing.
Step 4: Analyse
Read data (see DMS.FLK), I stored all auto test modes:
If I save data to the CF-Card on device and read it at my PC, i got the exactly same result.
The format looks very, very old scool. A type of pint format for bon printer or something like that.
Every device i tested was fine. so we have to do another run to see what changes if somethinges bad. At the first try i numbert the devices execdly like the auto mode.
what else, lets look at the first lines
MODEL 6500-02 15 chars, pretty clear, my model number
SN 1801234 18 chars, my device serialnumber
one empty line
TEST NUMBER 1 18 chars, the first testrun i stored, this is a counter
DATE 25-AUG-06 18 chars, the date i tested the device, i did not set the clock so i is not right, because the device lost sometimes the clock and reseting is user unfriendly i ignore this line at the moment
APP NO 145 18 chars, the device number I typed in, i can set 2-3 other things by storing linke department or comment, but if i have to type this 40 times i go crazy, so i fill only this line in real world
TEST MODE 145 AUTO 18 chars, the test mode i used
SITE 18 chars, no idea
SITE1 18 chars, still no idea
SITE2 18 chars, realy i have no idea
USER 18 chars, an this also, i have no idea
VISUAL CHECK P 18 chars, the first mesurement at every testrun is to look if the decice is OK. P is for Positive i think
BOND RANGE 200mA 18 chars, mesurement 1 this is range of the mesurement there are a few possible ranges (see device manual)
EARTH 0.28 OHM P 18 chars, mesurement 1 this is result of the mesurement
LIMIT 0.30 OHM 18 chars, mesurement 1 this is limit of the mesurement INS 1 >299.9 MEG P 18 chars, mesurement 2 this is result
LIMIT 1.0 MEG 18 chars, mesurement 2 this is limit
PN CONTINUITY P 18 chars, mesurement 3 this is result
LOAD 160 VA P 18 chars, mesurement 4 this is result LIMIT 3700 VA 18 chars, mesurement 4 this is limit CURRENT 0.6 A P 18 chars, mesurement 5 this is result LIMIT 16.0 A 18 chars, mesurement 5 this is limit LKGE 0.03 mA P 18 chars, mesurement 6 this is result LIMIT 3.50 mA 18 chars, mesurement 6 this is limit and again one empty line
reapeat simmlar Format for other recordings.
END OF DATA 11 chars, very clear
Step 5: Time to Puzzle
See, Check, Test
What I do till now is almost the same waht I have to do in Fluke DMS. This is irritating, because all other Testers read by PC so no one have to press buttons there. And in any case I do it everytime and waiting but nothing happen.
Lets see if we can do it better than Fluke. Manipulate communikation.
I think this is possible because the developer who build this needed a way to programm and debug.
I never done something before and show what i try and how i work.
1. Tryed random like 1, aaa
shows that the device is reciving something by "1" it makes a beep,
by "aaa" it makes 3 beeps. Yay this is a goog sing. This is telling me if i write comands like "wakeup", "listen", "start" it would not work because every char is send as one sepperate command.
Whats next. Time to ask duckduck.
After reading I found commands used by telecommunication called ATcommands but no luck, nothing happen.
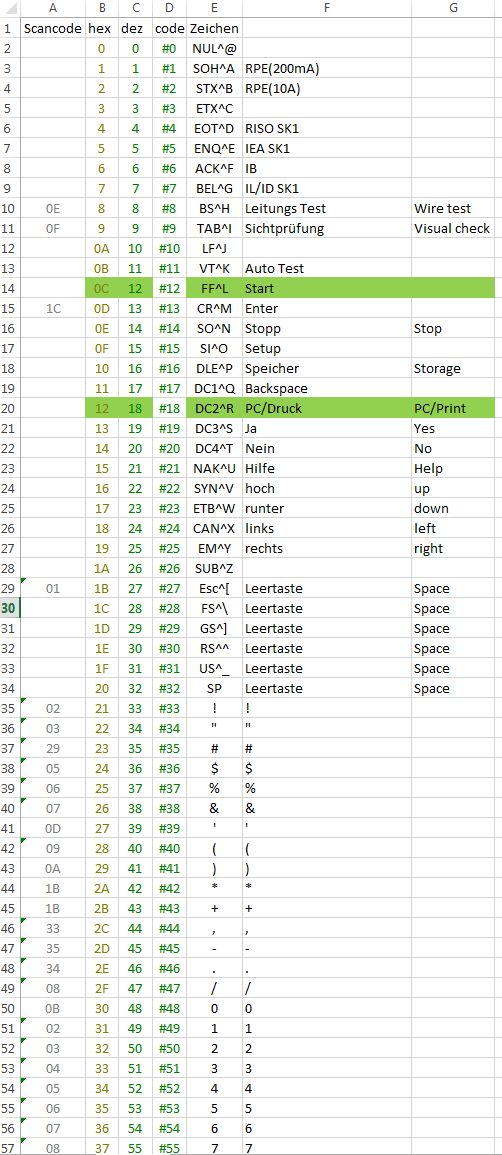
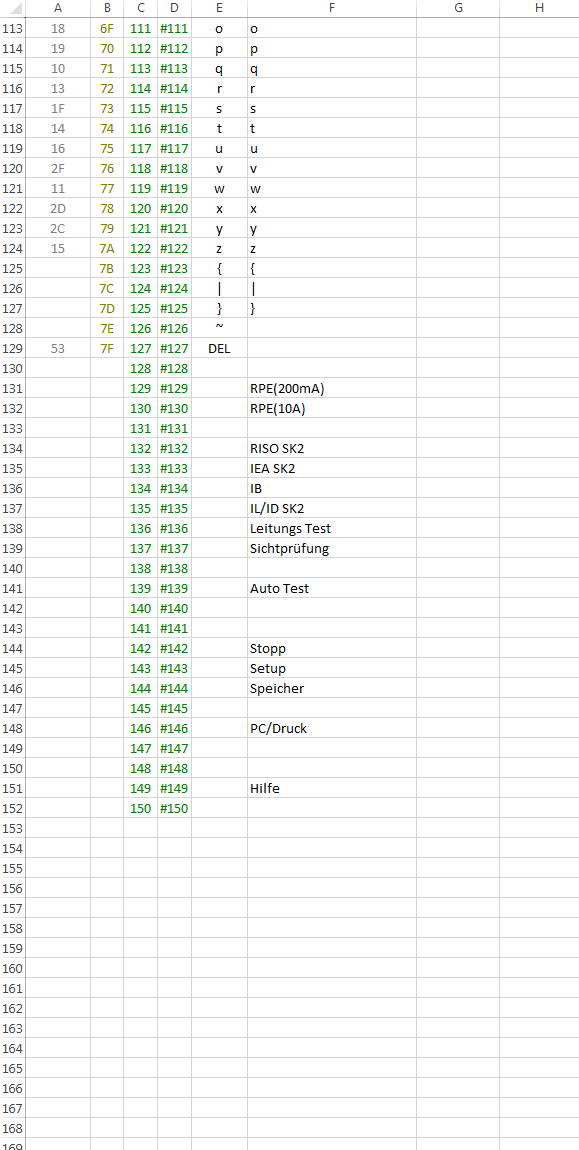
Next thing I found ASCII codes in Br@y's Terminal i have to write them with a # in front of the ASCII comand I will write. So I try #001 and WOW something happen at the tester now it shows the RPE-Check(200mA).
I want more of this, I found a ASCII Table
https://www.torsten-horn.de/techdocs/ascii.htm
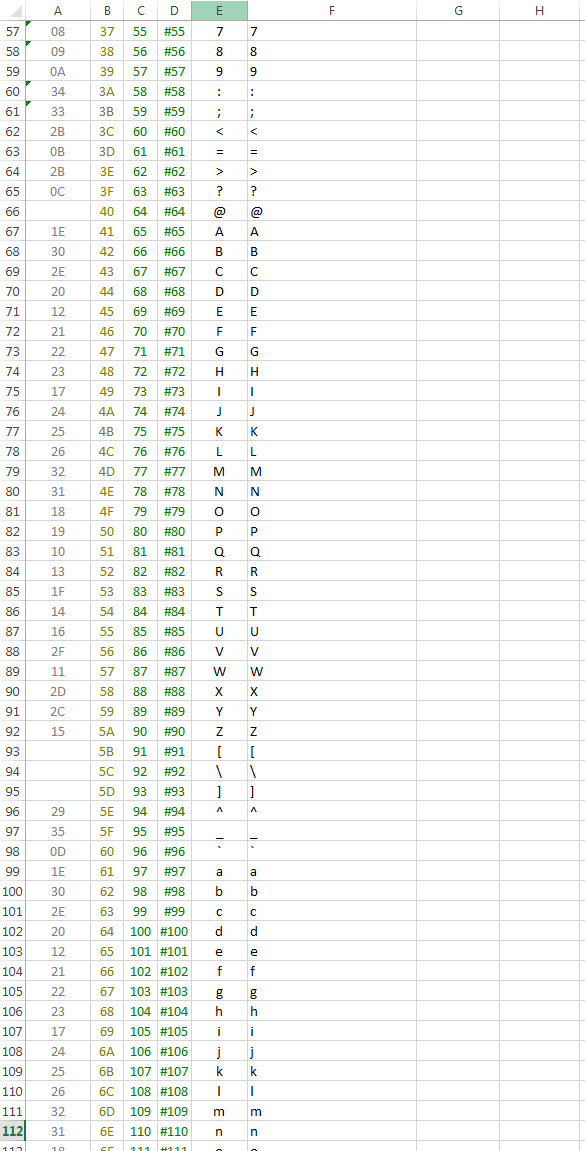
I set up a table and try every command and look what happen and go back to main sceen. This will take some time.
Some keys missing so next text run in a screen were I see more.
The result you can see in tables1-3.
code for terminal ;Zeichen;button;
#0;NUL^@;;
#1;SOH^A;RPE(200mA);
#2;STX^B;RPE(10A);
#3;ETX^C;;
#4;EOT^D;RISO SK1;
#5;ENQ^E;IEA SK1;
#6;ACK^F;IB ;
#7;BEL^G;IL/ID SK1;
#8;BS^H;Leitungs Test;Wire test
#9;TAB^I;Sichtprüfung;Visual check
#10;LF^J;;
#11;VT^K;Auto Test;
#12;FF^L;Start;
#13;CR^M;Enter;
#14;SO^N;Stopp;Stop
#15;SI^O;Setup;
#16;DLE^P;Speicher;Storage
#17;DC1^Q;Backspace;
#18;DC2^R;PC/Druck;PC/Print
#19;DC3^S;Ja;Yes
#20;DC4^T;Nein;No
#21;NAK^U;Hilfe;Help
#22;SYN^V;hoch;up
#23;ETB^W;runter;down
#24;CAN^X;links;left
#25;EM^Y;rechts;right
#26;SUB^Z;;
#27;Esc^[;Leertaste;Space
#28;FS^\;Leertaste;Space
#29;GS^];Leertaste;Space
#30;RS^^;Leertaste;Space
#31;US^_;Leertaste;Space
#32;SP;Leertaste;Space
#33;!;!;
#34;"""";"""";
#35;#;#;
#36;$;$;
#37;%;%;
#38;&;&;
#39;';';
#40;(;(;
#41;););
#42;*;*;
#43;+;+;
#44;,;,;
#45;-;-;
#46;.;.;
#47;/;/;
#48;0;0;
#49;1;1;
#50;2;2;
#51;3;3;
#52;4;4;
#53;5;5;
#54;6;6;
#55;7;7;
#56;8;8;
#57;9;9;
#58;:;:;
#59;";";";";
#60;<;<;
#61;=;=;
#62;>;>;
#63;?;?;
#64;@;@;
#65;A;A;
#66;B;B;
#67;C;C;
#68;D;D;
#69;E;E;
#70;F;F;
#71;G;G;
#72;H;H;
#73;I;I;
#74;J;J;
#75;K;K;
#76;L;L;
#77;M;M;
#78;N;N;
#79;O;O;
#80;P;P;
#81;Q;Q;
#82;R;R;
#83;S;S;
#84;T;T; #
85;U;U;
#86;V;V;
#87;W;W;
#88;X;X;
#89;Y;Y;
#90;Z;Z;
#91;[;[;
#92;\;\;
#93;];];
#94;^;^;
#95;_;_;
#96;`;`;
#97;a;a;
#98;b;b;
#99;c;c;
#100;d;d;
#101;e;e;
#102;f;f;
#103;g;g;
#104;h;h;
#105;i;i;
#106;j;j;
#107;k;k;
#108;l;l;
#109;m;m;
#110;n;n;
#111;o;o;
#112;p;p;
#113;q;q;
#114;r;r;
#115;s;s;
#116;t;t;
#117;u;u;
#118;v;v;
#119;w;w;
#120;x;x;
#121;y;y;
#122;z;z;
#123;{;{;
#124;|;|;
#125;};};
#126;~;;
#127;DEL;;
#128;;;
#129;;RPE(200mA);
#130;;RPE(10A);
#131;;;
#132;;RISO SK2;
#133;;IEA SK2;
#134;;IB ;
#135;;IL/ID SK2;
#136;;Leitungs Test;
#137;;Sichtprüfung;
#138;;;
#139;;Auto Test;
#140;;;
#141;;;
#142;;Stopp;
#143;;Setup;
#144;;Speicher;
#145;;;
#146;;PC/Druck;
#147;;;
#148;;;
#149;;Hilfe;
#150;;;
Result: We have to send Char 18 for PC/Print and 3 times Char 12 for Start, to start the send funktion.
Step 6: Read File to Excel
The project is growing to fast and to big. I will make a break here.
Reading this with Excel is a very big puzzle. I can´t write everything here. This is a project for opensouce and I am serching for software engeneers who helping through this.
But, one last part, I want to show. Reading files with Excel.
Aktivate "developer tools" in Excel.
go to Visualbasic editor.
insert this in Module or Worksheet:
Instructable editor is not good for code, so I attach the code as VBAcode.txt
I add the DMS.FLK too. That I get from the CF card of my Application Tester.
You also can read the data you copy out of the Terminal and save as .txt.
Now I start the big Puzzles:
- get data with excel direct form Tester
- move values to readable documents
- save data to database
- export to word
Thanks and greetings to FAU/IAA, linksunten.indymedia, FLUKE, www.herber.de/forum and many more.
Zynch