RaspberryPi WSPR Node
by lofi-adhocracy in Circuits > Raspberry Pi
12493 Views, 9 Favorites, 0 Comments
RaspberryPi WSPR Node

I wanted to make a WSPRnet (Weak Signal Propegation Reporter) Transmitter to get my feet wet in the WSPRnet game and start seeing how far I can transmit a beacon. I had some of this equipment laying around, and decided that i would throw a quick prototype together to explore the science, and then later expand on the foundational knowledge that I would gain from this project to maybe build something a little more efficient or interesting.
Supplies
Major Components:
- Benchtop Power Supply
- Raspberry Pi (any model SHOULD work, but i have Raspberry Pi 3 Model B v1.2 on hand)
- SD Card
- Breadboard
Passive Components:
- Capicitor ( ?F )
- Resistor
Software:
Flash OS to SD Card
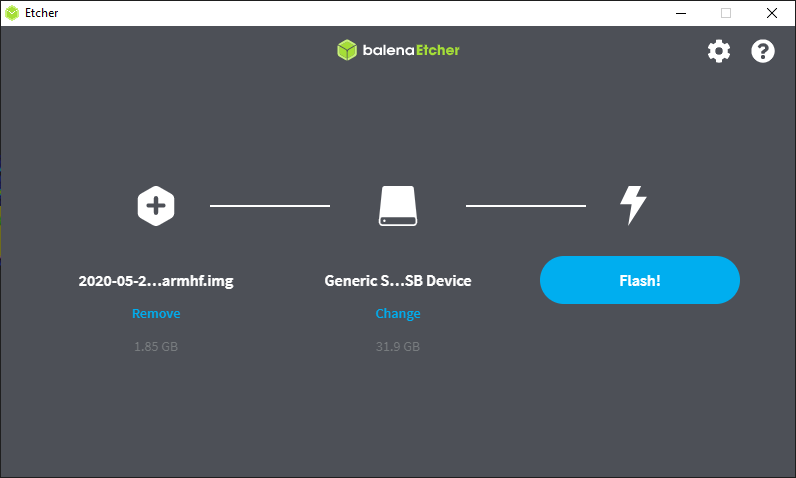
Balena Etcher is a fantastic cross platform tool for writing operating systems to SD Cards and USB drives. Simply load the Image, choose the SD card, and click
Prepare WsprryPi
Before removing the SD card from the computer, be sure to add a file to the root of the boot folder on the SD card called ssh. This should be a blank file, but enables the SSH server on the Raspberry Pi so that you can connect to it headless. Once you are logged in, feel free to use raspi-config to enable wifi or change the memory split size (headless doesn't need much video ram).
sudo raspi-config
Don't forget to update and install some required packages.
sudo apt-get update && sudo apt-get install git
Once you have your initial configuration finished, we can download the requisite software.
git clone https://github.com/JamesP6000/WsprryPi.git
Move into the directory
cd WsprryPi
There is a library missing from one of the files in the repository. You will need to include a sysmacro to the list of includes at the top of ./WsprryPi/mailbox.c. Edit this file, and under the last include where it says:
#include <stdio.h>
#include <string.h>
#include <stdlib.h>
#include <fcntl.h>
#include <unistd.h>
#include <assert.h>
#include <stdint.h>
#include <sys/mman.h>
#include <sys/ioctl.h>
#include <sys/stat.h>

#include "mailbox.h"
Add an include so that it says:
#include <stdio.h>
#include <string.h>
#include <stdlib.h>
#include <fcntl.h>
#include <unistd.h>
#include <assert.h>
#include <stdint.h>
#include <sys/mman.h>
#include <sys/ioctl.h>
#include <sys/stat.h>
#include <sys/sysmacros.h><br>

#include "mailbox.h"<br>
Once this is done, you can build and install the code.
make && sudo make install
Testing WsprryPi
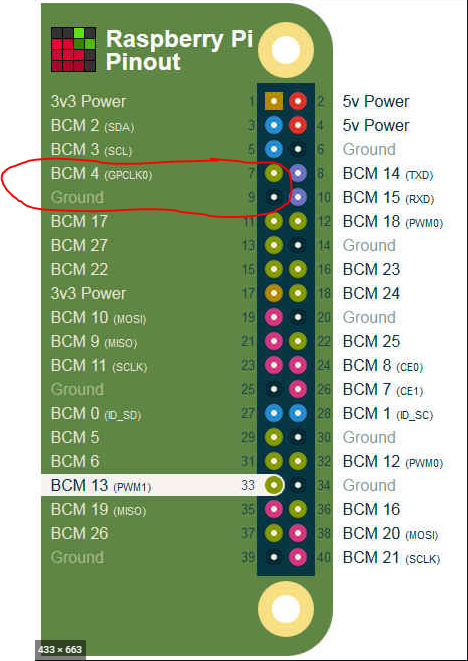
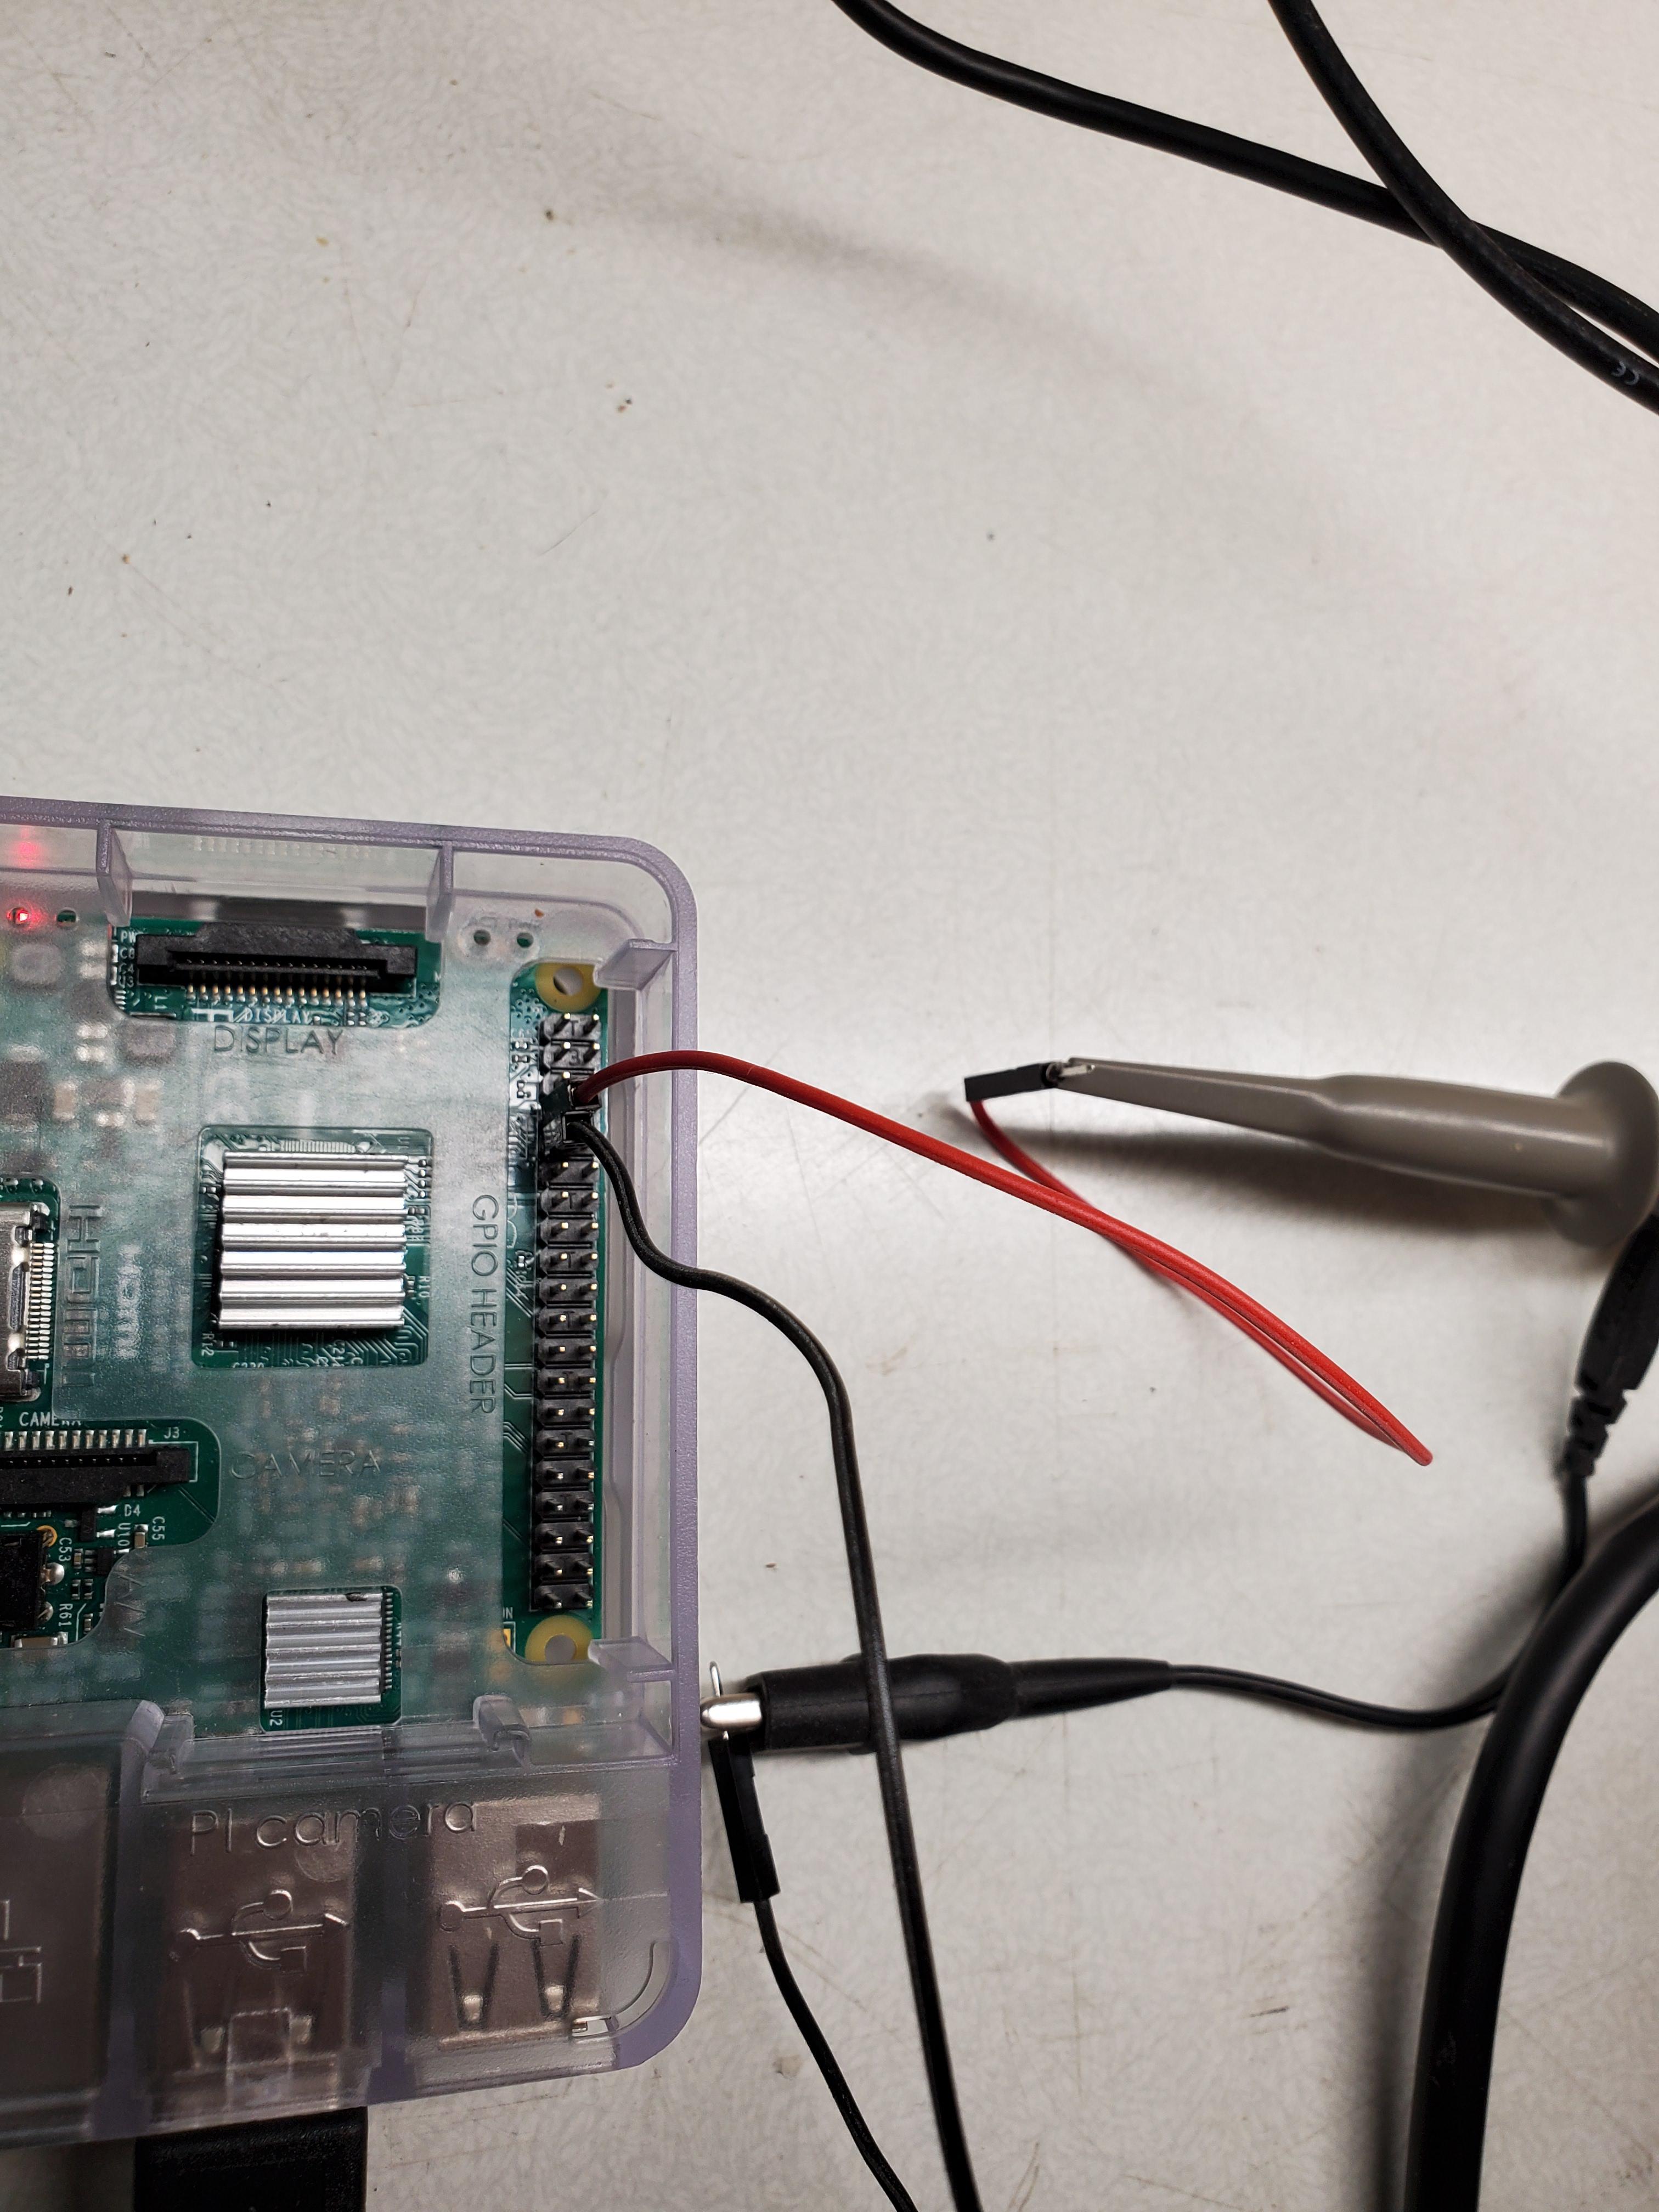
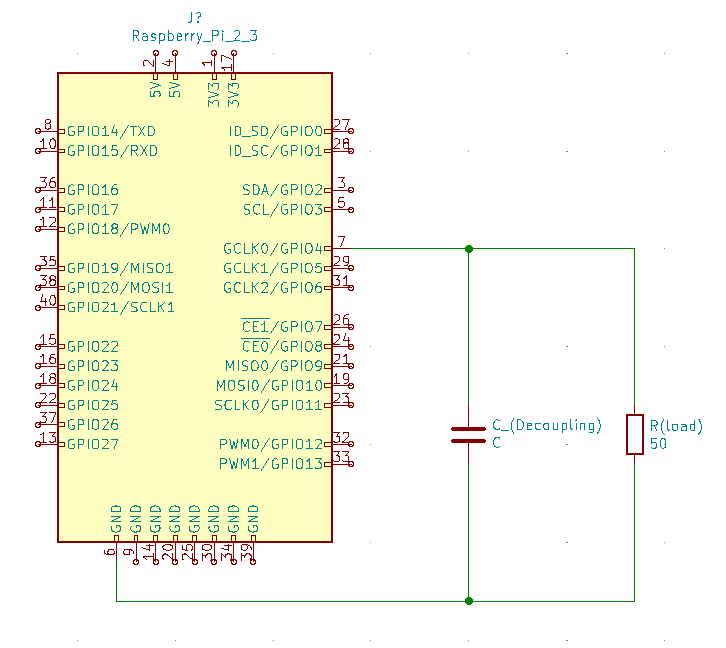
Pins 7 and 9 on the Raspberry Pi's GPIO headers are where the signal is output. Pin 9 is the Ground pin, and pin 7 is the Signal pin.
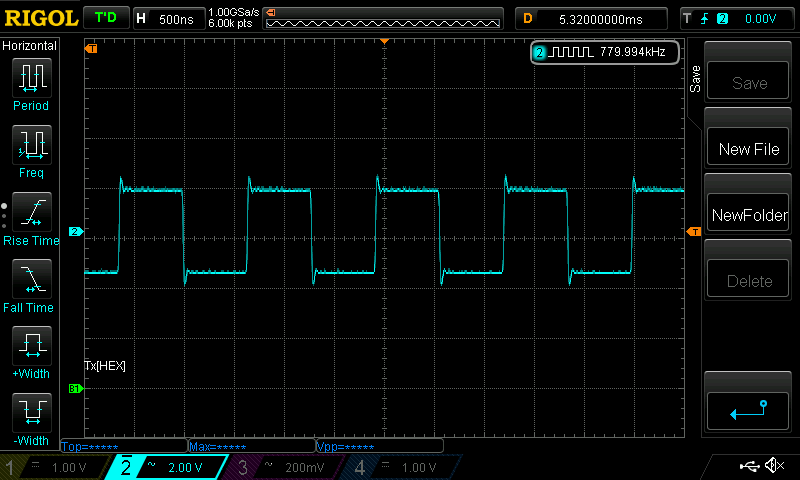
Once the oscilloscope was connected, WsprryPi was ran with a test frequency:
sudo wspr --test-tone 780e3
This is telling the software to emit a test tone on those pins with a frequency of 780 kHz. As seen from the capture from the oscilloscope, it was only off by about 6 Hz, so that's good enough.
Required Information

In order to effectively utilize the WSPRnet, you will need to be able to answer a few questions.
- Who are you? (Callsign)
- Where are you? (Location)
- How are you? (Frequency)
For clarification, transmission on these frequencies requires a license to operate on the amateur bands. You should have been assigned a callsign upon receiving a pass from the FCC on the amateur radio tests. If you do not have one of these, please get one before continuing.
The location is a little more straight forward. No testing needed! Find your location on this map, and just mouse over to get a 6 digit grid location (I believe only 4 are necessary(?)).
https://www.voacap.com/qth.html
Lastly, you must determine what frequency you would like to utilize for WSPR operation. This is vital because antenna selection will greatly determine the propagation distance of the signal, but even more importantly, the Raspberry Pi is using GPIO to generate signals. This means that the output is a square wave. What we need is a sinusoidal. We will need to construct a LPF (Low Pass Filter) to smooth the square shape to a usable sinusoid.
Filter Design
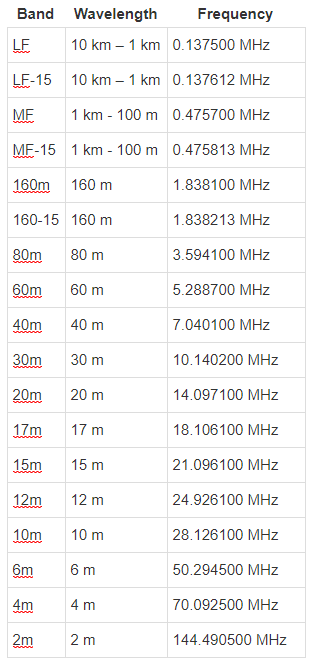
WSPR has designated frequencies allocated on multiple bands of the amateur radio spectrum. the bands are as follows in the table attached.
These numbers are going to be important for the antenna selection and LPF design. For this project, we will keep the filter design very simple and use a 1st order RC LPF (Resistor-Capacitor network Low Pass Filter). This makes the process very straight forward, as the equation for RC LPF design is:
F_c = 1/(2 * pi * R * C)
If we rearrange that a little bit, we can use the frequency to design our filter:
R * C = 1/(2 * pi * F_C)
We can assume that the load (antenna) will be a 50 Ohm, so if we cram that number into the equation and solve for C:
C = 1/(100 * pi * F_c)
Filter Design Cont'd

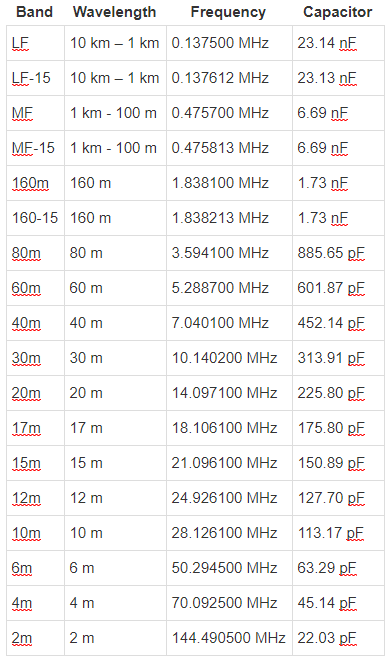
Bear in mind that these are math numbers, and likely not realizable with real components, but it's a good guide to use to quickly reference what size'ish you should need.
WSPR Away
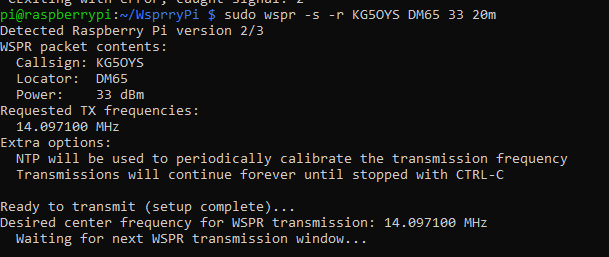
Just attach wires to act as a dipole antenna, and you're ready to join the WSPR fun. I am using 20m, so here's the shell input I used to transmit my beacon:
sudo wspr -s -r KG5OYS DM65 33 20m
ENJOY!