Raspberry Pi Security Camera
by MattW230 in Circuits > Wireless
3082 Views, 23 Favorites, 0 Comments
Raspberry Pi Security Camera
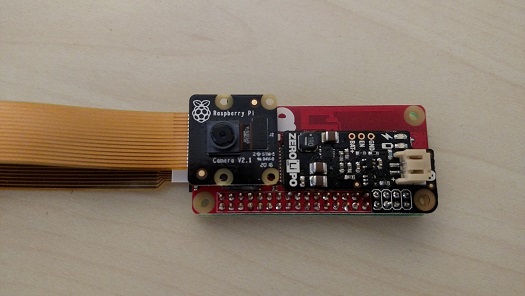
The finished product will be an IP camera that will stream wirelessly over your wifi. For more projects like this, and a more in-depth set of steps, visit https://hackmypi.com/PiCamPart1.php
Step 1: Building the Hardware
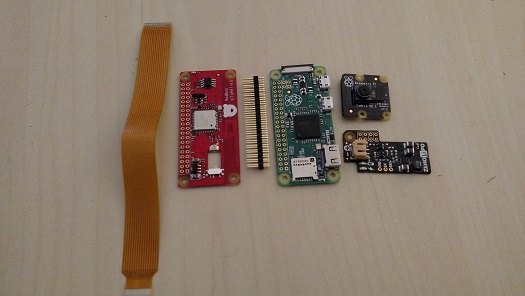
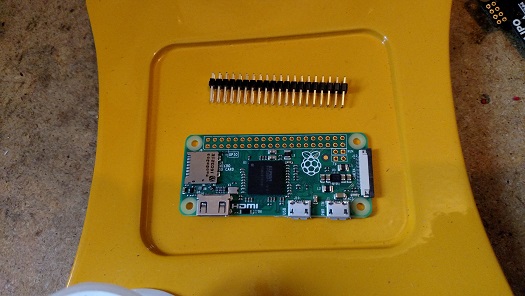
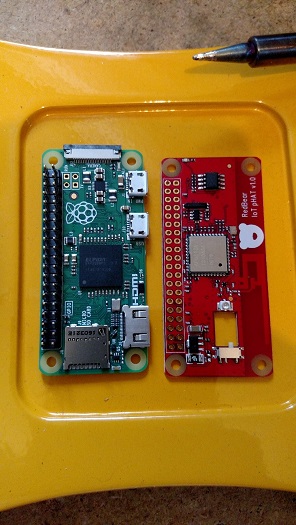

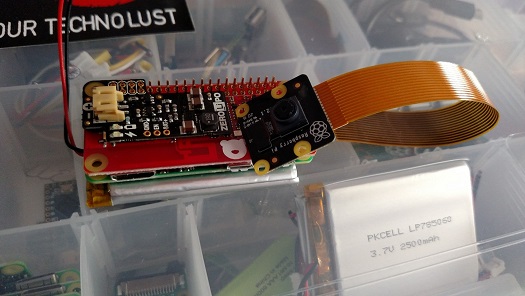
Start off by attaching a set of 2x20 headers onto the Pi Zero, and soldering a redbear IoT pHAT on top (no needed if using rapsberry pi zero W). This will give our basic Pi Zero wifi. Next, solder a Zero Lipo onto the left most 8 pins. This board allows for battery power for our IP Camera. Finally, attach a Raspberry Pi camera to the Pi Zero using the Pi Zero Camera Cable. Again, view my full guide here: https://hackmypi.com/PiCamPart1.php for more in depth guides.
Next We Need to Modify Some Code
The hardware side of this guide is done. Next we just need to get the Pi setup to stream it's video wirelessly. Start by loading up an SD card with standard rasbian Pixel. If unsure how to do this, reference my guide on it, here. Once the OS is loaded, put the SD card into the Pi, let the Pi bootup, and settle on the desktop. Connect the Pi to the wifi (top right corner). First thing to do will be change the hostname/password. Run the command:
sudo raspi-config
in a terminal window. From this menu, change your hostname to whatever you wish, change the password on the pi, and enable the camera. Once those settings are done, reboot the Pi.
Once the Pi comes back up, open up a terminal and type:
ifconfig
Under wlan0 you will see your Pi's IP addess. Make sure to note it down somewhere. The next few commands will install a package called Motion, and configure it to stream whatever the camera sees wirelessly. Run the following command to update your Pi:
sudo apt-get update
Depending on you internet connection, this command may take some time to do everything. Once the update command is done, run the following command:
sudo apt-get install motion
After the install is over, we will configure Motion properly. A few notes before we start, Motion will by default record motion detection. For some reason, this is crashing my Pi Zero, so for now we will disable motion detection. At a later date we will be setting up a Pi 3 to handle input from multiple of these IP cameras. At that point we will have the Pi 3 handle the motion detection. First thing we need to do to configure Motion is tell the daemon to always be on. Run the following command:
sudo nano /etc/default/motion
to open and edit a config file,
change start_motion_daemon=no to start_motion_daemon=yes
The next command will bring up the configuration file for motion itself:
sudo /etc/motion/motion.conf In here you are going to need to find the following lines, and modify them to match mine:
daemon on
width 640
height 480
framerate 100
stream_localhost off
set motion threshold to 300000
set stream fps to 30
These will set the stream resolution, the local framerate, allow for it to be viewed wirelessly, practically disable motion activation, and set the stream framerate. After this, there is just one more section. Currently, the Pi will work properly, but the proper drivers are not loaded for the Pi Camera. Run the following command:
sudo /etc/init.d/motionIn
this file, add the line
sudo modprobe bcm2835-v4l2
after the line that says 'chown'.
Reboot the pi, and if you open up a web browser on another computer to "ipaddresofpi:8081" you should see the camera streaming whatever it sees!
Again, view the full guide here: https://hackmypi.com/PiCamPart1.php for a more in-depth guide!