Raspberry Pi Rover (simple) Using Rpi , Arduino
by ysingh7 in Circuits > Raspberry Pi
7304 Views, 21 Favorites, 0 Comments
Raspberry Pi Rover (simple) Using Rpi , Arduino
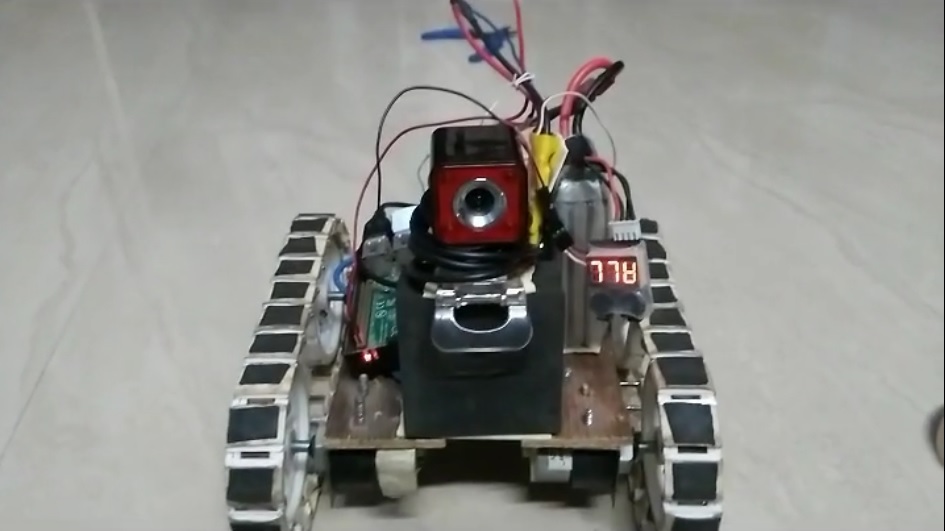
building an Autonomous rover has been a dream for me . it is not that easy to build a self driving vehicle without 3D sensors like lider , kinect ... etc . in this instructable , i will be teaching you the basic rover which can be controlled using wifi with a video feed
Introduction
Parts Needed
list of parts needed to do this project
1. Raspberry pi (B+,2,3)
2. wifi dongle (if Rpi B+ is used . other models comes with inbuild wifi module)
3. Arduino uno
4.L293D or other similar motor driver
5.webcam (if needed)
6.wifi router
7.monitor,keyboard,mouse (only for first time installation of Raspberry pi)
8.chassis , motor for making the rover
9.Lipo battery 11.1v , charger
10. battery eliminator 11.1v to 5vdc or ESC with battery eliminator inbuild
Main Concept
i have planned to do this in two instructables (simple and Advanced) . this instructable will explain the steps to build a standard rover which can be controlled over wifi network . the harder one will cover ROS , image processing and Navigation
MAIN IDEA :
using ssh and vnc server , we are going to connect our computer with the onboard raspberry pi and send controls to the motors
Software Needed
1.raspbian os (follow these instruction to flash a memory card for raspberry pi https://www.raspberrypi.org/documentation/installa...)
2.ssh client : for windows (putty http://www.chiark.greenend.org.uk/~sgtatham/putty/...) for ubuntu (sudo apt install openssh-client)
3.install arduino for raspberry pi (will be covered in this instructable later)
4.xtightvncviewer : for windows (http://www.tightvnc.com/download.php)
see next slides for more details
Preparing Raspberry Pi
1. flash a memory card and install the raspbian os by following these steps (simple steps only)
connect RPI to a monitor ,keyboard,and mouse (only for the beginning)
open terminal and
2. run sudo apt-get update and sudo apt-get update (only for first time)
3. install vncserver (sudo apt-get install tightvncserver)
4.install Arduino ide (sudo apt-get install arduino)
for the purpose of operating raspberry pi remotely , we need to set a wifi connection with constant ip address . you need a wifi router (or hotspot ) connect pi to it (wifi dongle or inbuild wifi module)
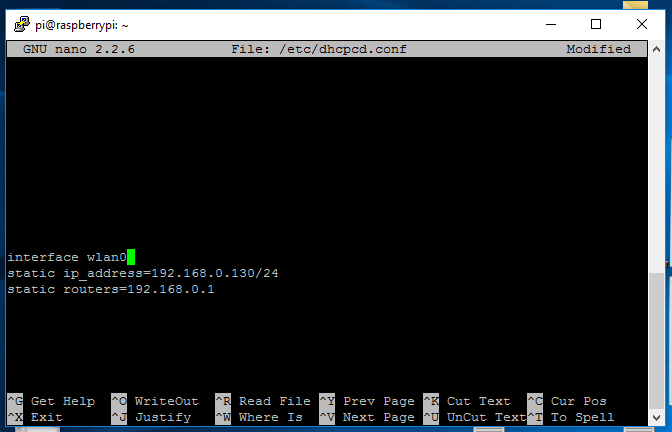
open dhcpcd.conf by using this cmd in the terminal
sudo nano /etc/dhcpcd.conf
enter the following
interface wlan0
static ip_address=192.168.0.130/24
static routers=192.168.0.1
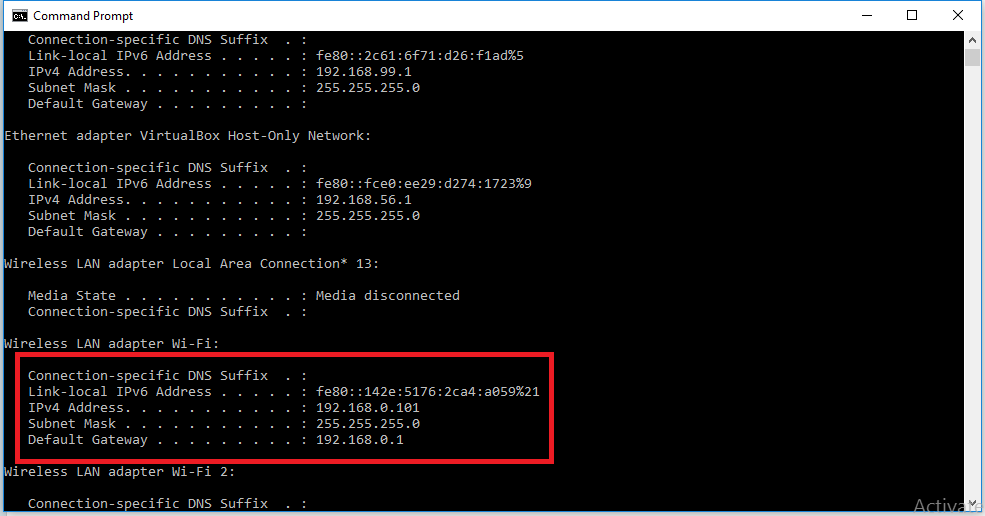
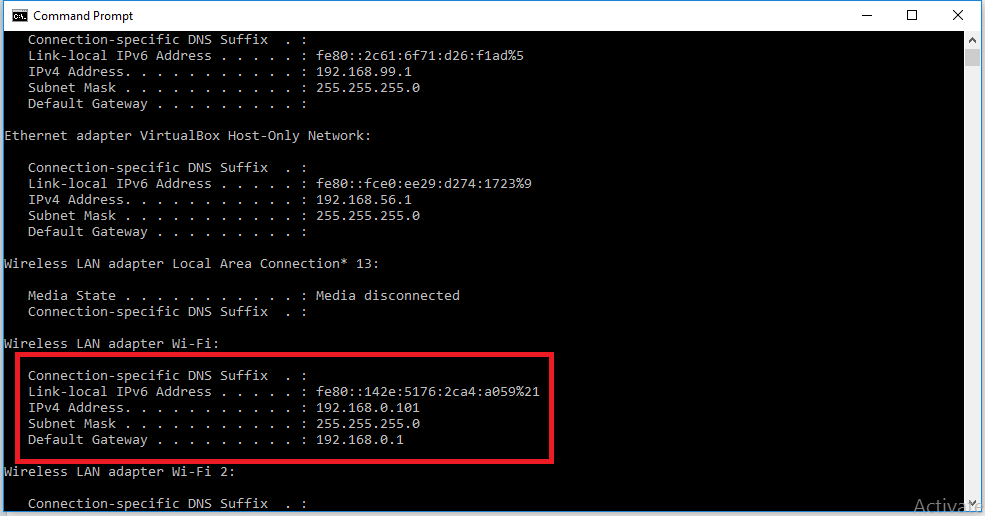
(note the ip address and static routers will change for your system . check your router gateway before setting this)
in this pic you can see the default gateway and my ip 192.168.0.101 ... change the last 101 to 130
restart raspberry pi
sudo shutdown -h now
power it on again
now your wifi should be connected automatically (provided you had connected it manually one time with password )
Preparing System
for windows
1.install putty http://www.chiark.greenend.org.uk/~sgtatham/putty/... download the correct version for your windows 32 or 64 bit and install it .. (simple installation only :) )
2.install xtigntvncviewer http://www.tightvnc.com/download.php
thats it .. connect the the same wifi network
for ubuntu
1. install xtightvncviewer apt-get install vncviewer
connect to the same wifi network and we are good to go
Ssh Connection
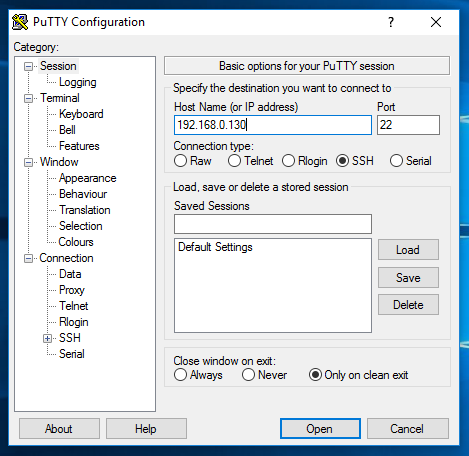
1. power up raspberry pi
2.open putty
3.type the ip address of the raspberry pi that we set earlier and connect
4.enter the username and password for raspberry pi (default USERNAME : pi PASS : raspberry)
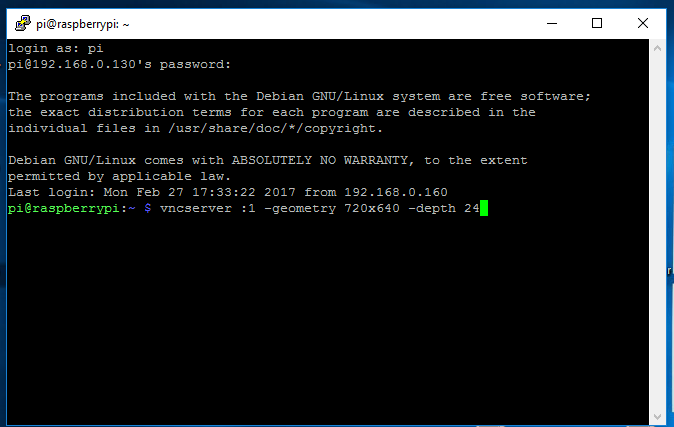
5.you should see a terminal window as shown in this image
6.enter this command to start the ssh server
vncserver :1 -geometry 720x640 -depth 24
note : for the first time , you will be asked te set a password for ssh client
in windows
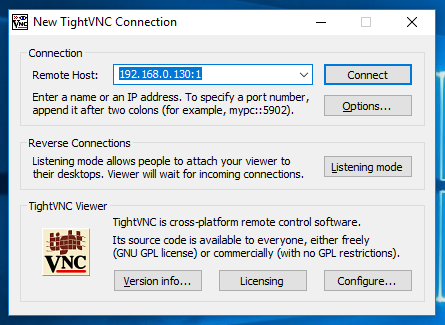
open xtightvncviewer (this will also ask you to set password)
in the dialog box , enter the RPI ip address followed by :1
mine is 192.168.0.130:1
my ip followed by :1
enter the password in the dialog box
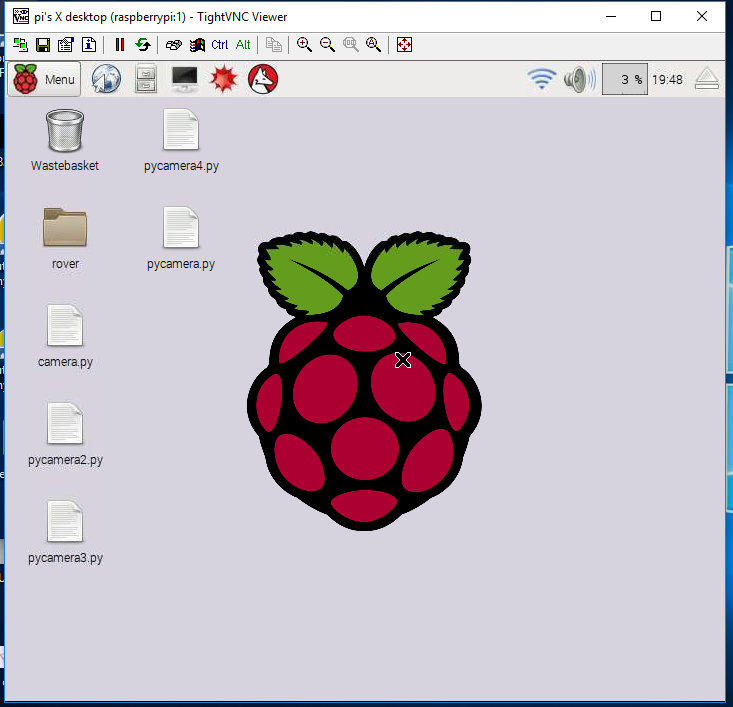
now you should see the RPI display . if not check your connection with wifi and check your RPI ip address
ARDUINO
upload this porgram either from computer or from RPI
thats it
Downloads
Hardware Connection


see my video on building this rover
Final Step
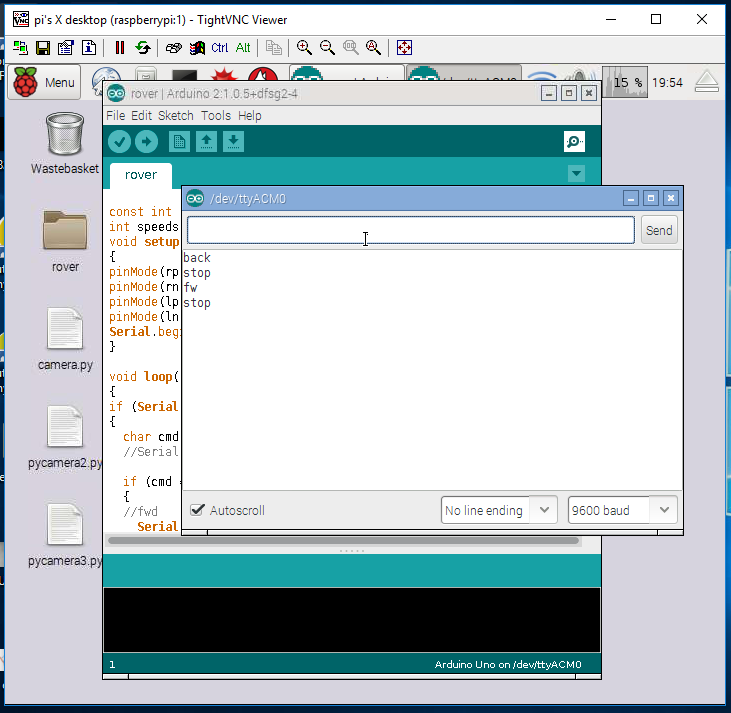
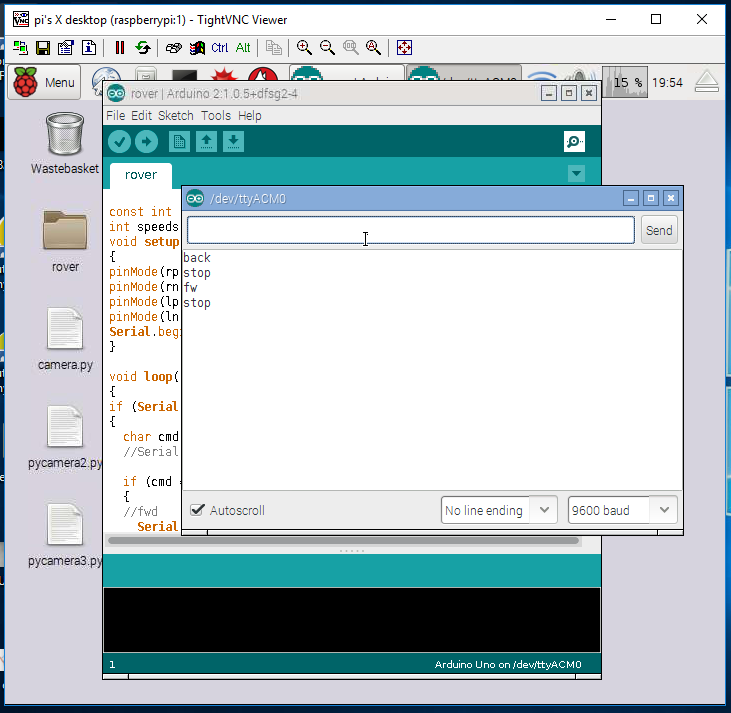
we had done all the hard works . now , as shown in the video . just open our RPI monitor (xtightvncviewer) open arduino ide and go to serial connection window and enter the commands
f - forward
b - backword
r & l - right and left turn
s - stop
Conclusion
we just finished our first tele-operated rover by just using some opensource softwares . in my next instructable , i will teach you how to use ROS ,and image processing for doing an autonomous rover without changing any thing in our rover.
thanks .. if you like this , vote for me !!! :)