Raspberry Pi Radio
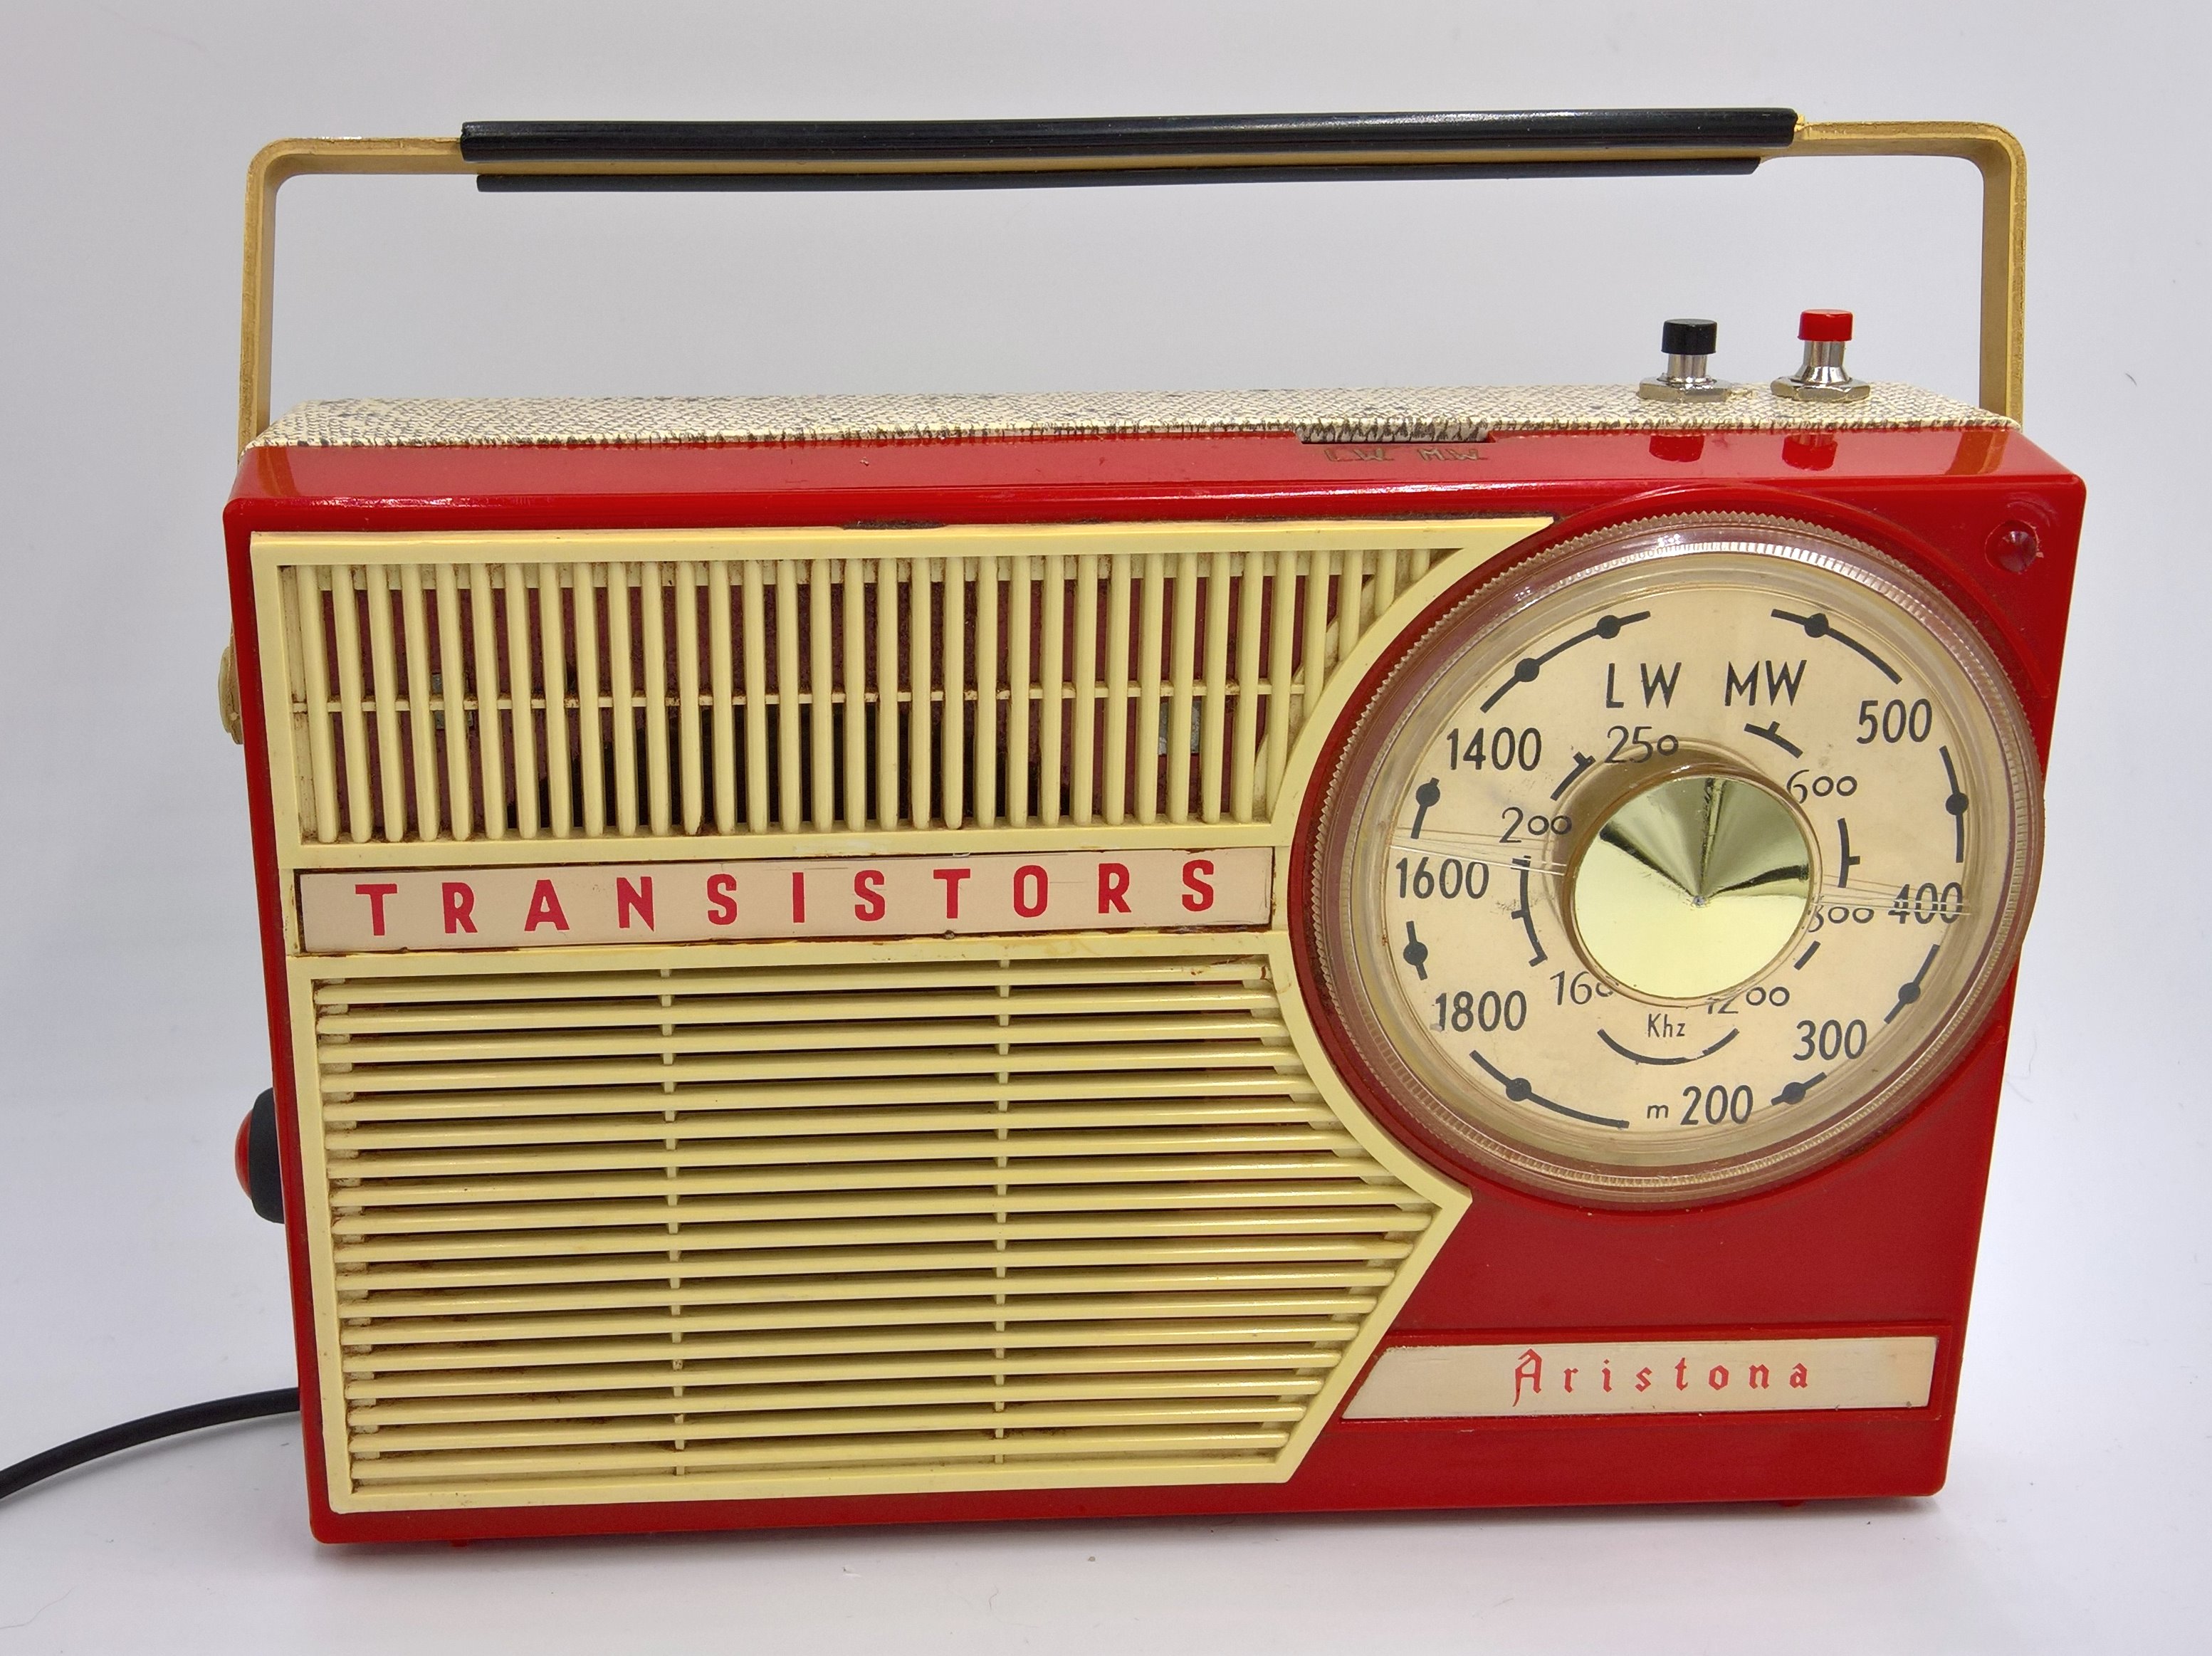
This retro looking radio was made from an old radio. Inside a Raspberry Pi and some other components were placed to make it work via the internet. It uses radio streams from the internet. Features of the radio are:
- Tuning is done by turning the original tuning knob of the radio.
- The tuned channel is pronounced through the speaker (in English or in your own language).
- Both the tuned channel and current volume are stored in text files in order to restore these settings automatically the next time the radio is switched on.
- Safe power off: the Raspberry Pi inside is properly shutdown upon pressing the power off button.
- LED indicator to show if it is safe to remove the power cord.
- Old style buttons for volume up/volume down.
- Hardware includes a Raspberry Pi, a small audio amplifier, a rotary encoder as tuning control. All controls are connected to the Pi's GPIO connector. The software is a python script that I wrote.
Materials needed:
- An old radio. If the speaker is working you can re-use it.
- A Raspberry Pi.
- Two switches for volume control.
- One switch for power off.
- A rotary encoder on a PCB.
- A small audio amplifier.
- A capacitor of 100uF.
- An LED and resistor.
- Some wires.
- Some hot glue and a power adapter.
Raspberry Pi Preparation
The OS and other software must be installed on the Raspberry Pi first. In this step we use a HDMI monitor to work with the Raspberry Pi. Later when all parts are mounted inside the radio case the only way to work with the Pi (for instance to add new radio channels, or update the software) is via SSH.
- Install the OS Raspbian with desktop on the Pi.
- Connect the Pi to your Wifi network and enable SSH and GPIO in Raspian settings.
- After this we need some additional software. Minimal MPlayer and Festival are needed. MPlayer is used to play the radio streams and Festival is a text-to-speech program that is used to pronounce the radio channels that you tune.
This step can also be done using SSH since the network is there.sudo apt-get update
sudo apt-get upgrade
sudo apt-get install festival
sudo apt-get install mplayer2
Hardware Installation
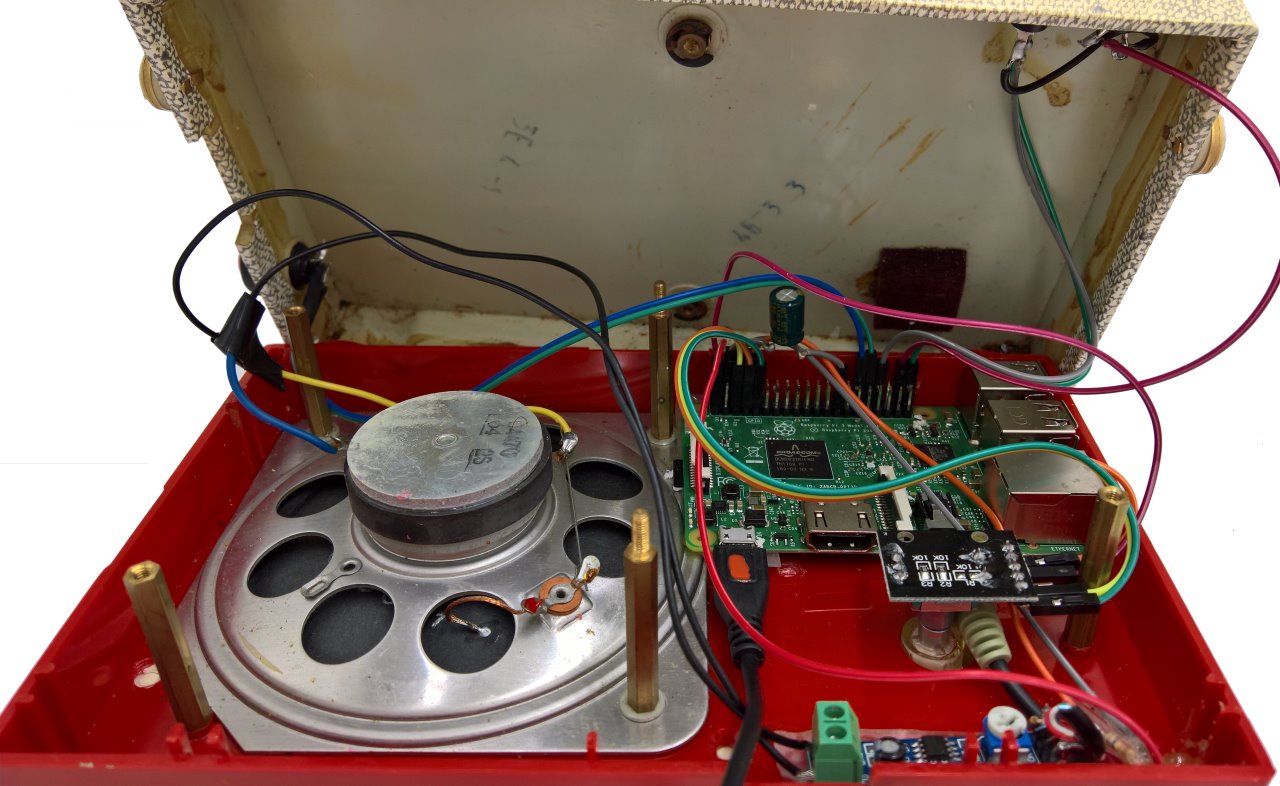
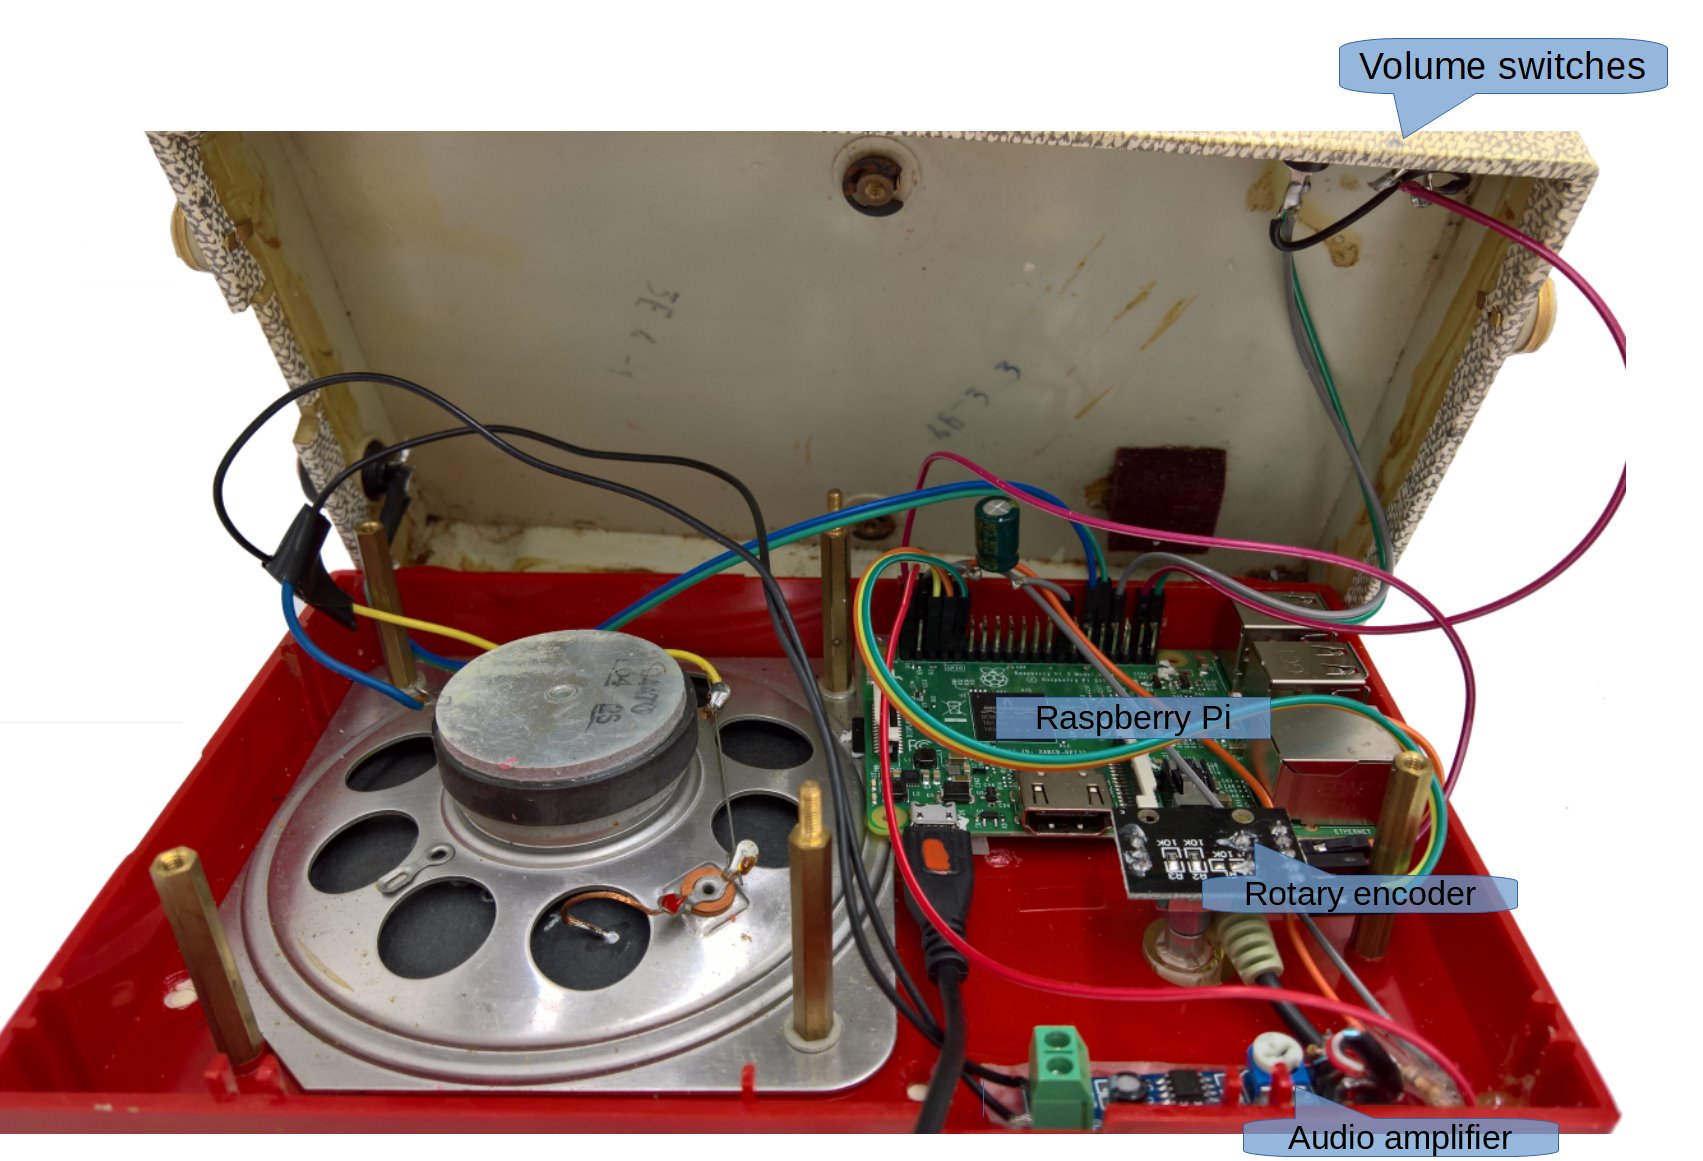
Open the case of your old radio and remove all components but the speaker.
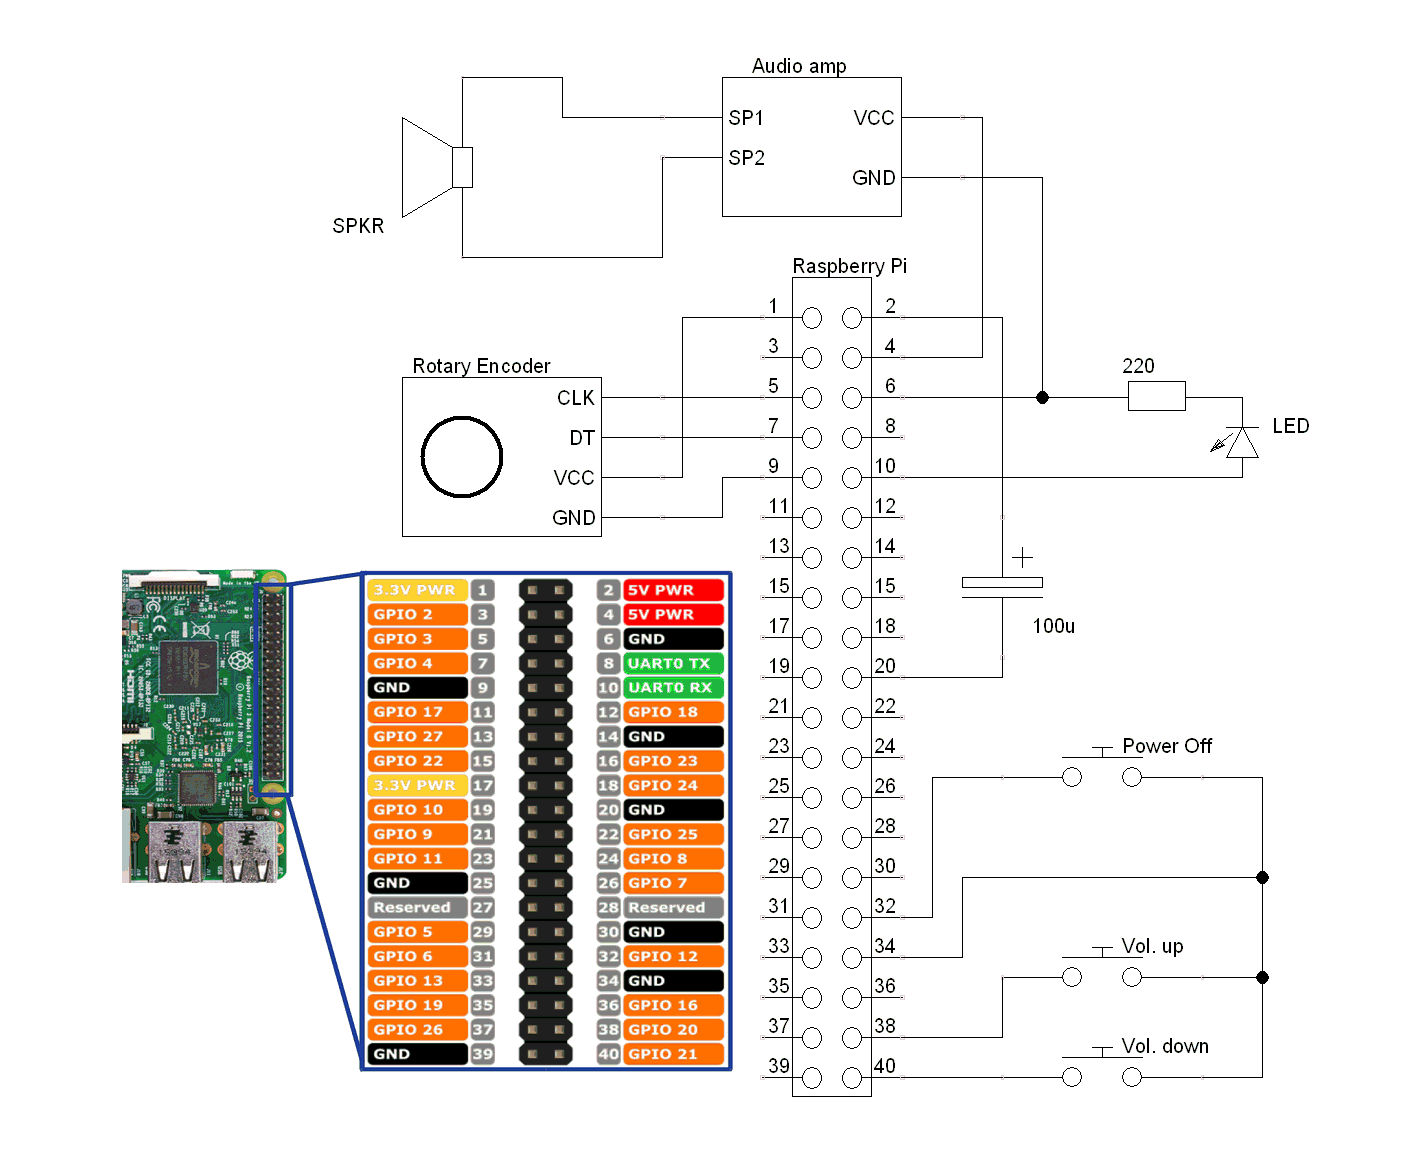
Then install the new components according to the schematic. The input of the audio amplifier is connected to the audio output of the Pi. A capacitor is placed over the 5V of the Pi to decrease noise. I needed this because I use a cheap power adapter as power a source.
Connect the rotary encoder, the 3 switches and the LED with resistor with wires to the Pi.
I used high quality double sided tape to mount the Raspberry Pi and the audio amplifier. The LED needed some hot glue to stay stuck. Wire everything according to the schematic. If you do not understand anything, just ask me.
Software Installation

The software consists of a Python script that is run automatically upon boot. You may want to change the Pyhton program before you upload it to your Raspberry Pi. You'll need to put in the radio channels that you want your radio to be tuned to.
When you look at the Python script you see that the array Channels holds all streams. Every stream has a name and a URL (2 consecutive entries in the array). The name will be pronounced by the system as you tune in to that station.
If you want the names to be pronounced in your own language instead of English you need to change the names into some sort of phonetic English. For instance I use the phrase "Bay N Err" to make the system say "BNR" in Dutch (instead of "Bee N Arr" as it would do if I just had put "BNR").
Upload the file Radio1.py to /home/pi
Config changes
- Add the line
enable_uart=1in/boot/config.txt - Add the line
python Radio2.pyto the end of the file.bashrc
Also make sure that your Pi boots in command line.
Downloads
Listen to the Music
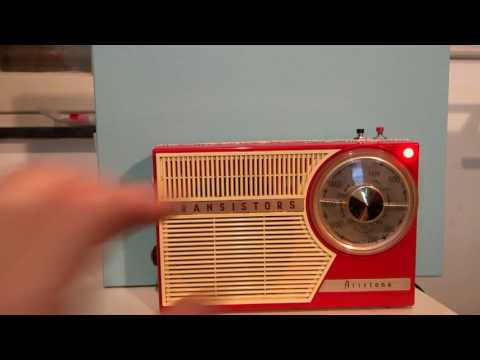
Listen to your favorite radio channels (or your own hosted streams) by tuning the tuning knob.
Increase or decrease the volume by pressing the volume switches.
If you want to switch off the radio press the power off button once and wait for the LED to be off. As soon as it is off then the Pi has halted and it is safe to remove the power cord.