Raspberry Pi Pico STEAM Robot: Low-Cost, Programmable Robot
by TechLabsCH in Circuits > Raspberry Pi
2339 Views, 17 Favorites, 0 Comments
Raspberry Pi Pico STEAM Robot: Low-Cost, Programmable Robot
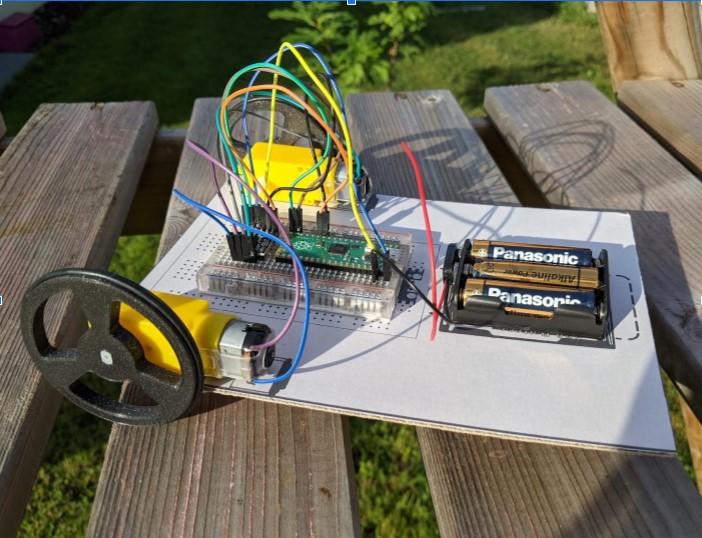
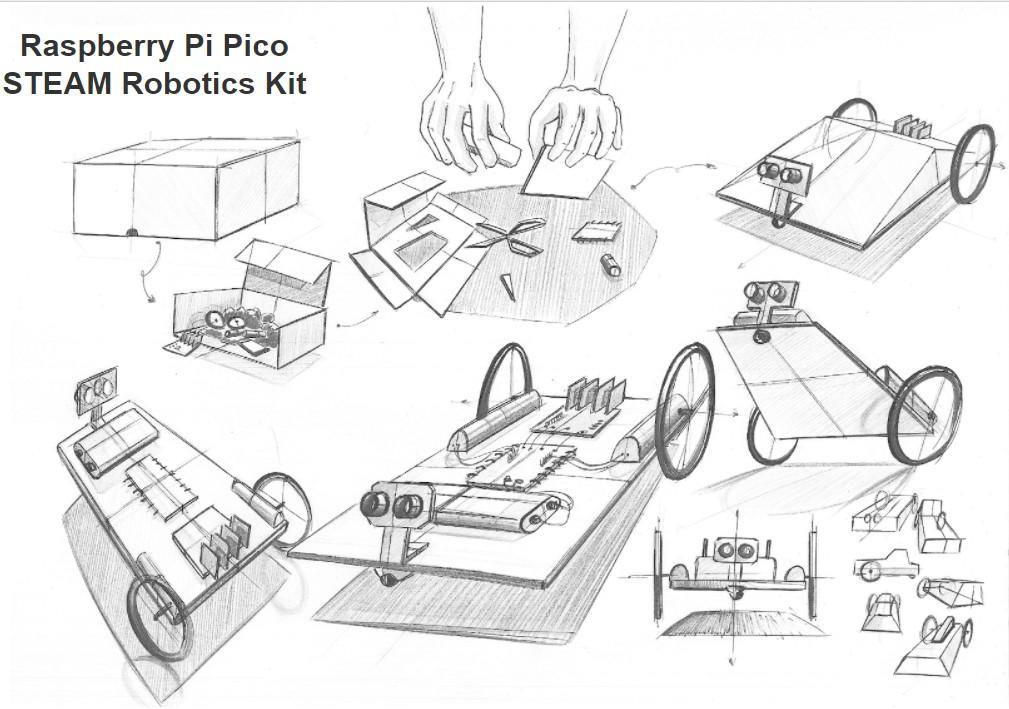
Introducing the Raspberry Pi Pico STEAM Robot, a low-cost, programmable car suitable for young learners to build, program, and customize on their own! It utilizes Raspberry Pi pico at the core and is paired with simple electronics and recycled material. The movement of the car is programmable using the simple Scratch-like block coding from make.playpiper.
Supplies
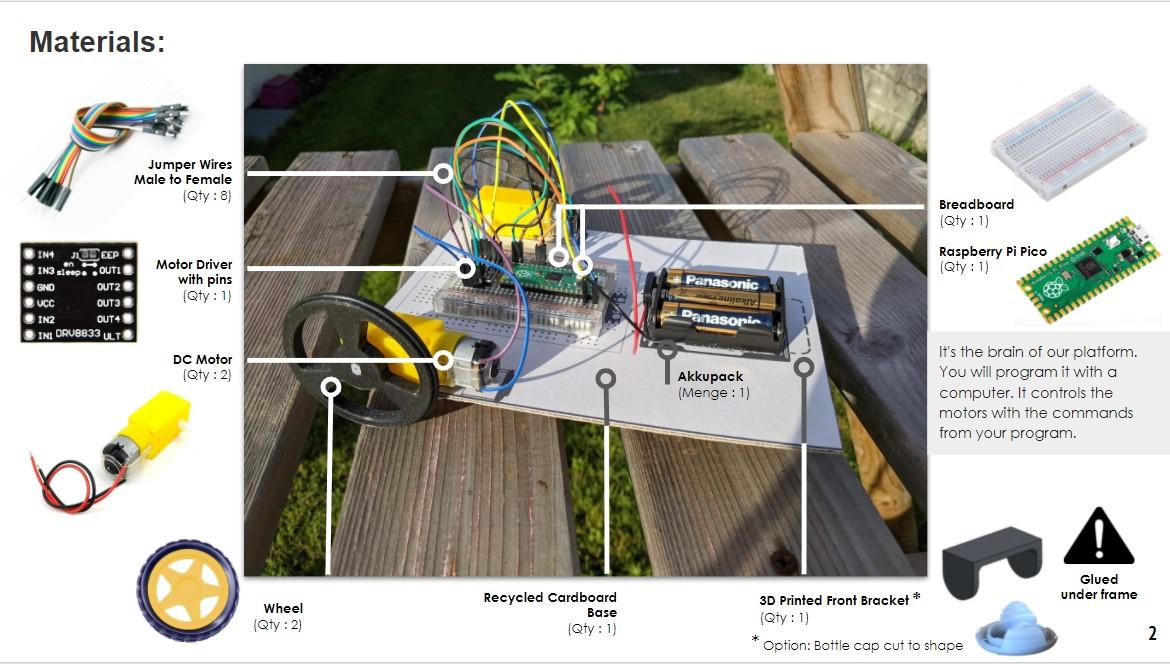
- RaspberryPi Pico with soldered headers QTY 1
- Motor + wheel QTY 2
- DRV8833 Motor driver QTY 1
- Breadboard QTY 1
- Wires: Male to Female QTY 7
- 3x AAA battery box QTY 1
- micro-USB cable QTY 1
- 3D printed bracket or Upcycled from bottle cap
- Recycled Cardboard box
- Box cutter
- Double-Sided Tape
- Recycled material or craft materials to decorate
Cut Out Car Frame
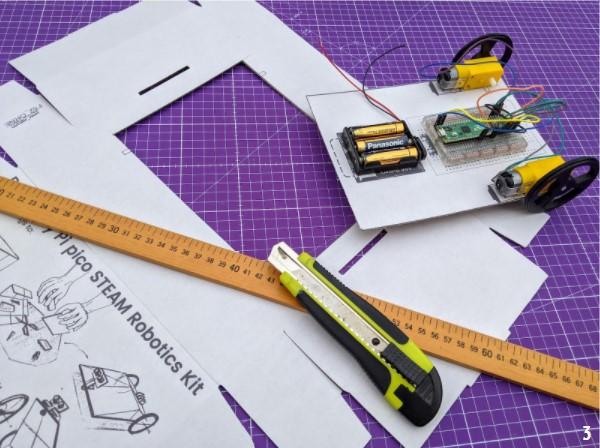
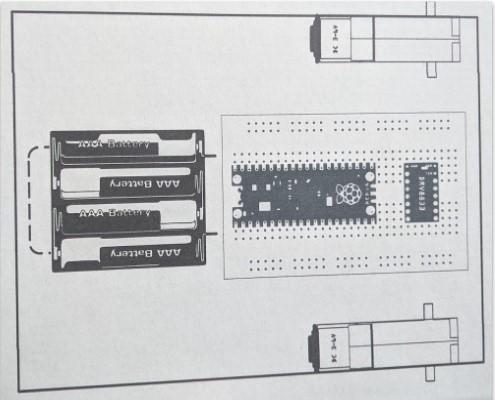
The car frame can be made from any recycled cardboard material cut to the size that fits the main components.
- Position the breadboard and battery housing on the top-side center of the frame and the motors to each side.
- Cut a frame to your desired shape and size that, at minimum, fits these main components. Option to use the provided printable file as a template for the frame and part layout (See PicoRobotLayout).
Downloads
Add Double Sided Tape to Frame
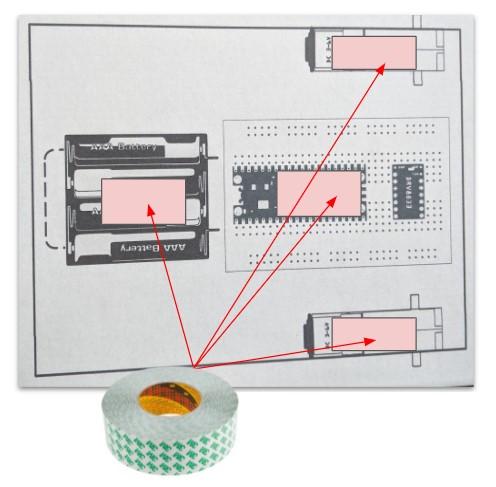
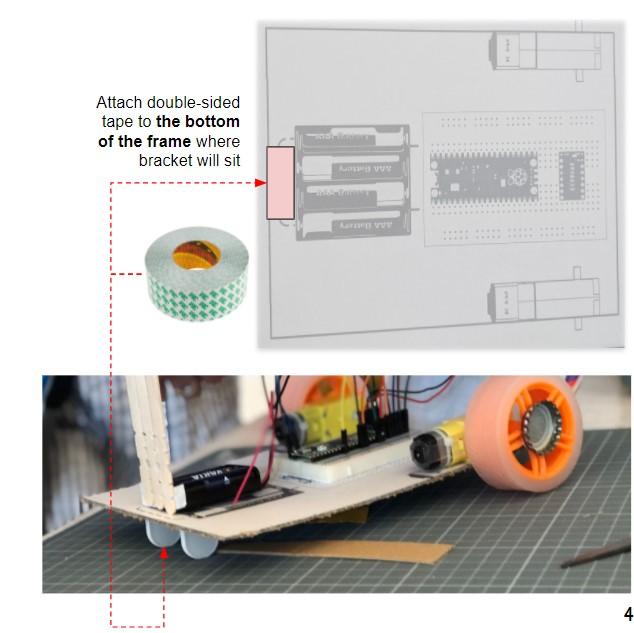
- Attach 4 strips of the double-sided adhesive tape to the top where the breadboard, battery, and motors will sit.
- Attach one strip of the double-sided adhesive tape to the bottom front where the bracket will attach.
Make a Front Bracket
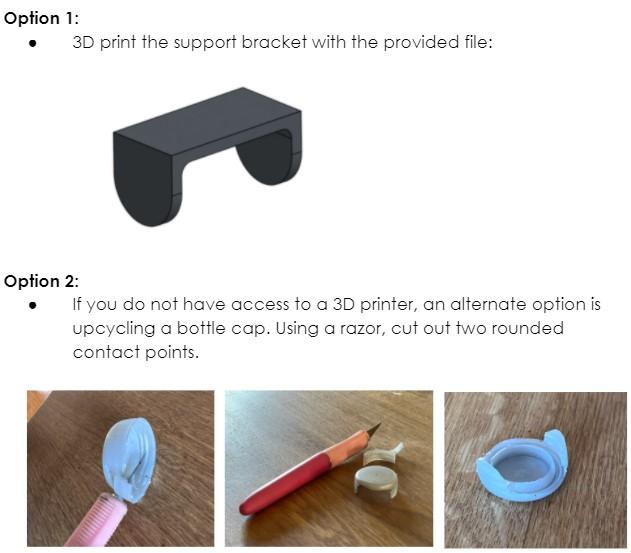
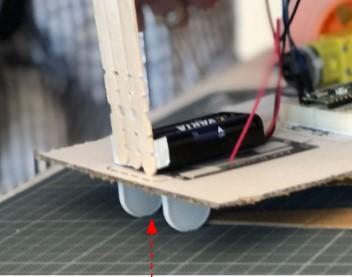
The front side of the car is supported underneath with a stationary, plastic bracket. You have two options for making this front bracket.
- Option 1: 3D print the support bracket with the provided 3D file (See Bracket.stl)
- Option 2: If you do not have access to a 3D printer, an alternate option is upcycling a bottle cap. Using a razor, cut out two rounded contact points.
Downloads
Attach Parts to the Frame
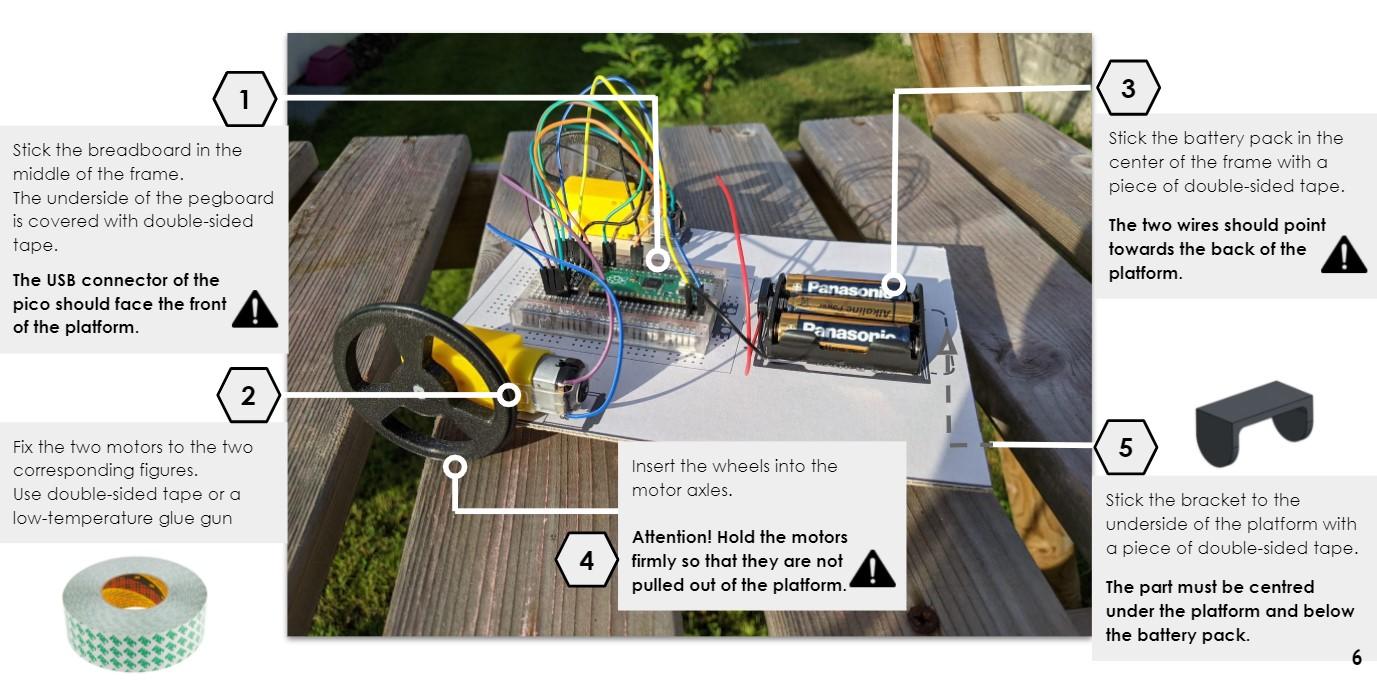
- Stick the breadboard in the middle of the frame using the pre-affixed double-sided tape. The USB connector of the pico should face the front of the platform.
- Fix the two motors to the two corresponding figures. Use double-sided tape (a low-temperature glue gun is also suitable if preferred)
- Stick the battery pack in the center of the frame with a piece of double-sided tape. The two wires should point towards the back of the platform.
- Insert the wheels into the motor axles. Attention! Hold the motors firmly so that they are not pulled out of the platform.
- Stick the bracket to the underside of the platform with a piece of double-sided tape. The part must be centered under the platform and below the battery pack.
Mount Boards
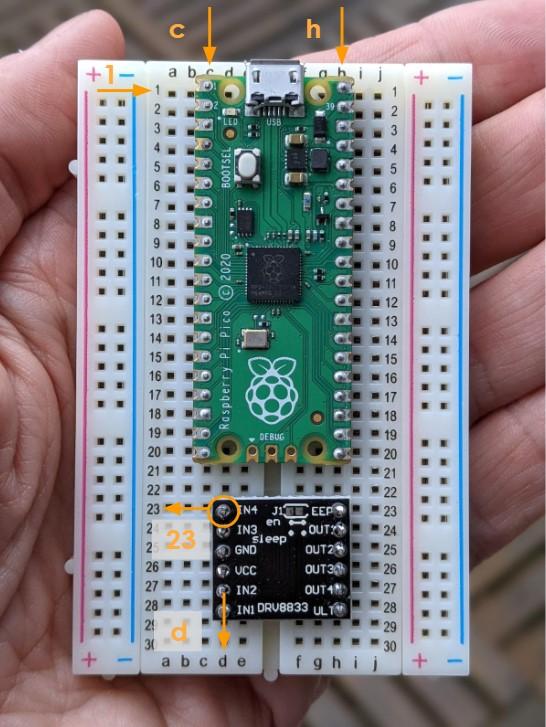
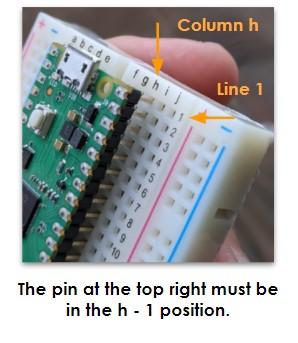
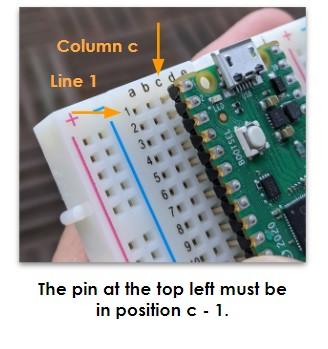
- Carefully insert the Raspberry Pi Pico into the breadboard as shown.
- The pin at the top left must be in position c - 1.
- The pin at the top right must be in the h - 1 position.
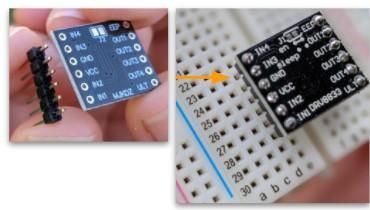
- Attach the header pin rows on both sides of the board as shown in the figure on the left.
- The pin at the top left (IN4) must be in position d - 23.
- Carefully insert the motor card into the breadboard and solder the header pins to the card.
Connect Wires
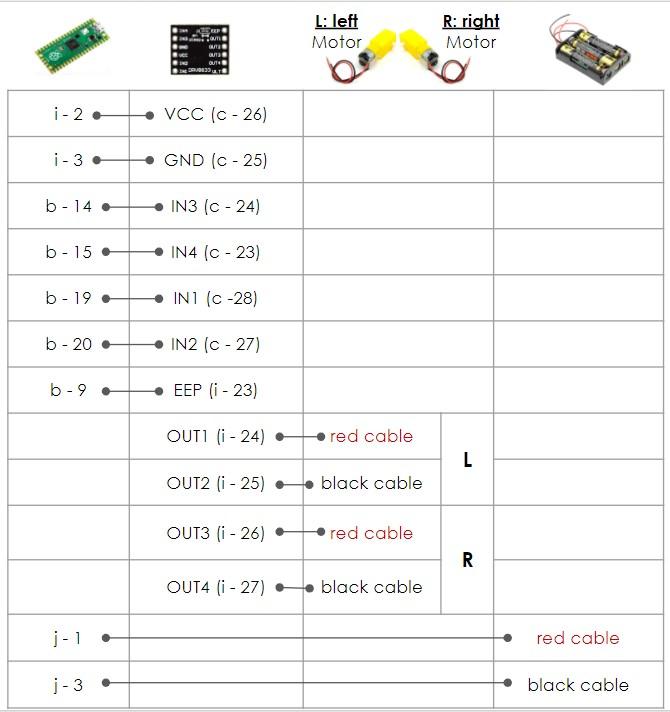
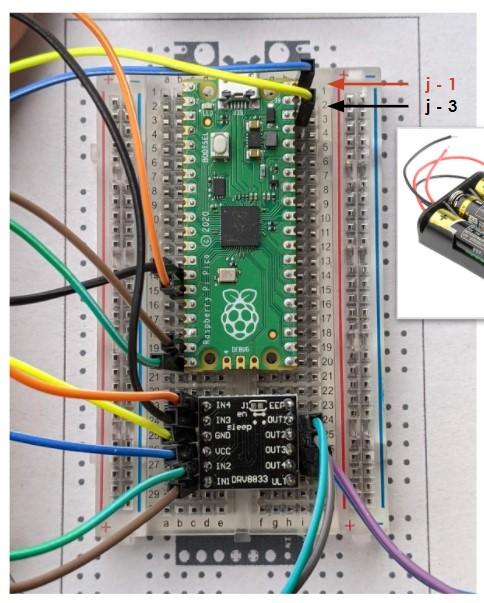
- Connect the component wires to the breadboard as shown in the table.
- After this step the car is built and ready for programming?
Install Pico Firmware
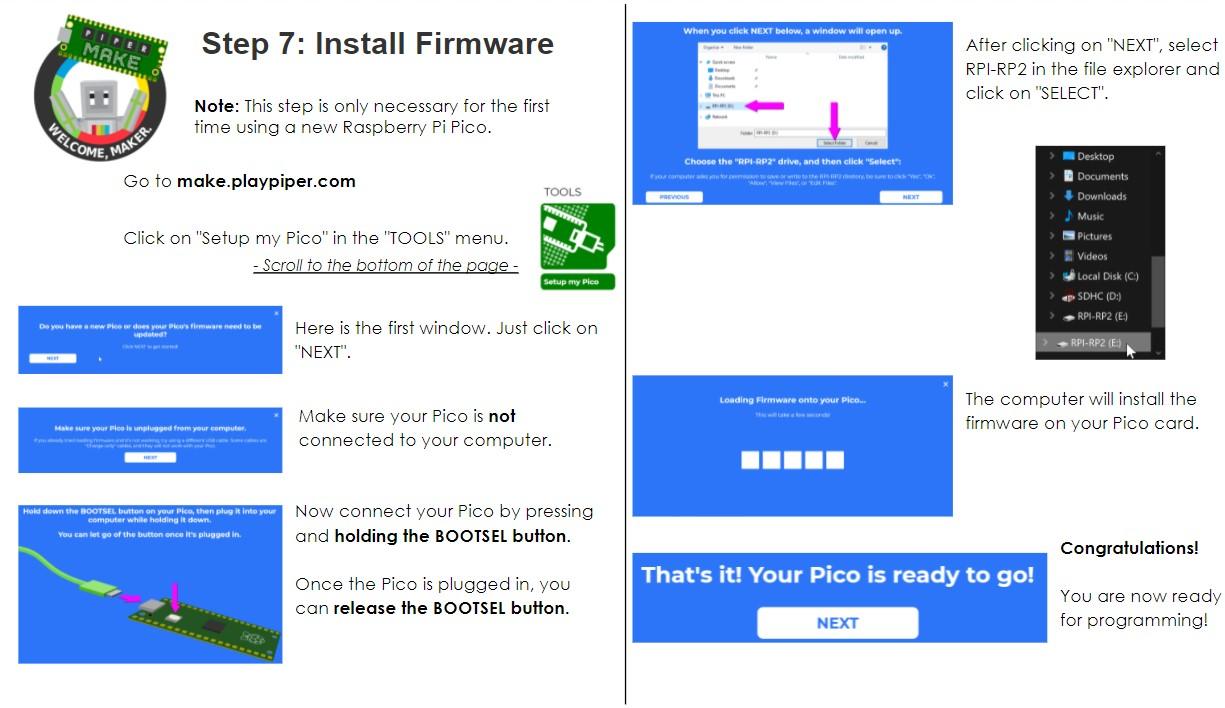
Note: This step is only necessary for the first time using a new Raspberry Pi Pico. When you reprogram the car you can skip this step.
- Go to make.playpiper.com
- Click on "Setup my Pico" in the "TOOLS" menu. Scroll to the bottom of the page.
- Click on "NEXT".
- Make sure your Pico is not connected to your computer.
- Now connect your Pico by pressing and holding the BOOTSEL button.
- Once the Pico is plugged in, you can release the BOOTSEL button.
- After clicking on "NEXT", select RPI-RP2 in the file explorer and click on "SELECT".
- The computer will install the firmware on your Pico card.
- Congratulations! You are now ready for programming!
Begin Programming
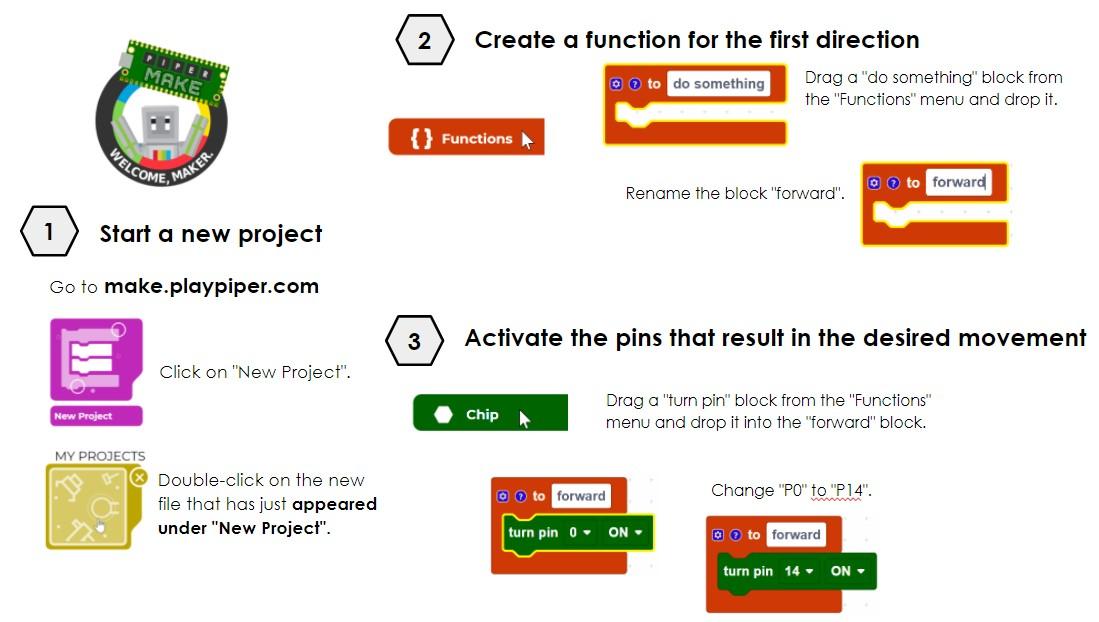
- Go to make.playpiper.com
- Start a new project
- Click on "New Project".
- Double-click on the new file that has just appeared under "New Project".
- Create a function for the first direction
- Drag a "do something" block from the "Functions" menu and drop it.
- Rename the block "forward".
- Use the Chip block to Activate the pins that result in the desired movement of the motor
- Drag a "turn pin" block from the "Functions" menu and drop it into the "forward" block.
- Change "P0" to "P14".
Continue Programming
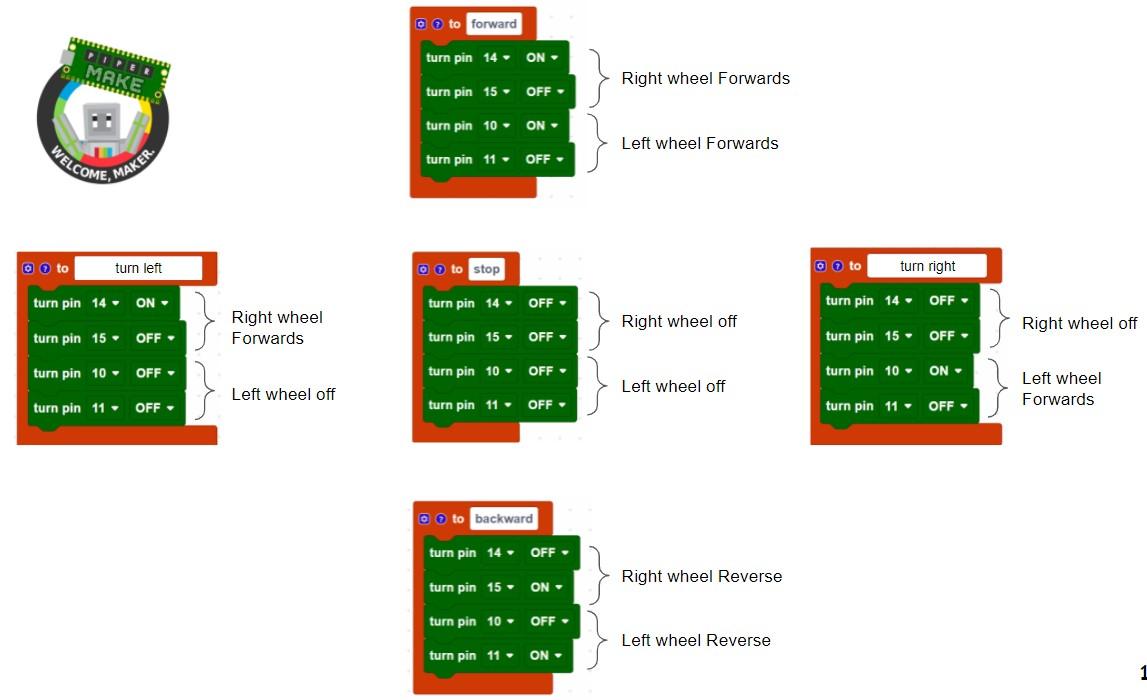
- Repeat these same steps to create the functions for the basic movement directions
- Create Functions for: forward, backward, turn right, turn left, and stop
- Drag and drop Chip blocks and change the pin number and on/off values to match code
Program a Movement Sequence
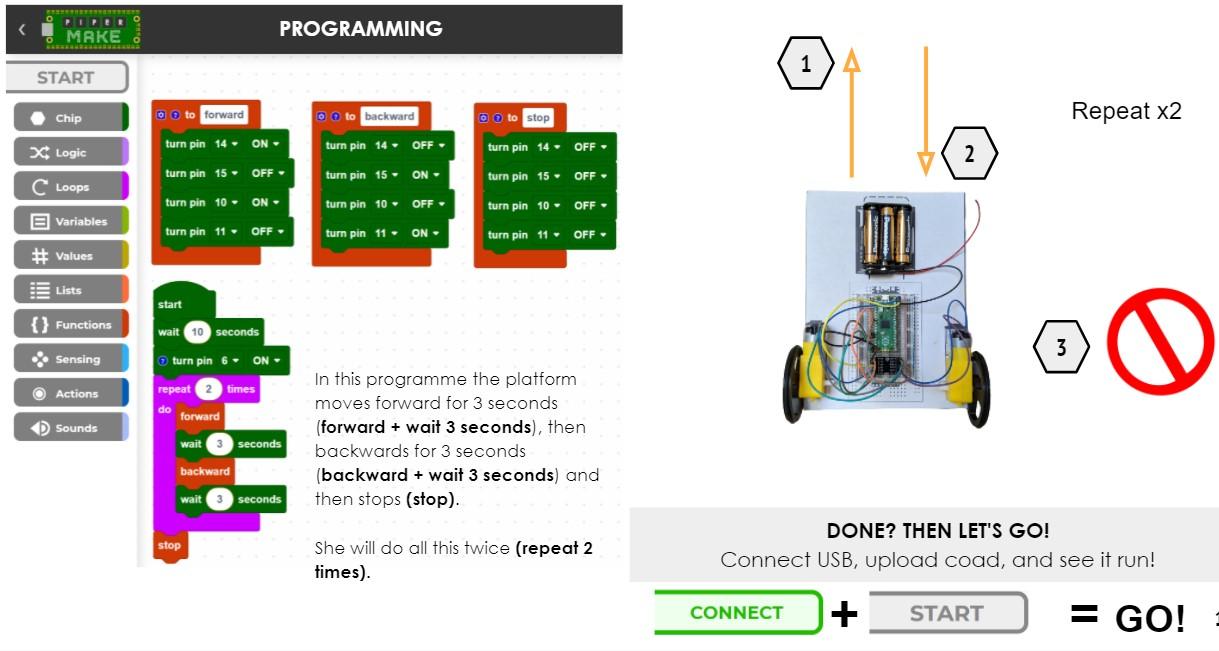
Now it's time for fun! Decide the path that you would like the robot to drive.
- Begin with the on Start Event Block
- Add a Wait 10 seconds block (this is the time your robot waits after you download the code. You need enough time to unplug and set the robot on the floor)
- Now use your direction functions (forward, backward, etc) followed by a wait block to create a sequence of motion. The wait block tells the robot how long to move in the direction you programmed.
- Here is a simple example where the robot moves forwards and backward. The sequence is inside a repeat loop to the sequence repeats two times.
- You can create any sequence you desire.
Here is a link to a sample software program.
Customize
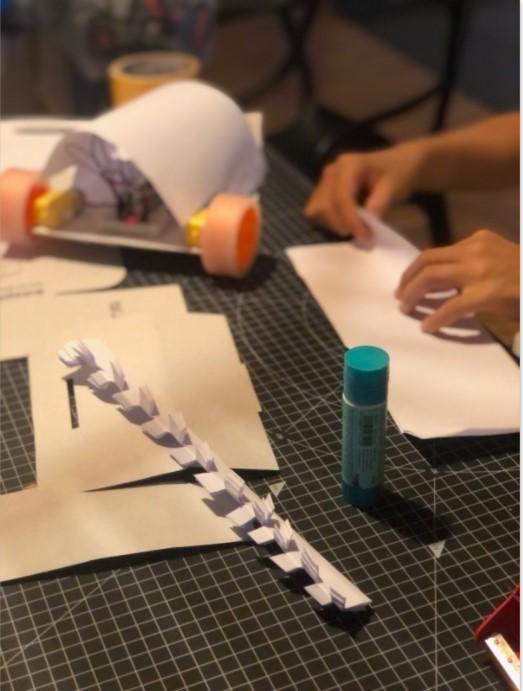
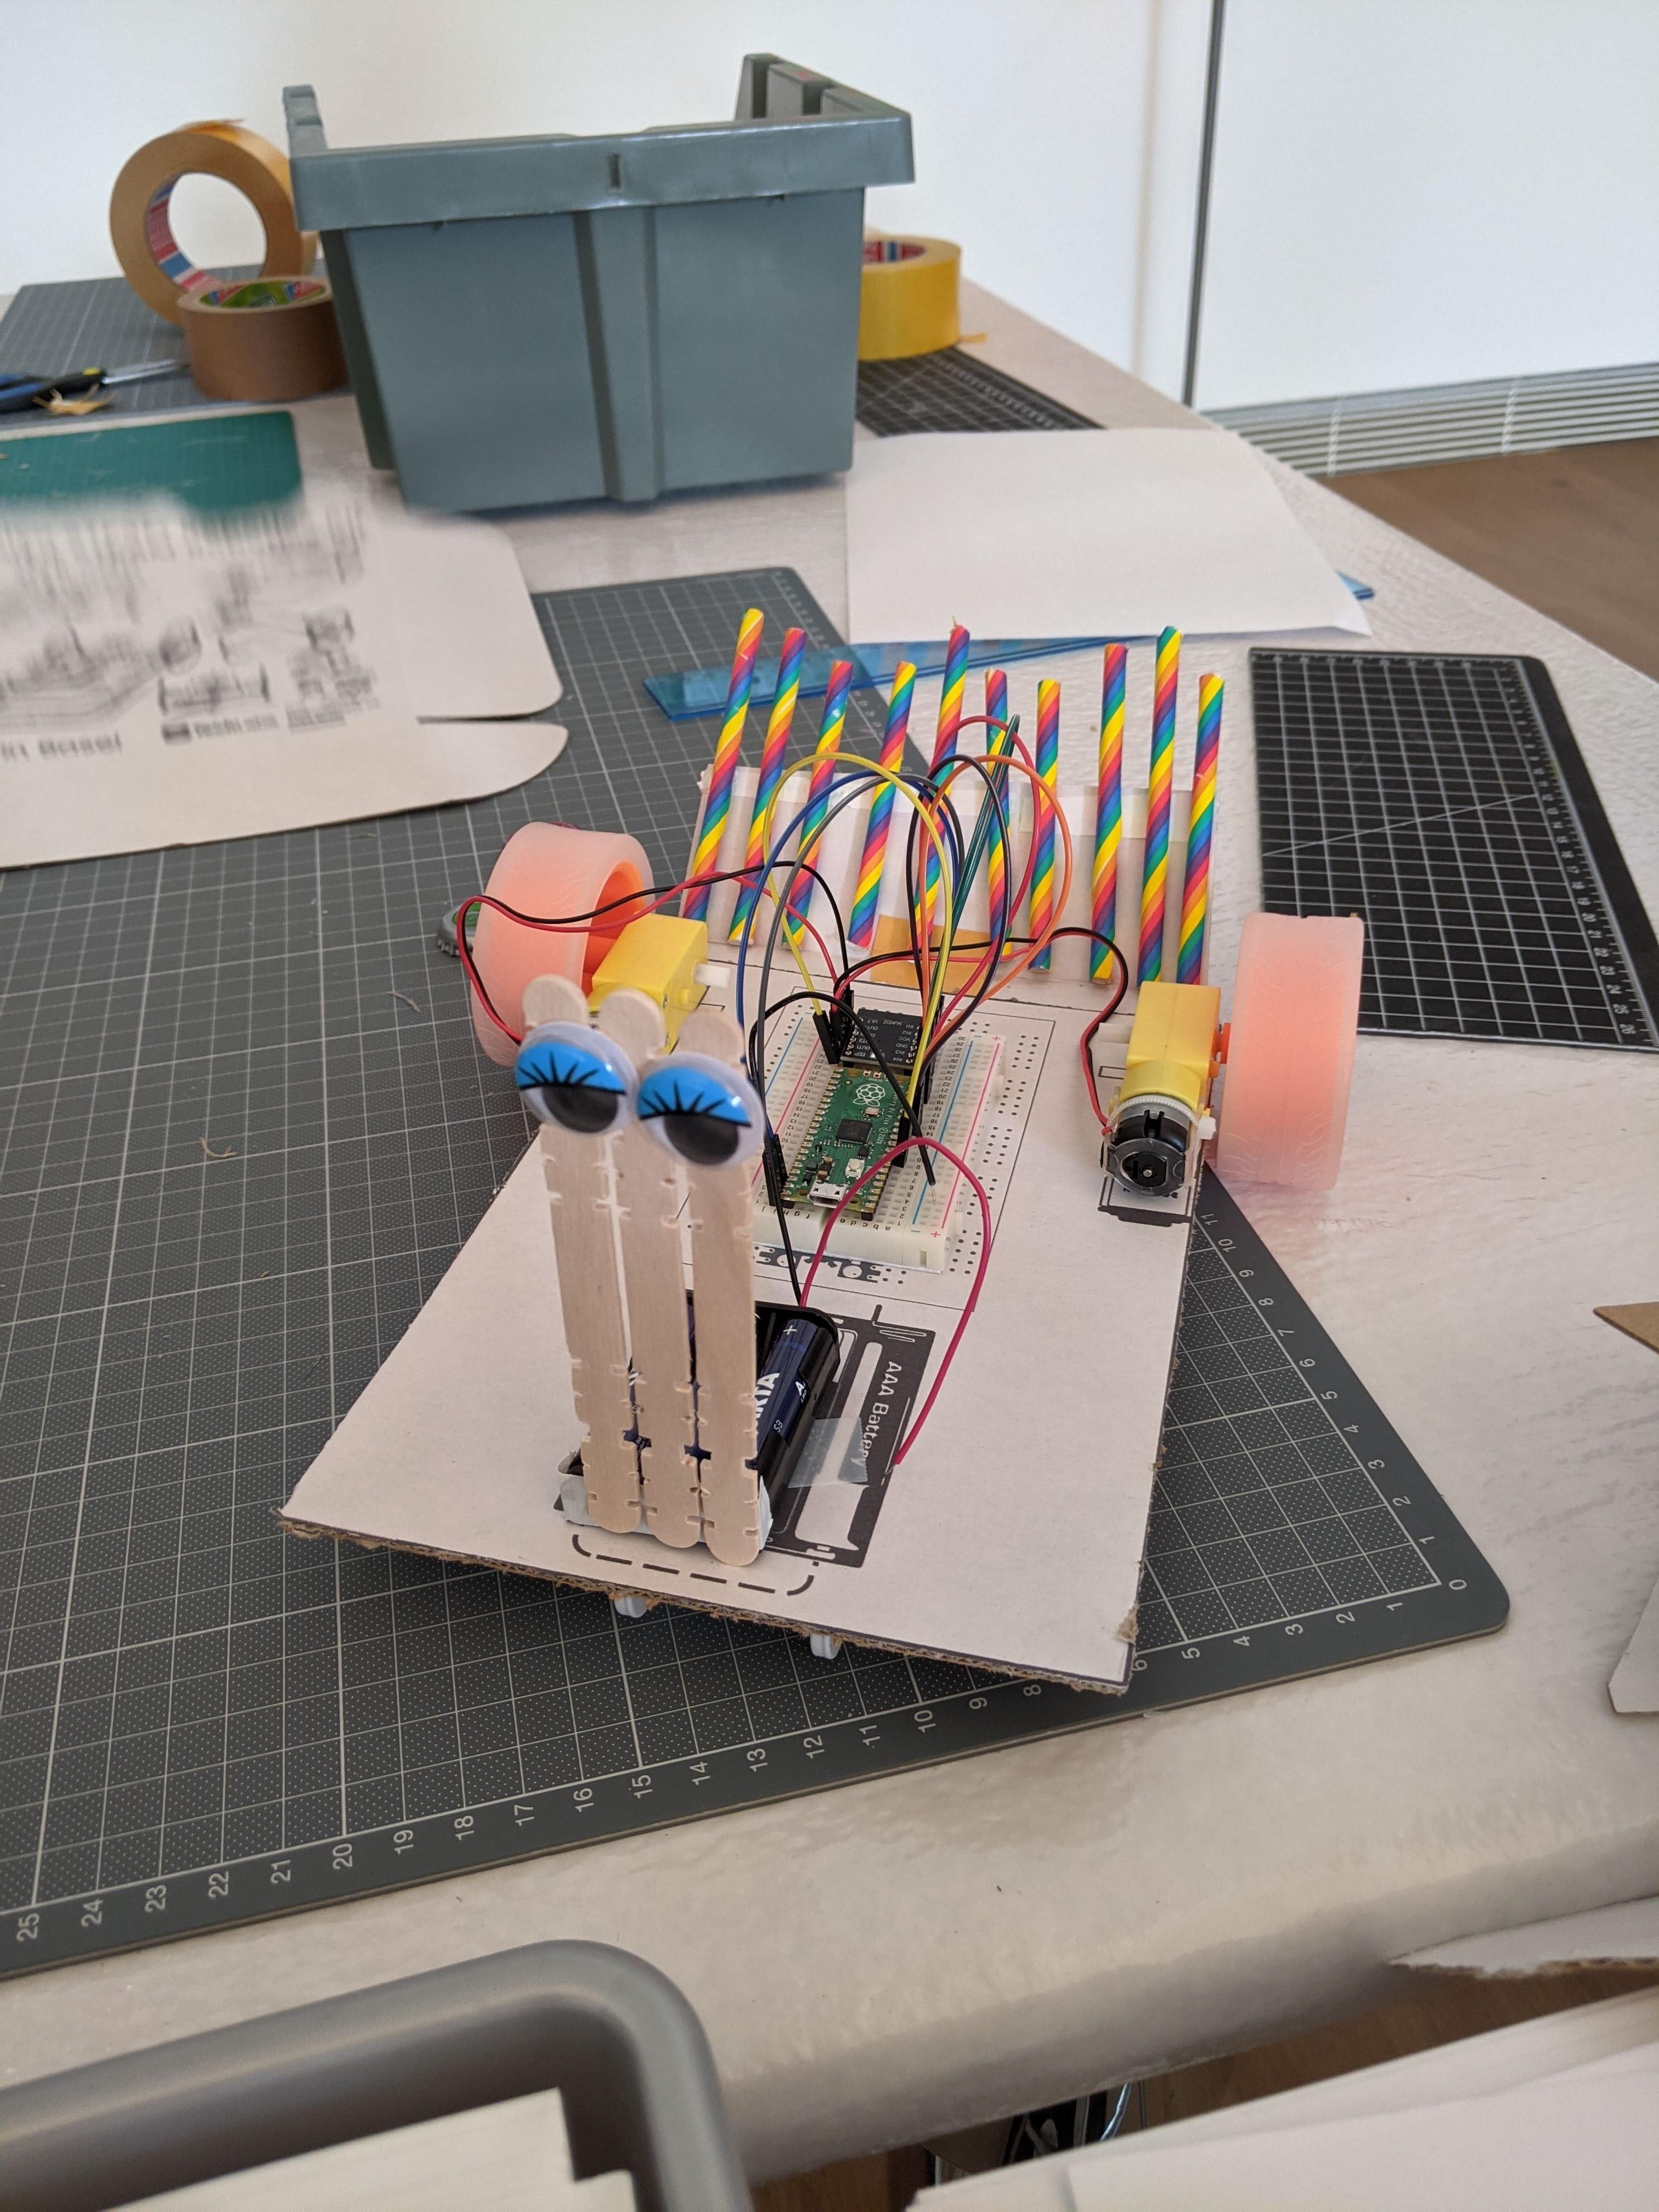
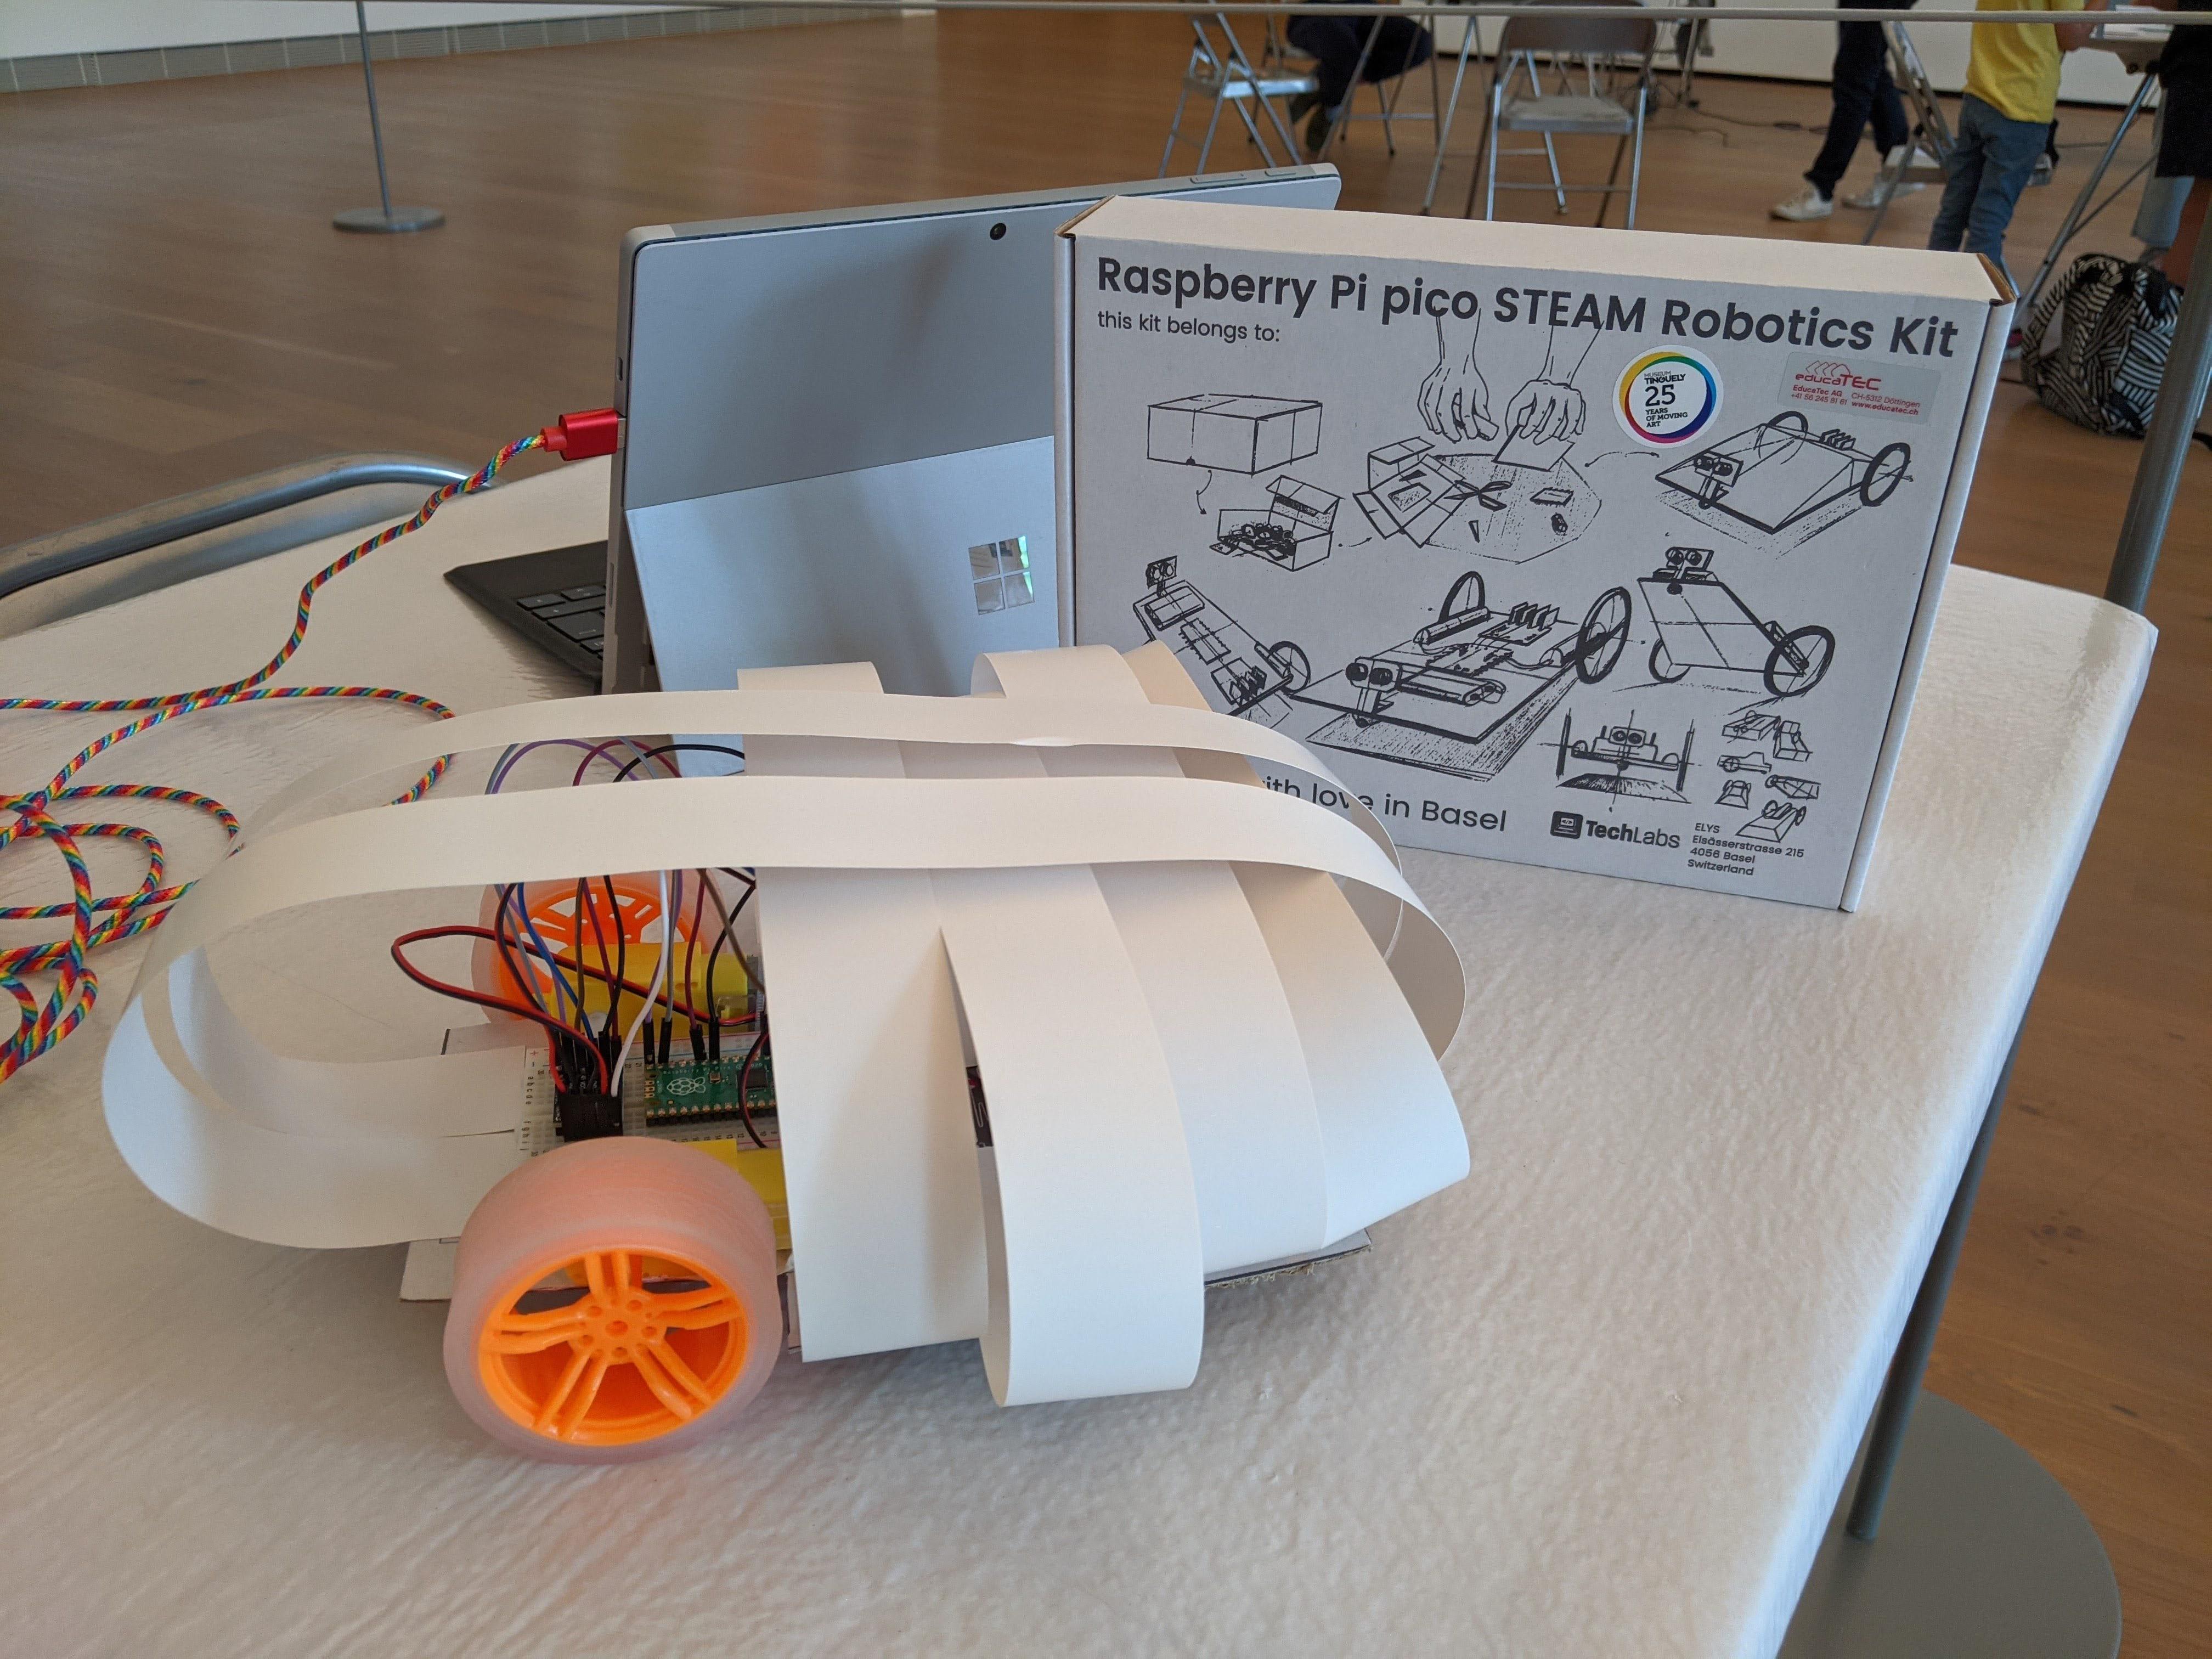.jpg)
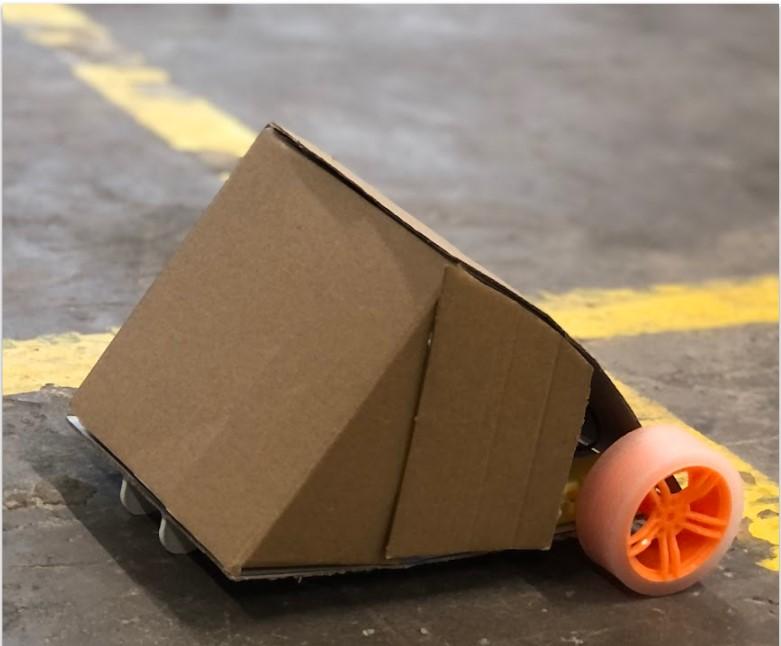
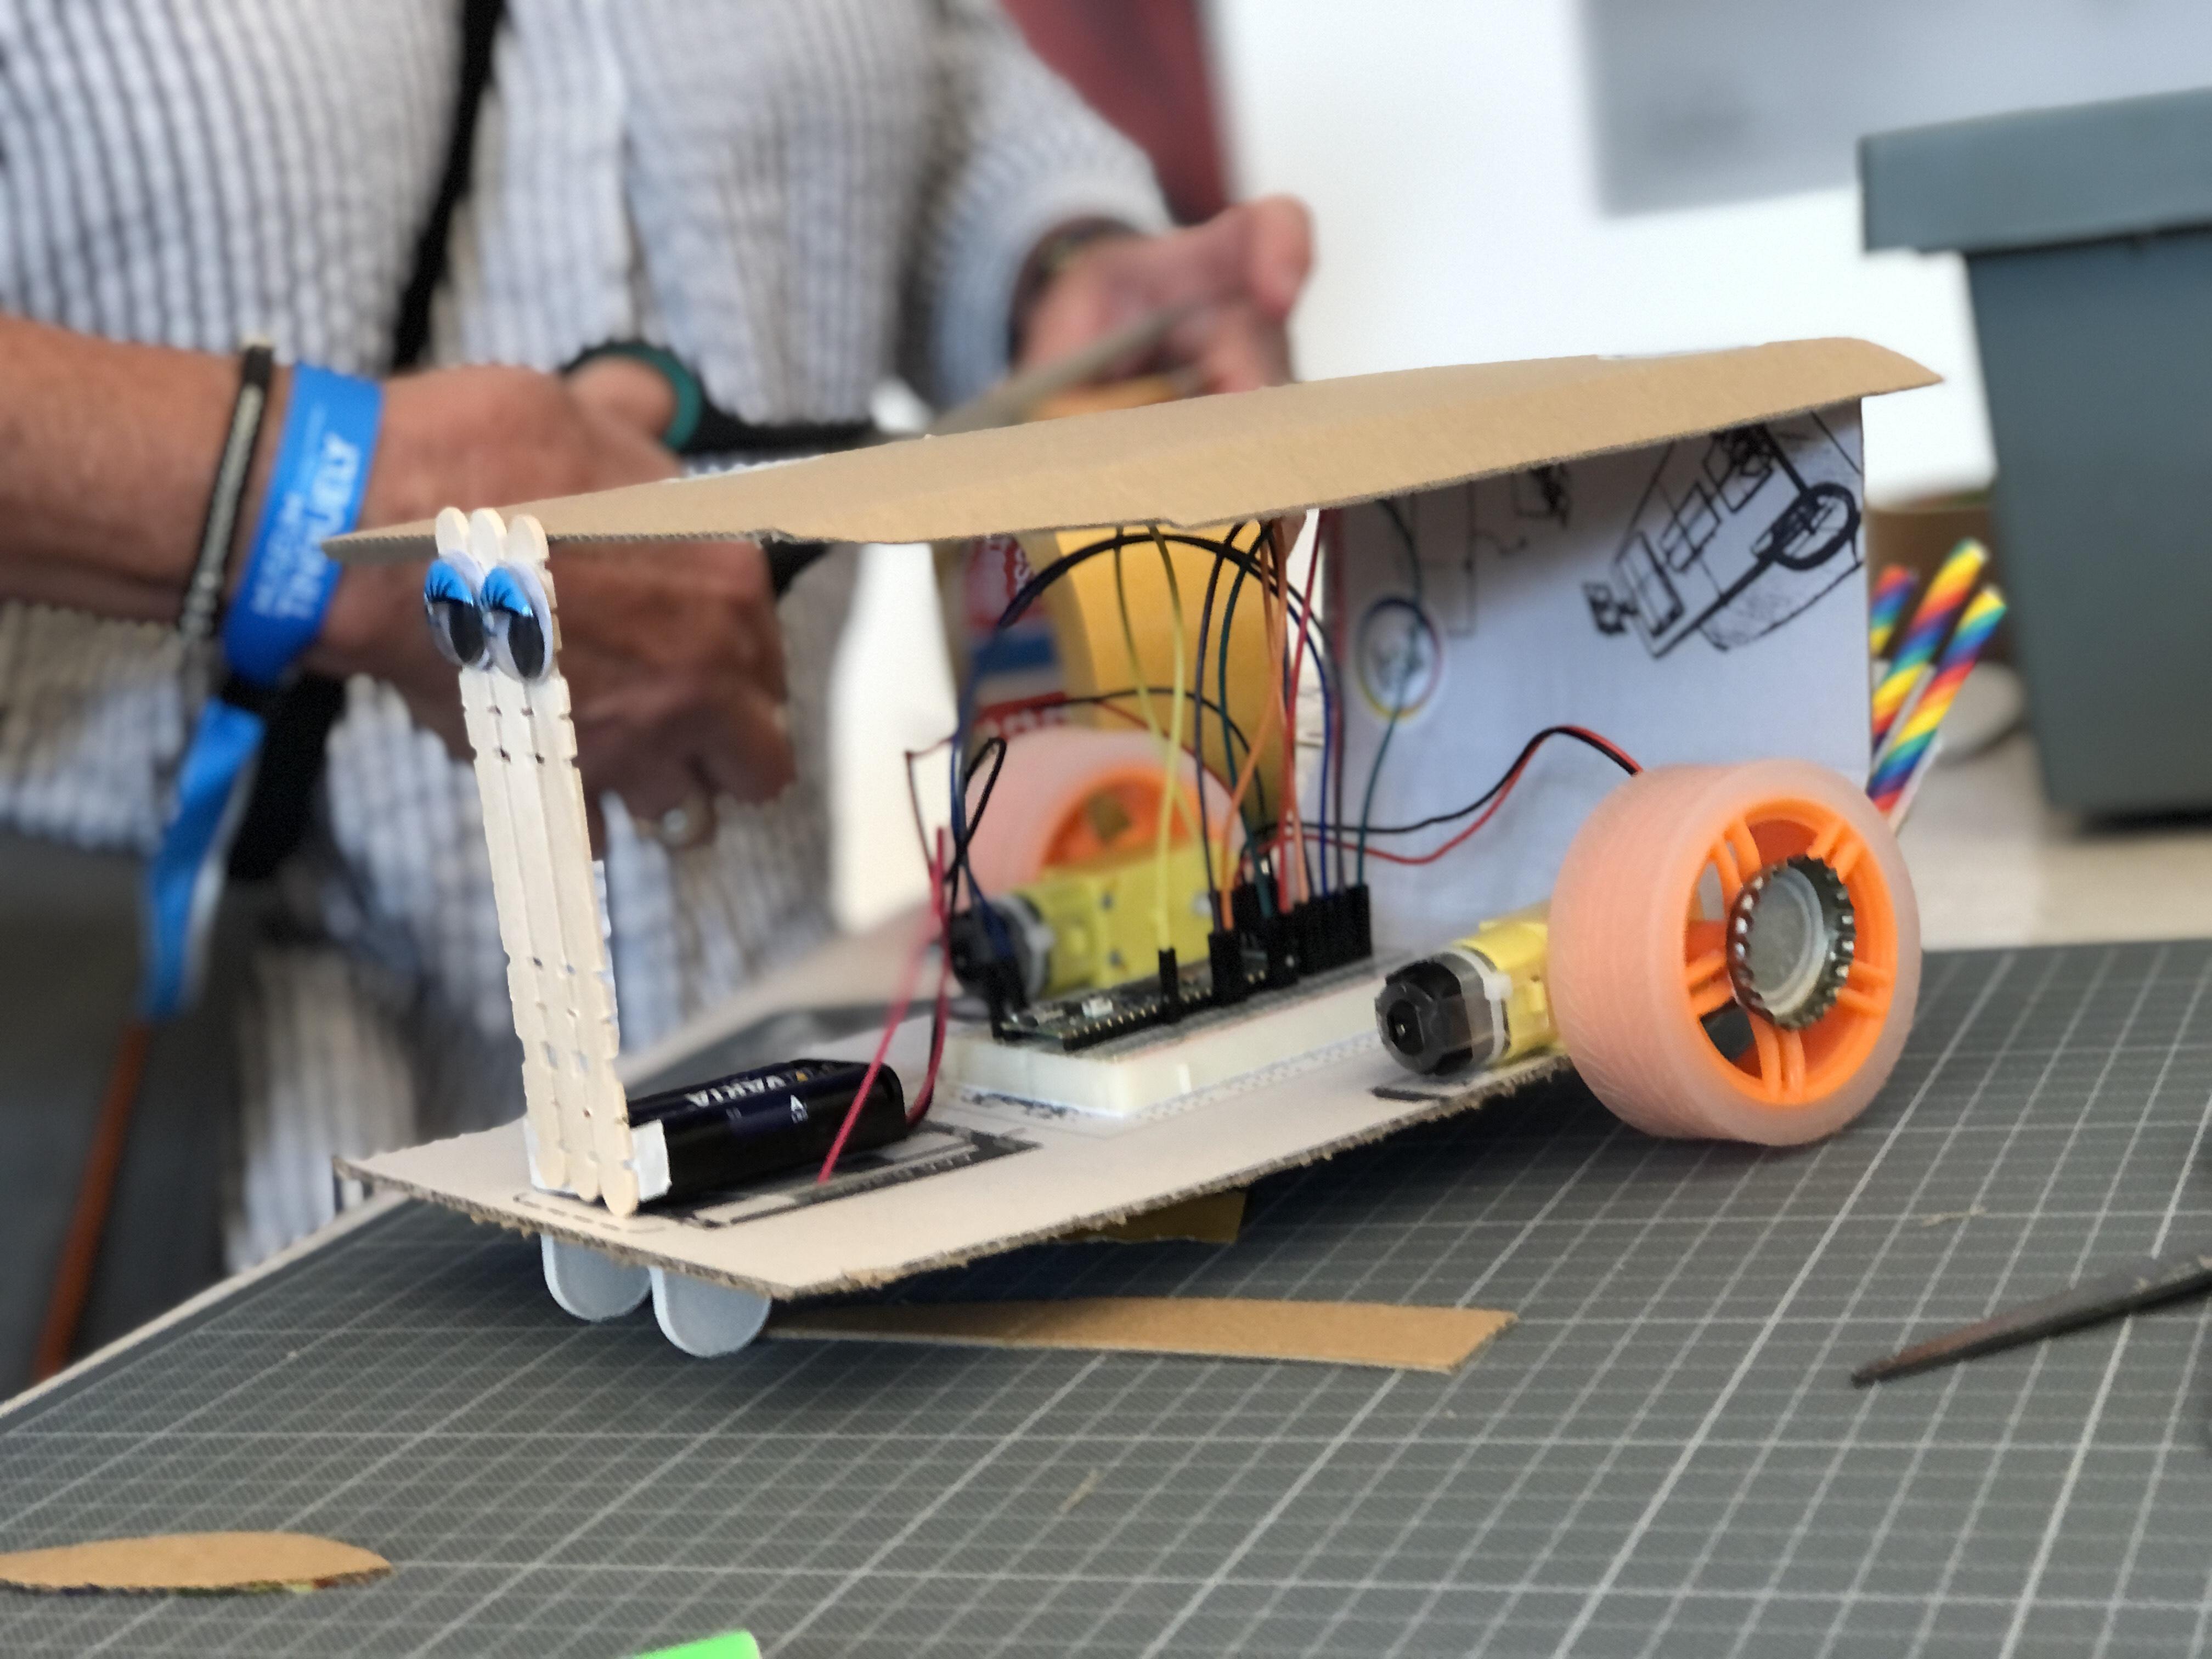
GET CREATIVE!
Use recycled or craft materials to design your own unique robot creation.