Raspberry Pi Object Detection
by Rithikthegr8 in Circuits > Raspberry Pi
9507 Views, 24 Favorites, 0 Comments
Raspberry Pi Object Detection

This guide provides step-by-step instructions for how to set up TensorFlow’s Object Detection API on the Raspberry Pi. By following the steps in this guide, you will be able to use your Raspberry Pi to perform object detection on live video from a Picamera or USB webcam. Manual machine learning is not required as used in the online database for object detection. You can detect most of the objects which are commonly used worldwide.
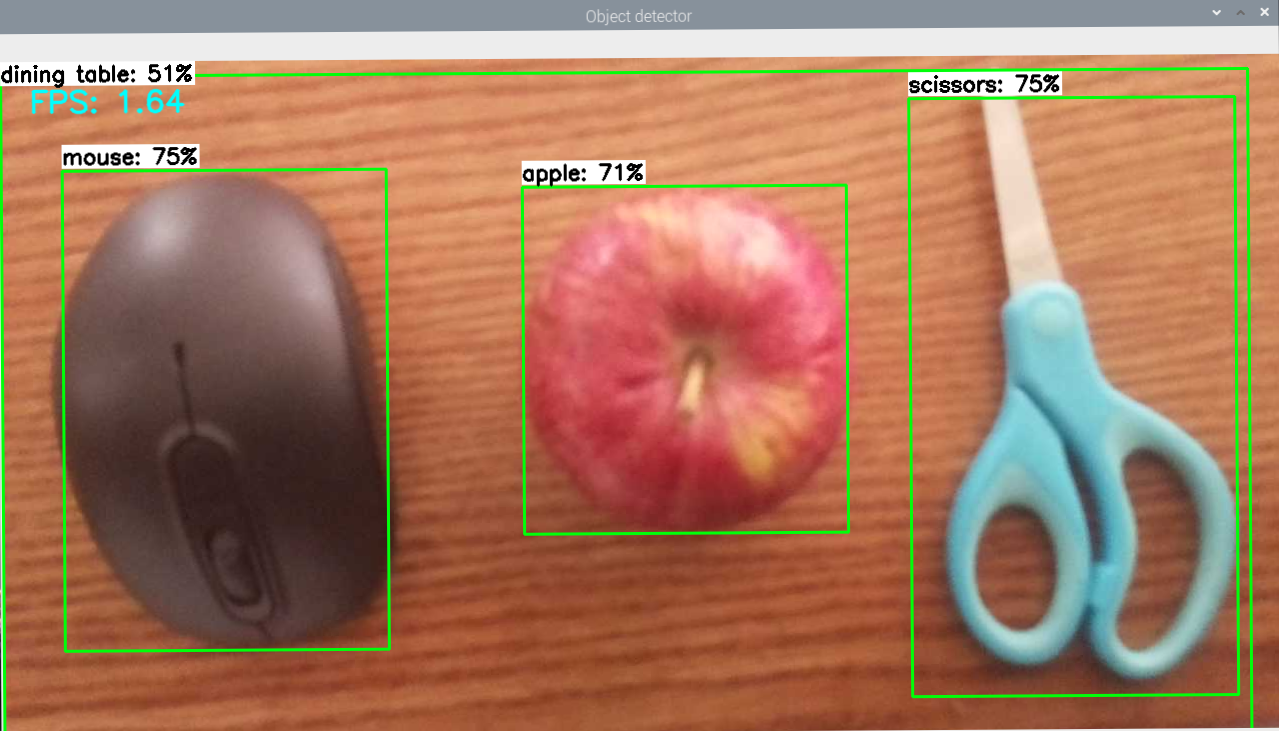
Please refer to my above picture, we used a mouse, Apple and Scissors and detected the object perfectly.
The guide walks through the following steps:
Update the Raspberry Pi
Install TensorFlowInstall OpenCV
Compile and install Protobuf
Set up TensorFlow directory structure
Detect objects!
Update Raspberry Pi

Start by updating your Raspberry Pi system. Open the terminal and execute the following commands, one after another:
Be prepared, as this may take some time depending on the speed of your internet connection and the performance of your Raspberry Pi. Once completed, your Raspberry Pi will be fully updated—ready for the next steps!
Install TensorFlow

Proceed with installing TensorFlow. Run the command:
Ensure the LibAtlas package is also installed by executing:
Next, enter the following command to install additional required Python libraries:
Don't forget to install python-tk as well:
You are now done with TensorFlow installation—move on to the next setup!
Install OpenCV

The Object Detection examples for TensorFlow utilize matplotlib to display images. However, we will use OpenCV due to its simplicity and reduced error likelihood. Begin by installing several dependencies:
Afterward, install OpenCV with the following command:
Now OpenCV is installed, allowing you to utilize it efficiently!
Install Protobuf

TensorFlow’s Object Detection API relies on Protobuf, a library for working with Google’s Protocol Buffer format. Install the protobuf-compiler by executing:
Verify the installation by checking the version:
Set Up TensorFlow Directory Structure

Create a new directory for TensorFlow models and set the Python environment path appropriately. From your home directory, type:
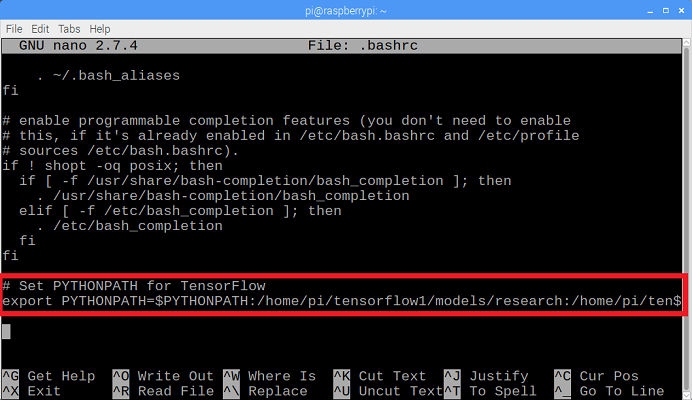
Add the TensorFlow research directories to your PYTHONPATH by editing the .bashrc file:
Add this line at the end:
Run protoc to compile Protocol Buffer files:
Detect Object

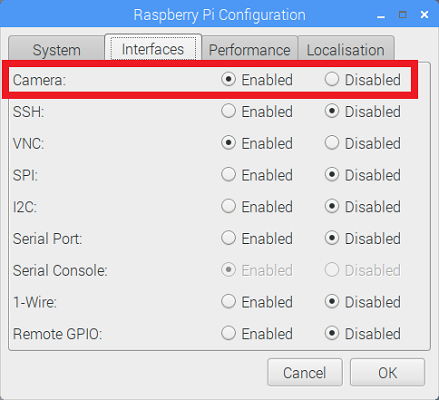
Now that everything is set up, execute object detection on live video streams. If using a PiCamera, update your Raspberry Pi configurations and run:
For USB cameras, simply append --usbcam to the command.
Issues and Thank You

Please let me know if you have any questions
Email: rithij_gobinath@gmail.com
Thank you,
Rithik