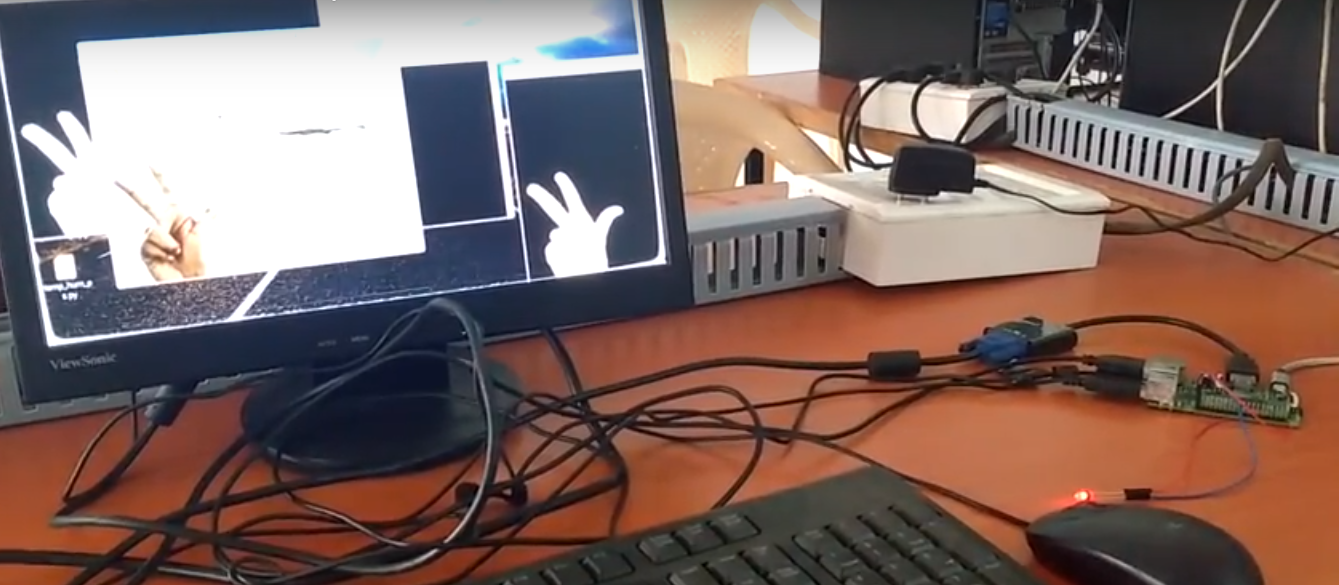
Raspberry Pi Hand Detection Finger Counting Based Home Automation
by BhaskarP6 in Circuits > Raspberry Pi
1402 Views, 1 Favorites, 0 Comments
Raspberry Pi Hand Detection Finger Counting Based Home Automation

This project makes use of Rpi and opencv to turn on and off electrical appliances by showing respective hand (finger count) gesture infront of the raspberry pi webcamera
Dependencies:
- OpenCV (google it to install in your Pi)
- WiringPi (Installation: http://wiringpi.com/download-and-install/)
video link:
https://drive.google.com/file/d/1CVgpH9-SdRxy7wluB...
Compiling the code by typing this command in your Raspberry pi terminal:
g++ Hand.cpp -o Handy pkg-config --libs opencv -std=c++11 -lwiringPi
Running the code:
./Handy
Have Problem, put an email @ varaprasad239@gmail.com
Installing Opnecv on Raspberry Pi
Lets go with OpenCV
you can go through this link or you can follow these steps to get opencv:
https://tutorials-raspberrypi.com/installing-openc...
Here we are going to download, configure, build and install OpenCV. Download OpenCV Remember that if you don't have at least 2GB on your root partition you have to use some external memory (Linux partition).
If everything worked, we could clone OpenCV from git. This step also takes a few minutes.
git clone https://github.com/Itseez/opencv.git && cd opencv &&git checkout 3.0.0
Whether version 3.0 or 2.4 of OpenCV is taken is up to you. Depending on the application, one of the versions may be better suited. Afterwards, OpenCV can be compiled.
You can either use Python 2.7 or Python 3+. There are some differences between the versions, especially as some libraries are not (yet) executable with Python 3+. However, this mainly affects smaller libraries, as common libraries (NumPy, SciPy, etc.) usually provide the respective files for both versions.
In this tutorial, I use Python 2.7. If you already have Python installed and want to know which version is installed, you can simply enter python into the console and get the exact version at the beginning (the command for Python 3+ is python3). If you do not have a Python installed, you can install it by following the steps below: sudo apt-get install python2.7-devWe also need the package management tool pip, which installs NumPy right away:
cd ~ && wget https://bootstrap.pypa.io/get-pip.py && sudo python get-pip.py
Now we can simply install via pip NumPy.
NumPy is a library that makes it very easy to perform array operations in Python.
pip install numpy
But now to compile OpenCV. For this purpose, a build folder must be created in which the compiled files land:
cd ~/opencv && mkdir build && cd build
cmake -D CMAKE_BUILD_TYPE=RELEASE
 -D CMAKE_INSTALL_PREFIX=/usr/local
 -D INSTALL_PYTHON_EXAMPLES=ON
 -D INSTALL_C_EXAMPLES=ON
 -D OPENCV_EXTRA_MODULES_PATH=~/opencv_contrib/modules
 -D BUILD_EXAMPLES=ON ..
Now you can finally compile. This step takes (depending on Raspberry Pi model) quite a long time (on my Pi 2 about an hour). To use all four cores to compile on the Raspberry Pi 2, type in the following:
make -j4
If the compilation has worked without problems,
we can install OpenCV:
sudo make install && sudo ldconfig
Done!
To check if everything worked, you can open the Python console and import the library:
sudo Python
import cv2
cv2.__version__
Install Wiring Pi on Your Raspberry Pi:
WiringPi is maintained under GIT for ease of change tracking, however there is a Plan B if you’re unable to use GIT for whatever reasons (usually your firewall will be blocking you, so do check that first!)
Note: wiringPi is NOT hosted on Github.
There are many forks that you may find there, but they are not the original version maintained by myself. To view the wiringPi sources, then go to: https://git.drogon.net/ and select the wiringPi link.
To install… First check that wiringPi is not already installed.
In a terminal, run:
$ gpio -v
If you get something, then you have it already installed.
The next step is to work out if it’s installed via a standard package or from source.
If you installed it from source, then you know what you’re doing – carry on – but if it’s installed as a package, you will need to remove the package first.
To do this:
$ sudo apt-get purge wiringpi
$ hash -rThen carry on.
If you do not have GIT installed, then under any of the Debian releases (e.g. Raspbian), you can install it with:
$ sudo apt-get install git-core
If you get any errors here, make sure your Pi is up to date with the latest versions of Raspbian: (this is a good idea to do regularly, anyway)
$ sudo apt-get update
$ sudo apt-get upgrade
To obtain WiringPi using GIT:
$ cd $ git clone git://git.drogon.net/wiringPi
If you have already used the clone operation for the first time, then
$ cd ~/wiringPi
$ git pull origin
Will fetch an updated version then you can re-run the build script below.
To build/install there is a new simplified script:
$ cd ~/wiringPi $ ./build
The new build script will compile and install it all for you – it does use the sudo command at one point, so you may wish to inspect the script before running it.
Plan B
Click on this URL: (it should open in a new page) https://git.drogon.net/
Then look for the link marked snapshot at the right-hand side.
You want to click on the top one.
This will download a tar.gz file with a name like wiringPi-98bcb20.tar.gz.
Note that the numbers and letters after wiringPi (98bcb20 in this case) will probably be different – they’re a unique identifier for each release.
You then need to do this to install:
$ cd $ tar xfz wiringPi-98bcb20.tar.gz
$ cd wiringPi-98bcb20 $ ./build
Note that the actual filename will be different – you will have to check the name and adjust accordingly.
Test wiringPi’s installation run the gpio command to check the installation:
$ gpio -v $ gpio readall
That should give you some confidence that it’s working OK.
CPP Code
you can find the files and video from the below link