Raspberry Pi Desktop: Secure Headless Setup Without a Display
by wrecker25 in Circuits > Raspberry Pi
5381 Views, 12 Favorites, 0 Comments
Raspberry Pi Desktop: Secure Headless Setup Without a Display
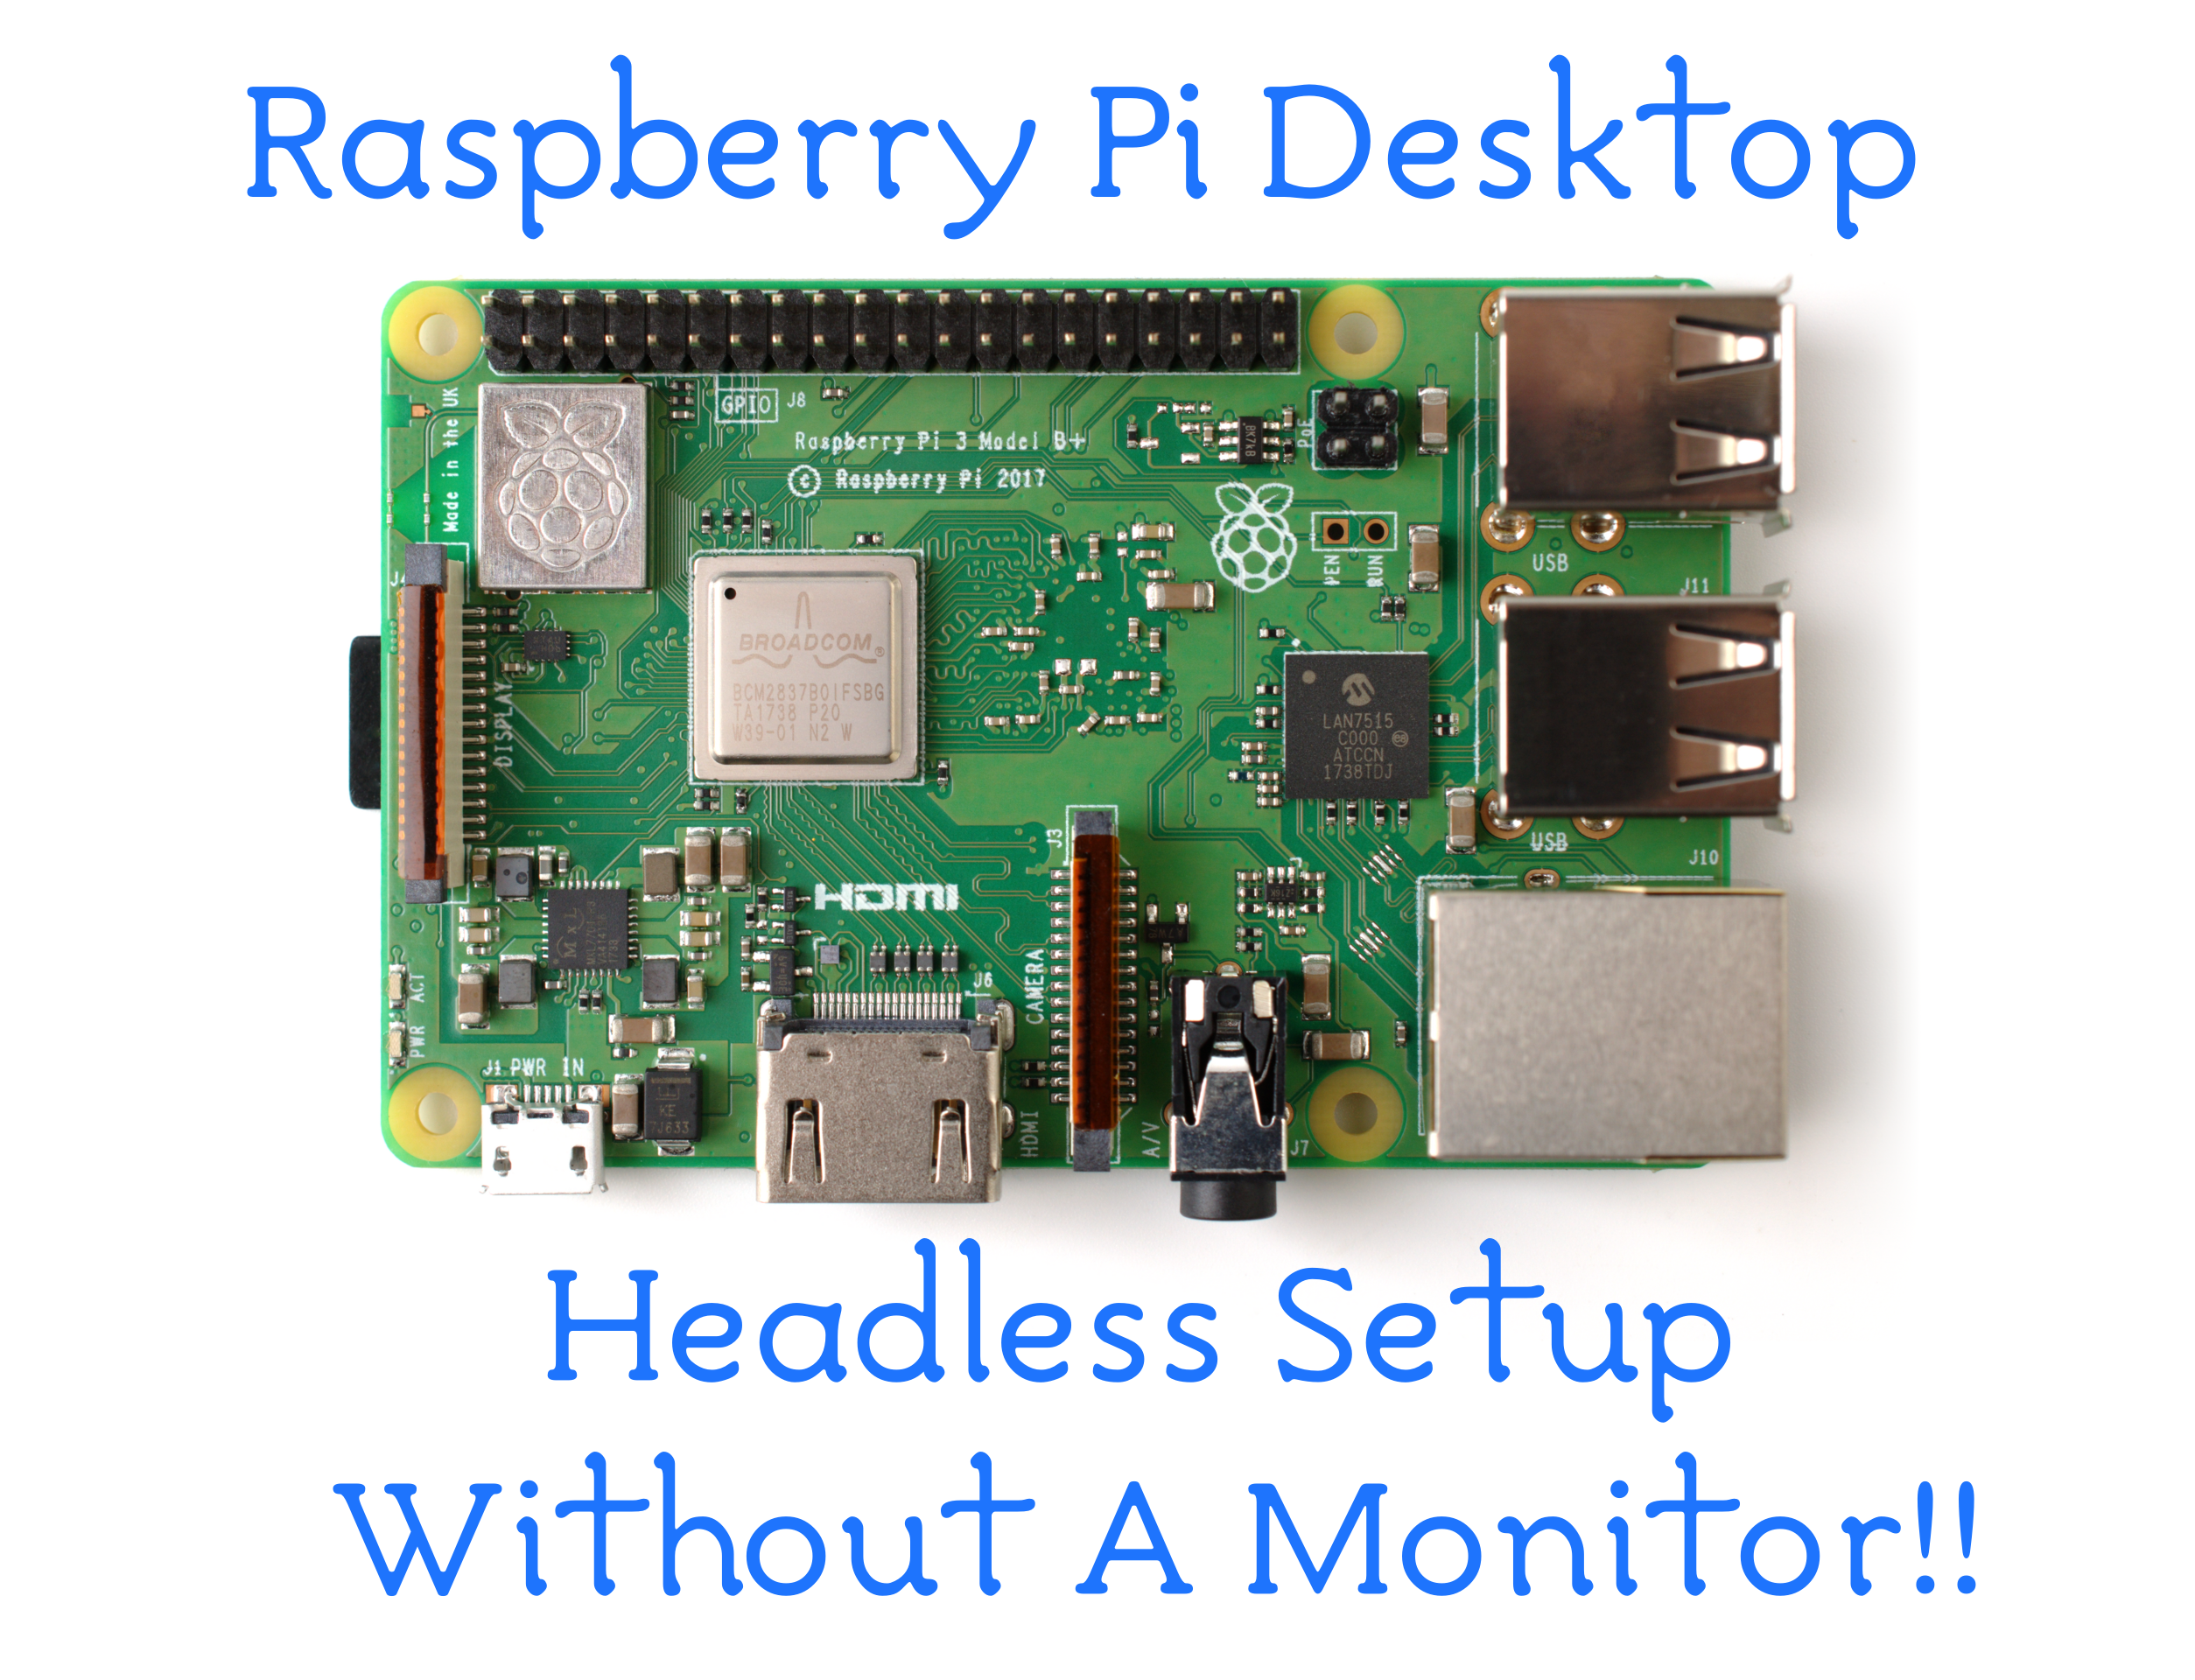
If you are reading this, you probably already are familiar with the Raspberry Pi. I have a couple of these awesome boards around the house for running various projects. If you look at any guide that shows you how to get started with the Raspberry Pi, it will very likely involve hooking up the Pi to a monitor with a HDMI Cable and then attaching a Keyboard and Mouse to use it.
Recently I got hold of an Raspberry Pi 3B+ and I didn't have any of the peripherals to get started. No Problem! I will run in Headless Mode - with no keyboard or monitor attached. But all the guides for using the Pi in headless mode first required me to hook up the Pi to a monitor & keyboard before I can switch to running in headless mode. So I set out to figure out a way to do the install of the Raspberry Pi Desktop completely "headless". As an added bonus I will show you how you can encrypt and secure your remote desktop access to the Pi.
Supplies
- Raspberry Pi Board (3B+ or the latest 4B) & Power Supply
- Micro SD Card (minimum 8GB)
- PC/Laptop with Micro SD Card Slot or an external USB SD Card Reader (e.g https://www.amazon.com/dp/B06ZYXR7DL/)
Prepare the SD Card: Write the OS
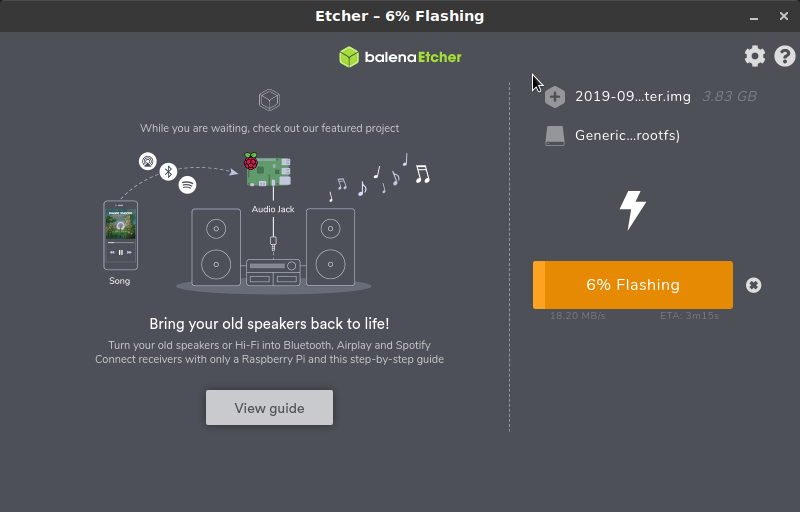
The first step in the process is create a bootable SD Card with the OS. For most users the best choice is the Raspbian OS - the official debian based Linux distribution that has been customized for the Raspberry Pi. It comes in two flavors, Desktop and Lite (a minimal version with only command-line access). For this Instrutable, we will be using the Desktop flavor. Download the the latest the Raspbian Desktop distribution from the official downloads page.
TIP: If you have a BitTorrent client installed on your laptop/PC use the Torrent link for a much faster download.
While that is downloading, download and Install Balena Etcher - a cross-platform tool designed to write the Raspbian Image to SD Cards. Download the version for the OS (OSX or Windows or Linux) you have on your PC.
- Insert the SD Card reader with the SD card
- Start Balena Etcher and select from your hard drive the Raspberry Pi OS .zip file you downloaded.
- Choose the SD Card Drive
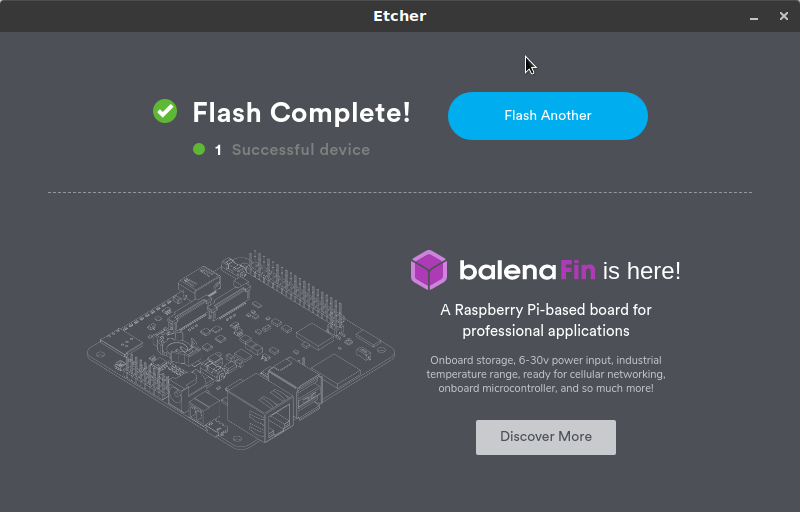
- Click on 'Flash!' to write the Raspbian OS to the SD Card. Wait for the 'Flash Complete!' message and quite Balena Ethcher.
Prepare SD Card: Headless Setup
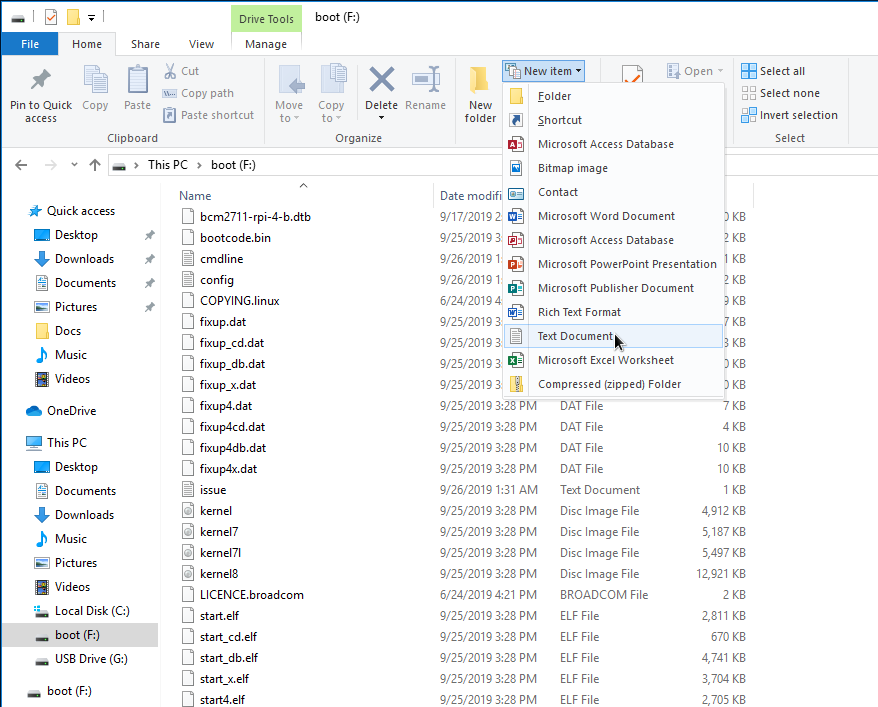
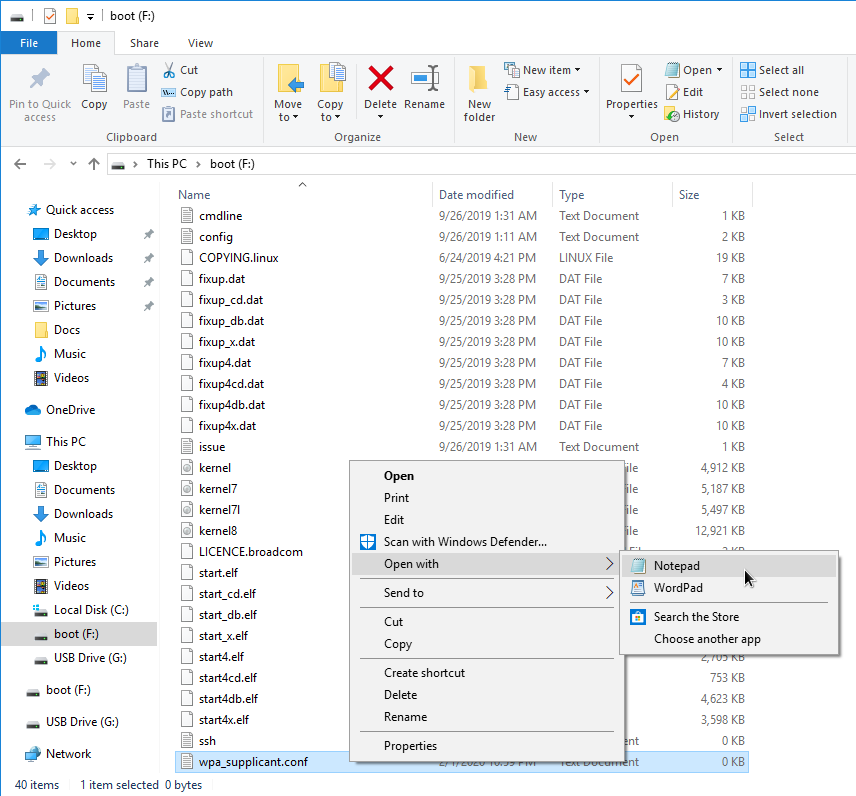
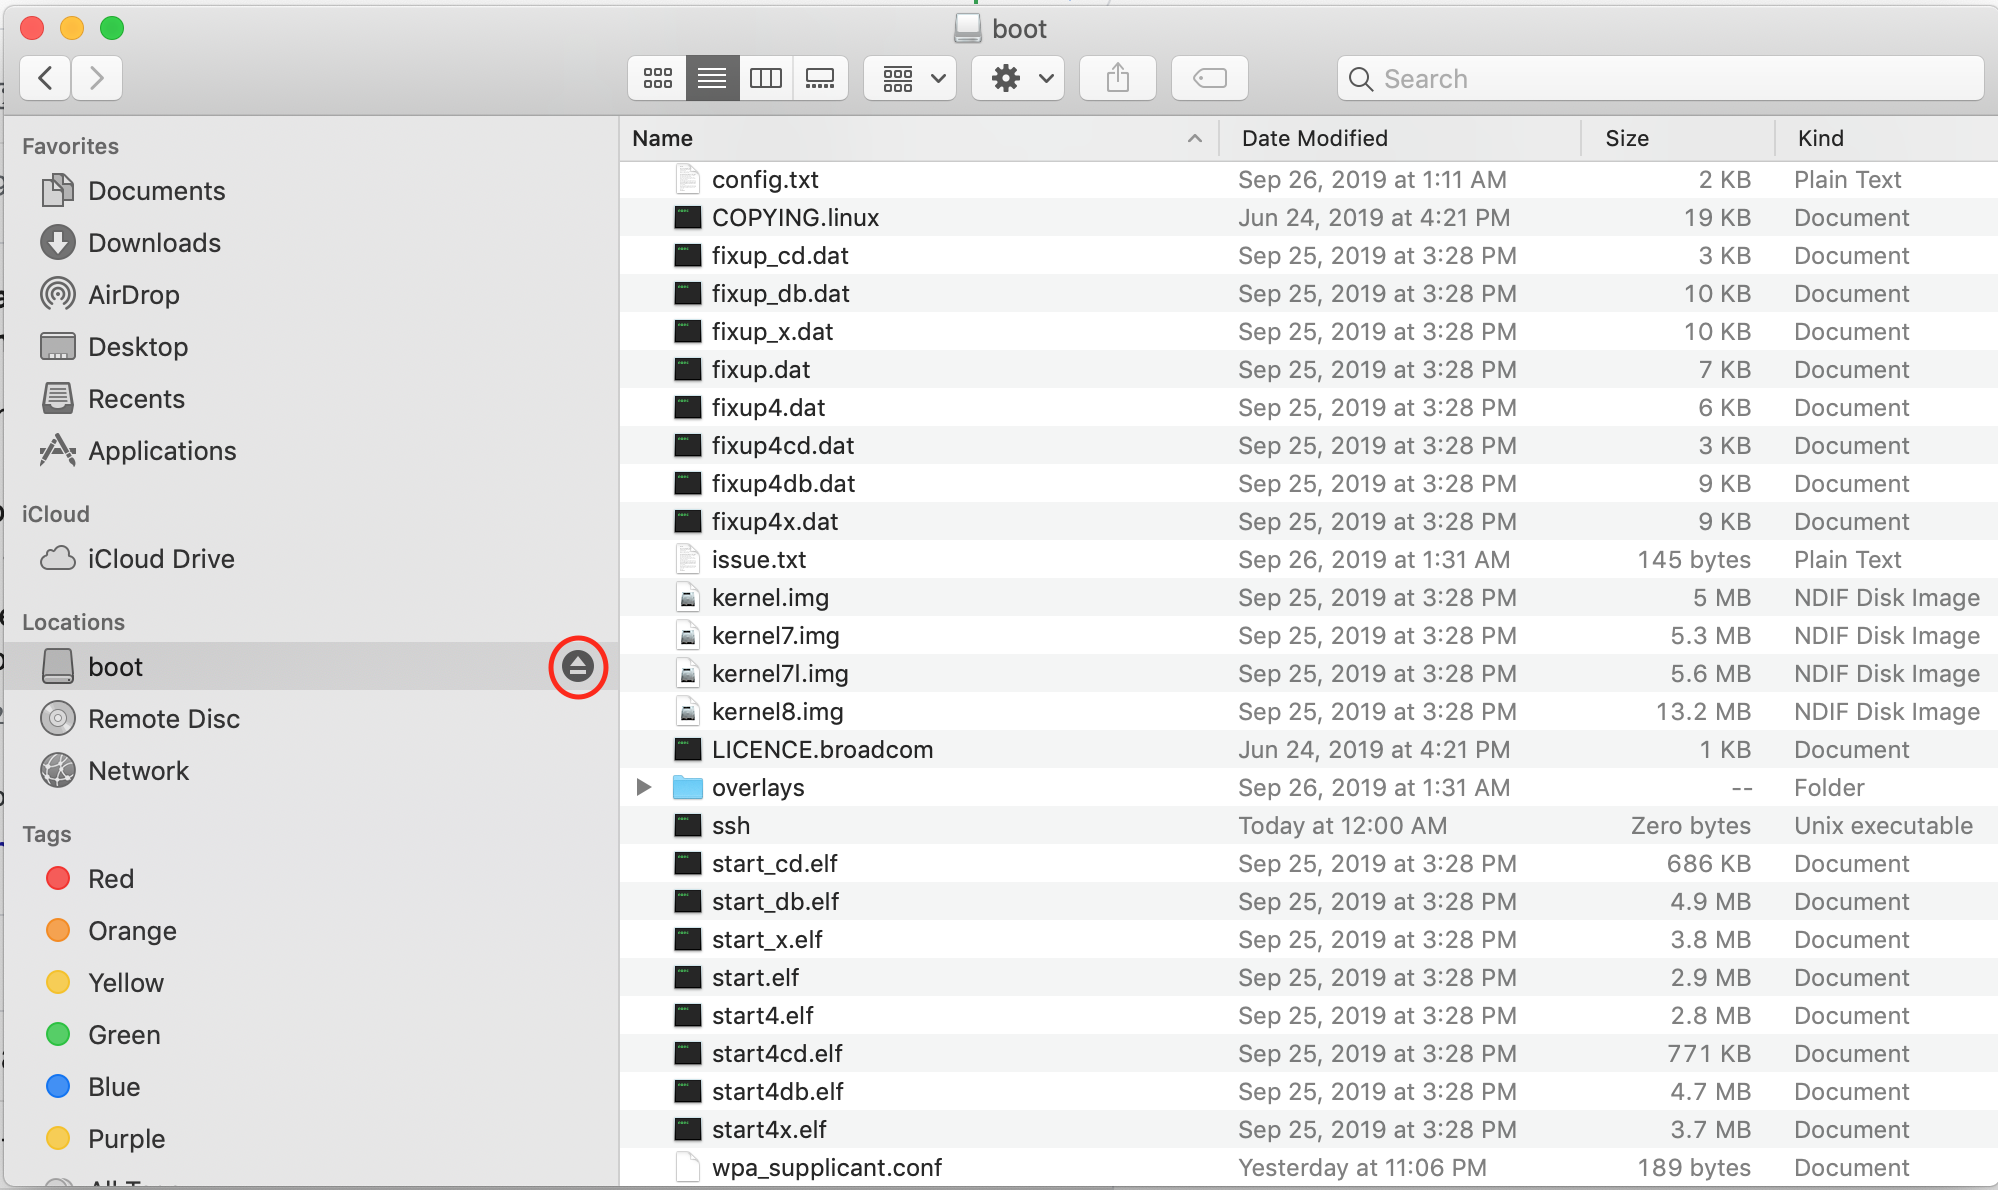
Next we are going to configure the SD Card to do two things
- Enable SSH
- Have the Pi Connect to your Wifi when it boots up
Typically after Balena Etcher is done, the OS will automatically find and mount the partition labelled 'boot' on the SD Card.
WINDOWS
In Windows, open Windows Explorer and look for a new drive with the label 'boot' and click on it to show the contents. Click on 'New Item' in the menu bar and then choose 'Text Document' to create a new empty file. Rename this to 'ssh'
NOTE: By default Windows hides know file extensions. This will cause the file to be name 'ssh.txt' instead of ssh, but Windows will hide it from you. Follow these instructions to enable showing file extensions.
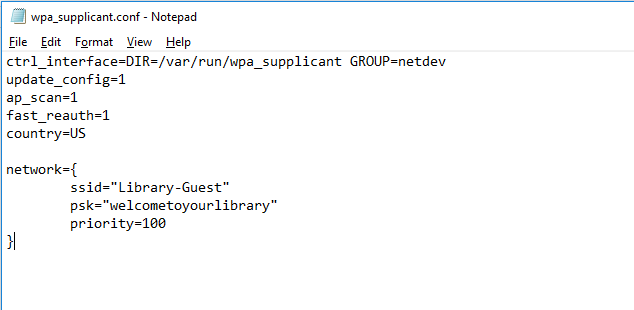
Follow the same process and create another file and rename it 'wpa_supplicant.conf'. Again ensure there is no '.txt' added to the end of this file. Edit this file using Notepad or your preferred text editor and add this text:
ctrl_interface=DIR=/var/run/wpa_supplicant GROUP=netdev
update_config=1
ap_scan=1
fast_reauth=1
country=US

network={
	ssid="Your network's SSID"
	psk="Your network's password"
	priority=100
}
Change the country code to an appropriate code (Link). Set the SSID and PSK to match your WiFi's SSID and Passphrase/password.
Save the file and eject the SD Card.
OSX
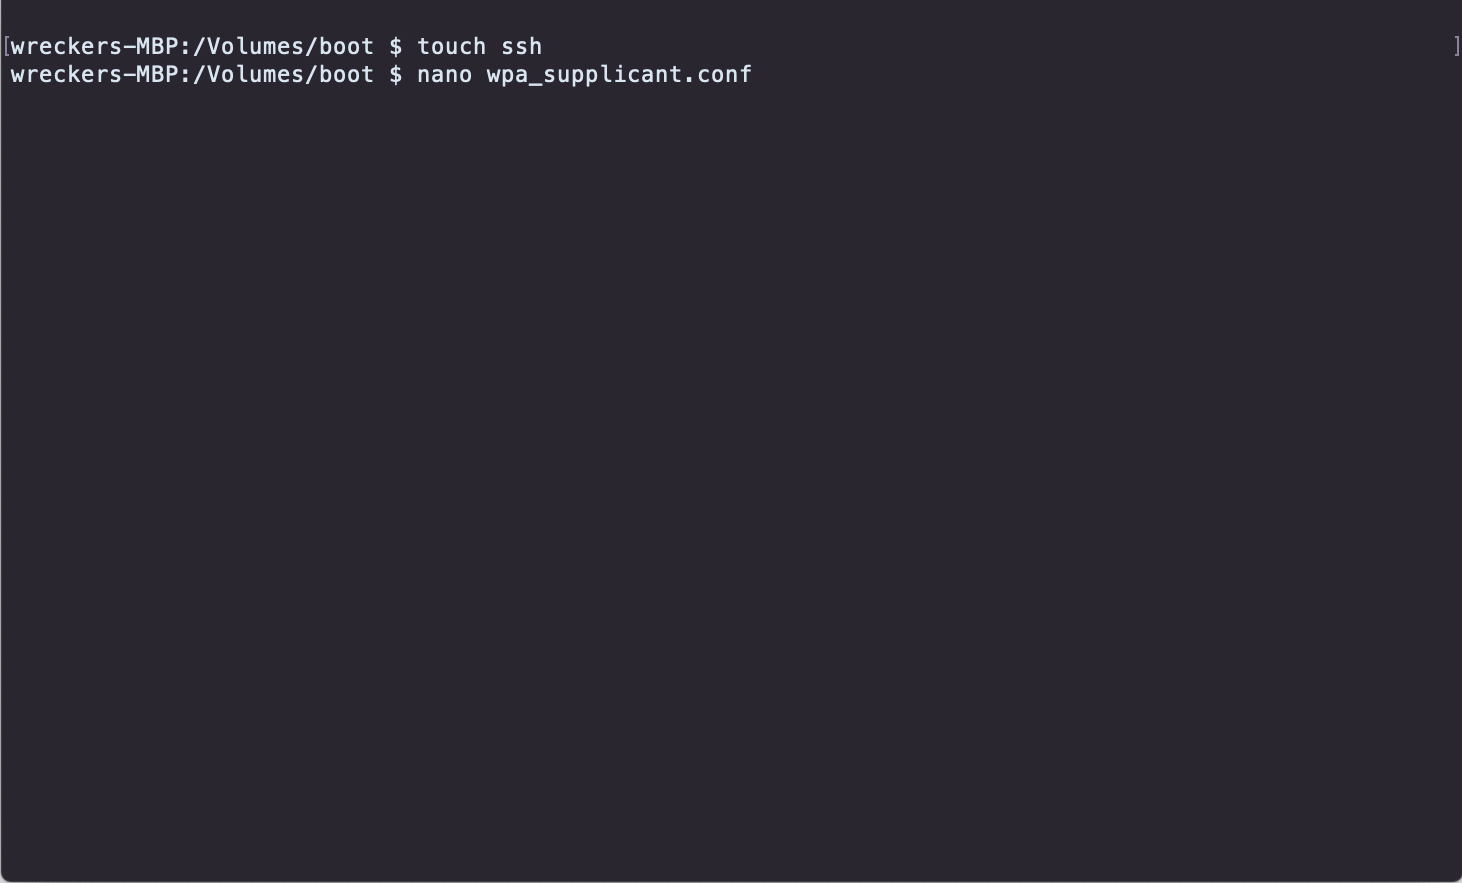
In OSX, the best way to do this is using the Terminal app. Launch Terminal and change directory to /Volumes/boot
In terminal run the following commands
touch ssh
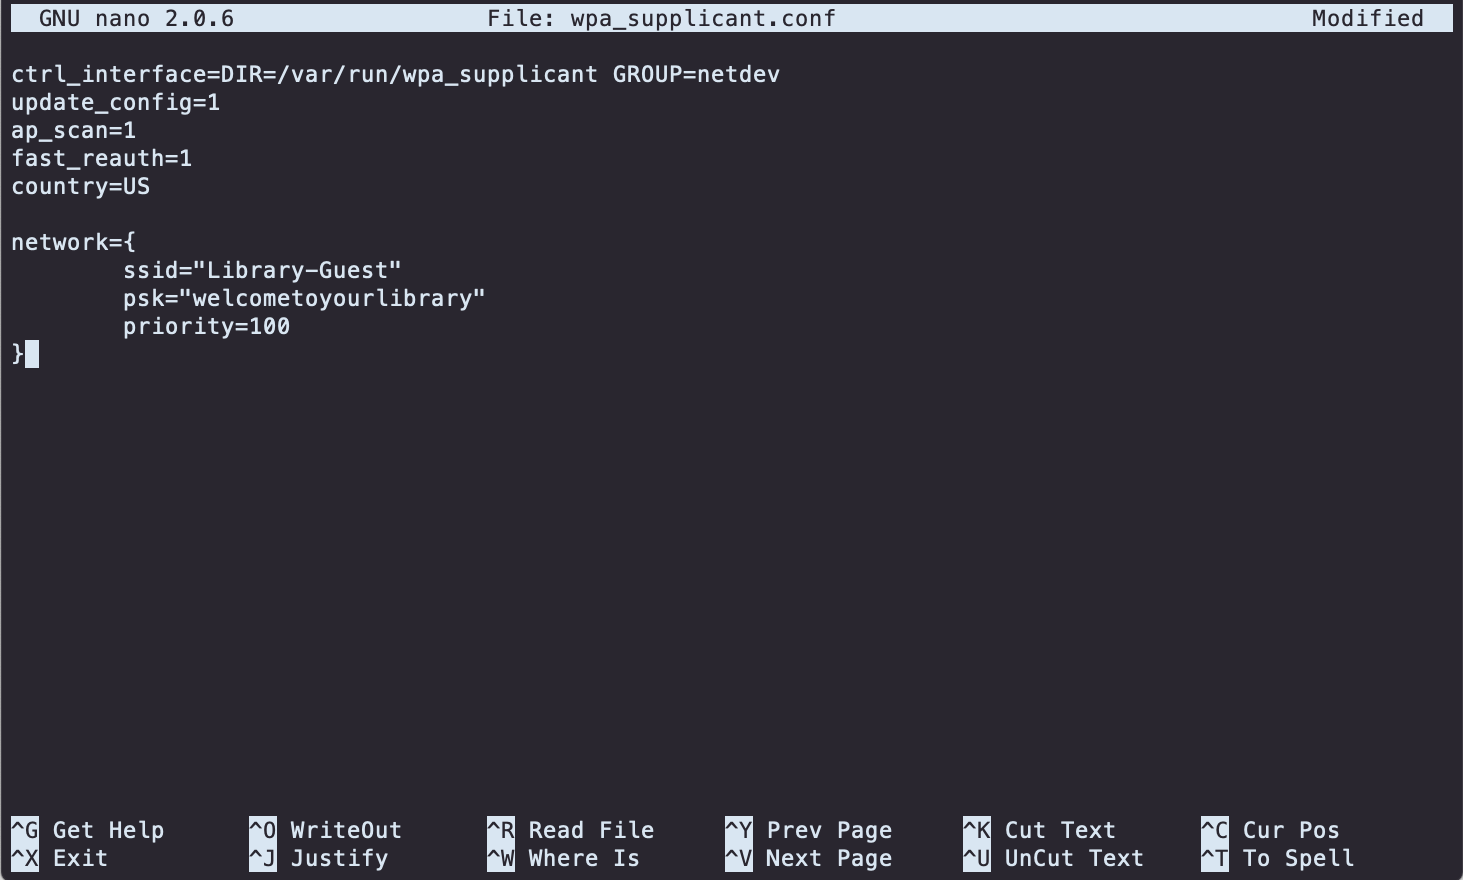
nano wpa_supplicant.conf
The second command will open the file wpa_supplicant.conf in nano text editor. Add the same text as above (see in Windows Section). Save the file an eject the SD Card from finder.
Boot Up and Find the PI's IP Address
.png)
Insert the prepared SD Card into the Raspberry Pi and connect power to boot it up. Wait a couple of minutes for the Pi to finish booting up. At this point the Pi is running the Raspbian Desktop but we have no way to see it.
Searching for the Pi's IP Address
We will first install Nmap - a free and open source network discovery tool and Zenmap - the GUI Tool for nmap. You can download both from the official Nmap downloads page. The installer for either OS will have the option to install Zenmap alongwith nmap.
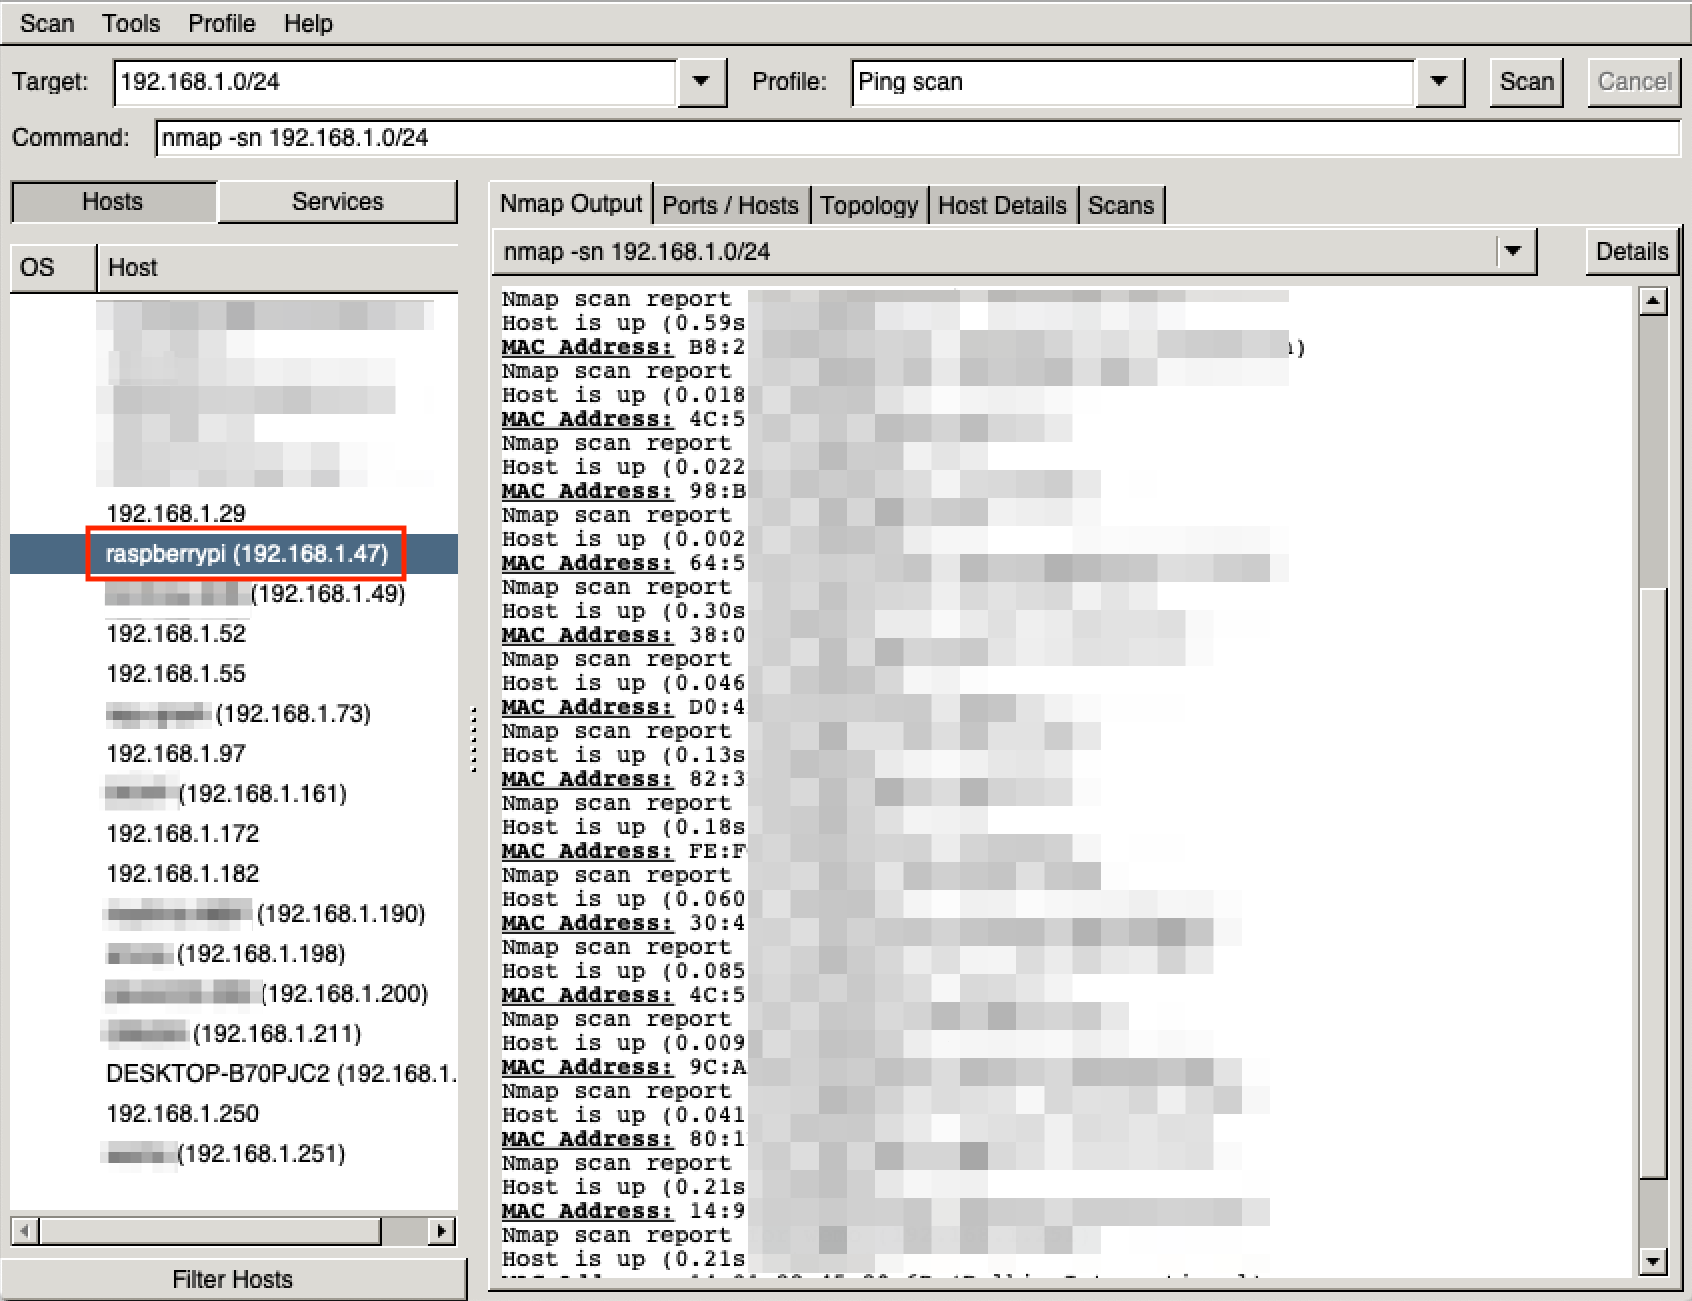
This next step requires a little bit of knowledge about your home Wifi network's IP Address range. Get your PC's IP address. e.g. 192.168.1.21. The network subnet for your home will be 192.168.1.0/24 based on your PC's ip address.
Launch Zenmap
- In the target type the network subnet you have identified as your home network
- Change the profile dropdown and select 'Ping Scan'
- In the command box, type 'nmap -sn'. The Subnet should already be typed in.
- Click on the 'Scan' button. Within a couple of minutes the tool will list all the devices it found in your Wifi network. Look for the device called 'raspberrypi' and note its IP Address. In the screenshots above you will see the raspberry pi got the IP address 192.168.1.47
Connect Using SSH
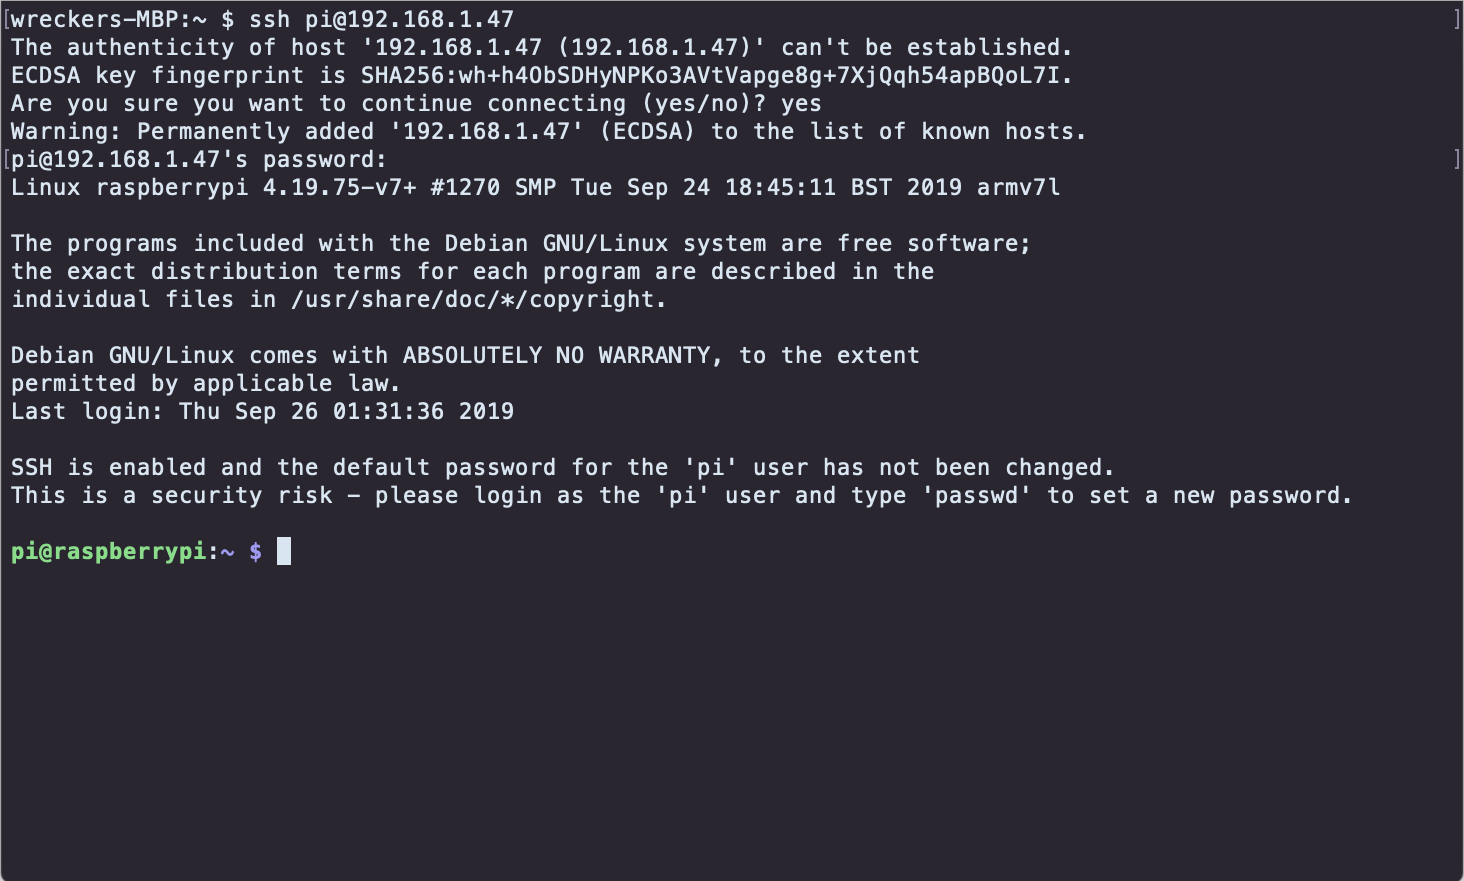
If the SD Card was prepared correctly, then on the first boot the Pi will have automatically connected to the WiFi and also enabled the SSH service. Now we can connect to it using an SSH Client on your PC. But this is not the full desktop experience we want. There are a few more steps to get there.
WINDOWS
Almost every guide for using SSH on Windows recommends using PuTTY. I personally think the UI is very dated and hard to use. My preferred SSH client on Windows is MobaXterm. Download and install MobaXterm on your Windows PC. When you first launch MobaXterm, Windows 10 Firewall will pop a notification about certain features being blocked. Its safe to unblock the app. Launch MobaXterm and start the terminal to continue.
OSX
If you are on OSX, it already includes everything needed to connect via SSH. Launch the Terminal App to continue.
Connect to the Raspberry Pi
In your terminal, SSH to the Pi using the IP Address you got earlier from the Nmap scan. My raspberry Pi got 192.168.1.47 and I will be using that through the rest of this guide. Replace it with the right IP Address for the Pi you are setting up.
Type this in your terminal and hit ENTER
ssh pi@192.168.1.47
When you connect for the first time, you will get a warning about connecting to a new device. Type 'y' or 'Y' and ENTER to continue. Next it will prompt for a password. The initial password for the 'pi' user is 'raspberry'. If all went well you will be logged in and be the bash prompt that looks like this
pi@raspberry: ~$
Good!
Update Raspbian and Install X11VNC
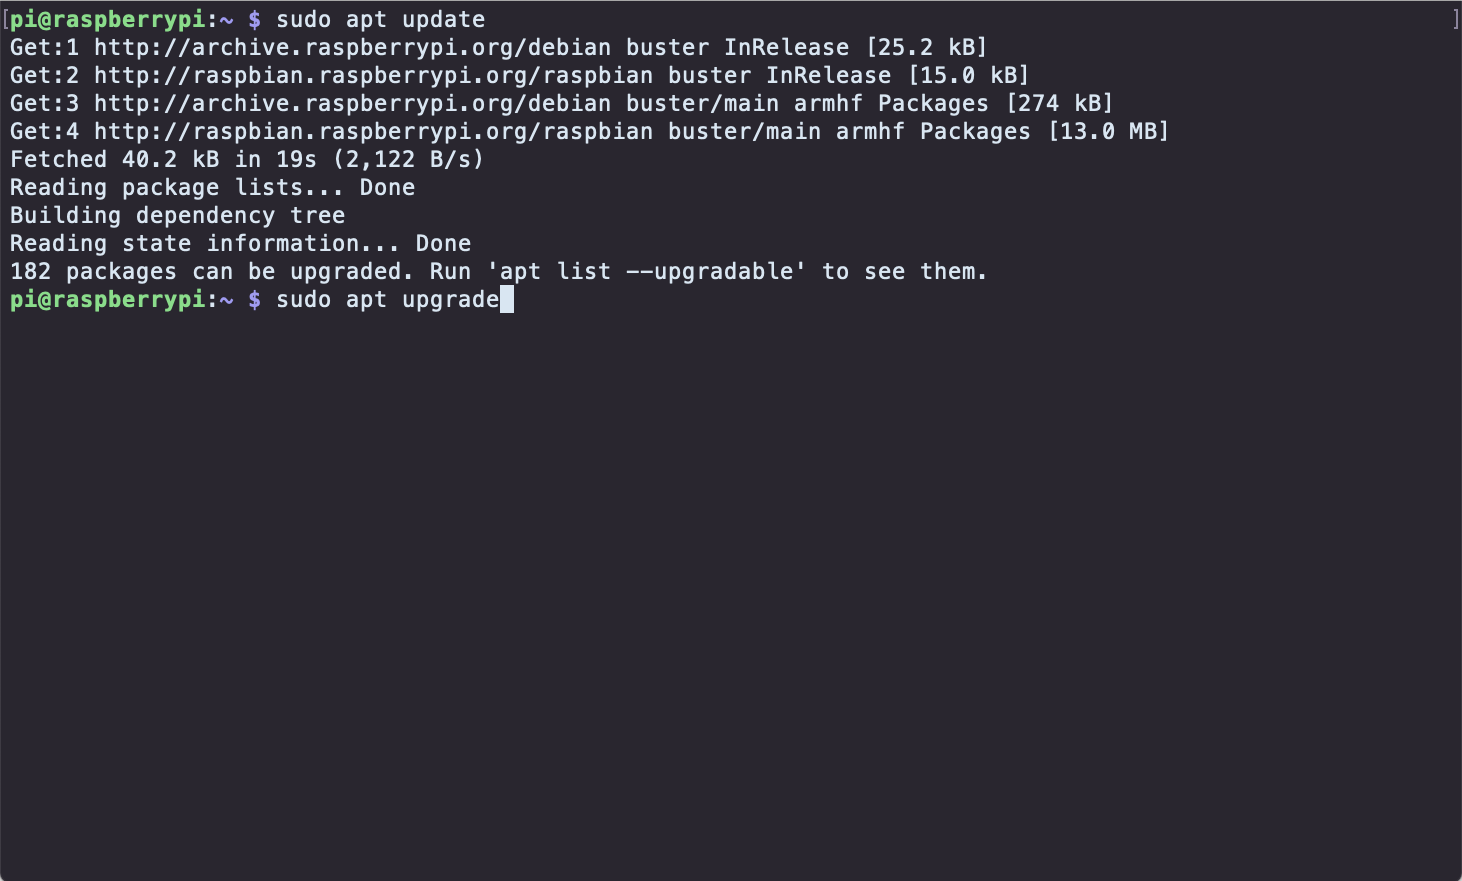
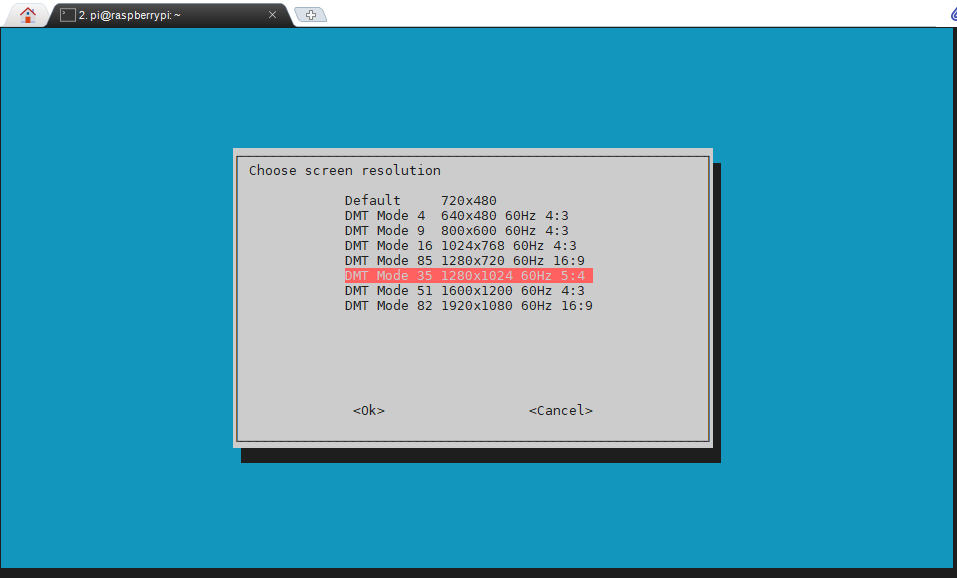
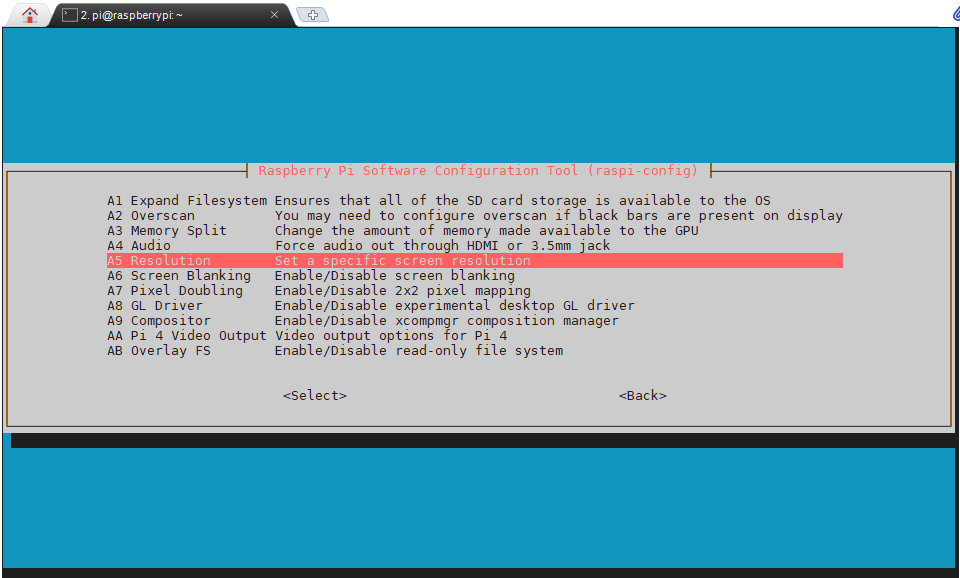
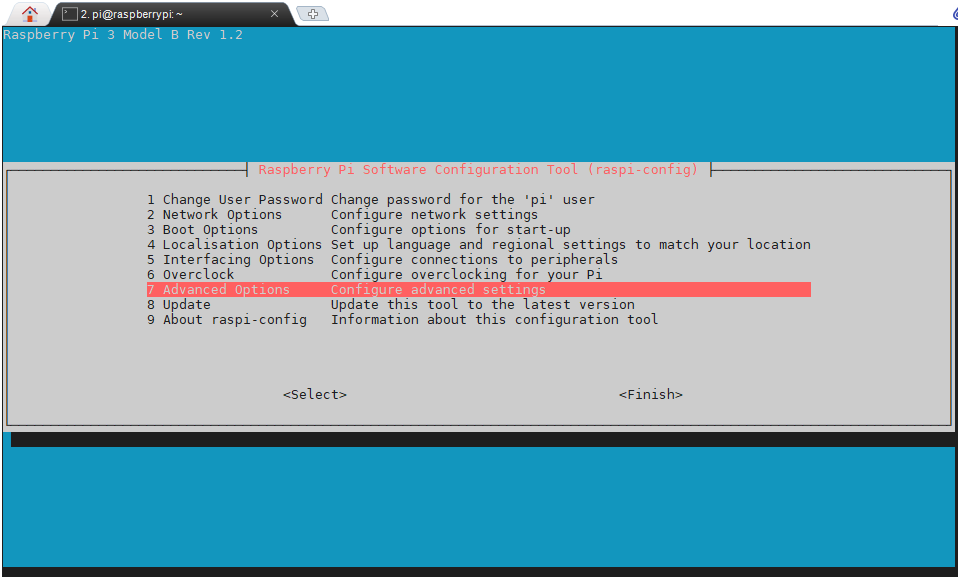
Staying in the same SSH Connection from the previous step we will first update all the software already installed on the Pi. Type the following two commands in the terminal while connected via SSH
sudo apt update
sudo apt upgrade
After each command follow any prompts on the terminal. the second command will take anywhere from 15-20 minutes to complete. You will need to answer one or two more prompts and then take a coffee break while all update software is downloaded and then installed.
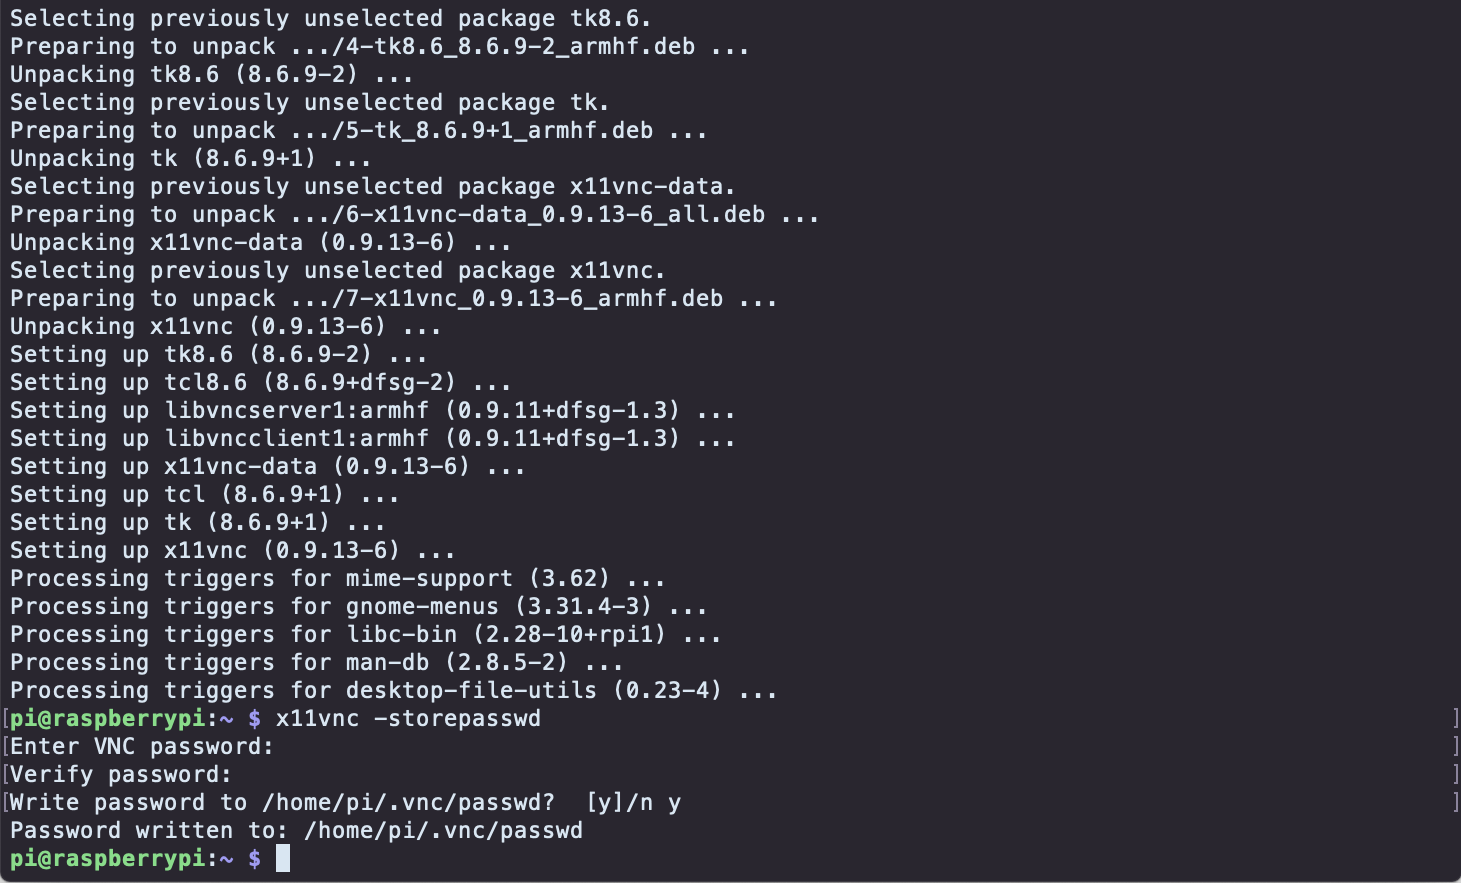
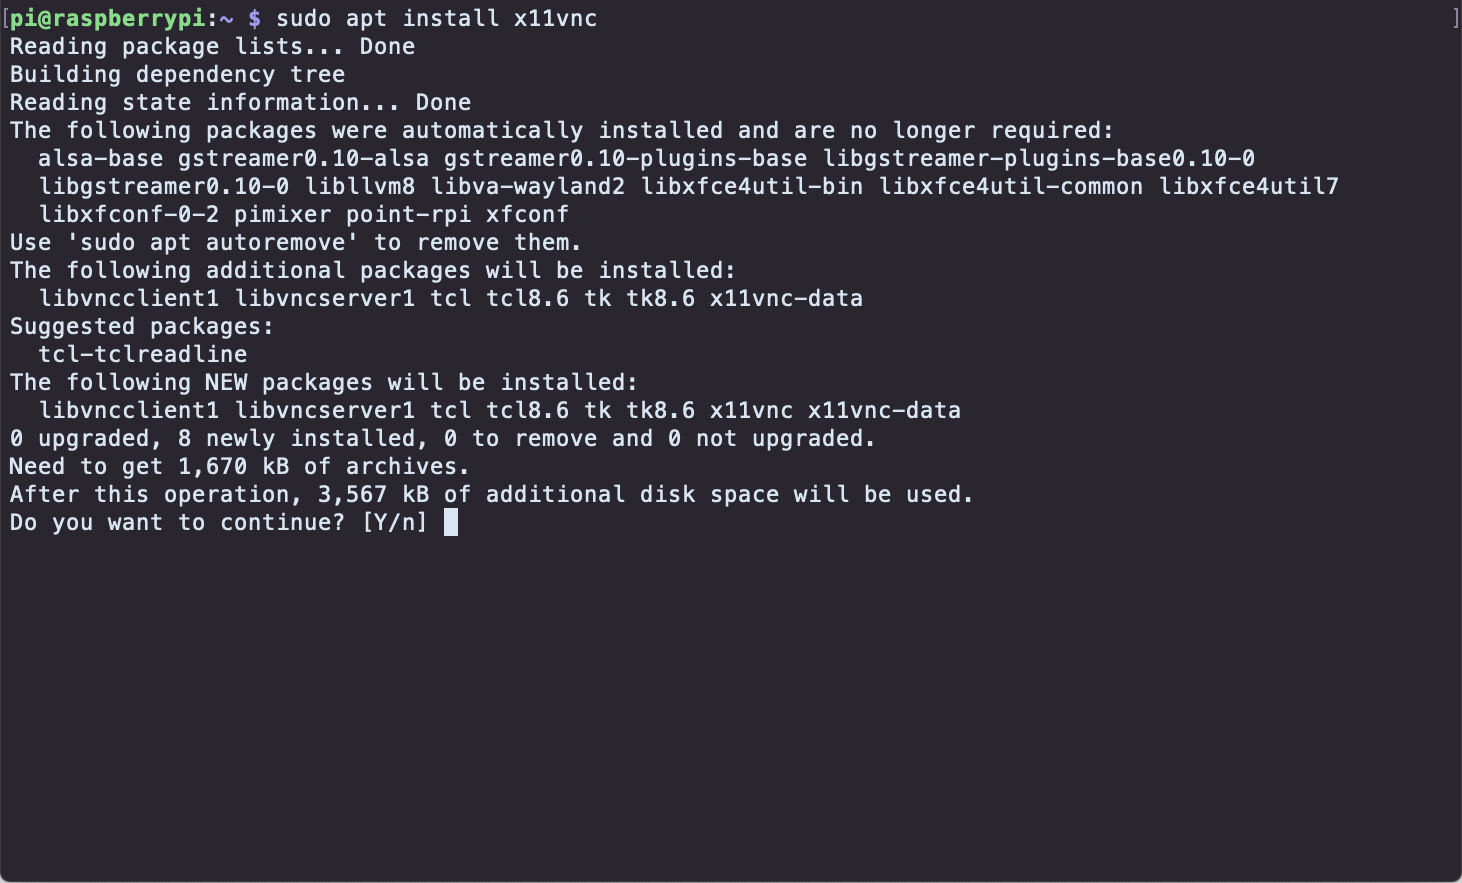
After the update is complete its time to install x11VNC. x11VNC is a remote desktop application that will run on the raspberry pi and enable us to view the desktop from our PC. Type these command in the terminal
sudo apt install x11vnc
x11vnc -storepasswd
The second command is to set a password to access your remote desktop. NOTE: This has to be 8 characters maximum.
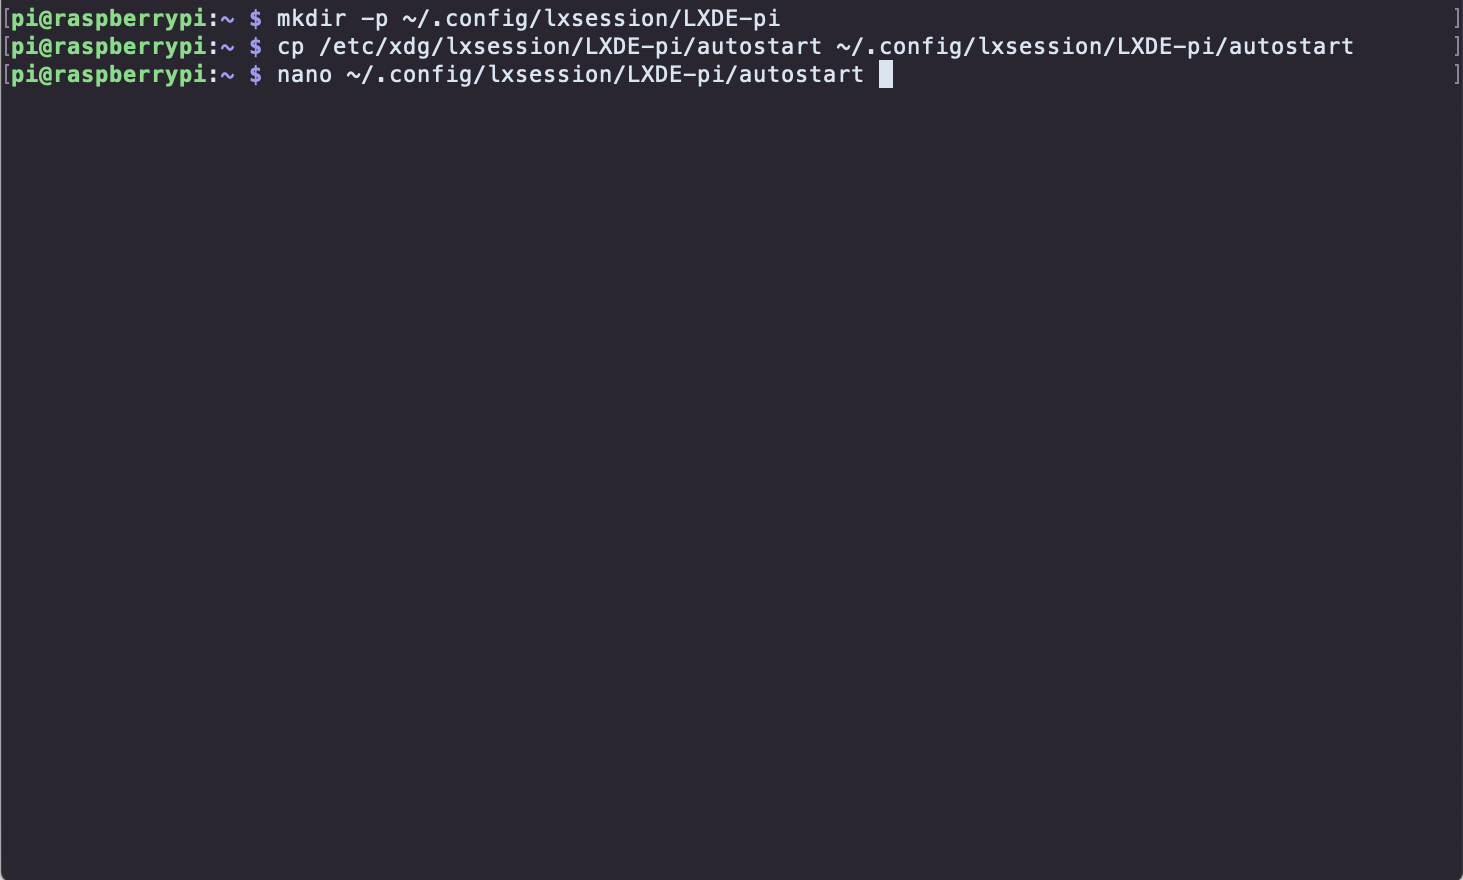
Next we will update a config file to have x11vnc run automatically at boot. Still in the terminal type these commands
mkdir -p ~/.config/lxsession/LXDE-pi
cp /etc/xdg/lxsession/LXDE-pi/autostart ~/.config/lxsession/LXDE-pi/autostart
nano ~/.config/lxsession/LXDE-pi/autostart
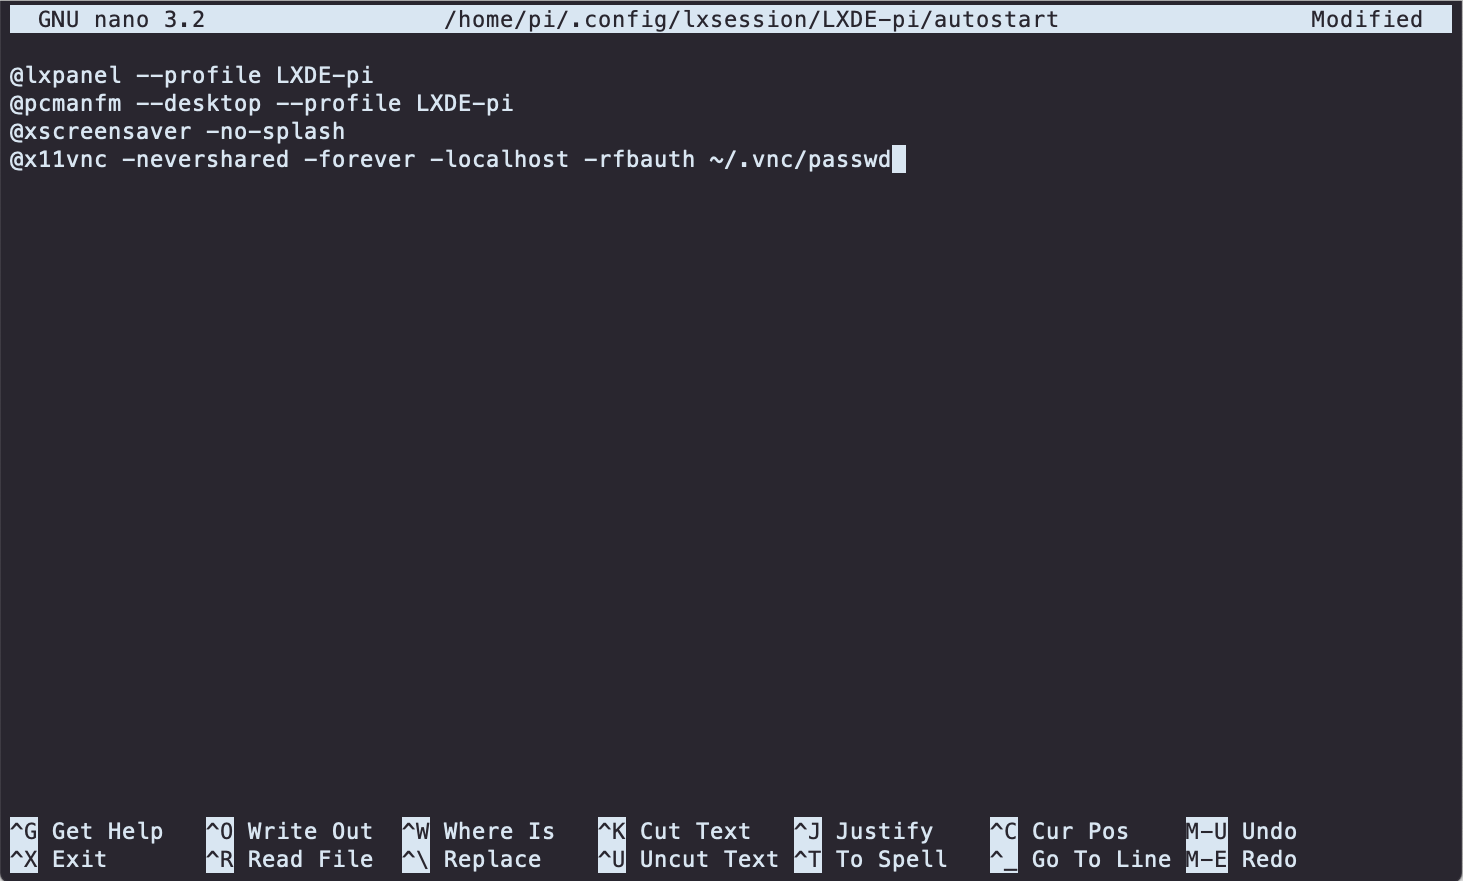
The last command will start the 'nano' simple text editor. At the end of the file add this
@x11vnc -nevershared -forever -localhost -rfbauth /home/pi/.vnc/passwd
Save the file with 'Ctrl-o' and quit nano with 'Ctrl-x'
Since we have never connected any display to the Raspberry Pi, by default the desktop will start off in a very low 720x480 resolution. But this is easy to fix. Still in the SSH session, run
sudo raspi-config
This will launch the raspbian configuration text mode app. Using arrow keys, chose 'Advanced Options' and hit ENTER. Next choose 'Resolution' and hit ENTER. Finally you will be presented with a list of available screen resolutions. Choose one of the higher resolution options and hit ENTER. Back at the main screen using TAB switch to the '' option and hit ENTER.
Reboot the Raspberry Pi
sudo reboot
Remote Desktop.. Finally!
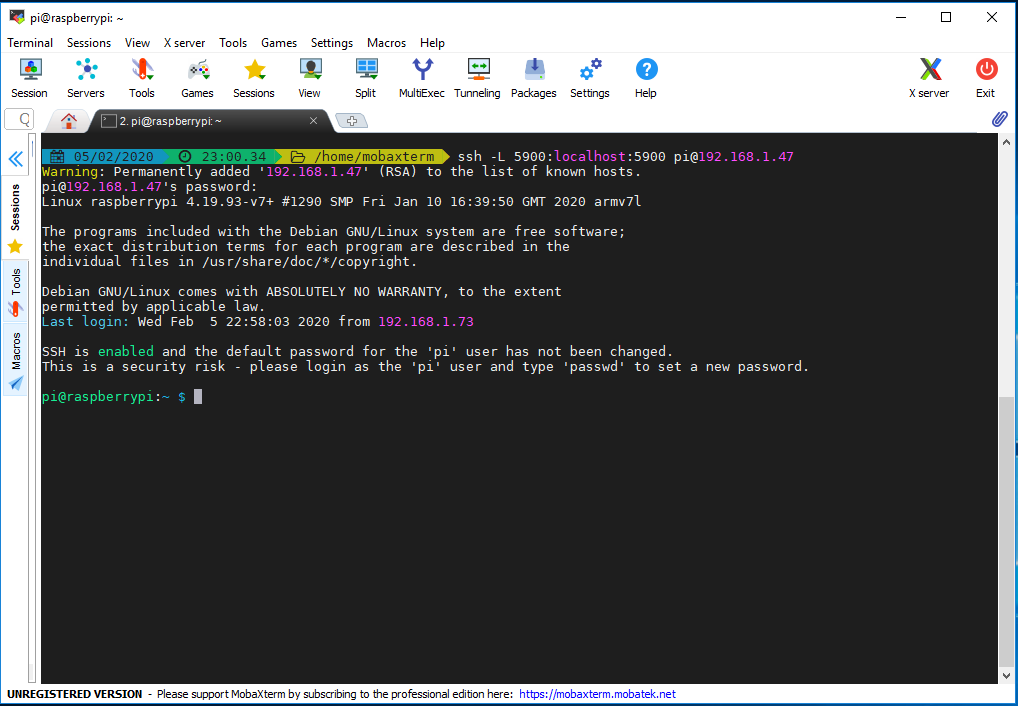
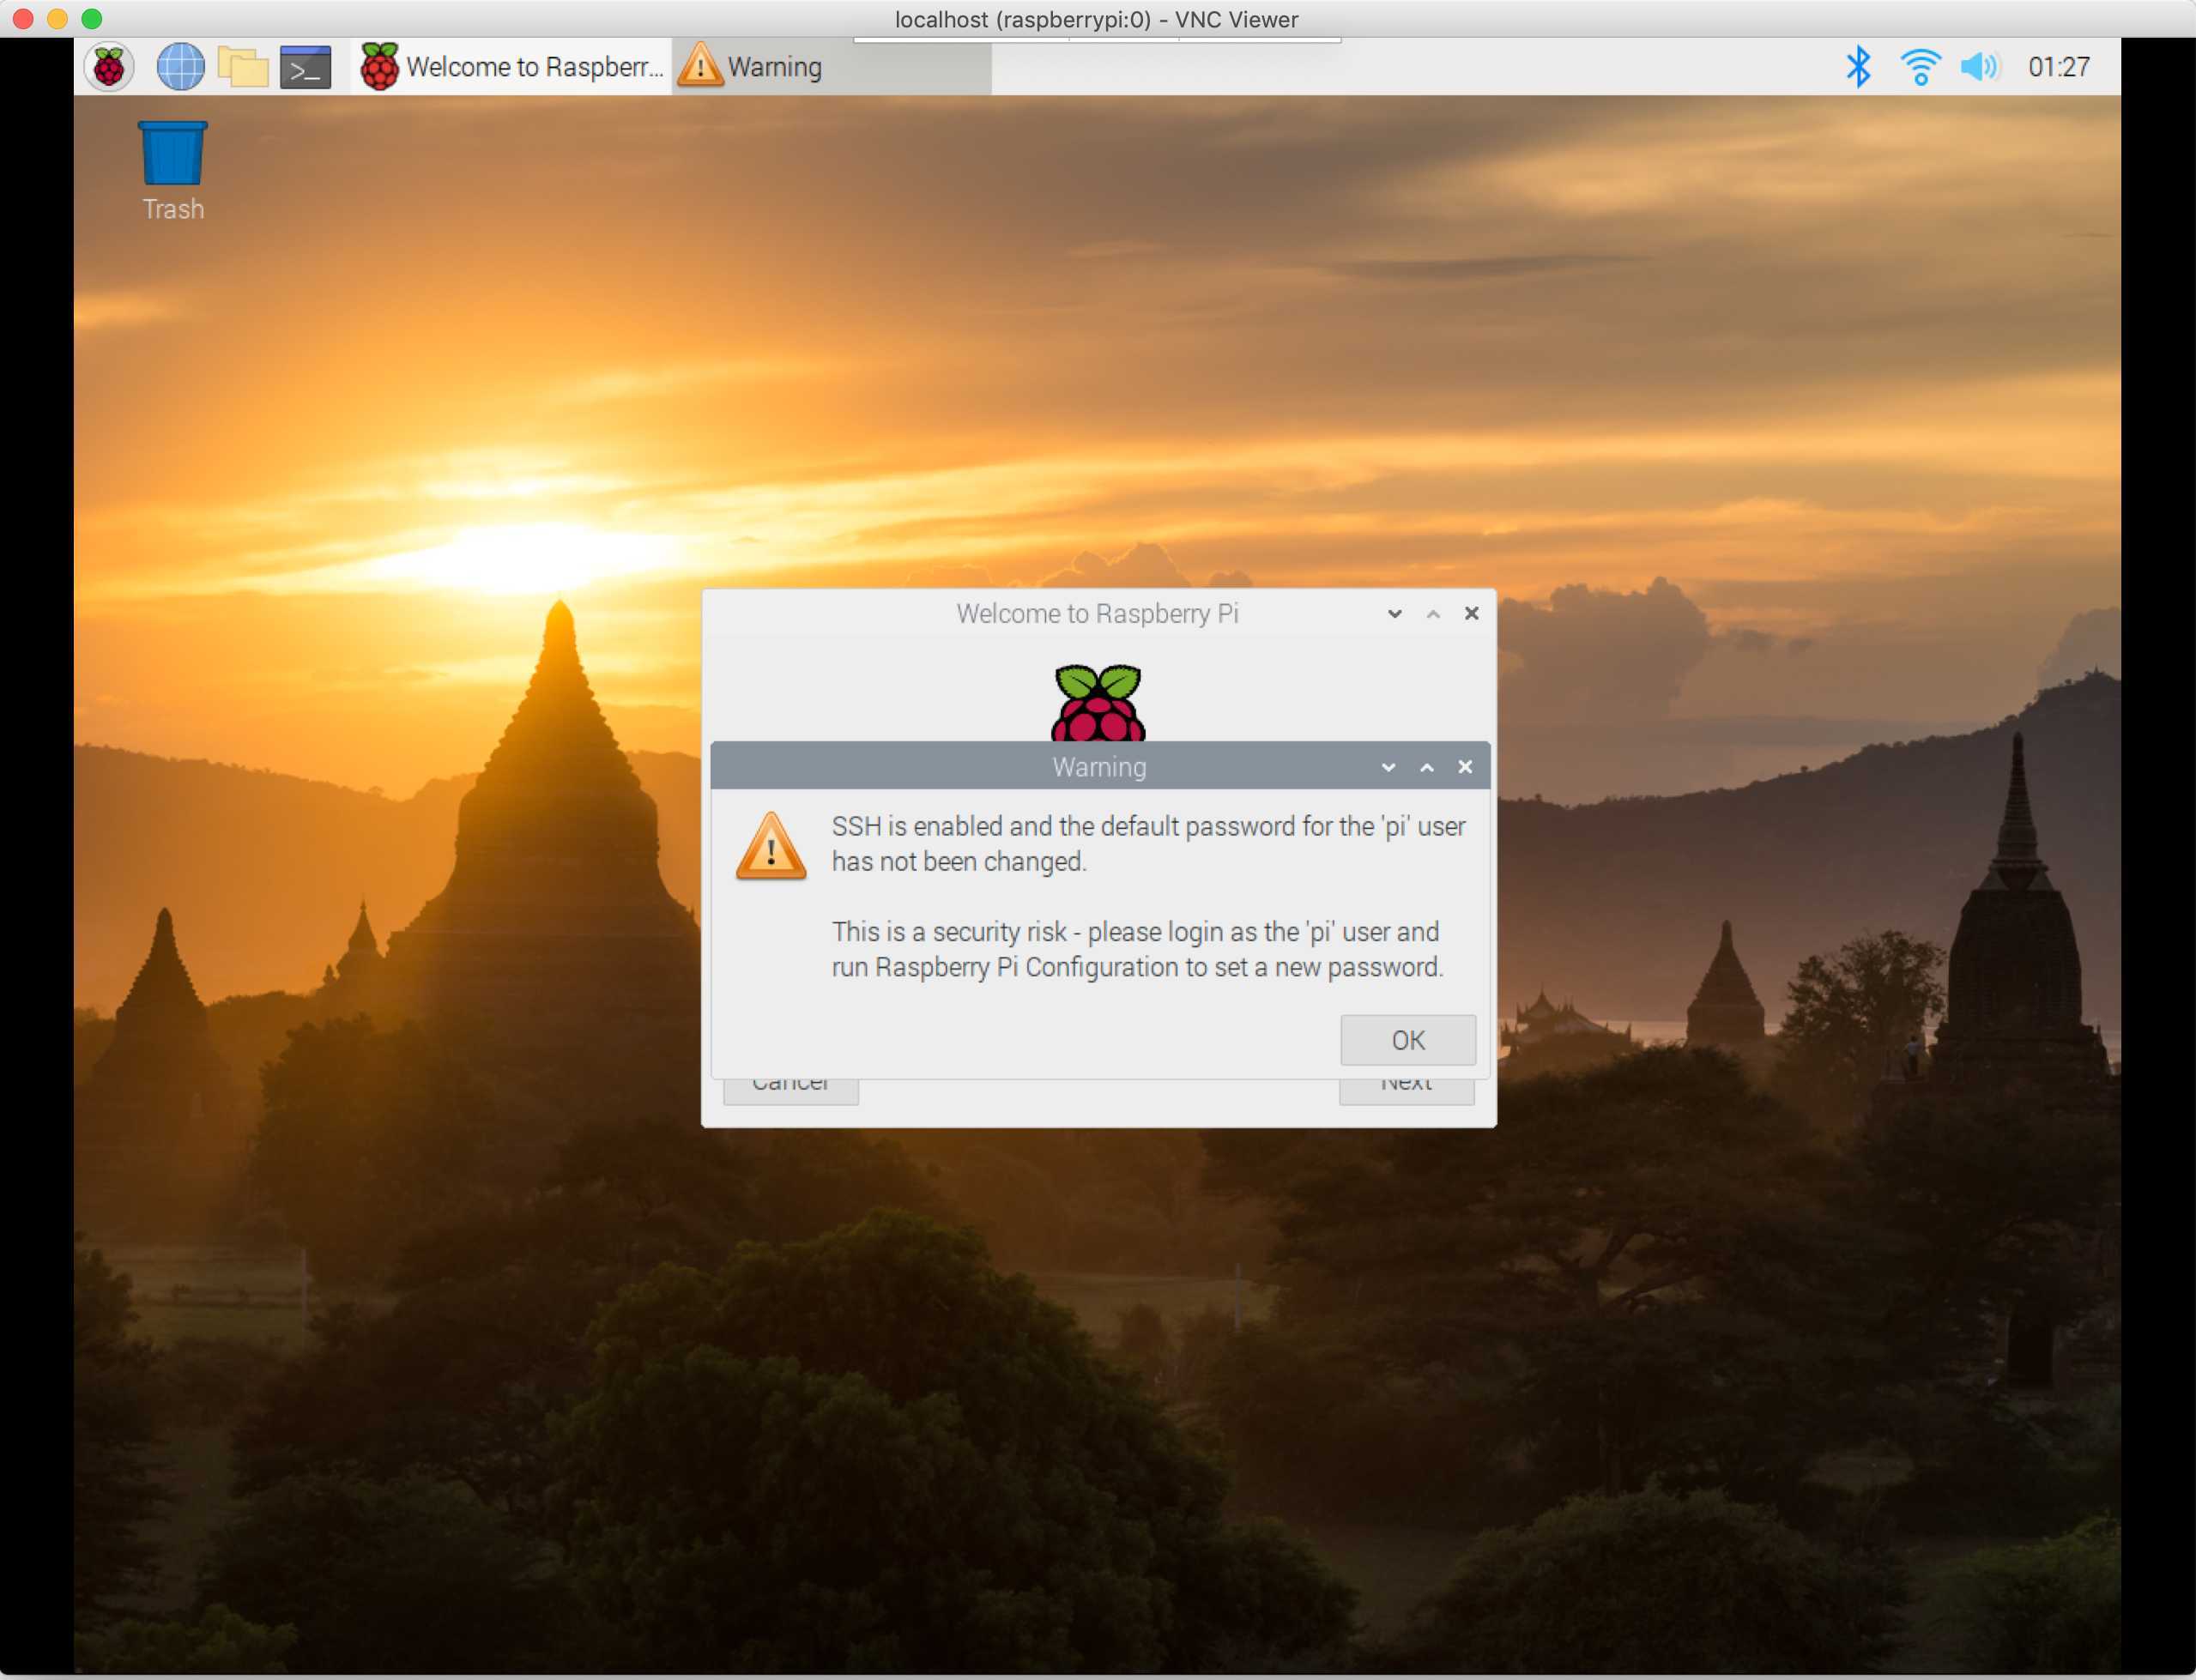
After the Raspberry Pi is done booting we are ready to view the glorious Desktop without ever connection an external monitor or keyboard and mouse.
SSH with Port Forwarding
This final part is a bit technical and harder to explain. I will recommend reading this very good guide.
Go back to the terminal you used to connect to the Pi via SSH. Now carefully type and run this command
ssh -L 5900:localhost:5900 pi@192.168.1.47
RealVNC Viewer
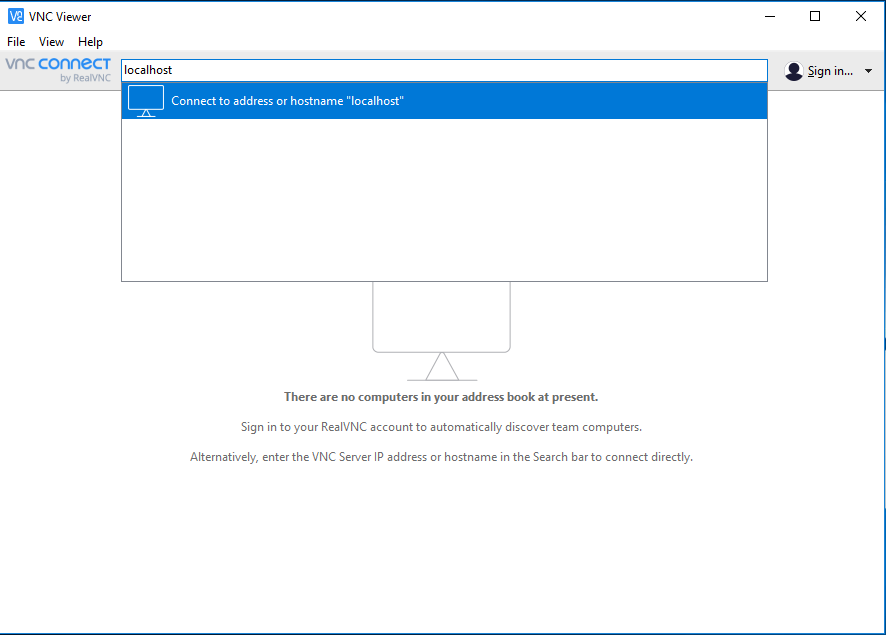
Download and install the RealVNC Viewer. Launch RealVNC Viewer. In the VNC Server Address just type
localhost
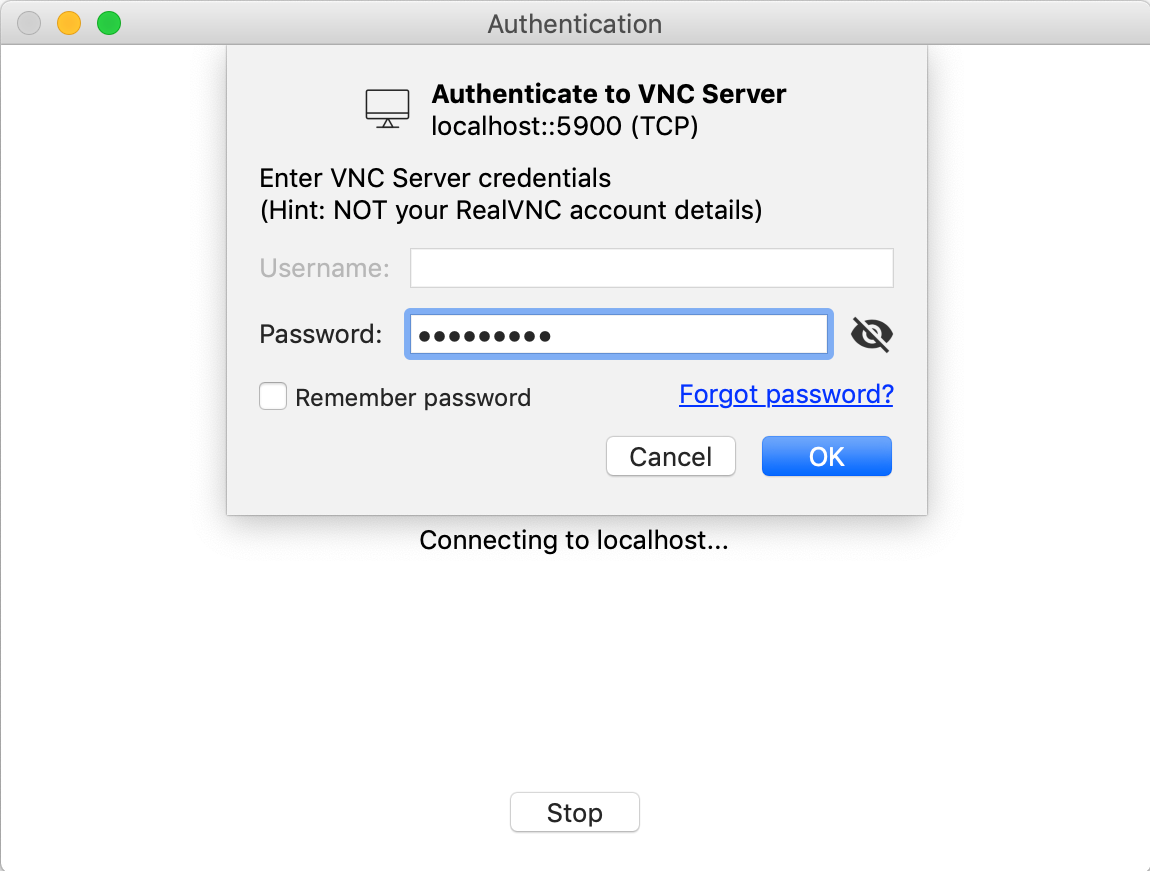
and click on Connect or just hit ENTER. The viewer will complain about connection not being secure. Accept the warning and continue. You will be prompted for a password. This is the 8-character (or less) password you set for x11vnc. Click on 'OK' and you will be greeted with the Raspberry Pi Desktop.
You will notice a warning about using default password. At this point go ahead and change the default password for the 'pi' user.
Normally VNC connections are not secure. But with this method you have now made the VNC connection secure by tunneling it over the encrypted SSH Connection.
Thats It!!! You have successfully setup a truly headless Raspberry Pi.