Raspberry Pi 5 Case With Integrated Water Cooling
by thediylife in Workshop > 3D Printing
10820 Views, 76 Favorites, 0 Comments
Raspberry Pi 5 Case With Integrated Water Cooling


I previously built a water-cooled Raspberry Pi 4 using a CM4 module and the official IO board. While it performed well, the setup was bulky, so I started exploring ways to make it more compact.
The main challenge is that standard PC water-cooling components are oversized for a Raspberry Pi—one kit could cool an entire Pi cluster. This requires using unconventional hardware and sometimes creating custom parts.
Supplies
To build this project, you'll need the following supplies and equipment;
Components Used:
- Raspberry Pi 5 - Buy Here
- MicroSD Card - Buy Here
- Raspberry Pi 5 Power Supply - Buy Here
- Ice Pump Cooling Block - Buy Here
- 5V Submersible Pump - Buy Here
- 60mm Radiator - Buy Here
- 5V Fan - Buy Here
- M2.5 x 6mm Button Head Screws - Buy Here
- M2.5 Brass Inserts - Buy Here
- 2mm Clear Acrylic - Buy Here
Tool & Equipment Used:
Designing the Case


Earlier this year, I tested the Ice Pump Cooling kit for a Pi 5. While the water block design was good, the radiator and fan felt like overkill.
Seeing the acrylic top on the block gave me an idea: why not design a new top for the copper base that combines tubing and a reservoir into a compact 3D-printed piece? This would make the cooling setup smaller, with the print handling the connections and storing the extra coolant. I’d just need to add a fan, radiator, and pump to the case.
I started modelling the components in Fusion360, which became one of my most complex designs yet. The case ended up with the Pi mounted vertically at the back, with ports accessible through cutouts. The cooling block attaches to the Pi via the side panel, and the opposite side holds a reservoir with a built-in pump. The radiator and fan are on the front, and most cooling lines are integrated into the 3D print, with short flexible tubing for the radiator.
I also added finishing touches like a grill for the radiator, a top cover for the pump, case feet, and a Pi logo on the reservoir. I’m hoping the logo stands out more with a contrasting coolant colour.
3D Printing the Case Components


I first tried printing the entire case as one large resin piece, making the cooling loop a fixed part of the case. It didn’t go well—transparent resin didn’t work for large overhangs, and the prints came out distorted and messy.
So, I switched to printing the tank, block, and cooling lines separately from the case, using different printers for each.
The tank and block, printed in smokey black transparent resin, turned out great. The smokey finish avoided the clear resin's yellowing problem and still lets you see inside. After cleaning the resin, I added brass inserts for mounting and cured the pieces with UV light.
I used dark blue sparkle PLA with white accents on the fan grill, top cover, and feet for the case body. These colours should pair nicely with the white coolant planned for the reservoir. This approach worked much better than my earlier resin attempt. I just need to add brass inserts to the case using a soldering iron.
Finally, I made the side panels from clear acrylic, sticking with my usual style for showing off the internals. These were laser cut from 2mm acrylic sheets.
Assembling the Cooling Loop

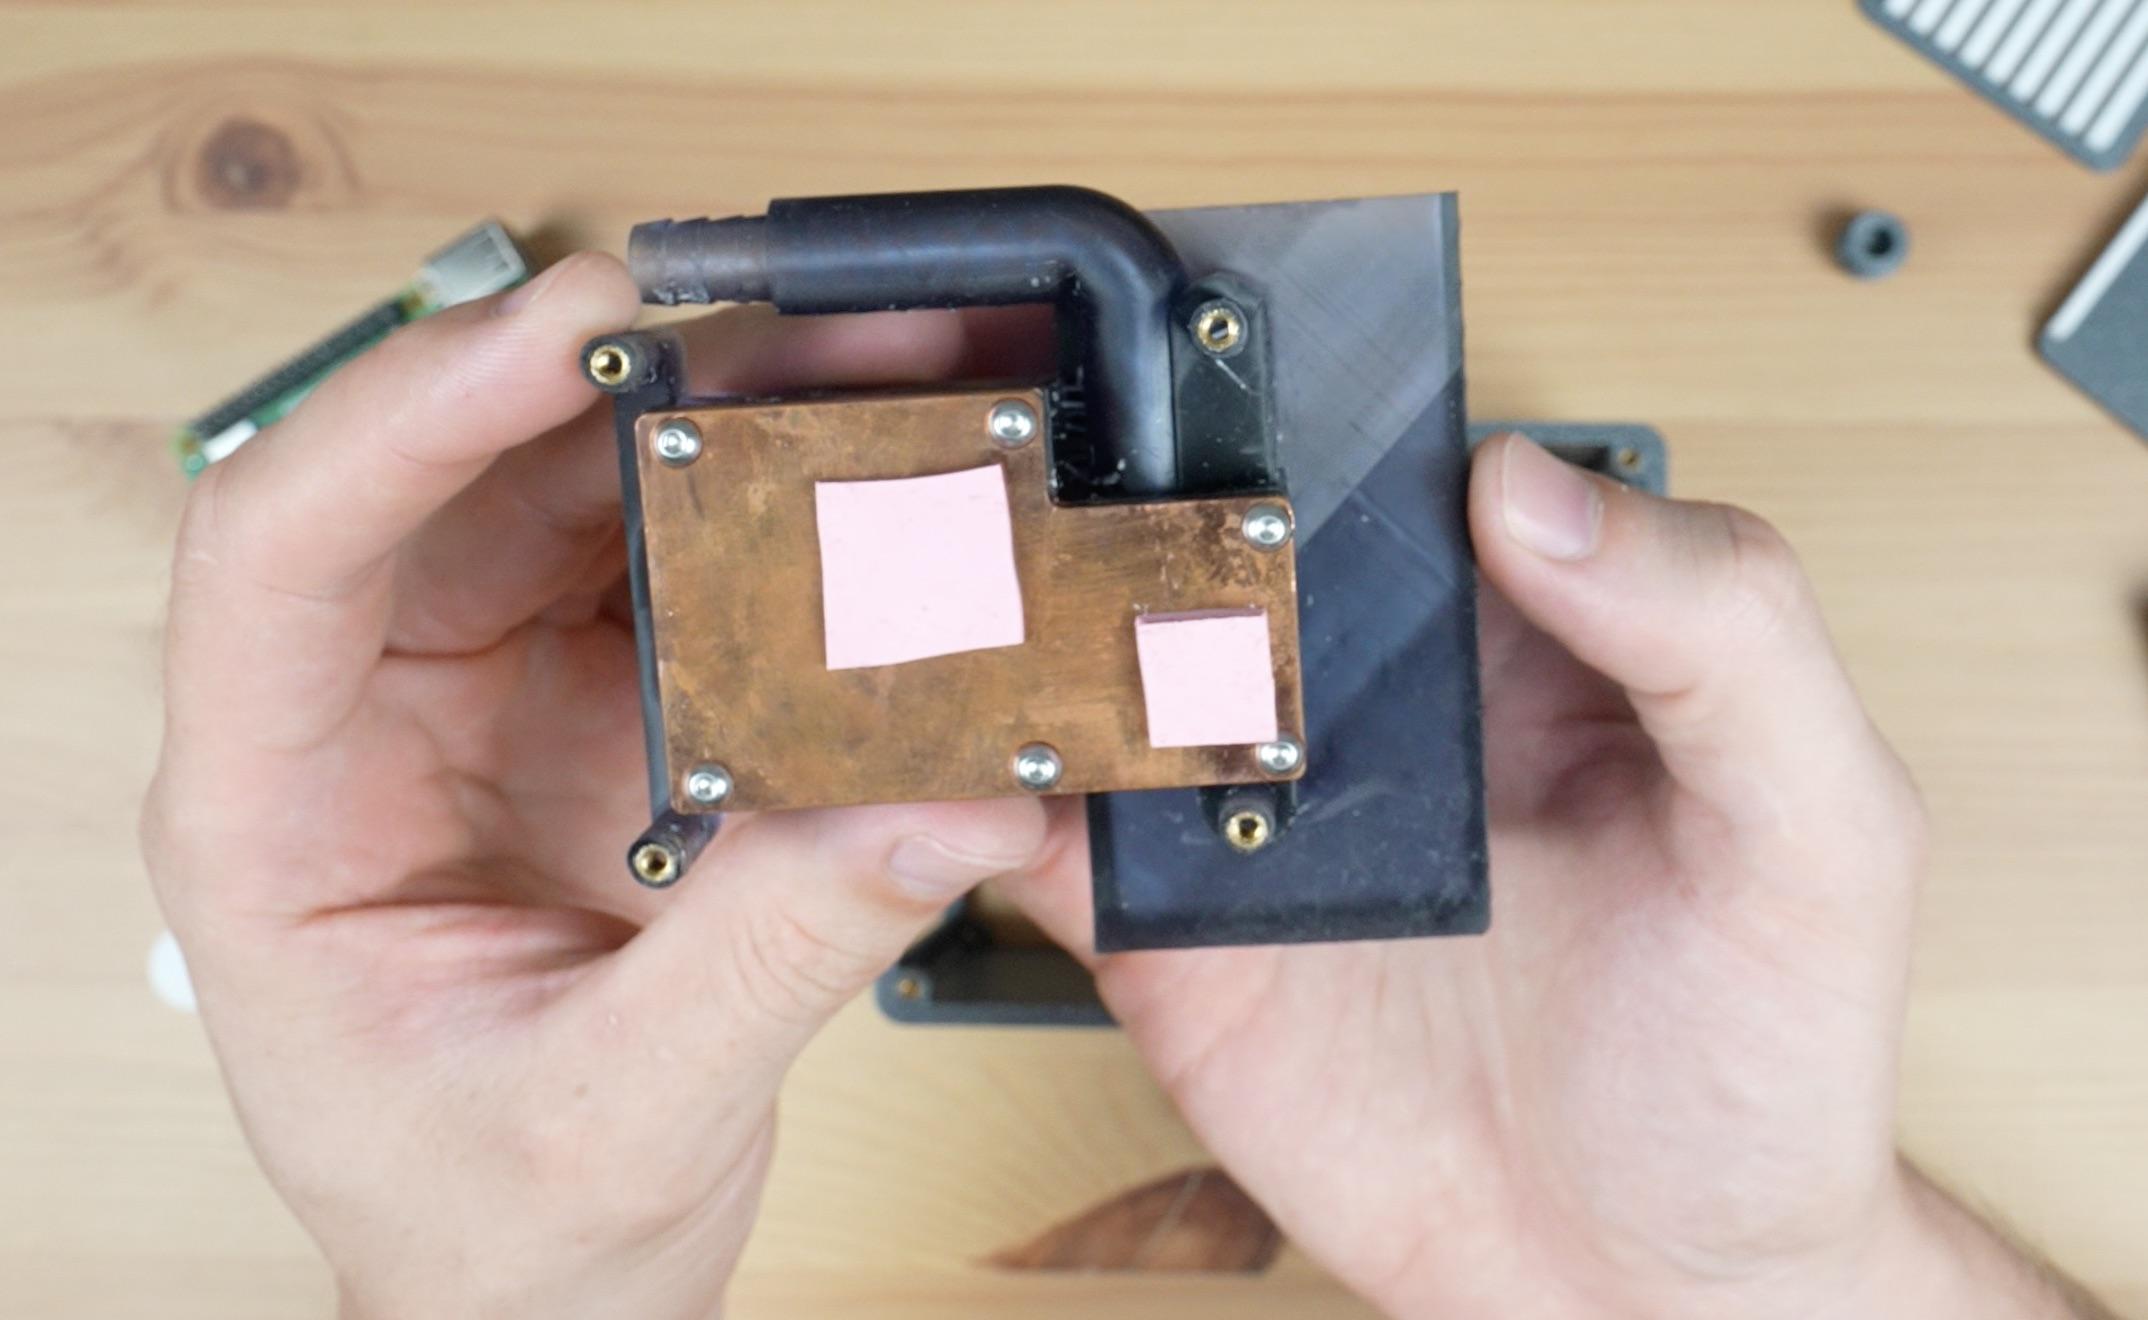


Let’s start by putting the cooling loop together. First, attach the copper heatsink to the cooling block. My design reuses the original o-ring, so I swapped it over and hoped the dimensions were right to avoid leaks.
The pump is a 5V submersible USB pump. I cut off the connector and crimped DuPont connectors onto the wires so it plugs directly into the Pi’s GPIO pins for power. A short piece of flexible tubing connects the pump to the reservoir outlet, secured with a zip tie since the fit felt loose.
Next, we’ll connect the radiator using flexible tubing. Before that, I mounted a 60mm 5V fan to the 60mm radiator, also with connectors crimped for GPIO power.
With most of the cooling loop assembled, I tested it before sealing the reservoir and installing it in the case. I filled it with water and powered it with a 5V supply, letting it run for half an hour. There were two tiny resin print holes that I patched, but everything else worked fine.
Once tested, I closed the reservoir with a few drops of hot glue—enough to hold it securely but still allow disassembly if needed.
Finishing Off the Case


Then I installed the assembly into the case, securing the reservoir with one screw to start (a second will go in when the side panel is added).
Next, I mounted the Pi. The fan connects to the Pi’s 3.3V and ground pins, and the pump to the 5V and ground pins. The copper block’s cooling pads stayed in place, and the Pi was secured to the cooling loop with four M2.5 screws.
To finish, I added the side panels and cover plates. I also made some decals for the opposite side.
With everything complete, I filled the reservoir with coolant, booted up the Pi, and ran some thermal tests.
Thermal Testing the Case


I used CPU Burn to max out all four CPU cores and tracked the temperature for 30 minutes.
The performance is similar to my water-cooling stand. Idle temps are about 28°C, and under full load, the temperature levels off at 42°C after 90 seconds, staying steady for the rest of the test.
Comparing it to the water-cooling stand, the results are almost identical, though the stand heats up slightly faster, likely due to its block having less thermal mass.
As expected, this water-cooling setup outperforms the official Pi 5 Active Cooler by a significant margin, maintaining a 25°C lower steady-state temperature.
Once the test ended and the CPU was unloaded, the temperature dropped back to 28°C in around 90 seconds.
Thoughts on the Case Design


I’m really happy with how this build turned out! It took way longer than I expected, but it was worth it.
Of course, there’s always room for improvement. Next time, I plan to add a power button for the Pi, make space for an NVMe drive under the Pi, secure the cooling loop to the case better, and tidy up the cable management.
Visit my blog post for more detailed build instructions and test results or watch my video at the beginning of the Instructable.
Let me know your thoughts on my water-cooled Pi 5 project in the comments, or if you’ve got any suggestions for what I should add.
If you enjoyed this Instructable, please consider voting for it in the Anything Goes contest!