Raspberry PI Temperature and Humidity Logging, Cloud Weather Station, Wifi and Mobile Stats
by loggingforest in Circuits > Raspberry Pi
3472 Views, 9 Favorites, 0 Comments
Raspberry PI Temperature and Humidity Logging, Cloud Weather Station, Wifi and Mobile Stats
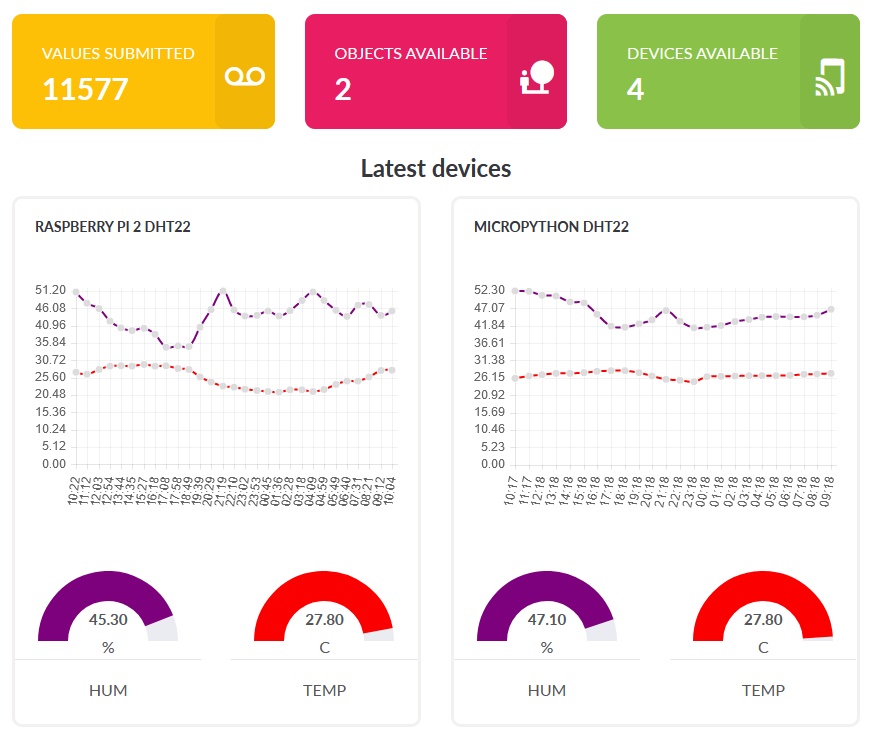
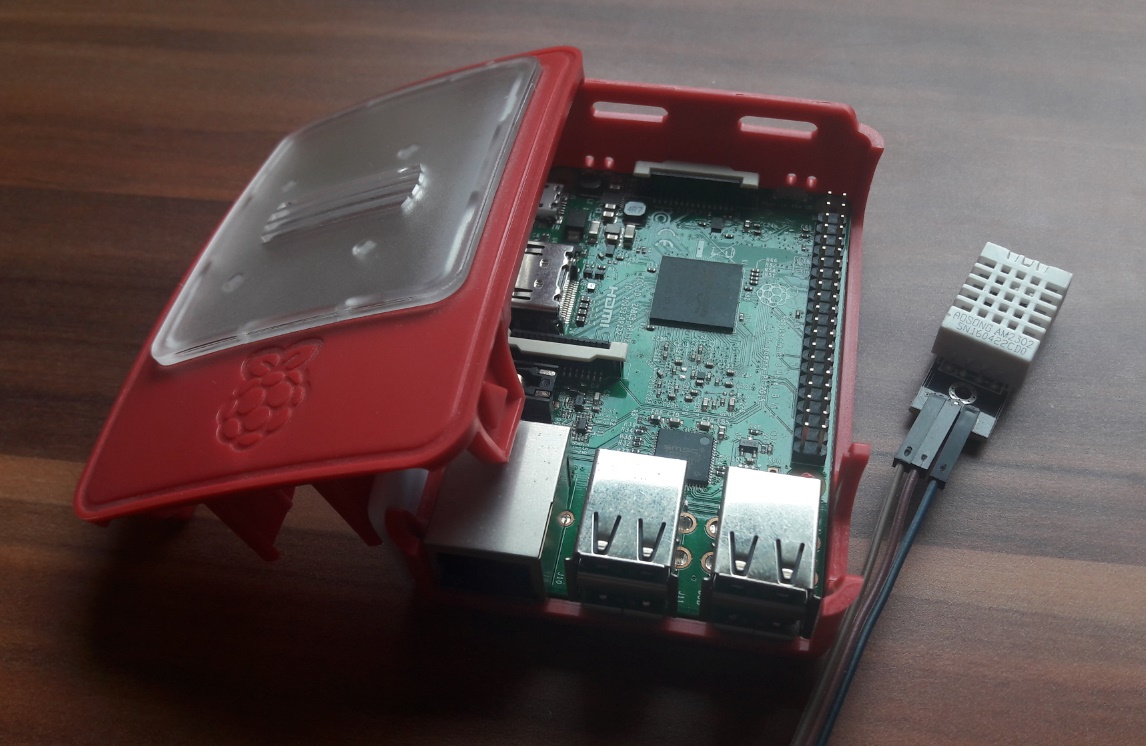
With Raspberry PI device you can log temperature and humidity data
outside, in room, greenhouse, lab, cooling room or any other places completely free. This example we will use to log temperature and humidity.
Device will be connected to internet via Wifi or Ethernet
You will be able to check latest readings on your mobile phone, desktop or any other device with browser
Supplies
Monitor with HDMI, HDMI cable, USB mouse and keyboard are also required for this tutorial but usualy you already have this
You can purchase needed devices here (minimal required):
Raspberry PI 3 or Raspberry PI 2 with wifi stick
micro SD card (suggested 32GB)
Also nice to have:
USB charger to Power your device
Standard Raspberry Enclosure (as on my example)
If you don’t have USB MicroSD reader
I purchased this on Banggood.com
This also tested/works with industrial AM2305 sensor
Add Your Device to LoggingPlatform
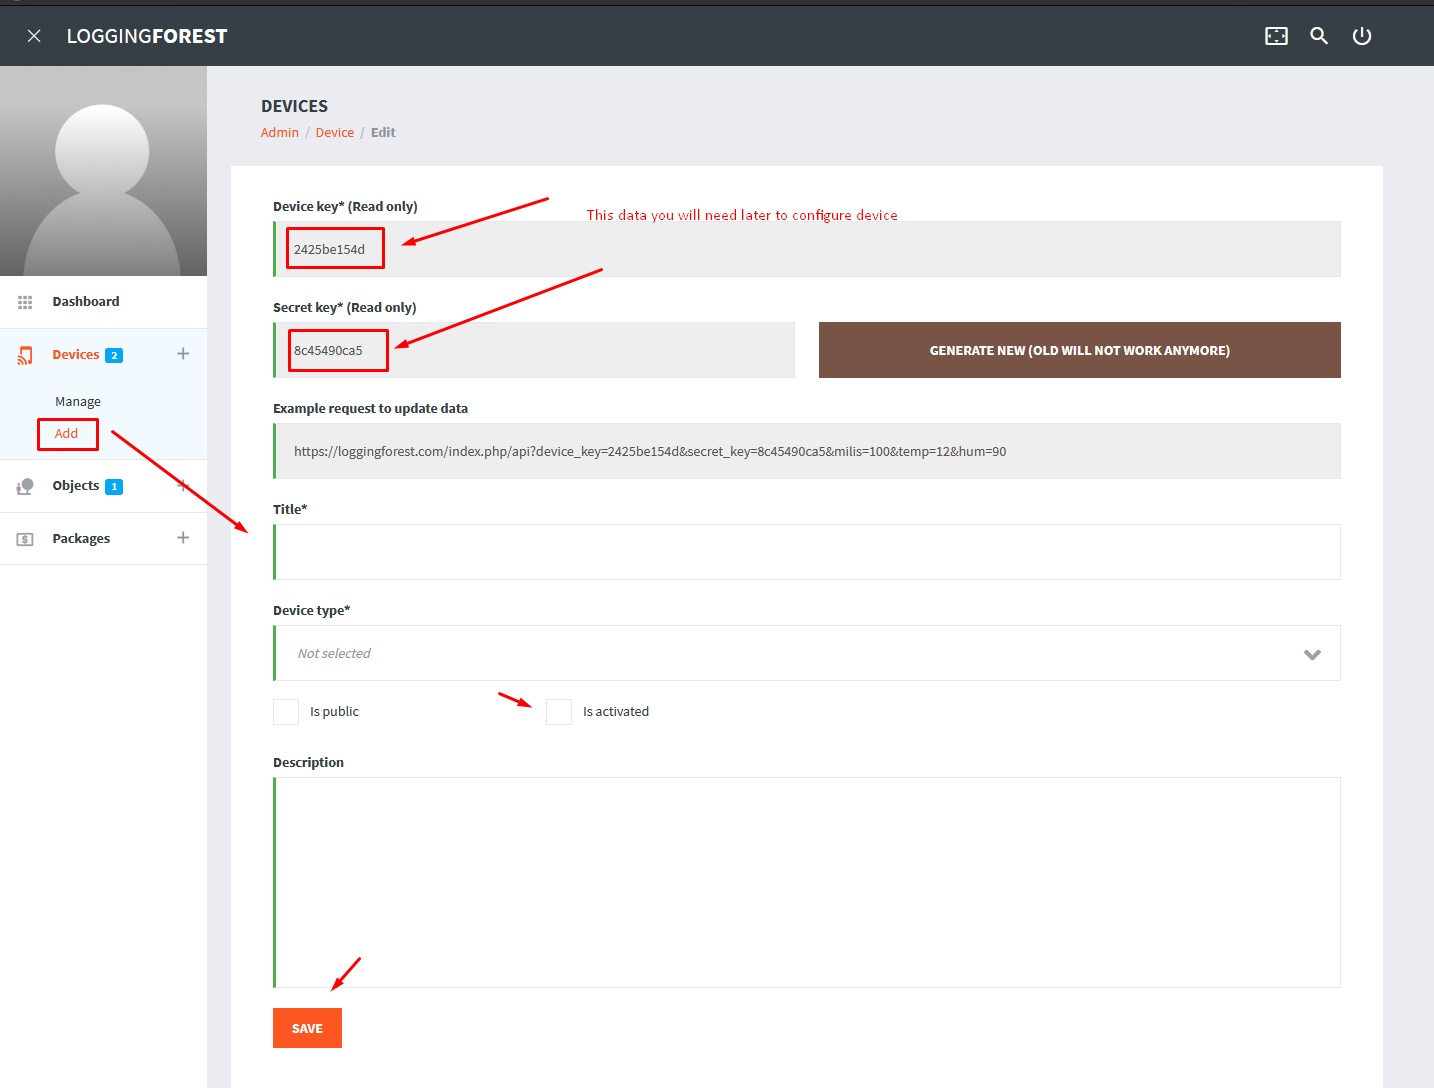
Here you can add your device to get api keys needed later: https://loggingforest.com/index.php/page/pricing
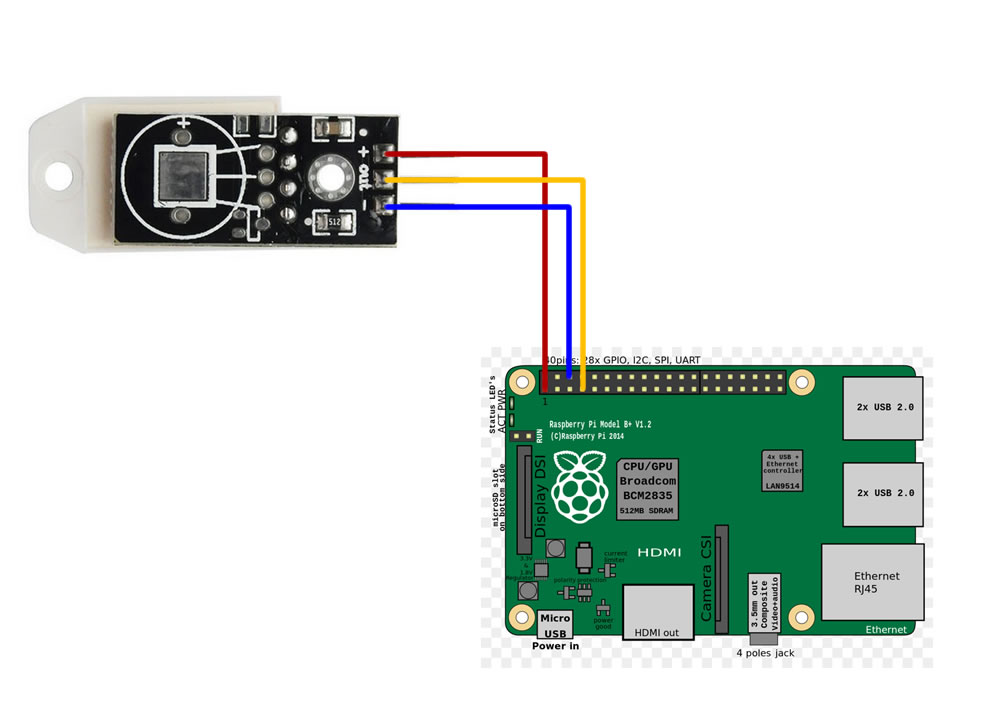
Hardware Connection Diagram Example
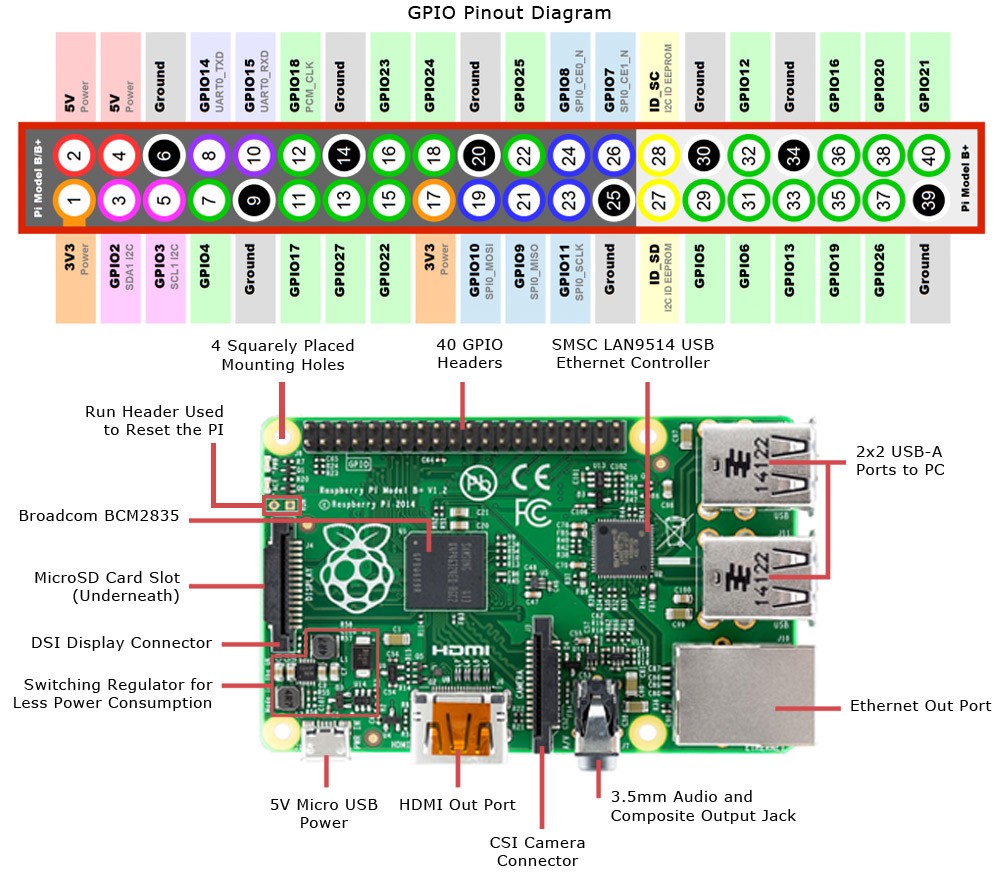
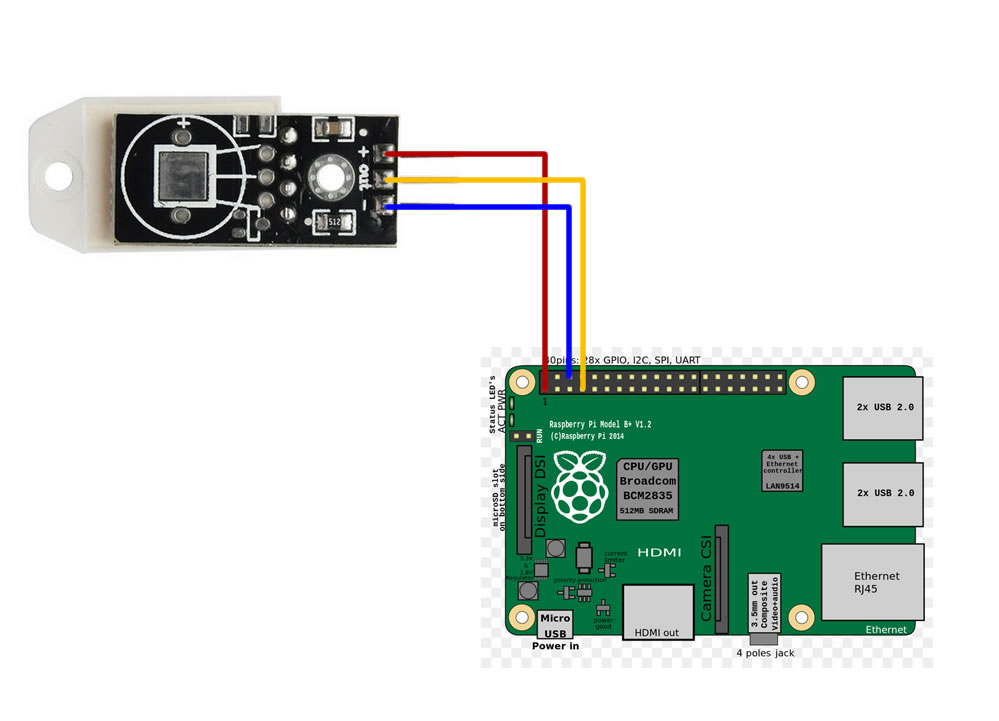
Connect DHT22 Out to RaspberryPi in/out PIN GPIO 4
Connect DHT22 + to RaspberryPi 3V PIN 1
Connect DHT22 – to RaspberryPi Ground PIN 6
Upload Software Needed to Micro SD Card (Windows Guide)


Connect MicroSD to MicroSD input on your Windows PC, if you don’t have it then purchase usb version like:
Download Latest Raspbian OS for Raspberry PI here (Official Raspberry PI link)
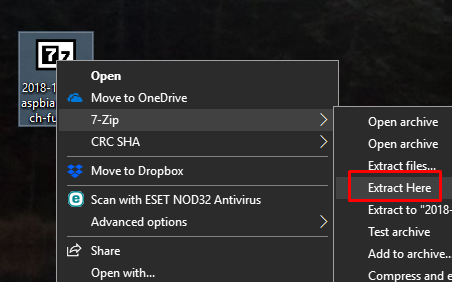
Extract downloaded Raspbian OS archive with your archiver or 7zip as on screen 1
Now you need to write Raspbian OS with Win32DiskImager to your MicroSD card:
So insert MicroSD into your reader and run Win32DiskImager
Select your downloaded and extracted Raspbian OS image file, your MicroSD and click on Write as on screen 2
NOTICE ON ISSUE: If you have troubles or strangely formatted
MicroSD, or running this again, then before this you need to remove all volumes from drive and create only one. This can be done with Disk Management tool in Windows as on screen 3
Insert MicroSD into your Raspberry, connect it to monitor, mouse and keyboard and run it
RaspbianOS, Loading Python Program to Raspberry and Configuration Needed
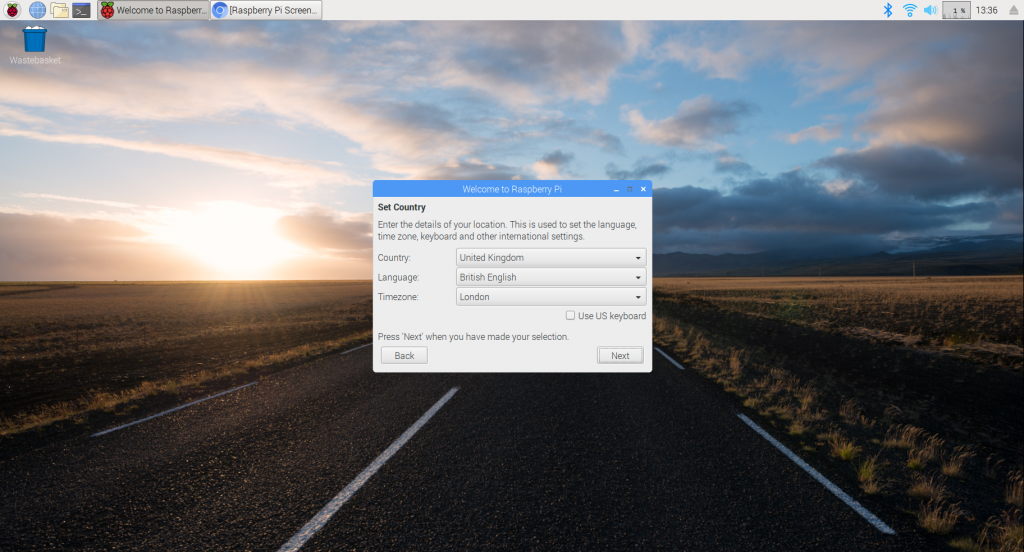


When Raspberry boot up, you just need to configure it with nice wizard, example screen 1
After that install some libraries for DHT22 so in terminal run:
sudo apt-get update
sudo apt-get install build-essential python-dev python-openssl git
git clone https://github.com/adafruit/Adafruit_Python_DHT.git && cd Adafruit_Python_DHT
sudo python setup.py install
Create file now with command as on screen 2
Paste basic LoggingForest code from this page in file
https://github.com/sandiwinter/loggingforest/blob...
and change parameters received on loggingforest.com website as on screen 3
CTRL+X
Y
enter
For test now you can run this script as on screen 4
With CTRL+Z you can stop this program
Check Data on Loggingforest.com Platform
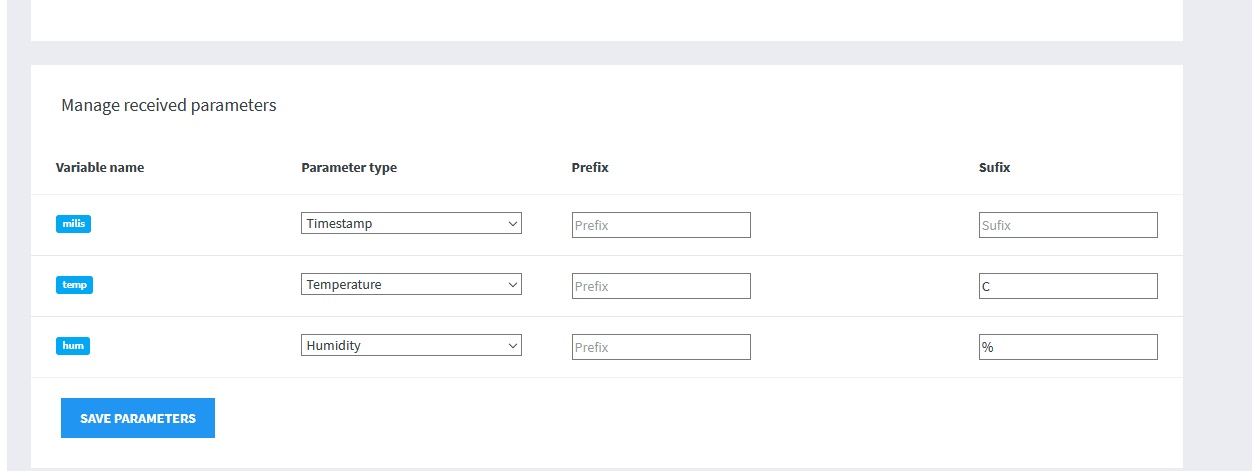

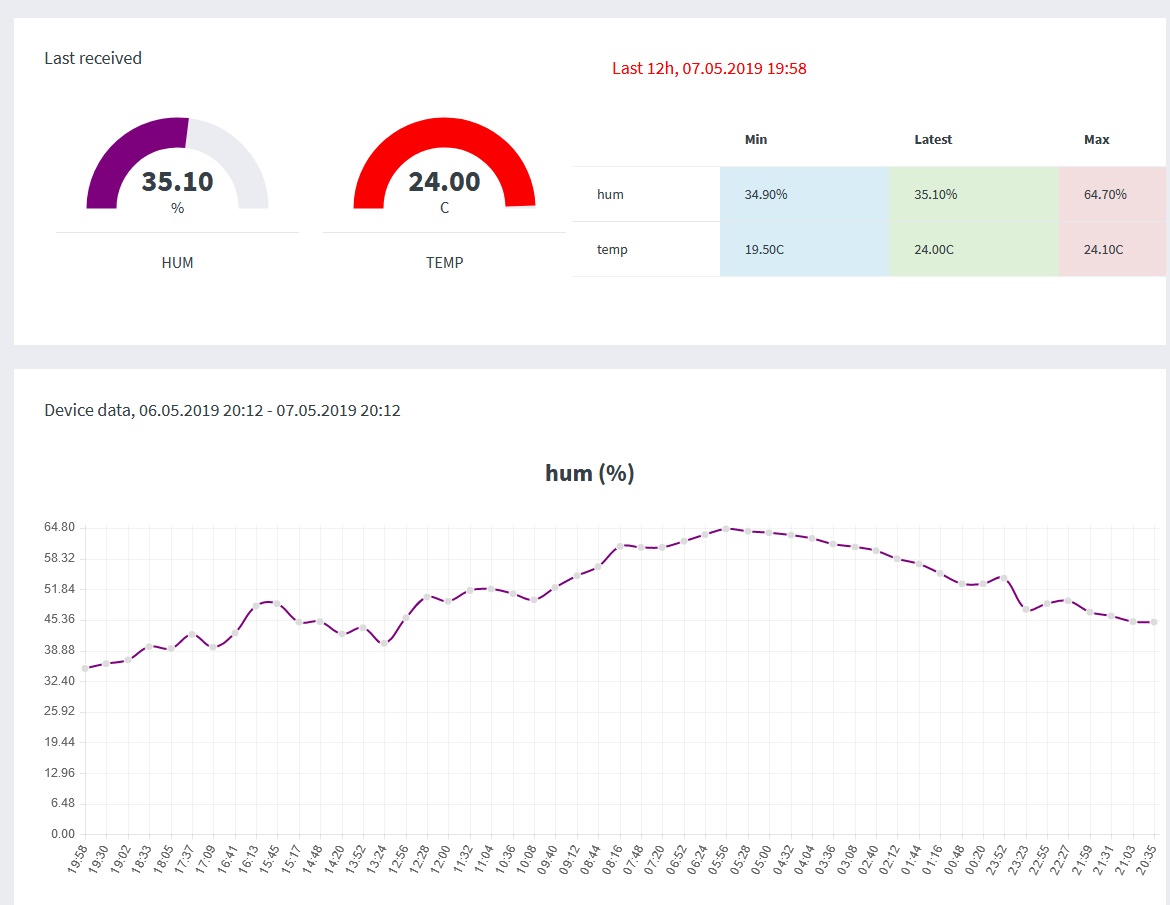
After that your device will start sending data to loggingforest and you can see it there
In loggingforest device edit just define parameters name and values as on screen 1
Click on preview as on screen 2
And you will see nice data as on screen 3
Run Python Script Automatically on Raspberry Boot Up

Of course, you probably want to run this python script automatically
when Raspberry will be started or connected to power source.
open terminal and run:
sudo nano /etc/rc.local
and before exit 0 add code to run your script:
sudo bash -c 'python /home/pi/dht22-api.py > /home/pi/dht22-api.log 2>&1' &
as on screen 1
Save file with CTRL+X , Y, Enter
Try to restart your raspberry PI, and now it’s ready!
Feel free to comment and share your logger
You can also find other code versions in github rep: