Random Snowflake Ornaments
by Frugha in Workshop > 3D Printing
22771 Views, 147 Favorites, 0 Comments
Random Snowflake Ornaments
.gif)
In this instructables I will show you how I made a Random Snowflake Ornament Generator using Tinkercad Codeblocks.
Supplies
- 3D printer
- Iron Wire
Add Variables
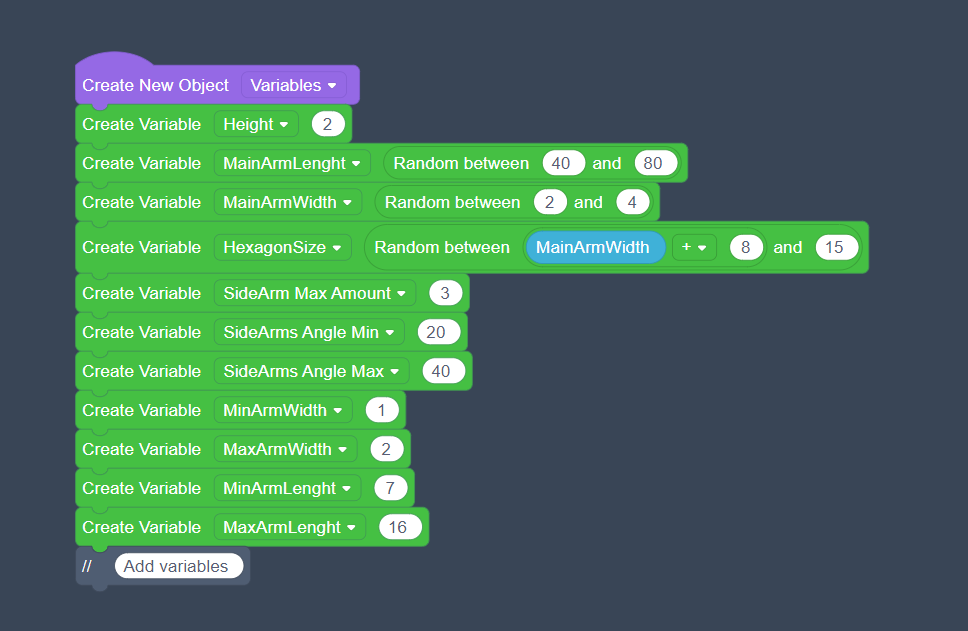
To make it easy to set some variables for the random snowflakes I added them separate so they are all in one place and you can easily change them.
- Height
This variable will set the height of the snowflake I picked 2mm becouse it's a nice thickness where the print will not break as easily and still isn't to thick.
- MainArmLenght & MaxArmLenght / MinArmLenght
These variables will pick the lenght of the arms. The MainArmLenght will set the main arm lenght to a random size between the set values. The MaxArmLenght/MinArmLenght will set the lenght of the side arms / dubble side arms. The min and max are separate so the width off the arms are all different.
- MainArmWidth & MaxArmWidth / MinArmWidth
These variables are the same as the MainArmLenght & MaxArmLenght / MinArmLenght but these variables will set the width of the main arm and side arms / dubble side arms
- HexagonSize
This variable will set the size of the hexagons that are on the points and the middle. Note the min value is the width of the main arm + 8 this will make sure the hole for the hook is not outside of the snowflake so it won't matter if the min value is set higher but it does if it is set lower.
- SideArm Max Amount
This variable will set the max amount of side arms the snowflake will have.
- SideArms Angle Min / SideArms Angle Max
These variables will set the min and max angle the side arms will have.
Add the Main Arm

First we make one of the arms of the snowflake. The lenght and width will be random so this means that the overall size of the snowflake will change ever time you run the blockcode. The size of the main arm will be a bit smaller than the diameter of the snowflake becouse later there will be hexagons added on the tips of the snowflake.
Becouse a snowflake has 6 arms we will later copy this arm 2x with a rotation of 60 degrees from the middle so there will be 6 arms in total.
Add the Hexagons
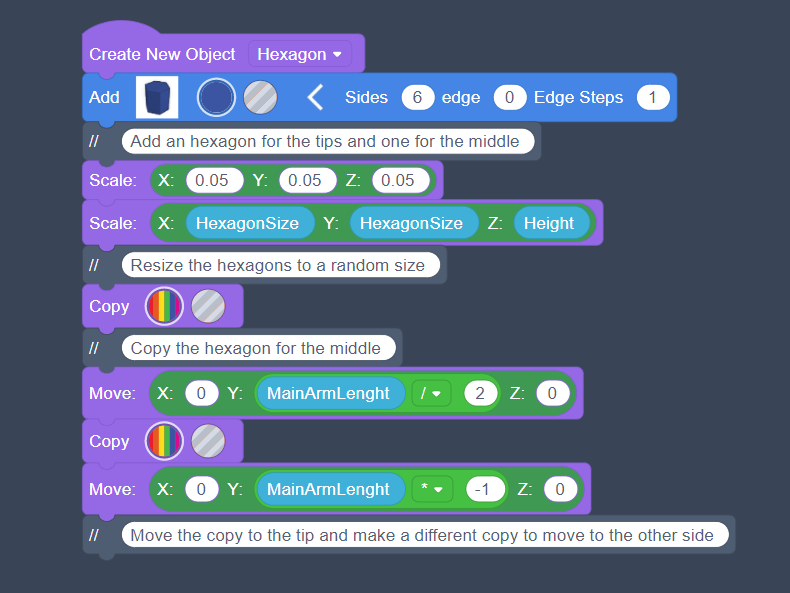
For the snowflake we want to have a hexagon on the tips and the middle of the snowflake. The hexagon size will also be randomized.
Becouse there isn't a option to set the diameter of the hexagon I first scaled it 0.05x. This lets me scale the hexagon where I just can set the diameter.
We now have the hexagon for the middle so we will copy it and move it up half of the main arm lenght so the hexagon is now on the tip of the snowflake. Now the second hexagon is in place we can copy it and move it the main arm lenght down so the hexagon in now on the bottom tip of the snowflake.
Add the Side Arms and Dubble Side Arms

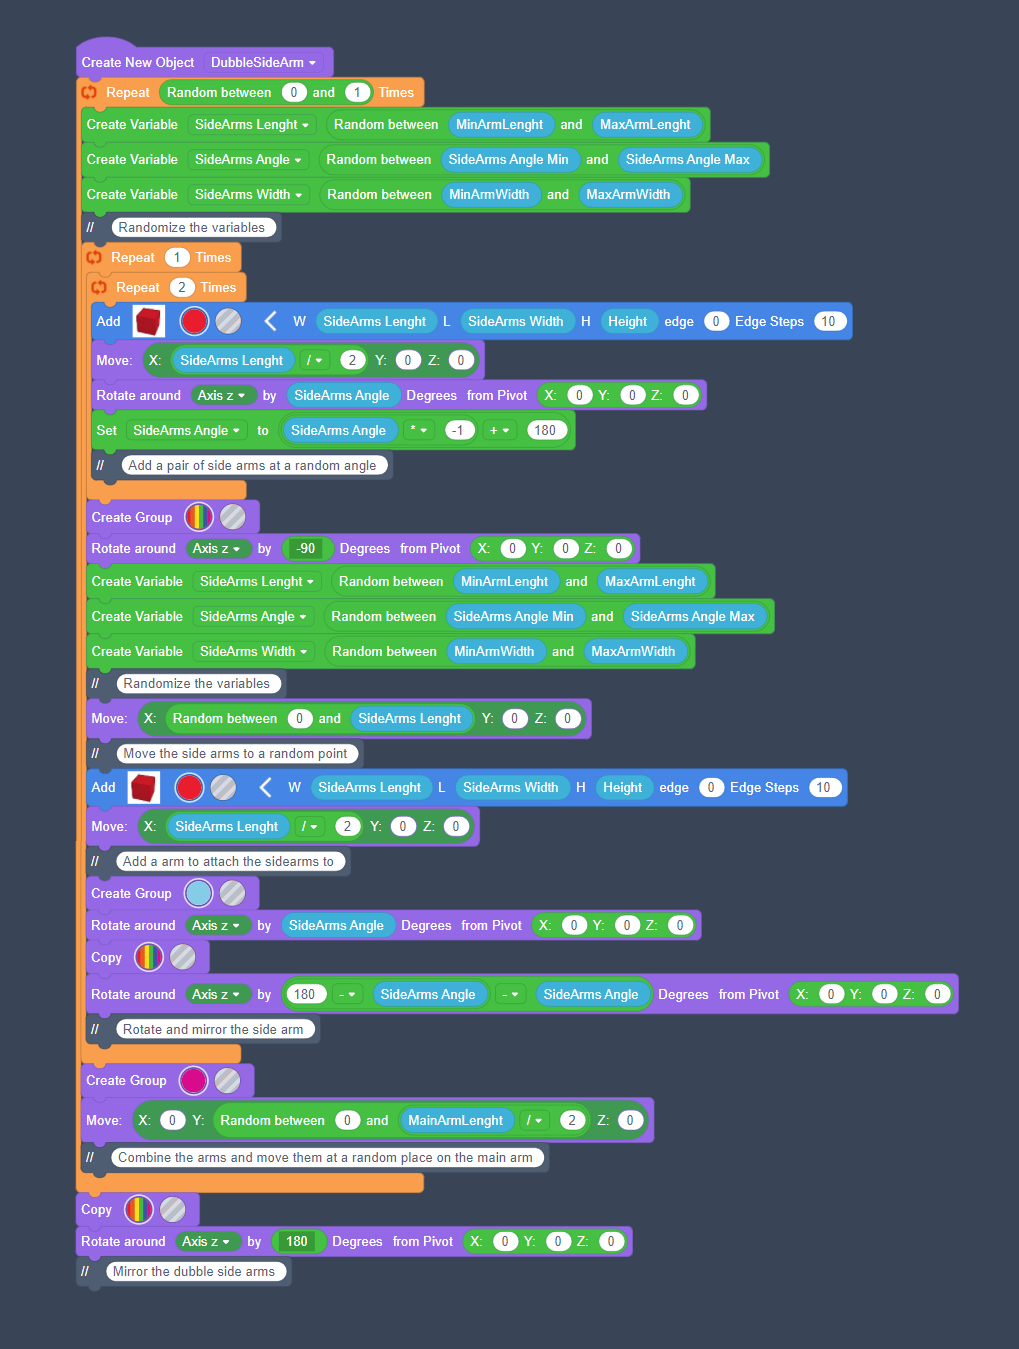
We will add a object for the side arms. The side arms will be random in the angle size and amount.
For the normal side arms we will first create a box with random values and the set height. After the box is made it will be moved to the side and rotated with a random angle. after the first arm is made we make a copy of it and mirror it. After both arms are done they will be grouped and moved up a random amount. if the snowflake has more side arms this will all be repeated.
After all the snowflakes are done they will be grouped and mirrored to the other side.
The dubble side arms are like the normal side arms but these will also have a pair of side arms.
Add the Indents
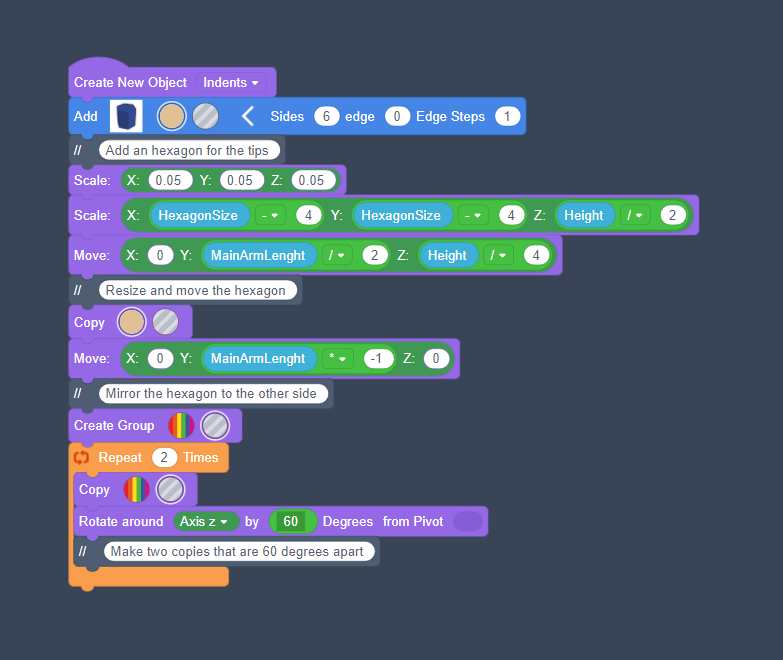
To give more depth to the snowflakes I added some indents on the hexagons.
First we add the hexagon and scale it 0.05x so we can just set the size in mm. Next we will scale the hexagon to the same size as before but -4mm this will couse a 2mm border around the hexagon. Also the height of the hexagon will be half of the total height of the snowflake.
After the hexagon is resized we will move it to the tip of the main arm. We will also move the hexagon to the top half of the snowflake. now the first hexagon is in the right place we will copy it and move it to the other side of the main arm and group them.
Finally we will make a copy 2x and rotate them 60 degrees apart.
Finish the Code
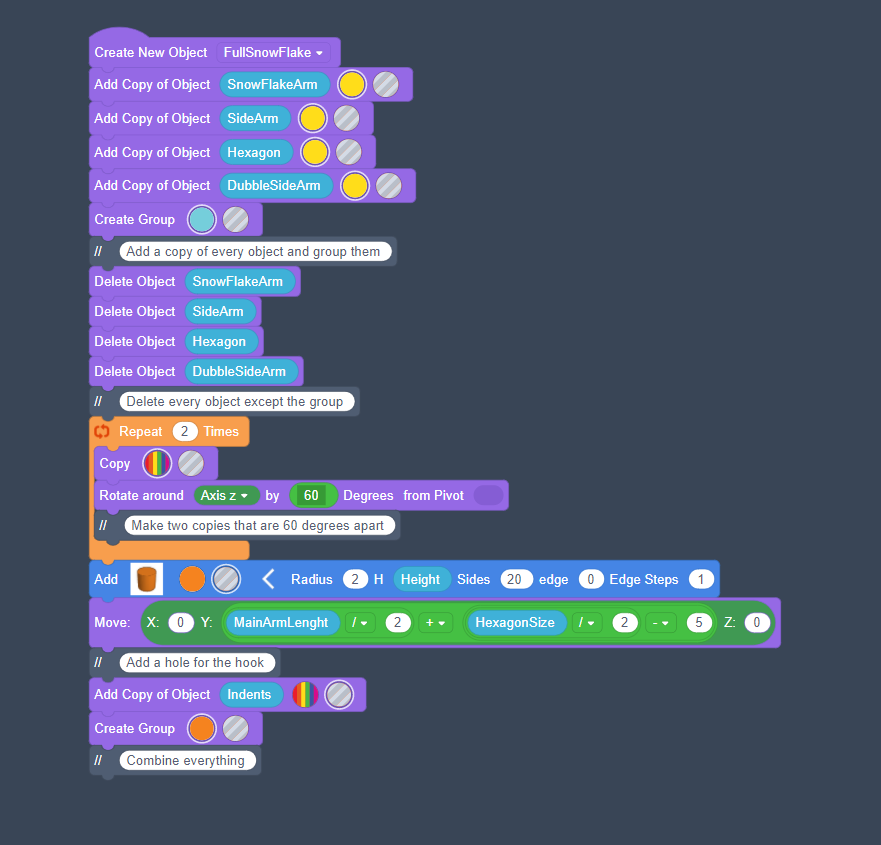
The last step is to create a copy of all the objects and group them. After the group is created we will delete all the objects except the group. Now we have 2 of the 6 arms we will copy it 2x and rotate them 60 degrees apart.
Next we will add a cylinder with a diameter of 2mm this cylinder will make the hole for the hook. When the cylinder is made we will move it almost to the top of the snowflake so it will still be sturdy enough.
And finally we will make a group of everything.
See the full codeblock here
Print the Models
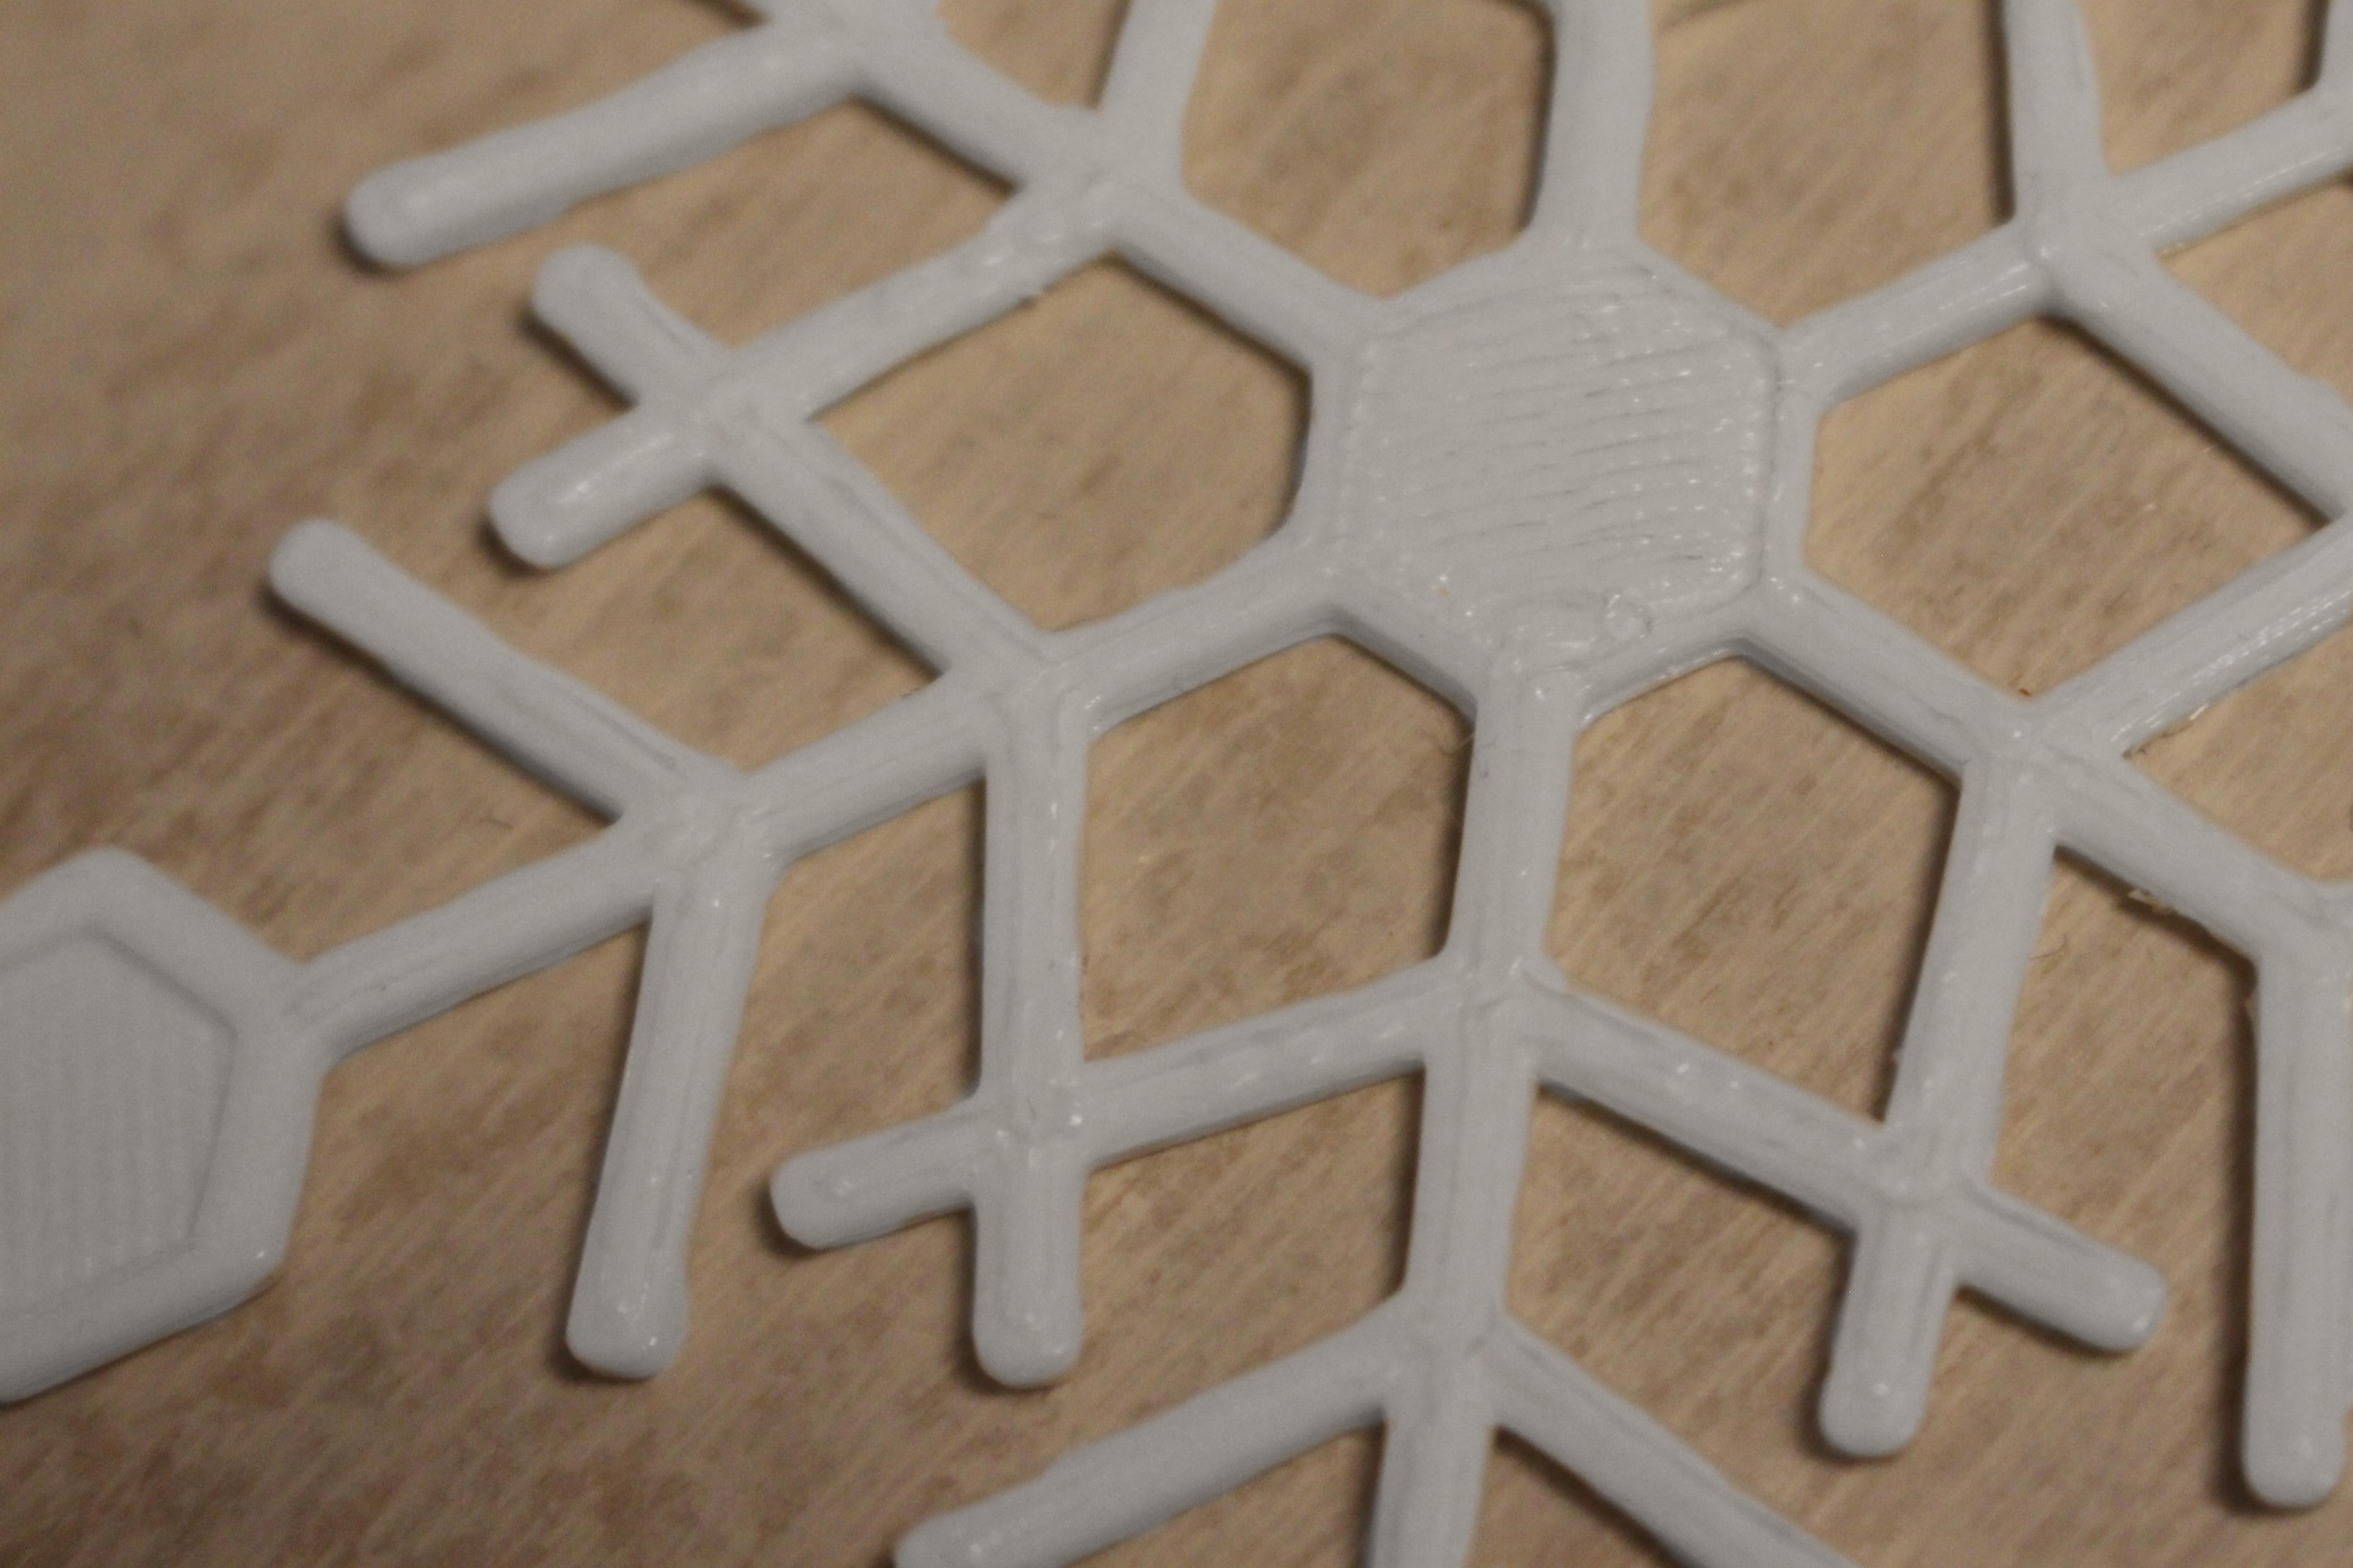
When you find a snowflake you like download the STL file and print them on a 3D-printer with some white fillament. I didn't have any problems with warping but if you do make sure you use a brim in your slicer software.
Make and Add the Hook
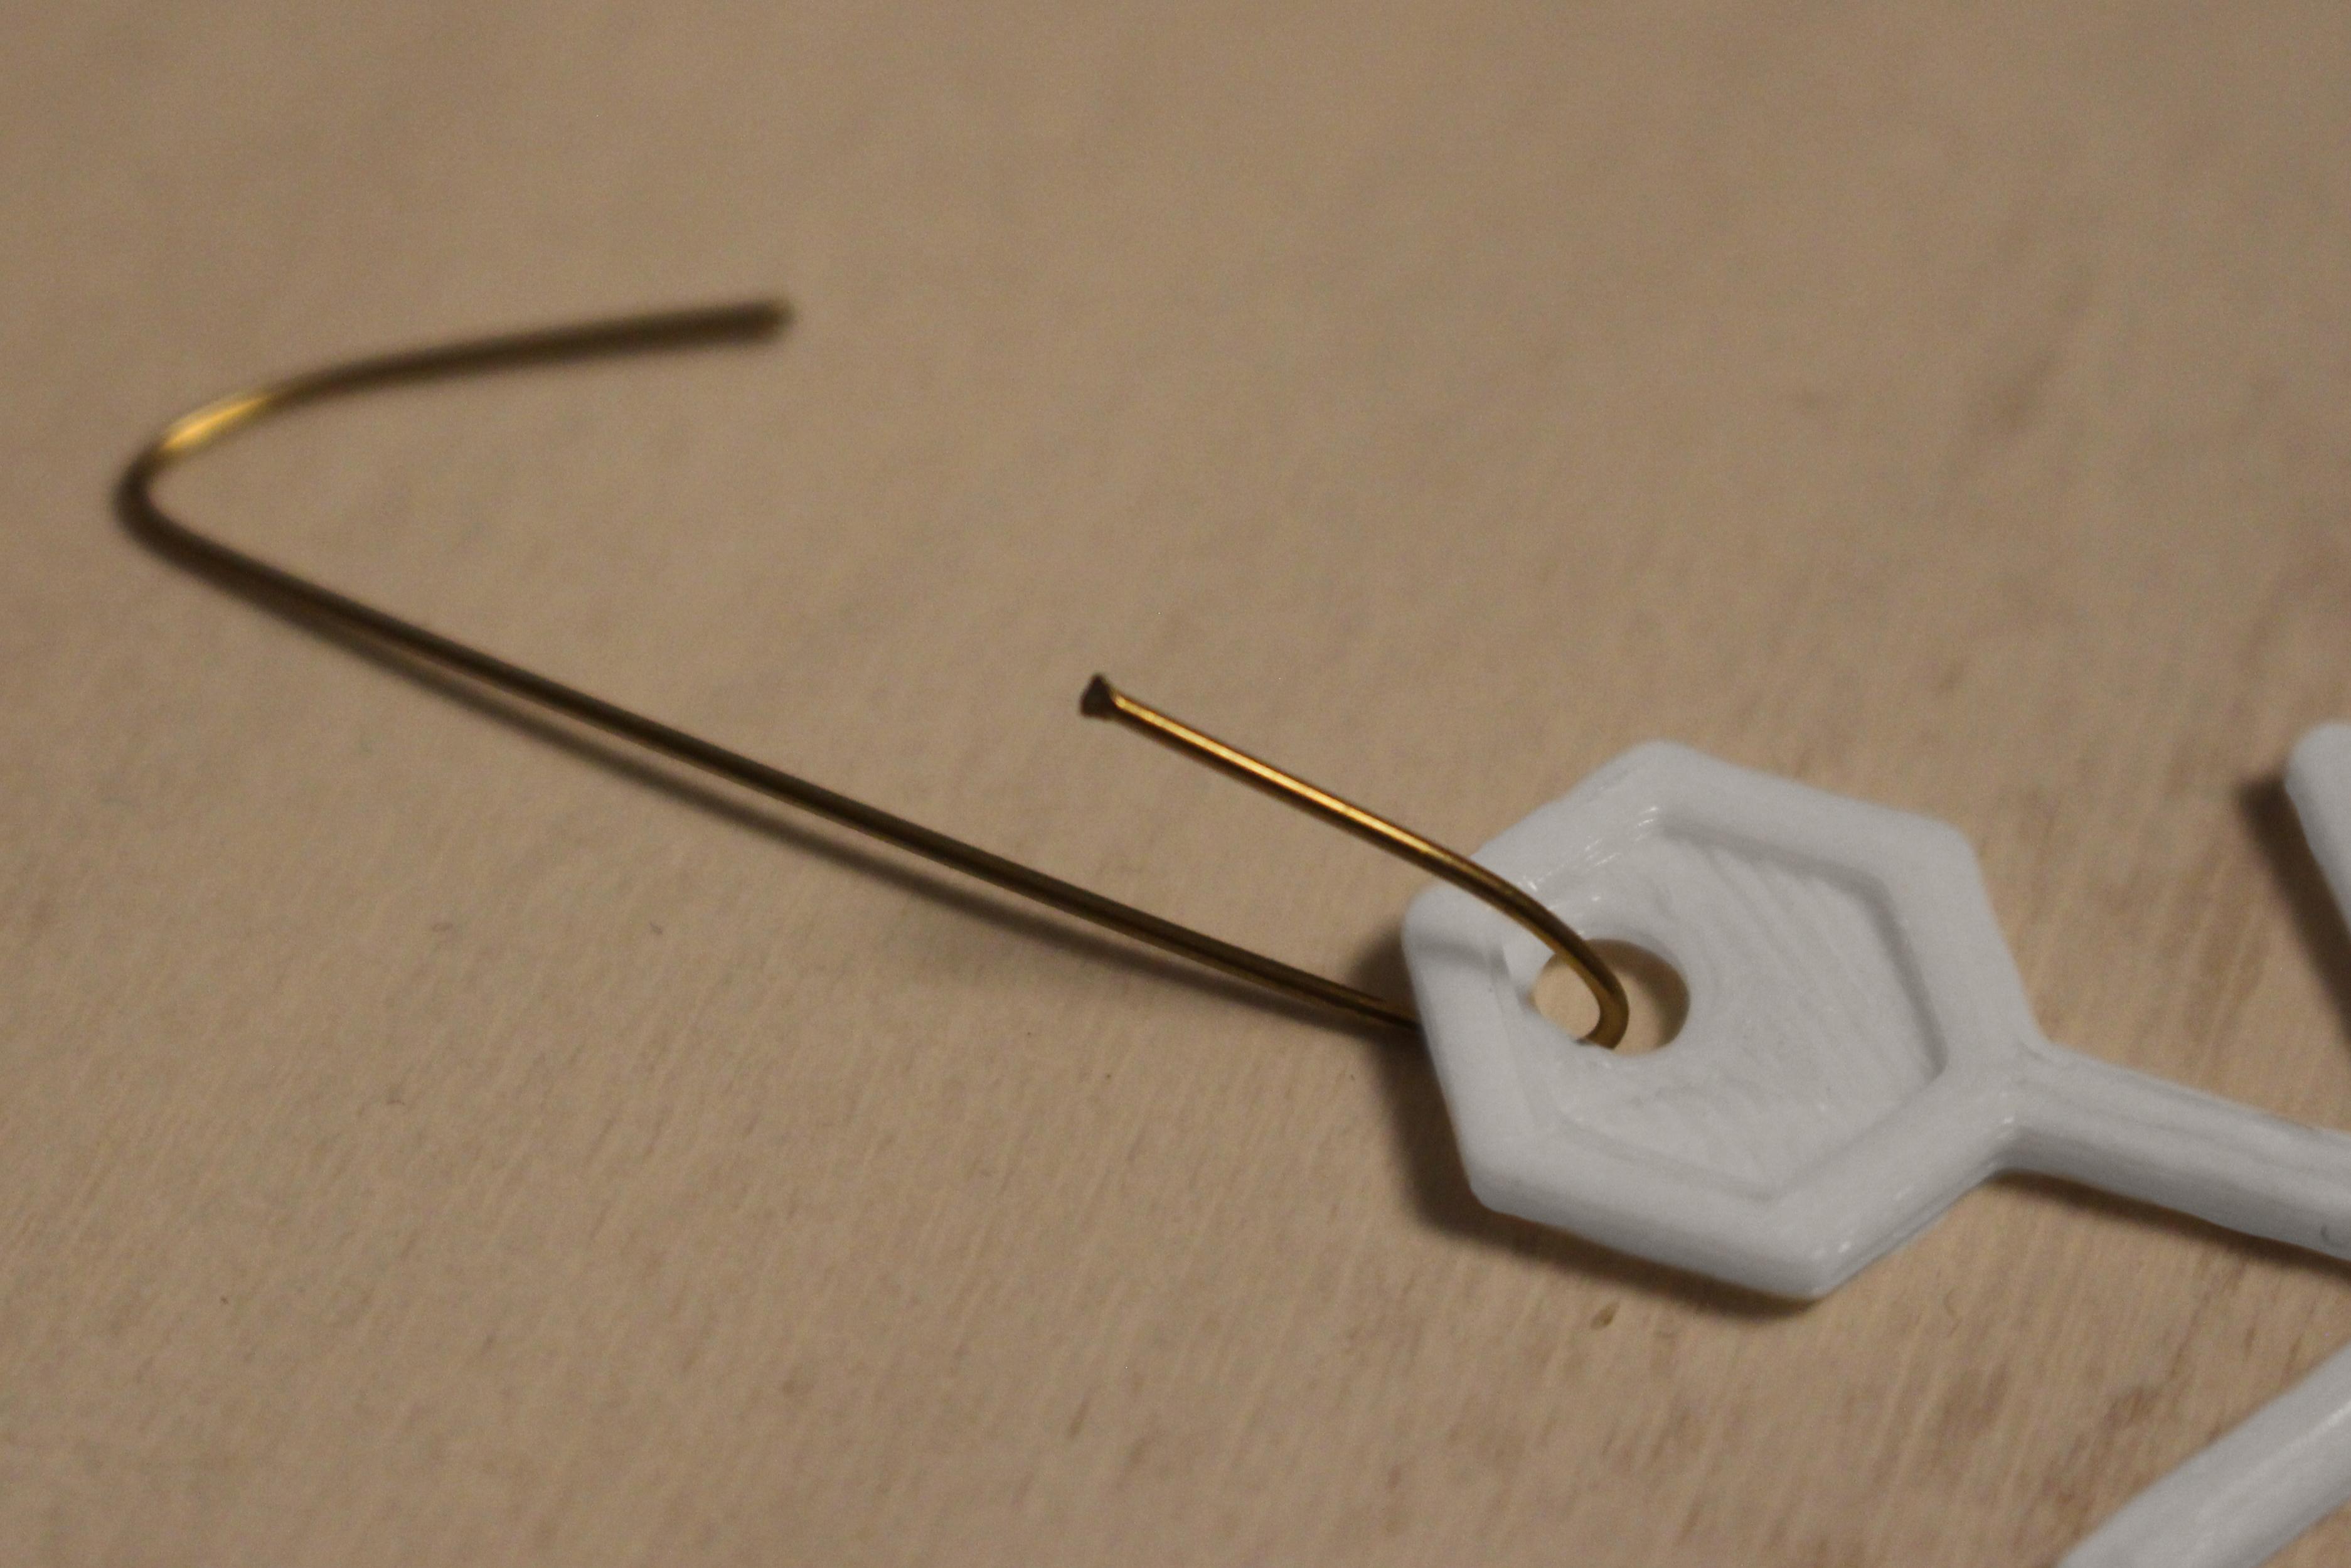
To make it possible to add the snowflakes in your christmas tree you need a hook.
I made one from a piece of iron wire. You just need to bend the wire into a C form and rotate the bottom half 90 degrees when done you will get something like the picture.
Ofcourse you can also use a piece of string or anything you like.
Final

Hang the ornaments in your christmas tree and you are done!
Merry Christmas & Happy New Year!