Random Number Generator With LCD
by anitalilee in Circuits > Arduino
1154 Views, 0 Favorites, 0 Comments
Random Number Generator With LCD
.jpg)
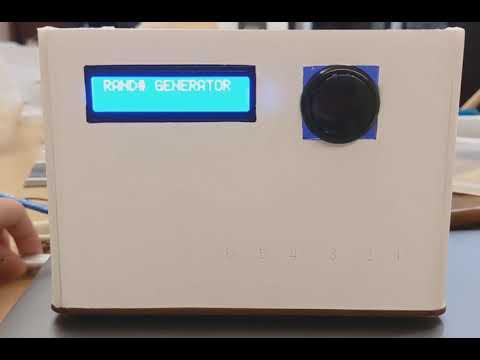
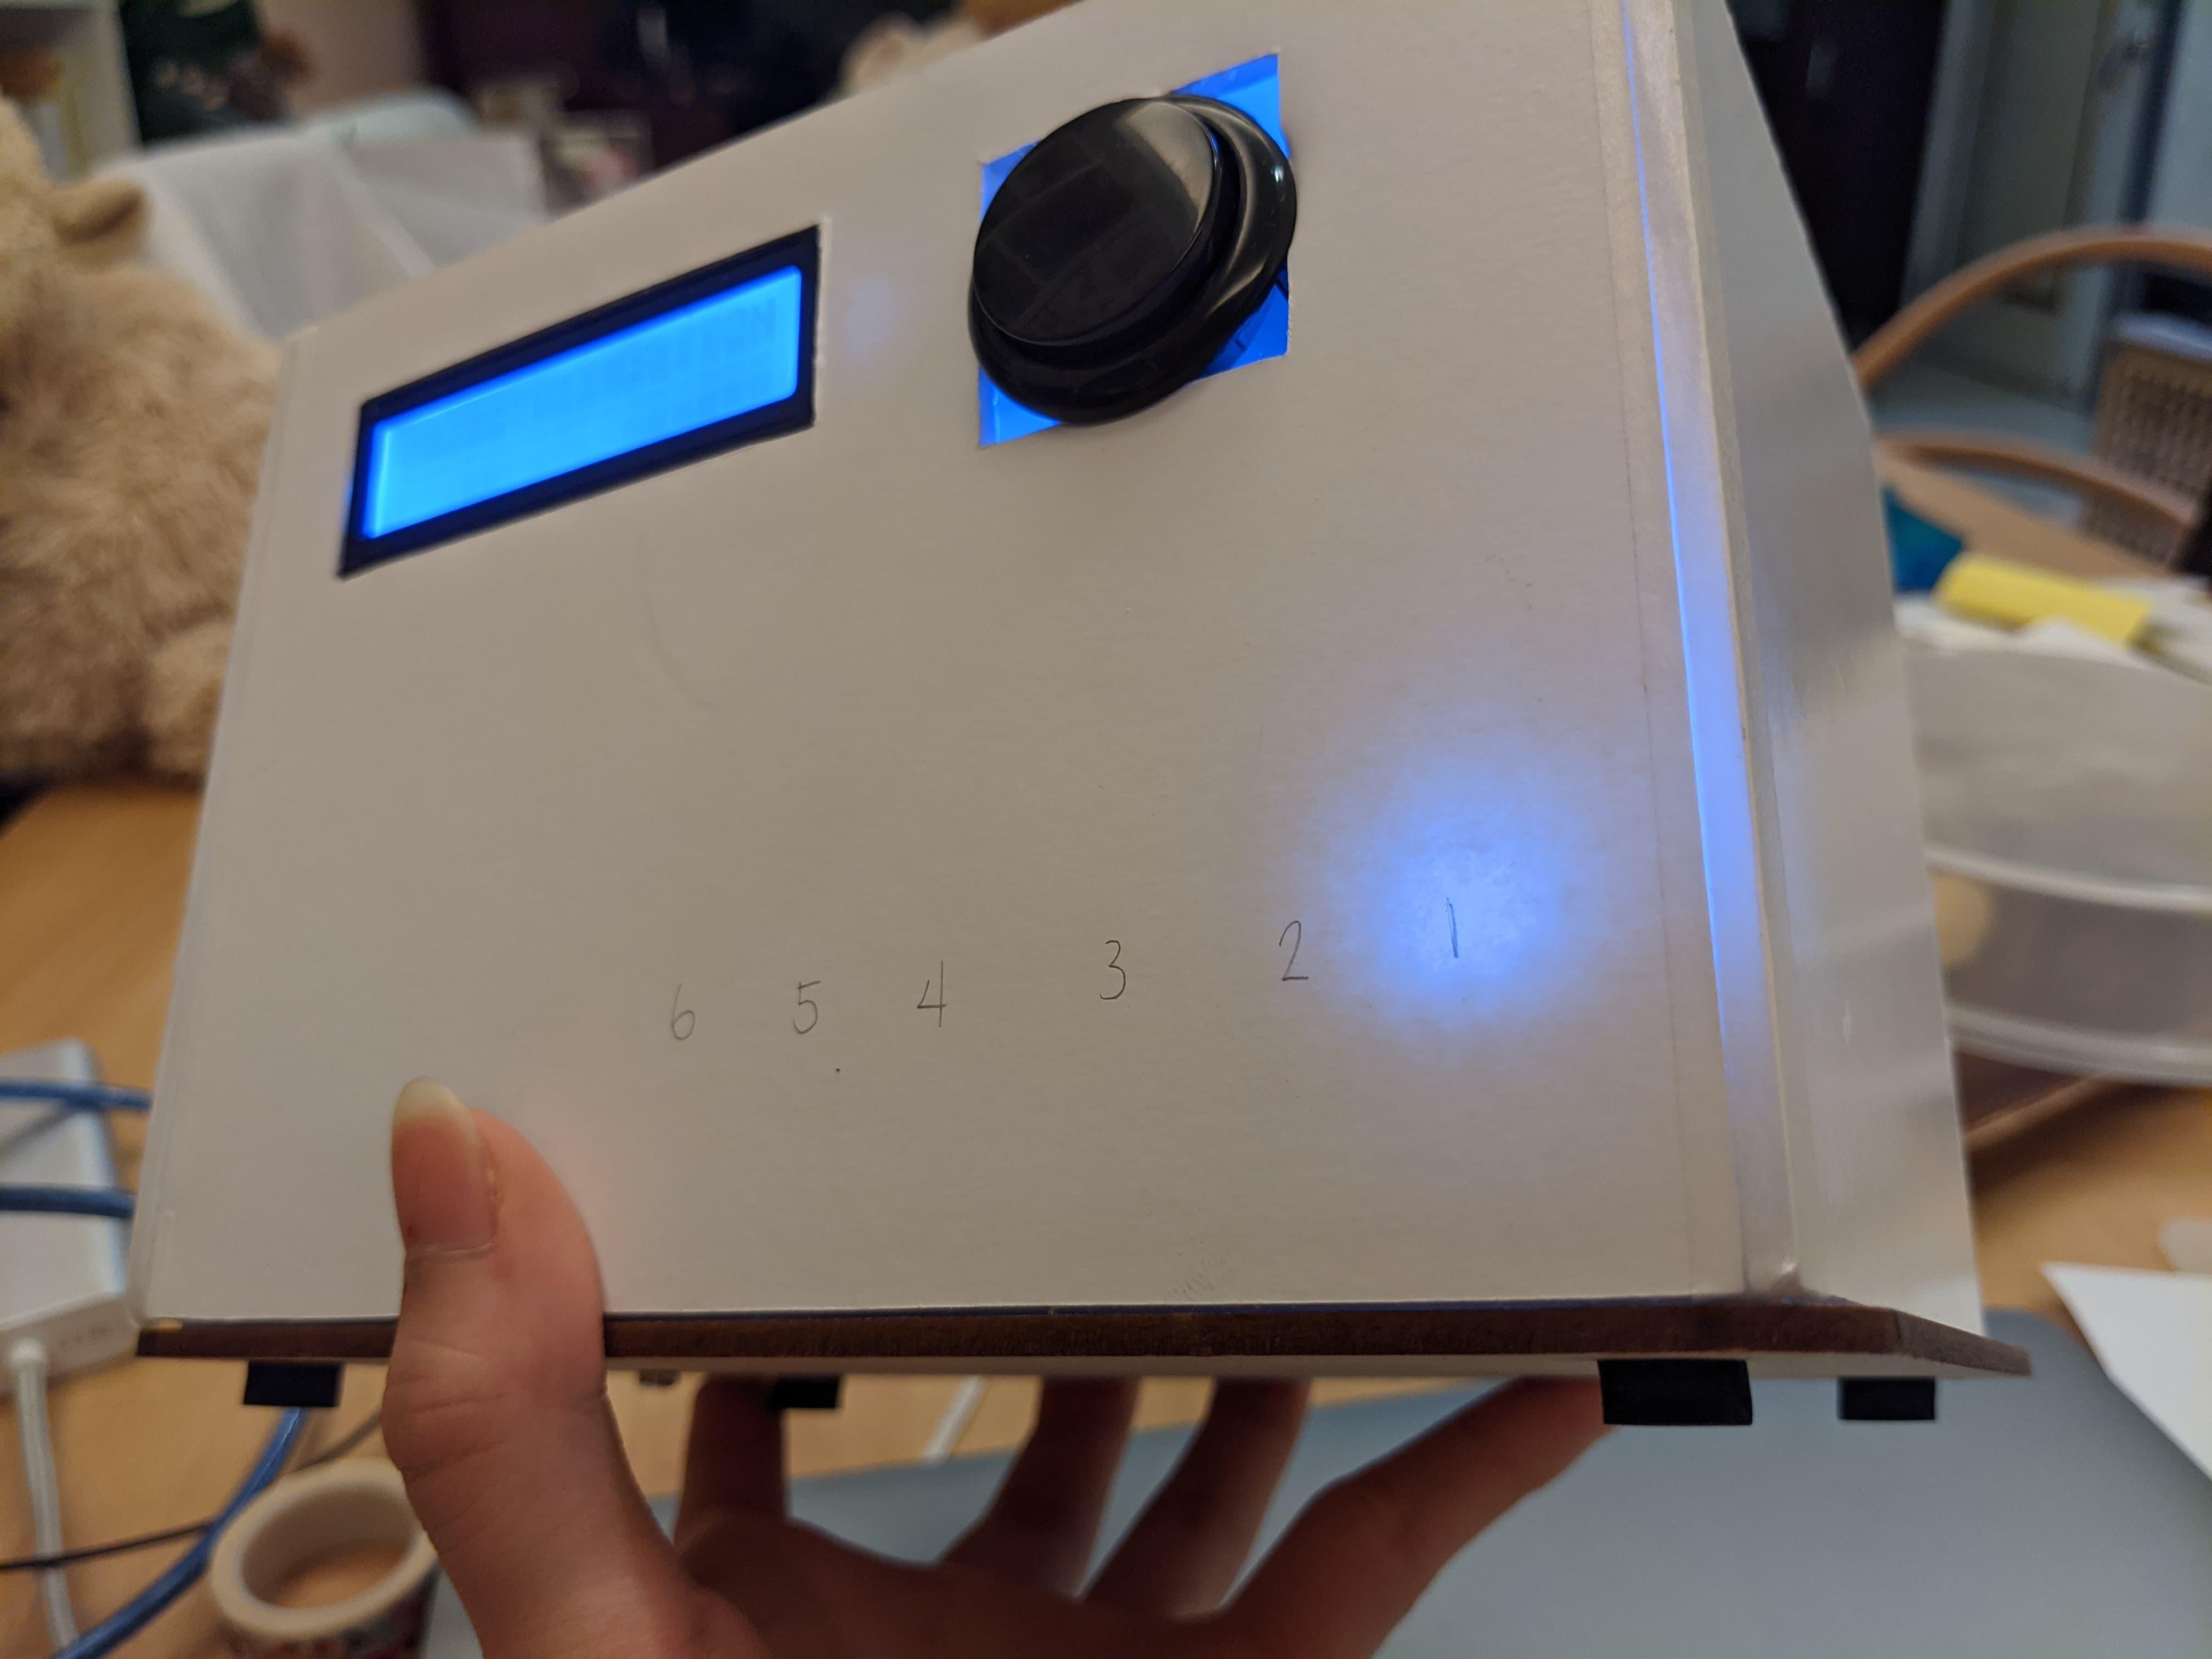
This device can generate numbers from 1 to 6 randomly. It was built base on SW9761's project, original website: https://www.instructables.com/LED-Random-Number-Ge...
Improvements I made:
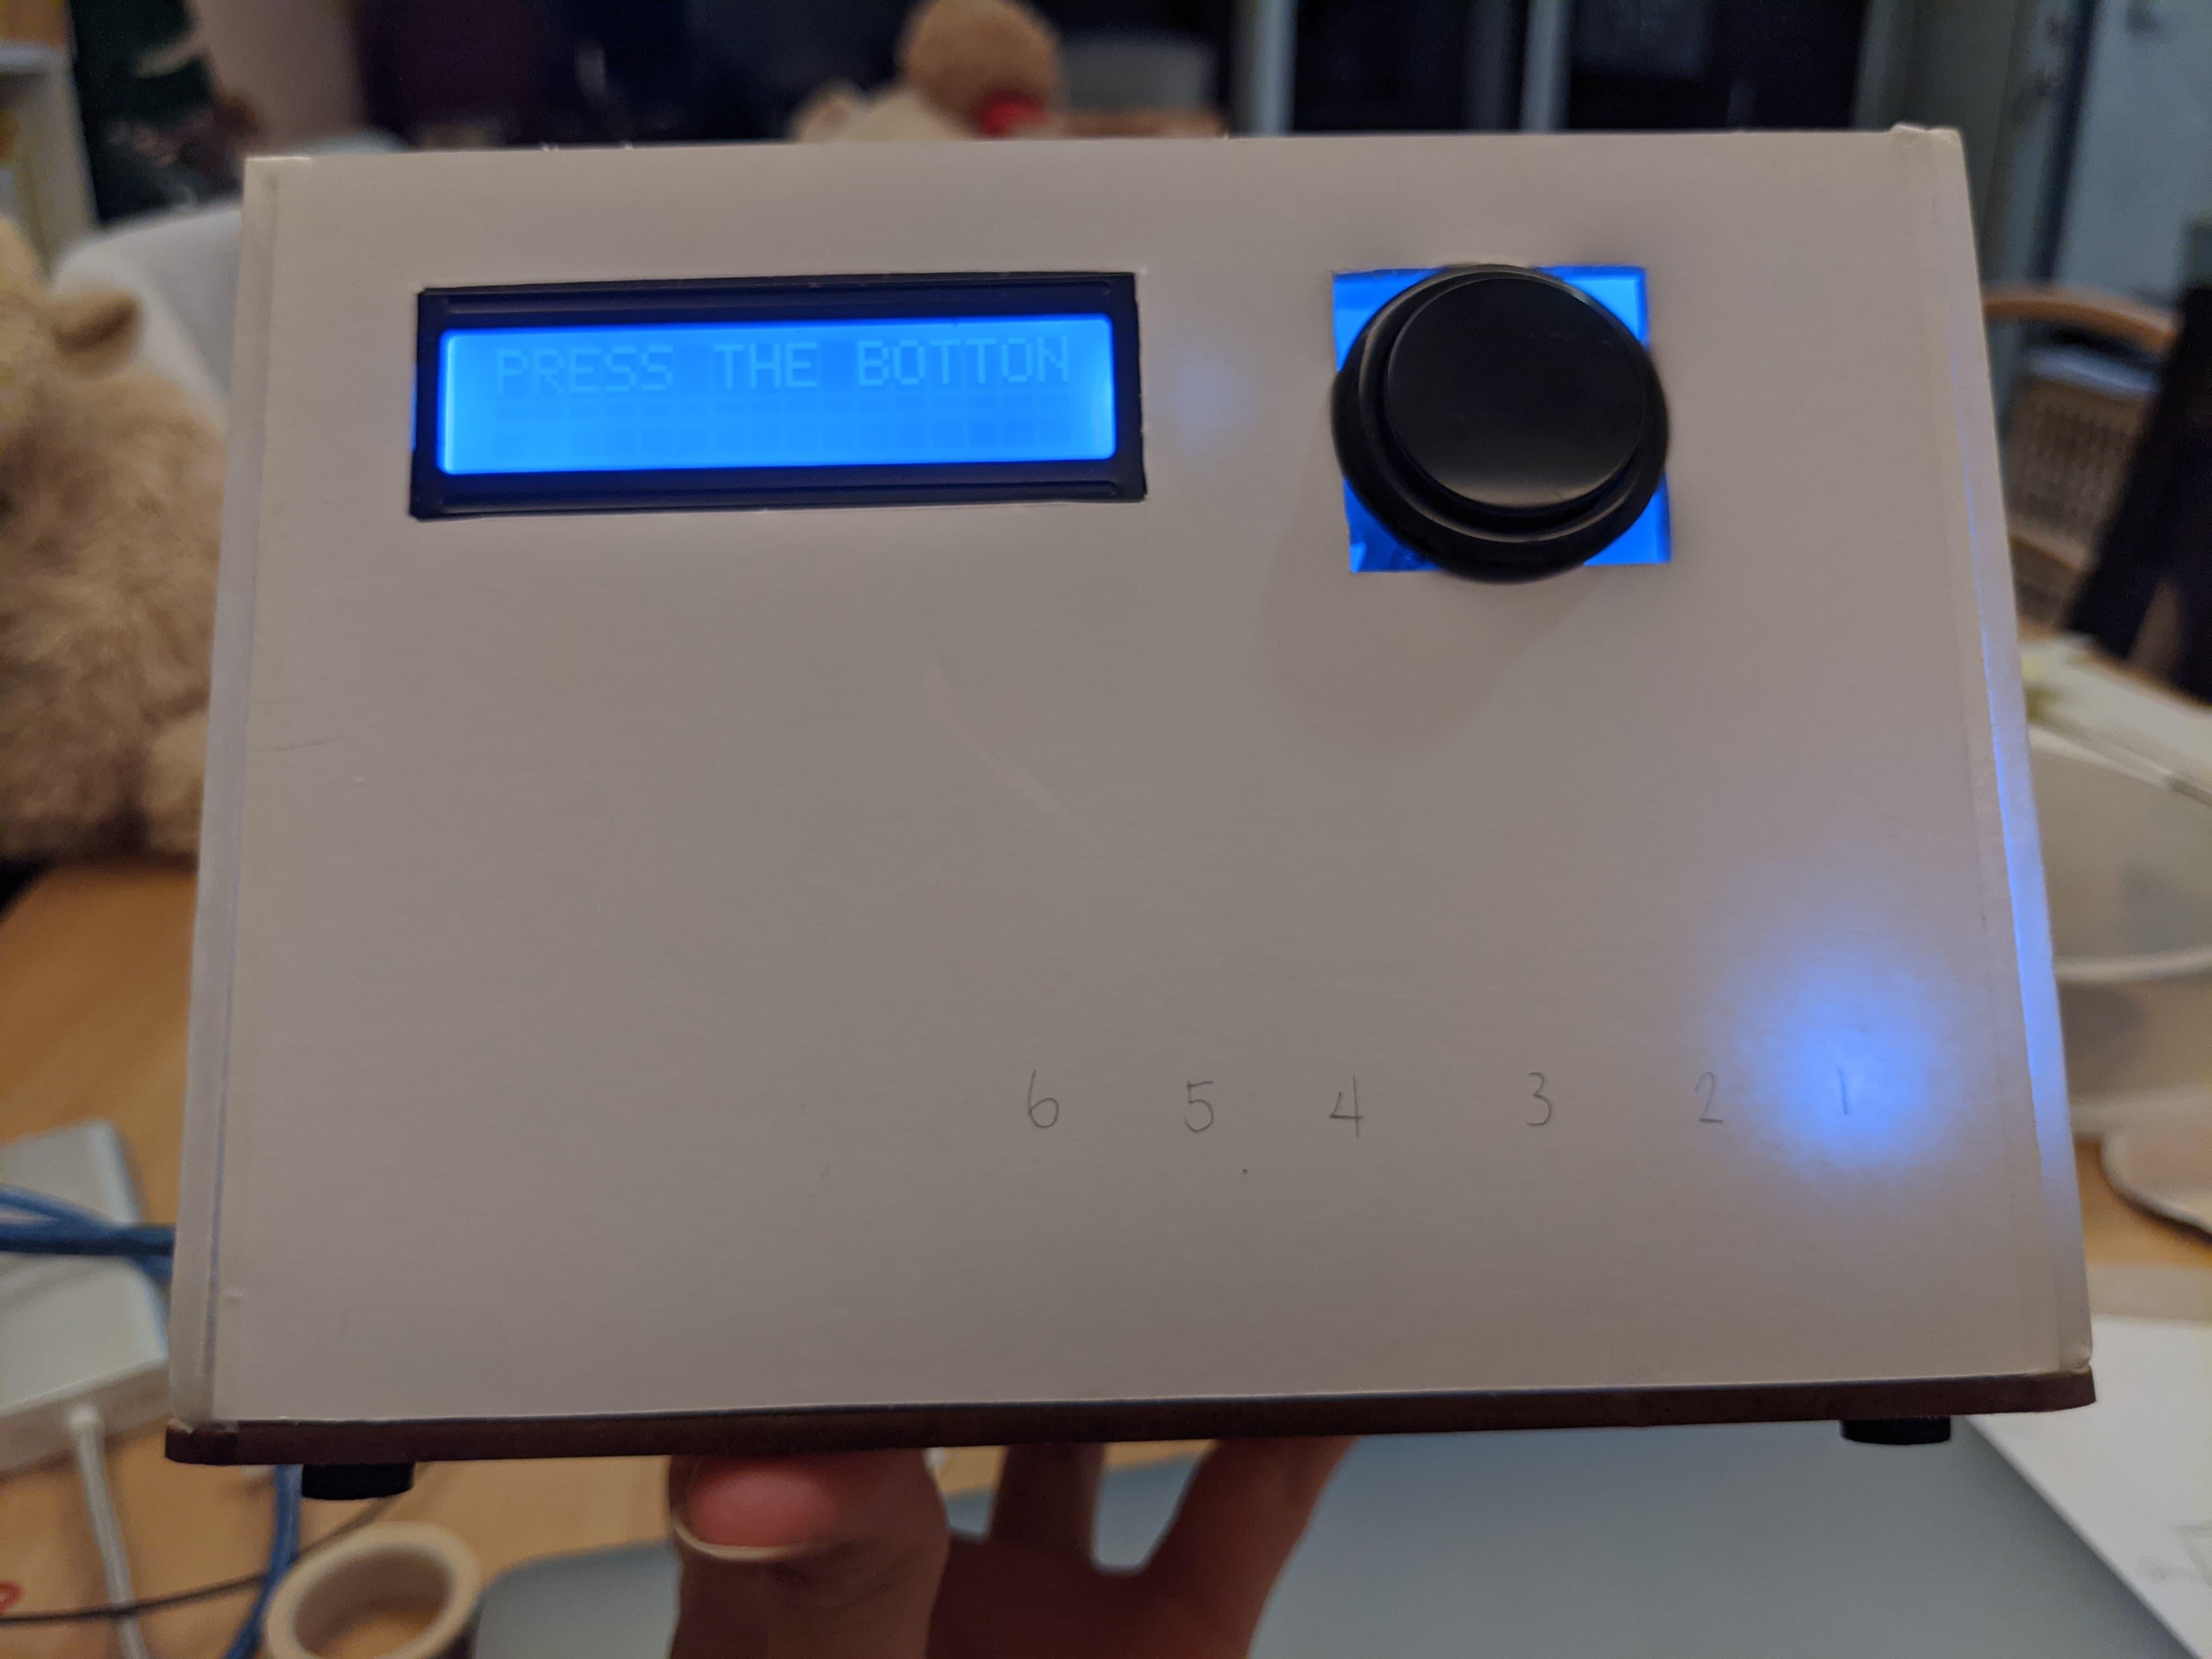
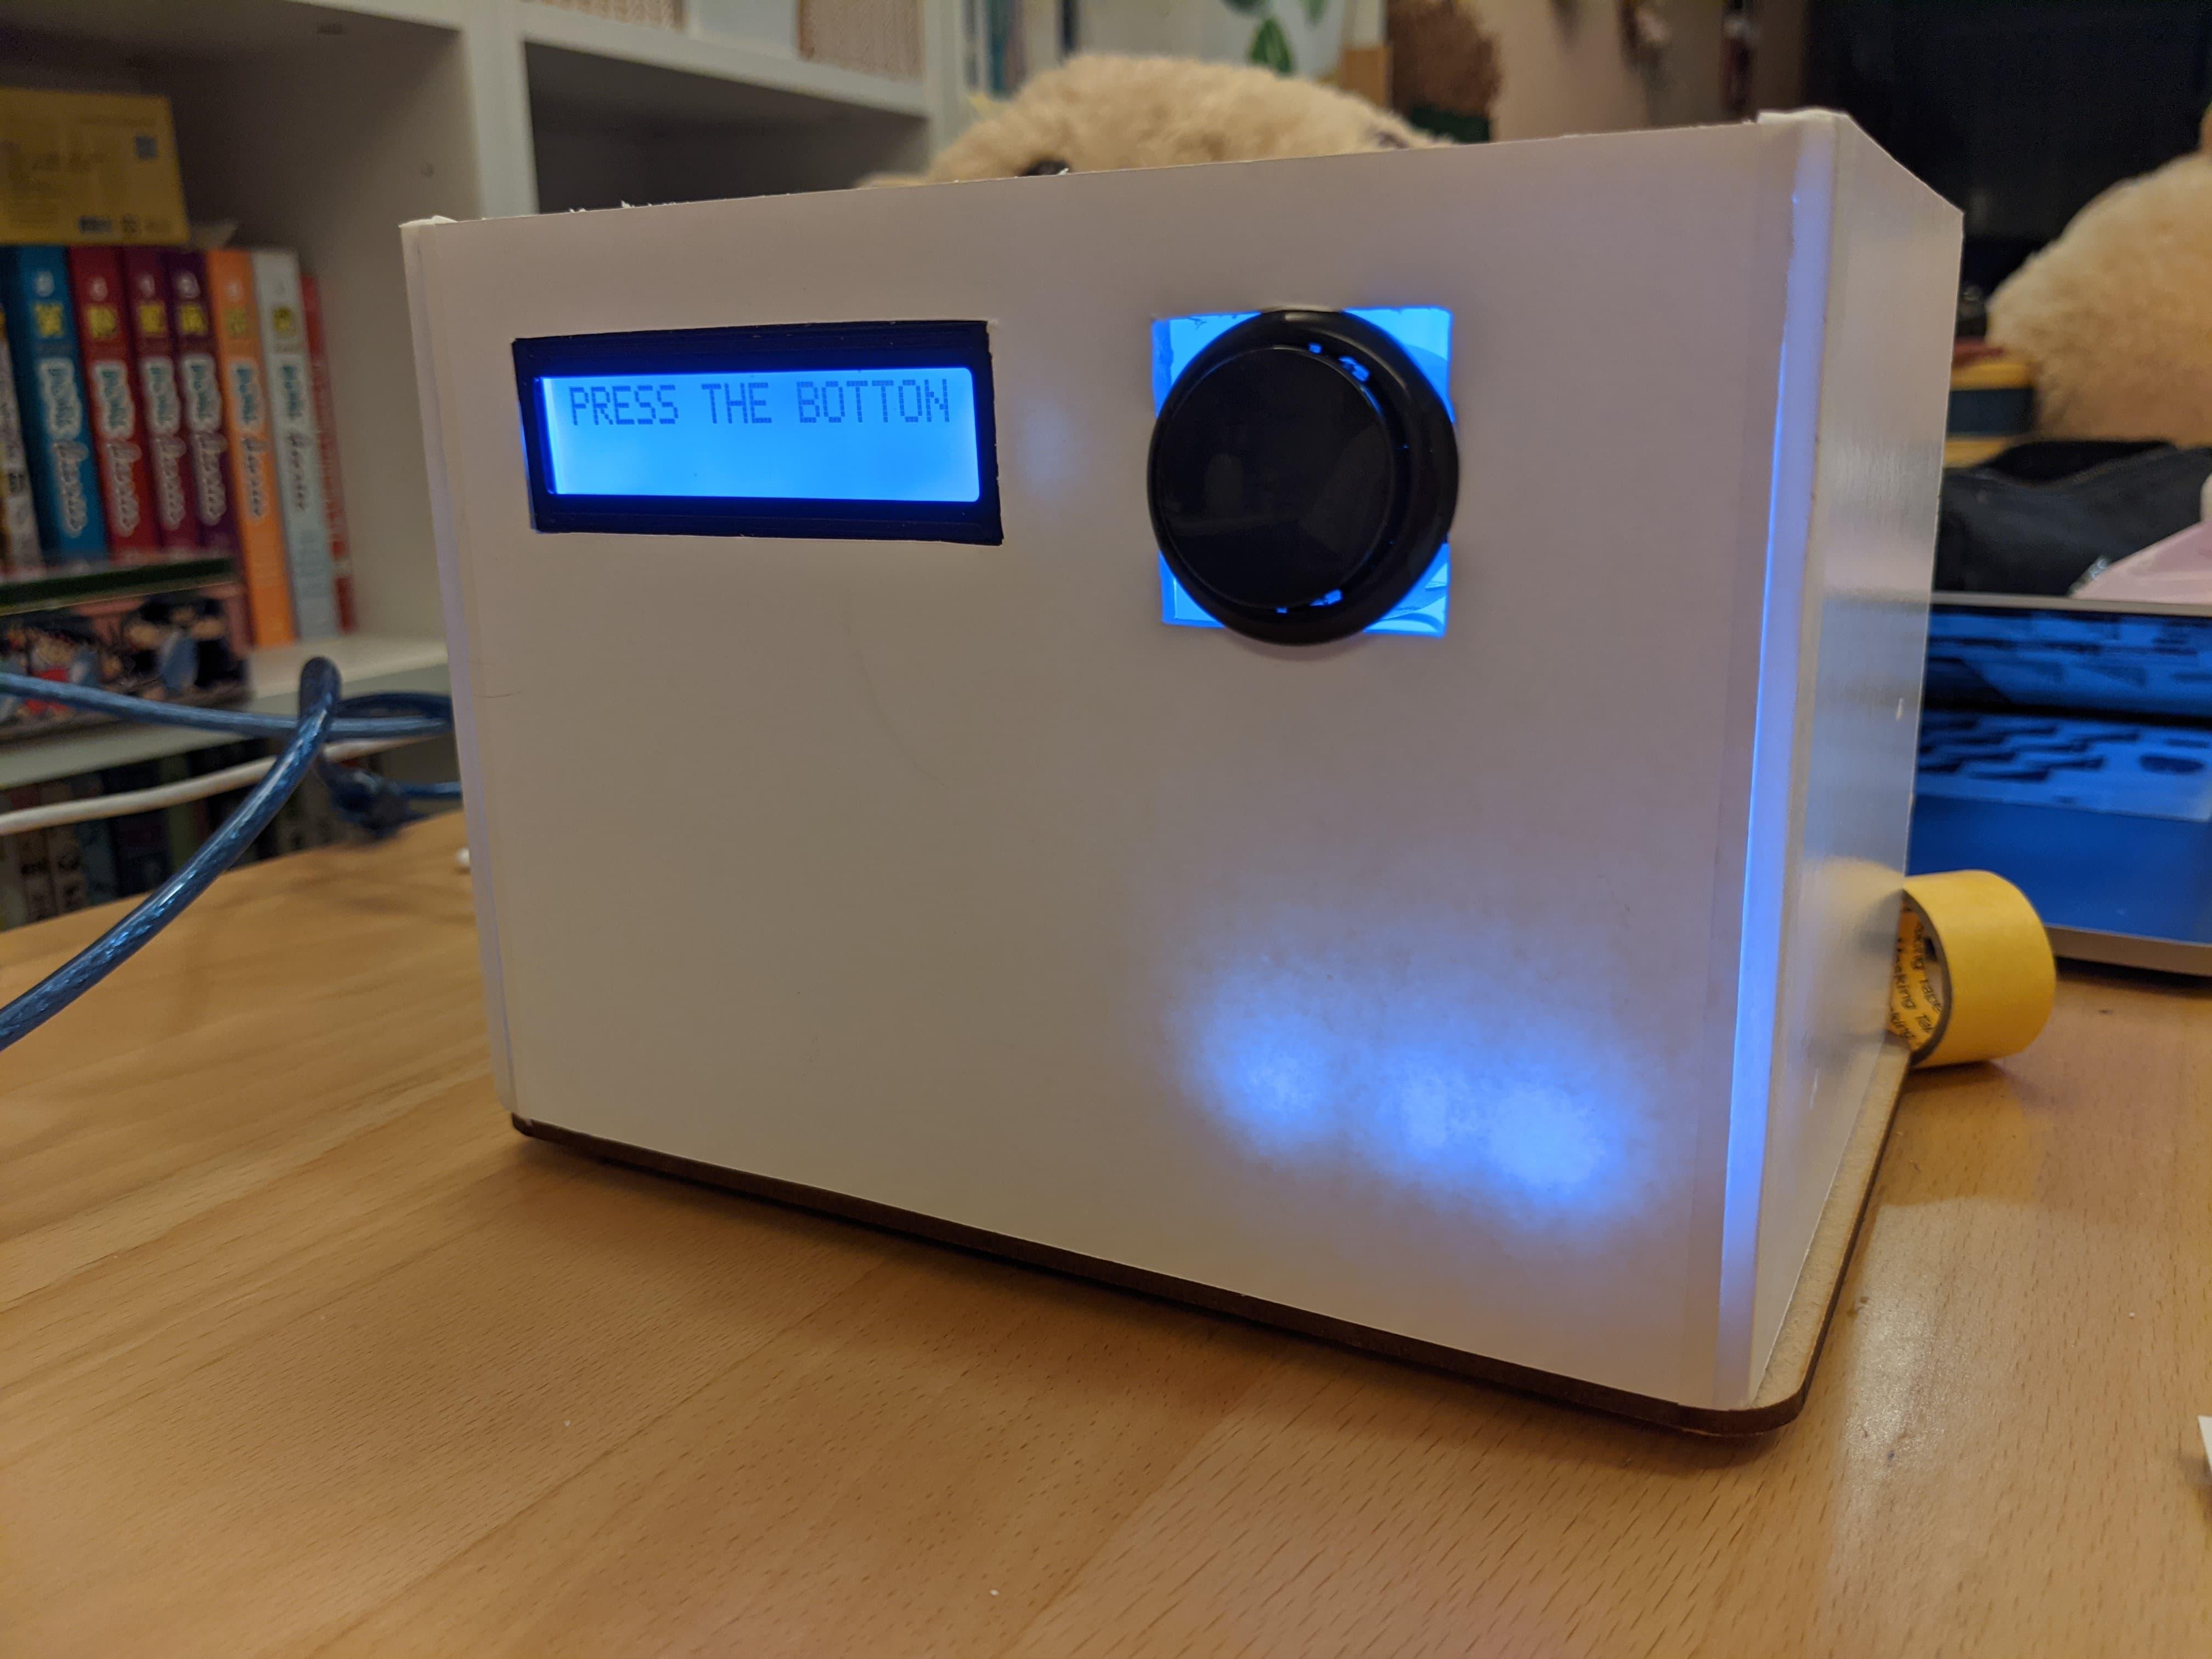
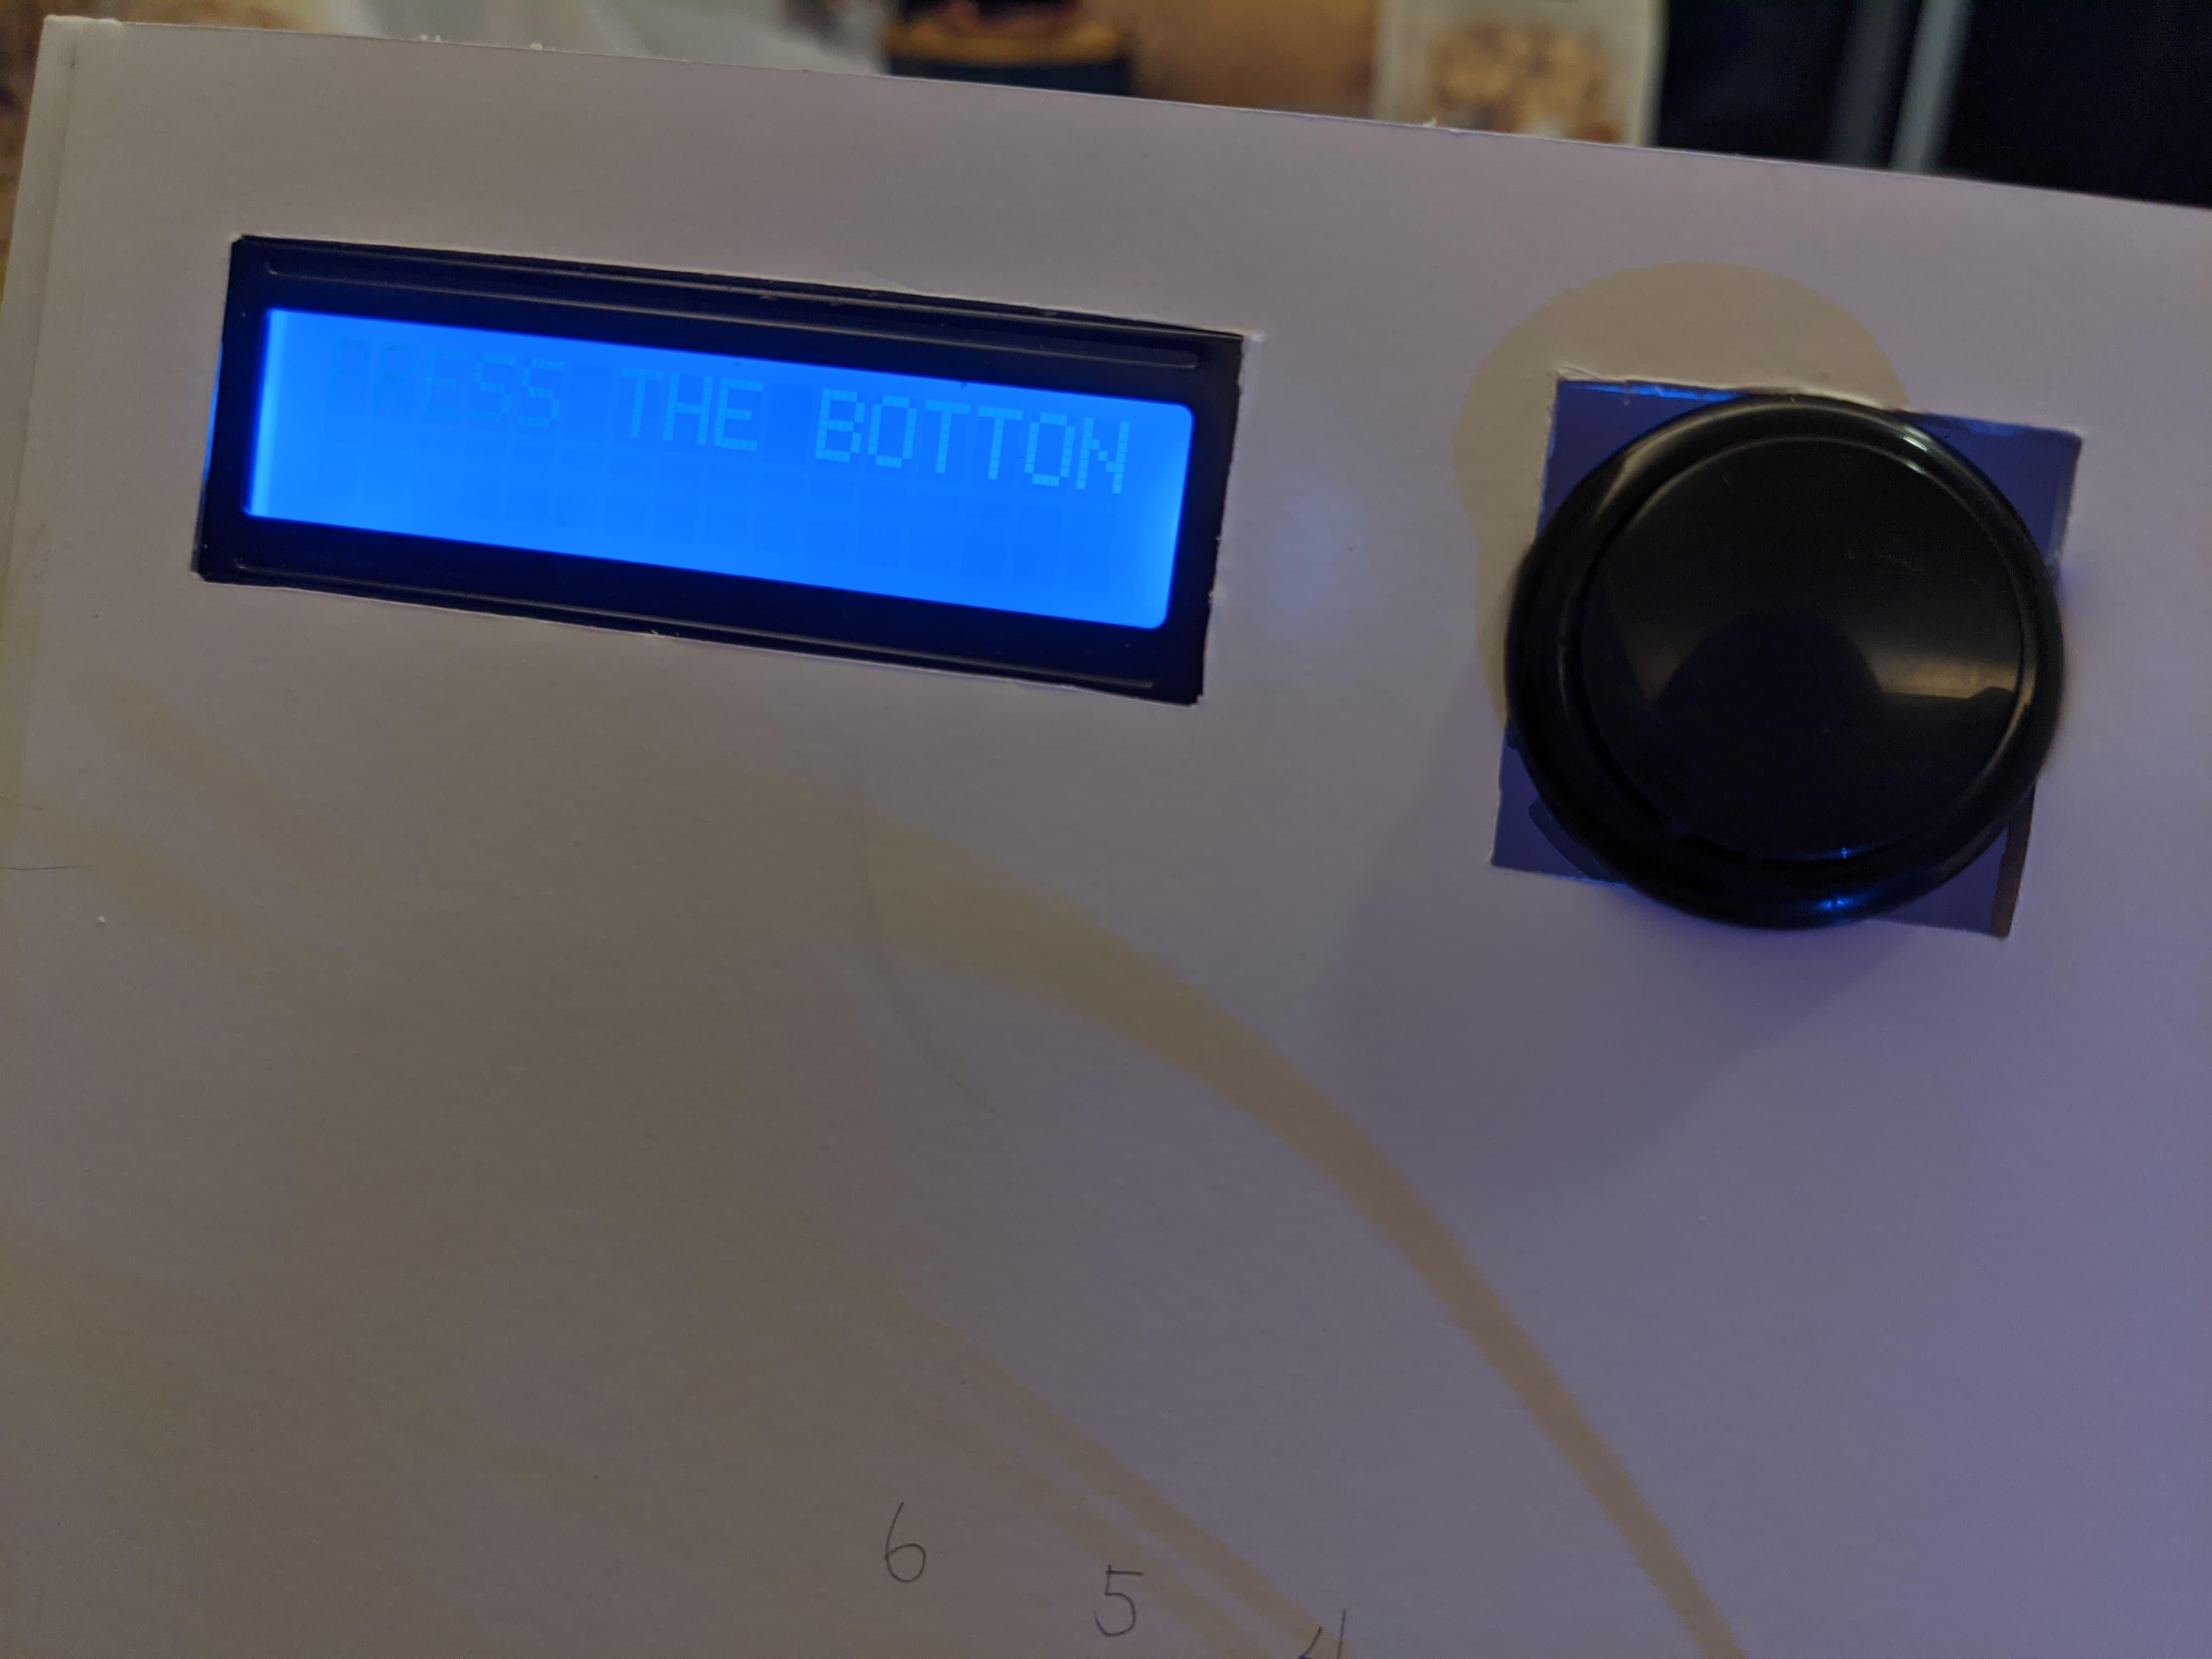
I added a LCD board to tell the user what to do. When the device is turned on, it will show "RAND# GENERATOR" at first and then tell the user to "PRESS THE BOTTON."
Supplies
Tools
- utility knife
- cutting mat
- ruler
Materials
- fome board
- tape
- Arduino Leonardo
- breadboard
- wires
- LCD board
- button
- LEDs*6
Measurements and Cutting
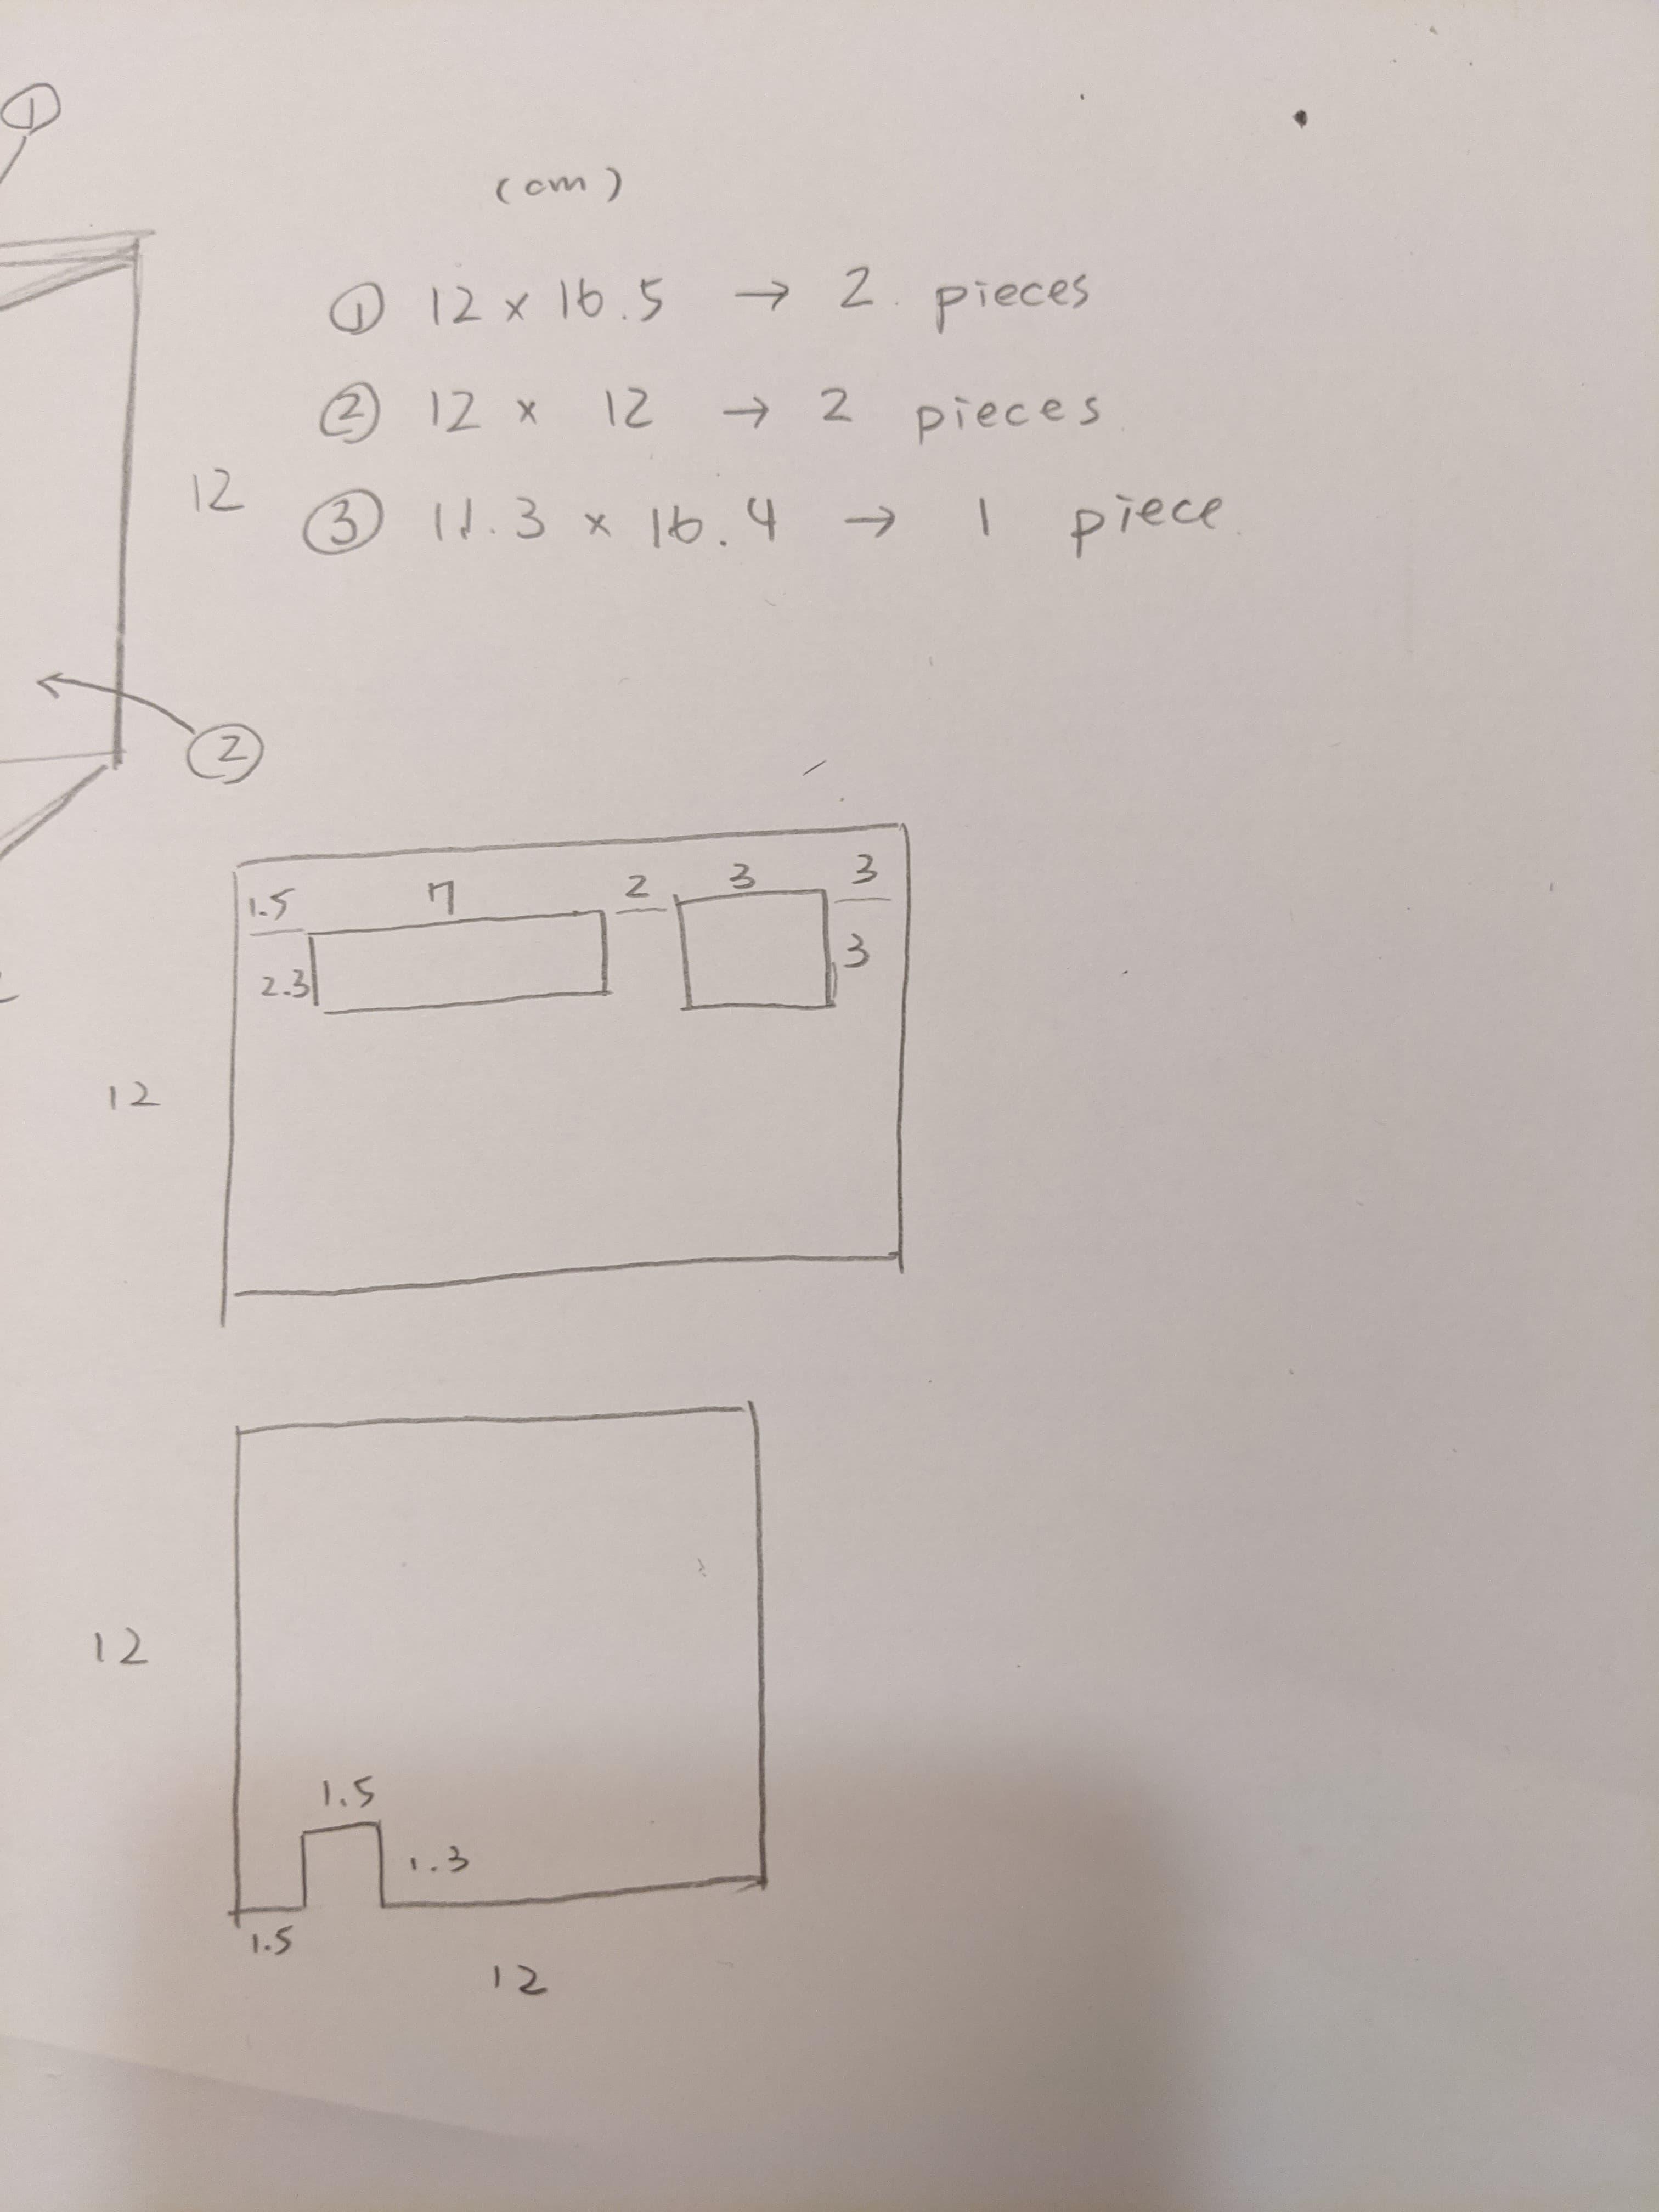
cut out the five pieces of fome board that will be used to construct the package of the Arduino.
All the measurements and details are shown in the picture.
*tools needed: utility knife and the cutting mat
Assembly
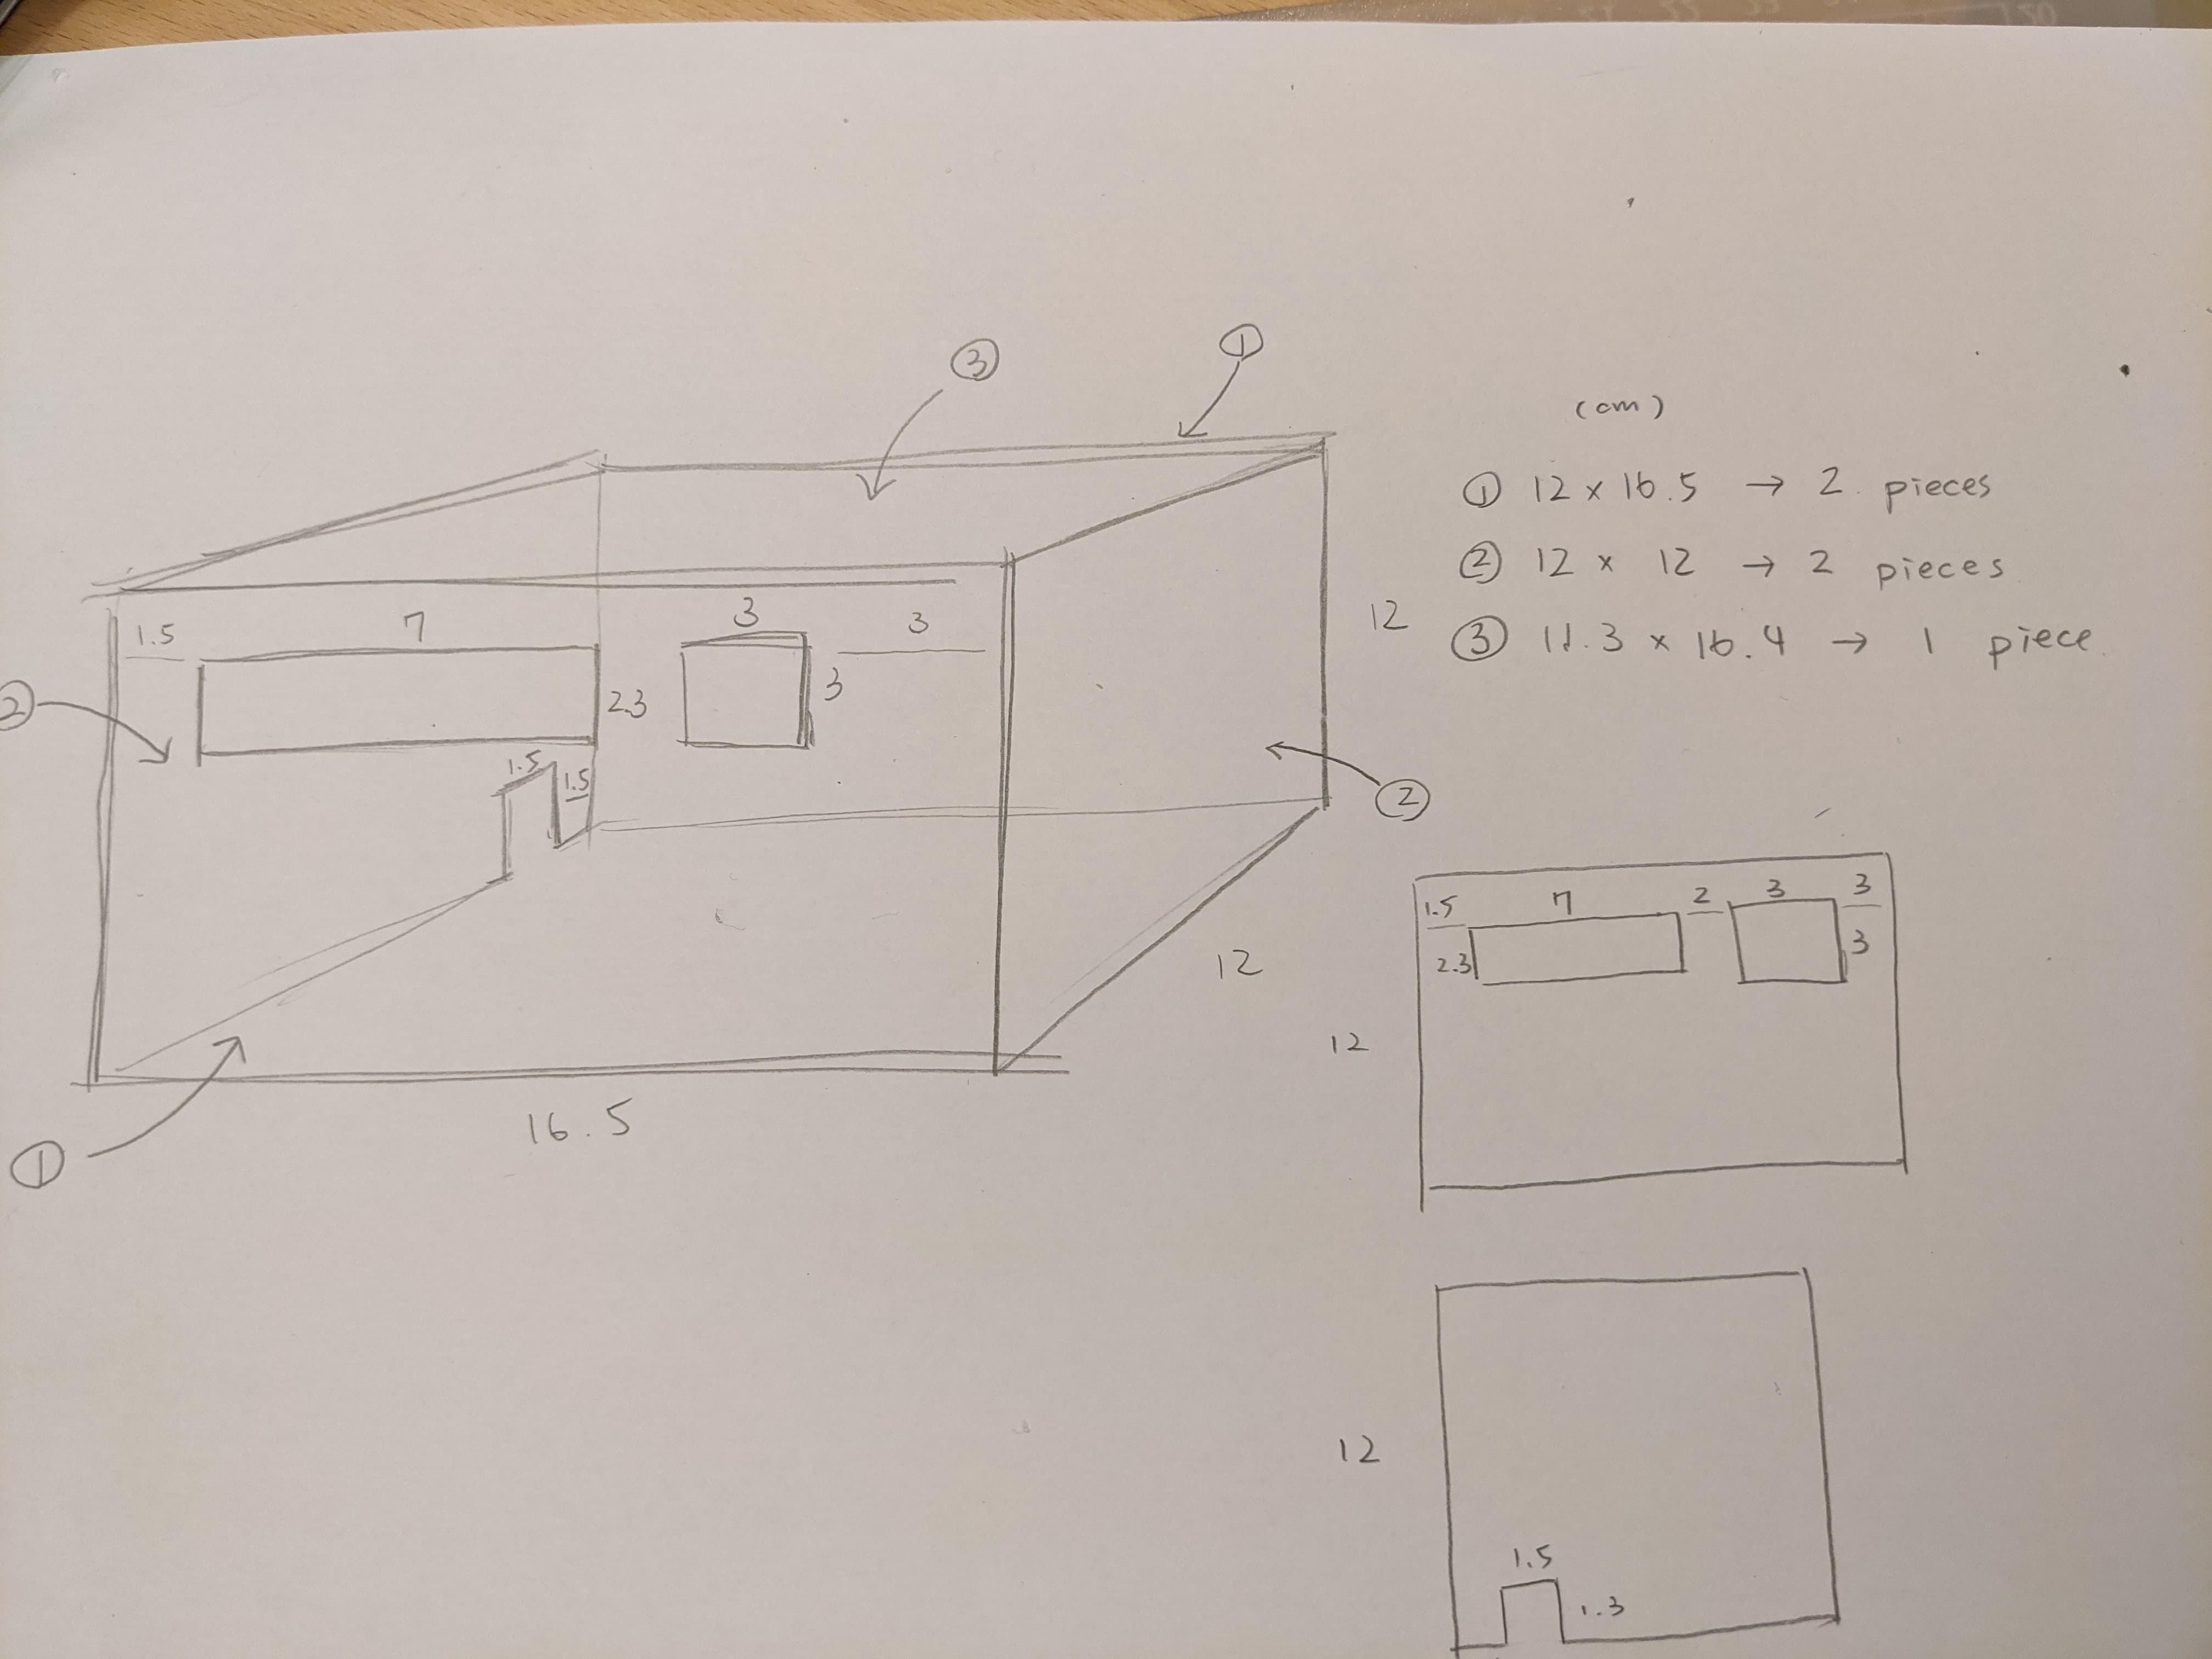
- first stick board 2 over board 1, constructing a box without cover
- build the cover, board 3 on the box you just made
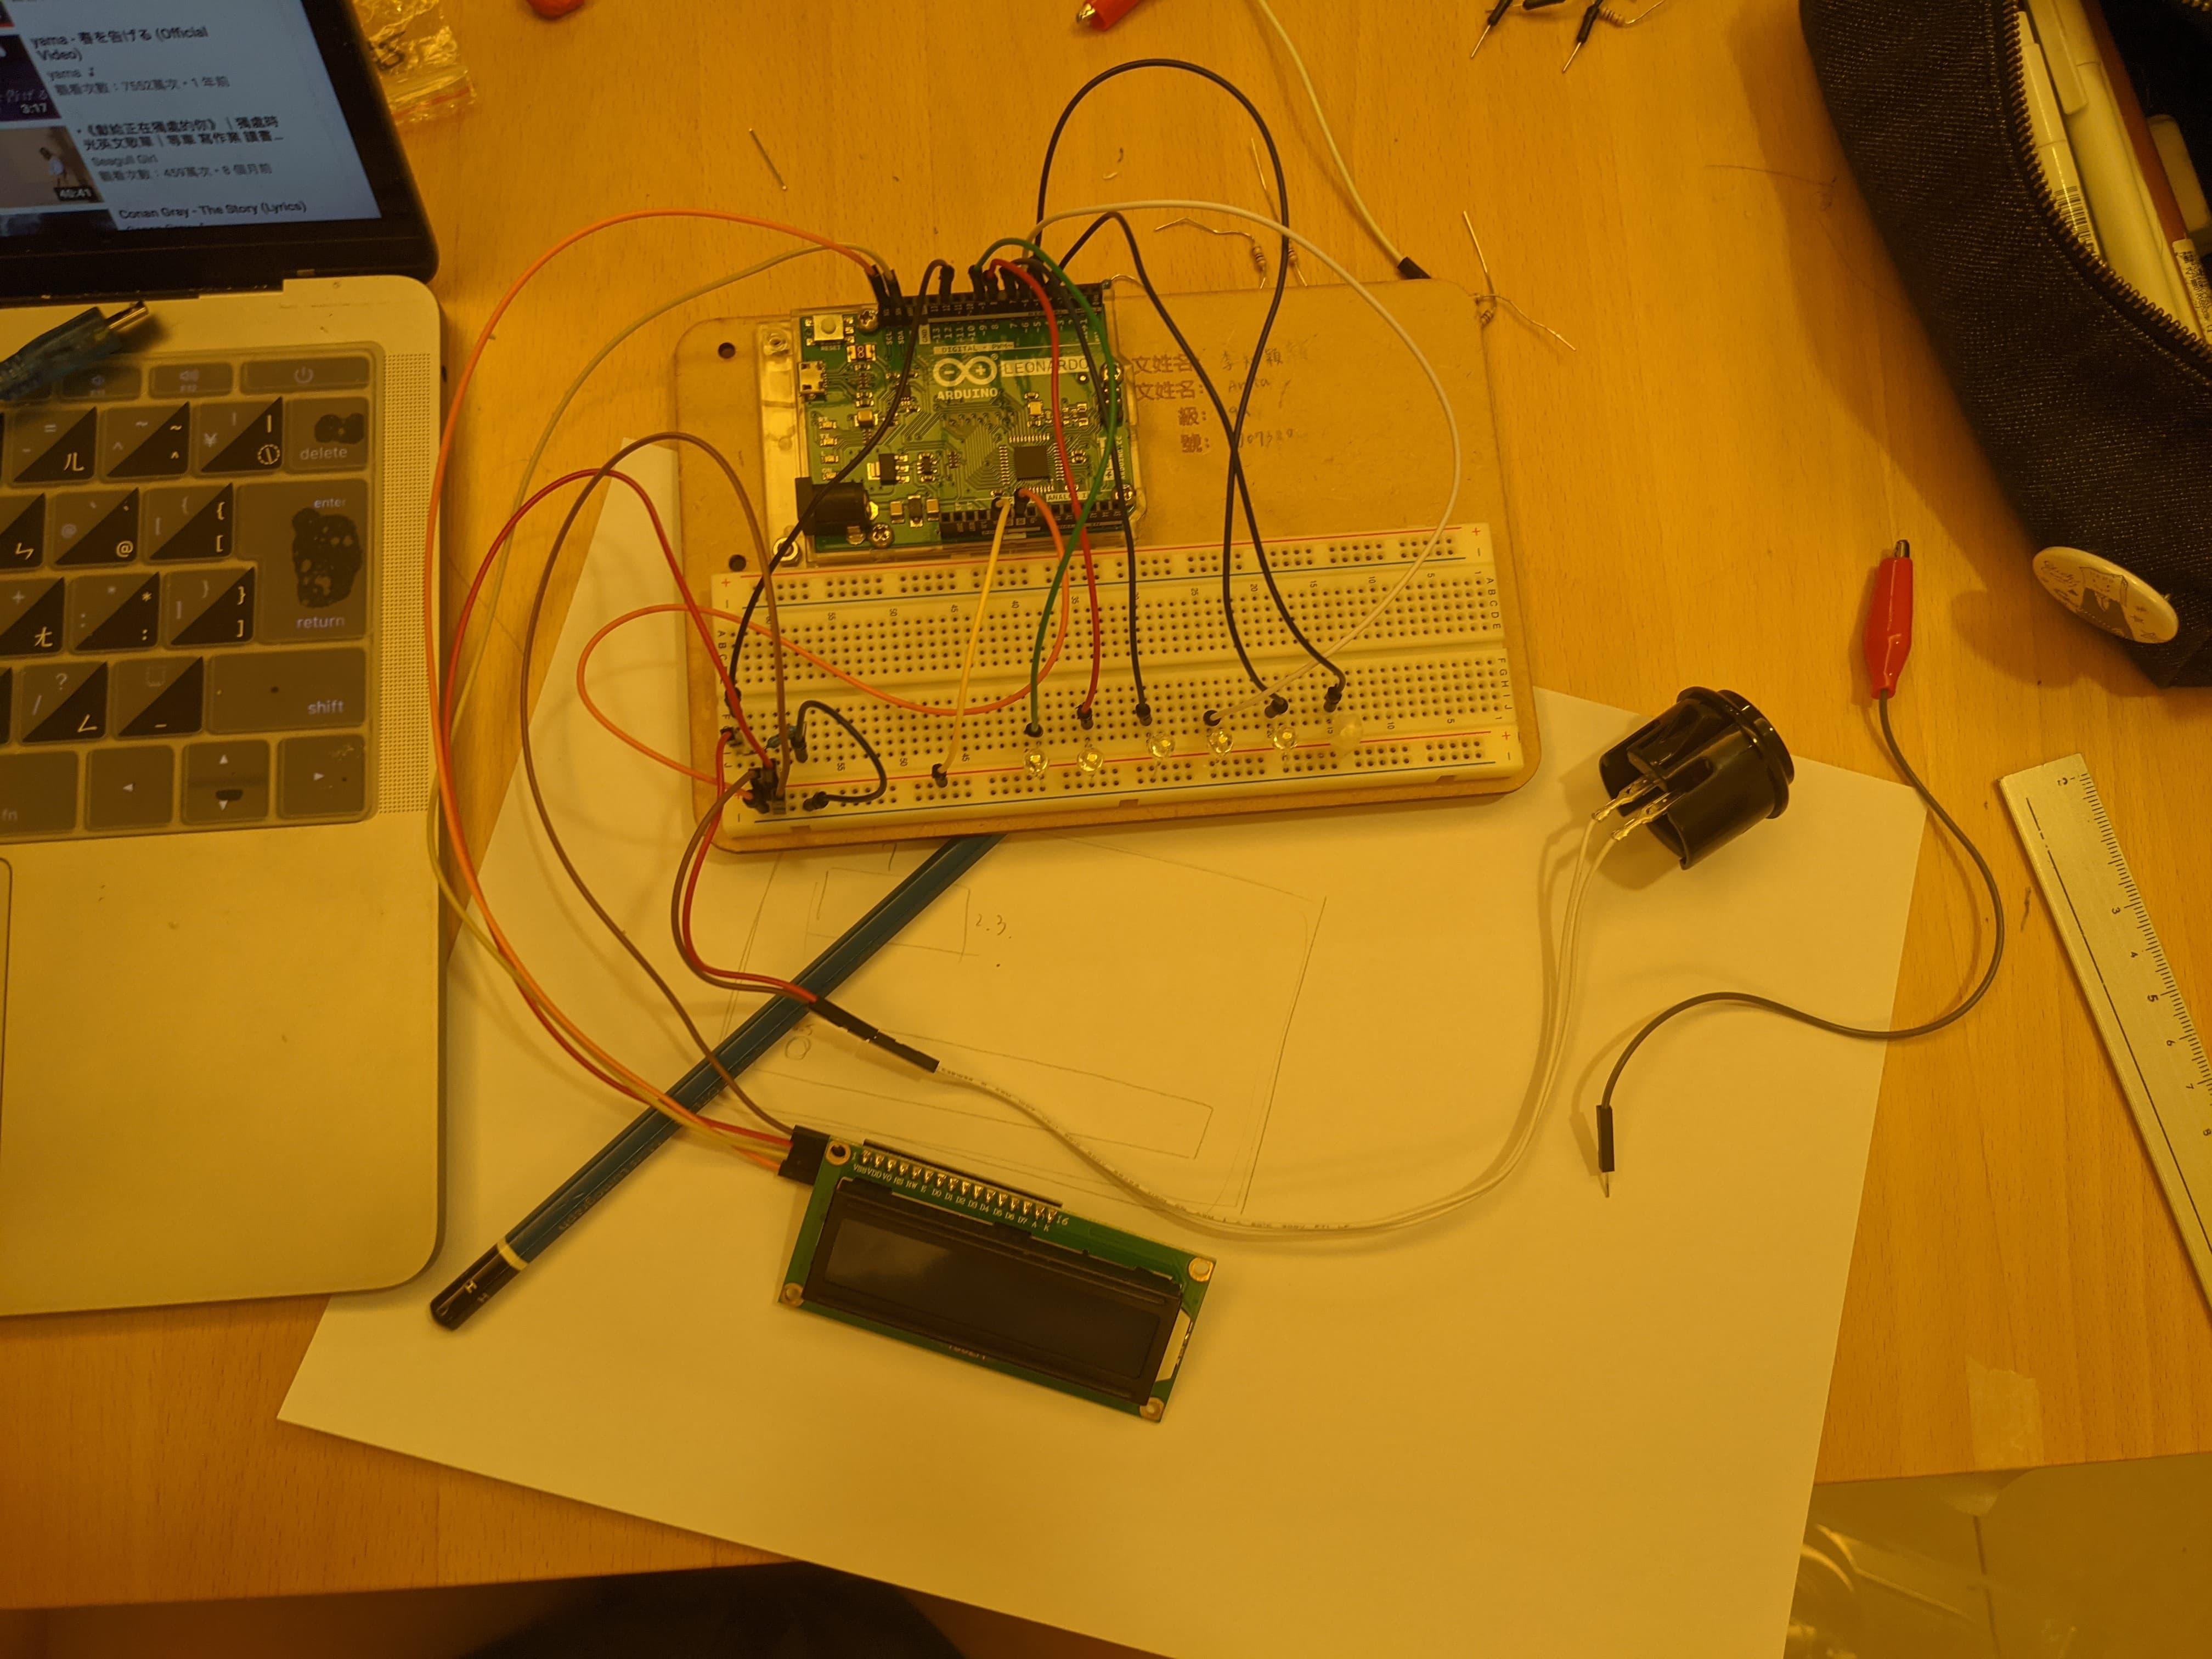
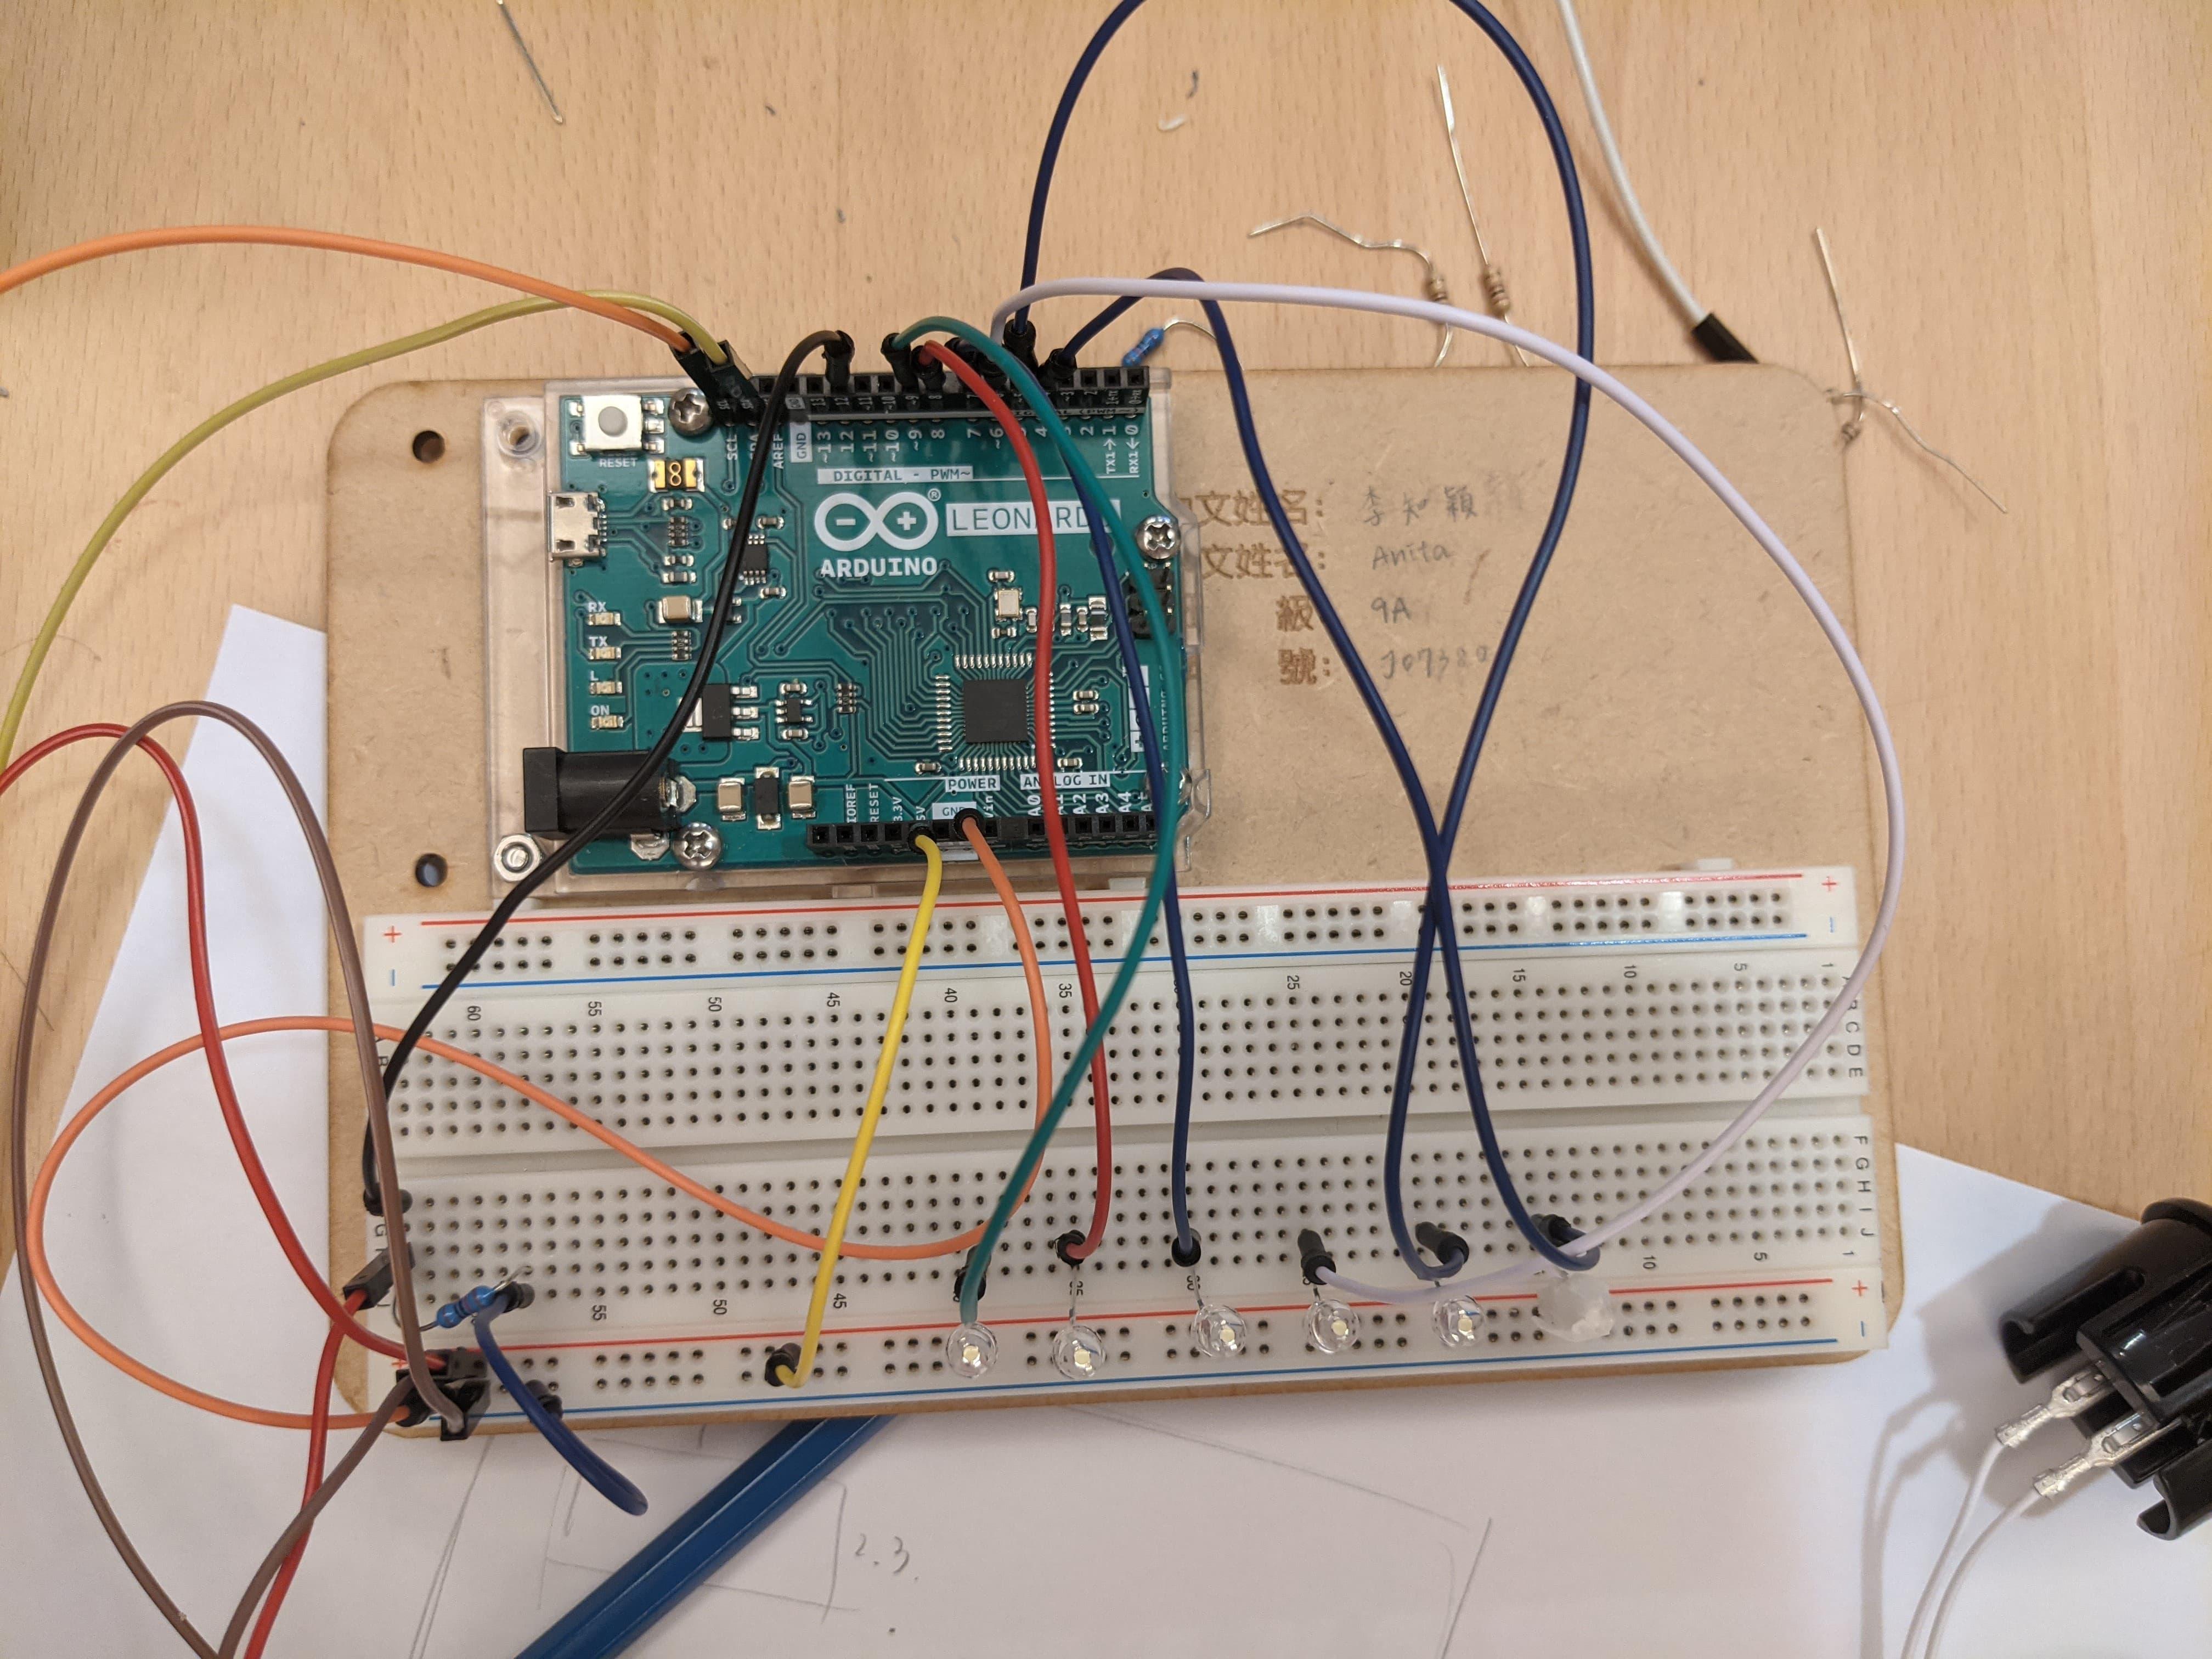
Coding and Wiring


- download Arduino
- download the code and paste it on your Arduino
- start wiring! (connect all the wires, LEDs, button, and the LCD board on the right place as the picture shown.)
- connect the Arduino board to your computer using the USB cable.
- select "Arduino Leonardo" for your evaluation board (tools > evaluation board > Arduino Leonardo)
- select the right serial port (choose the one that has Arduino Leonardo with brackets at the back)
- upload the codes
- check if it is working the way you expect
codes
Constructing
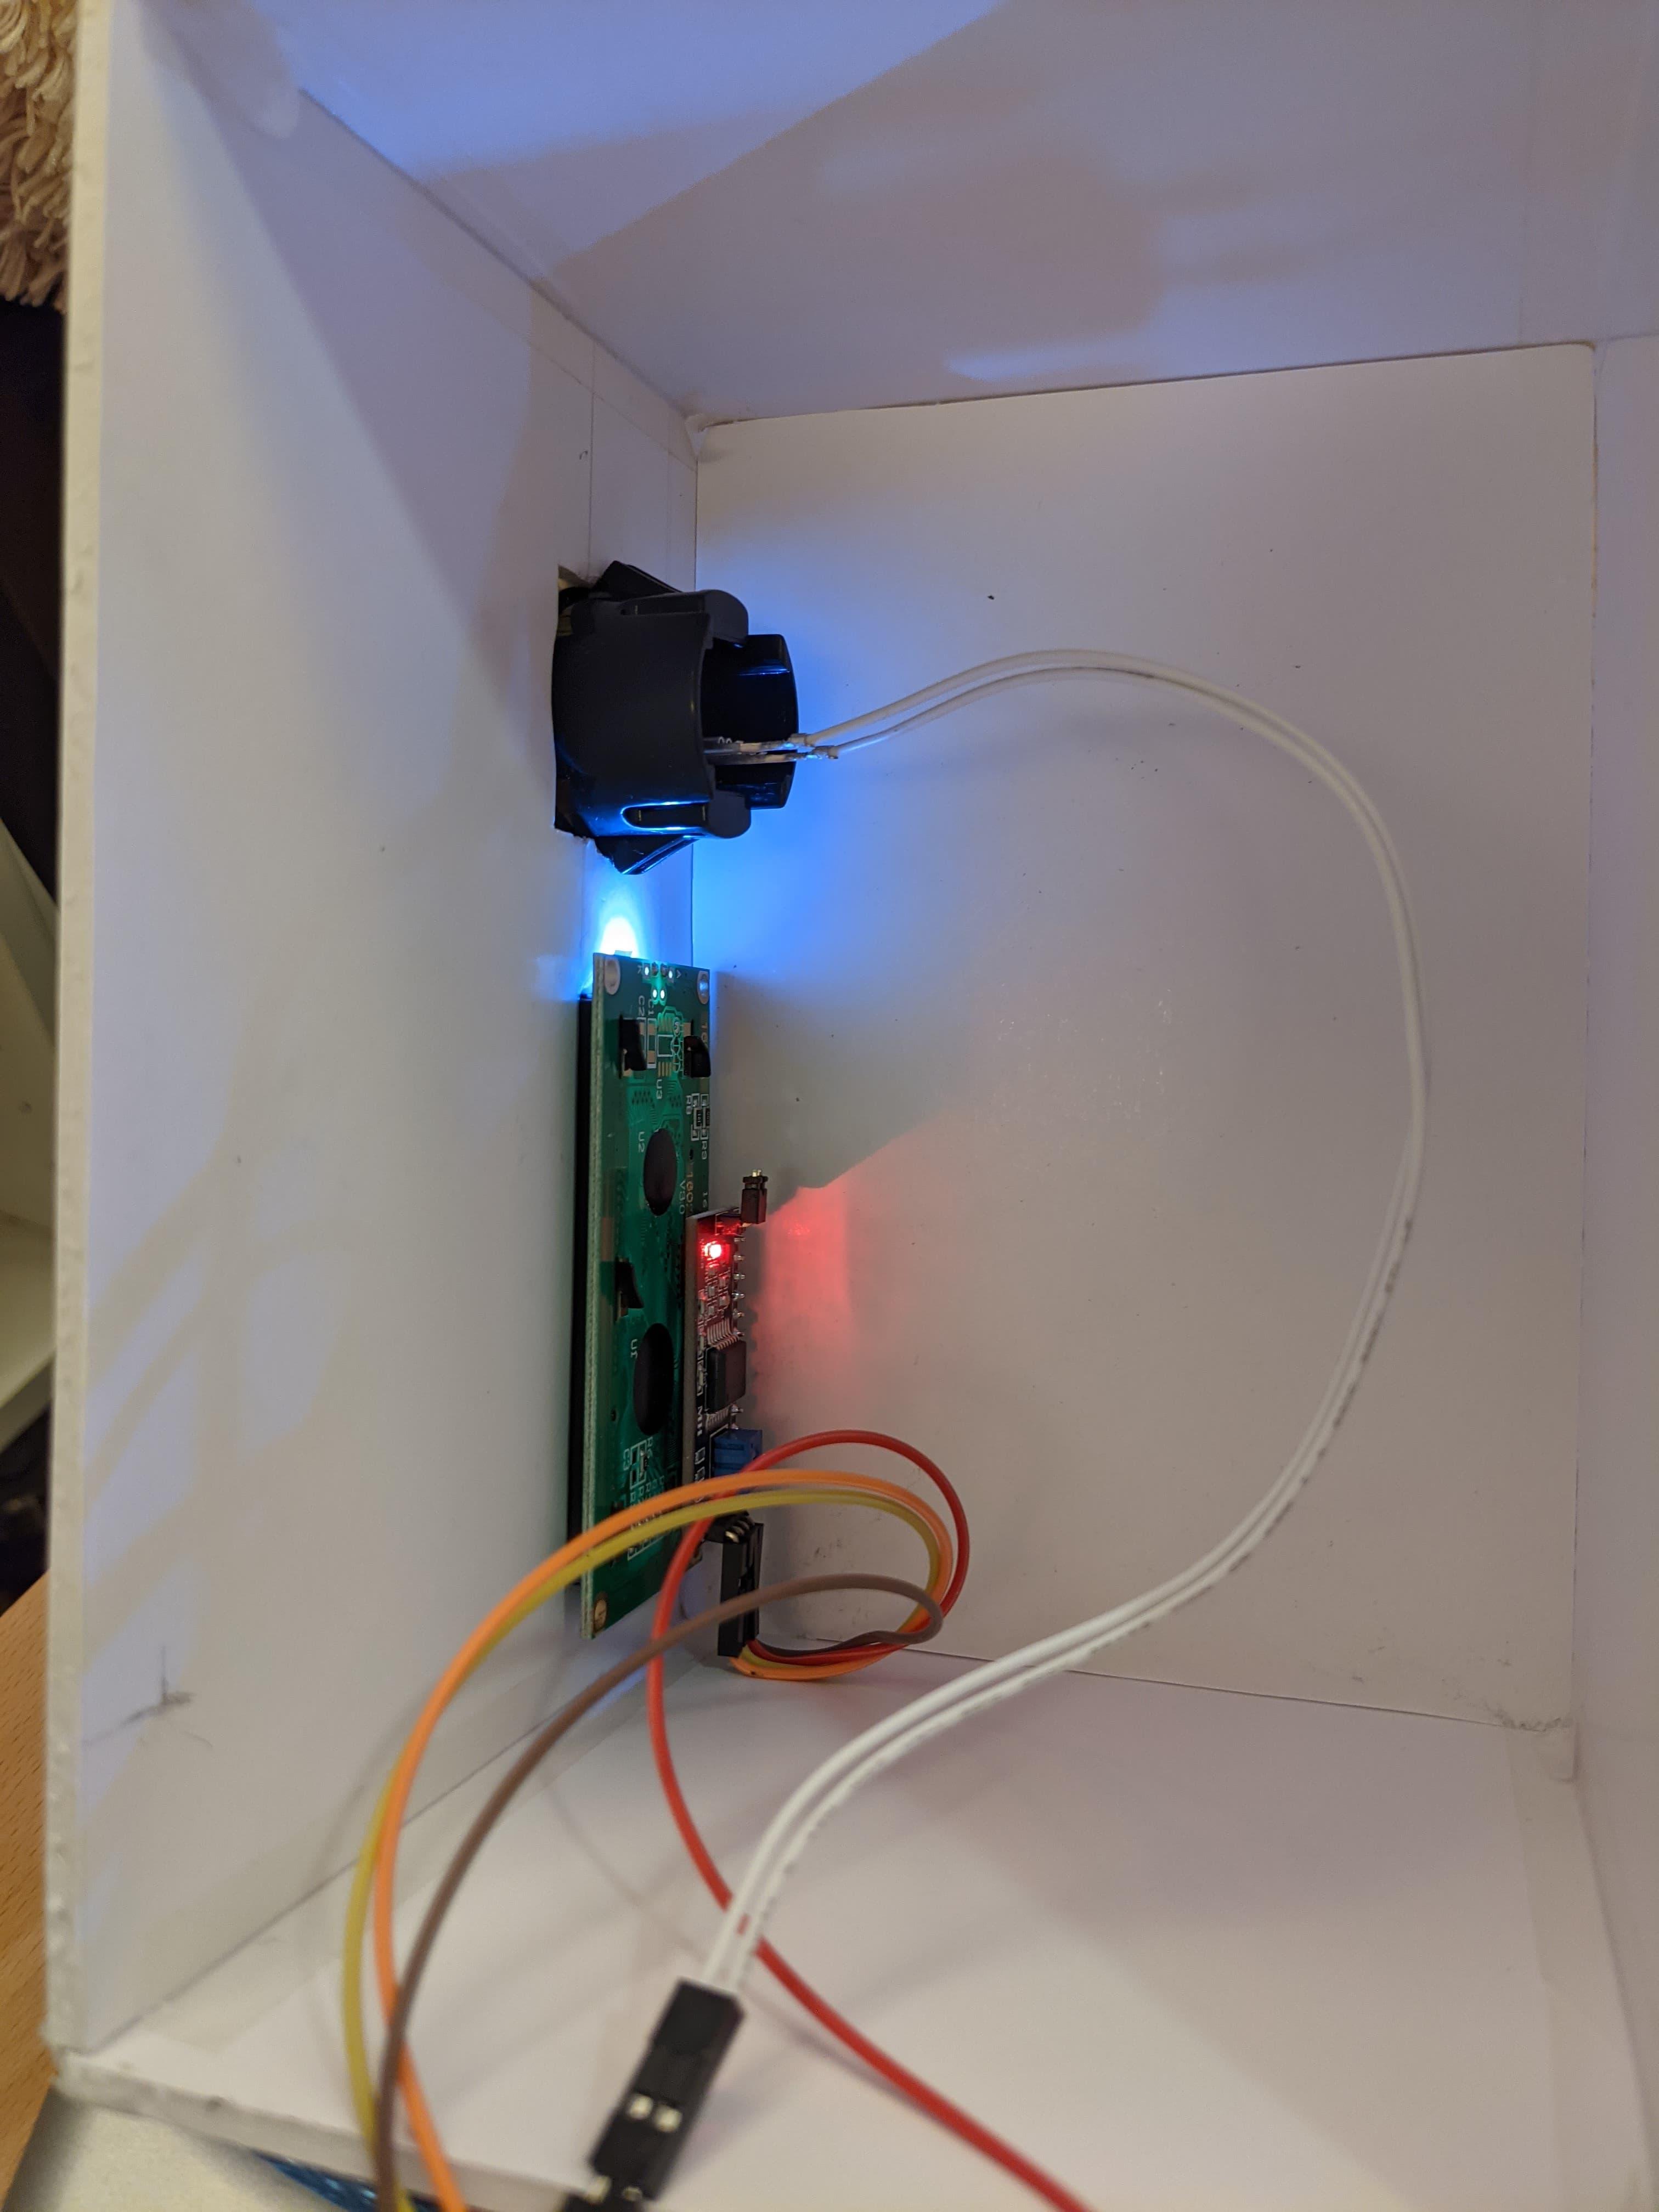
- put the LCD board and the button on their place.
- cover the Arduino board using the box you just made (the size should be just right and not falling down without gluing them together.)
Finished