Radio Shack Microcomputer Trainer Emulator in Scratch
by arpruss in Circuits > Computers
5116 Views, 10 Favorites, 0 Comments
Radio Shack Microcomputer Trainer Emulator in Scratch
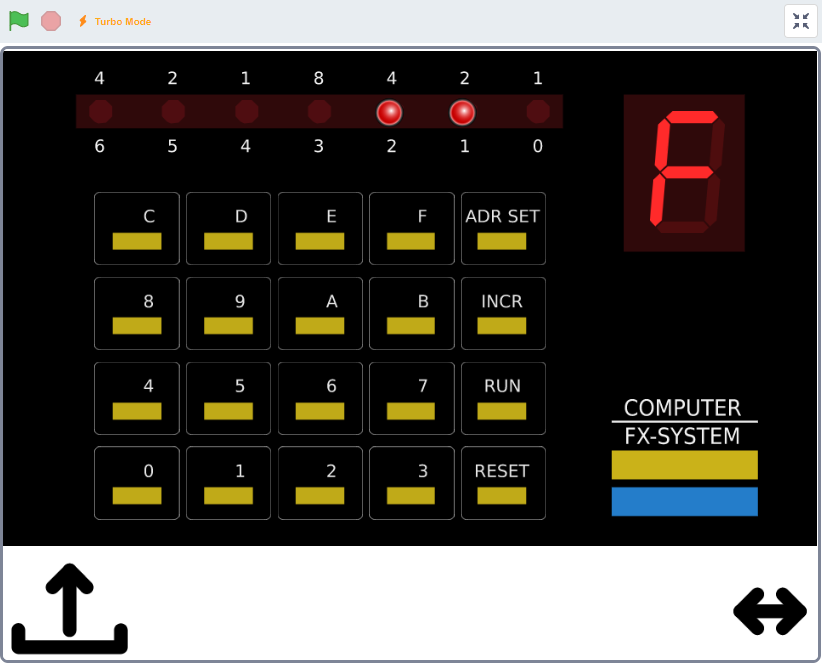
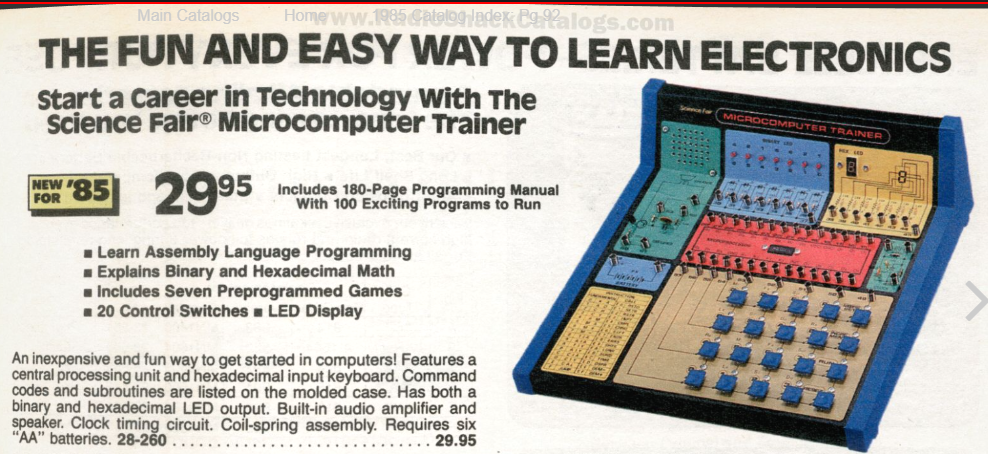
When I was a kid, my family got me a Radio Shack Science Fair Microcomputer Trainer (here's the Radio Shack catalog page). This was a 4-bit system, with a hex keyboard, seven red LEDs, one 7-segment LED, a speaker, and 112 nibbles(!) of RAM, designed for learning simple machine code / assembly language. It came with a programming manual with lots of well-explained example code. It turns out that this is basically a variant of the Japanese 1983 FX-Micom R-165, re-made in the 21st century as the GMC-4 (manual here).
Things have changed: now instead of learning programming with assembly language, kids learn it with high-level languages like javascript or even block-programming languages like Scratch. I thought it would be fun to make a simple emulator of the unit in Scratch (fast version here), bridging the gap between then and now. My emulation covers the machine code programming part of the system (I didn't reimplement the packaged games).
I also made a web-based assembler, which can be used with both the emulator and the original.
This Instructable is in two main parts: The first part explains how to use the emulator to begin programming in assembly / machine code (you can also use this part with one of the original hardware devices, which alas I no longer own) and the second part explains how the emulator was made with the Scratch block language.
(A Windows-based emulator is found here. I found its sound and DEM-/+ code particularly helpful in my Scratch emulator's development.)
Back in the 1980s, the original trainer was running in a virtual machine implemented on a TMS-1x00 processor overclocked to 400 kHz. If you run Scratch in Turbo Mode (shift-click the green flag), on my i5-6300U Windows laptop, the emulator actually runs faster than the original.
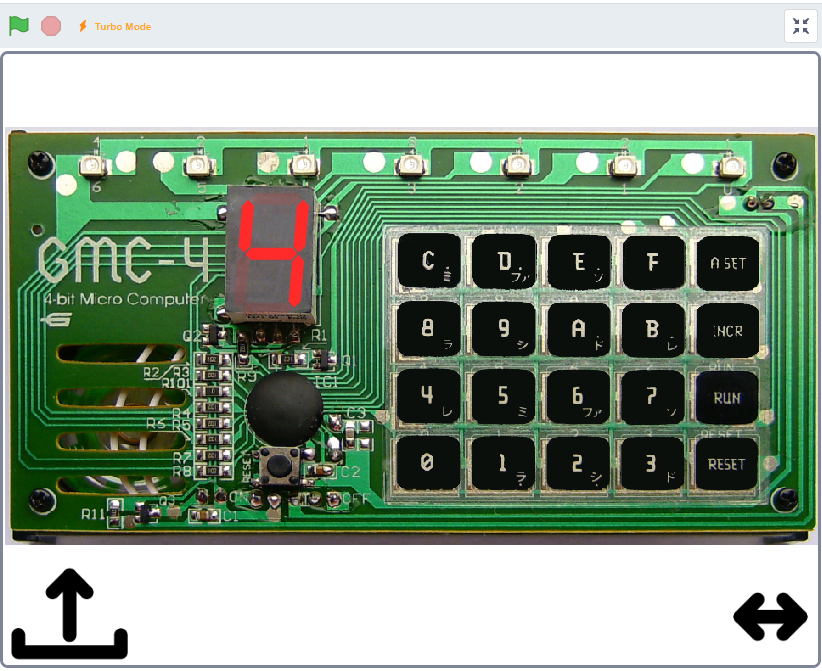
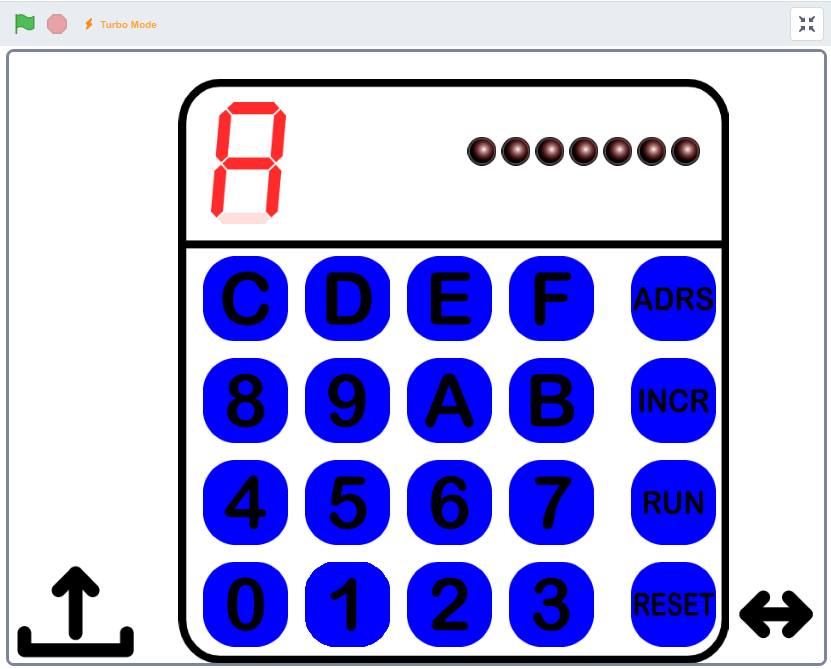
The emulator can look either like the R-165, or like the newer GMC-4, or can have a simple user interface inspired by the Radio Shack unit's blue buttons.
Entering and Running Code
The trainer has hexadecimal buttons 0-F and four function buttons. It starts in code entry mode, and by default uses a display based on the Japanese R-165 unit (you can also switch to a plainer user interface or the GMC-4 user interface by clicking the left-right arrow on the right of the screen). Shift-click the green flag to put Scratch in Turbo Mode.
In code entry mode, the seven individual LEDs display the current address in binary, and the seven-segment LED starts by displaying the 4-bit value at that address. Program memory addresses range from 00 to 4F (1001111 in binary), which is then followed by data memory from 50 to 5F. The virtual machine registers are stored from 66 to 6F.
Each address stores a nibble, namely four bits (half a byte), from 0 to F in hex.
To enter a code/data value at an address, just press one of the 0-F buttons and then INCR to push the code into memory and go to the next address. You can go back to address 00 by pressing RESET (this does not erase any of your code, but simply sets the address to 00). You can also go to a specific address by typing in the two hex digits of the address and pressing ADR SET.
Once you have entered a program, you can run it by pressing RESET (to set the address to 00), and then typing in a run code 1, 2, 5 and 6 and pressing RUN. Specifically:
- 1, RUN: run continuously
- 2, RUN: run continuously with the individual LEDs showing the program address
- 5, RUN: run step-by-step: press INCR to execute the next program step
- 6, RUN: run step-by-step with the individual LEDs showing the program address: press INCR to execute next step.
To stop a continuous run, press RESET.
My Scratch emulator also has these keyboard shortcuts:
- space = INCR
- left-arrow = RESET
- right-arrow = ADR SET
- r = RUN.
Here is a simple machine-code blinky program:
A084E1ECE2ECF04
Enter it (e.g., hex key + space + hex key + space + ...), then press RESET, 1, RUN. The right-most LED should pulse. Press RESET to stop running the program.
If you like, you can also press the upload button (lower left), and then copy and paste the program in, and then press 1, RUN. (The upload button automatically resets the address.)
Here is how the code works:
A0 = TIY 0: put 0 in Y register; this will indicate which LED to flash
84 = TIA 4: put 4 in A register; this will indicate the LED pause time
E1 = CAL SETR: activate LED indicated by Y register (0=rightmost)
EC = CAL TIMR: pause for time indicated by A register ((4+1)*0.1 seconds)
E2 = CAL RSTR: deactivate LED indicated by Y register
EC = CAL TIMR: pause again
F04 = JUMP 04: jump to offset 04 in program (the CAL SETR command above)
The mnemonics like "TIY 0" are called "assembly language". What you actually put into the trainer is the "machine code" that the assembly mnemonics translate to.
If you use 5, RUN to run step-by-step, then you will start with all displays off: you have executed the TIY 0 command, and you have 0 in the Y register. Press INCR. Nothing will change on screen, but you will now have 4 in the A register. Press INCR. Now, the LED will turn on because of the CAL SETR command. Press INCR again. Seemingly, nothing will happen, but actually there will be a 0.5 second pause. Press INCR again. Now, the LED will turn off because of the CAL RSTR command.
There are lots of demo programs in the Radio Shack and Gakken manuals that you can type in.
Writing Your Own Code
There is a very nice semi-detailed summary here of how the trainer works and what the assembly language mnemonics and machine codes are. You can also get really good explanations in the Radio Shack and Gakken manuals.
There are eight 4-bit registers: A, B, Y, Z, A', B', Y', Z'. The A and Y registers are used most often. Additionally, there is a 16-nibble data storage area indexed by the Y register, and a number of instructions to access it.
Here are all the instructions:
A Worked-Out Example: Rolling Two Dice
Let's write an assembly language program that simulates two die rolls. Here's the idea. Once the program starts, it will quickly and repeatedly count 1,2,3,4,5,6 until you press a key. Since the trainer runs fast, the number when you press the key will be basically random. Then the trainer will count again until you release the key. Finally, it will display the two random numbers (after adding one to make sure that the range is from 1 to 6). One number it will show on the seven-segment LED and the other by lighting up the right number of individual LEDs.
First, let's do the repeat counting. We'll do it with the Y register, because the A register is used by the key-check instruction KA. We can repeatedly count 1-6 with Y by doing:
  TIY 1  ; transfer 1 into Y
roll1:   ; label for the assembler
  AIY 1  ; add 1 to Y
  CIY 7  ; compare Y with 7
  JUMP skip1 ; if not equal, skip
  TIY 1  ; reset back to 1
skip1:
  JUMP roll1 ; continue counting
Comments start with semicolons.
The code starts by putting 1 into Y, adding 1, and then checking if you've reached 7. If you have, you reset Y to 1. And then you repeat. There is one tricky bit. The trainer has a status flag. Most instructions simply set the status flag, and the JUMP instruction is only executed if the flag is set. But a few instructions can clear the status flag in special cases. For instance, the CIY instruction clears the flag if Y equals the number given after the instruction. Thus, the JUMP skip1 instruction is only executed if Y is not 7. That instruction skips over the step that resets Y back to 1. And then at the end we jump back to the beginning of the counting.
If you run the above program, you won't see anything, as it will simply do an endless loop of counting over and over with Y. We need to check if a key is pressed to get out of the loop. You check whether a key is pressed using the KA instruction, which loads a hex key (0-F) into the A register and clears the flag if the hex key is pressed. So the first part of the code can be rewritten as:
TIY 1  ; transfer 1 into Y<br>roll1:   ; label for the assembler
  AIY 1  ; add 1 to Y
  CIY 7  ; compare Y with 7
  JUMP skip1 ; if not equal, skip
  TIY 1  ; reset back to 1
skip1:
  KA     ; check for key press
  JUMP roll1  ; continue counting if key is NOT pressed
Once this code runs and a key is pressed, we have our random number in Y. We can display a number using the AO instruction. However, AO only displays a number in the A register. So we need to exchange the contents of A and Y using CY:
  CY     ; swap A and Y, putting first die result into A
  AO     ; show first die on 7-seg
Now, let's do a second counting loop, except that the end condition for it is reversed: we now stop when the key is released.
  TIY 1
roll2:
  AIY 1
  CIY 7
  JUMP skip2 ; if not 7
  TIY 1
skip2:
  KA
  JUMP done
  JUMP roll2 ; keep rolling while pressed
done:
The KA instruction will set the flag only when a hex key is not pressed. This results in a jump to the end of the above code snippet. Otherwise, if the key is still held down, we continue counting (JUMP roll2). Note that JUMP, like most instructions, set the flag, so if you have a sequence of two JUMPs, one of the two is guaranteed to be executed.
Now, we have the second die in Y. And we need to display it on the LEDs. To do that, we use the CAL SETR opcode, which turns on the LED numbered by Y, where Y=0 is the right-most LED. Because our die numbers start at 1, to match CAL SETR, we begin by subtracting 1 from Y, and then we turn on the LED, then we subtract another 1, and unless we've reached -1, we turn on the next LED.
There is no instruction to subtract 1. But subtracting 1 is the same as adding F when we are dealing with 4-bit numbers! Moreover, my assembler will translate -1 to F. So we can write:
; Y = second die
; show second die on LEDs
 AIY -1   ; subtract 1
setLED:
 CAL SETR ; turn on LED
 AIY -1   ; subtract 1
 CIY -1   ; have we reached -1?
 JUMP setLED  ; if not, continue<br>
This almost completes the code. But there is one tricky thing. If we just put the above code into the trainer, then the system will continue running code after the end of the above. This will run whatever junk may be leftover from previous operations. We need to halt here. To halt we do an endless loop (which we can get out of with the RESET button):
END: JUMP END
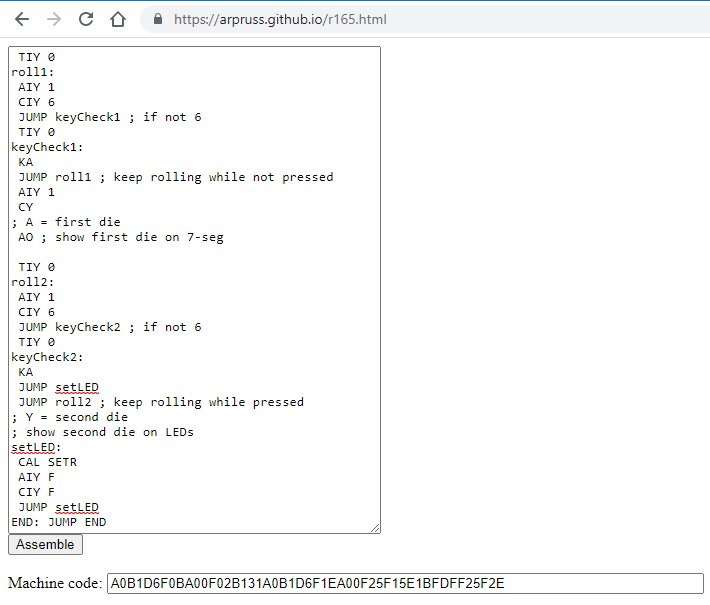
Put the code into my assembler, and it should assemble to:
A1B1D7F0BA10F0231A1B1D7F1CA10F23F13BFE1BFDFF25F2E
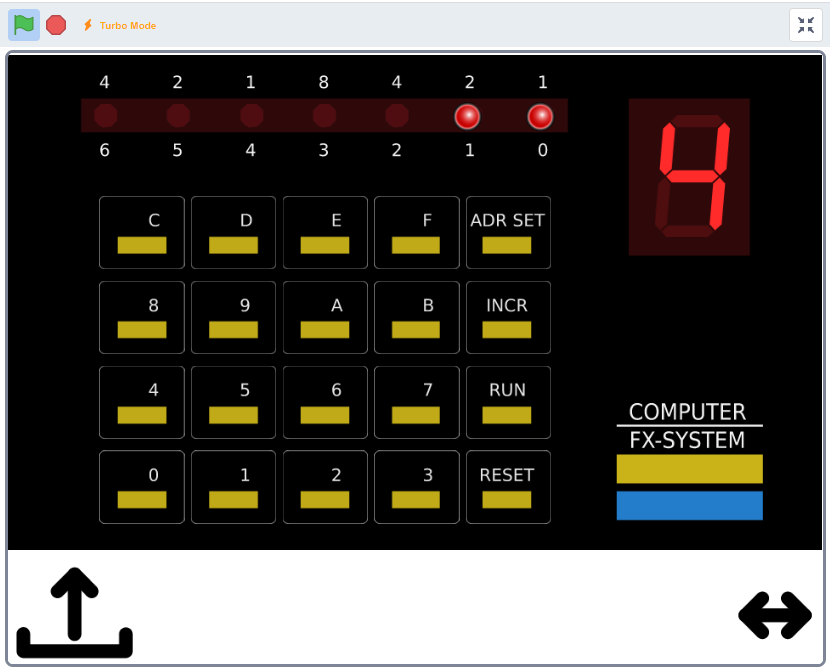
Put that into the emulator (either the long way with hex, space, hex, space, ..., or by copying and pasting into the upload box). Press 1, RUN. Hold down a hex key and release it. And you will have the two die results, like 4 and 2 in my screenshot.
Part II.0: How I Made It: Scratch Code Overview
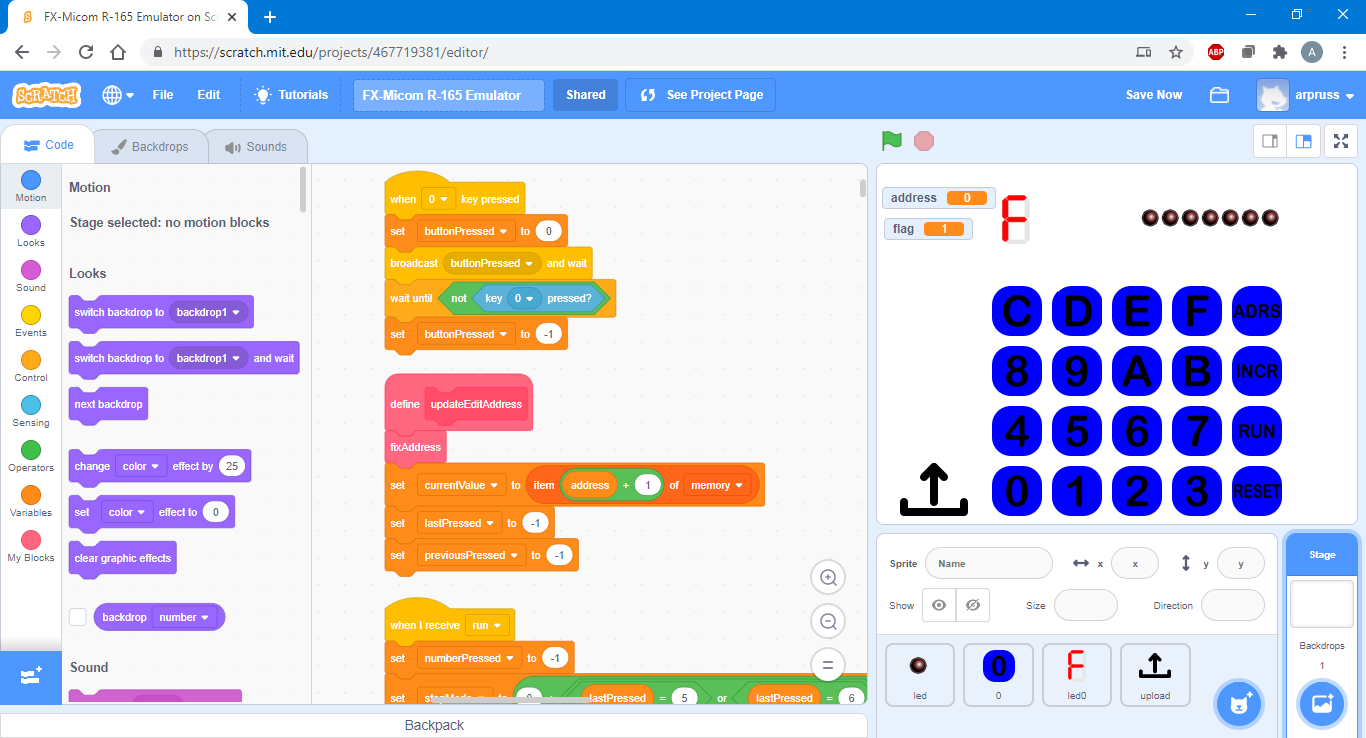
The Scratch code is divided into six parts:
- individual LED [sprite with clones]
- seven-segment LED [sprite]
- buttons [sprite with clones]
- main [stage]
- upload [sprite]
- UI switch [sprite]
Part II.1: Individual LEDs
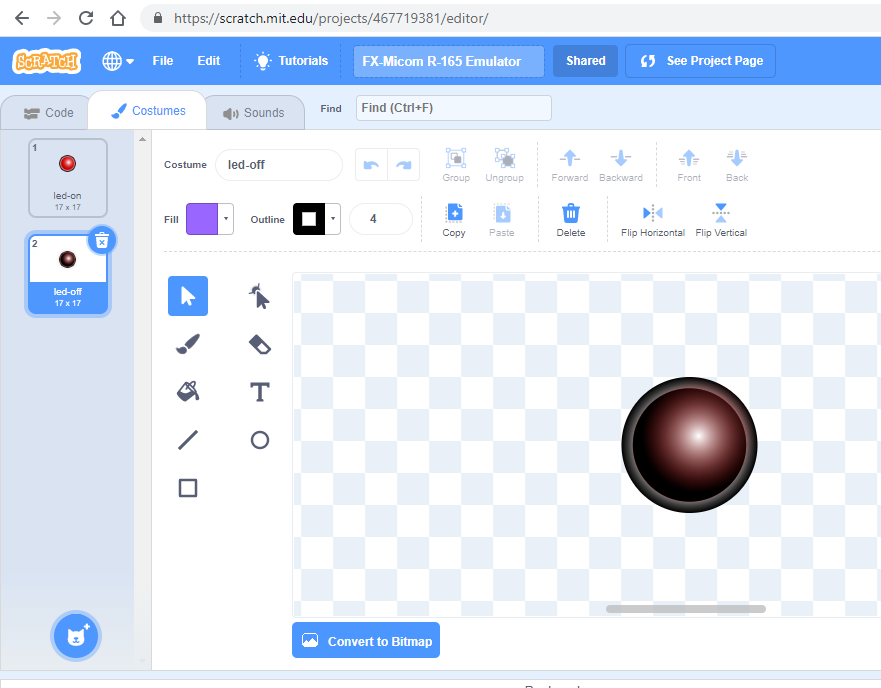
I made a base LED sprite, and uploaded two SVG images, one with the LED off and the other with the LED on.
Hints: Images uploaded from Inkscape are mangled in Scratch for multiple reasons. First, text and thick lines are not supported by Scratch. So, in Inkscape, select all (ctrl-a) and then do Path | Stroke to path before saving. But that's still not good enough: they get cut-off weirdly in Scratch. The quick fix for that is to change the images a little and put them back where they were in the Scratch editor. The quickest way I found was: ctrl-a (select all), drag with mouse, ctrl-z (undo).
The other six LEDs are positioned relative to the base LED sprite.
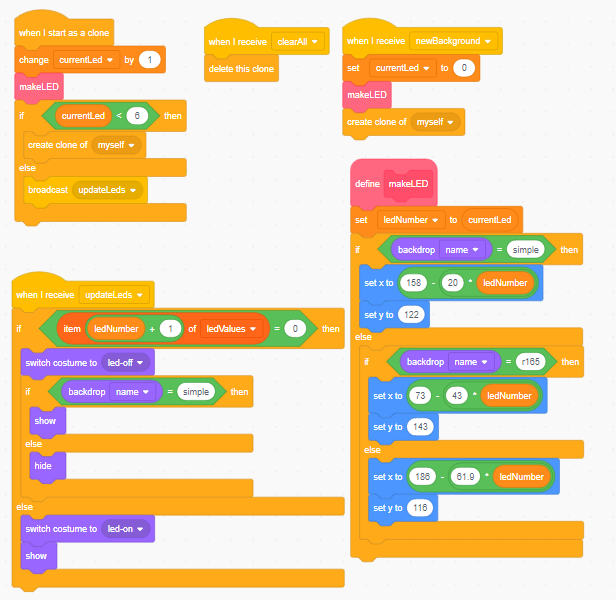
When the code starts up (green flag click), or the background changes (currently, between my simple white with outlines background, the Gakken Micom FX R-165 background, and the Gakken GMC-4 background), a clearAll message is sent to all sprites from the stage code. All sprite clones delete themselves when they get it. After that, a newBackground message is sent to all sprites. At this point, there should be no sprite clones.
When the base sprite gets the newBackground message, a currentLED global variable is set to 0, and a makeLED custom block is called that sets a ledNumber sprite variable equal to currentLED and positions the sprite correctly on the background. The base LED sprite then clones itself.
When a clone is created, it increases currentLED by one and calls makeLED. As a result, each LED is correctly positioned by code for the correct background. Moreover, each LED sprite has its own ledNumber variable so it knows its own number. Once a LED clone has finishing setting itself up, it checks currentLED to see if more clones are needed, and if so, it clones itself. If not, an updateLEDs message is sent.
Each LED sprite has an updateLEDs message receiver. The sprite checks, using its ledNumber, in a global ledValues list whether it should be on or off, and displays itself appropriately to the background: on the plain background we switch between the LED-off costume and the LED-on costume, while on the R-165 background, we switch between hiding and showing the LED-on costume.
Part II.2: Seven-segment LED
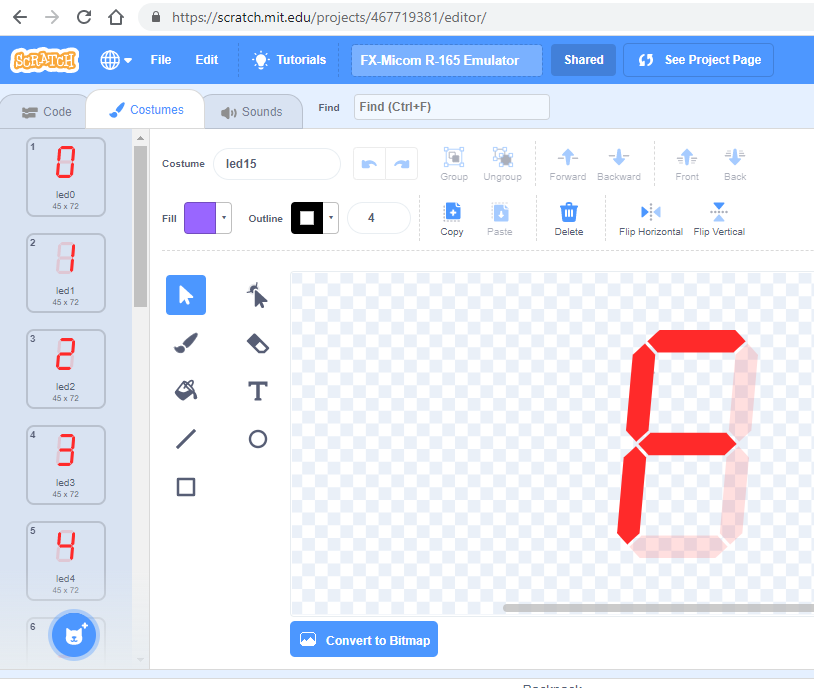
I started with a public domain 7-segment LED SVG image for the numeral 8, sloped it by about 5% in Inkscape, and then modified it to generate 0-F images as well as a blank by turning down the opacity of the relevant segments of the LED. I uploaded these in order.
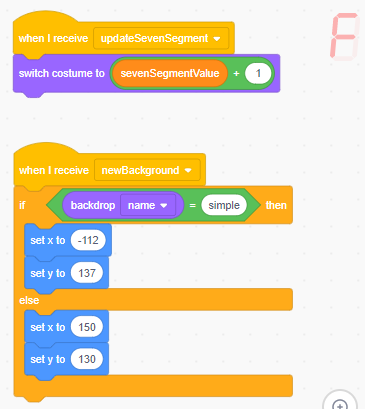
On a newBackground event, the LED positions itself correctly.
Then the 7-segment LED is controlled by an updateSevenSegment message, which checks a sevenSegmentValue global variable. That variable takes values from 0 to 16. Values 0-15 get displayed as hex digits, while 16 is a blank.
Part II.3: Buttons
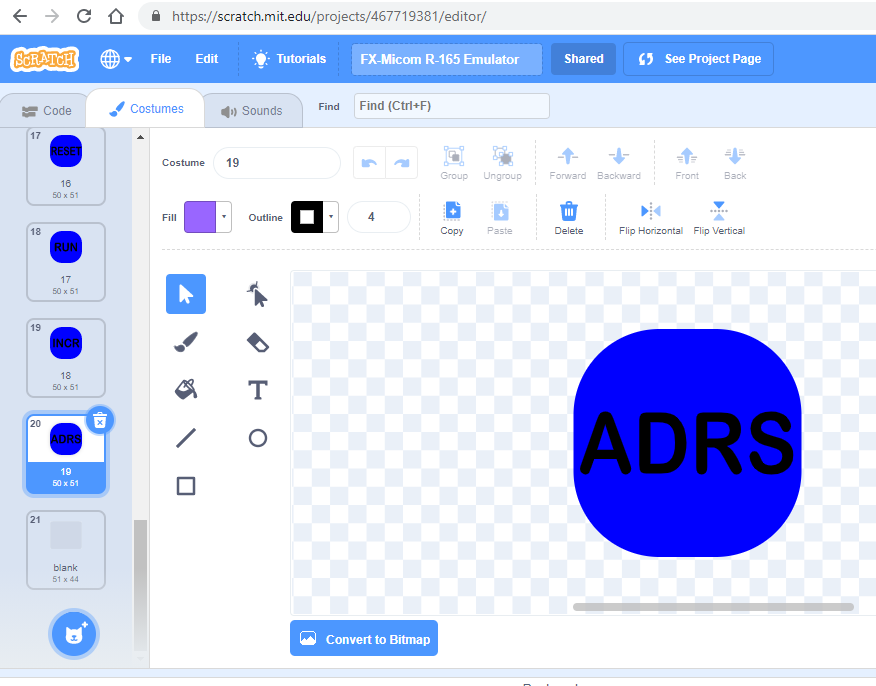
I made 20 individual labeled SVG button costumes in Inkscape for the plain background. The R-165 and GMC-4 backgrounds only need a simple rounded outline for the clickable areas. I drew those in Inkscape, putting a fill with a very low opacity inside the rounded outline. (If there were no fill, Scratch would require you to click the outline!) I resized it in Scratch to fit the button areas when I had the background.
As for LEDs, there is a base sprite, and a number (in this case 19) of clones.
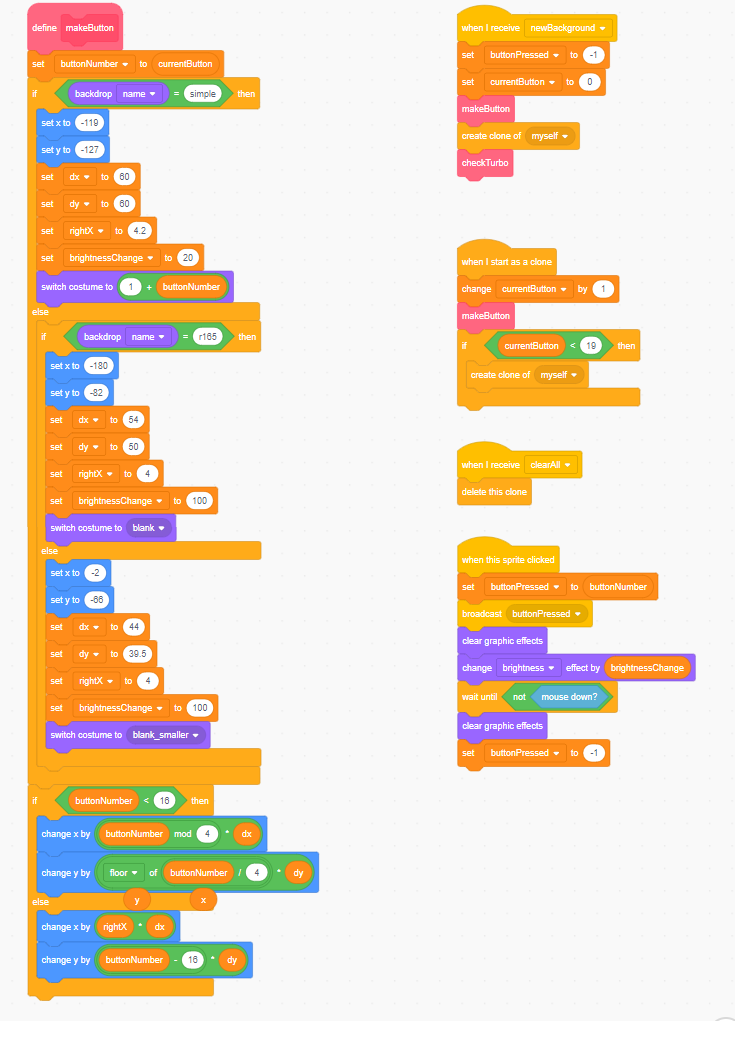
On clearAll, each clone gets deleted, after which the base button sprite responds to newBackground. Much as in the case of the individual LEDs, we have a global currentButton variable, and then we have a makeButton block that sets a local sprite buttonNumber variable so each clone knows what number it belongs to (0-F, RESET-ADRS), and then calculates its position. It also sets its costume based on its button number and the background, and sets a variable as to how much the brightness of the button should change on clicking. We also set a global buttonPressed variable to -1 to indicate that nothing is pressed. After
And there is a when this sprite clicked handler. This sets a global buttonPressed variable to the local buttonNumber. It brightens up the button and emits a buttonPressed event for the rest of the emulator to use. It then waits for the mouse to be released, whereupon it clears buttonNumber to -1.
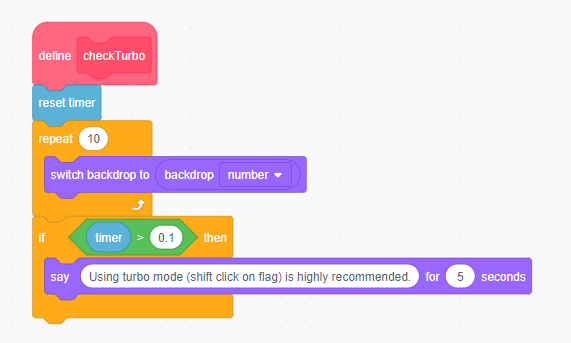
Finally, I added a little test to see if turbo mode is off, in which case a message to turn it on is shown.
Gripe: Scratch is meant to teach coding. But it is hard to avoid using lots of global variables to communicate between sprites, which teaches poor coding style. Some of this could be fixed by passing parameters along with messages and sprite clonings.
Part II.4.1: Assets
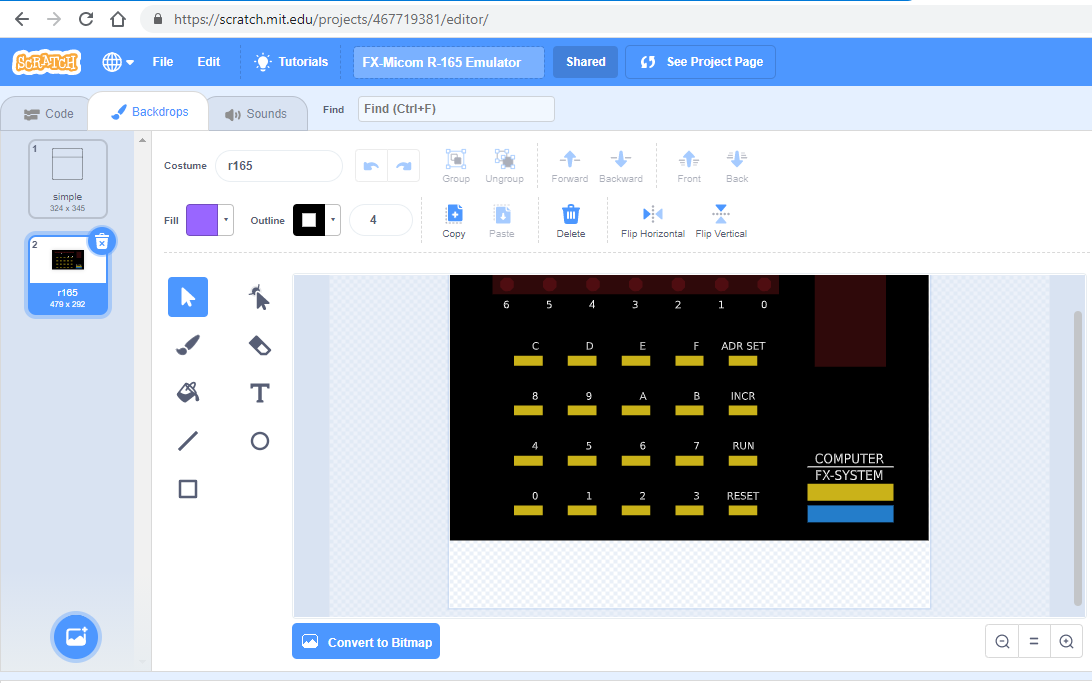
I designed a simple main outline in Inkscape and uploaded it as a background to the project stage (which is associated with the backgrounds in Scratch).
The R-165 outline was harder. I found a MAME R-165 screenshot online. I turned the background white in Paint, loaded it into Inkscape, and traced the colors with Inkscape's bitmap tracer. I deleted junk from the tracing, and put real Inkscape text as the labels in the right positions. Mainly, I used the R-165 screenshot to ensure I had the right positions for everything.
I generated the sounds by using a python script adapted from the answer here. For most of the sounds I used the frequencies and notes from this emulator. I uploaded them to Scratch, with the musical notes (for the CAL SUND instruction) in correct order.
Part II.4.2: the Main Emulator
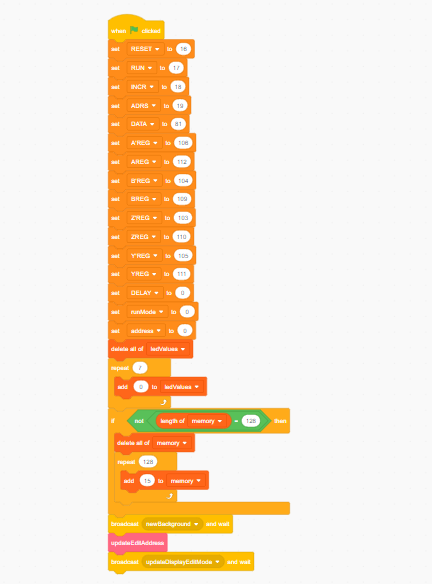
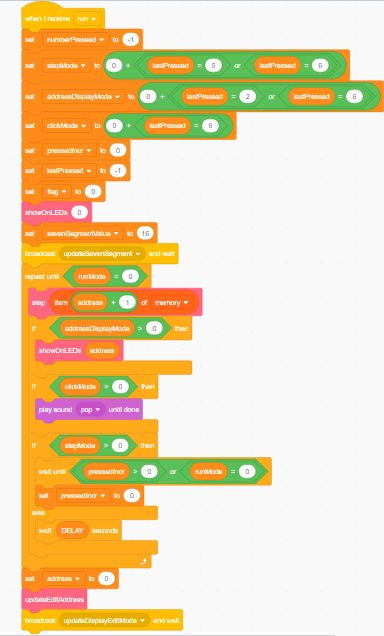
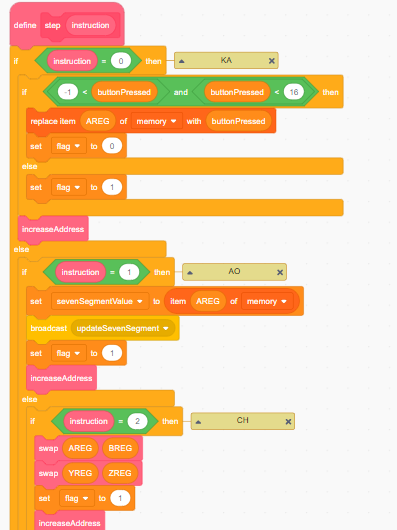
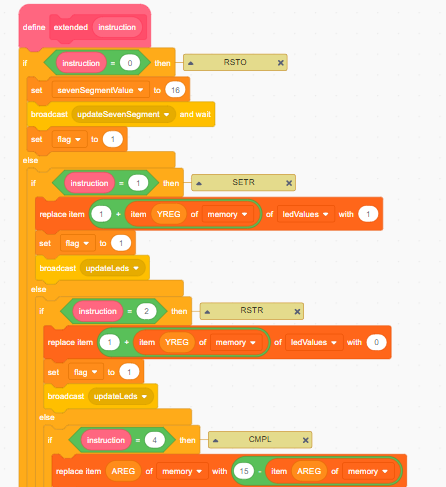
The main emulator code is the code for project's stage. It communicates with the sprites via messages.
First (on green flag clicked), the emulator code sets a ton of global variables. Some of these are shorthand to make code easier to read (they would be const in C++). For instance, there are variables that hold the button numbers for the four side buttons (ADRS, INCR, RESET and RUN), and variables that hold memory locations corresponding to the machine registers. There is a runMode variable which is 1 when a program is running and 0 in edit mode. There is a ledValues list of seven values for the LED states, and most importantly a memory list of 128 values for the memory. (On the original system, the last 16 memory locations are reserved for the code operating the virtual machine.) Note that Scratch lists are one-based instead of the usual zero-based ones. There is an address variable that holds the current edit or run program location.
Once all the globals are set, newBackground is sent out, the program location is displayed on the LEDs, and then we wait for key press events.
We process the key events (which come as messages from the button sprites) differently depending on runMode. When runMode is 1, we only watch for INCR (in case we are in step-by-step mode) and RESET. (The emulator core will also check if a hex key is pressed for the KA instruction). Otherwise, we edit the memory as required, save the last two hex keystrokes for the sake of the ADRS and RUN buttons, and when it's time, send out a run message.
The run message receiver checks the run mode (by looking at the last hex keystroke, if there is one) and sets some variables. Then it repeatedly calls a step custom block with the current instruction, and this does the actual emulation instruction work. We stop if RESET is called. And if we are in step-by-step mode, the run message receiver will wait for an INCR button press between instructions.
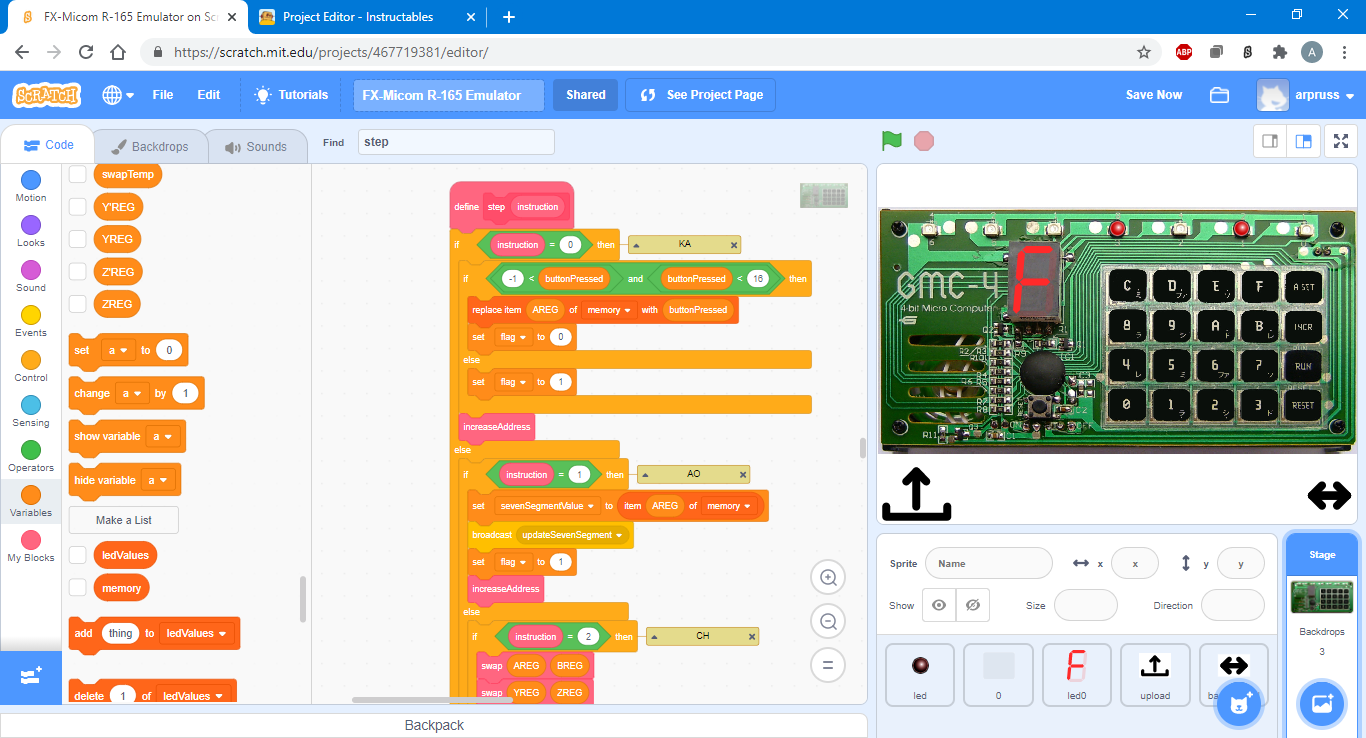
The step block has a bunch of nested if-then-else blocks to check for the 16 possible main instructions, and process them. Note that just as the original system does, the virtual machine registers are stored in memory locations, here stored in the memory list. This in theory could allow weird self-modifying code. It would be faster and make the code more readable to store the virtual machine registers as ordinary Scratch variables, but would reduce emulation accuracy (though probably there is no actual code where this matters). And in Turbo Mode, we are already faster than the original system. And if you want speed, just run the project in Turbo Warp: my benchmark says that you will have more 100 times the performance of the original. (Well, that's for code that doesn't do any LED I/O. LED I/O is probably a lot slower than in the original, since it's way harder to draw an SVG than to toggle a microcontroller line, even if the microcontroller only runs at 100kHz. But optimizing my emulator inner code won't help here.)
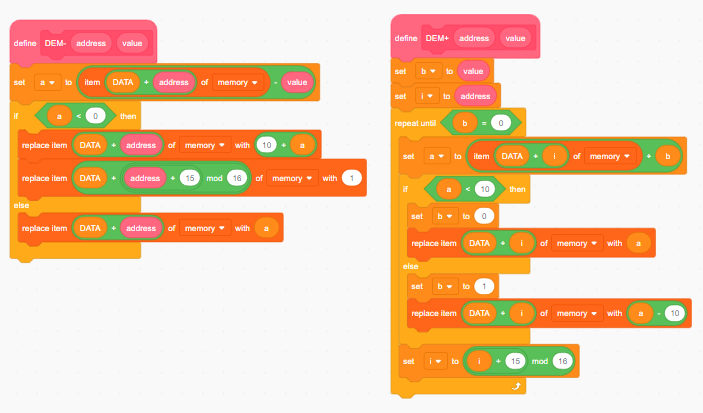
If the step block encounters a CAL instruction, it calls an extended block that processes that. The most complex part of that is the DEM+ instruction. I used Google Translate on this Japanese description to learn how DEM+ and DEM- work, and then checked against the Windows emulator code.
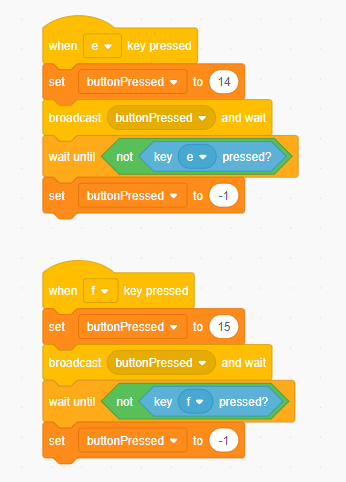
Finally, I have handler blocks for shortcut keys that emulate the messages and globals sent from the button sprites.
Part II.5: Upload
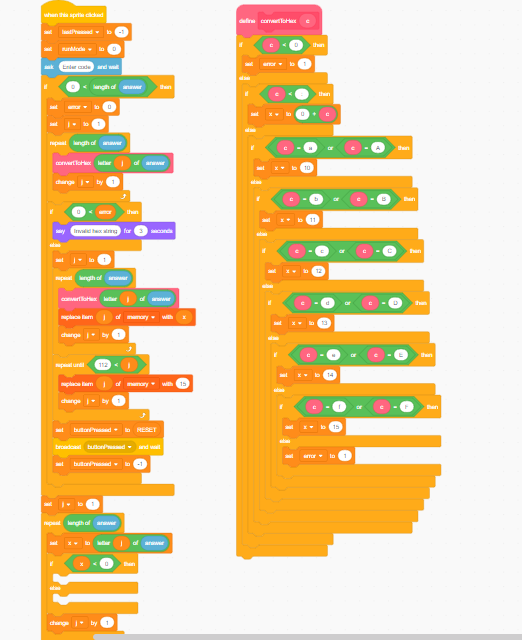
This is a sprite that uses an ask block to get a hex string. If the string isn't empty, it converts it to memory values, and resets the address.
Part II.6: Switch Background
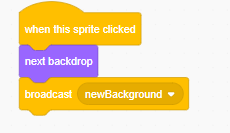
This is a very simple sprite that loads the next background ("backdrop" in Scratch terminology) and sends a newBackground message that will make the LED and button sprites reposition themselves.