RPi MacroScope
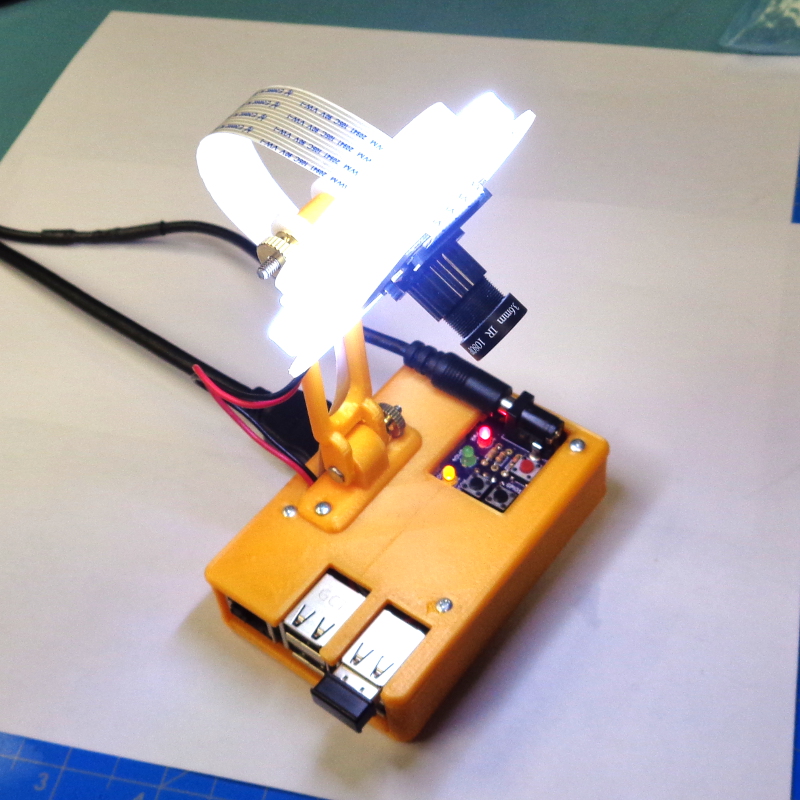
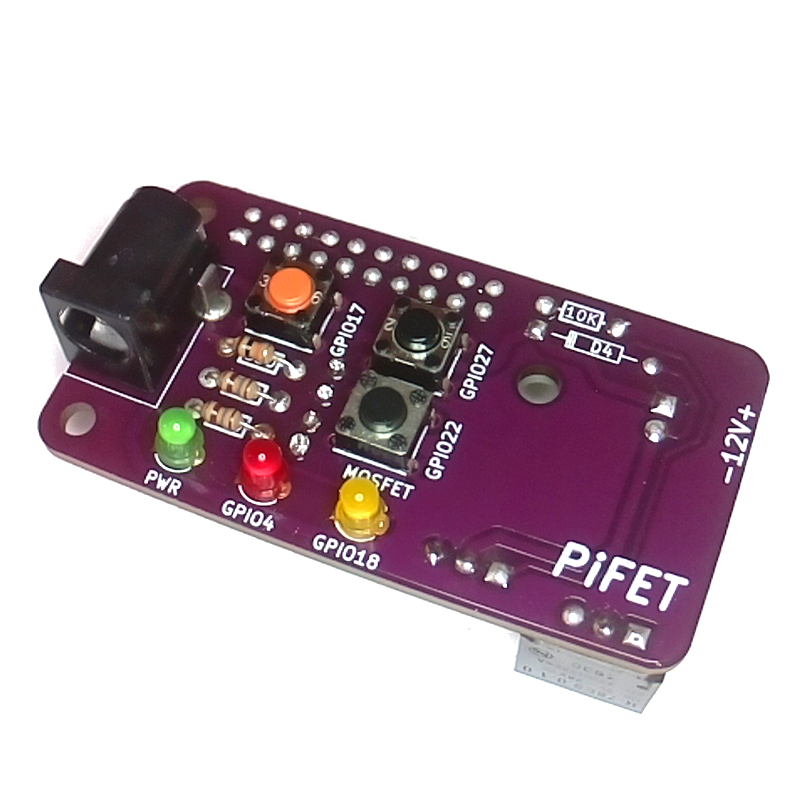
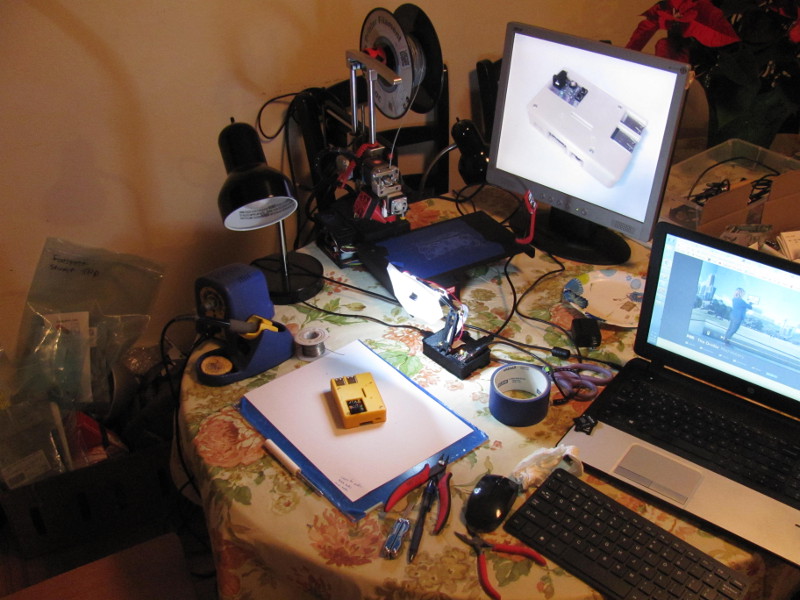
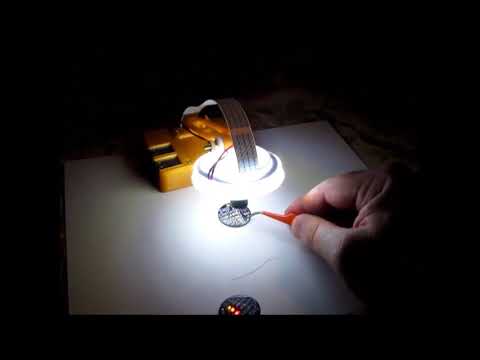
The Raspberry Pi, combined with an adjustable focus camera, can be used to help us better observe the world between microscopic and the un-aided eye. I primarily use this for photographing electronic assembly (including all the pictures in this Instructable), but it can also be used to take videos and create timelapses. The addition of a foot pedal allows for hands-free camera work. Images can be stored on a USB thumb drive, or to the expanded Fat32 formatted section of the Pi's SD card so it can be removed and read on a Windows computer.
This project is quite involved, but has three separate aspects that can be utilized independent of the others:
- PiFet: A circuit board containing circuitry to control the LED light ring and provide user input via push buttons.
- Case: A 3D printed case and camera mount.
- Setup: Configure the Raspberry Pi and Python scripts.
I've found this project to be quite useful, and hope you will find something intriguing enough for you to try it. Let's begin ...
PiFet: Parts and Supplies
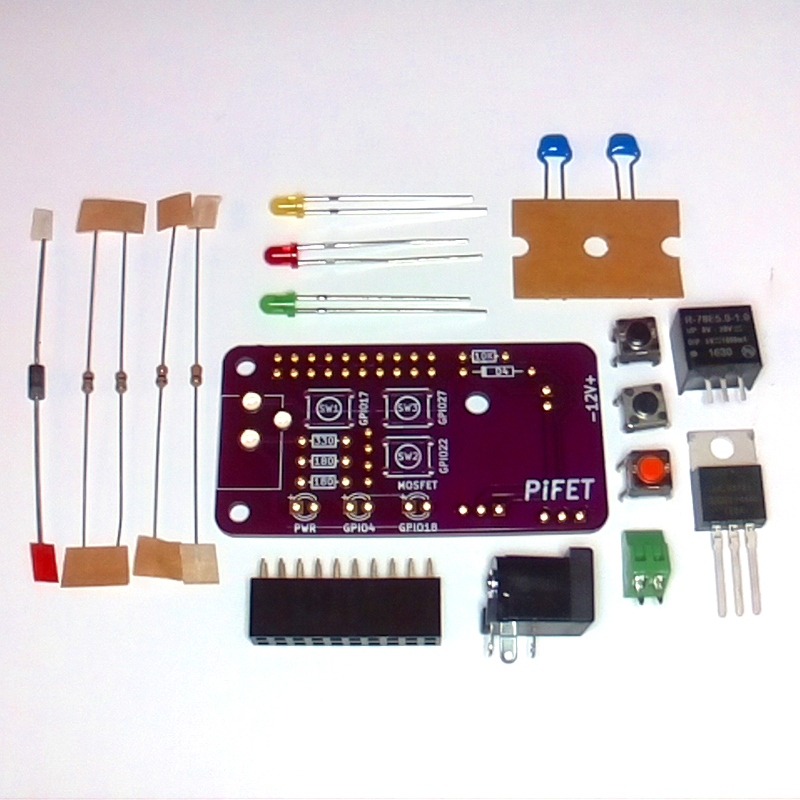
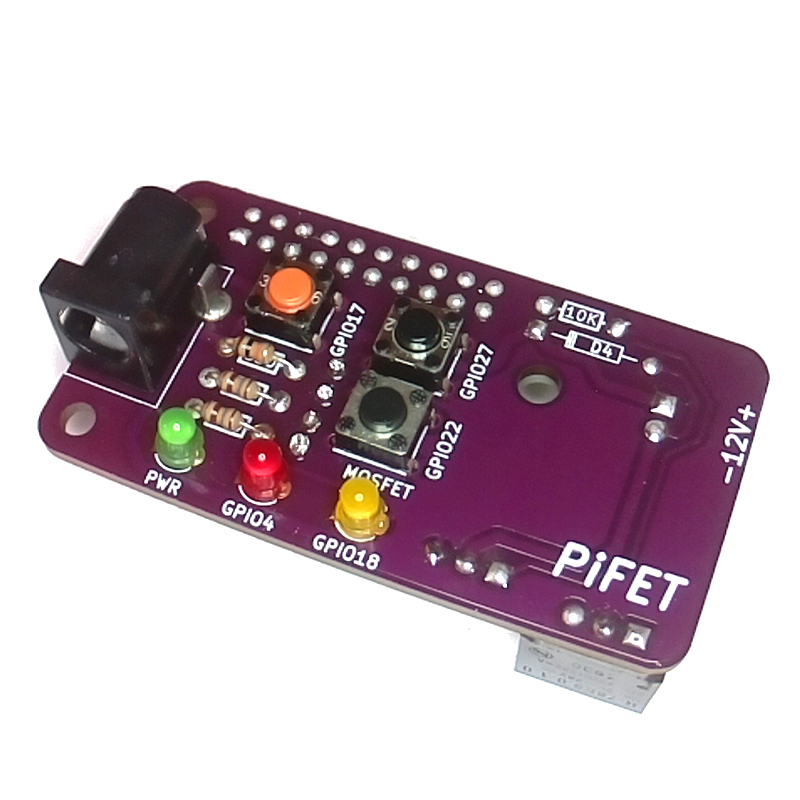
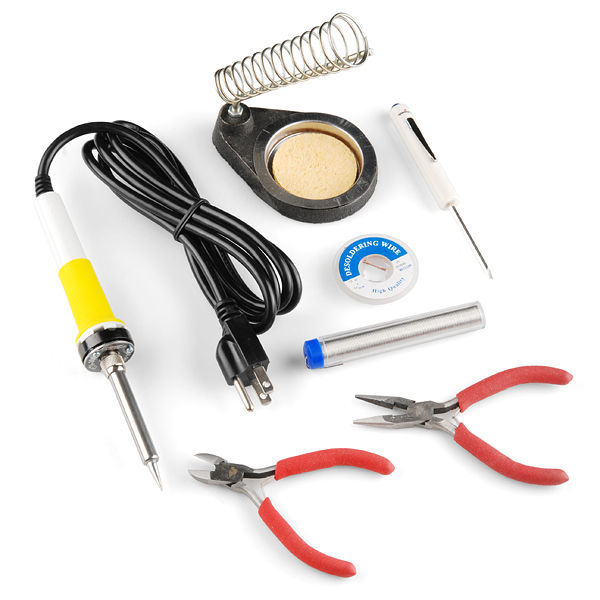
To start with, we are going to use a MOSFET to control a 12 volt LED ring. Since we are going to use 12 volts, we might as well power the Pi with it to eliminate an unneeded USB cable. And, since we are making a PCB, we might as well add buttons and LEDs for user interaction.
You will need the following items for the PiFet:
- 1 ea., PCB OSH Park, https://oshpark.com/shared_projects/1LgXdCnR
- 1 ea., MOSFET, Infineon IRLB8721PBF, https://www.digikey.com/short/qq990t
- 1 ea., CAP CER 10UF 25V X7R RADIAL, TDK FG16X7R1E106KRT06, https://www.digikey.com/short/qq990t
- 1 ea., Power Jack 2.1x5.5mm, MPD EJ508A, https://www.digikey.com/short/qq990t
- 1 ea., RES 330 OHM 1/8W 5% CF AXIAL, Stackpole CF18JT330R, https://www.digikey.com/short/qq990t
- 1 ea., RES 180 OHM 1/8W 5% CF AXIAL, Stackpole CF18JT180R, https://www.digikey.com/short/qq990t
- 1 ea., 10K resistor 1/8W, Stackpole CF18JT10K0, https://www.digikey.com/short/qq990t
- 2 ea., 6 mm tactile button black, Omron 3F-1020, https://www.digikey.com/short/qq990t
- 1 ea., 6 mm tactile button red, Omron B3F-1005, https://www.digikey.com/short/qq990t
- 1 ea., 20 Position Header Connector, Female Sullins PPPC102LFBN-RC, https://www.digikey.com/short/qq990t
- 1 ea., LED YELLOW DIFF 3MM ROUND T/H, Wurth 151031YS06000, https://www.digikey.com/short/qq990t
- 1 ea., LED RED DIFF 3MM ROUND T/H, Wurth 151031SS04000, https://www.digikey.com/short/qq990t
- 1 ea., LED GRN DIFF 3MM ROUND T/H, Wurth 151031VS06000, https://www.digikey.com/short/qq990t
- 1 ea., Kick-back diode 1N4001, Comchip 1N4001-G, https://www.digikey.com/short/qq990t
- 1 ea., CONN TERM BLOCK 2.54MM 2POS PCB, On Shore OSTVN02A150, https://www.digikey.com/short/qq990t
- 1 ea., DC/DC CONVERTER 5V 5W, Recom R-78E5.0-1.0, https://www.digikey.com/short/qq990t
The following items needed for setting up the Pi can also be purchased from Digikey:
- 1 ea., Raspberry Pi 3, https://www.digikey.com/short/qq9bfz
- 1 ea., IR Camera adjustable focus, Seed 114990837, https://www.digikey.com/short/q373nz
- 1 ea., 8 Gb SD Class 10, Apacer AP8GMCSH10U1-B, https://www.digikey.com/short/q37320
- 1 ea., AC/DC WALL MOUNT ADAPTER 12V 12W 1A, XP Power VEL12US120-US-JA, https://www.digikey.com/short/q37320
- 1 ea., 300mm camera ribbon cable, https://www.digikey.com/short/qq28nv
Tools and Supplies:
For my workshops, I use SparkFun's Beginner's ToolKit which has everything you need:
- Soldering iron.
- Solder
- WireFlush-cut plyers (I love the $5 Hakko CHP170!)
- Desoldering braid
A kit for this project is available on Tindie.com. Purchasing the kit will save you the time and expense of ordering from several different vendors and avoid the minimum PCB order premium. You will also be helping me develop and share other projects in my workshops!
PiFet: Resistors
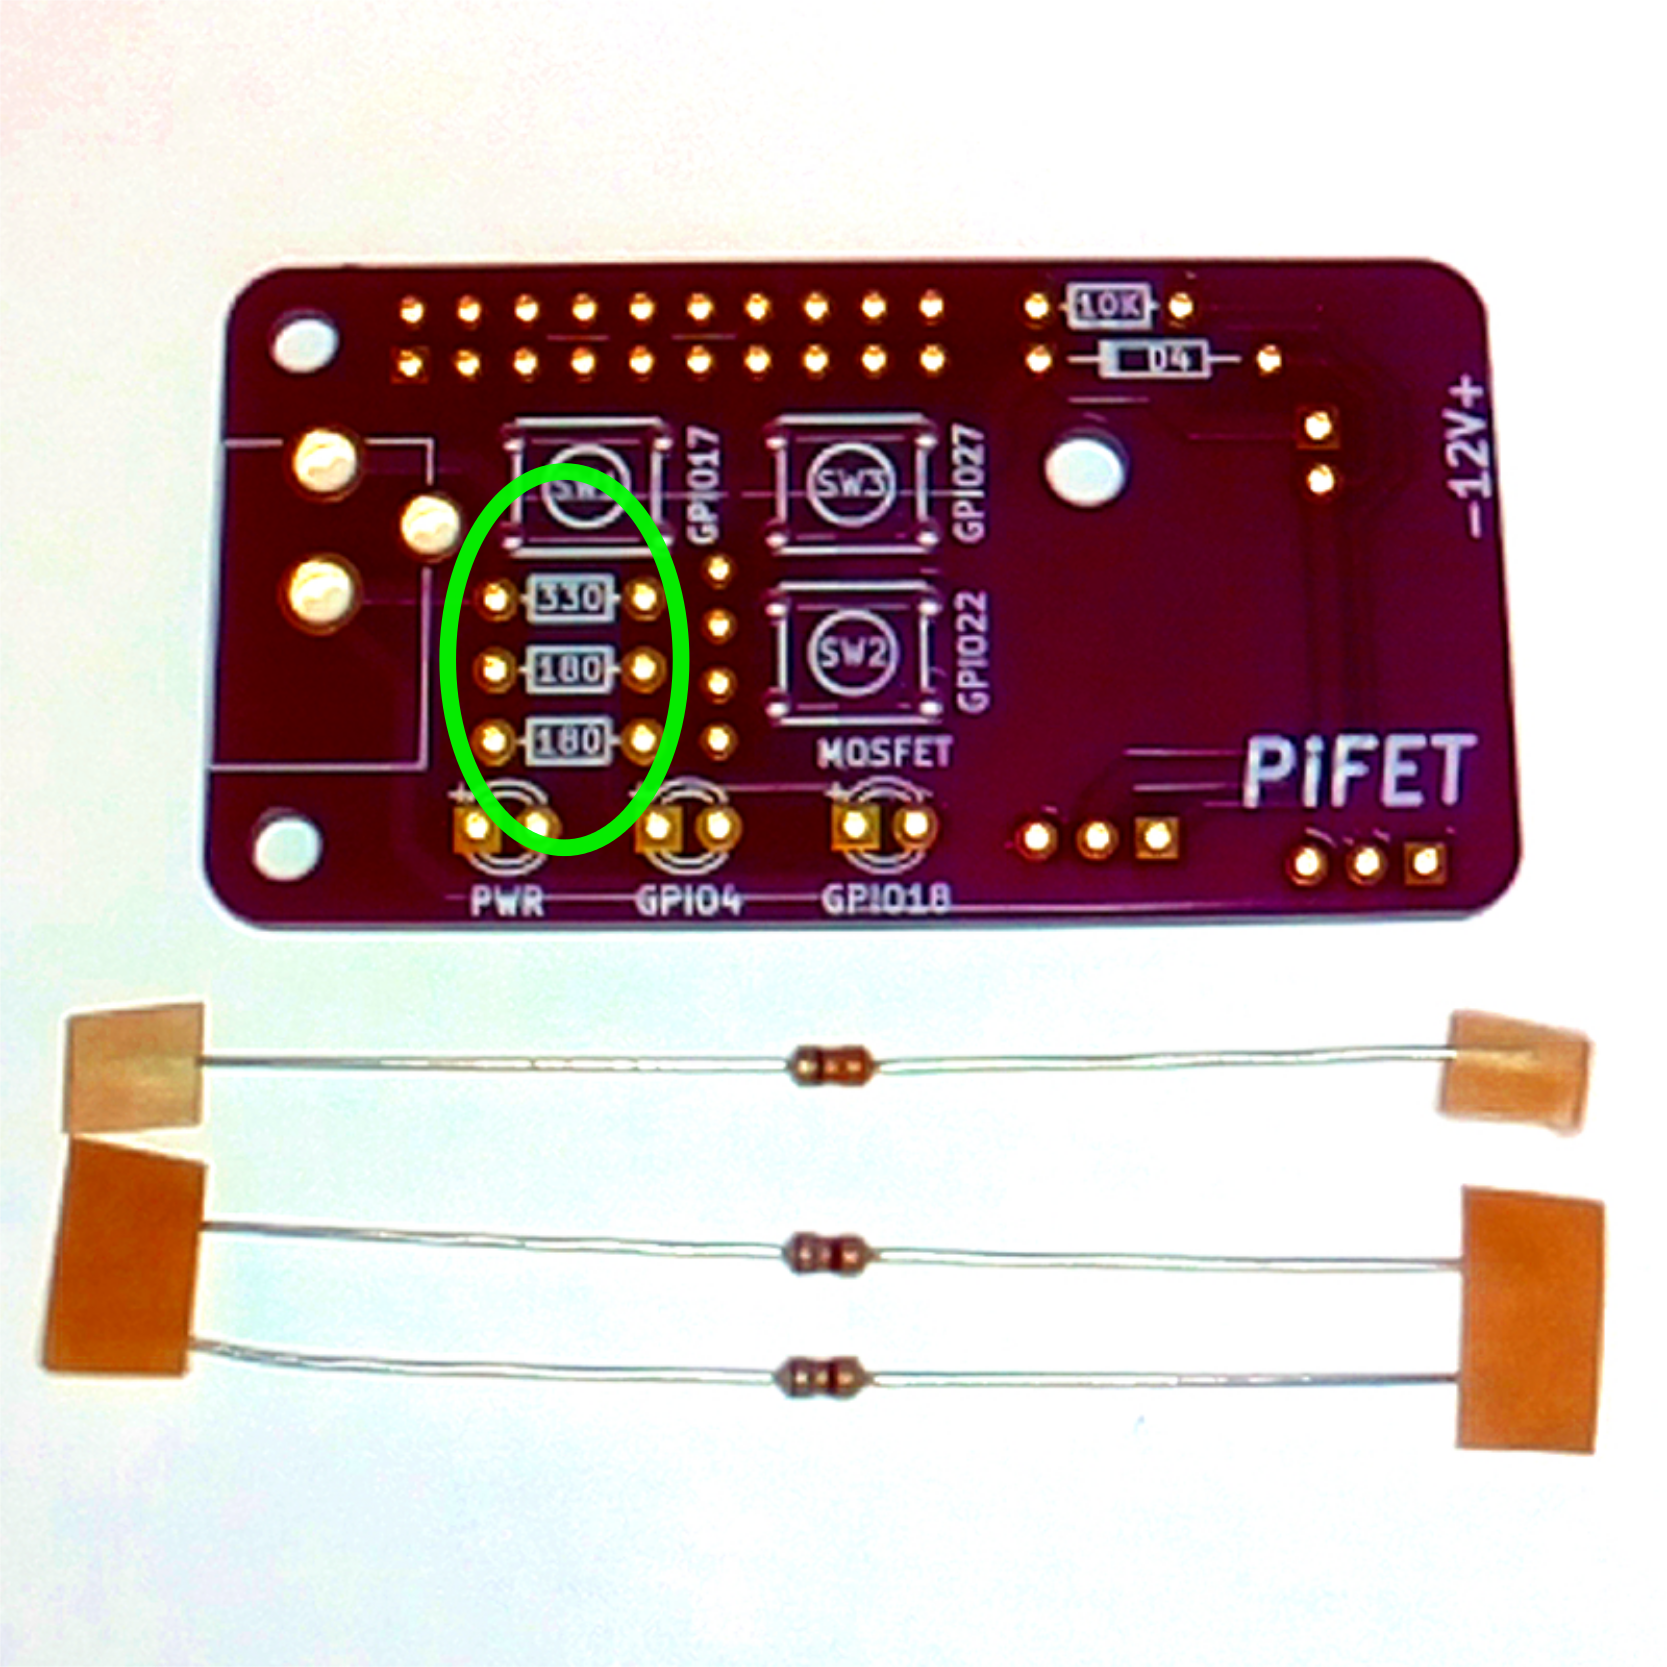
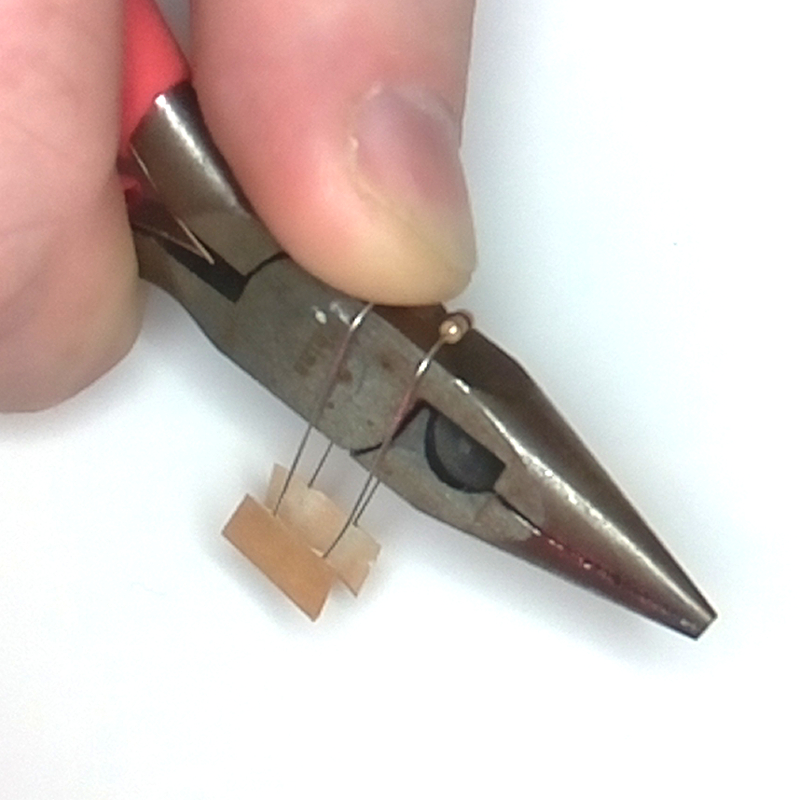
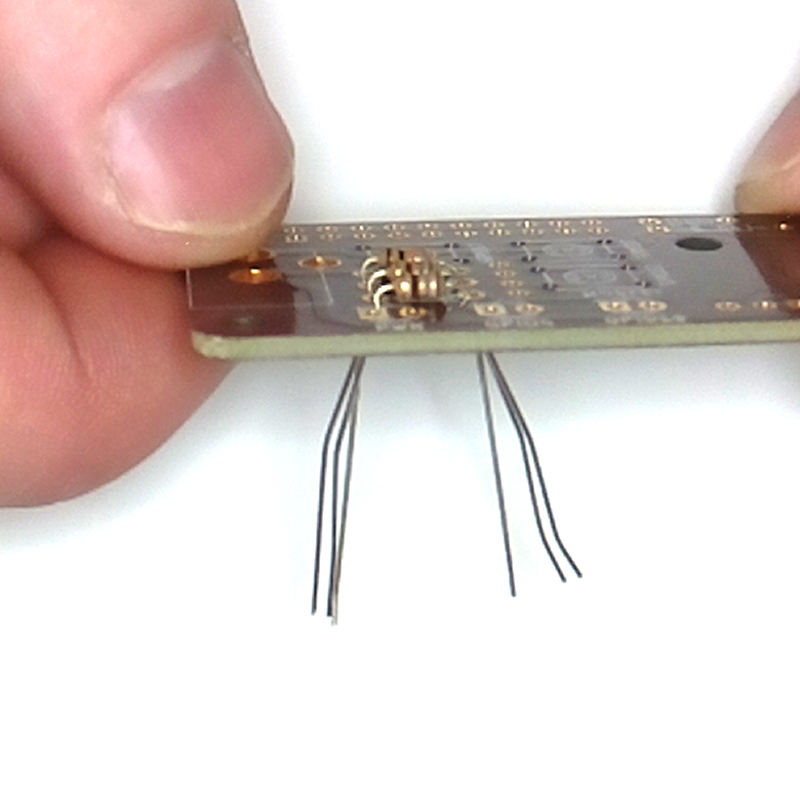
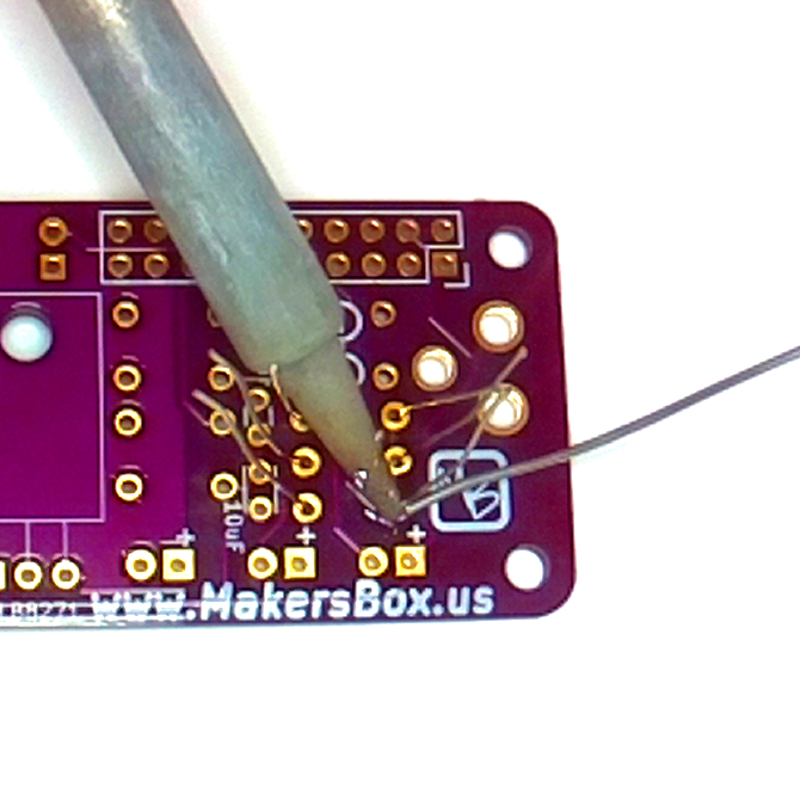
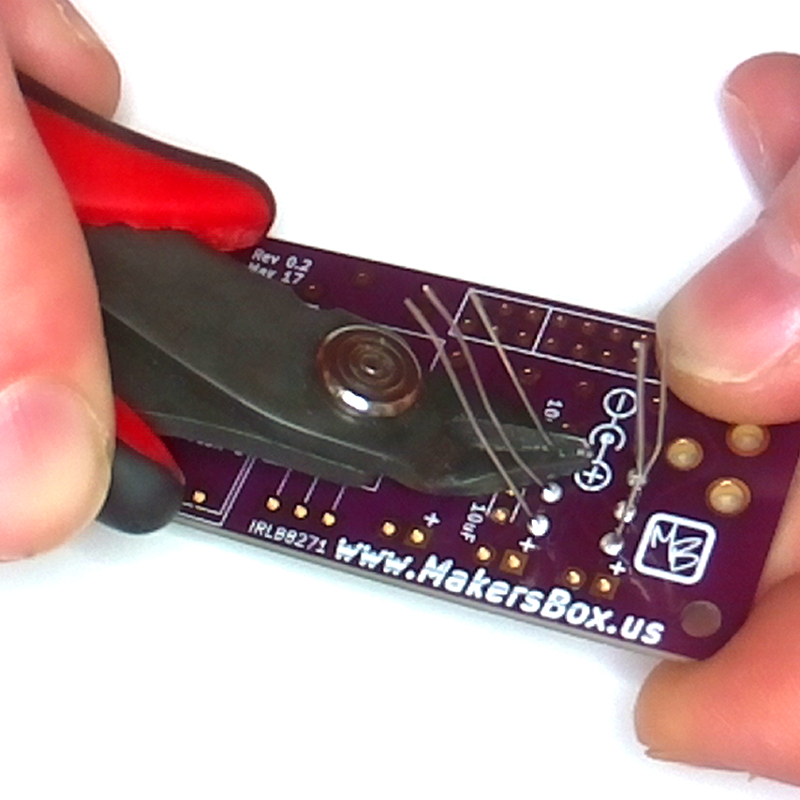
We are going to assume you have some kit-building experience. If you need some help soldering, head over to www.sparkfun.com/tutorials/213 to brush up or watch the Geek Girl explain it at https://youtu.be/P5L4Gl6Q4Xo. I also have a kit appropriate for beginners at https://www.tindie.com/products/3447/.
I like starting with the resistors because a) they are relatively heat resistant while you are getting into your soldering groove and the iron is coming up to temp, b) they have no polarity, so orientation is not critical, and c) they are the lowest component on the board so sit tight when soldering.
- Bend the leads to the width of the pads
- Insert the resistor.
- Flip the board over and solder the leads.
- Trim the leads with flush cuts.
- Hit them again with the iron if you want them to impress your geek friends.
PiFet: Diode
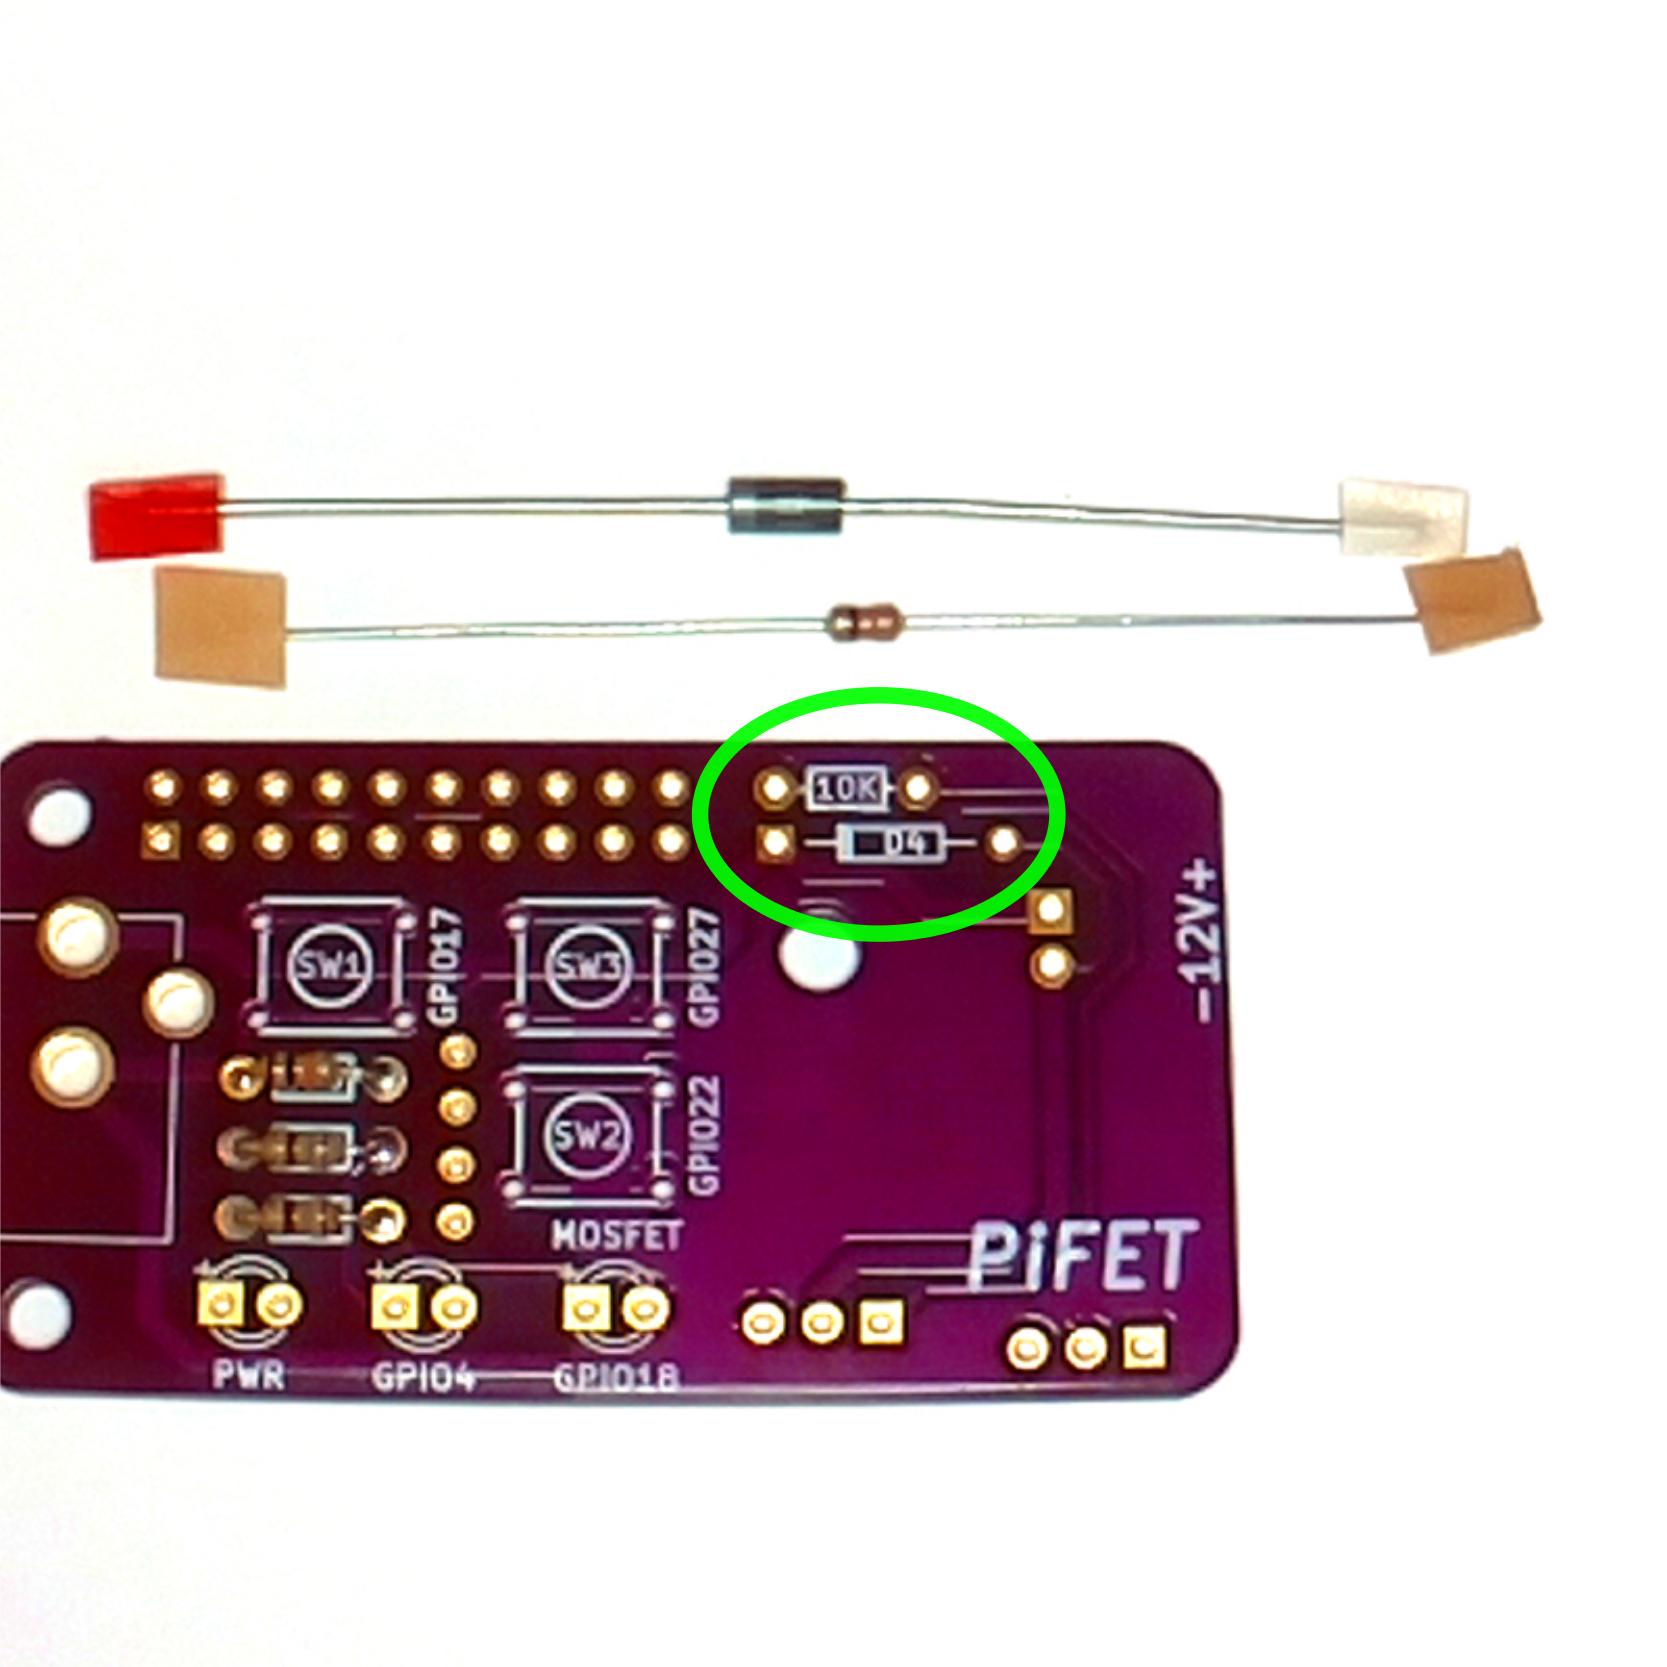
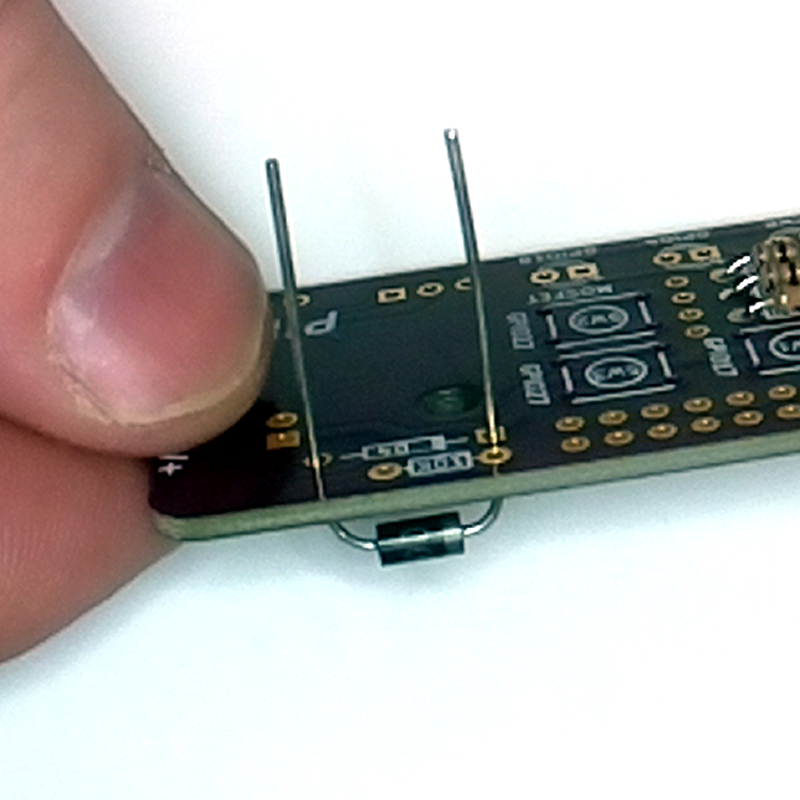
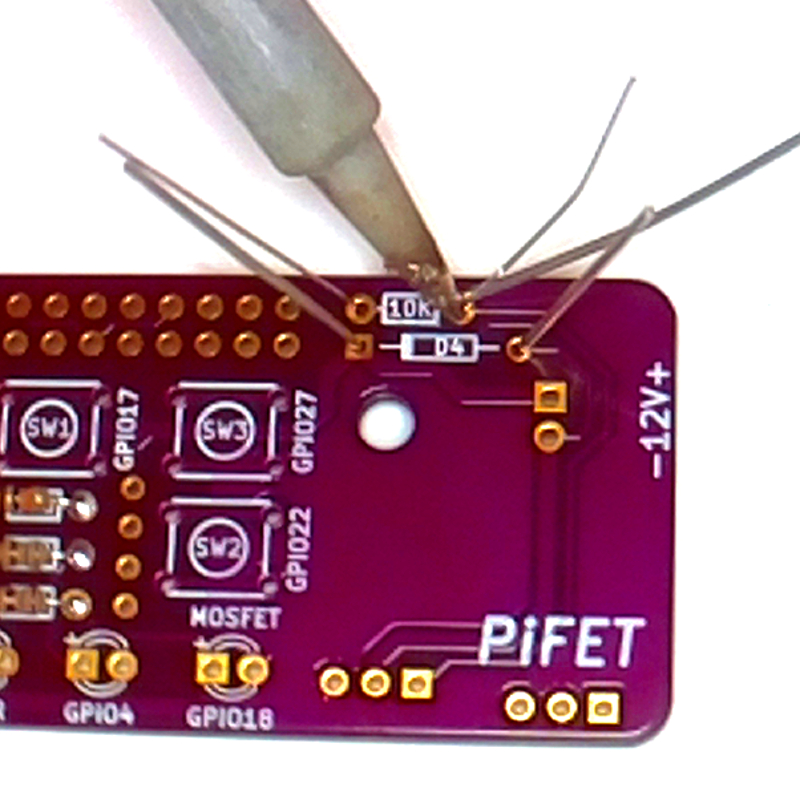
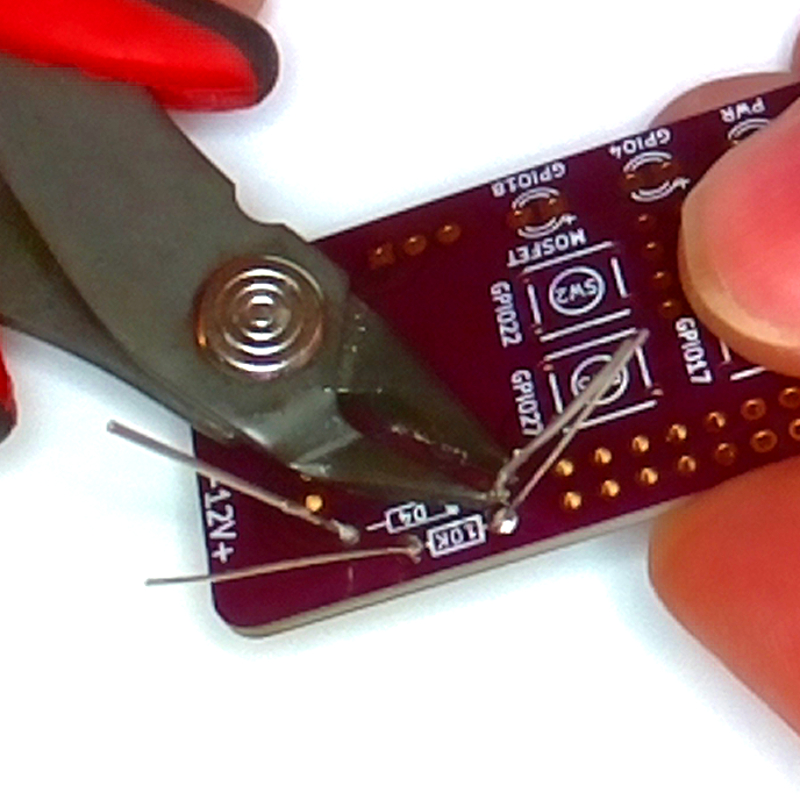
We have one diode to install, which does have a polarity, so must be installed in the correct orientation. The position on the board is marked "D4" and has a wight stripe on one end which must match the strip on the component.
Note: If you intend to put the project in a case, the diode and 10K resistor must be installed on the opposite side of the board.
- Bend the leads to the width of the pads
- Insert the diode.
- Flip the board over and solder the leads.
- Trim the leads with flush cuts.
Repeat this steps for the final remaining 10K resistor (or do them at the same time).
PiFet: Capacitors
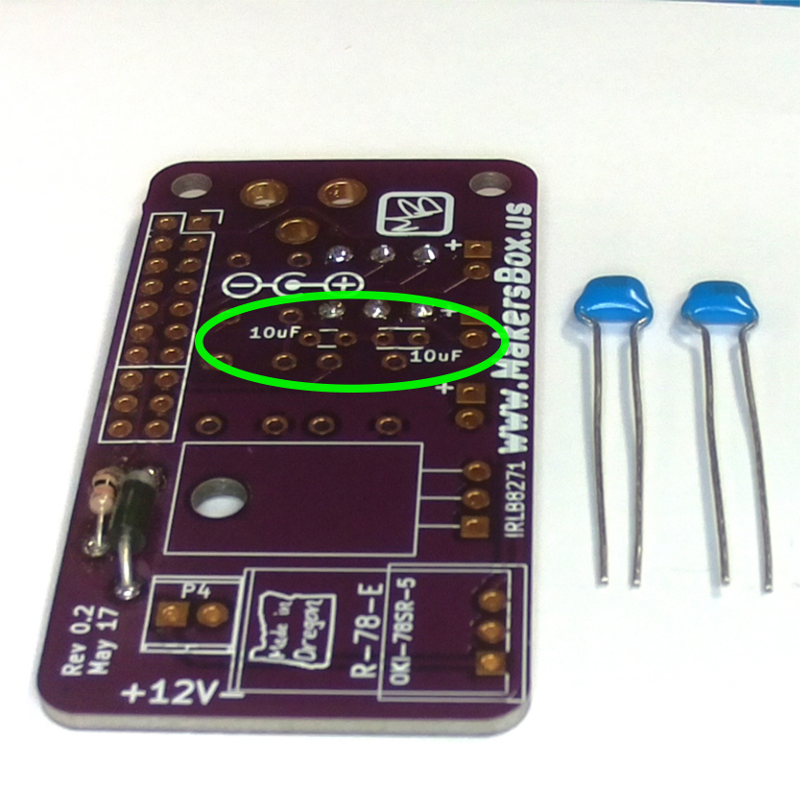
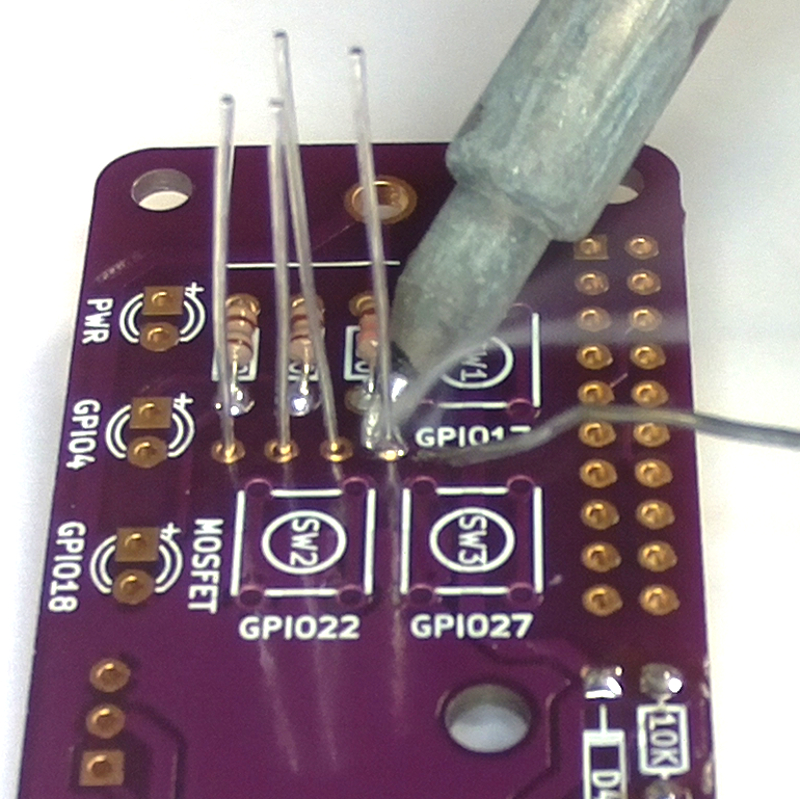
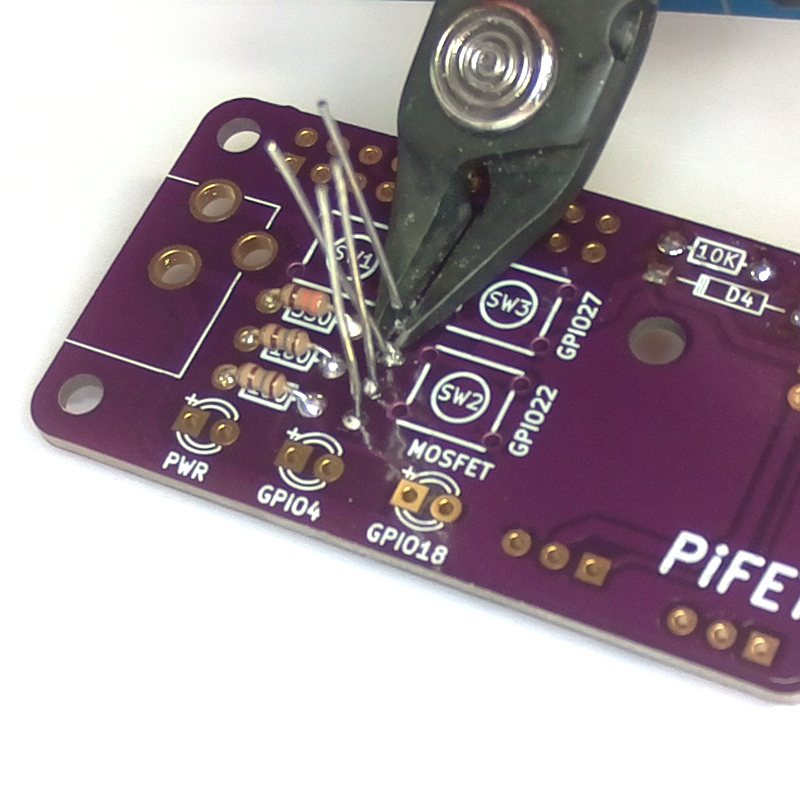
Some capacitors have polarity, but these do not. These are also installed on the bottom side of the board.
- Insert the capacitors so the leads come up next to the push button silk screen on the top of the board.
- Solder the leads in place.
- Cut the leads flush with the board.
PiFet: LEDs
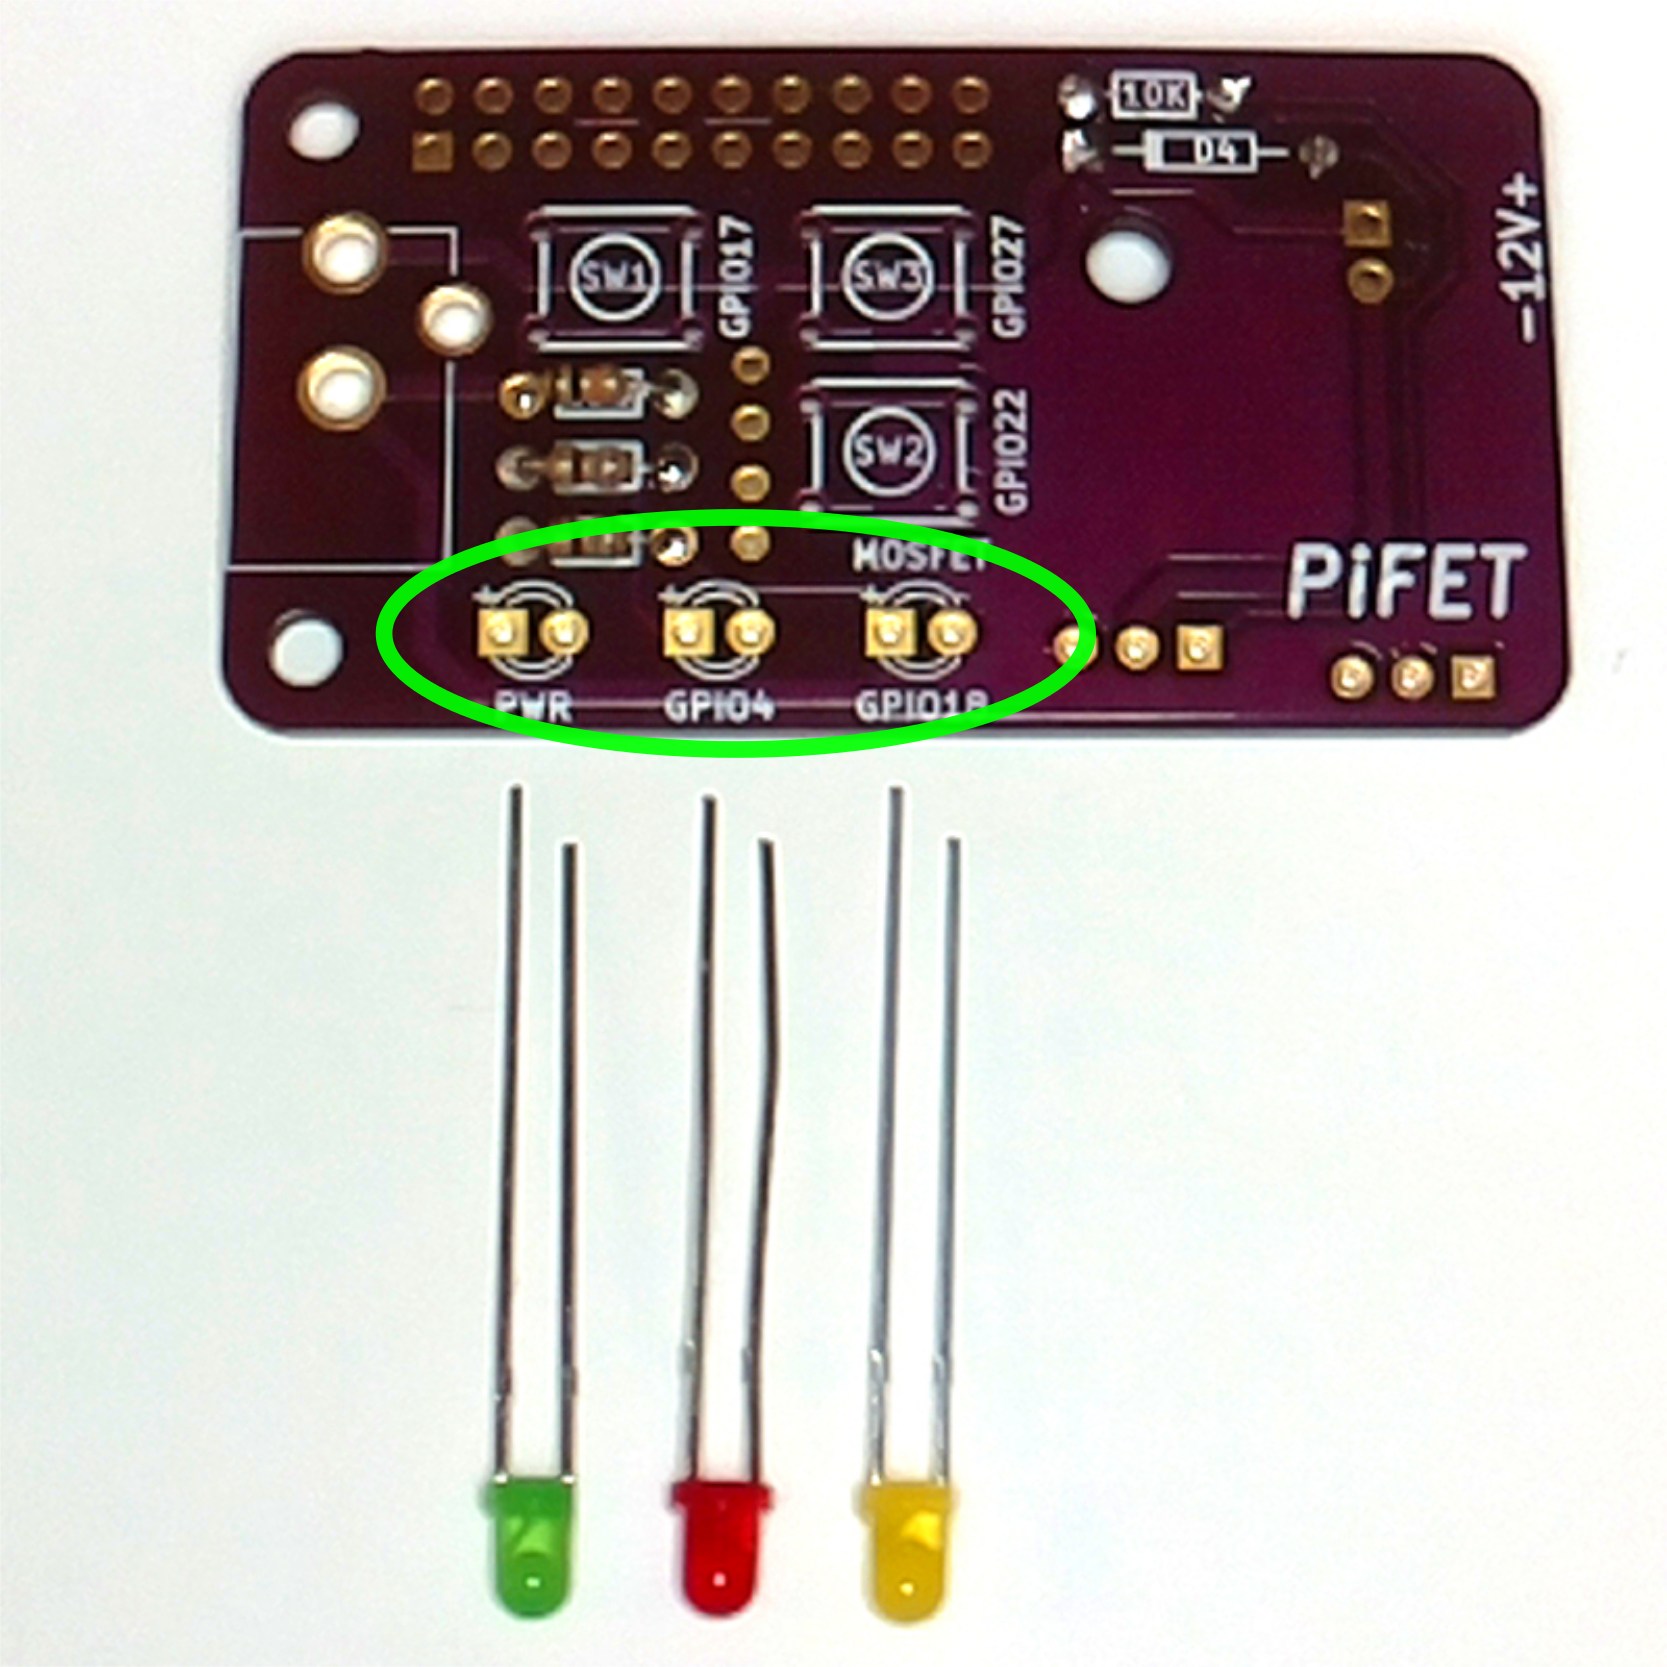
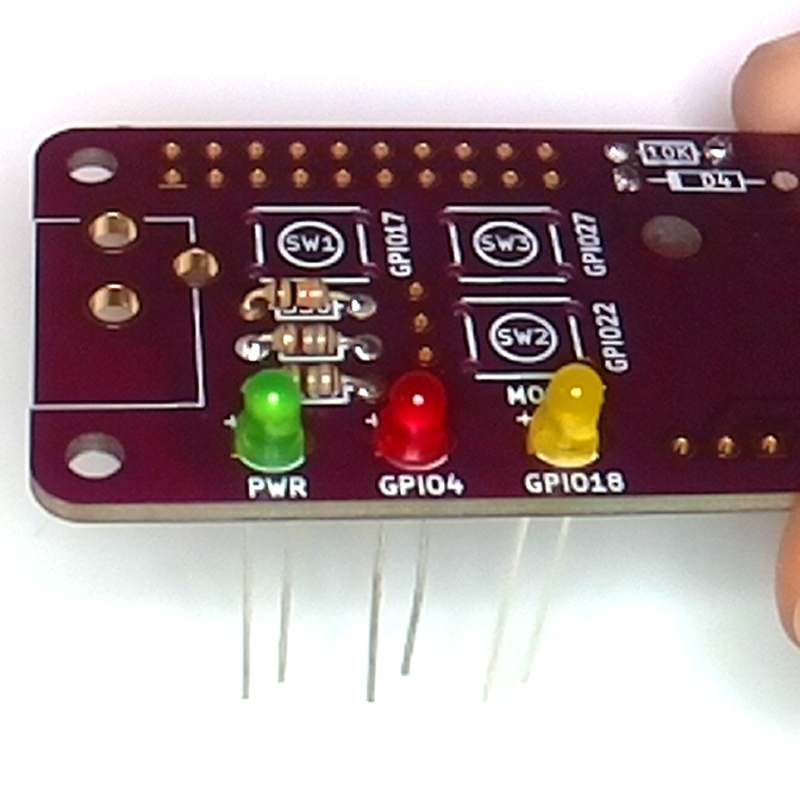
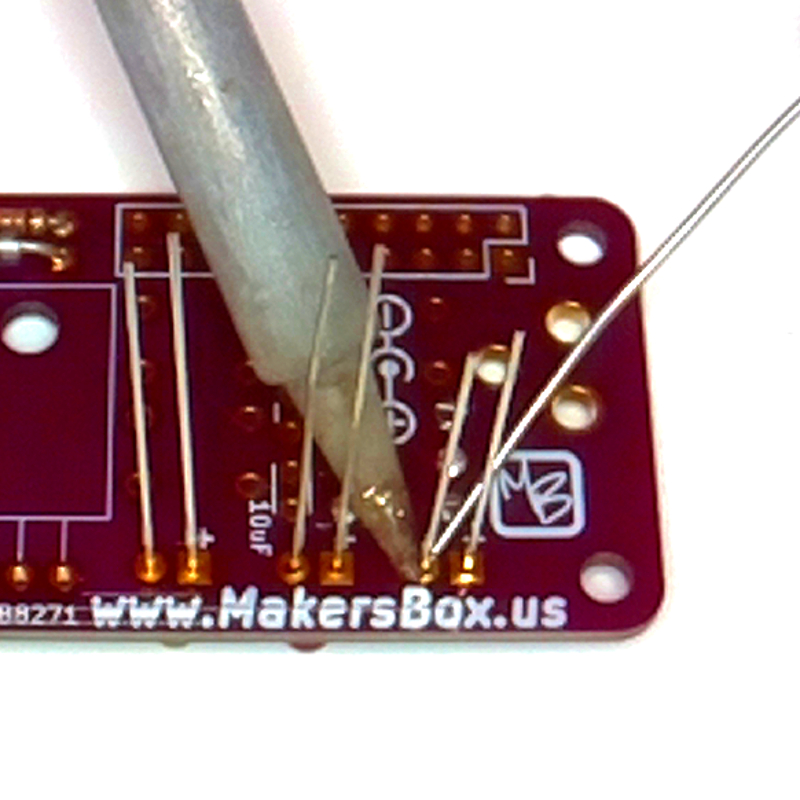
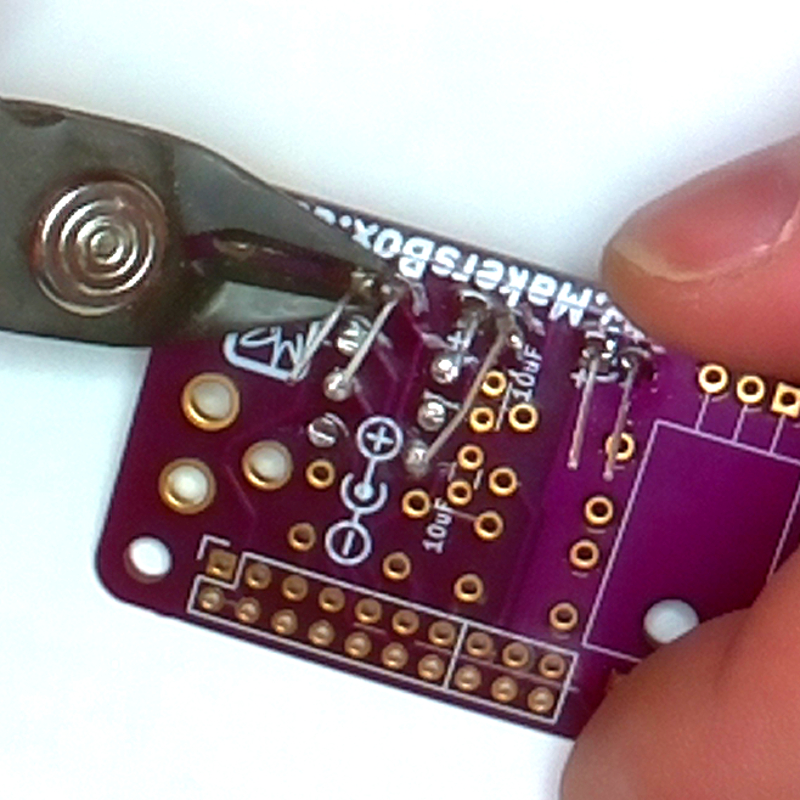
LEDs have polarity, and are the most heat-sensitive component on the board. The color order is arbitrary and your choice.
- Insert the LED with the long lead (positive) in the square pad marked "+".
- Solder one lead in place.
- Verify the LED is seated correctly and reheat if necessary.
- Solder the remaining lead in place.
- Trim the leads flush with the circuit board.
PiFet: Buttons
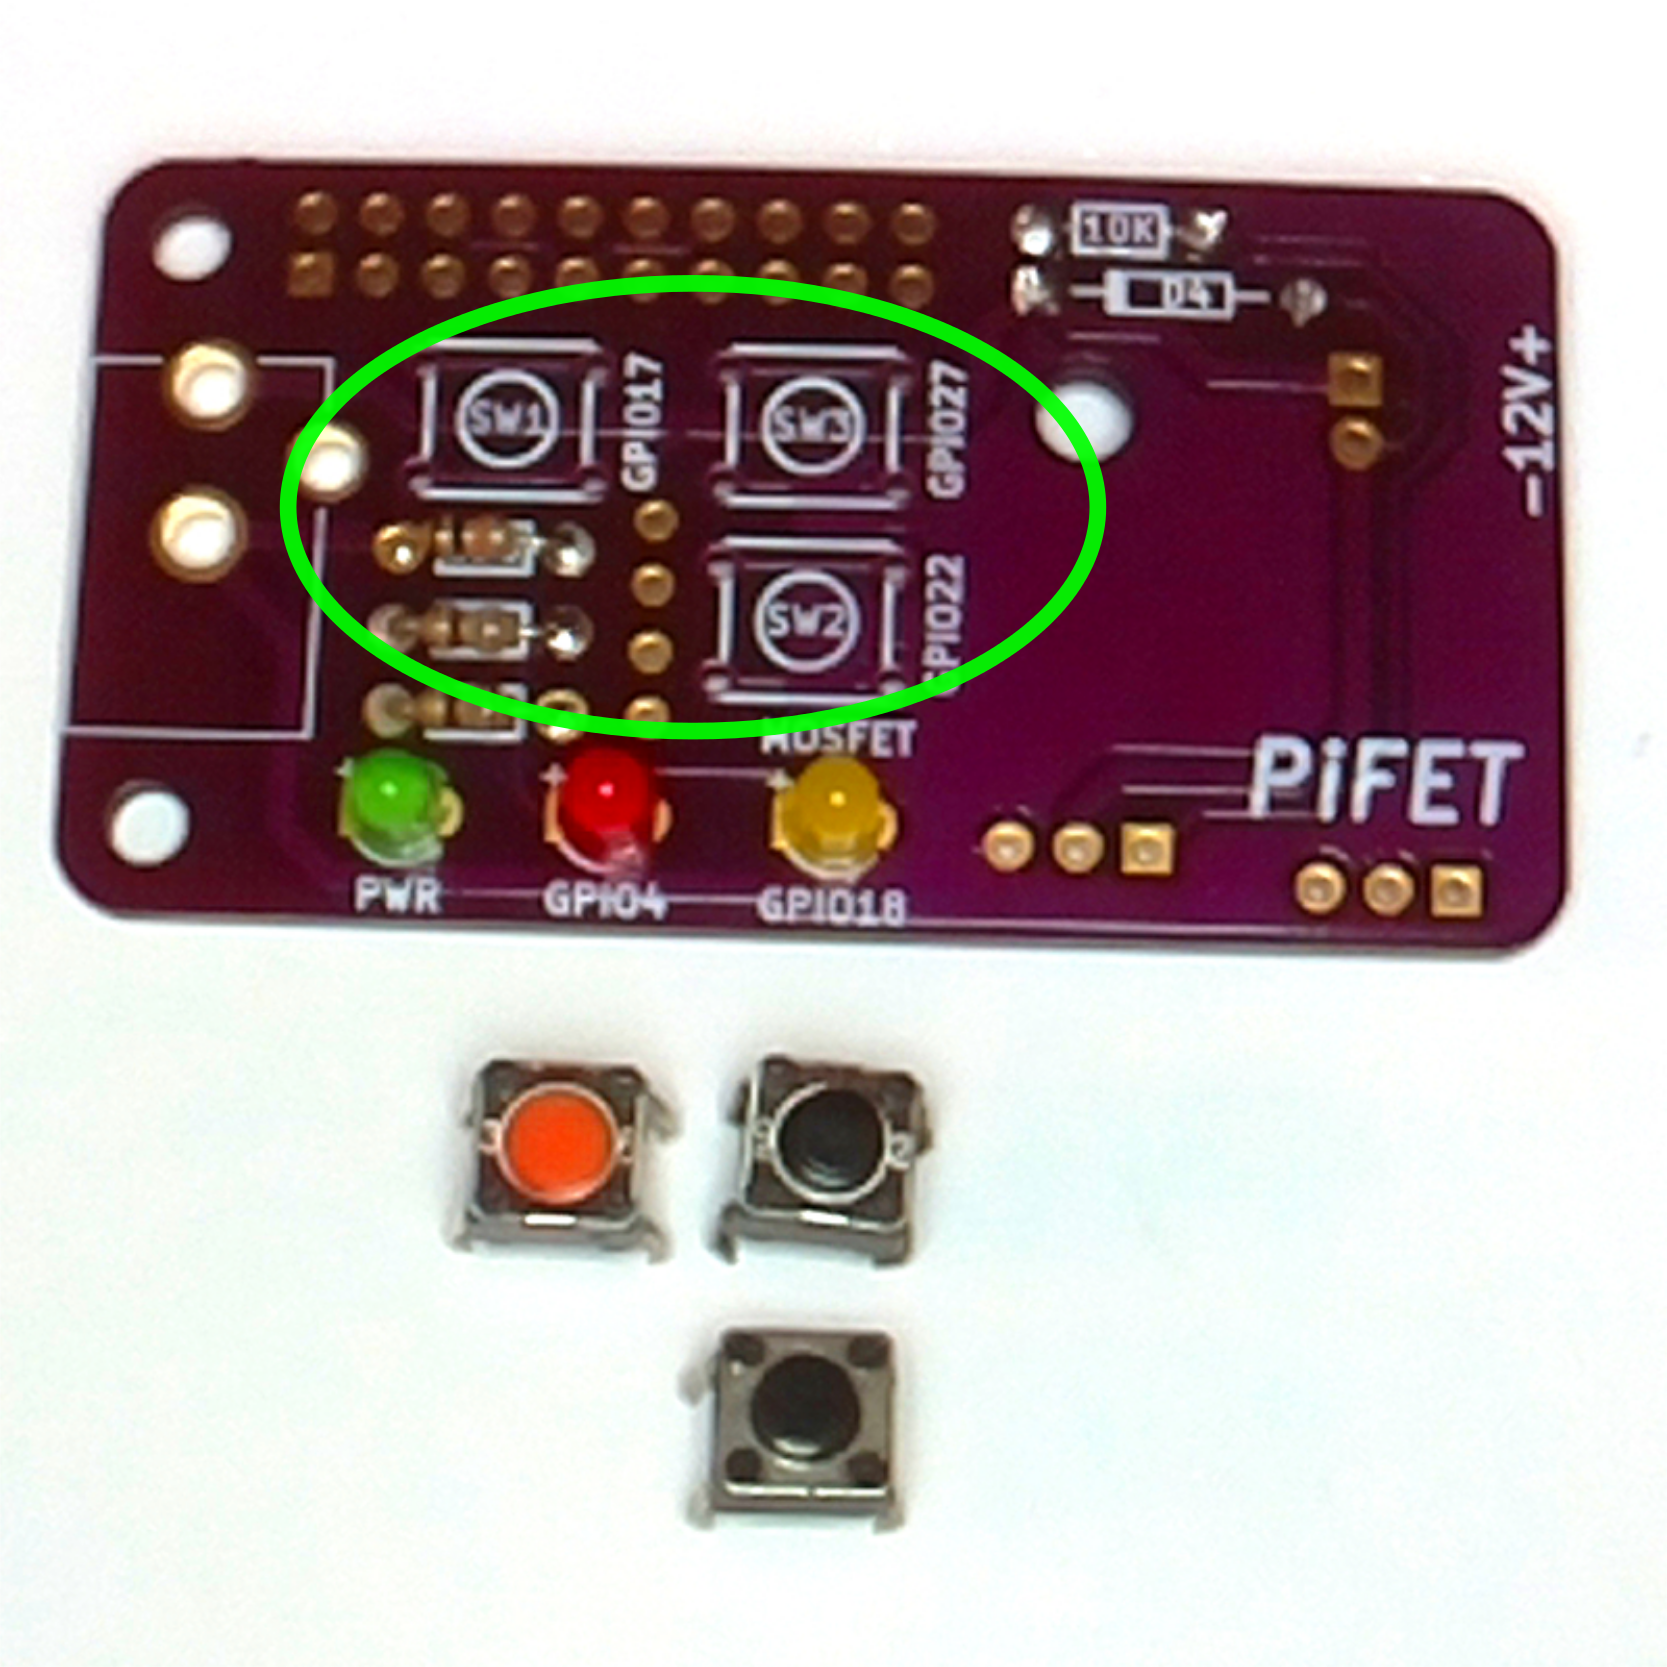
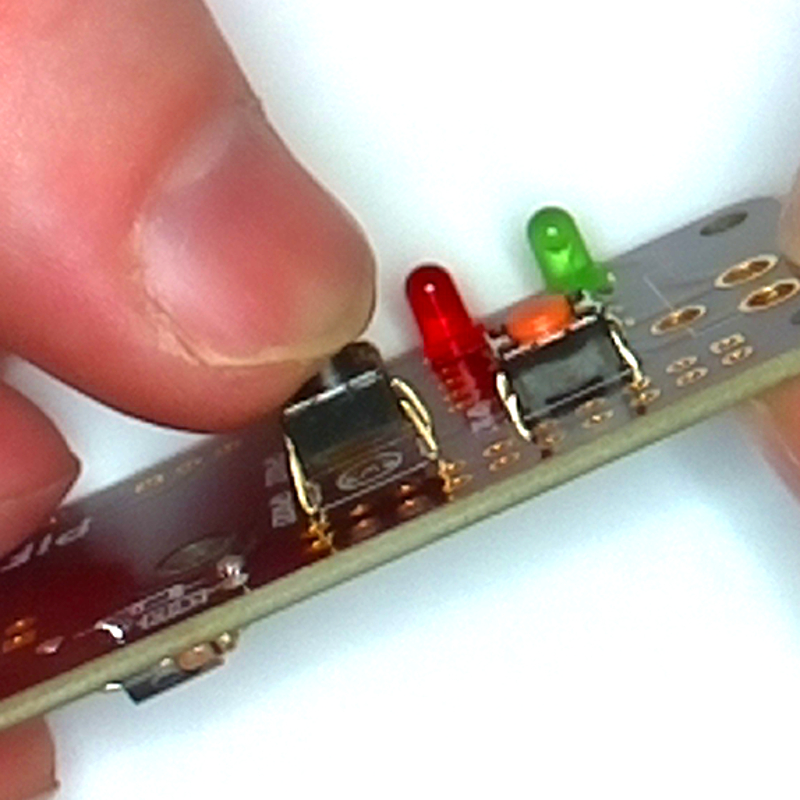
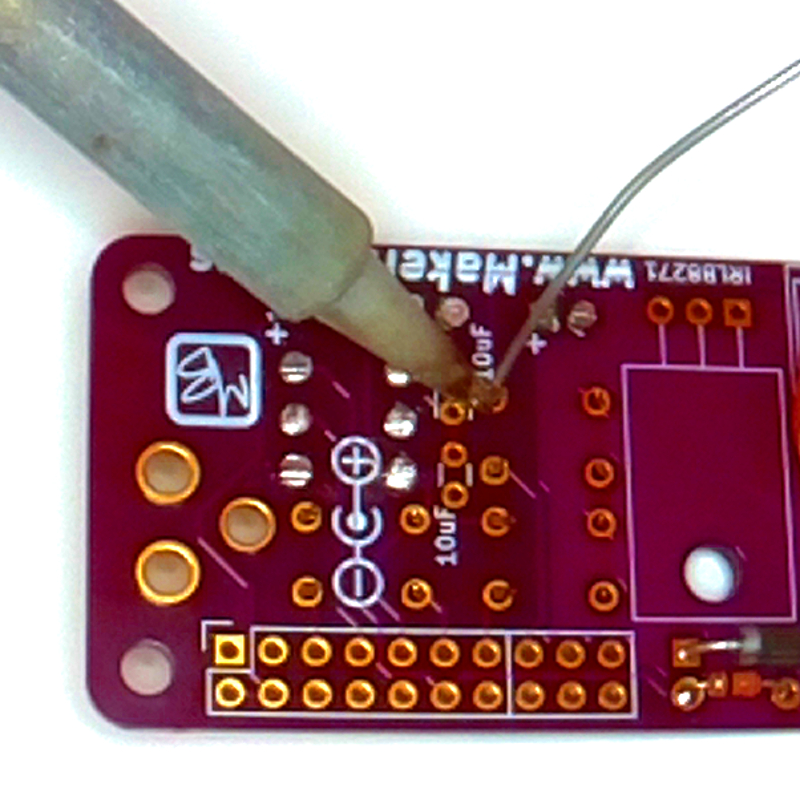
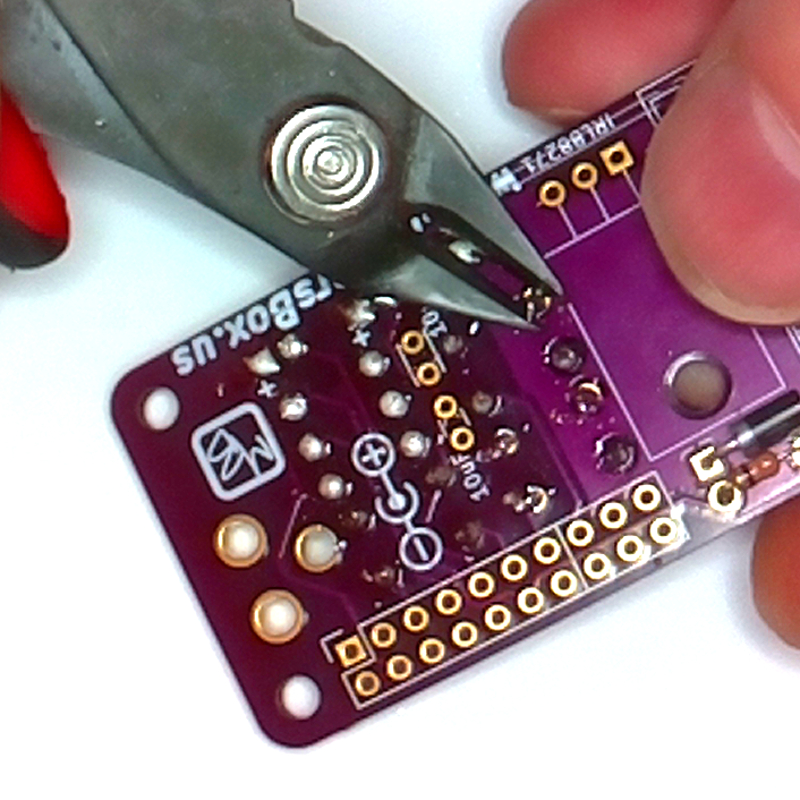
The buttons can be used for anything and are marked with the GPIO pins they are connected for. I use SW1 to turn the light on and off and shutdown or restart the Pi. I use the other two to zoom in and out.
- Insert the red button in SW1 position.
- Insert black buttons in SW2 & 3 positions.
- Flip the circuit board over and solder the leads.
- Clip the leads flush.
PiFet: MOSFET
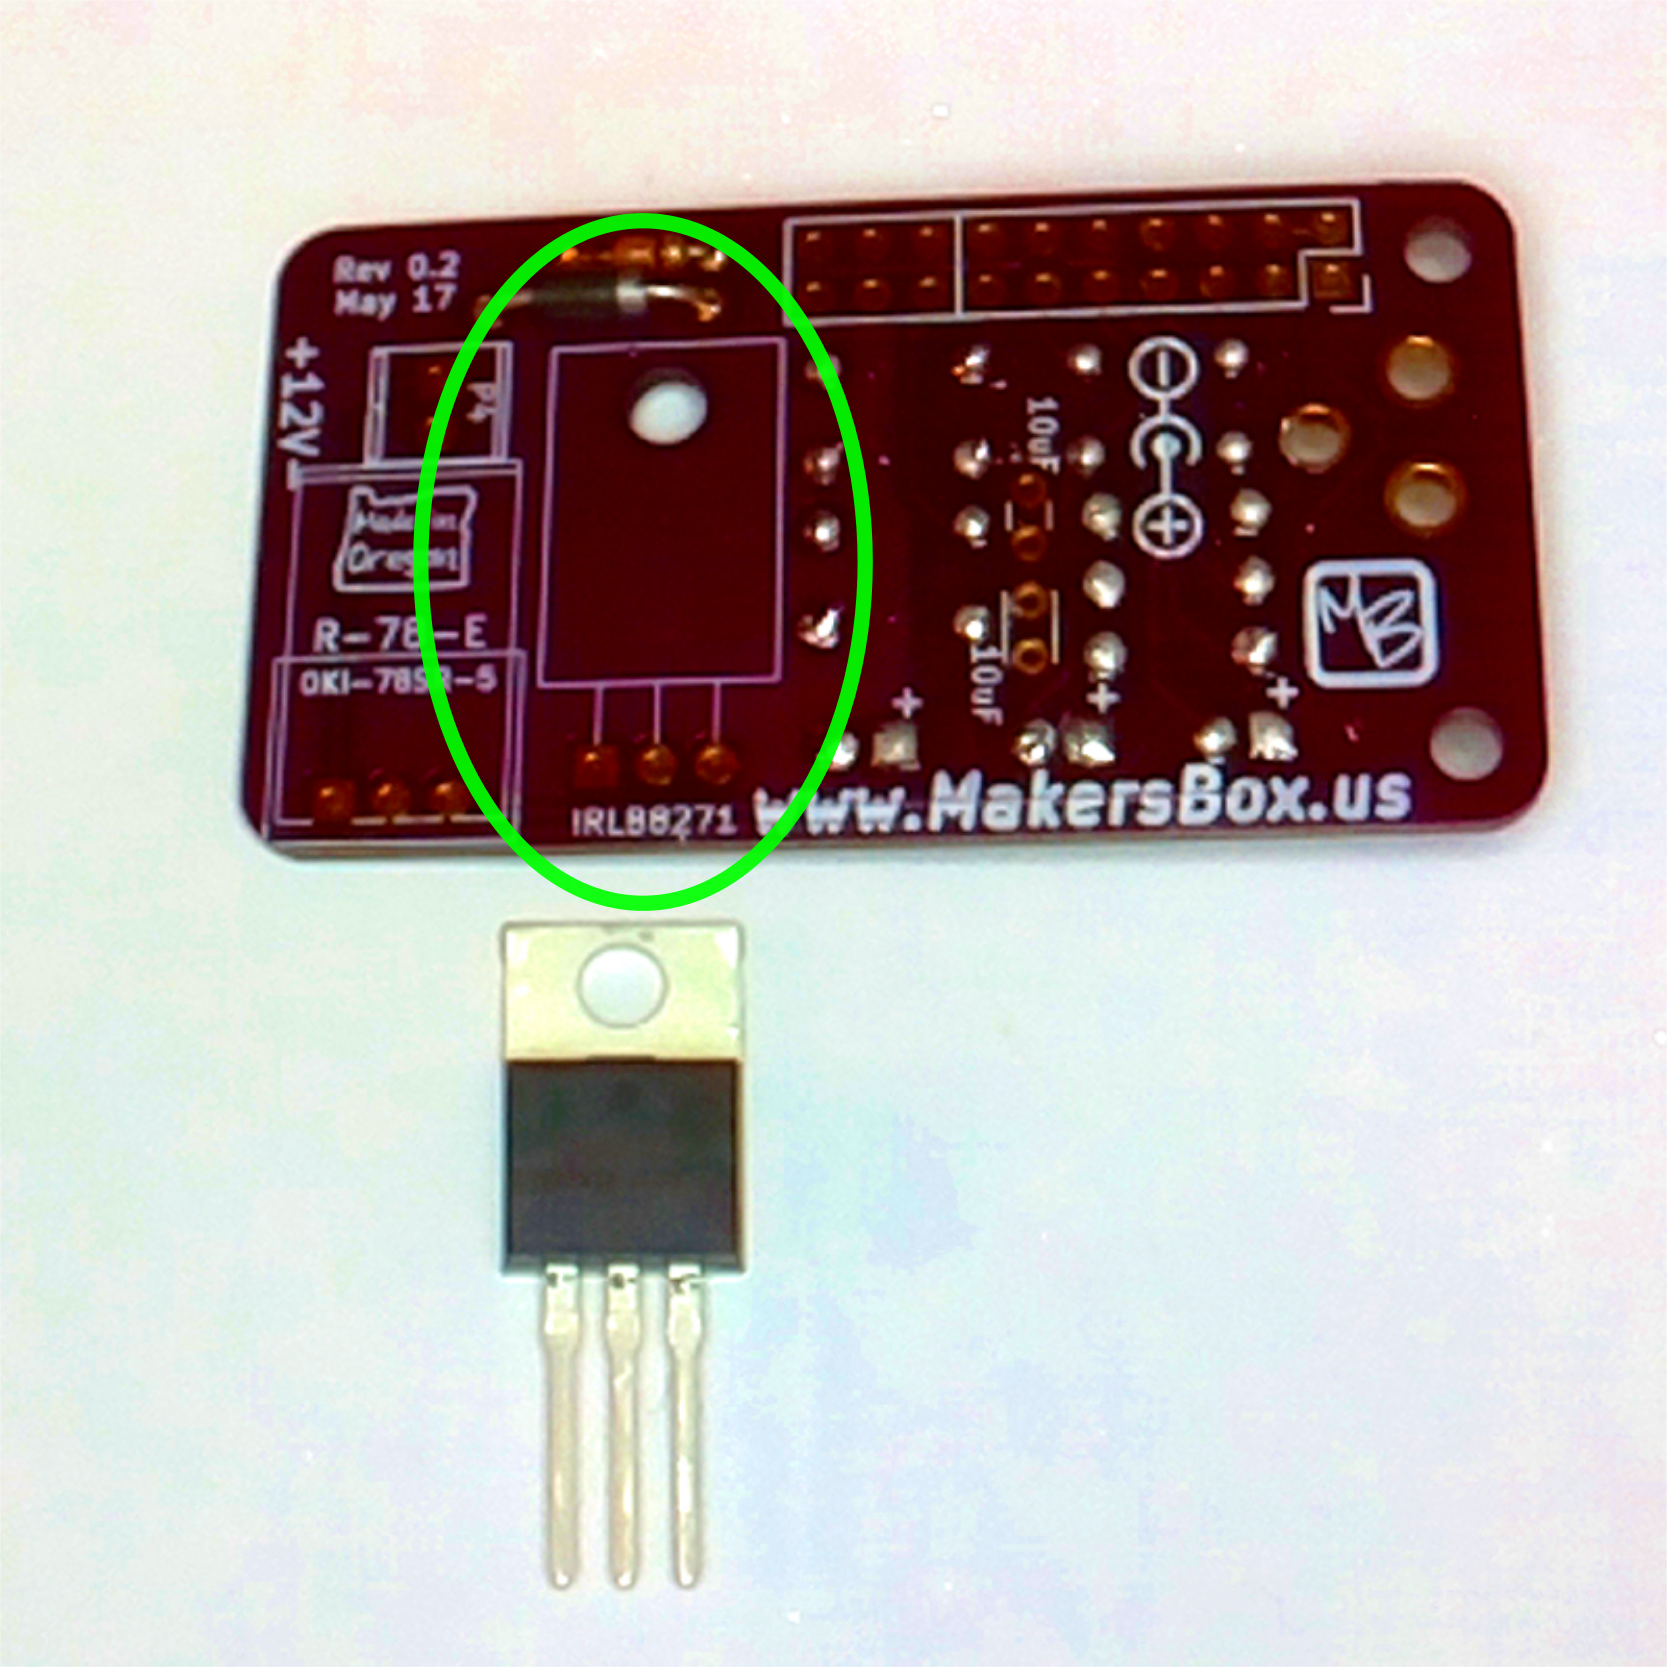
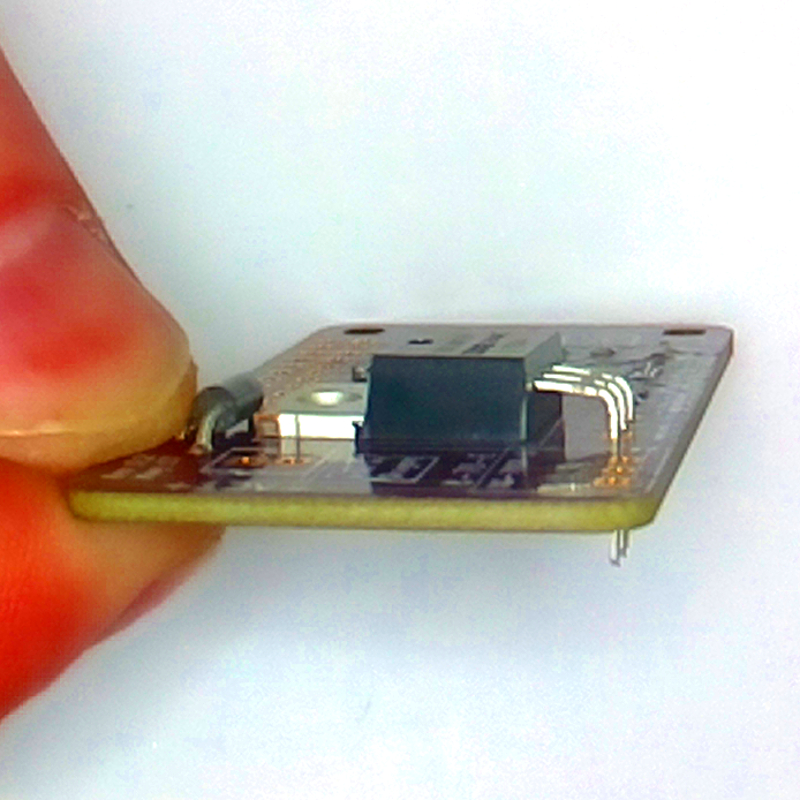
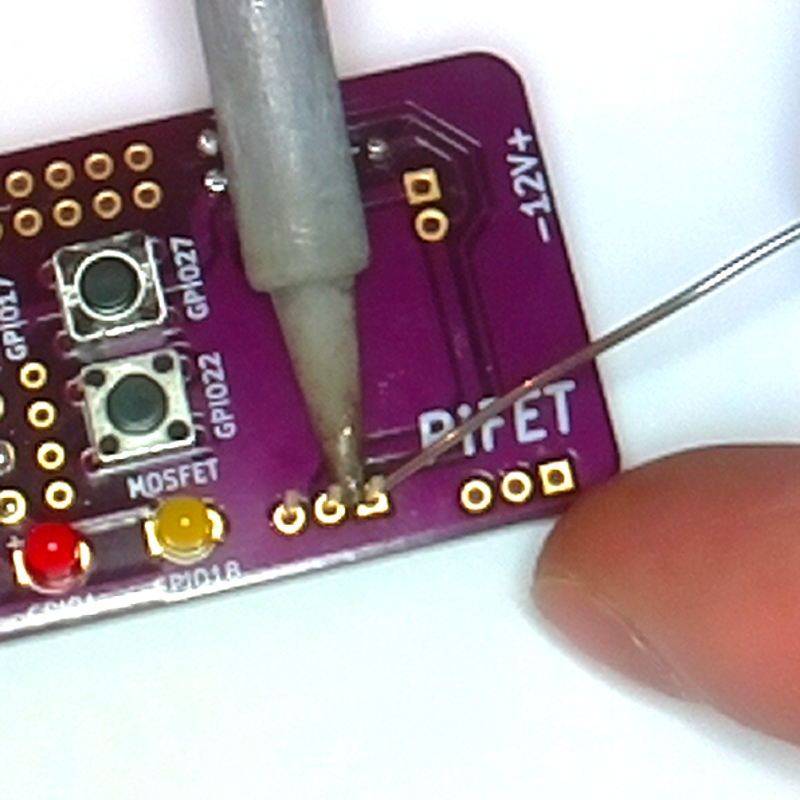
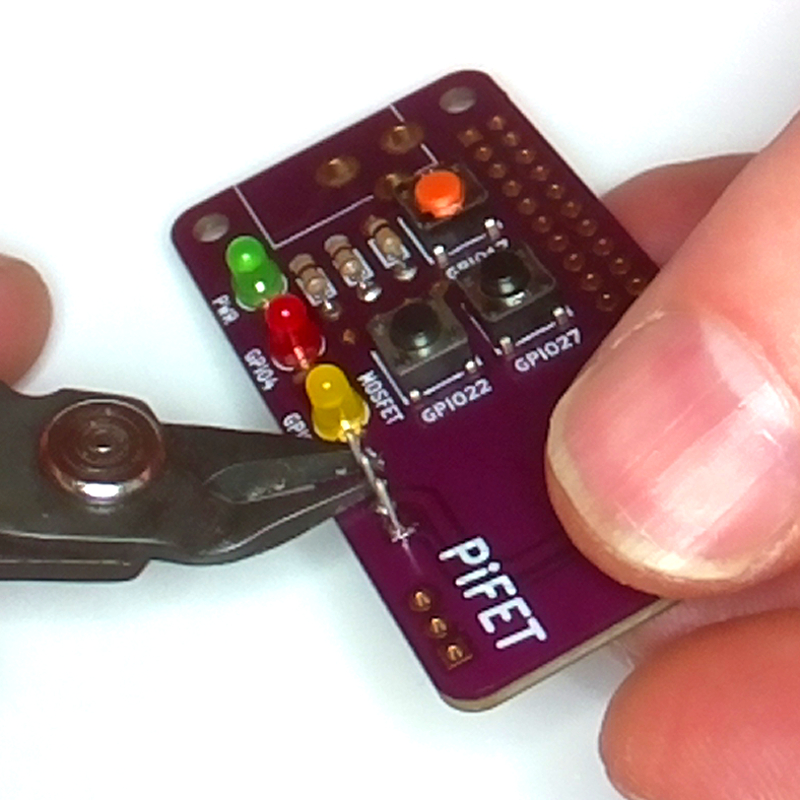
- Place the MOSFET leads in the pads and bend the leads so hole in the heat sink matches up the hole in the PCB.
- Solder the leads in place.
- Trim the leads flush with the PCB.
PiFet: Power Jack
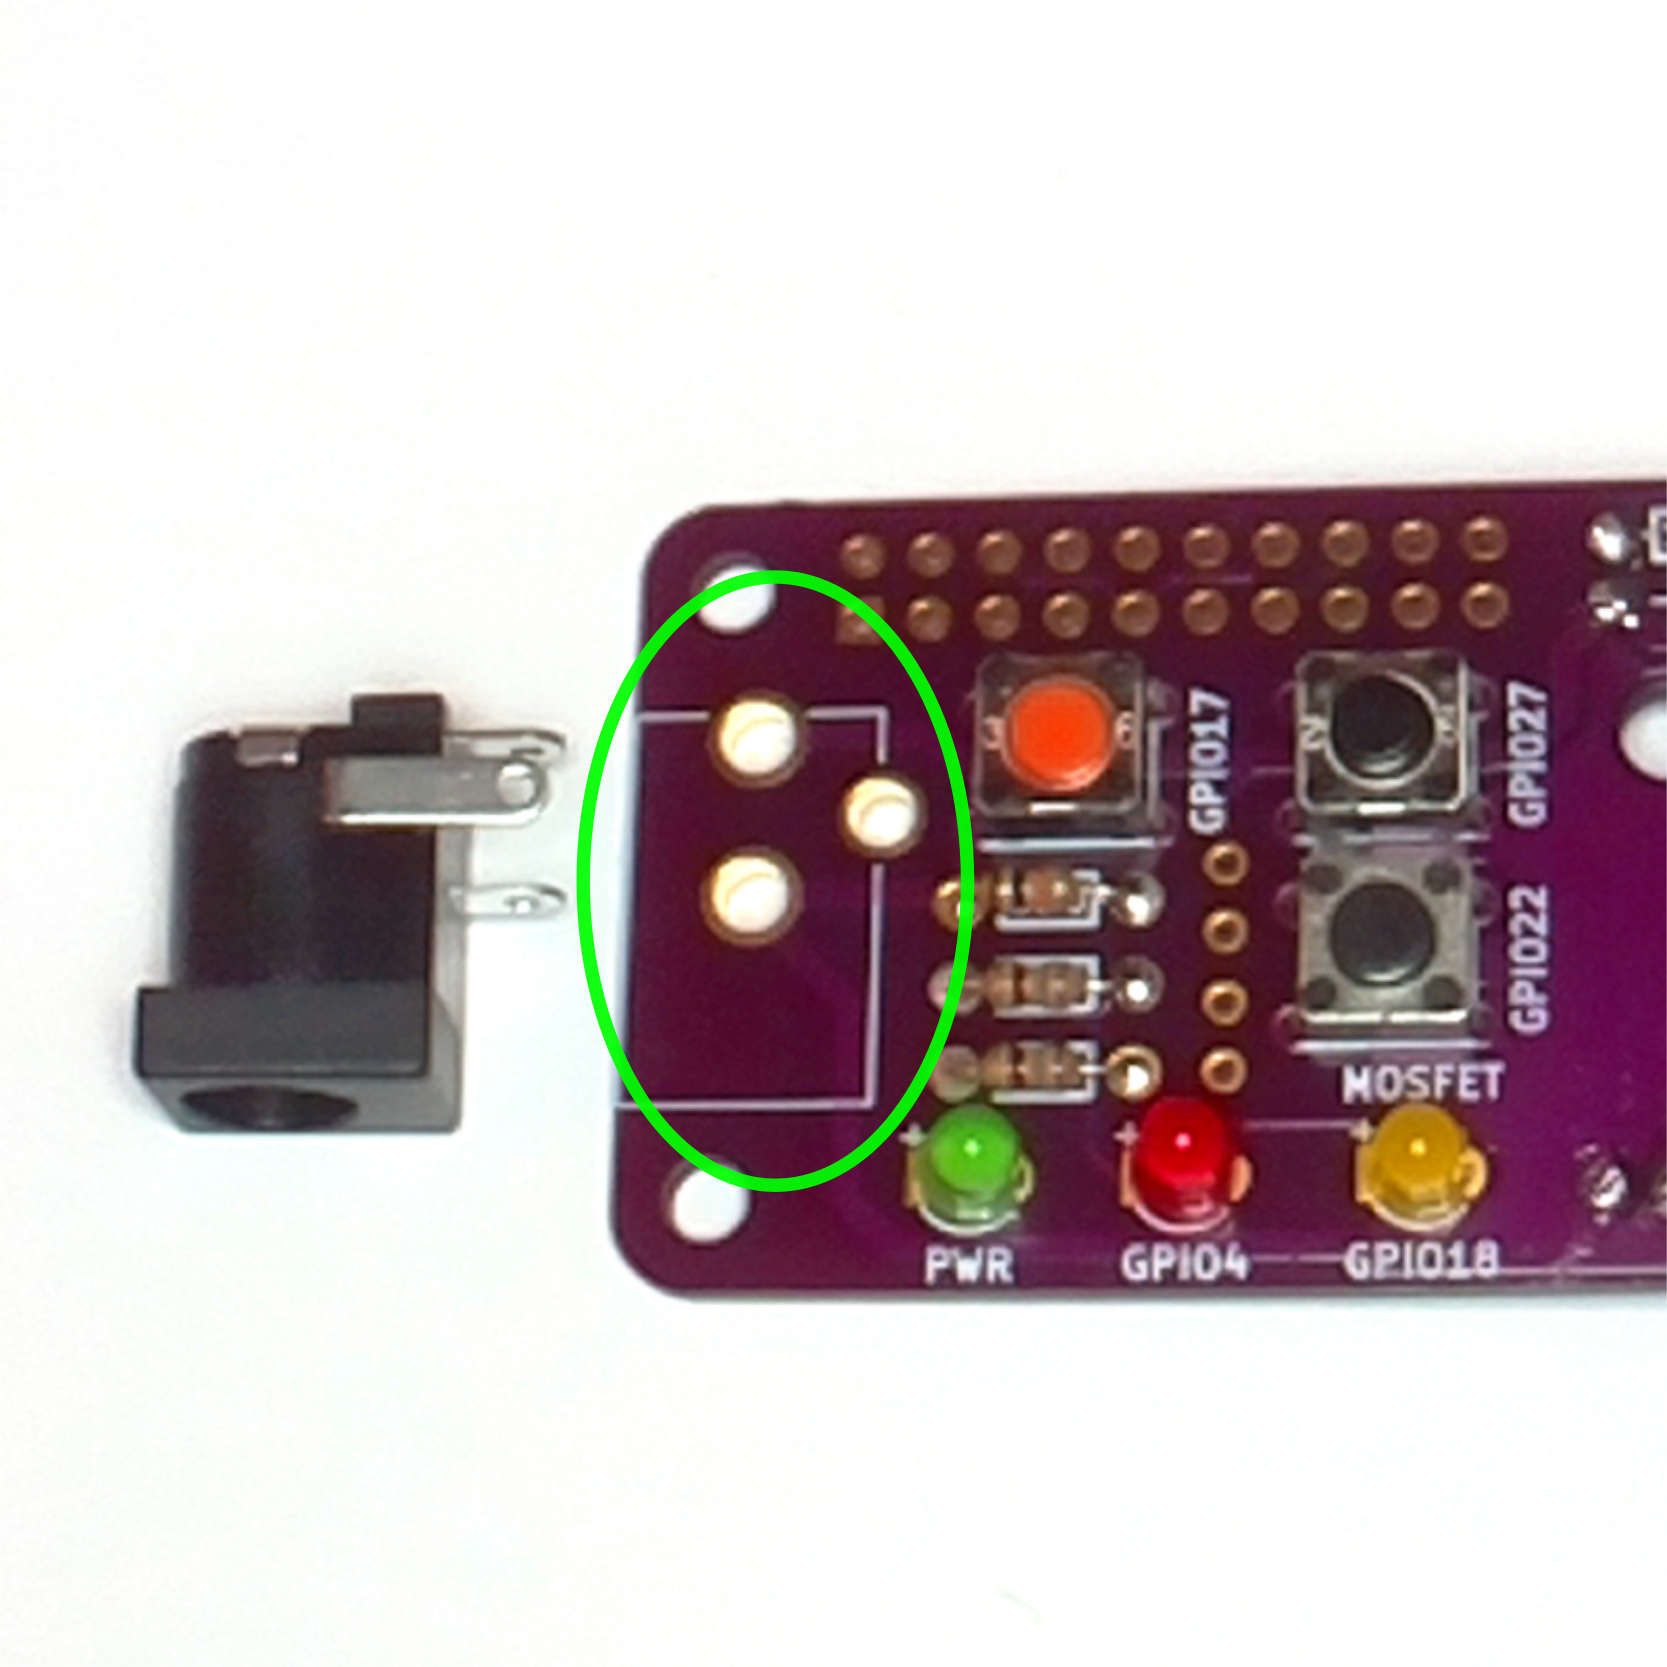
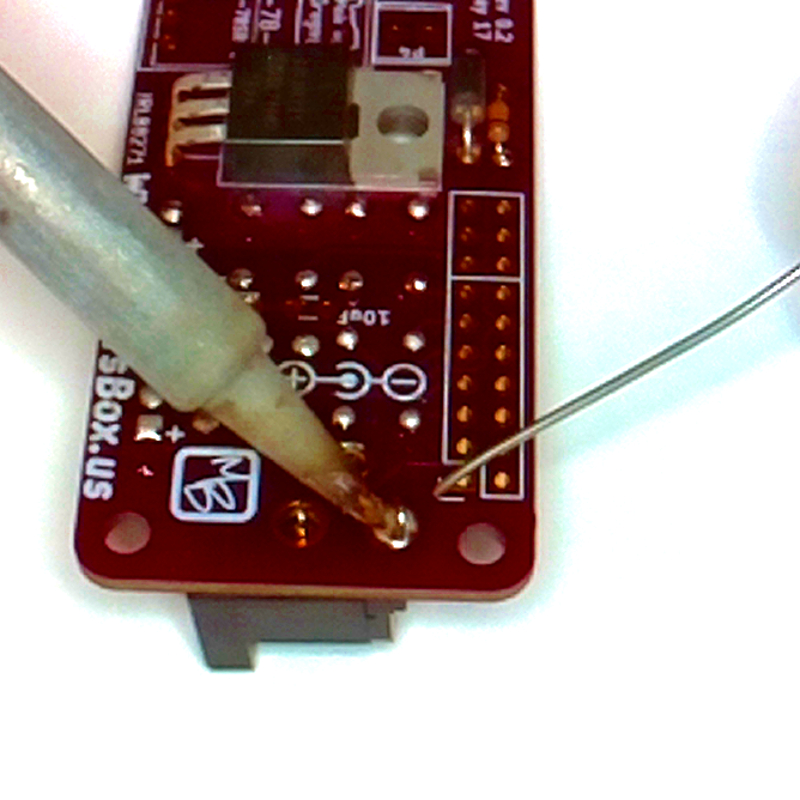
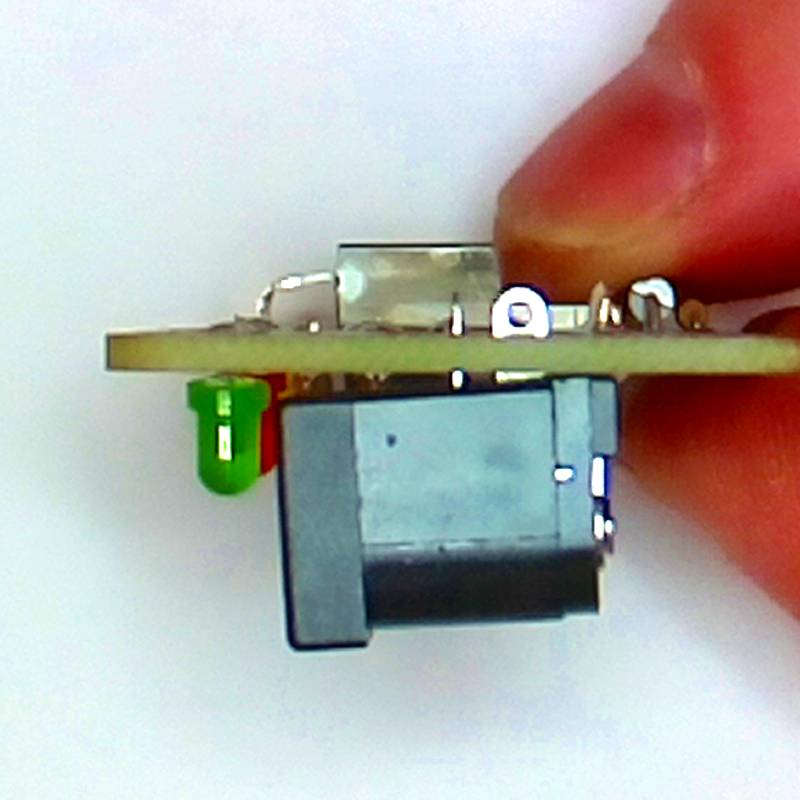
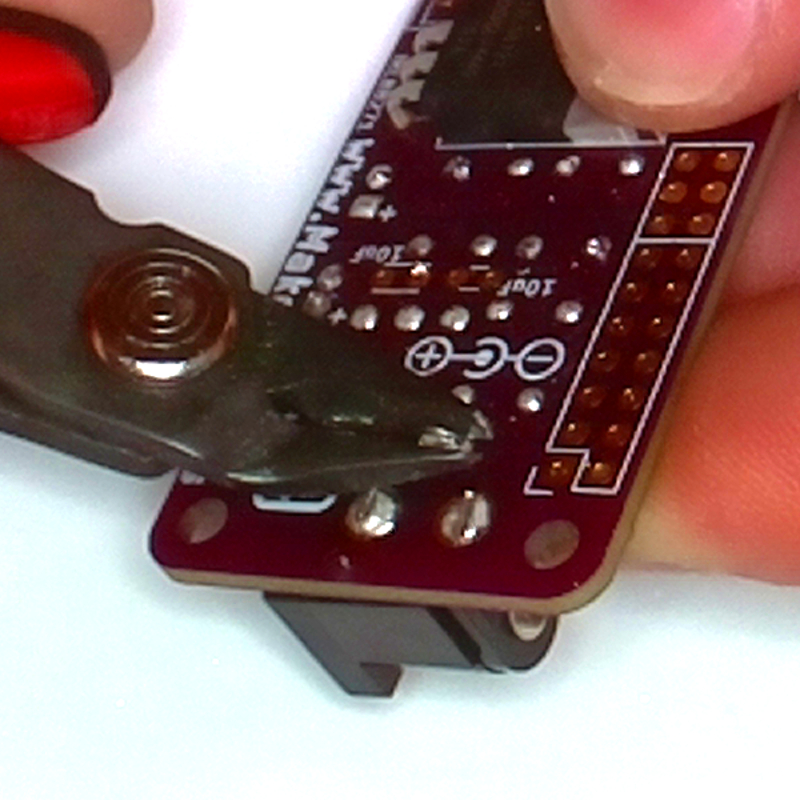
The 2.1mm Power jack is pretty common, and "center-positive" is the usual arrangement, so hopefully you have one laying around.
- Insert the jack on the top side of the board.
- Solder the back led in position.
- Tilt the jack up several millimeters (you'll see why later).
- Solder the remaining two leads in position.
PiFet: Terminal
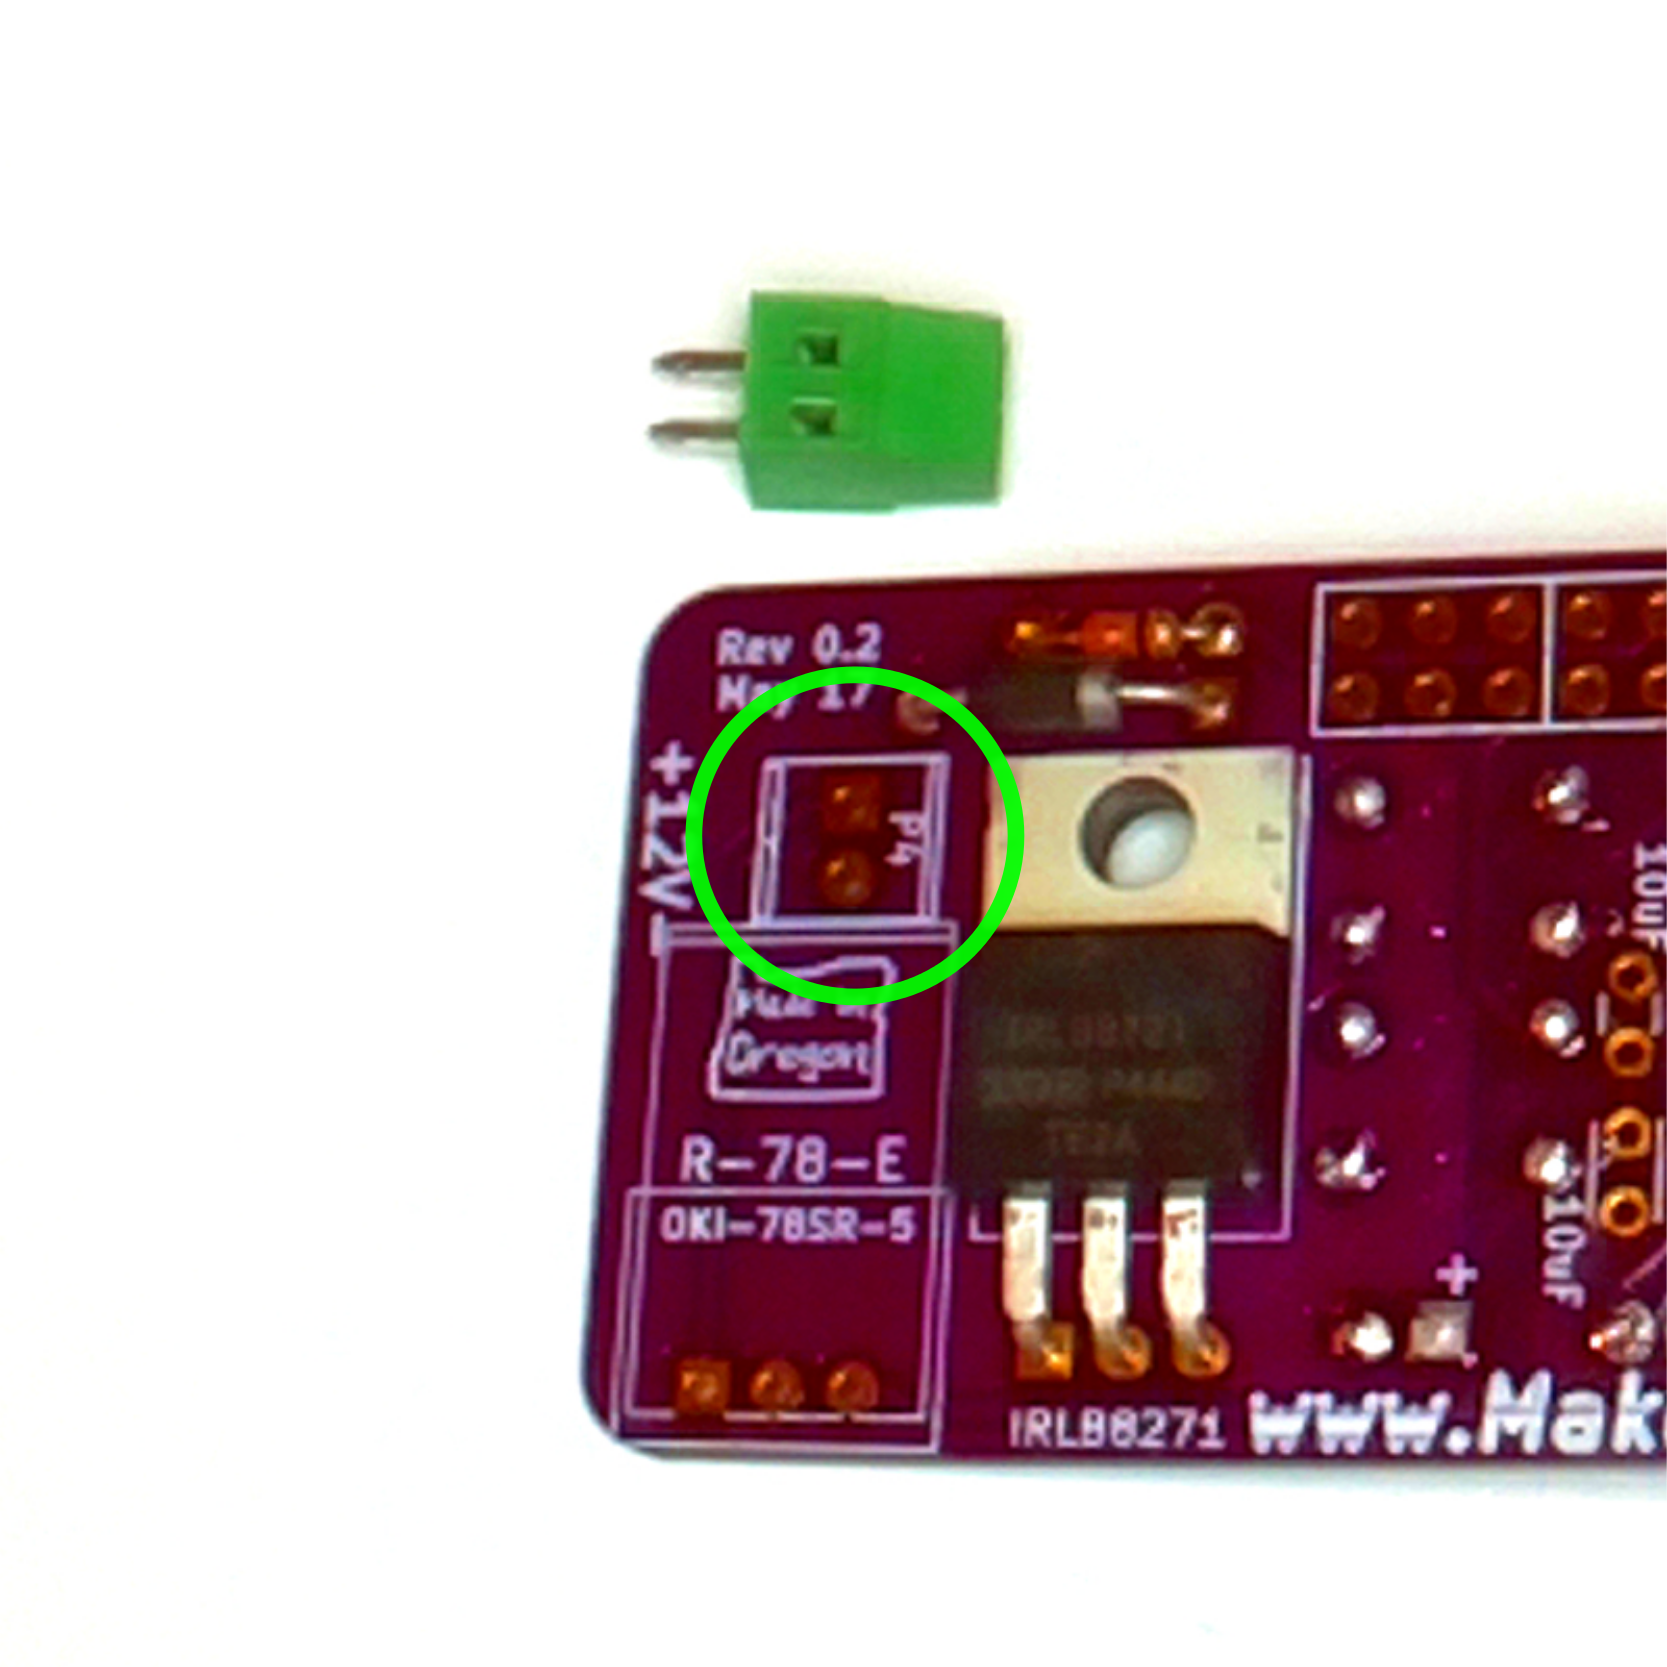
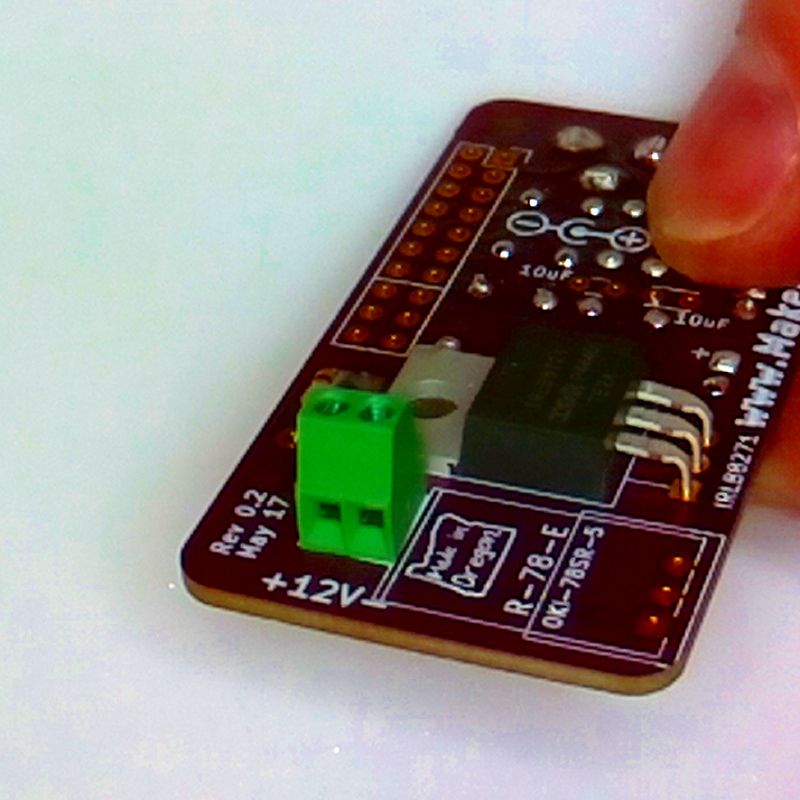
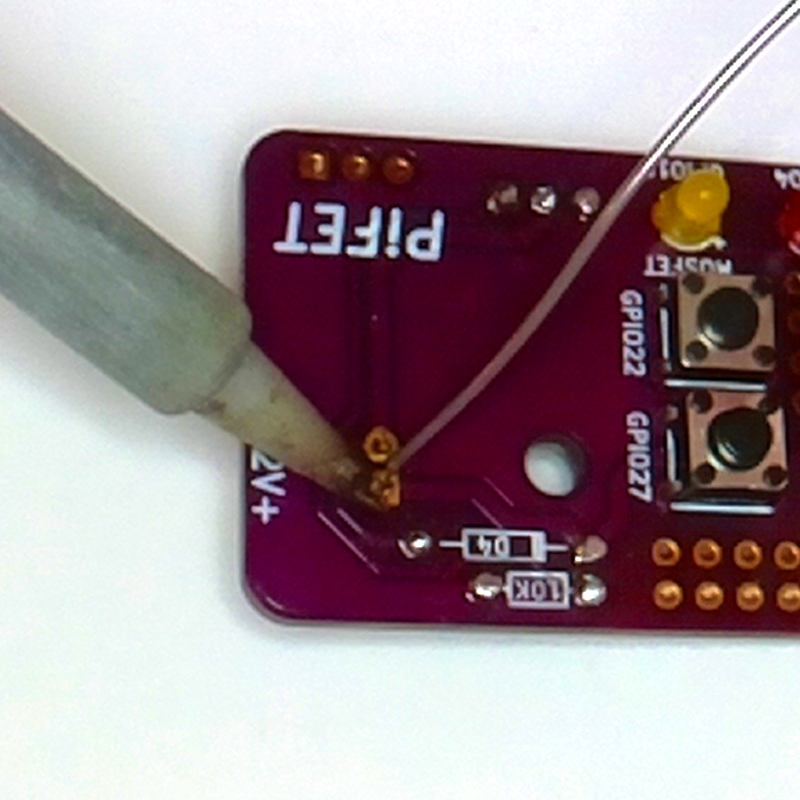
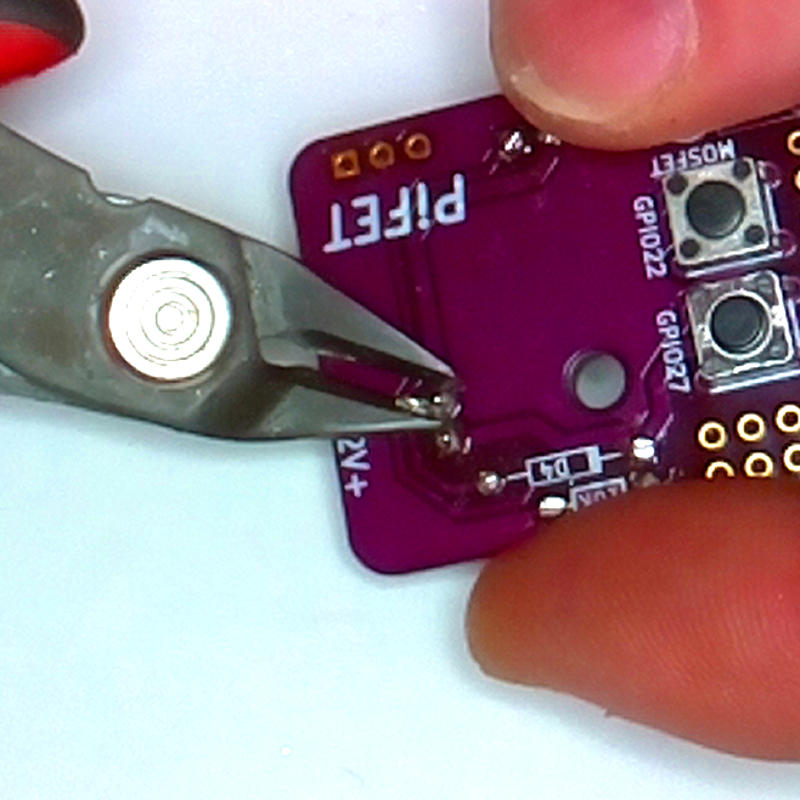
- Insert the terminal on the bottom side of the board with the terminal opening facing outward.
- Solder the leads in place.
- Trim the leads flush with the PCB.
PiFet: Header
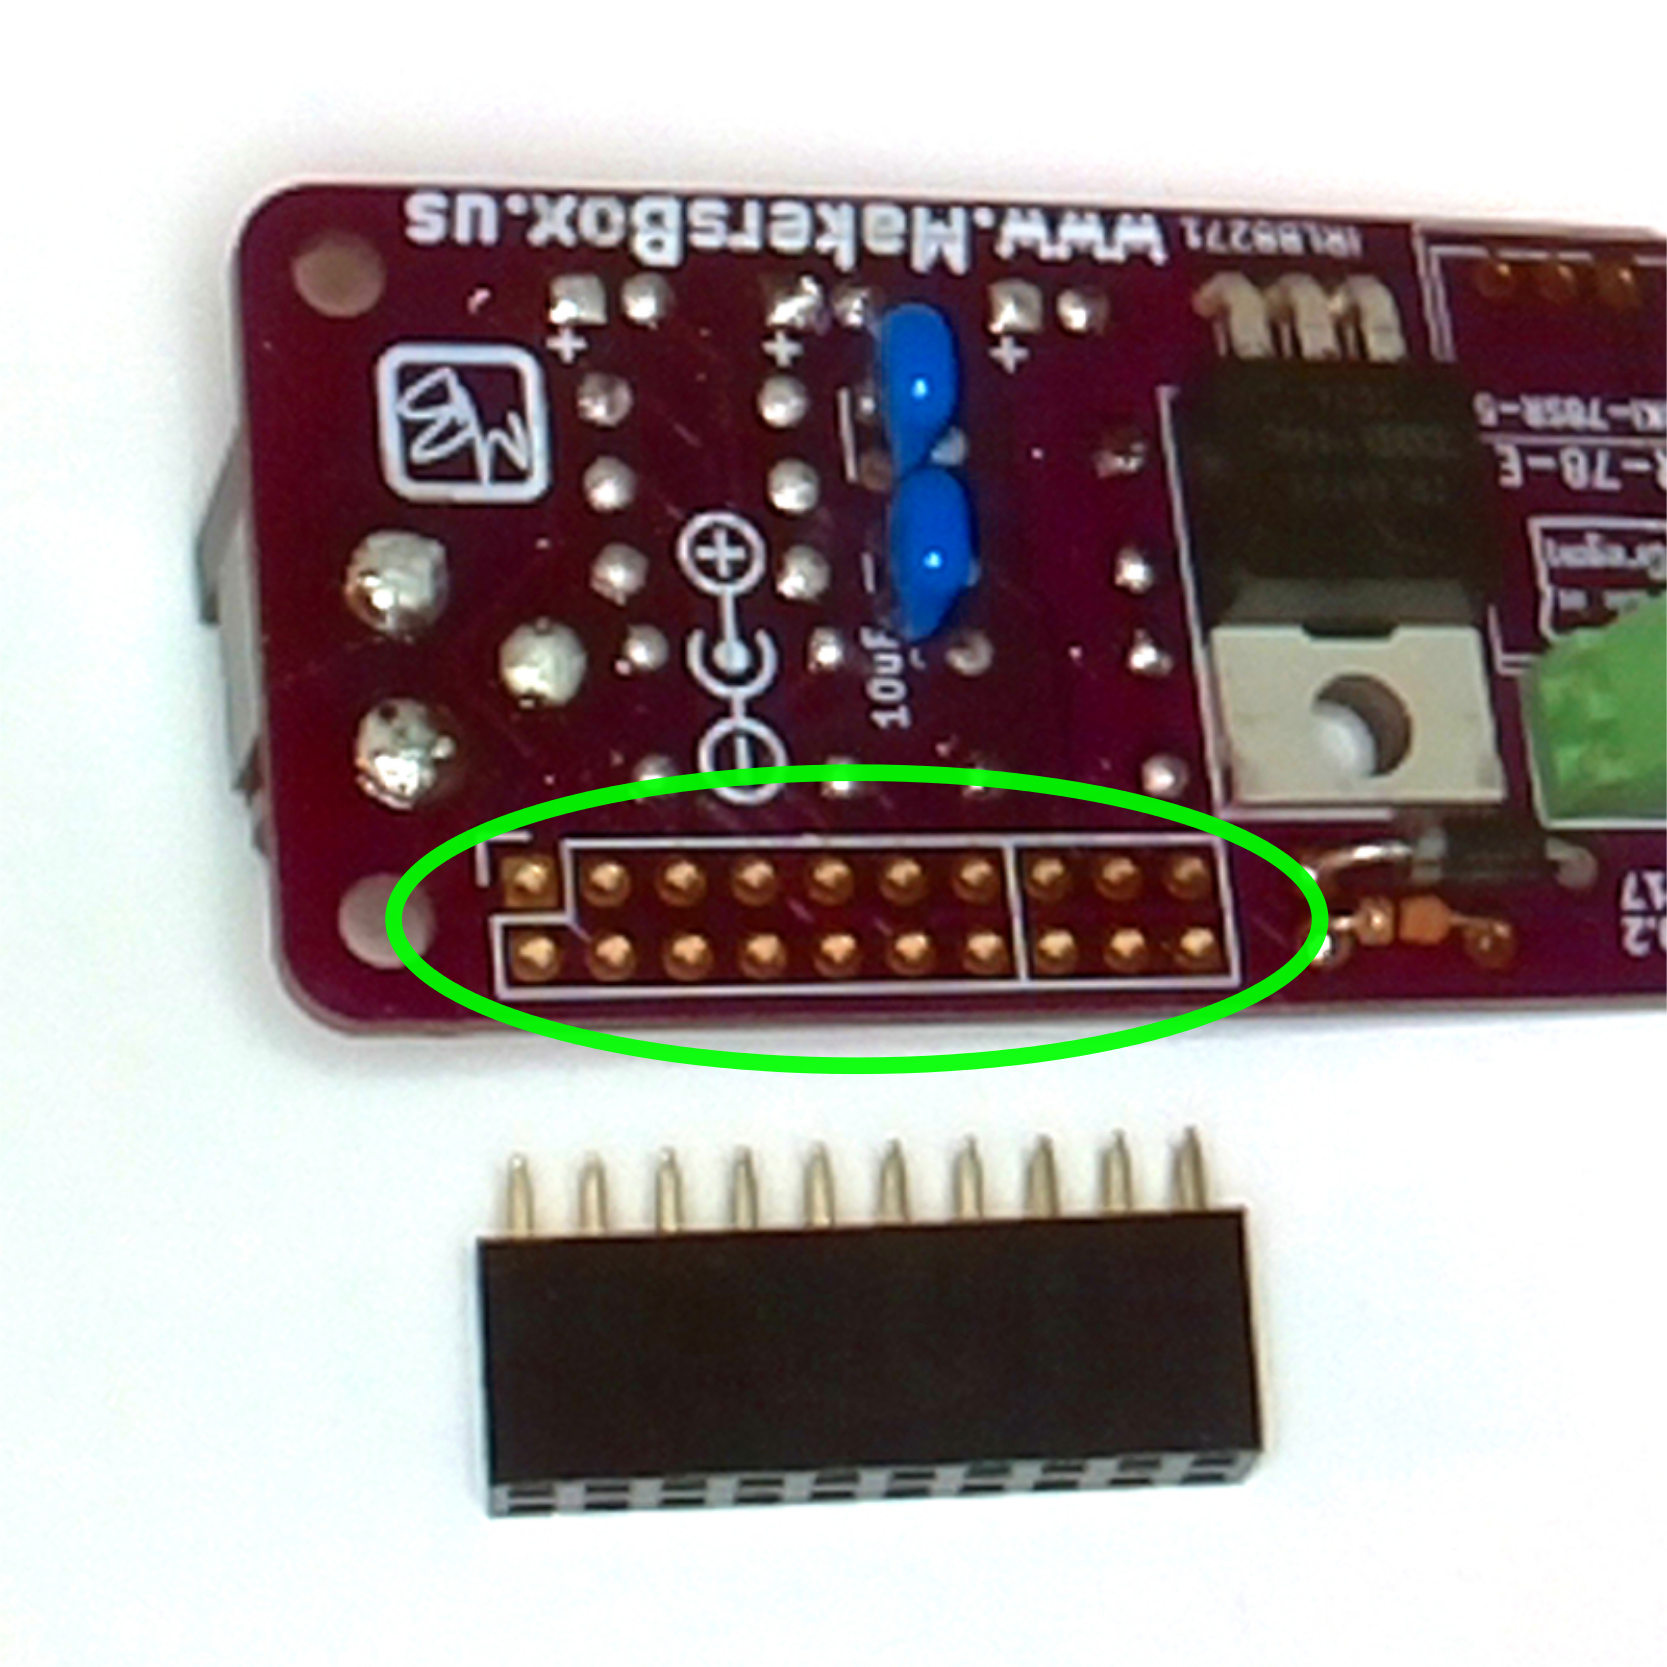
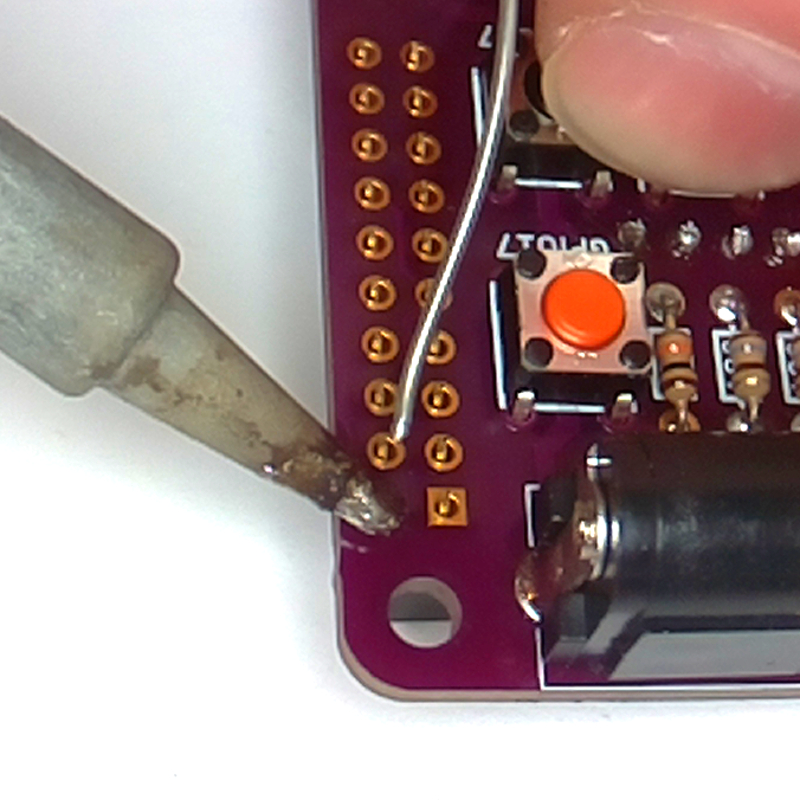
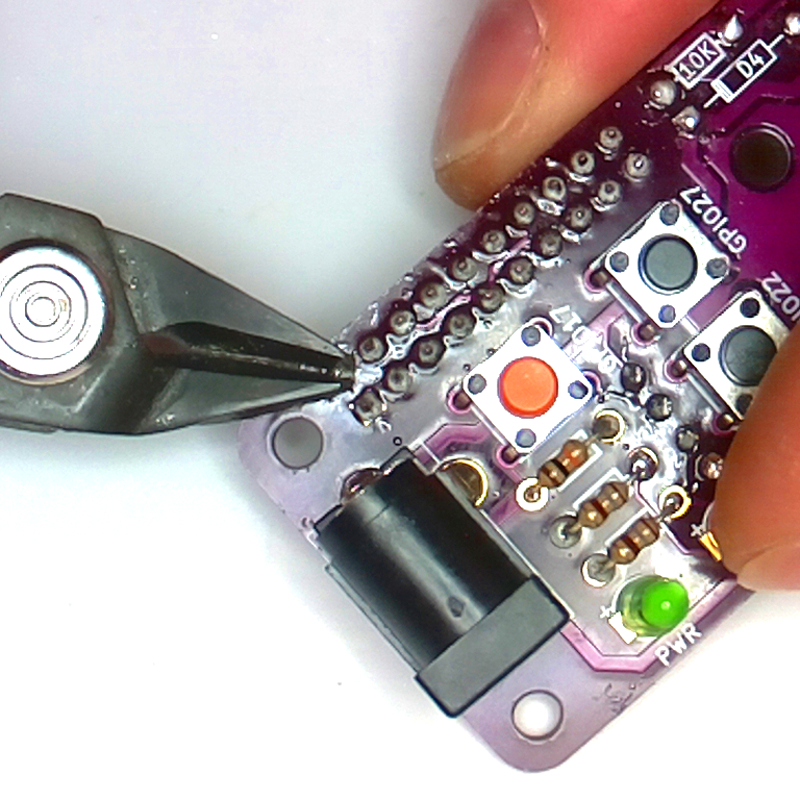
- Insert the header on the bottom side of the board.
- Solder two pins in place.
- Check that the header is flush and straight.
- Solder the remaining pins.
- Clip the pins flush.
PiFet: Regulator
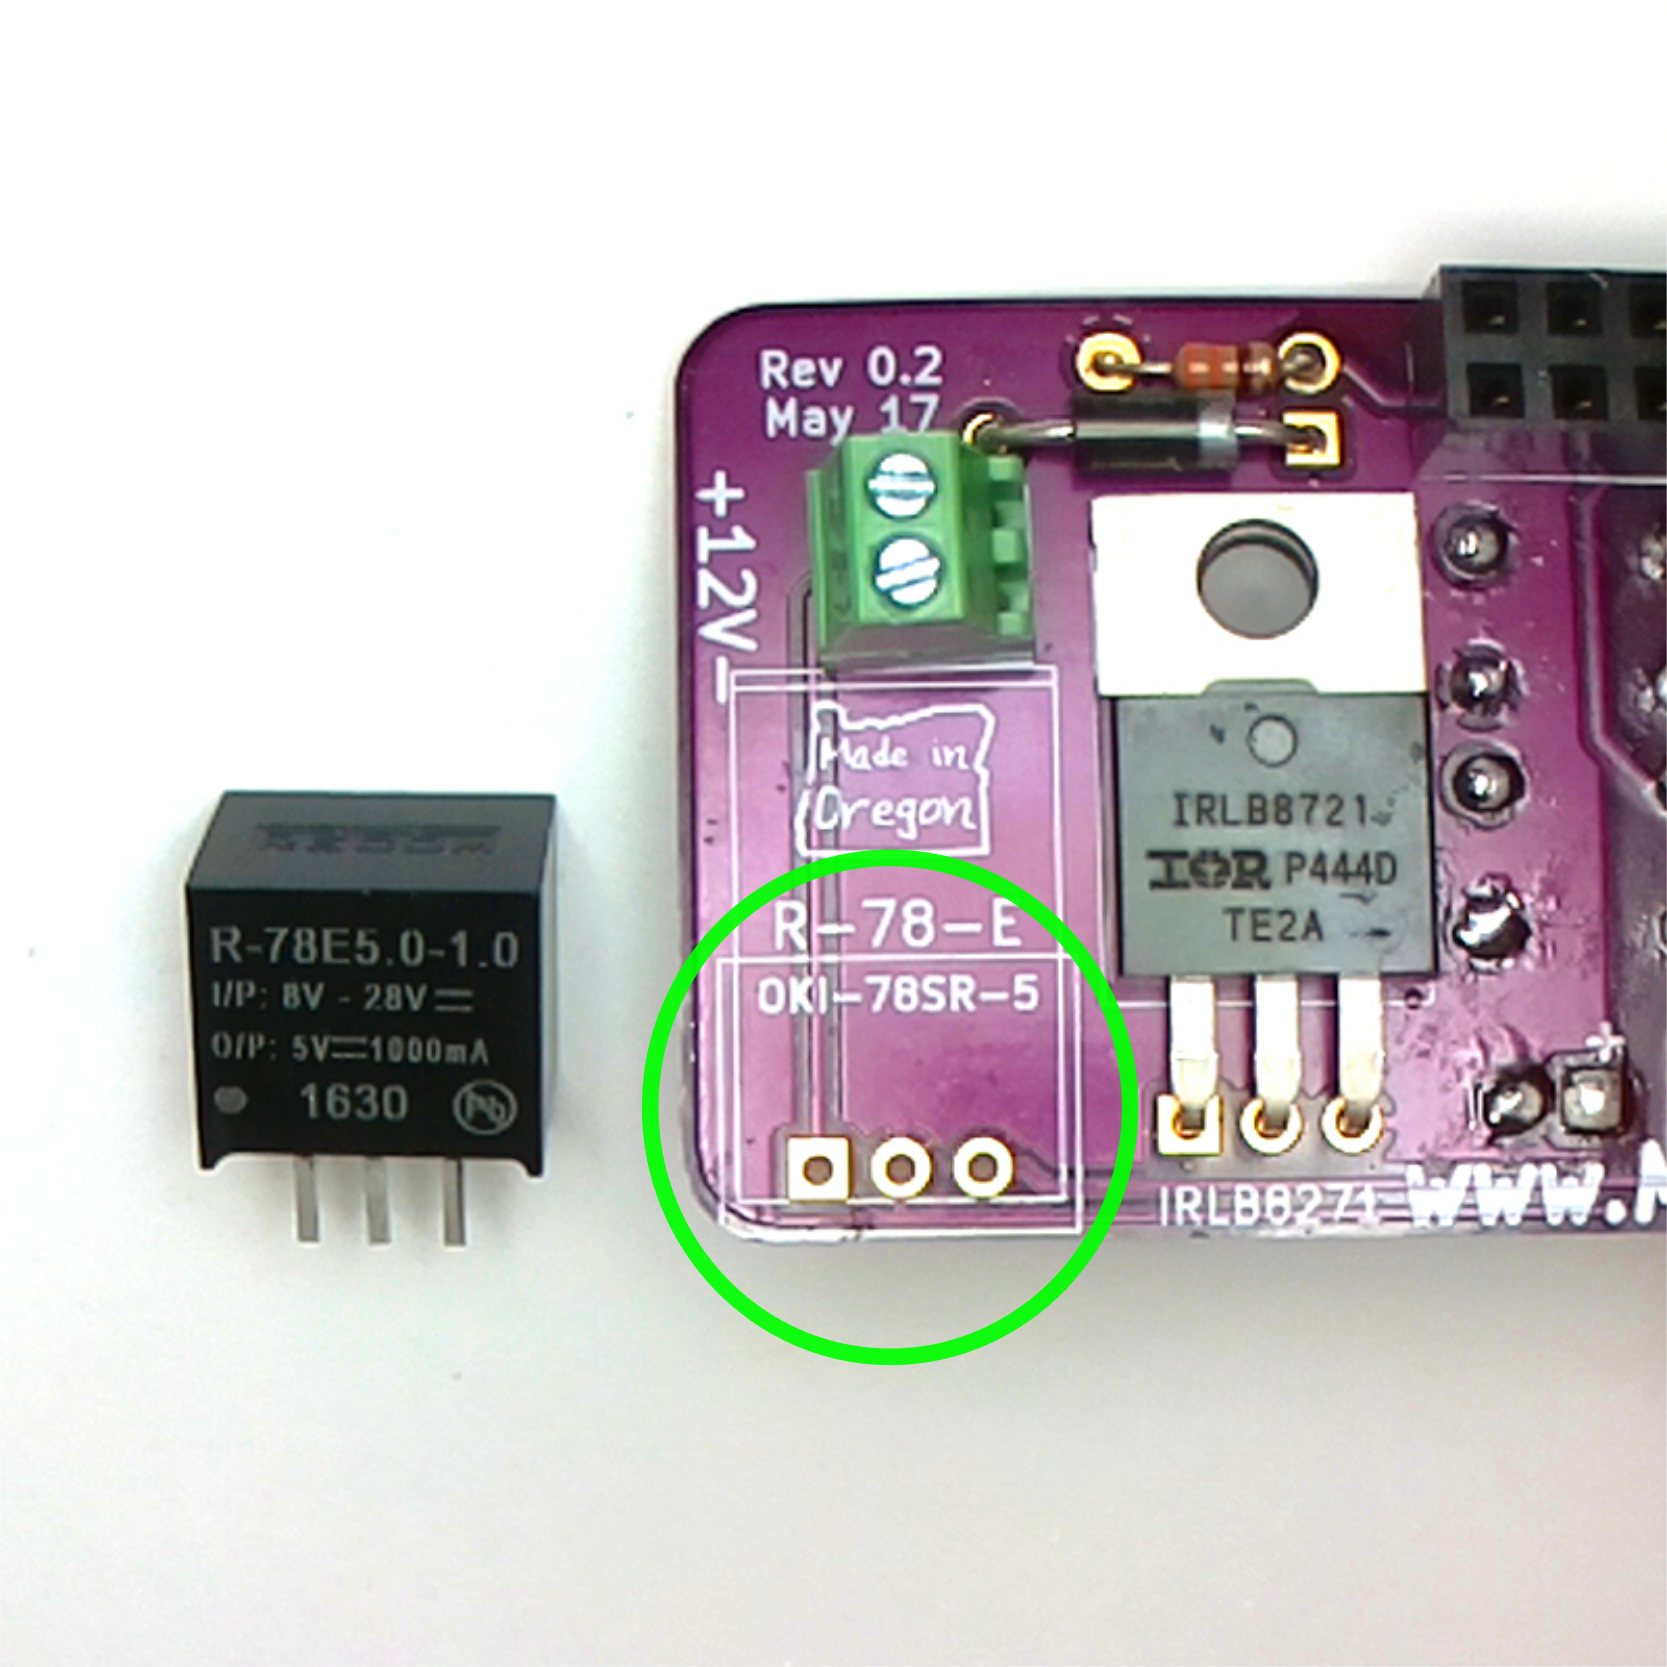
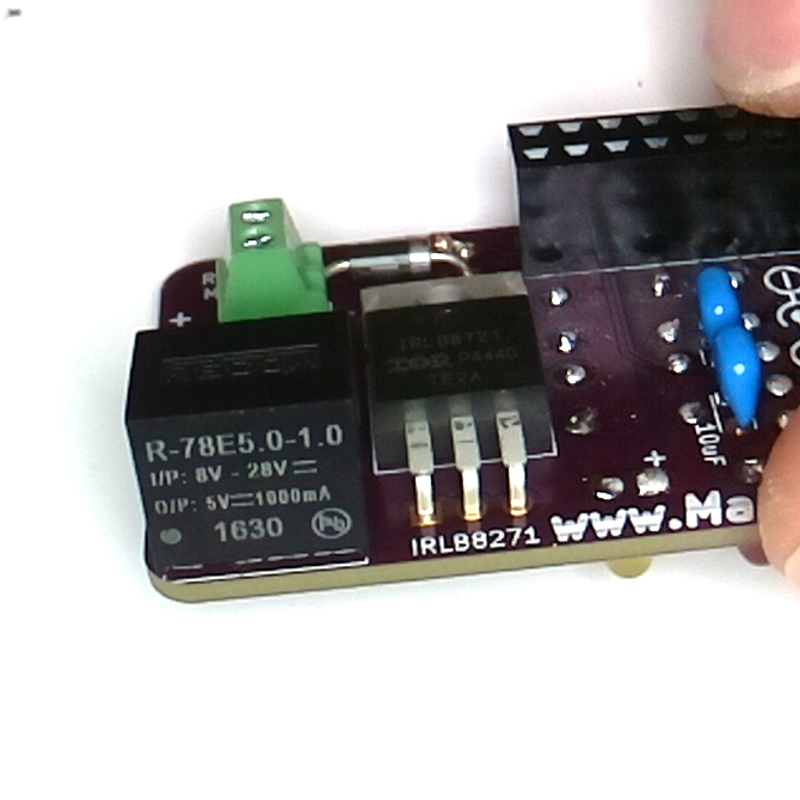
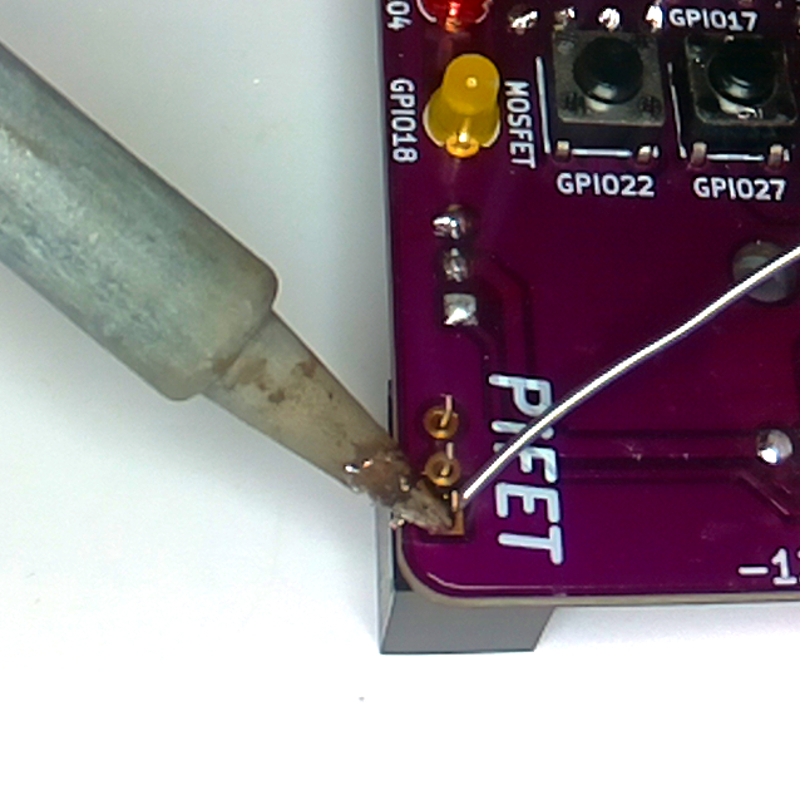
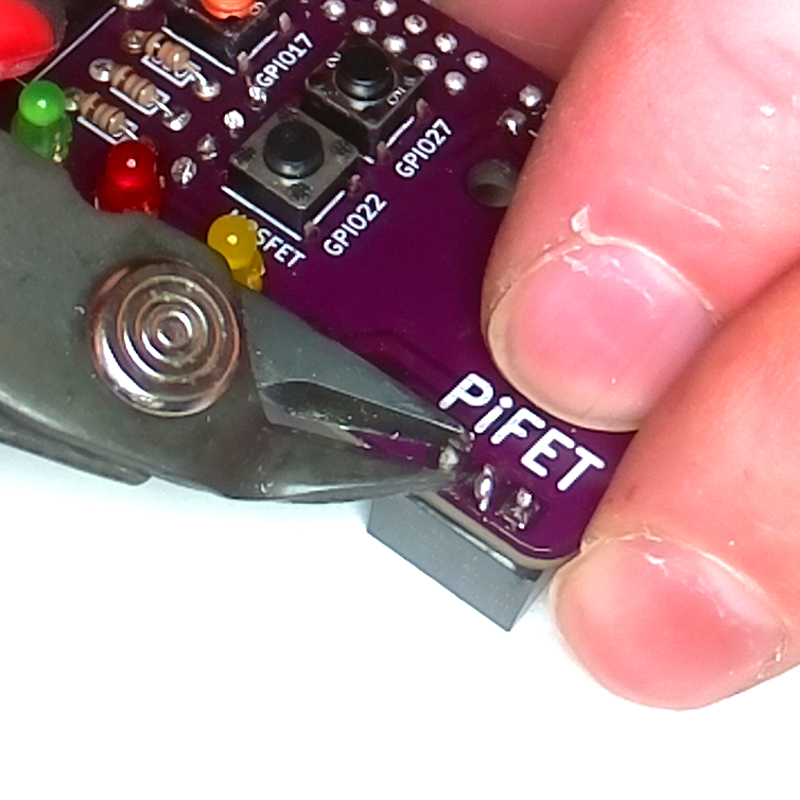
To convert 12 volts to 5 volts, we will use a 1 amp power switching regulator for efficiency.
- Install the regulator on the bottom side of the PCB with the text facing outward.
- Solder the leads in place.
- Clip the leads flush with the circuit board.
Case: Parts & Hardware
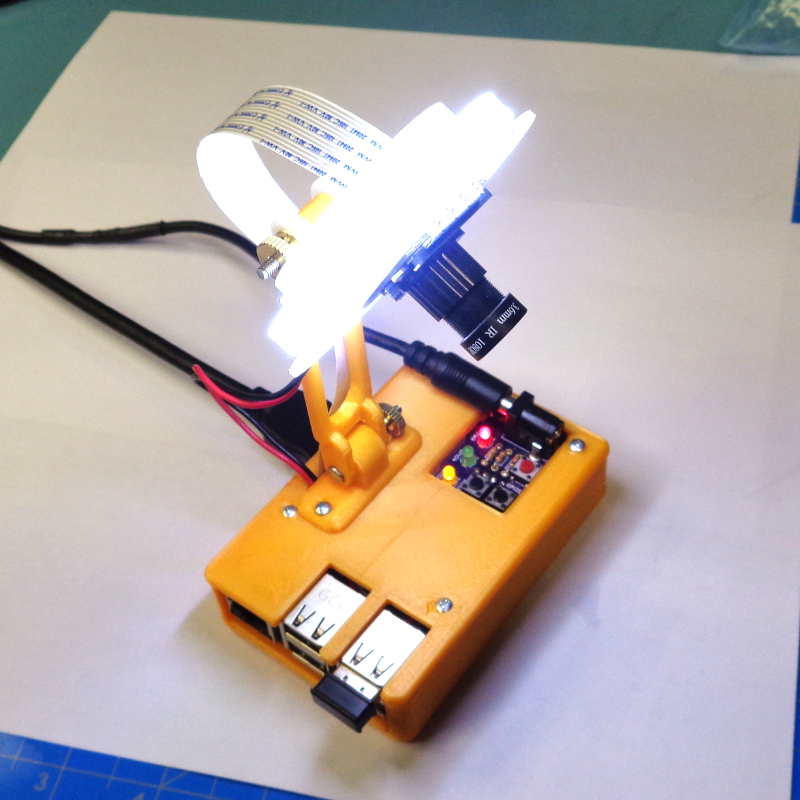
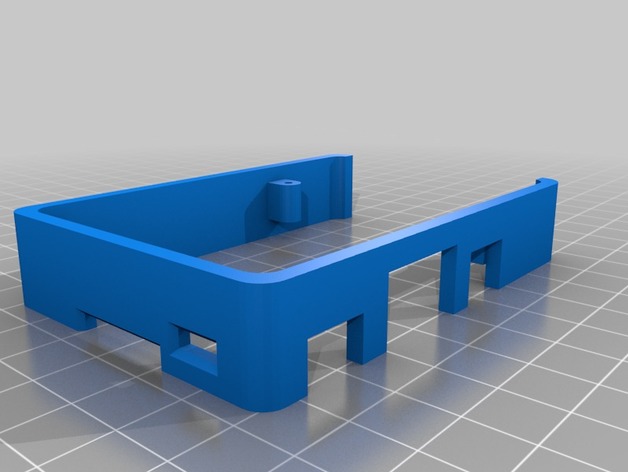
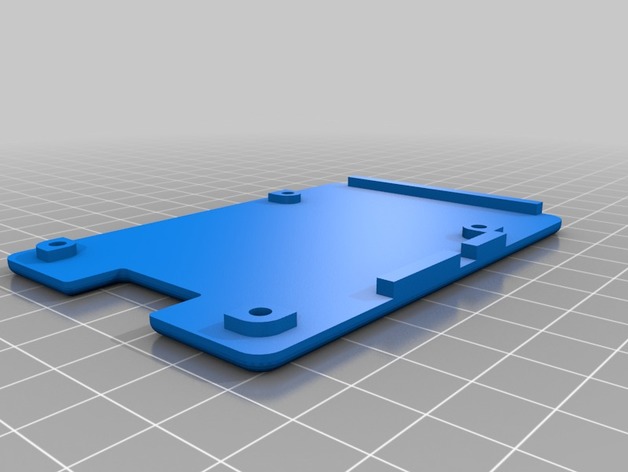
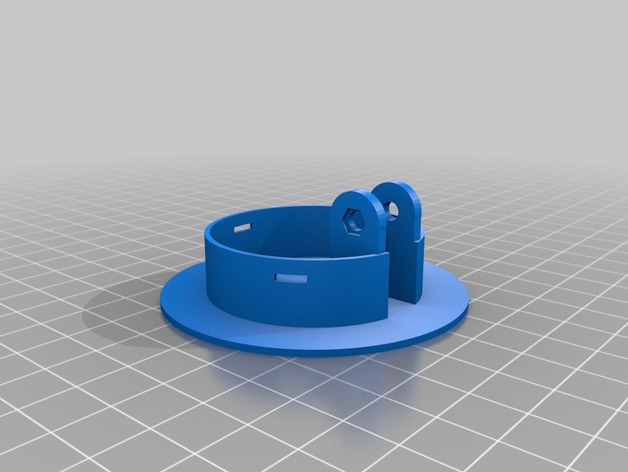
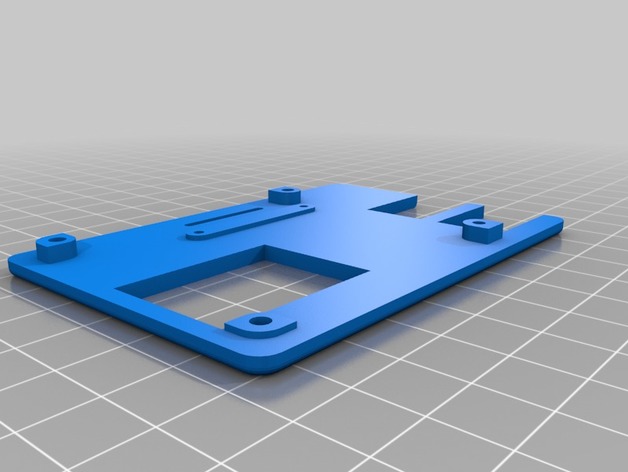
Now to case our project. I've tried a couple of cases I found on Thingiverse, but was never completely happy with them, so I designed one from the ground up using FreeCad. That means not only can you build one, you can change it to meet your needs (using free Open Source software)!
I've posted all the files you will need at https://www.thingiverse.com/thing:2720256
Print the body with support. All the other parts do not need support. I would use a fill of 50% or 100%.
You will also need the following hardware and parts:
- #2 x 3/8 plastic screw, https://www.mcmaster.com/#90380a011/=1ajevok
- 4-40 x 1" bolt, https://www.mcmaster.com/#92314a115/=1aq7zuf
- Knurled 4-40 thumb nut, https://www.mcmaster.com/#92741a100/=1aq808l
- 60mm 12V LED ring, http://a.co/4Sqlqgr
Case: Assembly
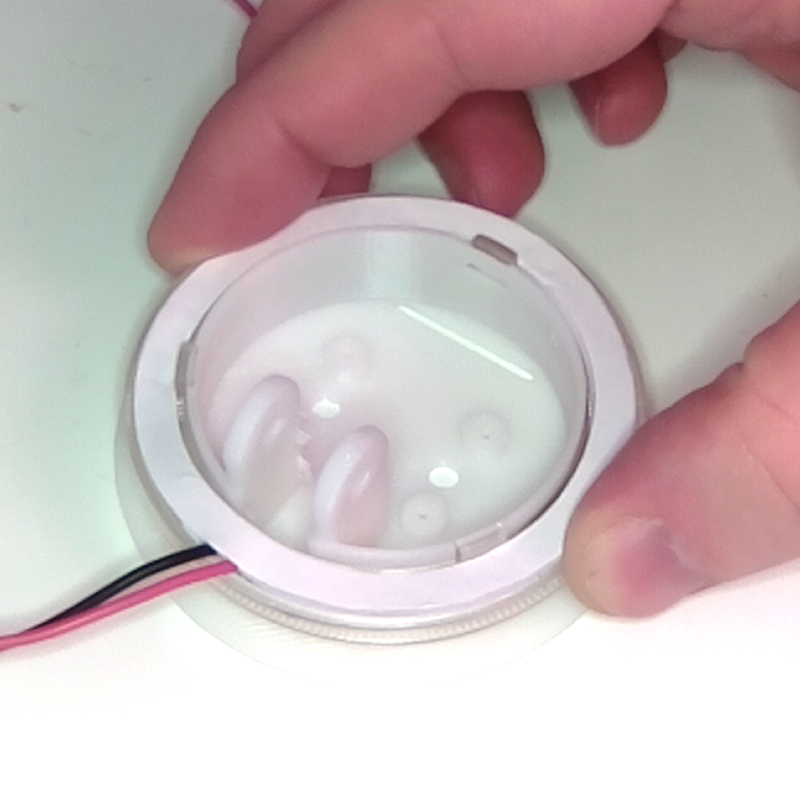
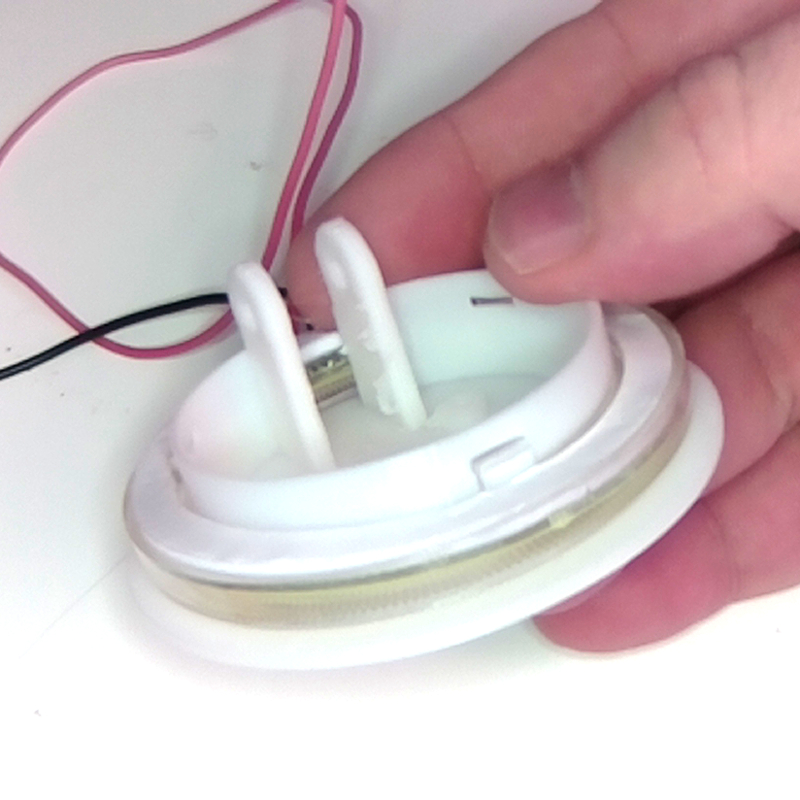
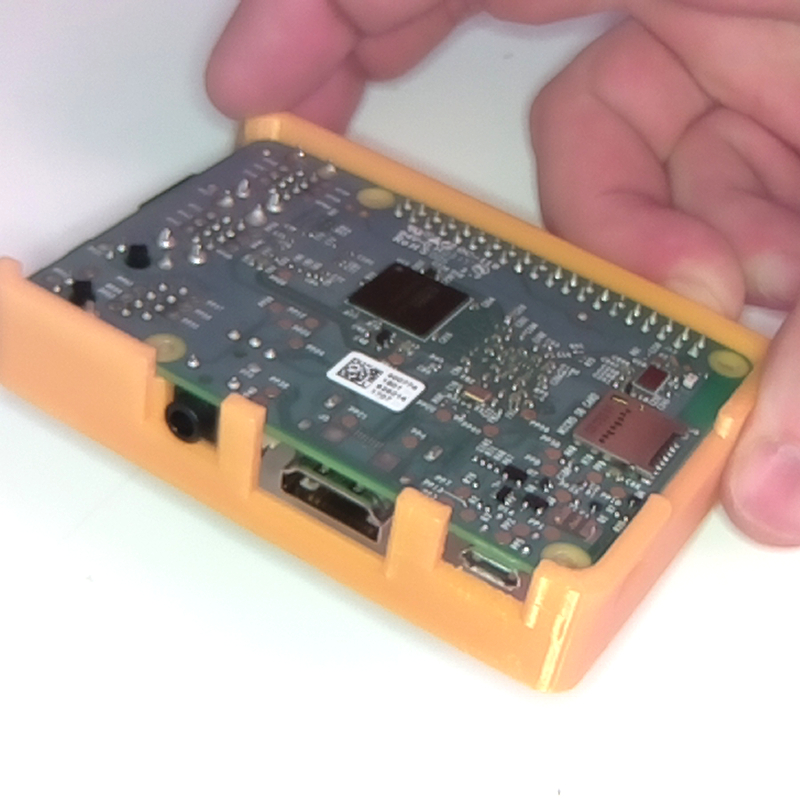
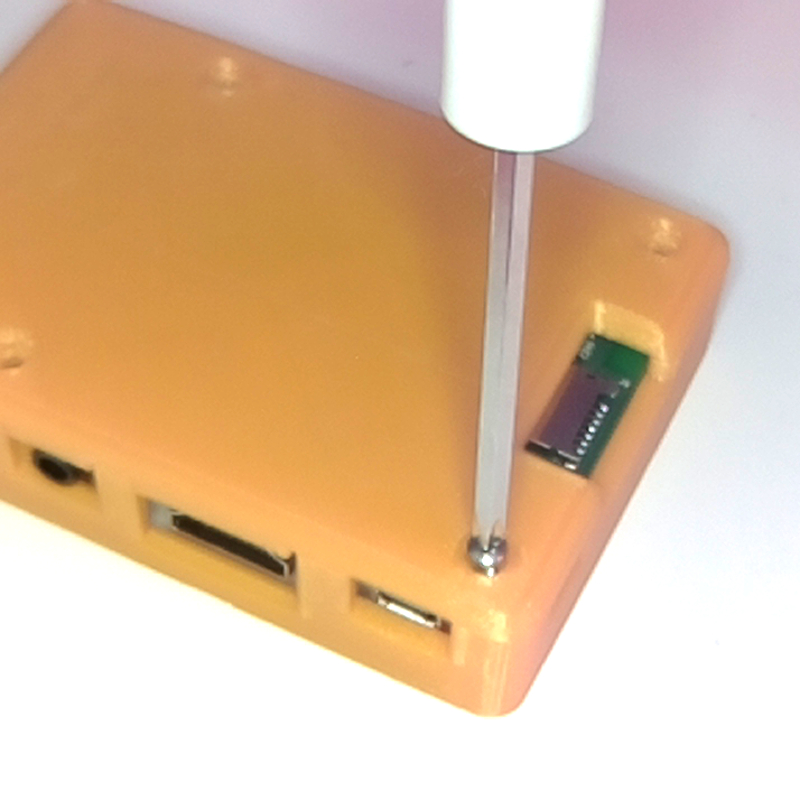
- Slide the light ring over the housing.
- Press firmly to get the tabs over the edge (this is opposite the way they were designed).
- Place the Pi into the body with the underside up.
- Place the bottom on to the case.
- Insert the four screws and tighten.
Case: Camera Cable and LED Leads
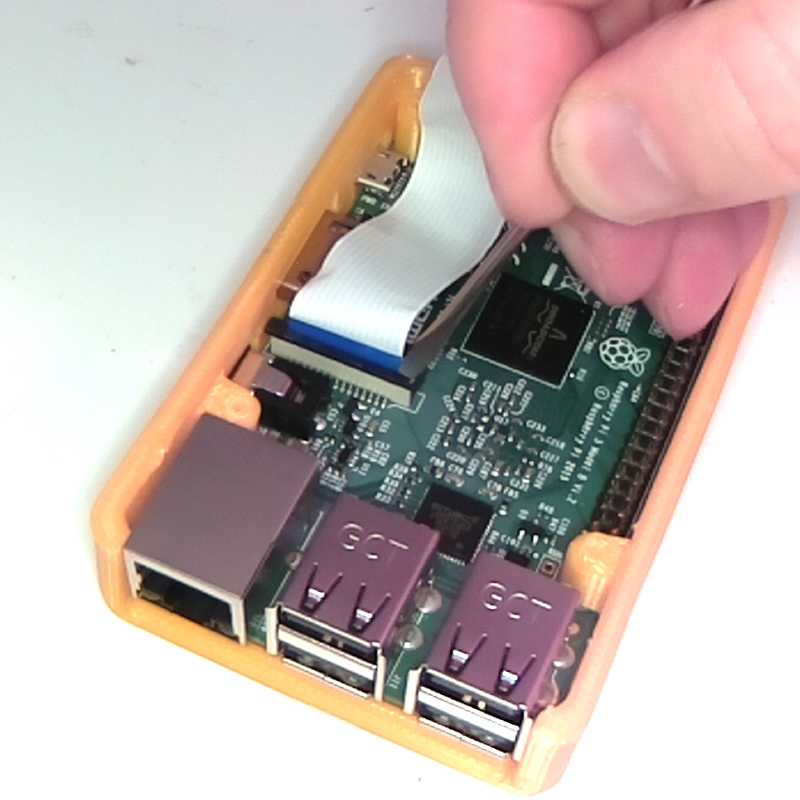
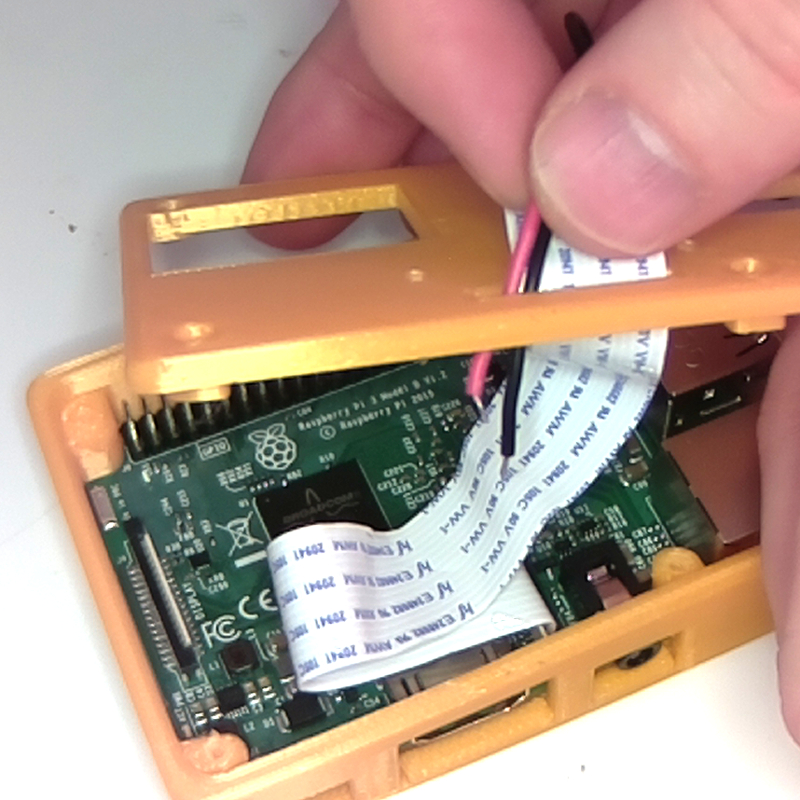
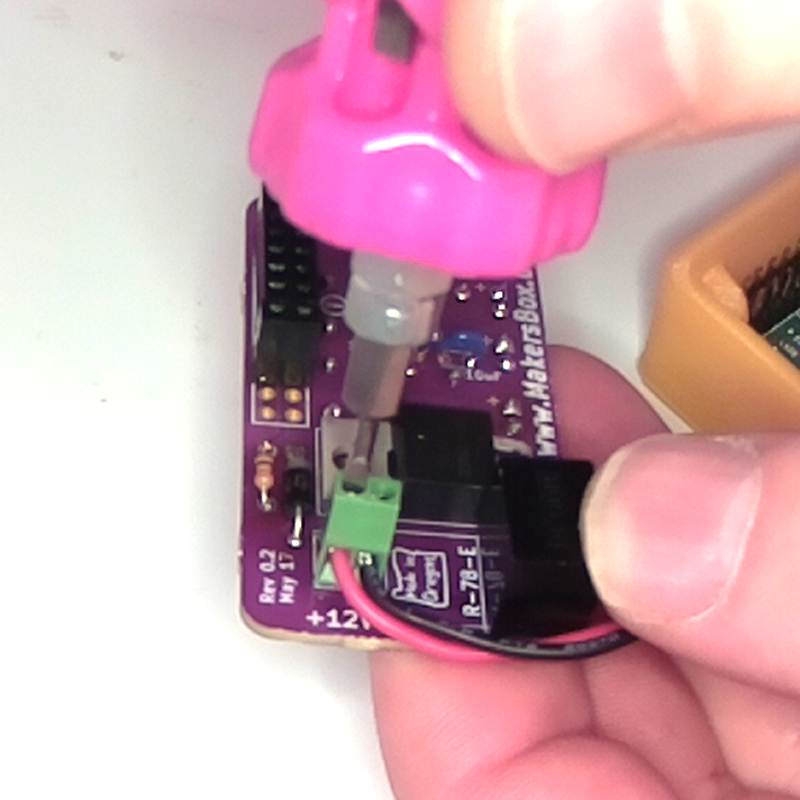
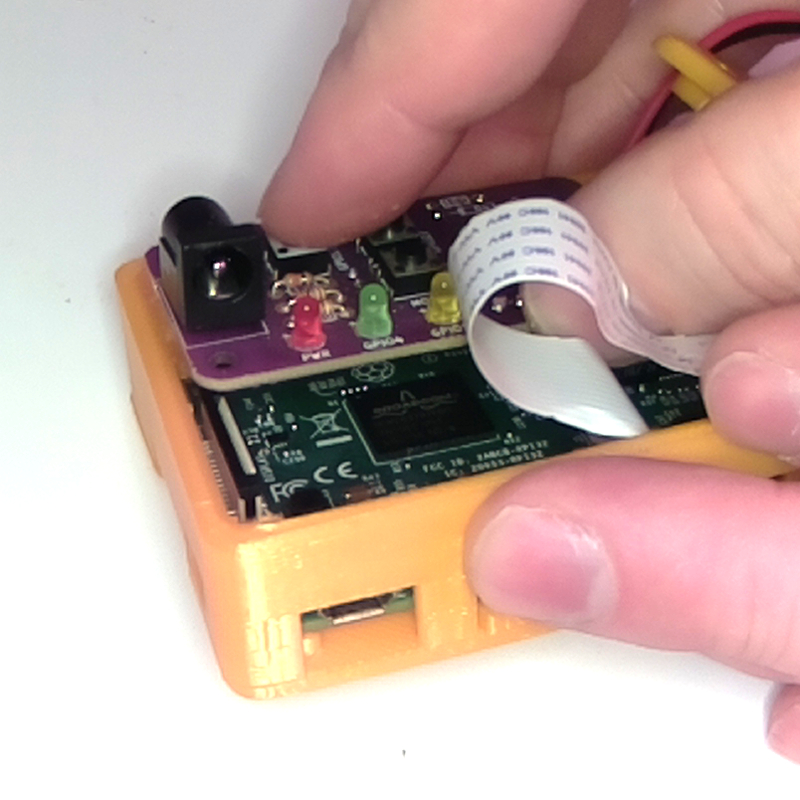
- Install the camera cable (with the pads away from the Ethernet port).
- Insert the ribbon cable up through the top of the case.
- Insert the LED leads down through the top of the case.
- Insert the leads to the terminal observing the polarity.
- Insert the PiFet on to the Pi header.
Case: Top and LED Ring
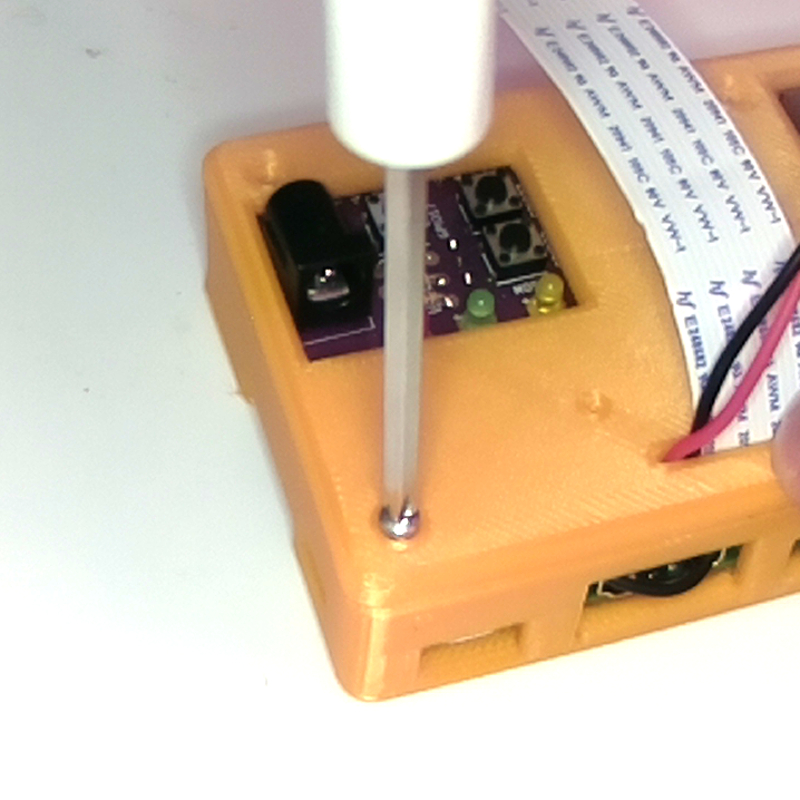
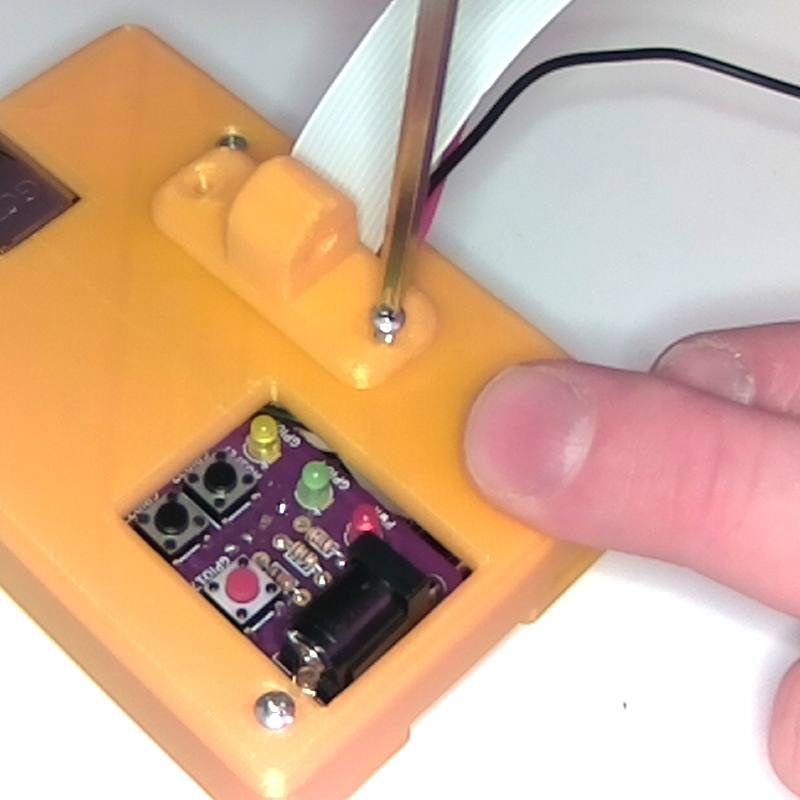
- Arrange the wires so they don't pinch and place the top of the case in place.
- Insert the four screws.
- Place the camera arm base on the top and insert two screws.
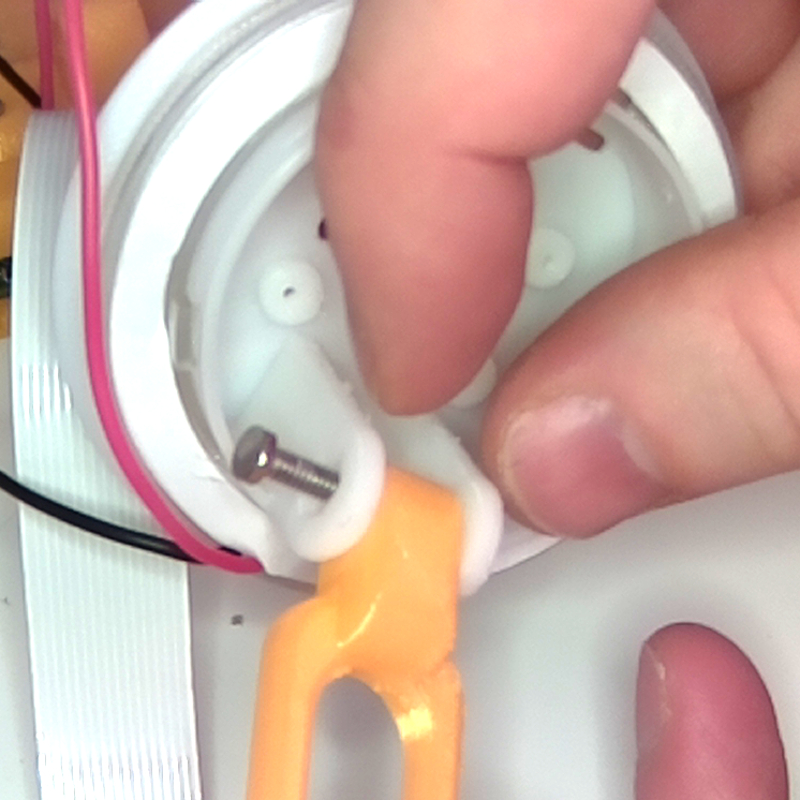
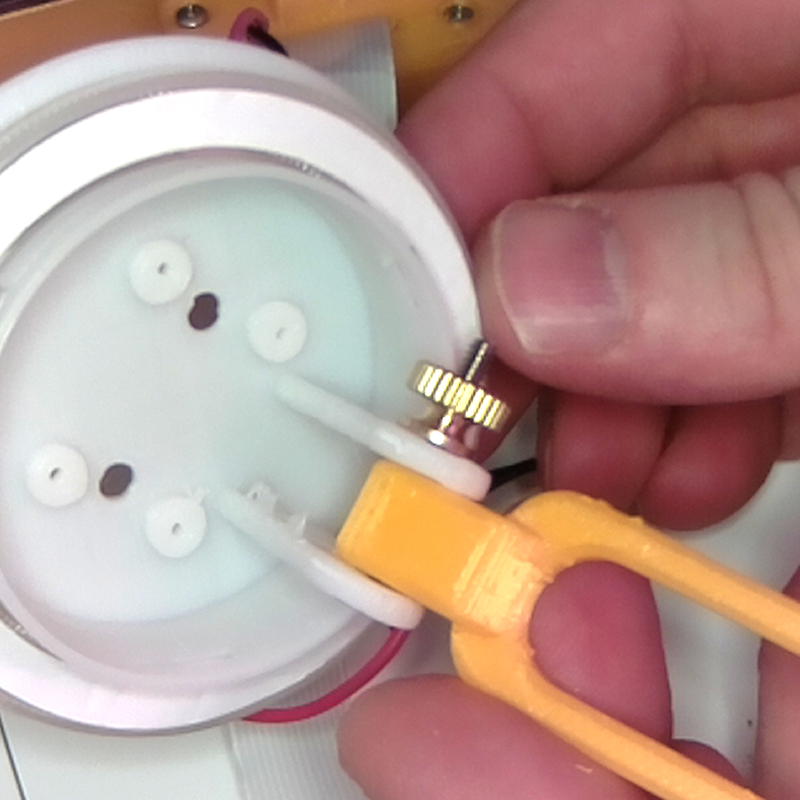
- Place the LED ring housing on the top of the arm.
- Insert the bolt with the hex head on the side containing the hex inset.
- Screw the knurled knob until it is snug.
Case: Camera Arm and Camera.
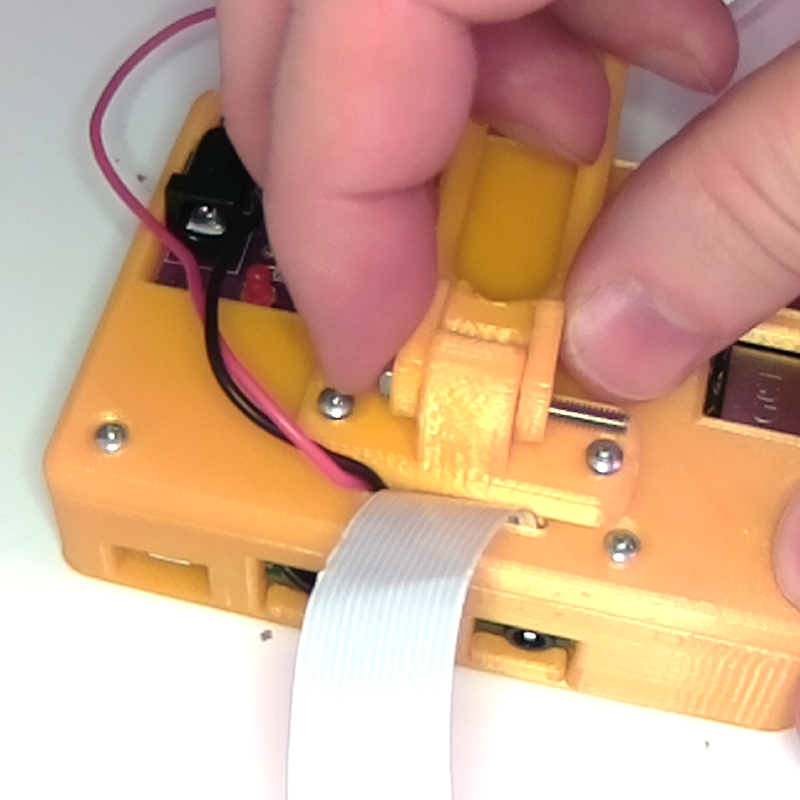
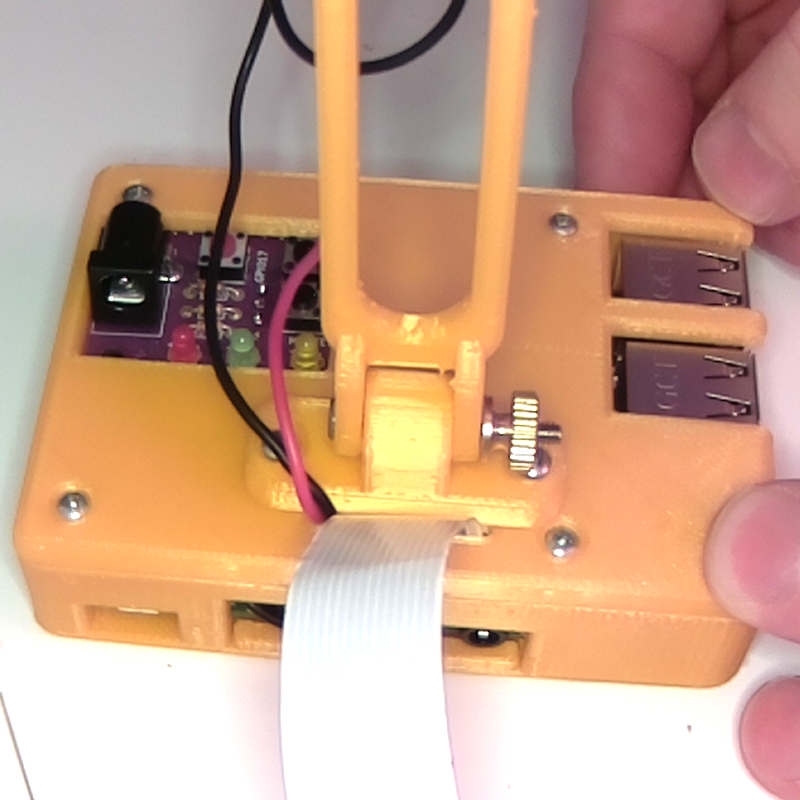
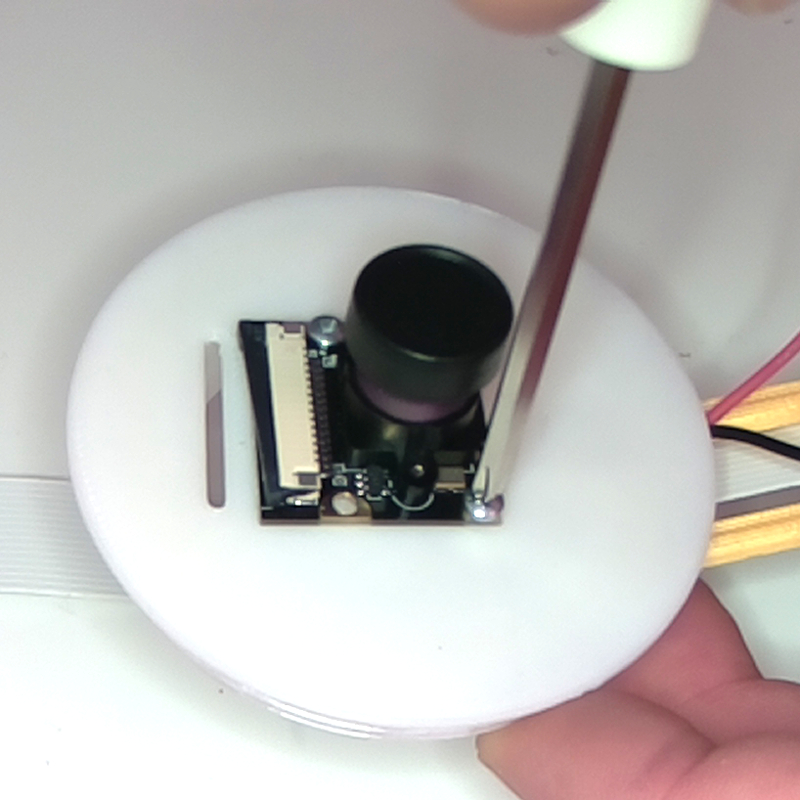
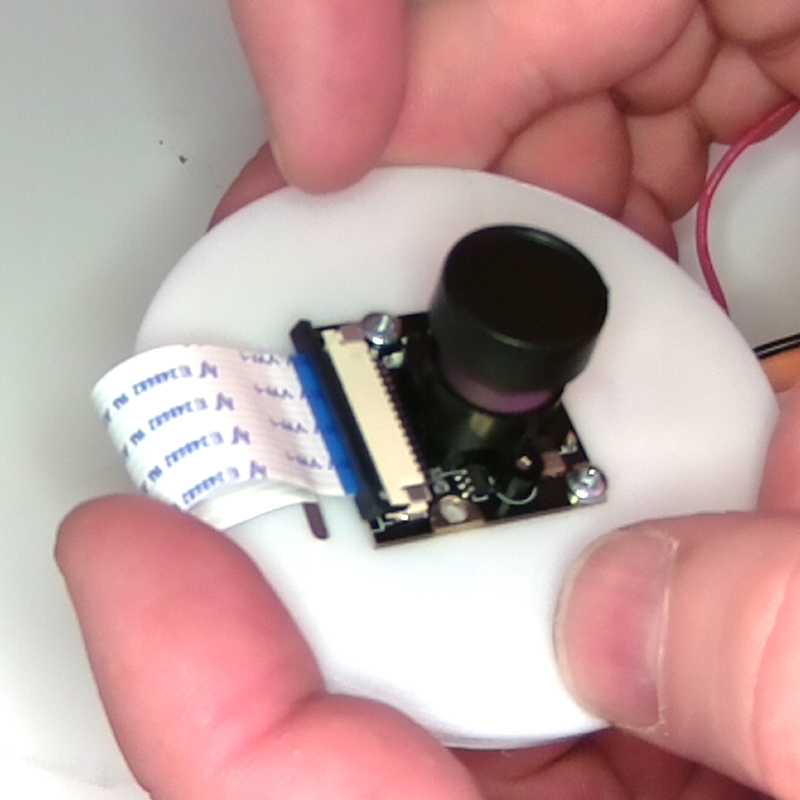
- Insert the arm on the arm bracket.
- Insert the hex nut on the side with the hex inset.
- Screw knurled nut on to bolt snugly.
- Place camera on LED ring base and install at least two of the screws on opposite sides.
- Insert the ribbon cable through the slot and into the camera connector.
Setup: Downloads
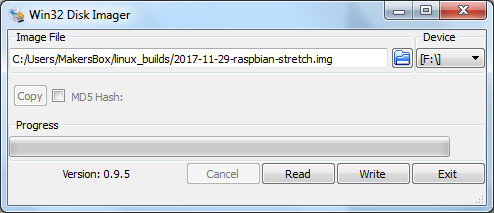
- Download Raspbian Desktop from https://www.raspberrypi.org/downloads/raspbian/
- Download and Install Win32DiskImager and use it to install the Raspbian OS on the SD Card using the instructions at http://www.raspberry-projects.com/pi/pi-operating-systems/win32diskimager
- Download the attached "macroscope.zip" file.
- Uncompressed "macroscope.zip" and copy the "macroscope" directory to the SD Card.
Downloads
Setup: Raspberry Pi
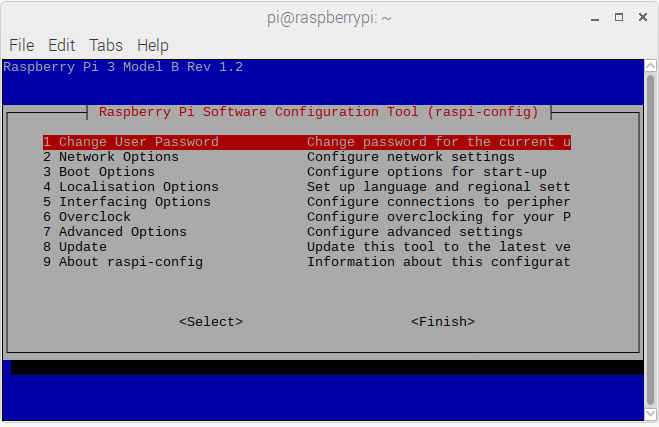
Fire Up the Pi:
- Insert the SD card into the Raspberry Pi.
- Connect your Raspberry Pi to the monitor, keyboard, and mouse.
- Power up the Pi and let it boot into the desktop.
From the desktop, start a command window, and issue the command "sudo raspi-config" and change the following options:
- Change password
- Enable SSH, I2C (optional)
- Enable camera
- Set time zone
- US keyboard
Free up some extra space by removing unnecessary software via the command line:
- sudo apt-get update
- sudo apt-get upgrade
- sudo apt-get purge wolfram-engine sonic-pi scratch
- sudo apt-get clean
- sudo apt-get autoremove
And lastly, we need some additional software for creating MP4 videos:
- sudo apt-get install -y gpac
Setup: Resize Partition (Optional, and a Bit Difficult)
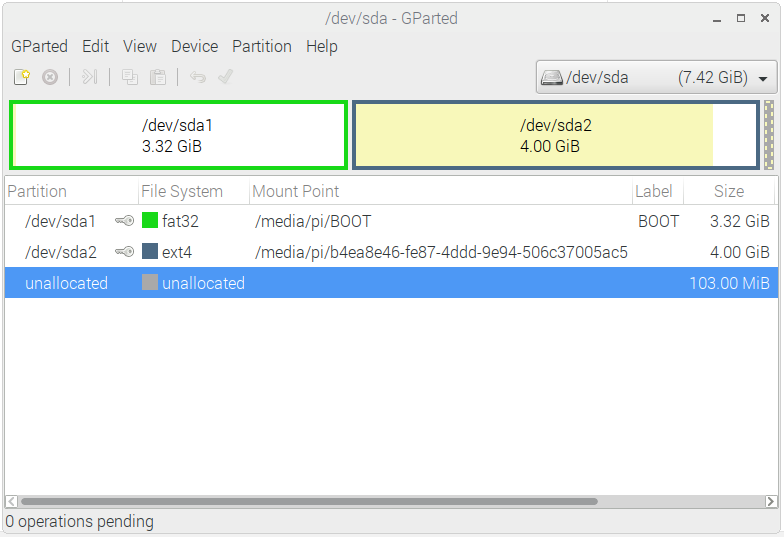
The Raspberry Pi card has two partitions, a small FAT32 formatted section that is readable in a Windows computer, and the Linux partition containing the Raspberian OS. If we want to save more than just a couple of pictures to the FAT32 section, we need to resize it. Unfortunately, this is not trivial. I use the instructions at: https://learn.adafruit.com/resizing-raspberry-pi-boot-partition/edit-partitions
You can use the program GParted in one of the following methods:
- A computer running Linux
- A computer booted on a Live CD like https://gparted.org/livecd.php
- The Raspberry Pi running on a separate image with the Macroscope SD card connected wit a reader like http://a.co/8uDso8A
If this all seems a bit overwhelming, skip this part and just use a USB thumb drive to save the pictures to.
The good news is, once you get the partitions the way you want, use Win32DiskImg to save a copy of the image and you can clone it at will.
Setup: Final Touches
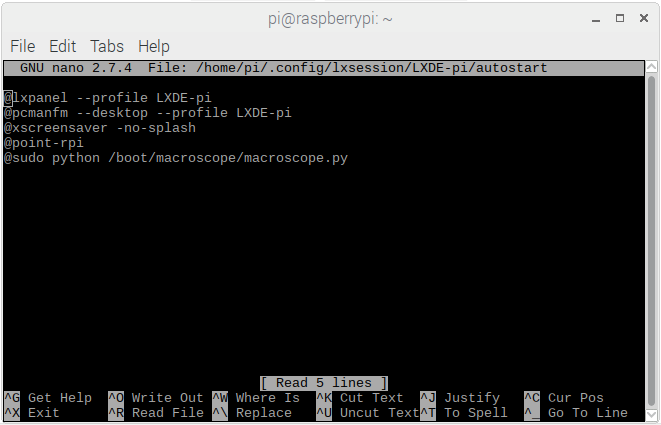
All that is left is to make a desktop icon and configure the script to run on startup:
Add desktop icon:
- sudo cp /boot/macroscope/Macroscope.desktop /home/pi/Desktop/Macroscope.desktop
- sudo chmod +x /home/pi/Desktop/Macroscope.desktop
Execute script on startup:
- sudo nano ~/.config/lxsession/LXDE-pi/autostart
- Add: "@sudo python /boot/macroscope/macroscope.py"
Setup: Use
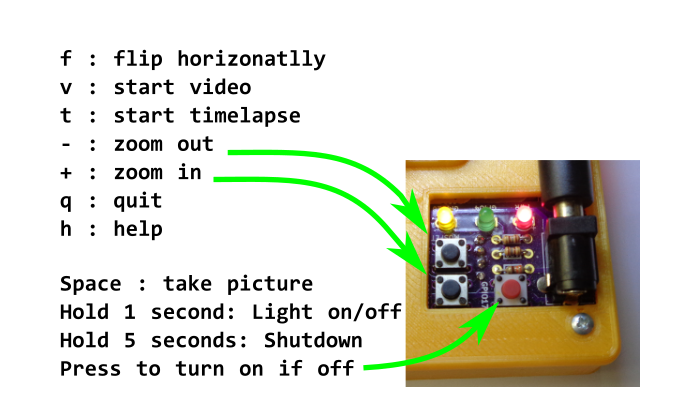
For most actions, there are buttons and keyboard commands. I initially pictured this being used without a keyboard or mouse, but they can be useful if you want to use the Pi for other things as well.
Red button:
- Single quick push takes a photo.
- One second hold turns LED ring on or off.
- Five second hold shuts down Pi.
- If the Pi is off, press to startup.
Black buttons zoom in or out.
Keyboard:
- Space: take a picture
- f : flips the screen horizontally
- - : zoom out
- = : zoom in
- q : quit
- h : help
- v : start video
- t : start timelapse
If a USB drive is inserted, the picture/video will be saved in a folder based on the date, otherwise, it will be saved in the boot partition of the SD card.
All this can easily be modified in the "/boot/macroscope/macroscope.py" file if you have other needs or ideas. Please share them if you come up with something you find useful!