RPi IoT Smart Light Using Firebase
by AndersSeverinsen in Circuits > Raspberry Pi
12513 Views, 23 Favorites, 0 Comments
RPi IoT Smart Light Using Firebase
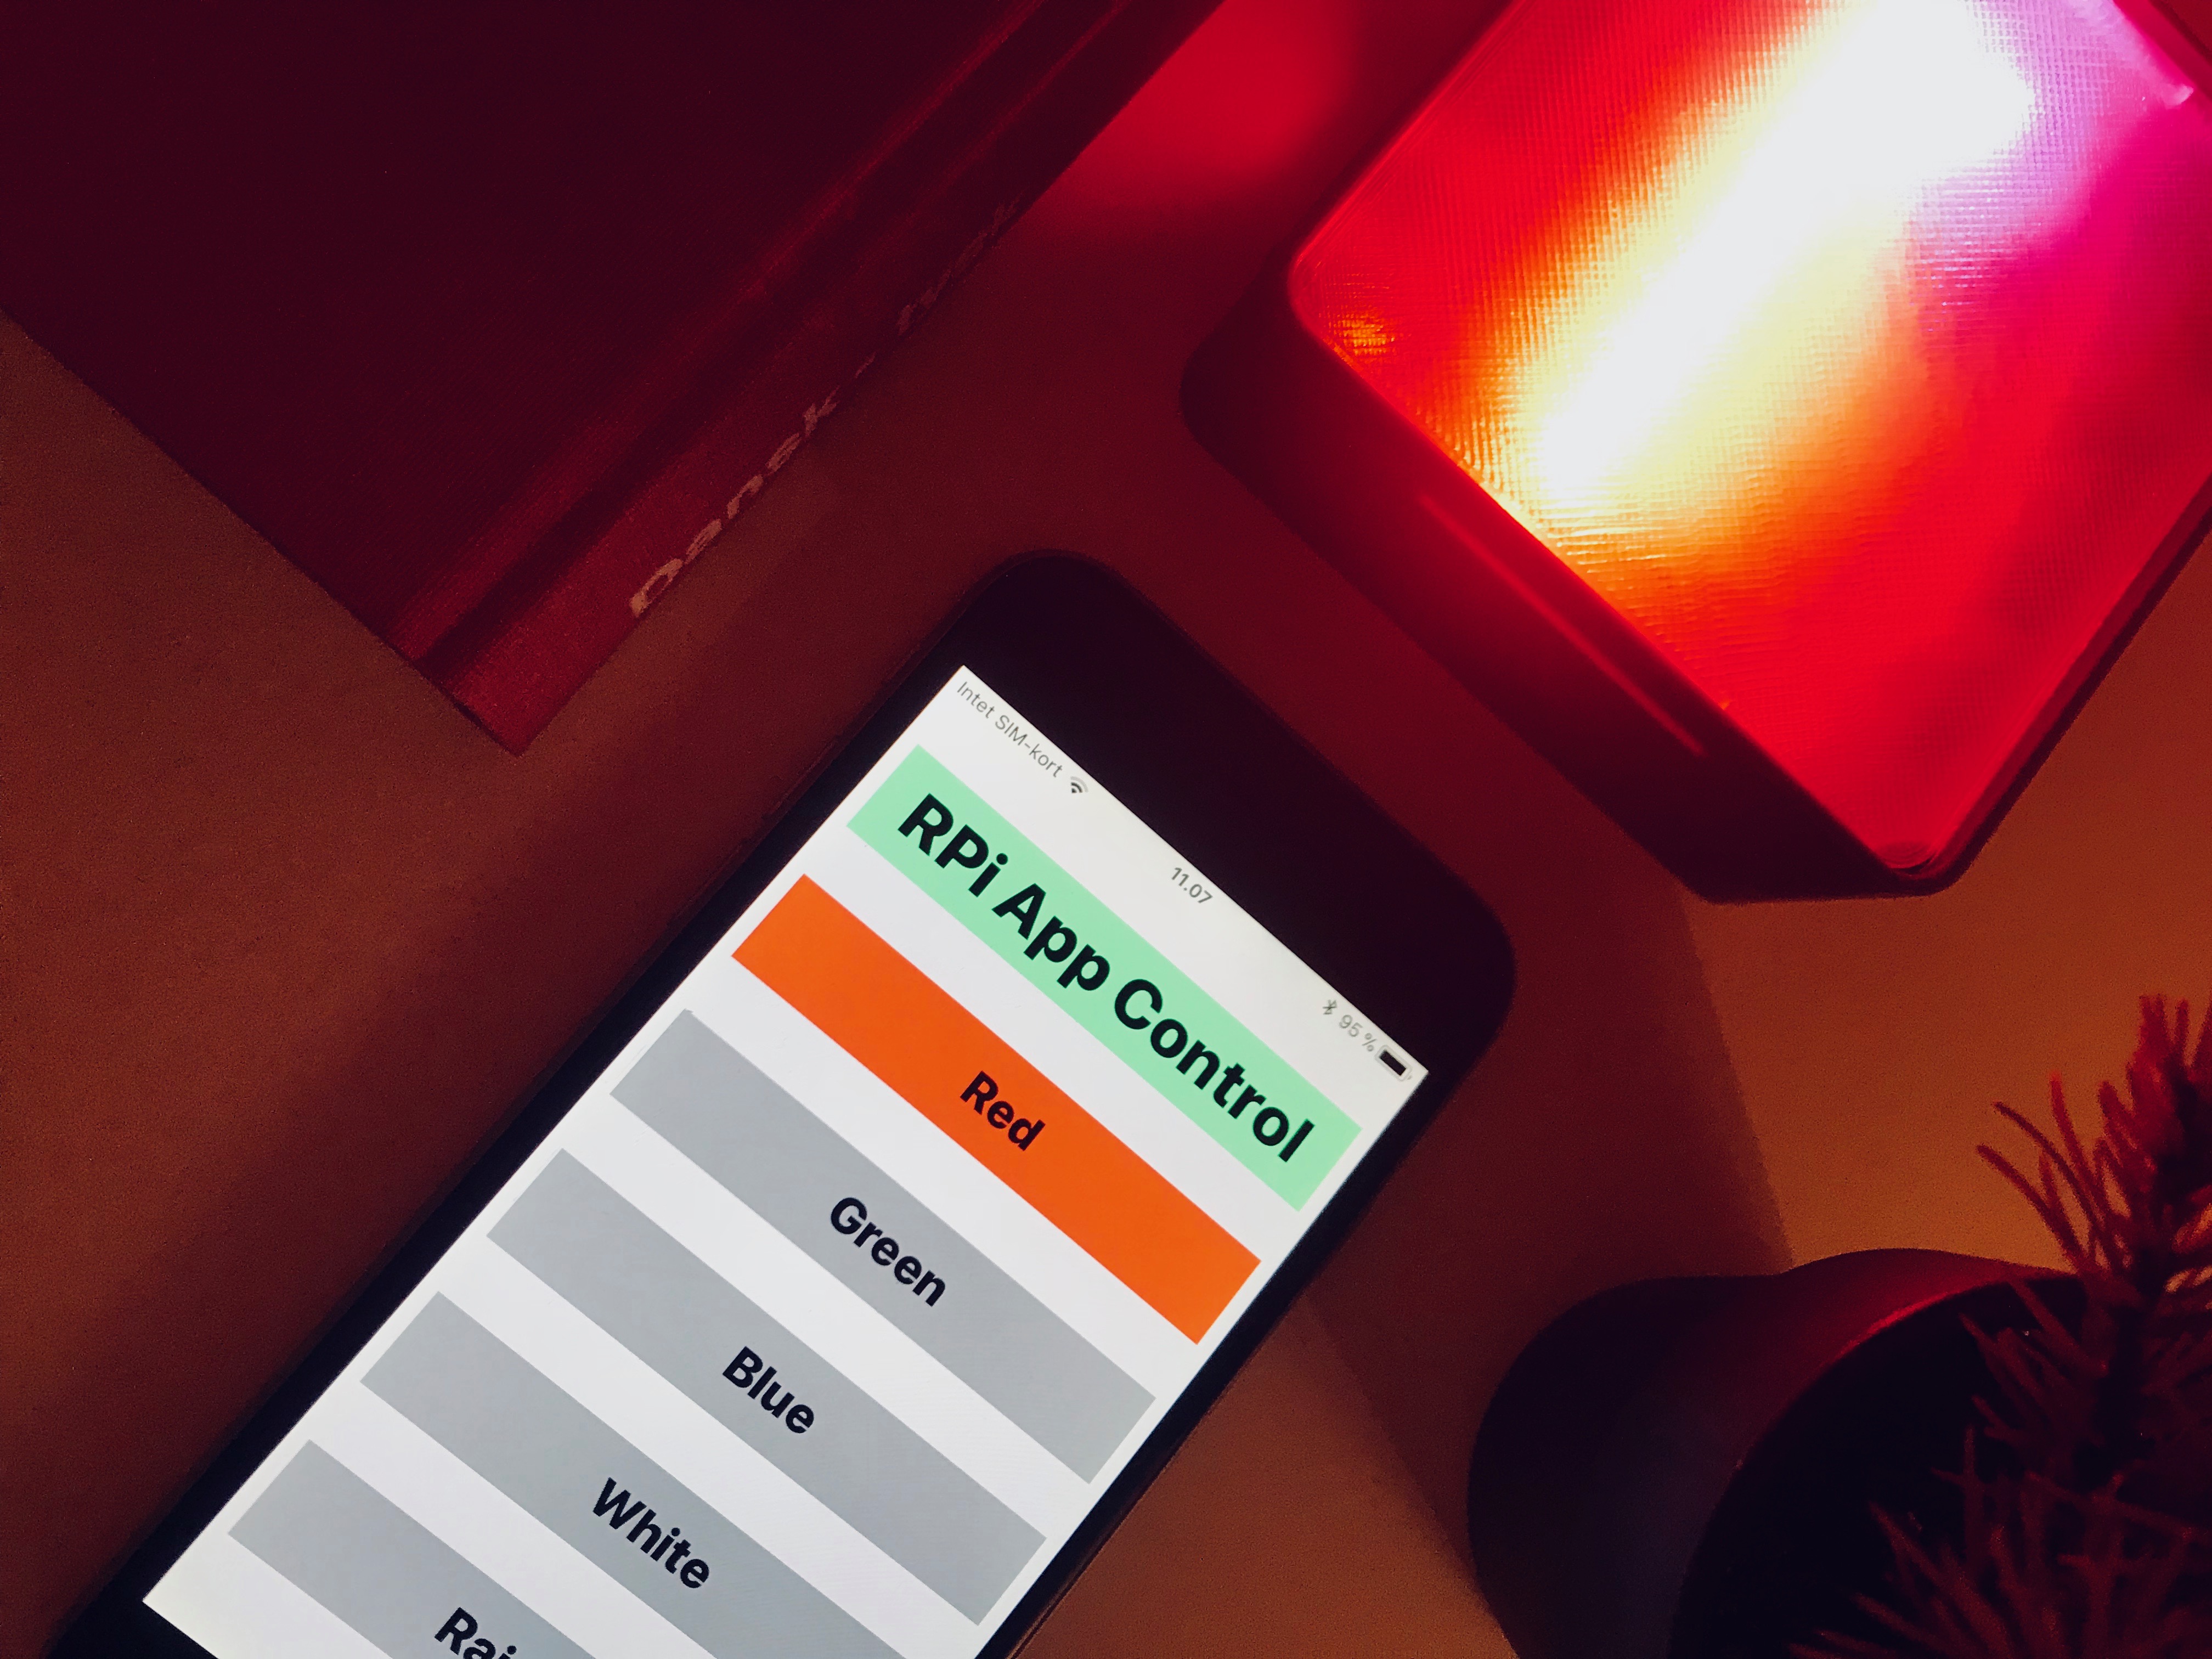
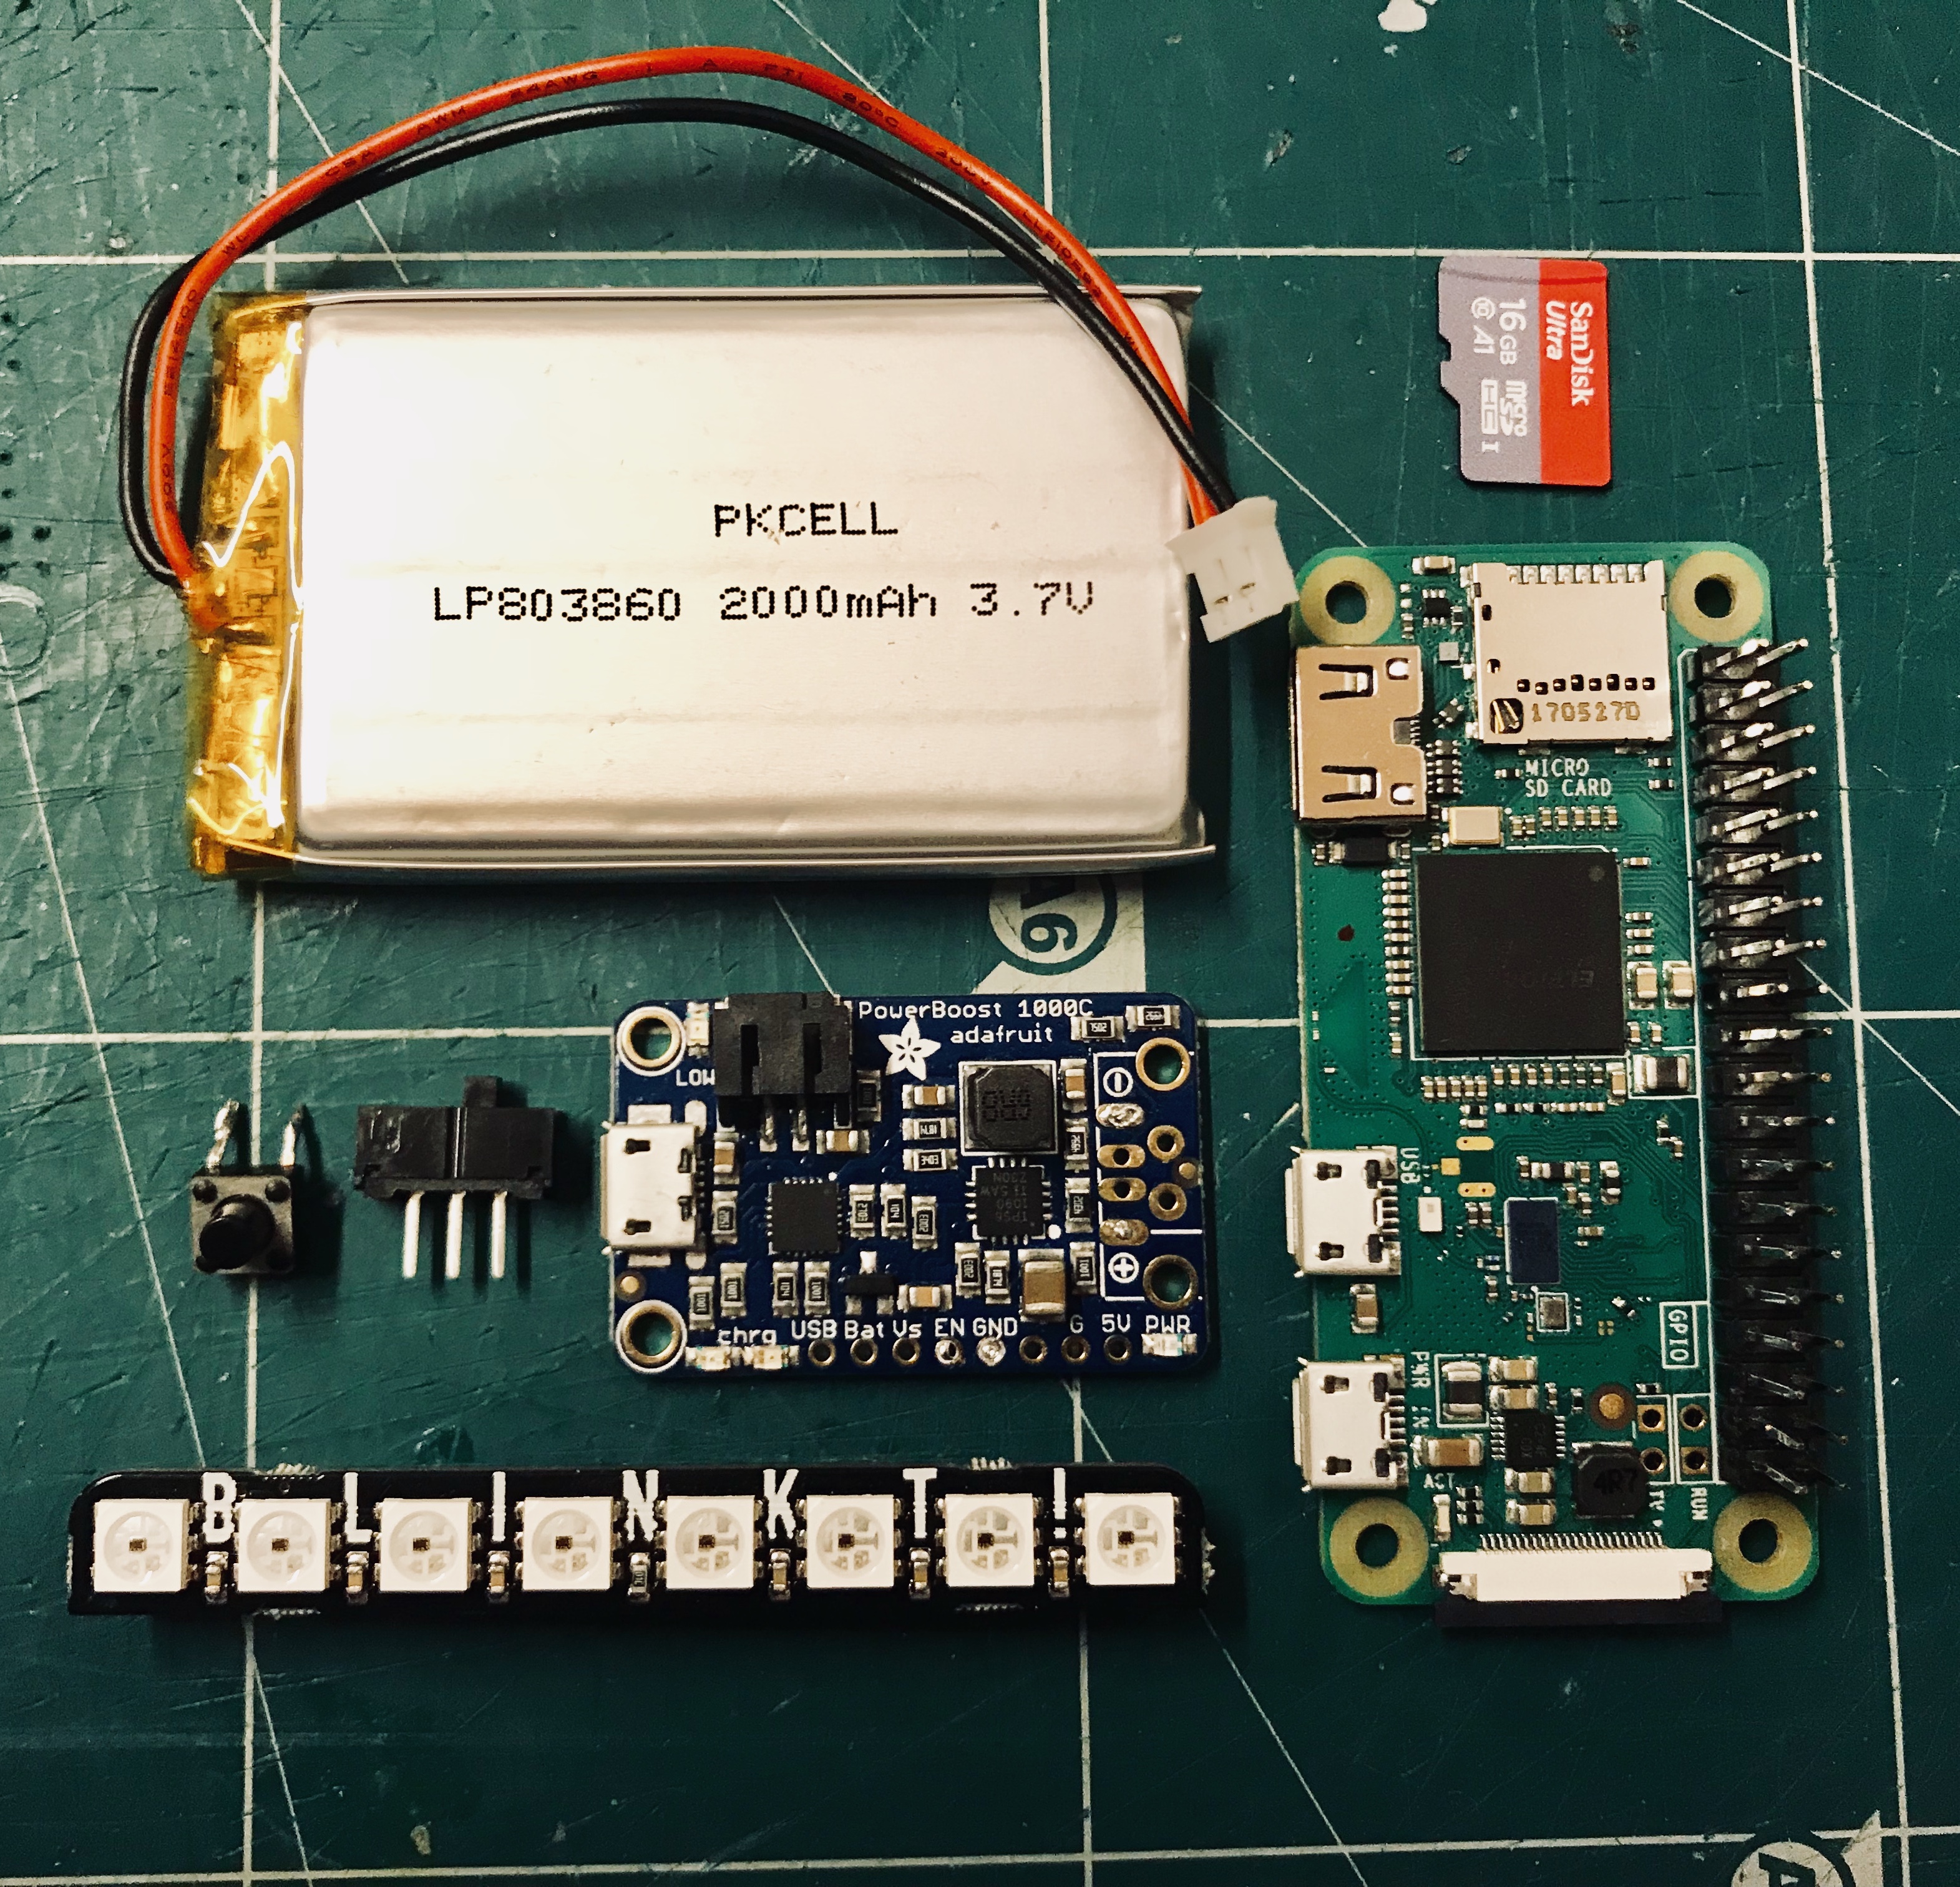

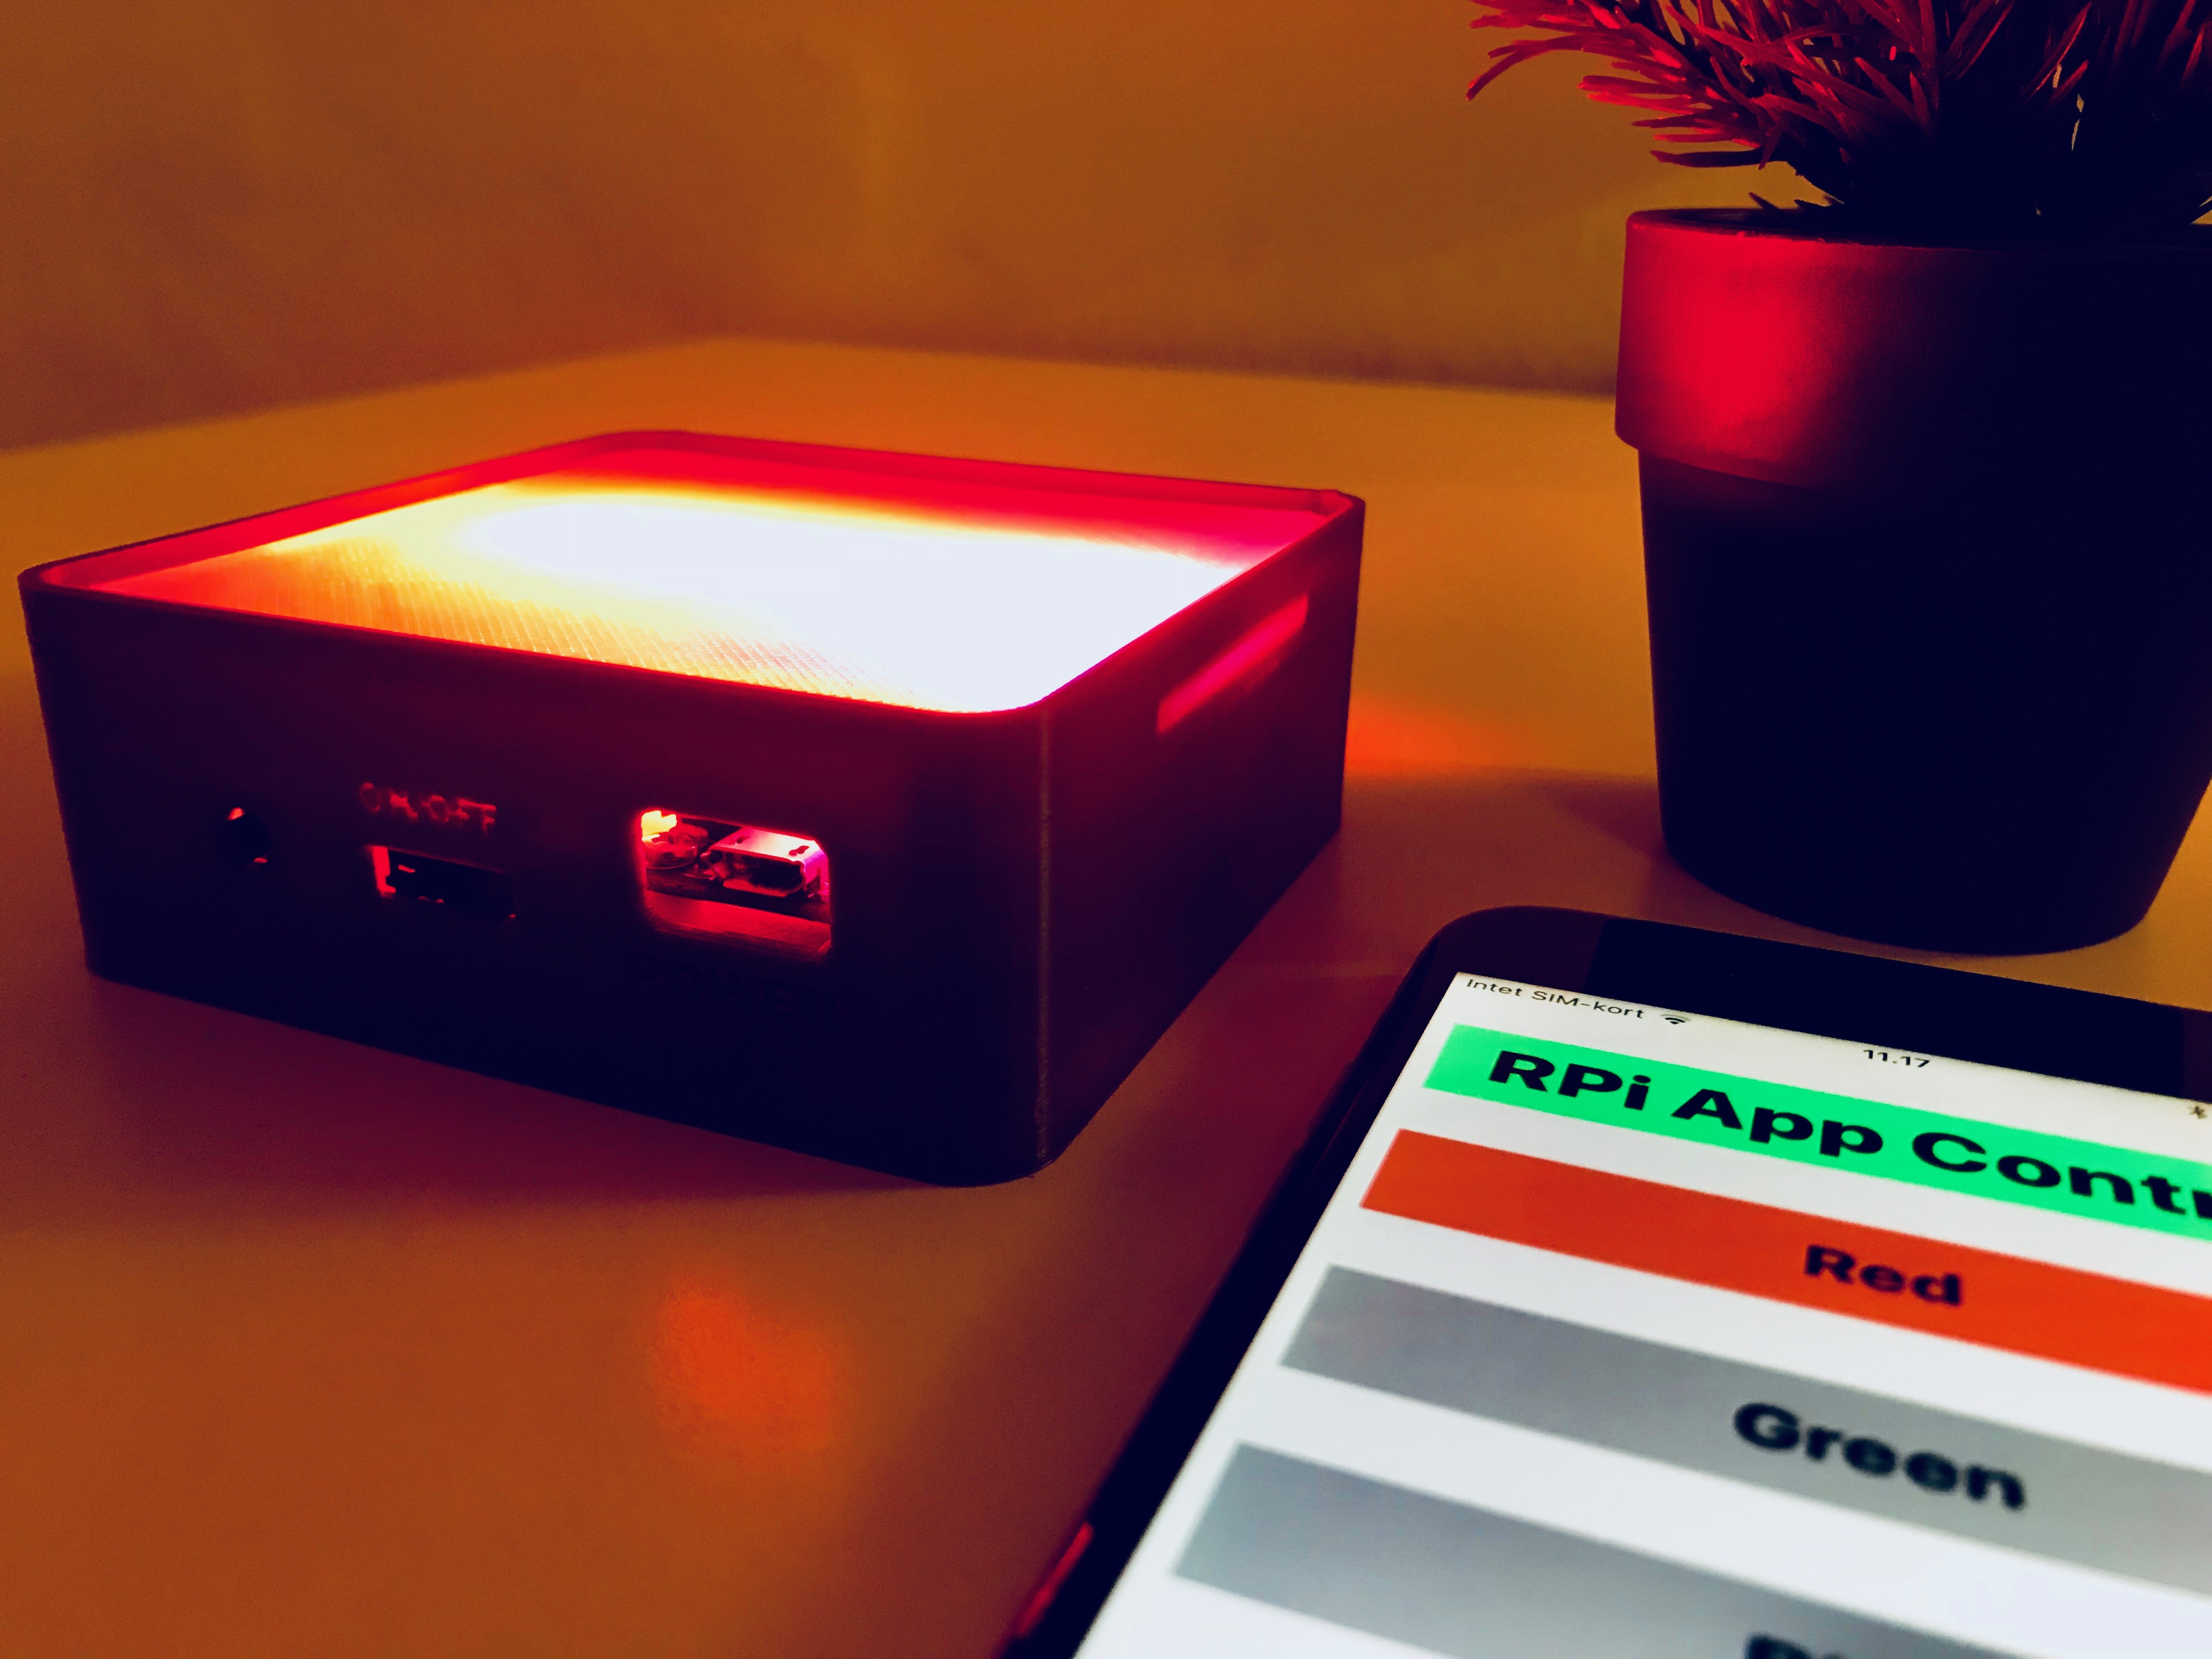
This guide shows you how to make and setup an app to control the Raspberry Pi via Firebase (A online database). And then 3D printing a case for the Pi Zero W, a Powerboost 1000C, a battery, and a Blinkt!.
To be able to follow along most easily, i recommend being familiar with Xcode and Raspberry Pi.
And if you like what you see, follow me on Instagram and Twitter (@Anders644PI) to keep up with what I make.
You will need:
- A Raspberry Pi Zero W with adapters and GPIO-headers
(or the ordinary Pi Zero with a WiFi dongle)
- A PowerBoost 1000 C
- A Lithium Ion Battery - 3.7v 2000mAh
- A Blinkt! (or any pHAT/HAT, that: doesn't use pin 5 physical and HAT's should be flat on the bottom.)
- A 8GB or higher Micro SD Card, with Raspbian Stretch (with desktop) on it
- A Keyboard and a mouse (but you can also connect over ssh, if you now how)
- A connection to a monitor or TV (or ssh!)
- Scrap screws
- Small wires
- A small switch and a small button
- A 3D printer and one spool of any color PLA filament, and one spool of transparent PLA (or you could use a 3D service like 3D Hubs to print it for you)
Firebase and Xcode

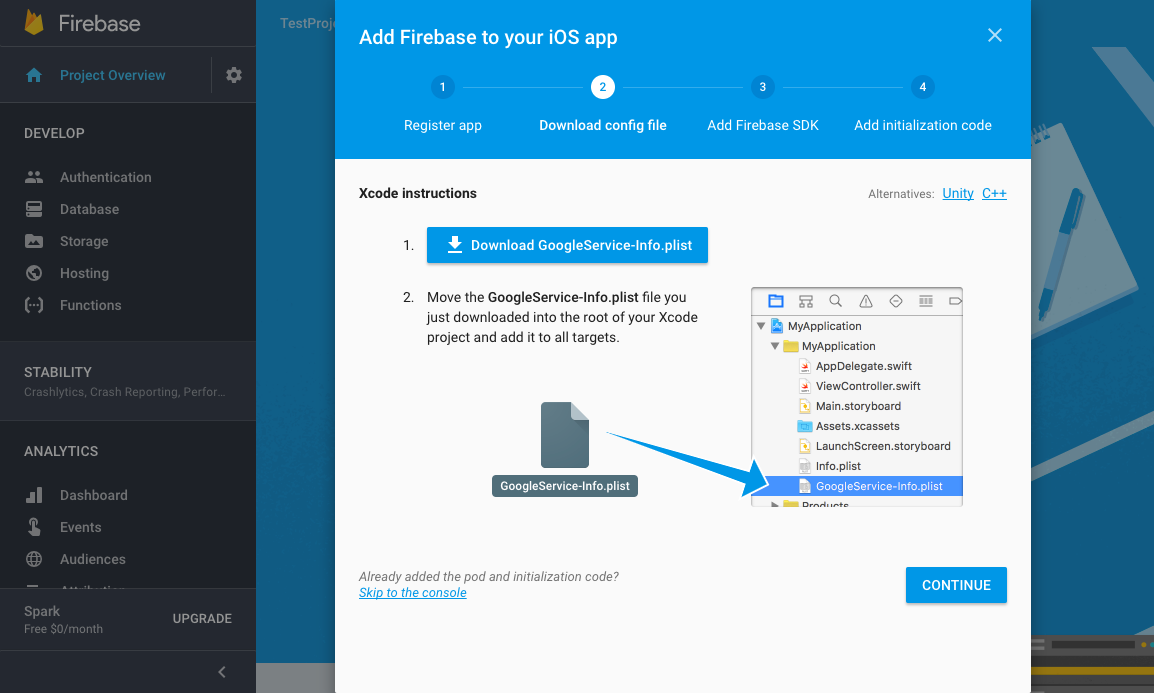
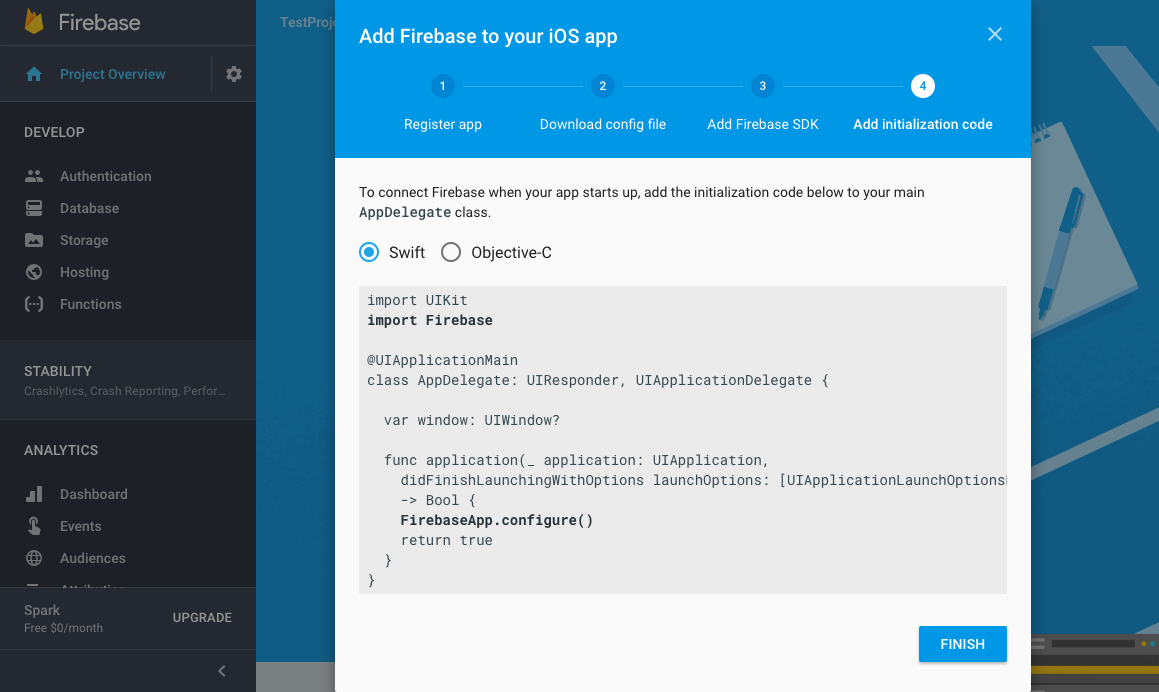
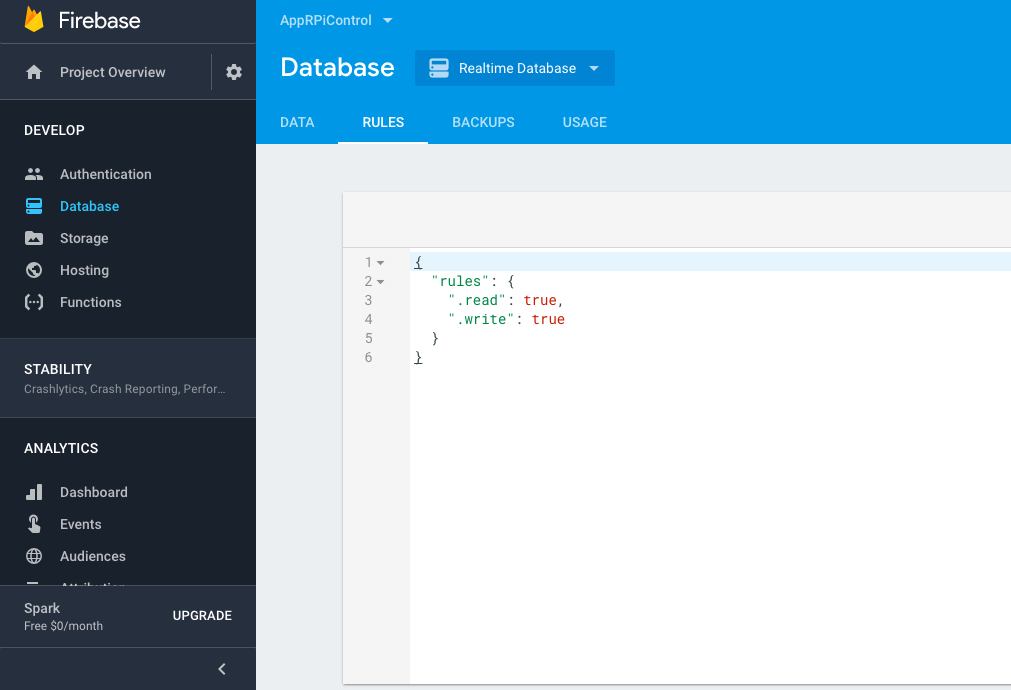
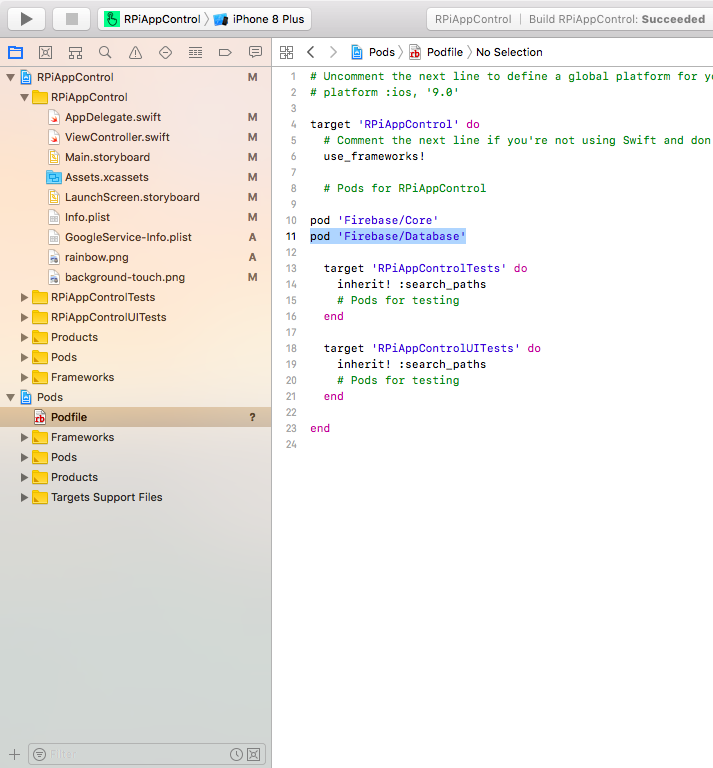
First we will setup Firebase with the app, so we can communicate from the app to the Pi.
If you get confused, you can watch this video.
1. Open up Xcode, and make a new Xcode project. Choose Single View App and call it RPiAppControl, and make sure that the language is Swift. Press Next, and save it.
2. Copy your Bundle Identifier, because we will need that later.
3. In Firebase, login with your Google account, and click Go to console.
4. Create a new project, and call it RPiAppControl.
5. Click Add Firebase to your IOS App. Paste in your Bundle Identifier, and press Register App.
6. Download the GoogleService-Info.plist, and drag it into your Xcode Project.
7. Back at Firebase, press Continue. Then open a terminal window and navigate to the location of your Xcode project.
8. Run this command:
pod init
9. Open the Podfile, and under use_frameworks!, add this line:
pod 'Firebase/Core'
10. Back in the terminal type: pod install, and close Xcode.
11. In Finder, navigate to your Xcode project, and open the newly created .xcworkspacefile.
12. In here go to the AppDelegate.swift, and under import UIKit add this line:
import Firebase
And in the application-function, add this line:
FIRApp.configure().
13. Back in Firebase, click Continue and then Finish.
14. Go to Database, then Rules, and set the ".read" and ".write" to true. Press PUBLISH.
15. Back at Xcode, open up the Podfile, and under the first line we set in, add this:
pod 'Firebase/Database'
16. Back in the terminal, run pod install again.
Finishing Xcode
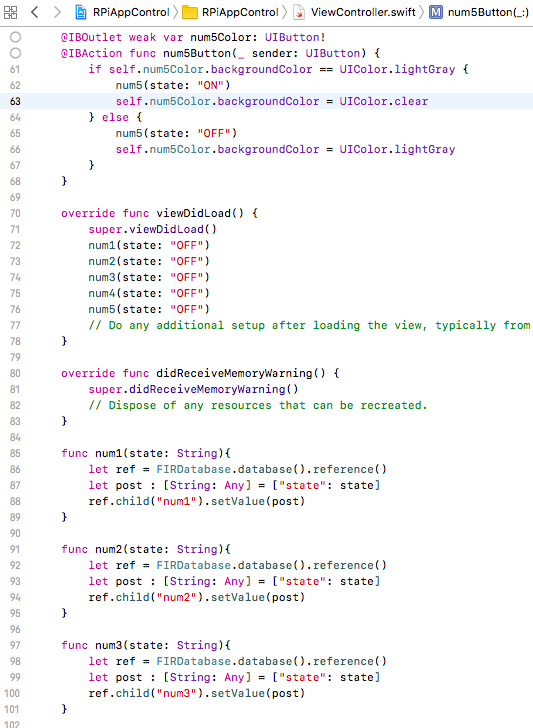
We will now finish the code and layout in Xcode.
This is using Xcode 9 and Swift 4
Code for the ViewController
1. At the top of the ViewController, and under the import UIKit, add this:
import Firebase
import FirebaseDatabase
2. On the bottom of the ViewController, and under the didReceiveMemoryWarning-function, copy paste this functions for each button:
func num1(state: String){
  let ref = FIRDatabase.database().reference()
  let post : [String: Any] = ["state": state]
  ref.child("num1").setValue(post)
}
Remember to change the (number)
3. In the viewDidLoad-function, under the super.viewDidLoad(), insert this line for each button (For multiple buttons, just change the (number). See picture...):
num1(state: "OFF")
Layout of the Main.storyboard and buttons
1. Go to the Main.storyboard, and put in some buttons. You could layout them like I did, or customize them as you like.
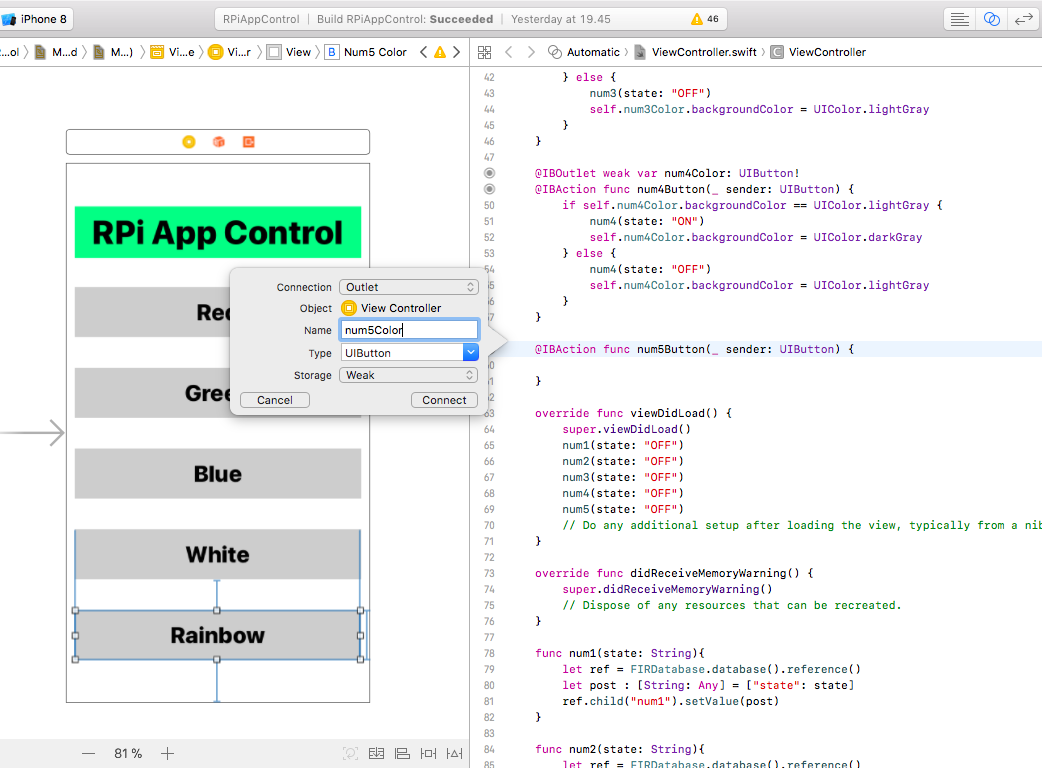
2. Connect the buttons with the ViewController. Each button need to be connected twice: One as an action and UIButton called num(number)Button, and the other one as the default Outlet and call it num(number)Color. See picture...
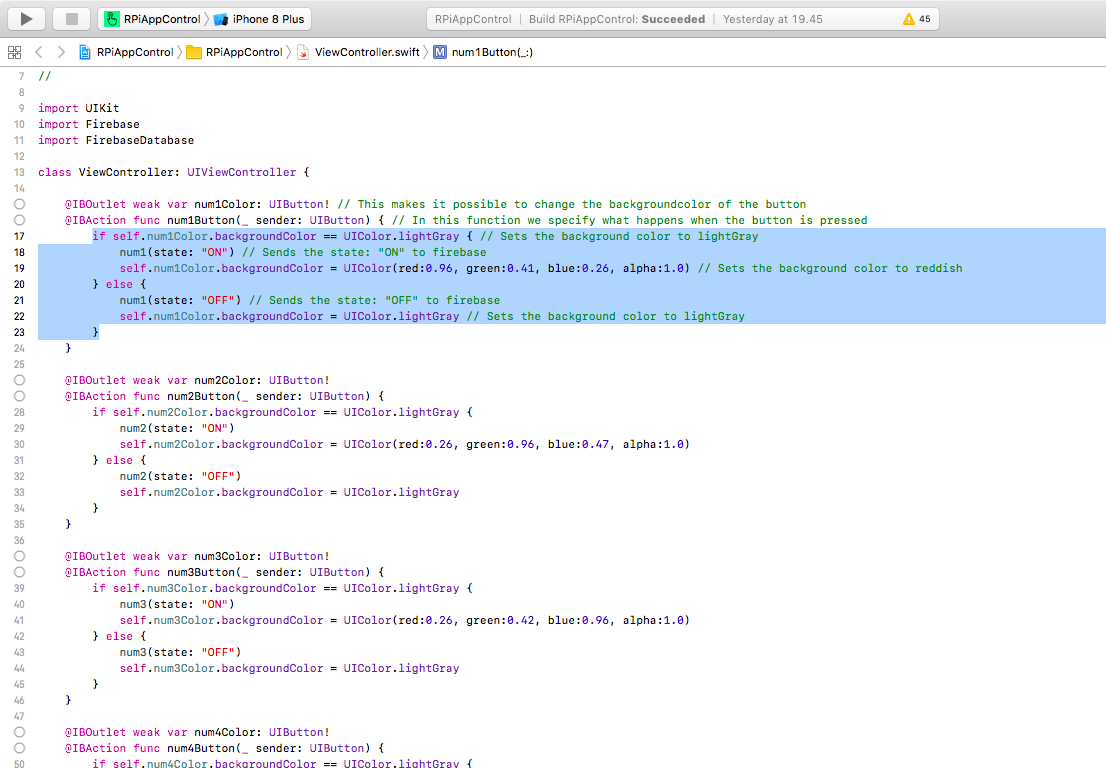
3. Then for all of the buttons, paste in this line to each of the functions:
if self.num1Color.backgroundColor == UIColor.lightGray { // Sets the background color to lightGray
  num1(state: "ON") // Sends the state: "ON" to firebase
  self.num1Color.backgroundColor = UIColor(red:0.96, green:0.41, blue:0.26, alpha:1.0) // Sets the background color to reddish
} else {
  num1(state: "OFF") // Sends the state: "OFF" to firebase
  self.num1Color.backgroundColor = UIColor.lightGray // Sets the background color to lightGray
}
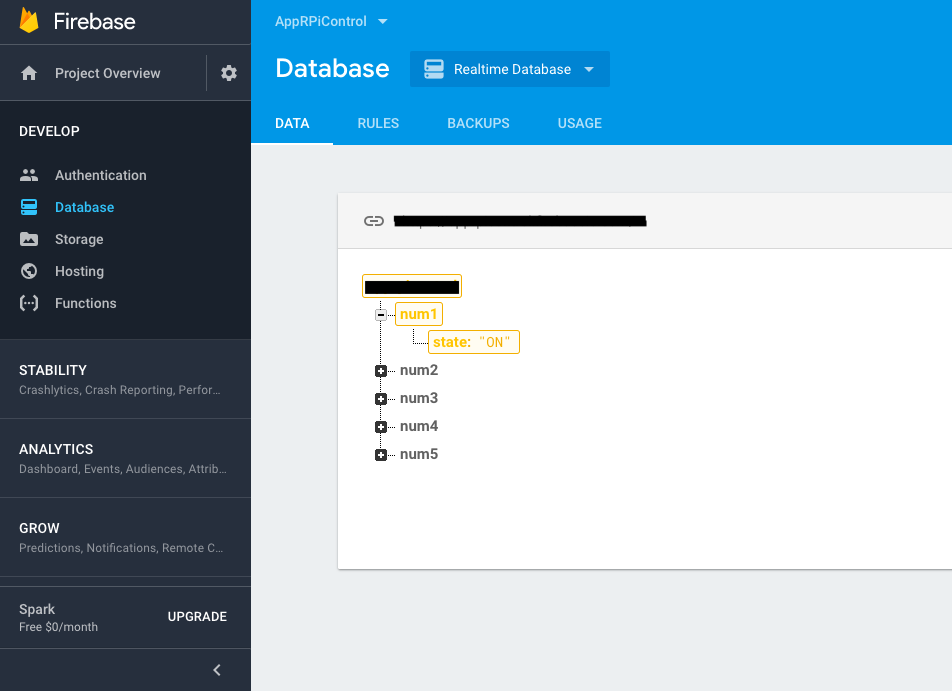
Now you should be able to test it out, by running the app, and when you press the buttons, you should see it changing state, in the Realtime Database in Firebase.
Finishing touches (Optional)
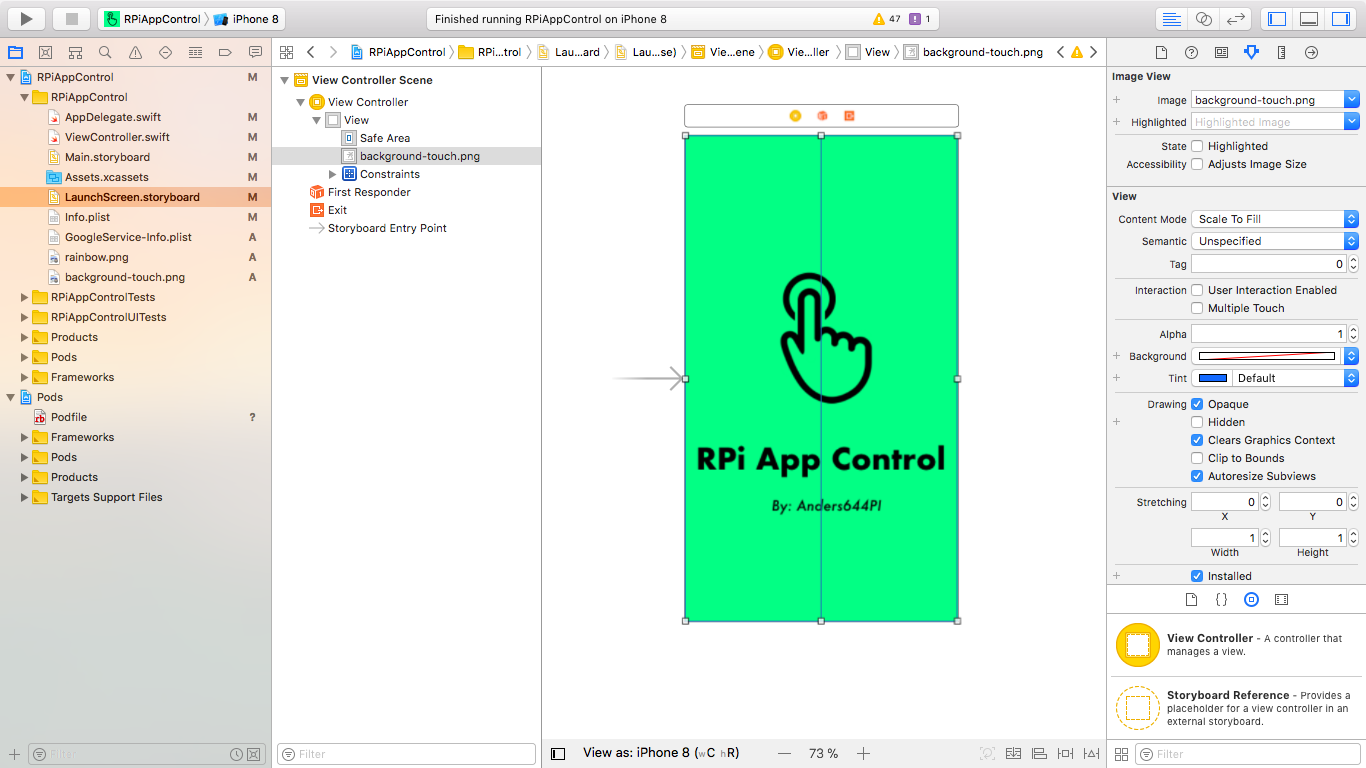
1. Download the images below, and insert the LaunchScreen-image.jpeg into a image-view, in the LaunchScreen.storyboard.
2. Go to Assets.xcassets and then AppIcon. In here, place in the corresponding AppIcon-size.
Downloads
Raspberry Pi Setup

Now we have to setup the Pi with Firebase, so the app can communicate, throw Firebase, to the Pi.
I didn't write the code, but you can find the original code here.
1. In the terminal, run the usual updates:
sudo apt-get update && sudo apt-get dist-upgrade
2. Then we will import pyrebase (Firebase):
sudo pip install pyrebase
sudo pip3 install pyrebase
sudo pip3 install --upgrade google-auth-oauthlib
3. Now download the Blinkt library:
curl https://get.pimoroni.com/blinkt | bash
4. Clone my GitHub repository:
git clone https://github.com/Anders644PI/RPiAppControl.git
cd RPiAppControl
5. Edit the AppRPiControl_Template.py:
nano RPiAppControl_Template.py
6. Fill in your Firebase ApiKey and projectId. You can find these by going to your Firebase Project, and clicking Add Another App and then Add Firebase to your web app.
7. Customize the functions, and save your changes by pressing ctrl-o (enter) and close with ctrl-x.
8. Now run it with:
sudo python3 RPiAppControl_Template.py
9. Then if you are using a Blinkt, you can try the example, when you have filled in your Firebase ApiKey and projectId:
cd examples
nano RPiAppControl_blinkt_demo.py
Now run it:
sudo python3 RPiAppControl_blinkt_demo.py
Keep in mind that after you run the script, it takes about a minute to get ready (At least on the Pi Zero). And the script has to be run in python 3.
10. BONUS: If you want the script to run on boot, you can find out how, here.
Shutdown/Power button
It's optional to install a power button, but I recommend it. Follow along with this video, to set it up.
Keep in mind that this uses physical pin 5 on the Pi, so some HATs won't work.
Enclosure
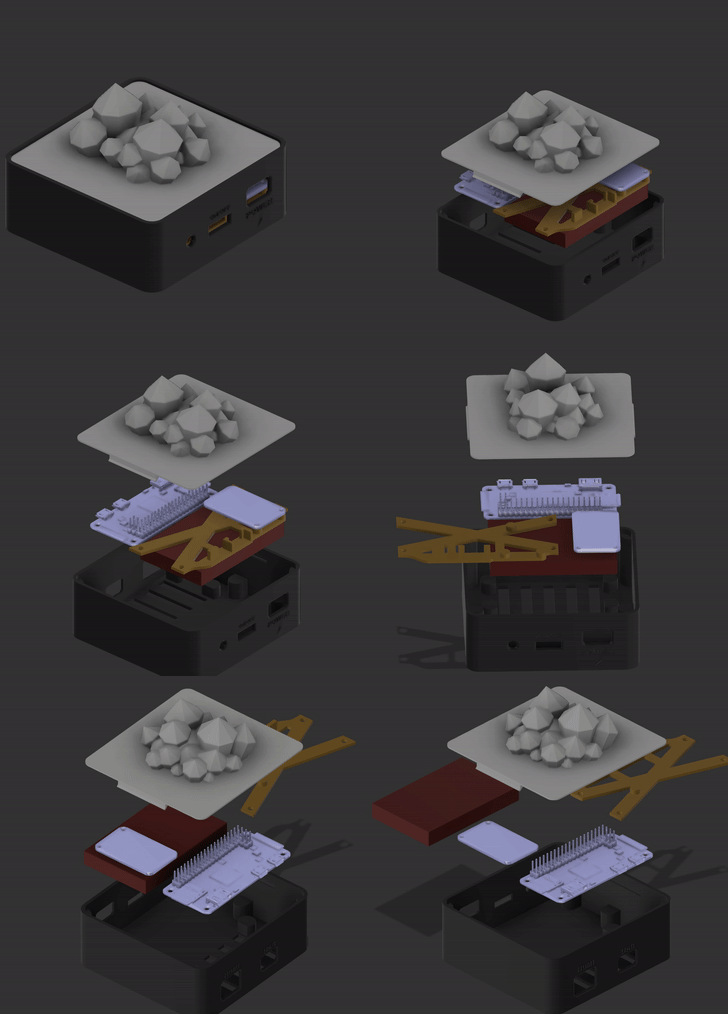
Now to show the potential of the app control, I designed a 3D printed enclosure, to house the Pi Zero W, a Blinkt, a Powerboost 1000C and a battery. But you could also make your own, and adapt it for what you want to use the app for.
3D printing
Print the parts from the links below or directly from Thingiverse here. You will have to print the following:
- The Base (Slate Gray)
- The Powerboost Rest (Orange)
- The Top (Transparent) - Here you have multiple options; There is one with crystals (need support), one without, and one with GPIO cut-out.
Assembly
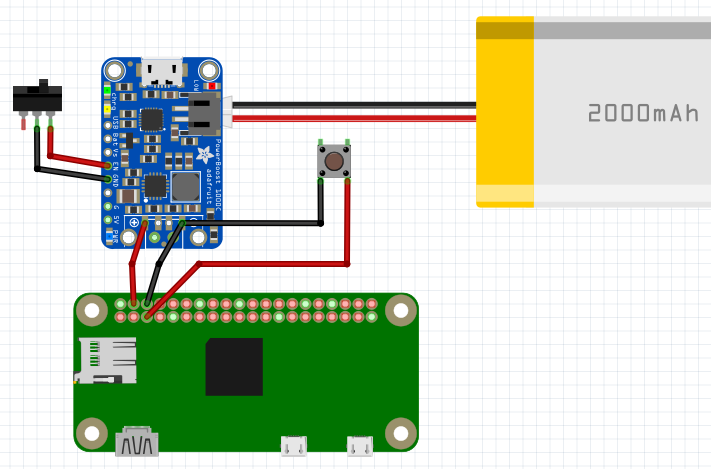
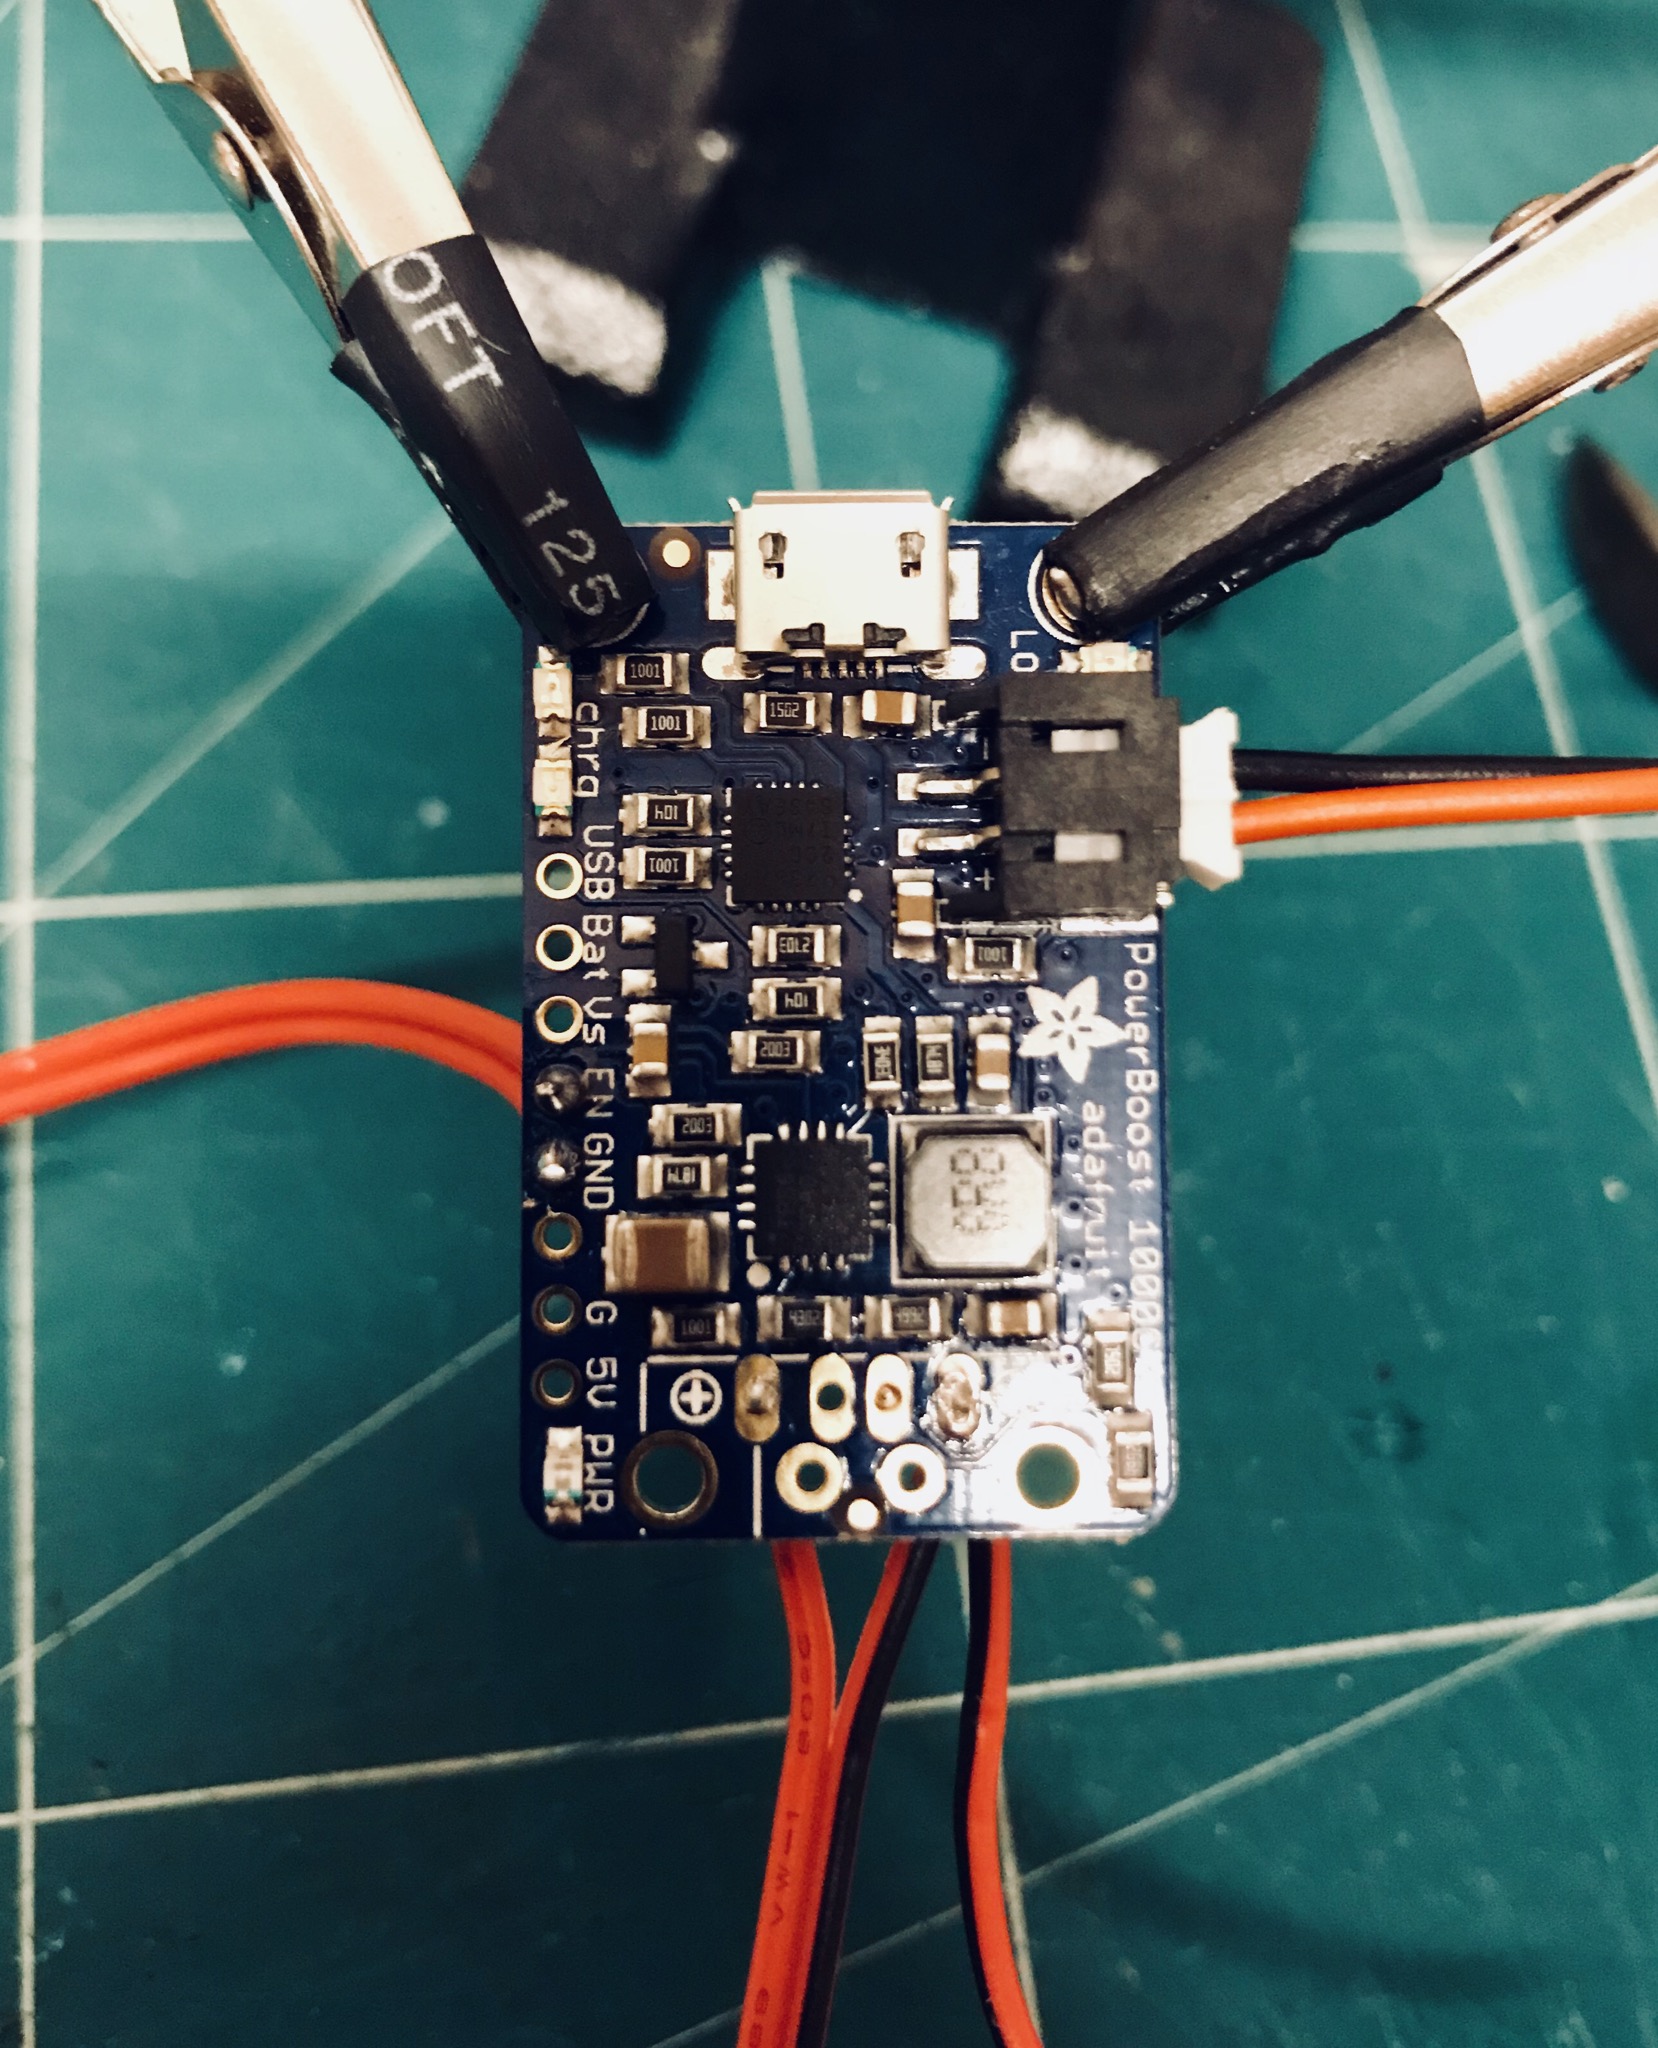
1. Solder wires as shown on the circuit diagram. The wires are NOT to scale.
2. Screw the Powerboost to the Powerboost Rest, on-top of the standoff's, with small scrap screws.
I recommend punching holes in the stand-off's, to give the screws a better grip.
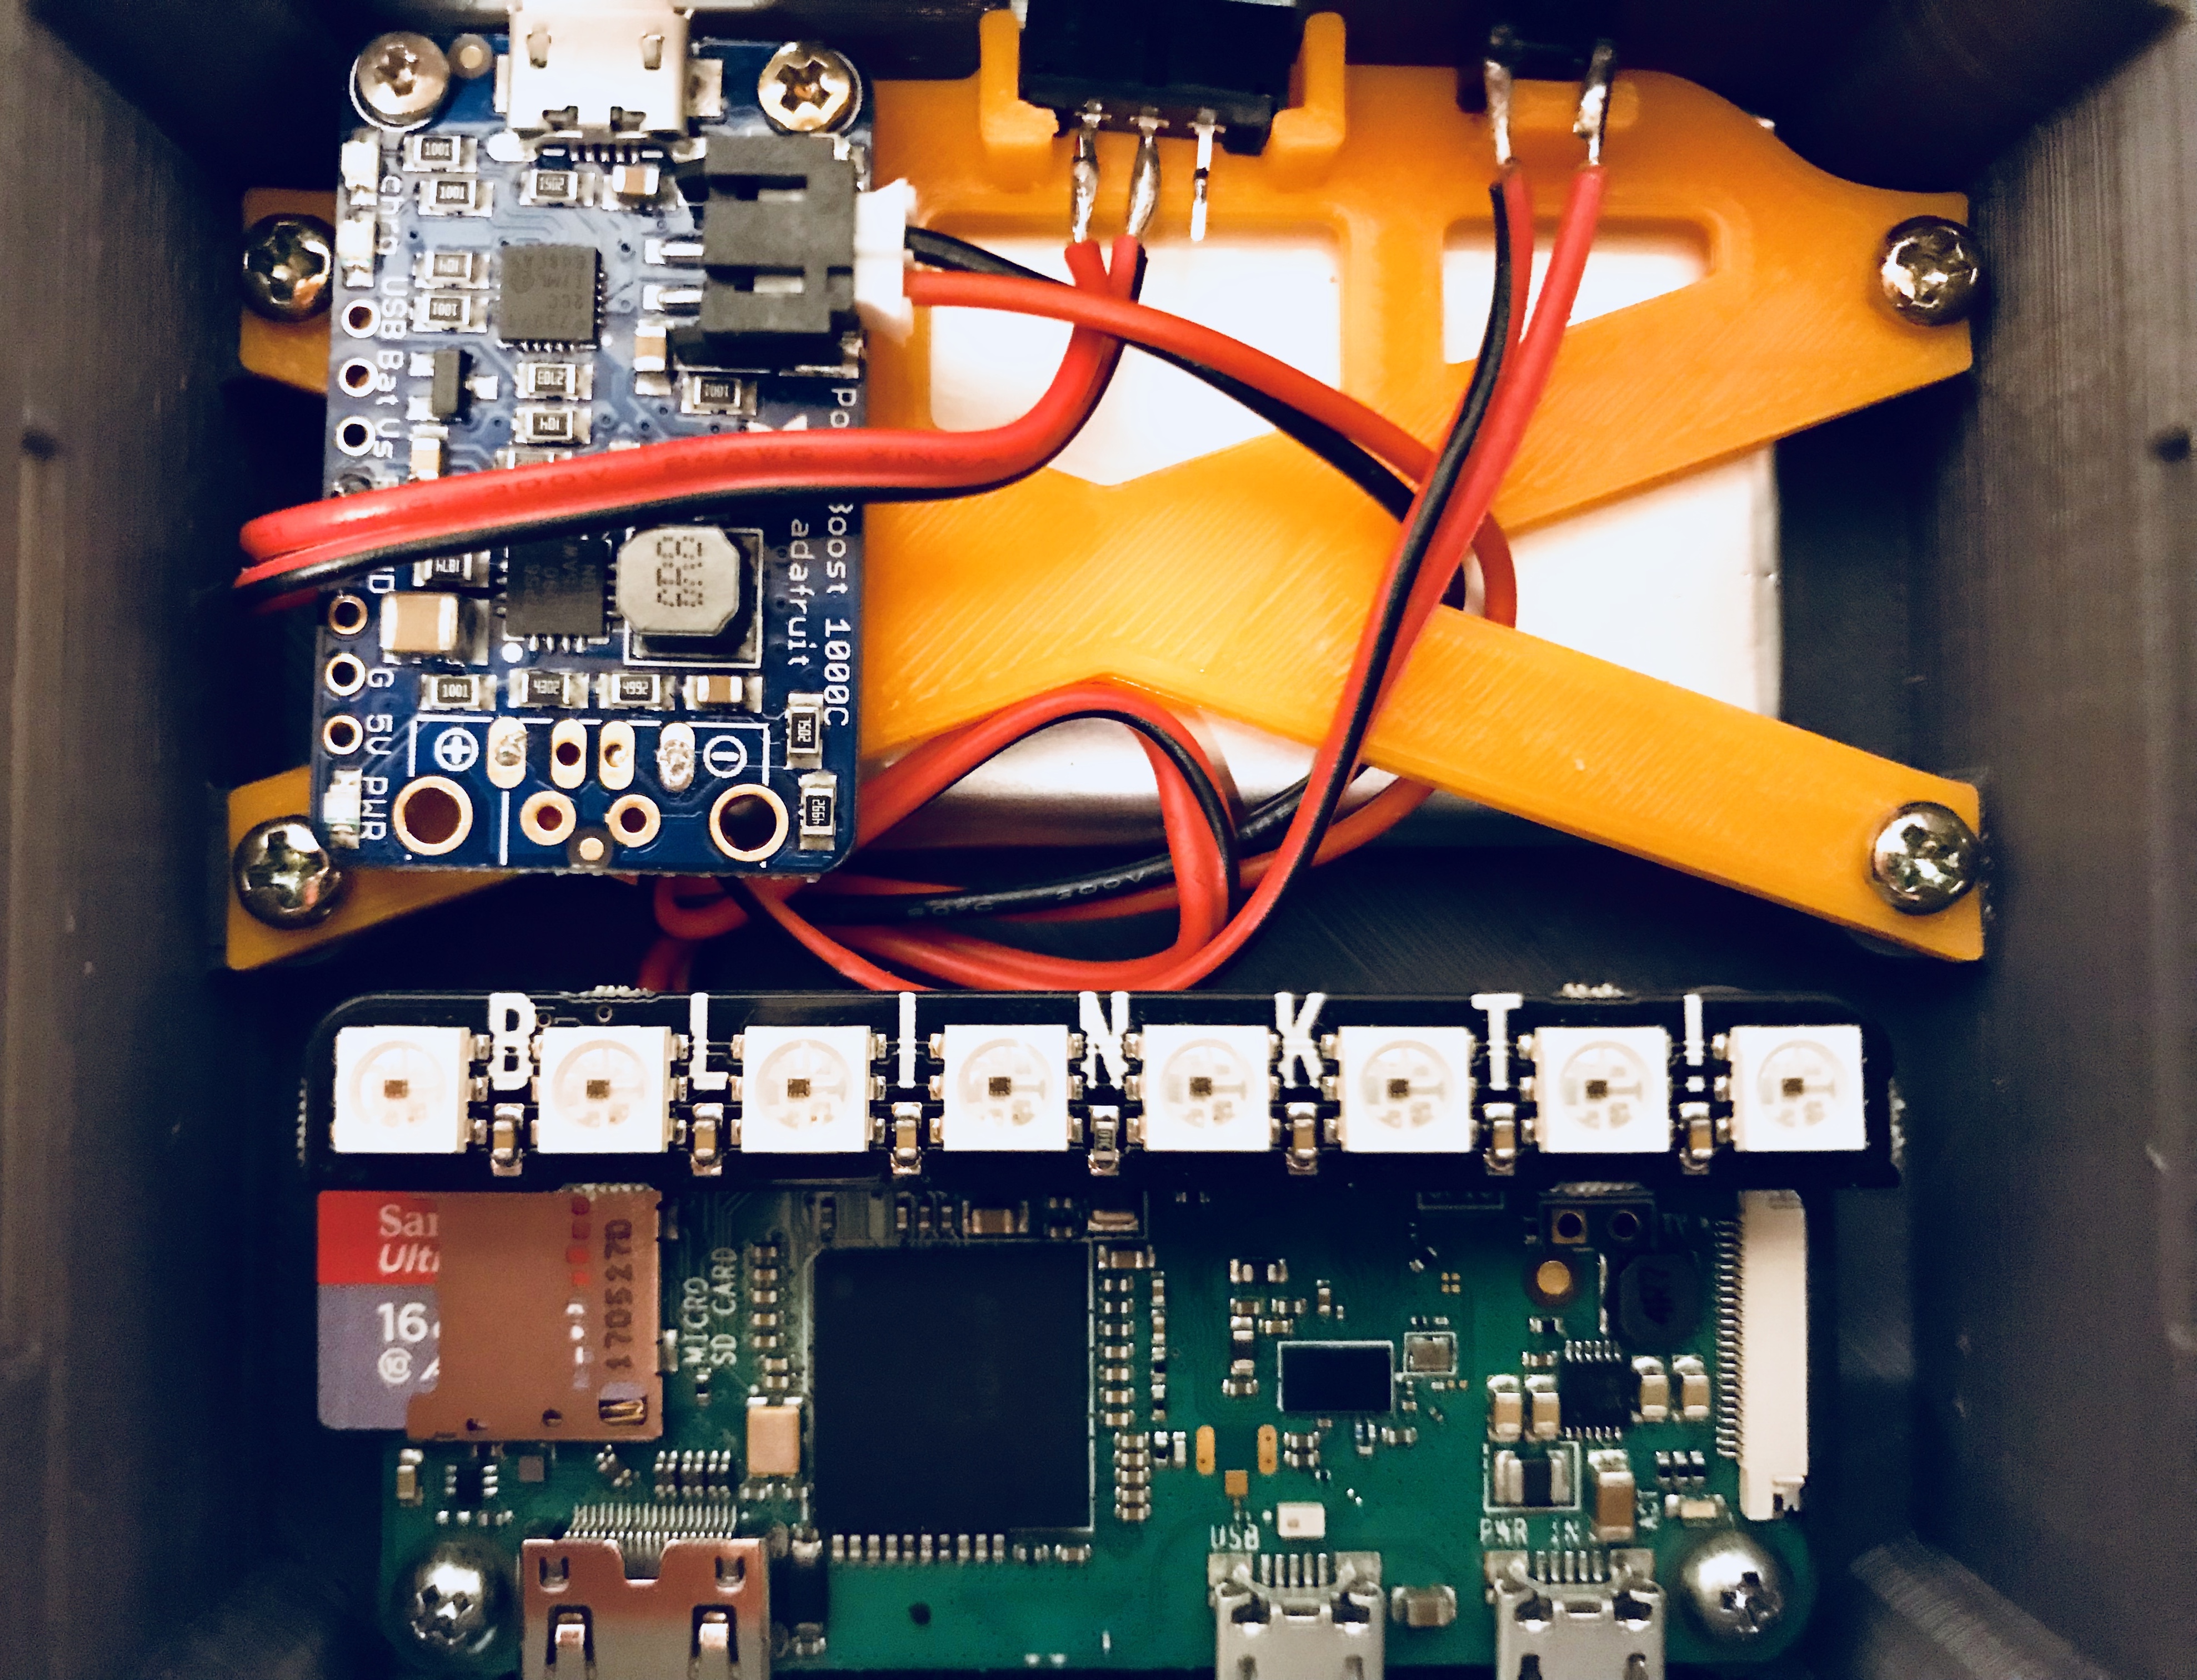
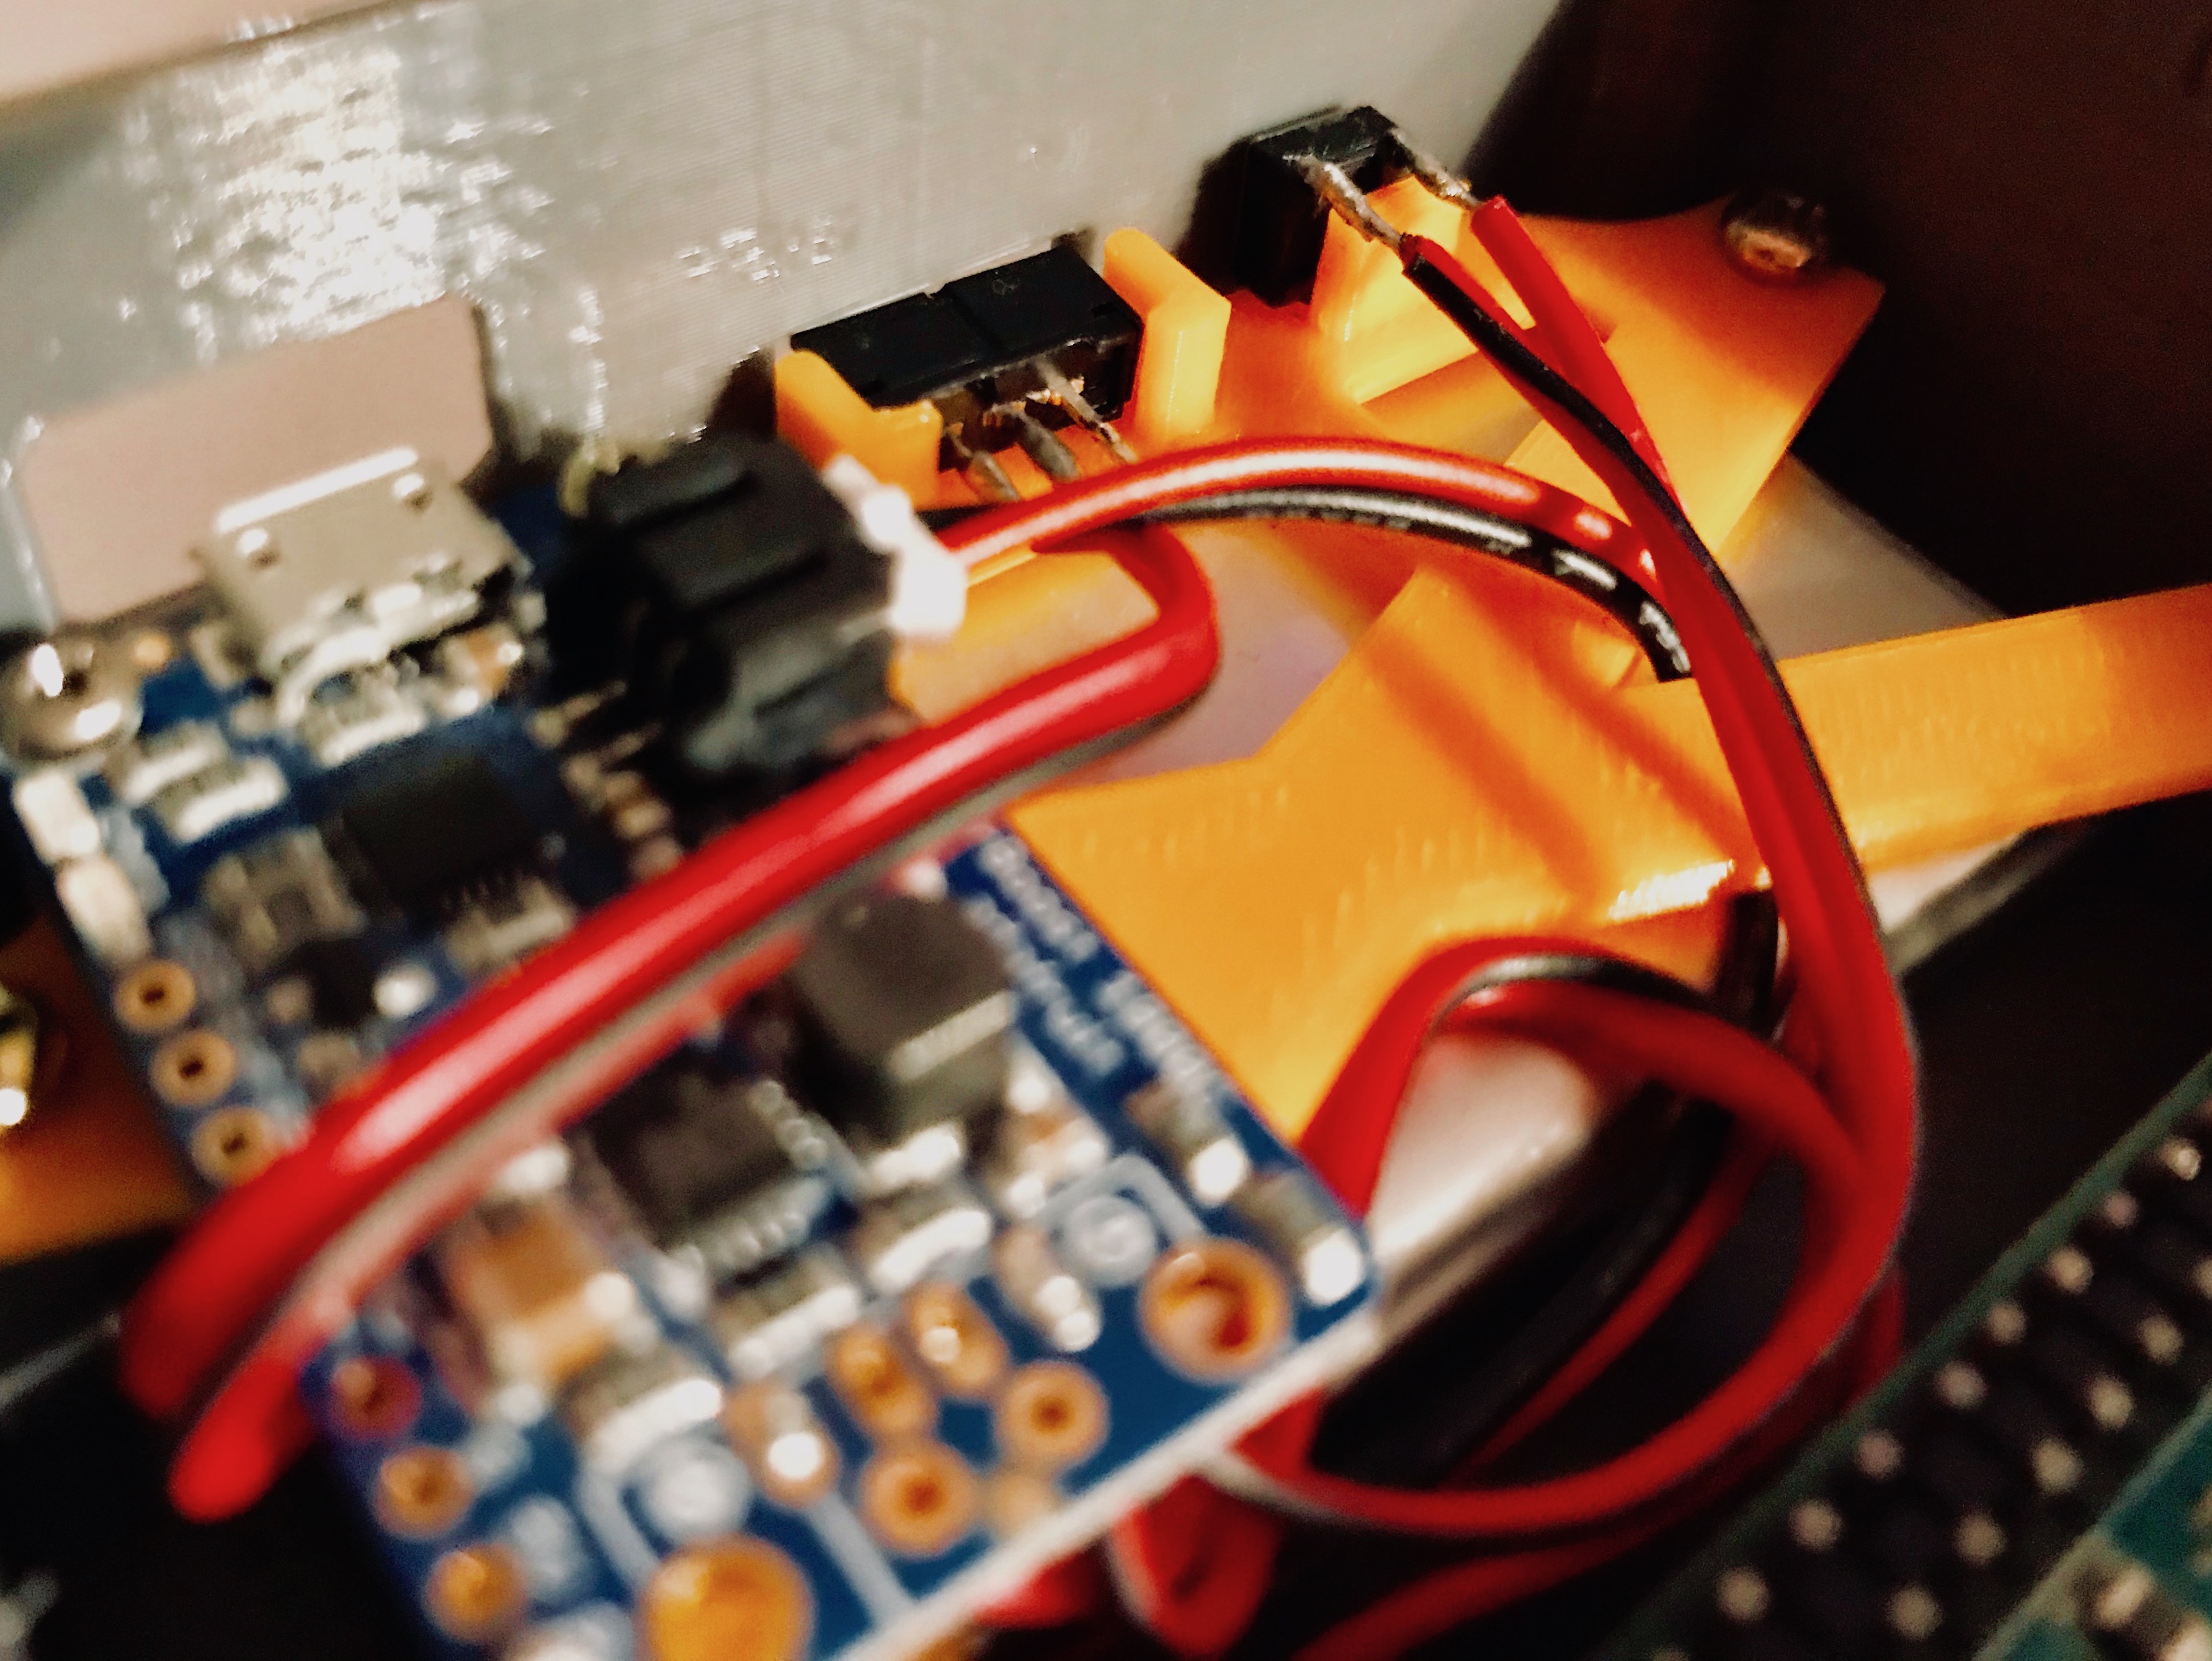
3. Place the components in the box, as shown on the picture. The Pi shall sit on the smallest stand-offs, and the Powerboost Rest on-top of the battery. The switch and button have to be set into position and through the cut-outs.
4. Screw the components down with screws.
5. Snap on the lid, by putting it down at an angle. To remove it, use a nail or a small screwdriver.