RIG CELL LITE INTRO: INFRARED SENSOR
by flabbyandroid in Circuits > Microcontrollers
656 Views, 0 Favorites, 0 Comments
RIG CELL LITE INTRO: INFRARED SENSOR

An infrared sensor is an electronic device, that emits in order to sense some aspects of the surroundings. An IR sensor can measure the heat of an object as well as detects the motion.These types of sensors measures only infrared radiation, rather than emitting it that is called as a passive IR sensor.
Parts Needed
You will need the following parts:
- 1x Breadboard
- 1x Rig Cell Lite
- 1x LED
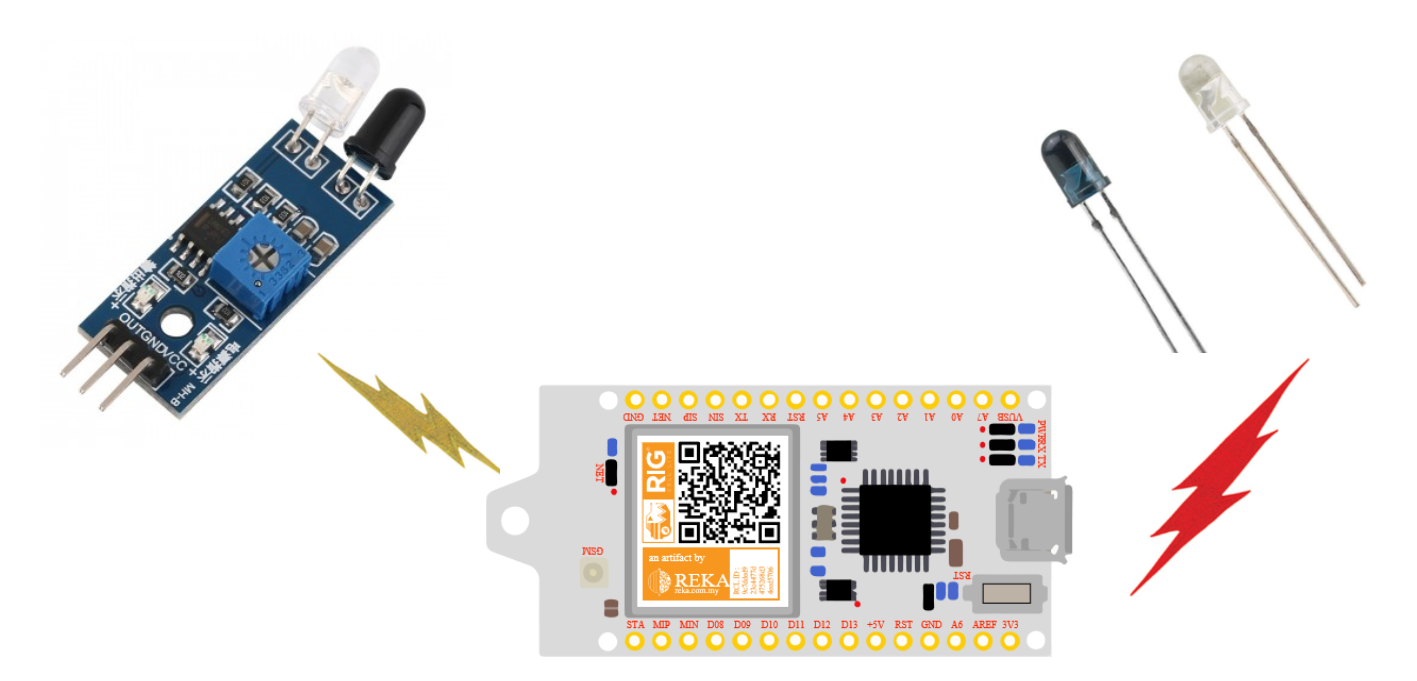
- 1x Infrared LED Emitter
- 1x Photodiode
- Jumper Wires as needed
SETTING UP THE CIRCUIT (HARDWARE)

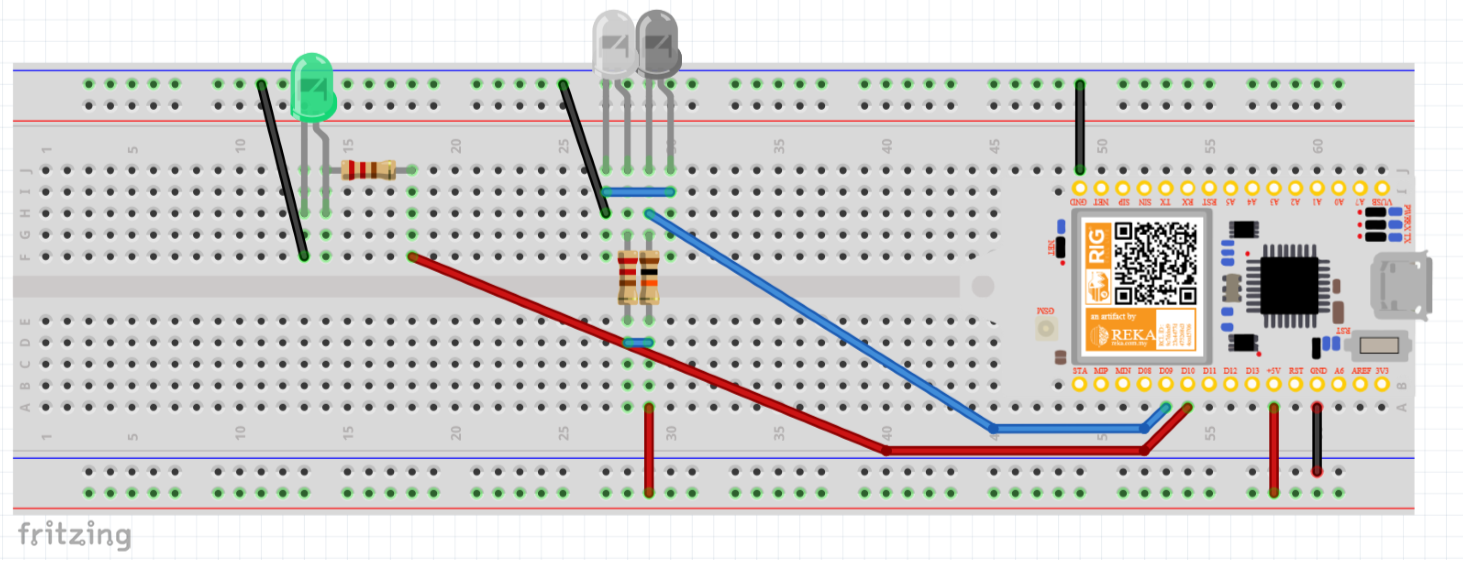
In this tutorial, we use both emitter and detector infrared LED as our infrared circuit. We can also use the IR sensor module like these http://www.ebay.com/bhp/ir-sensor there are some IR modules offers variable resister to fine tune the sensors. Usually these sensors can be use for line following robot, or also to detect obstacles.
construct the circuit as shown in the picture above.
THE INFRARED SENSOR CODE

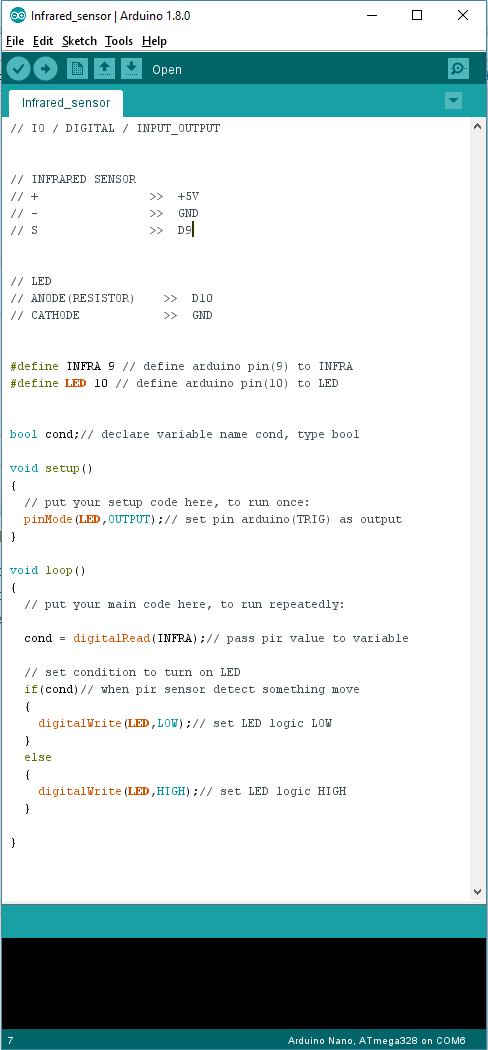
We will use the arduino IDE software to burn the coding in, based on our previous example on setting up the environment for the coding writing. https://www.instructables.com/id/RIG-CELL-LITE-INT... here are the link for the arduino IDE software set up.
I've attached the code here.
- All that you have to do is open it with the arduino sketch program.
- connect your rig cell lite with the computer.
- make sure your rig cell lite is detected by your computer
- click upload on the ide software.
Downloads
RESULTS :D
After complete upload the Infrared_sensor.ino code on the RIG CELL LITE, the infrared led will detect object near it. If the infrared leds detected some obstacles or object, the LED connected to the RIG CCELL LITE pin 10 will light up, indicates that the infrared led is detecting something.
If it isn’t, make sure you have assembled the circuit correctly and verified and uploaded the code to your board, or see the troubleshooting section.