RIG CELL LITE INTRO: BLINK LED
by flabbyandroid in Circuits > Microcontrollers
552 Views, 2 Favorites, 0 Comments
RIG CELL LITE INTRO: BLINK LED
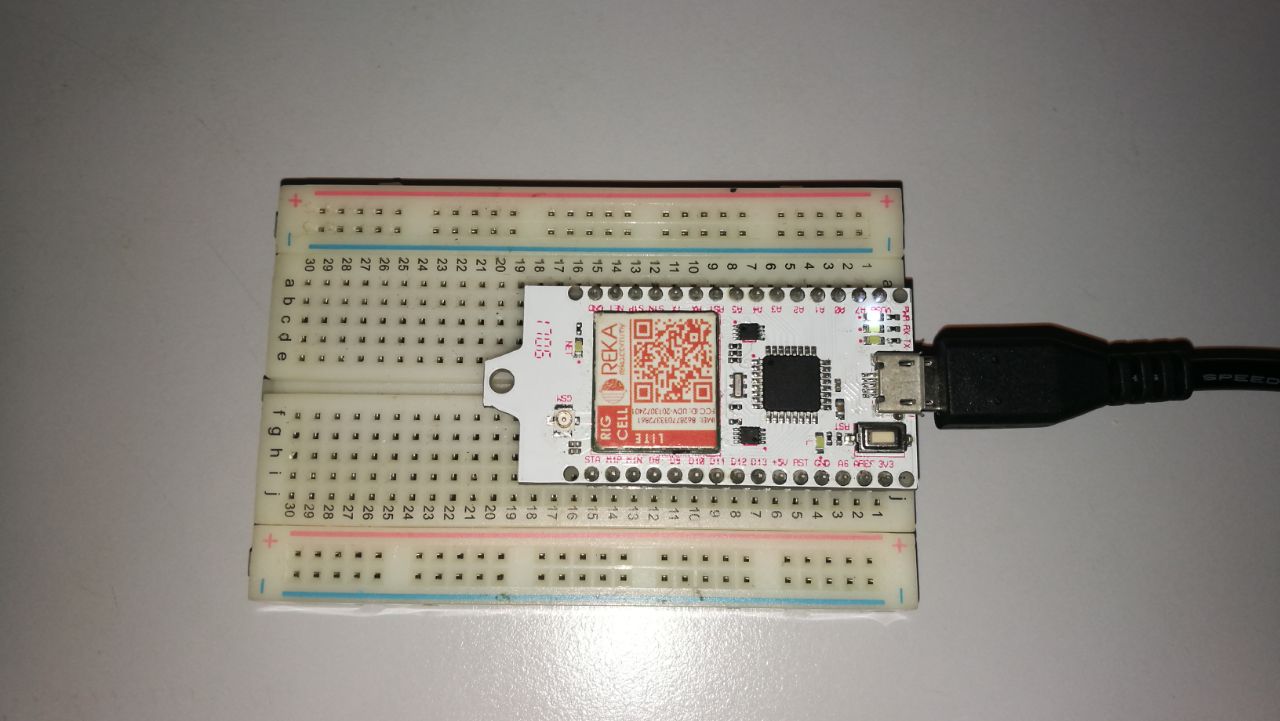
Introduction
LEDs are small, powerful lights that are used in many different applications. To start off, we will work on blinking an LED, the Hello World of microcontrollers. That’s right - it’s as simple as turning a light on and off. It might not seem like much, but establishing this important baseline will give you a solid foundation as we work toward more complex experiments.
Parts Needed
You will need the following parts:
- 1x Breadboard
- 1x Rig Cell Lite
- 1x LED
- 2x Jumper Wires
SETTING UP THE CIRCUIT (HARDWARE)
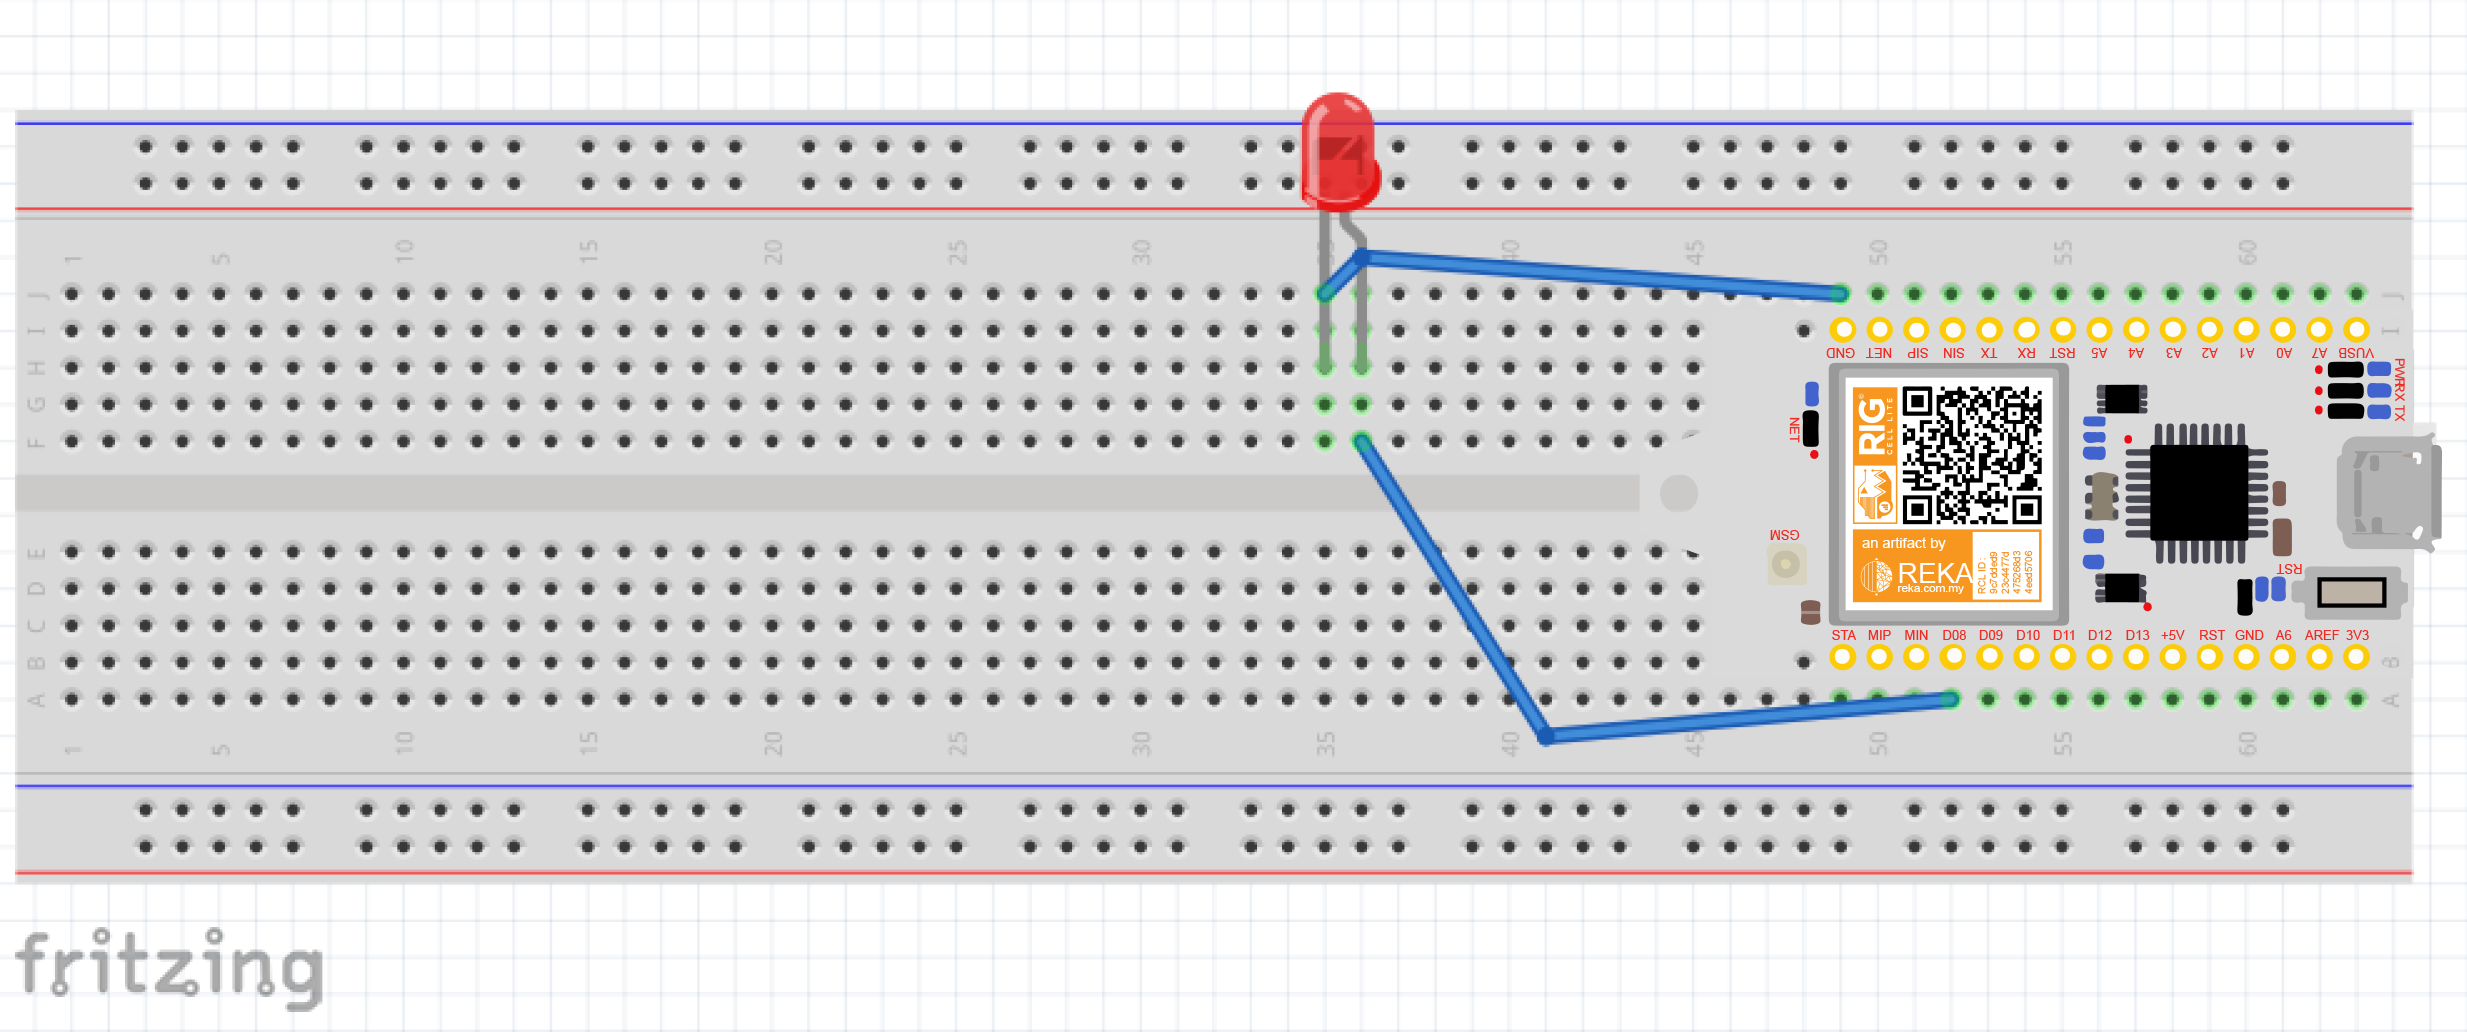
Simple connection on the breadboard, we could attach the LED to an output pin of the Arduino.
- attach the jumper wire from the RIG CELL LITE pin connector D8 to the positive polarity pin of the LED as shown.
- attach another jumper wire from the RIG CELL LITE pin GND to the negative polarity pin of the LED
-
the circuitit will not do anything until you have uploaded the code to the board, which is done at a later stage
SETTING UP THE SOFTWARE
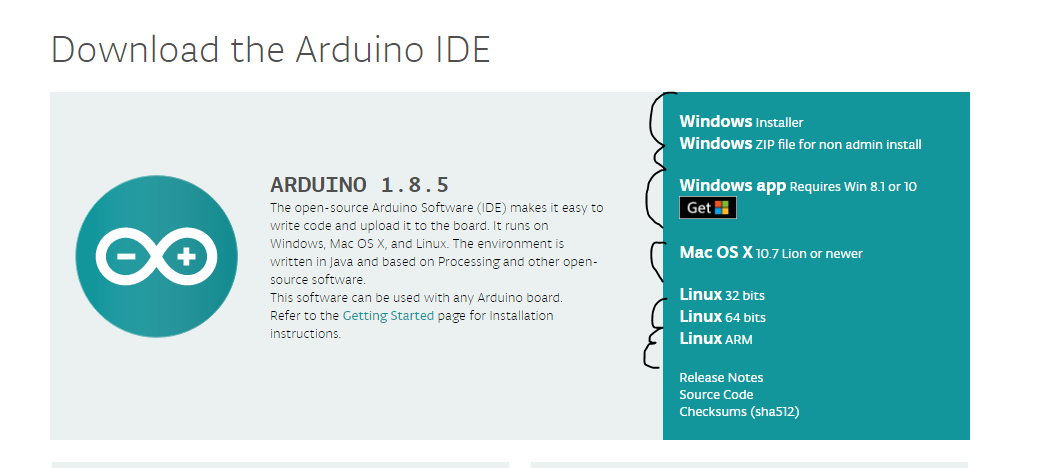
Go to the Arduino download page and download the latest version of the Arduino software for your own operating system at this link --> https://www.arduino.cc/en/Main/Software
- When the download is finished, un-zip it and open up the Arduino folder to confirm that yes, there are indeed some files and sub-folders inside. The file structure is important so don’t be moving any files around unless you really know what you’re doing.
- after finished installing the software, download the LED_BLINKING.ino
- download these https://github.com/melloremell/rigcelllite the RIG CELL LITE library to be install on your arduino IDE
if you got any problem installing arduino, u can follow the link here --> https://www.arduino.cc/en/Guide/Windows
The LED Blinking Code
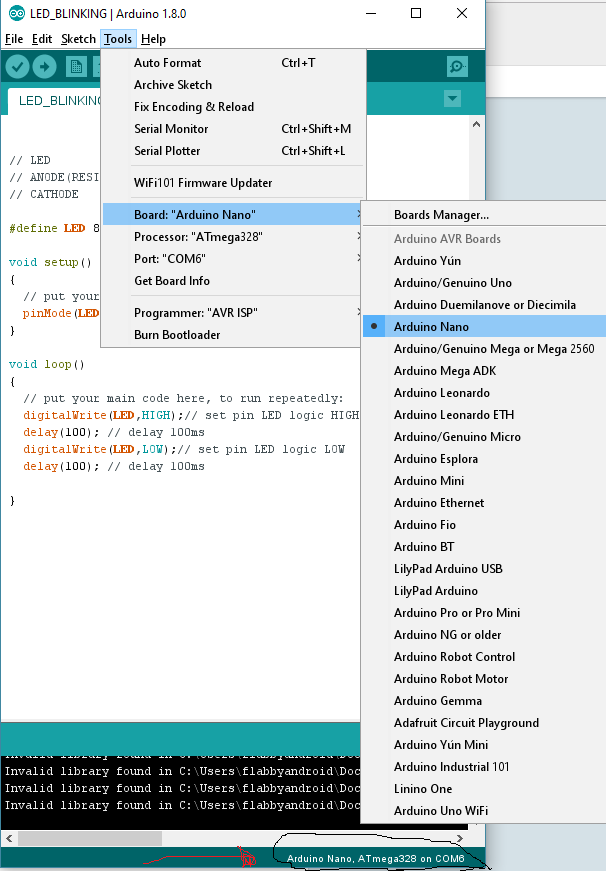
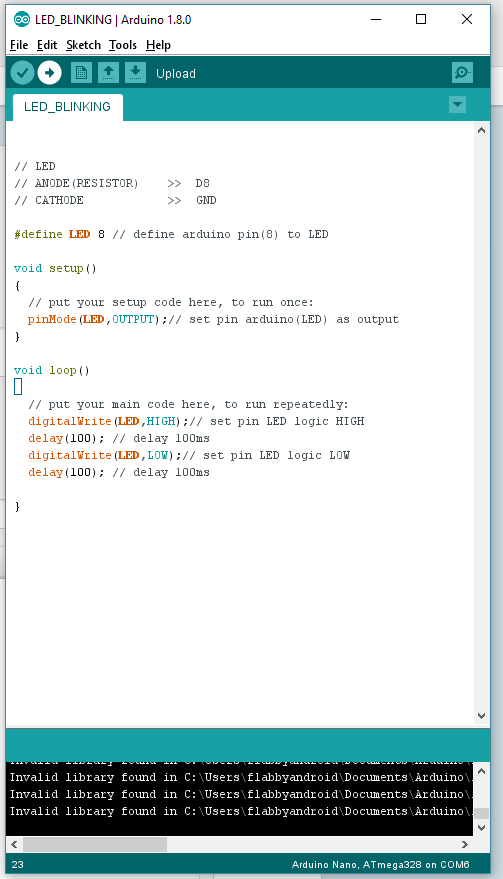
I've attached the code here.
- All that you have to do is open it with the arduino sketch program.
- connect your rig cell lite with the computer.
- make sure your rig cell lite is detected by your computer
- set your board to arduino nano in the board manager option.
- click upload on the ide software.
Downloads
RESULTS :D
You should see your LED blink on and off. If it isn’t, make sure you have assembled the circuit correctly and verified and uploaded the code to your board, or see the troubleshooting section.