RAW Files and Editing - a Photography Tutorial
by ChronicCrafter in Circuits > Cameras
8336 Views, 31 Favorites, 0 Comments
RAW Files and Editing - a Photography Tutorial
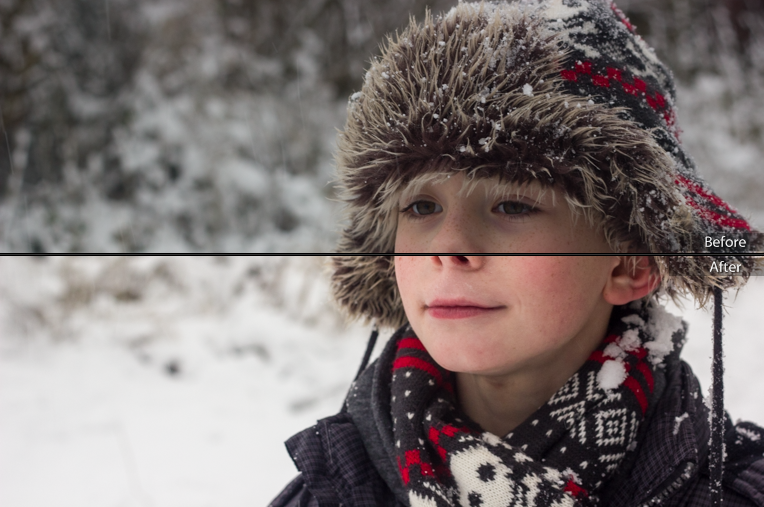
dSLR cameras and most bridge cameras have the option to shoot in raw, but what exactly is it and what are the benefits? Let me attempt to explain.
A camera raw file contains all the data that is captured when the shutter button is pressed whereas a JPEG is compressed and a lot of the data is lost. They are often called digital negatives as they serve the same purpose as the negatives in film photography; they are not ready to be used as the final image, but hold all the information and data needed to produce one. This all means that you are left with a higher image quality which also allows you to have more control and manipulate more parameters than a JPEG. All of the metadata is also still in tact, meaning that the original state can always be referred back to if needed.
So, surely you want to see the difference, right? Well you're in luck.
RAW - Photoshop
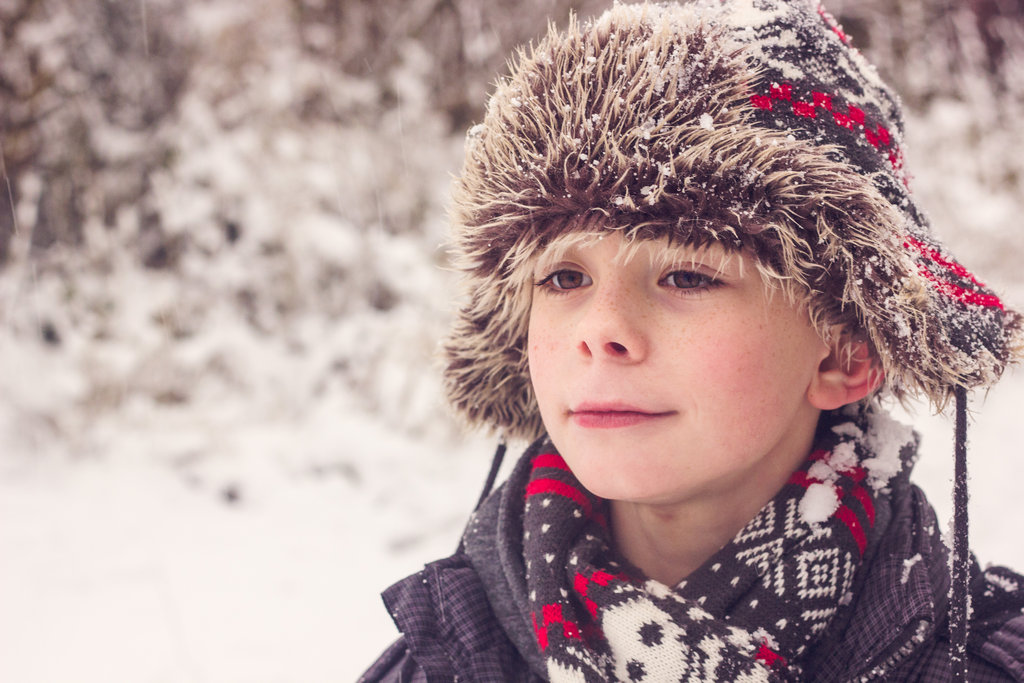
Once you've made the basic adjustments, this can either then be exported or saved as a JPEG for uploading to Facebook/Flickr/deviantART/wherever. If you want to edit it further, you can open the raw file in Photoshop which is what I did with the image above.
As you can see, the image has been edited and brightened tremendously without losing quality. This is because a JPEG records only 256 levels of brightness, while a raw file records 4,096 to 16,384 levels. This is what is known as a "bit". JPEG captures in 8bit, while raw captures in 12 or 14bit. Those extra bits allow for more control over the adjustments - brightness, shadows, recovery, fill light, exposure, etc. This will give you best results as the images are easier to edit to just how you want them.
As you can see, the image has been edited and brightened tremendously without losing quality. This is because a JPEG records only 256 levels of brightness, while a raw file records 4,096 to 16,384 levels. This is what is known as a "bit". JPEG captures in 8bit, while raw captures in 12 or 14bit. Those extra bits allow for more control over the adjustments - brightness, shadows, recovery, fill light, exposure, etc. This will give you best results as the images are easier to edit to just how you want them.
JPEG - Camera RAW - Photoshop
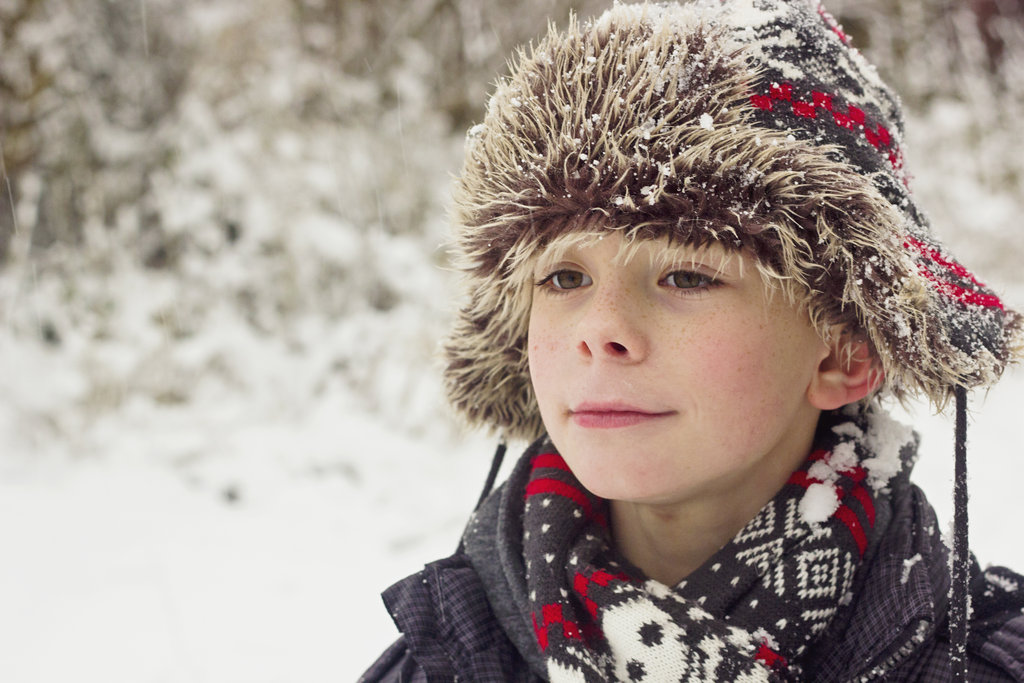
The shot above was saved as a JPEG, therefore, some of the data was lost during the compression stage. The file was then opened as a camera raw in Photoshop (File > Open As > Camera Raw > Select File > Open). This allows for a little control over the basic adjustments, but it isn't as easy as when working with the true raw file. It was then opened fully in Photoshop and edited in exactly the same way as the image before. As you may notice, the brightness is a little reduced and the colours are not nearly as rich as before.
JPEG - Photoshop
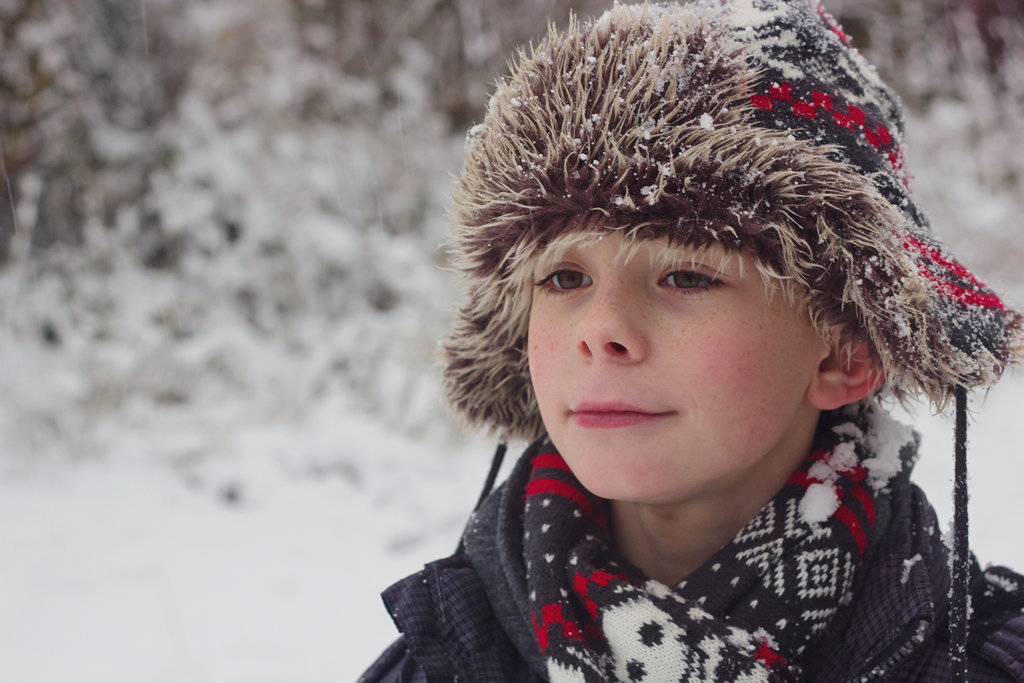
This final one was saved as a JPEG and opened up straight away in Photoshop without first opening as a raw file or any basic adjustments. It was then edited in exactly the same way as the previous two. You will notice that the brightness has been significantly reduced and the colours are bland. The eyes do not pop and the whole thing is just a little too dark. Sure, you could brighten it a little, but the difference between this and the previous ones is remarkable.
Other Benefits


- Easily correct under or overexposed images - if you only have one brief moment to get the shot right, but your camera settings aren't right, the image may come out too bright or too dark. With a JPEG file, it may be a little difficult to recover some of the detail in these areas. However, by shooting in raw, you will have all the data available to be able to recover the data for the under/overexposed areas easily.
- Never lose the original state - no matter what you do to the original raw file in LightRoom or Photoshop, you will always be able to revert back as the file will always hold all the original information and data. Handy for if you ever need to refer back to it for some reason!
- Easily adjust the white balance - when you take a photo, the white balance is applied to it, either from the white balance setting you chose or from the auto white balance setting. When shooting in raw, the white balance is still applied, but because you have a lot more data and levels, it is more easily adjusted after the fact.