Quickly Sketch Escher-type Repeats Using Inkscape
by wolfCatWorkshop in Circuits > Art
4188 Views, 44 Favorites, 0 Comments
Quickly Sketch Escher-type Repeats Using Inkscape


The free open source software Inkscape has a very robust feature that lets you create tiled patterns. There is a world of beauty and mathematical complexity to explore out there, but this Instructable is meant to get you up and running quickly sketching the kind of interlocking repeats the M.C. Escher is famous for.
It takes some fiddling around to arrive at interesting results which makes you appreciate M.C. Escher's considerable skill and talent.
I mostly adapted the explanations below from the excellent book by Paul Jackson How to make repeat patterns, A guide for designers, architects and artists, go check it out for a more in depth reference. If you are new to Inkscape or need a refresher I also recommend you check out Billie Ruben's excellent series of short tip videos.
The following steps assume you are at least familiar with manipulating shapes and shape nodes.
Set Up
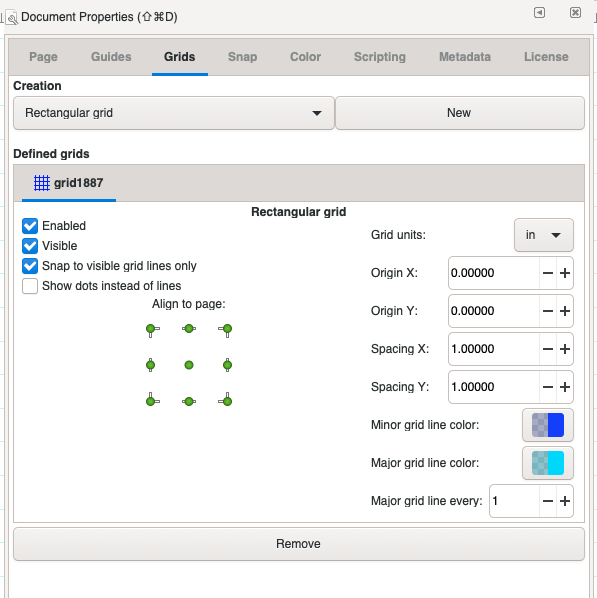
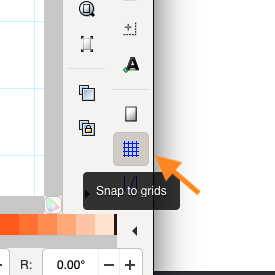
Let's start by opening a blank document on Inkscape and then changing the grid settings to helps us visualize our repeat patterns.
- Make the grid visible by going to View > Page Grid
- Then change the grid size by going to File > Document Properties
- Select Grid and change the Grid units to Inches and set the Spacing X to 1 and Spacing Y to 1, close that window when you are done.
- Initially we want to enable the option Snap to Grids, but we'll be turning it on and off as we go.
Tiles With Four Unrelated Sides
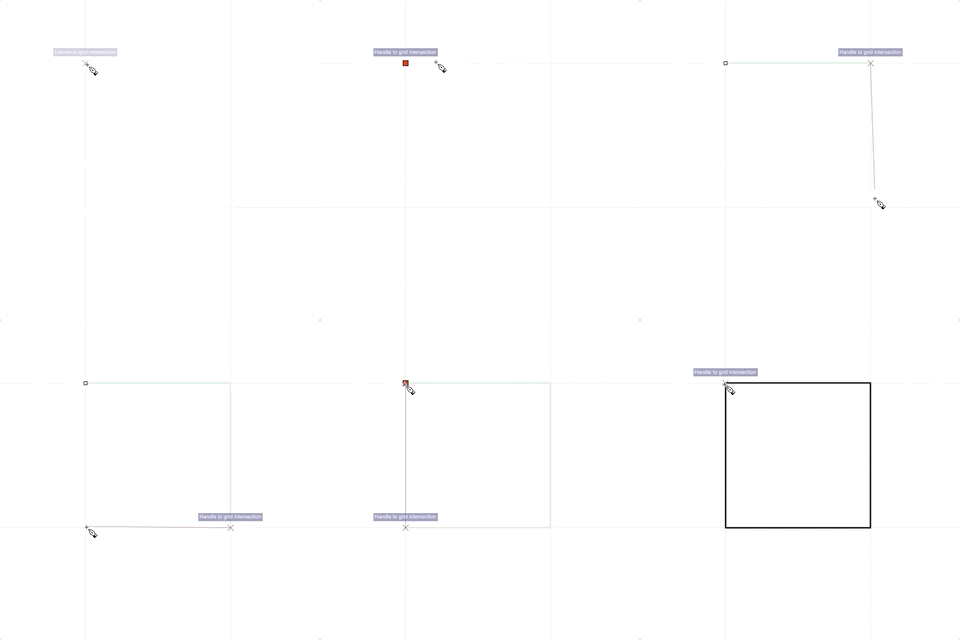
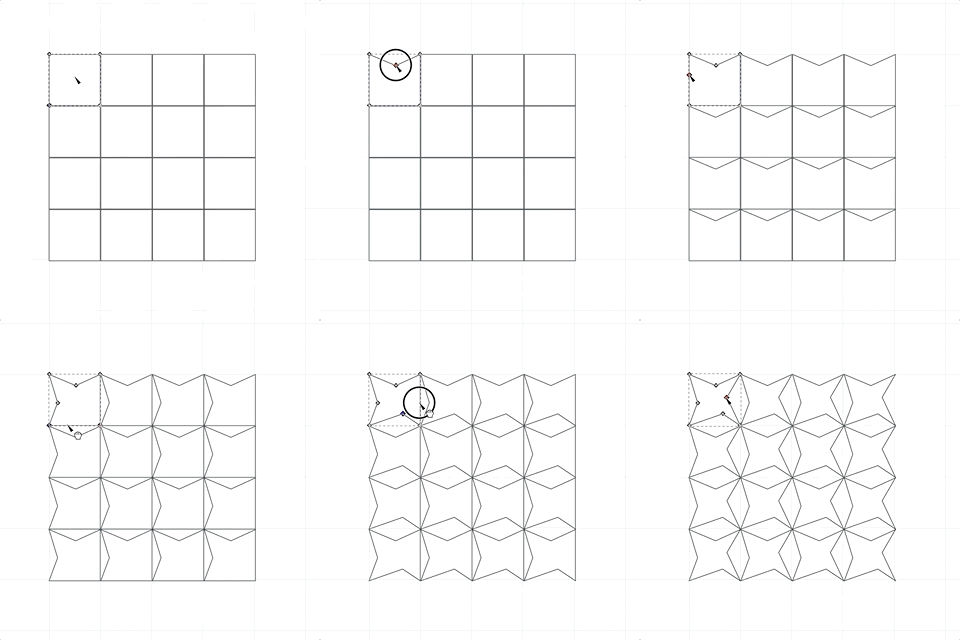
This is the most basic tile but we'll build upon this technique as we go.
- With Grid Snap enabled use the Bezier Curves Tool to draw a square shape using the grid as a guide.
- Now switch to the Select tool and with your shape selected go to Edit > Clone > Create Tiled Clones
- On this menu select P1:simple translation (usually selected by default) and change the rows and columns sections below to 4 x 4, then click Create.
A clone in Inkscape is a copy of an original shape that remains linked to that shape, so when you make changes to the original, all the copies will reflect those changes.
One potential source of confusion is that with the tiled clones feature Inkscape creates a clone on the same position as the original, so I find it easier to delete that clone. You can tell which one is the clone by looking at the bottom status bar, when a clone is selected you will see a message that says "Clone of: Path..."
Delete the first clone by selecting it and pressing delete. Now we can make changes to the original shape (or path as Inkscape likes to call them) and all the clones should update.
Disable Grid Snap and use the Edit paths by nodes tool to make changes to all four sides of the square, you can add additional nodes by double clicking.
Tiles With Identical Opposite Sides

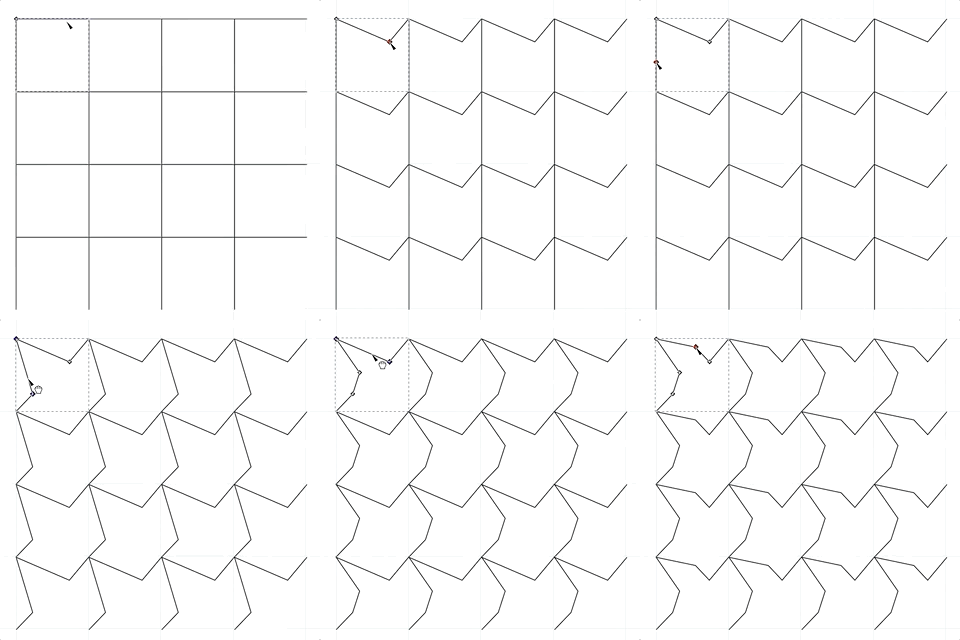
This is where things get interesting, the steps are very similar except we'll only draw two sides of the square:
- With Grid Snap enabled use the Bezier Curves Tool to draw two sides of the square using the grid as a guide.
- Now switch to the Select tool and with your shape selected go to Edit > Clone > Create Tiled Clones
- On this menu select P1:simple translation (usually selected by default) then click Create.
Delete the first clone again, disable Grid Snap and use the Edit paths by nodes tool to make changes to the lines.
You are getting the hang of this!
Rectangular Tiles With Identical Opposite Sides

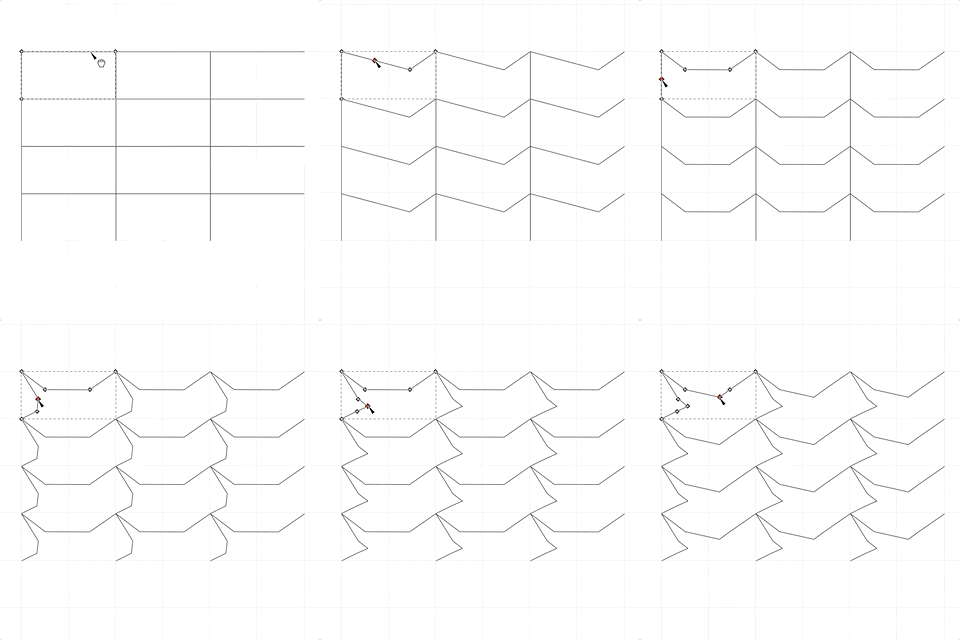
Identical to the previous one but the tile is a rectangle. Rectangles could work better for some kinds of animals.
The steps below are the same but I'll repeat them anyway, it's an Instructable about repeats after all:
- With Grid Snap enabled use the Bezier Curves Tool to draw two sides of the rectangle using the grid as a guide.
- Now switch to the Select tool and with your shape selected go to Edit > Clone > Create Tiled Clones
- On this menu select P1:simple translation (usually selected by default) then click Create.
Now delete the first clone again, disable Grid Snap and use the Edit paths by nodes tool to make changes to the lines.
Grouping to Add Features

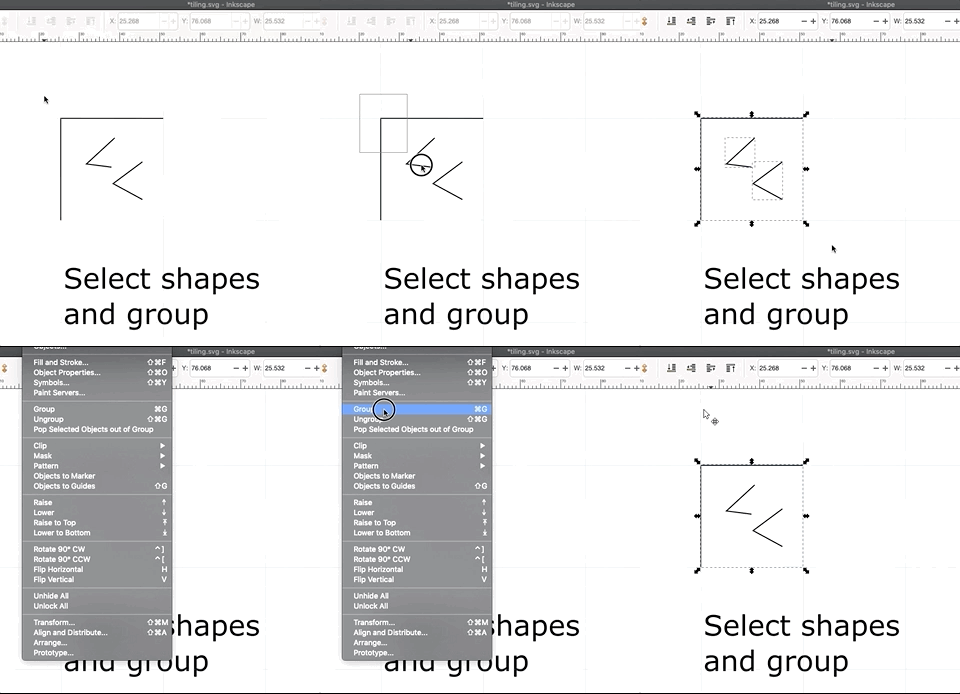
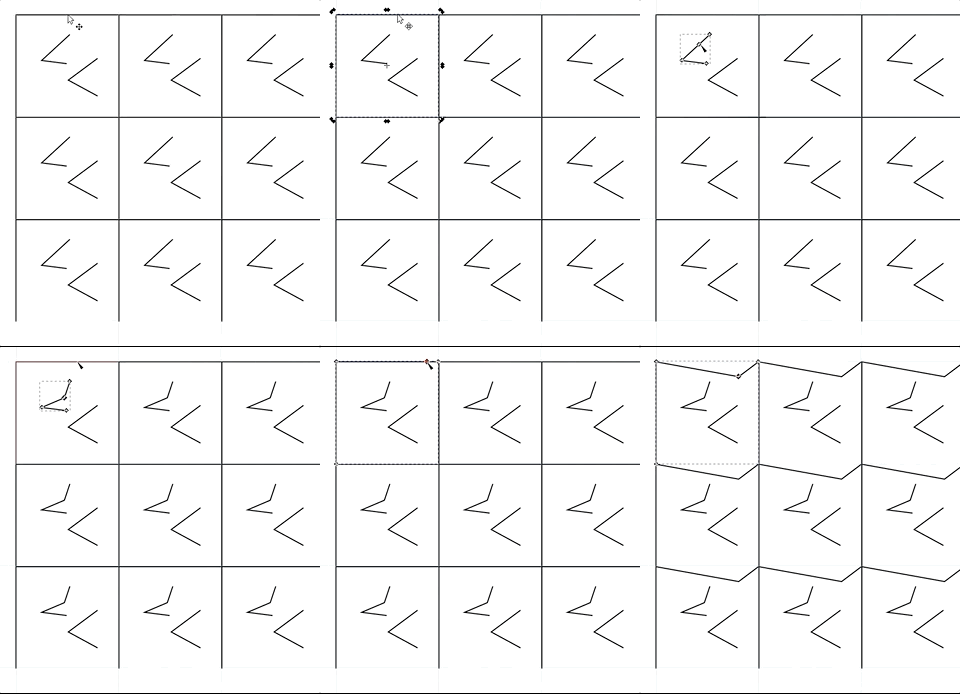
In all the previous examples we were only defining the edges of the tile, but sometimes it's nice to add other features. The easiest way to do this is by grouping the initial shapes.
In this example I created two sides of a square tile and I added two additional features. Before creating the tiled clones group these shapes by selecting them and going to Object > Group
Repeat the same steps (Create tiled clones and delete the first clone) but before making any edits double click the selection to go into group editing mode. Any changes you make to the group should update all the tiles.
Set Up for Hexagonal Tiles
There are of course many other types of tilings out there, but I will only mention one additional type because its so satisfying and because Inkscape can handle it well, hexagonal tiles (think honeycomb).
This is one possible way to approach them:
- Start a new document by going to File > New
- Make the grid visible by going to View > Page Grid
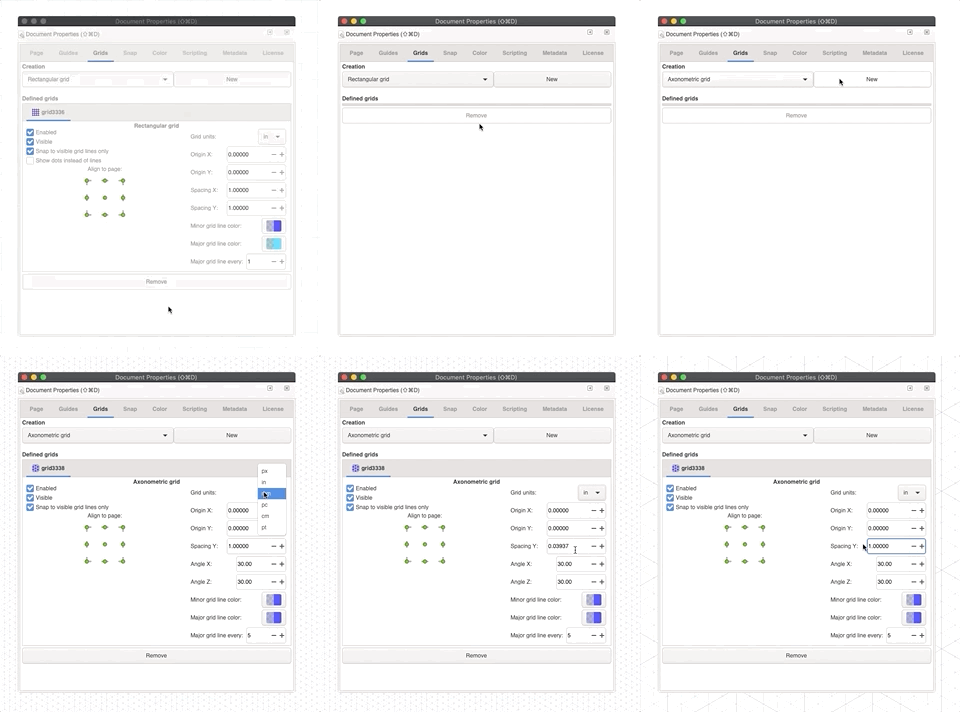
- Then open the document properties by going to File > Document Properties and select Grids
- Let's get rid of the current grid by clicking on Remove
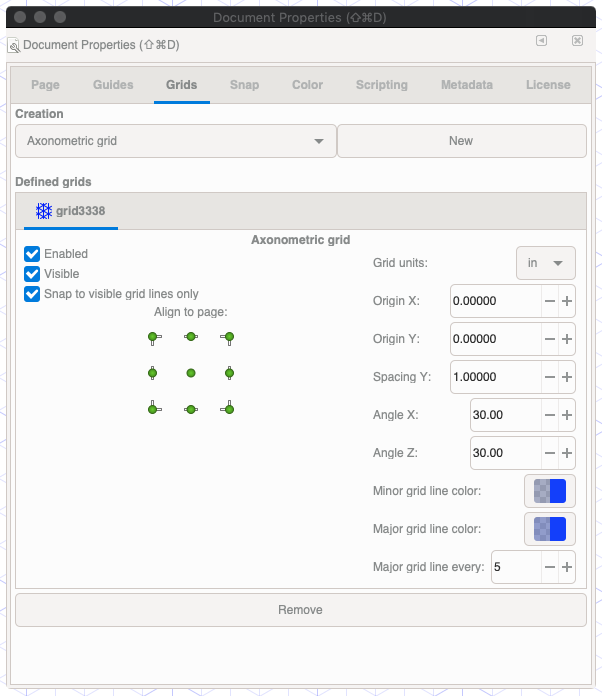
- Then on the drop down menu select Axonometric grid, and then New
- You could stick to the defaults but I'll change the Grid Units to Inches and Spacing Y to 1. Angle X and Angle Z should both be 30 which is the default.
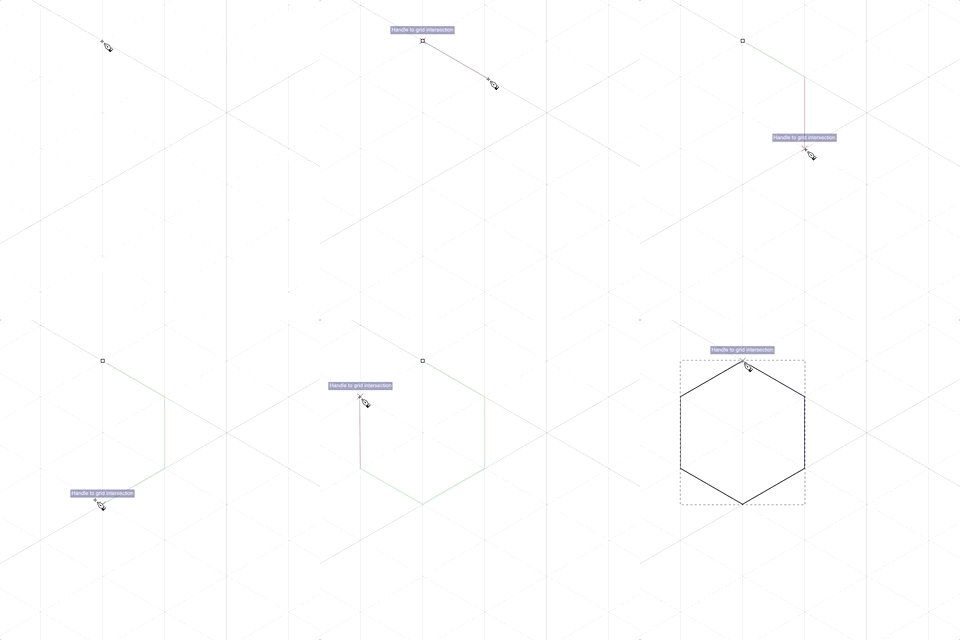
Now enable Grid snap and draw a hexagon using the Draw bezier curves tool.
Hexagonal Tile Clones
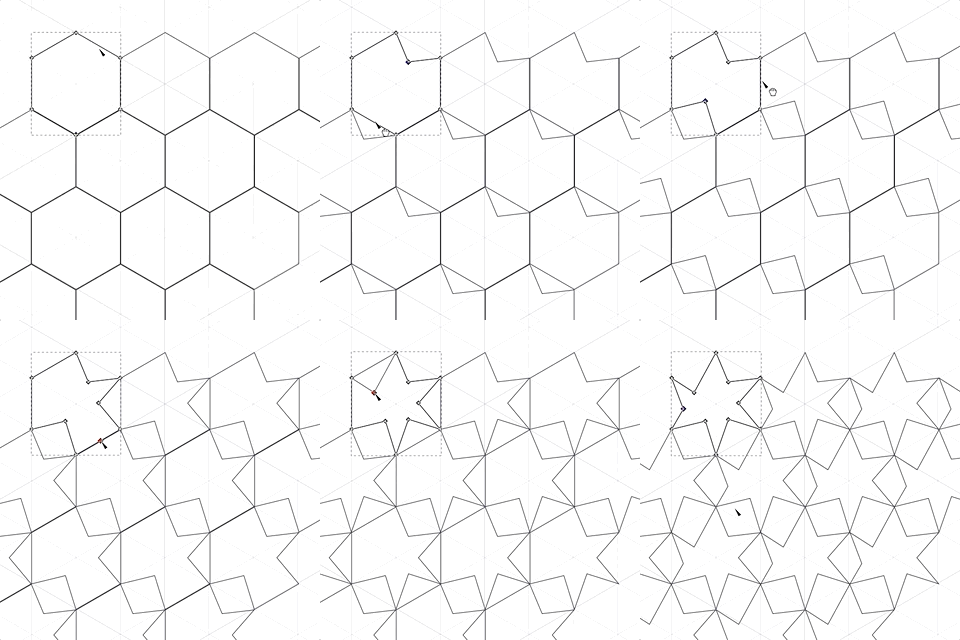
Cloning these tiles is very similar to the rectangular clones, we just need to change a couple of things.
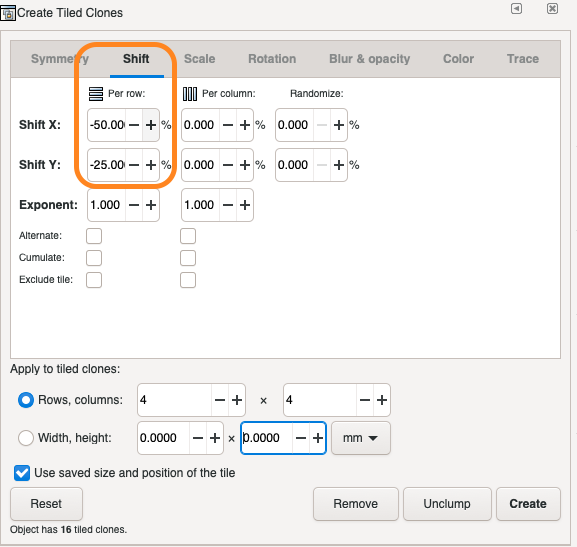
- Now switch to the Select tool and with your shape selected go to Edit > Clone > Create Tiled Clones
- On this menu select P1:simple translation (usually selected by default).
- And this is the important part for hexagons: on the Create Tiled Clones menu select Shift, and change the following values on the Per row column: Shift X should be -50% and Shift Y should be -25%
- Now click Create
Like in the previous examples it's easier to delete the first clone and then you can edit the original hexagon using the Edit paths by nodes tool after disabling Grid snap.
Last Thoughts
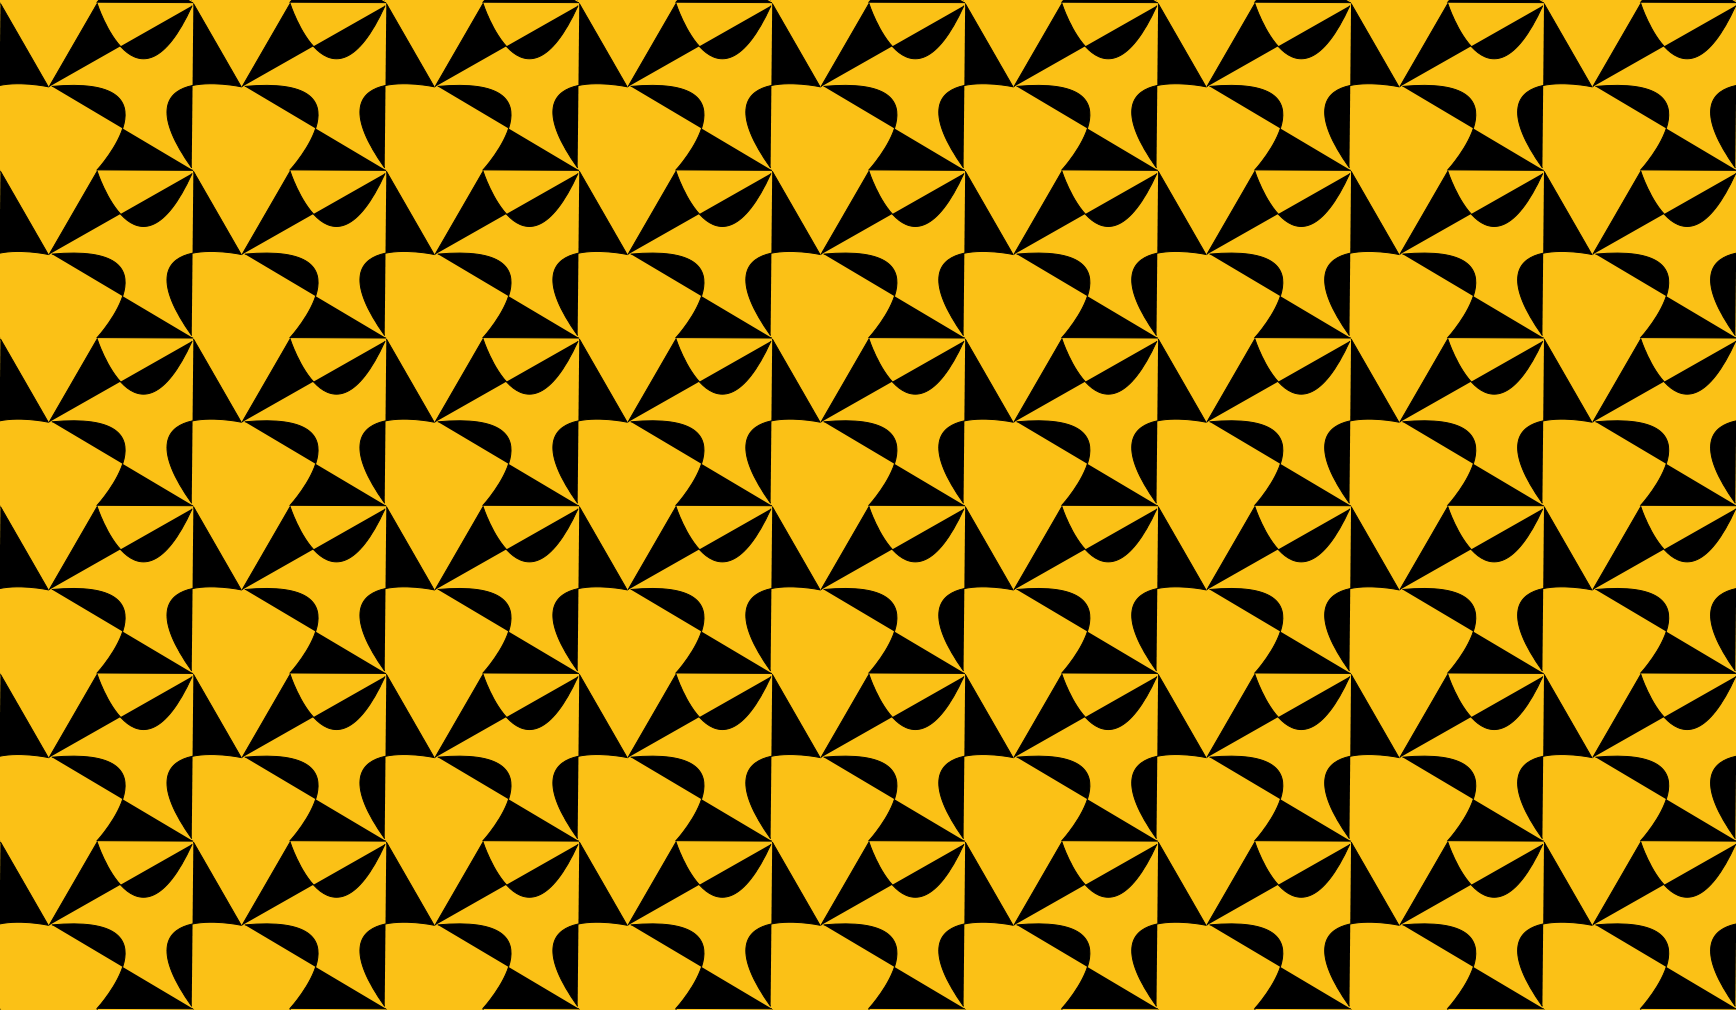
I've kept the example designs very simple but I encourage you to experiment more, here are some suggestions:
- Add other shapes to tiled groups
- Use a fill (all my examples were outlines only, by filling your shape you can play more with negative space like the last image above)
- You can also clone shapes without tiling, then group them, and tile those groups increasing the complexity.
I hope this can help someone create some interesting designs and perhaps get lost in the wonderful world of tiling and repeat patterns. Go forth and tile! :)